
Segreto - Range hood BAUMATIC - Free user manual and instructions
Find the device manual for free Segreto BAUMATIC in PDF.


| Product Type | Recirculating Range Hood |
| Brand | Baumatic |
| Model | Segreto |
| Control Type | Touch sensor with LED indicator on control bar |
| Number of Suction Speeds | 4 (Stand-by, 1st green, 2nd orange, 3rd red, 4th red flashing) |
| Automatic Function | Auto-start at >70°C room temperature (1st speed) |
| Lighting Type | Halogen (central and lateral) |
| Maximum Lamp Power | Central: 40W (GU10), Lateral: 40W (E14) |
| Filter Type | Metal anti-fat filter and active carbon filter |
| Filter Cleaning Frequency | Anti-fat: monthly; Carbon: every 2 months (washable) |
| Carbon Filter Replacement | Every 3 years or if cloth damaged |
| Minimum Installation Distance | 50 cm above electric hob, 70 cm above gas/mixed hob |
| Electrical Connection | Mains voltage (as per label), requires bipolar switch for full disconnection |
| Safety Features | Earth conductor (yellow-green) in ceiling bracket; overload category III |
| Included Accessories | Control lever, mounting hardware |
| Usage Mode | Internal recirculating (carbon filter mandatory) |
| Maintenance Warnings | Do not use alcohol; clean regularly to avoid fire risk |
| Disposal | WEEE directive 2002/96/EC – do not dispose as household waste |
Frequently Asked Questions - Segreto BAUMATIC
User questions about Segreto BAUMATIC
0 question about this device. Answer the ones you know or ask your own.
Ask a new question about this device
Download the instructions for your Range hood in PDF format for free! Find your manual Segreto - BAUMATIC and take your electronic device back in hand. On this page are published all the documents necessary for the use of your device. Segreto by BAUMATIC.
USER MANUAL Segreto BAUMATIC










natural_image
Four-panel diagram showing cross-sectional views of a biological structure, labeled 'b' (no text or symbols within the diagrams)

natural_image
Technical illustration showing mechanical assembly steps with labeled views (d, e), no readable text or symbols present.
natural_image
Diagram showing a cross-section of a biological structure with three views, one broken into two parts (no text or labels)Cappa in stand-by: LED SPENTO
Instruction on mounting and use
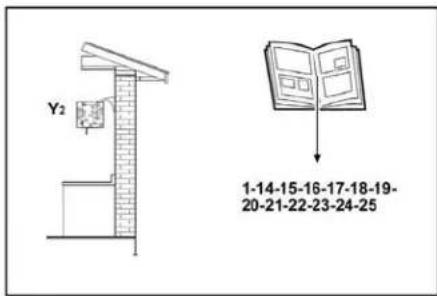
Consult the designs in the front pages referenced in the text by alphabet letters.
Closely follow the instructions set out in this manual. All responsibility, for any eventual inconveniences, damages or fires caused by not complying with the instructions in this manual, is declined.
Use
The hood has been made for use in the internal recirculating filtering version.
Cooking fumes and steam are aspirated inside the hood, filtered and cleaned, passing through the fat filter/s and the carbon filter/s that MUST be supplied with the hood.
Attention!
If the hood is not supplied with carbon filter, then it must be ordered and mounted.
Installation
Specialised personnel must carry out both the electrical and the mechanical installation.
The minimum distance between the supporting surface for the cooking vessels on the hob and the lowest part of the range hood must be not less than 50cm from electric cookers and 70cm from gas or mixed cookers. If the instructions for installation for the gas hob specify a greater distance, this must be adhered to.
Electrical connection
The mains tension must correspond to the tension shown on the characteristic label situated inside the hood.
The product is meant for connecting directly to the mains supply, therefore apply a regulation bipolar switch that ensures complete disconnection from the mains in the conditions of category III over-tension, conforming to the installation rules.
ATTENTION! Detail B (fixing bracket to the ceiling - Fig. 1) is equipped with a conductor (yellow-green) that must be connected to the earth of the domestic electrical plant. Fig. 4
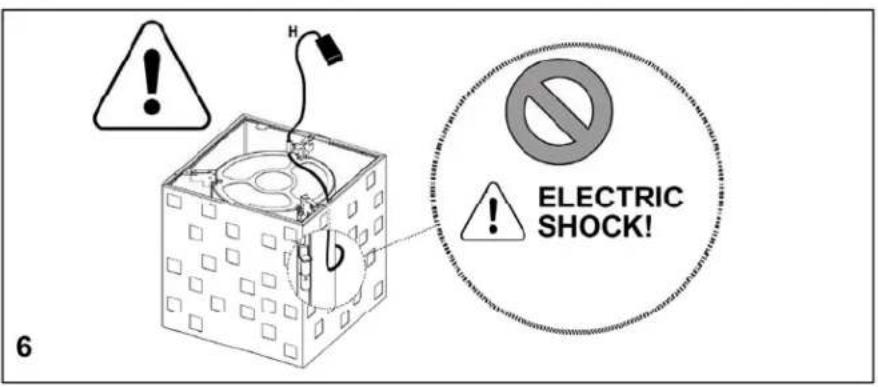
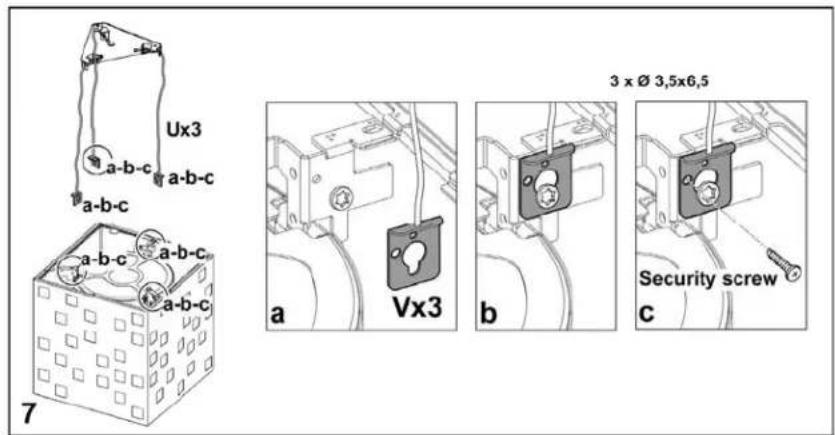
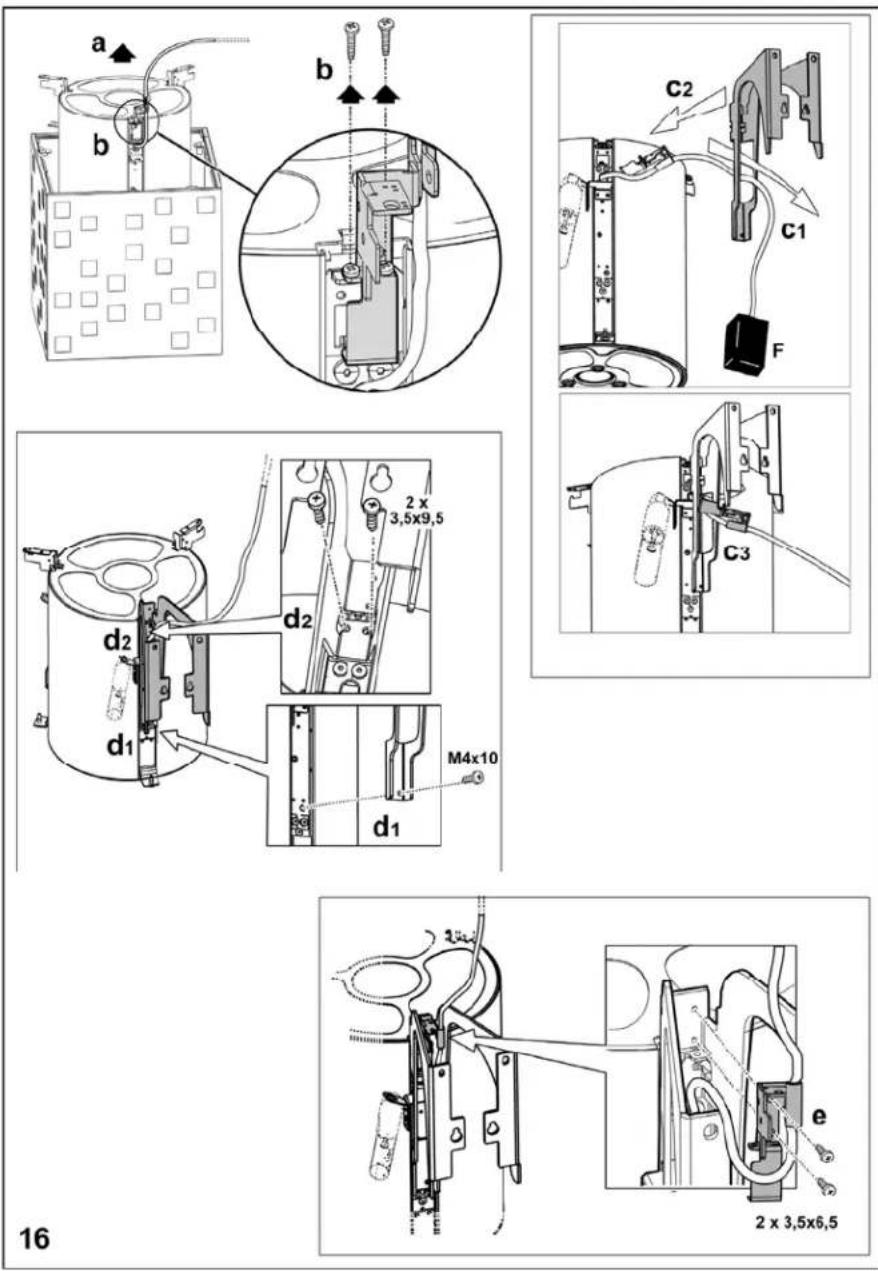
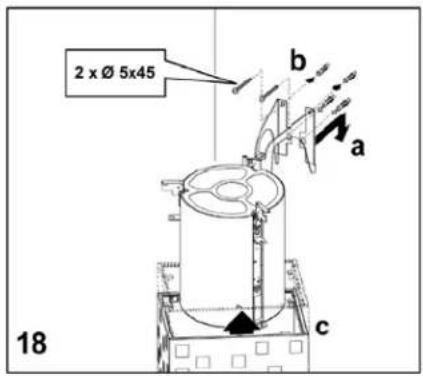
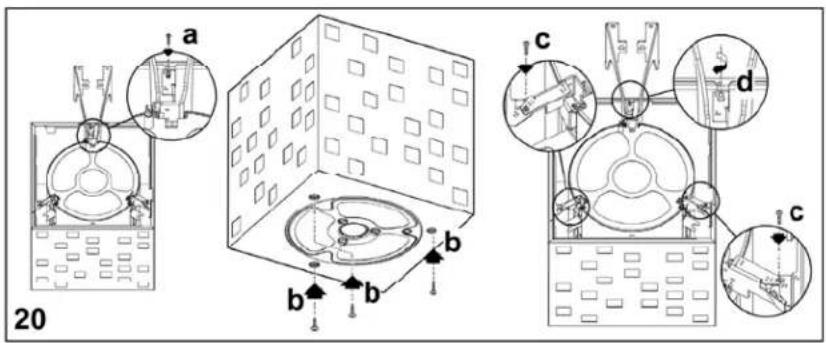
ATTENTION! Be particularly careful about positioning the excess cable. Failure to observe this indication could cause grave damage to the apparatus and/or an electric shock to the user or the installer. For further details see Fig. 6-22
Attention! Changing the interconnection cable must be carried out by the authorised technical assistance service.
Mounting
Expansion wall plugs are provided to secure the hood to most types of walls/ceilings. However, a qualified technician must verify suitability of the materials in accordance with the type of wall/ceiling. The wall/ceiling must be strong enough to take the weight of the hood. Do not tile, grout or silicone this appliance to the wall. Surface mounting only.
Description of the hood
Fig. 1
K. Control lever
Attention! The control lever is already supplied. It is to be installed last, before connecting the hood to the mains.
Insert the control lever into the apposite housing (see drawings on the first pages of this booklet - triggered connection, compulsory direction.
L. Halogen bulb
M. Lateral filter holder frame
N. Active carbon filter
O. Metal anti-fat filter
Note: other carbon and anti-fat filters are installed inside the hood in correspondence with the shaped lateral slots and the upper part of the hood.
P. Anti-fat and carbon filters holder frame
Q. Filter holder frame releases
Operation
Use the high suction speed in cases of concentrated kitchen vapours. It is recommended that the cooker hood suction is switched on for 5 minutes prior to cooking and to leave in operation during cooking and for another 15 minutes approximately after terminating cooking.
The hood is equipped with a "TOUCH SENSOR" device able to determine the control of the lights and the speed when the user touches the control bar. Read the instructions below carefully for this purpose.
Automatic switch-on function
The hood is equipped with a temperature sensor that starts the motor at the 1st suction speed (power) when the room temperature around the hood is higher than 70^ C.
The user can, however, switch off or modify the suction speed (power). (See paragraph "Control of suction speed (power)).
Control of suction speed (power)
The selection of the suction speed (power) is cyclical, according to the speed sequences "stand-by - 1-2-3-4-Stand by -1-2-" so that at every touch of the UPPER PART of the control bar the suction speed (power) increases by a level and then to switches off (stand-by) if the control bar is touched again when the hood is at suction speed (power) 4.
It is possible to turn the hood off (standby) even when the hood is at any speed by pressing the UPPER PART of the control bar (for more than 3 seconds).
It is possible to determine what suction speed (power) the hood is in when the bar is equipped with a led that changes colour on the basis of the suction speed (power), as follows:
Hood in stand-by: LED OFF
1st suction speed (power) - led GREEN
2st suction speed (power) - led ORANGE (amber)
3st suction speed (power) - led RED
4st suction speed (power) - led RED (FLASHING)
Note: the 4th suction speed (power) remains on for 5 minutes, after which the suction motor switches off (Stand-by)
Touched once more, the suction motor switches off (Stand-by).
Need to wash the anti-fat filter: GREEN led FLASHING (read the instructions relative to "Reset and configuration of the filters saturation signal")
Need to wash or replace the carbon filters: ORANGE (amber) led FLASHING (read the instructions relative to "Reset and configuration of the filters saturation signal")
Note: reset can be carried out both with the control lever and the remote control.
Control of the central light
The central light can be switched on and off by touching the LOWER PART of the control bar BRIEFLY.
Control of the lateral lights (when envisaged)
The lateral lights can be switched on and off by touching IN A PROLONGED MANNER the LOWER PART of the control lever.
The PROLONGED TOUCH allows, other than switching on and off, adjusting the intensity of the light emitted by the lamp. Note: The functions of switching and off (and adjustment) alternate.
The light intensity regulation feature is not available for hoods with neon lights.
Reset and configuration of the filters saturation signal
Switch the hood on at any speed (see paragraph above "Selection of the suction speed (power)"
Reset anti-fat filter saturation signal (GREEN LED FLASHING on the control level)
First proceed with the maintenance of the filter as described in the corresponding paragraph.
Touch in a prolonged manner (more than 3 seconds) the UPPER PART of the control lever, the LED stops flashing to indicate that the reset of the signal has been carried out and the hood switches off.
Reset anti-fat filter saturation signal ORANGE (amber) LED FLASHING
First proceed with the maintenance of the filter as described in the corresponding paragraph.
Touch in a prolonged manner (more than 3 seconds) the UPPER PART of the control lever, the LED stops flashing to indicate that the reset of the signal has been carried out and the hood switches off.
Deactivating the carbon filter saturation signal (for special applications)
Switch the hood off (see paragraph above "Select the suction speed power")
Touch in a prolonged manner (more than 5 seconds) the UPPER PART of the control lever, the LED flashes in GREEN (amber) to indicate that the carbon filter saturation signal has been deactivated.
To reactivate the carbon filter saturation signal, repeat the operation. The LED flashes in ORANGE.
Maintenance
Before performing any maintenance operation, isolate the hood from the electrical supply by switching off at the connector and removing the connector fuse.
Cleaning
The cooker hood should be cleaned regularly (at least with the same frequency with which you carry out maintenance of the fat filters) internally and externally. Clean using the cloth dampened with neutral liquid detergent. Do not use abrasive products.
DO NOT USE ALCOHOL!
Grease filter
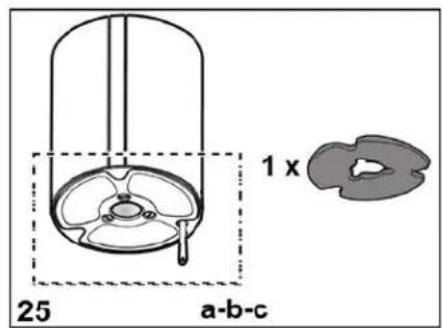
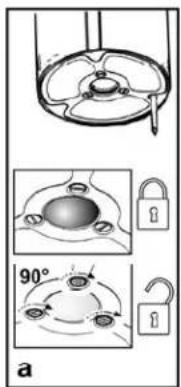
Fig. 25
This must be cleaned once a month (or when the filter saturation indication system – if envisaged on the model in possession – indicates this necessity) using non aggressive detergents, either by hand or in the dishwasher, which must be set to a low temperature and a short cycle.
When washed in a dishwasher, the grease filter may discolour slightly, but this does not affect its filtering capacity.
Charcoal filter (filter version only)
Fig. 25
It absorbs unpleasant odours caused by cooking.
The charcoal filter can be washed once every two months (or when the filter saturation indication system – if envisaged on the model in possession – indicates this necessity) using hot water and a suitable detergent, or in a dishwasher at 65^ C (if the dishwasher is used, select the full cycle function and leave dishes out).
Eliminate excess water without damaging the filter, then put it in the oven for 10 minutes at 100^ to dry completely. Replace the mattress every 3 years and when the cloth is damaged.
Replacing lamps
Fig. 1-5
Disconnect the hood from the electricity.
Warning! Prior to touching the light bulbs ensure they are cooled down.
To replace the central lamp: use only 40W max 40° D25 GU10.halogen lamps.
Removing the bulb:
rotate anti-clockwise a quarter turn and take out.
Mounting the bulb:
insert the bulb in its seat so that its contacts enter the congruent seats on the bulb-holder, rotate clockwise for about a quarter turn.
Some models envisage lateral lamps:
Replace them with identical forms of 40W (E14) max).
Remove cover A to access the lamp housing A.
If the lights do not work, make sure that the lamps are fitted properly into their housings before you call for technical assistance.
Caution
Never use the hood without the grill being mounted correctly!
The hood must NEVER be used as a support top unless expressly indicated.
This apparatus is not suitable for use by people (including children) with reduced sensory, physical or mental capacity, or lacking experience and knowledge, unless under supervision or instructed in the use of the apparatus by a person responsible for their safety.
Children must be watched to see that they do not play with the apparatus.
Cooking on the flame under the hood (flambé) is strictly forbidden.
The use of open flame will damage the filters and can lead to fires. It must, therefore, be avoided in any case.
Frying must be controlled to avoid overheated oil taking fire.
The hood must be frequently cleaned both internally and externally.
Failure to observe the cleaning of the hood and the substitution and cleaning of the filters regulations will leads to the risk of fire.
We decline any responsibility for possible inconvenience, damage or fire caused to the apparatus as a result of the failure to observe the instructions reported in this manual.
This appliance is marked according to the European directive 2002/96/EC on Waste Electrical and Electronic Equipment (WEEE). By ensuring this product is disposed of correctly, you will help prevent potential negative consequences for the environment and human health, which could otherwise be caused by inappropriate waste handling of this product.

The symbol — on the product, or on the documents accompanying the product, indicates that this appliance may not be treated as household waste. Instead it shall be handed over to the applicable collection point for the recycling of electrical and electronic equipment. Disposal must be carried out in accordance with local environmental regulations for waste disposal.
For more detailed information about treatment, recovery and recycling of this product, please contact your local city office, your household waste disposal service or the shop where you purchased the product.
Ed. 12/06
- Instruction on mounting and use
- Use
- Attention!
- Installation
- Electrical connection
- Mounting
- Description of the hood
- Fig. 1
- Operation
- Automatic switch-on function
- Control of suction speed (power)
- Hood in stand-by: LED OFF
- Control of the central light
- Control of the lateral lights (when envisaged)
- Reset and configuration of the filters saturation signal
- Reset anti-fat filter saturation signal (GREEN LED FLASHING on the control level)
- Reset anti-fat filter saturation signal ORANGE (amber) LED FLASHING
- Deactivating the carbon filter saturation signal (for special applications)
- Maintenance
- Cleaning
- DO NOT USE ALCOHOL!
- Grease filter
- Fig. 25
- Charcoal filter (filter version only)
- Replacing lamps
- Fig. 1-5
- Removing the bulb:
- Mounting the bulb:
- Some models envisage lateral lamps:
- Caution
Brand : BAUMATIC
Model : Segreto
Category : Range hood