10 Foot Offset Umbrella 21224-17 - Parasol Gardenline - Free user manual and instructions
Find the device manual for free 10 Foot Offset Umbrella 21224-17 Gardenline in PDF.


| Product Type | Offset Patio Umbrella |
| Brand | Gardenline |
| Model | 21224-17 |
| Canopy Diameter | 10 feet (3.05 m) |
| Canopy Material | Polyester with UV protection |
| Frame Material | Aluminum pole, steel ribs |
| Color | Beige / Taupe |
| Weight | Approximately 25 lbs (11.3 kg) |
| Base Type | Cross base or plate (sold separately) |
| Base Weight Required | At least 50 lbs (22.7 kg) |
| Lift Mechanism | Crank lift with push-button tilt |
| Tilt Angles | Up to 45 degrees |
| UV Protection | UPF 50+ |
| Water Resistance | Water-repellent finish |
| Assembly Required | Yes (2 persons recommended) |
| Cleaning Instructions | Hand wash with mild soap, air dry |
| Storage | Store in a dry place, use cover |
| Replacement Parts | Canopy, ribs, push-button, crank handle available |
| Wind Resistance | Not recommended for high wind >15 mph |
Frequently Asked Questions - 10 Foot Offset Umbrella 21224-17 Gardenline
User questions about 10 Foot Offset Umbrella 21224-17 Gardenline
0 question about this device. Answer the ones you know or ask your own.
Ask a new question about this device
Download the instructions for your Parasol in PDF format for free! Find your manual 10 Foot Offset Umbrella 21224-17 - Gardenline and take your electronic device back in hand. On this page are published all the documents necessary for the use of your device. 10 Foot Offset Umbrella 21224-17 by Gardenline.
USER MANUAL 10 Foot Offset Umbrella 21224-17 Gardenline
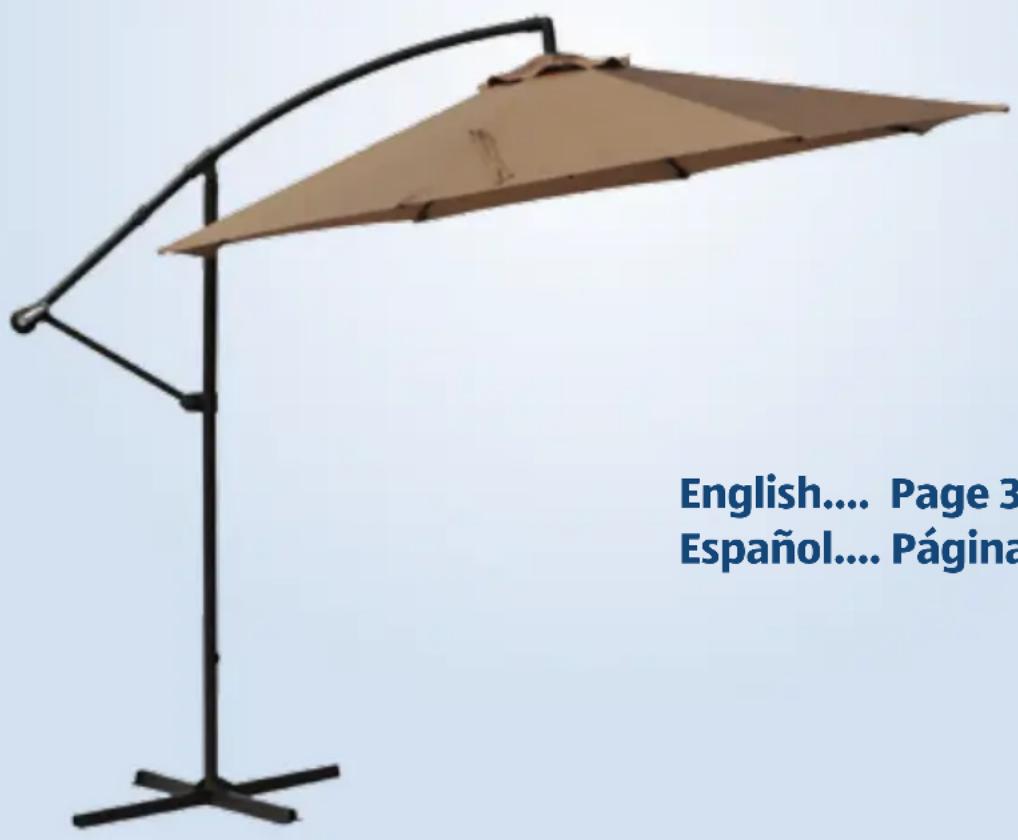
10 FOOT OFFSET UMBRELLA
SOMBRILLA DE 10 PIES CON SOPORTE LATERAL
Assembly Instructions 6
Instructions for Use 8
Warranty 9
Getting Started
Identify all parts packaged in carton against the parts list. Remove all protective materials and place parts on a non-abrasive surface to avoid scratching. If any parts are missing or damaged, DO NOT attempt to assemble. Please contact our customer service center (Monday-Friday 9:00am – 5:00pm EST) at 1-800-599-8898.
Caution
Read all the instructions before assembly. Failure to do so may result in faulty assembly and potential injury! Assemble product on a soft, non-abrasive surface such as a carpet or cardboard to avoid damaging the item. Seek assistance to assemble bulky or heavy items. After final alignment, make sure all bolts and nuts are securely tightened with screw covers pressed in place.
* Must be weighed down.
Pack contents / parts
A Umbrella Frame
B Lower Pole
C Umbrella Base Pole
D Top Cross Bar
E Bottom Cross Bar
F Locking Knob
G Bolt (M8*15MM)
H Wrench
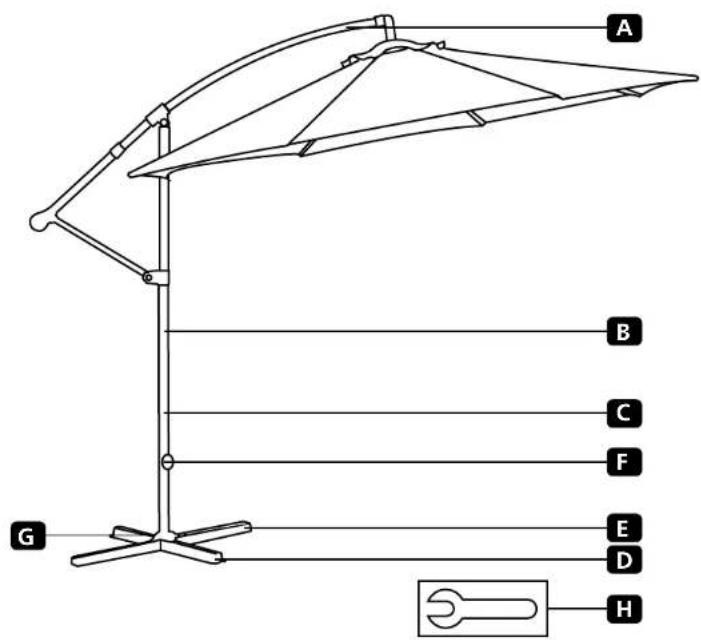
| Description Qty | Description Bar | Qty | |||
| AUm | brella Frame 1EBotto | m Cross | 1 | ||
| B | Lower Pole | 1 | F | Locking Knob | 1 |
| C | Umbrella Base Pole | 1G | Bolt (M) | 8*15MM) 4 | |
| D | Top Cross Bar | 1 | H | Wrench | 1 |
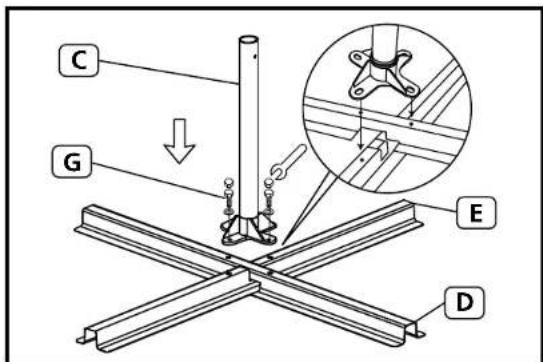
- Place the Top Leg Base (D) over the Bottom Leg Base (E) to form an "x". Attach the Umbrella Base Pole (C) to the Base Legs and screw tightly with the 4 provided bolts (G).
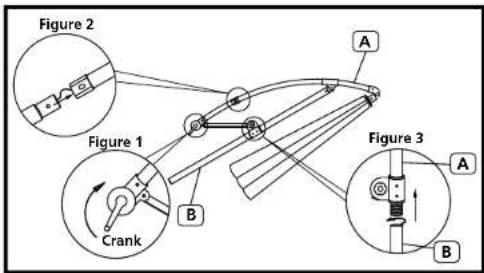
- In order to put the umbrella together, close the umbrella properly by cranking the umbrella clockwise as shown in Figure 1. As the umbrella is being cranked, make sure the rope stays inside the poles and does not get tangled as shown in figure 2, and then snap the curved pole together. Screw the Lower Pole (B) to the Umbrella Frame (A) as shown in figure 3.
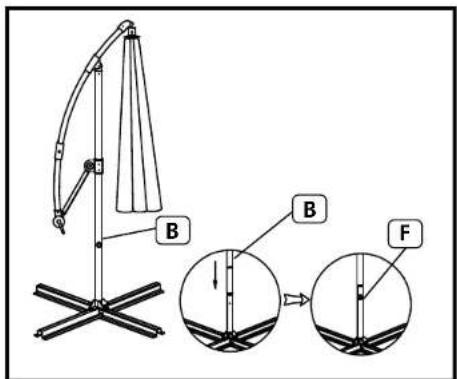
- Place a water or sand based counter-weight (not included) onto the base to stabilize the umbrella. Other weights such as cinderblocks or sandbags would work as well. Insert the Lower Pole (B) into the Umbrella Base Pole (C). Tighten with the Locking Knob (F).
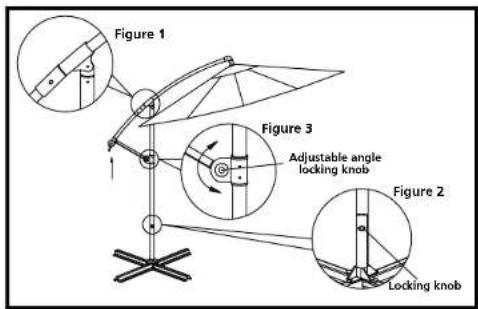
How to open the umbrella
- Push the curved umbrella frame to the top as shown in figure 1.
- Tighten the locking knob to lock the umbrella position as shown in figure 2.
- Turn the crank clockwise to open the umbrella.
- Loosen the adjustable angle locking knob to angle the umbrella canopy to desired position (figure 3).
- Now enjoy your new offset umbrella.
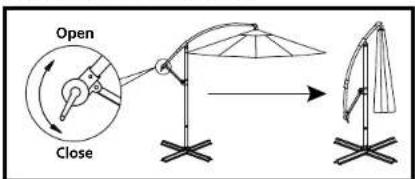
How to close the umbrella
- Turn the crank counterclockwise to close the umbrella
- Loosen the adjustable angle locking knob and pull the curved umbrella frame down to the bottom.
- Tie the umbrella to the pole.
Please close the umbrella and tie it securely in severe weather or strong winds.

WARRANTY CARD 10 FOOT OFFSET UMBRELLA
Your details:
Name
Address

E mail
Date of purchase
* We recommend you keep the receipt with this warranty card. You must include a copy of your receipt
Location of purchase
Description of malfunction:
Return your completed warranty card with the faulty product to:
TDC USA, Inc.
14 Madison Road
Fairfield, NJ 07004
United States of America
support@tdcusainc.com
AFTER SALES SUPPORT
1958

1800 599 8898

support@tdcusainc.com
MODEL
10 FT OFFSET UMBRELLA MODEL: 21224-17 05/2017
Phone lines available
Monday to Friday
9am - 5pm EST.
ALDI INC. FULL WARRANTY CONDITIONS
Dear Customer:
The ALDI warranty is a full warranty offering you the following benefits:
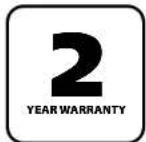
Warranty period: 2 years* from date of purchase.
Costs: Free repair / exchange or refund. No transport costs.
ADVICE Please contact our service hotline by phone, email or fax before sending the device. This allows us to provide support in the event of possible operator errors.
In order to make a claim under the warranty, please send us:
The faulty item with all component parts, the original receipt and the warranty card properly completed.
The warranty does not cover damage caused by:
Accident or unanticipated events (e.g. lightning, wind, water, fire).
Improper use or transport.
Failure to follow safety and maintenance instructions.
Other improper treatment or modification.
After the expiration of the warranty period, you may wish to have your product repaired at your own expense. You will be notified of the repair costs in advance.
This warranty gives you specific legal rights, and you may also have other rights which vary from state to state but this warranty is not intended to exceed statutory minimum requirements beyond what is included above.
This warranty does not limit the statutory obligation of the seller arising from any implied warranties. The period of warranty can only be extended in accordance with applicable law.
Neither the service company nor ALDI will assume any liability for data or settings stored on any returned product.
Contenido
Para comenzar 12
Lista de piezas 13
United States of America
support@tdcusainc.com
SERVICIO POSVENTA
1958
1800 599 8898
support@tdcusainc.com
MODELO:
SOMBRILLA DE 10 PIES CON SOPORTE LATERAL MODELO: 21224-17 05/2017
10 FT OFFSET UMBRELLA
MODEL: 21224-17
05/2017

YEAR WARRANTY AÑOS DE GARANTÍA


Brand : Gardenline
Model : 10 Foot Offset Umbrella 21224-17
Category : Parasol