
AE 77 H - Uncategorized ALBRECHT - Free user manual and instructions
Find the device manual for free AE 77 H ALBRECHT in PDF.


User questions about AE 77 H ALBRECHT
0 question about this device. Answer the ones you know or ask your own.
Ask a new question about this device
Download the instructions for your Uncategorized in PDF format for free! Find your manual AE 77 H - ALBRECHT and take your electronic device back in hand. On this page are published all the documents necessary for the use of your device. AE 77 H by ALBRECHT.
USER MANUAL AE 77 H ALBRECHT
Before you use this scanner, please read and observe the following:
Earphone Warning!
The output of the Phone jack is monaural. Set the volume to a comfortable audio level coming from the speaker before plugging in the monaural earphone. Otherwise you might experience some discomfort or possible hearing damage if the volume suddenly becomes too loud because of the volume control or squelch control setting. This may be particularly true of the type of earphone that is placed in the canal.
Warning!
Uniden does not represent this unit to be waterproof. To reduce the risk of fire or electrical shock, do not expose this unit to rain or moisture.
Important!
The installation, possession, or use of this scanning radio in a motor vehicle may be prohibited, regulated, or require a permit in certain states, cities, and/or local jurisdictions. Your local law enforcement officials should be able to provide you with information regarding the laws in your community.
General Battery Warning!
Do not short-circuit any battery. Do not discard batteries in a fire, they may explode.
Alkaline Battery Warning!
Do not recharge alkaline batteries in the product.
Doing so may cause serious damage to the product and will void the warranty. Uniden does not recommend using rechargeable alkaline batteries in this product.
Nickel-Cadmium Battery Warning! Do not charge nickel-cadmium batteries with any charger other than the one supplied by authorized dealer as an option. Using another charger may damage the batteries, or cause them to explode.
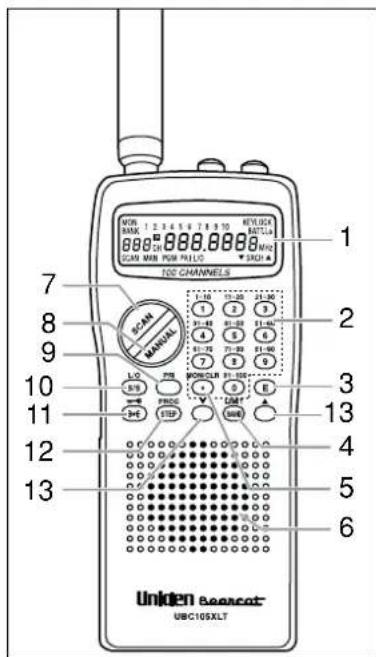
Function Keys
text_image
UNiden beaccat UBC105XLT 100 CHANNELS 1 2 3 4 5 6 7 8 9 10 11 12 13 1 2 3 4 5 6 7 8 9 LO PIN POWER 01-100- 1:10 11:20 21:30 2 3 31:42 51:52 51:62 4 5 6 51:72 71:82 51:92 5 6 7 6 8 7 9 8 10 9 11 10 11 11 12 12 13 13 6 5 4 5 6- Display
- Numeric keypad
- Enter
- Band/Limit
- Monitor/Clear
- Speaker
- Scan Mode
- Manual Mode
- Priority
- S/S (Search Skip), L/O (Lock Out)
- LIGHT/Keypad Lock
- Step/Program
- ▲/▼
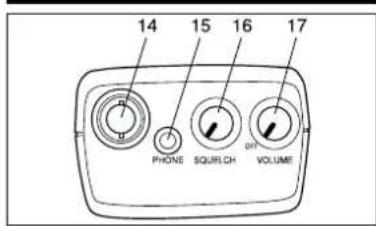
Controls and Indicators
text_image
14 15 16 17 PHONE SQUISCH DIFF VOLUME- Antenna Connector
- Phone Jack
- Squelch Control
- On/Off Volume Control
text_image
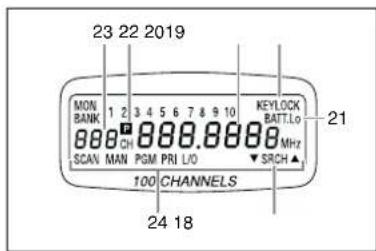
23 22 2019 MON BANK 1 2 3 4 5 6 7 8 9 10 KEYLOCK BATT,Lo 21 SCAN MAN PGM PRI L/O SRCH ▲ 100 CHANNELS 24 18- Search indicator
- Frequency Display
- Keypad Lock Indicator
- Low Battery Indicator
- Priority Channel Indicator
- Channel Indicator
- Function Indicators
Included in Your Package
- Antenna
•Belt clip
•Screw (2)
•This Operating Guide
Contents
Introduction 6
What is Scanning? .....6
Feature Highlights 6
Setup 6
Installing the Batteries .....7
AC Adapter/Charger (not supplied) .7
Charging Warning 7
Flexible Antenna 7
Belt Clip 7
Basic Operation ....8
Setting the Squelch 8
Keylock....8
Programming 9
Programming Tips 9
Scanning .....10
Channel Lockout .....10
Lockout in Manual Mode .....10
Locking a Channel While Scanning 11
Lockout Tips 11
Restore a Locked Out Channel ...11
Restore All Locked-out Channels ..12
Priority Scan ....12
Changing the Priority Channel ....12
Searching ....13
Band Search 13
Limit Search ....13
Direct Search 14
Search Hold Feature .....15
Channel Skip 15
Storing Search Frequencies .....16
Care and Maintenance .....17
General Use 17
Location 17
Cleaning 17
Repairs 17
Birdies .....17
Troubleshooting .....18
Specifications .....19
Declaration of Conformity .....19
Introduction
The AE 77 H Hand Scanner is a sophisticated information radio that allows you to monitor 6 different frequency bands. It is a state-of-the-art radio with scanning capabilities, and it can save up to 100 different frequencies in memory.
What is Scanning?
Unlike standard AM or FM radio stations, most two-way communications do not transmit continuously. The AE 77H scans programmed channels until it finds an active frequency.
Scanning stops on an active frequency and remains on that channel as long as the transmission continues. When the transmission ends, the scanning cycle resumes until another transmission is received.
Frequency Bands Transmission
29 - 54 MHz VHF low band
108 - 137 MHz Aircraft
137 - 144 MHz Military land mobile
144 - 146 MHz 2 meter amateur band
146 - 174 MHz VHF high band
406 - 512 MHz UHF band 70 cm amateur band
Feature Highlights
- 100 Channels – Program one frequency into each channel. You must have at least one channel programmed to use the scan mode.
- 29 MHz-512 MHz – Search these frequency ranges with your scanner. (The frequency coverage is not totally continuous from 29 MHz to 512 MHz.)
- 6 Preprogrammed Band Search – (See page 19 for Frequency Bands)
•Priority Channel Scanning –
Allows you to designate a priority channel which is monitored every two seconds when Priority Scanning is selected.
- Manual Channel Access – Go directly to any channel.
- Memory Backup – Frequencies programmed in channels are retained in memory. If power is completely disconnected, the frequencies are retained for one hour.
•Preset Two-second Delay –
Scanner waits two seconds after transmission stops before resuming scanning.
- LCD Back-Light – An orange LCD light remains on for 15 seconds when 36/π is pressed.
•Air Band Step - You can select the AIR Band step from 12.5 kHz to 8.33 kHz. There are two AIR BAND STEPs in the AIRCRAFT Range. Press and hold STEP/PROG to switch the AIR BAND STEPs to find the appropriate range in your area.
Setup
These are helpful guidelines when using your new scanner:
- If your scanner receives interference or electrical noise, move the scanner or its antenna away from the source.
- If you need to improve reception, use an optional antenna designed for multi-band coverage. (You can purchase this type of antenna at a local electronics store.)
Installing the Batteries
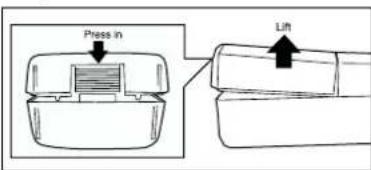
- Open the cover.
text_image
Press in Lift- Insert batteries according to the polarity symbols inside the battery compartment.
- Replace cover and press down until it clicks into place.
Warning:
Do not mix alkaline batteries with Ni-Cd batteries. Be sure to install four batteries of the same type.
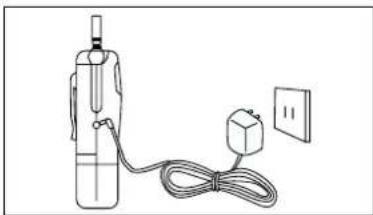
AC Adapter/Charger (not supplied) Using an adapter/charger to power the UBC105XLT from a wall socket.
natural_image
Line drawing of a gas collection device connected to a wall-mounted power outlet (no text or symbols)There are two external power jacks-POWER Jack and CHARGE Jack.
The POWER Jack powers only the scanner and it is not connected to the batteries.
The CHARGE Jack supplies power to scanner and batteries. Use this Jack only when you have installed rechargeable batteries.
Warning: Do not use the CHARGE Jack if you have installed non-rechargeable batteries.
Charging Warning
Do not charge alkaline batteries in this scanner. Doing so may cause serious damage to the product and void the warranty. Before attempting to recharge batteries, make sure you have installed four rechargeable nickel-cadmium batteries.
Flexible Antenna
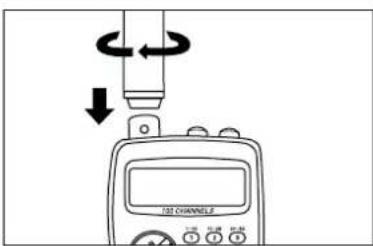
Attach the flexible antenna to the BNC connector.
text_image
Diagram showing a digital device with a 120-channel digital display and directional arrows indicating rotation or signal flow.Belt Clip
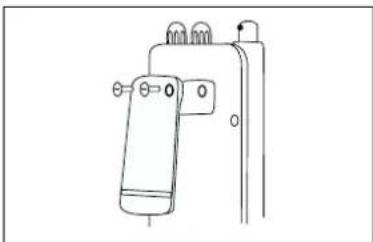
Do not tighten the screws too tight. You can damage the case or clip.
natural_image
Line drawing of a mechanical device with ports and mounting bracket (no text or symbols)Basic Operation
Note: See page 4 for function keys, controls and indicators while reading this guide.
Setting the Squelch
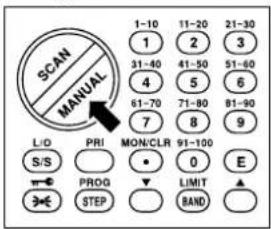
To set the squelch, you must be in the manual mode. No signal should be present when adjusting squelch.
- Press until you do not hear a signal.
text_image
SCAN MANUAL 1-10 11-20 21-30 1 2 3 31-40 41-50 51-60 4 5 6 61-70 71-80 81-90 7 8 9 L/O PRI MON/CLR 91-100 E S/S • 0 E PROG ▼ LIMIT ▲ STEP BAND- Adjust VOLUME to a comfortable listening level.
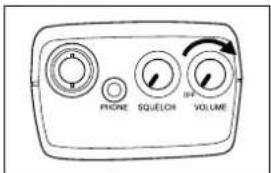
text_image
PHONE SQUELCH VOLUME- Think of the Squelch Control as a gate. Turn SQUELCH fully counterclockwise. This raises the "SquelchGate" so high that no signals can get through.
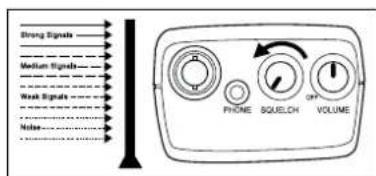
text_image
Strong Signals Medium Signals Weak Signals Noise PHONE SQUELCH OFF VOLUME- Turn SQUELCH fully clockwise until you hear a hiss. This lowers the "Squelch-Gate" so that everything gets through - noise, weak, medium and strong signals.
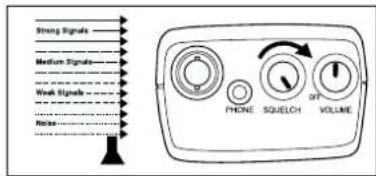
text_image
String Signals Medium Signals Weak Signals Noise PHONE SHELCH VOLTAGE- Turn SQUELCH back counterclockwise just until the hiss stops. Now the "Squelch Gate" allows only strong signals through.
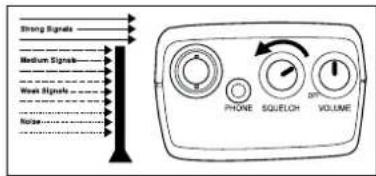
text_image
Strong Signals Medium Signals West Signals Noise PHONE SQUELCH VOLUMEKeylock
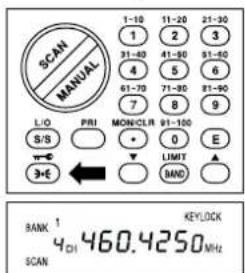
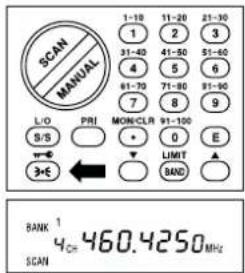
Keylock prevents accidental key entries during scanning.
- To lock the keypad, press 34/9 until KEYLOCK appears.
text_image
SCAN MANUAL 1-10 11-20 21-30 1 2 3 31-60 41-90 51-60 4 5 6 61-70 71-90 81-90 7 8 9 L/O PRI MON-CLR 91-100 E S/S 0 0 + LIMIT ▲ 3+E MNC ▲ BANK 1 KEYLOCK 4CH 460.4250MHz SCAN- To unlock the keypad, press 34/1 until KEYLOCK disappears.
text_image
SCAN MANUAL 1-10 11-20 21-30 1 2 3 31-40 41-50 51-60 4 5 6 61-70 71-80 81-90 7 8 9 L/O PRI MON-CLR 91-100 E S/S + • LIMIT BAND ▲ +- 3+E ← BANK 1 4Cm 460.4250 MHz SCANProgramming
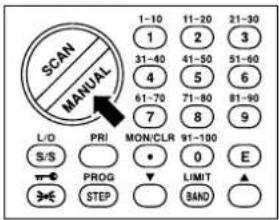
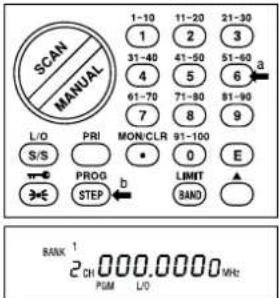
Before the AE 77 H can receive radio broadcasts, you must program a frequency into at least one channel. Before scanning, repeat this procedure for each channel you program.
1.
MAPRESS
text_image
SCAN MANUAL 1-10 11-20 21-30 3 31-40 41-50 51-60 6 4 5 6 7 8 9 L/D PRI MON/CLR 91-100 E S/S PROG LIMIT BAND STEP- Select a channel.
a) Enter the channel number.
b) Then press /PROG
text_image
SCAN MANUAL 1-10 11-20 21-30 1 2 3 31-40 41-50 51-60 4 5 6 61-70 71-80 81-90 7 8 9 L/O PRI MON/CLR 91-100 S/S 0 E PROG LIMIT STEP SANO b BANK CH 000.0000 MHz PUM L/O- Enter the frequency.
a) Enter the frequency number.
b) Then press E

text_image
SCAN MANUAL 1-10 11-20 21-30 1 2 3 31-40 41-50 51-60 4 5 6 61-70 71-80 81-90 7 8 9 L/O PRI MON/CLR 91-100 S/S 0 E b PROG LIMIT STEP BAND BANK 1 2 CH 460.3750 MHz PGMNote: To clear a mistake while entering the frequency, press /MON/CLR twice, and start over.
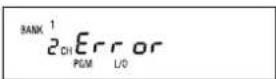
If the frequency entered is outside the frequency range of the scanner, a distinctive beep sounds. (See the table on page 6 or the band list on page 19.)
Press /MON/ CLR and go back to Step 3.
Programming Tips
- Group similar frequencies into adjacent channels. For example, program Marine frequencies in channels 1 through 10 and public services into channels 11 through 20 and so on.
- Put the frequency that you listen to the most or the most important frequency into a priority channel.
•To quickly program a series of channels, start with the lowest number channel. For example, when you are programming five new frequencies into channels 4 through 8, start with channel 4. After you finish programming a channel, press STEP /PROG to go to the next higher channel.
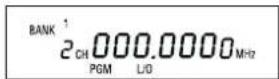
• To erase the channel, press, and then press. Channels with no frequencies are automatically locked out.
- Record channels and frequencies in some convenient place in case the scanner memory is lost.
Scanning
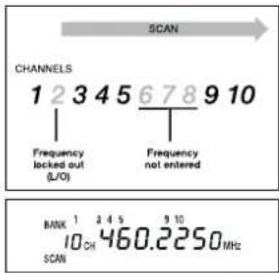
When you turn on the power, the AE 77 H automatically starts in the scan mode.
During normal scanning the scanner skips unprogrammed or locked out channels.
When a transmission is received, the scanner stops on that channel. When the transmission ends, scanning resumes automatically after two seconds.
text_image
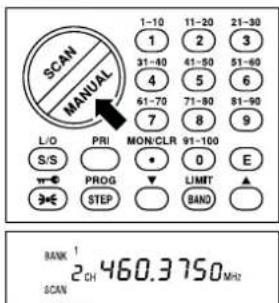
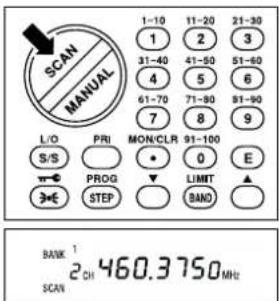
SCAN CHANNELS 1 2 3 4 5 6 7 8 9 10 Frequency locked out (L/O) Frequency not entered BANK 1 2 4 5 9 10 10CH 460.2250MHz SCANTo stop on a channel during scanning, press MANUAL.
text_image
SCAN MANUAL 1-10 11-20 21-30 31-40 41-50 51-60 4 5 6 61-70 71-80 81-90 7 8 9 L/O PRI MON/CLR 91-100 S/S PROG 0 E 3← STEP LIMIT BAND BANK 2 CH 460.3750 MHz SCANTo resume scanning, press . SCAN
text_image
SCAN MANUAL 1-10 11-20 21-30 1 2 3 31-40 41-50 51-60 4 5 6 61-70 71-80 81-90 7 8 9 L/O PRI MON/CLR 91-100 S/S 0 E PROG LIMIT ▲ STEP BAND BANK 1 2 CH 460.3750 MHz SCANChannel Lockout
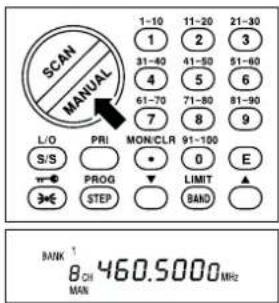
You can lockout any channel so it is not reviewed during normal scanning. You can restore the channel to scanning whenever you wish.
Lockout in Manual Mode
1.
MAPress
text_image
SCAN MANUAL 1-10 11-20 21-30 1 2 3 31-40 41-50 51-60 4 5 6 61-70 71-80 81-90 7 8 9 L/O PRI MON/CLR 91-100 E S/S PROG LIMIT BAND STEP BAND BANK 1 8CH 460.5000 MHz MAN- Select a channel.
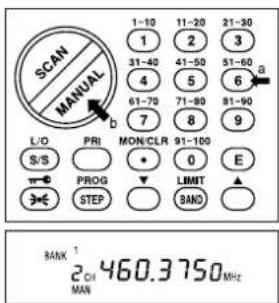
a) Enter the channel number. b) Then press against
text_image
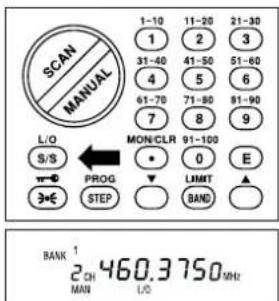
SCAN MANUAL 1-10 11-20 21-30 1 2 3 31-40 41-50 51-60 4 5 6 a 61-70 71-80 81-90 7 8 9 L/O PRI MON/CLR 91-100 S/S 0 E PROG LIMIT STEP BAND BANK CH 460.3750 MHz MAN- Press ☐ to lockout the channel.
text_image
SCAN MANUAL 1-10 11-20 21-30 31-60 41-50 51-60 61-70 71-80 81-90 9 MON/CLR 91-100 0 E PROG LIMIT BAND S/S STEP BANK 2CH MAN L/O 460.3750 MHLocking a Channel While Scanning If the scanner keeps stopping on a particular channel due to noise or too frequent transmissions, you may want to keep that channel from scanning.
- Wait until the scanner stops at the channel.
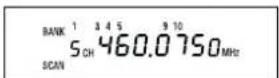
- Then press 140.
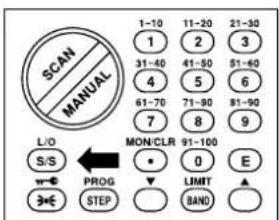
text_image
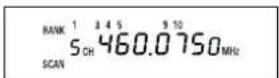
SCAN MANUAL 1-10 11-20 21-30 1 2 3 31-40 41-50 51-60 4 5 6 61-70 71-80 81-90 7 8 9 L/O MON/CLR 91-100 S/S • 0 E PROG LIMIT ▲ STEP BAND- The scanner immediately resumes scanning because the locked out channel is no longer in the scanning sequence.
Lockout Tips
•To quickly lockout a series of channels, start with the lowest number channel. For example, if you are locking out channels 4, 7, 8, 12, and 15, start with channel 4. After selecting channel 4, press ⬆E/O. Then press ⬇MUAL or more times to step up to the next channel to be locked out.
- Record the locked-out channels in some convenient place so you can restore them.
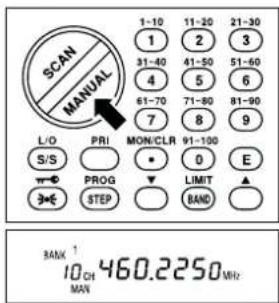
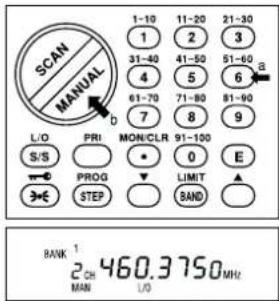
Restore a Locked Out Channel
1.
MAPress
text_image
SCAN MANUAL L/O S/S PROG STEP 1-10 1 31-40 4 61-70 7 PRI MON/CLR 0 LIMIT BAND 11-20 2 41-50 5 71-80 8 91-100 21-30 3 51-60 6 81-90 9 E ▲ BANK 10CH 460.2250 MHz MAN- Select a locked out channel. a) Enter the channel number. b) Then press against
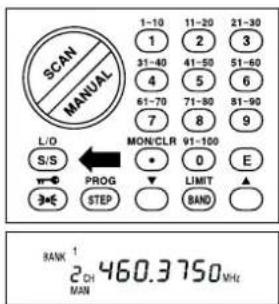
text_image
SCAN MANUAL 1-10 11-20 21-30 1 2 3 31-40 41-50 51-60 4 5 6 61-70 71-80 81-90 7 8 9 L/O PRI MON/CLR 91-100 S/S 0 E PROG LIMIT STEP BAND BANK 1 2 CH 460.3750 MHz MAIN L/O- Press ⬆ to unlock the channel.
text_image
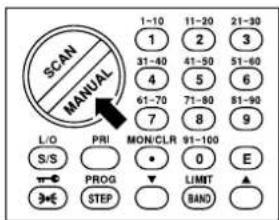
SCAN MANUAL 1-10 11-20 21-30 1 2 3 31-40 41-50 51-60 4 5 6 61-70 71-80 81-90 7 8 9 MON/CLR 91-100 S/S ← PROG 3← STEP LIMIT ▲ BAND ▲ E BANK 1 2CH 460.3750 MHz MANRestore All Locked-out Channels
1.
MAPRESS
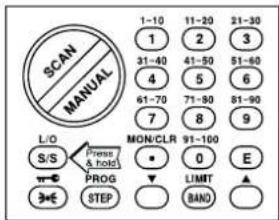
text_image
SCAN MANUAL 1-10 11-20 21-30 1 2 3 31-40 41-50 51-60 4 5 6 61-70 71-80 81-90 7 8 9 L/O PRI MON/CLR 91-100 S/S • 0 E PROG LIMIT STEP BAND- Press and hold Ⓤ for about two seconds.
You will hear two beeps when all the channels have been restored.
text_image
SCAN MANUAL 1-10 11-20 21-30 1 2 3 31-40 41-50 51-60 4 5 6 61-70 71-80 81-90 7 8 9 MON/CLR 91-100 S/S (Fines & hold) PROG STEP LIMIT BAND EPriority Scan
When priority scan is turned on, your scanner checks the priority channel every two seconds for activity. If a signal is present on the priority channel, your scanner monitors the channel until the transmission ends, then resumes normal scanning. You can designate any of the 100 available channels as your priority channel.
To activate priority scan (in either manual or scan mode):
- Press PRI.
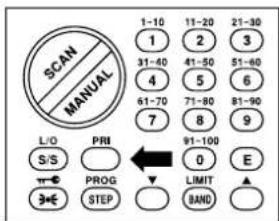
text_image
SCAN MANUAL 1-10 11-20 21-30 1 2 3 31-40 41-50 51-60 4 5 6 61-70 71-80 81-90 7 8 9 L/O PRI 91-100 S/S 0 E PROG LIMIT STEP BAND- Press PRI again at anytime to deactivate priority scan.
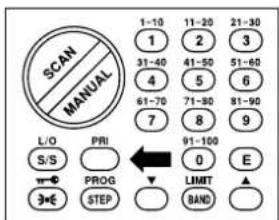
text_image
SCAN MANUAL 1-10 11-20 21-30 1 2 3 31-40 41-50 51-60 4 5 6 61-70 71-80 81-90 7 8 9 L/O PRI 91-100 S/S 0 E PROG LIMIT ▲ STEP BANDChanging the Priority Channel You cannot eliminate the priority channel, but you can change it to any other of the 100 available channels.
- Press
/PROG.
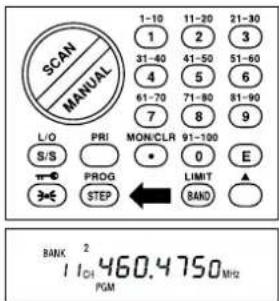
text_image
SCAN MANUAL 1-10 11-20 21-30 1 2 3 31-40 41-50 51-60 4 5 6 61-70 71-80 81-90 7 8 9 L/O PRI MON/CLR 91-100 E S/S PROG LIMIT ▲ STEP BAND BANK 2 11CH 460.4750MHz PGM- Select a new priority channel.
a) Enter the channel number.
b) Then press PRI again.
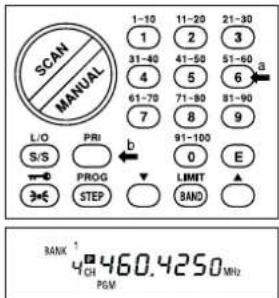
text_image
SCAN MANUAL 1-10 11-20 21-30 1 2 3 31-40 41-50 51-60 4 5 6 a 61-70 71-80 81-90 7 8 9 L/O PRI b 91-100 S/S PROG LIMIT E →→ STEP BAND BANK 4 CH 460.4250 MHz PGMSearching
Band Search
The AE 77H has 6 factory-Preprogrammed Search Bands. You can search any of these Bands to find desired frequencies if you do not have a Frequency Directory handy, or if new stations have been added since the Directory was published.
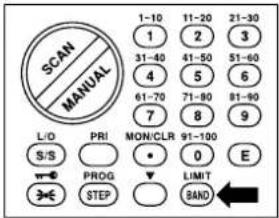
- Press and hold 📄 to enter the Band Search Mode. Then the upper and lower limits of the band currently selected are displayed.
text_image
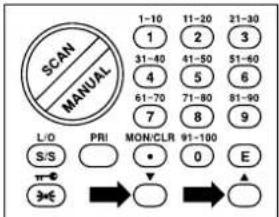
SCAN MANUAL 1-10 11-20 21-30 1 2 3 31-40 41-50 51-60 4 5 6 61-70 71-80 81-90 7 8 9 L/D PRI MON/CLR 91-100 E S/S PROG LIMIT E STEP BAND- Press ▲ or ▼ to select the band you wish to search.
text_image
SCAN MANUAL 1-10 11-20 21-30 1 2 3 31-40 41-50 51-60 4 5 6 61-70 71-80 81-90 7 8 9 L/O PRI MON/CLR 91-100 E S/S • 0 E π← → ▶ ▶ ▲-
Wait for about 2 seconds and the UBC105XLT will begin searching that Band. Or, press BANNT again to begin.
-
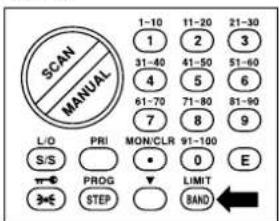
Press LIMIT at any time to stop the search on a frequency. Press BAND /LIMIT to searching.
text_image
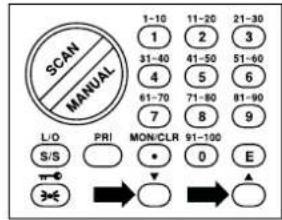
SCAN MANUAL 1-10 11-20 21-30 1 2 3 31-40 41-50 51-60 4 5 6 61-70 71-80 81-90 7 8 9 L/O PRI MON/CLR 91-100 E S/S 0 PROG LIMIT STEP BAND- When Search is stopped, you can press ▲ or ▼ to move up or down 1 frequency step. (See the table on page 19 for the step size for each Band.)
text_image
SCAN MANUAL 1-10 11-20 21-30 1 2 3 31-40 41-50 51-60 4 5 6 61-70 71-80 81-90 7 8 9 L/O PRI MON/CLR 91-100 E S/S 0 E → →Limit Search
In Limit Search mode, you can search within the frequency range you have set.
To use this function, you must set the lower/higher frequency of your search range list.
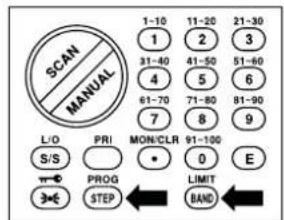
To program a frequency range follow these steps:
- Press PROG to until the search channel you want appears in the display, and press ALAMIT.
text_image
SCAN MANUAL 1-10 11-20 21-30 1 2 3 31-40 41-50 51-60 4 5 6 61-70 71-80 81-90 7 8 9 L/O PRI MON/CLR 91-100 E S/S PROG LIMIT BAND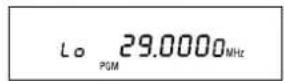
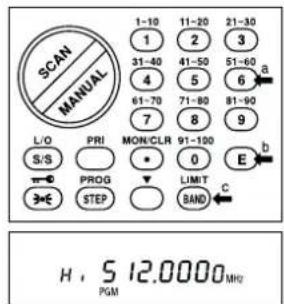
- Enter lower limit of the search band.
a) Enter the frequency number.
b) Then press E
c) Then press VEMLT.
text_image
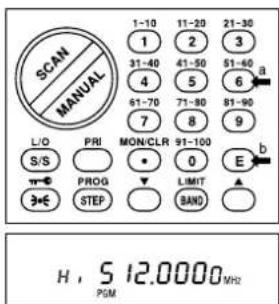
SCAN MANUAL 1-10 11-20 21-30 1 2 3 31-40 41-50 51-60 4 5 6 a 61-70 71-80 81-90 7 8 9 L/O PRI MON/CLR 91-100 E b S/S 0 PROG LIMIT STEP BAND c H, S 12.0000 MHz PGM- Enter upper limit of the search band.
a) Enter the frequency number.
b) Then press E
text_image
SCAN MANUAL 1-10 11-20 21-30 1 2 3 31-40 41-50 51-60 4 5 6 61-70 71-80 81-90 7 8 9 L/O PRI MON/CLR 91-100 E b S/S PROG LIMIT ▲ π-φ STEP BAND 3+E- Either press ▲ or ▼ to begin your search.
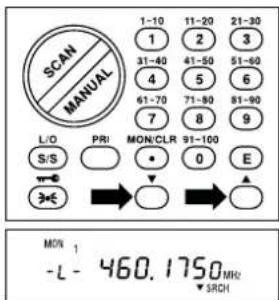
text_image
SCAN MANUAL 1-10 11-20 21-30 1 2 3 31-40 41-50 51-60 4 5 6 61-70 71-80 81-90 7 8 9 L/O PRI MON/CLR 91-100 E S/S 0 0 3€ MON 1 -L - 460.1750MHz SRCH- Press LIMIT at any time to stop the search on a frequency. Press BAND/LIMIT to searching.
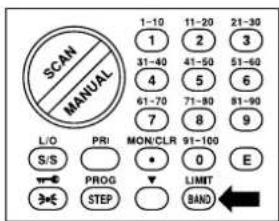
text_image
SCAN MANUAL 1-10 11-20 21-30 1 2 3 31-40 41-50 51-60 4 5 6 61-70 71-80 81-90 7 8 9 L/O PRI MON/CLR 91-100 E S/S PROG LIMIT BANDDirect Search
You can search by using ▲ or ▼ when you listen to a channel.
1.
MARCH
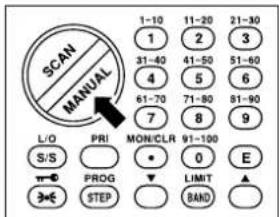
text_image
SCAN MANUAL 1-10 11-20 21-30 1 2 3 31-40 41-50 51-60 4 5 6 61-70 71-80 81-90 7 8 9 L/O PRI MON/CLR 91-100 E S/S FROG 0 E STEP LIMIT ▲- Select a channel
a) Enter the channel number.
b) Then press MANUAL
—OR—
Enter the frequency.
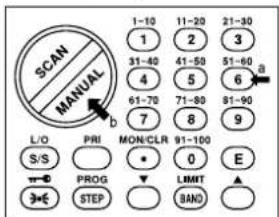
text_image
SCAN MANUAL 1-10 11-20 21-30 1 2 3 31-40 41-50 51-60 4 5 6 7 61-70 71-80 81-90 7 8 9 L/O PRI MON/CLR 91-100 S/S 0 E PROG LIMIT ▲ STEP BAND- Press ▲ or ▼ to start seaching.
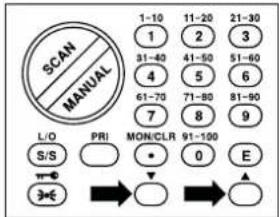
text_image
SCAN MANUAL 1-10 11-20 21-30 1 2 3 31-80 41-50 51-60 4 5 6 61-70 71-80 81-90 7 8 9 L/O PRI MON/CLR 91-100 E S/S □ ○ 0 E → → →- Press LIMIT at any time to stop the search on a frequency. Press BAND /LIMIT to searching.
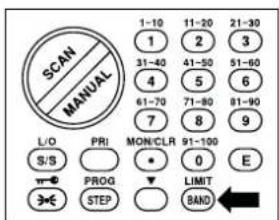
text_image
SCAN MANUAL 1-10 11-20 21-30 1 2 3 31-40 41-50 51-60 4 5 6 61-70 71-80 81-90 7 8 9 L/O PRI MON/CLR 91-100 E S/S PROG 0 STEP LIMIT BANDresume
- When search is stopped, you can press ▲ or ▼ to move up or down 1 frequency step.
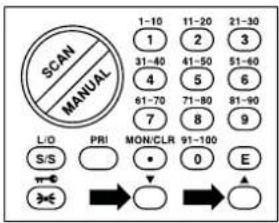
text_image
SCAN MANUAL 1-10 11-20 21-30 1 2 3 31-40 41-50 51-60 4 5 6 61-70 71-80 81-90 7 8 9 L/D PRI MON/CLR 91-100 S/S 0 E → →Search Hold Feature
- Press ⓄAMT at anytime to stop the search.
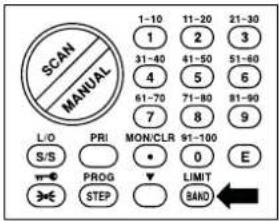
text_image
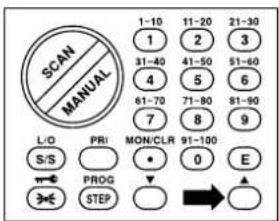
SCAN MANUAL 1-10 11-20 21-30 1 2 3 31-40 41-50 51-60 4 5 6 61-70 71-80 81-90 7 8 9 L/O PRI MON/CLR 91-100 E S/S • 0 PROG ▼ LIMIT STEP BAND ←- Press ▲ to move to the next higher frequency
text_image
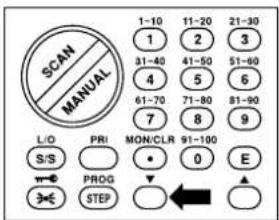
SCAN MANUAL 1-10 11-20 21-30 1 2 3 31-40 41-50 51-60 4 5 6 61-70 71-80 81-90 7 8 9 L/O PRI MON/CLR 91-100 S/S 0 E PROG STEP- Press ▼ to move down to the previous frequency.
text_image
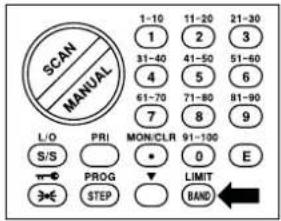
SCAN MANUAL 1-10 11-20 21-30 31-40 41-50 51-60 6 7 8 9 L/O PRI MON/CLR 91-100 S/S PROG 0 E STEP4.

/LIMIT
to
searching.
text_image
SCAN MANUAL 1-10 11-20 21-30 1 2 3 31-40 41-50 51-60 4 5 6 61-70 71-80 81-90 7 8 9 L/O PRI MON/CLR 91-100 E S/S • 0 E PROG ▼ LIMIT STEP BAND ←Note: The search continues toward either the upper or lower search limit, depending on which direction key (▲ or ▼) was pressed last.
Channel Skip
If a particular channel continues to interrupt search scanning, it is possible to set your scanner to skip the frequency.
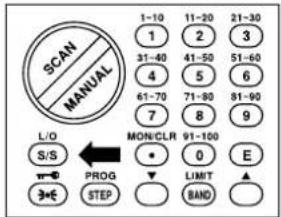
If your scanner stops while searching, press /E/O to lockout the frequency from the search range.
text_image
SCAN MANUAL 1-10 11-20 21-30 1 2 3 31-40 41-50 51-60 4 5 6 61-70 71-80 81-90 7 8 9 L/O MON/CLR 91-100 S/S • 0 E PROG LIMIT ▲ STEP BANDNote: You can program 20 skip frequencies. The 21st skip frequency entered causes the 1st skip frequency to unlock.
To unlock all skip frequencies at once, follow this step:
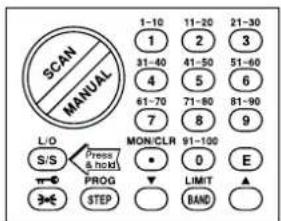
Press and hold 📄 for about three seconds.
You will hear two beeps when all the frequencies have been restored.
text_image
SCAN MANUAL 1-10 11-20 21-30 1 2 3 31-40 41-50 51-60 4 5 6 61-70 71-80 81-90 7 8 9 MON/CLR 91-100 S/S (Press & hold) PROG STEP LIMIT BAND E ▲Storing Search Frequencies
You can quickly store any frequency you find during search.
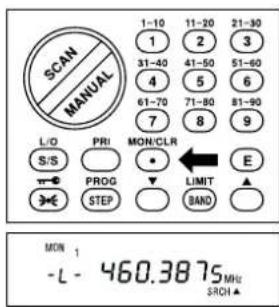
- Press MON/ CLR to store the displayed frequency in the MONITOR MEMORY.
text_image
SCAN MANUAL 1-10 11-20 21-30 1 2 3 31-40 41-50 51-60 4 5 6 61-70 71-80 81-90 7 8 9 L/O PRI MON/CLR E S/S PROG LIMIT BAND STEP BAND MON 1 -L - 460.3875MHz SROI▲Note:
You can program 10 MONITOR MEMORIES.
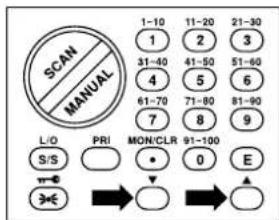
- Either press ▲ or ▼ to begin your search.
text_image
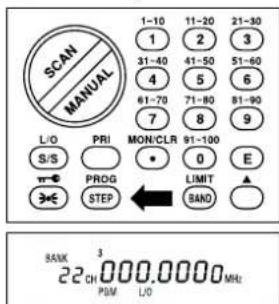
SCAN MANUAL 1-10 11-20 21-30 1 2 3 31-40 41-50 51-60 4 5 6 61-70 71-80 81-90 7 8 9 L/O PRI MON/CLR 91-100 E S/S 0 E → →- Press /PROG and enter the channel number, then press STEP /PROG again.
text_image
SCAN MANUAL 1-10 11-20 21-30 1 2 3 31-40 41-50 51-60 4 5 6 61-70 71-80 81-90 7 8 9 L/O PRI MON/CLR 91-100 E S/S PROG LIMIT STEP BAND ▲ BANK 3 22 CH 000.0000 MHz PUM L/O- Press /MON/ CLR and number key to select the MONITOR MEMORY.

/MON/ CLR repeatedly.
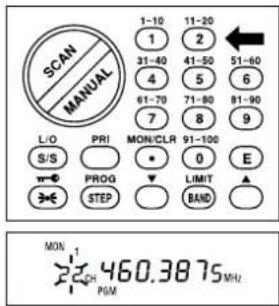
text_image
SCAN MANUAL 1-10 11-20 1 2 31-40 41-50 51-60 4 5 6 61-70 71-80 81-90 7 8 9 L/O PRI MON/CLR 91-100 E S/S PROG LIMIT BAND STEP BAND MON 1 PGM 460.3875MHU- Press to store the frequency in the channel you selected.
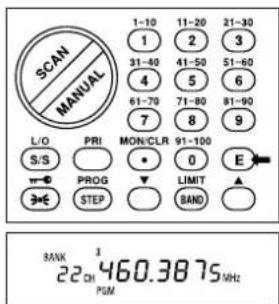
text_image
SCAN MANUAL 1-10 11-20 21-30 1 2 3 31-40 41-50 51-60 4 5 6 61-70 71-80 81-90 7 8 9 L/O PRI MON/CLR 91-100 S/S 0 E PROG LIMIT STEP BAND 3×E BAND BANK 1 22 OH 460.3875 MHz PGMRepeat steps 2 through 5 for all the search frequencies you want to store.
Care and Maintenance
General Use
- Turn the scanner off before disconnecting the power or replacing the batteries.
- Always write down the programmed frequencies in the event of memory loss.
- If memory is lost, simply reprogram each channel.
The display shows 000.0000 in all channels when there has been a memory loss.
•Always press each button firmly until you hear the entry tone for that key entry.
Location
- Do not use the scanner in high-moisture environments such as the kitchen or bathroom.
- Avoid placing the unit in direct sunlight or near heating elements or vents.
- If the scanner receives strong interference or electrical noise, move it or its antenna away from the source of the noise. If possible, a higher elevation, may provide better reception. Also try changing the height or angle of the antenna.
- Do not plug the scanner into an outlet controlled by a wall switch because long power interruptions may cause memory loss.
Cleaning
- Disconnect the power to the unit before cleaning.
- Clean the outside of the scanner with a mild detergent. To prevent scratches, do not use abrasive cleaners or solvents. Be careful not to rub the LCD window.
- Do not use excessive amounts of water.
Repairs
- Do not attempt any repair. The scanner contains no serviceable parts. Contact the dealer from whom you purchased the radio or take it to a qualified repair technician.
Birdies
- All radios can receive "birdies" (undesired signals). If your scanner stops during Scan mode and no sound is heard, it may be receiving a birdie. Birdies are internally generated signals inherent in the electronics of the receiver.
Press ⬆/∅ to lockout the channel.
- Narrow band responses (start scanning without reason) occur in the VHF low band in case of strong signals around 367 MHz.
Troubleshooting
If your AE 77 H is not performing properly, try the following steps.
| Problem Suggestion | |
| Scanner won't work. 1. Check | the connections at both ends of the AC Adapter.Turn on the wall switch of your room. You could be using an outlet controlled by the wall switch.Check to see the batteries are installed followed by the + and – symbols. |
| Improper reception. 1. Check | the antenna connection or move and reposition the antenna.Move the scanner.You may be in a remote area which could require an optional multi-band antenna. Check with your dealer or local electronics store. |
| Scan won't stop. 1. Adjust squelch threshold - refer to page 8, Setting the Squelch.Check the antenna connection.Check to see if many of the channels are locked out.If so, the scanner has less chance of finding an active channel.Review each channel's frequency to see if it is still stored in memory and is correct.It's possible that none of the programmed frequencies are currently active. | |
| Scan won't start. 1. Press the | key again.SCANAdjust squelch threshold - refer to page 8, Setting the Squelch.Check to see if all channels are locked out. |
Specifications
Channels: 100
Frequency Bands: 6 Preprogrammed Search bands
No. RANGE (MHz) MODE STEP (kHz)
(1) 66.0000 - 88.0000 FM 5
(2) 108.0000 - 136.9750 AM 12.5
or
(2) 108.0000 - 136.9916 AM 8.33
(3) 137.0000 - 143.9950 FM 5
(4) 144.0000 - 145.9875 FM 12.5
(5) 146.0000 - 174.0000 FM 5
(6) 406.0000 - 512.0000 FM 12.5
Operating temperature : -20^ to +60^
Scan rate: 17 channels per second
Search rate: 20 steps per second
Scan delay: 2 seconds
Audio output: 230 mW nominal into
8Ωinternal speaker
40 mW nominal into
64Ωearphone
Power requirements: 9VDC using optional adapter or 4 AA alkaline or rechargeable nickel-cadmium batteries
Antenna: Rubber antenna (included)
External jacks: Earphone jack, DC Charge jack DC power jack
Size: 64.5 (W) x 42.5 (D) x 147 (H) mm
Weight: approx 216 g (without batteries)
Features, specifications, and availability of optional accessories are all subject to change without notice.
Importer for Germany: ALAN Electronics GmbH, Dovenkamp 11, D 22952 Lütjensee
Declaration of Conformity
We: Uniden Corporation
2-12-7 Hatchobori, Chuo-Ku, Tokyo 104-8512 Japan
declare, under our sole responsibility, that this equipment : Uniden Bearcat model
UBC105XLT is in compliance with the essential requirements and other relevant provisions of
the Council Directive 1999/5/EC. See next page for Albrecht OEM CE declaration valid for Germany