DS-DELL-604 - Support voiture Havis - Free user manual and instructions
Find the device manual for free DS-DELL-604 Havis in PDF.


User questions about DS-DELL-604 Havis
0 question about this device. Answer the ones you know or ask your own.
Ask a new question about this device
Download the instructions for your Support voiture in PDF format for free! Find your manual DS-DELL-604 - Havis and take your electronic device back in hand. On this page are published all the documents necessary for the use of your device. DS-DELL-604 by Havis.
USER MANUAL DS-DELL-604 Havis
Havis Docking Station for
Dell Latitude Rugged 12 Tablet
DS-DELL-600 Series
DS-DELL-601
DS-DELL-603
DS-DELL-601-2
DS-DELL-603-2
DS-DELL-602
DS-DELL-604
DS-DELL-602-2
DS-DELL-604-2
natural_image
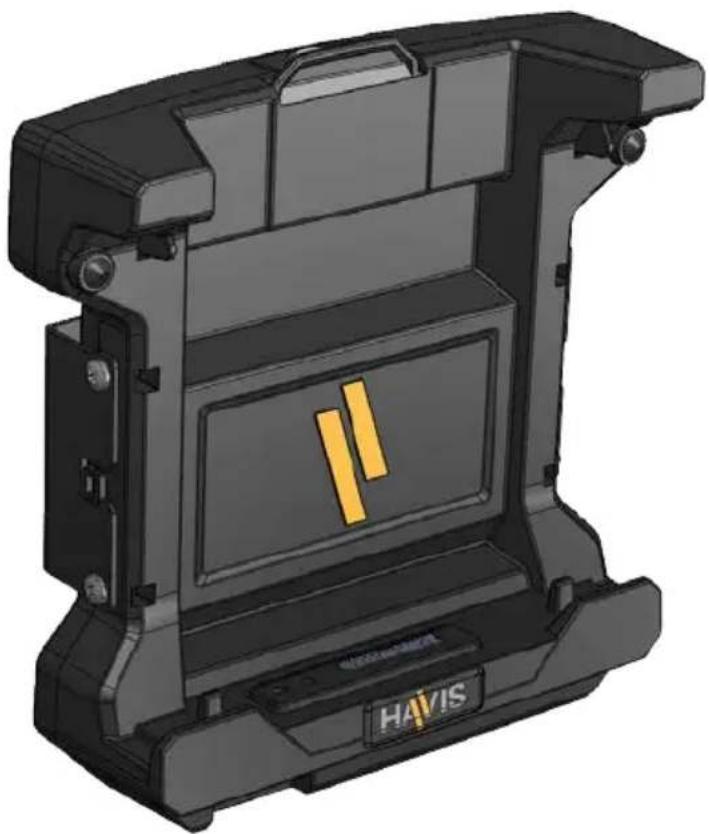
3D CAD model of a mechanical housing component with no visible text or symbolsHavis is pleased to provide this Owner's Manual to aid in the proper installation and use of the DS-DELL-600 Series Docking Station for Dell Latitude Rugged 12 Tablet
For questions regarding the set-up of your DS-DELL-600 Series Docking Station, please contact Havis at 1-800-524-9900 or visit www.havis.com for additional product support and information.
This Owner's Manual applies to the following Part Numbers:
DS-DELL-601
DS-DELL-602
DS-DELL-603
DS-DELL-604
DS-DELL-601-2
DS-DELL-602-2
DS-DELL-603-2
DS-DELL-604-2
WARNING
- NEVER STOW OR MOUNT THE DOCKING STATION DIRECTLY IN A VEHICLE AIRBAG DEPLOYMENT ZONE.
• DO NOT USE COMPUTER WHILE DRIVING.
CAUTION
- READ ALL INSTRUCTIONS THOROUGHLY BEFORE BEGINNING INSTALLATION.
- FOR THE DS-DELL-601, DS-DELL-601-2, DS-DELL-602, DS-DELL-602-2 DOCKING STATIONS: DO NOT CONNECT DIRECTLY TO VEHICLE VOLTAGE SOURCE: This product requires a certified, automotive grade, Dell approved 90W power source rated for a continuous, regulated 19.5VDC output (Havis Part Number LPS-131 or equivalent). Failure to comply with this requirement will cause product damage that is NOT repairable and is NOT covered under warranty.
- THE DS-DELL-604, DS-DELL-604-2 DOCKING STATIONS MUST BE USED WITH POWER CABLE SHIPPED WITH DOCKING STATION (PART # DS-DA-316). THIS CABLE INCLUDES A 15AMP PROTECTION FUSE.
NOTICE
• FOR DOCKING STATION MODELS EQUIPPED WITH A BUNDLED POWER SUPPLY
(DS-DELL-602, DS-DELL-602-2) REFER TO THE SUPPLIED LIND POWER SUPPLY REFERENCE GUIDE.
EC DECLARATION OF CONFORMITY in accordance with EN 50498
Manufacturers Name: Havis, Inc.
Manufacturers Address: 47099 Five Mile Road, Plymouth Twp, MI 48170 USA
Declares under our sole responsibility that the product:
Product name: Havis Docking Station For Dell Latitude Rugged 12 Tablet
Model: DS-DELL-60X, where 'X' may be any alphanumeric character and which describes product options.
May be followed by any alphanumeric characters which describe product options.
Product Options: This declaration covers all options of the above product which bear the CE Marking.
Is in conformity with the following standards or other normative documents:
Automotive EMC Directive EN 50498:2010, Electromagnetic compatibility (EMC) -
2004/108/EC: Product family standard for aftermarket electronic equipment in vehicles
Directive 2011/65/EU Restriction of the use of certain hazardous substances (RoHS)
Supplementary Information:
The product herewith complies with the requirements of the Automotive EMC Directive 2004/108/EC, Annex I, 6.5, 6.6, 6.8, and 6.9.
This product requires the use of a recommended e-Marked automotive power supply when used within vehicles.
Plymouth twp, MI, USA August 13, 2015
Bruce Jonik, Director of Engineering, Havis, Inc.
FCC 47CFR, Part 15 compliance: This is an FCC Class B device. Any changes or modifications to the model DS-DELL-60X not expressly approved by Havis, Inc. could void the user's authority to operate this equipment.
Table of Contents
Specifications 3
Parts Included 3
Port Replication Capability 5
Antenna Identification 5
Installation and Cable Management 6
Operation - Docking 8
Operation - Undoing 10
Precautions
- Do not place metal objects or containers of liquid on top of the Docking Station
- If a malfunction occurs, immediately unplug the Power Supply and remove the laptop
- Use only the specified Power Supply (Part # LPS-131) with this Docking Station, or Internal Power Supply cable (Part # DS-DA-316) with Internal Power Supply Docking Stations.
- Do not store the Docking Station where water, moisture, steam, dust, etc. are present
- Do not connect cables into ports other than what they are specified for
- Do not leave the Docking Station in a high temperature environment (greater than 85°C, 185°F) for a long period of time
Specifications
| Power Supply Input 19.5V DC-In |
| Dimensions 14.1” (35.8 cm) H x 13.7” (34.8 cm) W x 3.0” (7.6 cm) D |
| Weight 4.88 lbs (2.21 kg) |
| Operating Environment 0° C to 50° C (32° F to 122°F) |
| Storage Environment -40° C to 85° C (-40° F to 185° F) |
Parts Included
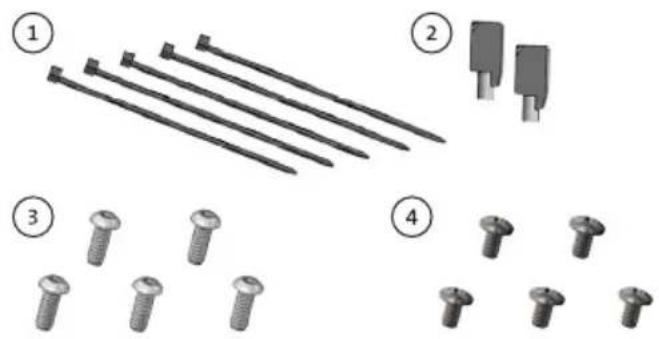
Hardware Kit (HWK-0036)
This Hardware Kit includes:
- Zip Ties (5)
- Keys (2)
- 1/4"-20 x 5/8" long Button Head Screws (5)
- 1/4"-20 x 3/8" long Pan Head Screws (5)
natural_image
Illustration of four types of screw-like components: rods, two clamps, and three screws arranged in a grid (no text or symbols)Tools required for installation:
-
3 Phillips (For attaching Mounting Bracket to Docking Station with Pan Head 1/4"-20 Screws)
- 5/32" Hex Drive (For attaching Mounting Bracket to Motion Device with Button Head 1/4"-20 Screws)

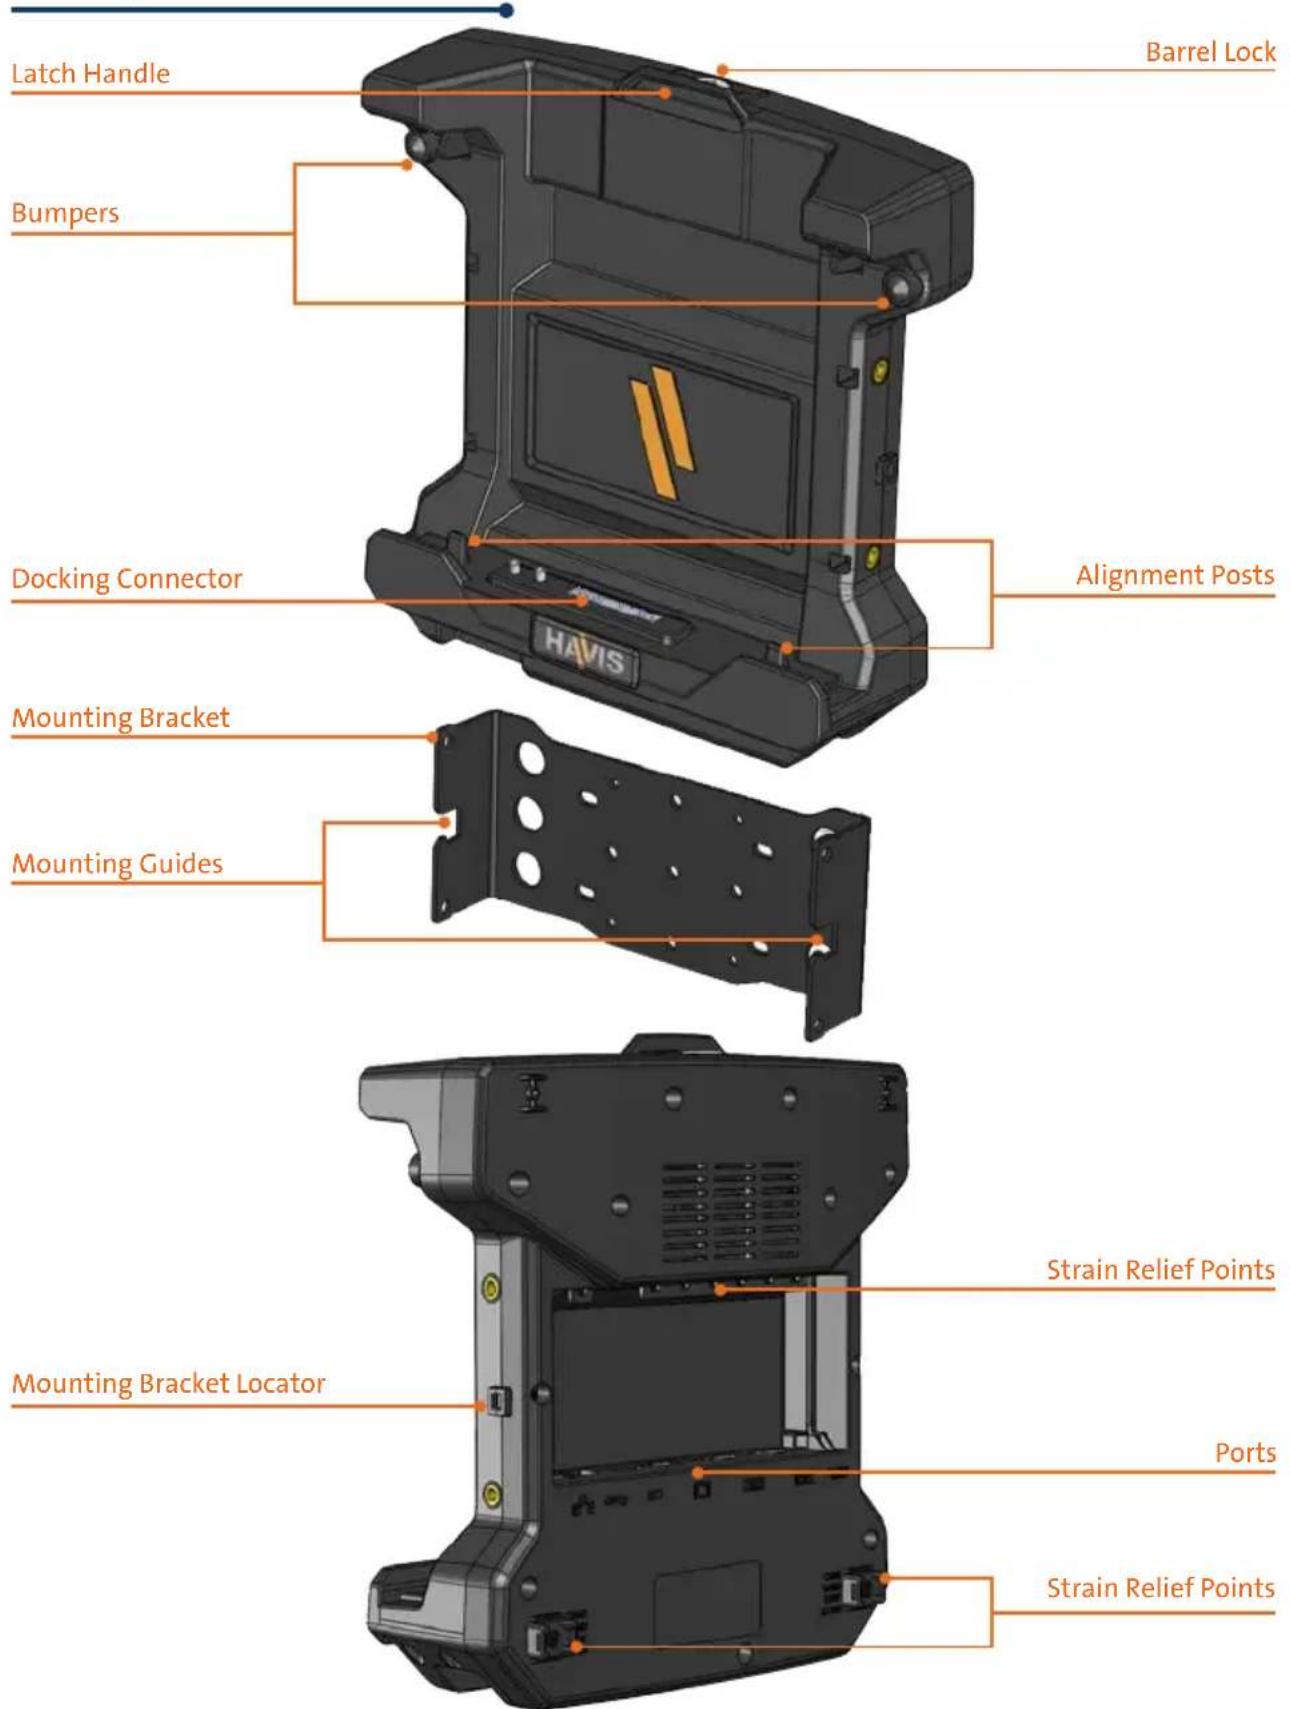
Docking Station
text_image
Latch Handle Bumpers Docking Connector Barrel Lock Alignment Posts Mounting Bracket Mounting Guides Strain Relief Points Mounting Bracket Locator Ports Strain Relief PointsPower Cable
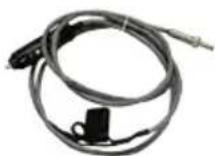
(For DS-DELL-604 & DS-DELL-604-2 only)
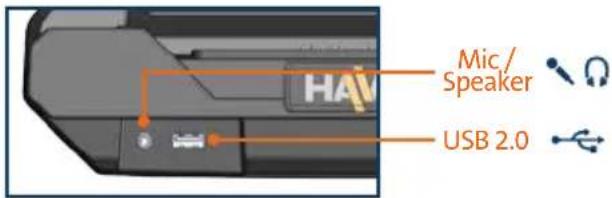
Forward Facing Ports
(All Docking Stations, not including DS-DELL-603 & DS-DELL-603-2)
text_image
Mic/ Speaker USB 2.0Rear Ports
(DS-DELL-601, DS-DELL-601-3, DS-DELL-602, DS-DELL-602-3)
text_image
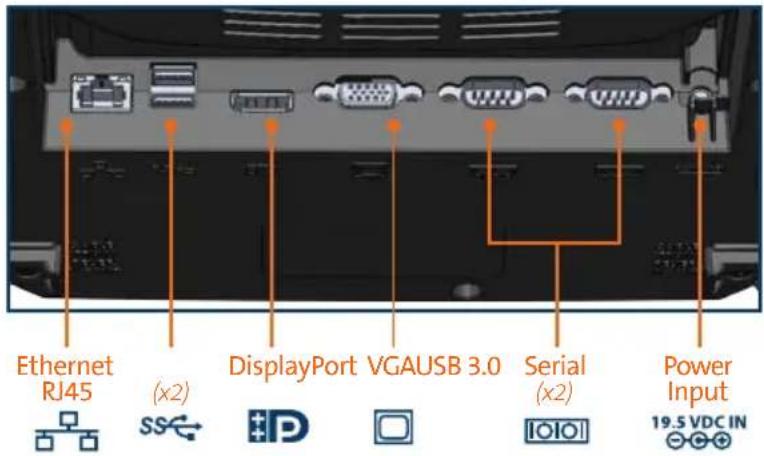
Ethernet RJ45 (x2) DisplayPort VGAUSB 3.0 Serial (x2) Power Input 19.5 VDC INRear Ports - Internal Power Supply
(DS-DELL-604 & DS-DELL-604-3)
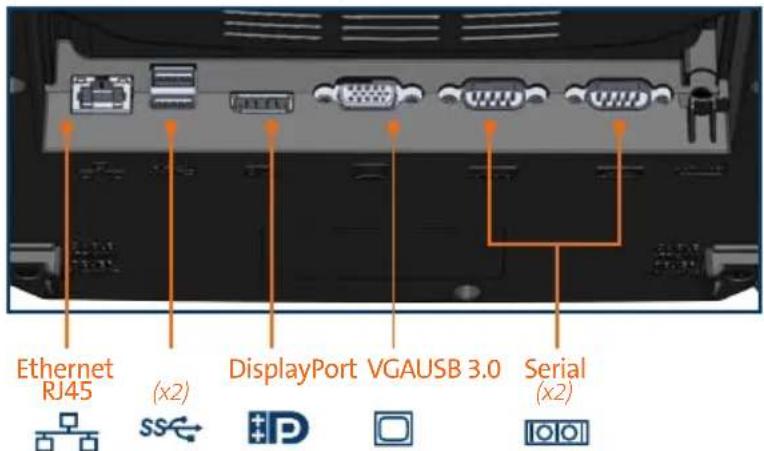
text_image
Ethernet RJ45 (x2) DisplayPort VGAUSB 3.0 Serial (x2)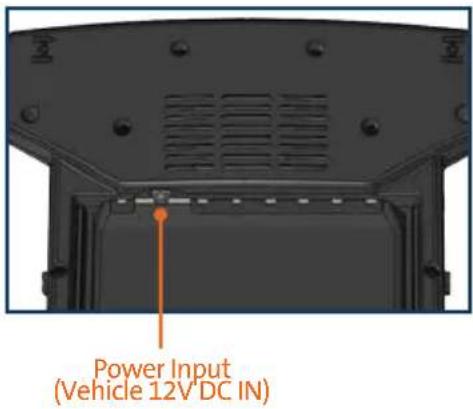
text_image
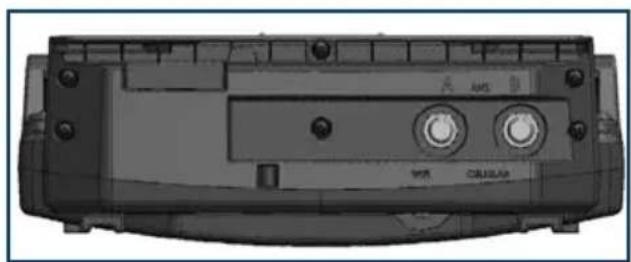
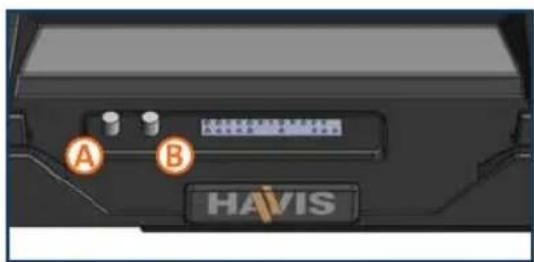
Power Input (Vehicle 12V DC IN)Antenna Identification (DS-DELL-601-2, DS-DELL-602-2, DS-DELL-603-2, DS-DELL-604-2)
natural_image
Close-up of a black electronic device casing with buttons and ports (no visible text or symbols)Laptop InterfaceDownward Facing Antenna
text_image
A B HAVISNOTE: We recommend applying a drop of medium strength (blue) thread locking adhesive to the threads of all fasteners.
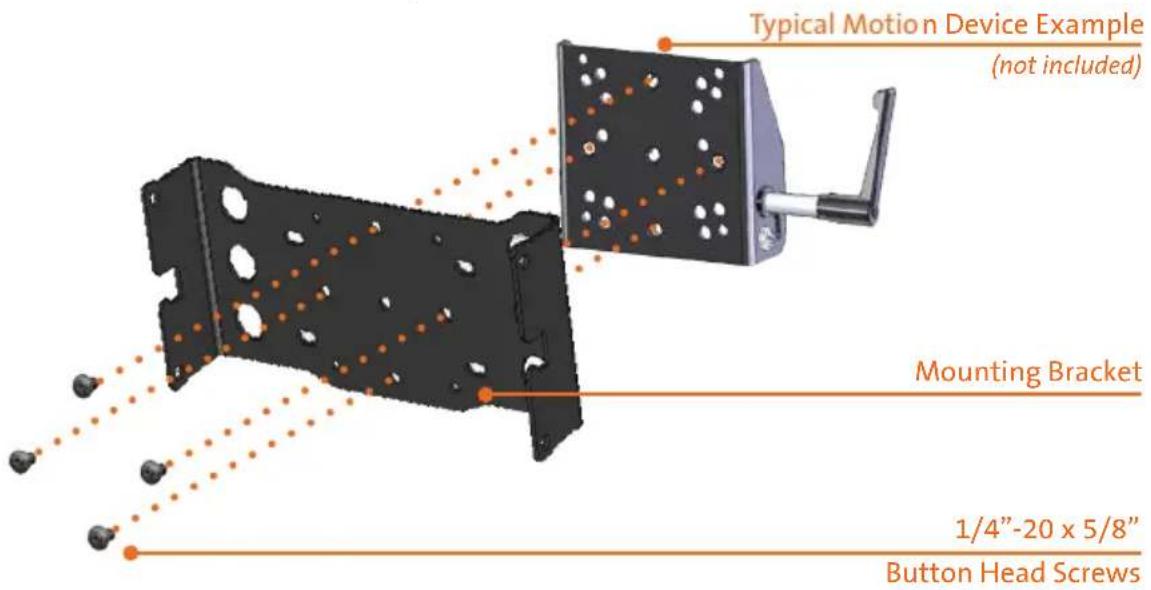
1) Remove the Mounting Bracket from the packaging. Install the Mounting Bracket to the Motion Device using (4) 1/4"-20 x 5/8" long button head screws (Hardware Kit Item 3).
Torque screws to 80 in-lbs (9.0Nm) ± 10%.
NOTE: Numerous hole patterns present in Mounting Bracket will accommodate Havis Motion Devices as well as most competitors'
text_image
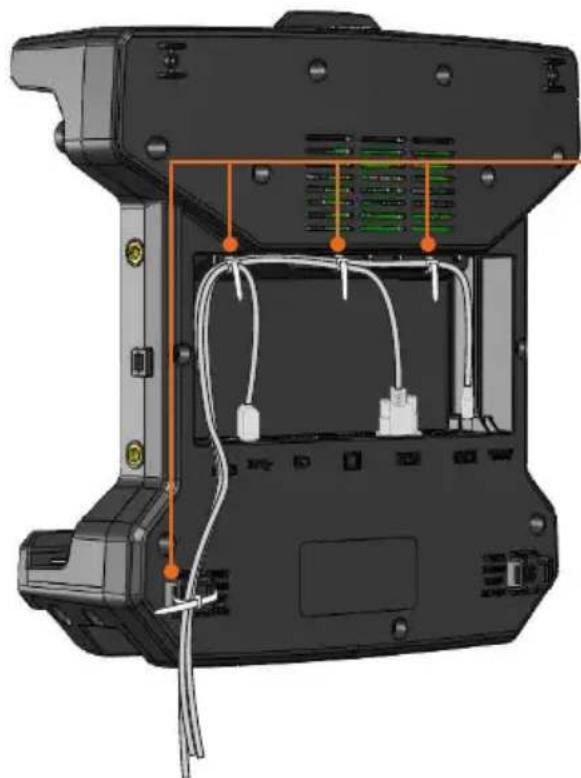
Typical Motion Device Example (not included) Mounting Bracket 1/4"-20 x 5/8" Button Head Screws2) Install all cables that are necessary for computing needs. Use Zip Ties (Hardware Kit Item 1) to strain relieve cables to the Strain Relief Points, routing all cables together to the front of the Docking Station.
natural_image
3D technical diagram of a device rear panel with internal wiring and ports (no text or symbols)Use as many zip ties as necessary to secure cables.
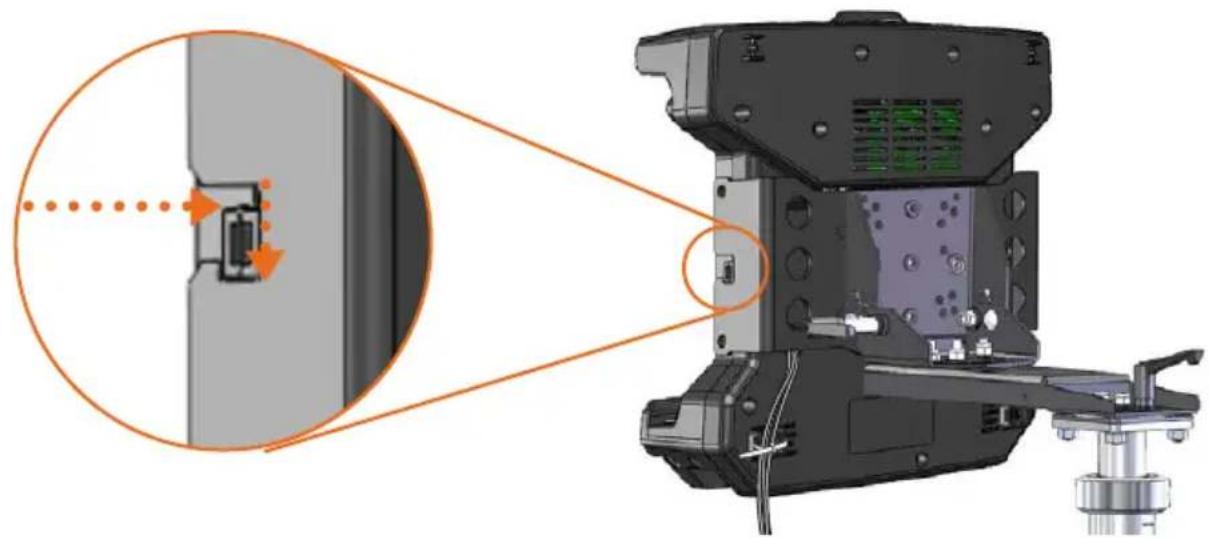
3) Place the Docking Station onto the Mounting Bracket by guiding the mounting bracket locators into the mounting guides.
natural_image
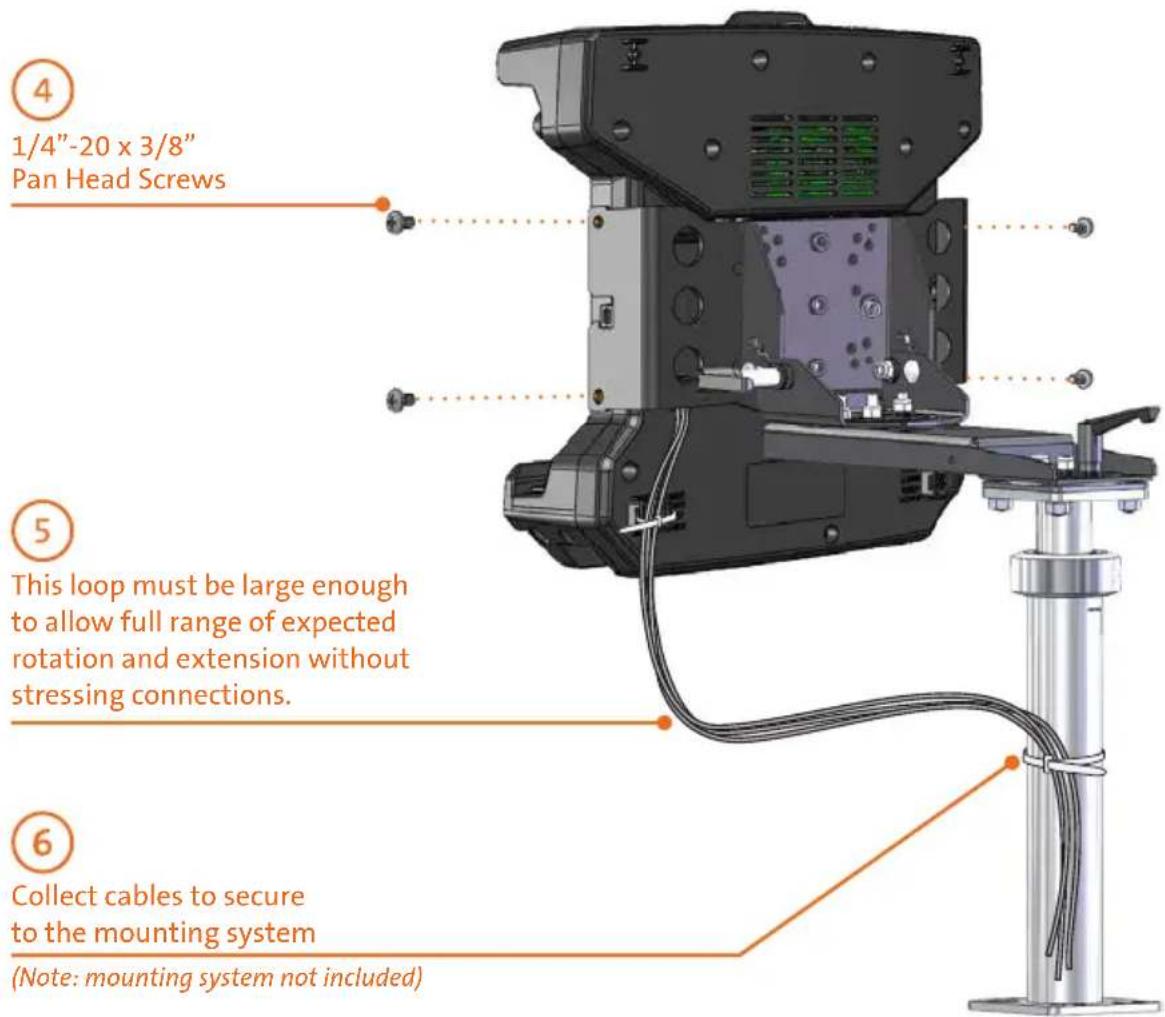
Technical diagram of a mechanical assembly with an inset close-up showing a component detail (no text or symbols present)4) Secure with (4) 1/4"-20 x 3/8" long pan head screws (Hardware Kit Item 4). Torque screws to 80 in-lbs (9.0 Nm) ± 10%.
5) Create a service loop with cable bundle to ensure that no tension is on the connectors and to enable intended motion.
6) Tie off cables onto a stationary part of the mounting system. (Mounting system not included with Docking Station)
text_image
④ 1/4"-20 x 3/8" Pan Head Screws ⑤ This loop must be large enough to allow full range of expected rotation and extension without stressing connections. ⑥ Collect cables to secure to the mounting system (Note: mounting system not included)
1/4"-20 x 3/8" Pan Head Screws
CAUTION
DO NOT FORCE TABLET ONTO DOCKING STATION. IF THERE IS RESISTANCE, CHECK THE ALIGNMENT OF TABLET ON DOCKING STATION.
natural_image
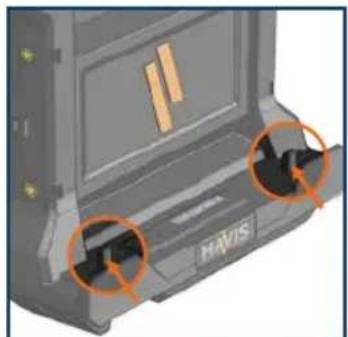
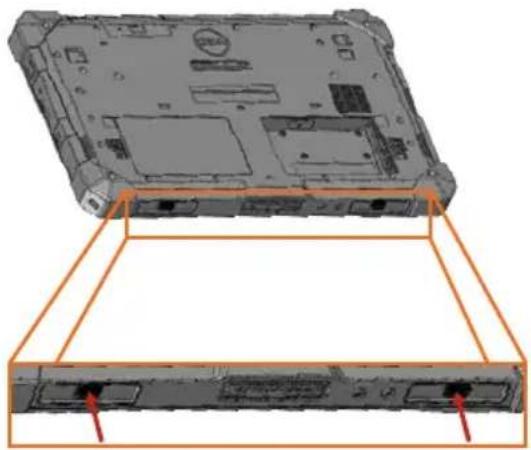
3D mechanical component with orange circles highlighting two ports, no visible text or symbolsYour tablet's Alignment Sockets will align with the Docking Station's Alignment Posts.
natural_image
Laptop chassis diagram showing front and rear views with orange alignment lines (no text or symbols)1) Ensure Docking Station is unlatched by pulling the Latch Handle forward.
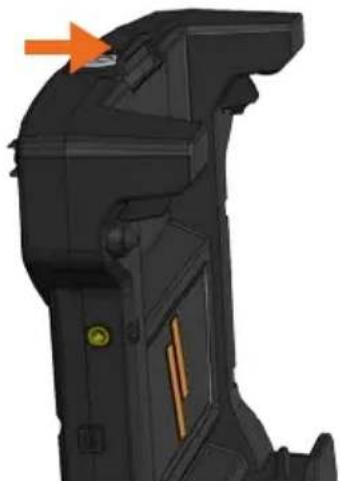
natural_image
3D model of a black mechanical component with an orange arrow pointing to a specific feature (no text or symbols visible)2) Hold tablet in landscape orientation, with bottom angled toward Docking Station. Lower tablet into the bottom of the Docking Station by aligning the tablet Alignment Sockets with the Docking Station's Alignment Posts
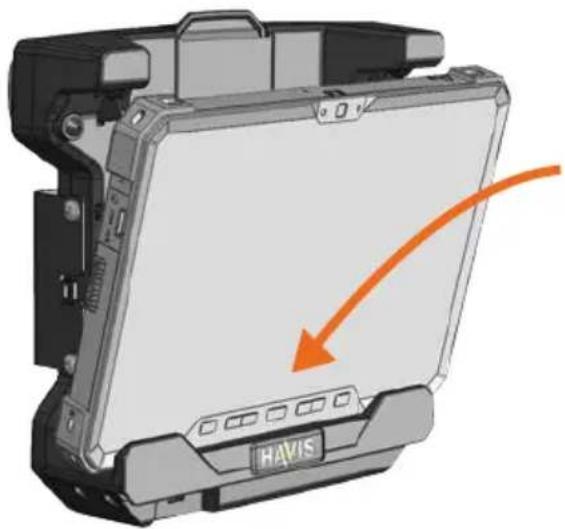
natural_image
3D diagram of a Havis device with an orange arrow indicating motion or force, no text or symbols present.3) Pivot the top of tablet into Docking Station and apply light rearward pressure to top center of tablet. An audible click will indicate when tablet is latched.
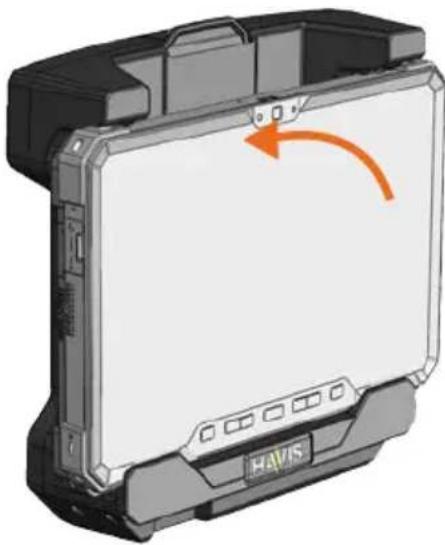
natural_image
3D rendering of a device casing with an orange arrow indicating rotation, labeled 'HAVIS' at the base (no text or symbols on the casing itself)4) For theft detterence, secure tablet by locking Docking Station with supplied key (Hardware Kit item 2).
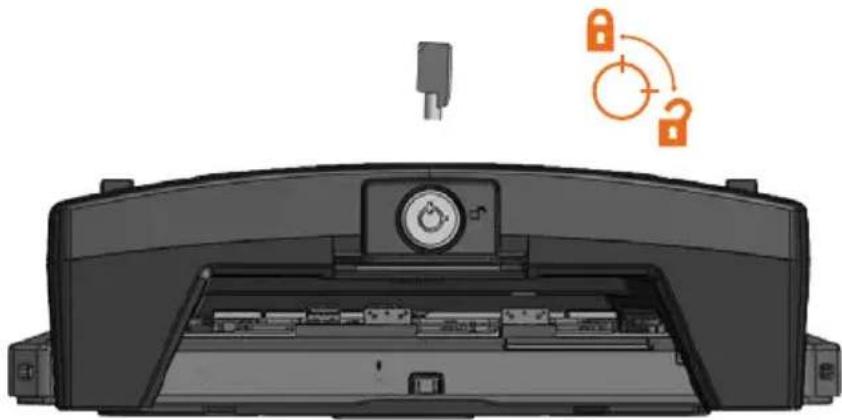
natural_image
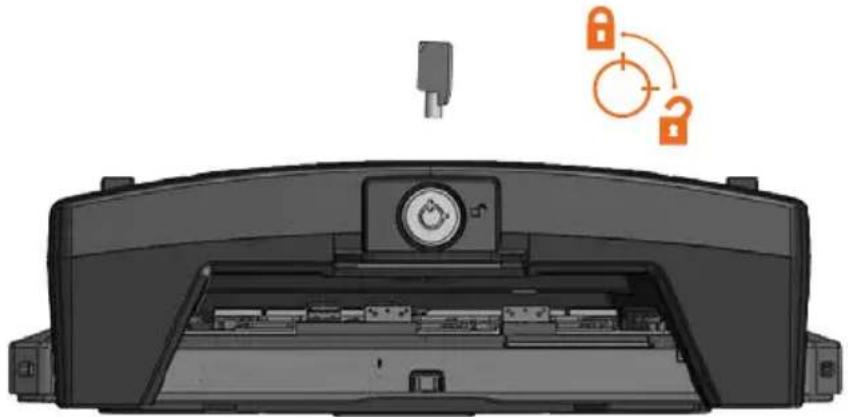
Diagram of a printer front panel with an open base and a lock icon above it, no text or symbols present.1) If previously locked, unlock Docking Station using supplied key.
natural_image
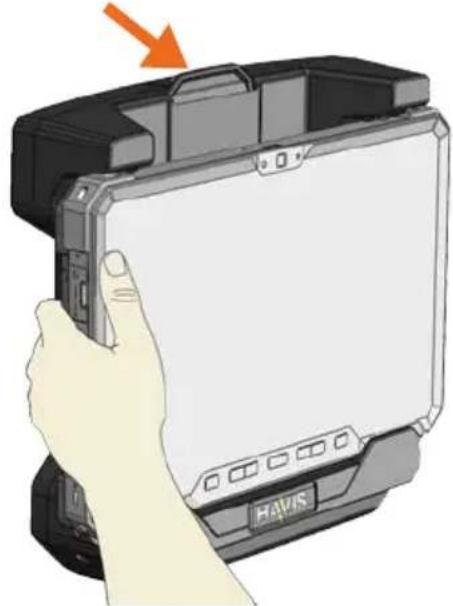
Diagram of a printer front panel with internal compartments and a lock icon, no text or symbols present2) While holding tablet with one hand, pull the Latch Handle on the top of Docking Station until the Latch Hooks release.
natural_image
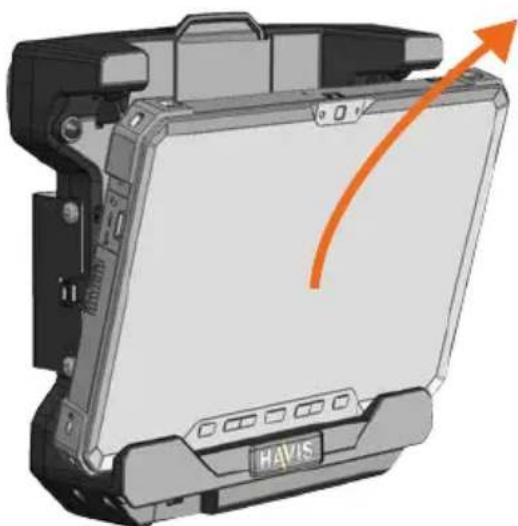
Hand holding a tablet device with an orange arrow pointing to the screen (no text or symbols visible)3) Once unlatched grab both sides of tablet, rock the top forward and carefully lift out of Docking Station, top end first.
natural_image
3D diagram of a Havis device with orange directional arrow indicating motion or movement (no text or symbols on the device itself)Havis offers a wide variety of accessory products specifically for use with the DS-DELL-600 Series Docking Station. For more information or to order, please visit www.havis.com.
natural_image
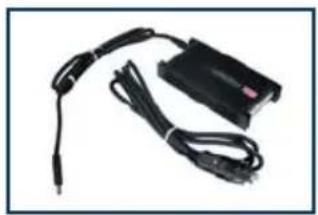
Black electronic device with coiled cable and connector (no visible text or symbols)LPS-131
90W Power Supply
External power supply and cable for Dell Laptops with cigarette lighter adaptor.
natural_image
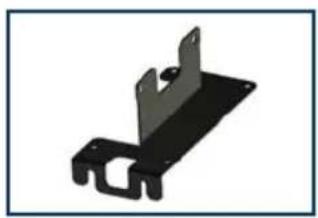
3D rendering of a black metal bracket with mounting holes and a U-shaped cutout (no text or symbols)LPS-206
Power Supply Mounting Kit
Attach the LPS-131 Power Supply to DS-DELL-600 Series Docking Stations.
natural_image
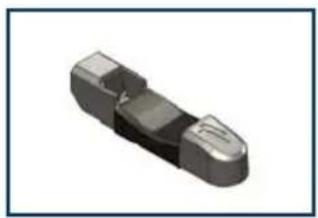
3D rendered image of a mechanical component with rounded ends and a central slot (no text or symbols visible)DS-DA-103
Stylus Holder
Secure a wide array of styluses to your DS-DELL-600 Series Docking Station.
natural_image
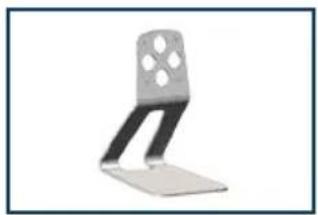
Metal bracket with four holes, no visible text or symbolsDS-DA-218
Desktop Stand
Durable stand for mounting the Universal Tablet Mount in the home or office.
natural_image
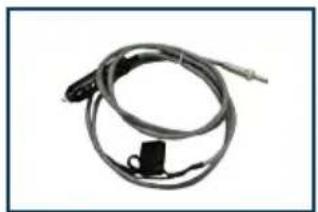
Coiled electrical sensor or probe with a small component, no visible text or symbolsDS-DA-316
Power Cable
Power cable with 15amp fuse for DS-DELL-604, and DS-DELL-604-2 Docking Stations.
natural_image
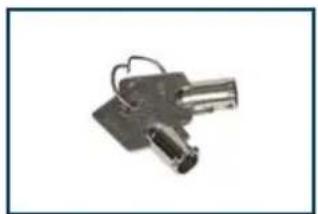
Close-up of a metallic key with a handle and circular ring (no text or symbols visible)DS-DA-501
Replacement Keys
Set of two (2) replacement keys for DS-DELL-600 Series Docking Stations.

text_image
PRODUCTIVITY HAVIS COMFORT SAFETY QUALITYHavis, Inc.
75 Jacksonville Road
Warminster, PA 18974
www.havis.com 1-800-524-9900