
N2810 - NAS Thecus - Free user manual and instructions
Find the device manual for free N2810 Thecus in PDF.


User questions about N2810 Thecus
0 question about this device. Answer the ones you know or ask your own.
Ask a new question about this device
Download the instructions for your NAS in PDF format for free! Find your manual N2810 - Thecus and take your electronic device back in hand. On this page are published all the documents necessary for the use of your device. N2810 by Thecus.
USER MANUAL N2810 Thecus
N2810 Series/N5810 Series
Copyright and Trademark Notice
Thecus and other names of Thecus products are registered trademarks of Thecus Technology Corp. Microsoft, Windows, and the Windows logo are registered trademarks of Microsoft Corporation. Apple, iTunes and Apple OS X are registered trademarks of Apple Computers, Inc. All other trademarks and brand names are the property of their respective owners. Specifications are subject to change without notice.
Copyright © 2016 Thecus Technology Corporation. All rights reserved.
About This Manual
All information in this manual has been carefully verified to ensure its correctness. In case of an error, please provide us with your feedback. Thecus Technology Corporation reserves the right to modify the contents of this manual without notice.
Product name: Thecus OS7.0 used models
Manual Version: 1.1
Release Date: March 2016
Limited Warranty
Thecus Technology Corporation guarantees all components of Thecus NAS products are thoroughly tested before they leave the factory and should function normally under general usage. In case of any system malfunctions, Thecus Technology Corporation and its local representatives and dealers are responsible for repair without cost to the customer if the product fails within the warranty period and under normal usage. Thecus Technology Corporation is not responsible for any damage or loss of data deemed to be caused by its products. It is highly recommended that users conduct necessary back-up practices.
Check the functions that are available on your particular Thecus NAS model at: http://www.Thecus.com
Safety Warnings
For your safety, please read and follow the following safety warnings:
- Read this manual thoroughly before attempting to set up your Thecus IP storage.
- Your Thecus IP storage is a complicated electronic device. DO NOT attempt to repair it under any circumstances. In the case of malfunction, turn off the power immediately and have it repaired at a qualified service center. Contact your vendor for details.
- DO NOT allow anything to rest on the power cord and DO NOT place the power cord in an area where it can be stepped on. Carefully place connecting cables to avoid stepping or tripping on them.
- Your Thecus IP storage can operate normally under temperatures between 5°C and 40°C, with relative humidity of 20% – 85%. Using Thecus IP storage under extreme environmental conditions could damage the unit.
- Ensure that the Thecus IP storage is provided with the correct supply voltage. Plugging the Thecus IP storage to an incorrect power source could damage the unit.
- Do NOT expose Thecus IP storage to dampness, dust, or corrosive liquids.
- Do NOT place Thecus IP storage on any uneven surfaces.
- DO NOT place Thecus IP storage in direct sunlight or expose it to other heat sources.
- DO NOT use chemicals or aerosols to clean Thecus IP storage. Unplug the power cord and all connected cables before cleaning.
- DO NOT place any objects on the Thecus IP storage or obstruct its ventilation slots to avoid overheating the unit.
- Keep packaging out of the reach of children.
- If disposing of the device, please follow your local regulations for the safe disposal of electronic products to protect the environment.
● Risk of explosion if battery is replaced by an incorrect type. - Dispose of used batteries according to the instructions
Table of Contents
Copyright and Trademark Notice.... 2
About This Manual.... 2
Limited Warranty 2
Safety Warnings.... 3
Table of Contents 4
Chapter 1: Introduction......7
Overview....7
Product Highlights 7
Package Contents....9
N2810 Series 10
Chapter 2: Hardware Installation.... 14
Overview.... 14
Before You Begin.... 14
Cable Connections 14
Chapter 3: First Time Setup.... 16
Overview.... 16
Thecus Setup Wizard 16
Typical Setup Procedure 18
Chapter 4: System Administration.... 20
Overview.... 20
Web Administration Interface.... 20
Menu Tree....21
Feedback for OS7.0 23
Quick System Log Info....23
Quick System Resource Monitor 23
System shut down and reboot 24
Language Selection 24
Logout....24
Change Password 24
Control Panel 25
CONTROL 25
Log and Notification.... 25
Power & Hardware....29
System Information.... 33
Network 35
Regional Option 42
External Device.... 44
Monitor 44
Firmware Setting 46
PRIVILEGE....48
Share Folder 48
Local Account 59
ADS 68
LDAP 70
Storage 71
Disk & RAID 71
iSCSI 84
ISO Mount 96
Disk Clone & Wipe....98
Services....100
File Service 100
Web Service 108
SSH Service 109
iTunes Service 109
VPN Service.... 111
UPnP Service 114
Backup....116
Local Backup 116
Remote Backup.... 126
Rsync Service 134
USB Copy 136
AWS S3 139
System Failover 139
Chapter 5: General User Login.... 139
Overview....139
General User Login Interface....139
Menu Tree.... 140
Quick System Resource Monitor 140
Language Selection 142
Logout 142
Change Password 142
App Center.... 142
File Center 144
Photo Center 146
Chapter 6: Tips and Tricks.... 148
Access your NAS from Windows 148
Share folder accessibility with associated login user account......148
USB Storage Expansion....149
Remote Administration....149
Part I - Setup a DynDNS Account 150
Part II - Enable DDNS on the Router.... 150
Part III - Setting up Virtual Servers (HTTPS) 150
Firewall Software Configuration....150
Replacing Damaged Hard Drives....151
Hard Drive Damage.... 151
Replacing a Hard Drive 151
RAID Auto-Rebuild 151
Chapter 7: Troubleshooting .... 151
Forgot My Network IP Address 151
Can't Map a Network Drive in Windows XP....152
Restoring Factory Defaults....152
Problems with Time and Date Settings 153
Appendix A: Customer Support.... 154
Appendix B: RAID Basics.... 155
Overview....155
Benefits 155
Improved Performance 155
Data Security 155
RAID Levels....155
Overview....158
What is Active Directory?......158
ADS Benefits....158
Appendix D: Licensing Information 159
Overview....159
Source Code Availability 159
CGIC License Terms....160
GNU General Public License 160
Chapter 1: Introduction
Overview
Thank you for choosing the Thecus IP Storage Server. The Thecus IP storage is an easy-to-use storage server that allows a dedicated approach to storing and distributing data on a network. Data reliability is ensured with RAID features that provide data security and recovery—over multiple Terabyte of storage are available using RAID 5 and RAID 6. Gigabit Ethernet ports enhance network efficiency, allowing Thecus IP storage to take over file management functions, increase application and data sharing and provide faster data response. The Thecus IP storage offers data mobility with a disk roaming feature that lets you swap working hard drives for use in other Thecus IP storage, securing the continuity of data in the event of hardware failure. The Thecus IP storage allows data consolidation and sharing between Windows (SMB/CIFS), UNIX/Linux, and Apple OS X environments. The Thecus IP storage's user-friendly GUI supports multiple Languages.
Product Highlights
File Server
First and foremost, the Thecus IP storage allows you to store and share files over an IP network. With a Network Attached Storage (NAS) device, you can centralize your files and share them easily over your network. With the easy-to-use web-based interface, users on your network can access these files in a snap.
FTP Server
With the built-in FTP Server, friends, clients, and customers can upload and download files to your Thecus IP storage over the Internet with their favorite FTP programs. You can create user accounts so that only authorized users have access.
iTunes Server
With the built-in iTunes server capability, the Thecus IP storage enables digital music to be shared and played anywhere on the network!
Printer Server
With the Thecus IP storage's Printer Server, you can easily share an IPP printer with other PCs connected to your network.
Multiple RAID
Thecus IP storage supports multiple RAID volumes on one system. So, you can create RAID 0 for your non-critical data, and create RAID 1,5,6,50 or 60 (depend on model) for mission-critical data. Create the RAID levels depending on your needs.
iSCSI Capability
Thecus IP storage is not only a file server, but it also supports iSCSI initiators. Your server can access Thecus IP storage as a direct-attached-storage over the LAN or Internet. There is no easier way to expand the capacity of your current application servers. All the storage needs can be centrally managed and deployed. This brings ultimate flexibility to users.
Superior Power Management
Thecus IP storage supports schedule power on/off. With this feature, administrator can set at what time to turn on or off the system. This feature is a big plus for people who want to conserve energy. Wake-On-LAN enables administrator to remotely turn on the system without even leaving their own seat.
Package Contents
N2810 Series
The Thecus IP storage should contain the following common items:
- System Unit x1
• QIG (Quick Installation Guide) x1
• CD-Title (OS7 Universal CD) - Ethernet Cable x1
- Accessory box x1
• HDD Compatibility list Card x1 - Multiple Languages Warranty Card x1
• Power adaptor cable tie x1
• Power adaptor x1 - Power cord x1
The Thecus IP storage should contain the following common items:
- System Unit x1
• QIG (Quick Installation Guide) x1
• CD-Title (OS7 Universal CD) - Ethernet Cable x1
- Accessory bag x1
• HDD Compatibility list Card x1 - Multiple Languages Warranty Card x1
- Power cord x1
Please check to see if your package is complete. If you find that some items are missing, contact your dealer.
N2810 Series
Front Panel
The Thecus N2810 Series front panel has the device's controls, indicators, and hard disk trays:
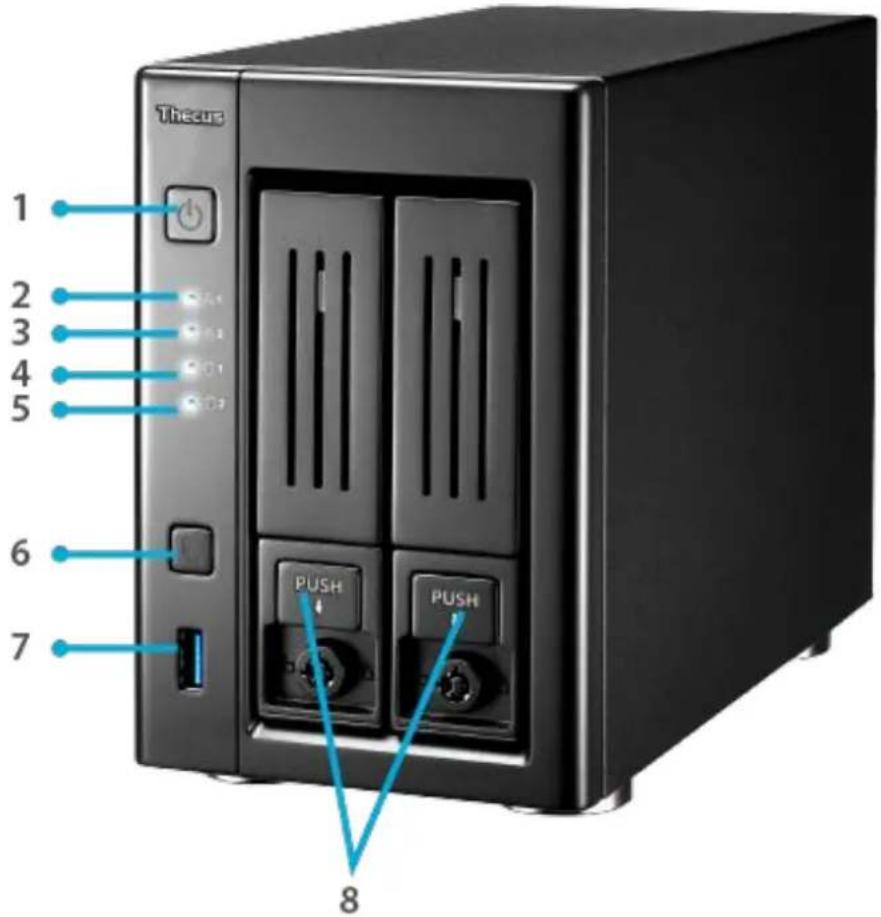
text_image
Theus 1 2 3 4 5 6 7 PUSH PUSH 8| Front Panel | |
| Item | Description |
| 1. Power Button | Power on/off N2810 Series |
| 2. LAN1 LED | Solid yellow: LAN1 Cable linkBlinking : Network activity |
| 3. LAN2 LED | Solid yellow: LAN2 Cable linkBlinking : Network activity |
| 4. HDD1 led | Blinking yellow: HDD activity |
| 5. HDD2 led | Blinking yellow: HDD activity |
| 6. USB Copy Button | Copies USB storage contents to N2810 Series. |
| 7. USB Port | USB 3.0 port for compatible USB devices, such as digital cameras, USB disks, and USB printers. |
| 8. HDD Trays | Two 2.5"/3.5" SATA HDD traysLocks are provided for added security |
Rear Panel
The N2810 Series rear panel features ports and connectors.
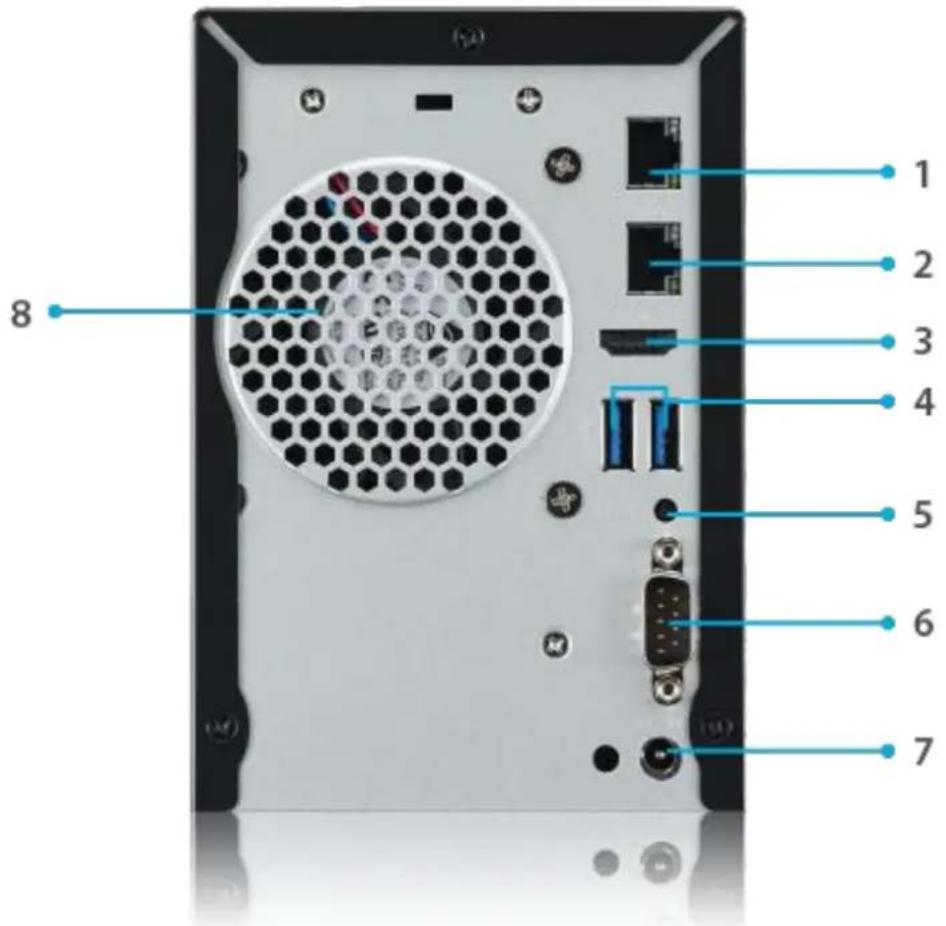
text_image
1 2 3 4 5 6 7 8| Back Panel | |
| Item | Description |
| 1. LAN2 Port | • LAN2 port for connecting to an Ethernet network through a switch or router |
| 2. LAN1 Port | • WAN/LAN1 port for connecting to an Ethernet network through a switch or router |
| 3. HDMI Port | • For Video/Audio out |
| 4. USB Port | • USB 3.0 port for compatible USB devices, such as digital cameras, USB disks, and USB printers. |
| 5. Reset Button | • Reboot system. |
| 6. Serial Port | • This port has used for debug purpose |
| 7. Power Connector | • Connect the included power adaptor to this connector. |
| 8. System Fan | • System fan that exhausts heat from the unit. |
The Thecus N5810/N5810PRO Series front panel has the device's controls, indicators, and hard disk trays:
Item
- Power LED
2.WAN/LAN1 LED
-
LAN2 LED
-
USB Copy LED
-
System LED
6.USB Port
7.Power Button
8.Up Button ▲
- Down Button ▼
10.Enter Button
- Escape Button ESC
12.LCD Display
13.HDD Trays
Description
- White: System is power on.
- White: Network activity
• White: Network activity
- White: Files are being copied from a USB storage device
• Red: USB copy error
- White: System is being upgraded or ;is starting up; data currently inaccessible
- RED: System error
- USB 3.0 port for compatible USB devices, such as USB disks.
- Power on/off N5810/N5810PRO Series and Power LED.
- Push to scroll up when using the LCD display.
- Push to enter the USB copy operation screen.
- Push to enter LCD administrator password to access basic system setting.
- Push to leave the current LCD menu.
- Displays current system status and warning messages.
- Five 3.5" SATA HDD trays.
- Locks are provided for added security.
Rear Panel
The N5810/N5810PRO Series rear panel features ports and connectors.
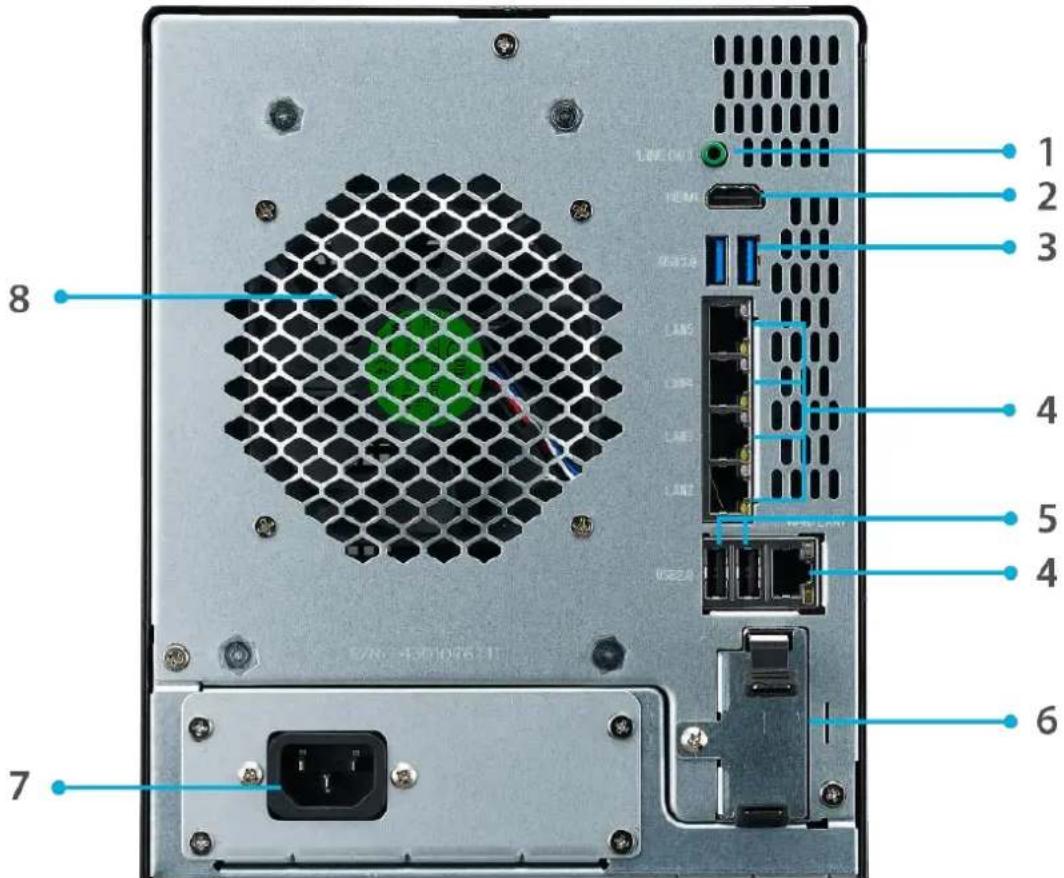
text_image
1 2 3 4 5 4 6 7 8 LINE ON HDMI LAN5 LAN6 LAN7 USB2.0 S/N: 430107671T| Back Panel | |
| Item | Description |
| 1. Line out | For Audio out |
| 2.HDMI Port | For Video/Audio out |
| 3.USB Port | USB 3.0 port for compatible USB devices, such as USB disks, and USB printers |
| 4. WAN/LAN1/LAN2/LAN3/LAN4/LAN5 Port | WAN/LAN1/LAN2/LAN3/LAN4/LAN5 port for connecting to an Ethernet network through a switch or router |
| 5.USB Port | USB 2.0 port for compatible USB devices. |
| 6.UPS Battery slot (N5810PRO) | For UPS Battery |
| 7.Power Connector | Connect the included power cords to these connectors |
| 8.System Fan | System fan that exhausts heat from the unit. |
Chapter 2: Hardware Installation
Overview
Your Thecus IP storage is designed for easy installation. To help you get started, the following chapter will help you quickly get your Thecus IP storage up and running. Please read it carefully to prevent damaging your unit during installation.
Before You Begin
Before you begin, be sure to take the following precautions:
- Read and understand the Safety Warnings outlined in the beginning of the manual.
- If possible, wear an anti-static wrist strap during installation to prevent static discharge from damaging the sensitive electronic components on the Thecus IP storage.
- Be careful not to use magnetized screwdrivers around the Thecus IP storage's electronic components.
Cable Connections
To connect the Thecus IP storage product to your network, follow the steps below:
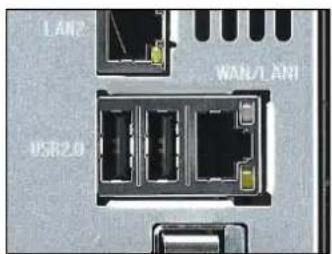
- Connect an Ethernet cable from your network to the WAN/LAN1 port on the back panel of the Thecus IP storage.

natural_image
Close-up of a network device rear panel showing hexagonal mesh casing and two Ethernet ports (no visible text or labels)▲ N2810 Series WAN/LAN1 port
natural_image
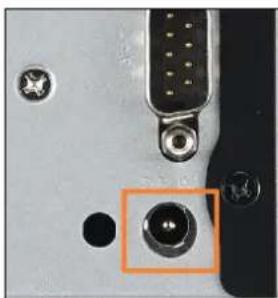
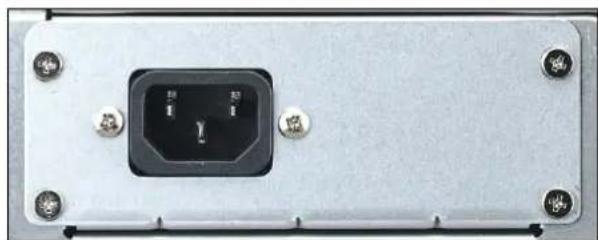
Close-up of an electronic device showing network ports and connectors (no readable text or symbols)- Connect the provided power adaptor and power cord into the power socket on the back panel. Plug the other end of the cord into a surge protector socket.
natural_image
Close-up of a computer interface component with a highlighted screw and mounting holes (no text or symbols visible)▲ N2810 Series power socket
natural_image
Close-up of a metallic electronic device front panel with a black octagonal socket and four screws (no visible text or symbols)▲ N5810/N5810PRO Series power socket
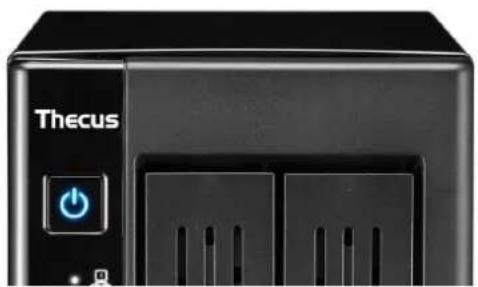
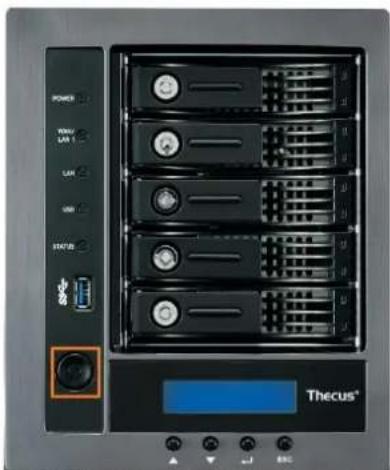
- Press the power button on the Front Panel to boot up the Thecus IP storage.
natural_image
Close-up of a black Thecus device front panel with a blue power button and ventilation slots (no readable text beyond branding)▲ N2810 Series power button
text_image
POWER RANGE LAVI LAN USB STATUS Thecus®▲ N5810/N5810PRO Series power button
Chapter 3: First Time Setup
Overview
Once the hardware is installed, physically connected to your network, and powered on, you can configure the Thecus IP storage so that it is accessible to your network users. There are two ways to set up your Thecus IP storage: using the Thecus Setup Wizard or the LCD display (Depend on models). Follow the steps below for initial software setup.
Thecus Setup Wizard
The handy Thecus Setup Wizard makes configuring Thecus IP storage a snap. To configure the Thecus IP storage using the Setup Wizard, perform the following steps:
- Insert the installation CD into your CD-ROM drive (the host PC must be connected to the network).
- The Setup Wizard should launch automatically. If not, please browse your CD-ROM drive and double click on Setup.exe.
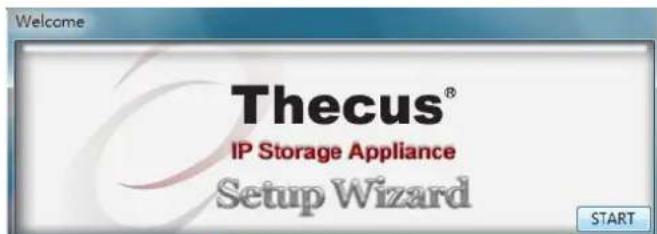
text_image
Welcome Thecus® IP Storage Appliance Setup WizardNOTE
For MAC OS X users, double click on Thecus Setup Wizard .dmg file.
- The Setup Wizard will start and automatically detect all Thecus storage devices on your network. If none are found, please check your connection and refer to Chapter 7: Troubleshooting for assistance.
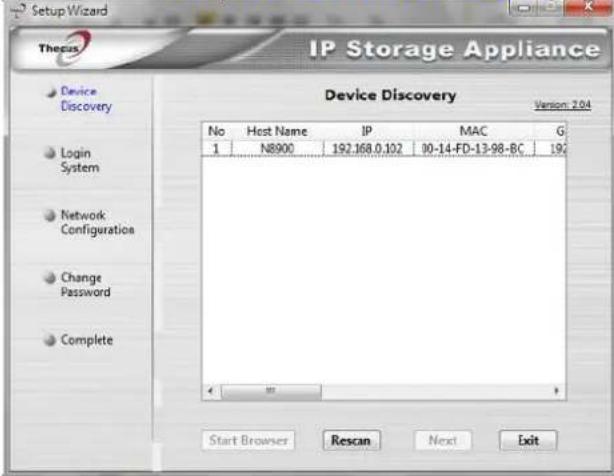
text_image
Setup Wizard Thecas IP Storage Appliance Device Discovery Version: 2.04 No Host Name IP MAC G 1 N8900 192.168.0.102 10-14-FD-13-98-BC 192 Start Browser Rescan Next Exit- Select the Thecus IP storage that you like to configure.
- Login with the administrator account and password. The default account and password are both "admin".
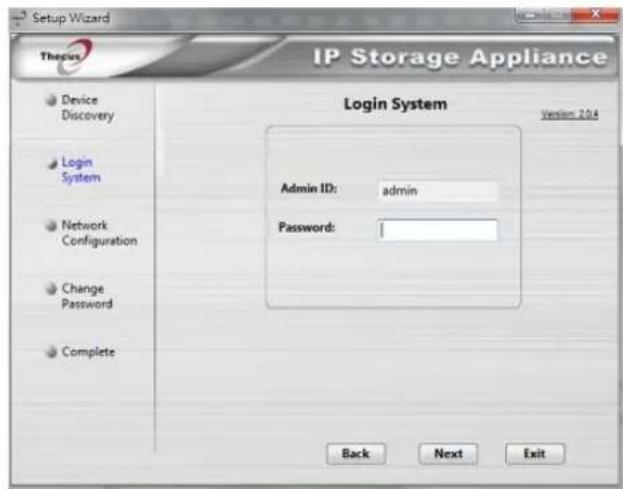
text_image
Setup Wizard Thepsis IP Storage Appliance Login System Version 204 Device Discovery Login System Network Configuration Change Password Complete Admin ID: admin Password: Back Next Exit- Name your Thecus IP storage and configure the network IP address. If your switch or router is configured as a DHCP Server, configuring the Thecus IP storage to automatically obtain an IP address is recommended. You may also use a static IP address and enter the DNS Server address manually.
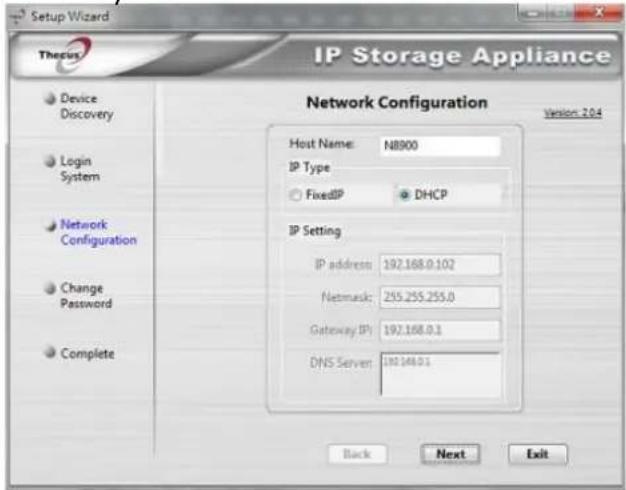
text_image
Setup Wizard Thescis IP Storage Appliance Network Configuration Host Name: NB900 IP Type FixedIP DHCP IP Setting IP address: 192.168.0.102 Netmask: 255.255.255.0 Gateway (IP) 192.168.0.1 DNS Server: 192.168.0.1 Back Next Exit- Change the default administrator password.
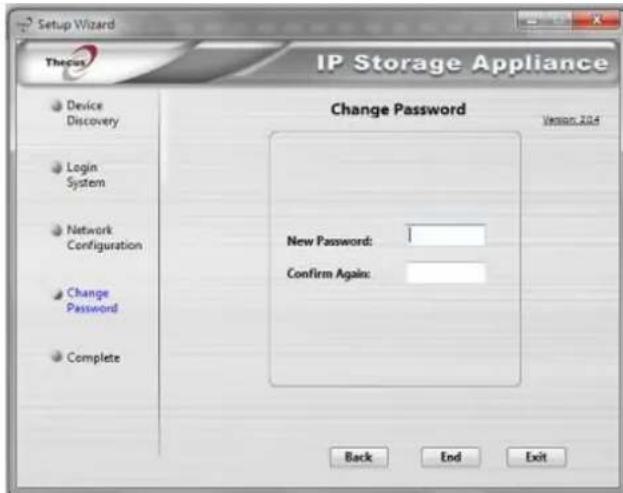
text_image
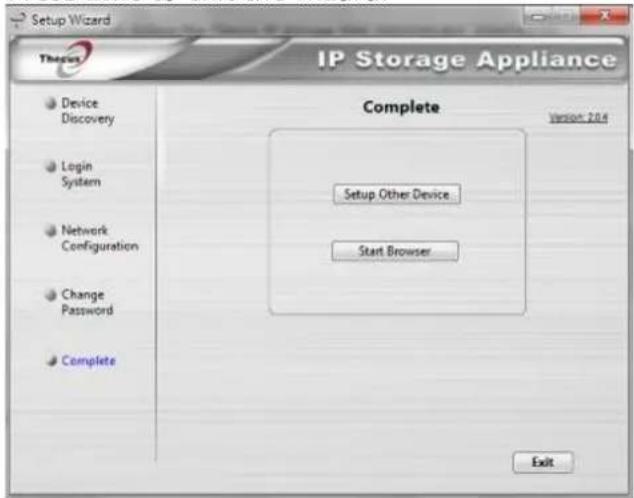
Setup Wizard Thocus IP Storage Appliance Change Password Version 2014 Device Discovery Login System Network Configuration Change Password Complete New Password: Confirm Again: Back End Exit- Finished! Access the Thecus IP storage Web Administrator Interface by pressing the Start Browser button. You can also configure another
Thecus IP storage at this point by clicking the Setup Other Device button. Press Exit to exit the wizard.
text_image
Setup Wizard Thesys IP Storage Appliance Complete Version 2014 Device Discovery Login System Network Configuration Change Password Complete Setup Other Device Start Browser ExitNOTE
The Thecus Setup Wizard is designed for installation on systems running Windows XP/2000/vista/7/8/10 or Mac OSX or later. Users with other operating systems will need to install the Thecus Setup Wizard on a host machine with one of these operating systems before using the unit.
Typical Setup Procedure
From the Web Administration Interface, you can begin to setup your Thecus IP storage for use on your network. Setting up the Thecus IP storage typically follows the five steps outlined below.
For more on how to use the Web Administration Interface, see
Chapter 4: Web Administration Interface.
Step 1: Network Setup
From the Web Administration Interface, you can configure the network settings of the Thecus IP storage for your network. You can access the Network menu from the control panel.
For details on how to configure your network settings, refer to
Chapter 4: System Network.
Step 2: RAID Creation
Next, administrators can configure their preferred RAID setting and build their RAID volume. You can access RAID settings from the control panel of the Web Administration Interface by navigating to Storage Management > Disk and RAID.
For more information on configuring RAID, see
Chapter 4: Storage > Disk and RAID Management.
Don't know which RAID level to use? Find out more about the different RAID levels from Appendix B: RAID Basics.
Step 3: Create Local Users or Setup Authentication
Once the RAID is ready, you can begin to create local users for Thecus IP storage, or choose to setup authentication protocols such as Active Directory (AD).
For more on managing users, go to Chapter 4: Privilege.
For more information on configuring Active Directory, see
Chapter 4: Privilege > ADS Support.
For information about the benefits of Active Directory, see Appendix D: Active Directory Basics.
Step 4: Create Folders and Set Up ACLs
Once users are introduced into your network, you can begin to create various folders on the Thecus IP storage and control user access to each using Folder Access Control Lists.
More information on managing folders, see
Chapter 4: Privilege > Share Folder.
To find out about configuring Folder Access Control Lists, see Chapter 4:
Privilege > Share Folder> Edit & ACL.
Step 5: Start Services
Finally, you can start to setup the different services of Thecus IP storage for the users on your network.
Chapter 4: System Administration
Overview
The Thecus IP storage provides an easily accessible Web Administration Interface. With it, you can configure and monitor the Thecus IP storage anywhere on the network.
Web Administration Interface
Make sure your network is connected to the Internet. To access Thecus IP storage Web Administration Interface:
- Type the Thecus IP storage IP address into your browser. (Default IP address is http://192.168.1.100)
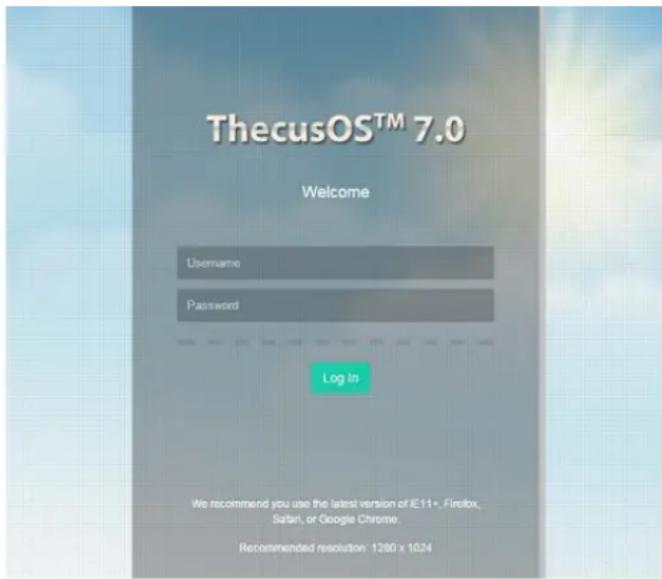
text_image
ThecusOS™ 7.0 Welcome Username Password Log In We recommend you use the latest version of IE11+. Firefox, Safari, or Google Chrome. Recommended resolution: 1280 x 1824NOTE
Your computer's network IP address must be on the same subnet as the Thecus IP storage. If the Thecus IP storage has default IP address of 192.168.1.100, your managing PC IP address must be 192.168.1.x, where x is a number between 1 and 254, but not 100.
- Login to the system using the administrator user name and password. The factory defaults are:
User Name: admin
Password: admin
※ If you changed your password in the setup wizard, use the new password.
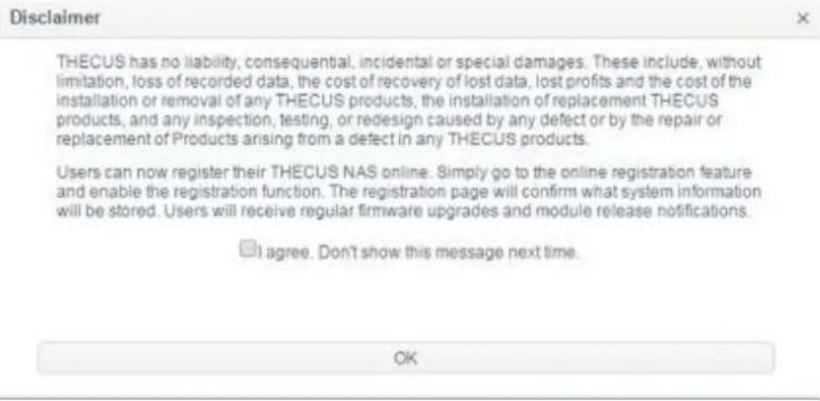
Once you are logged in as an administrator, the disclaimer page will appear as below. Please click the check box if you do not want to have this page displayed during the next login.
text_image
Disclaimer THECUS has no liability, consequential, incidental or special damages. These include, without limitation, loss of recorded data, the cost of recovery of lost data, lost profits and the cost of the installation or removal of any THECUS products, the installation of replacement THECUS products, and any inspection, testing, or redesign caused by any defect or by the repair or replacement of Products arising from a defect in any THECUS products. Users can now register their THECUS NAS online. Simply go to the online registration feature and enable the registration function. The registration page will confirm what system information will be stored. Users will receive regular firmware upgrades and module release notifications. I agree. Don't show this message next time. OKFollowing the disclaimer page, you will see the Web Administration Interface. From here, you can configure and monitor virtually every aspect of the Thecus IP storage from anywhere on the network.
Menu Tree
The Menu Tree is where you will find all of the information screens and system settings of Thecus IP storage. The various settings are placed in the following groups on the menu bar.
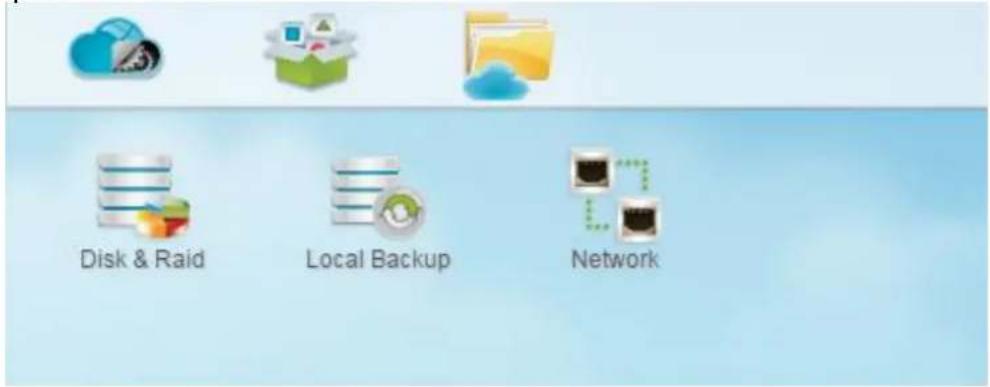
text_image
Disk & Raid Local Backup Network| Menu Bar | |
| Item | Description |
| Control Panel | The Entry of system and function setting |
| App Center | The entry of App Center |
| File Center | The entry of File Center |
Moving your cursor over any of these items and click, it will display the associated screen for each topic.
Add/Remove Shortcut
The user interface allows the user to designate often used items and have them display on the main screen area by add Shortcut. The figure below displays system favorite functions.
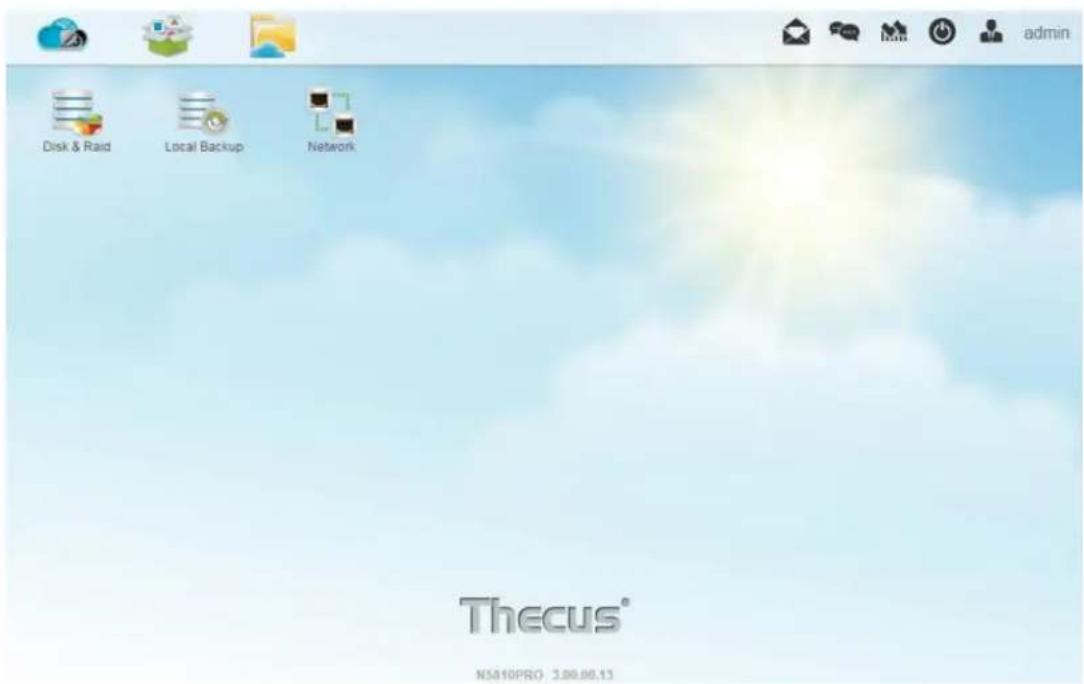
text_image
Disk & Raid Local Backup Network Thecus® NS810PRO 3.88.86.13Administrators can add or remove Shortcut by right clicking the mouse and selecting "Add Shortcut" icon in each function screen. See the figure below with the red circled icon.
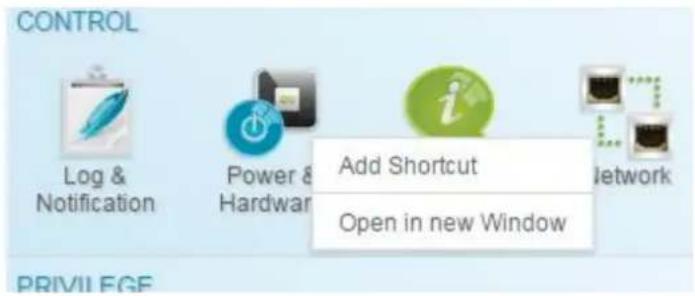
text_image
CONTROL Log & Notification Power & Hardware Add Shortcut Open in new Window PRIVILEGETo remove "Shortcut" from main screen, right click the mouse button and select "Remove Shortcut".
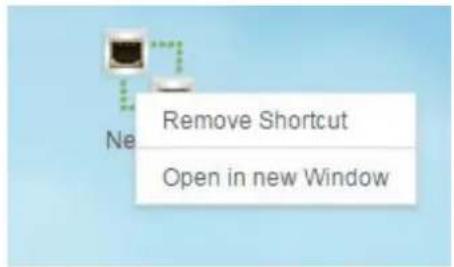
text_image
Remove Shortcut Open in new WindowOpen in New Window
To open associated function on the front of screen, right click mouse and select "Open in new window".
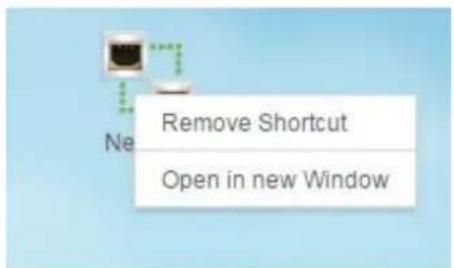
text_image
Remove Shortcut Open in new WindowIn the following sections, you will find detailed explanations of each function, and how to configure your Thecus IP storage.
Feedback for OS7.0
On the top right hand corner of menu bar, click on and it will open the mail sending screen, please provide your feedback.
Quick System Log Info
On the top right hand corner of the menu bar, click on and it will display the system log info.
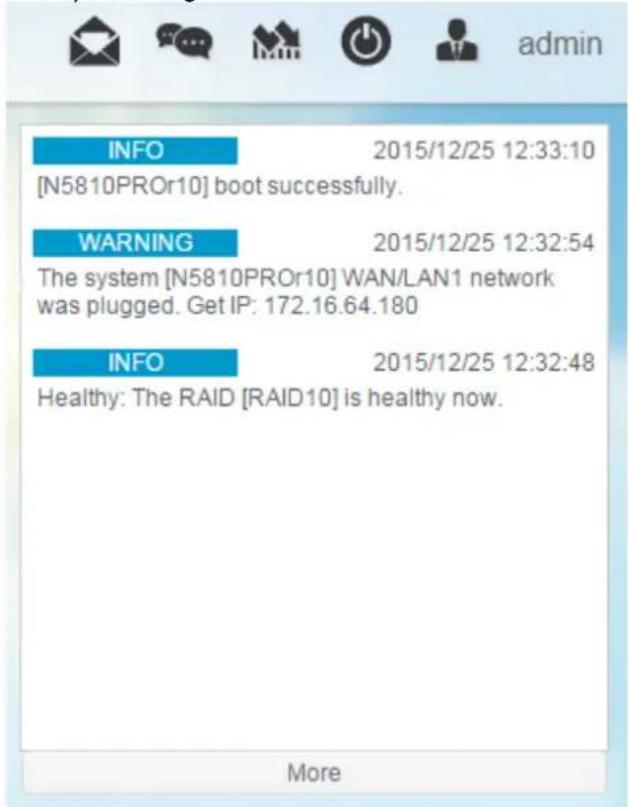
text_image
INFO 2015/12/25 12:33:10 [N5810PROr10] boot successfully. WARNING 2015/12/25 12:32:54 The system [N5810PROr10] WAN/LAN1 network was plugged. Get IP: 172.16.64.180 INFO 2015/12/25 12:32:48 Healthy: The RAID [RAID10] is healthy now.Quick System Resource Monitor
On the top right hand corner of the menu bar, click on and it will display the
system resource monitor info such as CPU, memory and storage usage.
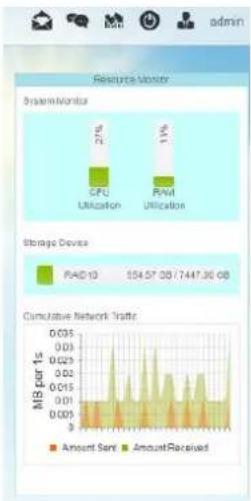
bar
| Category | Total Resource Utilization (%) | | :--- | :--- | | CPU Utilization | 21 | | PAM Utilization | 11 | | Storage Device | Amount Sent | Amount Received | | :--- | :--- | :--- | | PAID10 | 554.57 08 / 7447.36 08 | Not labeled | | Cumulative Network Traffic | | |System shut down and reboot
On the top right hand corner of the menu bar, click on , this is a shortcut to shut down or reboot the system.
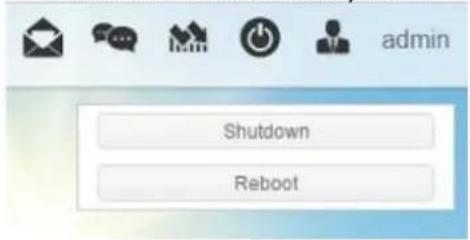
text_image
admin Shutdown RebootLanguage Selection
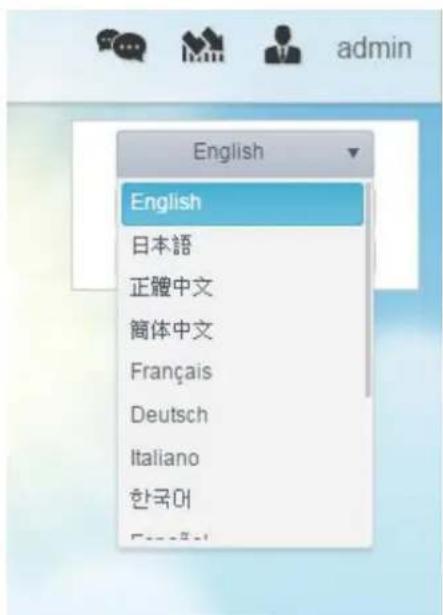
The Thecus IP storage supports multiple Languages, including:
- English
- Japanese
• Traditional Chinese - Simplified Chinese
- French
- German
- Italian
- Korean
- Spanish
- Russian
- Polish
- Portuguese
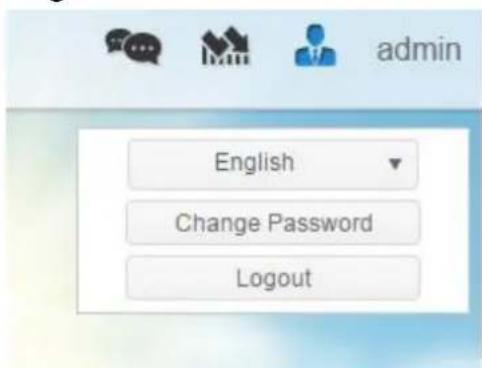
On the top right hand corner of menu bar, select desired language from drop down list. This user interface will switch to the selected language for Thecus IP storage.
Logout
text_image
English Change Password LogoutClick on logout to quit Web Administration Interface.
Change Password
On the top right hand corner of menu bar, select Password item and the Change Password screen will appear. Enter a new password in the New Password box and confirm your new password in the Verify box. Click on Change to confirm password changes.
text_image
English English 日本語 正體中文 簡体中文 Français Deutsch Italiano 한국어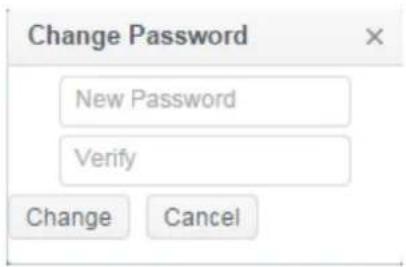
text_image
Change Password New Password Verify Change CancelControl Panel
The control panel has 5 main categories: CONTROL, PRIVILLEGE, STORAGE, SERVICES and BACKUP. Please see below for explanation.
CONTROL
CONTROL

Log & Notification

Power & Hardware

System Information

Network

Regional Option

External Device

Monitor

Firmware Setting
Log and Notification
System Log
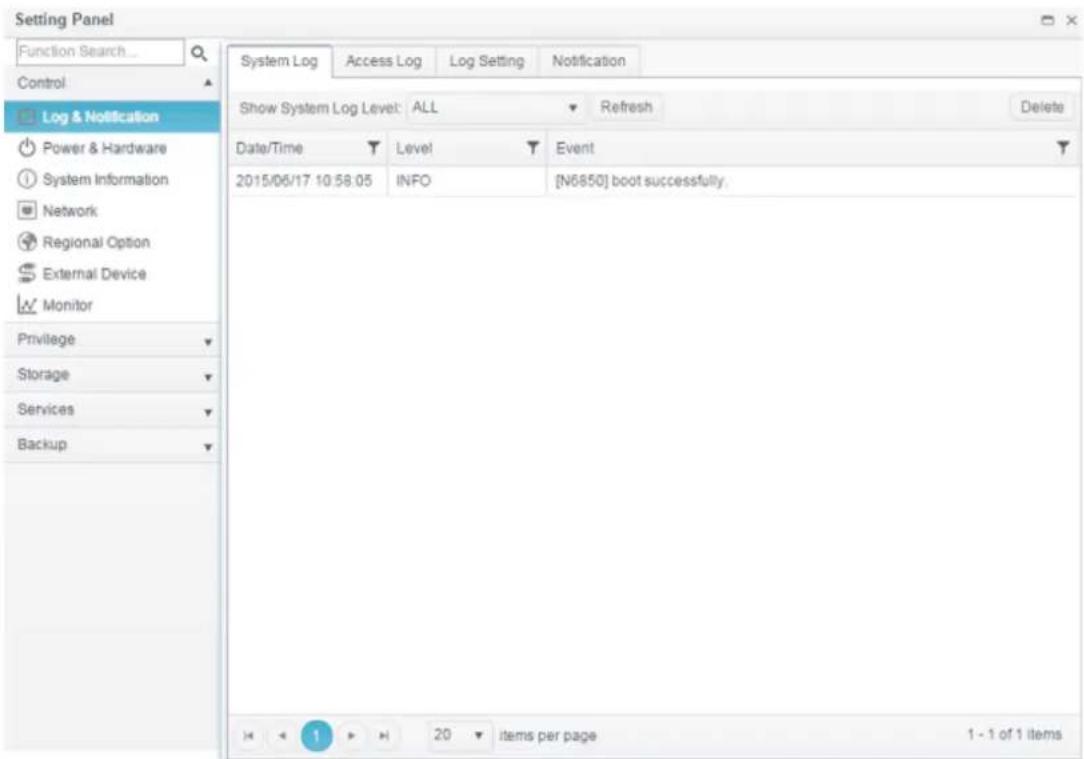
From the Log & Notification menu, choose the System Log option and the System Log screen will appear. This screen will show a history of system usage and important events such as disk status, network information, and system booting.
text_image
Setting Panel Function Search... Control Log & Notification Power & Hardware System Information Network Regional Option External Device Monitor Privilege Storage Services Backup System Log Access Log Log Setting Notification Show System Log Level: ALL Refresh Delete Date/Time Level Event 2015/06/17 10:58.05 NFO [N6850] boot successfully. 1 20 items per page 1 - 1 of 1 items| Logs | |
| Item | Description |
| Log Level | ALL: Provides all log information including system, warning, and error messages.WARN: Shows only warning messages.ERROR: Shows only error messages. |
| Delete | Clear all log files. |
| Items per page □ | Specify the desired number of lines to display per page. |
| Filters | Input desired value to filter unwanted items |
| |<< < > >>| | Use the forward ( > >>| ) and backward ( |<< < ) buttons to browse through the log pages. |
| Refresh | Reload logs |
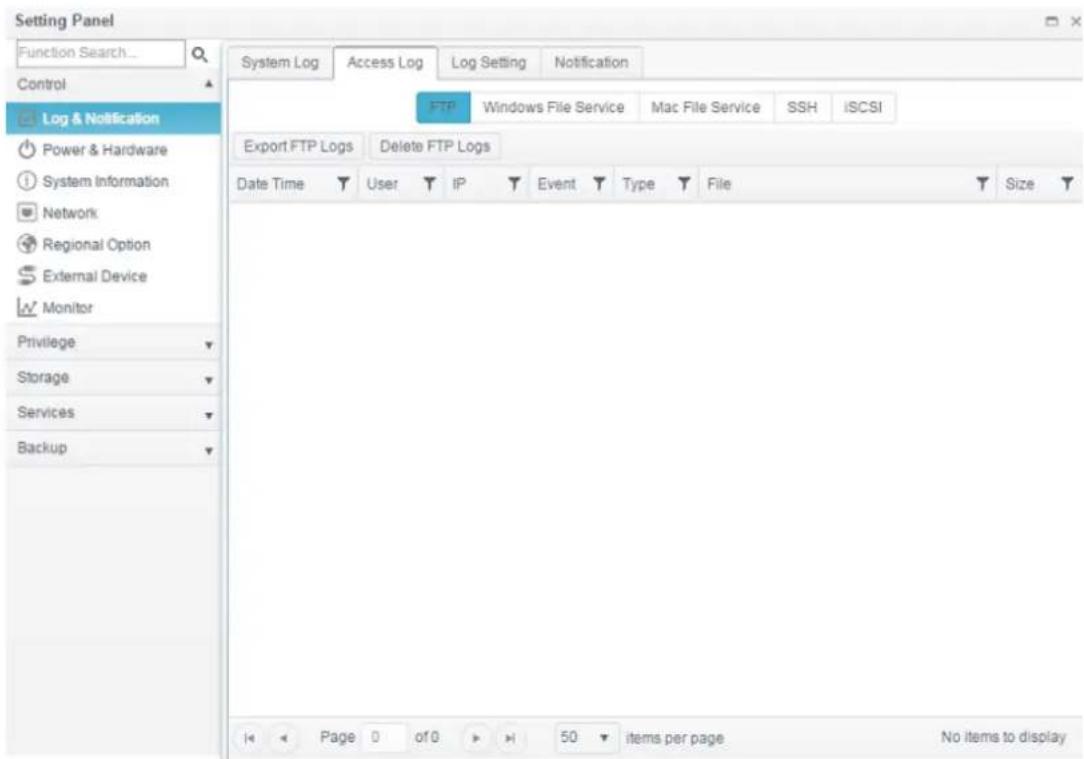
Access Log
The Access Log Support section allows administrators to choose associated protocol and view user activity information.
text_image
Setting Panel Function Search... Control Log & Notification Power & Hardware System Information Network Regional Option External Device Monitor Privilege Storage Services Backup System Log Access Log Log Setting Notification FTP Windows File Service Mac File Service SSH iSCSI Export FTP Logs Delete FTP Logs Date Time User IP Event Type File Size Page 0 of 0 50 items per page No items to displayLog Setting
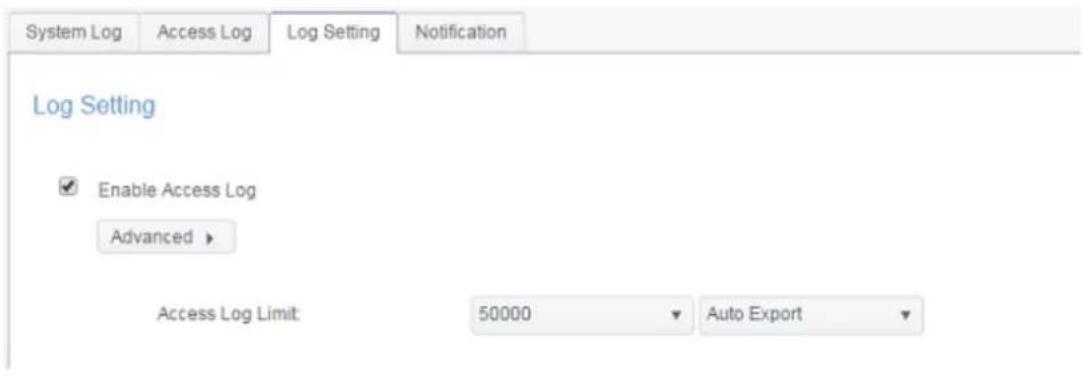
To have user access details for associated system, Access Log Support must be enabled and confirmed with "Apply" button, at the time all supported services will restart. To view Access Log details, please go to Access Log section.
text_image
System Log Access Log Log Setting Notification Log Setting ✓ Enable Access Log Advanced ▶ Access Log Limit: 50000 Auto ExportTo export details from the User Access Log as a single file from target folder, administrators must first select the desired number of records from the dropdown list and also select the "Auto export" option. Please choose the number of logs to export and click Apply to activate these settings.
Once (for example) 10,000 records have been reached, the log file will appear in /NAS_public/access_log/

text_image
dom_backup_log syslog log_20140611_161212Syslog service can generate system logs to be stored locally or remotely. Information can be obtained in two ways: locally and remotely.
Enable Syslog Daemon
Advanced ▶
Location of Syslog:
Local
Remote
Enable Syslog Server
Log Storage Folder:
eSATAHDD

Log Level:
All

| Log Setting | |
| Item | Description |
| Enable Access Log | Enable or disable the Access Log service. |
| Access log limit | This can be selected from a dropdown list to export the log(s) as a single file. Please also choose "Auto Export" or "Auto Delete" once the log item exceeded the defined number. |
| Enable Syslog Daemon | Enable or disable Syslog service. |
| Location of Syslog | Choose Local, all system logs will be stored in an associated syslog folder filled in from next filed. And the syslog folder will have file "messages" to store all system logs. If Remotely has been selected, a syslog server is needed and an IP address is required to fill in from next filed. |
| Enable Syslog Server | Checked to enable associated system can play a role as syslog server while syslog location has select "Local" |
| Log Server IP (Remote) | Input the remote syslog server IP address once syslog store in remote server has selected |
| Log storage folder (Local) | Select from a drop down share list, all of the system logs will be stored on it. This syslog folder is applied to "syslog server" or "syslog client" with "local" selected. |
| Log Level | The user can choose from 3 different levels. "All", "Warning/Error" or "Error". |
| Apply | Click Apply to save changes. |
| Description | The user access list will record different activities for supported protocols.1. AFP: User login and logout.2. FTP: User file deletion, uploads/downloads, folder creation, object renaming, and login and logout.3. iSCSI: User login and logout.4. Samba: User file deletion, folder creation, folder opening, and object reading, renaming, and writing.5. SSH: User login and logout.6. VPN: User login and logout |
Notification
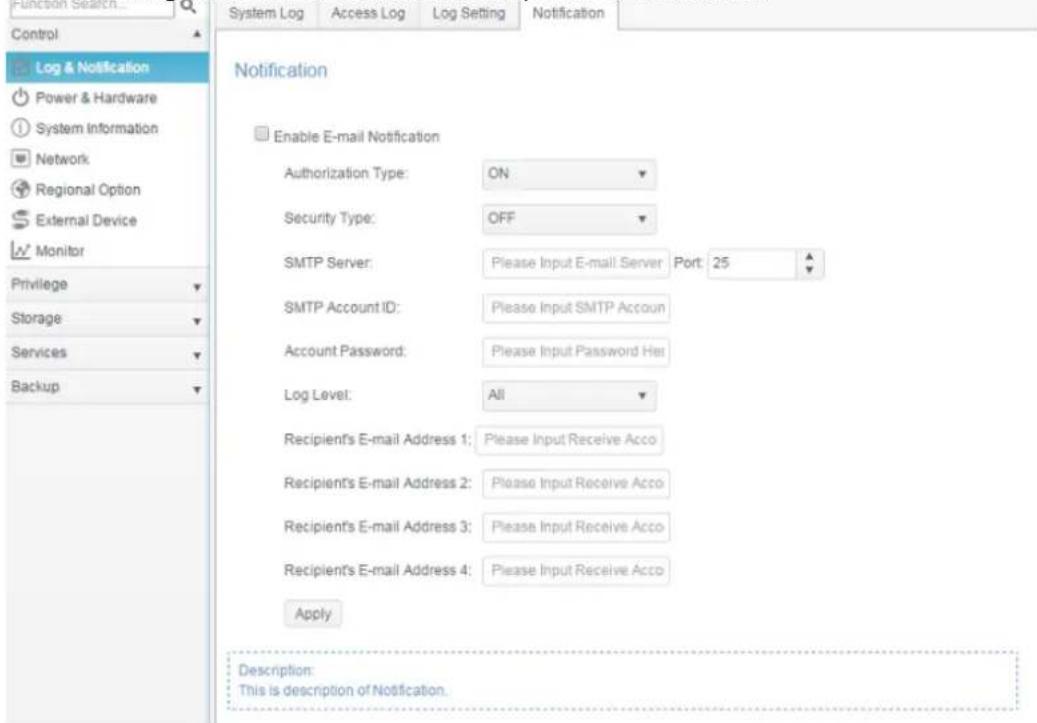
From log and notification, choose the Notification item, and the Notification Configuration screen will appear. This screen lets you have Thecus IP storage notify you in case of any system malfunction. Press Apply to confirm all settings. See following table for a detailed description of each item.
text_image
Control Log & Notification Power & Hardware System Information Network Regional Option External Device Monitor Privilege Storage Services Backup Notification Enable E-mail Notification Authorization Type: ON Security Type: OFF SMTP Server: Please Input E-mail Server Port: 25 SMTP Account ID: Please Input SMTP Accoun Account Password: Please Input Password Her Log Level: All Recipient's E-mail Address 1: Please Input Receive Acco Recipient's E-mail Address 2: Please Input Receive Acco Recipient's E-mail Address 3: Please Input Receive Acco Recipient's E-mail Address 4: Please Input Receive Acco Apply Description: This is description of Notification.| Notification Configuration | |
| Item | Description |
| Email Notification | Enable or disable email notifications of system problems. |
| Authentication Type | Select the SMTP Server account authentication type from drop down list. |
| Security Type | Select the security type while mail has sent out |
| SMTP Server | Specifies the hostname/IP address of the SMTP server. |
| Port | Specifies the port to send outgoing notification emails. |
| SMTP Account ID | Set the SMTP Server Email account ID. |
| Account Password | Enter a new password. |
| Log Level | Select the log level to send the e-mail out. |
| Sender's E-mail Address | Set senders email address to send email notifications. |
| HELO/EHLO Domain Name | Specified valid HELO/EHLO domain name |
| Receiver's E-mail Address (1,2,3,4) | Add one or more recipient's email addresses to receive email notifications. |
NOTE
Consult with your mail server administrator for email server information.
Power & Hardware
text_image
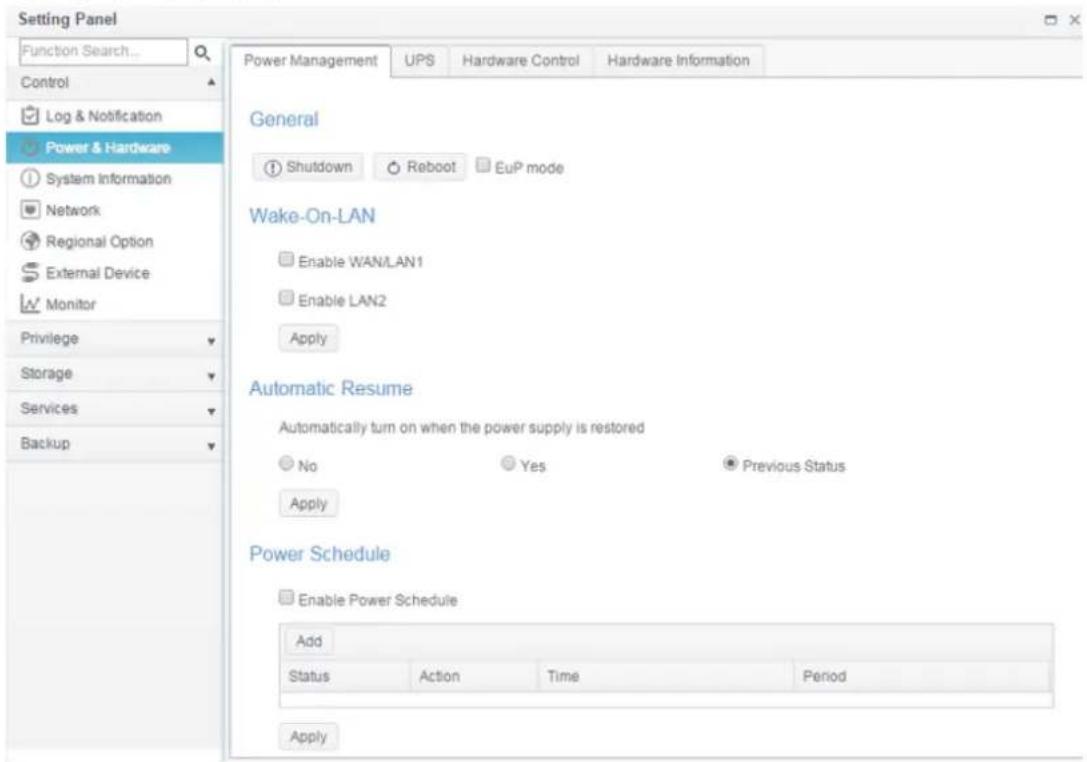
Setting Panel Function Search... Control Log & Notification Power & Hardware System Information Network Regional Option External Device Monitor Privilege Storage Services Backup Power Management UPS Hardware Control Hardware Information General Shutdown Reboot EuP mode Wake-On-LAN Enable WAN/LAN1 Enable LAN2 Apply Automatic Resume Automatically turn on when the power supply is restored No Yes Previous Status Apply Power Schedule Enable Power Schedule Add Status Action Time Period ApplyPower Management
General
Press Reboot to restart the system or Shutdown to turn the system off.
The option of Eup mode could help to lower system power consumption. However, once it has enabled the Wake-On-Lan
, Power Schedule will be disabled automatically to meet Eup standard.
| Power Management | UPS | Hardware Control | Hardware Information |
General

Automatic Resume
Thecus IP storage allows users to setup in 3 different modes while power cut resume.
Automatic Resume
Automatically turn on when the power supply is restored
No
① Yes
Previous Status
Apply
| Automatic Resume | |
| Item | Description |
| No | Choose No to keep system off after power cut resume |
| Yes | Choose Yes to have system on after power cut resume |
| Previous Status | Keep former state of system while power cut resume |
| Apply | Click Apply to save changes. |
Power Schedule
Using the Thecus IP storage Power Management, you can save energy and money by scheduling the Thecus IP storage to turn itself on and off during certain times of the day.
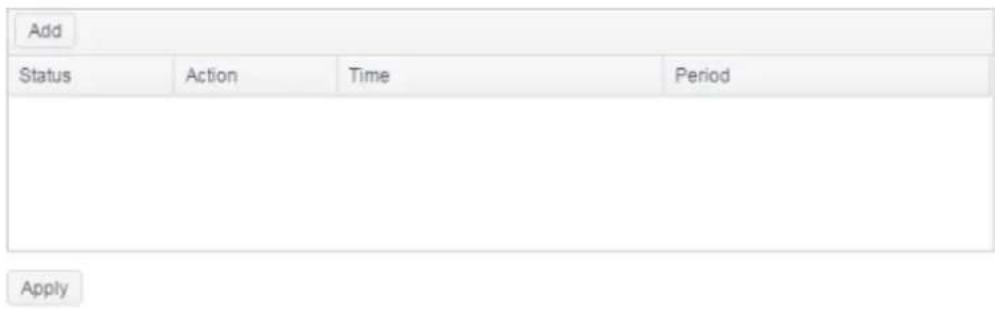
To designate a schedule for the Thecus IP storage to turn on and off, first enable the feature by checking the Enable Power Schedule checkbox.
Then, click Add to add desired time for system power on or off.
Finally, click Apply to save your changes.
Power Schedule
Enable Power Schedule
text_image
Add Status Action Time Period ApplyExample - Monday: On: 8:00; Off: 16:00
System will turn on at 8:00 AM on Monday, and off at 16:00 on Monday. System will turn on for the rest of the week.
If you choose an on time, but do not assign an off time, the system will turn on and remain on until a scheduled off time is reached, or if the unit is shutdown manually.
Example - Monday: On: 8:00
System will turn on at 8:00 AM on Monday, and will not shut down unless powered down manually.
You may also choose two on times or two off times on a particular day, and the system will act accordingly.
Example - Monday: Off: 8:00; Off: 16:00
System will turn off at 8:00 AM on Monday. System will turn off at 16:00 PM on Monday, if it was on. If the system was already off at 16:00 PM on Monday, system will stay off.
Wake-On-LAN
The Thecus IP storage has the ability to be awoken from sleep mode via WAN/LAN1 or LAN2 port.
Wake-On-LAN


Apply
Click on associated NIC interface to Enable or Disable Wake-On-LAN.
| Wake-up On LAN Configuration | |
| Item | Description |
| WAN/LAN1 | Enable or Disable WOL service from WAN/LAN1 |
| LAN2 | Enable or Disable WOL service from LAN2 |
| Apply | Click Apply to save changes. |
UPS
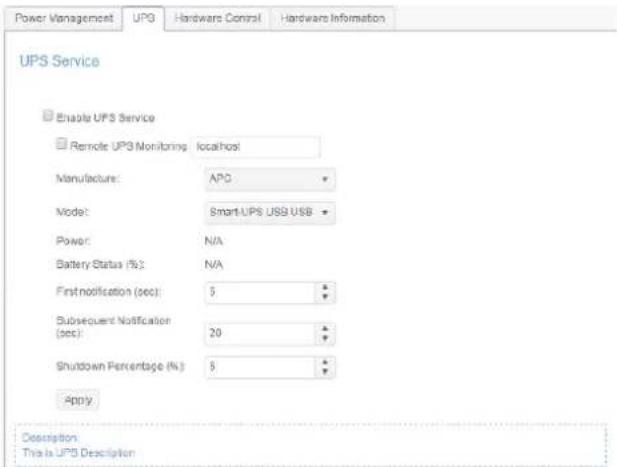
Thecus IP storage supports Uninterrupted Power Source through USB interface. Make the changes of UPS Setting and press Apply to confirm changes.
text_image
Power Management UPG Hardware Control Hardware Information UPS Service Enable UPS Service Remote UPS Monitoring localhost Manufacturer: APC Model: Smart-UPS US$ USB Power: N/A Battery Status (%): N/A First notification (sec): 5 Subsequent Notification (sec): 20 Shutdown Percentage (%): 5 Apply Description This is UPS DescriptionSee the following table for a detailed description of each item.
| UPS Setting | |
| Item | Description |
| UPS Service | Enable or disable UPS monitoring. |
| Remote UPS Monitoring | Checked to enable remote UPS monitoring. And input the IP address of the NAS that the UPS device is connected to via USB. |
| Manufacturer | Choose the UPS manufacturer from the dropdowns. |
| Model | Choose the UPS model number from the dropdowns. |
| Battery Status | Current status of the UPS battery |
| Power | Current status of the power being supplied to the UPS |
| First notification (sec) | Delay between power failure and first notification in seconds. |
| Subsequent notifications (sec) | Delay between subsequent notifications in seconds. |
| Shutdown percentage (%) | Amount of UPS battery remaining before system should auto-shutdown. |
| Apply | Press Apply to save your changes. |
Hardware Control
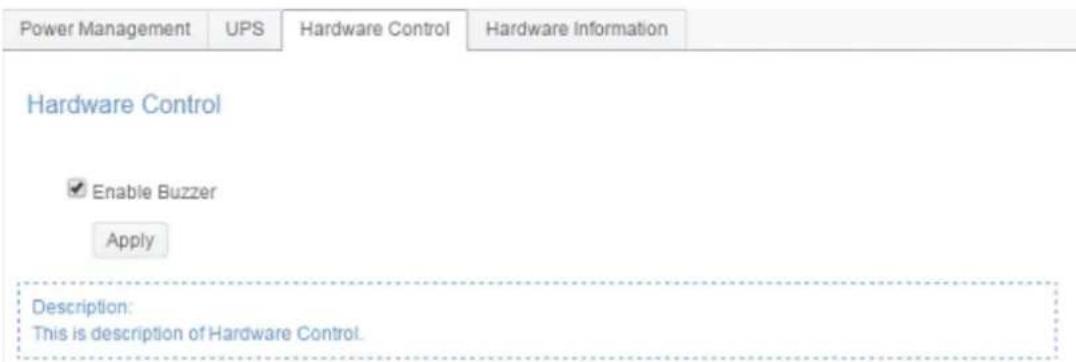
The system buzzer can be Enabled/Disabled by clicking the check box. Check to enable system buzzer when any error occurs or disable to mute the system.
text_image
Power Management UPS Hardware Control Hardware Information Hardware Control ✓ Enable Buzzer Apply Description: This is description of Hardware Control.System Information
System Status
This screen provides basic system status information.
| System | Network | Service Status | Hardware Information |
System Status
natural_image
Front view of a black industrial control panel with multiple slots and a digital display (no visible text or symbols)Model Name N5810PRO
Version 3.00.01.2
CPU Activity 0.2%
Memory Activity 8.5%
Up Time 2Day, 0Hour, 55Minute
CPU Temperature 42°C / 107.6°F
SYS Temperature1 33°C / 91.4°F
SYS Fan Speed1 449 rpm
| System Status | |
| Item | Description |
| Model | Model name |
| Version | Current FW version |
| CPU Activity | Displays current CPU workload of the Thecus IP storage. |
| Memory Activity | Display current memory workload of the Thecus IP storage |
| CPU Temperature | Displays current CPU Temperature. |
| System Temperature/1 | Displays current System temperature from 2 positions |
| System Fan Speed | Displays the current status of the system fan. |
| Up Time | Shows how long the system has been up and running. |
Network Status
This screen provides basic system network status and information.
| System | Network | Service Status | Hardware Information | |||
| Network Status · Host Name: N2810-pm · Domain Name: thecus.com | ||||||
| Name | IP Address | MAC Address | Status | Speed (Mb/s) | IPv6 Address | |
| WAN/LAN1 | 172.16.65.147 | 00:14:fd:19:0a:23 | up | 1000 | ||
| LAN2 | 00:14:fd:19:0a:24 | down | N/A | |||
| Network Information (Global parameter) | |
| Item | Description |
| Host name | Host name that identifies the Thecus IP storage on the network. |
| Domain name | Specifies the domain name of Thecus IP storage. |
| Link speed | Display associated NIC port link speed. |
| Link status | Display associated NIC port link status. |
| MAC address | MAC address of the network interface. |
| IPv4 IP address | IP address of associate NIC interface in IPv4. |
IPv6 IP address
IP address of associate NIC interface in IPv6.
Service Status
This screen provides basic service status information.
| System | Network | Service Status | Hardware Information |
| Service Status | |||
| FTP | Running | ||
| Rsync | Stopped | ||
| Samba | Running | ||
| WebDAV | Running | ||
| iTunes | Running | ||
| NFS | Stopped | ||
| DDNS | Stopped | ||
| AFP | Running | ||
| SNMP | Stopped | ||
| SSH | Running | ||
| TFTP | Stopped | ||
| UPnP | Running | ||
| Service Status | |
| Item | Description |
| AFP Status | The status of the Apple Filing Protocol server. |
| NFS Status | The status of the Network File Service Server. |
| SMB/CIFS Status | The status of the SMB/CIFS server. |
| FTP Status | The status of the FTP server. |
| TFTP Status | The status of the TFTP server. |
| Rsync Status | The status of the Rsync server. |
| UPnP Status | The status of the UPnP service. |
| SNMP | The status of the SNMP service. |
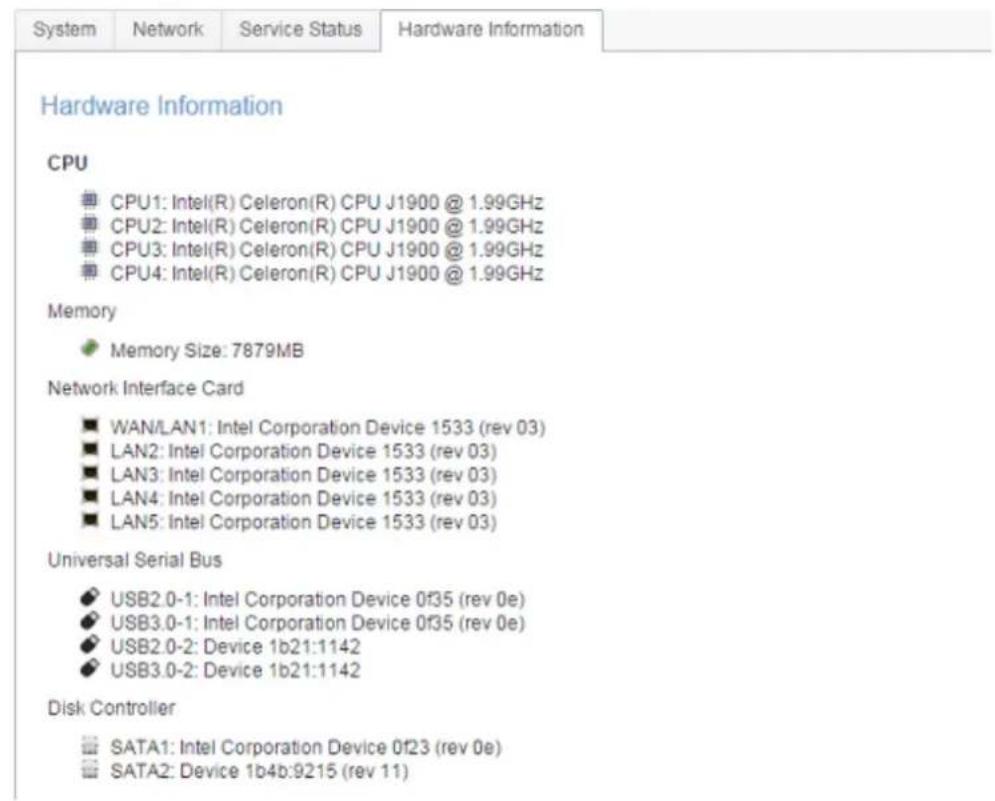
Hardware Information
Click on Hardware Information, this will display the related HW details for the associated model. Below is an example of the information for a Thecus N5810.
text_image
System Network Service Status Hardware Information Hardware Information CPU CPU1: Intel(R) Celeron(R) CPU J1900 @ 1.99GHz CPU2: Intel(R) Celeron(R) CPU J1900 @ 1.99GHz CPU3: Intel(R) Celeron(R) CPU J1900 @ 1.99GHz CPU4: Intel(R) Celeron(R) CPU J1900 @ 1.99GHz Memory ● Memory Size: 7879MB Network Interface Card ■ WAN/LAN1: Intel Corporation Device 1533 (rev 03) ■ LAN2: Intel Corporation Device 1533 (rev 03) ■ LAN3: Intel Corporation Device 1533 (rev 03) ■ LAN4: Intel Corporation Device 1533 (rev 03) ■ LAN5: Intel Corporation Device 1533 (rev 03) Universal Serial Bus ◆ USB2.0-1: Intel Corporation Device 0f35 (rev 0e) ◆ USB3.0-1: Intel Corporation Device 0f35 (rev 0e) ◆ USB2.0-2: Device 1b21:1142 ◆ USB3.0-2: Device 1b21:1142 Disk Controller ■ SATA1: Intel Corporation Device 0f23 (rev 0e) ■ SATA2: Device 1b4b:9215 (rev 11)Network
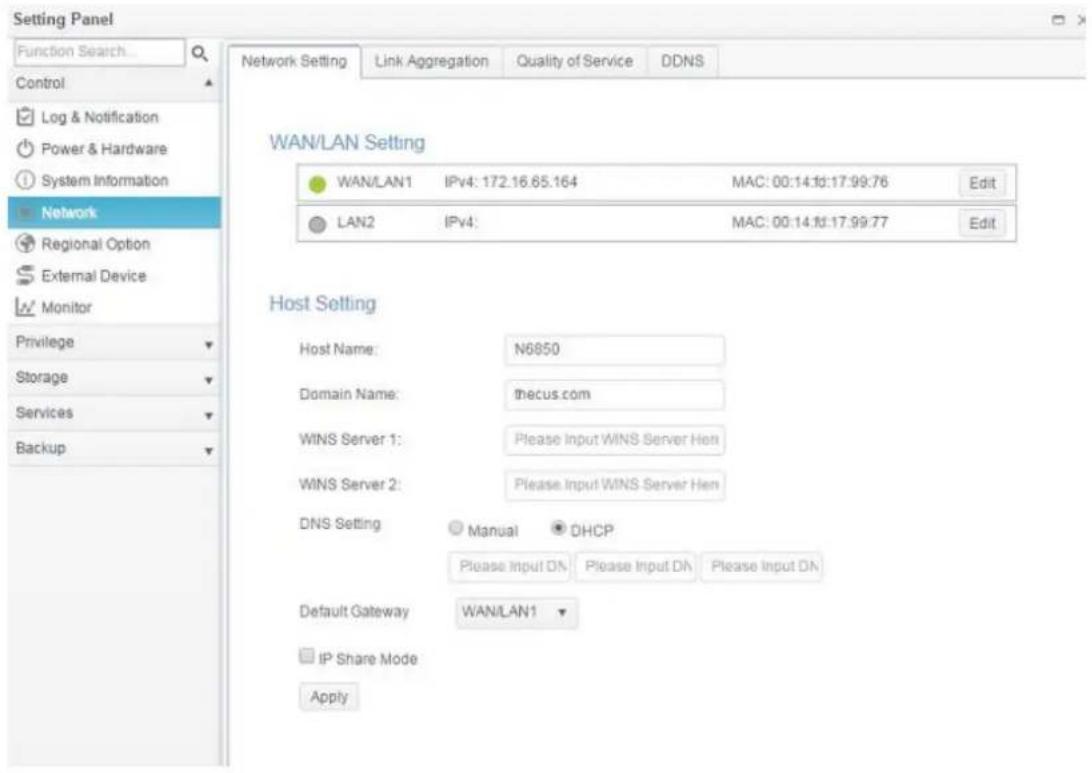
From the Control menu, choose Network, and the Networking Configuration screen will appear. This screen displays the network parameters of the global setting and available network connection. You may change any of these items and press Apply to confirm your settings. See a description of each item in the following table:
text_image
Setting Panel Function Search... Control Log & Notification Power & Hardware System Information Network Regional Option External Device Monitor Privilege Storage Services Backup Network Setting Link Aggregation Quality of Service DDNS WAN/LAN Setting WAN/LAN1 IPv4: 172.16.65.164 MAC: 00:14:1d:17:99.76 Edit LAN2 IPv4: MAC: 00:14:1d:17:99.77 Edit Host Setting Host Name: N6850 Domain Name: thecus.com WINS Server 1: Please Input WINS Server Hen WINS Server 2: Please Input WINS Server Hen DNS Setting Manual DHCP Please Input DN Please Input DN Please Input DN Default Gateway WAN/LAN1 IP Share Mode ApplyNetwork Setting
WAN/LAN Setting:
The available system network ports are coming from embedded system ports. Therefore, the screen shown above is an example of a Thecus N5810 with 2 on board GbE NIC.
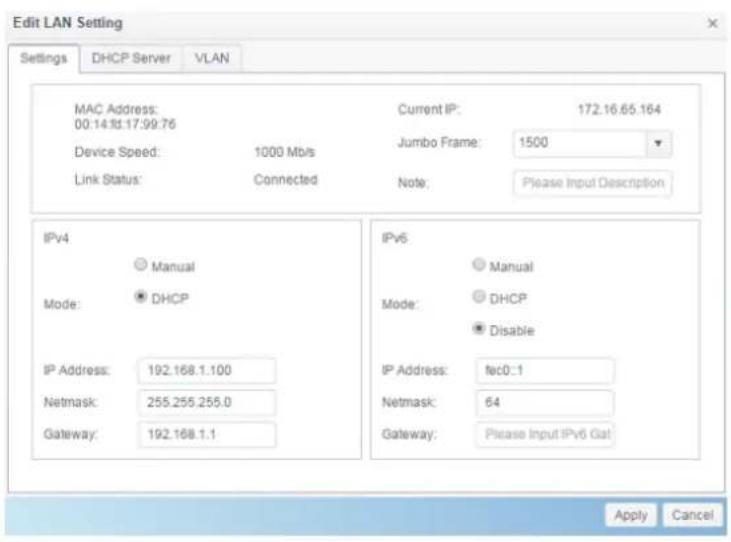
To modify port setting, please click on Edit with the associated network port. The setting screen will appear, it can be configured for basic setting, DHCP server and VLAN.
Basic Setting:
text_image
Edit LAN Setting Settings DHCP Server VLAN MAC Address: 00:14:1d.17:99:76 Device Speed: 1000 Mb/s Link Status: Connected Current IP: 172.16.65.164 Jumbo Frame: 1500 Note: Please Input Description IPv4 ○ Manual Mode: ● DHCP IPv6 ○ Manual Mode: ○ DHCP ● Disable IP Address: 192.168.1.100 Netmask: 255.255.255.0 Gateway: 192.168.1.1 IP Address: fec0::1 Netmask: 64 Gateway: Please Input IPv6 Gat Apply Cancel| Basic Setting | |
| MAC address | MAC address of the network interface. |
| IP | IP address of associate NIC interface. |
| Device speed | Display associated NIC port link speed. |
| Link status | Display associated NIC port link status. |
| Jumbo Frame | Input Jumbo Frame rate from drop down list, default is 1500 |
| Note | Input the description of associated network port if any |
| IPv4/IPv6 | Setting IP address from manual input or DHCP server . |
| Mode | It can choose a static IP by manually input or Dynamic IP from DHCP server. |
| IP address | Input IP address if manually input has selected or displayed by granted from DHCP server |
| Netmask | Input netmask if manually input has selected or displayed by granted from DHCP server |
| Gateway | Input gateway if manually input has selected or displayed by granted from DHCP server |
NOTE
- Only use Jumbo Frame settings when operating in a Gigabit environment where all other clients have Jumbo Frame Setting enabled.
- Proper DNS setting is vital to networks services, such as SMTP and NTP.
WARNING
Most faster Ethernet (10/100) Switches/Routers do not support Jumbo Frame and will not be able to connect to your Thecus NAS after Jumbo Frame is turned on.
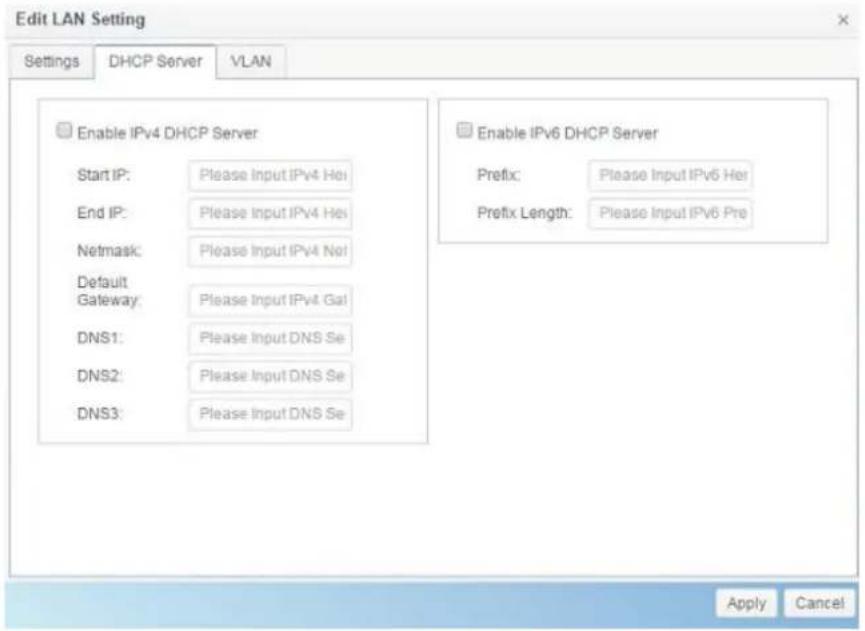
DHCP Server:
The network port of Thecus IP storage can be acted as DHCP server if associated NIC has been set-up to a static IP. Please fill in the fields to complete setting.
text_image
Edit LAN Setting Settings DHCP Server VLAN Enable IPv4 DHCP Server Start IP: Please Input IPv4 Hei End IP: Please Input IPv4 Hei Netmask: Please Input IPv4 Noi Default Gateway: Please Input IPv4 Gal DNS1: Please Input DNS Se DNS2: Please Input DNS Se DNS3: Please Input DNS Se Enable IPv6 DHCP Server Prefix: Please Input IPv6 Her Prefix Length: Please Input IPv6 Pre Apply Cancel| DHCP Configuration | |
| Item | Description |
| Enable IPv4/IPv6 DHCP Server | Enable or disable the IPv4/IPv6 DHCP Server to automatically assign IP address to PCs connected to associate NIC interface. |
| Start IP (IPv4) | Specifies the lower IP address of the DHCP range. |
| End IP in (IPv4) | Specifies the highest IP address of the DHCP range. |
| Netmask(IPv4) | Specifies netmask for the DHCP server service. |
| Default Gateway (IPv4) | Specifies gateway for the DHCP server service. |
| DNS Server 1,2,3 (IPv4) | Displayed the DNS server IP address. |
| Prefix (IPv6) | Specifies prefix |
| Prefix Length (IPv6) | Specifies prefix length |
WARNING
The IP address of associated NIC should not be in the range of the Start IP address and End IP address (IPv4).
VLAN:
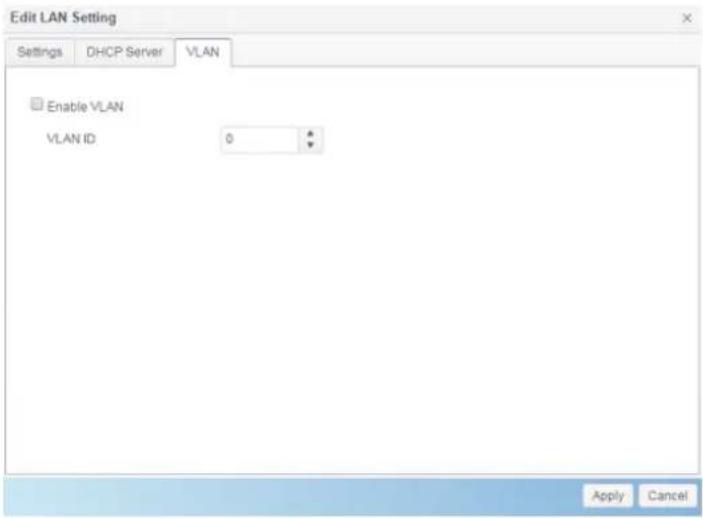
Each NIC is capable of VLAN support. To enable VLAN, simply click the check box and input the VLAN ID (VLAN ID can be any digital number). The system with the same VLAN ID will become a Virtual LAN group to allow more specific communication among members.
text_image
Edit LAN Setting Settings DHCP Server VLAN Enable VLAN VLAN ID 0 + Apply CancelLink Aggregation
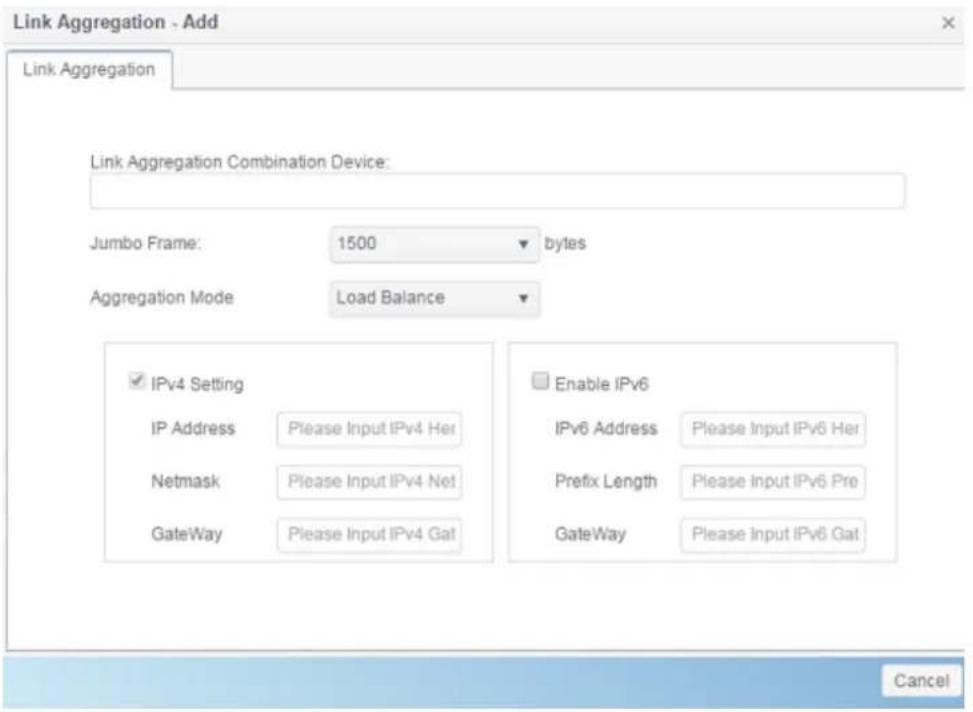
The Thecus IP storage supports link aggregation from on board network port. Simply click on Add from Link Aggregation page and the screen will appear as below.
text_image
Link Aggregation - Add Link Aggregation Link Aggregation Combination Device: Jumbo Frame: 1500 bytes Aggregation Mode Load Balance IPv4 Setting IP Address Please Input IPv4 Her Netmask Please Input IPv4 Net GateWay Please Input IPv4 Gat Enable IPv6 IPv6 Address Please Input IPv6 Her Prefix Length Please Input IPv6 Pre GateWay Please Input IPv6 Gat CancelClick on field of "Link Aggregation Combination Device" to select member for Link Aggregation. Also fill in all other required information to complete the setting.

text_image
Link Aggregation Combination Device: WAN/LAN1 LAN2 Aggregation Mode Load Release -| Link Aggregation Configuration | |
| Jumbo Frame Support | Enable or disable Jumbo Frame Support of the associated interface on your Thecus IP storage. |
| Aggregation Mode | Select from drop down list for desired mode. |
| IPv4/IPv6 | Click to enable IPv4/IPv6 for TCP/IP. The default is IPv4 enabled. |
| Mode | It has to be a static IP with the link aggregation being used. |
| IP | IP address of link aggregation. |
| Netmask/Prefix Length | Input netmask for IPv4 and Prefix length for IPv6. |
| Gateway | Gateway for associated link aggregation |
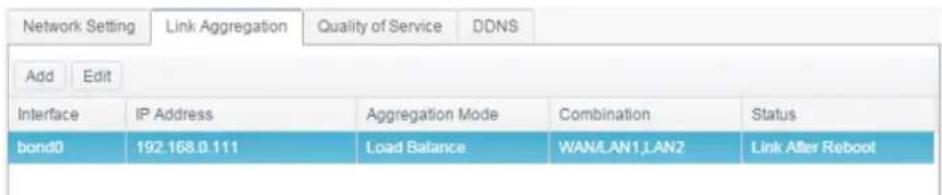
Click Apply to confirm the setting. The newly created Link Aggregation will appear on associated device list
text_image
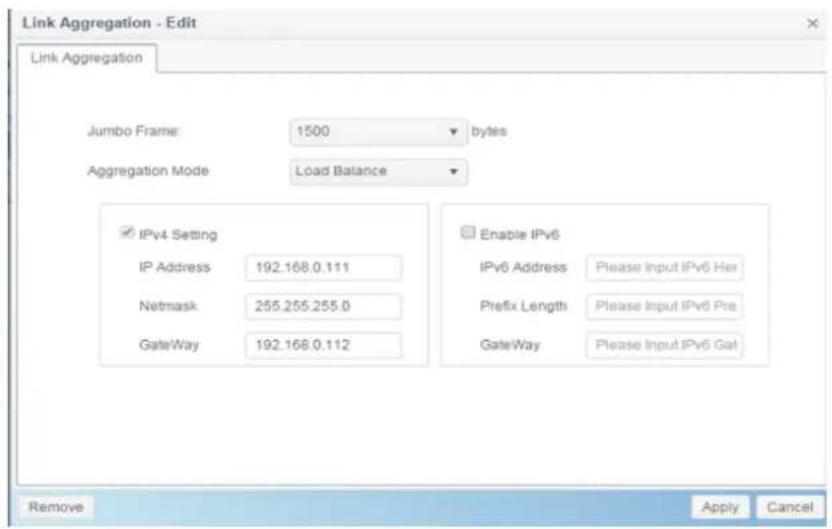
Network Setting Link Aggregation Quality of Service DDNS Add Edit Interface IP Address Aggregation Mode Combination Status bond0 192.168.0.111 Load Balance WAN/LAN1,LAN2 Link Alter RebootTo modify or delete Link Aggregation device, select desired device from device list then click "Edit". The associated screen will appear as below. Carry on for necessary modification to modify or click on Remove button from left hand bottom corner to remove from device list.
text_image
Link Aggregation - Edit Link Aggregation Jumbo Frame: 1500 bytes Aggregation Mode Load Balance IPv4 Setting IP Address 192.168.0.111 Netmask 255.255.255.0 GateWay 192.166.0.112 Enable IPv6 IPv6 Address Please Input IPv6 Her Prefix Length Please Input IPv6 Pre GateWay Please Input IPv6 Gal Remove Apply CancelQuality of Service
Thecus IP storage is capable for QoS (Quality of Service) by supported services. The bandwidth will give by the order from QoS list once the overall bandwidth required is larger than the physical number.
| Network Setting | Link Aggregation | Quality of Service | DDNS |
Quality of Service (QoS)
Enable QoS
| Ena... | Network Interface | Service | Protocol | Ports | Guaranteed (K... | Maximum (KB/s) |
| Yes | WAN/LAN1 | Samba | TCP | 139,445 | 50000 | 1000000 |
| Yes | WAN/LAN1 | AFP | TCP | 548 | 3000 | 500000 |
Description: This is description of Quality of Service.
To setup QoS, simply Enable QoS and then click 'Add" on QoS screen. The screen will appear as below.
| Quality of Service Configuration | |
| Enable the Rule | Checked the box to enable defined rule. |
| Network Interface | Select network interface from drop down list. |
| Service List | Select desired service to have QoS served |
| User Defined | Other than pre-defined service list, user defined service is allowed. |
| Service Name | Input user defined service name |
| Protocol and Ports | Input user defined protocol from drop down list and associated ports will be used |
| Protocol | List associated protocol of selected service. |
| Ports | List associated port number of selected service. |
| Guaranteed (KB/s) | Input MUST of throughput for associated service. |
| Maximum (KB/s) | Input maximum of throughput for associated service |
To modify, delete or change priority of created QoS service, select desired service from service list then click required activities. Carry on for necessary modification to modify by click "Edit" or click on "Move Up" or "Move Down" to change priority. The Delete the rule button can be found on left hand bottom corner after go into "Edit" screen.
Network Setting Link Aggregation Quality of Service DDNS
Quality of Service (QoS)

Enable QoS
| Add | Edit | Move Up | Move Down | ||||
| Ena... | Network Interface | Service | Protocol | Ports | Guaranteed (K... | Maximum (KB/s) | |
| Yes | WAN/LAN1 | Samba | TCP | 139,445 | 50000 | 1000000 | |
| Yes | WAN/LAN1 | AFP | TCP | 548 | 3000 | 500000 | |
Apply
DDNS
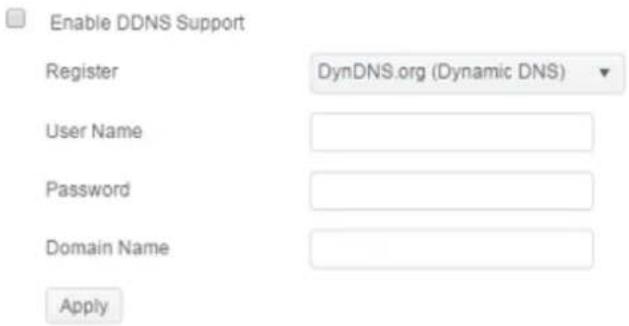
DDNS Support:
To set up a server on the Internet and enable the users to connect to it easily, a fixed and easy-to remember host name is often required. However, if the ISP provides only dynamic IP address, the IP address of the server will change from time to time and is difficult to recall. You can enable the DDNS service to solve the problem.
After enabling the DDNS service of the NAS, whenever the NAS restarts or the IP address is changed, the NAS will notify the DDNS provider immediately to record the new IP address. When the user tries to connect to the NAS by the host name, the DDNS will transfer the recorded IP address to the user.
The NAS supports the DDNS providers:
DyDNS.org(Dynamic DNS), DyDNS.org(Custom DNS), DyDNS.org(Static DNS), www.zoneedit.com, www.no-ip.com.
A description for each item as following:
| DDNS | |
| Item | Description |
| DDNS Service | Enable or disable DDNS service. |
| Register | Choose the service provider from the drop down list |
| User name | Input user name with DDNS registry. |
| Password | Input password with DDNS registry. |
| Domain name | Input domain name with DDNS registry. |
| Apply | Click "Apply" to confirm the changes. |
DDNS Support
text_image
Enable DDNS Support Register DynDNS.org (Dynamic DNS) User Name Password Domain Name ApplyRegional Option
Date/Time
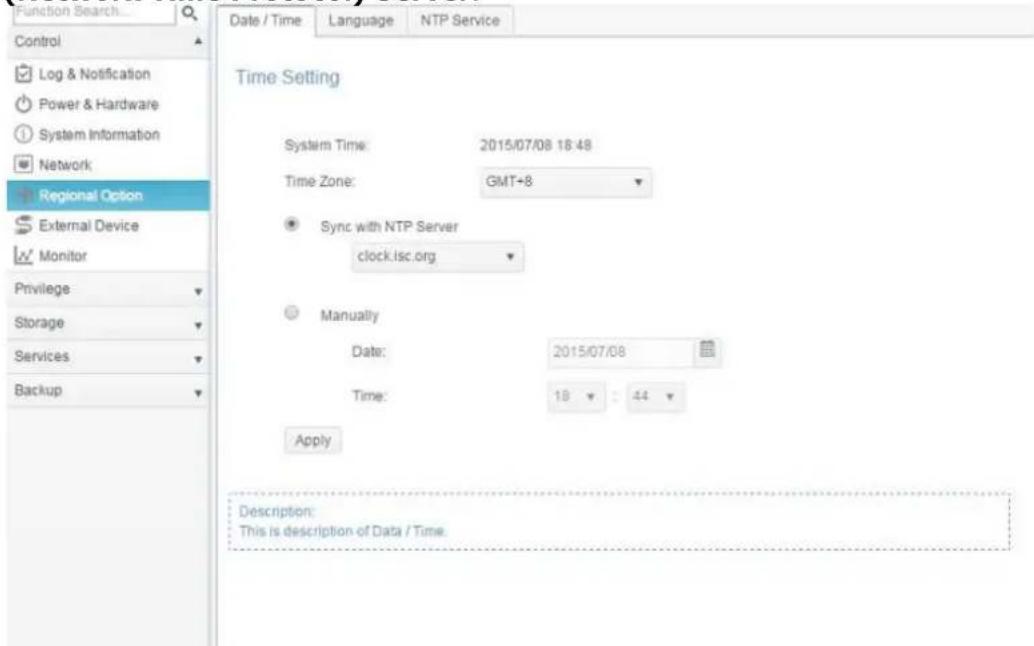
From the Regional Option menu, choose the Date/Time item and the Time Settings screen appears. Set the desired Date, Time, and Time Zone. You can also elect to synchronize the system time on Thecus IP storage with an NTP (Network Time Protocol) Server.
text_image
Function Search... Control Log & Notification Power & Hardware System Information Network Regional Option External Device Monitor Privilege Storage Services Backup Date / Time Language NTP Service Time Setting System Time: 2015/07/08 18:48 Time Zone: GMT+8 Sync with NTP Server clock.isc.org Manually Date: 2015/07/08 Time: 18 : 44 Apply Description: This is description of Data / Time.See the following table for a detailed description of each item:
| Time | |
| Item | Description |
| System Time | The current system date and time |
| Time Zone | Sets the system time zone. |
| Sync with NTP Server | Select NTP server from drop down list to sync up system time |
| Date | Sets the system date manually. |
| Time | Sets the system time manually. |
| Apply | Click Apply to save changes. |
WARNING
If an NTP server is selected, please make sure your Thecus IP storage has been setup to access the NTP server.
NTP Service
The Thecus IP storage can also provide NTP service. You can also elect to synchronize the system time on Thecus IP storage with an NTP (Network Time Protocol) Server. To do this, simply click on NTP service button to enable it.
Date / Time Language NTP Service
NTP Service

Enable NTP Service
Apply
Description:
NTP service allow other devices to sync with this NAS machine.
External Device
External HDD
From the External Devices menu, choose the External HDD, and the External HDD screen will appear. This screen provides the information about the external HDDs have connected to this system.
| External HDD Printer | |||
| Refresh | |||
| Device Type | Model | Device Capacity | Firmware Version |
| USB | Transcend 8GB | 7 GB | 8.07 |
| USB | USB Flash Disk | 3 GB | 0.00 |
Printer
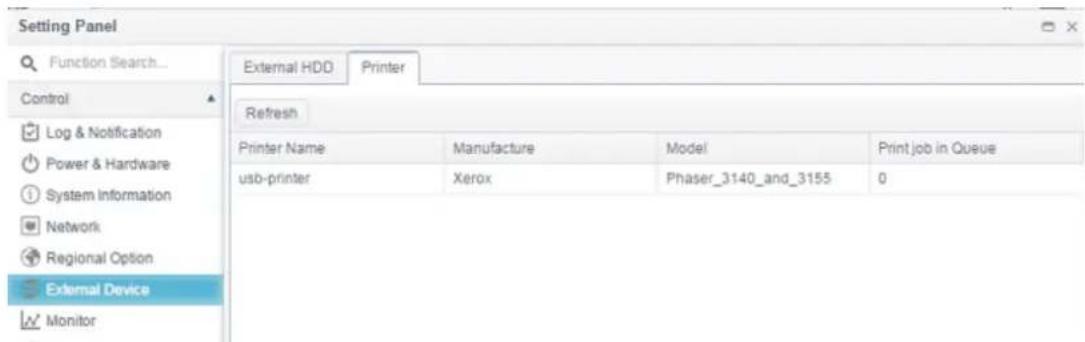
From the External Devices menu, choose the Printer item, and the Printer Information screen will appear. This screen provides the following information about the USB printer connected to the USB port.
text_image
Setting Panel Function Search... Control Log & Notification Power & Hardware System Information Network Regional Option External Device Monitor External HDD Printer Refresh Printer Name Manufacture Model Print job in Queue usb-printer Xerox Phaser_3140_and_3155 0| Printer Information | |
| Item | Description |
| Printer Name | The default is usb-printer. It can be changed by select printer then click on Edit to modify it. |
| Manufacturer | Displays the name of the USB printer manufacturer. |
| Model | Displays the model of the USB printer. |
| Printer job in Queue | Displays the print job in queue of the USB printer. |
You can configure Thecus IP storage to act as a printer server. That way, all PCs connected to the network can utilize the same printer.
NOTE
- For example to setup attached USB printer on your Windows 7 environment. Please use http://
Monitor
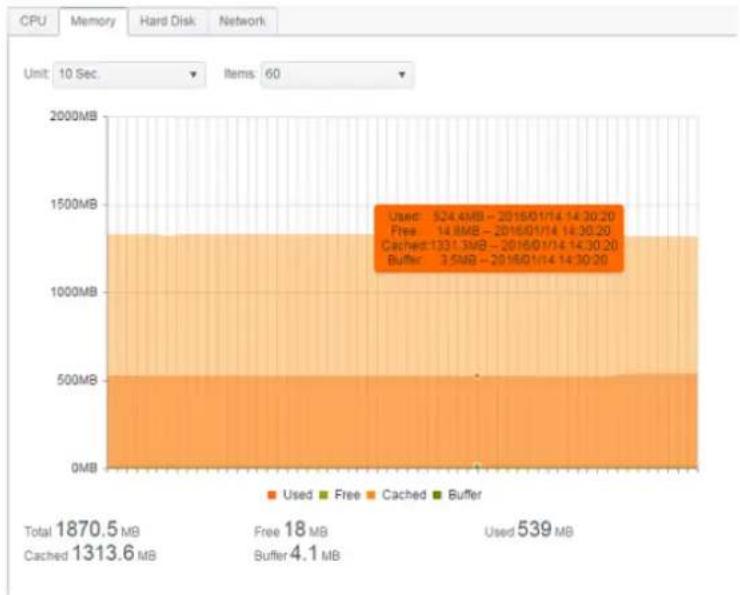
The system monitor is capable to monitor system status including CPU, memory, hard disk and network.
To monitor system status, simply click on tab of associated item and the screen will appear accordingly.
CPU

area
| Component | Percentage | | --------- | ---------- | | User | 31.2% | | System | 25.1% | | IO Wait | 0.5% |Memory
bar_stacked
| Component | Value (MB) | | :--- | :--- | | Used | 524.4 | | Free | 14.8 | | Cached | 133.1 | | Buffer | 3.5 | | Total | 1870.5 | | Cached | 1313.6 | | Free | 18 | | Buffered | 4.1 | | Items | 60 | CPU Memory Hard Disk Network Unit: 10 Sec. Item: 60 Total: 1870.5 MB Buffer: 4.1 MB Used: 539 MBHard Disk
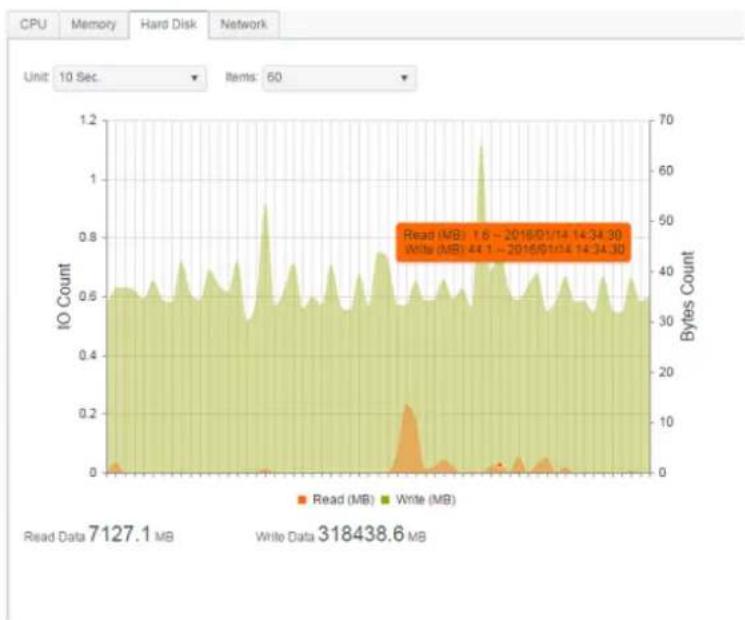
line
| Date | Read (MB) | Write (MB) | | ---------- | --------- | ---------- | | 2016/01/14 | 1.6 | 44.1 | | 2016/01/14 | 14.34 | 34.30 |Network
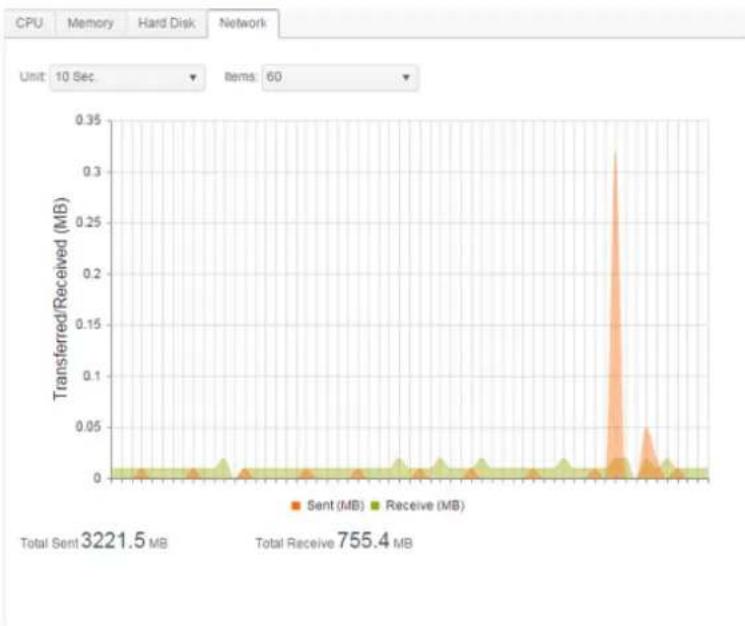
line
| Metric | Value | | ---------------- | --------- | | Total Sent | 3221.5 MB | | Total Receive | 755.4 MB |Firmware Setting
Firmware Setting
From the menu, choose the Firmware Setting item and the Firmware Setting screen appears.
Firmware Upgrade
Please select the upgraded firmware file:
Select
drop files here to upload
Follow the steps below to upgrade your firmware:
- Click the Select button to find the firmware file.
- System will check correctness of selected file and carry on for upgrade process.
- The buzzer will beep and the Busy LED will blink until the upgrade is complete.
NOTE
- Check Thecus website for the latest firmware release and release notes.
• Downgrading firmware is not permitted.
WARNING
Do not turns off the system during the firmware upgrade process. This will lead to a catastrophic result that may render the system inoperable.
Configuration Management
The System Configuration Management is to let you to download or upload stored system configurations.
Configuration Management
Please select the restored configuration file:
Select
drop files here to upload
Backup
See the following table for a detailed description of each item.
| System Configuration Management | |
| Item | Description |
| Backup | Save and export the current system configuration. |
| Select | Import a saved configuration file to overwrite the current system configuration. |
NOTE
Backing up your system configuration is a great way to ensure that you can revert to a working configuration when you are experimenting with new system settings.
The system configuration you have backed up can only be restored in the same firmware version. The backup details exclude user/group accounts.
Automatic Upgrade
The system is defaulted to enable Major upgrade mode for any MUST update. It also provides the option for Latest upgrade mode, which has Major upgrade included but also most updated fixes and latest functions.
Click on Check Upgrade Now can let you find out the latest FW version.
Automatic Upgrade
Automatically upgrade firmware when new version is available.
Major
Latest
Apply
Check Upgrade Now
Reset to Default
In any case the system needs to set back to factory default, click on Apply on Reset to Default section to reset Thecus IP storage to factory default settings.
Reset to Default
Apply
WARNING
Resetting to factory defaults will not erase the data stored in the hard disks, but WILL revert all the settings to the factory default values.
PRIVILEGE
PRIVILEGE

Shared Folder

Local Account

ADS

LDAP
Share Folder
From the PRIVILEGE menu, choose Share Folder, and the Shared Folder screen will appear. This screen allows you to create and configure folders on the Thecus IP storage volume.
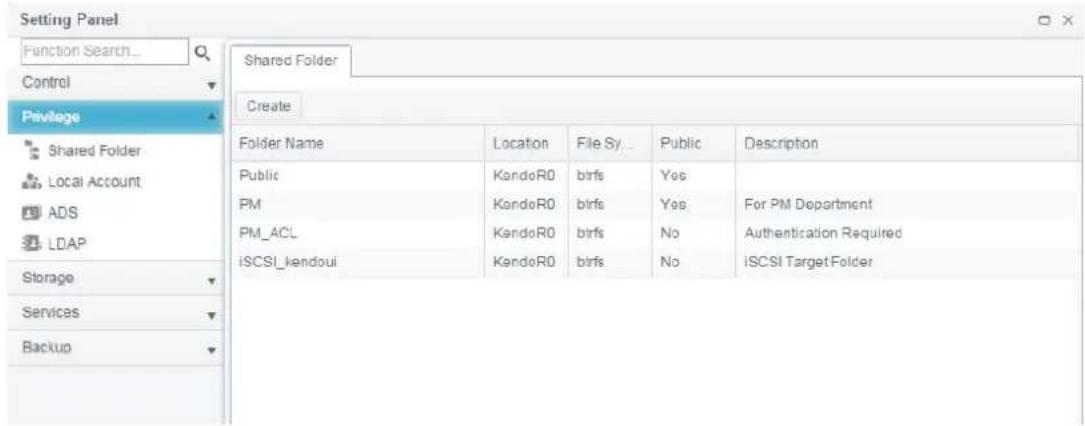
text_image
Setting Panel Function Search... Control Privilege Shared Folder Create Folder Name Location File Sy... Public Description Public KandoR0 birfs Yes PM KandoR0 birfs Yes For PM Department PM_ACL KandoR0 birfs No-Augustification Required iSCSI_kendoui KandoR0 birfs No-iSCSI Target FolderAdding Folders
On the Shared Folder screen, click on the Create button and the Create Folder screen appears. There are four sub-items related folder creation setting. Please fill in necessary information then press Apply to complete folder creation.
General Settings:
Please input required information to complete general setting of folder creation.
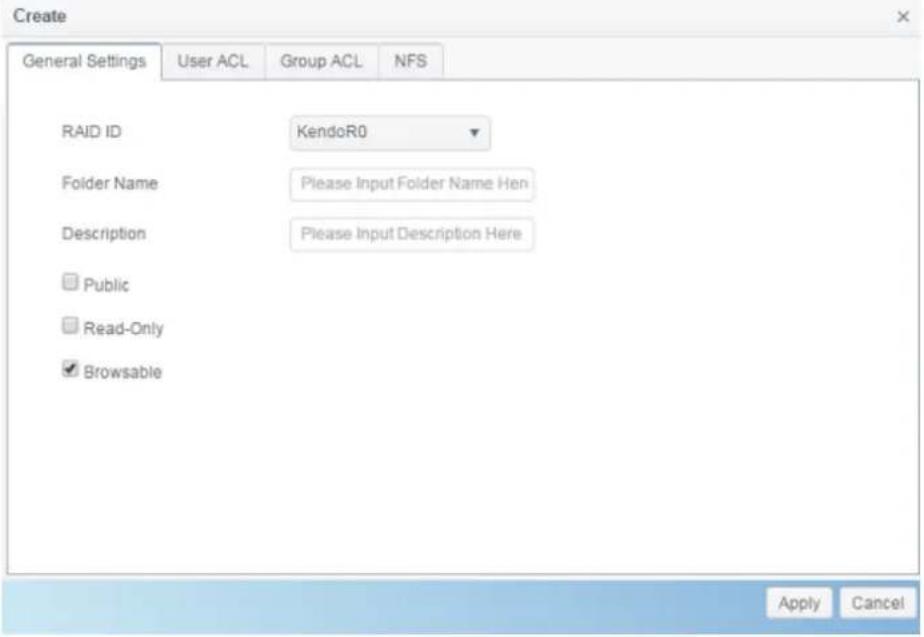
text_image
Create General Settings User ACL Group ACL NFS RAID ID KendoR0 Folder Name Please Input Folder Name Hen Description Please Input Description Here □ Public □ Read-Only ✓ Browsable Apply Cancel| Add Folder | |
| Item | Description |
| RAID ID | RAID volume where the new folder will reside. |
| Folder Name | Enter the name of the folder. |
| Description | Provide a description the folder. |
| Browseable | Enable or disable users from browsing the folder contents. If Yes is selected, then the share folder will be browseable. |
| Public | Admit or deny public access to this folder. If Yes is selected, then users do not need to have access permission to write to this folder. When accessing a public folder via FTP, the behavior is similar to anonymous FTP. Anonymous users can upload/download a file to the folder, but they cannot delete a file from the folder. |
| Read Only | Define only allowed to read from associate but not write into. |
| Apply | Press Apply to create the folder. |
NOTE
Folder names are limited to 60 characters. Systems running Windows 98 or earlier may not support file names longer than 15 characters.
User ACL:
On the Folder Create screen, press the User ACL button, and the User ACL setting screen will appear. This screen allows you to configure access to the specific folder for users. From the left hand column user lists then choose Deny, Read Only, or Writable to configure their access level. Press the Apply button to confirm your settings.
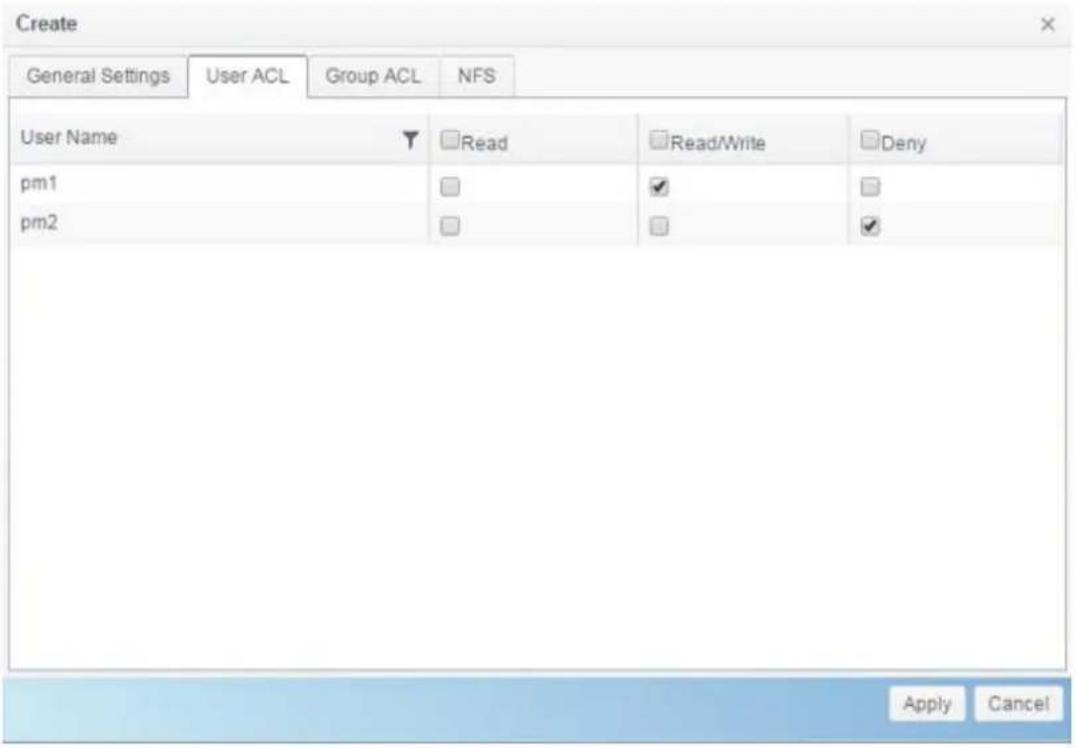
text_image
Create General Settings User ACL Group ACL NFS User Name ▼ Read □ Read/Write □ Deny pm1 □ ✓ □ pm2 □ □ ✓ Apply Cancel| User ACL setting | |
| Item | Description |
| Deny | Denies access to users who are displayed in this column. |
| Read Only | Provides Read Only access to users who are displayed in this column. |
| Writable | Provides Write access to users who are displayed in this column. |
Group ACL:
On the Folder Create screen, press the Group ACL button, and the Group ACL setting screen appears. This screen allows you to configure access to the specific folder for groups. From the left hand column group lists then choose Deny, Read Only, or Writable to configure their access level. Press the Apply button to confirm your settings.
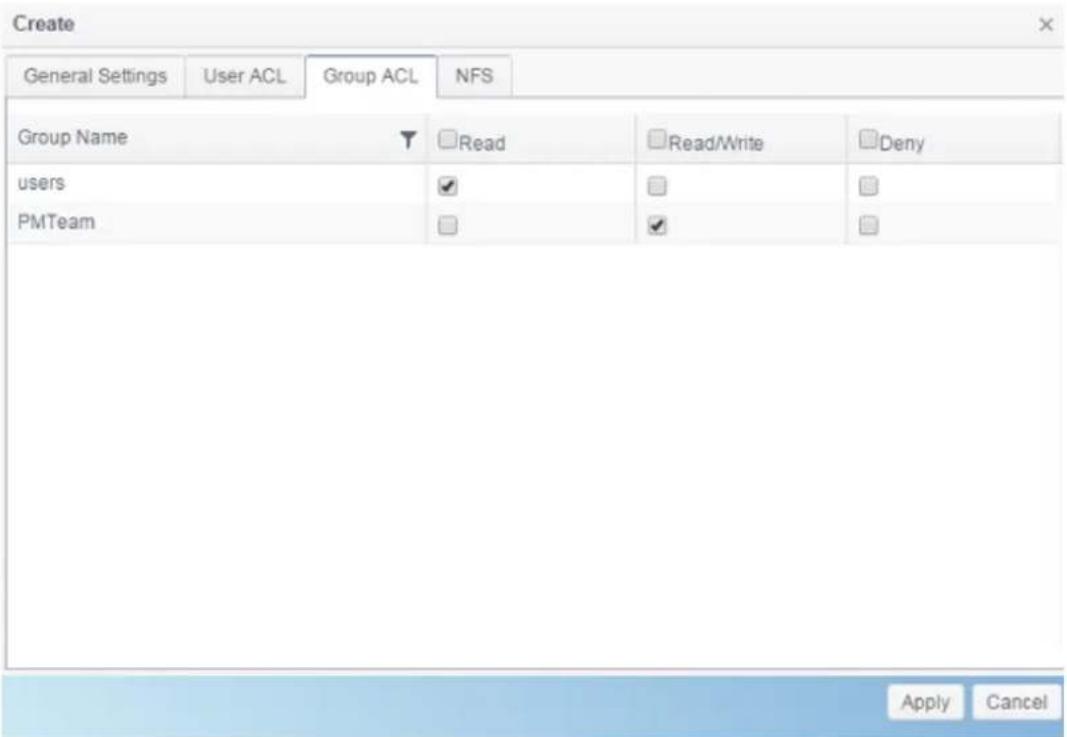
text_image
Create General Settings User ACL Group ACL NFS Group Name ▼ Read □Read/Write □Deny users ✓ □ PMTeam ✓ □| Group ACL setting | |
| Item | Description |
| Deny | Denies access to groups who are displayed in this column. |
| Read Only | Provides Read Only access to groups who are displayed in this column. |
| Writable | Provides Write access to groups who are displayed in this column. |
NOTE
If one user has belonged to more than one group with different privilege, then the priority of the privilege will be as followed:
Deny > Read Only > Writable
NFS:
To allow NFS access to the share folder, enable the NFS Service, and then set up hosts with access rights as well as related options.
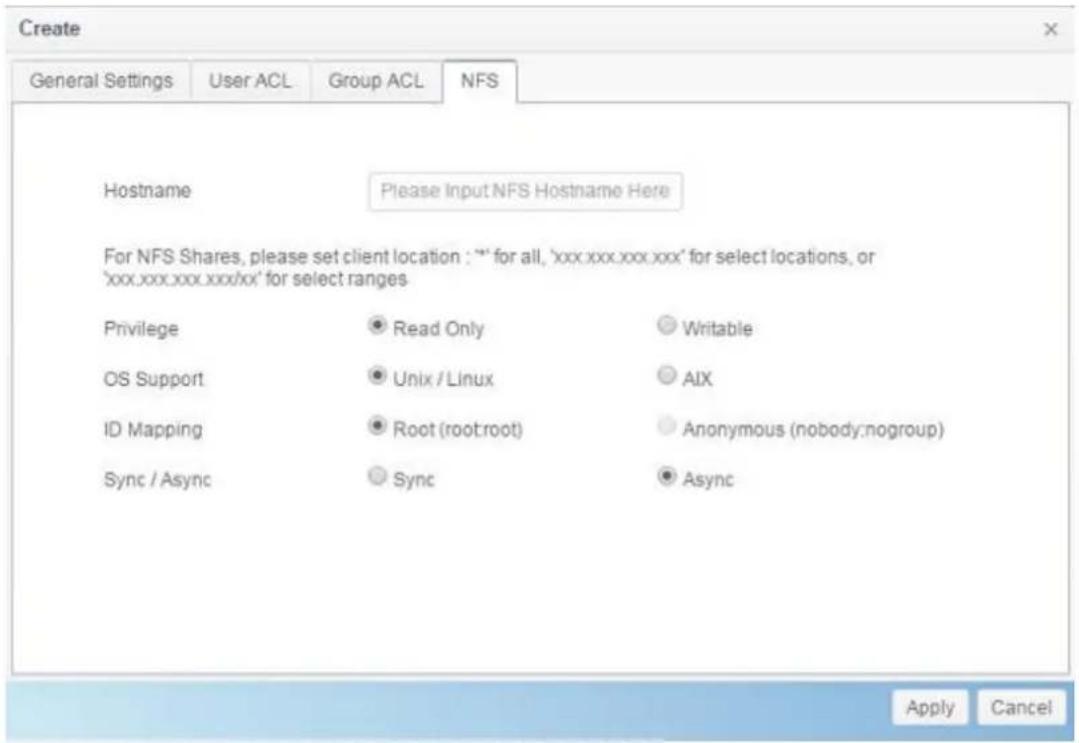
text_image
Create General Settings User ACL Group ACL NFS Hostname Please Input NFS Hostname Here For NFS Shares, please set client location : "" for all, 'xxx.xxx.xxx.xxx' for select locations, or 'xxx.xxx.xxx.xxx/xx' for select ranges Privilege Read Only Writable OS Support Unix / Linux AIX ID Mapping Root (root:root) Anonymous (nobody:nogroup) Sync / Async Sync Async Apply Cancel| NFS Share | |
| Item | Description |
| Hostname | Enter the name or IP address of the host |
| Privilege | Host has either read only or writeable access to the folder. |
| OS Support | There are two selections available:Unix / Linux SystemAIX (Allow source port > 1024)Choose the one which best fits your needs. |
| ID Mapping | There are three selections available:Guest system root account will have full access to this share (root:root).Guest system root account will be mapped to anonymous user (nobody:nogroup) on NAS.All user on guest system will be mapped to anonymous user (nobody:nogroup) on NAS.Choose the one which best fits your needs. |
| Sync / Async | Choose to determine the data "Sync" at once or "Async" in arranged batch. |
| Apply | Click to save your changes. |
Modify/Remove Folders
On the existed Folder list, click on desired Folder then the associated menu items will appear.
| Shared Folder | ||||||
| Create | Edit & ACL | SnapShot | ||||
| Folder Name | Location | File Sy... | Public | Description | ||
| Public | KendoR0 | btrfs | Yes | |||
| PM | KendoR0 | btrfs | Yes | For PM Department | ||
| PM_ACL | KendoR0 | btrfs | No | Authentication Required | ||
| iSCSI_kendoui | KendoR0 | btrfs | No | iSCSI Target Folder | ||
NOTE
The Snapshot item will appear only if:
- The system RAID volume is selected btrfs file system.
- The folder is user created not system default.
Edit & ACL:
Click on the Edit & ACL buttons, there are five sub-items related folder modification that can be choose if the associated folder has ACL defined. Or ACL related tabs won't appear and it is known as public folder.
General Settings:
The only item can't be changed is folder belonging with associated RAID volume. With others, make any changes if required.
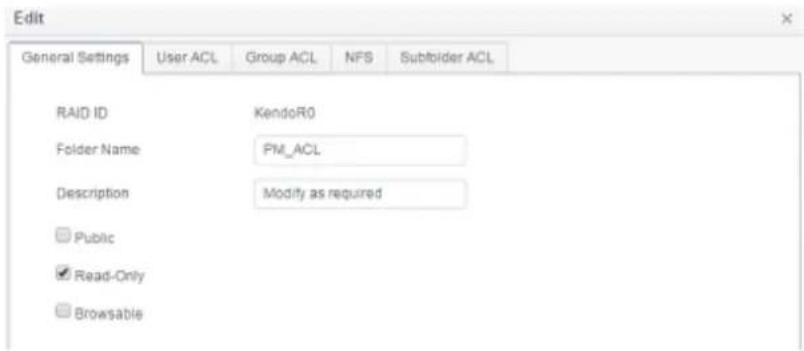
text_image
Edit General Settings User ACL Group ACL NFS Subfolder ACL RAID ID KendoR0 Folder Name PM_ACL Description Modify as required □ Public ✓ Read-Only □ BrowsableUser ACL (ACL folder only):
It is allowed to change access user list of associated folder.
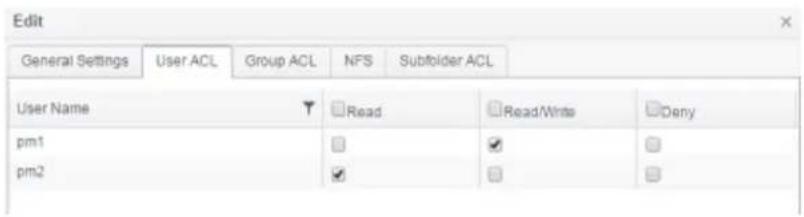
text_image
Edit General Settings User ACL Group ACL NFS Subfolder ACL User Name Read Read/Write Deny pm1 ✓ □ pm2 ✓ □ □Group ACL (ACL folder only):
It is allowed to change access group list of associated folder.
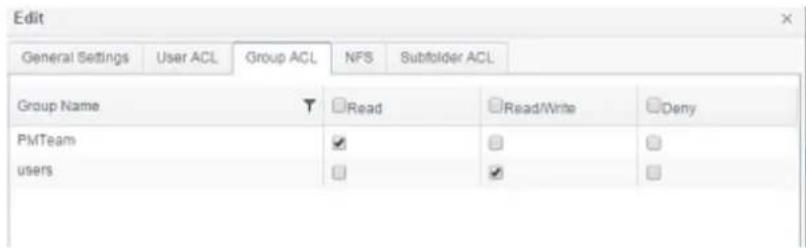
text_image
Edit General Settings User ACL Group ACL NFS Subfolder ACL Group Name Read Read/Write Deny PMTeam ✓ □ □ users □ ✓ □NFS:
It is allowed to change the existing NFS access setting or create a new one. To modify existing setting, click on from list then press Edit tab,
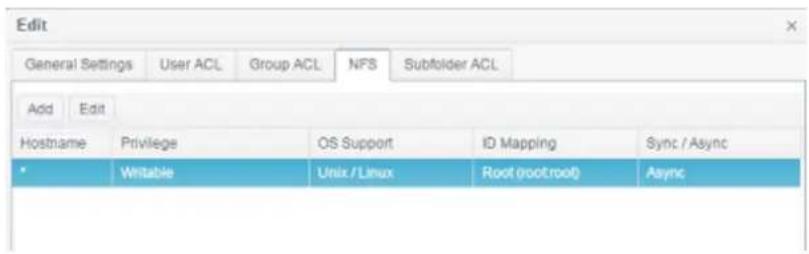
text_image
Edit General Settings User ACL Group ACL NFS Subfolder ACL Add Edit Hostname Privilege OS Support ID Mapping Sync /Async Writable Unix/Linux Root(root. root) AsyncOr click on Add tab to create new access setting.
Subfolder ACL:
Other than folder level access control support, Thecus IP storage is capable for sub-folder ACL. To setup sub-folders ACL, click on Subfolder ACL tab and screen shows as below.
The left hand pane is the subfolders list for the associated parent folder. Click on desired subfolder and the right hand pane will appear and have system's user and group. Make necessary changes for user or group access right of associated subfolder. Please do remember to click on Save ACL tab once setting completed.
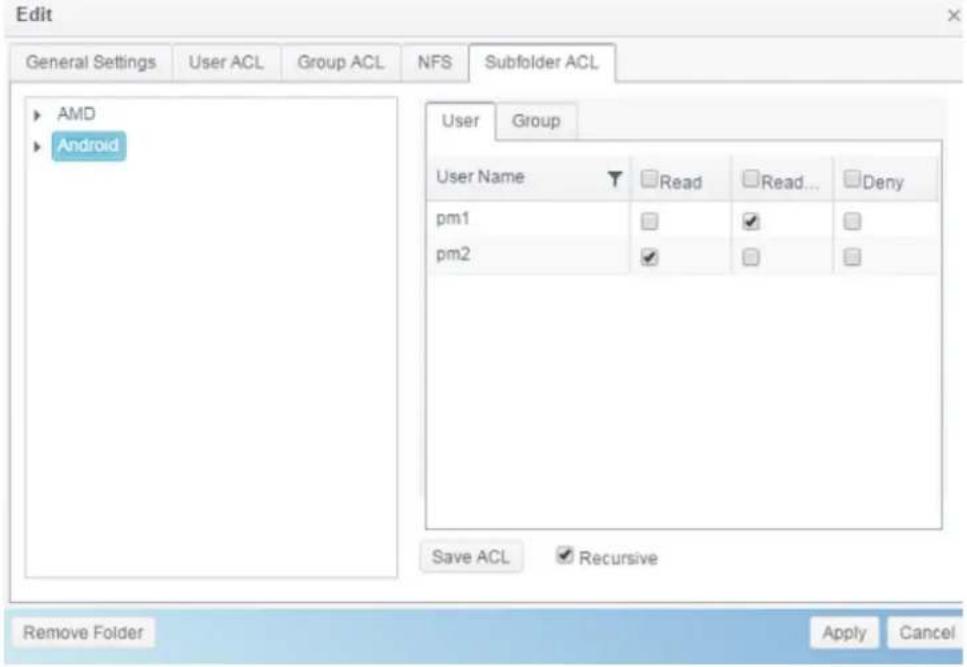
text_image
Edit General Settings User ACL Group ACL NFS Subfolder ACL AMD Android User Group User Name ▼ Read □Read... □Deny pm1 □ ✓ □ pm2 ✓ □ ✓ Save ACL ✓ Recursive Remove Folder Apply CancelNOTE
The ACL can only be set for share and sub-folders level, not for files.
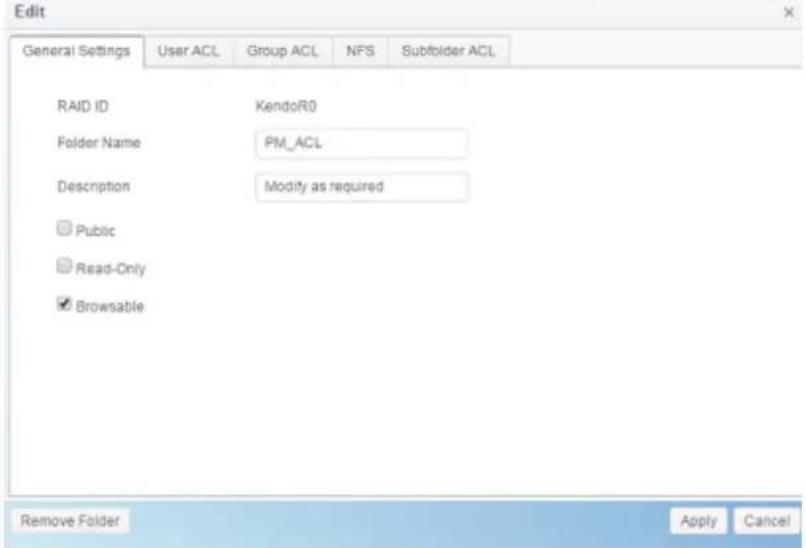
Remove Folder:
Click on Remove Folder tab and associated folder will be deleted from system.
text_image
Edit General Settings User ACL Group ACL NFS Subfolder ACL RAID ID KendoR0 Folder Name PM_ACL Description Modify as required □ Public □ Read-Only ✓ Browsable Remove Folder Apply CancelWARNING
All the data stored in the folder will be deleted once the folder is deleted. The data will not be recoverable.
Snapshot
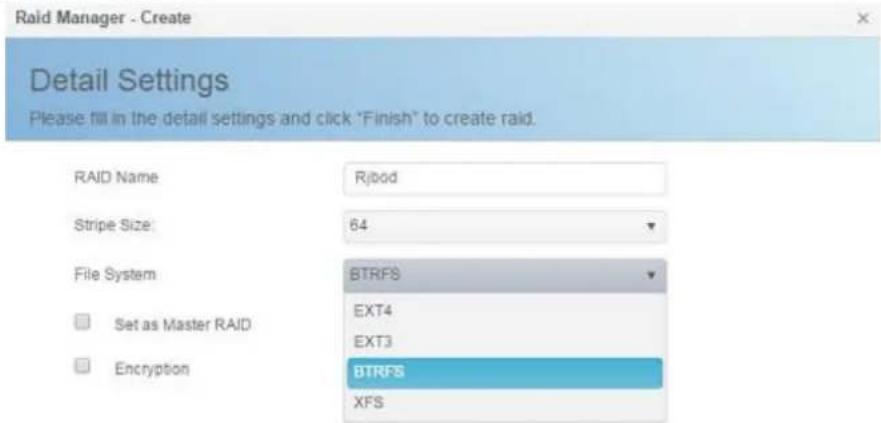
Snapshot (Btrfs file system only):
SMB and enterprise Thecus IP storage systems are now capable of saving 16 snapshot versions of files and folders. For Snapshot to function, a "BTRFS" file system is required.
text_image
Raid Manager - Create Detail Settings Please fill in the detail settings and click "Finish" to create raid. RAID Name Rjpod Stripe Size 64 File System BTRFS Set as Master RAID EXT4 Encryption BTRFS XFS
text_image
Previous Create Finished CancelAny folder using a "BTRFS" file system is capable of being included in the Snapshot function. In the "Share Folder" submenu, the Snapshot button is available in the tool bar.
| Shared Folder | ||||||
| Create | Edit & ACL | SnapShot | ||||
| Folder Name | Create ... | File Sy... | Public | Description | Quota Limit | |
| Snapshot | KendoR5 | btrfs | No | * | ||
| Public | KendoR5 | btrfs | Yes | * | ||
| HOME | KendoR5 | btrfs | Yes | * | ||
| eSATAHDD | KendoR5 | btrfs | Yes | * | ||
| USBHDD | KendoR5 | btrfs | Yes | * | ||
Taking a Snapshot
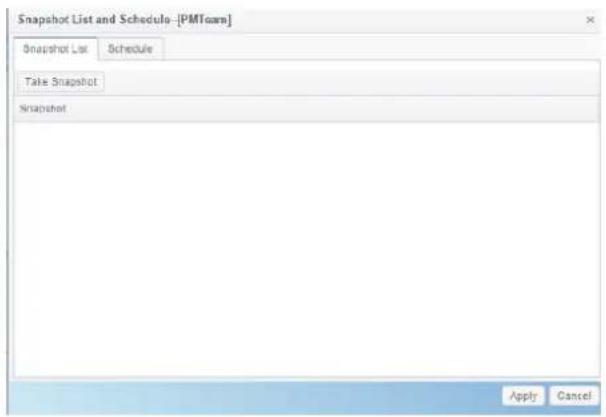
Click on the Snapshot button. The management screen will then appear as below for the associated folder.
text_image
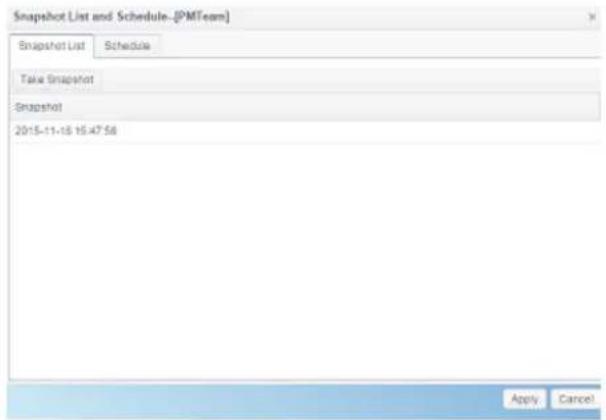
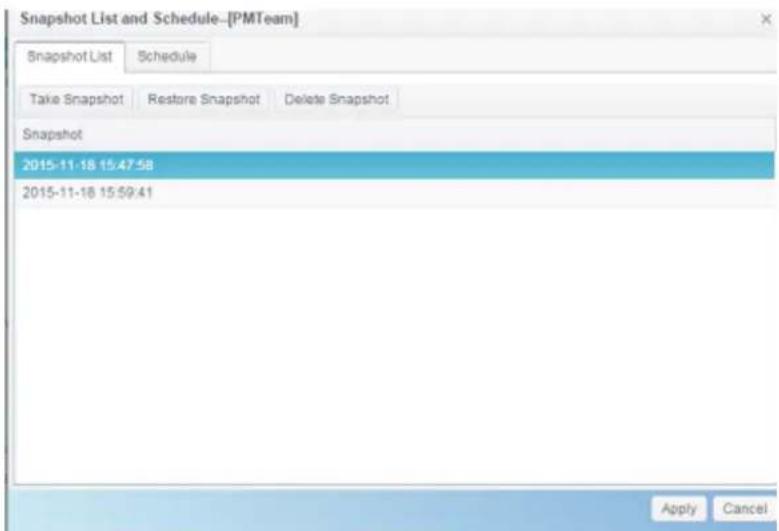
Snapshot List and Schedule - [PMToam] Snapshot List Schedule Take Snapshot Snapshot Apply CancelTo manually take a Snapshot, simply click Take Snapshot and the Snapshot history will be listed. It can store up to 16 versions.
text_image
Snapshot List and Schedule-[PMTeam] Snapshot List Schedule Take Snapshot Snapshot 2015-11-18 15:47:56 Apply CancelTo locate where the Snapshot files or folders are stored, please browse to \System_IP\snapshot. Please note that you will need to have the relevant folder permissions enabled for your account.
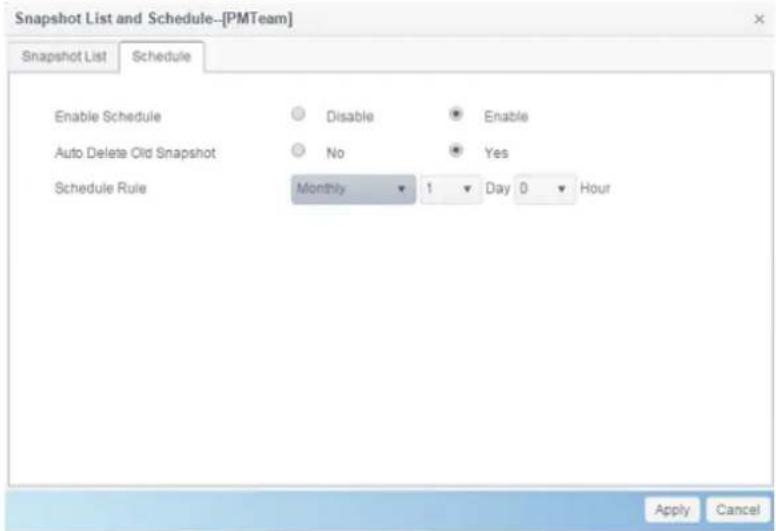
Besides manual Snapshots, this feature also allows for scheduled backups. Click on Schedule and the setup screen will appear. Check "Enable Snapshot Schedule" and select the desired Snapshot interval. Options include Daily, Weekly, or Monthly.
Since files and folders are limited to 16 Snapshots versions, the "Auto Delete Old Snapshot" option allows for the removal of the oldest version automatically once the limit is reached.
text_image
Snapshot List and Schedule--[PMTeam] Snapshot List Schedule Enable Schedule Disable Enable Auto Delete Old Snapshot No Yes Schedule Rule Monthly 1 Day 0 Hour Apply CancelSnapshot Restore
To restore a Snapshot, simply select the desired version from list and click "Restore Snapshot". Once the restore confirmation has been made, the selected Snapshot will overwrite the current associated file or folder.
text_image
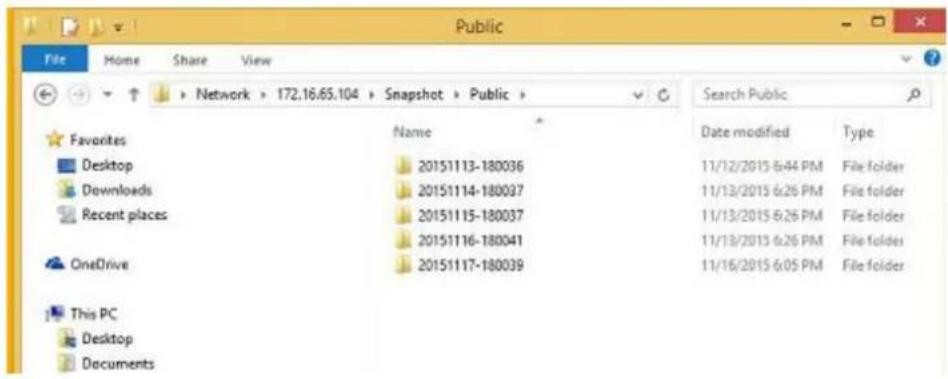
Snapshot List and Schedule-[PMTeam] Snapshot List Schedule Take Snapshot Restore Snapshot Delete Snapshot Snapshot 2015-11-18 15:47:58 2015-11-18 15:59:41 Apply CancelThe other way to restore a recorded Snapshot version is manually by browsing to the "Snapshot" folder via SAMBA (\System_IP\snapshot). All Snapshot versions are stored here, and you can copy or paste to restore a version manually.
For example, the NAS system at 172.16.65.104 has a folder named "Public" with a Snapshot version backed up. If the user were to browse to \172.16.65.104\Snapshot, the following details would be visible:
text_image
Public File Home Share View Network 172.16.65.104 Snapshot Public Search Public Favorites Name Date modified Type Desktop 20151113-180036 11/12/2015 6:44 PM File folder Downloads 20151114-180037 11/13/2015 6:26 PM File folder Recent places 20151115-180037 11/13/2015 6:26 PM File folder OneDrive 20151116-180041 11/13/2015 6:26 PM File folder OneDrive 20151117-180039 11/16/2015 6:05 PM File folder This PC Desktop DocumentsNOTE
To access the Snapshot folder, a user requires the relevant authentication rights.
NOTE
If the Snapshot folder is used for iSCSI purposes, it can only be restored from the WebUI (i.e. through the Snapshot feature) and cannot be done manually.
Snapshot Removal
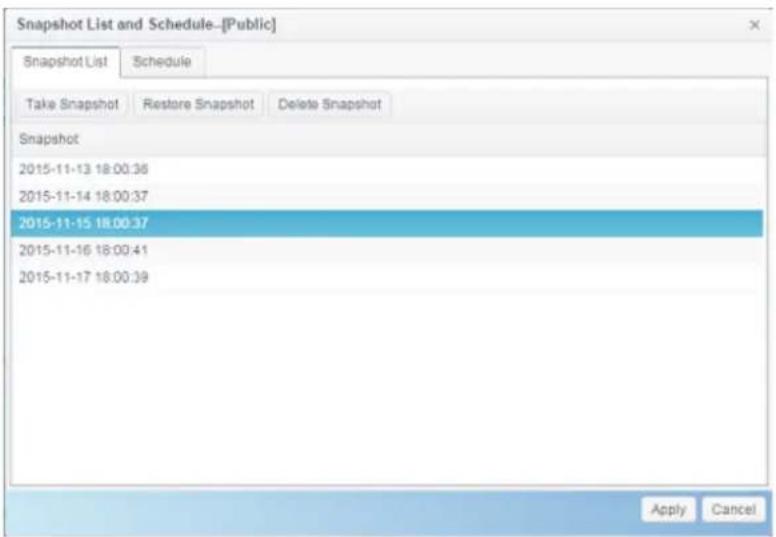
To remove a Snapshot, simply select the desired version from list and click "Delete Snapshot".
text_image
Snapshot List and Schedule-[(Public)] Snapshot List Schedule Take Snapshot Restore Snapshot Delete Snapshot Snapshot 2015-11-13 18:00:36 2015-11-14 18:00:37 2015-11-15 18:00:37 2015-11-16 18:00:41 2015-11-17 18:00:39 Apply CancelLocal Account
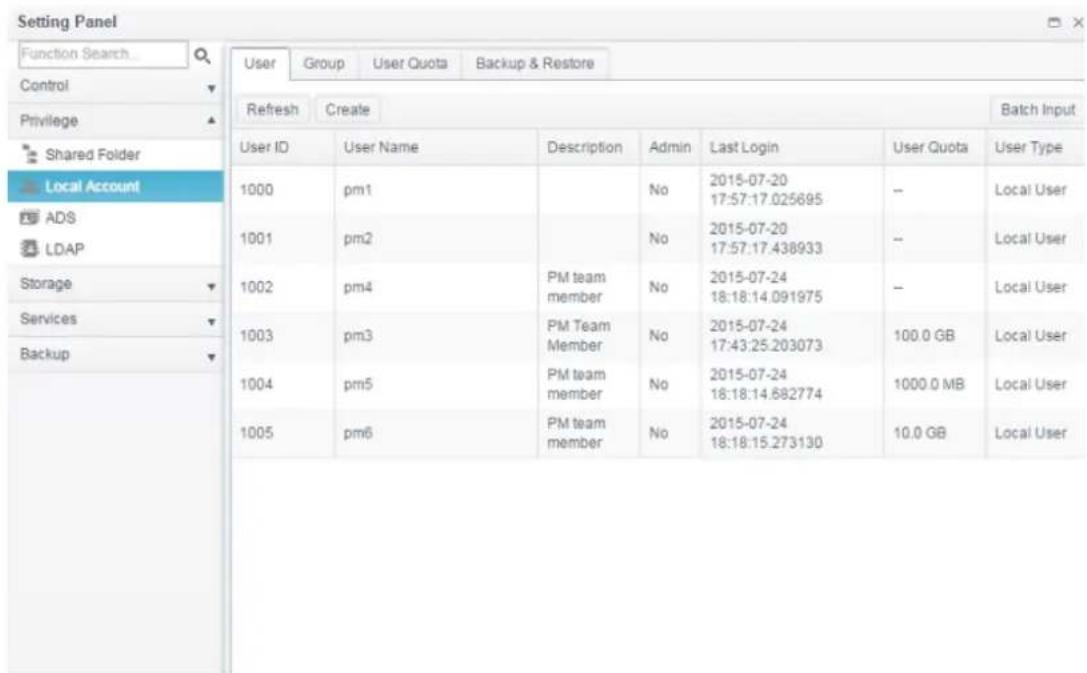
The Thecus IP storage has built-in user database that allows administrators to manage user access using different group policies. From the Privilege menu of Local Account, you can create, modify, and delete users, and assign them to groups that you designate.
text_image
Setting Panel Function Search... Control Privilege Shared Folder Local Account ADS LDAP Storage Services Backup User ID User Name Description Admin Last Login User Quota Batch Input 1000 pm1 No 2015-07-20 -- Local User 1001 pm2 No 2015-07-20 -- Local User 1002 pm4 PM team member No 2015-07-24 -- Local User 1003 pm3 PM Team Member No 2015-07-24 100.0 GB Local User 1004 pm5 PM team member No 2015-07-24 1000.0 MB Local User 1005 pm6 PM team member No 2015-07-24 10.0 GB Local UserUser
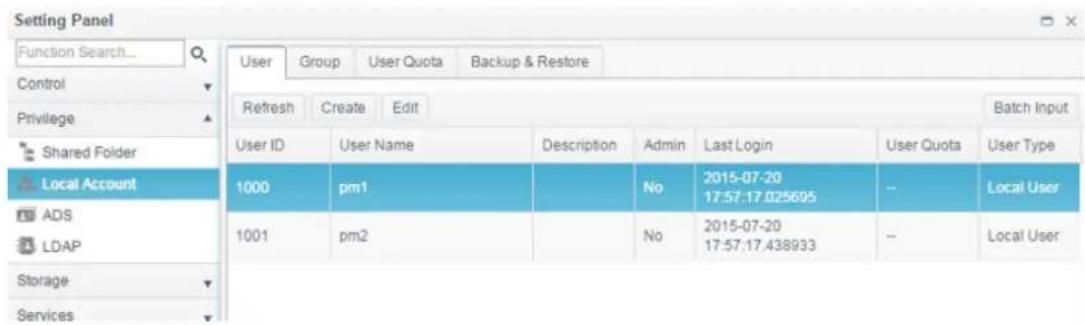
From the Local Account menu, choose the User item, and the Local User Configuration screen appears. This screen allows you to Add, Edit, Remove and Batch Input local users.
text_image
Setting Panel Function Search... Control Privilege Shared Folder Local Account ADS LDAP Storage Services User Group User Quota Backup & Restore Refresh Create Edit Batch Input User ID User Name Description Admin Last Login User Quota User Type 1000 pm1 No 2015-07-20 17:57:17.025695 -- Local User 1001 pm2 No 2015-07-20 17:57:17.438933 -- Local User| Local User Configuration | |
| Item | Description |
| Refresh | Press Refresh to reload user list |
| Create | Press the Create button to add a user to the list of local users. |
| Edit | Press the Edit button to modify a local user. |
| Batch Input | Press the Batch Input button and associated screen appear to allow using batch input of local users. |
Create User:
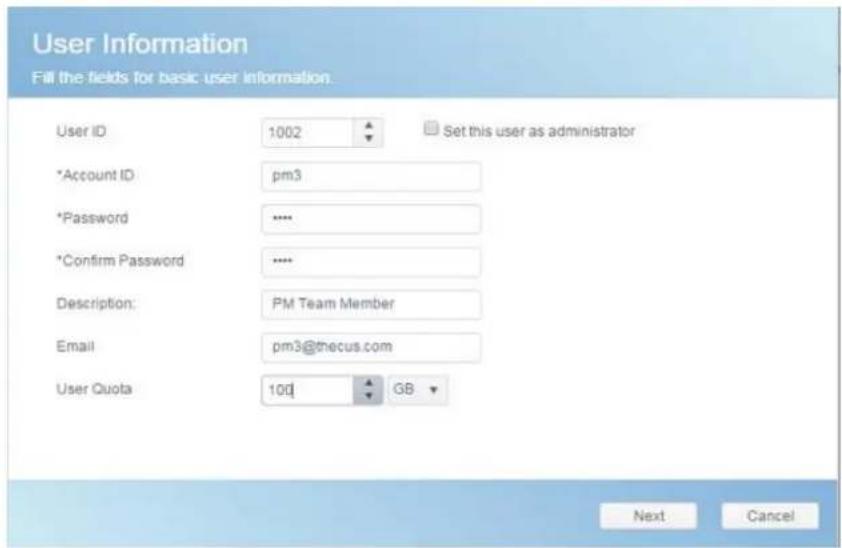
On the User screen, press the Create button and the Create User screen appears. Follow the wizard and system will lead you to complete the setting.
- Enter a User ID number or leave it to use the system default value.
- Tick on check box if this can be acted as administrator.
- On the Account ID field, enter a name for the User.
- Enter a User ID number or leave blank to use the system default value.
- Enter a password in the Password box and re-enter the password in the Confirm box.
- Input the user description
- Input user's mail address
- Input user quota or leave it as default for no limitation.
- Press the Next button to next page.
text_image
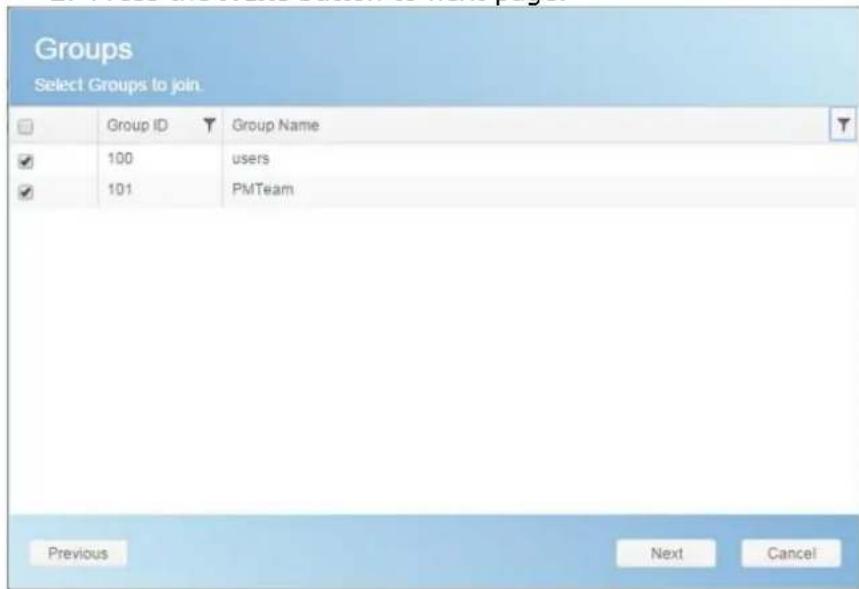
User Information Fill the fields for basic user information. User ID 1002 *Account ID pm3 *Password **** *Confirm Password **** Description: PM Team Member Email pm3@thecus.com User Quota 10q GB Next Cancel- Select which group the user will belong to. Group Members is a list of groups this user belongs to.
- Press the Next button to next page.
text_image
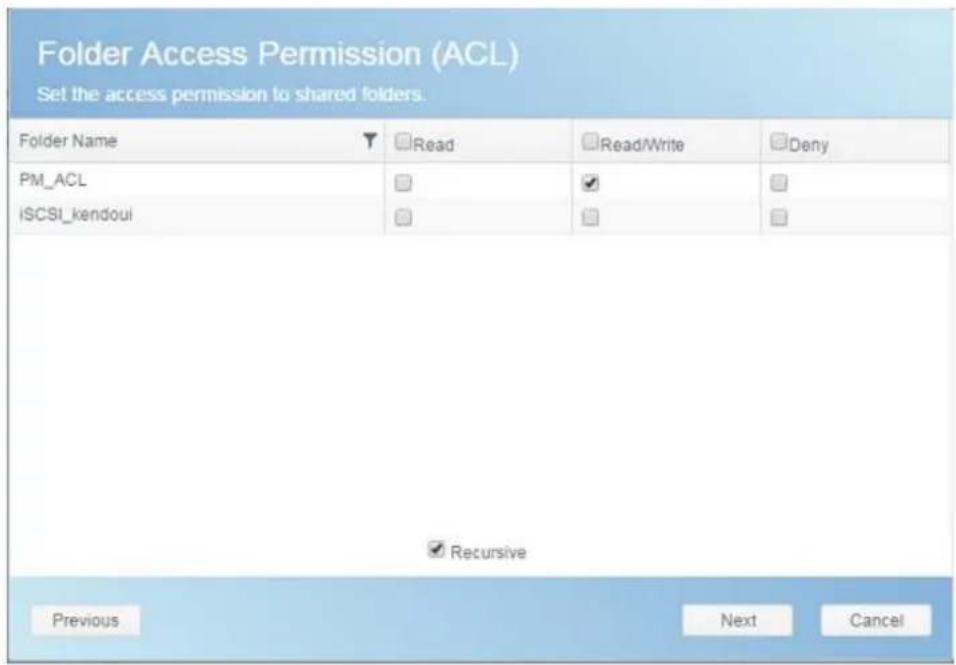
Groups Select Groups to join. Group ID Group Name 100 users 101 PMTeam Previous Next Cancel- Set the access right for ACL folders.
- Checked "Recursive" box if it will apply to all subfolders
- Press the Next button go to next page.
text_image
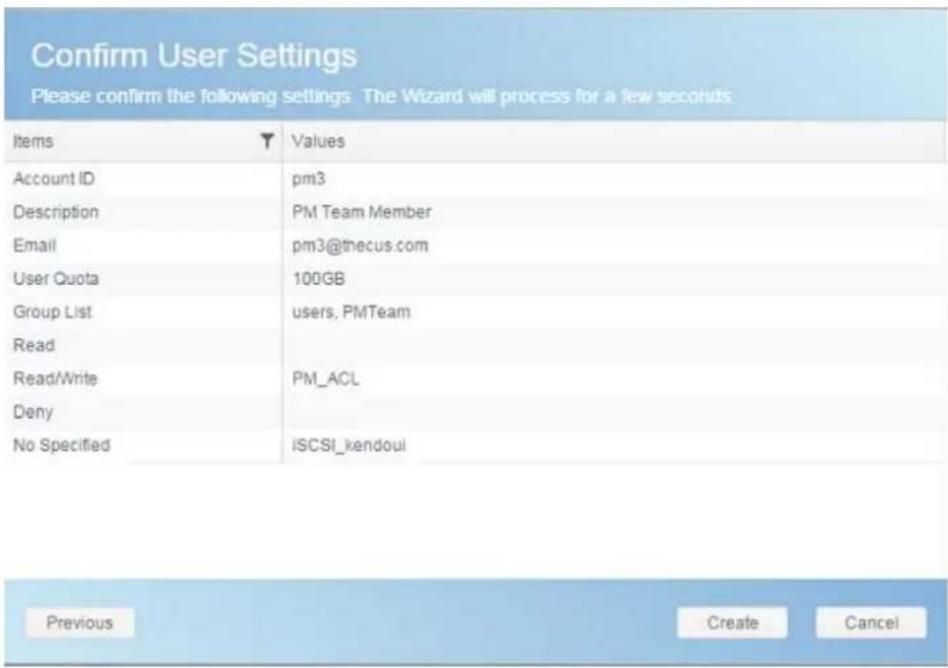
Folder Access Permission (ACL) Set the access permission to shared folders. Folder Name Read Read/Write Deny PM_ACL ISCSI_kendoui Recursive Previous Next Cancel- The page has listed user's information for double check.
- Press the Create button and the user is created.
text_image
Confirm User Settings Please confirm the following settings The Wizard will process for a few seconds Items Values Account ID pm3 Description PM Team Member Email pm3@thecus.com User Quota 100GB Group List users, PMTeam Read Read/Write PM_ACL Deny No Specified ISCSI_kendoul Previous Create CancelBatch Input:
The Thecus IP storage can also add users and groups in batch mode. This enables you to conveniently add numerous users and groups automatically by importing a simple Microsoft Excel (*.csv) file.
From the User menu, click Batch Input and the Batch User Input Creation dialogue will appear. To import your list of users and groups, follow these steps:
- Click on the Select button to locate your Excel (.csv) file.
- Click Confirm Batch Input to confirm import.
- Or on the left bottom corner can download sample file to manipulate.
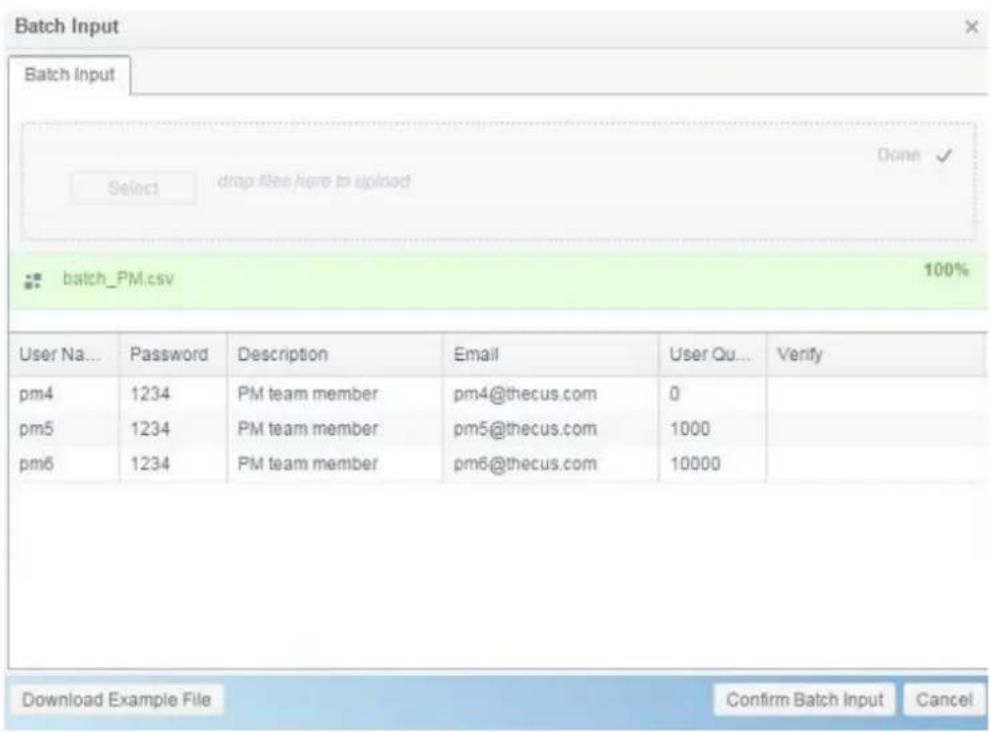
text_image
Batch Input Batch Input Select drop files here to upload Done ✓ batch_PM.csv 100% User Na... Password Description Email User Qu... Verify pm4 1234 PM team member pm4@thecus.com 0 pm5 1234 PM team member pm5@thecus.com 1000 pm6 1234 PM team member pm6@thecus.com 10000 Download Example File Confirm Batch Input CancelNOTE
All users are automatically assigned to the 'users' group.
Edit User:
- Select an existing user from the list.
- Click on the Edit button, and the User Setting screen appears.
- Making the changes if need.
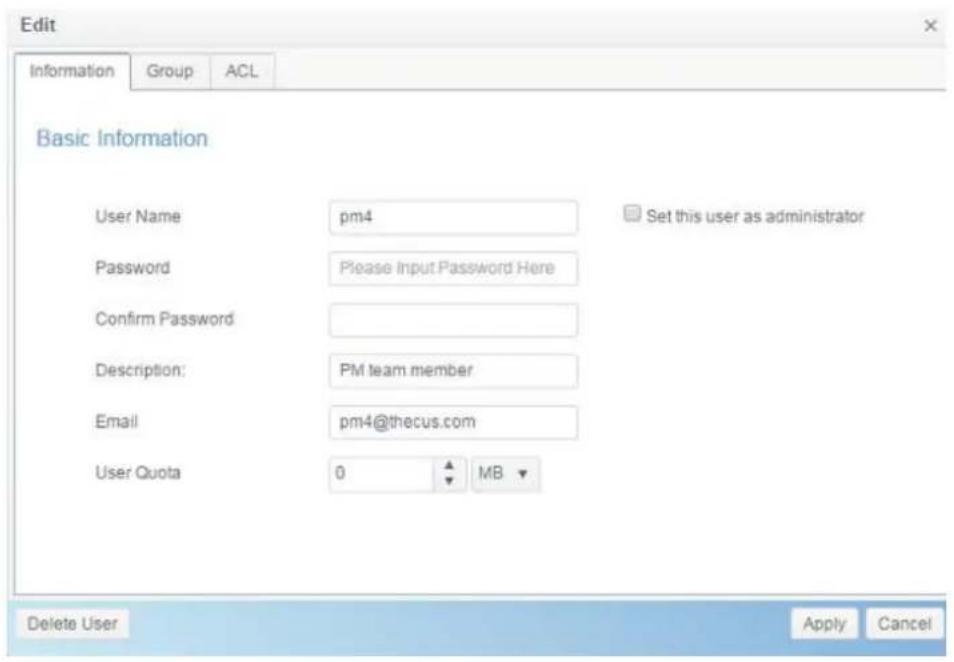
text_image
Edit Information Group ACL Basic Information User Name pm4 Password Please Input Password Here Confirm Password Description: PM team member Email pm4@thecus.com User Quota 0 MB Delete User Apply CancelDelete User:
- Select an existing user from the list.
- Click on the Delete User button, and the User will remove from system.
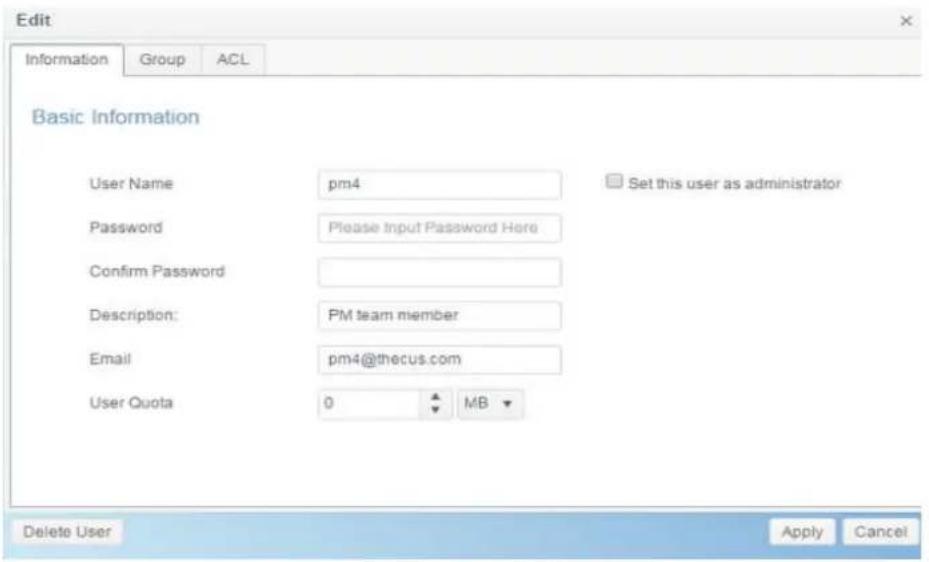
text_image
Edit Information Group ACL Basic Information User Name pm4 Password Please Input Password Here Confirm Password Description: PM team member Email pm4@thecus.com User Quota 0 MB Delete User Apply CancelGroup
Create Group:
On the Group screen, press the Create button and the Create Group screen appears. Follow the wizard and system will lead you to complete the setting.
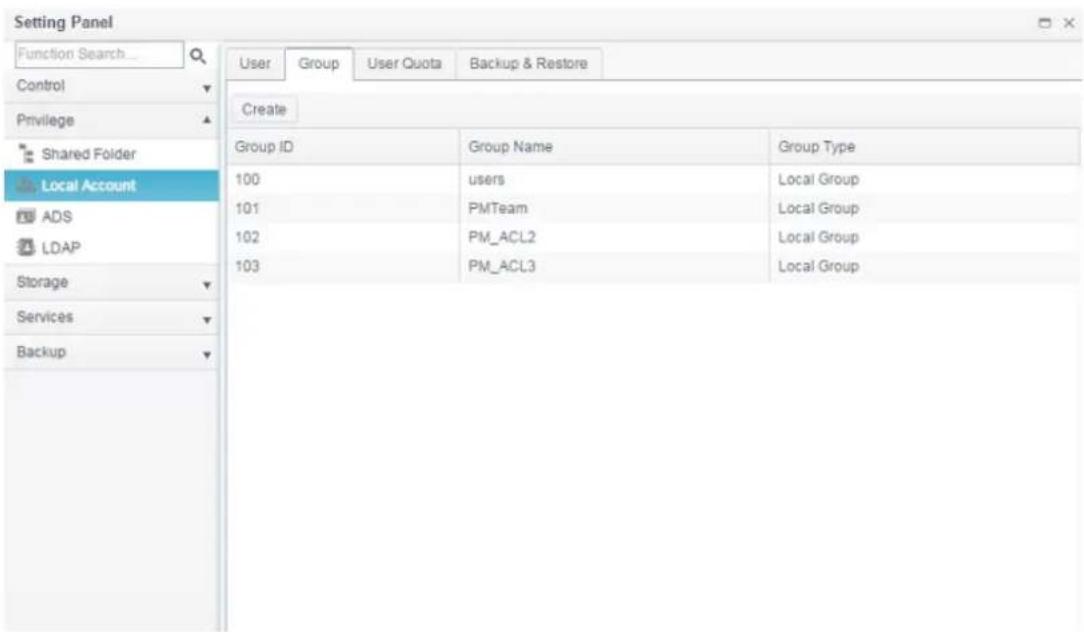
text_image
Setting Panel Function Search... Control Privilege Shared Folder Local Account ADS LDAP Storage Services Backup User Group User Quota Backup & Restore Create Group ID Group Name Group Type 100 users Local Group 101 PMTeam Local Group 102 PM_ACL2 Local Group 103 PM_ACL3 Local Group- Enter a Group ID number or leave it to use the system default value.
- On the Group Name field, enter a name for the Group.
- Press the Next button to next page.
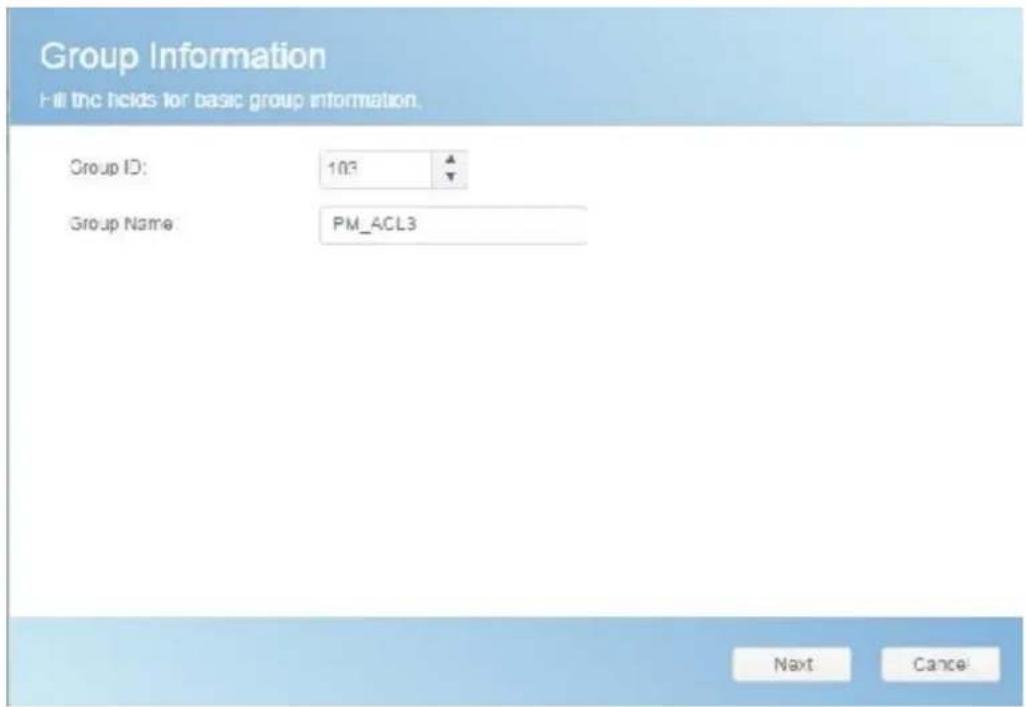
text_image
Group Information Fill the holds for basic group information. Group ID: 103 Group Name: PM_ACL3 Next Cancel- Select group members from user list.
- Press the Next button to next page.
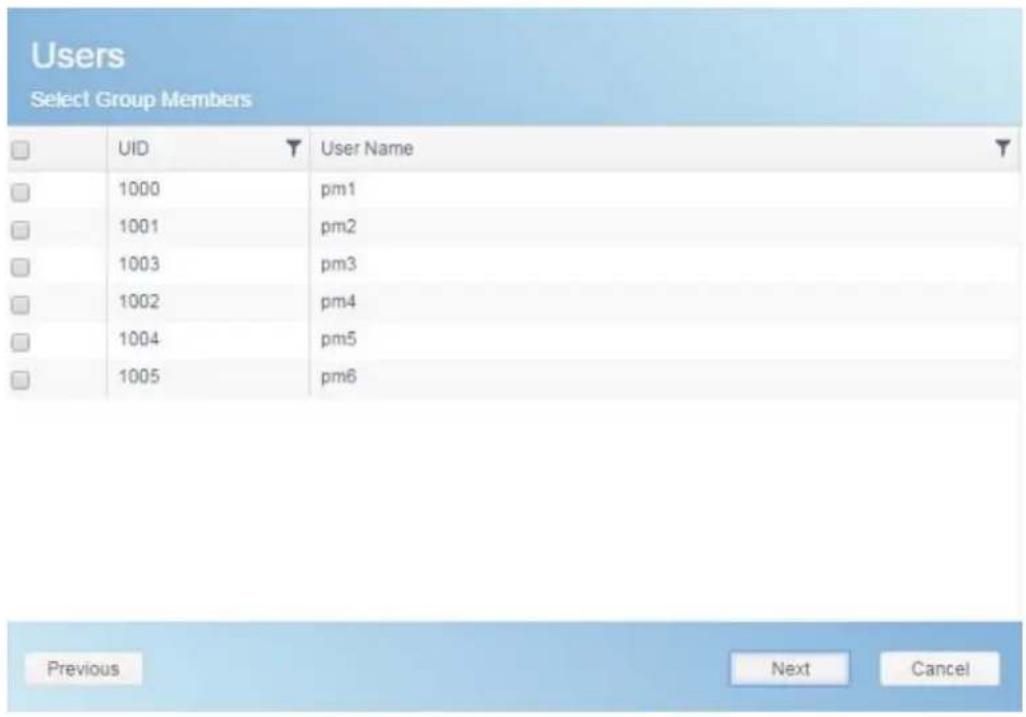
text_image
Users Select Group Members UID User Name 1000 pm1 1001 pm2 1003 pm3 1002 pm4 1004 pm5 1005 pm6 Previous Next Cancel- Set the access right for ACL folders.
- Checked "Recursive" box if it will apply to all subfolders
- Press the Next button to go to next page.
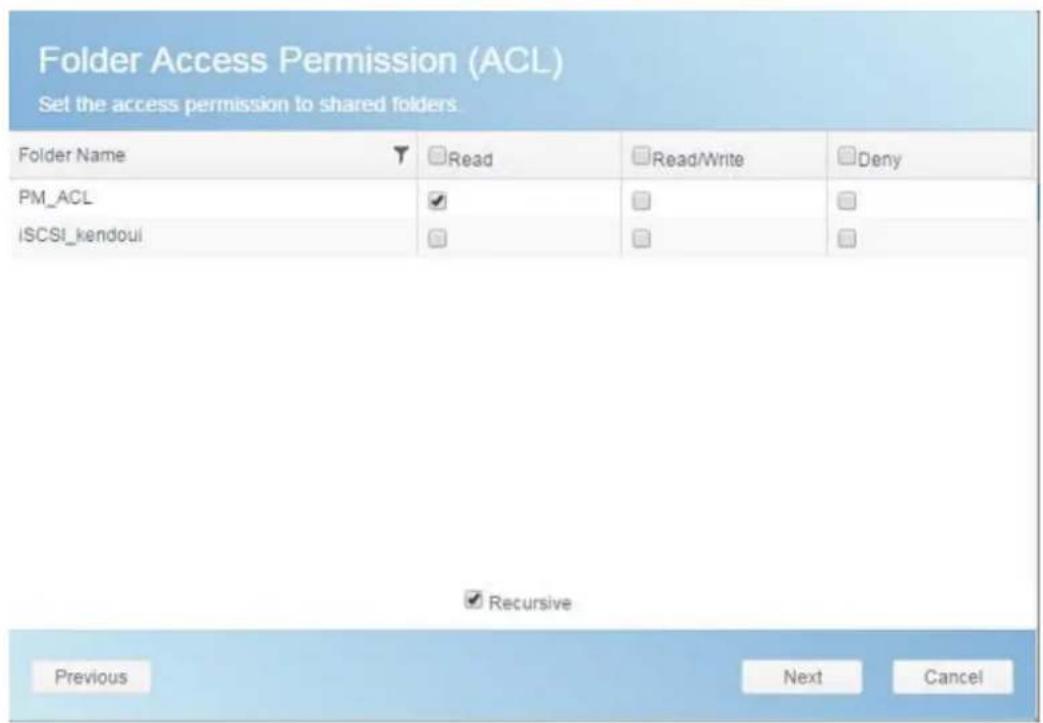
text_image
Folder Access Permission (ACL) Set the access permission to shared folders. Folder Name Read Read/Write Deny PM_ACL ✓ ✓ ✓ ISCSI_kendoul ✓ ✓ ✓ ✓ Previous Next Cancel- The page has listed group's information for double check.
- Press the Create button and the group is created.
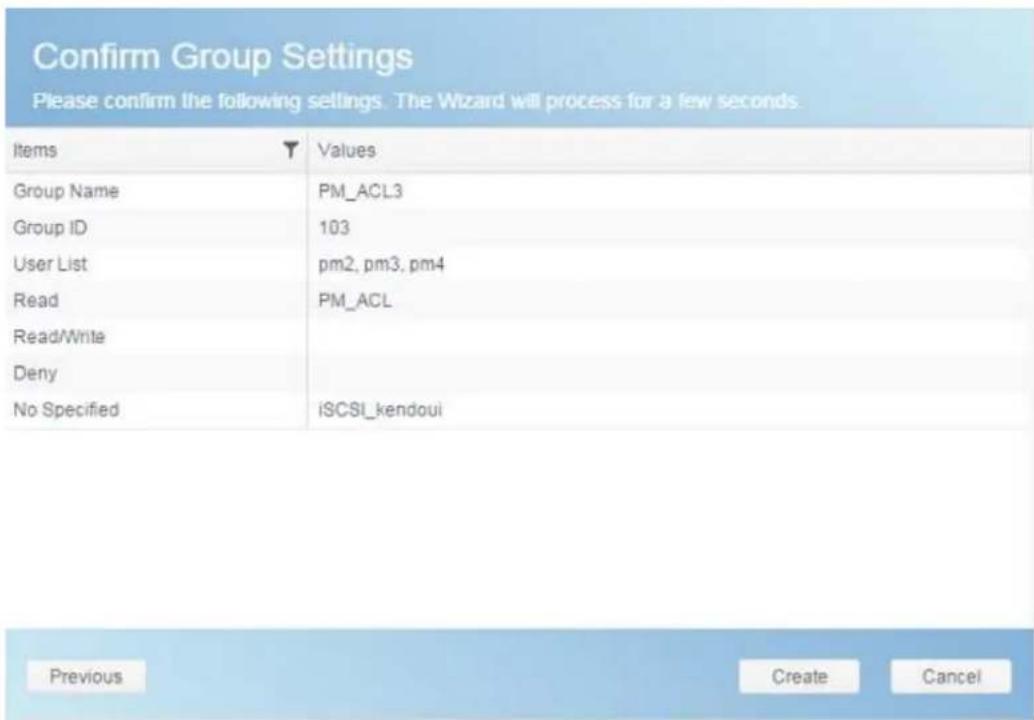
text_image
Confirm Group Settings Please confirm the following settings. The Wizard will process for a few seconds. Items Values Group Name PM_ACL3 Group ID 103 User List pM2, pm3, pm4 Read PM_ACL Read/Write Deny No Specified%iSCSI_kendoui Previoussi Create CancelEdit Group:
- Select an existing group from the list.
- Click on the Edit button, and the Group Setting screen appears.
- Making the changes if need.
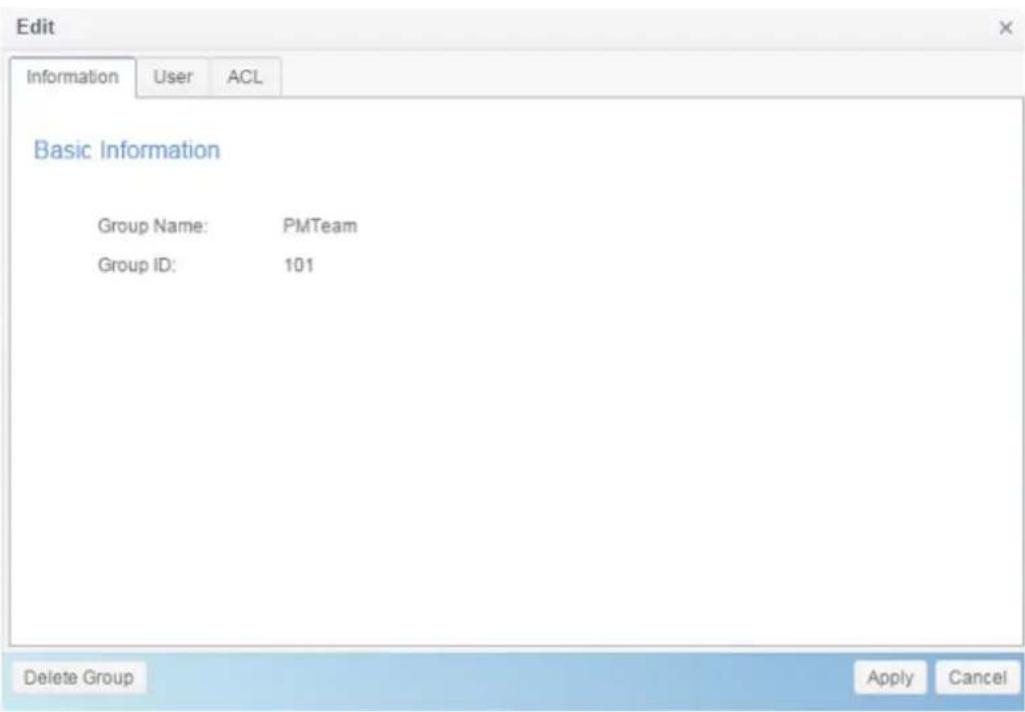
text_image
Edit Information User ACL Basic Information Group Name: PMTeam Group ID: 101 Delete Group Apply CancelDelete Group:
-
Select an existing user from the list.
-
Click on the Delete Group button, and the User will remove from system.
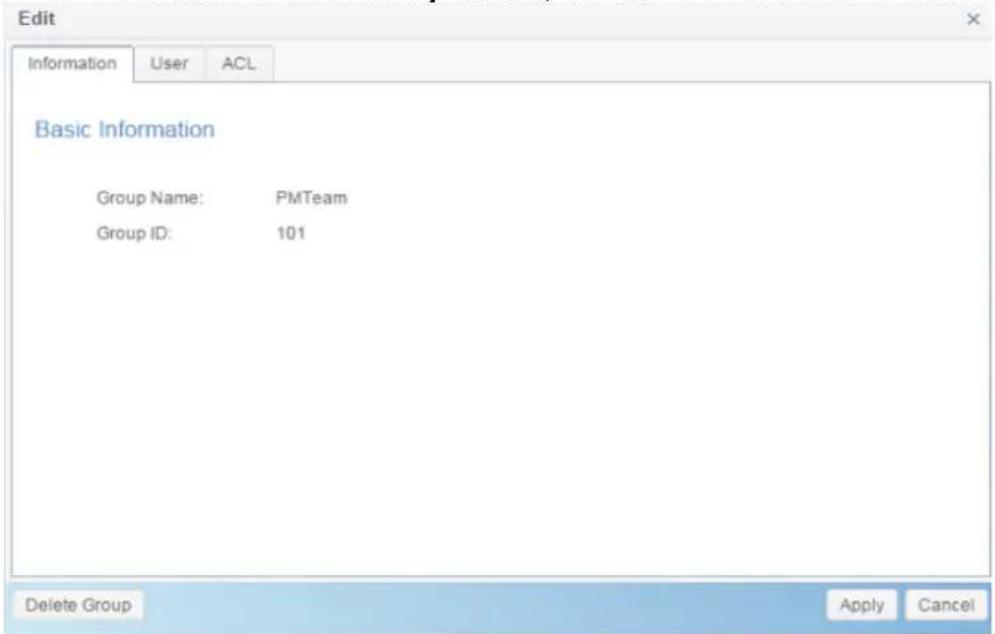
text_image
Edit Information User ACL Basic Information Group Name: PMTeam Group ID: 101 Delete Group Apply CancelUser Quota (Btrfs not support)
The Thecus IP storage support local or AD users with storage quota limitations in each RAID volume of the system. To enable this function, simply click "Enable", then apply.
It can click on Start Scan button to have most update of quota usage for every user and associated RAID volumes.

text_image
Setting Panel Function Search Control Privilege Shared Folder Local Account ADS LDAP Storage Services Backup User Group User Quota Backup & Restore User Quota Enable User Quota Start Scan Last Scan Time: 2015/07/24 19:09 Apply User ID User Name User Quota KendoR0 1000 pm1 MB 1001 pm2 MB 1002 pm4 0 MB 1003 pm3 102400 MB 1004 pm5 1000 MB 1005 pm6 10000 MBBackup & Restore
User and group settings download/upload:
The user and group backup feature allow system users and groups to be backed up to another location and be restored if needed.
Please note, when restoring previous backup users and groups, the current users and groups list will be replaced from this restore file's contents.
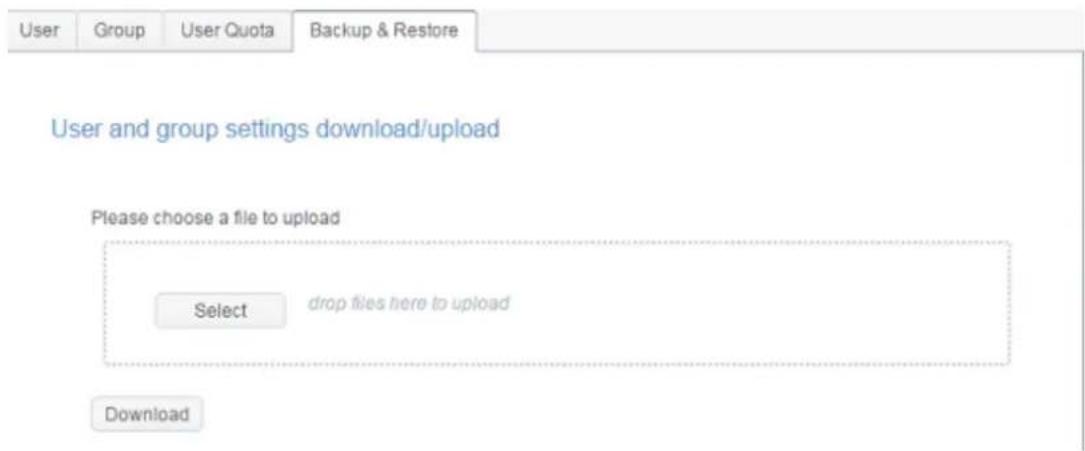
text_image
User and group settings download/upload Please choose a file to upload Select drop files here to upload DownloadACL backup/restore
The ACL backup and restore feature enables the system ACL (Access Control List) to be backed up on the RAID volume based to other location and restored if needed.
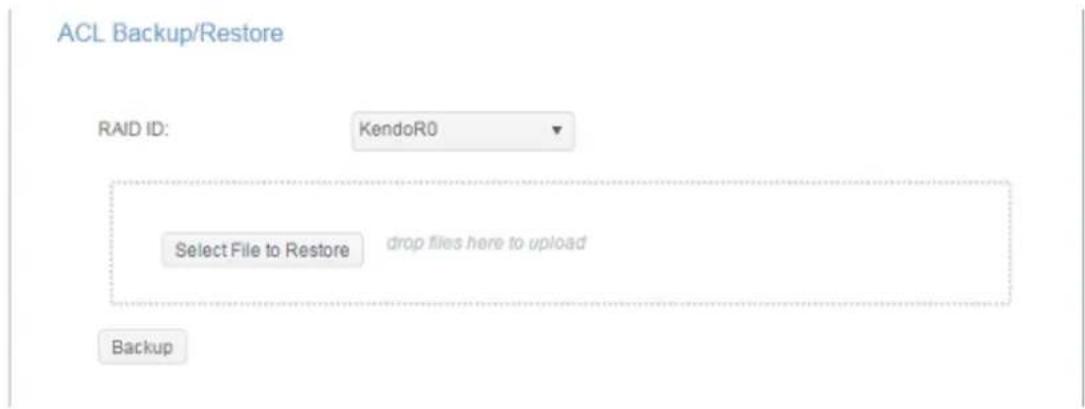
text_image
ACL Backup/Restore RAID ID: KendoR0 Select File to Restore drop files here to upload BackupADS
If you have a Windows Active Directory Server (ADS) to handle the domain security in your network, you can simply enable the ADS support feature; the Thecus IP storage will connect with the ADS server and get all the information of the domain users and groups automatically. From the Privilege menu, choose ADS item and the ADS Setting screen appears. You can change any of these items and press Apply to confirm your settings.
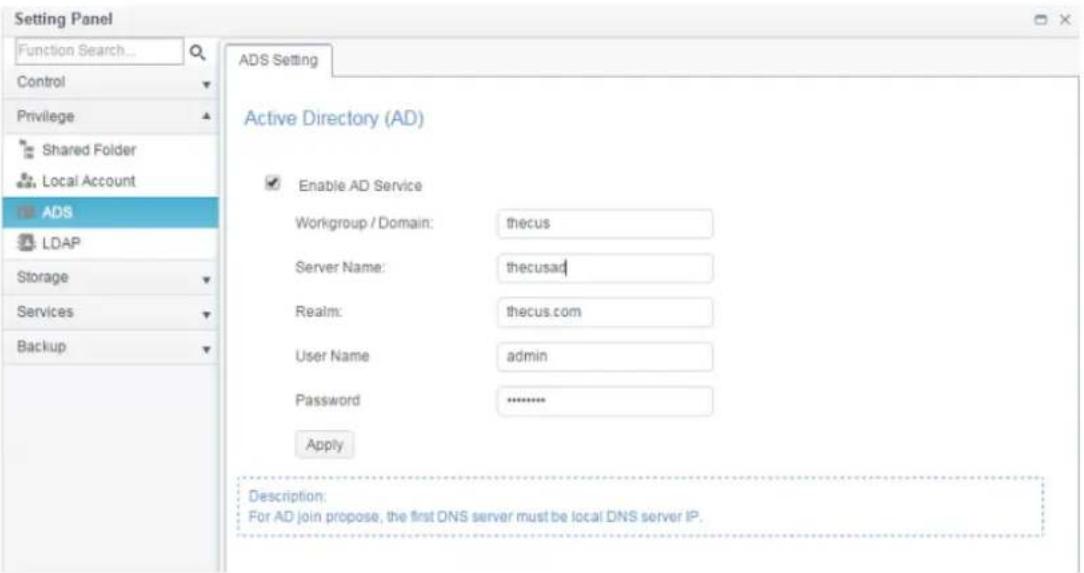
text_image
Setting Panel Function Search... Control Privilege Shared Folder Local Account ADS LDAP Storage Services Backup ADS Setting Active Directory (AD) Enable AD Service Workgroup / Domain: thecus Server Name: thecusad Realm: thecus.com User Name admin Password .......... Apply Description: For AD join propose, the first DNS server must be local DNS server IP.A description of each item follows:
| ADS/NT Support | |
| Item | Description |
| Work Group / Domain Name | Specifies the SMB/CIFS Work Group / ADS Domain Name (e.g. MYGROUP). |
| ADS Support | Select Disable to disable authentication through Windows Active Directory Server. |
| ADS Server Name | Specifies the ADS server name (e.g. adservername). |
| ADS Realm | Specifies the ADS realm (e.g. example.com). |
| Administrator ID | Enter the administrators ID of Windows Active Directory, which is required for Thecus IP storage to join domain. |
| Administrator Password | Enter the ADS Administrator password. |
| Apply | To save your settings. |
To join an AD domain, you can refer to the figure here and use the example below to configure the Thecus IP storage for associated filed input:
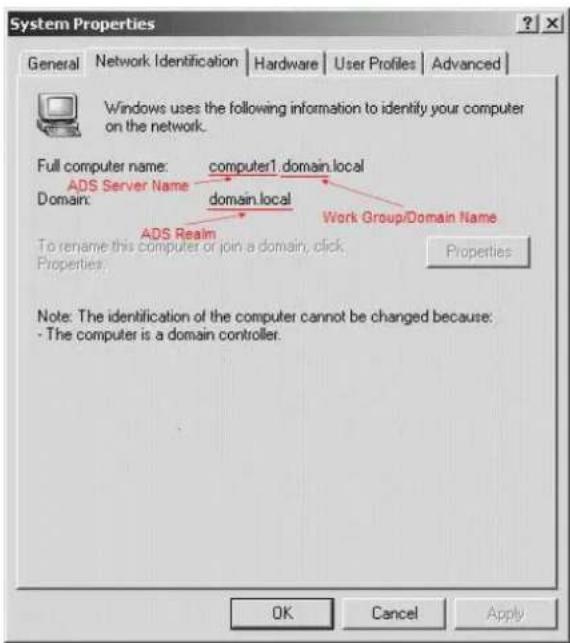
text_image
System Properties General Network Identification Hardware User Profiles Advanced Windows uses the following information to identify your computer on the network. Full computer name: computer1.domain.local ADS Server Name domain.local Domain: ADS Realm Work Group/Domain Name To rename this computer or join a domain, click Properties Properties Note: The identification of the computer cannot be changed because: - The computer is a domain controller. OK Cancel Apply| AD Domain Example | |
| Item | Information |
| Work Group / Domain Name | domain |
| ADS Support | Enable |
| ADS Server Name | Computer1 |
| ADS Realm | Domain.local |
| Administrator ID | Administrator |
| Administrator Password | ********** |
NOTE
- The DNS server specified in the WAN/LAN1 configuration page should be able to correctly resolve the ADS server name.
- The time zone setting between Thecus IP storage and ADS should be identical.
- The system time difference between Thecus IP storage and ADS should be less than five minutes.
- The Administrator Password field is for the password of ADS (Active Directory Server) not Thecus IP storage.
LDAP
The LDAP is the other way to authenticate login users who has joined LDAP server, fill in the LDAP server information and get LDAP authentication started. Please make sure that the LDAP server has a Samba sam and a POSIX ObjectClass account.
LDAP Setting
Lightweight Directory Access Protocol (LDAP)

Enable LDAP Service
Server IP:
172.16.65.64
Bind DN or LDAP Account:
manager
Password:
......
Base DN:
dc=example
User Base DN:
cn=pm
Group Base DN:
dc=pmteam
Security:
TLS
Samba ID:
S-1-5-21-4211182674-4247146397-3431630560
Check objectClass
Apply
| LDAP Support | |
| Item | Description |
| LDAP Service | Enable or Disable LDAP service. |
| LDAP Server IP | Input LDAP server IP address. |
| Base Domain | Input base domain information ex. dc=tuned, dc=com, dc=tw |
| Manager | Input manager's name. |
| Password | Input manager's password |
| Apply | ClickApplyto save your changes. |
| Check ObjectClass | Click this checkbox to ensure LDAP server has a Samba sam and a POSIX account or it may not work properly for LDAP client authentication. |
Storage
STORAGE

Disk & Raid
iSCSI

ISO Mount

Disk Clone and Wipe
Disk & RAID
& RAID and the associated storage information will display. Also the related setting can be operated from here.
RAID
From the Disk& RAID menu, choose the RAID item and the RAID Management screen appears.
This screen lists the RAID volumes currently residing in the Thecus IP storage. From this screen, you can get information about the status of your RAID volumes, as well as the capacities allocated for data.
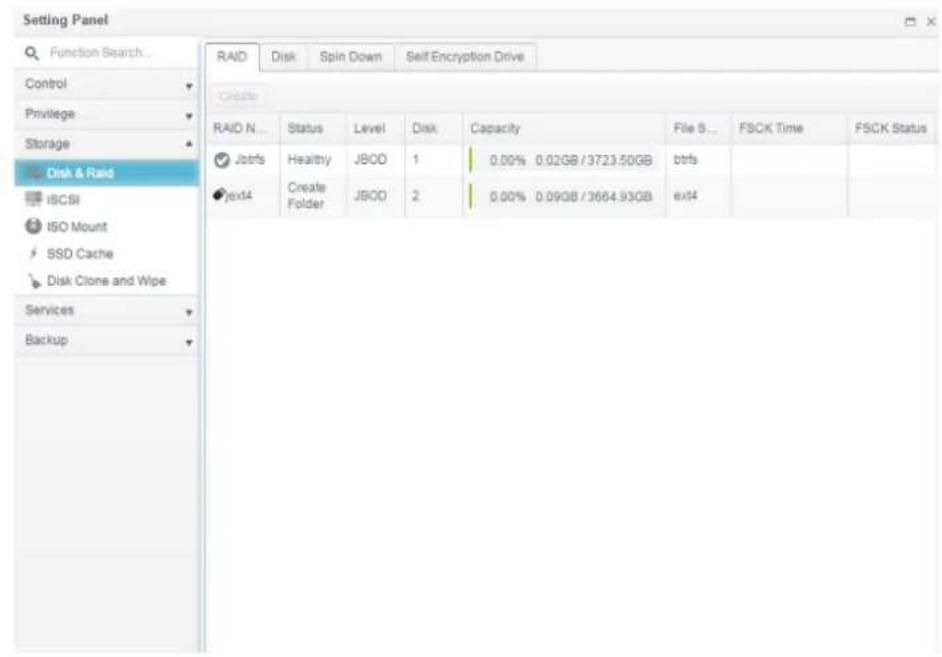
text_image
Setting Panel Function Search... Control Privilege Storage Disk & Raid iSCSI ISO Mount SSD Cache Disk Clone and Wipe Services Backup RAID Disk Spin Down Self Encryption Drive Create RAID N... Status Level Disk Capacity File S... FSCK Time FSCK Status Jbtrfs Healthy JBOO 1 0.00% 0.02GB /3723.50GB btrfs tex4 Create Folder JBOO 2 0.00% 0.09GB /3664.93GB ex4Create a RAID
On the RAID Information screen, press the Create button to go to the RAID Volume Creation screen. In addition to RAID disk information and status, this screen lets you make RAID configuration settings.
Using Create RAID, you can select stripe size, choose which disks are RAID disks or the Spare Disk.
| RAID Configurations | |
| Item | Description |
| Disk . | Number assigned to the installed hard disks. |
| Capacity (MB) | Capacity of the installed hard disks. |
| Model | Model number of the installed hard disks. |
| Status | Status of the installed hard disks. |
| Used | If this is checked, current hard disk is aalready part of a RAID volume. |
| Spare | If this is checked, current hard disk is designated as a spare for a RAID volume. |
| Master RAID | Check a box to designate this as the Master RAID volume. See theNOTEbelow for more information. |
| Stripe Size | This sets the stripe size to maximize performance of sequential files in a storage volume. Keep the 64K setting unless you require a special file storage layout in the storage volume. A larger stripe size is better for large files. |
| Data Percentage | The percentage of the RAID volume that will be used to store data. |
| Create | Press this button to configure a file system and create the RAID storage volume. |
To create a RAID volume, follow the steps below:
- On the Select Disk screen, select available disks for the RAID volume member(s).
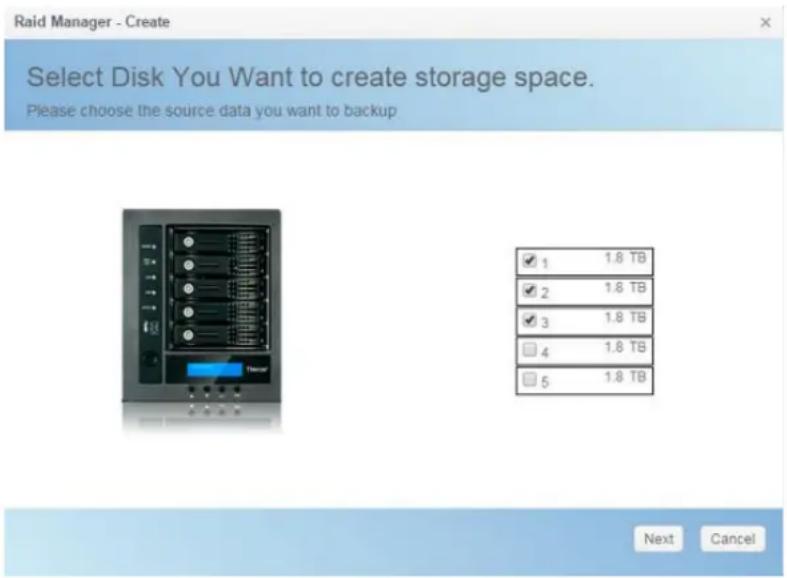
text_image
Raid Manager - Create Select Disk You Want to create storage space. Please choose the source data you want to backup ✓ 1 1.8 TB ✓ 2 1.8 TB ✓ 3 1.8 TB □ 4 1.8 TB □ 5 1.8 TB Next Cancel- Set the RAID storage space as JBOD, RAID 0, RAID 1, RAID 5, RAID 6, or RAID 10 (depends on how many disks has installed into system)—see Appendix B: RAID Basics for a detailed description of each.
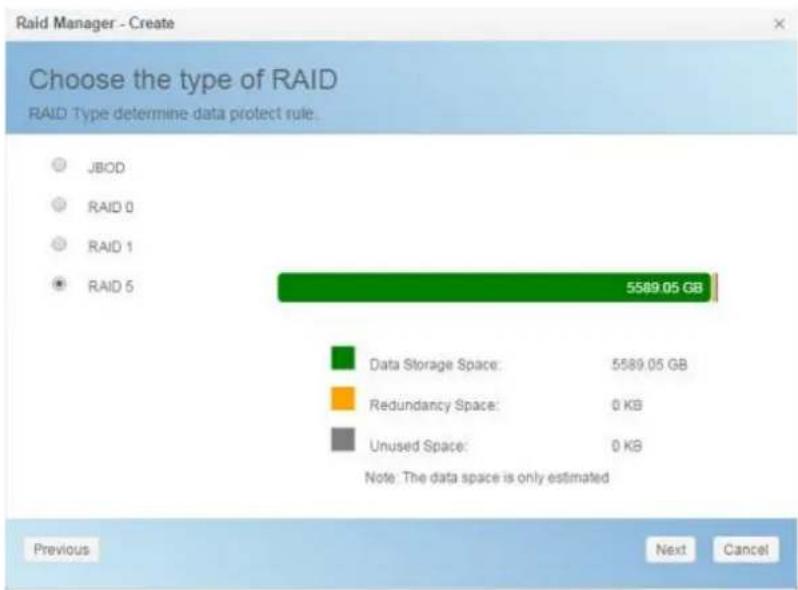
text_image
Raid Manager - Create Choose the type of RAID RAID Type determine data protect rule. JBOD RAID 0 RAID 1 RAID 5 5589.05 GB Data Storage Space: 5589.05 GB Redundancy Space: 0 KB Unused Space: 0 KB Note: The data space is only estimated Previous Next Cancel- Choose spare disk for associated RAID volume if applicable.
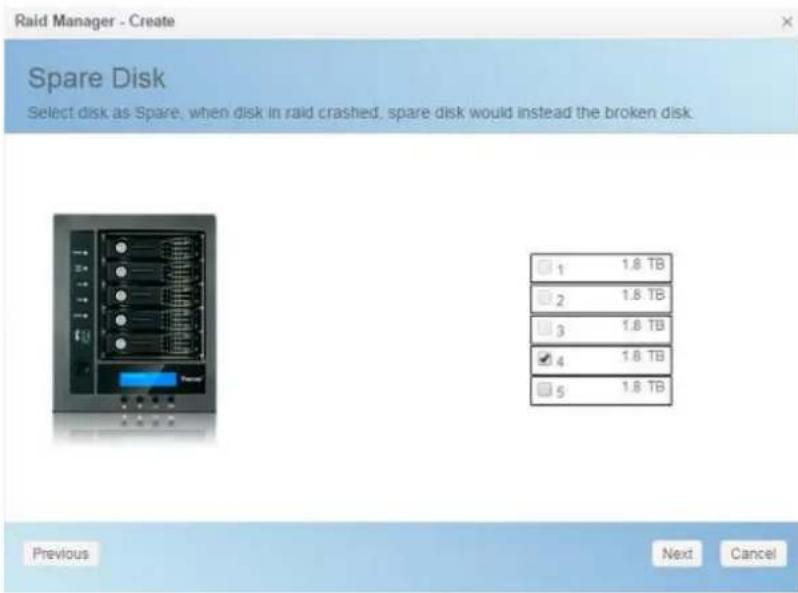
text_image
Raid Manager - Create Spare Disk Select disk as Spare, when disk in raid crashed, spare disk would instead the broken disk. 1 1.8 TB 2 1.8 TB 3 1.8 TB 4 1.8 TB 5 1.8 TB Previous Next Cancel- Specify a RAID Name.
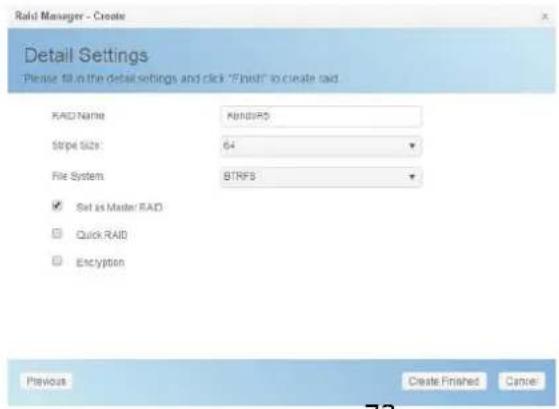
text_image
Raid Manager - Create Detail Settings Please fill in the detail settings and click "Find" to create said. READ Name RendIPS Stripe Size: 64 File System BTRFS ✓ Set as Master RAD ☐ Quick RAID ☐ Encryption Previous Create Finished Cancel- If this RAID volume is meant to be the Master RAID volume, tick the Master RAID checkbox.
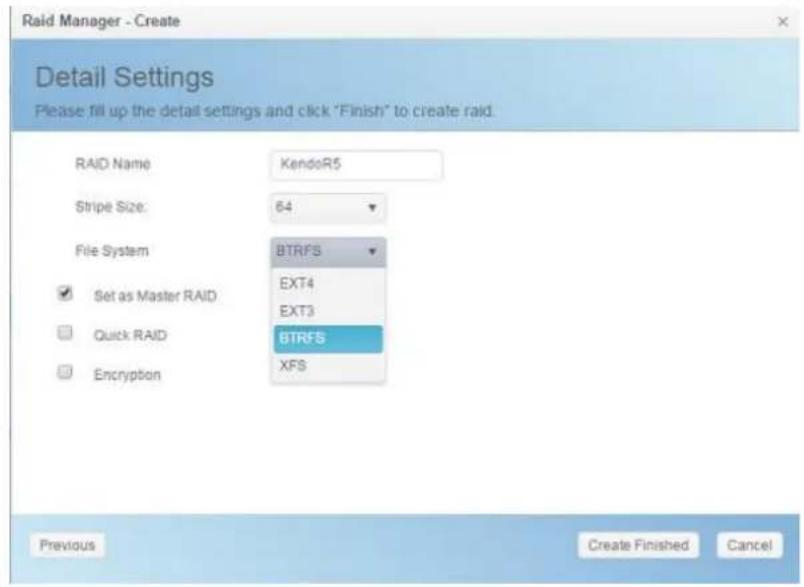
text_image
Raid Manager - Create Detail Settings Please fill up the detail settings and click "Finish" to create raid. RAID Name KendoR5 Stripe Size: 64 File System BTRFS EXT4 EXT3 Set as Master RAID BTRFS XFS Quick RAID Encryption Previous Create Finished CancelNOTE
In a multiple RAID configuration, one RAID volume must be designated as the Master RAID volume. The Master RAID volume will store all installed modules. If the Master RAID is changed to another location (i.e. assigning volume 2 to be the Master RAID volume after volume 1 had been previously assigned), then all modules must be reinstalled. In addition, all system folders that were contained on the Master RAID volume will be invisible. Reassigning this volume to be the Master RAID will make these folders visible again.
- Selected whether the RAID volume will be encrypted or not. The RAID volume can protect data by using RAID Volume Encryption function to prevent the risk of data exposure. To activate this function, the Encryption option needs to be enabled while the RAID is created and followed by a password input for identification. Also, an external writable USB disk plugged into any USB port on the system is required to save the password you have entered while the RAID volume is being created. See the screenshot below for details.
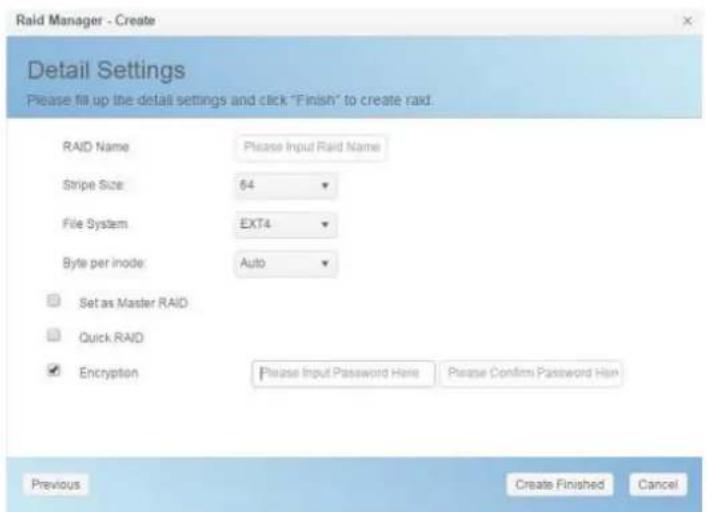
text_image
Raid Manager - Create Detail Settings Please fill up the detail settings and click "Finish" to create raid. RAID Name Please Input Raid Name Stripe Size: 64 File System EXT4 Byte per inode: Auto Set as Master RAID Quick RAID Encryption Please Input Password Here Please Confirm Password Here Previous Create Finished CancelAfter the RAID volume has been created, you may remove the USB disk until the next time the system boots. The RAID volume cannot be mounted if the USB disk with the encryption key isn't found in any system USB port when the volume is accessed. To activate the encrypted volume, plug the USB disk containing the encryption key and into any system USB port.
We strongly recommended copying the RAID volume encryption key to a safe place. You can find the encryption key file from the USB disk in the following format:
(RAID volume created date)_xxxxx.key
WARNING
Please keep your USB disk in a safe place and also backup the encrypted key.
There is no way to rescue data back if the key is lost.
NOTE
With RAID volume encryption enabled, the system performance will go down.
RAID volumes with encryption enabled will be displayed with a key lock symbol next to volume ID name.
| RAID N... | Status | Level | Disk | Capacity | File S... | FSCK T... | FSCK Status |
| KendoR5 | Create Folder | RAID5 | 1, 3, 2(4) | 0.02% 0.74GB / 3721.00 | btrfs | ||
| EncryptRAID | Format Data | JBOD | 5 | ext4 |
- Quick RAID — Enabling the quick RAID setting is going to enhance RAID creation time.
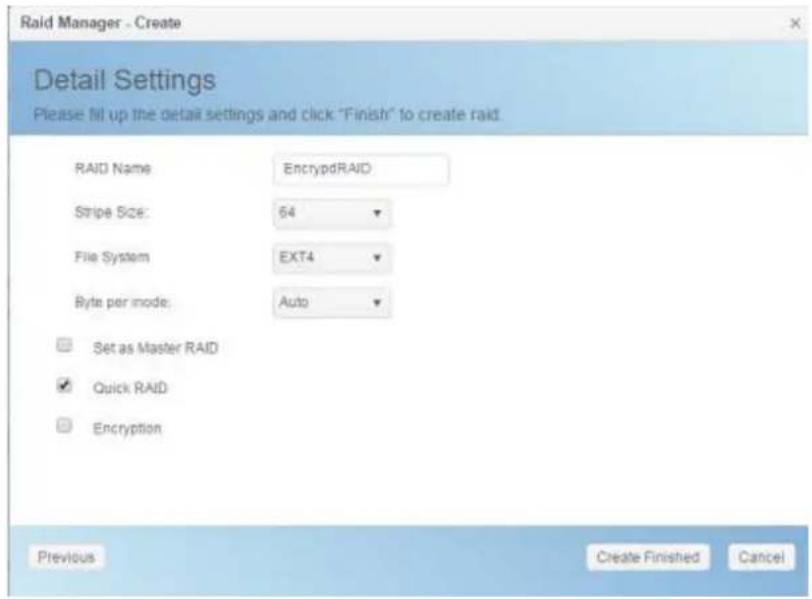
text_image
Raid Manager - Create Detail Settings Please fill up the detail settings and click "Finish" to create raid RAID Name EncrypdRAID Stripe Size: 64 File System EXT4 Byte per mode: Auto □ Set as Master RAID ✓ Quick RAID □ Encryption Previous Create Finished CancelNOTE
We recommend using the "Quick RAID" setting only if the hard disks are brand new or if no existing partitions are contained.
- Specify a stripe size — 64K is the default setting.
- Specify size for "Bytes per inode" if ext3/ext4 has selected. The default value is Auto and it has no need to change for general use.
- Select the file system you would like to have for this RAID volume. The selection is available from ext3, XFS, ext4 and btrfs.
File System
Byte per inode:

Set as Master RAID

Quick RAID

Encryption
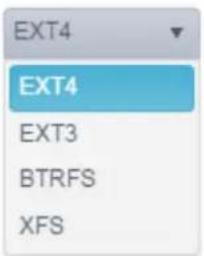
text_image
EXT4 EXT4 EXT3 BTRFS XFSNOTE
Single volume size supported:
ext3 → 8TB
XFS → 48TB
ext4 → 36TB
btrfs → 16EB
- Press Create Finished to build the RAID storage volume.
NOTE
Building a RAID volume may be time consuming, depending on the size of hard drives and RAID mode. In general, if the RAID volume building process is up to "RAID Building", then the data volume is accessible.
WARNING
Creating RAID destroys all data in the current RAID volume. The data will be unrecoverable.
RAID Level
You can set the storage volume as JBOD, RAID 0, RAID 1, RAID 5, RAID 6, and RAID 10 (Depend on Model and how many disks has been installed).
RAID configuration is usually required only when you first set up the device. A brief description of each RAID setting follows:
| RAID Levels | |
| Level | Description |
| JBOD | The storage volume is a single HDD with no RAID support.JBOD requires a minimum of 1 disk. |
| RAID 0 | Provides data striping but no redundancy. Improves performance but not data safety. RAID 0 requires a minimum of 2 disks. |
| RAID 1 | Offers disk mirroring. Provides twice the read rate of a single disk, but same write rate. RAID 1 requires a minimum of 2disks. |
| RAID 5 | Data striping and stripe error correction information provided. RAID 5 requires a minimum of 3 disks. RAID 5 can sustain one failed disk. |
| RAID 6 | Two independent parity computations must be used in order to provide protection against double disk failure. Two different algorithms are employed to achieve this purpose. RAID 6 requires a minimum of 4 disks. RAID 6 can sustain two failed disks. |
| RAID 10 | RAID 10 has high reliability and high performance. RAID 10 is implemented as a striped array whose segments are RAID 1 arrays. It has the fault tolerance of RAID 1 and the performance of RAID 0. RAID 10 requires 4 disks. RAID 10 can sustain two failed disks. |
WARNING
If the administrator improperly removes a hard disk that should not be removed when RAID status is degraded, all data will be lost.
Edit RAID
- Select an existing RAID volume from the list.
- Click on the Edit button, and the RAID volume setting screen appears.
- Making the changes such as RAID name or role of master RAID if needed.

text_image
Raid Manager - Edit Raid Information Grow Basic Information RAID Name KendoR5 Set as Master RAID Level RAID5 Disk 1,3,2(4) Size 3721.00 GB Remove RAID Apply CancelRemove RAID
- Select an existing RAID volume from the list.
- Click on the Remove RAID button from left bottom corner, A confirmation screen will appear.
- Confirm with click "OK" to complete the "Remove RAID" operation.
Click to remove the RAID volume. All user data and iSCSI created in the selected RAID volume will be deleted.
WARNING
Remove RAID destroys all data in the selected RAID volume. The data will be unrecoverable.
Expanding a RAID
To expand a RAID 1, RAID 5, or RAID 6 volume, follow the steps below:
- Replace one of the hard drives in the RAID volume and allow it to automatically rebuild.
- Once rebuilt, you can continue to replace any remaining disks in the RAID array.
- When you are done replacing hard drives, click on RAID volume that is going to expand capacity. System will have additional tab "Space Expansion" appear if associated RAID volume is capable for expansion.
- On the RAID Configuration screen, click Space Expansion.
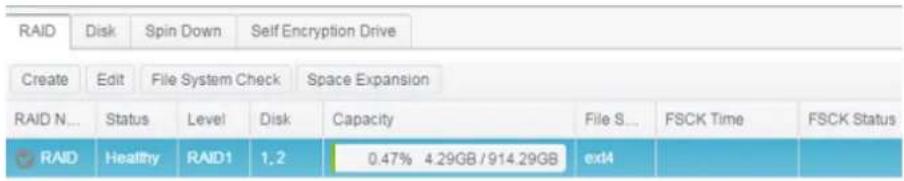
text_image
RAID Disk Spin Down Self Encryption Drive Create Edit File System Check Space Expansion RAID N... Status Level Disk Capacity File S... FSCK Time FSCK Status RAID Healthy RAID1 1.2 0.47% 4.29GB / 914.29GB ext4File System Check
The File System Check allows you to perform a check on the integrity of your disks' file system.
To perform File System Check, select RAID volume from RAID Volume list and the tab File System Check will appear. Click on File System Check button to start the task. From the screen, it will display FSCK check time and checking status.

text_image
RAID Disk Spin Down Self Encryption Drive Create Edit Stop File System Check RAID N... Status Level Disk Capacity File S... FSCK Time FSCK Status RAID Healthy RAID1 1, 2 ex4 2015/12/07 12:51 Checking...
text_image
RAID Disk Spin Down Self Encryption Drive Create Edit File System Check RAID N... Status Level Disk Capacity File S... FSCK Time FSCK Status RAID Healthy RAID1 1,2 0.23% 4.28GB / 1831.17GB ext4 2015/12/07 12:51 No errors.Migrating a RAID
Once a RAID volume has been created, you may want to move it to other physical drives or change the RAID array all together. To migrate a RAID 1, RAID 5, RAID 6, RAID50 or RAID 60 volume, follow the steps below:
- Select RAID volume which is going to execute RAID Migration.
- Press Edit to bring up management screen.
- Choose Grow to have all installed disks listed included used and unused.
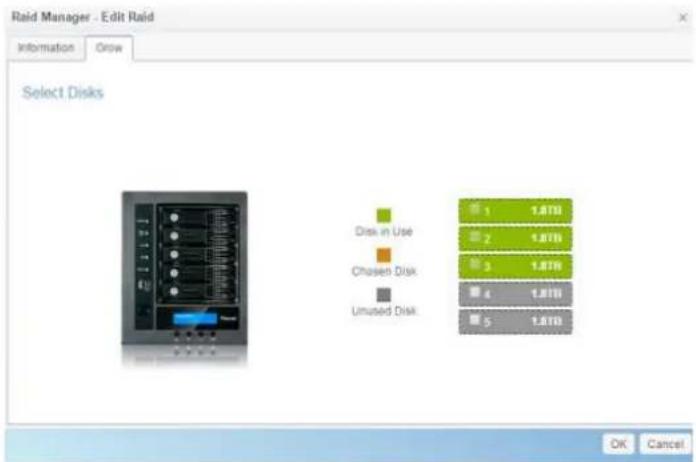
text_image
Raid Manager - Edit Raid Information Grow Select Disks Disk in Use Chosen Disk Unused Disk 1 1.87B 2 1.87B 3 1.87B 4 1.87B 5 1.87B OK Cancel- Select from unused disk then click OK, the system will bring up available options to choose from.
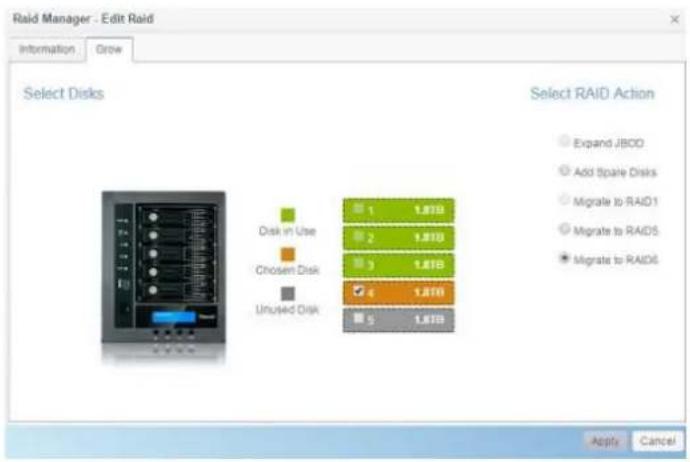
text_image
Raid Manager - Edit Raid Information... Grow Select Disks Disk in Use Chosen Disk Unused Disk 1.87B 2.87B 3.87B 4.87B 5.87B Select RAID Action Expand JBOO Add Spare Disks Migrate to RAID1 Migrate to RAID5 Migrate to RAID6 Apply Cancel- Confirm the setting, then system will begin migrate the RAID volume.
NOTE
■ Migrating a RAID volume could take several hours to complete
■ The RAID migration feature is available only when it is configurable.
Here is a list of limitation with RAID level migration function:
-
During RAID level migration, it is not permitted to reboot or shutdown system.
-
For RAID migration from R1 to R5 or R1 to R6, all services will restart and "iSCSI" volume will be in read only mode but read/write of the "user data" will be possible during the operation.
NOTE
The migration scheme below is based on Thecus IP Storage product's maximum possible combination. For other model which supports less HDD, please refer to the web UI while RAID migration operates.
Disk
Disk & RAID talked hard disks basic information, used status and progress while perform bad block scan.
| Raid | Disk | Spin Down | ||||
| Tray | Model | Capacity | Firmware | Used Status | Progress | |
| 1 | WDC WD20EFRX-68E | 1863 GB | 80.0 | RAID | ||
| 2 | WDC WD20EFRX-68E | 1863 GB | 80.0 | RAID | ||
| 3 | WDC WD20EFRX-68E | 1863 GB | 82.0 | RAID | ||
| 4 | WDC WD20EFRX-68E | 1863 GB | 82.0 | RAID | ||
| 5 | WDC WD20EFRX-68E | 1863 GB | 80.0 | Unused | Scanning 1 % | |
S.M.A.R.T :
- Select a disk from the list.
- Click on S.M.A.R.T. tab to perform.
Once clicking on S.M.A.R.T., system will display the basic hard disk information and status. Based on S.M.A.R.T. status, system will give the healthy condition for reference. Please see below for details.
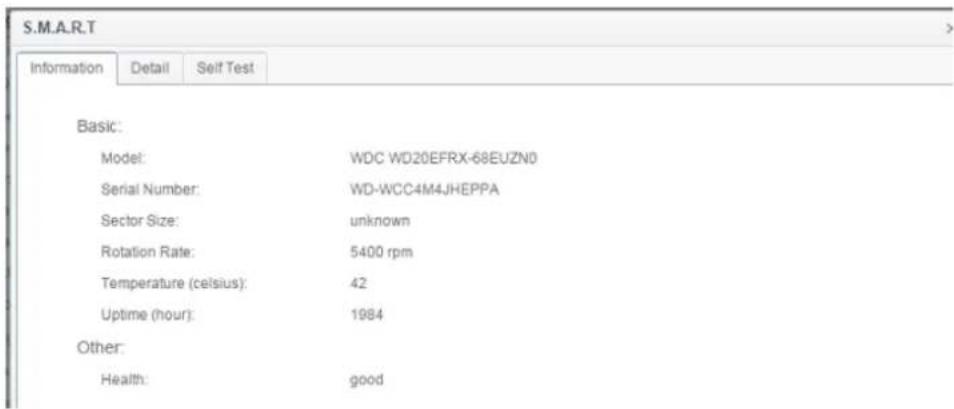
text_image
S.M.A.R.T Information Detail Self Test Basic: Model: WDC WD20EFRX-68EUZN0 Serial Number: WD-WCC4M4JHEPPA Sector Size: unknown Rotation Rate: 5400 rpm Temperature (celsius): 42 Uptime (hour): 1984 Other: Health: hood| S.M.A.R.T. Information | |
| Item | Description |
| Model | Model name of the installed hard disk. |
| Serial Number | Serial number of the installed hard disk |
| Sector Size | Sector size of the installed hard disk |
| Rotation Rate | Rotation speed of the installed hard disk |
| Temperature (Celsius) | The current temperature of the installed disk in degree Celsius |
| Uptime(Hour) | Count of hours in power-on state. The raw value of thisattribute shows total count of hours (or minutes, or seconds, depending on manufacturer) in power-on state. |
For more technical S.M.A.R.T. information, please click on Detail.
| S.M.A.R.T | ||||||||
| Information | Detail | Self Test | ||||||
| Attribute: | ||||||||
| ID | Attribute N... | Value | Worst | Thresh | Type | Updated | When Failed | Raw Value |
| 1 | Raw_Rea... | 200 | 200 | 051 | Pre-fail | Always | - | 0 |
| 3 | Spin_Up... | 173 | 173 | 021 | Pre-fail | Always | - | 4325 |
| 4 | Start_Stop... | 100 | 100 | 000 | Old_age | Always | - | 193 |
| 5 | Reallocate... | 200 | 200 | 140 | Pre-fail | Always | - | 0 |
| 7 | Seek_Erro... | 200 | 200 | 000 | Old_age | Always | - | 0 |
| 9 | Power_On... | 098 | 098 | 000 | Old_age | Always | - | 1984 |
| 10 | Spin_Retr... | 100 | 100 | 000 | Old_age | Always | - | 0 |
| 11 | Calibration... | 100 | 253 | 000 | Old_age | Always | - | 0 |
| 12 | Power_Cy... | 100 | 100 | 000 | Old_age | Always | - | 50 |
| 192 | Power- Off_Retrac... | 200 | 200 | 000 | Old_age | Always | - | 17 |
| 193 | Load_Cycl... | 200 | 200 | 000 | Old_age | Always | - | 1253 |
| 194 | Temperatu... | 105 | 105 | 000 | Old_age | Always | - | 42 |
| 196 | Reallocate... | 200 | 200 | 000 | Old_age | Always | - | 0 |
| 197 | Current_P... | 200 | 200 | 000 | Old_age | Always | - | 0 |
| 198 | Offline_Un... | 100 | 253 | 000 | Old_age | Offline | - | 0 |
| 199 | UDMA_C... | 200 | 200 | 000 | Old_age | Always | - | 0 |
| 200 | Multi_Zon... | 100 | 253 | 000 | Old_age | Offline | ||
You may also like to perform a disk SMART test, simply click "Self Test" to start the SMART test. The result is only for reference and the system will not take any action from its results.
There are "Fast Test" or 'Full test" can be choose from.
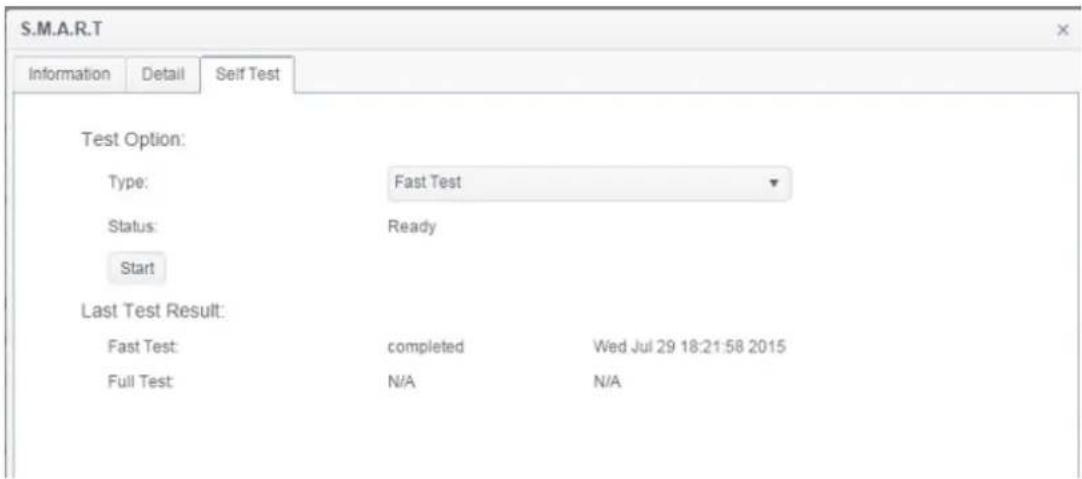
text_image
S.M.A.R.T Information Detail Self Test Test Option: Type: Fast Test Status: Ready Start Last Test Result: Fast Test completed Wed Jul 29 18:21:58 2015 Full Test N/A N/ABad Block Scan:
- Select a disk from the list.
- Click on Start Scan Block button to perform.
- Click again to stop bad block scanning.
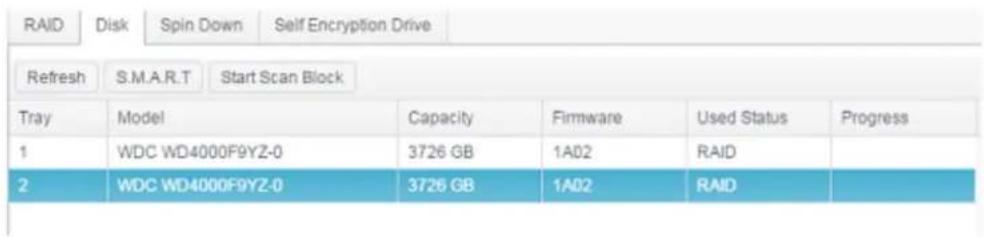
text_image
RAID Disk Spin Down Self Encryption Drive Refresh S.M.A.R.T Start Scan Block Tray Model Capacity Firmware Used Status Progress 1 WDC WD4000F9YZ-0 3726 GB 1A02 RAID 2 WDC WD4000F9YZ-0 3726 GB 1A02 RAIDGlobal Hot Spare:
Click on installed hard disk but at unused status and the "Global Hot Spare" tab will appear. Check on the button to have associated hard disk as spare disk.
| S.M.A.R.T | Stop Scan Block | Add Global Hot Spare | |||
| Tray | Model | Capacity | Firmware | Used Status | Progress |
| 1 | WDC WD20EFRX-68E | 1863 GB | 80.0 | RAID | |
| 2 | WDC WD20EFRX-68E | 1863 GB | 80.0 | RAID | |
| 3 | WDC WD20EFRX-68E | 1863 GB | 82.0 | RAID | |
| 4 | WDC WD20EFRX-68E | 1863 GB | 82.0 | RAID | Scanning 1 % |
| 5 | WDC WD20EFRX-68E | 1863 GB | 80.0 | Unused | Scanning 34 % |
Spin Down
For disks installed into system, there is default 30 minutes to spin down if no disk activities have been detected. However, the spin down duration can be either turned off or extended. Select from drop down option to make choice.
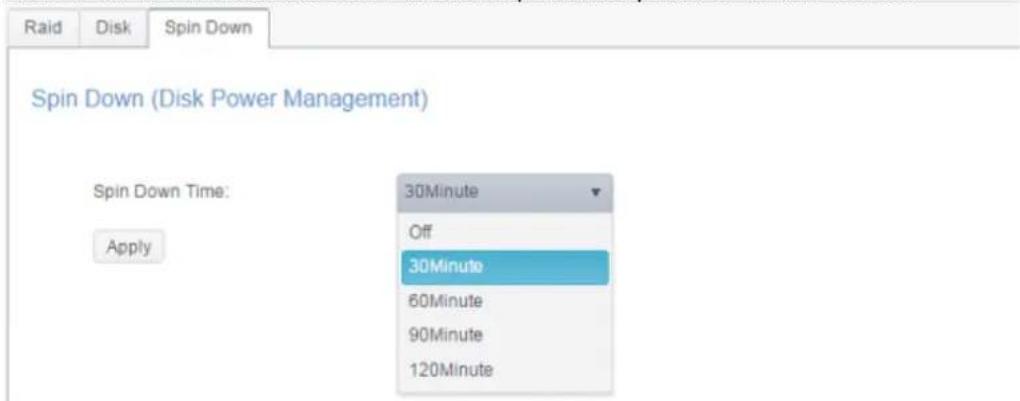
text_image
Raid Disk Spin Down Spin Down (Disk Power Management) Spin Down Time: Apply 30Minute Off 30Minute 60Minute 90Minute 120MinuteDisk Security
Thecus IP storage support Disk Security which could perform disk lock capability of disk itself. Click on "Disk Security" from category Disk & RAID and the installed disks list will appear. The disk drive which is capable for disk-security will have check box available to operate further. Please see below:
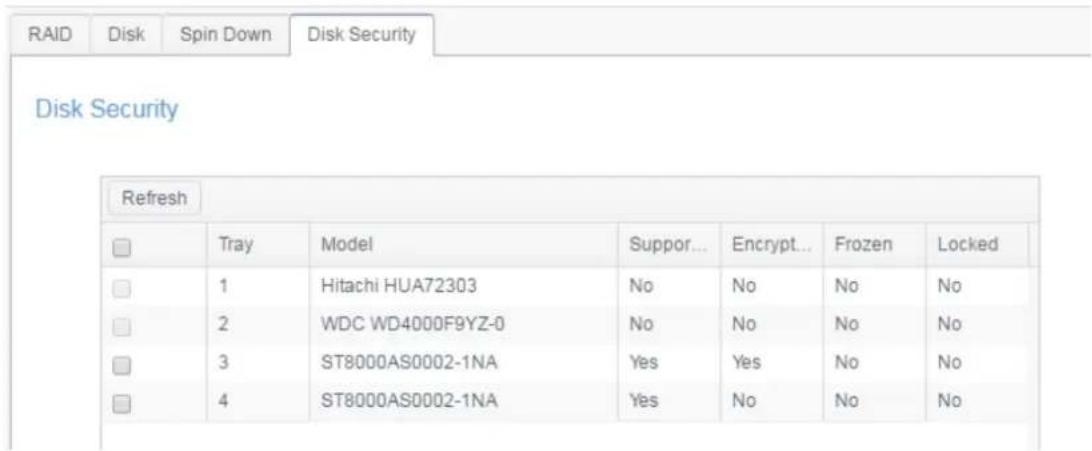
text_image
RAID Disk Spin Down Disk Security Disk Security Refresh Tray Model Suppor... Encrypt... Frozen Locked 1 Hitachi HUA72303 No No No No 2 WDC WD4000F9YZ-0 No No No No 3 ST8000AS0002-1NA Yes Yes No No 4 ST8000AS0002-1NA Yes No No NoTo setup available disk-security drive, please click on check box then "Set Password" tab will appear. Click on "Set Password" to have associated disk with Disk-Security enabled, please do install USB disk and the password will store on it or it will have an error message to notify you.
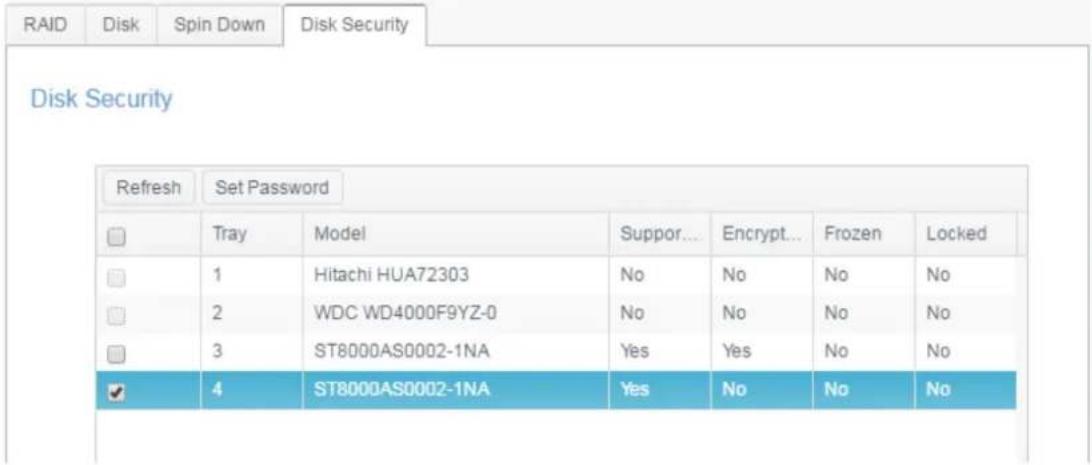
text_image
RAID Disk Spin Down Disk Security Disk Security Refresh Set Password Tray Model Suppor... Encrypt... Frozen Locked 1 Hitachi HUA72303 No No No No 2 WDC WD4000F9YZ-0 No No No No 3 ST8000AS0002-1NA Yes Yes No No 4 ST8000AS0002-1NA Yes No No No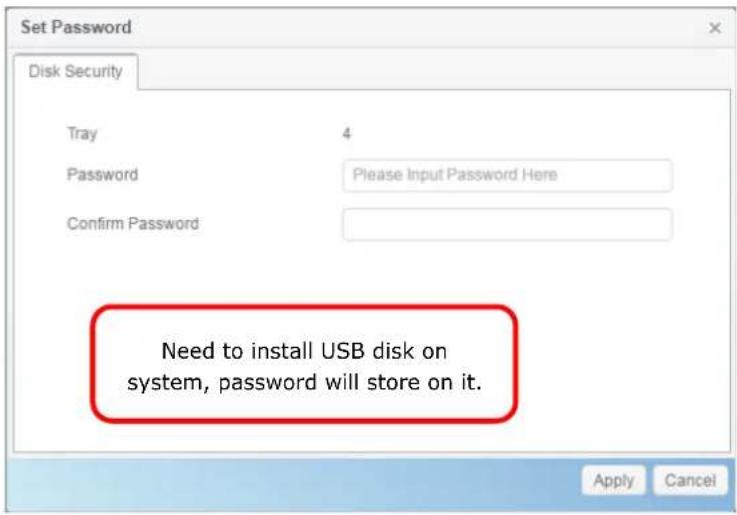
text_image
Set Password Disk Security Tray 4 Password Please Input Password Here Confirm Password Need to install USB disk on system, password will store on it. Apply CancelNOTE
■ The disk to enable Disk-Security setting is only available while disk is unused
■ The USB disk which has contained password need to plug-in on system once associated disk with Disk-Security enabled is part of RAID member during system power on.
■ Without enable Disk-Security on installed disk, it is just like normal disk
To change the state of enabled Disk-Security disk, click on associated disk (MUST in unused) and the available function tab will appear.
| Refresh | Set Password | Disable Disk Security | Erase Disk | ||||
| Tray | Model | Suppor... | Encrypt... | Frozen | Locked | ||
| 1 | Hitachi HUA72303 | No | No | No | No | ||
| 2 | WDC WD4000F9YZ-0 | No | No | No | No | ||
| √ | 3 | ST8000AS0002-1NA | Yes | Yes | No | No | |
| 4 | ST8000AS0002-1NA | Yes | No | No | No | ||
Other than Set Password as mentioned above, the Disk Security can be disabled by clicking on 'Disable Disk Security' and the disk can be erased by clicking on "Erase Disk" if correct password has been inputted.
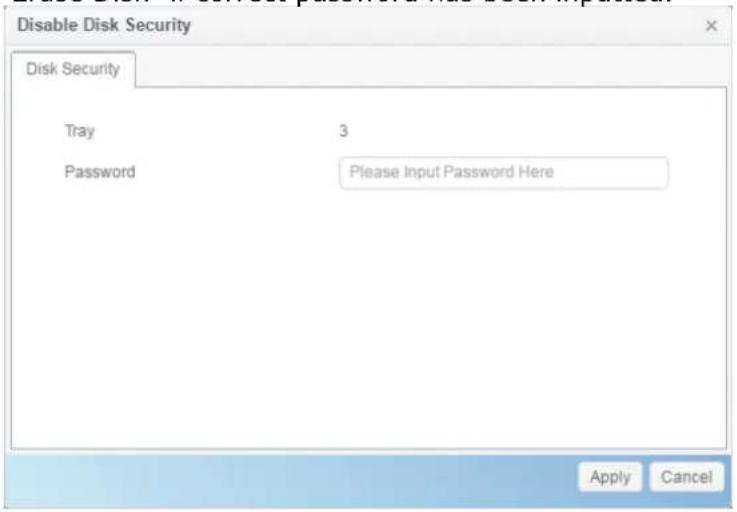
text_image
Disable Disk Security Disk Security Tray 3 Password Please Input Password Here Apply CanceliSCSI
You may specify the space allocated for iSCSI. See the table below to view the allowed iSCSI target number per system:
| Model | N2810 | N5810N5810PRO |
| Allowed iSCSI volume | 15 | 25 |
iSCSI List
Add iSCSI Target
To add iSCSI target volume, click Add from iSCSI List and associated screen will appear.
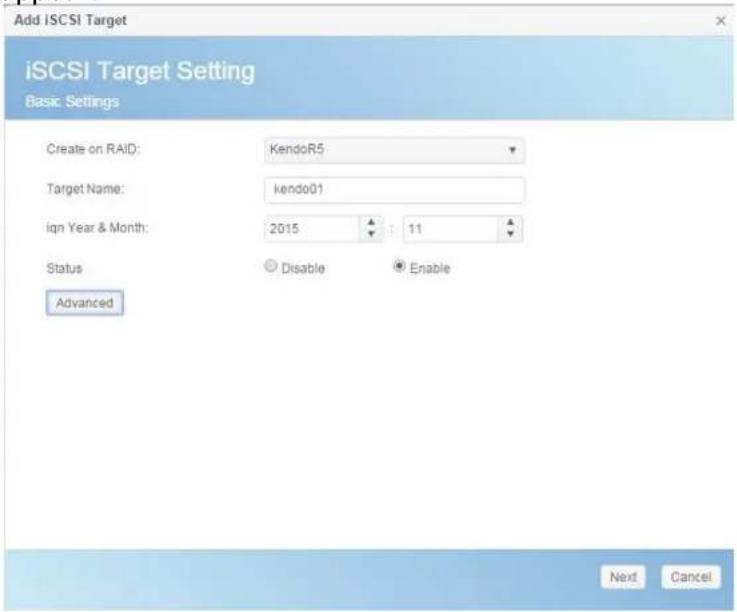
text_image
Add iSCSI Target iSCSI Target Setting Basic Settings Create on RAID: KendoR5 Target Name: kendo01 ign Year & Month: 2015 11 Status Disable Enable Advanced Next CancelTo allocate space for an iSCSI target on the current RAID volume, follow the steps below:
- Select desired RAID volume from its drop down list to have iSCSI target created.
- Enter a Target Name. This will be used by the Stackable NAS function to identify this export share.
- Choose the current year from the Year dropdown.
- Choose the current month from the Month dropdown.
- Enable the iSCSI Target Volume by selecting Enable.
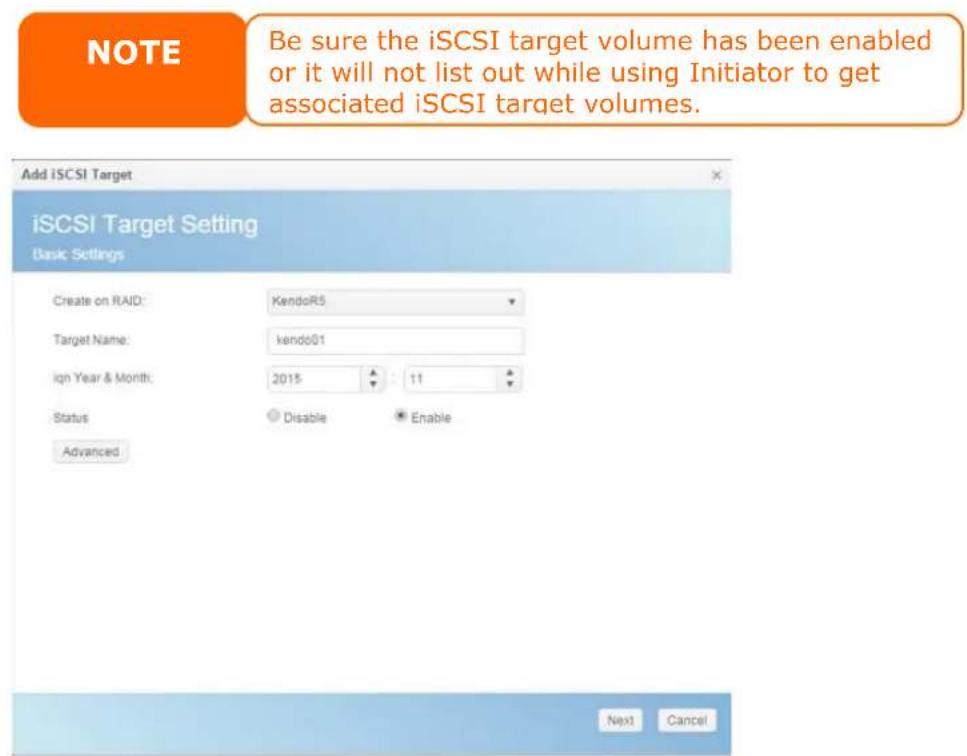
text_image
NOTE Be sure the iSCSI target volume has been enabled or it will not list out while using Initiator to get associated iSCSI target volumes. Add iSCSI Target iSCSI Target Setting Basic Settings Create on RAID: KendoR5 Target Name: kendoQ1 igh Year & Month: 2015 11 Status Disable Enable Advanced Next CancelClick Next
-
Choose Authority Type to enable CHAP authentication or None.
-
If you've enabled CHAP authentication, enter a username and a password. Confirm your chosen password be reentering it in the Password Confirm box.
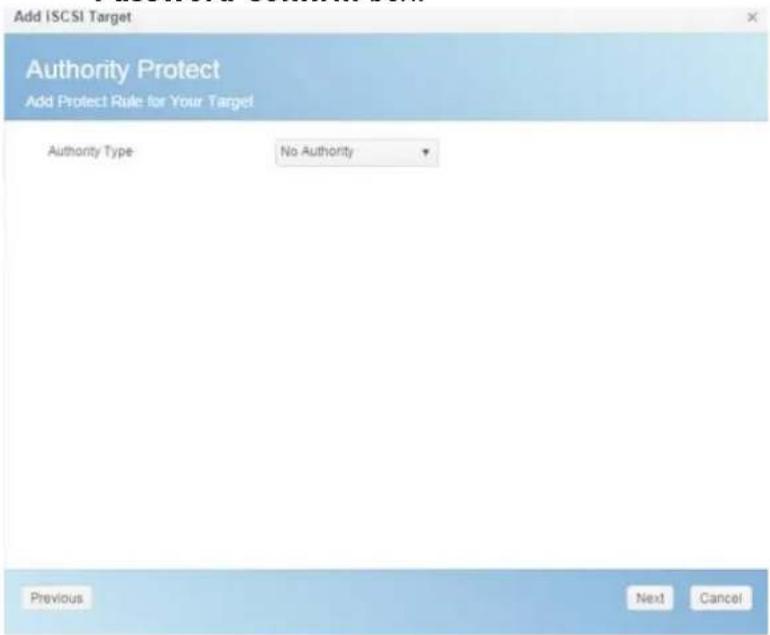
text_image
Add ISCSI Target Authority Protect Add Protect Rule for Your Target Authority Type No Authority Previous Next CancelAuthority Type
Mutual CHAP

CHAP:
CHAP User Name:
Please Input iSCSI User Name Here
CHAP Password:
Please Input iSCSI User Password Here
Confirm CHAP Password:
Mutual CHAP
Mutual User Name:
Please Input iSCSI User Name Here
Mutual Password:
Please Input iSCSI User Password Here
Confirm Mutual Password:
Click Next
-
Enter a LUN Name.
-
When iSCSI target volume has been created, the LUN ID is configurable from 0 to 254 with a default of the next available number in ascending numerical order. The LUN ID is unique and cannot be duplicated.
-
Designate the capacity for associate LUN.
-
Choose Thin-Provision or Instant Allocation
- Choose [4K] block size to have iSCSI target volume over 2TB barrier or [512 Bytes] block size in some application needed.
NOTE
The iSCSI target volume creation will associate at least one LUN together. It can be assigned either "Thin-Provisioning" or "Instant Allocation".
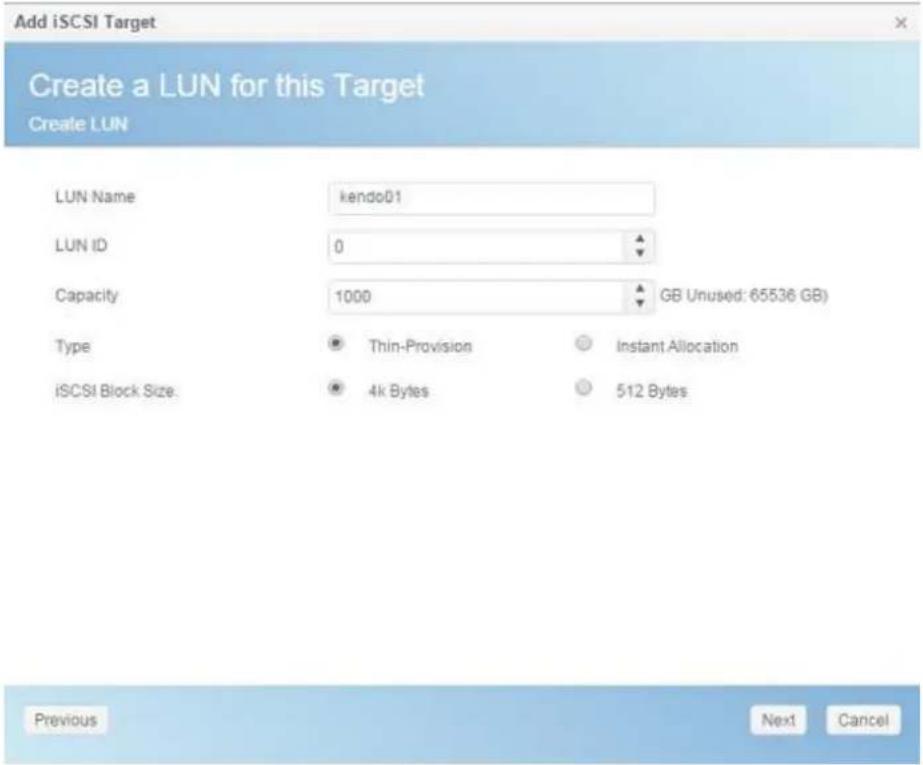
text_image
Add iSCSI Target Create a LUN for this Target Create LUN LUN Name:kendo01 LUN ID 0 Capacity 1000 GB Unused: 65536 GB) Type Thin-Provision Instant Allocation iSCSI Block Size 4k Bytes 512 Bytes Previous Next CancelClick Next
- It will display the setting for associated iSCSI target creation. Click Finish to create the iSCSI volume.
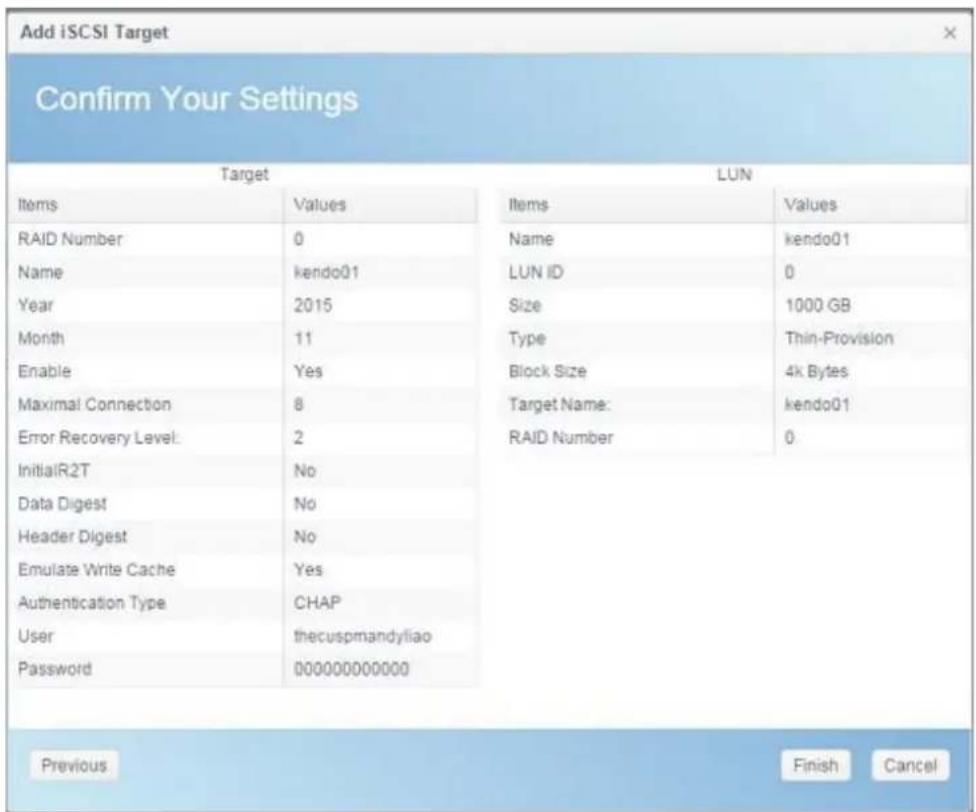
text_image
Add iSCSI Target Confirm Your Settings Target LUN Items Values Items Values RAID Number 0 Name kendo01 Name kendo01 LUN ID 0 Year 2015 Size 1000 GB Month 11 Type Thin-Provision Enable Yes(Block Size 4k Bytes Maximal Connection 8 asset Name:kendo01 Error Recovery Level: 2 RAID Number 0 InitialR2T No Data Digest No Header Digest No Emulate Write Cache Yes Authentication Type CHAP User thecuspmandyliao Password 000000000000 Previous Finish Cancel| Create iSCSI Volume | |
| Item | Description |
| iSCSI Target Volume | Enable or Disable the iSCSI Target Volume. |
| Target Name | Name of the iSCSI Target. This name will be used by the Stackable NAS function to identify this export share. |
| ign_Year | Select the current year from the dropdown. |
| Iqn_Month | Select the current month from the dropdown. |
| Authentication | You may choose CHAP authentication or choose None. |
| Username | Enter a username. |
| Password | Enter a password. |
| Password Confirm | Reenter the chosen password |
| Mutual CHAP | With this level of security, the target and the initiator authenticate each other. |
| Username | Enter a username. |
| Password | Enter a password. |
| Password Confirm | Reenter the chosen password |
| RAID ID | ID of current RAID volume. |
| LUN Allocation | Two modes can be choose from:Thin-provision : iSCSI thin-provisioning shares the available physical capacity to multiple iSCSI target volumes. It allows virtual capacity to be assigned to targets prior to adding physical space when it has run out.Instant Allocation: Allocate available physical capacity to iSCSI target volumes. |
| LUN Name | Name of the LUN. |
| Unused | Unused space on current RAID volume. |
Max Connections
The maximum number of iSCSI connections.
Error Recovery Level
The Error Recovery Level (ERL) is negotiated during a leading iSCSI connection login in traditional iSCSI (RFC 3720) and iSER (RFC 5046).
ERL=0: Session Recovery
ERL=0 (Session Recovery) is triggered when failures within a command, within a connection, and/or within TCP occur. This causes all of the previous connections from the failed session to be restarted on a new session by sending a iSCSI Login Request with a zero TSIHRestart all iSCSI connections on any failure.
ERL=1: Digest Failure Recovery
ERL=1, only applies to traditional iSCSI. For iSCSI/SCTP (which has its own CRC32C) and both types of iSER (so far), handling header and data checksum recovery can be disabled.
ERL=2: Connection Recovery
ERL=2, allows for both single and multiple communication path sessions within a iSCSI Nexus (and hence the SCSI Nexus) to actively perform realligence/retry on iSCSI ITTs from failed iSCSI connections. ERL=2 allows iSCSI fabrics to take advantage of recovery in all regards of transport level fabric failures, and in a completely OS independent fashion (i.e. below the host OS storage stack).
initialR2T
InitialR2T is a setting that only really matters over high-latency WAN connections and perhaps in some exotic situations with synchronous writes to very, very fast storage.
iSCSI CRC/Checksum
To enable this option, the initiator can connect with "Data digest" and "Header digest".
Emulate Write Cache
To enable this option, the performance will increase.
Modify/Remove iSCSI Target
To modify or remove iSCSI target on the current RAID volume, follow the steps below:
- Under the iSCSI List, click on desired iSCSI volume you like to modify or remove.
| ISCSI List | ISCSI Setting | NAS Stacking | |||
| Add Edit | |||||
| Status | Name | Create o... | Auth | LUNs | IQN |
| Enable | kendo01 | KendoR5 | CHAP | 1 | ign.2015- 11.com.thecus.n5810pro.iscsi.kendo01.raid0 |
| Enable | kendo02 | KendoR5 | No Authority | 1 | ign.2015- 11.com.thecus.n5810pro.iscsi.kendo02.raid0 |
| Enable | kendo03 | KendoR5 | No Authority | 1 | ign.2015- 11.com.thecus.n5810pro.iscsi.kendo03.raid0 |
- Click on Edit and associated screen will appear.
- Click on Remove Target to remove it or make necessary change then press Apply to confirm.
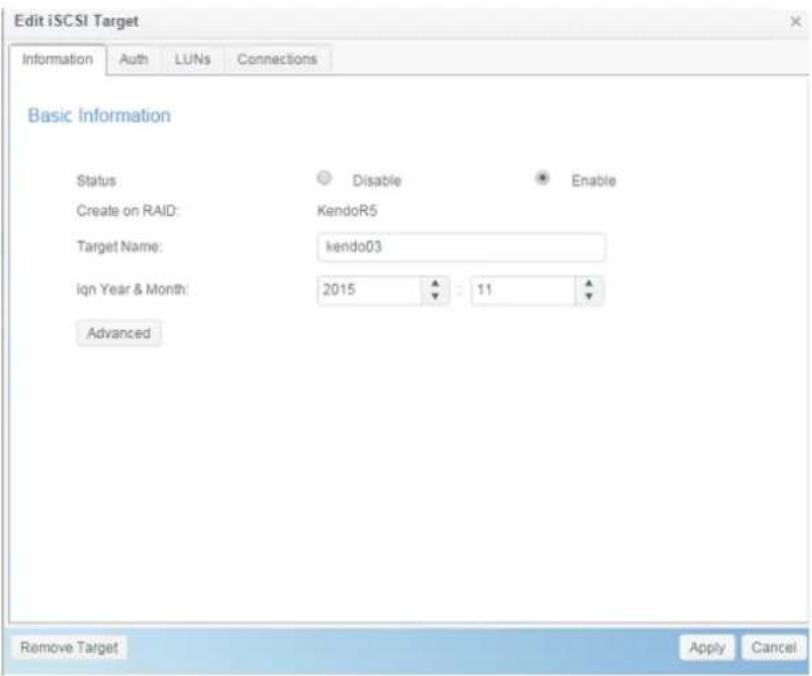
text_image
Edit iSCSI Target Information Auth LUNs Connections Basic Information Status Disable Enable Create on RAID: KendoR5 Target Name: kendo03 ign Year & Month: 2015 11 Advanced Remove Target Apply Cancel- The associated LUN ID can be changed and also expand LUN capacity from LUNs tab.
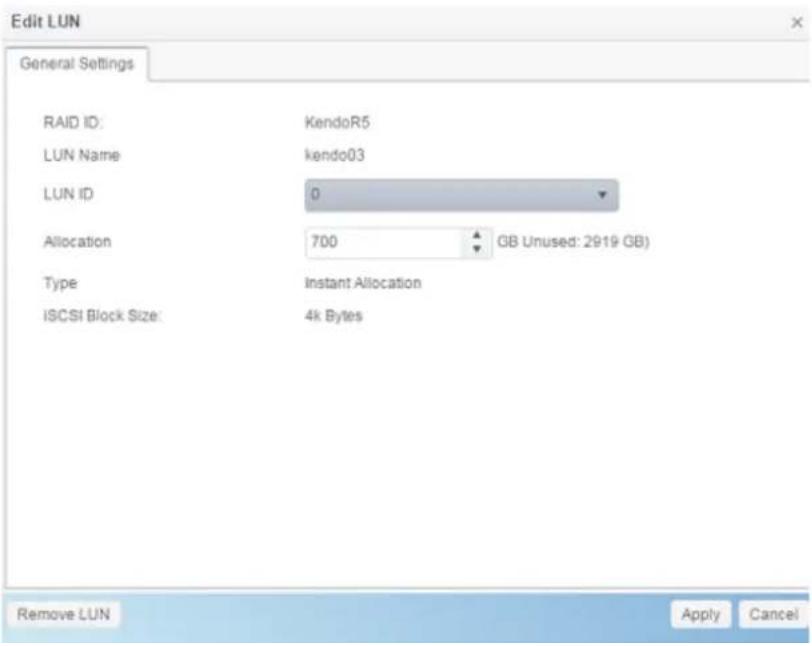
text_image
Edit LUN General Settings RAID ID: KendoR5 LUN Name kendo03 LUN ID 0 Allocation 700 GB Unused: 2919 GB) Type Instant Allocation ISCSI Block Size: 4k Bytes Remove LUN Apply Cancel- To check the connection for associated LUN, click on Connections.
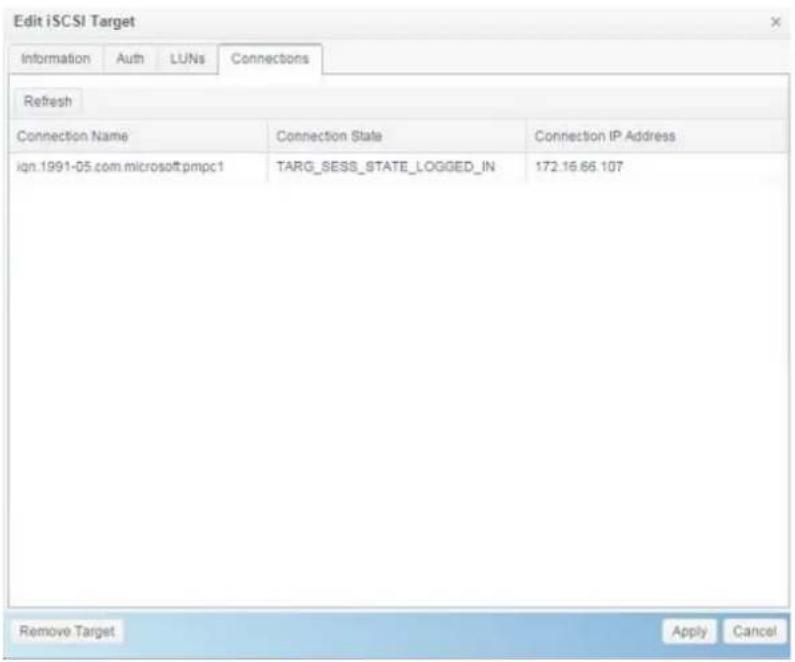
text_image
Edit iSCSI Target Information Auth LUNs Connections Refresh Connection Name Connection State Connection IP Address ign.1991-05.com.microsoft.pmpc1 TARG_SESS_STATE_LOGGED_IN 172.16.66.107 Remove Target Apply CanceliSCSI Setting
The iSCSI service can be enabled/disabled globally. If iSCSI service has been turned off then each individual iSCSI volume will be inaccessible.
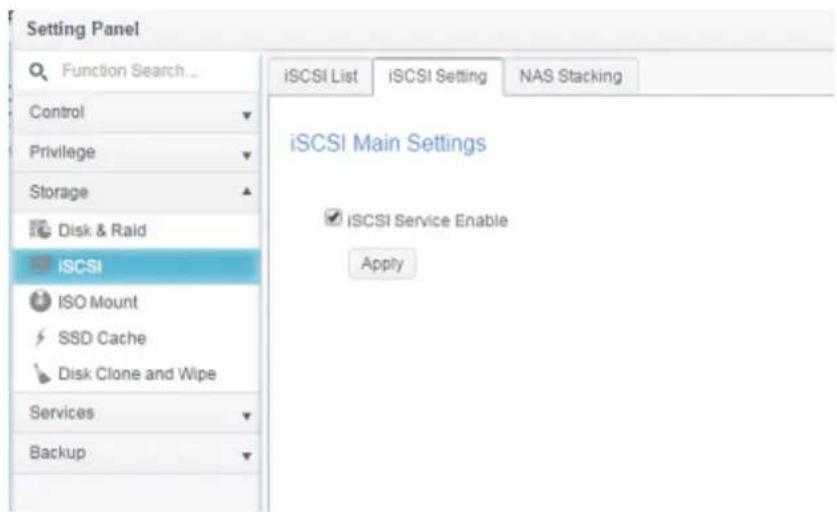
text_image
Setting Panel Function Search... Control Privilege Storage Disk & Raid iSCSI ISO Mount SSD Cache Disk Clone and Wipe Services Backup iSCSI List iSCSI Setting NAS Stacking iSCSI Main Settings ✓ iSCSI Service Enable ApplyNAS Stacking
The Thecus IP storage's capacity can be expanded even further using the stackable function. With it, users can expand the capacity of their network storage systems up to 5 other stack target volumes which are located in different systems. These can be stacked through single network access like SMB or AFP acting as a share folder type.
From the main menu, the NAS Stacking feature is located in iSCSI under "Storage". Please refer the figure below for reference.
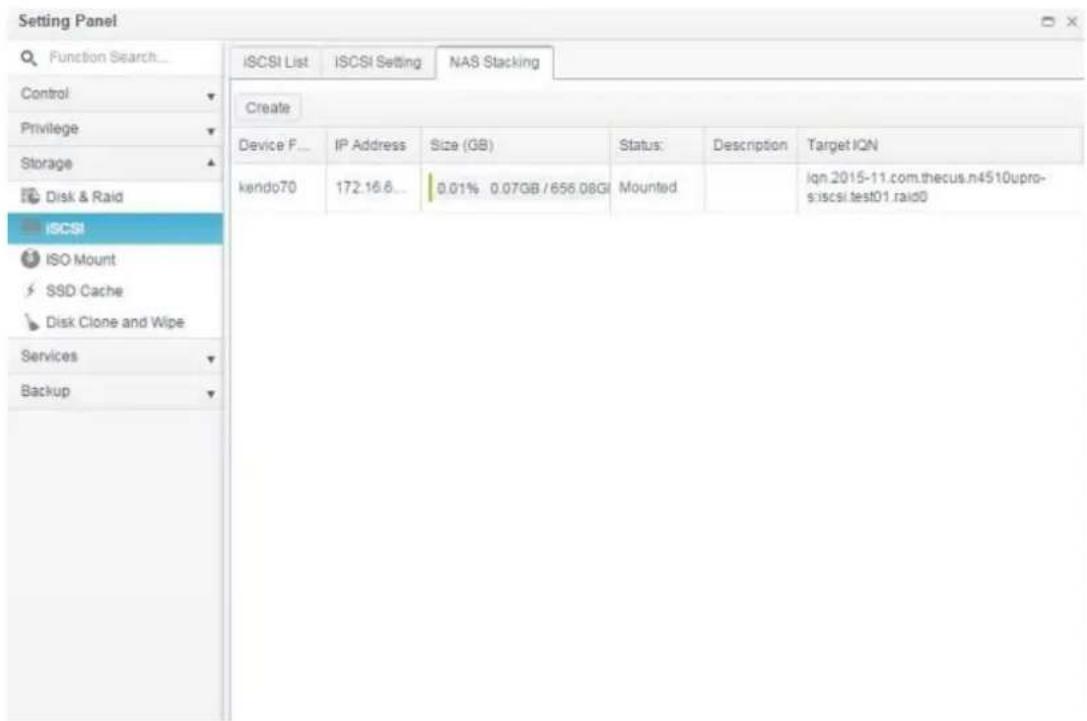
text_image
Setting Panel Function Search... Control Privilege Storage Disk & Raid iSCSI ISO Mount SSD Cache Disk Clone and Wipe Services Backup iSCSI List iSCSI Setting NAS Stacking Create Device F... IP Address Size (GB) Status: Description企業 Target IQN kendo70 172.16.6... 0.01% 0.07GB / 656.08GI Mounted iqn.2015-11.com.thecus.n4510upro- s:iscsi.test01.raid0A. Add a Stack Target Volume
From the figure above, click Create to access the stackable target device configuration page. Please refer to the figure below:
With the added stack target you can "Enable" or "Disable" the stack target now or later depending on usage required.
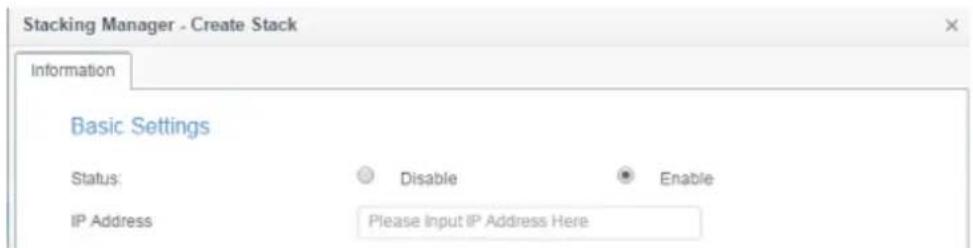
text_image
Stacking Manager - Create Stack Information Basic Settings Status: Disable Enable IP Address Please Input IP Address HereNext, input the target IP address of the stackable device and click the Discovery Target button. The system will list available target volumes from the inputted IP address.
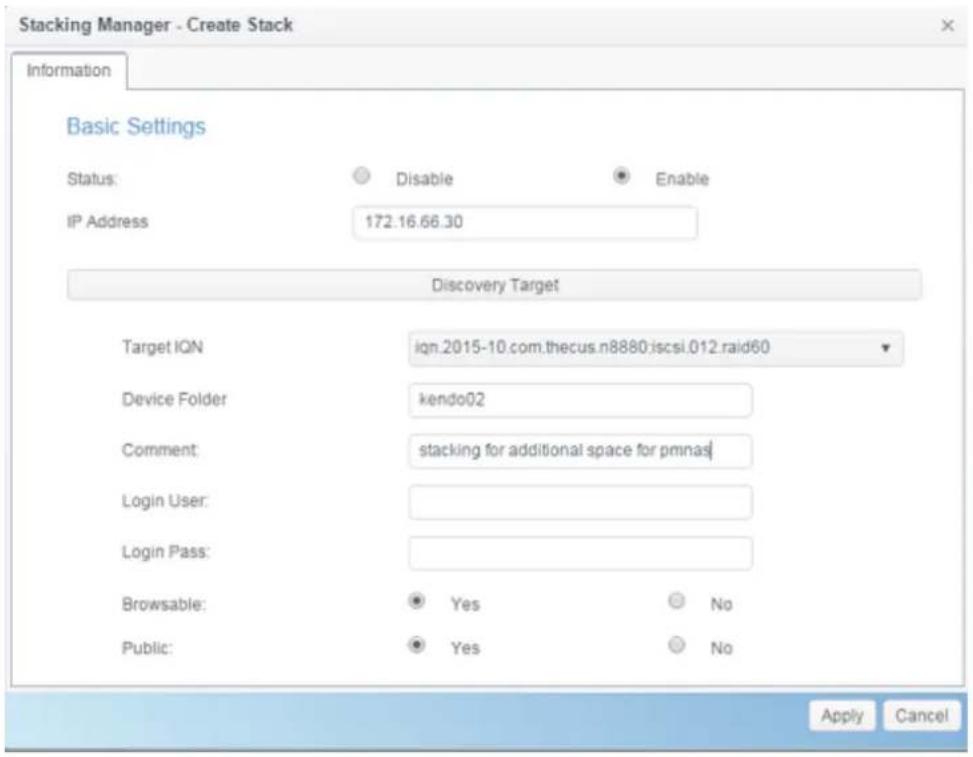
text_image
Stacking Manager - Create Stack Information Basic Settings Status: Disable Enable IP Address 172.16.66.30 Discovery Target Target IQN ign.2015-10.com.thecus.n8880.iscsi.012.raid60 Device Folder kendo02 Comment: stacking for additional space for pmnas Login User: Login Pass: Browsable: Yes No Public: Yes No Apply CancelSelect Target IQN from drop list whic will be the stacking device after connected.
The Device Folder will become the network share name and will be displayed through network access such as SMB. You may input Comment to tell the subject of this stack folder if needed.
For this associated stacking device, you may need to input a valid user name and password to validate your access rights. If there is no user name and password needed to access target volume, then leave it blank.
From the figure above, the Device Folder is "kendo02". The figures below show the result before and after via Microsoft Network Access when settings have been completed.
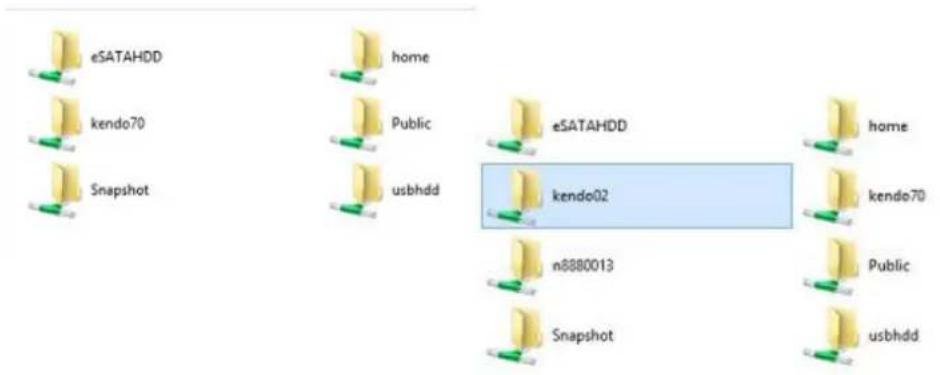
text_image
eSATAHDD kendo70 Snapshot home Public usbhdd eSATAHDD kendo02 n8880013 Snapshot home kendo70 Public usbhddThe Browseable setting is the same method used for setting a system share folder. It designates whether or not this folder will be visible through web disk. You may refer to the figure below for reference when Yes and No are selected.
The Public setting will be set the same way as the setting for the system share folder associated with the ACL permission is. The sample above of Device Folder "Kendo02" can be found from share folder list.
| Shared Folder | |||||
| Create Edit & ACL | |||||
| Folder Name | Create ... | File Sy... | Public | Description | Quota Limit |
| Snapshot | KendoR5 | btrfs | No | * | |
| Public | KendoR5 | btrfs | Yes | * | |
| HOME | KendoR5 | btrfs | Yes | * | |
| eSATAHDD | KendoR5 | btrfs | Yes | * | |
| USBHDD | KendoR5 | btrfs | Yes | * | |
| iSCSI_kendo01 | KendoR5 | btrfs | No | iSCSI Target Folder | * |
| iSCSI_kendo03 | KendoR5 | btrfs | No | iSCSI Target Folder | * |
| iSCSI_kendo04 | KendoR5 | btrfs | No | iSCSI Target Folder | * |
| kendo70 | KendoR5 | btrfs | Yes | * | |
| kendo02 | KendoR5 | btrfs | Yes | stacking for additional space for pmnas | * |
| n8880013 | KendoR5 | btrfs | Yes | -- | |
Click Apply to save your changes.
B. Activate a Stack Target
After your settings have been applied, the system will bring you back to the NAS Stacking List window as shown below. There is one stack target device that has been attached into this stack master.
With this newly attached stack target device, you will see the information displayed.
| iSCSI List | iSCSI Setting | NAS Stacking | |||
| Create | |||||
| Device F... | IP Address | Size (GB) | Status: | Description | Target IQN |
| kendo02 | 172.16.6... | Connected | stacking for additional space for pmnas | iqn.2015-10.com.thecus.n8880.iscsi.012.raid60 | |
| kendo70 | 172.16.6... | 0.01% 0.07GB / 656.08GI | Mounted | iqn.2015-11.com.thecus.n4510upro-s.iscsi.test01.raid0 | |
In general, clicking on associated stack target, if the attached stack target device has been used by another Thecus NAS as stack target volume, then the status Mounted will be displayed and system will recognize it straight away and display its capacity. Otherwise, the Connected will be displayed in Status. Now click on associated stack target and you will see the File System Format tab appear. Click on it to proceed with formatting.
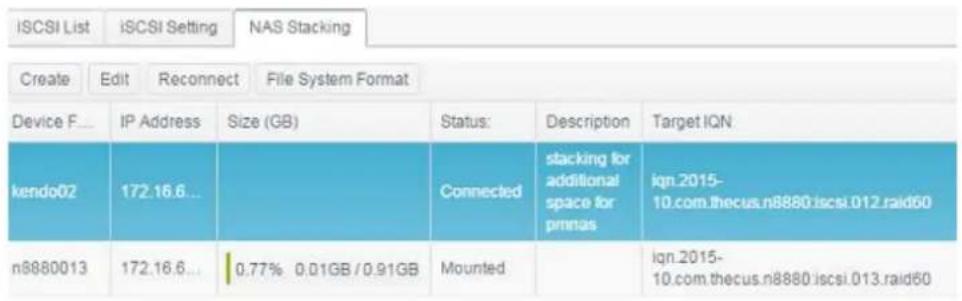
text_image
ISCSI List iSCSI Setting NAS Stacking Create Edit Reconnect File System Format Device F... IP Address Size (GB) Status: Description Target IQN kendo02 172.16.6... Connected stacking for additional space for prmnas iqn.2015-10.com.thecus.n8880.iscsi.012.raid60 n8880013 172.16.6... 0.77% 0.01GB / 0.91GB Mounted iqn.2015-10.com.thecus.n8880.iscsi.013.raid60After the format is completed, the stack target volume will be created successfully. You will see the volume's capacity and status in the NAS Stacking List screen.
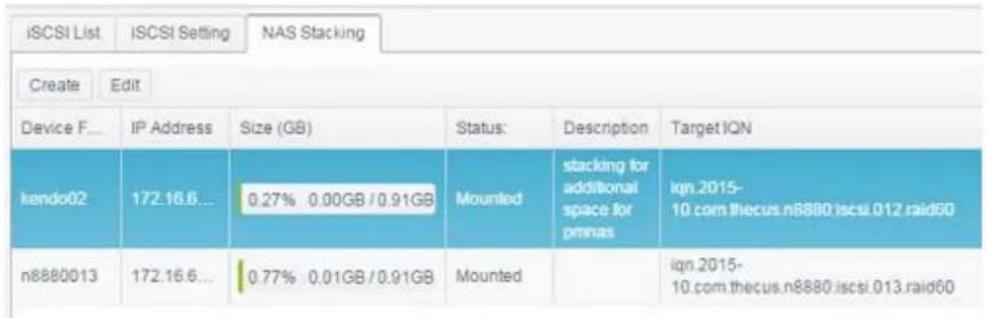
text_image
iSCSI List iSCSI Setting NAS Stacking Create Edit Device F... IP Address Size (GB) Status: Descriptionedges Target IQN kendo02 172.16.6... 0.27% 0.00GB / 0.91GB Mounted stacking for additional space for pmnas ign.2015-10.com.thecus.n8880.iscsi.012.raid60 n8880013 172.16.6... 0.77% 0.01GB / 0.91GB Mounted ign.2015-10.com.thecus.n8880.iscsi.013.raid60C. Edit a Stack Target
To make any changes to a stack target, select the corresponding stack target then click Edit, and the system will bring up the following dialogue window:
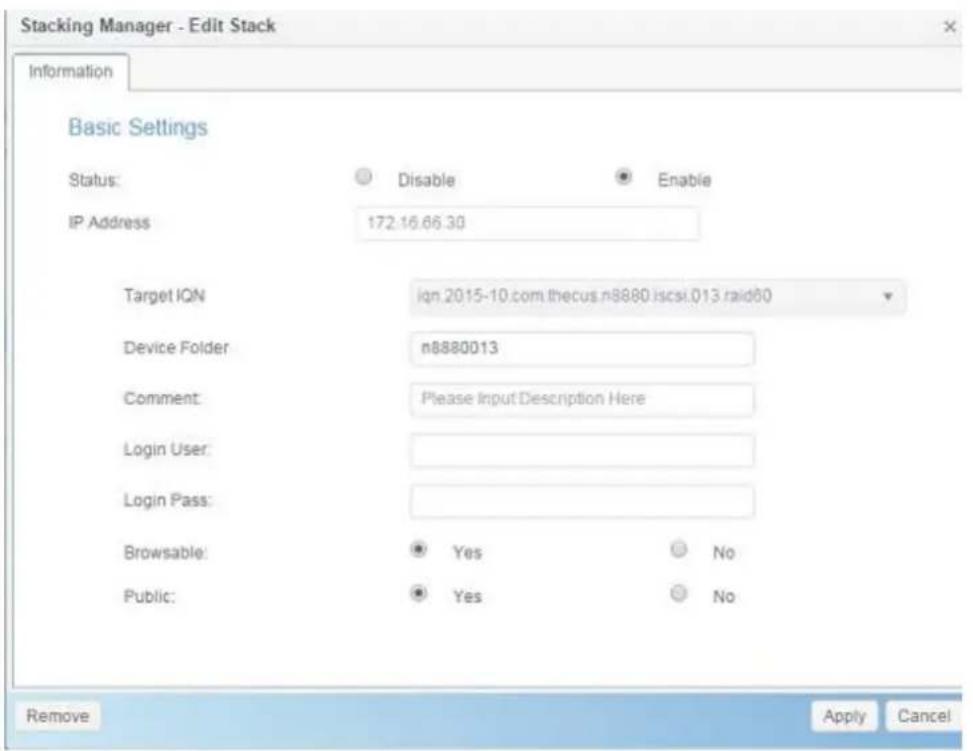
text_image
Stacking Manager - Edit Stack Information Basic Settings Status: Disable Enable IP Address 172.16.66.30 Target IQN iqn 2015-10.com.thecus.n8880.iscsi.013.raid60 Device Folder n8880013 Comment: Please Input Description Here Login User: Login Pass: Browsable: Yes No Public: Yes No Remove Apply CancelAfter your changes have been made, click Apply to confirm any modifications. Once changes are applied, the associated information will be updated on the Stack Target List window.
D. Stack Target ACL
Go to the System Folder section with associated Device Folder created by NAS stacking. The ACL settings will be exactly the same as the system folder that you may have setup previously.
E. Reconnect a Stack Target
This is used to enable stack target devices that may have been disconnected due to a power outage or a disconnected network. When this happens, the
Reconnect button will become available. To attempt to reconnect the stack target, click Reconnect.
| iSCSI List | iSCSI Setting | NAS Stacking | |||
| Create | Edit | Reconnect | File System Format | ||
| Device F... | IP Address | Size (GB) | Status: | Description | Target IQN |
| kendo02 | 172.16.6... | 0.27% 0.00GB / 0.91GB | Mounted | stacking for additional space for pmnas | ign.2015-10.com.thecus.n8880.iscsi.012.raid60 |
| n8880013 | 172.16.6... | 0.77% 0.01GB / 0.91GB | Mounted | ign.2015-10.com.thecus.n8880.iscsi.013.raid60 | |
| os5164 | 172.16.6... | Connected | ign.2015-11.com.thecus.n4510upro-s.iscsi.test01.raid0 |
ISO Mount
The ISO Mount feature is a very useful tool from the Thecus product line. With it, users can mount an ISO file and have the export name display all the details from the mounted ISO file.
From the Control Panel, the ISO Mount feature is located under "Storage".
Select the ISO Image function and the ISO Image Mounting window will appear as shown below.
A. Add an ISO file
Click on the Add button and the available system share will appear.
| ISO Mount | ||
| Add | ||
| ISO File Name | Path | Size |
| XenServer-5.6.0-install-cd.iso | /raid/data/ftproot/NAS_Public/myisofile | 431MB |
To mount the new ISO file, select one ISO file from the associated share list and input the desired mounting name into the "Mount Folder Name" field. Click Mount to confirm the completion of the mounting.
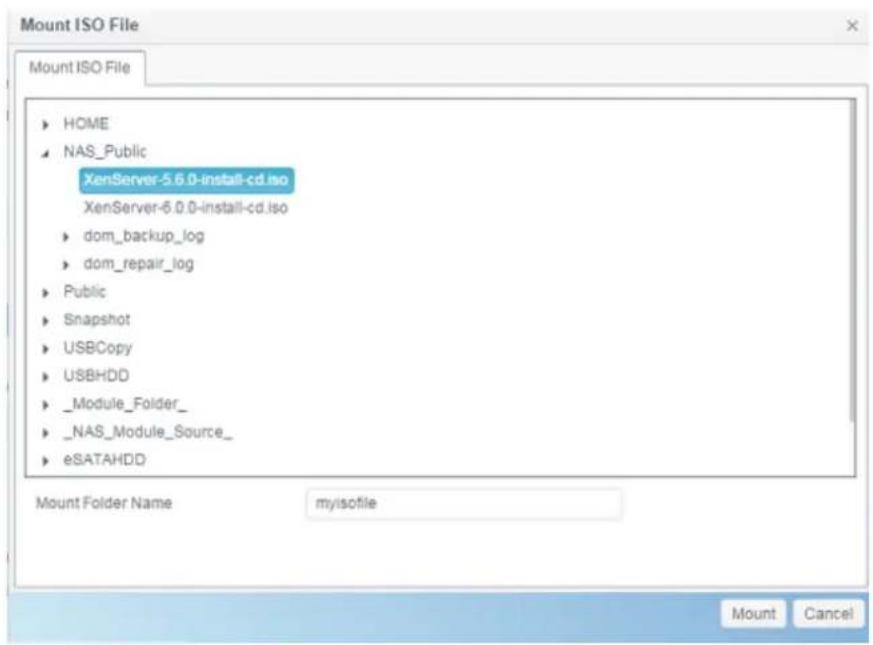
text_image
Mount ISO File Mount ISO File ► HOME ► NAS_Public XenServer-5.6.0-install-cd.iso XenServer-6.0.0-install-cd.iso ► dom_backup_log ► dom_repair_log ► Public ► Snapshot ► USBCopy ► USBHDD ► _Module_Folder_ ► _NAS_Module_Source_ ► eSATAHDD Mount Folder Name myisofile Mount CancelAfter completion, the page will display all mounted ISO files.
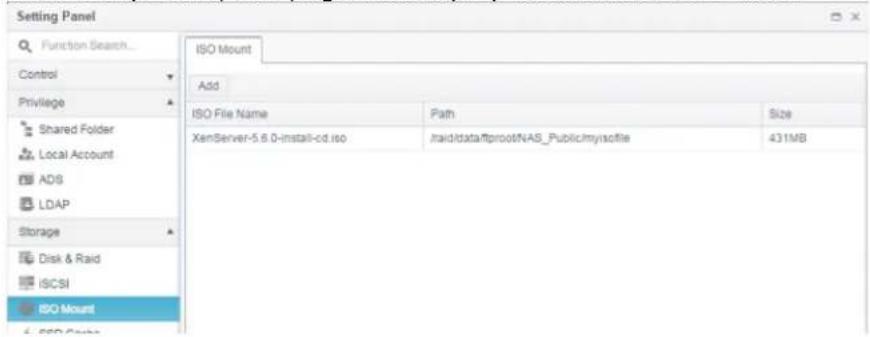
text_image
Setting Panel Function Search... Control Privilege Shared Folder Local Account ADS LDAP Storage Disk & Raid ISCSI ISO Mount Add ISO File Name Path Size XenServer-5.6.0-install-cd.iso .raid/data#productNAS_Public#mysoftile 431MBTo unmount the image file, select the mounted ISO file from list then click Unmount to eliminate a mounted ISO file.

text_image
ISO Mount Add Unmount ISO File Name Path Size XenServer-5 6.0-install-cd.iso //raid/data//proof/NAS_Public//myisoffile 431MBB. Using ISO
The mounted ISO image file will have a folder created from input "Mount Folder Name" and be located in the share folder same as selected ISO file. Please refer the screen shot below and folder "myisofile" can be found.
| dom_backup_log | 2015/10/28 上午 ... |
| dom_repair_log | 2015/11/5 下午 0... |
| myisofile | 2010/5/20 下午 0... |
| XenServer-5.6.0-install-cd.iso | 2010/11/10 下午 ... |
| XenServer-6.0.0-install-cd.iso | 2012/2/16 下午 0... |
Disk Clone & Wipe
From the Control Panel, the Disk Clone and Wipe feature is located under "Storage".
Select the Disk Clone and Wipe function and the unused internal and installed USB disks will list as shown below.
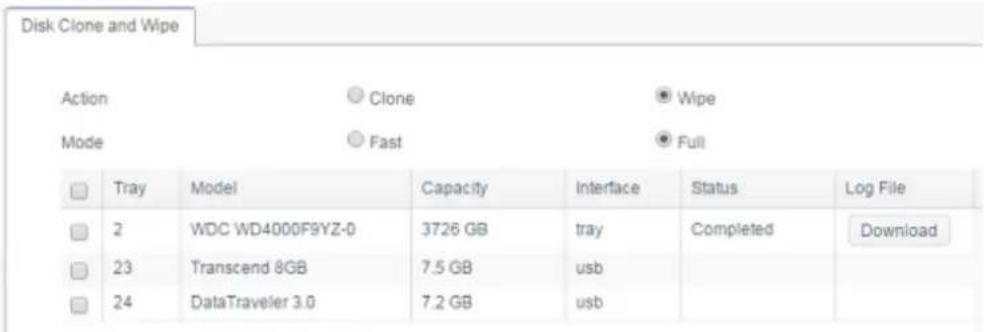
text_image
Disk Clone and Wipe Action Clone Wipe Mode Fast Full Tray Model Capacity Interface Status Log File 2 WDC WD4000F9YZ-0 3726 GB tray Completed Download 23 Transcend 8GB 7.5 GB usb 24 DataTraveler 3.0 7.2 GB usbDisk Clone:
Unused Disks and plugin USB disks that have been installed on this storage device can utilize the disk clone function. If disks have already been configured in a RAID volume or as a spare disk, they cannot perform disk clone.
To start disk clone, select the source disk from the Source Disk drop down menu and target a disk from the dialog box as seen below. Carry on to press "Apply," then the task will start after confirmation. It may take a few hours depending on the size of the disk.
Please be sure the source disk is equal to or smaller than the target disk.
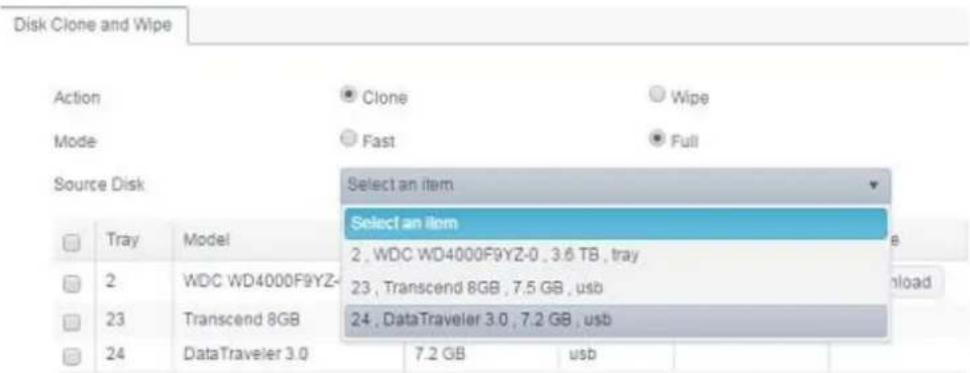
text_image
Disk Clone and Wipe Action Clone Wipe Mode Fast Full Source Disk Select an item Select an item Tray Model 2,WDC WD4000F9YZ-0,3.6 TB, tray 23,Transcend 8GB,7.5 GB,usb 24,DataTraveler 3.0,7.2 GB,usb 24 DataTraveler 3.0 7.2 GB usbApply
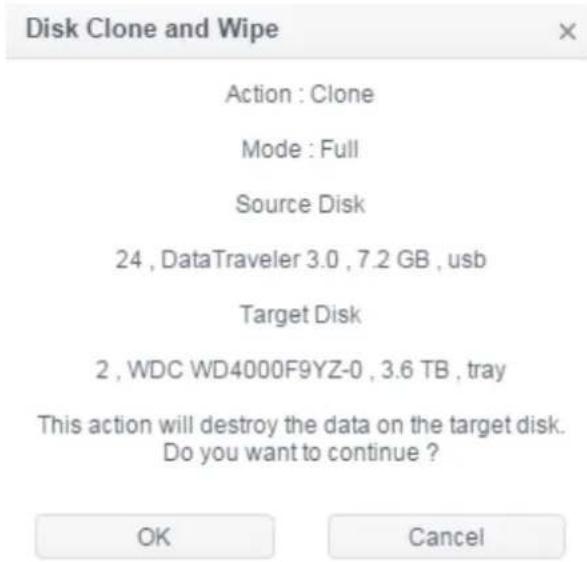
text_image
Disk Clone and Wipe Action : Clone Mode : Full Source Disk 24 , DataTraveler 3.0 , 7.2 GB , usb Target Disk 2 , WDC WD4000F9YZ-0 , 3.6 TB , tray This action will destroy the data on the target disk. Do you want to continue ? OK CancelThe task will list and status as shown below.
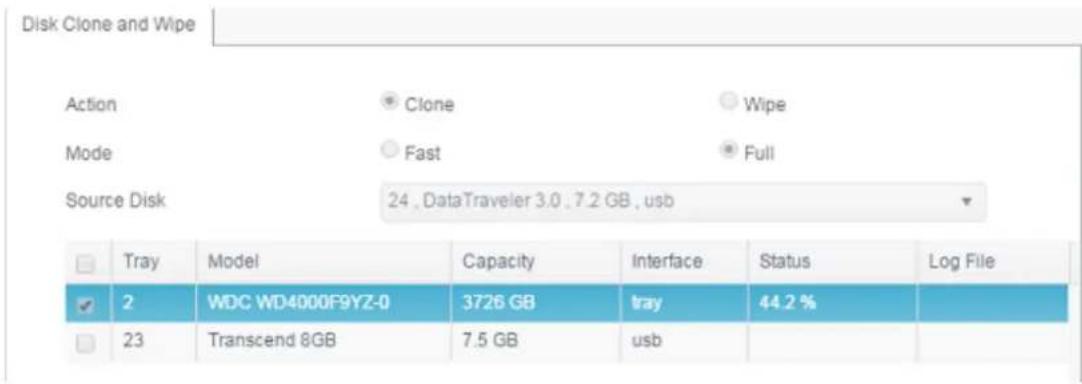
text_image
Disk Clone and Wipe Action Clone Wipe Mode Fast Full Source Disk 24 , DataTraveler 3.0 , 7.2 GB , usb Tray Model Capacity Interface Status Log File 2 WDC WD4000F9YZ-0 3726 GB tray 44.2 % 23 Transcend 8GB 7.5 GB usbDisk Wipe:
Disk Wipe is able to erase data from selected disks. Again, disks that have already been configured in a RAID volume or as a spare disk cannot perform this function.
To start disk wipe, select the disk from the list and carry on to press "Apply," then the task will start after confirmation. It may take a few hours depending on the size of the disk.
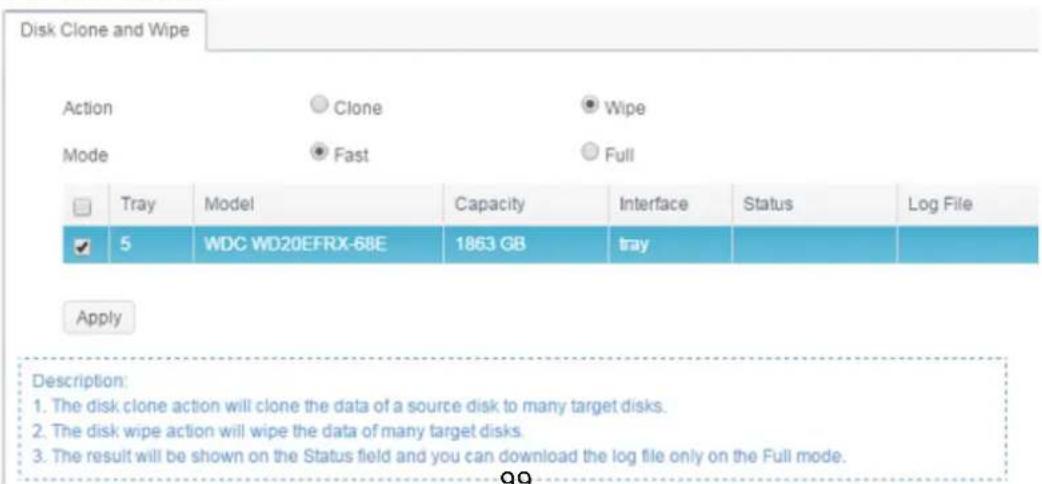
text_image
Disk Clone and Wipe Action Clone Wipe Mode Fast Full Tray Model Capacity Interface Status Log File 5 WDC WD20EFRX-68E 1863 GB tray Apply Description: 1. The disk clone action will clone the data of a source disk to many target disks. 2. The disk wipe action will wipe the data of many target disks. 3. The result will be shown on the Status field and you can download the log file only on the Full mode.The task will list and status as shown below.
Disk Clone and Wipe ×
Action: Wipe
Mode : Fast
Target Disk
5, WDC WD20EFRX-68E, 1.8 TB, tray
This action will destroy the data on the target disk.
Do you want to continue?
OK
Cancel
| Tray | Model | Capacity | Interface | Status | Log File |
| 5 | WDC WD20EFRX-68E | 1863 GB | tray | 0.4 % |
Abort
| Disk Clone and Wipe | |
| Item | Description |
| Action | Click to choose to perform Disk Clone or Disk Wipe |
| Mode | 2 options can be chosen:Fast: suitable for single disk to many tasks but less information to be displayedFull: suitable for single to single disk operation and will have a complete log recorded during operation |
| Source Disk | Listed available disks can used as the source disk while performing disk clone |
| Target Disk | Listed available disks can be used for disk clone or disk wipe |
| Apply | To save your settings. |
Services
SERVICES

File Service

Web Service

SSH Service

iTunes Service

SNMP Service

VPN Service

UPnP Service
Use the Services menu to make network service support settings.
File Service
Samba
There are options allow Admin to Enable/Disable to operate Thecus IP storage associated with Samba / CIFS protocol.
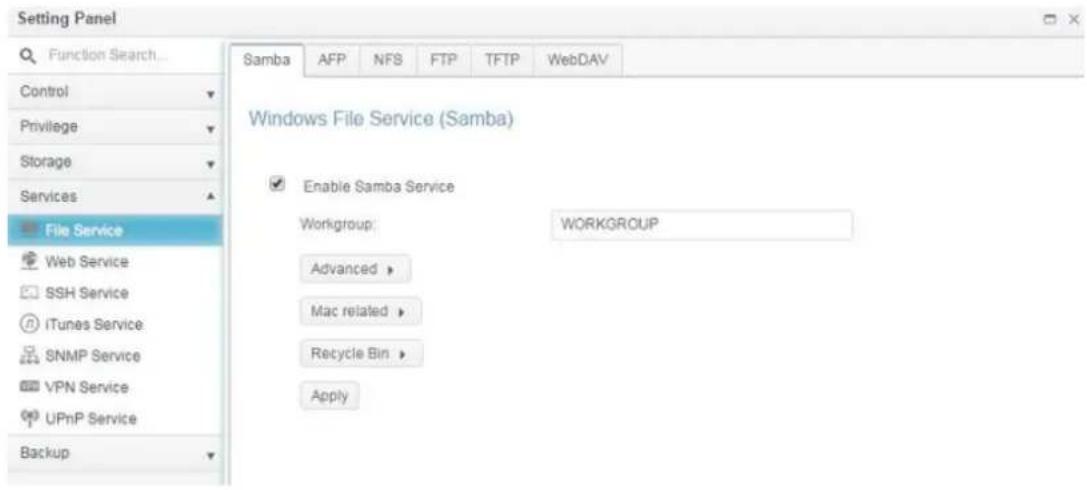
text_image
Setting Panel Function Search... Control Privilege Storage Services File Service Web Service SSH Service iTunes Service SNMP Service VPN Service UPnP Service Backup Samba AFP NFS FTP TFTP WebDAV Windows File Service (Samba) Enable Samba Service Workgroup: WORKGROUP Advanced > Mac related > Recycle Bin > ApplySamba Service
Used for letting the operating system of UNIX series and SMB/CIFS of Microsoft Windows operating system (Server Message Block / Common Internet File System). Do the link in network protocol. Enable or Disable SMB/CIFS protocol for Windows, Apple, Unix drive mapping.
NOTE
- In some environments, due to security concerns, you may wish to disable SMB/CIFS as a precaution against computer viruses.
For more options related to the Samba option, please click Advanced for details.
Advanced
General Setting
File Access Cache
☑ Restrict Anonymous Login
Native Mode
Allow Trusted Domains
NT ACL Support
Allocated buffering size
Block Size
Server Signing
Support policy for LDAP
File Access Cache
File Access Cache is default Enable. This option will help to increase the performance while single client access the share folder in writing under SMB/CIFS protocol.
Restrict Anonymous Login
To enable this option, no matter there is share folder has been created in public access. The user account and password is needed from system to access under SMB/CIFS protocol. On the other hand, no more anonymous login is allowed.
Native Mode
The Thecus IP storage is supported Samba mode options. In the ADS environment with "Native" mode selected then Thecus IP storage is capable to become local master position.
Allowed Trusted Domain
This is useful if you only want your Samba server to serve resources to users in the domain it is a member of. As an example, suppose that there are two domains DOMA and DOMB. DOMB is trusted by DOMA, which contains the Samba server. Under normal circumstances, a user with an account in DOMB can then access the resources of a UNIX account with the same account name on the Samba server even if they do not have an account in DOMA. This can make implementing a security boundary difficult.
NT ACL Support
This setting controls whether Samba will attempt to map UNIX permissions into Windows NT access control lists.
Allowed Buffering Size (Block Size)
This function controls the behavior of Samba when reporting available disk space. This function was added to allow advanced administrators to increase block size to increase write performance without re-compiling the code.
Disabled= 4k Enabled=256k
Server Signing
This is setting while Samba server has been used in US of FDCC. If the system has used only in Windows environment choose "Mandatory" otherwise "Auto".
is Support policy for LDAP
The client LDAP sasl wrapping defines whether ldap traffic will be signed or signed and encrypted (sealed). Possible values are plain, sign and seal.
For Mac related option, please click on "Mac Related" for details.
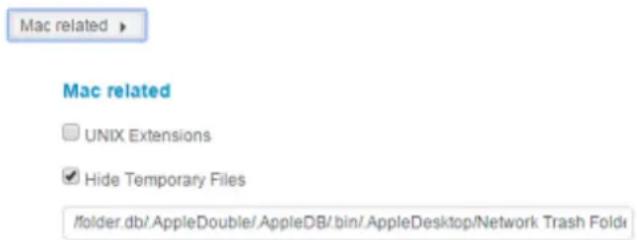
text_image
Mac related Mac related UNIX Extensions Hide Temporary Files /folder.db/AppleDouble/AppleDB/bin/AppleDesktop/Network Trash FoldiUNIX Extension
The default is enabled for Samba usage, if there is a situation with using Mac OSX with smb connection, it may have permission issue. When it happens, please setup "UNIX Extension" disable to get issue solved.
Hide Temporary File
This is a list of files or directories that are not visible but are accessible
For Samba Recycled Bin related setting, please see below.
Recycle Bin
Recycle Bin
Enable Recycle Bin
☑ Display Folder
Auto Deleted
Max File Size
The Thecus IP storage is supported recycle bin via SMB/CIFS protocol.
Simply enable the "Recycle Bin" function and "Recycle Folder Display" then all of deleted files/folders will reside in the "_NAS_Recycle_(Associated RDID Volume)" share folder.
For example, the system has created 2 RAID volumes with ID "RAIDpm" and 'RAID". Then it will have 2 recycle bin folder appear as "_NAS_Recycle_RAID" and "_NAS_Recycle_RAIDpm".

_NAS_Recycle_RAID
共用

_NAS_Recycle_RAIDpm
共用
There are 2 more setting could help to manage the recycle bin for deleted folders/files.
- Setup the "Day" to remove deleted folders/files which has resided in recycle bin permanently. Left default value "0" if desired to clean up recycle bin manually.
- Setup the "Size" for recycle bin to allow deleted folders/files can store. Left default value "0" with no limitation.
NOTE
- The deleted files/folders which have resided in recycle bin will keep its permission. On the other hand, only the admin and owner can view/read/write these folders/files.
- If deleted single file size is large than 2GB then it won't reside in the recycle bin but erase permanently.
AFP
From the File Services menu, choose the AFP item, and the AFP Support screen appears. This screen displays the configuration items for the Apple Filing Protocol. You can change any of these items and press Apply to confirm your settings.
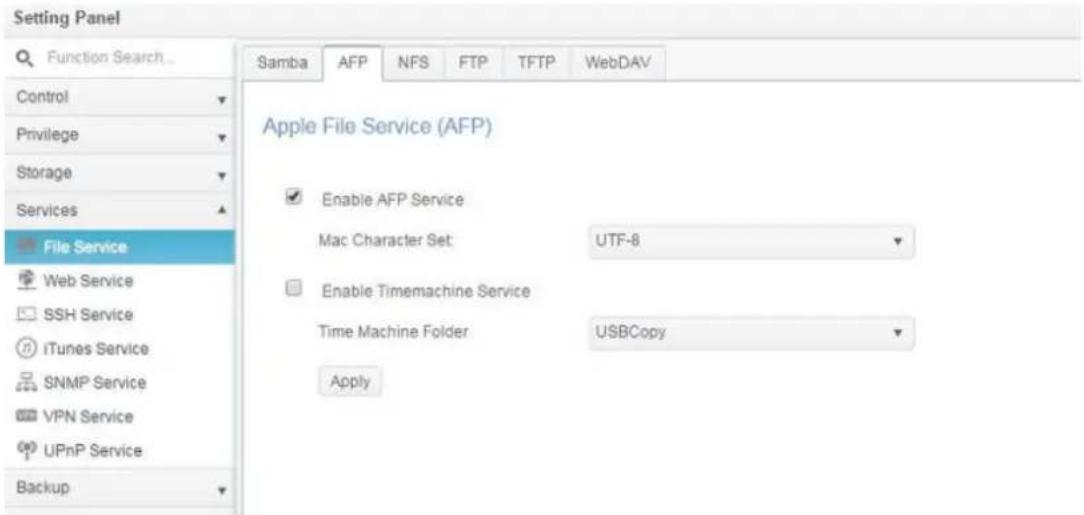
text_image
Setting Panel Function Search... Control Privilege Storage Services File Service Web Service SSH Service iTunes Service SNMP Service VPN Service UPnP Service Backup Samba AFP NFS FTP TFTP WebDAV Apple File Service (AFP) Enable AFP Service Mac Character Set: UTF-8 Enable Timemachine Service Time Machine Folder: USBCopy ApplyA description of each item follows:
| Apple Network Configuration | |
| Item | Description |
| AFP Server | Enable or disable Apple File Service to use the Thecus IP storage with MAC OS-based systems. |
| MAC CHARSET | Specifies the code page from the drop down list. |
| Zone | Specifies Zone for Applet Talk service.If your AppleTalk network uses extended networks and is assigned with multiple zones, assign a zone name to the Thecus IP storage. If you do not want to assign a network zone, enter an asterisk (*) to use the default setting. |
| Time Machine | Click the enable checked box if you would like your MAC system to use the Thecus IP storage as MAC time machine backup. |
| Time Machine backup folder | Select from the drop down list to designate the folder for time machine backup destination. |
NFS
From the System NetworkFile Ss menu, choose the NFS item, and the NFS Support screen appears. The Thecus IP storage can act as an NFS server, enabling users to download and upload files with their favorite NFS clients. Press Apply to confirm your settings.
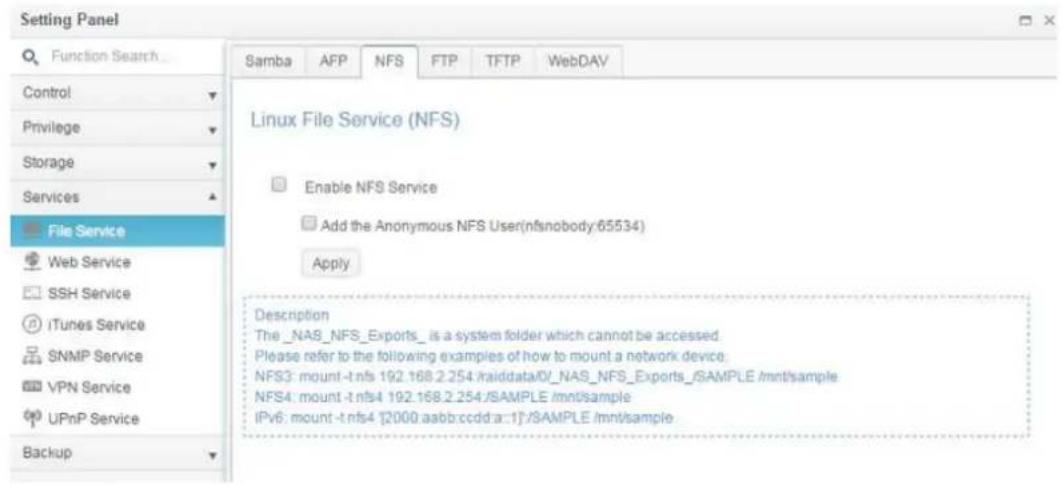
text_image
Setting Panel Function Search... Samba AFP NFS FTP TFTP WebDAY Control Privilege Storage Services File Service Web Service SSH Service iTunes Service SNMP Service VPN Service UPnP Service Backup Linux File Service (NFS) Enable NFS Service Add the Anonymous NFS User(nfsnobody:65534) Apply Description The _NAS_NFS_Exports_ is a system folder which cannot be accessed. Please refer to the following examples of how to mount a network device. NFS3: mount-t nfs 192.168.2.254:/raidata0/_NAS_NFS_Exports_/SAMPLE /mnt/sample NFS4: mount-t.nfs4 192.168.2.254:/SAMPLE /mnt/sample IPv6: mount-t.nfs4 [2000.asbb:ccdd:a:1]:/SAMPLE /mnt/sampleA description of each item follows:
| NFS Server Setting | |
| Item | Description |
| NFS | Enable or Disable NFS support. |
| NFS Threads | Choose the number of NFS threads. |
| Advanced | Checked to add the Anonymous NFS User. |
| Apply | Click Apply to save your changes. |
FTP
The Thecus IP storage can act as an FTP server, enabling users to download and upload files with their favorite FTP programs. From the System File Ss menu, choose the FTP item, and the FTP screen appears. You can change any of these items and press Apply to confirm your settings.
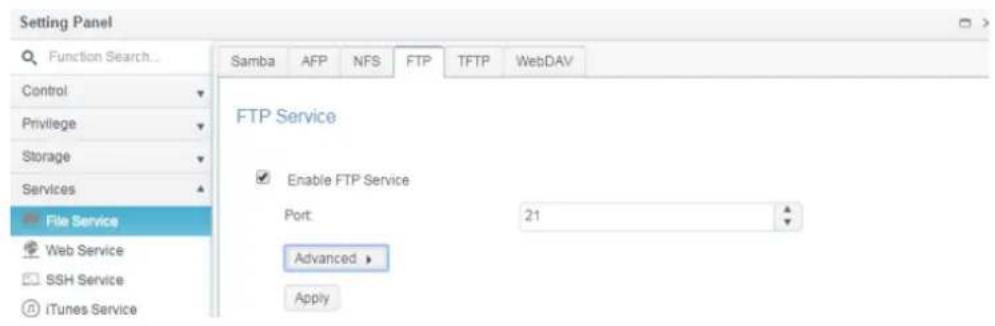
text_image
Setting Panel Function Search... Samba AFP NFS FTP TFTP WebDAV Control Privilege Storage Services File Service Web Service SSH Service iTunes Service FTP Service Enable FTP Service Port: 21 Advanced > ApplyClick on "Advanced" button to have more setting details.
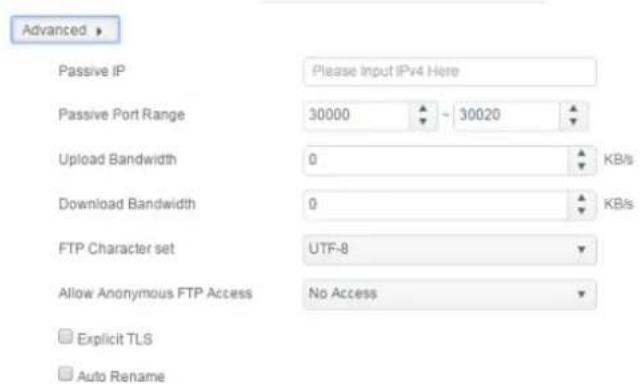
text_image
Advanced Passive IP Please Input IPv4 Here Passive Port Range 30000 ~ 30020 Upload Bandwidth 0 KB/s Download Bandwidth 0 KB/s FTP Character set UTF-8 Allow Anonymous FTP Access No Access Explicit TLS Auto RenameA description of each
item follows:
| FTP | |
| Item | Description |
| FTP | Enables FTP Service on the Thecus IP storage. |
| Port | Specifies the port number of an incoming connection on a non-standard port. |
| Passive IP | Input the public IP address of the router when the Thecus secure FTP server has been enabled. This can help to respond to the ftp client with proper communication information. |
| Passive Port Range (30000-32000) | Limited port range for the FTP server to use. |
| FTP ENCODE | If your FTP client or operating system does not support Unicode (e.g. Windows® 95/98/ME or MAC OS9/8), select the same encoding as your OS here in order to properly view the files and directories on the server. Available options are BIG5, HZ, GB2312, GB18030, ISO, EUC-JP, SHIFT-JIS and UTF-8. |
| Allow Anonymous FTP | Upload/Download: Allow anonymous FTP users to upload or |
| Access | download files to/from public folders.Download: Allow anonymous FTP users to download files from public folders.No access: Block anonymous FTP user access. |
| Upload Bandwidth | You may set the maximum bandwidth allocated for file uploads. Selections include Unlimited, 1 ~ 32 MB/s. |
| Download Bandwidth | You may set the maximum bandwidth allocated for file downloads. Selections include Unlimited, 1 ~ 32 MB/s. |
| Explicit TLS | Enable or disable Security TLS, be sure the client FTP software has also security TLS setting enabled. |
| Auto Rename | If checked, the system will automatically rename files that are uploaded with a duplicate file name. The renaming scheme is [filename].#, where # represents an integer. |
TFTP
Thecus IP storage can act as a TFTP server, enabling users to download and upload files with their favorite TFTP programs. From the System NetworkFile Ss menu, choose the TFTP item, and the TFTP screen appears. You can change any of these items and press Apply to confirm your settings.
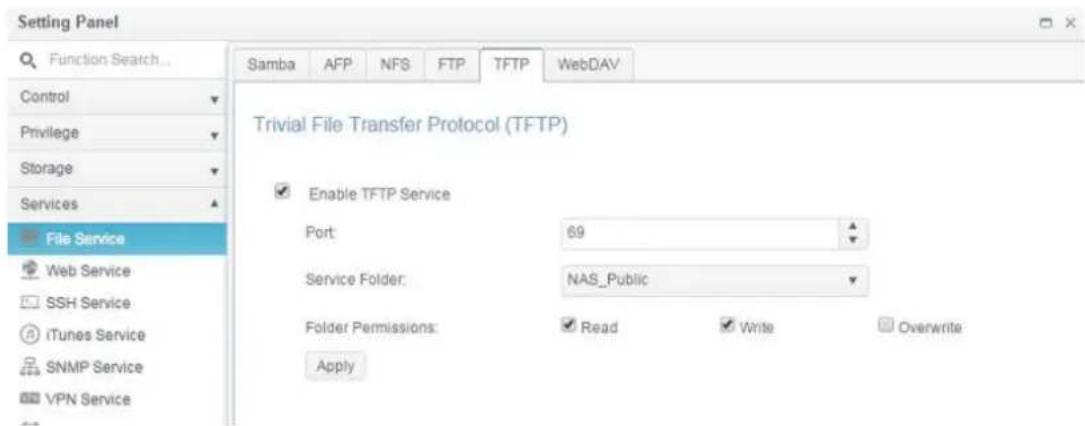
text_image
Setting Panel Function Search... Samba AFP NFS FTP TFTP WebDAV Control Privilege Storage Services File Service Web Service SSH Service iTunes Service SNMP Service VPN Service Trivial File Transfer Protocol (TFTP) Enable TFTP Service Port: 69 Service Folder: NAS_Public Folder Permissions: Read Write Overwrite ApplyA description of each item follows:
| TFTP | |
| Item | Description |
| TFTP | Enables TFTP Service on the Thecus IP storage. |
| IP | Checked WAN/LAN1 or LAN2 to enable port use |
| Port | Specifies the port number of an incoming connection on a non-standard port. |
| Share Folder | Select the file stored folder, it cannot be empty. |
| Folder Permission | Select the folder permission |
WebDAV
The WebDAV is an extended protocol of http(s) which allows remote access to your NAS system.
To begin using WebDAV and WebDAV SSL, simply click enable and provide the port number. The default port number is 9800, under normal circumstances this will not need to be changed.
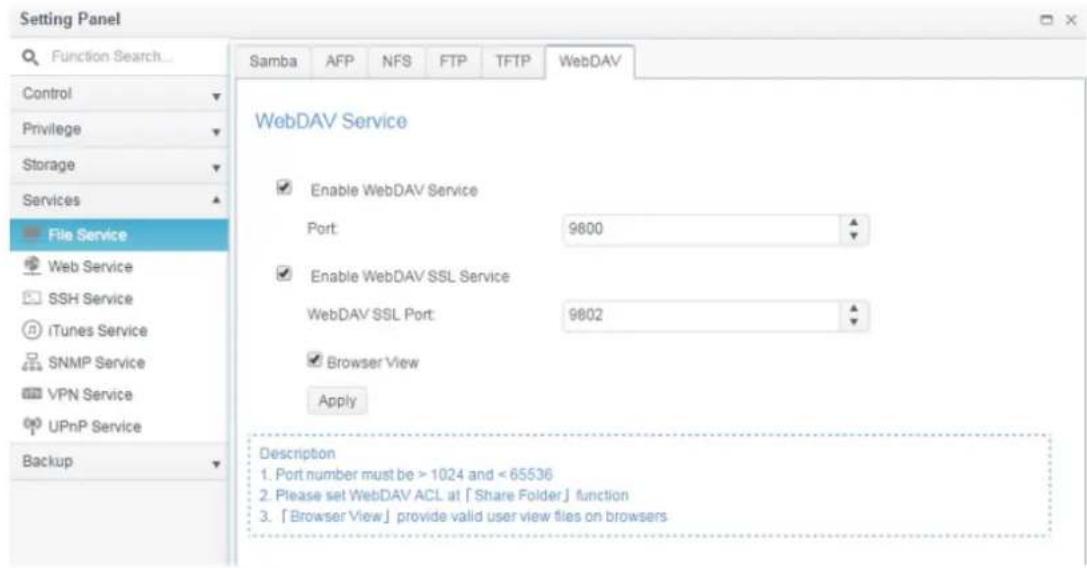
text_image
Setting Panel Function Search... Samba AFP NFS FTP TFTP WebDAV Control Privilege Storage Services File Service Web Service SSH Service iTunes Service SNMP Service VPN Service UPnP Service Backup WebDAV Service Enable WebDAV Service Port: 9800 Enable WebDAV SSL Service WebDAV SSL Port: 9802 Browser View Apply Description 1. Port number must be > 1024 and < 65536 2. Please set WebDAV ACL at [ Share Folder ] function 3. [ Browser View ] provide valid user view files on browsers| WebDAV Configuration | |
| Item | Description |
| WebDAV Service | Press the Enable button to activate WebDAV service and specify the port number if it needs to change from the default value.P.S. Port number is limited to greater than 1024 and less than 65536 |
| WebDAV SSL Service | Press the Enable button to activate WebDAV SSL service and specify the port number if it needs to be changed from the default value.P.S. The ort number is limited to greater than 1024 and less than 65536 |
| Browser View | Press the Enable button and viewing the share folder list through the browser will be allowed |
| Apply | Click “Apply” to confirm the changes. |
Web Service
From the Services menu, choose the Web Service item, and the Web Service screen appears. This screen displays the service support parameters of the system. You can change any of these items and press Apply to confirm your settings.
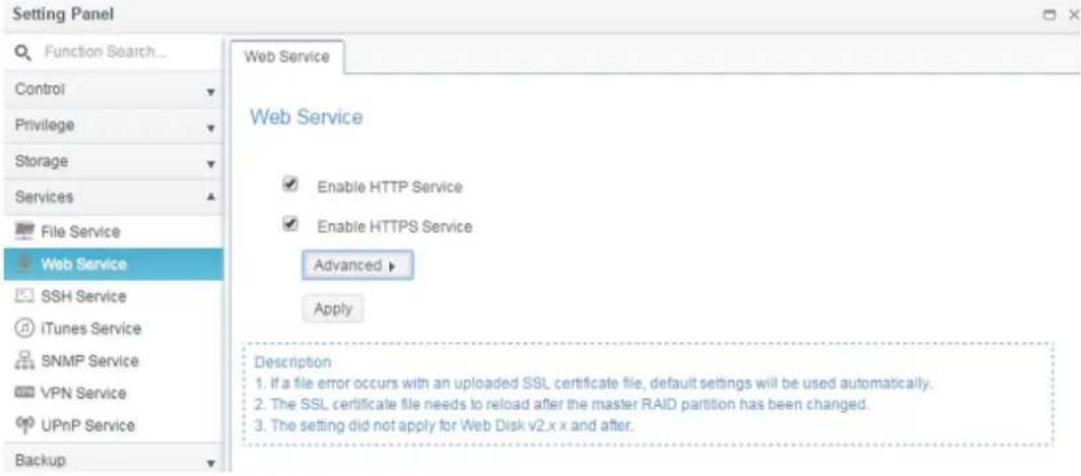
text_image
Setting Panel Function Search... Control Privilege Storage Services File Service Web Service SSH Service iTunes Service SNMP Service VPN Service UPnP Service Backup Web Service Web Service Enable HTTP Service Enable HTTPS Service Advanced > Apply Description 1. If a file error occurs with an uploaded SSL certificate file, default settings will be used automatically. 2. The SSL certificate file needs to reload after the master RAID partition has been changed. 3. The setting did not apply for Web Disk v2.x x and after.Click on the Advanced button to have more setting details.
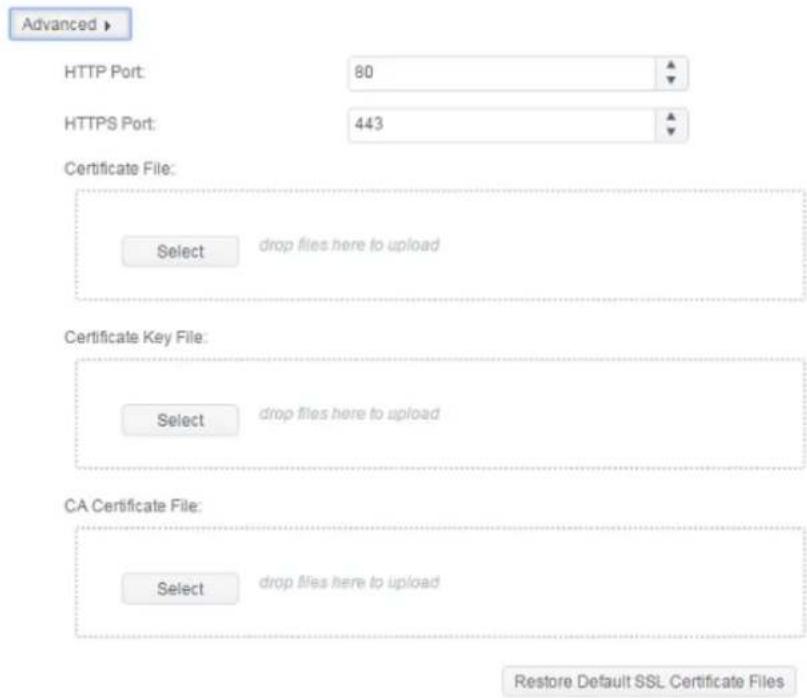
text_image
Advanced HTTP Port: 80 HTTPS Port: 443 Certificate File: Select drop files here to upload Certificate Key File: Select drop files here to upload CA Certificate File: Select drop files here to upload Restore Default SSL Certificate FilesA description of each item follows:
| Web Service | |
| Item | Description |
| HTTP (WebDisk) Support | Enable or disable WebDisk support. Enter the port number if this option is enabled. The port number is default 80. |
| HTTPS (Secure WebDisk) Support | Enable or disable secure WebDisk support. Enter the port if this option is enabled. |
| Certificate Type | Select "User" if there is available Certification ID ex. Apply from VeriSign. Or using system default by select "System". |
| Certificate File | Upload Certificate File if choose Certificate type "User". |
| Certificate Key File | Upload Certificate Key File if choose Certificate type "User". |
| CA Certificate File | Upload CA Certificate File if choose Certificate type "User". |
| Restore All SSL Certificate Files | Click to set back to default certification details. |
| Apply | Click "Apply" to confirm the changes. |
NOTE
- Disable HTTP support and Enable Secure HTTP support to guarantee secure access.
SSH Service
The device is now SSH protocol supported. It allows user to use SSH and have console to manipulate as needed. The SSH default login user name is "root" with full privilege and password is admin's password. The default admin password is "admin" so once the admin password has changed then SSH login need to change the password too.
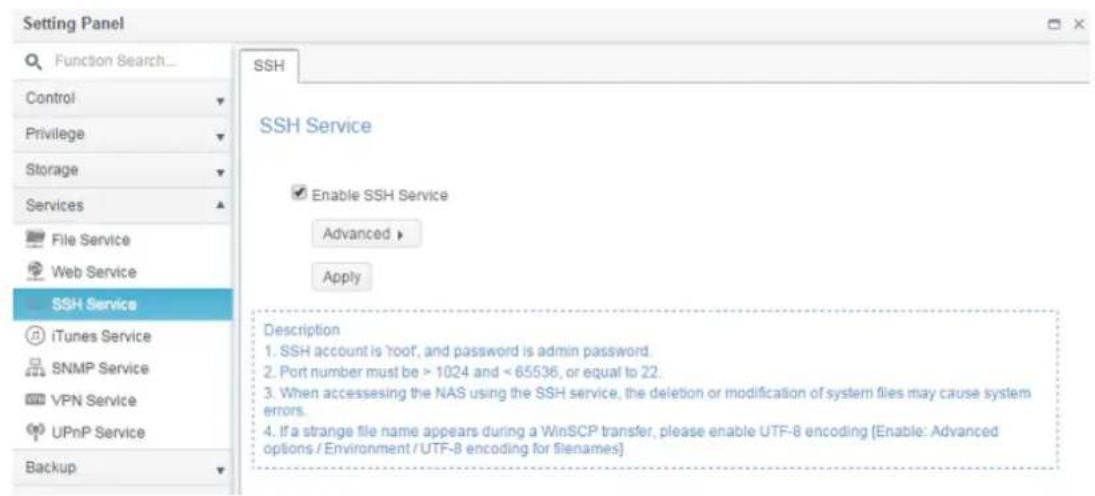
text_image
Setting Panel Function Search... Control Privilege Storage Services File Service Web Service SSH Service iTunes Service SNMP Service VPN Service UPnP Service Backup SSH SSH Service Enable SSH Service Advanced > Apply Description 1. SSH account is 'roof', and password is admin password. 2. Port number must be > 1024 and < 65536, or equal to 22. 3. When accessing the NAS using the SSH service, the deletion or modification of system files may cause system errors. 4. If a strange file name appears during a WinSCP transfer, please enable UTF-8 encoding [Enable: Advanced options / Environment / UTF-8 encoding for filenames]Click on Advanced button to have more setting details.
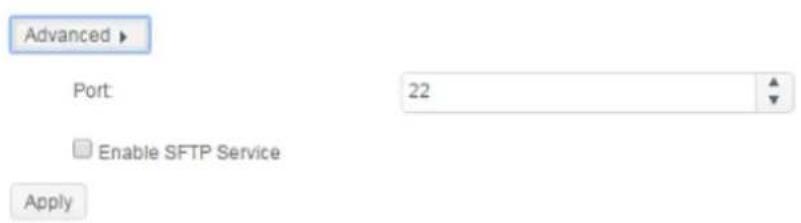
text_image
Advanced Port: 22 Enable SFTP Service ApplyA description for each item as following:
| SSH | |
| Item | Description |
| SSH Service | Enable or disable SSH service. |
| Port | The port number is default 22. |
| SFTP | Enable or disable SFTP protocol under SSH service. |
| Apply | Click "Apply" to confirm the changes. |
iTunes Service
With the built-in iTunes server capability, Thecus IP storage enables digital music to be shared and played anywhere on the network!
From the s menu, choose the iTunes item, and the iTunes Configuration screen appears. You may enable or disable the iTunes Service from here. Once enabled, enter the proper information for each field and press Apply to save your changes.
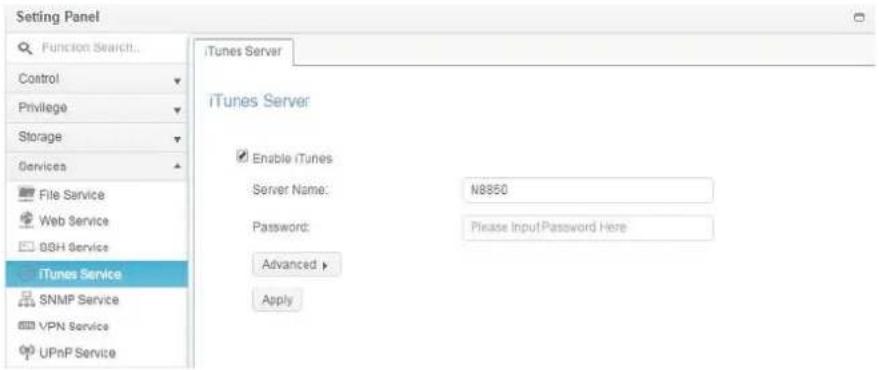
text_image
Setting Panel Function Search... Control Privilege Storage Services File Service Web Service BSH Service iTunes Service SNMP Service VPN Service UPnP Service iTunes Server iTunes Server Enable iTunes Server Name: N8850 Password: Please Input Password Here Advanced > ApplyClick on "Advanced" button to have more setting details.
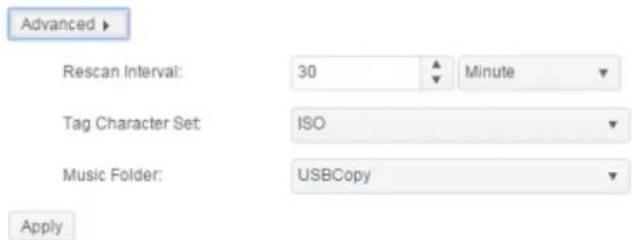
text_image
Advanced Rescan Interval: 30 Minute Tag Character Set: ISO Music Folder: USBCopy ApplySee the following table for a detailed description of each field:
| iTunes Configuration | |
| Item | Description |
| iTunes Service | Enable or disable the iTunes Service. |
| iTunes Server Name | Name used to identify Thecus IP storage to iTunes clients. |
| Password | Enter a password to control access to your iTunes music. |
| Rescan Interval | Rescan interval in seconds. |
| Tag Character Set | Specify tag encoding for MP3 files stored in Thecus IP storage.All ID3 tags will be sent out in UTF-8 format. |
| Music Folder | Select from drop down list for music location of associated iTunes server on the network |
SNMP Service
From the Services menu, choose the SNMP item and the SNMP Support screen appears. You could enable the SNMP function and fill in the related information in each fields. With the SNMP management software, you can get other system's basic information.
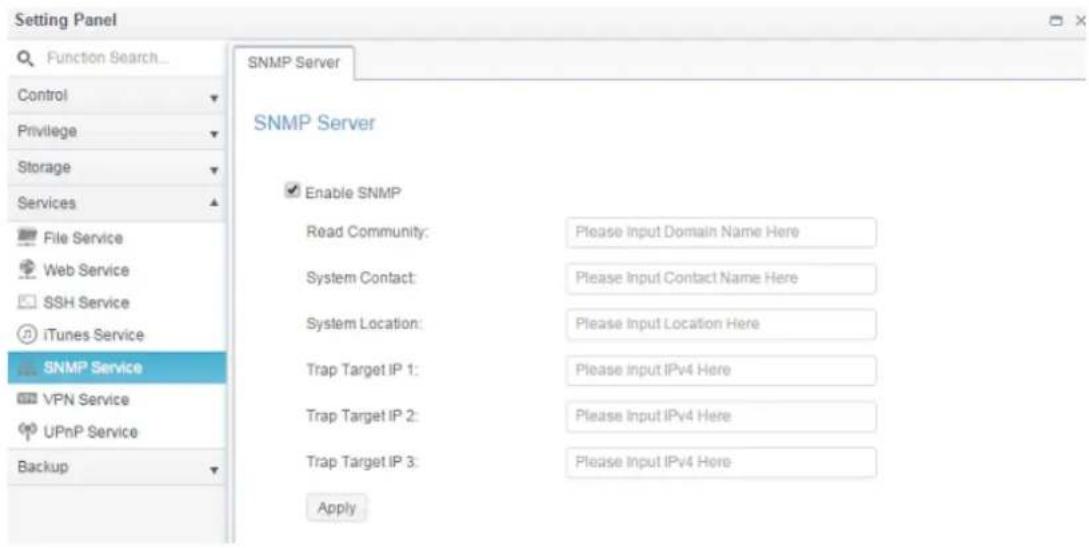
text_image
Setting Panel Function Search... Control Privilege Storage Services File Service Web Service SSH Service iTunes Service SNMP Service VPN Service UPnP Service Backup SNMP Server SNMP Server Enable SNMP Read Community: Please Input Domain Name Here System Contact: Please Input Contact Name Here System Location: Please Input Location Here Trap Target IP 1: Please Input IPv4 Here Trap Target IP 2: Please Input IPv4 Here Trap Target IP 3: Please Input IPv4 Here ApplyVPN Service
VPN Server
This storage device provides VPN server service and this allows remote access to this device via a secure connection. Settings can be found in the "VPN Service" tab as seen below
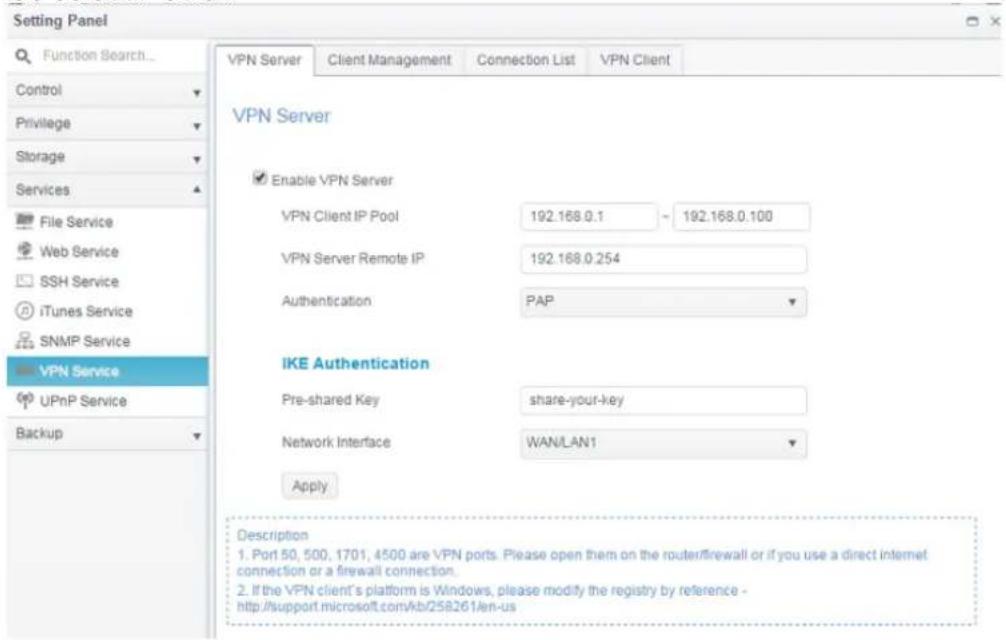
text_image
Setting Panel Function Search... Control Privilege Storage Services File Service Web Service SSH Service iTunes Service SNMP Service VPN Service UPnP Service Backup VPN Server Client Management Connection List VPN Client VPN Server Enable VPN Server VPN Client IP Pool 192.168.0.1 192.168.0.100 VPN Server Remote IP 192.168.0.254 Authentication PAP IKE Authentication Pre-shared Key share-your-key Network Interface WAN/LAN1 Apply Description 1. Port 50, 500, 1701, 4500 are VPN ports. Please open them on the router/firewall or if you use a direct internet connection or a firewall connection. 2. If the VPN client's platform is Windows, please modify the registry by reference - http://support.microsoft.com/Ab/258261/en-usTo setup your VPN server you must first choose the NIC interface from the drop down menu and complete the rest of the necessary information.
Below is a description of each item:
| VPN Server | |
| Item | Description |
| Enable VPN Server | Check to enable VPN server service |
| VPN Client IP Pool | Input the IP range for client IP. |
| VPN Server remote IP | Input the IP for the VPN server for VPN client connection |
| Authentication | The default is PAP, can't change. |
| IKE Authentication | Internet Key Exchange for authentication while connection is made. |
| Pre-shared key | Input the key for connection authentication in between VPN client and server. |
| Network Interface | Select the NIC interface to use for VPN server |
| Apply | Click "Apply" to confirm the changes. |
Client Management
For the VPN client access control, simply click on "Client Management" tab. It will list all the users on this system and default "not allowed" for VPN connection.
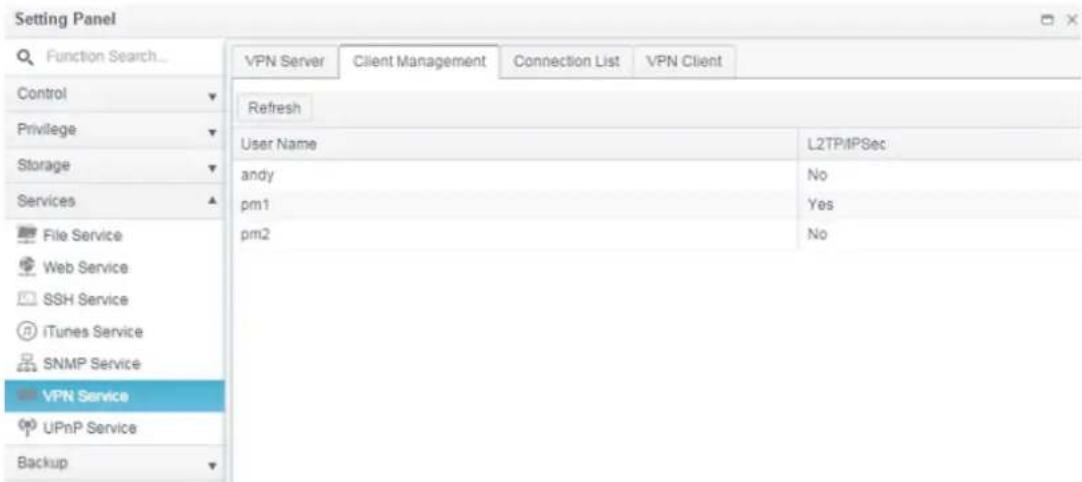
text_image
Setting Panel Function Search... Control Privilege Storage Services File Service Web Service SSH Service iTunes Service SNMP Service VPN Service UPnP Service Backup VPN Server Client Management Connection List VPN Client Refresh User Name L2TP/IPSec andy No pm1 Yes pm2 NoClick on associated user and Edit button to change the accessibility.

text_image
Edit General Settings User Name pm1 L2TP/IP0cc Yes Apply CancelConnection List
To get the on-line connection list, click on the "Connection List" tab. It will display connected users with associated connection information.
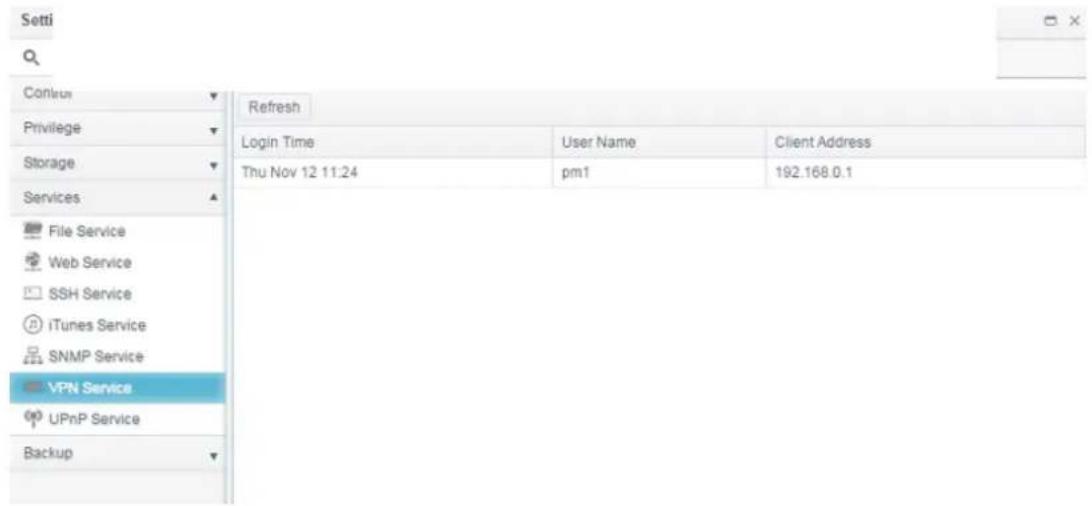
text_image
Setti Q Continue Privilege Storage Services File Service Web Service SSH Service iTunes Service SNMP Service VPN Service UPnP Service Backup Refresh Login Time User Name Client Address Thu Nov 12 11:24 pml 192.168.0.1NOTE
The VPN server only supports L2TP/IPSec connection.
VPN Client
To have this storage device join a Virtual Private Network, simply provide a VPN server IP address and a valid login user name and password. Once the input information has been confirmed, the connection will be made. This storage device will be capable of playing a role as a local device to communicate with other systems.
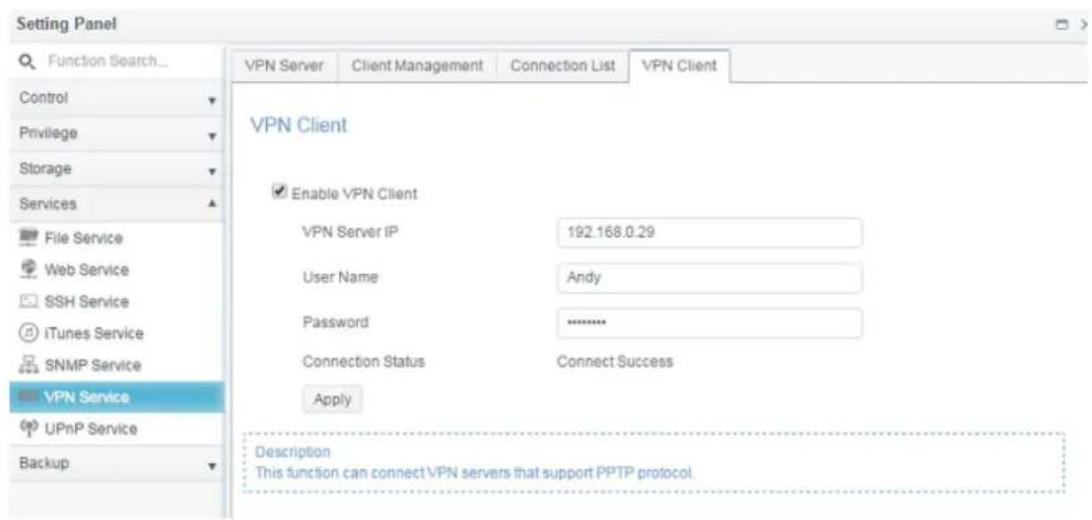
text_image
Setting Panel Function Search... Control Privilege Storage Services File Service Web Service SSH Service iTunes Service SNMP Service VPN Service UPnP Service Backup VPN Server Client Management Connection List VPN Client VPN Client Enable VPN Client VPN Server IP 192.168.0.29 User Name Andy Password .......... Connection Status Connect Success Apply Description This function can connect VPN servers that support PPTP protocol.NOTE
- Please notice that the connection to the VPN server only supports PPTP.
UPnP Service
UPnP
This device supports UPnP Media server, which allows users to play media files with UPnP client (ex. DMA devices). Enable or disable Universal Plug and Play protocol. UPnP helps to find the IP address of Thecus IP storage.
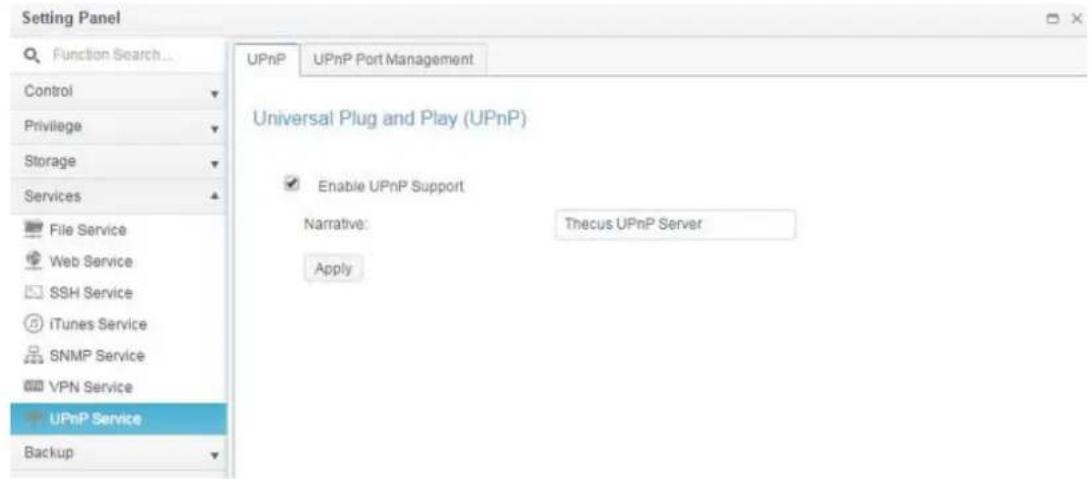
text_image
Setting Panel Function Search... Control Privilege Storage Services File Service Web Service SSH Service iTunes Service SNMP Service VPN Service UPnP Service Backup UPnP UPnP Port Management Universal Plug and Play (UPnP) Enable UPnP Support Narrative: Thecus UPnP Server ApplyUPnP Port Management
One of the most convenient ways to allow users to access required services such as FTP, SSH, web disk and http etc. from Internet environment is setting UPnP port management.
To set up this UPnP port forwarding feature, please be sure that the router has "UPnP Service" Enabled. The following is an example from one of the router manufacture with UPnP Configuration page.
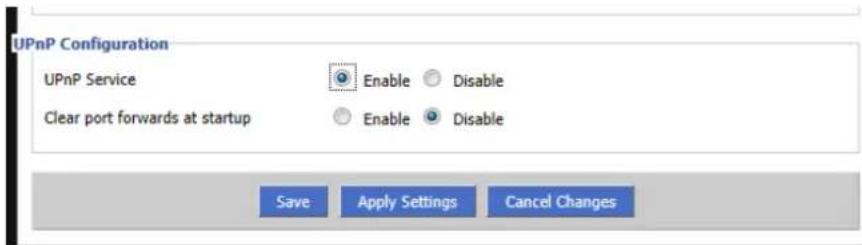
text_image
UPnP Configuration UPnP Service Enable Disable Clear port forwards at startup Enable Disable Save Apply Settings Cancel ChangesAfter the router has enabled "UPnP Service" then you will have information come from associated router to UPnP port management as shown in the screen shot below.
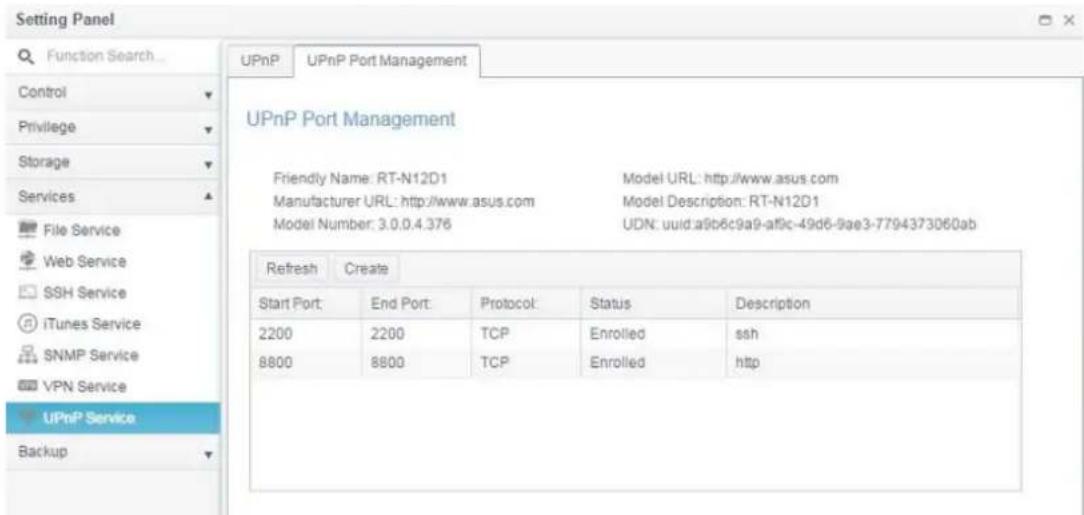
text_image
Setting Panel Function Search... Control Privilege Storage Services File Service Web Service SSH Service iTunes Service SNMP Service VPN Service UPnP Service Backup UPnP Port Management Friendly Name: RT-N12D1 Model URL: http://www.asus.com Manufacturer URL: http://www.asus.com Model Description: RT-N12D1 Model Number: 3.0.0.4.376 UDN: uuid:a9b6c9a9-atfic-49d6-9ae3-7794373060ab Refresh Create Start Port End Port Protocol Status Description 2200 2200 TCP Enrolled ssh 8800 8800 TCP Enrolled httpClick "Create" to add more port mapping from Internet to access desired services or press "Refresh" to get most updated list.
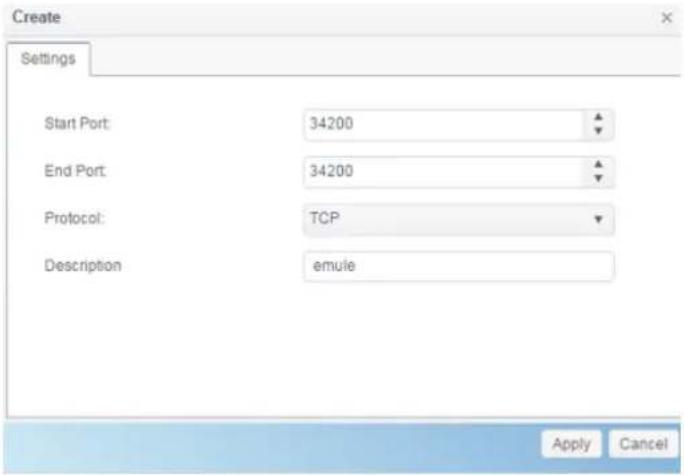
text_image
Create Settings Start Port: 34200 End Port: 34200 Protocol: TCP Description emule Apply CancelA description for each item as follows:
| UPnP Port Management | |
| Item | Description |
| Start port | Specific port number starts with. |
| End port | Specific port number ended |
| Protocol | Choose the protocol for port forwarding needed. |
| Description | Specific the port services if applicable. |
| Apply | Click "Apply" to confirm the changes. |
| Cancel | Click "Cancel" to abort the changes |
WARNING
Some of the routers do not allow the input of port number below 1024. So it may have resulted "setting fails".
To modify or remove listed role, click on associated item then press Edit to carry on necessary action.
UPnP Port Management
Friendly Name: RT-N12D1
Manufacturer URL: http://www.asus.com
Model Number: 3.0.0.4.376
Model URL: http://www.asus.com
Model Description: RT-N12D1
UDN: uuid:a9b6c9a9-af9c-49d6-9ae3-7794373060ab
| Refresh Create Edit | ||||
| Start Port | End Port: | Protocol: | Status | Description |
| 2200 | 2200 | TCP | Enrolled | ssh |
| 8800 | 8800 | TCP | Enrolled | http |
Backup
BACKUP

Local Backup

Remote Backup

Rsync Service

USB Copy

AWS S3

System Failover
Local Backup
(Remote Backup/details in next section) (Local Backup)
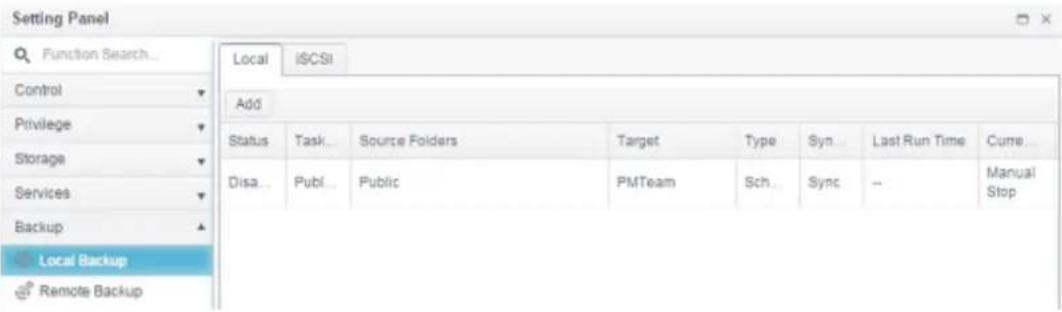
text_image
Setting Panel Function Search... Control Privilege Storage Services Backup Local Backup Remote Backup Local iSCSI Add Status Task Source Folders Target Type Syn Last Run Time Curr. Disa Publ Public PMTeam Sch Sync Manual StopLocal File/Folder Backup
Add Task:
From "Local" tab click on Add button and the setting screen will appear as below. Follow the steps to complete the setting.
- Choose backup target folder, this is the destination where the files/folders backup to.
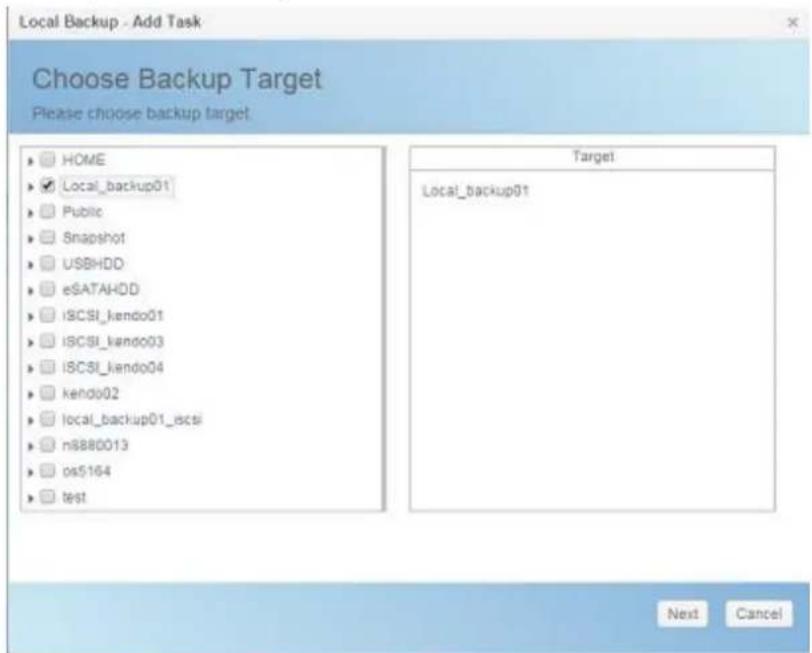
text_image
Local Backup - Add Task Choose Backup Target Please choose backup target HOME Local_backup01 Public Snapshot USBHDD eSATAHDD ISCSI_hendo01 ISCSI_hendo03 ISCSI_hendo04 kendo02 local_backup01_bcsi n8880013 os5164 test Target Local_backup01 Next Cancel- Choose source folder to backup. The multiple folders selection is allowed.
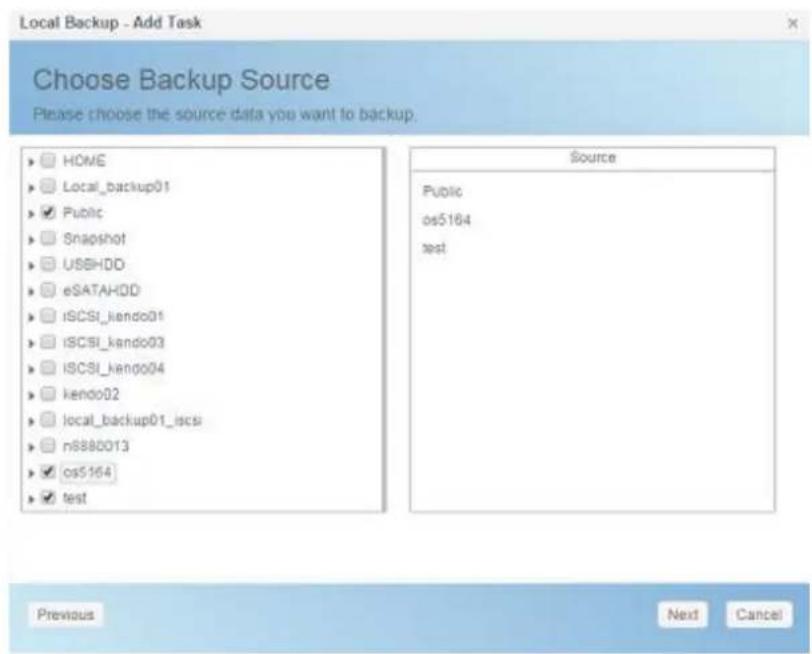
text_image
Local Backup - Add Task Choose Backup Source Please choose the source data you want to backup. HOME Local_backup01 Public Snapshot USBHDD eSATAHDD iSCSI_kendo01 iSCSI_kendo03 iSCSI_kendo04 kendo02 local_backup01_iscsi n8880013 os5164 test Source Public os5164 test Previous Next Cancel- Input task name and related options.
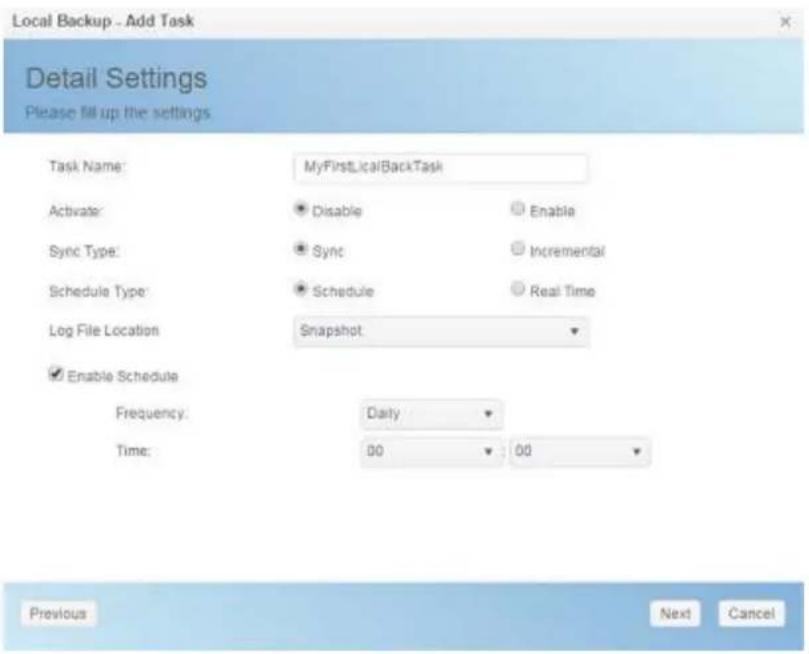
text_image
Local Backup - Add Task Detail Settings Please fill up the settings Task Name: MyFirstLicalBackTask Activate: Disable Enable Sync Type: Sync Incremental Schedule Type: Schedule Real Time Log File Location Snapshot Enable Schedule Frequency: Daily Time: 00 00 Previous Next Cancel| Add Rsync Backup Task | |
| Item | Description |
| Task Name | This is how this task will appear in the task list. |
| Activate | Enable to activate task or disable to execute later. |
| Sync Type | Sync mode:Makes your source match your target completely; deleting and adding files on your target as they are deleted and added on your source.Incremental Mode :Makes your source match your target and keep all old files; adding files on your target as they are added on your source, but NOT deleting files on your target as they are deleted on your source. |
| Schedule Type | Real time:It will backup folders/files from source to target on the fly. On the other hand, any changes from the source will back up to the target right away.Schedule:The task will start only according to the schedule. |
| Log Location | Choose the folder to save the log details while the task is executed. |
| Enable Schedule | If backup is set as "Schedule", please input the related period and time. |
- More advanced settings
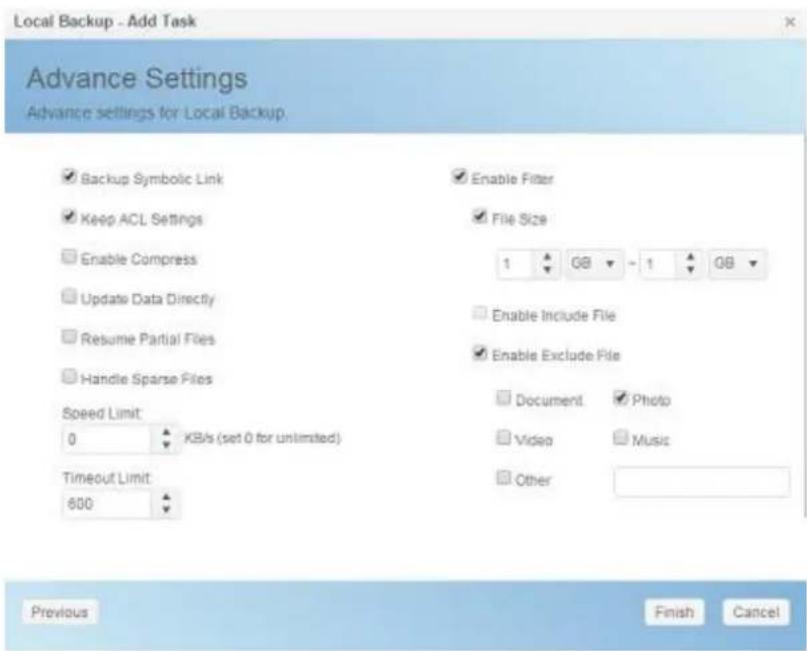
text_image
Local Backup - Add Task Advance Settings Advance settings for Local Backup. Backup Symbolic Link Keep ACL Settings Enable Compress Update Data Directly Resume Partial Files Handle Sparse Files Speed Limit: 0 KB/s (set 0 for unlimited) Timeout Limit: 600 Enable Filter File Size 1 GB - 1 GB Enable Include File Enable Exclude File Document Photo Video Music Other Previous Finish Cancel- Click Finish to complete task added.
| Add Rsync Backup Task | |
| Item | Description |
| Backup Symbolic Link | |
| Keep ACL Setting | It will backup not just data itself but also ACL configuration with associated folders/files. |
| Enable Compress | With this option, compress the file data as it is sent to the destination machine, which reduces the amount of data being transmitted – something that is useful over a slow connection. |
| Update Data Directly | It could by pass temp file creation wile copy file from source to destination. It will more efficiency but risky if any interrupt during operation. |
| Resume Partial File | Enable this could keep the partial file which should make a subsequent transfer of the rest of the file much faster |
| Handle Sparse File | Try to handle sparse file efficiently so they take up less space on the destination. |
| Speed Limit | Input the bandwidth control for data backup operation. |
| Timeout Limit | Setup the timeout when trying to build up a connection in between the source and the target system. |
| Enable Filter | The filter can be set to be executed only in certain circumstances. If none of them has been selected, it will do the backup from the source to the destination in full.File size: From xx ~ xxxIf xx=1 and xxx blank then only file size > xx will execute real time backup.If xx=1 and xxx=2 then only size in between xx and xxx will execute real time backup.If xx blank and xxx=2 then only file size < xxx will execute real time backup.Include File Type: Only the associated file format will do the real time backup.Exclude File Type: The excluded file format won't be included in the real time backup.For document file format:doc, xls, pdf, docx, xlsx, txt, ppt, pptx, html, htmFor picture file format:jpg, bmp, tif, png, pbm, tga, xar, xbmFor video file format:avi, mpg, mp4, mkv, fli, flv, rm, ramFor music file format:mp3, wav, wma, acc, dss, msv, dvf, m4p, 3gp, amr, awbUser defined can be input in other box. |
Edit Task:
To edit created task, select desired item and click on Edit.
| Local | iSCSI | ||||||
| Add | Edit | ||||||
| Status | Task... | Source Folders | Target | Type | Syn... | Last Run Time | Curre... |
| Enable | test | Public | test | Sch... | Sync | 2015/11/23 16:16 | Finish |
| Disa... | MyFi... | Public, os5164, test | Local_backup01 | Sch... | Sync | - | Manual Stop |
Then you can follow the task creation wizard to do the necessary modification.
Start Task:
If the task has status Enabled, it can be selected and click on Start button to execute right away.
| Local | iSCSI | ||||||
| Add | Edit | Start | Restore | ||||
| Status | Task... | Source Folders | Target | Type | Syn... | Last Run Time | Curre... |
| Enable | test | Public | test | Sch... | Sync | 2015/11/23 16:16 | Finish |
| Disa... | MyFi... | Public, os5164, test | Local_backup01 | Sch... | Sync | - | Manual Stop |
| Enable | local... | Snapshot | Public | Sch... | Sync | - | Manual Stop |
Restore Task:
To restore a backup from the backup task, simply select a task from the task list then click "Restore" from the function bar. The restore task will start to have the associated files/folders from the target folder restored to the source.
| Local | iSCSI | |||||||
| Add | Edit | Start | Restore | |||||
| Status | Task... | Source Folders | Target | Type | Syn... | Last Run Time | Curre... | |
| Enable | test | Public | test | Sch... | Sync | 2015/11/23 16:16 | Finish | |
| Disa... | MyFi... | Public, os5164, test | Local_backup01 | Sch... | Sync | - | Manual Stop | |
| Enable | local... | Snapshot | Public | Sch... | Sync | - | Manual Stop | |
NOTE
- To restore task with backup type set as "Real time", first you need to stop the task then you can proceed with the restore operation.
iSCSI Backup
From "iSCSI" tab click on "Add" button and the setting screen appear as below. Follow the steps to complete the setting.
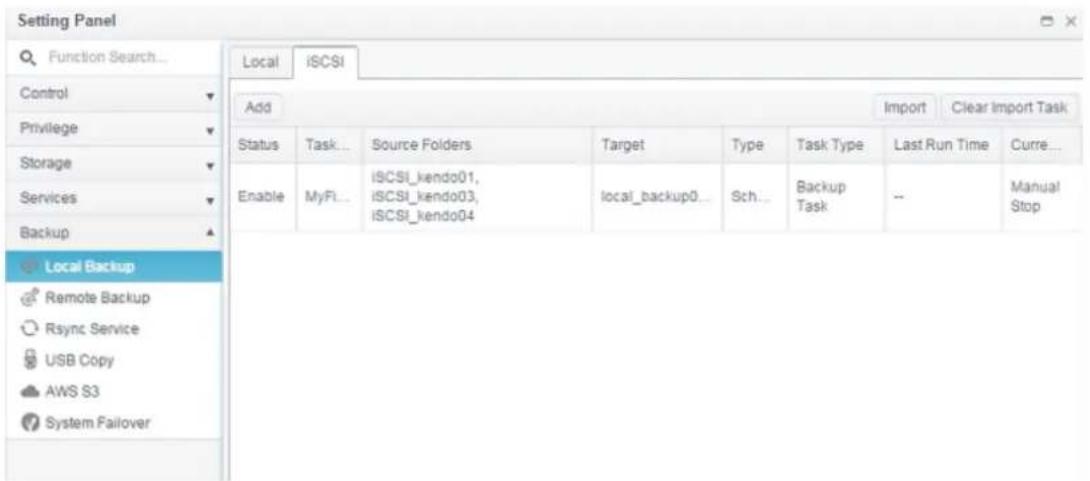
text_image
Setting Panel Function Search... Control Privilege Storage Services Backup Local Backup Remote Backup Rsync Service USB Copy AWS S3 System Failover Local iSCSI Add Import Clear Import Task Status Task Source Folders Target Type Task Type Last Run Time Curre... Enable MyFI... iSCSI_kendo01, iSCSI_kendo03, iSCSI_kendo04 local_backup0... Sch... Backup Task -- Manual StopAdd Task:
- Choose backup target folder, this is the destination where the iSCSI volume will backup to.
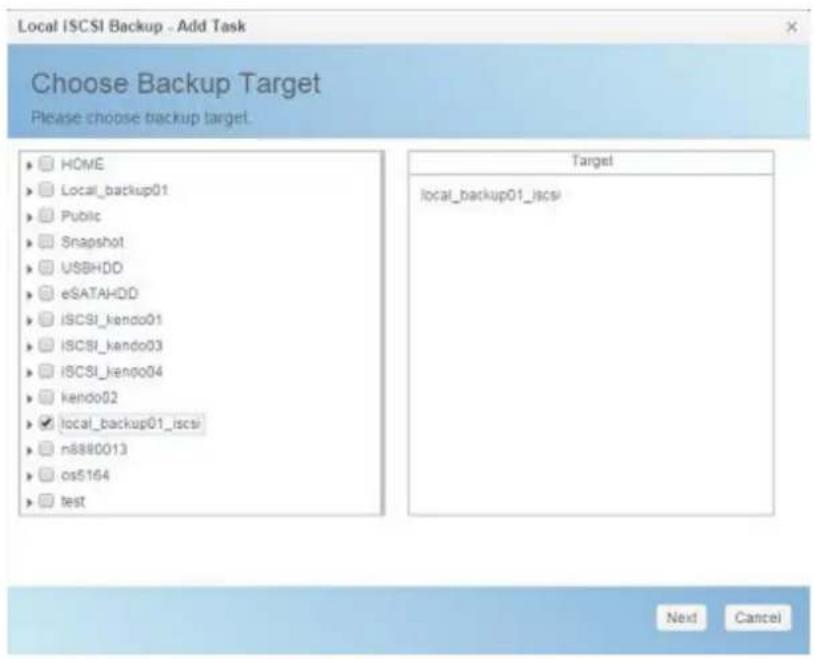
text_image
Local ISCSI Backup - Add Task Choose Backup Target Please choose backup target. HOME Local_backup01 Public Snapshot USBHDD eSATAHDD ISCSI_kendo01 ISCSI_kendo03 ISCSI_kendo04 kendo02 local_backup01_iscs n8880013 os5164 test Target local_backup01_iscs Next Cancel- System will list available iSCSI volume, choose source iSCSI volume to backup. The multiple iSCSI volume selection is allowed.
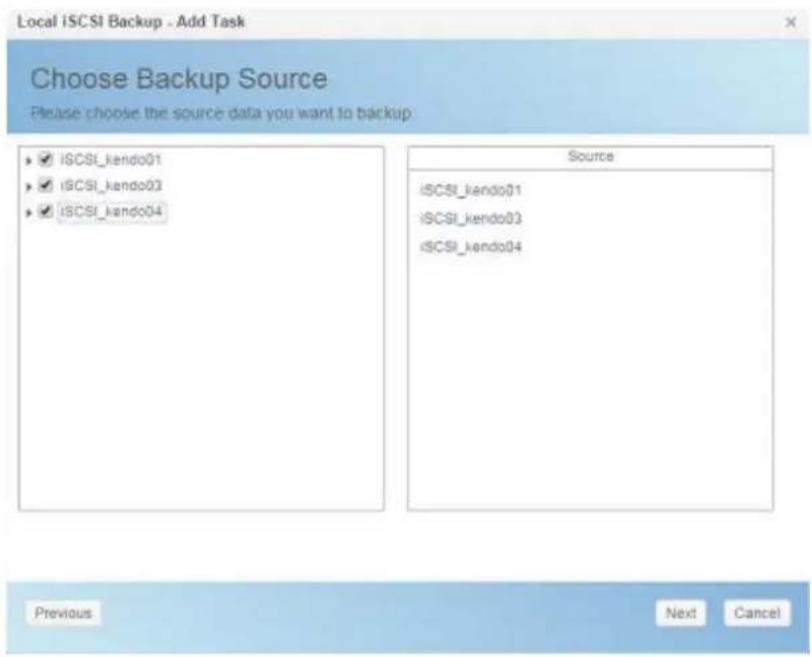
text_image
Local iSCSI Backup - Add Task Choose Backup Source Please choose the source data you want to backup ✓ iSCSI_kendo01 ✓ iSCSI_kendo03 ✓ iSCSI_kendo04 Source iSCSI_kendo01 iSCSI_kendo03 iSCSI_kendo04 Previous Next Cancel- Input task name and related options.
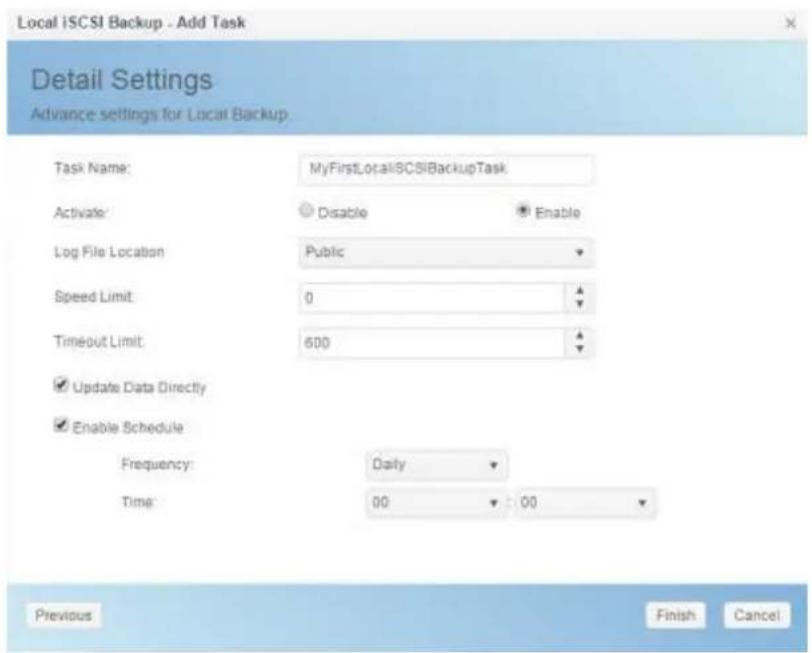
text_image
Local ISCSI Backup - Add Task Detail Settings Advance settings for Local Backup. Task Name: MyFirstLocalISCSIBackupTask Activate: Disable Enable Log File Location Public Speed Limit: 0 Timeout Limit: 600 ✓ Update Data Directly ✓ Enable Schedule Frequency: Daily Time: 00 00 Previous Finish Cancel| Add Rsync Backup Task | |
| Item | Description |
| Task Name | This is how this task will appear in the task list. |
| Activate | Enable to activate task or disable to execute later. |
| Log Location | Choose the folder to save the log details while the task is executed. |
| Speed Limit | Input the bandwidth control for data backup operation. |
| Timeout Limit | Setup the timeout when trying to build up a connection in between the source and the target system. |
| Update Data Directly | It could by pass temp file creation wile copy file from source to destination. It will more efficiency but risky if any interrupt during operation. |
| Enable Schedule | If backup is set as “Schedule”, please input the related period and time. |
4. Click Finish to complete task added.
Edit Task:
To edit created task, select desired item and click on Edit.
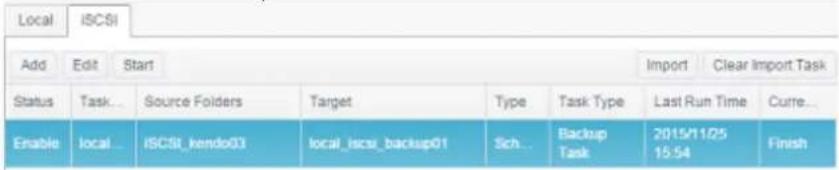
text_image
Local ICSI Add Edit Start Import Clear Import Task Status Task... Source Folders Target Type Task Type Last Run Time Curre... Enable local... ICSI_hendo03 local_iscsi_backup01 Sch... Backup Task 2015/11/25 15:54 FinishThen you can follow the task creation wizard to do the necessary modification.
Start Task:
If the task has status Enabled, it can be selected and click on Start button to execute right away.
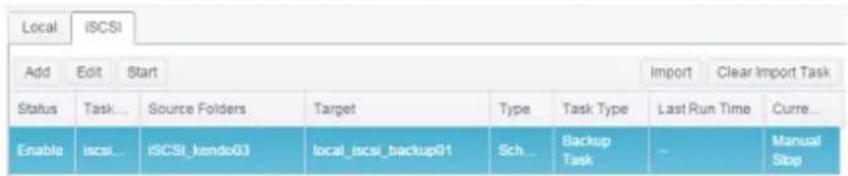
text_image
Local iSCSI Add Edit Start Import Clear Import Task Status Task... Source Folders Target Type Task Type Last Run Time Curre... Enable iscsi... iSCSI_hendo03 local_iscsi_backup01 Sch... Backup Task Manual StopImport:
It can be imported from backup of iSCSI and become to physical iSCSI volume. Click on "Import" tab on right hand portion of task bar and screen appear as below. Follow the steps to complete the setting.
| Local | iSCSI | ||||||
| Add | Import | Clear Import Task | |||||
| Status | Task... | Source Folders | Target | Type | Task Type | Last Run Time | Curre... |
| Enable | Impo... | data/USBCopy/iSCSI_300211 | RAID | - | Import Task | 2015/12/11 19:09 | Finish |
| Enable | dual... | iSCSI_300jbodbtrfs, data/iSCSI_300211 | iscsibackup | Sch... | Backup Task | 2015/12/11 20:07 | Finish |
- Choose RAID volume where iSCSI is going to import.
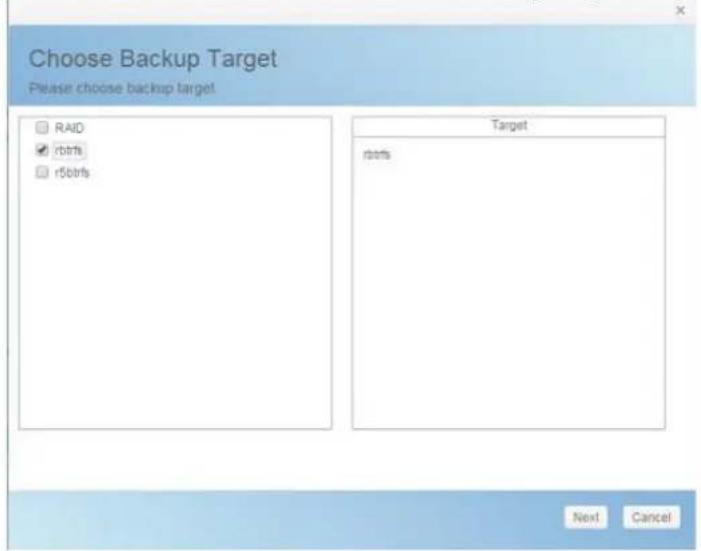
text_image
Choose Backup Target Please choose backup target RAID rbrfs r5brfs Target rbrfs Next Cancel- Choose the iSCSI backup folder and locate the file where the iSCSI volume has backuped previously. System will denote the triangle symbol for the valid file which can be imported.
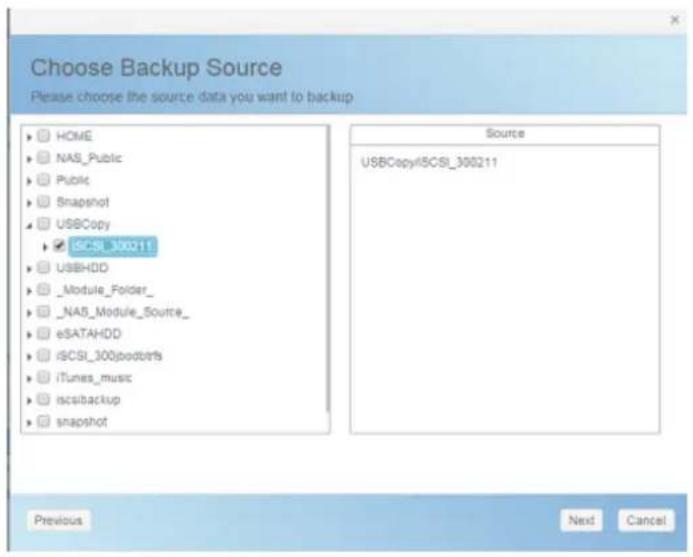
text_image
Choose Backup Source Please choose the source data you want to backup HOME NAS_Public Public Snapshot USBCopy iSCSI_300211 USBHDD _Module_Folder_ _NAS_Module_Source_ eSATAHDD iSCSI_300jobbirds iTunes_music iscsibackup snapshot Source USBCopy@iSCSI_300211 Previous Next Cancel- Input task name for this iSCSI import job and select where the task log will be recorded.
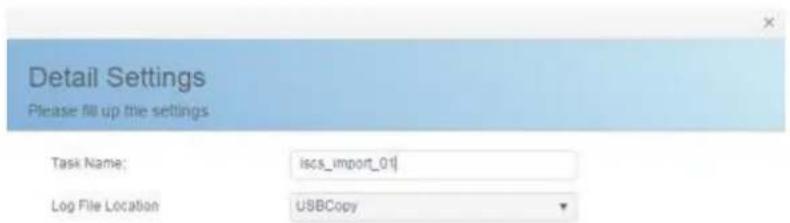
text_image
Detail Settings Please fill up the settings Task Name: iscs_import_01 Log File Location: USBCopy
text_image
Previous Finish Cancel- Clicking on "Finish" to complete the iSCSI import task and confirm OK to start the iSCSI import job.
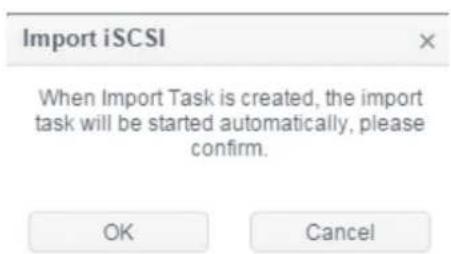
text_image
Import iSCSI When Import Task is created, the import task will be started automatically, please confirm. OK Cancel- Now the local backup task list has the iSCSI import job listed and under process.
| Enable | iscs... | data/USBCopy/ISCSI_300211 | rbtrfs | -- | Import Task | -- | Process |
- The status will change to "Finish" once the task has completed. iSCSI volume 30021 can be found on iSCSI list under RAID volume rbtrfs.
| Enable | iscs... | data/USBCopy/ISCSI_300211 | rbtrfs | -- | Import Task | 2015/12/14 12:53 | Finish |
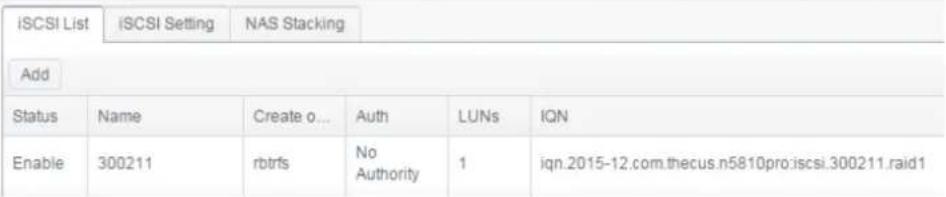 | |||||||
NOTE
- To import iSCSI volume from backup folder → file, system will check whether the physical iSCSI volume existed or not. If the iSCSI volume is existed, then warning message "The target name already
Clear Import Task:
Click on "Clear Import Task" tab on right hand portion of task bar, following with confirmation "OK" to remove all import tasks.
| Add | Import | Clear Import Task | |||||
| Status | Task... | Source Folders | Target | Type | Task Type | Last Run Time | Curre... |
| Enable | iscsi... | data/USBCopy/ISCSI_300211 | rbtrfs | -- | Import Task | 2015/12/14 13:20 | Finish |
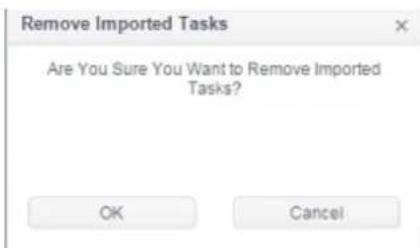
text_image
Remove Imported Tasks Are You Sure You Want to Remove Imported Tasks? OK CancelRemote Backup
When it comes to backing up your data, it's very important to have flexibility. Remote Backup provides you with many options, including custom/full backup for shares and iSCSI volume backup.
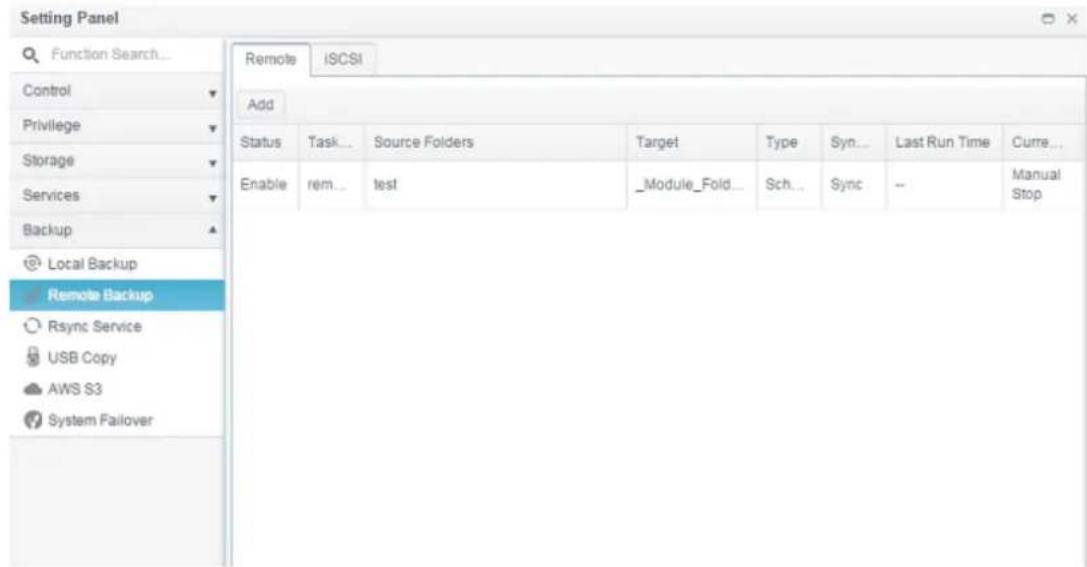
text_image
Setting Panel Function Search... Control Privilege Storage Services Backup Local Backup Remote Backup Rsync Service USB Copy AWS S3 System Failover Remote ISCSI Add Status asset Source Folders Target Type Syn... Last Run Time Curre... Enable rem test _Module_Fold_ Sch... Sync -- Manual StopRemote File/Folder Backup
Add Task:
From "Remote" tab click on "Add" button and the setting screen will appear as below. Follow the steps to complete the setting.
- Fill in the remote target IP (Destination) and port (need to be changed only if this port is already in use). If encryption is required then enable it. Please make sure the associated target server also has encryption enabled. And click on "Get Server Folder" to get remote target server folder list to choose destination.
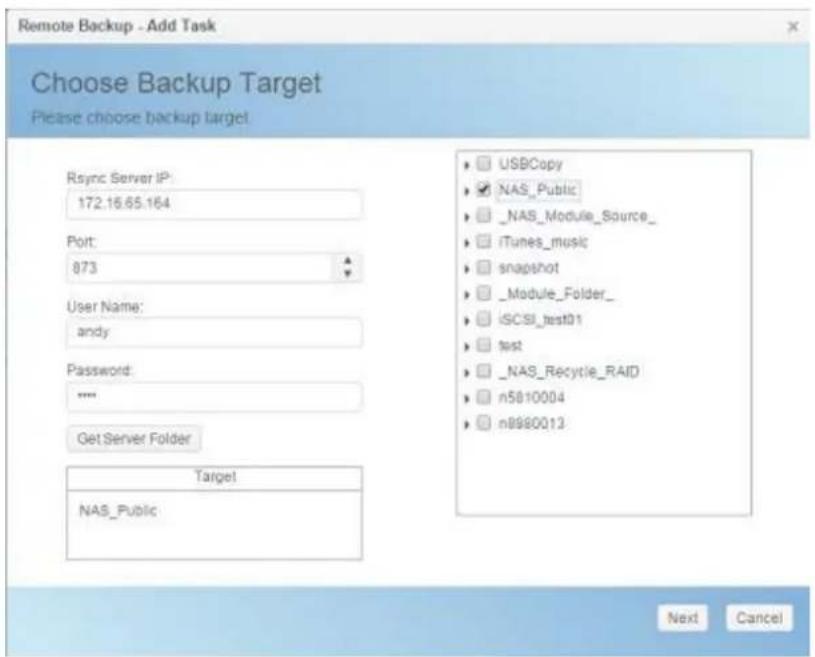
text_image
Remote Backup - Add Task Choose Backup Target Please choose backup target Rsync Server IP: 172.16.65.164 Port: 873 User Name: andy Password: **** Get Server Folder Target NAS_Public USBCopy NAS_Public _NAS_Module_Source_ iTunes_music snapshot _Module_Folder_ iSCSI_test01 test _NAS_Recycle_RAID n5810004 n8980013 Next Cancel- Choose source folder to backup. The multiple folders selection is allowed.
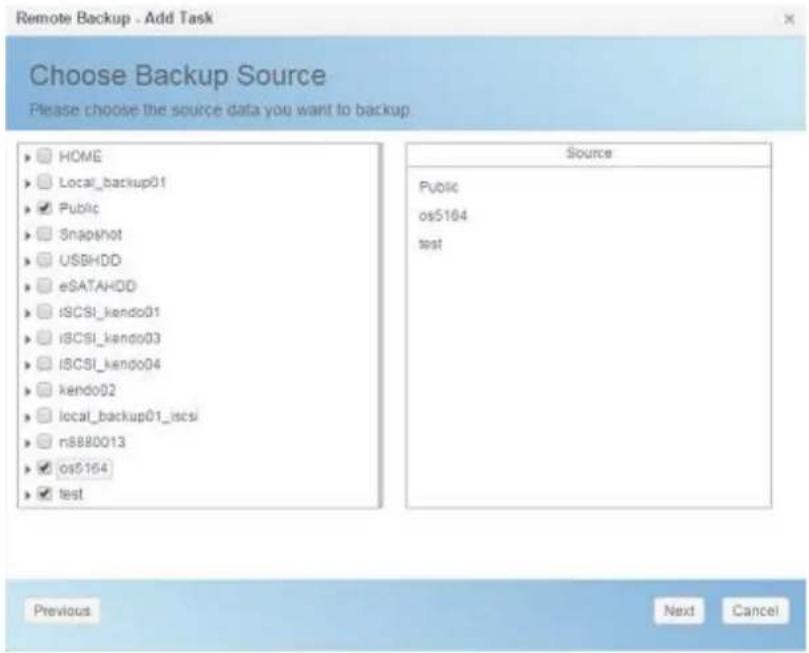
text_image
Remote Backup - Add Task Choose Backup Source Please choose the source data you want to backup. HOME Local_backup01 Public Snapshot USBHDD eSATAHDD iSCSI_kendo01 iSCSI_kendo03 iSCSI_kendo04 kendo02 local_backup01_iscsi n8880013 os5164 test Source Public os5164 test Previous Next Cancel- Input task name and related options.
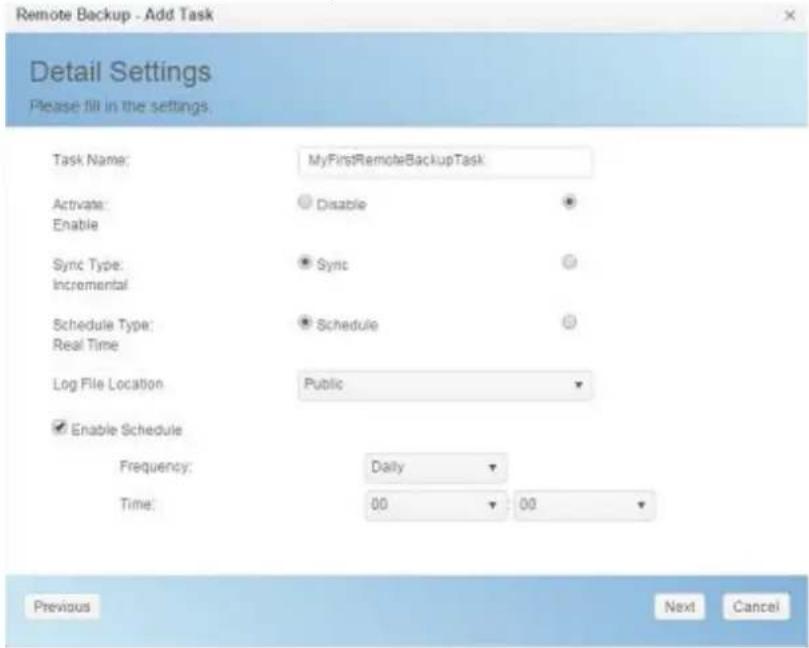
text_image
Remote Backup - Add Task Detail Settings Please fill in the settings. Task Name: MyFirstRemoteBackupTask Activate: Disable Enable Sync Type: Sync Incremental Schedule Type: Schedule Real Time Log File Location Public Enable Schedule Frequency: Daily Time: 00 00 Previous Next Cancel| Add Rsync Backup Task | |
| Item | Description |
| Task Name | This is how this task will appear in the task list. |
| Activate | Enable to activate task or disable to execute later. |
| Sync Type | Sync mode:Makes your source match your target completely; deleting and adding files on your target as they are deleted and added on your source.Incremental Mode :Makes your source match your target and keep all old files; adding files on your target as they are added on |
| your source, but NOT deleting files on your target as they are deleted on your source. | |
| Schedule Type | Real time:It will backup folders/files from source to target on the fly. On the other hand, any changes from the source will back up to the target right away.Schedule:The task will start only according to the schedule. |
| Log Location | Choose the folder to save the log details while the task is executed. |
| Enable Schedule | If backup is set as “Schedule”, please input the related period and time. |
4. More advanced settings.
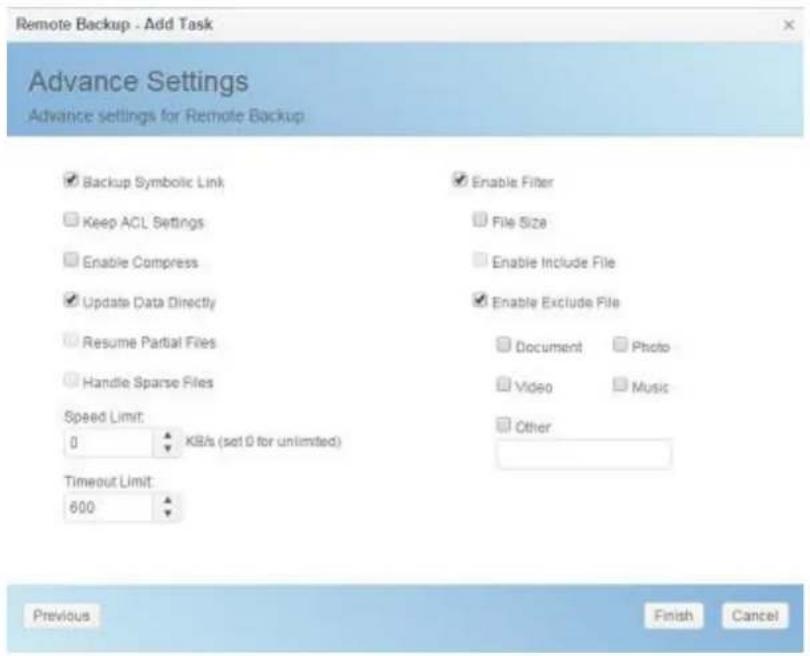
text_image
Remote Backup - Add Task Advance Settings Advance settings for Remote Backup Backup Symbolic Link Keep ACL Settings Enable Compress Update Data Directly Resume Partial Files Handle Sparse Files Speed Limit: 0 KB/s (set 0 for unlimited) Timeout Limit: 600 Enable Filter File Size Enable Include File Enable Exclude File Document Photo Video Music Other Previous Finish Cancel| Add Rsync Backup Task | |
| Item | Description |
| Backup Symbolic Link | |
| Keep ACL Setting | It will backup not just data itself but also ACL configuration with associated folders/files. |
| Enable Compress | With this option, compress the file data as it is sent to the destination machine, which reduces the amount of data being transmitted – something that is useful over a slow connection. |
| Update Data Directly | It could by pass temp file creation wile copy file from source to destination. It will more efficiency but risky if any interrupt during operation. |
| Resume Partial File | Enable this could keep the partial file which should make a subsequent transfer of the rest of the file much faster |
| Handle Sparse File | Try to handle sparse file efficiently so they take up lessspace on the destination. |
| Speed Limit | Input the bandwidth control for data backup operation. |
| Timeout Limit | Setup the timeout when trying to build up a connection in between the source and the target system. |
| Enable Filter | The filter can be set to be executed only in certain circumstances. If none of them has been selected, it will do the backup from the source to the destination in full.File size: From xx ~ xxxIf xx=1 and xxx blank then only file size > xx will execute real time backup.If xx=1 and xxx=2 then only size in between xx and xxx will execute real time backup.If xx blank and xxx=2 then only file size < xxx will execute real time backup.Include File Type: Only the associated file format will do the real time backup.Exclude File Type: The excluded file format won't be included in the real time backup.For document file format:doc, xls, pdf, docx, xlsx, txt, ppt, pptx, html, htmFor picture file format:jpg, bmp, tif, png, pbm, tga, xar, xbmFor video file format:avi, mpg, mp4, mkv, fli, flv, rm, ramFor music file format:mp3, wav, wma, acc, dss, msv, dvf, m4p, 3gp, amr, awbUser defined can be input in other box. |
- Click Finish to complete task added
Edit Task:
To edit created task, select desired item and click on Edit.
| Add | Edit | Start | Restore | |||||
| Status | Task... | Source Folders | Target | Type | Syn... | Last Run Time | Curre... | |
| Enable | rem... | test | _Module_Fold... | Sch... | Sync | - | Manual Stop | |
| Enable | MyFl... | Public, os5164, test | NAS_Public | Sch... | Sync | - | Manual Stop | |
Then you can follow the task creation wizard to do the necessary modification.
Start Task:
If the task has status Enable, it can be selected and click on Start button to execute right away.
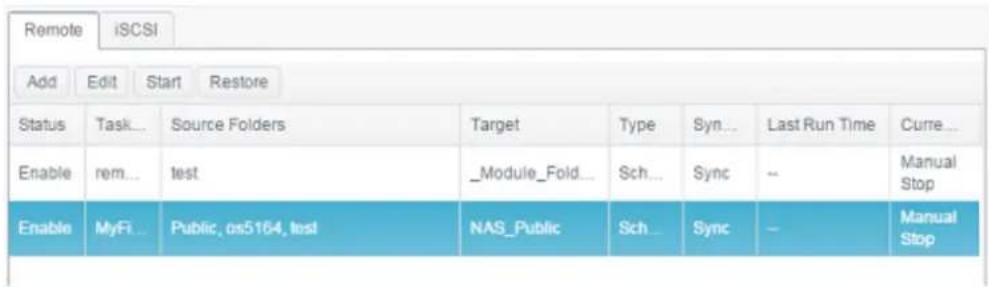
text_image
Remote iSCSI Add Edit Start Restore Status Task... Source Folders Target Type Syn... Last Run Time Curne... Enable rem... test _Module_Fold... Sch... Sync -- Manual Enable MyFi ... Public, os5164, test NAS_Public Sch ... Sync - Manual StopRestore Task:
| Add | Edit | Start | Restore | |||||
| Status | Task... | Source Folders | Target | Type | Syn ... | Last Run Time | Curre ... | |
| Enable | rem... | Public | NAS_Public | Sch ... | Sync | 2015/11/23 19:32 | Finish | |
| Enable | MyFi... | Public, os5164, test | NAS_Public | Sch ... | Sync | - | Manual Stop | |
Remote iSCSI Backup
Add Task:
From "iSCSI" tab click on Add button and the setting screen will appear as below. Follow the steps to complete the setting.
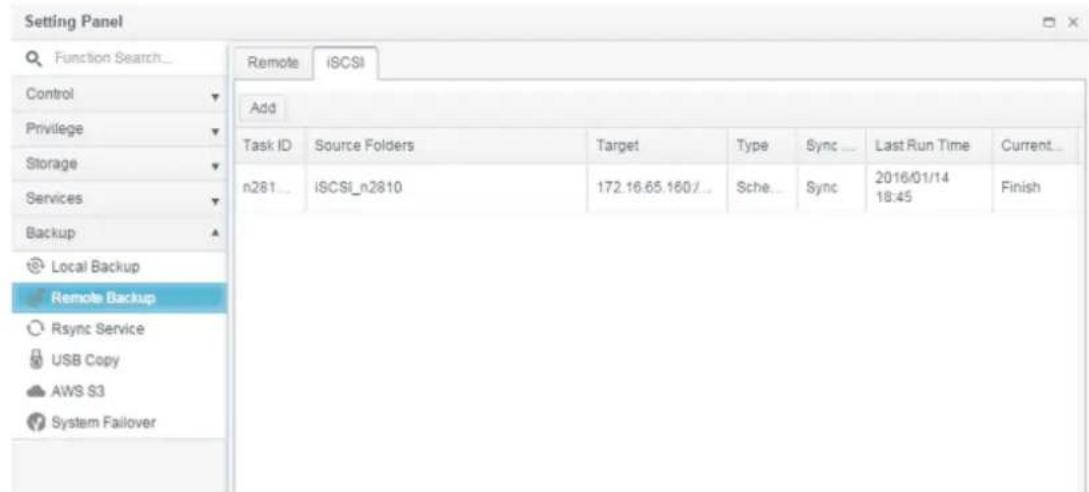
text_image
Setting Panel Function Search... Control Privilege Storage Services Backup Local Backup Remote Backup Rsync Service USB Copy AWS S3 System Failover Remote iSCSI Add Task ID Source Folders Target Type Sync Last Run Time Current... n281... iSCSI_n2810 172.16.65.160/... Sche... Sync 2016/01/14 18:45 Finish- Fill in the remote target IP (Destination) and port (need to be changed only if this port is already in use). If encryption is required then enable it. Please make sure the associated target server also has encryption enabled. And click on "Get Server Folder" to get remote target server folder list to choose destination.
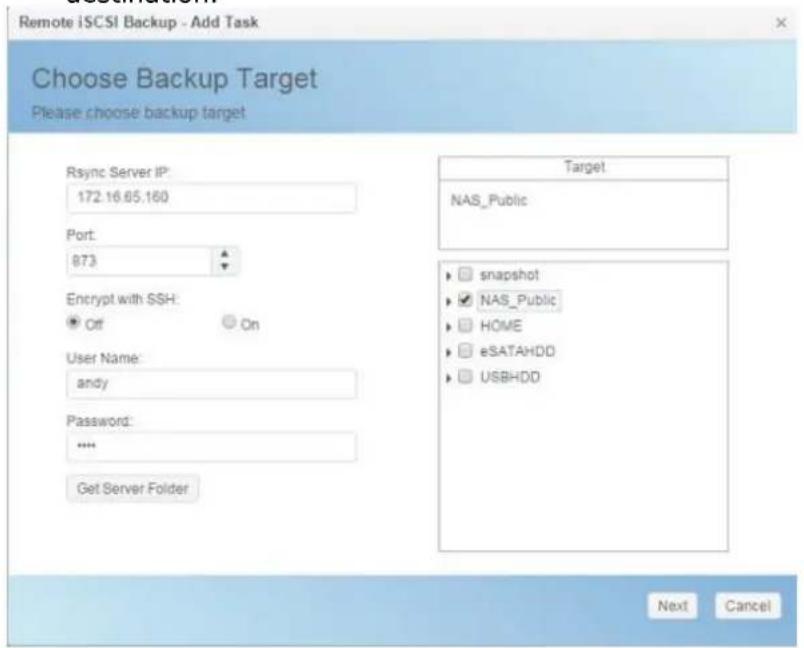
text_image
Remote iSCSI Backup - Add Task Choose Backup Target Please choose backup target Rsync Server IP: 172.16.65.160 Port: 873 Encrypt with SSH: Off On User Name: andy Password: **** Get Server Folder Target NAS_Public snapshot NAS_Public HOME eSATAHDD USBHDD Next Cancel- System will list available iSCSI volume, choose source iSCSI volume to backup. The multiple iSCSI volume selection is allowed.
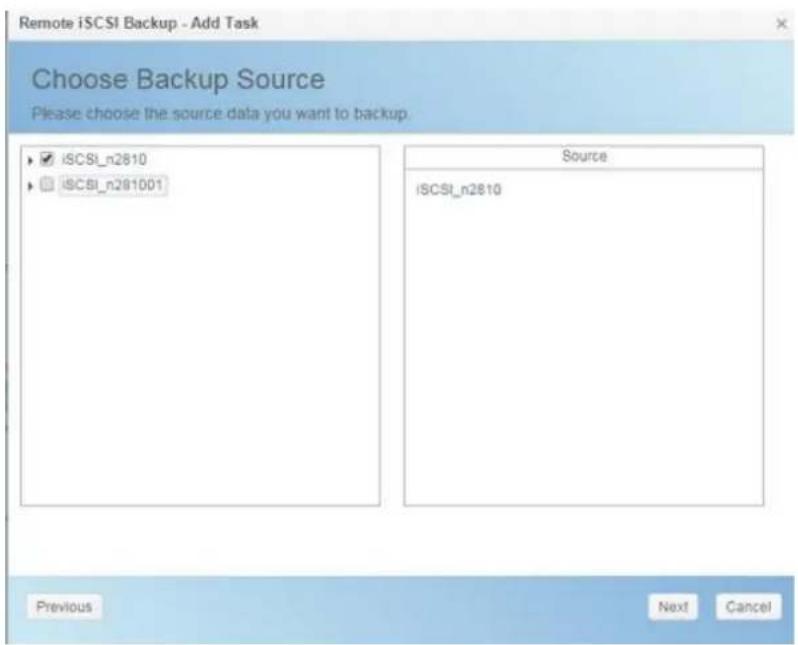
text_image
Remote iSCSI Backup - Add Task Choose Backup Source Please choose the source data you want to backup. iSCSI_n2810 iSCSI_n281001 Source iSCSI_n2810 Previous Next Cancel- Input task name and related options.
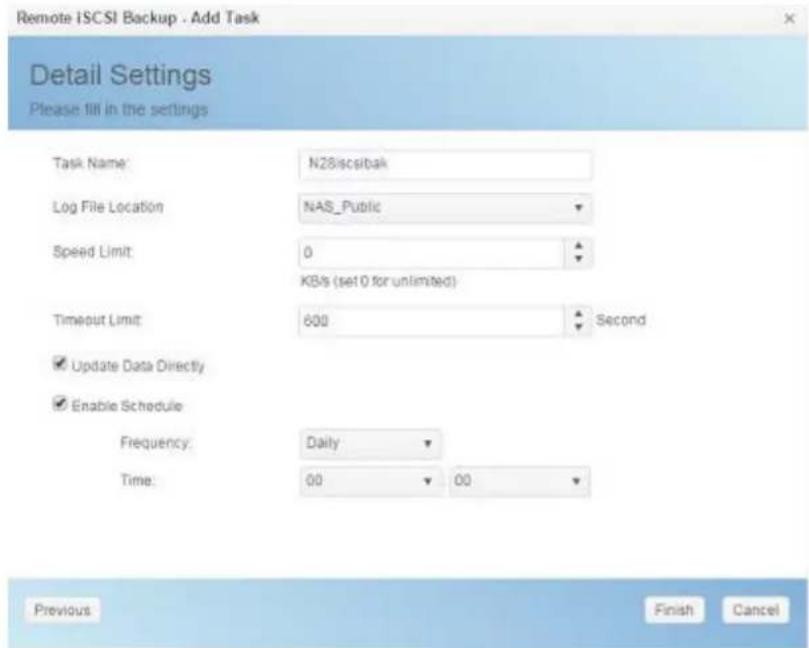
text_image
Remote ICSI Backup - Add Task Detail Settings Please fill in the settings Task Name: N28iscsibak Log File Location: NAS_Public Speed Limit: 0 KB/s (set 0 for unlimited) Timeout Limit: 600 Second ✓ Update Data Directly ✓ Enable Schedule Frequency: Daily Time: 00 00 Previous Finish Cancel| Add Rsync Backup Task | |
| Item | Description |
| Task Name | This is how this task will appear in the task list. |
| Log Location | Choose the folder to save the log details while the task is executed. |
| Speed Limit | Input the bandwidth control for data backup operation. |
| Timeout Limit | Setup the timeout when trying to build up a connection in between the source and the target system. |
| Update Data Directly | It could by pass temp file creation wile copy file from source to destination. It will more efficiency but risky ifany interrupt during operation. |
| Enable Schedule | If backup is set as "Schedule", please input the related period and time. |
- Click Finish to complete task added.
Edit Task:
To edit created task, select desired item and click on Edit.
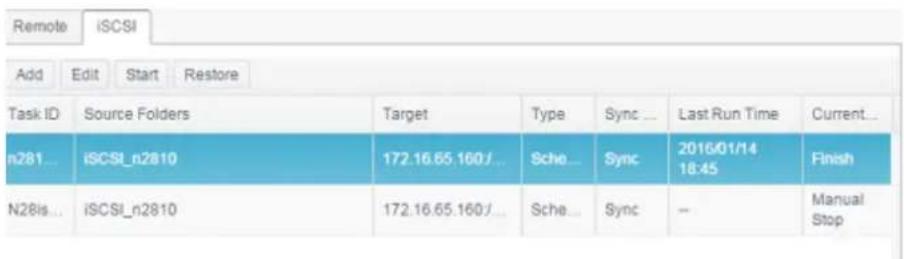
text_image
Remote iSCSI Add Edit Start Restore Task ID Source Folders Target Type Sync Last Run Time Current... n281... iSCSI_n2810 172.16.65.160/... Sche... Sync 2016/01/14 18:45 Finish N28ls... iSCSI_n2810 172.16.65.160/... Sche... Sync -- Manual StopThen you can follow the task creation wizard to do the necessary modification.
Start Task:
The task can be started right away by selecting the associated task and clicking on Start button to execute.
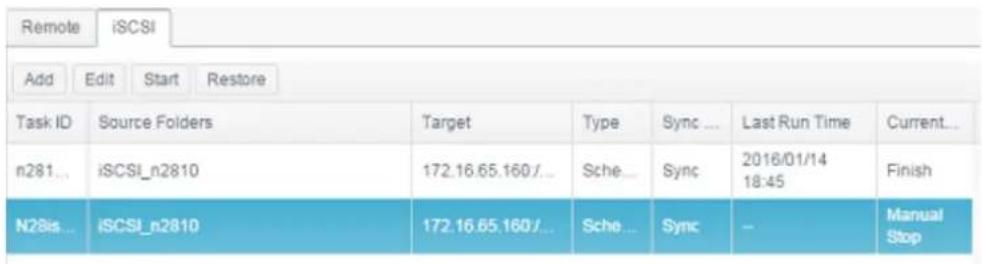
text_image
Remote iSCSI Add Edit Start Restore Task ID Source Folders Target Type Sync ... Last Run Time Current... n281... iSCSI_n2810 172.16.65.160/... Sche... Sync 2016/01/14 18:45 Finish N28is... iSCSI_n2810 172.16.65.160/... Sche... Sync -- Manual StopRestore Task:
iSCSI volumeserver
| Remote | iSCSI | ||||||
| Add | Edit | Start | Restore | ||||
| Task ID | Source Folders | Target | Type | Sync ... | Last Run Time | Current... | |
| n281... | iSCSI_n2810 | 172.16.65 160/... | Sche... | Sync | 2016/01/14 18:45 | Finish | |
| N28is... | iSCSI_n2810 | 172.16.65.160/... | Sche... | Sync | - | Manual Stop | |
Rsync Service
Rsync Service is used for rsync remote backup astarget role. So while setup rsync remote backup the associated rsync service from target side is required. To enable Thecus NAS as rsync target role, click on Rsync Service under Backup category and the setting screen will appear as below.
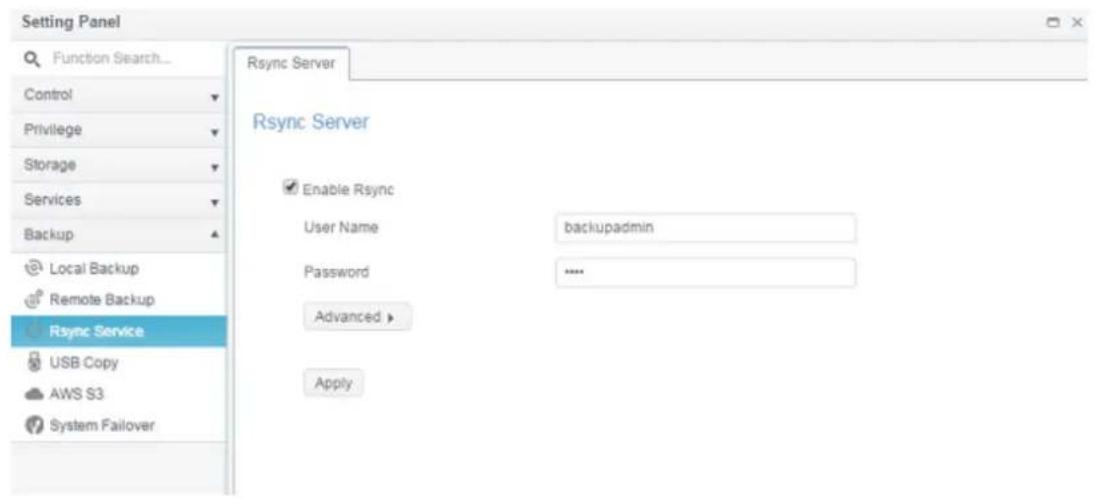
text_image
Setting Panel Function Search... Control Privilege Storage Services Backup Local Backup Remote Backup Rsync Service USB Copy AWS S3 System Failover Rsync Server Rsync Server Enable Rsync User Name backupadmin Password .... Advanced > Apply- Enable Rsync Service
- Add a username and password (they can be different than your NAS's username and password)
- Select Apply
NOTE
- You will need this user name and password while the data is going to remotely backup to this Rsync target server.
Now Rsync is turned on your NAS, which means it can be used as a target for Rsync backup, in other words, only the backup NAS needs to be activated in this way.
Click on Advanced to change network port or enable encryption transfer. If encryption transfer has been enabled, it needs to input both public and private keys. Or click on Download keys button to use system default.
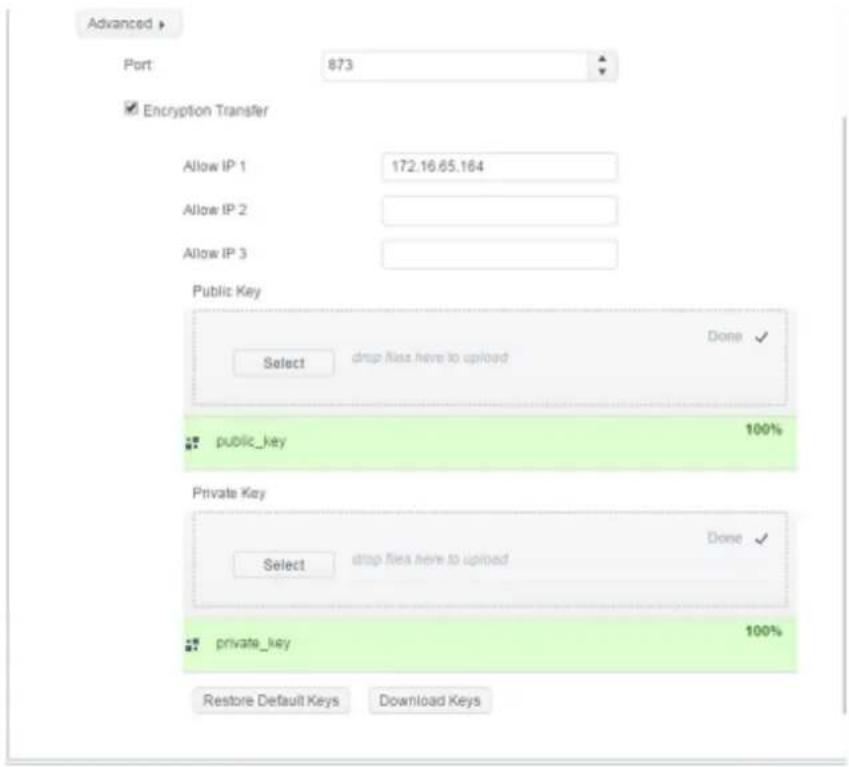
text_image
Advanced > Port 873 Encryption Transfer Allow IP 1 172.16.65.164 Allow IP 2 Allow IP 3 Public Key Select drop files here to upload Done ✓ public_key 100% private Key Select drop files here to upiped Done ✓ private_key 100% Restore Default Keys Download KeysUSB Copy
The USB Copy function using the USB copy button or front panel LCM/OLED of system used to only offer one-way transfers (i.e. only from the USB drive to the designated NAS folder). Now numerous options are available, such as: Disabled, bi-directional, and scheduled.
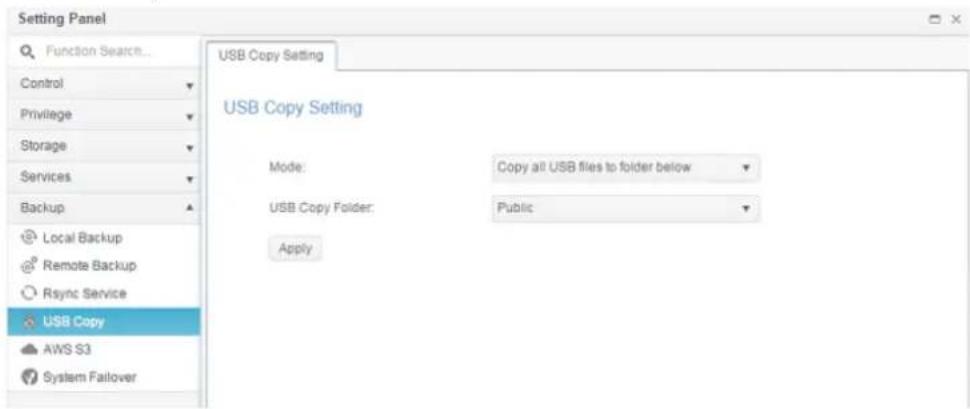
text_image
Setting Panel Function Search... Control Privilege Storage Services Backup Local Backup Remote Backup Rsync Service USB Copy AWS S3 System Failover USB Copy Setting USB Copy Setting Mode: Copy all USB files to folder below USB Copy Folder: Public ApplyDisable USB Copy:
Simply select Disable from USB Copy Mode and the USB Copy button or LCM/OLED USB Copy item will become inactive.
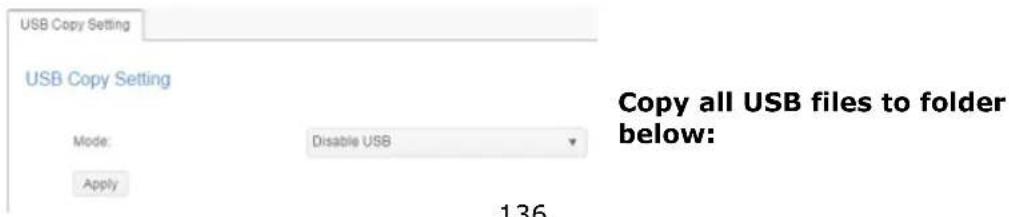
text_image
USB Copy Setting USB Copy Setting Mode: Disable USB Apply 136 Copy all USB files to folder below:If you select "Copy all USB files to folder below", then please choose the target path from the drop-down list. All files and folders on the USB device will be copied over to the NAS.
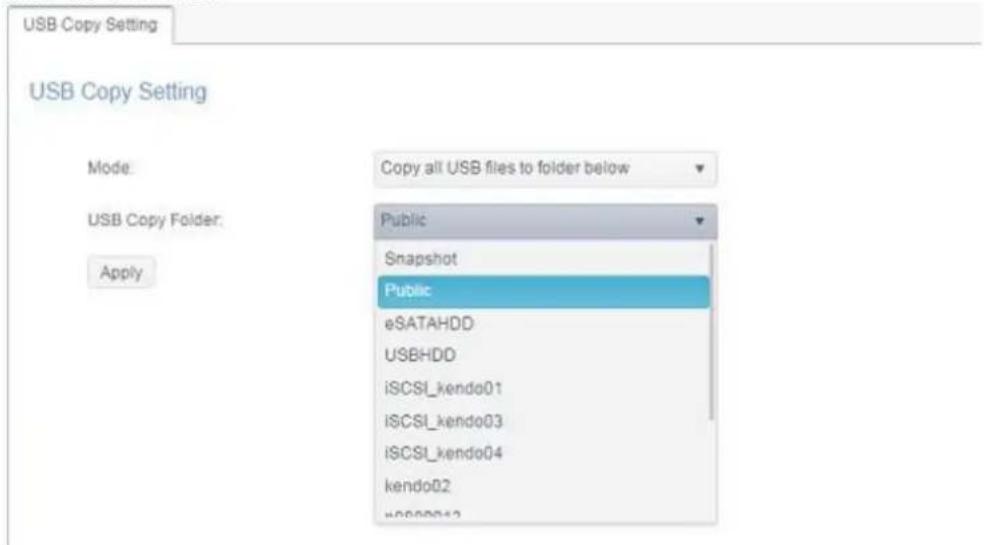
text_image
USB Copy Setting USB Copy Setting Mode: Copy all USB files to folder below USB Copy Folder: Public Snapshot eSATAHDD USBHDD iSCSI_kendo01 iSCSI_kendo03 iSCSI_kendo04 kendo02 +0000012User defined:
By applying the USB Copy service in user defined mode, the additional USB Copy tab will appear, click on USB Copy to add new task.

text_image
USB Copy Setting USB Copy Refresh Add Task N... USB Dongle USB Folder NAS Folder Orientation Last Run Time ActionThere
are 2 options available: "USB to NAS" and "NAS to USB", following the steps below to complete the setting.
- Choose direction and input task name then click next.
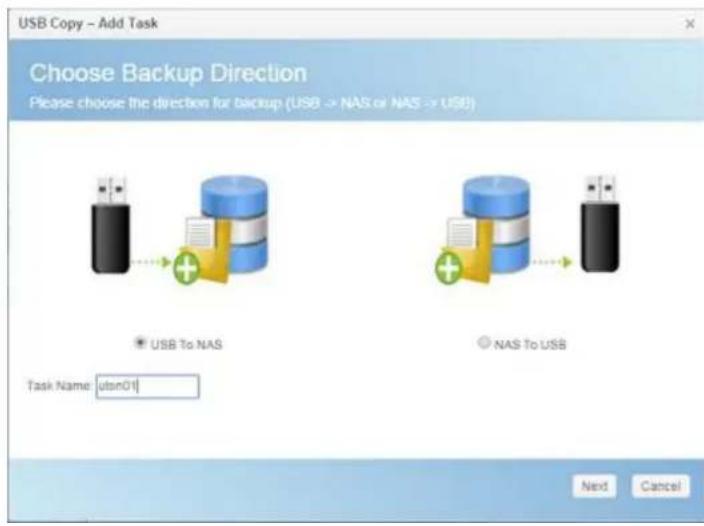
text_image
USB Copy - Add Task Choose Backup Direction Please choose the direction for backup (USB -> NAS or NAS -> USB) USB To NAS Task Name: uton01 NAS To USB Next Cancel- Choose USB device which has been installed on the system then select folder(s) to copy.
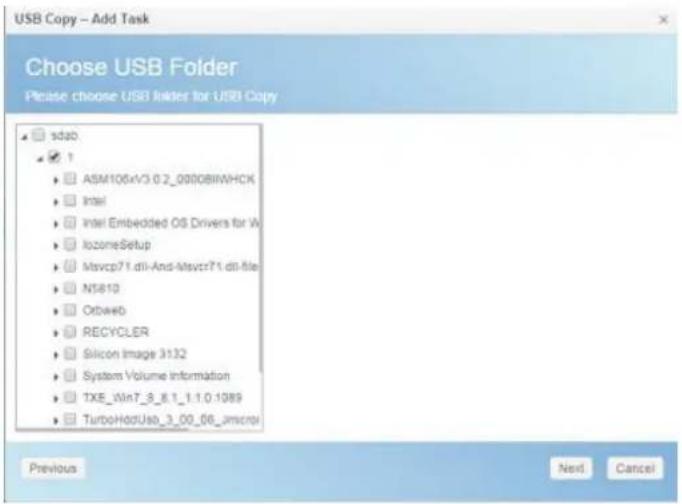
text_image
USB Copy - Add Task Choose USB Folder Please choose USB Linker for USB Copy sdab ASM106xV3.0.2_0000BIWHCK Intel Embedded OS Drivers for V IzoneSetup Mavcp71.dll-And-Mavcr71.dll-file N5810 Orbweb RECYCLER Silicon Image 3132 System Volume Information TXE_Win7_8_8.1_1.1.0.1089 TurboHotUsb_3_00_06_1mcmni Previous Next Cancel- Choose the destination on NAS folder.
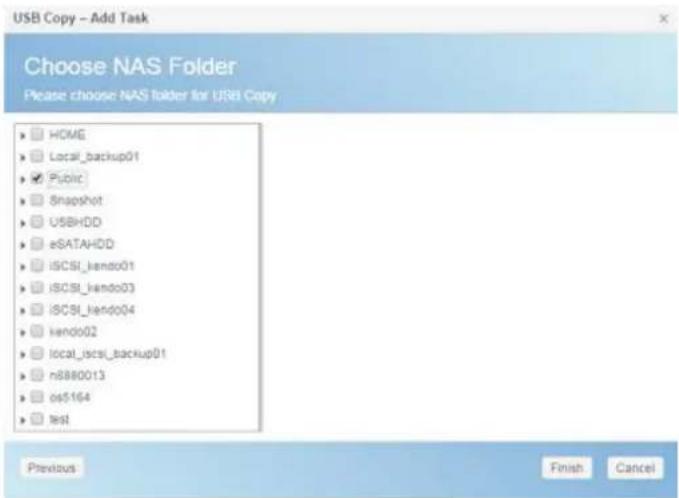
text_image
USB Copy - Add Task Choose NAS Folder Please choose NAS folder for USB Copy HOME Local_backup01 Public Snapshot USBHDD eSATAHDD iSCSI_lendo01 iSCSI_lendo03 iSCSI_lendo04 kendo02 local_iscsi_backup01 n8880013 os5164 test Previous Finish Cancel- Click on Finish to complete add USB copy task. The USB Copy page will have a new task listed.
| USB Copy Setting | USB Copy | |||||
| Refresh | Add | |||||
| Task N... | USB Dongle | USB Folder | NAS Folder | Orientation | Last Run Time | Action |
| uton01 | USB-Flash-Disk | 1 | Public | USB To NAS | -- | |
- Now you can operate by using USB copy button or LCM to execute USB copy task. Once the task has been completed, the Last Run Time and Action will update.
| USB Copy Setting USB Copy | ||||||
| Refresh | Add | |||||
| Task N... | USB Dongle | USB Folder | NAS Folder | Orientation | Last Run Time | Action |
| uton01 | USB-Flash-Disk | 1 | Public | USB To NAS | 2015/11/30 17:30 | Finished |
AWS S3
Please refer to the link
http://www.thecus.com/sp_download_page.php?TYPE_ID=1&PROD_ID=113
System Failover
Please refer to the link
http://www.thecus.com/sp_download_page.php?TYPE_ID=1&PROD_ID=113
Chapter 5: General User Login
Overview
The Thecus IP storage provides an easily accessible connection for General User via web interface. With it, you can manage your own files and photos on Thecus IP storage anywhere on the network.
General User Login Interface
Make sure your network is connected to the Internet and the system administrator has local user account created. To login Thecus IP storage as General User:
- Type the Thecus IP storage IP address into your browser. (Default IP address is http://192.168.1.100)
text_image
ThecusOS™ 7 Welcome andy .... Log In- Login to the system using the valid system user name and password which is created by administrator. The example for user andy and password 0000:
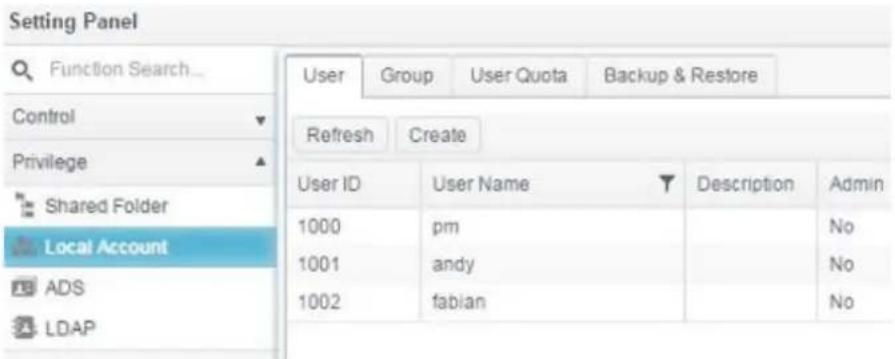
text_image
Setting Panel Function Search... Control Privilege Shared Folder Local Account ADS LDAP User Group User Quota Backup & Restore Refresh Create User ID User Name Description Admin 1000 pm No 1001 andy No 1002 fabian NoUser Name: andy
Password: 0000
You will see the General User Interface as below. From here, you can manage your own files/photos, change password, select display language and monitor virtually every aspect of the Thecus IP storage from anywhere on the network.
Menu Tree
The Menu Tree is where you will find the entry for each topic which General User can operate in the Thecus IP storage.

natural_image
Three icons: a green box with a triangular icon, a yellow folder with clouds, and a tropical beach with palm trees (no text or symbols)| Menu Bar | |
| Item | Description |
| App Center | The entry of App Center |
| File Center | The entry of File Center |
| Photo Center | The entry of Photo Center |
Moving your cursor over any of these items and click, it will display associated screen for each topic.
Quick System Resource Monitor
On the top right hand corner of menu bar, click on and it will display the system resource monitor info such as CPU, memory and storage usage.
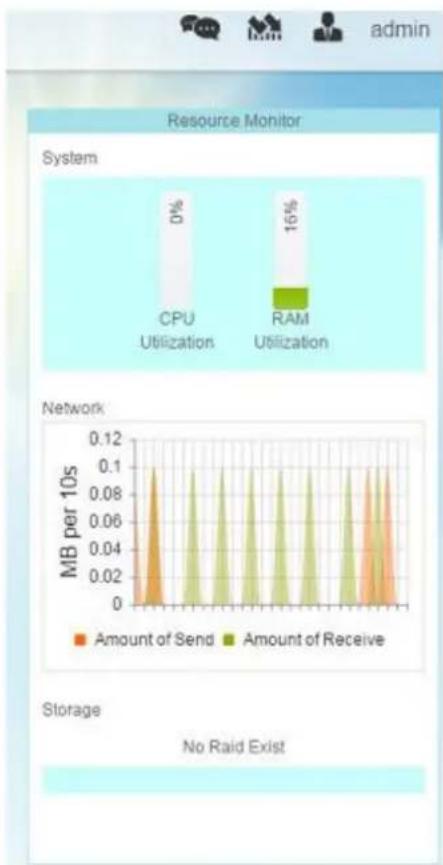
bar
| System | Category | Percentage (%) | | :--- | :--- | :--- | | CPU | Utilization | 0 | | RAM | Utilization | 16 | | Network | Amount of Send (MB per 10s) | 0.12 | | Network | Amount of Receive (MB per 10s) | 0.12 |Language Selection
The Thecus IP storage supports multiple Languages, including:
- English
- Japanese
• Traditional Chinese - Simplified Chinese
- French
- German
- Italian
- Korean
- Spanish
- Russian
- Polish
- Portuguese
On the top right hand corner of menu bar, select desired language from drop down list. This user interface will switch to the selected language for Thecus IP storage.
Logout
Click on logout to quit General User Web Interface.
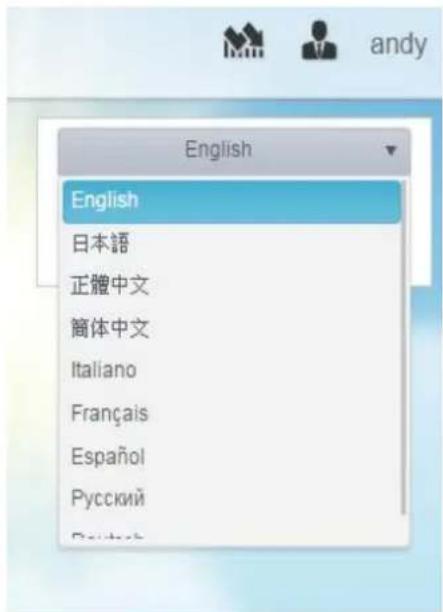
On the top right hand corner of menu bar, select Password item and the Change Password screen appears. Enter a new password in the New Password box and confirm your new password in the Verify box. Press Change to confirm password changes.
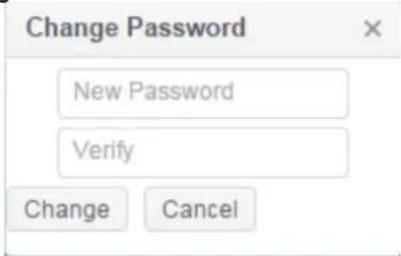
text_image
Change Password New Password Verify Change CancelApp Center
The App Center is where to store additional application which has provided by either 3 ^rd party users or Thecus. Click on App Center icon and a screen will appear as below. It will list "installed Apps" which has installed by administrator.

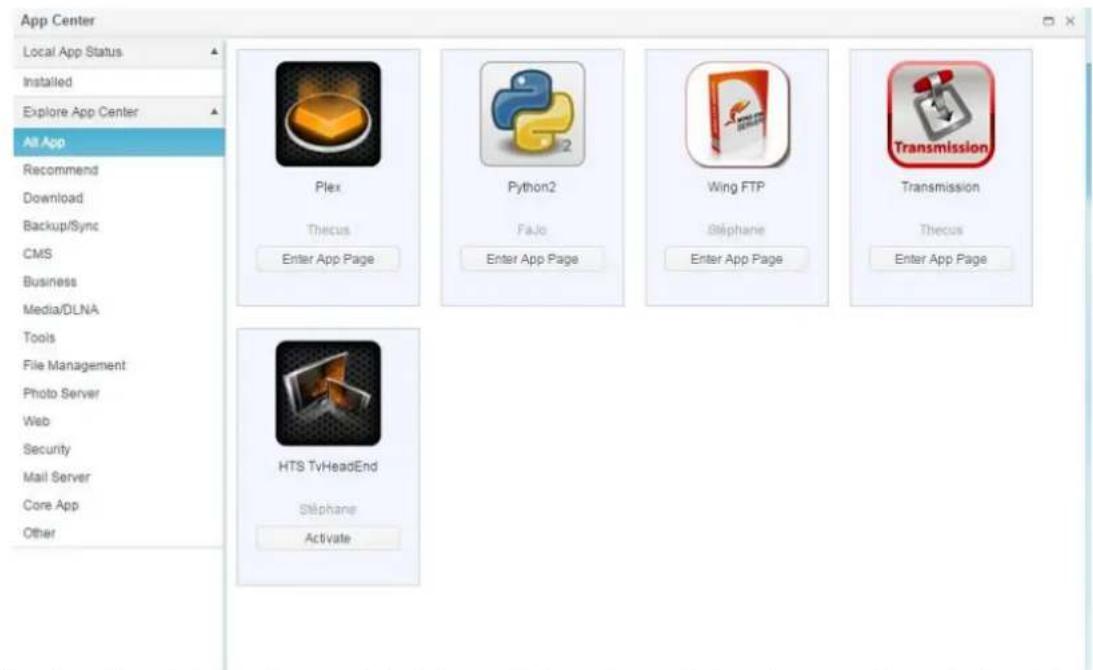
text_image
App Center Local App Status Installed Explore App Center All App Recommend Download Backup/Sync CMS Business Media/DLNA Tools File Management Photo Server Web Security Mail Server Core App Other Plex Thicus Enter App Page Python2 Fajo Enter App Page Wing FTP Stephane Enter App Page Transmission Thicus Enter App Page HTS TvHeadEnd Stephane ActivateTo view the details of associated App, click on icon of App to open the window. To execute associated App, click on 'Enter App Page".
text_image
Wing FTP Stéphane Enter App Page
text_image
Wing FTP Enter App Page Latest Version 4.3.8.1 現在版本 4.3.8.1 Module Size 12.4MB Release Date 2014-07-18 Developer Stéphane Release Note 4.3.8.1 Description: Wing FTP Server is a highly functional, easy-to-use and secure FTP Server solution that can be used in Windows, Linux, Mac OSX and Solaris. It supports a number of file transfer protocols, including FTP, HTTP, FTPS, HTTPS and SFTP, giving your end-users flexibility in how they connect to the server. And it provides admins with a web based interface to administer the server from anywhere. You can also monitor server performance and online sessions and even receive email notifications about various events taking place on the server. Features Major Features: Cross Platform You can run the server on Windows, Linux, Mac OSX and Solaris. Multiple Protocols Supports FTP, FTPS(FTP with SSL), HTTP, HTTPS, and SFTP(FTP with SSH). FIPS 140-2 Uses OpenSSL FIPS 140-2 validated cryptographic module (certificate #1051). Remote Web Based Administration Administrate your file server anytime, anywhere. Web Based Client Access your files anytime, anywhere. Multiple Domains You can run multiple virtual servers on the same IP address. Task Scheduler Uses the Lua scripting tasks to appoint an action at a specified time.File Center
The File Center allowed General NAS user to mange public, permitted and own files through web interface. Click on File Center icon and the system will display public system folder, associated ACL allowed folders and login user's Home folder.
The left pane has listed all available folders list for associated login user. The right pane will list details files/folders to against selected folder.
To manage files/folders using the function tabs or click on right button of mouse to bring out contact menu.
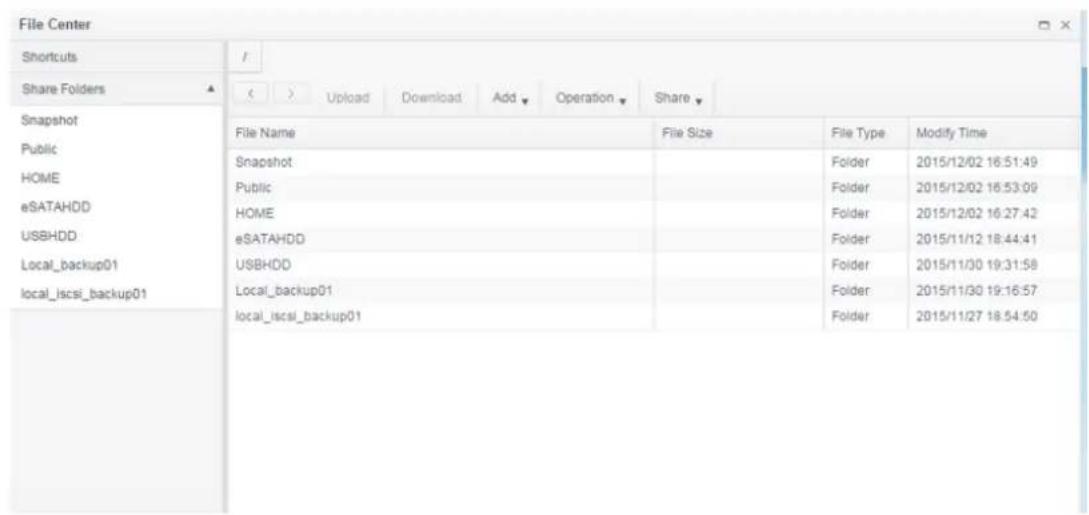
text_image
File Center Shortcuts Share Folders Snapshot Public HOME eSATAHDD USBHDD Local_backup01 local_iscsi_backup01 File Name Snapshot Public HOME eSATAHDD USBHDD Local_backup01 local_iscsi_backup01 File Size Folder Folder Folder Folder Folder Folder Folder Folder Folder File Type Modify Time 2015/12/02 16:51:49 2015/12/02 16:53:09 2015/12/02 16:27:42 2015/11/12 18:44:41 2015/11/30 19:31:58 2015/11/30 19:16:57 2015/11/27 18:54:50A description for functions on File Center as following:
| UPnP Port Management | |
| Item | Description |
| Upload | Upload the file(s) to associated NAS folder |
| Download | Download file(s) from NAS associated NAS folder to local system |
| Add | Allowed you to create folder |
| Operation | |
| Cut | Cut selected folder/file |
| Copy | Copy selected folder(s)/file(s), hold on shift key and next file/folder to have multiple selection |
| Paste | Paste Cut/Copy file(s)/folder(s) |
| Delete | Delete selected folder/file |
| Rename | Rename selected folder/file |
| Add to shortcut | Add selected file/folder to short list |
| Detail | Display selected file/folder details |
| Share | |
| Share file | Can generate share link/QR Code and shared on the network |
| Manage share link | To manage share link list |
For above function list, sharing file is very useful tool that could have particular file shared instantly via URL or QR Code. And it could also protect by password if there is security concern.
To share the file, simply select desired file from file list then click on "Share" to have drop down menu appear. Click on "Share File" and setting screen will appear as below. Input the password to have shared file protected if needed. The shared file can also setup duration for having period. Carry on to click on "Generate Share Link", system will generate URL and QR Code automatically. You could provide either one to whom have this file shared.
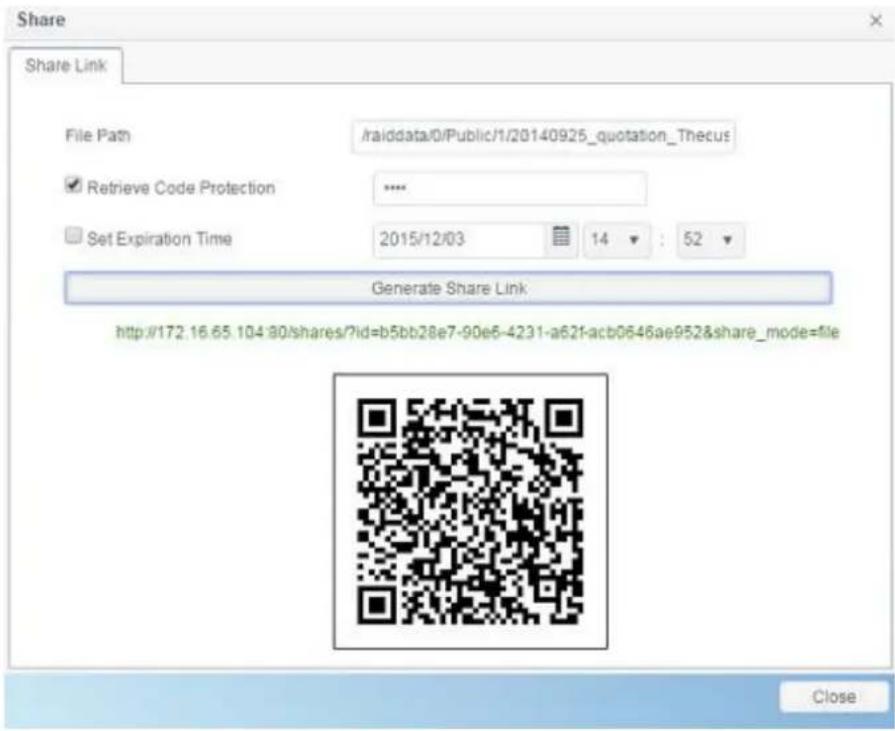
text_image
Share Share Link File Path /raiddata/0/Public/1/20140925_quotation_Thecus Retrieve Code Protection **** Set Expiration Time 2015/12/03 14 : 52 Generate Share Link http://172.16.65.104:80/shares/?id=b5bb28e7-90e6-4231-a62f-acb0646ae952&share_mode=file CloseFor all of share link been generated, it can be managed from "Manage Share Link". Click on "Share" to bring out drop down menu list then select "Manage Share Link". The all existed share link will be listed.
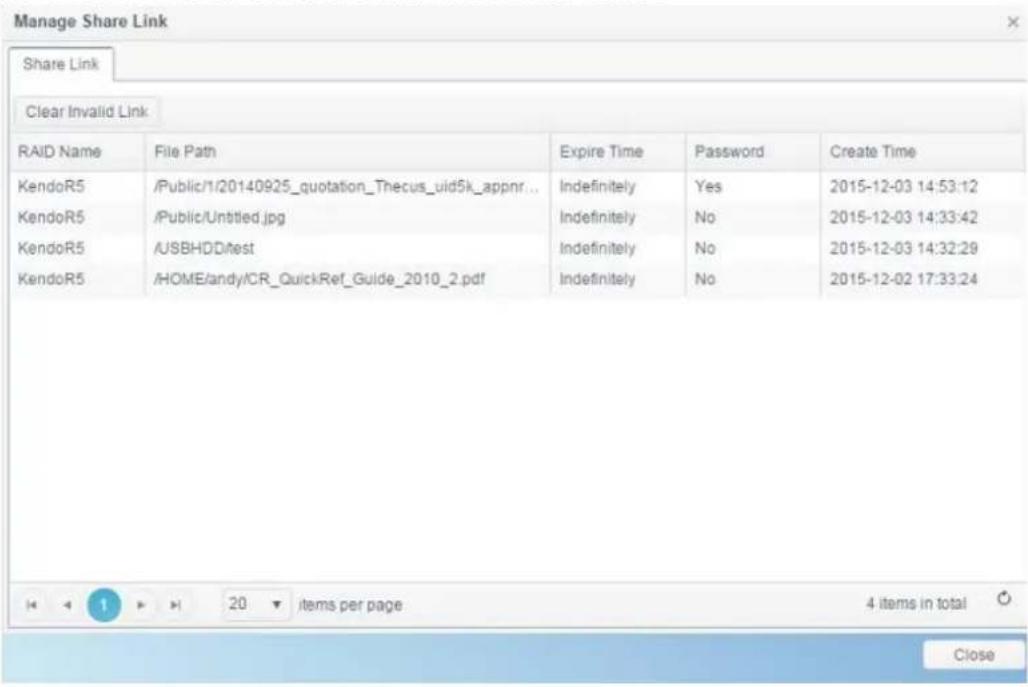
text_image
Manage Share Link Share Link Clear Invalid Link RAID Name File Path Expire Time Pbasword Create Time KendoR5 /Public/1/20140925_quotation_Thecus_uid5k_appnr... Indefinitely Yes 2015-12-03 14:53:12 KendoR5 /Public/Untitled.jpg Indefinitely No 2015-12-03 14:33:42 KendoR5 /USBHDD/test Indefinitely No 2015-12-03 14:32:29 KendoR5 /HOME/andy/CR_QuickRef_Guide_2010_2.pdf Indefinitely No 2015-12-02 17:33:24 1 20 items per page 4 items in total CloseClick on "Clear Invalid Link", system will check listed share link for file path correctness. If found the file is no longer existed, the share link will be deleted. To manage single share link, click on desired one from share link list. The additional function tab will appear to allow you "Edit" or "Delete" associated share link.
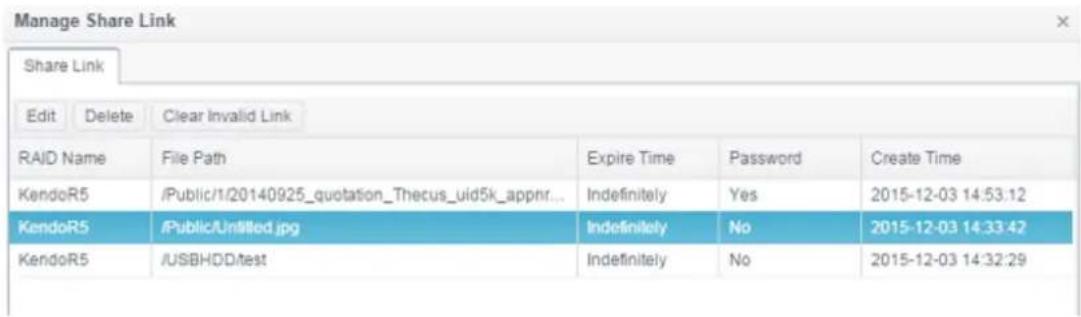
text_image
Manage Share Link Share Link Edit Delete Clear Invalid Link RAID Name File Path Expire Time Password Create Time KendoR5 /Public/1/20140925_quotation_Thecus_uid5k_appnr... Indefinitely Yes 2015-12-03 14:53:12 KendoR5 /Public/Untitled.jpg Indefinitely No 2015-12-03 14:33:42 KendoR5 /USBHDD.test Indefinitely No 2015-12-03 14:32:29To remove associated share link, simply click on "Delete". To add/remove password or make expire time, click on "Edit" to make the modification.
Photo Center
The Photo Center allowed General NAS user to manger album and photos through web interface. Click on Photo Center icon and system will display album list and operation tabs to manage album and photos.
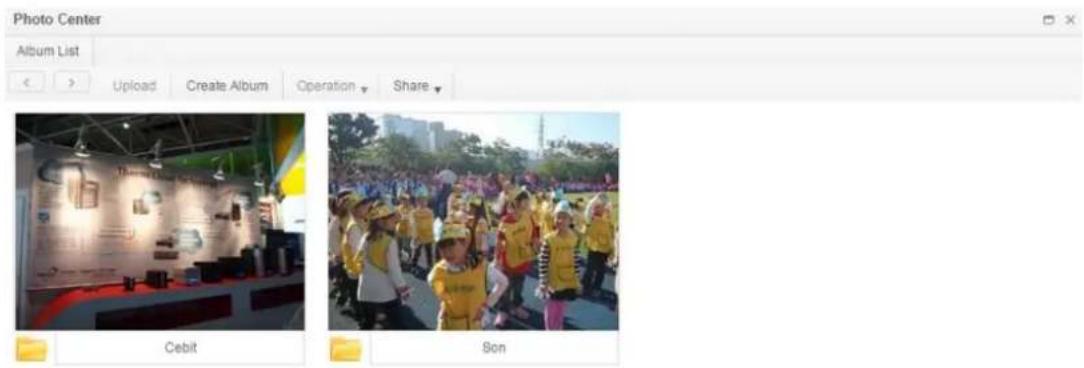
text_image
Photo Center Album List Upload Create Album Operation Share Cebit SonClick on created album to have all photos listed.
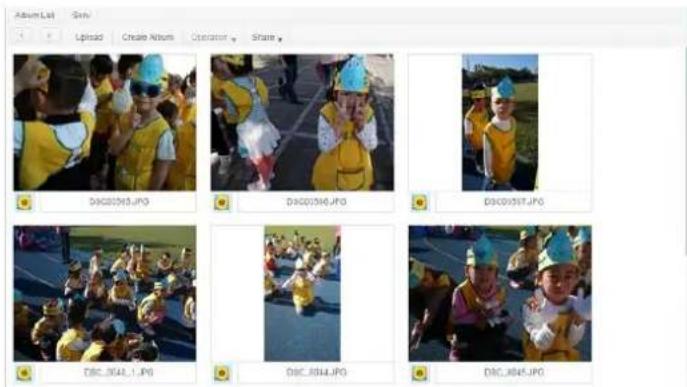
text_image
Album List Sens Lippsd Create Nsum Operator Share DRC00563.JPG DRC00560.JPG DRC00567.JPG DRC_8844_1.JPG DRC_8844.JPG DRC_8845.JPGA description for functions
on Photo Center as following:
| UPnP Port Management | |
| Item | Description |
| Upload | Upload the file(s) to associated NAS folder |
| Create Album | |
| Add | Allowed you to create folder |
| Operation | |
| Delete | Delete selected photo |
| Rename | Rename selected photo |
| Detail | Display selected photo details |
| Set as Cover | Set selected photo as album cover |
| Share | |
| Share album | Can generate share link/QR Code and shared associated album on the network |
| Share photo | Can generate share link/QR Code and shared associated photo on the network |
| Manage share link | To manage share link list |
Just like sharing tool from File Center, Photo Center is also capable of this. The album and photo can be shared on the network with or without password protection and also setup sharing time.
Exactly same way as File Center to manage share link, system could validate all of created share link and allowed to add/remove password protection or sharing duration.
Chapter 6: Tips and Tricks
Access your NAS from Windows
The quick way to access your Thecus IP storage from Windows is if the NAS IP is at 172.16.67.1, to access the NAS share folder, input \172.16.67.1 from file explore.
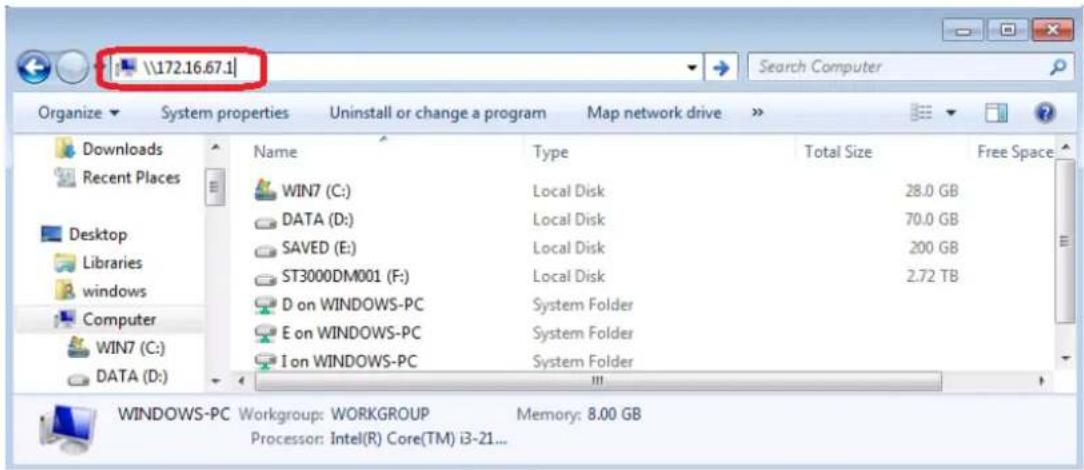
text_image
\172.16.67.1 Organize System properties Uninstall or change a program Map network drive Downloads Recent Places Desktop Libraries windows Computer WIN7 (C:) DATA (D:) Name Type Total Size Free Space WIN7 (C:) Local Disk 28.0 GB DATA (D:) Local Disk 70.0 GB SAVED (E:) Local Disk 200 GB ST3000DM001 (F:) Local Disk 2.72 TB D on WINDOWS-PC System Folder E on WINDOWS-PC System Folder I on WINDOWS-PC System Folder WINDOWS-PC Workgroup: WORKGROUP Memory: 8.00 GB Processor: Intel(R) Core(TM) i3-21...Share folder accessibility with associated login user account
If it is an open permission share folder (PUBLIC = YES), just click the right mouse key to map network driver.
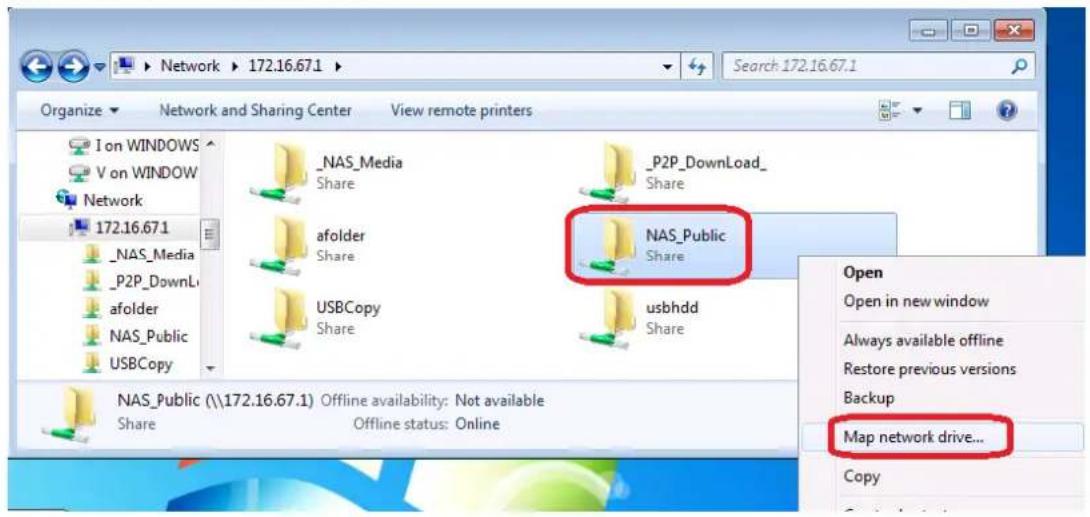
text_image
Network 172.16.67.1 Organize Network and Sharing Center View remote printers I on WINDOWS V on WINDOW Network 172.16.67.1 _NAS_Media _P2P_DownL afolder NAS_Public USBCopy _NAS_Media _P2P_DownL afolder NAS_Public USBCopy _NAS_Public (\172.16.67.1) Offline availability: Not available Share Share AFolder Share USBCopy Share _P2P_DownLoad_Share NAS_Public Share usbhdd Share Open Open in new window Always available offline Restore previous versions Backup Map network drive... CopyIf it is nonpublic ACL share folder (PUBLIC =NO), you will need to key-in the user account & password which has been created on Thecus IP storage user database and permission granted.
Warning: Windows will auto save the connection account & password automatically. If you want to test multiple accounts & ACL, please doing test from FTP.
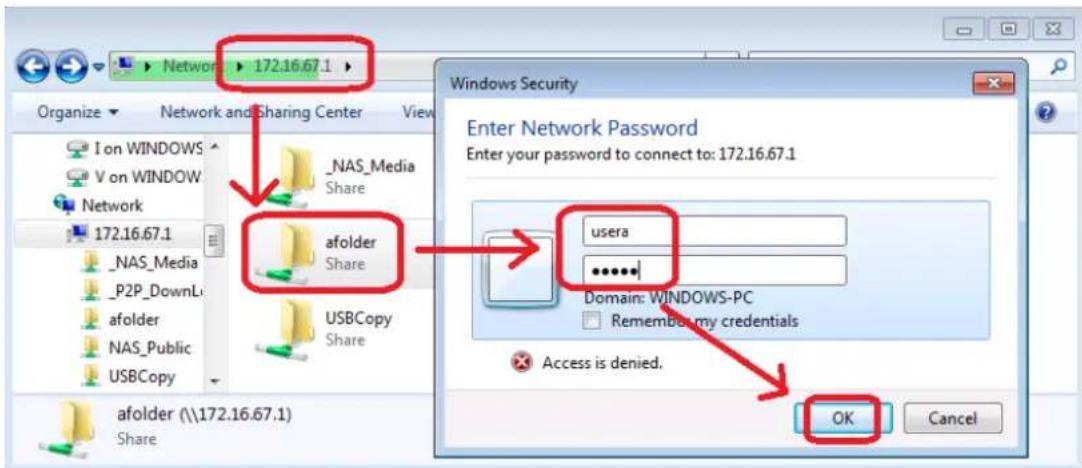
text_image
Network 172.16.67.1 Organize Network and Sharing Center View I on WINDOWS V on WINDOW Network 172.16.67.1 _NAS_Media Share afolder Share USBCopy Share afolder (\172.16.67.1) Share Windows Security Enter Network Password Enter your password to connect to: 172.16.67.1 usera **** Domain: WINDOWS-PC Remember my credentials Access is denied. OK CancelUSB Storage Expansion
The Thecus IP storage supports external USB hard disks through its USB ports. Once a USB hard disk is successfully mounted, the entire volume will be linked automatically to the default USB HDD folder. The Thecus IP storage supports USB external storage devices. All file names on the USB disk volume are case sensitive.
Before attaching a USB disk drive to Thecus IP storage, you have to partition and format it on a desktop computer or a notebook first. The attached device will be located at \192.168.1.100\usbhdd\sd(x)1 where 192.168.1.100 means the IP address of Thecus IP storage and sd(x)1 stands for the first partition on the USB disk drive.
Remote Administration
You can set up your Thecus IP storage for remote administration. With remote administration, you can access your Thecus IP storage over the Internet, even if your Thecus IP storage is behind a router. This is especially useful if you are traveling and suddenly need a file from your Thecus IP storage.
Setting up remote administration is a three-part process, and will require the following equipment:
• Thecus IP storage device
• Cable / DSL Router with Dynamic DNS support
- Home PC
- Internet Connection
NOTE
Router setup will differ slightly depending on router used. For this example, we will use the Asus WL500g because it has support for Dynamic DNS. Contact your router hardware vendor for setup help.
Part I - Setup a DynDNS Account
- Go to http://www.dyndns.org from your home PC.
- Click on the Sign Up Now link.
- Check the Check boxes, select a user name (i.e.: N5810), enter your email address (i.e.: xxx@example.com), check Enable Wildcard, and create a password (i.e.: xxxx).
- Wait for an email from www.dyndns.org.
- Open the email and click on the link to activate your account
Part II - Enable DDNS on the Router
- Go to the router setup screen and select IP Config > Miscellaneous DDNS Setting from your Home PC.
- Click on Yes for Enable the DDNS Client?
- Select www.dyndns.org.
- Go to router setup screen, and enter the following information:
a. User Name or E-mail Address: xxx@example.com
b. Password or DDNS Key: xxxx
c. Host Name: www.N5810.dyndns.org
d. Enable wildcard? Select Yes
e. Update Manually: Click Update
Part III - Setting up Virtual Servers (HTTPS)
- Navigate to NAT Setting > Virtual Server.
- For Enable Virtual Server?, select Yes
- Setup the HTTPS Server
a. Well-Known Applications: Select User Defined
b. Local IP: Enter 192.168.1.100
c. Port Range: 443 (the default HTTPS port setting on the Thecus IP storage)
d. Protocol: select TCP
e. Click Add.
f. Click Apply.
- Test the HTTPS connection from another computer on the Internet
a. From a remote computer, open your browser and enter https://www.N5810.dyndns.org
b. You should see the login page of Thecus IP storage.
Firewall Software Configuration
If you are using a software firewall (i.e. Norton Internet Security) and are having trouble connecting to Thecus IP storage, you can try the following steps:
- Double click the NIS icon on system tray, and then configure the Personal Firewall.
- On the Programs page, find the SetupWizard.exe and change its permission to "Permit All". If it's not in the program list, use the Add or Program Scan buttons to find it.
- On the Networking page, manually add Thecus IP storage IP address (i.e. 192.168.1.100) to the Trusted list.
Replacing Damaged Hard Drives
If you are using RAID 1 you can easily replace a damaged hard drive in the Thecus IP storage while keeping your data secure with the system's automatic data recovery.
Hard Drive Damage
When a hard drive is damaged and data in the RAID volume is corrupted, the system will beep to notify the status.
Replacing a Hard Drive
To replace a hard disk drive in the Thecus IP storage:
- Remove the tray with the damaged hard disk.
- Unscrew the damaged hard disk and remove it from the tray.
-
Slide a new hard disk into the tray and fasten the screws.
-
Insert the hard disk tray back into the Thecus IP storage until it snaps into place. You can also lock it with a key if desired.
-
The LED will blink green when the HDD is accessed.
RAID Auto-Rebuild
When using RAID 1 on the Thecus IP storage, you can use the auto-rebuild function when an error is detected.
- When a hard disk fails the system beeps and/or an email notification is sent to the specified receivers.
- Follow the steps mentioned above to replace the failed hard disk.
- The system automatically recognizes the new hard disk and starts the auto-rebuild sequence to resume its status before the hard disk crash.
Chapter 7: Troubleshooting
Forgot My Network IP Address
If you forget your network IP address and have no physical access to the system, you can find out the IP address by using the setup wizard to retrieve the IP of your Thecus IP storage.
- Start the Setup Wizard, and it will automatically detect all Thecus IP storage products on your network.
- You should be able to find the IP address of the Thecus IP storage which you have forgotten in the Device Discovery screen.
Can't Map a Network Drive in Windows XP
You may have problems mapping a network drive under the following conditions:
- The network folder is currently mapped using a different user name and password. To connect using a different user name and password, first disconnect any existing mappings to this network share.
- The mapped network drive could not be created because the following error has occurred: Multiple connections to a server or shared resource by the same user, using more than one user name, are not allowed. Disconnect all previous connections to the server or shared resource and try again.
To check out existing network connections, type net use under the DOS prompt. You may refer the URL below for more network mapping information.
http://thecus.kayako.com/default_import/Knowledgebase/Article/View/541/0/three-ways-to-remove-windows7-saved-network-password
http://thecus.kayako.com/default_import/Knowledgebase/Article/View/113/0/what-is-unc-path
Restoring Factory Defaults
From the Firmware Setting menu, choose the Reset to Default item and the Reset to Factory Default screen appears. Press Apply to reset Thecus IP storage factory default settings.
WARNING
Resetting to factory defaults will not erase the data stored in the hard disks, but WILL revert all the settings to the factory default values.
Problems with Time and Date Settings
The administrator is able to select an NTP Server to keep Thecus IP storage time synchronized. However, if Thecus IP storage cannot access the Internet, you may encounter a problem when setting the Time and Time Zone. If this happens:
- Login to the Web Administration Interface.
- Navigate to Regional Option>NTP Service.
- Under NTP Service, untick to disable.
- Set the Date, Time, and Time Zone manually from Date/Time.
- Click Apply.
In addition, if the Thecus IP storage is able to access the Internet and you want to keep the NTP Server clock.isc.org by default, please make sure the DNS Server is correctly entered, thereby allowing the NTP Server name to correctly resolve.
(See Network > Host Setting > DNS Setting)
Appendix A: Customer Support
If your Thecus IP storage is not working properly, we encourage you to check out Chapter 7: Troubleshooting, located in this manual. You can also try to ensure that you are using the latest firmware version for your Thecus IP storage. Thecus is committed to providing free firmware upgrades to our customers. Our newest firmware is available on our Download Center:
http://www.thecus.com/sp_download.php
If you are still experiencing problems with your Thecus IP storage, or require a Return Merchandise Authorization (RMA), feel free to contact technical support via our Technical Support Website:
http://www.thecus.com/sp_tech.php
For Sales Information you can e-mail us at:
sales@thecus.com
Thank you for choosing Thecus!
Appendix B: RAID Basics
Overview
A Redundant Array of Independent Disks (RAID) is an array of several hard disks that provide data security and high performance. A RAID system accesses several hard disks simultaneously, which improves I/O performance over a single hard disk. Data security is enhanced by a RAID, since data loss due to a hard disk failure is minimized by regenerating redundant data from the other RAID hard disks.
Benefits
RAID improves I/O performance, and increases data security through fault tolerance and redundant data storage.
Improved Performance
RAID provides access to several hard disk drives simultaneously, which greatly increases I/O performance.
Data Security
Hard disk drive failure unfortunately is a common occurrence. A RAID helps prevent against the loss of data due to hard disk failure. A RAID offers additional hard disk drives that can avert data loss from a hard disk drive failure. If a hard drive fails, the RAID volume can regenerate data from the data and parity stored on its other hard disk drives.
RAID Levels
The Thecus IP storage supports standard RAID levels 0, 1, 5, 6, 10, 50, 60 and JBOD. You choose a RAID level when you create a system volume. The factors for selecting a RAID level are:
- Your requirements for performance
- Your need for data security
- Number of hard disk drives in the system, capacity of hard disk drives in the system
The following is a description of each RAID level:
RAID 0
RAID 0 is best suited for applications that need high bandwidth but do not require a high level of data security. The RAID 0 level provides the best performance of all the RAID levels, but it does not provide data redundancy.
RAID 0 uses disk striping and breaking up data into blocks to write across all hard drives in the volume. The system can then use multiple hard drives for faster read and write. The stripe size parameter that was set when the RAID was created determines the size of each block. No parity calculations complicate the write operation.
RAID 1
RAID 1 mirrors all data from one hard disk drive to a second one hard disk drive, thus providing complete data redundancy. However, the cost of data storage capacity is doubled.
This is excellent for complete data security.
RAID 5
RAID 5 offers data security and it is best suited for networks that perform many small I/O transactions at the same time, as well as applications that require data security such as office automation and online customer service. Use it also for applications with high read requests but low write requests.
RAID 5 includes disk striping at the byte level and parity information is written to several hard disk drives. If a hard disk fails the system uses parity stored on each of the other hard disks to recreate all missing information.
RAID 6
RAID 6 is essentially an extension of RAID level 5 which allows for additional fault tolerance by using a second independent distributed parity scheme (dual parity). Data is striped on a block level across a set of drives, just like in RAID 5, and a second set of parity is calculated and written across all the drives; RAID 6 provides for an extremely high data fault tolerance and can sustain two simultaneous drive failures.
This is a perfect solution for mission critical applications.
RAID 10
RAID 10 is implemented as a striped array whose segments are RAID 1 arrays. RAID 10 has the same fault tolerance as RAID level 1.
RAID 10 has the same overhead for fault-tolerance as mirroring alone. High I/O rates are achieved by striping RAID 1 segments.
Under certain circumstances, RAID 10 array can sustain up to 2 simultaneous drive failures
Excellent solution for applications that would have otherwise gone with RAID 1 but need an additional performance boost.
RAID 50
A RAID 50 combines the straight block-level striping of RAID 0 with the distributed parity of RAID 5. This is a RAID 0 array striped across RAID 5 elements. It requires at least 6 drives.
RAID 60
A RAID 60 combines the straight block-level striping of RAID 0 with the distributed double parity of RAID 6. That is, a RAID 0 array striped across RAID 6 elements. It requires at least 8 disks.
JBOD
Although a concatenation of disks (also called JBOD, or "Just a Bunch of Disks") is not one of the numbered RAID levels, it is a popular method for combining multiple physical disk drives into a single virtual one. As the name implies, disks are merely concatenated together, end to beginning, so they appear to be a single large disk.
As the data on JBOD is not protected, one drive failure could result total data loss.
Stripe Size
The length of the data segments being written across multiple hard disks. Data is written in stripes across the multiple hard disks of a RAID. Since multiple disks are accessed at the same time, disk striping enhances performance. The stripes can vary in size.
Disk Usage
When all disks are of the same size, and used in RAID, Thecus IP storage disk usage percentage is listed below:
| RAID Level | Percentage Used |
| RAID 0 | 100% |
| RAID 1 | 1/n × 100% |
| RAID 5 | (n-1)/n × 100% |
| RAID 6 | (n-2)/n × 100% |
| RAID 10 | 50% |
| RAID 50 | (n-1)/n × 100% |
| RAID 60 | (n-2)/n × 100% |
| JBOD | 100% |
n : HDD number
Appendix C: Active Directory Basics
Overview
With Windows 2000, Microsoft introduced Active Directory (ADS), which is a large database/information store. Prior to Active Directory the Windows OS could not store additional information in its domain database. Active Directory also solved the problem of locating resources; which previously relied on Network Neighborhood, and was slow. Managing users and groups were among other issues Active Directory solved.
What is Active Directory?
Active Directory was built as a scalable, extensible directory service that was designed to meet corporate needs. A repository for storing user information, accounts, passwords, printers, computers, network information and other data, Microsoft calls Active Directory a "namespace" where names can be resolved.
ADS Benefits
ADS lets Thecus IP storage integrate itself with the existing ADS in an office environment. This means the Thecus IP storage is able to recognize your office users and passwords on the ADS server. Other major benefits ADS support provides include:
- Easy integration of Thecus IP storage into the existing office IT infrastructure
The Thecus IP storage acts as a member of the ADS. This feature significantly lowers the overhead of the system administrator. For example, corporate security policies and user privileges on an ADS server can be enforced automatically on Thecus IP storage.
- Centralized user/password database
The Thecus IP storage does not maintain its own copy of the user/password database. This avoids data inconsistency between Thecus IP storage and other servers. For example, without ADS support, an administrator might need to remove a specific user privilege on Thecus IP storage and each individual server. With ADS support, the change on an ADS server is known to all of its ADS members.
Appendix D: Licensing Information
Overview
This product included copyrighted third-party software licensed under the terms of GNU General Public License. Please see THE GNU General Public License for extra terms and conditions of this license.
Source Code Availability
Thecus Technology Corp. has exposed the full source code of the GPL licensed software. For more information on how you can obtain our source code, please visit our web site, http://www.thecus.com.
Copyrights
- This product includes cryptographic software written by Eric Young (eay@cryptsoft.com).
● This product includes software developed by Mark Murray. - This product includes software developed by Eric Young (eay@cryptsoft.com).
- This product includes software developed by the OpenSSL Project for use in the OpenSSL Toolkit (http://www.openssl.org/).
- This product includes PHP, freely available from (http://www.php.net/).
- This product includes software developed by the University of California, Berkeley and its contributors.
● This product includes software developed by Winning Strategies, Inc. - This product includes software developed by the Apache Group for use in the Apache HTTP server project (http://www.apache.org/).
- This product includes software developed by Softweyr LLC, the University of California, Berkeley, and its contributors.
● This product includes software developed by Bodo Moeller. - This product includes software developed by Greg Roelofs and contributors for the book, "PNG: The Definitive Guide," published by O'Reilly and Associates.
- This product includes software developed by the NetBSD Foundation, Inc. and its contributors.
- This product includes software developed by Yen Yen Lim and North Dakota State University.
- This product includes software developed by the Computer Systems Engineering Group at Lawrence Berkeley Laboratory.
- This product includes software developed by the Kungliga Tekniska Högskolan and its contributors.
● This product includes software developed by the Nick Simicich. - This product includes software written by Tim Hudson (tjh@cryptsoft.com).
- This product includes software developed by Christopher G. Demetriou for the NetBSD Project.
CGIC License Terms
Basic License
CGIC, copyright 1996, 1997, 1998, 1999, 2000, 2001, 2002, 2003, 2004 by Thomas Boutell and Boutell.Com, Inc.
Permission is granted to use CGIC in any application, commercial or noncommercial, at no cost. HOWEVER, this copyright paragraph must appear on a "credits" page accessible in the public online and offline documentation of the program. Modified versions of the CGIC library should not be distributed without the attachment of a clear statement regarding the author of the modifications, and this notice may in no case be removed. Modifications may also be submitted to the author for inclusion in the main CGIC distribution.
GNU General Public License
Version 2, June 1991
Copyright © 1989, 1991 Free Software Foundation, Inc. 51 Franklin St, Fifth Floor, Boston, MA 02110-1301 USA
Everyone is permitted to copy and distribute verbatim copies of this license document, but changing it is not allowed.
PREAMBLE
The licenses for most software are designed to take away your freedom to share and change it. By contrast, the GNU General Public License is intended to guarantee your freedom to share and change free software--to make sure the software is free for all its users. This General Public License applies to most of the Free Software
Foundation's software and to any other program whose authors commit to using it. (Some other Free Software Foundation software is covered by the GNU Library General Public License instead.) You can apply it to your programs, too.
When we speak of free software, we are referring to freedom, not price. Our General Public Licenses are designed to make sure that you have the freedom to distribute copies of free software (and charge for this service if you wish), that you receive source code or can get it if you want it, that you can change the software or use pieces of it in new free programs; and that you know you can do these things.
To protect your rights, we need to make restrictions that forbid anyone to deny you these rights or to ask you to surrender the rights. These restrictions translate to certain responsibilities for you if you distribute copies of the software, or if you modify it.
For example, if you distribute copies of such a program, whether gratis or for a fee, you must give the recipients all the rights that you have. You must make sure that they, too, receive or can get the source code. And you must show them these terms so they know their rights.
We protect your rights with two steps: (1) copyright the software, and (2) offer you this license which gives you legal permission to copy, distribute and/or modify the software.
Also, for each author's protection and ours, we want to make certain that everyone understands that there is no warranty for this free software. If the software is modified by someone else and passed on, we want its recipients to know that what they have is not the original, so that any problems introduced by others will not reflect on the original authors' reputations.
Finally, any free program is threatened constantly by software patents. We wish to avoid the danger that redistributors of a free program will individually obtain patent licenses, in effect making the program proprietary. To prevent this, we have made it clear that any patent must be licensed for everyone's free use or not licensed at all.
The precise terms and conditions for copying, distribution and modification follow.
TERMS AND CONDITIONS FOR COPYING, DISTRIBUTION AND MODIFICATION
- This License applies to any program or other work which contains a notice placed by the copyright holder saying it may be distributed under the terms of this General Public License. The "Program", below, refers to any such program or work, and a "work based on the Program" means either the Program or any derivative work under copyright law: that is to say, a work containing the Program or a portion of it, either verbatim or with modifications and/or translated into another Language. (Hereinafter, translation is included without limitation in the term "modification".) Each licensee is addressed as "you".
Activities other than copying, distribution and modification are not covered by this License; they are outside its scope. The act of running the Program is not restricted, and the output from the Program is covered only if its contents constitute a work based on the Program (independent of having been made by running the Program).
Whether that is true depends on what the Program does.
- You may copy and distribute verbatim copies of the Program's source code as you receive it, in any medium, provided that you conspicuously and appropriately publish on each copy an appropriate copyright notice and disclaimer of warranty; keep intact all the notices that refer to this License and to the absence of any warranty; and give any other recipients of the Program a copy of this License along with the Program.
You may charge a fee for the physical act of transferring a copy, and you may at your option offer warranty protection in exchange for a fee.
- You may modify your copy or copies of the Program or any portion of it, thus forming a work based on the Program, and copy and distribute such modifications or work under the terms of Section 1 above, provided that you also meet all of these conditions:
a) You must cause the modified files to carry prominent notices stating that you changed the files and the date of any change.
b) You must cause any work that you distribute or publish, that in whole or in part contains or is derived from the Program or any part thereof, to be licensed as a whole at no charge to all third parties under the terms of this License.
c) If the modified program normally reads commands interactively when run, you must cause it, when started running for such interactive use in the most ordinary way, to print or display an announcement including an appropriate copyright notice and a notice that there is no warranty (or else, saying that you provide a warranty) and that users may redistribute the program under these conditions, and telling the user how to view a copy of this License. (Exception: if the Program itself is interactive but does not normally print such an announcement, your work based on the Program is not required to print an announcement.)
These requirements apply to the modified work as a whole. If identifiable sections of that work are not derived from the Program, and can be reasonably considered independent and separate works in themselves, then this License, and its terms, do not apply to those sections when you distribute them as separate works. But when you distribute the same sections as part of a whole which is a work based on the Program, the distribution of the whole must be on the terms of this License, whose permissions for other licensees extend to the entire whole, and thus to each and every part regardless of who wrote it.
Thus, it is not the intent of this section to claim rights or contest your rights to work written entirely by you; rather, the intent is to exercise the right to control the distribution of derivative or collective works based on the Program.
In addition, mere aggregation of another work not based on the Program with the Program (or with a work based on the Program) on a volume of a storage or distribution medium does not bring the other work under the scope of this License.
- You may copy and distribute the Program (or a work based on it, under Section 2) in object code or executable form under the terms of Sections 1 and 2 above provided that you also do one of the following:
a) Accompany it with the complete corresponding machine-readable source code, which must be distributed under the terms of Sections 1 and 2 above on a medium customarily used for software interchange; or,
b) Accompany it with a written offer, valid for at least three years, to give any third party, for a charge no more than your cost of physically performing source distribution, a complete machine-readable copy of the corresponding source code, to be distributed under the terms of Sections 1 and 2 above on a medium customarily used for software interchange; or,
c) Accompany it with the information you received as to the offer to distribute corresponding source code. (This alternative is allowed only for noncommercial distribution and only if you received the program in object code or executable form with such an offer, in accord with Subsection b above.)
The source code for a work means the preferred form of the work for making modifications to it. For an executable work, complete source code means all the source code for all modules it contains, plus any associated interface definition files, plus the scripts used to control compilation and installation of the executable. However, as a special exception, the source code distributed need not include anything that is normally distributed (in either source or binary form) with the major components (compiler, kernel, and so on) of the
operating system on which the executable runs, unless that component itself accompanies the executable.
If distribution of executable or object code is made by offering access to copy from a designated place, then offering equivalent access to copy the source code from the same place counts as distribution of the source code, even though third parties are not compelled to copy the source along with the object code.
-
You may not copy, modify, sublicense, or distribute the Program except as expressly provided under this License. Any attempt otherwise to copy, modify, sublicense or distribute the Program is void, and will automatically terminate your rights under this License. However, parties who have received copies, or rights, from you under this License will not have their licenses terminated so long as such parties remain in full compliance.
-
You are not required to accept this License, since you have not signed it. However, nothing else grants you permission to modify or distribute the Program or its derivative works. These actions are prohibited by law if you do not accept this License. Therefore, by modifying or distributing the Program (or any work based on the Program), you indicate your acceptance of this License to do so, and all its terms and conditions for copying, distributing or modifying the Program or works based on it.
-
Each time you redistribute the Program (or any work based on the Program), the recipient automatically receives a license from the original licensor to copy, distribute or modify the Program subject to these terms and conditions. You may not impose any further restrictions on the recipients' exercise of the rights granted herein. You are not responsible for enforcing compliance by third parties to this License.
-
If, as a consequence of a court judgment or allegation of patent infringement or for any other reason (not limited to patent issues), conditions are imposed on you (whether by court order, agreement or otherwise) that contradict the conditions of this License, they do not excuse you from the conditions of this License. If you cannot distribute so as to satisfy simultaneously your obligations under this License and any other pertinent obligations, then as a consequence you may not distribute the Program at all. For example, if a patent license would not permit royalty-free redistribution of the Program by all those who receive copies directly or indirectly through you, then the only way you could satisfy both it and this License would be to refrain entirely from distribution of the Program.
If any portion of this section is held invalid or unenforceable under any particular circumstance, the balance of the section is intended to apply and the section as a whole is intended to apply in other circumstances.
It is not the purpose of this section to induce you to infringe any patents or other property right claims or to contest validity of any such claims; this section has the sole purpose of protecting the integrity of the free software distribution system, which is implemented by public license practices. Many people have made generous contributions to the wide range of software distributed through that system in reliance on consistent application of that system; it is up to the author/donor to decide if he or she is willing to distribute software through any other system and a licensee cannot impose that choice.
This section is intended to make thoroughly clear what is believed to be a consequence of the rest of this License.
-
If the distribution and/or use of the Program is restricted in certain countries either by patents or by copyrighted interfaces, the original copyright holder who places the Program under this License may add an explicit geographical distribution limitation excluding those countries, so that distribution is permitted only in or among countries not thus excluded. In such case, this License incorporates the limitation as if written in the body of this License.
-
The Free Software Foundation may publish revised and/or new versions of the General Public License from time to time. Such new versions will be similar in spirit to the present version, but may differ in detail to address new problems or concerns.
Each version is given a distinguishing version number. If the Program specifies a version number of this License which applies to it and "any later version", you have the option of following the terms and conditions either of that version or of any later version published by the Free Software Foundation. If the Program does not specify a version number of this License, you may choose any version ever published by the Free Software Foundation.
- If you wish to incorporate parts of the Program into other free programs whose distribution conditions are different, write to the author to ask for permission. For software which is copyrighted by the Free Software Foundation, write to the Free Software Foundation; we sometimes make exceptions for this. Our decision will be guided by the two goals of preserving the free status of all derivatives of our free software and of promoting the sharing and reuse of software generally.
NO WARRANTY
-
BECAUSE THE PROGRAM IS LICENSED FREE OF CHARGE, THERE IS NO WARRANTY FOR THE PROGRAM, TO THE EXTENT PERMITTED BY APPLICABLE LAW. EXCEPT WHEN OTHERWISE STATED IN WRITING THE COPYRIGHT HOLDERS AND/OR OTHER PARTIES PROVIDE THE PROGRAM "AS IS" WITHOUT WARRANTY OF ANY KIND, EITHER EXPRESSED OR IMPLIED, INCLUDING, BUT NOT LIMITED TO, THE IMPLIED WARRANTIES OF MERCHANTABILITY AND FITNESS FOR A PARTICULAR PURPOSE. THE ENTIRE RISK AS TO THE QUALITY AND PERFORMANCE OF THE PROGRAM IS WITH YOU. SHOULD THE PROGRAM PROVE DEFECTIVE, YOU ASSUME THE COST OF ALL NECESSARY SERVICING, REPAIR OR CORRECTION.
-
IN NO EVENT UNLESS REQUIRED BY APPLICABLE LAW OR AGREED TO IN WRITING WILL ANY COPYRIGHT HOLDER, OR ANY OTHER PARTY WHO MAY MODIFY AND/OR REDISTRIBUTE THE PROGRAM AS PERMITTED ABOVE, BE LIABLE TO YOU FOR DAMAGES, INCLUDING ANY GENERAL, SPECIAL, INCIDENTAL OR CONSEQUENTIAL DAMAGES ARISING OUT OF THE USE OR INABILITY TO USE THE PROGRAM (INCLUDING BUT NOT LIMITED TO LOSS OF DATA OR DATA BEING RENDERED INACCURATE OR LOSSES SUSTAINED BY YOU OR THIRD PARTIES OR A FAILURE OF THE PROGRAM TO OPERATE WITH ANY OTHER PROGRAMS), EVEN IF SUCH HOLDER OR OTHER PARTY HAS BEEN ADVISED OF THE POSSIBILITY OF SUCH DAMAGES.
END OF TERMS AND CONDITIONS