
Villa 6000 - Toilets Separett - Free user manual and instructions
Find the device manual for free Villa 6000 Separett in PDF.


User questions about Villa 6000 Separett
0 question about this device. Answer the ones you know or ask your own.
Ask a new question about this device
Download the instructions for your Toilets in PDF format for free! Find your manual Villa 6000 - Separett and take your electronic device back in hand. On this page are published all the documents necessary for the use of your device. Villa 6000 by Separett.
USER MANUAL Villa 6000 Separett
BRUKS- OCH INSTALLATIONSANVISNING
Separett ^® Villa 6000
text_image
Technical diagram of a mechanical device with labeled components and assembly linesnatural_image
Line drawing of a toilet with a roof support structure (no text or symbols)Alt 1 Alt 2
natural_image
Line drawing of a toilet and shower structure (no text or symbols)Alt 3
natural_image
Line drawing of a toilet and standing platform with directional arrows (no text or symbols)text_image
ANSLUTNING BDT AVLOPP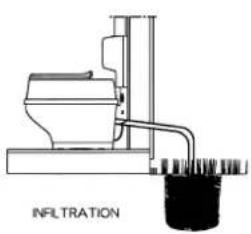
text_image
INfiltrATION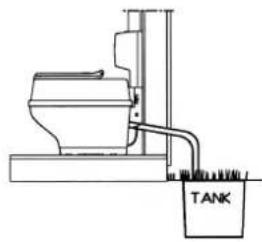
natural_image
Technical line drawing of a toilet and tank assembly (no text or symbols)natural_image
Line drawing of a person sitting on a toilet, viewed from the side (no text or symbols)natural_image
Line drawing of a person cleaning a toilet (no text or symbols)natural_image
Line drawing of a person washing a toilet in a sink (no text or symbols)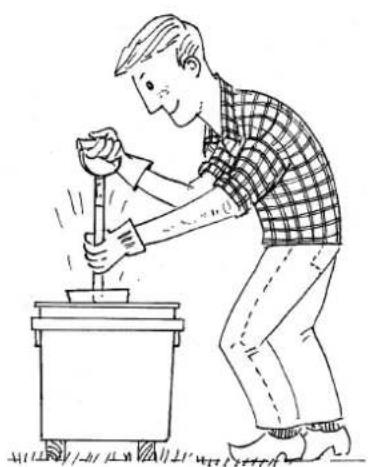
natural_image
Illustration of a person using a hammer to press or press a machine (no text or symbols present)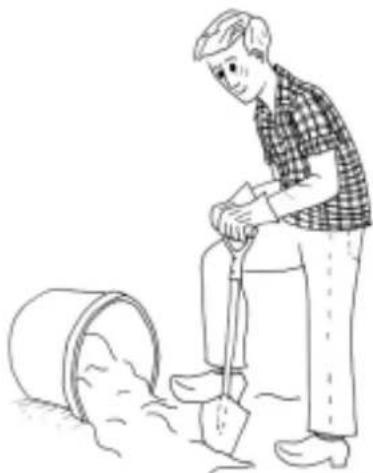
natural_image
Line drawing of a person digging with a shovel next to a bucket (no text or symbols)text_image
Technical diagram of a mechanical device with labeled components and directional arrows indicating assembly or motion.natural_image
Three line drawings of a toilet stand with support structures, no text or symbols presentnatural_image
Technical line drawings of three bathroom fixtures: toilet, sink, and tank (no text or symbols present)natural_image
Line drawing of a person cleaning a toilet (no text or symbols)natural_image
Line drawing of a person sitting on a toilet viewed from behind, no text or symbols present2. Käytön jälkeen.
natural_image
Line drawing of a person washing a toilet with a sink (no text or symbols)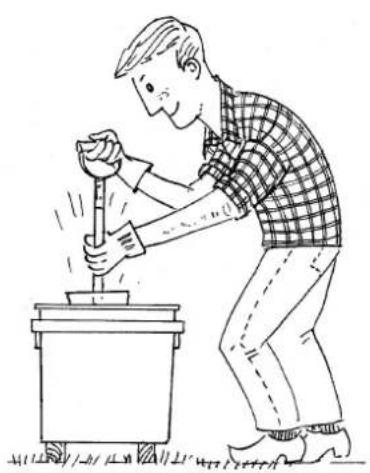
natural_image
Line drawing of a person using a hammer to press or press a machine (no text or symbols present)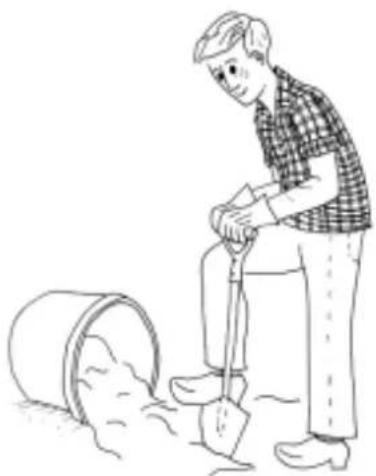
natural_image
Illustration of a person digging with a shovel near a bucket (no text or symbols)text_image
Technical diagram of a mechanical device with labeled components and assembly linesnatural_image
Line drawing of a toilet with a stand and roof, labeled 'Alt 3' below (no other text or symbols)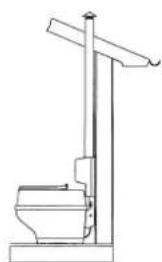
natural_image
Line drawing of a toilet and standing platform with directional arrows (no text or symbols)text_image
ANSLUTNING BDT AVLOPPnatural_image
Technical line drawing of a toilet and tank assembly (no text or symbols)natural_image
Line drawing of a person sitting on a toilet, viewed from the side (no text or symbols)3. Bruk toalettet sittende.
natural_image
Line drawing of a person cleaning a toilet (no text or symbols)natural_image
Line drawing of a person washing a toilet with a sink (no text or symbols)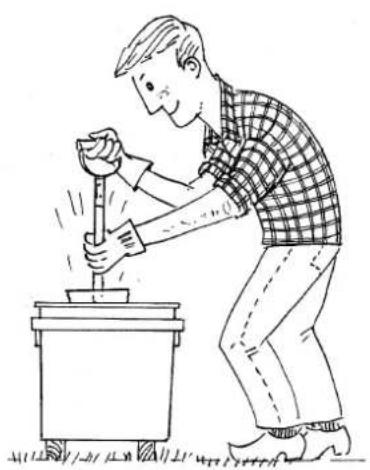
natural_image
Line drawing of a person using a hammer to press or press a machine (no text or symbols present)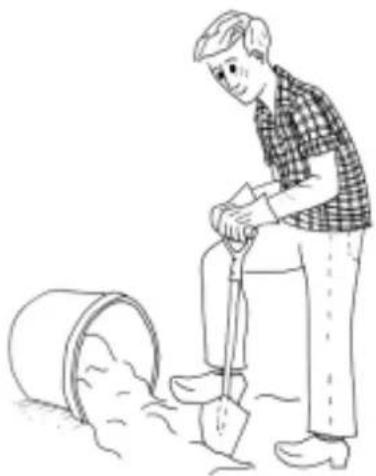
natural_image
Illustration of a person digging with a shovel near a bucket (no text or symbols)INSTRUCTIONS FOR INSTALLATION AND USE
Separett ^® Villa 6000
Thank you for choosing the new Separett Villa 6000.
This waterless toilet with separate urinal section is designed on the latest environmental principles. Made from recyclable materials, it is built to provide excellent performance over many years.
HOW THE TOILET WORKS
This type of toilet can only be used when sitting down. All urine must be directed by the user into the front urinal section, from where it is piped to a suitable disposal point. Depending on the local regulations in your country, the urine may be piped directly into the domestic wastewater system, into a suitably constructed soakaway outdoors, or into a urine tank. The faeces go into the solid waste container for drying out, which means they quickly become odourless.
Advantages:
-Because the urine and faeces are always kept separate, there will be no unpleasant ‘privy’ odours outdoors.
-Because the urine never comes into contact with faeces, it remains sterile.
-Depending on local regulations the urine can be piped into the domestic wastewater system, to a soakaway or be used as a fertiliser for lawns or shrubs.
-Because it is designed to operate 24 hours a day, the fan will keep the room where the toilet is both dry and free of odours.
Faeces have a moisture content of about 70%. The rate at which they dry will depend upon the degree of ventilation and the ambient temperature. The surface of faeces will usually have become dry and odourless 15 to 30 minutes after the toilet is used. The three 27-litre solid waste containers supplied will normally have adequate capacity for about six people using a holiday house intermittently. If more than six use the house, or if the house is used as a permanent dwelling, the capacity of the toilet can easily be extended by using additional solid waste containers, composting the solid waste elsewhere or using special bags to line the solid waste container. When a container is full it must be lifted out of the toilet and placed outdoors for further composting and neutralisation of bacteria. A small amount of soil and water are added at this stage, then the container and its contents must be left to stand for six months (this is the period currently required under health and safety regulations in Sweden). Once the composting period has ended, the contents of the container can be dug into your ordinary garden soil. At this stage the compost will look very much the same as it did when removed from the toilet, but it will now be free of harmful bacteria. It makes an excellent garden soil improver. Use the second solid waste container in the toilet while the first filled container is composting outdoors. If you use special bags to line the solid waste container, composting can be done in these, but they should be placed inside another suitable container to prevent any seepage into the soil.
PRODUCT DESCRIPTION
text_image
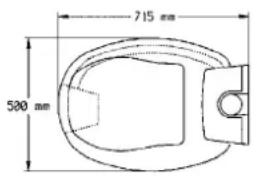
715 mm 500 mm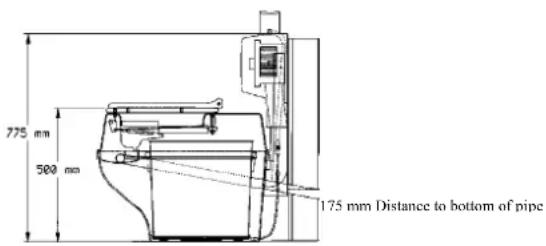
text_image
775 mm 500 mm 175 mm Distance to bottom of pipeLIST OF ALL PARTS SUPPLIED:
Separett Villa 6000 toilet, complete with seat. 40 cm of venting pipe, 90° bend and slotted outer pipe cover (75 mm diameter). Cowl for vertical pipe end. 3 solid waste containers, 2 lid for same. 10 bags for lining the solid waste container. 2 m of white urine hose (∅32 mm) with connector(s). Sealant for joints in urine hose and venting pipe. Screws for fastening toilet to wall.
TECHNICAL DATA
Materials:
Upper and lower main sections: impact-resistant, high-gloss polystyrene
Seat: polypropylene
Inner container and cover: polyethylene
All materials are recyclable.
Weight: 13 kg
Venting pipe diameter: OD 75 mm
Urine waste system: urine waste hose, OD 32 mm
Electrical equipment: fan, 230 V, 19 W
Electrical connection: 2 metre lead with earthed plug
Energy consumption: 0.456 kWh/24 hours (166 kWh/year)
Capacity using the three solid waste containers supplied, in rotation: approx. 6 people using a holiday house intermittently. No capacity restrictions if the solid waste is composted separately or more containers are used.
Please note: The fan should be allowed to run constantly. This increases the fan's service life (by reducing build-up of deposits on rotor shaft and other moving parts), and also helps to divert moisture outdoors.
IF THE TOILET IS NOT WORKING PROPERLY
The Separett Villa is manufactured and quality-controlled to ensure the best possible performance and reliability. If, in spite of this, it appears to be malfunctioning, please check the points in the list below before you contact the stockist who supplied it.
If there are flies inside the toilet
Either: Cover the solid waste inside the container with soil and use a fly spray.
Or: Lift out the solid waste container and compost its contents.
Spray inside the toilet and the room with fly spray. Put an empty container inside the toilet.
If there is an unpleasant odour in the room
-
Is the fan running?
-
Are all joints in the venting pipe and urine waste pipe completely airtight/watertight?
-
Is the condensation hose that runs from the venting pipe connector to the urine waste hose properly attached at both ends?
If the container is filling up too fast
-
Use toilet paper more frugally.
-
If urine finds its way into the solid waste container too often, this will significantly increase the volume of waste there.
If an odour from the toilet is apparent outdoors
-
If urine has got into the solid waste container and mixed with faeces, the combination will start to 'ferment', causing a 'privy' smell. Change over to an empty solid waste container.
-
If the urine is being piped into the domestic wastewater system, this can be the source of stray odours. If this is the case, install a U-bend in the urine domestic wastewater system to act as a trap.
If the fan is noisy or causing vibration
-
Is the toilet fixed securely onto the wall?
-
Are there any flies inside the fan housing? If so, they can be removed using a vacuum cleaner. First isolate the fan from the power supply, then disconnect the venting connector to gain access to the fan from above.
INSTALLATION
There are no particular temperature range restrictions on the room where the toilet is to be installed (i.e. installation is possible even in areas where the temperature may fall below 0°C). It must be possible to route the urine waste pipe to a suitable outlet and to install the venting pipe. A 230 V power supply is needed.
text_image
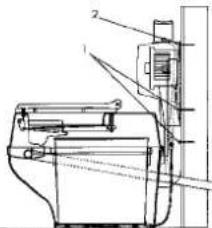
Technical diagram of a mechanical device with labeled components and assembly lines- Place the toilet where it is to be installed and remove the upper section. Mark out and cut/drill holes for the urine waste hose and venting pipe. Remove the fan housing by loosening the screws on either side. Lift the housing outwards and upwards. From the screw sets supplied, select the correct type for the wall to ensure a secure fixture. Attach the toilet to the wall using the 4 screws (1). Push the venting pipe connector into the fan housing and fix it to the wall using two screws (2). Replace the fan housing.
natural_image
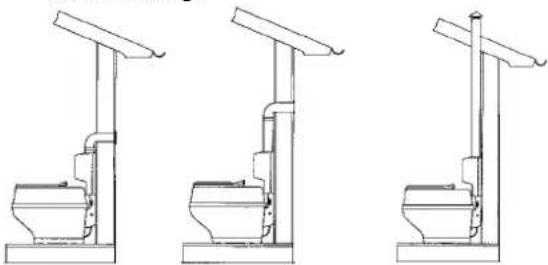
Three line drawings of a toilet stand with support structures, no text or symbols presentOption 1 Option 2 Option 3
-
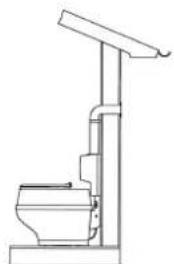
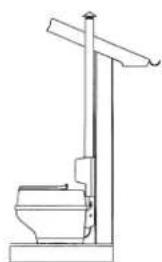
Ventilation: The toilet can be vented through an external wall or the roof. The venting kit supplied is for Option 1. If Option 3 is to be followed, the supplied cowl can be used and additional piping can be purchased. If the room already contains a venting pipe from a previously installed toilet, the Separett can be connected to it without problem – whatever the pipe diameter. Adapters for 55 mm and 110 mm diameter piping are available as optional accessories. All joints in the venting pipe must be sealed with silicone or equivalent, but do not need to be insulated. The condensing baffle by the fan housing will intercept any condensation and route it via the condensation hose to the urine waste hose.
-
The valve in front of the venting pipe in the lower section of the toilet will reduce the airflow if necessary, but is fully open during normal use.
-
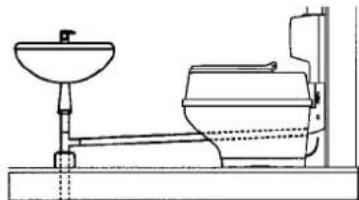
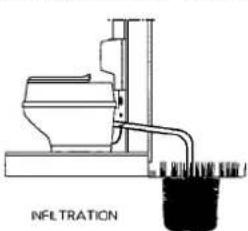
The urine waste system: Before deciding where to pipe the urine to, you will need to check the relevant local regulations (health and safety/building regulations etc.) in your area. If the urine is to flow into the domestic wastewater system (e.g. beneath a washbasin or shower) the hose or pipe from the toilet must have an adequate drop through its entire length, so that the normal flow will prevent the build-up of deposits inside this drain. If the hose/pipe is joined to the waste pipe below a washbasin, make sure that the water from the basin cannot flow back into the toilet via the urine hose/pipe. If an unpleasant smell is apparent from the domestic waste pipe to which the urine drain is connected, or from the venting pipe outside the house, this can be eliminated by adding a U-bend in the urine drain between the toilet and the domestic waste pipe, to act as a trap.
natural_image
Line drawing of a bathroom sink and toilet assembly (no text or symbols)Urine piped into domestic wastewater system
text_image
INFLTRATION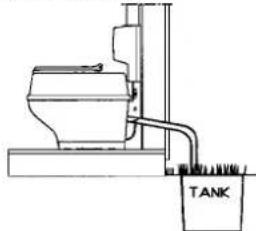
natural_image
Technical line drawing of a toilet and tank assembly (no text or symbols)Urine piped to soakaway Urine piped to outdoor tank Disposal via a soakaway: Depending on the surrounding soil or clay type present, a suitable volume for a soakaway you construct yourself should be about half a cubic metre. The soakaway should have a layer of stone or suitable gravel at the bottom where the urine pipe ends, and be filled with sand. For adequate flow, make sure the urine pipe has a steady drop from the toilet to its end. If the toilet will be used in the winter in cold climates the hose will need to be lagged (insulated). In the most severe winter climates some form of heating device for the pipe may be needed to prevent the urine from freezing and blocking the pipe.
Please note: if the urine waste needs to be routed close to radiators or through an insulated floor, we recommend using standard 32-mm-diameter plastic pipe instead of the hose supplied.
Disposal via a urine tank (e.g. the 'Separett Ejektortank'): A suitable tank can be installed outdoors. It must be at a lower level than the toilet to ensure an adequate flow.
The Separett Villa 6000 is supplied with an earthed electrical plug for a wall socket. Depending on the building regulations for bathrooms in your country you may need to have the electrical lead permanently wired into a fused connection unit with a switch, inside or outside the bathroom. In some countries, electrical installation work of this kind has to be carried out by a qualified tradesman. If in doubt, consult an electrician or the local building inspector. If you cut the moulded plug off the lead, remember that it must be totally destroyed immediately, so there is no risk of children playing with it. Once the electrical supply has been safely connected to the toilet, switch on the electrical supply. Check that the fan is operating and that the venting system is fully functional. Operate the ‘flush’ lever up and down to check that the solid waste container rotates as intended. Your new toilet will now be ready for use.
INSTRUCTIONS FOR USE
Please pin these instructions up where all users will see them.
Important: never throw anything which is burning or smouldering (such as cigarettes) into the toilet!
natural_image
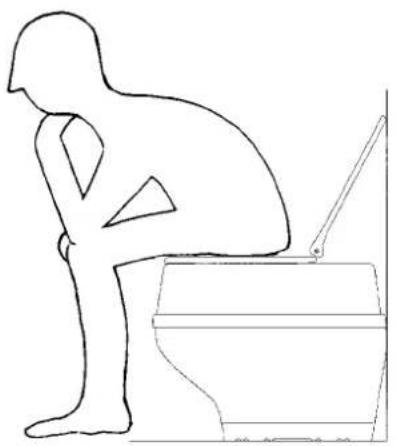
Line drawing of a person sitting on a toilet, viewed from the side (no text or symbols)- All users must sit down to use this toilet. Urine must be directed into the urinal section at the front. The solid waste container is for faeces and toilet paper only. Be frugal when using toilet paper, to prevent the container from filling up too fast.
natural_image
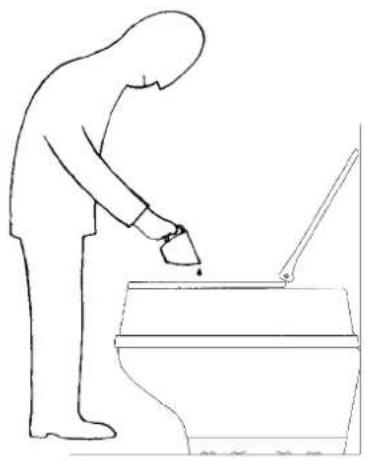
Line drawing of a person washing a toilet with a hand mixer (no text or symbols)- After using the toilet: Operate the 'flush' lever up and down. This will make the container below rotate. Pour a small amount of water into the urinal section to help keep the urinal and urine pipe clean.
COMPOSTING
natural_image
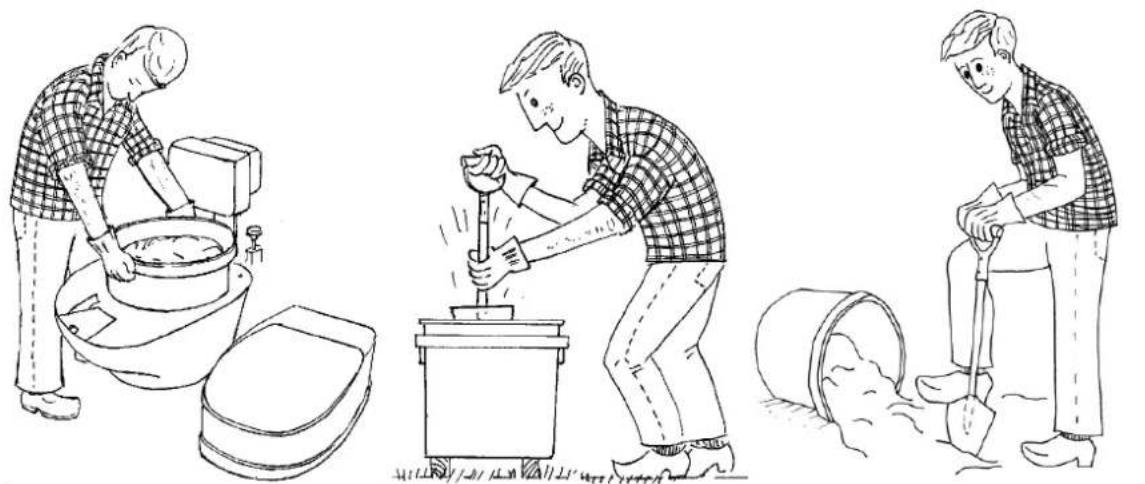
Illustration of three scenes: man washing a toilet, person using a mortar and bucket, and man shoveling soil (no text or symbols)Remove the upper section of the toilet, place the lid on the solid waste container and lift the whole container out. Take the container outdoors and put it in a suitable place where it will not be disturbed or opened by children. Mix in a few spadefuls of garden soil and a small quantity of water to moisten the compost. Add a layer of soil to cover the compost.
Replace the lid, but leave it slightly open to allow air to circulate. For reasons of health and safety the minimum time the contents must be left to compost before they can be dug into garden soil is six months (requirements may vary according to country/area.) At the end of the full composting period inside the container, its contents can be dug into your garden soil. It is normal for traces of toilet paper to be visible even at the end of composting inside the container, but these will soon disappear when dug into the soil. If the solid waste container is needed before the end of the six months, its contents can instead be composted in a suitably-contained compost bin. Similarly the container's contents may be composted in a special latrine compost bin or inside the bags supplied for lining the solid waste container. Full bags should be placed inside another suitable container to prevent any seepage into the soil.
Servator Separett AB, Skinnebo, SE-330 10 Bredaryd, Sweden Tel.+46-371-71220 Fax +46-371-71260 E-mail: info@separett.com www.separett.com