
Intuis BTE - Hearing aid SIEMENS - Free user manual and instructions
Find the device manual for free Intuis BTE SIEMENS in PDF.


| Product Type | Behind-the-Ear (BTE) hearing instrument |
| Models | Intuis S DIR, Intuis DIR, Intuis SP DIR |
| Battery Type | Size 13 (Intuis S DIR, Intuis DIR) or Size 675 (Intuis SP DIR) |
| Number of Programs | Up to 4 |
| Volume Control | Yes (on Intuis DIR and Intuis SP DIR) |
| Program Button | Yes, with ON/OFF function |
| Directional Microphone | Yes |
| Telecoil | Yes (for telephone use) |
| Audio Input | Yes (for Intuis DIR and Intuis SP DIR) |
| Power-On Delay | Yes (optional) |
| Battery Compartment Lock | Yes |
| Color Coding | Red for right, blue for left |
| Maintenance | Clean earmold regularly; use dry aid kit with moisture-attracting capsule |
| Safety | Avoid extreme heat, humidity, strong magnetic fields, X-rays; keep away from children |
| Reparability | Replaceable earhook, earmold, and tubing; consult Hearing Care Professional |
| Disposal | Recycle hearing instruments, batteries, and accessories according to national regulations |
| Compliance | CE marking (Directive 93/42/EEC) |
Frequently Asked Questions - Intuis BTE SIEMENS
User questions about Intuis BTE SIEMENS
0 question about this device. Answer the ones you know or ask your own.
Ask a new question about this device
Download the instructions for your Hearing aid in PDF format for free! Find your manual Intuis BTE - SIEMENS and take your electronic device back in hand. On this page are published all the documents necessary for the use of your device. Intuis BTE by SIEMENS.
USER MANUAL Intuis BTE SIEMENS
natural_image
Close-up of a transparent cylindrical device with a curved handle and two square cutouts, no visible text or symbols.Intuis™
User Guide
Behind-the-Ear System
SIEMENS
Congratulations!
As the owner of a new hearing instrument, you may once again enjoy the sounds of your environment, and conversation with your family and friends.
These instructions as well as guidance from your Hearing Care Professional will help you understand how your new hearing instrument work. In this guide, you'll find instructions about the insertion, removal and use of your Intuis™ hearing instrument. There are also tips and information on proper handling, cleaning, care and changing of the batteries. In addition, a troubleshooting section is offered for your reference.
Your hearing improvement with hearing instrument depends on the fit of the hearing instruments, the type and degree of hearing loss, and proper diagnostic testing. Of course, a hearing instrument cannot restore normal hearing, and not everyone will benefit equally. More than 80 percent of individuals with a hearing loss have a hearing loss in both ears. Studies show that even when a hearing loss is worse in one ear, most people with a hearing loss in both ears will benefit from wearing two instruments.
Remember, a hearing instrument consists of finely-tuned devices that have been specially designed and expertly adjusted for your individual needs. Proper care and handling will ensure the best possible performance of your Intuis™ hearing instrument.
Contents
Your Intuis BTE (behind-the-ear) hearing instrument
- Intuis S DIR 4
- Intuis DIR 4
- Intuis SP DIR 5
Battery insertion and removal 6
Battery compartment lock 9
Inserting and removing your Intuis BTE 10
Turning on and off your Intuis BTE 11
Using the program button 13
Directional microphone system 14
Using the volume control 15
Audio input 16
Using the telephone 19
Maintenance and care 20
Important notes 21
Troubleshooting tips 22
Disposal information 24
Your Intuis BTE (behind-the-ear) hearing instrument
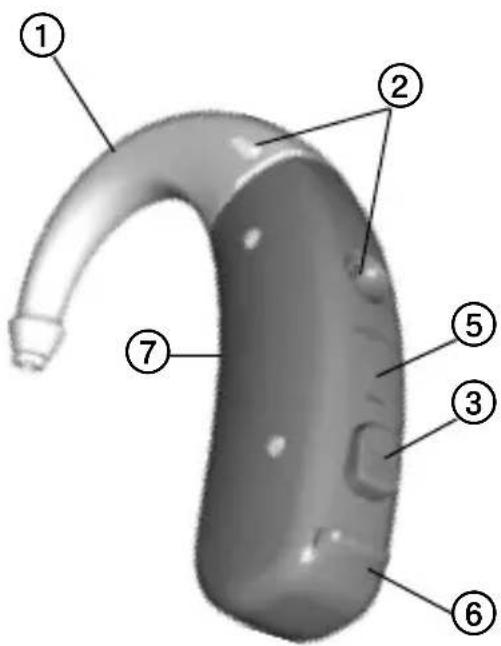
Intuis S DIR
(Battery type: 13)
Intuis DIR
(Battery type: 13)

Features
- Earhook
- Microphone openings
- Program button with ON/OFF function
-
Volume control (only Intuis DIR)
-
Cover for programming socket
- Battery compartment
- Color-coded typeplate red = right instrument blue = left instrument
- Audio input
Your Intuis BTE (behind-the-ear) hearing instrument
Intuis SP DIR
(Battery type: 675)
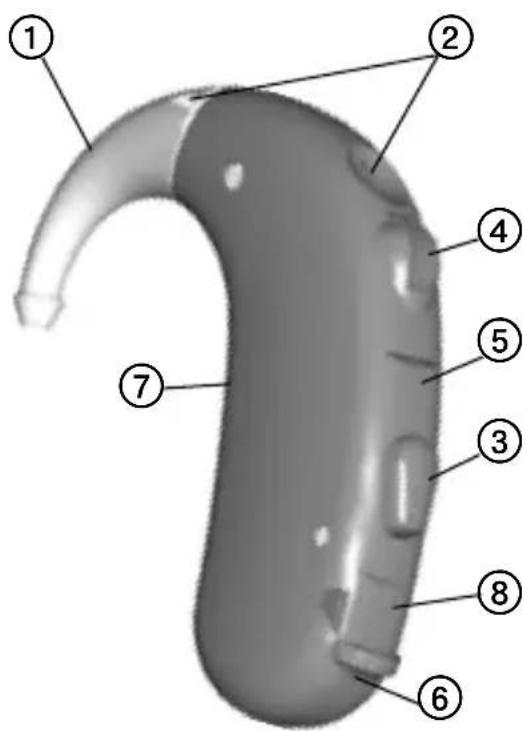
Features
- Earhook
- Microphone openings
- Program button with ON/OFF function
-
Volume control
-
Cover for programming socket
- Battery compartment
- Color-coded typeplate red = right instrument blue = left instrument
- Audio input
Battery insertion and removal
natural_image
Simple illustration of a capsule-shaped object with an arrow pointing to it, next to a cylindrical container with a cross symbol (no text or labels)Handling the battery
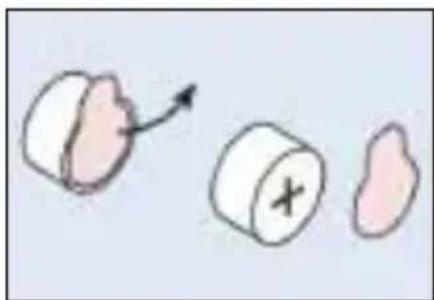
The protective tab on your battery should only be removed when you are ready to use the battery.
Three useful tips:
- The positive (+) side of the battery is always the smooth side. You can recognize the negative (-) side by the colored ring.
• Always keep spare batteries with you. - If you think you cannot change the battery by yourself, ask someone to help you: a family member, friend or your Hearing Care Professional.
natural_image
Simple line drawing of a finger pointing to a small object (no text or symbols)Inserting the battery
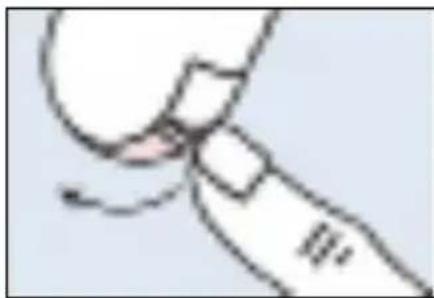
Open the battery compartment with your fi ngernail as shown in the illustration.
Swivel open the battery compartment door, if not already open.
natural_image
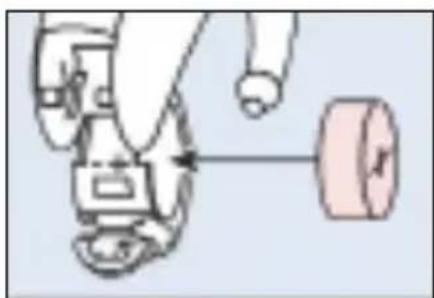
Diagram of a robotic arm and a mechanical component with directional arrow (no text or symbols)Place the proper size battery so that the "+" symbol on the battery matches the "+" marked on the battery compartment.
Battery insertion and removal

natural_image
Simple line drawing of a hand holding an object, with an arrow indicating direction (no text or symbols)Gently close the battery compartment by pressing the bottom of the door upward with your fi ngertip.
Do not force the door shut. If it does not close easily, check to see if the battery was inserted properly.
When the battery door is completely closed, your hearing instrument is ready for use.
natural_image
Illustration of a hand holding a coiled cable or wire, no text or symbols presentRemoving the battery
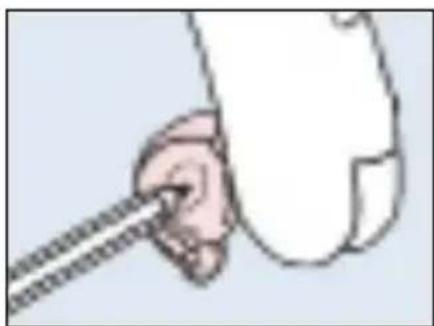
Normally the battery drops out when the compartment is completely open.
If the battery does not come out, lightly tap the instrument or push the battery out with a pencil as shown.
Low battery indicator
Your hearing instruments may be programmed to inform you when the battery should be replaced for best system performance. You may hear an intermittent series of beeps and/or experience low amplification power or volume. Change the battery when either of these occurs.
Battery insertion and removal
Change the batteries when any of the following occur:
• volume becomes softer or weak
- you hear a battery signal beep
NOTICE
Batteries contain harmful substances that pollute the environment.
- Do not throw used batteries into household trash.
- Dispose batteries according to national regulations or return them to your Hearing Care Professional.
NOTICE
Leaking batteries damage the hearing instruments.
- Turn the hearing instruments off when not in use to preserve the battery.
- Remove batteries when the instruments are not in use for a prolonged persiod of time.
Battery compartment lock
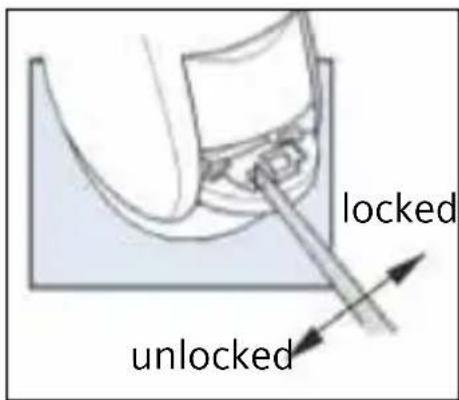
Your instruments are equipped with a battery compartment lock. They are intended to prevent the unintentional removal of batteries from their compartment.
To lock the battery compartment, open the compartment door to the first stop.
Push the slide to the right with a suitable tool.
To unlock the battery compartment again, open the compartment door to the first stop. Push the slide to the left with a suitable tool.
Your Hearing Care Professional can further instruct you on the use of this feature, if necessary.
Inserting and removing your Intuis BTE
natural_image
Illustration of a hand holding a medical device to connect an ear (no text or symbols present)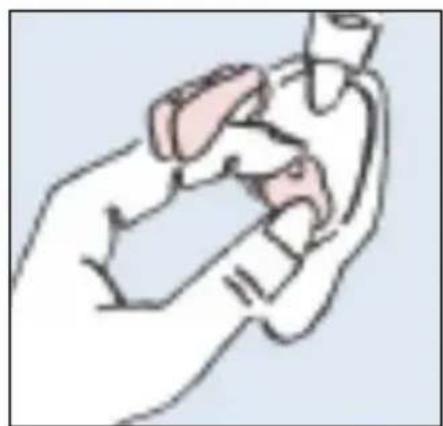
natural_image
Illustration of a hand holding an object with a pen inserted (no text or symbols)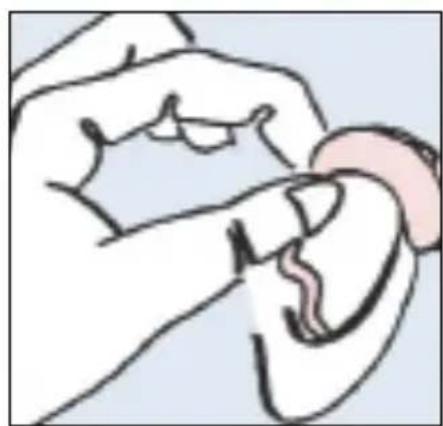
natural_image
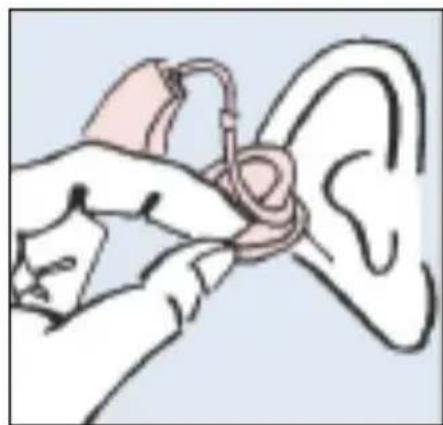
Illustration of a hand holding an object, possibly a tool or device, with no visible text or symbols.Turn your hearing instrument off. Hold the earmold between your thumb and index finger and insert it carefully into your ear canal. You may find it helpful to pull your ear slightly upward or to the back. Gently work the earmold into its proper position by adjusting it until it is firmly seated in your ear. Once inserted, you should be able to feel if the earmold is placed correctly.
Place your hearing instrument behind your ear and turn it on.
NOTE
Do not use lubricant when you insert the earmold, because it may clog the sound outlet.
Tip
Practice inserting and removing your hearing instrument correctly. An easy way to practice is to sit down at a table. Place a mirror in front of you and prop your elbows on the table so you can guide your hands easily and safely. This will help you stay relaxed and comfortable while you practice.
Turning your Intuis BTE on and off
Via the battery compartment
Your Intuis hearing instruments automatically turn on when a battery is inserted and the compartment door is completely closed.
natural_image
Simple line drawing of a curved object with a small circular mark (no text or symbols)To turn off
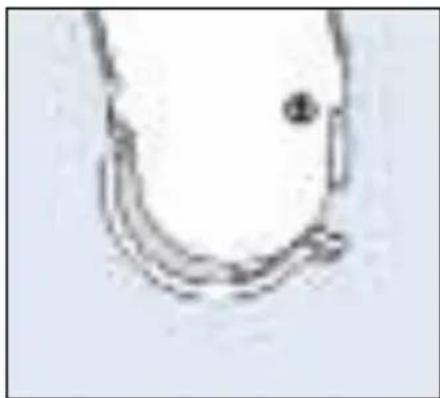
Press the battery compartment to the rear down to the first stop to turn the instrument OFF.
natural_image
Simple line drawing of a curved object with a small dot and arrowhead (no text or symbols)To turn on
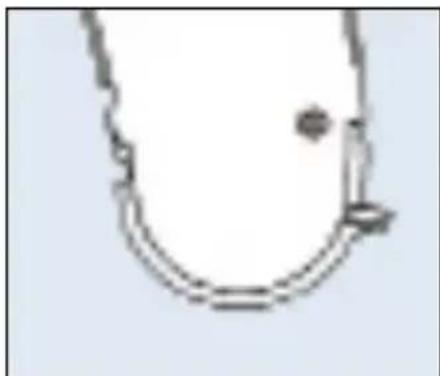
Fully close the battery compartment to turn the instrument ON.
Turning your Intuis BTE on and off

natural_image
Simple line drawing of a car with a rounded body and internal compartments (no text or symbols)Via the push button
Your hearing instruments can also be programmed by your Hearing Care Professional to be turned on and off using the program button.
To turn your hearing instruments off, press and hold the program button for approximately 2 seconds.
To turn your hearing instruments on again, press and hold the program button for approximately 2 seconds.
Please note that when you turn your hearing instruments off using the program button, you must wait approximately 10 seconds for the instruments to reset before turning it back on using the program button.
Check with your Hearing Care Professional about which on/off function your hearing instruments are equipped with.
Power-on delay
Your hearing instruments may be equipped with a "power-on delay" feature. This feature delays sound from entering your hearing instruments when it is first turned on, so that you may insert the hearing instruments into your ear without experiencing unpleasant feedback (whistling).
Using the program button
natural_image
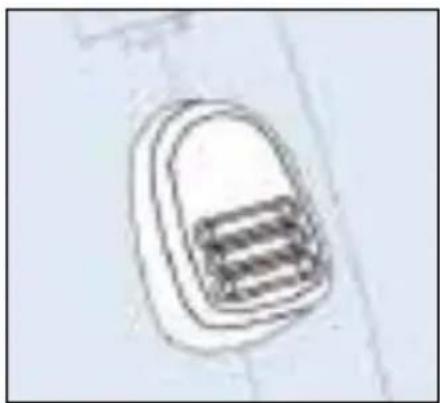
Simple line drawing of a car with a rounded body and three horizontal stripes (no text or symbols)How to select the programs
Your Intuis hearing instruments can have up to 4 hearing programs. They can be selected with a program button or when an audio shoe is attached.
These programs change the characteristics of the sound coming through the hearing instruments for specific listening environments.
Each time the button is pressed, the system changes to the next program, which is confirmed with a beep. The number of beeps you hear coincides with the selected program. That means when Program "3" is selected, for example, you will hear 3 beeps.
Each time your instruments are turned off and then on again, the systems automatically reset to Program 1.
| Hearing program | Description of the hearing situation |
| 1 | |
| 2 | |
| 3 | |
| 4 |
Directional microphone system
According to your hearing needs, your Intuis hearing instruments can be adjusted to focus on those sounds in front of you (directional mode) when you are having a face-to-face conversation in a noisy environment.
The hearing instruments can also be adjusted when you are in quieter environments and want to hear the sounds around you (omnidirectional mode).
To make this adjustment use the program button to change to the directional program. Your Hearing Care Professional will tell you which program is configured for directional mode.
Using the volume control

Rotate the wheel upwards to increase volume.
Rotate it down to decrease volume.
For Intuis DIR, Intuis SP DIR
Your Intuis DIR and Intuis SP DIR hearing instruments are fully automatic.
There is no need to manually adjust the volume control. If your hearing instruments have not been programmed for manual control adjustment, the volume will automatically adjust. Rotating the volume control wheel will have no effect. If you prefer manual volume control, Intuis DIR and Intuis SP DIR hearing instruments can be programmed for manual adjustment.
The wheel-shaped volume control can be rotated up (louder) or down (softer) to select the desired listening volume.
Audio input
For Intuis DIR and Intuis SP DIR
Your hearing instruments are equipped with audio input capability. This enables connection between the hearing instrument and accessories such as a FM system, CD player, television, or other suitable device. It can be useful for adults in diffi cult listening situations and for children in classrooms. Because the sound is coming directly from the sound source to the hearing instrument, the signal is clearer and is unaffected by poor room acoustics.
Your Hearing Care Professional can further instruct you on the use of the audio input, and provide information regarding audio input accessories such as audio shoes and cords.
NOTE
You must use the audio shoe designed exclusively for Intuis. It is marked by a printed "G" for Intuis Dir and "M" for Intuis SP which can be seen when looking from the top into the audio shoe.
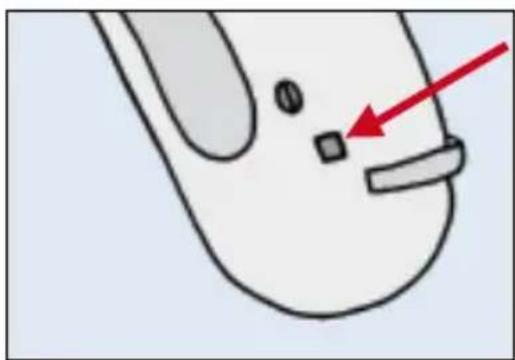
Intuis SP Dir audio shoe
natural_image
Simple line drawing of a mouse's head with a red arrow pointing to the finger area (no text or symbols)Small recess in the hearing instrument housing

natural_image
Diagram of a mechanical component with two red circles highlighting specific areas (no text or symbols present)Nib in the audio shoe
Audio input
Before the audio shoe can be connected to the hearing instrument the following steps have to be completed:
- Open the battery compartment
- Open the audio shoe cover
- Close the battery compartment
natural_image
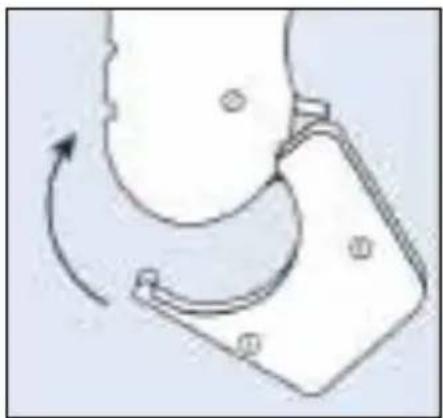
Diagram of a mechanical device with rotating arm and clamping mechanism (no text or symbols)Attaching the audio shoe
Take the audio shoe and hook the two nibs into the two small recesses of the hearing instrument housing. Slide the audio shoe towards the inner side of the hearing instrument housing until it snaps into the end position.
natural_image
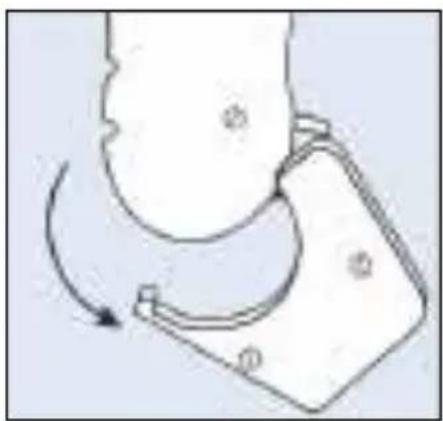
Diagram of a mechanical or electrical component with a rotating arrow indicating rotation (no text or symbols present)Removing the audio shoe
To remove the audio shoe, slide the audio shoe in the opposite direction.
With the connected audio shoe the battery compartment switch is disabled and the hearing instrument only can be switched off with the push button.
Audio input
Intuis DIR audio shoe
To fit the audio shoe to the hearing instrument hook it in from the front and press it to the rear into the four holes on the inner curve of the instrument.
Your hearing instrument immediately recognizes when an audio shoe is fitted and then automatically diverts to program "4". You will notice this by the four beep tones.

With the connected audio shoe the battery compartment switch is disabled and the hearing system only can be switched off with the push button.
WARNING
Risk of injuries caused by electric shock!
Connect audio input only to a device conforming to IEC 60065 (IEC-Norm for audio, video and other electronic devices).
Using the telephone
natural_image
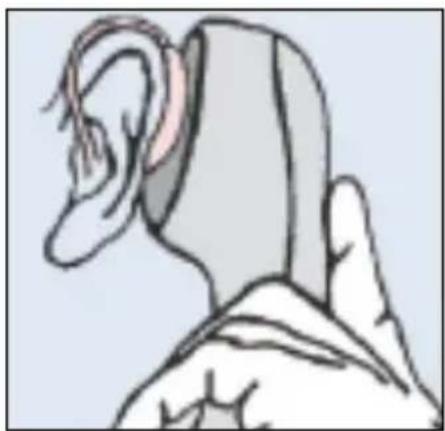
Illustration of a person's ear and hand (no text or symbols)The telecoil mode is intended for telephone use. In the telecoil mode, place the telephone receiver close to your hearing instrument for best reception. By trying various positions with the telephone receiver, you will discover what works best for you.
NOTE
In order for the telecoil to function properly, your telephone must be "hearing instrument compatible." Check your telephone's instruction manual to find out whether your phone has this capability.
Your Hearing Care Professional can advise you on the proper use of the telecoil program.
Not all telephones, especially cordless telephones and mobile phones, produce a magnetic fi eld required for use with the telecoil. In such cases we recommend that you use the telephone while in the program set for universal hearing situations (most likely Program 1).
Maintenance and care
Your new Intuis hearing instruments are highly sensitive systems. Proper care and handling will ensure the best possible performance.
Earwax may accumulate on your earmold. If not cleaned regularly you can damage the hearing instruments or cause health problems. Therefore:

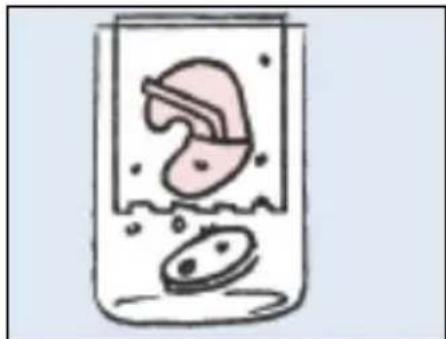
Detach the earmold from your behind-the-ear instruments and then place them in the cleaning bath.
NOTICE
Do NOT put hearing instruments in water, only the earmold.
natural_image
Illustration of a glass jar containing two small objects: one with a pink object inside, the other with a white object inside (no text or symbols)Occasionally bring your hearing instruments to your Hearing Care Professional to have the hearing tube changed and the system checked.
natural_image
Illustration of a hand inserting a small object into a device (no text or symbols visible)Care tips
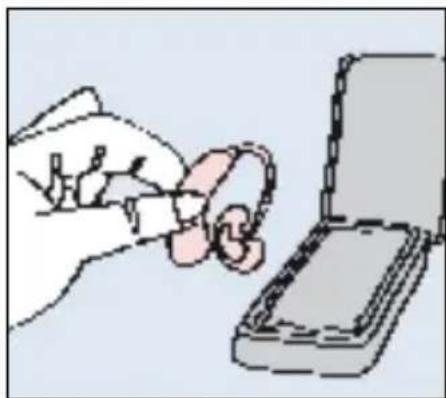
Place your hearing instruments in a "dry aid kit" with a special moisture-attracting capsule overnight. The drying capsule draws damaging moisture out of the instruments.
Your Hearing Care Professional can provide you with special care sets and drying capsules to keep your hearing instruments in good condition.
Always store your hearing instruments in the case provided.
Important notes
NOTICE
Your hearing instruments are sensitive to extreme heat, high humidity, strong magnetic fields (>0,1T), X-rays and mechanical stress.
Do not expose your hearing instruments to extreme temperature or high humidity.
Do not leave them in direct sunlight.
Do not wear them in the shower or when you apply make-up, perfume, aftershave, hairspray or suntan lotion.
Do not wear your hearing instruments when you are exposed to short-waves, a strong magnetic fi eld or X-rays.
Do not place your hearing instruments in a microwave oven.
WARNING
Choking hazard posed by small parts.
- Keep hearing instruments, batteries and accessories out of children's reach.
- If swallowed consult a physician or a hospital immediately.
- These hearing instruments are not designed for children under the age of 36 month or mentally disabled persons.
For suitable products please refer to your Hearing Care Professional.
NOTE
Siemens offers special hearing instruments for the fitting of infants and small children.
- Ask your Hearing Care Professional for further information.
WARNING
Hazard of explosions in explosive atmospheres!
Do not use your hearing instruments in areas where there is a danger of explosion (e.g. mining areas).
Troubleshooting tips
Your Intuis hearing instruments are extremely reliable devices. However, should a problem occur, this can usually be corrected quickly. Use this trouble shouting guide to sort out simple problems.
| PROBLEM CAUSE POSSIBLE SOLUTION | ||
| Instrument sound is weak | Weak or dead barrery | Replace with new battery |
| Instrument is clogged | Clean earmold | |
| Volume too low | Turn up volume | |
| Instrument whistles | Improper seating in ear | Try reinserting the instrument until it fi ts securely |
| Volume too high | Lover volume | |
| Clogged with wax or excessive wax in ears | Clean earmold or contact your hearing Care Professional | |
| Crack in ear-mold tubing | See your Hearing Care Professional | |
| Sound is distorted or intermittent | Volume too high | Lower volume |
| Weak battery | Replace with new battery | |
Troubleshooting tips
| PROBLEM CAUSE POSSIBLE SOLUTION | ||
| “Buzzing” or “Whistling” sound | Battery compartment is not completely closedWeak battery | Gently close battery compartmentReplace with new battery |
| Hearing instrument does not work | Instrument not turned onBattery compartment is not completely closedDead batteryBattery polarity reversed | Turn on hearing instrumentGently close battery compartmentReplace with new batteryMake sure battery is inserted correctly |
If you still encounter problems after trying these suggestions, consult your Hearing Care Professional.
Disposal information
Within the European Union, the marked equipment is covered by "Directive 2002/96/EC of the European Parliament and of the Council of 27 January 2003 on waste electrical and electronical equipment. Amended by Directive 2003/108/EC" (WEEE).

NOTE
Recycle hearing instruments, batteries and accessories according to national regulations.
www.siemens.com/hearing
With the CE marking Siemens confi rms compliance with the European Directive 93/42/EEC concerning medical devices.
CE 0123
Siemens
www.siemens.com/hearing
A91SAT-00022-99T8-7600
101 745 24
09.2011 • ANR
- Intuis™
- Congratulations!
- Contents
- Your Intuis BTE (behind-the-ear) hearing instrument
- Intuis S DIR
- Intuis DIR
- Features
- Intuis SP DIR
- Battery insertion and removal
- Handling the battery
- Three useful tips:
- Inserting the battery
- Removing the battery
- Low battery indicator
- NOTICE
- Battery compartment lock
- Inserting and removing your Intuis BTE
- NOTE
- Tip
- Turning your Intuis BTE on and off
- Via the battery compartment
- To turn off
- To turn on
- Via the push button
- Power-on delay
- Using the program button
- How to select the programs
- Directional microphone system
- Using the volume control
- For Intuis DIR, Intuis SP DIR
- Audio input
- For Intuis DIR and Intuis SP DIR
- Intuis SP Dir audio shoe
- Attaching the audio shoe
- Removing the audio shoe
- Intuis DIR audio shoe
- WARNING
- Using the telephone
- Maintenance and care
- Care tips
- Important notes
- Troubleshooting tips
- Disposal information
Brand : SIEMENS
Model : Intuis BTE
Category : Hearing aid