GK360 - Keyboard General Music - Free user manual and instructions
Find the device manual for free GK360 General Music in PDF.


User questions about GK360 General Music
0 question about this device. Answer the ones you know or ask your own.
Ask a new question about this device
Download the instructions for your Keyboard in PDF format for free! Find your manual GK360 - General Music and take your electronic device back in hand. On this page are published all the documents necessary for the use of your device. GK360 by General Music.
USER MANUAL GK360 General Music
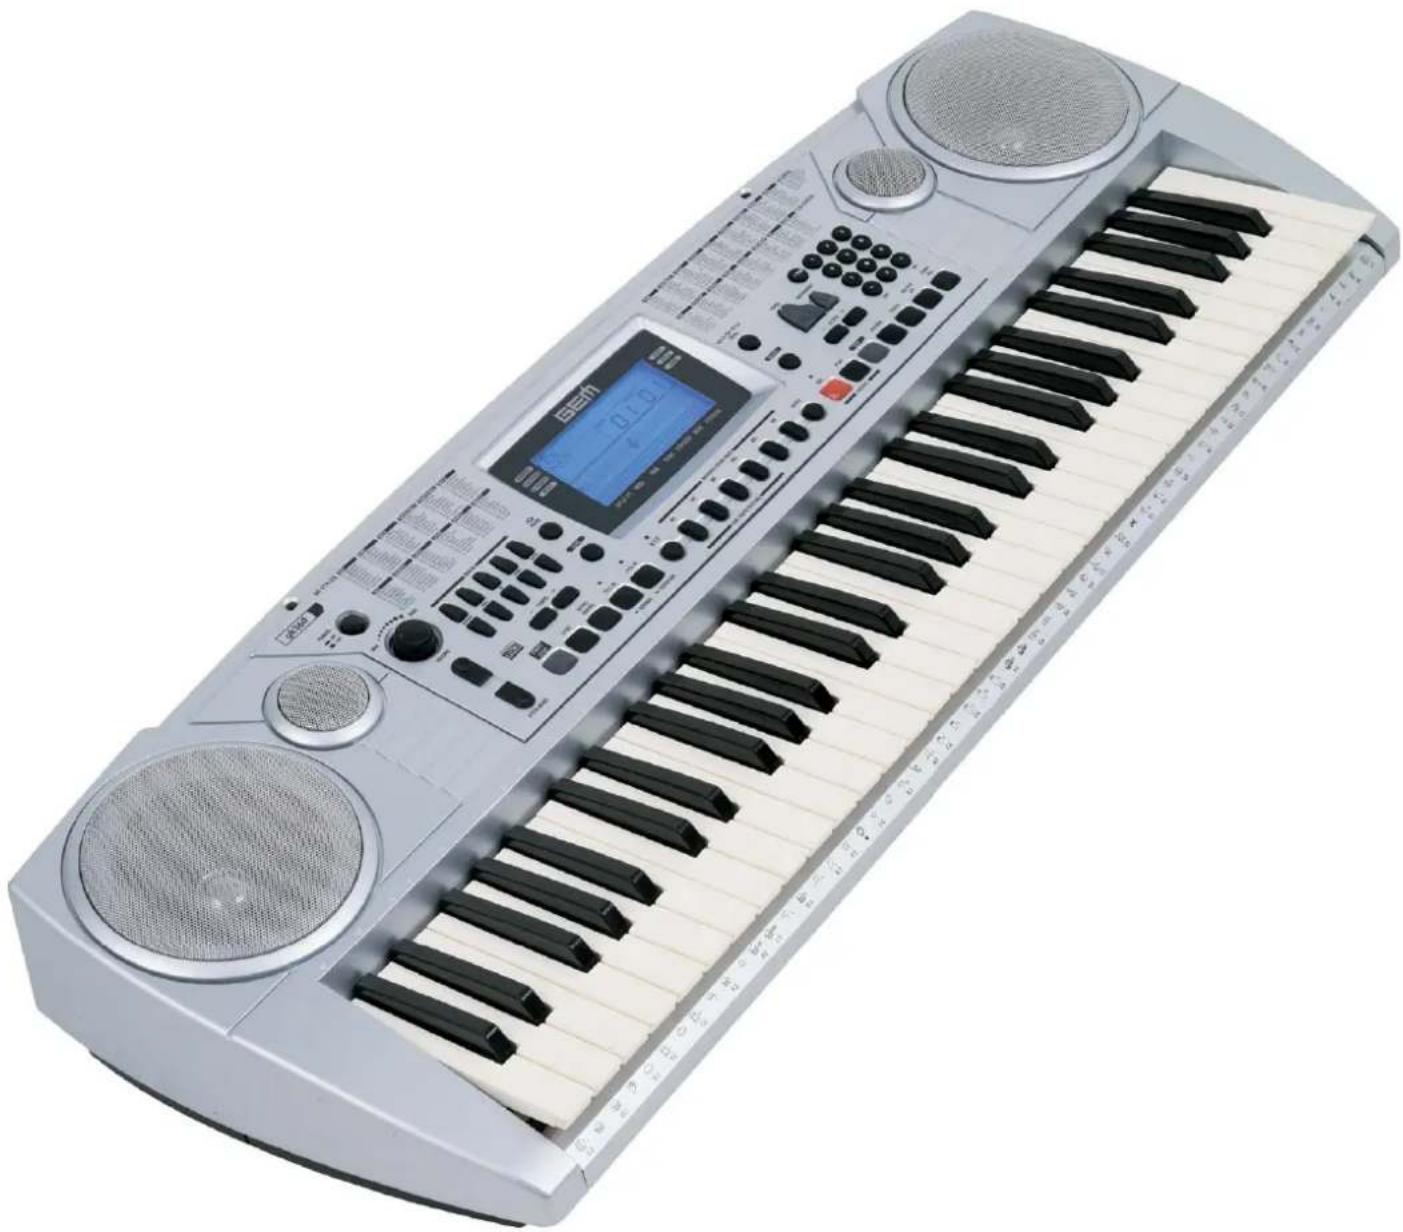
GEM DIGITAL KEY BOARD
natural_image
Silver electronic keyboard with black piano keys and a digital display (no visible text or symbols)owners manual
gk360
- English

text_image
GENERALMUSICSPECIAL MESSAGES

CAUTION!
RISK OF ELECTRIC SHOCK

CAUTION: TO REDUCE THE RISK OF ELECTRIC SHOCK, DO NOT REMOVE COVER (OR BACK). NO USER-SERVICEABLE PARTS INSIDE. REFER SERVICING TO QUALIFIED SERVICE PERSONNEL.
ALARM SYMBOLS:
Generalmusic electronics products/could present la bels sim i lar to that dis played in this section. Please follow ac cu rate ly the pre cau tions described in the safety instructions.


The exclamation mark within an equi lat er al triangle is intended to alert.
The lightning flash with arrowhead symbol, within an equilateral triangle, is intended to alert the user to the presence of uninsulated "dangerous voltage" within the product's enclosure that may be of sufficient magnitude to constitute a risk of electric shock to persons.
IMPORTANT NOTE: To reduce the risk related to the correct and normal use of the instrument, all Generalmusic products are accuracy tested in a safety laboratory. DO NOT modify the present unit, the safety standard and the correct instrument operativity could be compromised, and as a further con se quence the warranty will be invalidated.
IMPORTANT SAFETY AND INSTALLATION INSTRUCTIONS
INSTRUCTION PERTAINING TO A RISK OF FIRE, ELECTRIC SHOCK, OR INJURY TO PERSONS.
WARNING!
When using electric products, basic precautions should always be followed, including the following:
-
Read all the Safety and Installation instructions and explanations of Graphic Symbols before using the product.
-
This product must be earthed. If it should malfunction or breakdown, grounding provides a path of least resistance for electric current to reduce the risk of electric shock. This product is equipped with a cord having an equipment-grounding conductor and a grounding plug. The plug must be plugged into an appropriate outlet that is properly installed and earthed in accordance with all local codes and ordinances.
DANGER:Improper connection of the equipment grounding conductor can result in a risk of electric shock. Check with a qualified electrician or serviceman if you are in doubt as to whether the product is properly grounded. Do not modify the plug provided with the product, if it will not fit the outlet, have a proper outlet installed by a qualified electrician.
-
To reduce the risk of injury, close supervision is necessary when this product is used near children.
-
Do not use this product near water for example, near a bathtub, washbowl, kitchen sink, in a wet basement, or near a swimming
pool or the like.
-
This product should only be used by a stand or cart that is recommended by the manufacturer.
-
This product, either alone or in combination with an amplifier and headphones or speakers, may be capable of producing sound levels that could cause permanent hearing loss. Do not operate for a long period of time at a high volume level or at a level that is uncomfortable. If you experience hearing loss or ringing in the ears, you should consult an audiologist.
-
This product should be located so that its location or position does not interfere with its proper ventilation.
-
This product should be located away from heat sources such as radiators, heat registers, or other products that produce heat.
-
The product should be connected to a power supply only of the type described in the operating instructions or as marked on the product.
-
This product may be equipped with a polarized line plug (one blade wider than the other). This is a safety feature. If you are unable to insert the plug into the outlet, contact an electrician to replace your obsolete outlet. Do not defeat the safety purpose of the plug.
-
The power-supply cord of the product should be unplugged from the outlet when left unused for a long period of time. When supply cord, do not pull on the cord but grasp it by the plug.
unplugging the power
-
Care should be taken so that objects do not fall and liquids are not spilled into the enclosure through openings.
-
The product should be serviced by qualified service personnel when:
A. The power-supply cord or the plug has been damaged
B. Objects have fallen, or liquid has been spilled into the product;or
C. The products has been exposed to rain or moisture
D. The product does not appear to be operating normally or exhibits a marked change in performance
E. The product has been dropped, or the enclosure damaged.
-
Do not attempt to service the product beyond that described in the user-maintenance instructions. All other servicing should be referred to qualified service personnel.
-
WARNING - Do not place objects on product power cord or place it in a position where anyone could trip over, walk on or roll anything over it. Do not allow the product, or its bench, or its pedal board to rest on or to be installed over power cords of any type. Improper installations of this type create the possibility of fire hazard and/or personal injury.
-
Electromagnetic interference (RFI). This electronic product utilizes digital sampled wave processing technology (S.W.P.) that may adversely affect radio/tv reception. Read FCC information inside back cover for additional information.
Generalmusic cannot be held responsible for damage caused by improper use or modifications to the instrument, or data lost or destroyed
Technical specifications are subject to change
The information contained in this manual are considered correct at the moment of printing. Generalmusic reserves the right to change or modify any technical specification without prior notice or obbligation to upgrade existing units.
The illustrations and the screens of this manual are for instructional purposes only and may appear different from those on your instrument.
MANUAL INDEX
Introduction .... 1
Power supply....1
Using the AC adaptor....1
Using batteries....1
Connections....2
The Phones jack 2
The Sustain jack 2
The Aux. Out jack....2
The MIDI IN, MIDI OUT and MIDI THRU ports 2
Listen to the Demo Song 3
Basic Operation 3
Selecting & playing Voices 3
Play a single Voice....3
Select a Voice with the [-] and [+] buttons 3
Select a Voice with the numeric keypad 4
Dual voice (play two layered voices)....4
Keyboard percussion 4
The MEMORY 5
Selecting the Memory....5
Split keyboard 5
Play in Split mode with a Dual option on the Upper keyboard 5
To cancel Split mode....5
Muting the sections 6
Instant Piano Voice....6
Balancing the Lower and Upper sections....6
Add Pitch Bend to your playing 7
Play with Effects or bypass them....7
Touch Response....7
The Octave - transposer 8
Cancelling the Octave Transpose setting 8
Styles - Auto-Accompaniment 8
What are the Styles? 8
Selecting Style Mode 8
Use the [-] and [+] buttons to select a Style 9
Use the numeric keypad to select a Style 9
Selecting the Styles by recalling the Memory 9
Changing the Style Tempo....10
Restoring the memorized Tempo....10
About the Chord Recognition Modes....10
Using the Style Auto functions 11
Select the Fill In and change Style Variation....11
Start the Style accompaniments with Key Start 11
Start the Style with an Intro pattern....11
Stop the Style with an Ending phrase 11
Balancing the Style accompaniment tracks with the Mixer....12
Muting the Style tracks 12
Using the Single Touch Play settings in Style mode 12
Selecting the S.T. Play settings....13
Changing the accompaniment Split Point....13
Digital Effects....14
The Reverb and Chorus indicators....14
The Memory buttons and Store Memory....14
How to Store a Memory....14
The Sequencer 15
Listen to the playback of a recorded Song....15
Record a new song....15
The Metronome....16
The GK360 Utility functions 16
Transpose 16
Tune 16
Pan 16
MIDI 17
Midi channel selection....17
Control Change filter 17
The Beat function 17
PERCUS function 17
TECHNICAL SPECIFICATIONS....18
APPENDIX....19
GK360
natural_image
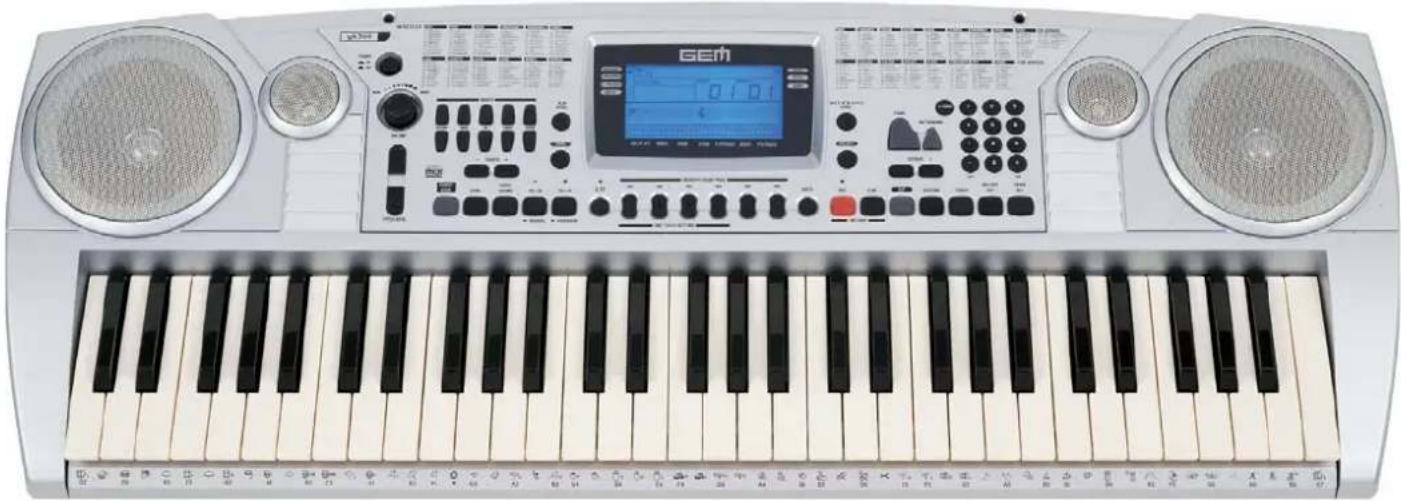
Front view of a silver GEM audio workstation keyboard with two speakers, a digital display, and control knobs (no visible text or symbols on the main device body)GK360 CONTROL PANEL LAYOUT
text_image
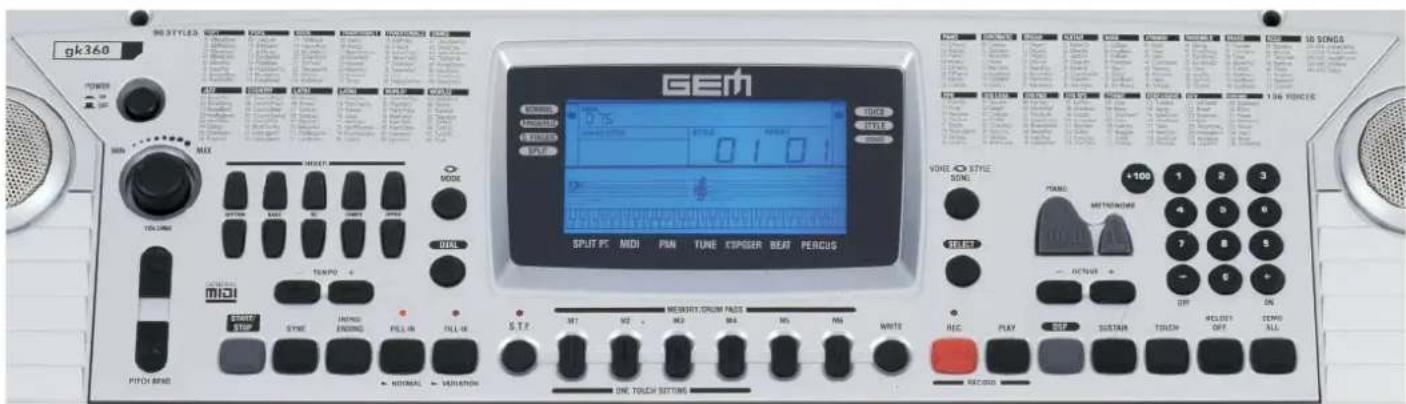
90 STTLED GMV GEM 10 SENS POWER MAX MODE TIME MINI MINI MINI MINI MINI MINI MINI MINI MINI MINI MINI MINI MINI MINI MINI MINI MINI MINI MINI MINI MINI MINI MINI MINI MINI MINI MINI MINI MINI MINI MINI MINI MINI MINICare of your keyboard
Your keyboard will give you years of playing pleasure if you follow the simple rules outlined below:
- Do not expose the keyboard to high temperature, direct sunlight and excessively dusty places.
- Avoid physical shocks caused by dropping, bumping, or placing heavy objects on the keyboard.
- Never use cleaners such as alcohol or solvents to clean the keyboard.
• Always turn the power off when making any connections.
The keyboard is provided with a replaceable NON-RECHARGEABLE LITHIUM BATTERY (CR2032 3 Volts), to maintain user programmed data intact while the instrument is off. The battery is internally mounted and has an approximate life-span of 1 year. When data is no longer retained, contact your authorized technical assistance centre to have the lithium battery replaced with the same or equivalent type recommended by the manufacturer.
Introduction
Thank you for purchasing the new GEM gk360 electronic keyboard. The gk360 offers the following features:
• 61 note keyboard with Touch Response;
• 178 PCM voices GeneralMidi Compatible
- On-board Digital multi-effects processor with 8 Reverb and 8 Chorus effects.
• 96 Styles (automatic accompaniments) with 2 Variations;
- Two chord recognition modes for the Styles: Fingered and One Finger;
• 384 Single Touch Play settings;
- 50 Demo songs;
- On-board Sequencer with Record, Play/Stop.
- MIDI compatibility.
Power supply
This keyboard can be powered by current from a standard household wall outlet (using the specified AC adaptor) or by batteries.
Using the AC adaptor
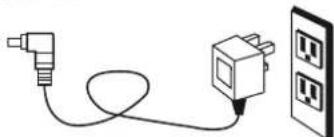
Always ensure that the instrument is turned OFF when connecting or disconnecting the power adaptor. Applying power while the power switch in depressed may damage the components inside the unit. Do not use adapters other than the one specified for this keyboard. The technical specifications of the adapter must be: 12V DC output, 1800mA, centre positive type.

DC 9 - 12V
natural_image
Simple line drawing of a plug and socket connected to an electrical outlet (no text or symbols)CAUTIONS:
Use only the specified AC adaptor. Use of another type of adaptor creates the danger of fire and electric shock. For safety sake, be sure to unplug the AC adaptor from the wall outlet whenever leaving the keyboard unattended for a long time.
Using batteries
Always make sure you turn the keyboard off before inserting new batteries or replacing old ones.
To insert the batteries
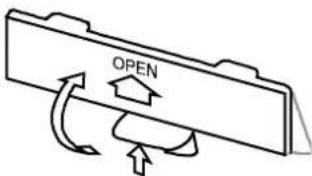
- Carefully turn the instrument upside-down and remove the battery compartment cover.
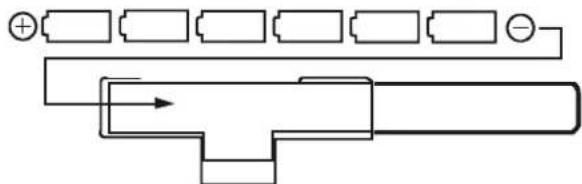
- Insert six D size (SUM-1 or R-20) batteries into the battery compartment, being careful to follow the polarity markings on the cabinet.
- Replace the compartment cover, making sure that it locks firmly in place, then turn the instrument the right way up.
text_image
OPENImportant battery information
Any of the following symptoms indicate low battery power. Replace the batteries
as soon as possible whenever any of the following occurs.
• A dim and diffi cult-to-read LCD display.
• Abnormally low speaker/headphone volume.
• Distortion of the sound output.
- Sudden power failure when playing at high volume.
• Abnormal playing of the rhythms or demo songs.
- Dimming of the display when playing at high volume.
Improper handling of the batteries can cause them to burst and leak, creating the danger of personal injury or damage of the keyboard. Be sure to take the following important precautions when using batteries:
- Never use batteries of different types.
- Never mix old batteries with new ones.
- Replace the batteries as soon as possible after any sign of discharge.
- Always make sure to remove the batteries from the keyboard's battery compartment when the keyboard is not expected to be used for a long period of time.
Connections
The Phones jack
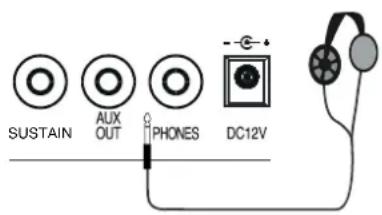
If you prefer to play with headphones for high quality personal monitoring, plug a standard stereo headphone set into the rear panel PHONES jack. The internal speakers are automatically disconnected. Use the VOLUME slider to adjust the headphone volume
text_image
SUSTAIN AUX OUT PHONES DC12VThe Sustain jack
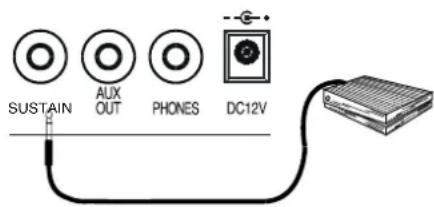
An optional footswitch can be plugged into the Sustain jack for sustain control. The footswitch operates like the Sustain pedal of an acoustic piano. Press for sustain, release for normal sound.
text_image
SUSTAIN AUX OUT PHONES DC12VThe Aux. Out jack
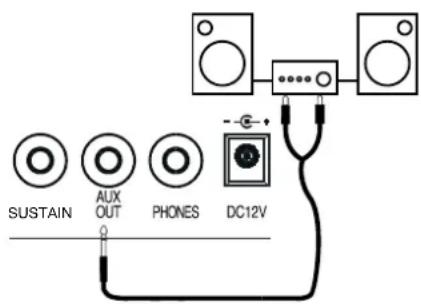
Connect the rear-panel AUX. OUT jack to amplified speakers, amplifiers or domestic hi-fi units for external amplification. Use audio cables with standard 1/4" jacks and plug into the LINE IN or AUX. IN of the external amp. system. To use the external amp. system only and exclude the internal speakers of the gk360, plug a jack into the PHONES jack.
text_image
SUSTAIN AUX OUT PHONES DC12VThe MIDI IN OUT and THRU ports
The gk360 is fitted with a standard MIDI interface consisting of In, Out and Thru ports for MIDI connections. The MIDI IN port receives MIDI data from an external MIDI device. The MIDI OUT port transmits MIDI data to an external MIDI device. The MIDI THRU port retransmits the same MIDI data received at the MIDI IN port to another external MIDI device.

MIDI THRU

MIDI IN

MIDI OUT
Listen to the Demo Songs
You can listen to the automatic playback of your gk360 to get an idea of what the instrument is capable of doing.
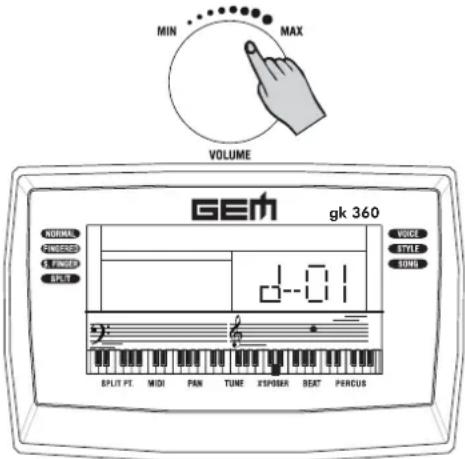
1 Turn the power ON by pressing the [POWER] switch. After a short period, the display will appear showing the NORMAL playing mode with a piano sound (Piano1) ready to play across the full keyboard
2 Turn the power ON by pressing the [POWER] switch. After a short period, the display will appear showing the NORMAL playing mode with a piano sound (Piano1) ready to play across the full keyboard
3 Press the [DEMO] button to stop the Song at any point of the playback. It is also possible stop the Demo with the [START/STOP] button.
The playback starts automatically; when the Song reaches the end, it goes to the next Song until you stop the playback; the 50 Demo songs can also be selected with the numeric keypad. During the playback, it is also possible to exclude the melodic line [MELODY OFF] and learn to play the melody by following the notes shown on the display.
Note: While the Demo song is playing, the buttons of the control panel will be temporarily deactivated and it will not be possible to play along with the song.
text_image
MIN MAX VOLUME GEM gk 360 NORMAL NIMIACED 1 FINGER SPLIT 0-01 VOICE STYLE TONG SPLIT PT MIDI PAN TUNE XPOSER BEAT PERCUS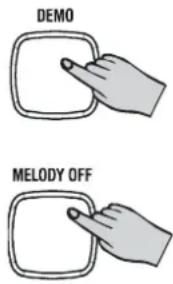
text_image
DEMO MELODY OFFBasic Operation
This section explains all the basic operations that you can carry out when the instrument is in NORMAL mode. Every time you turn on your instrument, it sets to NORMAL mode.
To return the instrument to NORMAL mode, press the [MODE] button to the left of the display.
Selecting & playing Voices
The gk360 has 178 PCM voices including 1 percussion kits that you can select and play on the keyboard. After turning on, the gk360 sets to NORMAL/VOICE mode with the display showing a black arrow pointing to the NORMAL mode in the top left hand corner of the display and the VOICE 1 message at the center. In VOICE mode, you can select and play voices.
Play a single Voice
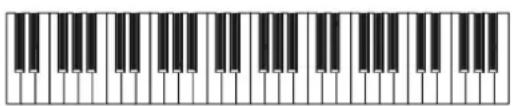
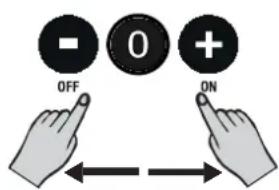
If you play on the keyboard after turning the instrument on, you will hear a piano sound (in this example, Voice 01, "Piano 1") play across the entire keyboard. Select a Voice with the [-] and [+] buttons In VOICE mode, the [-] and [+] buttons of the numeric keypad allow you to step through the individual Voices one by one. The [+] button selects in increasing numerical order while the [-] button selects in reverse order. Holding either button down scrolls rapidly forwards or backwards through all the voices. The selected voice number is shown in the bottom right hand corner of the display.
natural_image
Pure horizontal bar pattern of piano keys without any text or symbols<---- PIANO 1 ---->
text_image
OFF 0 + ONSelect a Voice with the numeric keypad
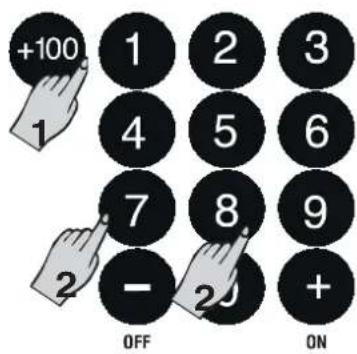
Using the numeric keypad is the quickest way to go directly to the Voice you need, but you must know the exact number of the voice. The name and corresponding number of all the Voices in memory are silkscreened above the display on the right. You'll see that they start from number 01 through to number 178. Two-digit voice numbers are selected by entering the two digits in sequence. For example, to select Voice number 17 (Organ 1), press button [1] then button [7]. Three digit voice numbers are entered by first pressing the [VOICE]/[+100] button to specify the "hundreds", then pressing the remaining two digits in sequence.
text_image
+100 1 2 3 4 5 6 7 8 9 - 2 3 + OFF ONDual voice (play two layered voices)
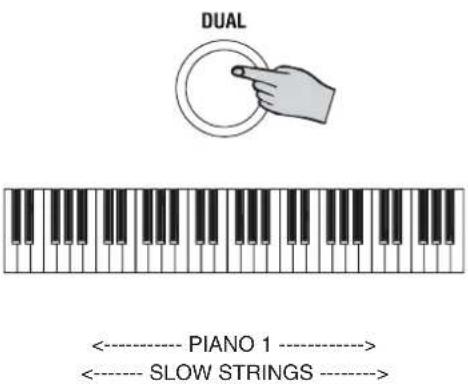
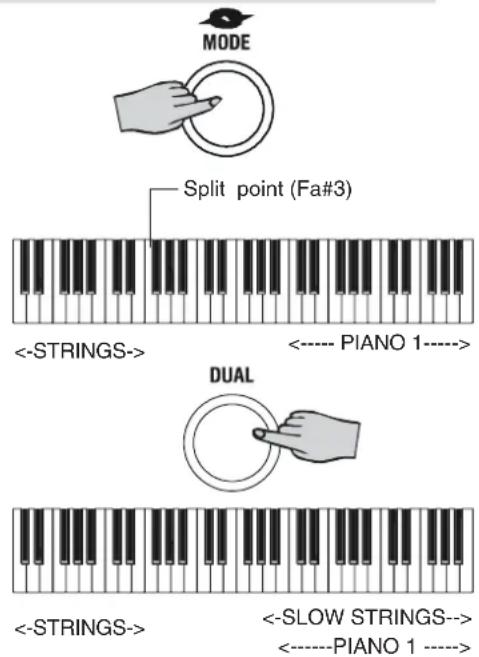
To play with the DUAL option (with two layered sounds), press the [DUAL] button. The message "VOICE 2" appears in the display as well as the voice number assigned to the layered section. If you play on the keyboard, you will hear two sounds for every note played. In our example, you will hear the Piano voice (01) together with Strings (49). In DUAL mode, whatever voice selection you make will always be assigned to the second voice. To return to NORMAL single voice play, press the [DUAL] button again.
text_image
DUAL ---- PIANO 1 ----> ----- SLOW STRINGS ---->Keyboard percussion
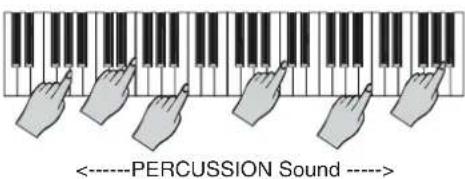
To play percussive instruments on the keyboard, select the DrumKit from the DRUMKIT group. The DrumKit is recalled using exactly the same method used to recall a Voice; by inserting the corresponding number on the numeric keypad when the instrument is in NORMAL mode (not DUAL or SPLIT). To recall the STANDARD Drum Kit, simply input voice number 129.

text_image
+100 1 1 1 2 3 4 2 5 6 7 8 9 - 0 3 + OFF ON1 Press the [VOICE]/[+100] button to select the "hundreds"
2 Insert the two remaining digits; "2" then "9". With the DRUMKIT selected, the keyboard transform into a device which plays all the percussive sounds of a real drum kit. You can see what kind of percussive instrument each note plays by referring to the silkscreened markings on the rail under the keyboard
To return to normal playing, simply recall a Voice from any group except the Drum Kit group.
text_image
<----PERCUSSION Sound ---->Note: To play all the sounds of a Drum Kit, it is important to remember that the keyboard must not be in Split or Dual mode. Be sure, therefore, that the left display arrow is pointing to the NORMAL function.
Split keyboard
To play on a split keyboard with one or two voices on the right hand side (UPPER keyboard) and one voice on the left (LOWER keyboard), press the [MODE] button as many times as necessary until the left display arrowhead points to the SPLIT function. The keyboard will be split into a Lower section and an Upper section. If you play on the keyboard, you will hear one sound (01: Piano 1) on the right hand side of the keyboard and another sound (49: Strings) on the left. You can check the sound assigned to the lower section. Play in Split mode with a Dual option on the Upper keyboard To play with two layered sounds on the Upper keyboard and one on the Lower, simply press the [DUAL] button while you are in SPLIT mode. If you want to change the voices on the Upper keyboard, proceed as already described on the previous pages for Single and Dual voice selection. To change the Voice of the Lower section, hold down the [MODE] button and proceed as already described to change the voice number.
text_image
MODE Split point (Fa#3) <--STRINGS-> <---- PIANO 1---- DUAL <--STRINGS-> <--SLOW STRINGS-> <----PIANO 1---->To cancel Split mode
To escape Split mode and return to a full NORMAL keyboard, press the [MODE] button once.
The MEMORY
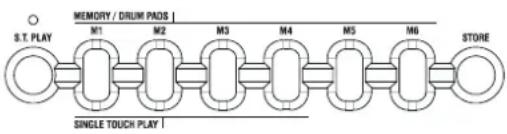
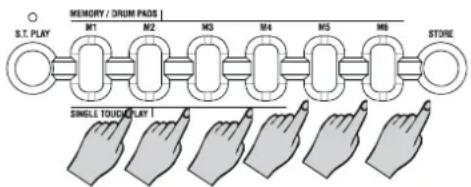
So far, you have learn how to select single and combined Voices in Normal, Dual and Split modes using a number of panel operations. If, every time you want to create a preferred sound combination, you have to take several steps to arrive at your goal, you would ask yourself if there wasn't a quicker way of selecting what you want. The answer lies in the MEMORY-which offers a quick and simple method of recalling a panel situation at the touch of a single button. A MEMORYis simply a combination of voices and other panel settings (Voices, Track Volumes, Effect type and level, Style, Variation, Chord Recognition mode, Split Point, etc.). The gk360 contains six Memory which recall factory-set panel confi gurations, but you can also memorize your own combinations using the STORE MEMORY feature.
flowchart
graph LR
    A["S.T. PLAY"] --> B["M1"]
    B --> C["M2"]
    C --> D["M3"]
    D --> E["M4"]
    E --> F["M5"]
    F --> G["M6"]
    G --> H["STORE"]
    I["SINGLE TOUCH PLAY"] --> B
    I --> C
    I --> D
    I --> E
    I --> F
    I --> G
flowchart
graph LR
    A["S.T. PLAY"] --> B["M1"]
    B --> C["M2"]
    C --> D["M3"]
    D --> E["M4"]
    E --> F["M5"]
    F --> G["M6"]
    G --> H["STORE"]
    I["SINGLE TOUCH PLAY T"] --> J["Hand icon pointing to second hand icon"]
    K["Hand icon pointing to second hand icon"]
Selecting the Memory
Take a quick look at the display, then press one of MEMORY buttons (M1 - M6); for example, press the [M1] button. The display shows the situation recalled by the MEMORY. If you were playing in NORMAL mode, after selecting the Performance you will find that the keyboard will be split and the mode will have changed to either Fingered, or One Finger, to enable the Styles. You will also see a change of Style number. For more information about how to recall Styles by selecting the MEMORY, refer to the section entitled "The Styles" on page 8)
2 Repeat the selections for all the other Performance buttons, observe the changes in the display and play on the keyboard to listen to the change of voices.
natural_image
Illustration of two hands typing on a piano keyboard (no text or symbols)Balancing the Lower and Upper sections
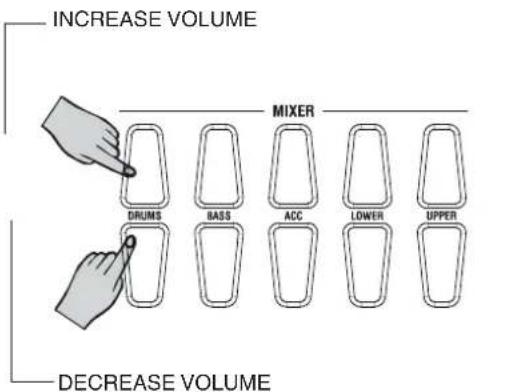
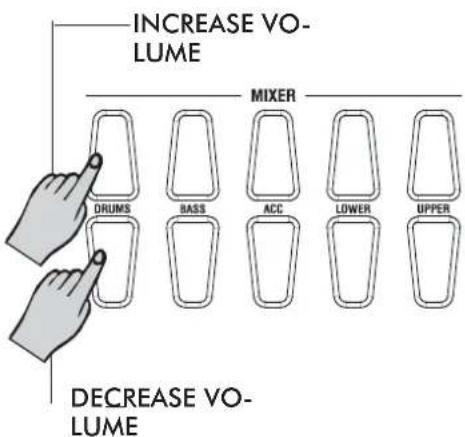
If you are playing in Normal mode with Voices on a Split keyboard, you may at some stage want to adjust the volume of one section with respect to the other. Using the [MIXER] Volume controls, you will be able to balance your Upper and Lower voices to the levels required very easily. The MIXER consists of 5 twin buttons organized in two rows. The top row of buttons are [INCREASE VOLUME] controls while the bottom row are [DECREASE VOLUME] controls. When you are playing with voices only, voice balancing tasks require the use of the [UPPER] and [LOWER] controls only. The other three controls, (Drums, Bass and Accomp), are explained under Styles on page 12.
To increase the volume of, the Upper section, for example, press the top [INCREASE VOLUME] button and hold it down until you reach the Volume required. The display shows the Volume level of the Upper section.
To decrease the volume, press the bottom [DECREASE VOLUME] control. If the Upper section is playing with the DUAL effect, the [UPPER MIXER] controls adjust both voices at the same time.
text_image
INCREASE VOLUME DRUMS BASS ACC LOWER UPPER DECREASE VOLUME MIXER
natural_image
Pure piano keyboard layout without any text, numbers, or symbolsMuting the sections
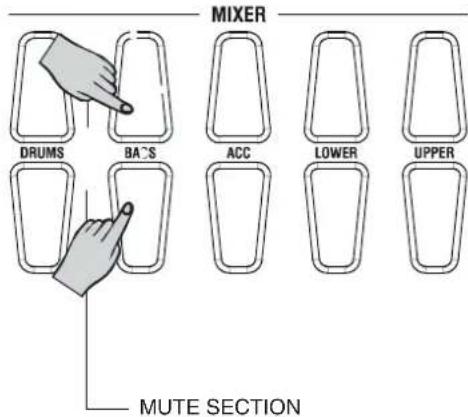
If you want to exclude a section (mute, or turn off), you can use the MIXER control buttons. Simply press both [INCREASE VOLUME] and [DECREASE VOLUME] buttons at the same time to mute the section required. For example, if you press both the top and bottom buttons of the [UPPER MIXER], the display will show UPPER OFF. To restore the volume to normal, press both the [INCREASE] and [DECREASE VOLUME] buttons again at the same time.
text_image
MIXER DRUMS BACS ACC LOWER UPPER MUTE SECTIONInstant Piano Voice
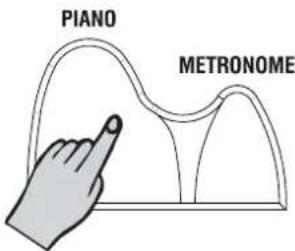
Regardless of the current situation, you can recall the Piano Voice instantly by pressing the [PIANO] button. Pressing this button returns the keyboard to NORMAL single voice play with the PIANO voice active across the entire keyboard. Press the [PIANO] button again to return to the previously selected situation.
text_image
PIANO METRONOMEThe [PIANO] button always returns you to a single piano voice playing across the full keyboard. You may use the PIANO button as a "return to start" button whenever you wish to have only one sound active across all 61 keys.
Add Pitch Bend to your playing
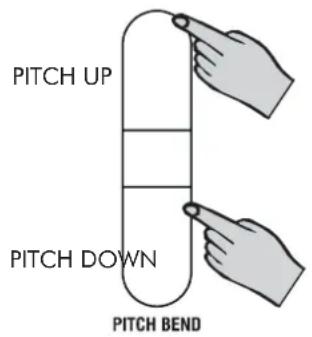
While you play, you can add Pitch Bend to your keyboard sounds by using the [PITCH BEND] buttons located to the left of the control panel. You can bend the pitch 2 semitones above or below normal using these controls. Hold down the top [PITCH BEND] button to bend the notes up. Hold down the bottom [PITCH BEND] button to bend the notes down. The pitch returns to normal when you release the button. Pitch Bend is a "glide" (or glissato) effect which simulates the effect heard in certain instruments (trombone, guitar, violin, etc.).
text_image
PITCH UP PITCH DOWN PITCH BENDPlay with Effects or bypass them
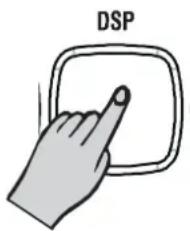
While you play, one or both effects (Reverb and/or Chorus) will be shown active by the small black indicator arrow at the top of the display. This means that the current Performance is being processed by one or both effect types. By means of the [REVERB] and [CHORUS] buttons on the extreme right hand side of the control panel, you can turn the effect on or off at will. When the small black display arrow is shown pointing to the REVERB and/or CHORUS indicator, the current voices are playing with the effects. When one or both indicators are off, the respective effect is bypassed and the sounds play with no effect.
text_image
DSPTo restore the effect, press the same button again. 8 Reverbs and 8 Chorus (Modulation effects) are available to choose from and both effects units have an independent effect level control. For further details refer to the section entitled "The Digital Effects" on page 14.
Touch Response
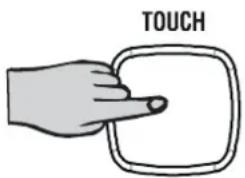
The [TOUCH] button is a general function which affects the keyboard globally. The gk360 keyboard is Velocity Sensitive; in other words, the harder you play on the keys, the louder the sound becomes, as occurs in an acoustic piano. If you prefer to play on the keyboard without TOUCH RESPONSE, you can disable the function by pressing the [TOUCH] button. The small black arrow pointing to the Touch indicator will turn off. Press the [TOUCH] button again to restore TOUCH RESPONSE to the keyboard.
text_image
TOUCHThe Octave - transposer
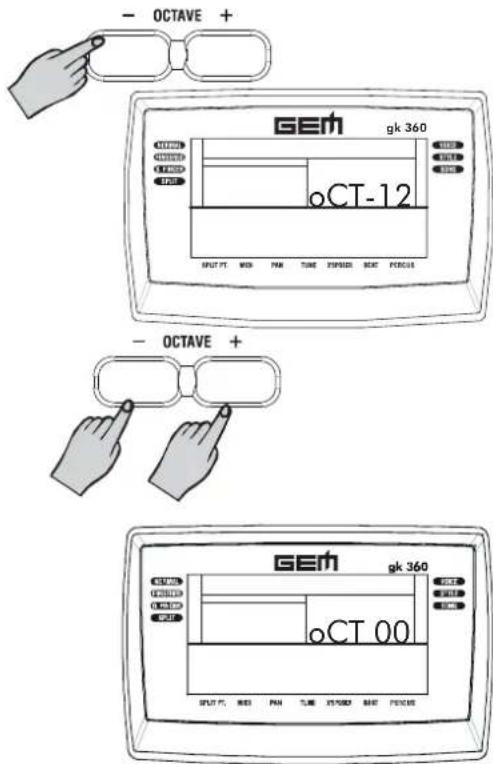
Whether you are playing with Styles or just Voices in single, dual or split mode, you can octave-shift the current Voice down one octave (maximum) in real time. The current Voice is shown in the display by the message VOICE 1, VOICE 2 or LOWER (when the [SPLIT/LOWER] button is held down).
1 Press the [OCTAVE-] button
A small black display arrow points to the OCTAVE – function on the right to show that the current voice is set to play one octave lower than normal. In the example, Voice 1 is shown set to play an octave lower
2 To cancel the octave transposition, press the [OCTAVE-and +] button again. The small black OCTAVE – display indicator turns off
text_image
- OCTAVE + GEM gk 360 oCT-12 OUTPUT PT. WIN PAN TIME IMPOST SET PERCISE - OCTAVE + GEM gk 360 oCT 00 SPUT PT. WIN PAN TIME IMPOST SET PERCISEStyles - Auto-Accompaniment
What are the Styles?
Styles are a collection of musical patterns representing many types of music, ranging from rock and pop to traditional and ethnic music. The gk360 contains 96 different auto-accompaniment Styles that can be used to provide fully-orchestrated arrangements. The sophisticated Auto Accompaniment system can provide automated bass and chord backing that is perfectly matched to the selected accompaniment Style. The Styles a formed by 5 sections, or tracks, that generate the automatic arrangements: Drums, Bass and 3 Accomp, and an additional two tracks, Upper and Lower, for the keyboard sounds. The automatic arrangements are triggered by playing chords (fingered or one-finger) on the lower part of the keyboard below the split point.
Selecting Style Mode
To select the Styles, you must set the gk360 to STYLE mode
1 Press the [STYLE] button
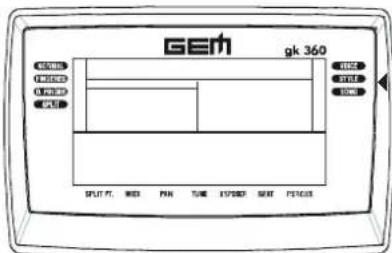
At the center of the display, the message STYLE is shown to show that the instrument is ready to accept a STYLE selection
To enable the Style auto-accompaniments, you must select one of the two chord recognition modes (ONE FINGER or FINGERED).
2 Press the [ SINGLE TOUCH PLAY] button
Pressing this button activates the KEY START function automatically and enables the Style auto-accompaniments by recalling one of the two chord recognition modes (ONE FINGER or FINGERED). The left display arrowhead points to FINGERED or ONE FINGER. The display example shows FINGERED selected. The FINGERED and ONE FINGER chord recognition modes are explained in detail further ahead.
VOICE STYLE

Note: When SINGLE TOUCH PLAY is on, the sounds memorized in the Style Performance are assigned to all the tracks. Selecting a Style changes the sounds of the accompaniment sections (Drums, Bass, Accomp) as well as the keyboard sections (Upper 1, Upper 2, Lower). When SINGLE TOUCH PLAY is off, selecting a Style changes the sounds of the accompaniment sections only.
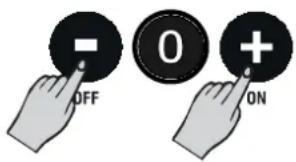
You can select a Style in three different ways: Use the [-] and [+] buttons to select a Style In STYLE mode, the [-] and [+] buttons of the numeric keypad step through the individual Styles one by one.
3 Press the [+] button to select the Styles in increasing numerical order
4 Press the [–] button to select the Styles in reverse order. Holding the button down scrolls rapidly forwards or backwards through all the Styles. The selected Style number is shown at the center of the display
text_image
- OFF 0 + ONUse the numeric keypad to select a Style
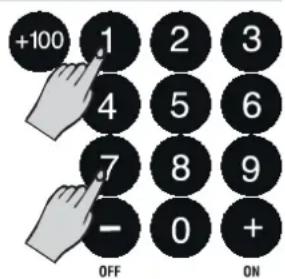
Using the numeric keypad is the quickest way to go directly to the Style you need, but first, you must know the exact number of the Style. The name and corresponding number of all the Styles in memory are silkscreened above the display on the left. You'll see that they are organized in Groups (8 BEAT, 16 BEAT, ROCK, etc.) and numbered from 01 through to 96. Select the Style you want by entering the corresponding two digits in sequence. For example, to select Style number 17 (SoftRock), press button [1] then [7].
text_image
+100 1 2 3 4 5 6 7 8 9 - 0 + OFF ONSelecting the Styles by recalling the Memory
Another quick way of selecting the Styles is by selecting the Performances, but this means that you have to remember which Style is memorized in the Memory. If you use the Performances to select Styles, remember to turn off the S.T. PLAY button. You can also memorize your preferred Styles to these buttons with Store Memory. This argument is explained in detail further ahead on page 14.
Playing the Styles
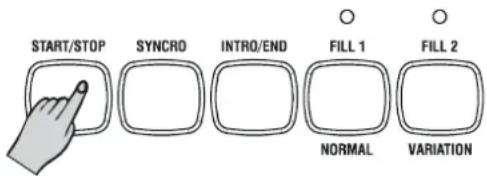
1 Once you have selected a Style, press the [START/STOP] button. You'll hear the Drums accompaniment track start to play.
2 Play a note or chord on the left part of the keyboard below note F#3 to trigger the automatic accompaniments
An automatic accompaniment will start to play, generated by the Style sections: Drums, Bass and Accomp. As you change chord from Major to minor or seventh, etc., you will notice a change of style pattern. Each time you change key, for example, from C to F, the Style pattern will transpose automatically. The names of the recognized chords are displayed in the left hand corner of the display. For example, if you play the chord of C, the display will show the large letter "C". If you play a chord not recognized by the instrument's chord recognition system, the current pattern will not change until you play a recognized chord. Also shown in the display are 4 round Beat pattern indicators which show the current beat of the bar as you play your style. The first bar of every two-bar cycle shows all 4 indicators, while every other beat shown one small indicator. The first beat of the second bar is shown with the larger beat indicator. To play your Style using the automatic functions (Var, Key Start, Intro, Fill, Ending), see the section entitled "Using the Style Auto functions" further ahead.
3 Press the [START/STOP] button if you want to stop the Style.
text_image
START/STOP SYNCRO INTRO/END FILL 1 FILL 2 NORMAL VARIATION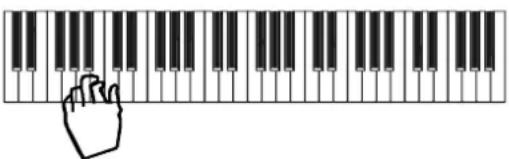
natural_image
Illustration of a hand pressing down on a piano keyboard (no text or symbols)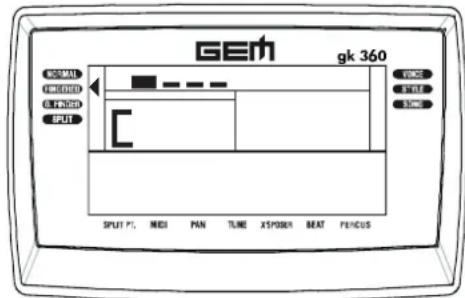
text_image
GEM gk 360 NORMAL ON/OFFIC O. TANISH SPLIT SPLIT PT. MEDI PAN TUNE X500N BEAT PENSUS VOICE STYLE SHORT VOICENOTE: If you hear a Drum pattern only without automatic accompaniment when you play a note or chord on the Lower keyboard, check that you are not in NORMAL or SPLIT mode. The arrowhead must point to either FINGERED or ONE FINGER for the Style accompaniment to play.
Changing the Style Tempo
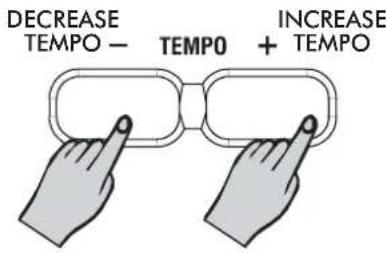
Every time you select a Style, you also recall a memorized playing speed, (TEMPO), shown in the top left hand corner of the display. You can speed up or slow down the tempo, before or after starting the Style, by pressing the [TEMPO /+] button.
- Press the [TEMPO+] button to increase the Tempo value, or the [TEMPO−] button to decrease the value.
Holding down either [+] or [-] end of the button changes the Tempo value at high speed continually until released.
Restoring the memorized Tempo
To restore the Style's memorized Tempo, press both the [TEMPO-/+ ] buttons at the same time
text_image
DECREASE TEMPO — TEMPO + INCREASE TEMPO TEMPO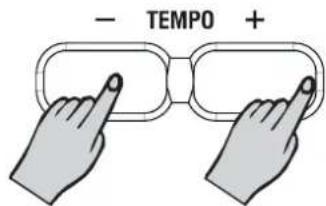
text_image
- TEMPO +About the Chord Recognition Modes
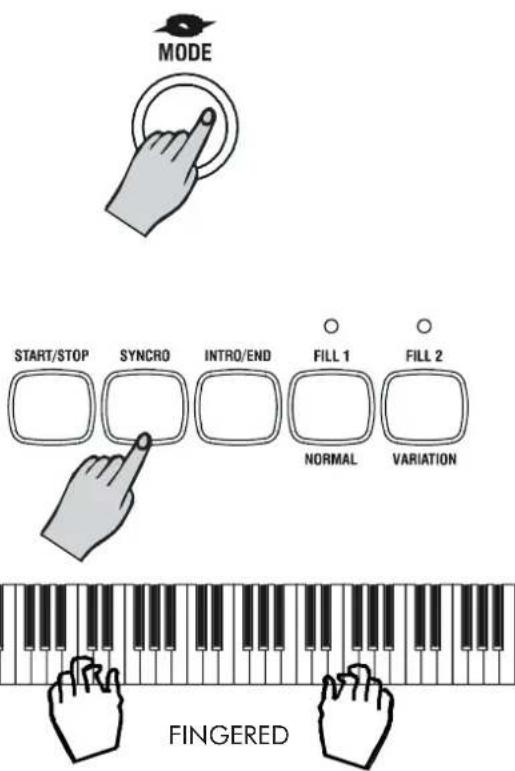
The gk360 allows you to choose between two different Chord recognition modes: FINGERED and ONE FINGER. The chords that you play (Fingered or One Finger type) must be played on the lower part of the keyboard dedicated to the Auto Bass Chords (from note C2 up to and including note F#3).
FINGERED mode requires that you press at least 3 notes for a chord to be recognized.
ONE FINGER mode requires that you press only one note for a Major chord to be recognized. Other chords require more notes
1 If a Chord recognition mode isn't selected, press the [MODE] button as many times as necessary until the left display arrowhead points to either FINGERED or ONE FINGER
2 Press the [START/STOP] button to start the current Style
3 If you select FINGERED, play a chord of at least 3 notes on the Auto Bass Chord section of the keyboard to trigger the auto-accompaniments
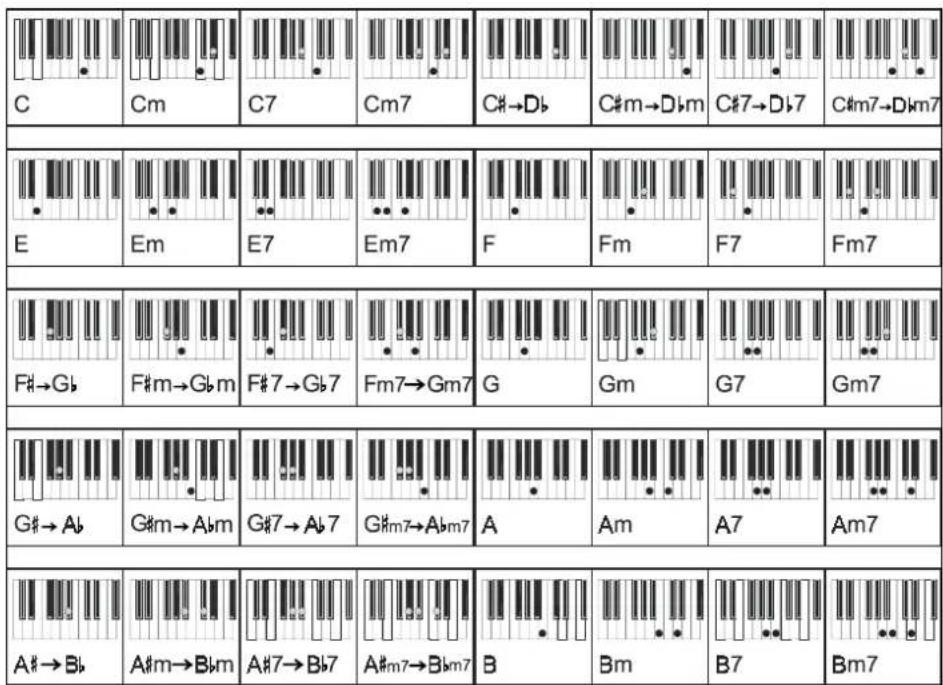
If you select ONE FINGER, play one note on the Auto Bass Chord section of the keyboard to trigger the Major chord of the auto-accompaniments. Other chords using the "One finger" method involves the use of two or three fingers. In the Appendix you'll find useful reference charts for Fingered and One Finger chords.
text_image
MODE START/STOP SYNCRO INTRO/END FILL 1 FILL 2 NORMAL VARIATION FINGERED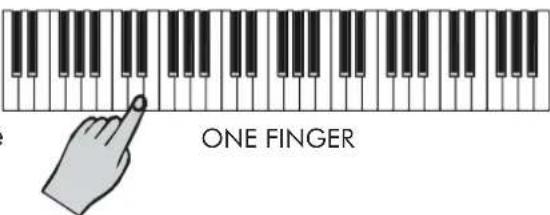
text_image
ONE FINGERNote: If you change Style while the rhythms are playing, the current Tempo rests unchanged. The memorized Style Tempo is recalled only when the Style is not playing.
Using the Style Auto functions
The Styles provide a wide variety of automatic functions that make the gk360 very easy to play. The functions are found in the ACCOMPANIMENT CONTROL section.
Select the Fill In and change Style Variation
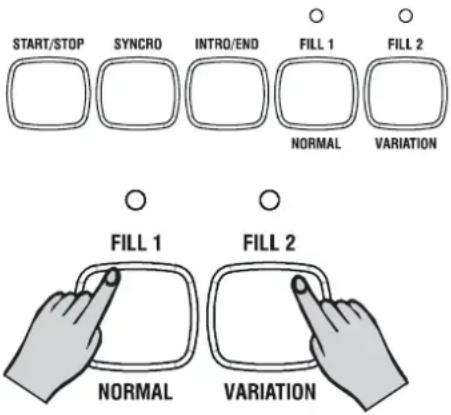
Each Style has two accompaniment patterns, NORMAL and VARIATION, which you can select at any time before or after starting to play the Styles by pressing the corresponding button. The LED status on the FILL 1 or FILL 2 buttons tells you which Style pattern is active for play, Normal or Variation. When you press the [FILL 1/NORMAL] or the [FILL 2/VAR] button during playback, the current pattern will be interrupted by an appropriate Fill In, or "break", then proceed with the same pattern or variation, depending on which button you press. The LED of the button pressed will turn on while the LED of the other button will turn off.
text_image
START/STOP SYNCRO INTRO/END FILL 1 FILL 2 NORMAL VARIATION FILL 1 FILL 2 NORMAL VARIATIONStart the Style accompaniments with Key Start
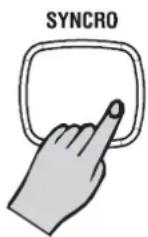
The KEY START function allows you to synchronize the start of your Style with a note or chord pressed on the keyboard without using the Start/Stop button. When you press the [SYNCRO] button, the display shows 4 fl ashing black dots (beat pattern indicators) after the word TEMPO to indicate the synchro start stand-by. Now, if you play a note or chord on the lower part of the keyboard, the Style pattern starts automatically.
Start the Style with an Intro pattern
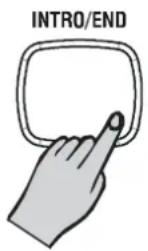
Before starting the Style, press the [INTRO] button to put the instrument into intro-stand-by mode. The LED of the current Style pattern (Fill1/Normal or Fill2/Var) starts to fl ash to indicate that the INTRO has been preset. Now press the [START/STOP] button and play a note or chord on the lower part of the keyboard. The Style starts with an introductory pattern then proceeds with the selected auto-accompaniment (Normal or Variation). Stop the Style with an Ending phrase You can stop your Style automatically with a professionally-programmed ending pattern without using the Start/Stop button. While the Style is playing, simply press the [ENDING] button. The Style auto-accompaniment will stop automatically with an Ending phrase.
Balancing the Style accompaniment tracks with the Mixer
Playing with Styles, you can adjust the volume of one section with respect to the others using the [MIXER] Volume controls. You will be able to balance all the Style sections; Drums, Bass, Accomp as well as the Lower and Upper keyboard sections. How the MIXER controls are organized is explained on page 6. In Style mode, to increase the volume of the Bass track, for example, press the top [INCREASE VOLUME] button and hold it down until you reach the Volume required. The display shows the Volume level of the section being controlled, in this case the Bass section. To decrease the volume, press the bottom [DECREASE VOLUME] control.
text_image
INCREASE VO- LUME MIXER DRUMS BASS ACC LOWER UPPER DECREASE VO- LUMENote: The volumes of the three Accompaniment tracks are controlled simultaneously by the [ACCOMP] Volume buttons.
Muting the Style tracks
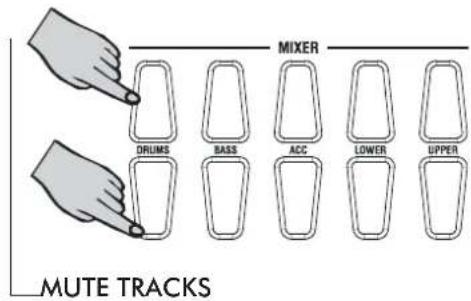
If you want to exclude a section (mute, or turn off), simply press both [INCREASE VOLUME] and [DECREASE VOLUME] buttons at the same time to mute the section required. For example, to play your Upper and Lower voices with the BASS accompaniment only, mute the DRUMS and ACCOMP tracks. The display will show OFF for the respective section. To restore the volume to normal, press both the [INCREASE] and [DECREASE VOLUME] buttons again at the same time.
text_image
MUTE TRACKS DRUMS BASS ACC LOWER UPPER MIXERUsing the Single Touch Play settings in Style mode
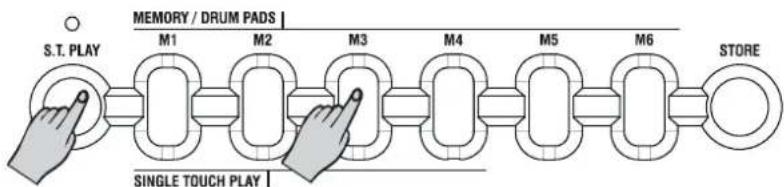
The SINGLE TOUCH PLAY settings are a quick and easy way of reconfi guring the voices of the UPPER and LOWER sections of a Style by pressing only one button while you are playing, without having to stop to change voices manually. Playing the Styles with the [SINGLE TOUCH PLAY] button on, each Style you select recalls a panel confi guration (voices and volume settings) for the accompaniment sections (Drums, Bass, Accomp) as well as for the Upper and Lower sections. The S.T. PLAY settings are recalled using the fi rst four buttons of the MEMORY section [M1-M4]. The gk360 provides a total of 96 x 4 = 384 different panel confi gurations.
flowchart
graph LR
    A["S.T. PLAY"] --> B["M1"]
    B --> C["M2"]
    C --> D["M3"]
    D --> E["M4"]
    E --> F["M5"]
    F --> G["M6"]
    G --> H["STORE"]
    style A fill:#fff,stroke:#000
    style H fill:#fff,stroke:#000
    subgraph MEMORY / DRUM PADS
        B
        C
        D
        E
        F
        G
    end
    subgraph SINGLE TOUCH PLAY
        D
        E
        F
        G
    end
Selecting the S.T. Play settings
1 Select a Style using the methods already described.
2 Press the [S.T. PLAY] button. The display will show a small black arrowhead pointing to the S.T. PLAY indicator in the bottom left hand corner
Make sure that one of the two chord recognition modes is selected.
3 Start the Style using the methods already described (Key Start, Intro, etc.)
4 While you are playing the Style, press one of the SINGLE TOUCH PLAY buttons ([M1], [M2], [M3] or [M4]). The display will show the current Single Touch Play setting. You'll hear a change of voice configuration and the Style Variation may also change
5 Repeat the selection procedure of the SINGLE TOUCH PLAY settings after changing other Styles
On the following page there are instructions on how to store your preferred settings into the 6 memories.
Note: The S.T. PLAY settings change the configuration of the UPPER and LOWER sections only.
Note: When the [S.T. PLAY] button is on (display indicator on), the two MEMORY buttons [M5] and [M6] are disabled for Performance selection.
Digital Effects
The gk360 contains a Digital multi-effects processor which adds realism to your playing. The Digital Signal Processor (DSP) consists of one unit which process the Performances with Reverb and Chorus effects. The buttons which control the Digital Effect are DSP button. The DSP indicators When the DSP display indicators are on, all the voices of the current Performance will play with their programmed effects. When one or both the corresponding display indicators are off, the sounds will play "dry" (without effects).
The Memory buttons and Store Memory
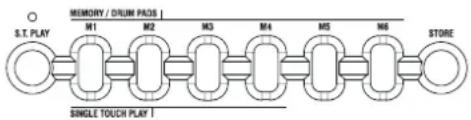
You have seen that the Single Touch Play settings recall factory-set confi gurations for the current Style when the [S.T. PLAY] button is on. You have also seen that, when S.T.PLAY is off, (display indicator off), the 6 buttons of the PERFORMANCE section recall factory-set panel confi gurations (see page 5), including Voices, Volumes, Style, Variation, Split Point, etc..
flowchart
graph LR
    A["S.T. PLAY"] --> B["M1"]
    B --> C["M2"]
    C --> D["M3"]
    D --> E["M4"]
    E --> F["M5"]
    F --> G["M6"]
    G --> H["STORE"]
    style A fill:#fff,stroke:#000
    style H fill:#fff,stroke:#000
    note right of A: MEMORY / DRUM PAGE |
    note right of B: SINGLE TOUCH PLAY !
How to Store a Memory
If you don't want to use the factory Performance settings, you can memorize your own panel configurations to the PERFORMANCE buttons. This very useful feature allows you to store up to 6 preferred panel configurations, including Style, Variation and other selections, which you can then recall at the touch of a single button. To memorize a Performance, the first thing to do is to modify one of the factory set situations. For example, if you select STYLE number 45 (Swing) with Single Touch Play on, the voices recalled for the Upper and Lower sections will be Organ 2 and Strings respectively. You only need to change one aspect of any factory setting to be able to save the new setting as a new Performance. In our example, let's change the voice assigned to the Voice 1 section.
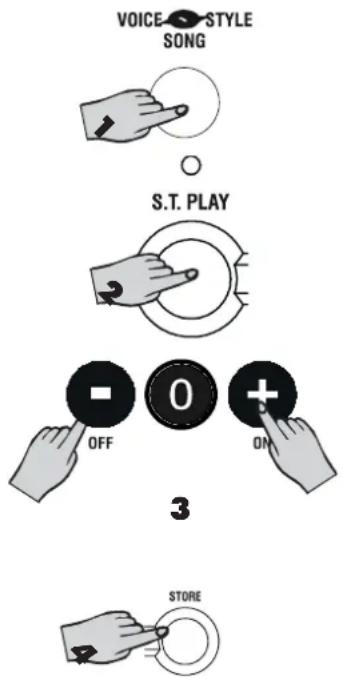
1 Press the [VOICE/SONG/STYLE] button, press the [S.T.PLAY] button, then select Style n. 49 (BasicTrio)
2 Press the [VOICE/SONG/STYLE] button and select a different Voice by using either the [+] and [-] buttons, or the numeric keypad (voice 27, Jazz Guitar, for this example).
3 Disable the Single Touch Play function (press the [S.T.PLAY])
4 Hold down the [STORE] button and simultaneously press one of the PERFORMANCE buttons [M1] - [M6].
For example, if you press [M5]. The small black arrowhead at the bottom of the display will show the current Performance. Whatever information was previously stored in the selected button will be erased by the new data
5 At this point, you can check if your new Performance has been stored. Changing the panel situation (for example, select a Voice or Style), then press the MEMORY button that you used to store your Performance in point 4 above.
text_image
VOICE STYLE SONG S.T. PLAY OFF 0 + ON 3 STORE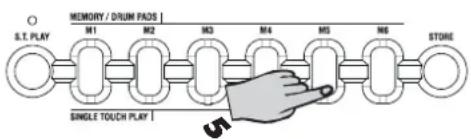
flowchart
graph LR
    A["O S.T. PLAY"] --> B["M1"]
    B --> C["M2"]
    C --> D["M3"]
    D --> E["M4"]
    E --> F["M5"]
    F --> G["M6"]
    G --> H["STORE"]
    I["SINGLE TOUCH PLAY"] --> J["Ground"]
The Sequencer
Your gk360 contains a very simple and easy to use sequencer which records whatever you play and plays back the recorded sequence just as you played it. You can record in Voice mode or Style mode with one or two melody tracks. In playback, you can play along with the recorded sequence using different voices to those used in the Melody tracks. The following example explains how to record a sequence using the Accompaniments.
1 Set the instrument for Style play and select a Style. (Follow the instructions explained on page 9
2 Press the [REC] button.
the four Beat indicators in the display will flash
3 If you want to start the recording of the Style with an introduction, press the [INTRO] button to preset the Intro
4 The sequencer Start to record the notes you play
The Key Start function triggers the Style accompaniment patterns when you play a chord on the keyboard below the split point. If you play a note or chord on the upper part of the keyboard, only the drum track will be triggered.
5 While playing, use the Fills, change the Variation, change Voices for the Upper and Lower sections, activate/deactivate Dual mode, etc.. Whatever you do will be captured by the sequencer
6 Stop the recording with the [REC] button. You can also stop the recording with an ending by press the [ENDING] button.

text_image
REC SEQUENCER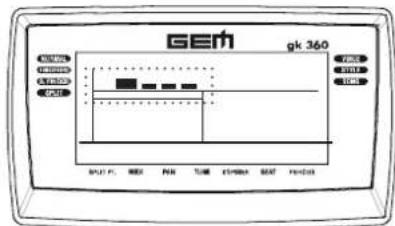
text_image
GEM gk 360 12.00 12.01 12.02 12.03 12.04 12.05 12.06 12.07 12.08 12.09 12.10 12.11 12.12 12.13 12.14 12.15 12.16 12.17 12.18 12.19 12.20 12.21 12.22 12.23 12.24 12.25 12.26 12.27 12.28 12.29 12.30 12.31 12.32 12.33 12.34 12.35 12.36 12.37 12.38 12.39 12.40 12.41 12.42 12.43 12.44 12.45 12.46 12.47 12.48 12.49 12.50 12.51 12.52 12.53 12.54 12.55 12.56 12.57 12.58 12.59 12.60 12.61 12.62 12.63 12.64 12.65 12.66 12.67 12.68 12.69 12.70 12.71 12.72 12.73 12.74 12.75 12.76 12.77 12.78 12.79 12.80 12.81 12.82 12.83 12.84 12.85 12.86 12.87 12.88 12.89 12.90 12.91 12.92 12.93 12.94 12.95 12.96 12.97 12.98 12.99 13.00
natural_image
Illustration of two hands typing on a piano keyboard (no text or symbols)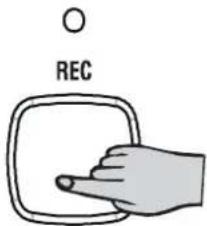
text_image
RECListen to the playback of a recorded Song
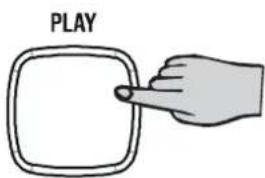
1 press the [PLAY] button to listen to the playback of your recording
While the recorded sequence is playing, you can play along using any voice. Simply select the one you want and play
text_image
PLAYRecord a new song
To record a new Song and overwrite the old one, simply press the [REC] button and the buttons you want to record. Proceed to record your new song using the method already described. The old song will be overwritten (cancelled). If you press [PLAY] when the sequencer contains no recorded notes, the display will show an EMPTY message.
The Metronome
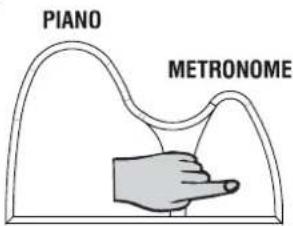
At any time, you can activate the METRONOME for practising purposes. To play with the Metronome, press the STYLE button and insert the value 00 on the numeric keypad (press the "0" button twice).
Press the [START/STOP] button to start the Metronome. The Metronome starts beating time with a 'tick'. If you select the Metronome while you are playing a Style, the auto accompaniment will stop and the Metronome will take over as the provider of the beat. The Metronome is useful to practice keeping time or when you have to practice a study piece.
To stop the Metronome tick, press the [START/STOP] button.
text_image
PIANO METRONOMETHE GK360 UTILITY FUNCTIONS
The gk360 features several utility functions which affect the keyboard globally. The functions are: SPLIT PT., TRANSPOSE, TUNE, PAN, BEAT, PERCUSS and MIDI.
SPLIT POINT
This function allows to increase or decrease the keyboard area dedicated to the Style chords, you can change the Split Point setting to any note of the keyboard and memorize the setting to a Performance. The default setting corresponds to the note F#3.
SPLIT POINT EDITING
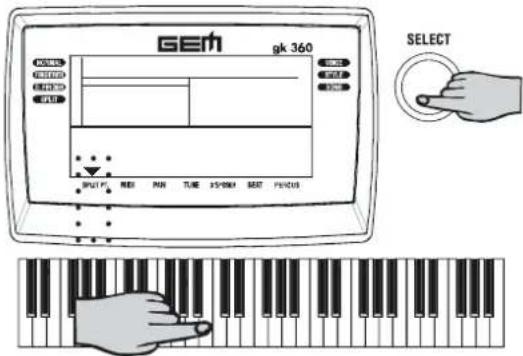
1 Press the [SELECT] button to select SPLIT PT. in the display
The display will show the current Split Point setting. The default Split Point is F#3.
2 Press the key corresponding to the new Split point
The new Split Point note is shown in the display. For example, if you press note C4, the display will show the letter C on the extreme left and the number 4 at the center.
The gk360 FUNCTION menu is temporized, then after some second you fi nish to use it the system escape from the menu automatically.
text_image
GEM gk 360 SELECT OUTPUT REE PIN TUBE 15/10/04 SEAT F=1/2/10Note: The Split Point can be different for each Performance, and the settings remain memorized even after turning the instrument off.
The new Split Point can be memorized to a Memory using the Store memory procedure, as already explained on the previous page.
The MIDI function
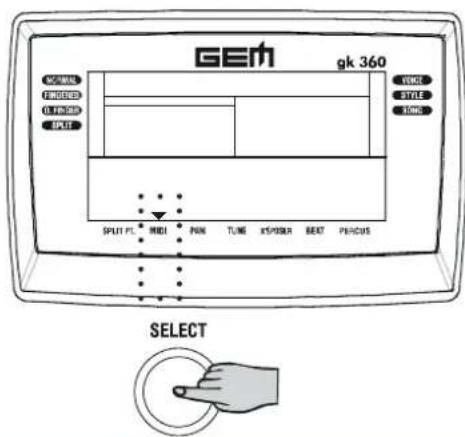
The MIDI function allows you to set the Transmission/Reception channel for the keyboard as a whole. You can set any MIDI channel from 1 -16. If you select the MIDI function, the display shows the factory-set MIDI channel assignment.
Use the [+ON] button to increase the channel number value, or the [-/OFF] button to decrease the channel number value.
Note: It is not possible to assign separate and independent MIDI channels to the voices and accompaniment sections.
text_image
GEM gk 360 NORMAL FINGERED 0.125mm SPLIT VEECE STYLE STOCK SPLIT PL MEDI PAN TUNE K/S/SSUR BEAT P/E/CUS SELECTPan
The PAN function allows you to change the stereo pan position of the overall sound, moving the sound at the speakers either to the left or to the right. If you press either the [+] or [-] PAN buttons once only, the display will show the normal setting corresponding to Pan at the centre (00). Press the [+] or [-] PAN buttons repeatedly to pan the overall sound to the left (max: 07) or to the right (max: 07). The cancel the Pan setting and restore the normal Pan position (centre), press both [+] and [-] PAN buttons at the same time.
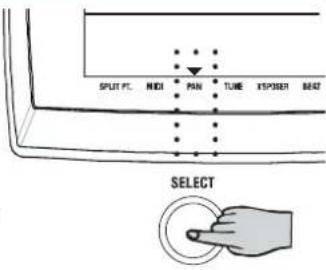
text_image
SPLIT PC. NICK PAN TUBE EXPOSER BEAT SELECTNote: The programmed PAN setting will remain memorized until you turn the instrument off. When you turn gk360 on again, the instrument will set to the normal Pan setting (00)
Tune
The TUNE function allows you to fi ne tune the instrument in steps on one cent at a time (cent = one hundredth of a tone). If you press either the [+] or [-] TUNE buttons once only, the display shows the normal tuning setting (00) corresponding to the standard A = 440 Hz. Press the [+] or [-] TUNE buttons repeatedly to raise (max: 50) or lower (max: 50) the tuning until you reach the value required. The cancel the Tuning setting and restore normal pitch, press both [+] and [-] TUNE buttons at the same time
Note: The programmed TUNE setting will remain memorized until you turn the instrument off. When you turn gk360 on again, the instrument will set to the normal Tune setting (00).
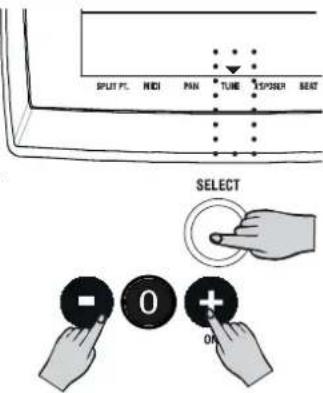
text_image
SPLIT PL. HBDI PAN TUBE EXPOSER SEAT SELECT 0 ONThe Transpose
The TRANSPOSE function allows you to change the pitch of the instrument in semitone steps, up to a maximum setting of 12 semitones above or below standard pitch. If you press either the [+] or [-] TRANSPOSE buttons once only, the display shows the normal pitch setting (00). Press the [+] or [-] TRANSPOSE buttons repeatedly to raise or lower the pitch in semitone steps until you reach the value required. The cancel the Transpose setting and restore normal pitch, press both [+] and [-] TRANSPOSE buttons at the same time.
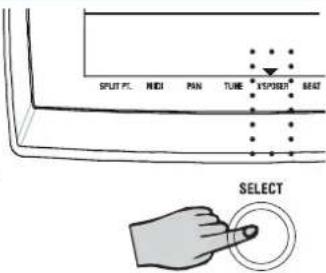
text_image
SPLIT PL. NEDI PAN TUBE SPEDER SEAT SELECTNote: The programmed TRANSPOSE setting will remain memorized until you turn the instrument off. When you turn gk360 on again, the instrument will set to the normal Transpose setting (00).
The Beat function
The BEAT function allows you to set a time signature (number of beats in a measure) for the Metronome. The factory setting corresponds to 4 beats for every measure. If you press either the [+] or [-] button, the display will show the factory setting (for example, "4").
Press either the [+] or [-] button repeatedly to scroll to the required Beat number.
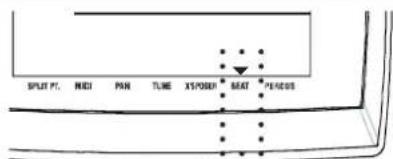
text_image
SPLIT PT. MEDI PON TUBE X5/POEN BEAT PERSUS
SELECT

The PERCUS function
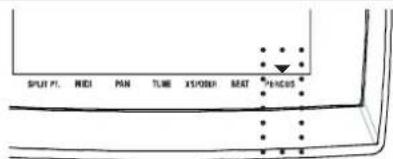
The percussion function allows to program as PAD the Memory keys. Through the [+] and [-] keys you can turn the PER-CUSS function ON so that you can play 6 different drum pad kits in real time.
text_image
SPLIT PI. MELI PAN TUBE 35/08/08 SEAT 24/08/08
GK360 TECHNICAL SPECIFICATIONS
| Keyboard | 61 keys with dynamics |
| Polyphony | 64 notes max. |
| Sounds | 178, GM compatibles |
| Performances | 6 memories, 92 albums |
| One Touch Setting | 384 (4 x style) |
| Operating Mode | layer/split |
| Digital Effects | reverb/chorus |
| Controls | Power on/off, volume, pitch buttons +/-, mixer (drum, bass, acc., lower, upper), tempo, +/-, mode, dual, voice/style/song, select, piano, metronome, octave +/, key pad, single touch play, memory/drum pads, store, dsp, sustain, touch, melody off, demo, M1/M6, transpose |
| Display | multifunction LCD display (neon backlit), with music notation & keyboard guide |
| Styles | 96 |
| Styles Controls | start/stop, sync, intro/ending, fi ll in normal, fi ll in variation, O.T.S. (one touch settings) |
| Sequencer | realtime recorder, rec, play/stop |
| Song Library | 50 Songs + 5 Demo |
| MIDI | MIDI In/Out/Thru |
| Connections | MIDI In/Out/Thru, sustain, aux out, phones, DC 12V In |
| Extra Info | Adapter included, music stand included, battery supply (6 D size batteries, not included) |
| Amplifi cation | 5W + 5W |
| Dimensions (lxhxd) | 950 x 145 x 350 mm/37" x 5" x 13" |
| Weight | 7 Kg/15 lbs (without batteries) |
Technical specification and design are subject to change without notice
Music Stand
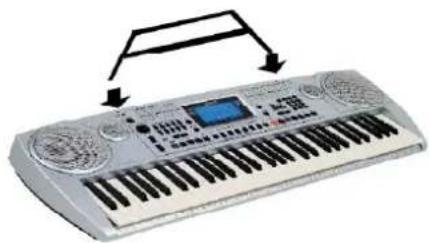
The keyboard is supplied with a music stand that can be mounted on the instrument by inserting the two lower pegs of the music stand into the two holes located on the top panel of the gk360. To remove the music stand, lift it upwards.
natural_image
White electronic keyboard with black keys and a digital display, shown with arrows pointing to the keys (no text or symbols visible)APPENDIX
One finger chords chart
text_image
C Cm C7 Cm7 C#→Db C#m→D#m C#7→D#7 C#m7→D#m7 E Em E7 Em7 F Fm F7 Fm7 F#→Gb F#m→Gb m F#7→Gb7 Fm7→Gm7 G Gm G7 Gm7 G#→Ab G#m→Ab m G#7→Ab 7 G#m7→Ab m7 A Am A7 Am7 A#→B# A#m→B#m A#7→B#7 A#m7→B#m7 B Bm B7 Bm7fi ingered chords chart
| C | C^\# | D | E^b | E | F | F^\# | G | A^b | A | B^B | B | |
| MAJOR (C) |  |  |  |  |  |  |  |  |  |  |  |  |
| MINOR (Cm) |  |  |  |  |  |  |  |  | [SWG6] |  |  |  |
| DOMINANT 7th (C7) |  |  |  |  |  |  |  |  |  |  |  |  |
| MINOR 7th (Cm7) |  |  |  |  |  |  |  |  |  |  |  |  |
| MAJOR 7th (Cmaj7) |  |  |  |  |  |  |  |  |  |  |  |  |
| DIMNISHED (Cdim) |  |  |  |  |  |  |  |  |  |  |  |  |
| AUGMENTED (Caug) |  |  |  |  |  |  |  |  |  |  |  |  |
| 6th (C6) |  |  |  |  |  |  |  |  |  |  |  |  |
 |  |  |  |  |  |  |  |  |  |  |  | |
| MINOR 6th (Cm6) |  |  |  |  |  |  |  |  |  |  |  |  |
APPENDIX 1-VOICE LIST
| Dis- play Num. | SoundName | Patch (Prog- Bank- MSB) | Instr. / Drum- Kit | Dis- play Num. | SoundName | Patch (Prog- Bank- MSB) | Instr. / Drum- Kit | Dis- play Num. | SoundName | Patch (Prog- Bank-MSB) | Instr. / DrumKit |
| 1 Piano1 0-0 Instrument 61 Fr.Horn 60-0 Instrument 121 FretNois 120-0 Instrument | |||||||||||
| 2 Piano2 1-0 Instrument 62 Brass 61-0 Instrument 122 Breath 121-0 Instrument | |||||||||||
| 3 Piano3 2-0 Instrument 63 SynBras1 62-0 Instrument 123 SeaShore 122-0 Instrument | |||||||||||
| 4 | HonkyPF | 3-0 | Instrument | 64 | SynBras2 | 63-0 | Instrument | 124 | Birds | 123-0 | Instrument |
| 5 | RhodesPF | 4-0 | Instrument | 65 | Sopr.Sax | 64-0 | Instrument | 125 | Phone 1 | 124-0 | Instrument |
| 6 | FMPiano | 5-0 | Instrument | 66 | Alto Sax | 65-0 | Instrument | 126 | Helicopter | 125-0 | Instrument |
| 7 | Harpsich | 6-0 | Instrument | 67 | TenorSax | 66-0 | Instrument | 127 | Applause | 126-0 | Instrument |
| 8 | Clavinet | 7-0 | Instrument | 68 | Bari.Sax | 67-0 | Instrument | 128 | Gun Shot | 127-0 | Instrument |
| 9 | Celesta | 8-0 | Instrument | 69 | Oboe | 68-0 | Instrument | 129 | STDdrum | 0 | DrumKit (ch.10) |
| 10 | Glocken | 9-0 | Instrument | 70 | Eng.Horn | 69-0 | Instrument | 130 | ROOMdrum | 8 | DrumKit (ch.10) |
| 11 | MusicBox | 10-0 | Instrument | 71 | Bassoon | 70-0 | Instrument | 131 | POWdrum | 16 | DrumKit (ch.10) |
| 12 | Vibes | 11-0 | Instrument | 72 | Clarinet | 71-0 | Instrument | 132 | ELECdrum | 24 | DrumKit (ch.10) |
| 13 | Marimba | 12-0 | Instrument | 73 | Piccolo | 72-0 | Instrument | 133 | ANLGdrum | 25 | DrumKit (ch.10) |
| 14 | Xilo | 13-0 | Instrument | 74 | Flute | 73-0 | Instrument | 134 | JAZZdrum | 32 | DrumKit (ch.10) |
| 15 | TubBell | 14-0 | Instrument | 75 | Recorder | 74-0 | Instrument | 135 | BRSHdrum | 40 | DrumKit (ch.10) |
| 16 | Santur | 15-0 | Instrument | 76 | PanFlute | 75-0 | Instrument | 136 | ORCdrum | 48 | DrumKit (ch.10) |
| 17 | Organ1 | 16-0 | Instrument | 77 | Bottle | 76-0 | Instrument | 137 | SFXdrum | 56 | DrumKit (ch.10) |
| 18 | Organ2 | 17-0 | Instrument | 78 | Shakuha. | 77-0 | Instrument | 138 | HarpsOct | 6-8 | Instrument |
| 19 | Organ3 | 18-0 | Instrument | 79 | Whistle | 78-0 | Instrument | 139 | 12strnGt | 25-8 | Instrument |
| 20 | Church | 19-0 | Instrument | 80 | Ocarina | 79-0 | Instrument | 140 | Hawai Gt | 26-8 | Instrument |
| 21 | ReedOrg | 20-0 | Instrument | 81 | SquareLd | 80-0 | Instrument | 141 | PhatSyn1 | 82-1 | Instrument |
| 22 | Musette | 21-0 | Instrument | 82 | SawLead | 81-0 | Instrument | 142 | PhatSyn2 | 84-1 | Instrument |
| 23 | Harmonic | 22-0 | Instrument | 83 | Calliope | 82-0 | Instrument | 143 | Sinus | 126-15 | Instrument |
| 24 | Bandoneo | 23-0 | Instrument | 84 | ChifLead | 83-0 | Instrument | 144 | Castanet | 115-8 | Instrument |
| 25 | NylonGt | 24-0 | Instrument | 85 | Charang | 84-0 | Instrument | 145 | Orch.BD | 116-8 | Instrument |
| 26 | HybridGt | 25-0 | Instrument | 86 | SoloVox | 85-0 | Instrument | 146 | GtCutNoi | 120-1 | Instrument |
| 27 | JazzGt | 26-0 | Instrument | 87 | Saw5th | 86-0 | Instrument | 147 | StrnSlap | 120-2 | Instrument |
| 28 CleanGt 27-0 Instrument 88 BassLead 87-0 Instrument 148 KeyClick 121-1 Instrument | |||||||||||
| 29 | MutedGt | 28-0 | Instrument | 89 | Fantasy | 88-0 | Instrument | 149 | Rain | 122-1 | Instrument |
| 30 | OverdrGt | 29-0 | Instrument | 90 | WarmPad | 89-0 | Instrument | 150 | Thunder | 122-2 | Instrument |
| 31 | DistorGt | 30-0 | Instrument | 91 | PolySynt | 90-0 | Instrument | 151 | Wind | 122-3 | Instrument |
| 32 | HarmonGt | 31-0 | Instrument | 92 | SpaceVox | 91-0 | Instrument | 152 | Stream | 122-4 | Instrument |
| 33 | AcouBass | 32-0 | Instrument | 93 | BowGlass | 92-0 | Instrument | 153 | Bubbles | 122-5 | Instrument |
| 34 | FingBass | 33-0 | Instrument | 94 | MetalPad | 93-0 | Instrument | 154 | Dog | 123-1 | Instrument |
| 35 | PickBass | 34-0 | Instrument | 95 | HaloPad | 94-0 | Instrument | 155 | Gallop | 123-2 | Instrument |
| 36 | FretlBas | 35-0 | Instrument | 96 | SweepPad | 95-0 | Instrument | 156 | Bird | 123-3 | Instrument |
| 37 | SlapBas1 | 36-0 | Instrument | 97 | IceRain | 96-0 | Instrument | 157 | Phone 2 | 124-1 | Instrument |
| 38 | SlapBas2 | 37-0 | Instrument | 98 | SoundTrk | 97-0 | Instrument | 158 | DoorCreak | 124-2 | Instrument |
| 39 | SyntBas1 | 38-0 | Instrument | 99 | Crystal | 98-0 | Instrument | 159 | DoorSlam | 124-3 | Instrument |
| 40 | SyntBas2 | 39-0 | Instrument | 100 | Atmosph. | 99-0 | Instrument | 160 | Scratch | 124-4 | Instrument |
| 41 | Violin | 40-0 | Instrument | 101 | Brightn. | 100-0 | Instrument | 161 | Windchim | 124-5 | Instrument |
| 42 | Viola | 41-0 | Instrument | 102 | Goblin | 101-0 | Instrument | 162 | CarEngin | 125-1 | Instrument |
| 43 | Cello | 42-0 | Instrument | 103 | EchoDrop | 102-0 | Instrument | 163 | Car Stop | 125-2 | Instrument |
| 44 | Contrabs | 43-0 | Instrument | 104 | StarThem | 103-0 | Instrument | 164 | Car Pass | 125-3 | Instrument |
| 45 | Tremolo | 44-0 | Instrument | 105 | Sitar | 104-0 | Instrument | 165 | CarCrash | 125-4 | Instrument |
| 46 | Pizzicat | 45-0 | Instrument | 106 | Banjo | 105-0 | Instrument | 166 | Soren | 125-5 | Instrument |
| 47 | Harp | 46-0 | Instrument | 107 | Shamisen | 106-0 | Instrument | 167 | Train | 125-6 | Instrument |
| 48 | Timpani | 47-0 | Instrument | 108 | Koto | 107-0 | Instrument | 168 | JetPlane | 125-7 | Instrument |
| 49 | Strings | 48-0 | Instrument | 109 | Kalimba | 108-0 | Instrument | 169 | Starship | 125-8 | Instrument |
| 50 | SlowStrn | 49-0 | Instrument | 110 | BagPipe | 109-0 | Instrument | 170 | BurstNoi | 125-9 | Instrument |
| 51 | SynStrn1 | 50-0 | Instrument | 111 | Fiddle | 110-0 | Instrument | 171 | Laughing | 126-1 | Instrument |
| 52 | SynStrn2 | 51-0 | Instrument | 112 | Shanai | 111-0 | Instrument | 172 | Scream | 126-2 | Instrument |
| 53 | Choir | 52-0 | Instrument | 113 | Tinkle | 112-0 | Instrument | 173 | Punch | 126-3 | Instrument |
| 54 | DooVox | 53-0 | Instrument | 114 | Agogo | 113-0 | Instrument | 174 | Heart Bt | 126-4 | Instrument |
| 55 | SyntVox | 54-0 | Instrument | 115 | SteelDrm | 114-0 | Instrument | 175 | Step | 126-5 | Instrument |
| 56 | Orch.Hit | 55-0 | Instrument | 116 | Woodblok | 115-0 | Instrument | 176 | Mach.Gun | 127-1 | Instrument |
| 57 | Trumpet | 56-0 | Instrument | 117 | Taiko | 116-0 | Instrument | 177 | LaserGun | 127-2 | Instrument |
| 58 | Trombone | 57-0 | Instrument | 118 | Melo.Tom | 117-0 | Instrument | 178 | Explosn. | 127-3 | Instrument |
| 59 | TubaBass | 58-0 | Instrument | 119 | Syn.Drum | 118-0 | Instrument | ||||
| 60 | MuteTrum | 59-0 | Instrument | 120 | Rev.Cymb. | 119-0 | Instrument | ||||
APPENDIX 2-STYLE LIST
| POP1 POP2 ROCK | TRADITIONAL1 TRADITIONAL2 | DANCE | |||||||||
| 01 | 8BeatSlow | 09 LiteFunk | 17 SoftRock | 25 Waltz1 | 33 6/8 | Polka | 41 | ||||
| 02 | 8BtMedium | 10 | 6/8Sweet 13 | HeavyRock 26 | Waltz2 | 34 Folk2 | /4 | 42 | Disco | Cha | |
| 03 | 8BeatFast | 11 | 6/8Blues | 19 | 80LiteRock | 27 | Real Vienna | 35 | ItalianFolk1 | 43 | JamiroDance |
| 04 | 8BeatLatin | 12 | EpicBallad | 20 | GuitarRock | 28 | SlowWaltz | 36 | ItalianFolk2 | 44 | 70sDance |
| 05 | 8BeatPop | 13 | PopBallad | 21 | SurfTwist | 29 | Musette | 37 | Tarantella1 | 45 | HouseDance |
| 06 | EasyPop | 14 | PopBallad12 | 22 | Teenage50s | 30 | Mazurka1 | 38 | Tarantella2 | 46 | SoulTown |
| 07 | SmoothPop | 15 | BlueBallad | 23 | 60sSoul | 31 | Mazurka2 | 39 | Jive | 47 | OrchDisco |
| 08 | PopShuffle | 16 | EasyBallad | 24 | 80sBallad | 32 | Tango | 40 | HappyDance | 48 | GloryDisco |
| JAZZ | COUNTRY | LATIN1 | LATIN2 | WORLD1 | WORLD2 | ||||||
| 49 | BasicTrio | 57 | CountryPop1 | 65 | Bossa1 | 73 | ChaCha | 81 | GermanPop | 89 | Zeibekico |
| 50 | SlowSwing | 58 | CountryPop2 | 66 | Bossa2 | 74 | PopChaCha | 82 | PopWaltz | 90 | Syrtos |
| 51 | BasieBand | 59 | CountryBeat | 67 | Samba1 | 75 | Mambo | 83 | PartyPolka | 91 | Kalamat |
| 52 | HotBigBand | 60 | CountrySwing | 68 | Samba2 | 76 | Salsa | 84 | Boehmish | 92 | Tsamikos |
| 53 | JazzWaltz | 61 | CountryFox | 69 | Beguine1 | 77 | Merengue | 85 | EgerWaltz | 93 | Turk9/8 |
| 54 | Django | 62 | ModCountry | 70 | Beguine2 | 78 | FastRhumba | 86 | PasoDoble | 94 | Turk7/8 |
| 55 | Charleston | 63 | Unplugged1 | 71 | PopBeguine | 79 | RhumbaClass | 87 | Flamenco | 95 | Turk5/8 |
| 56 | Dixieland | 64 | Unplugged2 | 72 | LatinBand | 80 | Guajira | 88 | Sevillana | 96 | Duek |
DiscoSamb
SONG LIST
| 1 | The Entertainer | S. Joplin | 26 | The Sideway | Folk song |
| 2 | The Old Gray Mare | 27 | Ave Maria | F. Schubert | |
| 3 | Brahms Lullaby | J. Brahms | 28 | Der Deitcher's Dog | S. Winner |
| 4 | Carmen | G. Bizet | 29 | Joy To The World | |
| 5 | The Stage Coach | 30 | Santa Claus Is Coming To Town | ||
| 6 | Nocturne | F. Chopin | 31 | Silent Night | F. Gruber |
| 7 | Back Arioso | J. S. Bach | 32 | Amazing Grace | |
| 8 | Symphony No.45 in F# Farewell mov.1 | F. J. Haydn | 33 | Sippin Cider Through A Straw | |
| 9 | Heidenröslein | Franz Schubert | 34 | Battle Hymne Of The Republic | |
| 10 | German Dance no.6 in E | F. J. Haydn | 35 | Carry Me Back To Old Virginny | |
| 11 | Canon | Pachelbel | 36 | Oh! Susanna | |
| 12 | Sonata | W. A. Mozart | 37 | Old Floks At Home | |
| 13 | Flute Sonata No 7 in A minor mov.4 | G. F. Haendel | 38 | Mazurka for Piano Op.6 No.1 | F. Chopin |
| 14 | Concerto in F Op.4 No.5 mov.3 | G. F. Haendel | 39 | Rondo # 1 | W. A. Mozart |
| 15 | Turkey In The Straw | 40 | O' Sole Mio | ||
| 16 | Old Black Joe | S. C. Foster | 41 | Nocturnes Op.32 No.2 in Ab | F. Chopin |
| 17 | Rondo | W. A. Mozart | 42 | mov.2 Adagio Cello Concerto in D Op.101 | F. J. Haydn |
| 18 | Londonderry Air | 43 | Chant San Sparoles Op.40 No.6 | P. I.Tschaikowsky | |
| 19 | My Bonnie | 44 | German Dance no.5 in D | F. J. Haydn | |
| 20 | Nocturne Op.15No.2 in F# | F. Chopin | 45 | Impromptu | F. Chopin |
| 21 | German Dance no.1 in D | F. J. Haydn | 46 | Nocturne | |
| 22 | Red River Valley | 47 | Minuet | ||
| 23 | Etudes Op.10 No.3 in E Major | F. Chopin | 48 | Invention A 2 Voix | J. S. Bach |
| 24 | Troika | 49 | Gavotte | F. J. Gossec | |
| 25 | Nocturnes Op.62 No.2 in E | F. Chopin | 50 | Spring | F. Mendelssohn |
APPENDIX
MIDI Implementation chart
| Function | Transmitted | RecognizedNRemarks | |
| BasicNDefault ChannelNChanged | 1ch 1-16ch | ALL 1-16ch | |
| Default ModeNMessages Altered | X X ***** | 3 3 X | |
| Note Number:NTrueNvoice | 0-127 ***** | 0-127 0-127 | |
| VelocityN:NNoteNon NoNteNoff | ○ 9nH,V=1-127 XN9nH,V=0 | 9nH,V=1-127 X (9nH,V=0;8nH,V=0-127) | |
| AfNter key's Touch Ch's | X X | X X | |
| Pitch Bend | |||
| Control Change N1 | ○ ○ | ○ ○ | BankNSelect Modulation PortamentoNTime DataNEntry Volume Pan Expression Sustain Pedal PortamentoON/OFF Sostenuto Pedal Soft Pedal ReverbNProgram ChorusProgram Reverb Level ChorusNLevel AllNSound Off ResetNAllControllers AllINNotes Off |
| ○ ○ | ○ ○ | ||
| ○ ○ | ○ ○ | ||
| ○ ○ | ○ ○ | ||
| ○ ○ | ○ ○ | ||
| ○ ○ | ○ ○ | ||
| ○ ○ | ○ ○ | ||
| ○ ○ | ○ ○ | ||
| ○ ○ | ○ ○ | ||
| ○ ○ | ○ ○ | ||
| ○ ○ | ○ ○ | ||
| ○ ○ | ○ ○ | ReverbNProgram ChorusProgram Reverb Level ChorusNLevel AllNSound Off ResetNAllControllers AllINNotes Off | |
| ○ ○ | ○ ○ | ||
| ○ ○ | ○ ○ | ||
| ○ ○ | ○ ○ | ||
| ○ ○ | ○ ○ | ||
| ○ ○ | ○ ○ | ||
| ○ ○ | ○ ○ | ||
| ○ ○ | ○ ○ | ||
| × ○ | ○ ○ | ||
| × ○ | ○ ○ | ||
| ○ ○ | ○ ○ | ||
| Program Change :Ntrue | ○ ***** | ○ 0-127 | |
| System Exclusive | X | ○ | |
| SystemN: SongPosition Common:Song Select :NTune | X X X | X X X | |
| System :Clock Real TimeN:Commands | X X *1 | X X *1 | |
| Aux :LOCAL ON/OFF :All NotesNOff Messages :ActiveNsense :Reset | X X X | X | |
| Notes: | *1 When the accompanimentis started, an FAH message is transmitted. When accompanimentis stopped, an FCH message is transmitted. When an FAH message is received, accompanimentis started. When an FCH message is received, accompanimentis stopped. | ||
Mode 1: OMNION, POLY
Mode 2: OMNI ON, MONO
o : YES
Mode 3: OMNIOFF, POLY
Mode 4: OMNI OFF, MONO
X : NO
FEDERAL COMMUNICATIONS COMMISSION
Note : This equipment has been tested and found to comply with the limits for a Class B digital device, pursuant to Part 15 of FCC Rules. These limits are designed to provide reasonable protection against harmful interference in a residential installation. This equipment generates, uses, and can radiate radio frequency energy and, if not installed and used in accordance with the instructions, may cause harmful interference to radio communications.
However, there is no guarantee that interference will not occur in a particular installation. If this instrument does cause harmful interference to radio or television reception, which can be determined by turning the instrument off and on, the user is encouraged to try to correct the interference by one or more of the following measures:
- Reorient or relocate the receiving antenna.
- Increase the separation between the equipment and the receiver.
- Connect the equipment into an outlet on a circuit different from that
to which the receiver is connected. - Consult the dealer or an experienced radio/TV technician for help.
CAUTION : Changes or modifications to this product not expressly approved by the manufacturer could void the user's authority to operate this product.
STOCK CODE 271466
Specifications are subject to change without prior notice.