Digta 422 - Audio recorder GRUNDIG - Free user manual and instructions
Find the device manual for free Digta 422 GRUNDIG in PDF.


User questions about Digta 422 GRUNDIG
0 question about this device. Answer the ones you know or ask your own.
Ask a new question about this device
Download the instructions for your Audio recorder in PDF format for free! Find your manual Digta 422 - GRUNDIG and take your electronic device back in hand. On this page are published all the documents necessary for the use of your device. Digta 422 by GRUNDIG.
USER MANUAL Digta 422 GRUNDIG
5 Environmental note
6 Scope of delivery
6 Accessories
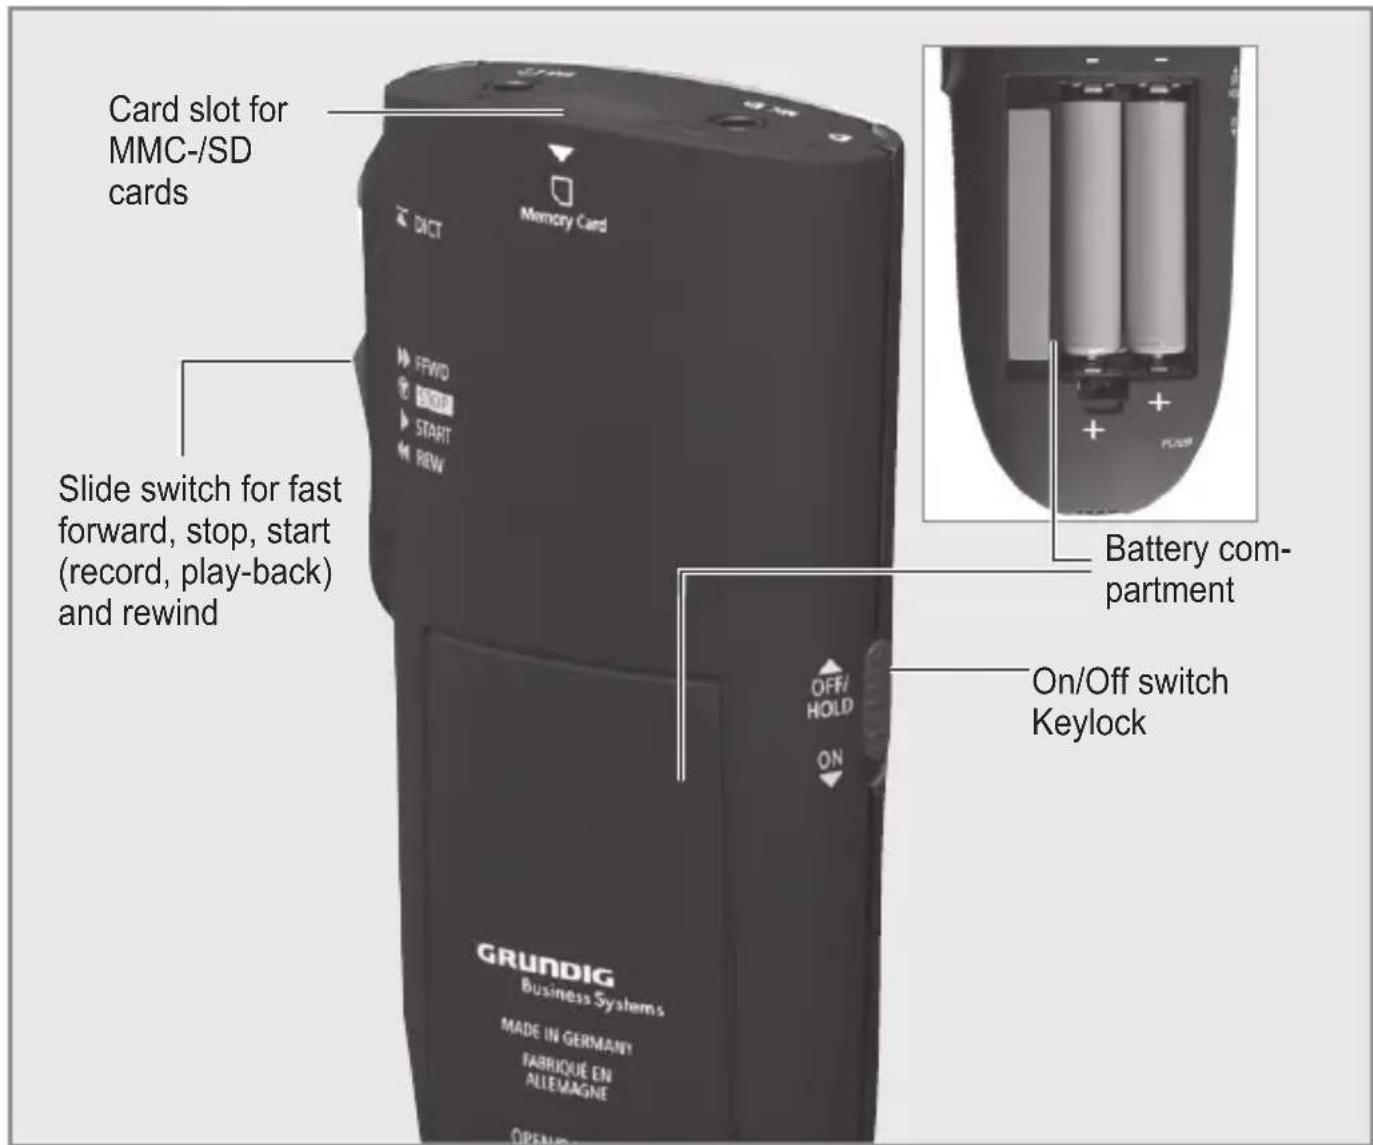
7 User controls
8 Rear view
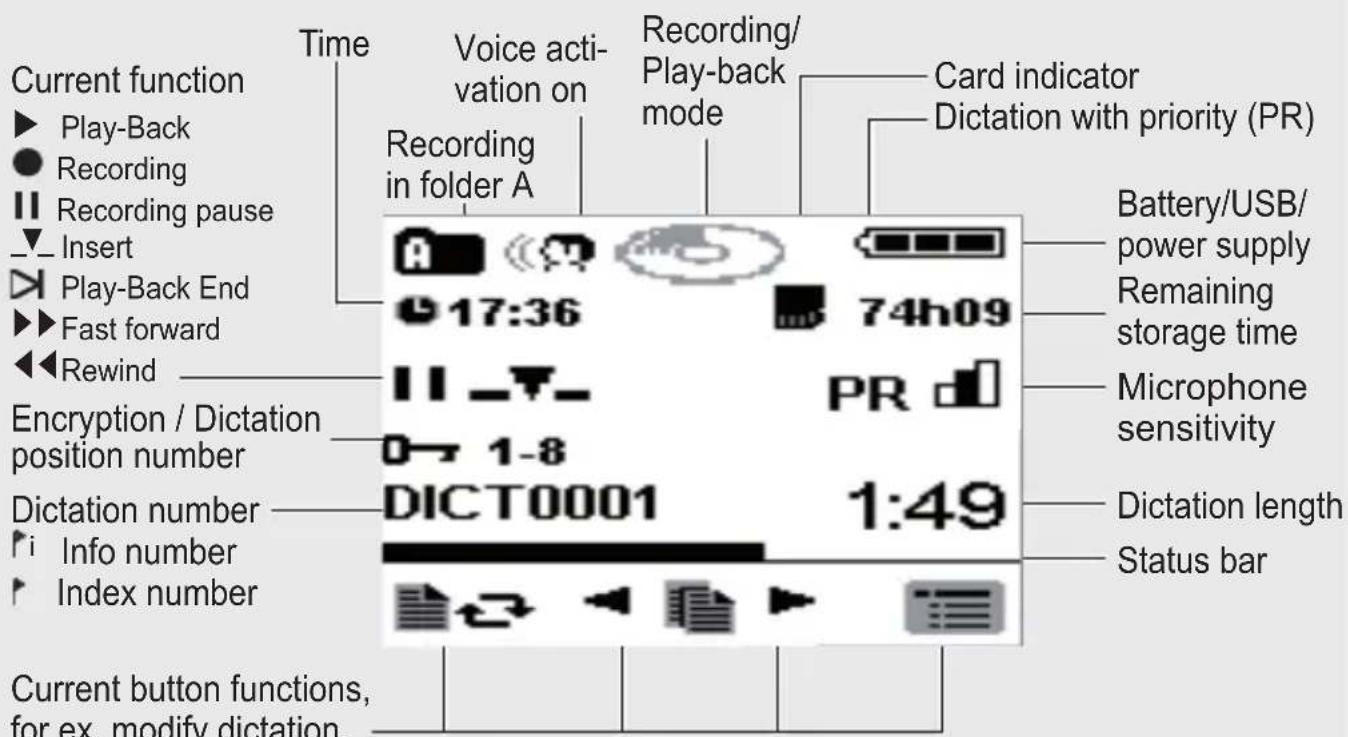
9 Display
10 Preparation
10 Battery operation
10 Rechargeable battery operation
10 Inserting rechargeable battery
11 Direct charging of the rechargeable battery
12 Charging the battery - using the Digta Station 446*
13 Notes on rechargeable battery 466
14 Mains operation via USB
14 Mains operation
15 Inserting and removing replaceable memory cards
16 Formatting replaceable memory cards
17 Switching on the machine
17 Switching on and off
17 Initial switching on
18 Subsequent switching on
18 Switching off
18 Keylock
18 Navigation
19 Navigation in the menus
19 EASY MODE- MENUE MODE
19 Switchover from EASY MODE- M ENUE MODE
20 PIN / PUK
20 Entering the four digits PIN
21 Entering the eight digits PUK
21 Saving dictations on removable memory cards
22 Recording
22 Saving dictations, selecting a folder
23 Dictation
23 New dictation
24 Recording pause
24 End recording
24 Modifying the dictation
26 Inserting a part of a dictation
27 The info function and the index function
27 Inserting an info
28 Inserting an index
29 Dictating using the foot control
30 Play-back
30 Select dictation and listen to it
31 Setting the volume
31 Skip quickly to the start or end of a dictation
31 Fast play-back
32 Fast forward and rewind
32 Inserting an info
33 Inserting an index
34 Search for info or index
35 Transcription with foot control
36 Automatic backspace
37 Modify Menu
37 Editing an existing dictation
38 Display or modify data set in the dictation
40 Setting a priority to a dictation
41 Postpone a dictation
42 Dictation lock
43 Deleting a dictation
43 Deleting an entire dictation
44 Deleting the contents of a folder
45 Deleting a part of the dictation
46 The menu
46 Functions in the menu at a glance
48 Functions available if the device is connected to a PC
49 Data list
52 Group
53 Typist
54 Dictation type
55 Priority
56 No./Reference
58 Microphone sensitivity
59 Voice activation
60 Automatic power off
61 Audio signals
62 Illumination
63 USB connection automatic / manual
64 Speaker
65 Fast forward / rewind
66 Foot control*
66 Foot control* assignment during recording
67 Foot control* assignment during play-back
68 Automatic backspace
69 Setting an index during play-back
70 Dictation position number
71 Time indicator
72 Date format
73 Display ID
74 Version
75 DSS Pro
76 Time, date
77 Dictation counter
78 Modifying the PIN
79 Formatting
80 Default settings
81 Language
82 Operation with Digta Station\*
82 Digta Station*
82 USB interface
82 Foot control
82 Charging unit, power supply*
83 Communication with the PC
83 The Grundig Business Systems PC software
83 System requirements
84 Connecting and separating the dictation machine and the PC
84 USB parallel operation
85 PC microphone operation, USB-Audio, USB-HID
86 Configuration of the dictation accompanying note
87 Firmware update
87 Carrying out a firmware update
89 Digta Scan 404 Barcode reader
89 Using barcodes
90 Plugging in
91 Unplugging
92 Switching the Digta Scan on and off
93 Scanning a barcode for a new dictation
94 Displaying a barcode for a dictation
95 Scanning a barcode for an existing dictation
96 Searching for a dictation belonging to barcode
97 Deleting a barcode from a dictation * Special extras
CONTENTS
98 Configuring the Digta Scan barcode reader
100 Setting the Digta Scan barcode reader
101 Restoring the default settings
102 RFID reader Digta RFID 414
102 Using RFID codes
102 Connecting and removing the RFID reader
103 Turning the RFID Reader on and off
104 Scanning a RFID code for a new dictation
105 Additional functions
106 Messages, error numbers
NOTES
Your DigtaSonic 422 is a digital portable dictation machine. It can be used as a single workstation dictation system together with the included software. It may also be integrated into a network solution (local network with several authors and typists). The dictating machine offers functions such as inserting or deleting passages that allow you to easily edit your dictations. Dictations can be transferred from your PC onto a network.
Safety
This digital portable dictation machine is designed to record and play-back spoken language. Protect your machine from exposure to moisture (rain, splashing liquids). Never lay your dictation machine down near a heater or directly into sunlight.
Note! You must not open the dictation machine under any circumstances. Opening the machine will invalidate the warranty repair. Open only the lid to the compartment of the battery. Use a dry cloth to clean the machine. Do not use chemical cleaning agents.
Environmental note
The batteries must not be thrown away as household garbage. Please dispose of the used batteries in an environmentally sound manner by bringing them to a public collecting point or back to the dealer.
CE The CE mark confirms that the device corresponds to the relevant guidelines of the European Union.
Technical and visual features subject to change!
Scope of delivery
- Digta 422
- PC software
- USB cable
- Pouch
Accessories
For the latest accessories like Digta Card, Digta Station, Foot control, plug-on microphone and earphone please visit the Grundig Business Systems Website on the internet at
www.grundig-gbs.com.
The performance features described by Grundig Business Systems only apply to genuine Grundig Business Systems accessories.
Please make sure to choose only genuine accessories from Grundig Business Systems. Product liability and warranty service are provided only in this case. The use of non-Grundig Business Systems accessories or those which are not recommended and approved by Grundig Business Systems automatically void any warranty claims towards Grundig Business Systems.
Socket for external microphone
Microphone
LED indicator
Record: illuminated red
Record pause: blinking red
Insert: illuminated orange
Insert pause: jittering orange
PC transfer: jittering red
Charging of rechargeable batteries: blinking green
Selection buttons*
Navigation buttons*
„new“-button
(new dictation)
* labeled in the bottom display line
Green indicator for USB connection
Yellow indicator for charging
Earphone socket
(output voltage max. 90 mV)
Recording button
Display
Slide switch for
fast forward,
stop,
start (record, play-back)
and rewind
Digta Station 446:
Special extras
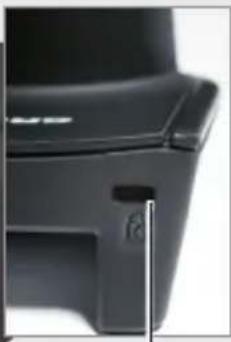
natural_image
Close-up of a black mechanical component with a small protrusion and a vertical line marker (no visible text or symbols)for Kensington lock
text_image
Card slot for MMC-/SD cards Slide switch for fast forward, stop, start (record, play-back) and rewind OFF/HOLD ON/OFF switch Keylock GRUNDIG Business Systems MADE IN GERMANY FABRIQUE EN ALLEMAGNEDisplay information
Menu Mode
text_image
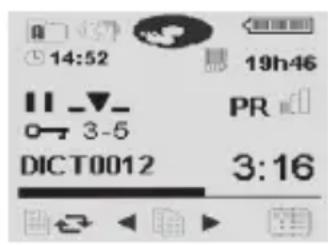
Current function ► Play-Back ● Recording || Recording pause ▼ Insert ► Play-Back End ► Fast forward ◄ Rewind Encryption / Dictation position number Dictation number i Info number ► Index number Time Voice acti- vation on Recording in folder A Recording/ Play-back mode Card indicator Dictation with priority (PR) 17:36 74h09 PR Battery/USB/ power supply Remaining storage time Microphone sensitivity Dictation length Status bar DICT0001 1:49 Current button functions, for ex. modify dictation.Easy Mode
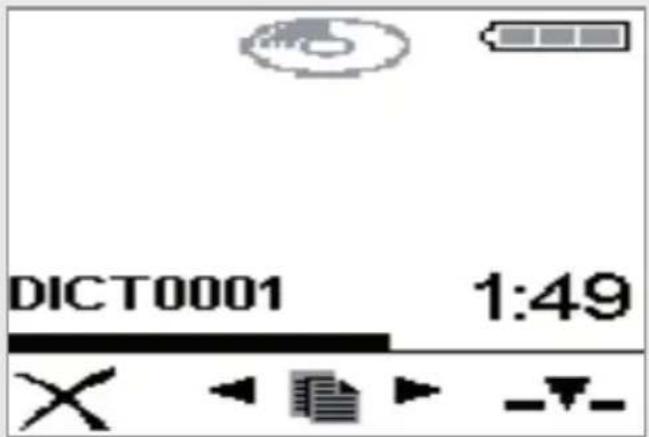
To switch between MENU MODE and Easy MODE, keep on pressing the „NEW“ button after having switched on the DIGTA 422 until the initial display appears on the display (hour glass and progress bar).
text_image
DICT0001 1:49For further information concerning the EASY MODE, please see the Quick Reference Guide.
Battery operation
natural_image
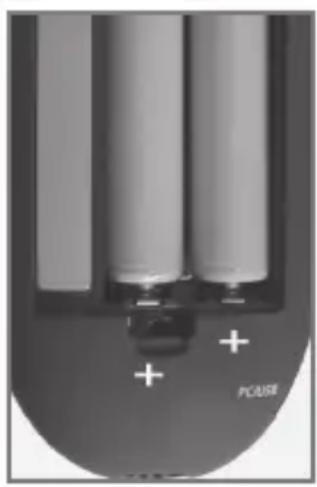
Close-up of a cylindrical battery with two segments and a labeled 'POUSE' button (no other text or symbols visible)The dictation machine can be used for approximately 12 hours when the alkaline manganese batteries are fully charged.
- Open the battery compartment.
- Insert batteries (Micro type / AAA, 2 x 1,5 V). Make certain the polarity is correct.
- Close the battery compartment.
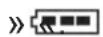
- Display for battery operation » 📄.
Note:
A signal will be omitted when batteries are weak. The battery symbol flashes on the upper right edge of the display. You will still be able to dictate for a few minutes until the dictation machine automatically switches off.
Rechargeable battery operation
To allow a smooth operation of the rechargeable battery* you should always switch off your dictation machine after you have finished dictations and connect it to the Digta Station* to be recharged.
– Display when operating with rechargeable batteries:
Inserting rechargeable battery
With the Digta Station 446* you only may recharge the Akku-Pack 466* rechargeable battery* in the dictation machine.
- Switch off the dictation machine. Move the On/Off switch upwards to »OFF/HOLD«.
- Open the compartment of the rechargeable battery*.
- Insert the rechargeable battery*. Make sure the polarity and position are right (see figure). * Special extras
* Special extras
Note:
The dictation machine's operating system is “shut down” (similar to a PC) when it is turned off. There must still be sufficient power available for this purpose. If, after the dictation machine has automatically turned off, you turn it back on again without having plugged it into a power supply* (e.g. via USB cable to a PC) or without having inserted new rechargeable batteries, your saved dictations may be permanently lost.
The rechargeable battery* is charged also when the dictation machine is switched on. In this case, however, charging will take a longer time.
Direct charging of the rechargeable battery
- Switch off the dictation machine by moving the On/Off slide switch upwards to »OFF/HOLD«.
- Plug the power supply* into the mains socket.
- Connect the USB plug of the power supply* cable to the »PC/USB« socket of the dictation machine.
- After a short time the display indicates that the batteries are recharged and the green recording indicator will be blinking.
- The flat rechargeable battery* will be fully recharged after about 4 hours. The charging indicator and the recording indicator then go out.
- Pull the power supply* from the socket and the power supply* cable's USB plug from the »PC/USB« socket.
Note:
When the rechargeable battery is flat (total discharge), it may take up to two hours until the load indicator appears on the display. Please check if the dictation machine and the power supply work accurately. To do so, take out the rechargeable battery. Then connect the dictation machine with the mains supply and switch on the dication machine.
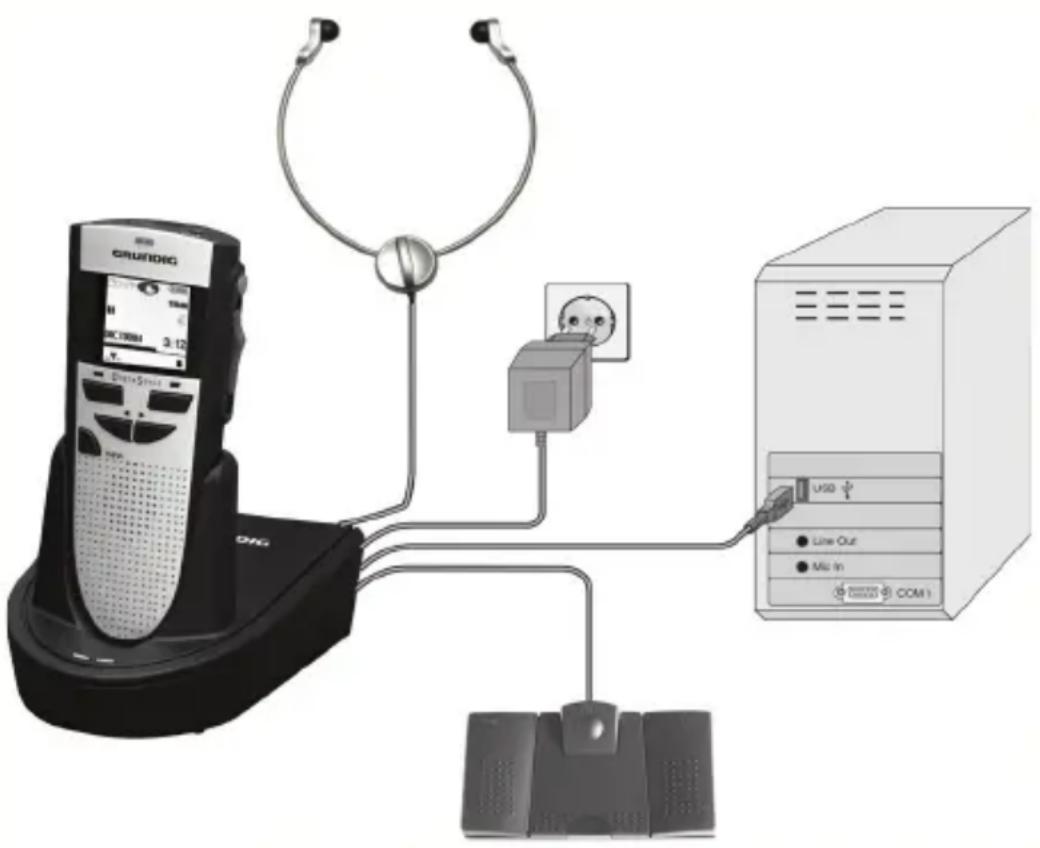
Charging the battery – using the Digta Station 446\*
text_image
GRUANDRG 3:12 Line Out Min In COM1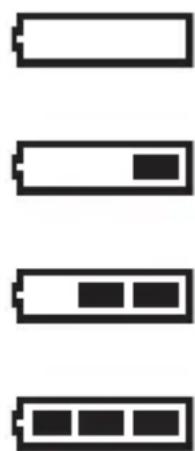
natural_image
Four horizontal rectangular blocks with varying internal patterns, no text or symbols present- Connect your USB plug from the power supply* cable to the »DC IN 5V« jack of the Digta Station*.
- Plug the power supply* plug to the wall outlet.
- The yellow indicator of the Digta Station* lights up.
- Switch off the dictation machine by moving the On/Off slide switch upwards to the »OFF/HOLD« position.
- With the dictation machine switched off, plug it into the-Digta Station*
- Shortly afterwards, the load indicator appears on the Digta display and the LED-indicator blinks green. The yellow indicator of the DIGTA Station flashes yellow during the loading process.
- After approx. 4 hours the flat rechargeable battery* is recharged. The charging indicators and the recording indicator disappear. * Special extras
Notes on rechargeable battery 466
New rechargeable batteries do not reach full capacity until they have been recharged several times. For this reason the operating time for new rechargeable batteries in some rare cases is less than 3 hours.
When the rechargeable battery* is fully charged, you can use the dictation machine up to 12 hours (DSS Standard Play).
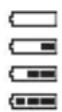
The rechargeable batteries' charge state is shown on the dictation machine display:
- »□□□« Rechargeable battery* charged;
- » Rechargeable battery* partly discharged;
- » « Rechargeable battery* weak;
- » « Rechargeable battery* nearly flat.
Note:
The rechargeable battery* must always be fully charged in the dictation machine to make sure that the real charging state is displayed.
Before the rechargeable battery* is completely flat a short warning beep will sound and the rechargeable battery* symbol »□« will flash on the display. There won't be a warning signal in the recording mode. You will still be able to dictate and play-back for a few minutes before the dictation machine automatically switches off. However, we recommend either starting the charging process after the warning beep and the flashing rechargeable battery* symbol » or to use the power supply* to operate the dictation machine.
The dictation machine's operating system is "shut down" (as for a PC) when it is switched off. Sufficient power must still be available for this purpose. If, after the dictation machine has automatically switched off, you switch it back on again without plugging in the power supply* or if the rechargeable batteries have not been recharged, your saved dictations may be permanently lost.
PREPARATION
Mains operation via USB
You can connect your dictation machine to your PC via a USB cable (included in delivery).
- Switch on your PC.
- Switch on your dictation machine and connect it to the PC via the USB cable. A display for rechargeable battery* operation appears on the upper right edge, or the symbol » ➕ ➕ ➕ for power supply* via PC flashes if the batteries are fully charged.
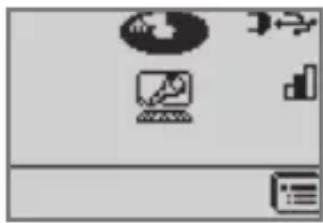
- If automatic PC connection is switched on, the dictation machine logs on at the PC via USB parallel operation. Open the menu with the right selection button. Select the symbol » 📋 « for dictations in PC power supply* mode with the navigation buttons and confirm with the right selection button » √.
natural_image
Generic desktop application icons including a computer, monitor, and document (no text or symbols)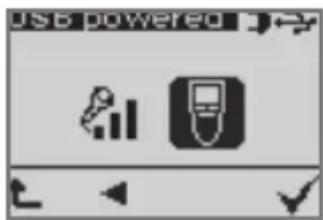
text_image
USB poweredNow your dictation machine is supplied with power by the PC (the battery* in the device is not discharged) and you can use it for recordings and play-back like under battery operation.
Mains operation
If the dictation machine has been switched on and a power supply* is connected to the »PC/USB« socket, the power supply* will supply the dictation machine with power. The rechargeable battery* is charged.
- Display for mains operation ».
Please use the Digta Station* for PC operation with power supply*.
Inserting and removing replaceable memory cards
You can use memory cards (not included in delivery) instead of the internal memory.
Use Digta Cards supplied as accessories by Grundig Business Systems.
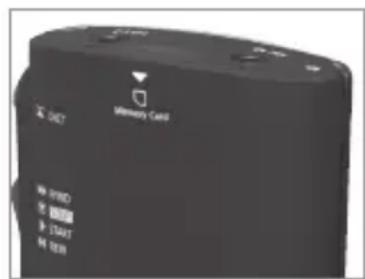
- Push the memory card into the slot with the side with the diagonal corner facing the direction shown on the back of the device.
Note:
Do not insert the card with force. Slight pressure is sufficient.
To remove the card press the memory card slightly until the snapping mechanism unlocks.
Do not remove the cards when recording is running or during data transfer from PC to PC. This can result in data loss.
If a full memory card (e.g. with over 300 dictations) is inserted into the dictation machine with factory default settings (or with a reset dictation counter), it takes up to 20 seconds to create a new dictation. This time is required for the dictation machine to search for the first free dictation number starting from dictation number 1. This time also varies depending on the manufacturer of the memory card.
If you use MultiMediaCards/SecureDigital Cards (MMC/SD) with insufficient writing speed, »Card not supported!« will appear in the display.
Make sure that the electrical contacts on the underside of the memory card are not subjected to physical stress. The cards are not affected by dirt or moisture, but they may only be put into the dictation machine when they are clean and dry.
text_image
Microarray Call MODE MODE START ESENPREPARATION
New memory cards must be formatted before any writing can be done.
It is essential that the notes in the chapter “THE MENU – Formatting” be observed.
Formatting replaceable memory cards
Memory cards – including those which have been preformatted – must first be formatted with the dictation machine prior to initial writing.
If an error message appears after a non-formatted memory card is inserted, confirm this with the right selection button »√«.
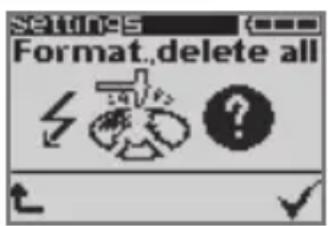
The »Format, delete all?« display should also be acknowledged with the right selection button »
The memory card may not be formatted as a removable disk using a PC formatting function.
New memory cards may only be formatted using the "Formatting" menu function. It is essential that the notes in the "THE MENU - Formatting" chapter be observed.
We recommend reformatting the memory card on a PC once it has been overwritten several times. The memory card is defragmented during formatting. Access to the next dictations is then faster.
text_image
Settings Format, delete all ▼ ?Switching on and off
Initial switching on
natural_image
Black cylindrical electronic device with control panel and indicator lights (no visible text or symbols)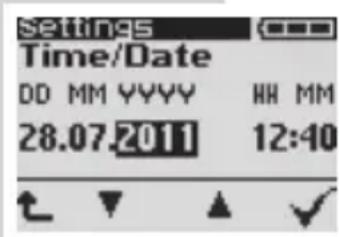
text_image
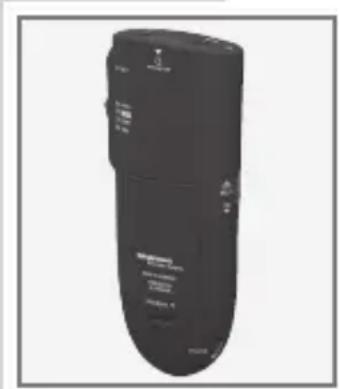
Settings Time/Date DD MM YYYY HH MM 28.07.2011 12:40- Move the On/Off switch down to »ON«.
- Select a language with the navigation buttons »◀▶« and confirm with the right selection button ✗«., for example, »English«.
- An authors list appears when more than 1 author (a maximum of 20 authors is possible) is configured. Please select your name and confirm with the right selection button »√«.
- The author's list is created by the administrator at the PC and transferred to the dictation machine.
Note:
If there are more than one author, the dictation list only shows the dictations with the author's recognition selected and confirmed by the user when he/she switched on the machine. This ensures that other dictations are not accidentally edited or worse deleted.
- We recommend you to adjust now time and date. To do this select year, month, day, hours and minutes with the navigation buttons »▲▼« and confirm each selection with the right selection button »√«.
• End your adjustments with » √ «.
- You can interrupt the time setting with the left selection button » ↗ « without saving the adjustments. Each time you switch on the device in the future, the date and time display will appear again, until the time setting is concluded with the right selection button.
- Now the device is ready for operation.
SWITCHING ON THE MACHINE
Subsequent switching on
- Move the On/Off switch downward to "On".
- If an authors list appears please select your name and confirm with the right selection button »√«.
Switching off
- Move the On/Off switch upward to »OFF/HOLD«.
Key lock
The keylock prevents you from accidentally turning off the machine while you are recording or playing back a dictation.
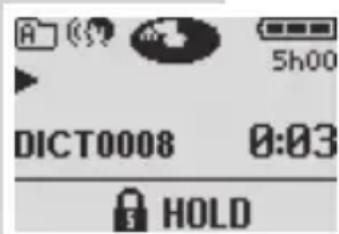
- When making a recording or playing back a recording, push the On/Off switch upward to »OFF/HOLD«. The keys are now locked and the ⏻ HOLD« symbol appears in the display. If you wish to unlock the keys again, push the On/Off switch back to »ON«. You can stop your recording or play-back again.
If you press the On/Off button in a different function, the device will turn off.
text_image
5h00 DICT0008 0:03 HOLDNAVIGATION
Navigation in the menus
- You may select desired menu items or functions/settings with the navigation buttons » ◀▶«.
- You activate menu items and confirm functions or parameters with the right selection button »√«
- With the left selection button » ↗ « you interrupt functions without saving any adjustments.
natural_image
Simple gray background with a horizontal line and four directional arrows (two left, two right, one checkmark) at the bottom (no text or symbols)EASY MODE - MENU MODE
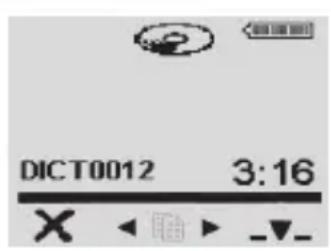
The EASY MODE serves for making the pure dictation functionality of the Digta 422 available for the author.
The menu functions are switched off in the EASY MODE. Instead of this, a delete button and an insert button are permanently available.
The advantages of the EASY MODE are:
text_image
DICT0012 3:16- All important functions (dictating-, delete- and insert functions) are available on the buttons.
- The display is more neatly designed because only the dictation information is displayed.
- Operating errors of rarley used functions (e.g. change folder, delete the entire memory, restore counter, insert info/index) are excluded.
- All device settings (e.g. microphone sensitivity, length of display illumination) which have been set in the MENU MODE remain after switching over to the EASY MODE.
Note:
GRUNDIG Business Systems recommends to perform all settings in the MENU MODE, to activate the desired workflow functions and then switchover to the EASY MODE.
Switchover from EASY MODE - MENU MODE
The switchover from the EASY MODE to MENU MODE is achieved through switching on the Digta 422.
- To switchover between the MODES, press the „NEW“ button when switching on the Digta 422 till the initial display view appears on the display (hour glass and progress bar).
text_image
14:52 19h46 II _▼_ PR 3-5 DICT0012 3:16Entering the four digits PIN
Your dictation machine comes with a PIN/PUK function. The PIN (Personal Identification Number) is activated via the supplied PC software. Afterwards you have to enter your PIN each time when you switch on your dictation machine. Die PIN (personal identification number) can be activated by means of the supplied PC software in the menu item „configuration/extended...“ or contact our service hotline on:
www.grundig-gbs.com
Support / Contact Info
text_image
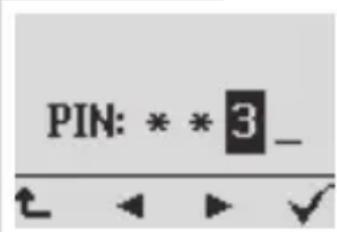
PIN: * * 3_Default settings are 0000. You may change your PIN via the menu functions described in the chapter „THE MENU – Modifying the PIN”.
- You may confirm your entry via the navigation buttons or you move the slide switch to » ◀◀REW« (smaller figures) or to » ▶▶FFWD« (higher figures) and confirm the figures with the recording button » ▽CT«.
- Each figure you entered in will appear as a star symbol "* " to screen from view. Having entered the fourth figure you will access the main menu.
If the wrong PIN was entered three times you have to wait for 30 seconds to try again. However, if in three trials the wrong PIN was entered three times, the dictation machine will be locked and only may be unlocked via entering the right PUK.
PIN / PUK
Entering the eight digits PUK
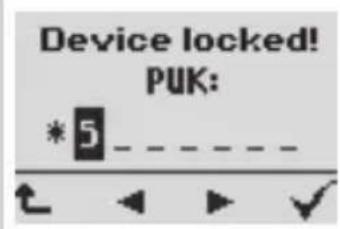
If the wrong PIN was entered several time the dictation machine will be locked. You then will have to enter the eight digits PUK (Personal Unblocking Key)
text_image
Device locked! PUK: * 5 _ _ _ _ _ _ _ ↑ < ▶ ▶ ✓- You may confirm your entry via the navigation buttons or you move the slide switch to »◀◀REW« (smaller figures) or to »▶FFWD« (higher figures) and confirm the figures with the recording button »DCT«.
If the wrong PUK was entered three times you have to wait for 30 seconds to try again. Entries may be done as often as you like. The PUK is generated from the device's specific serial number and will be supplied to you or to your system administrator when you buy the machine.
Having entered the PUK the PIN will be reset to 0000.
Saving dictations on removable memory cards
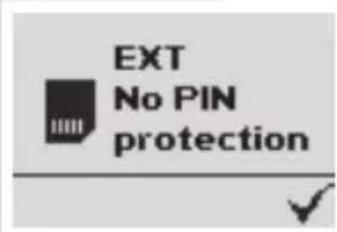
Dictations on external, removable memory cards (Digta Card) can not be protected through the PIN/PUK function. The following display appears when changing to an external memory card:
text_image
EXT No PIN protection- EXT NO PIN PROTECTION
- Confirm with the right selection button »√« that you would like to work with an external memory card without PIN protection.
Saving dictations, selecting a folder
Dictations are stored on the internal memory of the dictation machine if no external, replaceable memory card (Digta Card) is in use.
If a memory card is inserted, all dictations are recorded on this card. The internal memory is protected against access during this. It is not possible to copy between the internal memory and the memory card.
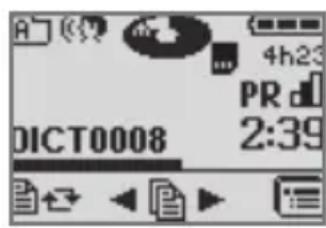
- When using an external memory card,» appears in the display.
There are six folders available for this purpose: one main folder » and five subfolders labeled A, B, C, D, and E. This allows you to sort your dictations (for example to separate private from business dictations).
text_image
A 4h23 PR 2:39 DICT0008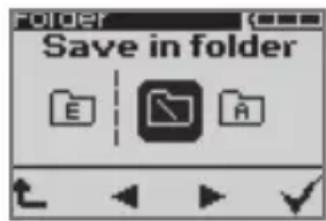
text_image
Folder Save in folder E ASelecting a folder
- Activate the menu with the right selection button »
- Select the Folder menu command » « with the navigation buttons » ◀▶« and confirm by pressing the right selection button » √.
- Now you can choose the folder of your choice with the navigation buttons. Confirm with »√«.
- You exit the menu with the left selection button » ↗«.
Your dictations will now be saved in this folder. When you turn the machine back on, the last selected folder and last edited dictation will be displayed.
Dictation
natural_image
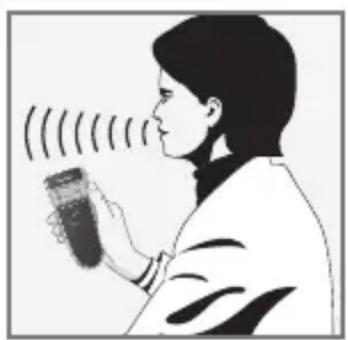
Illustration of a person holding a glass with sound waves (no text or symbols)- Speak in a direction just over the dictation machine. The figure illustrates the optimum position. The high precision microphone also allows you to record conversations from greater distances.
New dictation
- Move the slide switch to » ▼ STOP «.
-
Press the »new« button.
-
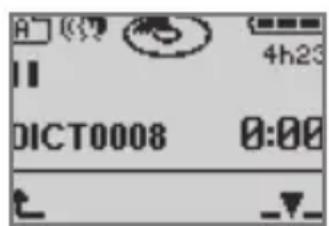
A new dictation with the next highest number available is created, display: » DICT0008« for example.
- The dictation position number and total number of dictations increase.
- The time and date are saved together with each new dictation (displayed only on the PC).
- The red recording indicator starts blinking, the black Disc symbol » 🎨« appears in the display as well as the Pause symbol » «
- Move the slide switch to »▶ START«.
- The recording indicator blinks, the Disc symbol » « starts spinning in the display and the Pause symbol turns into a Recording symbol » «
- The device is recording.
text_image
A 4h23 II DICT0008 0:00 t _▼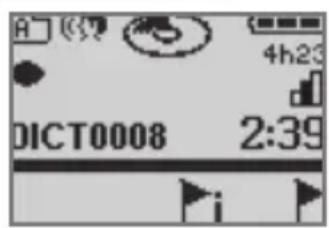
text_image
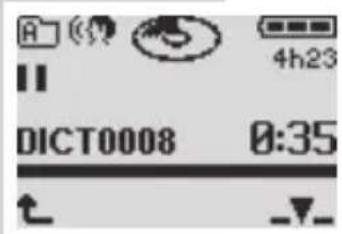
A 4h23 DICT0008 2:39Recording pause
text_image
4h23 DICT0008 0:35- Move the slide switch to » ▼ STOP «.
- The recording indicator blinks, the Disc symbol » stops spinning in the display and the Pause symbol » appears again.
End recording
- Press the red recording button »ICT«. The Disc symbol turns white ».
Fast forward or rewind during a recording also ends the recording.
– Each time a recording is ended, the time and data are saved along with it (displayed only on the PC).
Modifying the dictation
During play-back you can record over the previously recorded text at the current position or append a recording to the current dictation.
Pay attention to the remaining free memory space. In EASY MODE the free memory space is displayed firstly after the capacity falls below a value of 60 minutes.
Please note the time you have left in memory; this is displayed in hours and minutes.
- Move the slide switch to » ▼ STOP «.
- Select the dictation of your choice with the navigation buttons »◀▶« (see „Select dictation and listen to it").
- Move the slide switch to » ▶ START« (play-back).
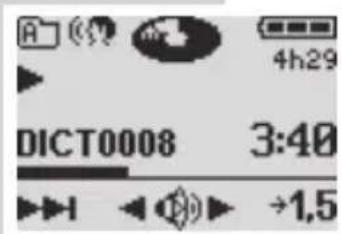
- During play-back push the slide switch to » ▼ STOP « at the desired dictation position..
text_image
4h29 DICT0008 3:40 →1,5RECORDING

text_image
A 4h23 II DICT0008 3:40 ↑ - A 4h23 DICT0008 3:40- Press the red recording button » ▲ DICT«, the red recording indicator starts blinking, the black Disc symbol » and the Pause symbol » « appear in the display.
- Move the slide switch to »▶START« and dictate the new text. The red recording indicator lights up, the black Disc symbol »●tarts to spin in the display and the Pause symbol turns into the recording symbol »●
Caution:
This will overwrite your old dictation starting at this point.
- At the end of the dictation move the slide switch to » ▼ STOP «.
- Press the red recording button »▲DICT« or the left selection button »◀. The recording is turned off.
Note:
If you press the recording button immediately after selecting the dictation, your dictation will be appended.
Inserting a part of a dictation
During play-back you may insert a new recording at your current dictation position.
Pay attention to the remaining free memory space. In EASY MODE the free memory space is displayed firstly after the capacity falls below a value of 60 minutes.
text_image
A 4h23 DICT0008 5:02- Move the slide switch to » ▼ STOP «.
- Select the desired dictation with the navigation buttons »◀▶« (see „Select dictation and listen to it“).
- Move the slide switch to »▶START«, to listen to the dictation.
- During play-back, move the slide switch to »▼ STOP «, once you have reached the dictation position at which you wish to insert the text.
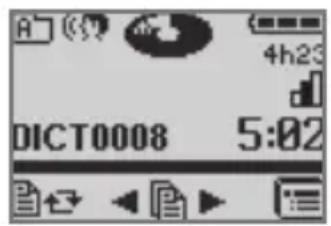
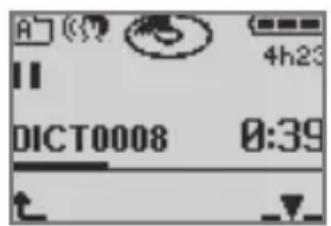
- Press the red recording button » ▲ DICT«, the red recording indicator starts blinking, the black Disc symbol » and the Pause symbol » « appear in the display.
- Confirm the insert function with the right selection button »—▼—« (Insert recording).
- Select the "Insert Part" » 📄« function from the menu and confirm with the selection button » √.
- Move the slide switch to »▶START« and dictate the text you want to be inserted.
- Move the slide switch to » ▼ STOP « once you have finished inserting the text.
- To stop, press the red recording button » ▲ DICT« or the left selection button »
text_image
A 4h23 II DICT0008 0:39 t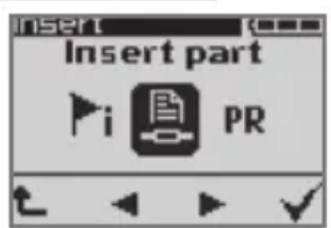
text_image
Insert part i PR
text_image
A 4h23 II DICT0008 0:39The info function and the index function
As an integral part of a dictation, in MENU MODE you can record information (»▶i« = Info) for your typist and mark them, or set index marks (»◀= Index) for specific parts of the dictation. Info »▶i« or Index »◀ appears in the display and the number of info or index (DSS: from 01 to 16. DSS Pro: from 01 to 32). You will hear an audible signal during play-back. These messages and indexes are transferred to the PC with the dictation.
Inserting an info
In the MENU MODE, you can insert a new info at the current dictation position during recording.
- Move the slide switch to » ▼ STOP «.
- Press the red recording button » ▲ DICT«.
- The red recording indicator starts blinking, the black Disc symbol » 🎨« and the Pause symbol » 📁 appear in the display.
- Move the slide switch to »▶ START«.
- The recording indicator lightens up, the Disc symbol » « starts to spin in the display and the Pause symbol turns into the recording symbol » « The device is recording now. The symbols for Info » i« and Index » are displayed in the bar for the key functions.
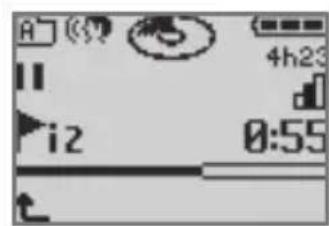
- Press the selection button » i« to insert an info at the current position.
- The next highest info number, for eg. » i2«, appears in the display.
- Speak the info text when the next higher info number appears in the display, e.g. »i2«.
text_image
A 4h23 II DICT0008 0:39 t
text_image
A 4h23 DICT0008 2:39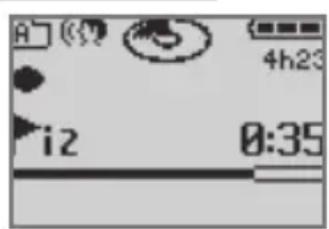
text_image
A 4h23 i2 0:35RECORDING
text_image
A 4h23 i2 0:55- Move the slide switch to »▼ STOP « once you have finished inserting the text.
- To stop, press the red recording button » ▲ DICT« or the left selection button »
Inserting an index
In the MENU MODE, a new index can be inserted at the active dictation position during recording.
- Move the slide switch to » ▼ STOP «.
- Press the red recording button » ▲ DICT«.
- The red recording indicator starts to blink, the black Disc symbol » ◎« and the Pause symbol » « I appear in the display.
- Move the slide switch to » ▶ START«.
- The recording indicator lightens up, the Disc symbol » 📋 « starts to spin in the display and the Pause symbol turns into the recording symbol »● «. The symbols for Info » i« and Index »l« are displayed in the bar for the key functions.
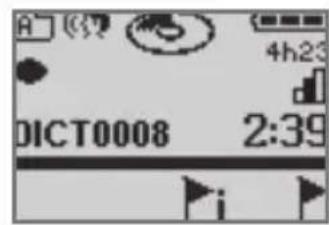
- Press the right selection button » ↗«.
- The next highest info number briefly appears in the display, » 2« for example.
- Move the slide switch to » ▼ STOP «.
- To stop, press the red recording button » ▲ DICT« or the left selection button »
text_image
A 4h23 DICT0008 2:39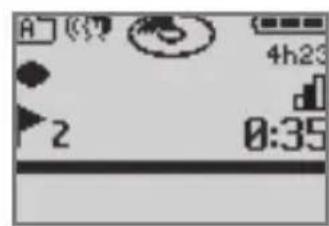
text_image
A 4h23 2 0:35Dictating using the foot control
- Connect the foot control to the »« socket of the Digta Station*.
- Connect the power supply* to the »DC IN 5V« socket or via USB cable to the »PC/USB« socket of a PC to supply the Digta Station* and the foot control with electric power.
- Move the slide switch to » ▼ STOP «.
- With the dictation machine switched on, plug it into the Digta Station*.
Note:
If automatic PC connection is switched on, the dictation machine logs on at the PC via USB parallel operation. Open the menu with the right selection button. Select the symbol » 📋 « for dictations in PC power supply* mode with the navigation buttons and confirm with the right selection button » √.
- The switches on the foot control are designed for hands-free dictation (default setting). If the »Playback« setting (transcription mode) is activated, you first have to change to »Recording« in the »Foot control« menu item. See chapter "SETTINGS IN THE MENU - Foot control".
Left pedal
- Rewind;
Middle pedal
- Press shortly to switch recording on or off;
- Hold down (approx. 1.5 seconds) for a new dictation. The red recording indicator lights up, a new dictation number, for eg. »DICT0003« is displayed;
Right pedal
- Start/stop recording and play-back.
Note:
Select the fast forward function using the slide switch function »▶▶ FFWD« on the dictation
machine.
* Special extras
PLAY-BACK
Select dictation and listen to it
text_image
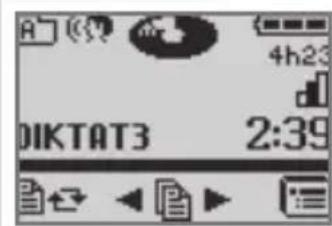
4h23 DIKTAT3 2:39- Move the slide switch to » ▼ STOP «.
- Select the folder in which your dictation is located (see „Saving dictations, selecting a folder“).
- Select the desired dictation with the navigation buttons »◀▶«. The selected dictation name appears in the display. If a dictation was renamed on the PC, or if it originates from another dictation machine, the dictation name is displayed as text, possibly abbreviated.
- Move the slide switch to » ▶START«.
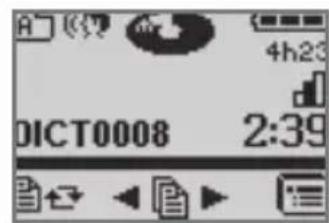
- The white Disc symbol » 📊 « starts to spin in the display, the play-back symbol » ▶« appears on the left in the display and the status bar begins to move. Play-back starts at the beginning of the dictation.
text_image
A 4h23 DICT0008 2:39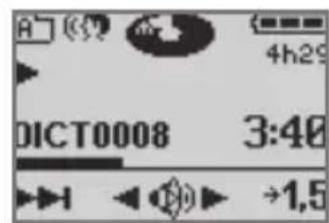
text_image
A 4h29 DICT0008 3:48 →1,5Note:
If, after you have turned on the dictation machine, no new dictation is selected, the last edited dictation will be played back at the position it was before the machine was turned off.
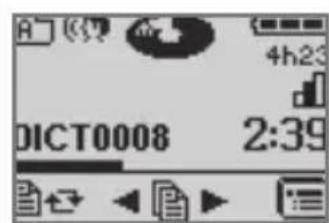
- If you wish to interrupt the play-back, push the slide switch to » ▼ STOP «.
- The white Disc symbol » ⚙️ « will stop spinning in the display. The status bar stops moving.
text_image
A 4h23 DICT0008 2:39Setting the volume
text_image
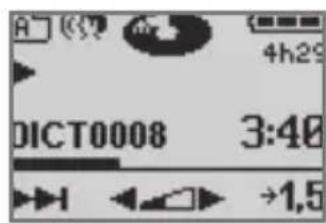
A 4h29 DICT0008 3:48 →1,5- During play-back, press the left navigation button to lower the volume or the right button to increase the volume.
- The loudspeaker symbol in the display » 📄« turns into the symbol for adjusting the volume » 🖱️
Skip quickly to the start or end of a dictation
text_image
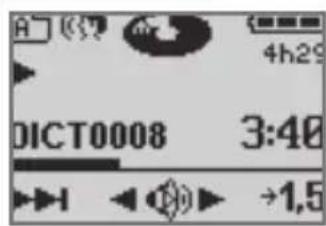
A 4h29 DICT0008 3:40 →1,5- Move the slide switch to » ▶ START«.
- By tapping the left selection button you can alternatively jump to the start and end of a dictation.
Note:
If an info or index was inserted during dictation the next info start, info end or index is jumped to. If you are at the end of a dictation you will jump to the beginning of this dictation.
Fast play-back
text_image
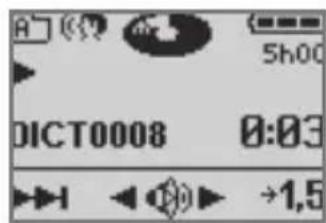
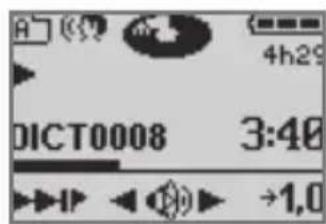
A 5h00 DICT0008 0:03 →1,5- Press the right selection button » ->1,5x « during play-back.
- The dictation will be played back with about 1.5 times the normal speed.
- To return to the normal play-back speed, press the right selection button » ->1,0x « during fast play-back.
text_image
A 4h29 DICT0008 3:48 →1,0Fast forward and rewind
- Move the slide switch to » ▶▶FFWD« or » ◀◀REW«.
- The status bar in the display quickly moves forward or backward.
Note:
Go to the »FFWD / Rewind« menu item to switch the speed to very slow, slow or fast.
Inserting an info
In the MENU MODE, you can insert a new info at the active dictation position during play back.
- Move the slide switch to » ▼ STOP «.
- Select the desired dictation with the navigation buttons » ◀▶« (see „Select dictation and listen to it“)
- Move the slide switch to » ▶START«, to listen to the dictation.
- Move the slide switch to » ▼ STOP « during play-back, when you have reached the dictation position where you want to insert your info message.
- Press the red recording button » ▲ DICT«, the red recording indicator flashes, the black Disc symbol » and the Pause symbol » appear in the display.
- Confirm the menu function with the right selection button » _▼_« (insert recording).
- Select the info function » i« from the shown display to insert an info and confirm with the selection button » «.
- Move the slide switch to » ▶START« and speak the info message to be inserted.
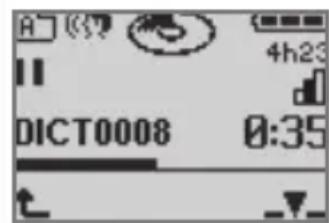
text_image
A 4h23 II DICT0008 0:35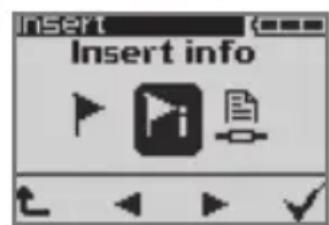
text_image
Insert Insert info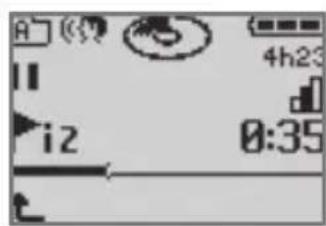
text_image
A 4h23 i2 0:35- The next highest info number appears in the display, »i2«, for example.
- Move the slide switch to » ▼ STOP « at the end of your recording.
- To stop, press the red recording button » ▲ DICT« or the left selection button »
Inserting an index
In the MENU MODE, a new index can be inserted at the active dictation position during recording.
- Move the slide switch to » ▼ STOP «.
- Select the desired dictation with the navigation buttons » ◀◀◀ (see „Select dictation and listen to it“).
- Move the slide switch to »▶START«, to listen to the desired dictation.
- Move the slide switch to » ▼ STOP «, during play-back when you have reached the position where you want to insert your index.
- Press the red recording button » ▲ DICT«, the red recording indicator flashes, the black Disc symbol » and the Pause symbol » appear in the display.
- Confirm the menu function with the right selection button » -▼-« (Insert recording).
- Select the index function » ↗ « from the shown display to insert an index and confirm with the selection button » √ «.
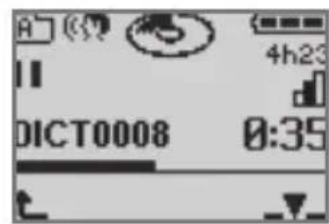
text_image
A 4h23 DICT0008 0:35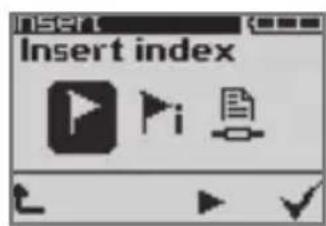
text_image
Insert Insert indexPLAY-BACK

text_image
A 4h23 2 0:35- The next highest info number shortly appears in the display, for e.g. »2«.
- Move the slide switch to » ▼ STOP «.
- To stop, press the red recording button » ▲ DICT« or the left selection button »
Search for info or index
text_image
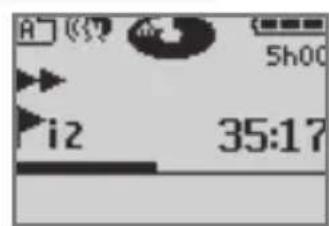
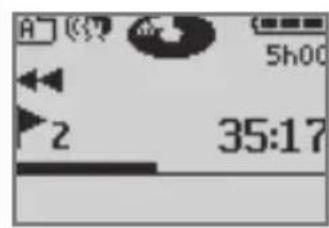
A 5h00 i2 35:17- Move the slide switch to » ◀◀REW« or press the »▶▶ FFWD« button.
- At an index and at the beginning of every info message, the "winding" briefly stops and you will hear one signal. At the end of an info message you will hear two signals.
- The message is shown in the display, e.g. »i2« or »2«.
Note:
It is easier to find short messages and indexes in the play-back mode.
text_image
A 5h00 2 35:17Transcription with foot control
- Connect the foot control* to the » « socket on the Digta Station*.
- To connect the Digta Station* and the foot control to a power supply*, connect the mains adapter to the »DC IN 5V« socket, or use a USB cable to connect it to a computer using the »PC/USB« socket.
- Push the slide-switch to » ▼ STOP «.
- With the dictation machine switched on, plug it into the Digta Station*.
Note:
If the automatic computer connection is activated, the dictation machine will log on to the computer in USB parallel mode. Call up the menu with the right selection button. With the navigation buttons, select the » ◎ « symbol for power supply* operation and confirm by pressing the right selection button » √.
- The pedals on the foot control are designed for hands-free dictation in the default setting. For transcription mode, you first have to activate »Play-back« in the »Foot control« menu item. See section “The menu, Foot control”.
Left pedal
- Reverse;
Middle pedal
- Fast forward;
Right pedal
- Start/stop play-back.
- Press the foot control.

9734
File read only!
Note:
In menu setting »Foot control play-back«, it is not possible to edit an existing dictation or create a new dictation. On pressing the New or Record buttons, the “Play-back only” message appears.
You can delete dictation as long as it has not been locked.
Automatic backspace
Every time play-back begins, the current position is rewound by the specified time, and play-back begins from there. This means that the part of the dictation most recently listened to is played back.
- Automatic backspace is available in the following steps:
Off, 1, 2, 4, 6, 8, 10 seconds (see menu item »Auto Backspack« in the »Settings« menu).
Note:
Automatic backspace is only possible in conjunction with the Digta Station and the foot control.
If the device is in the Digta Station, the »Modify« menu will not appear in the display. It is not possible to delete or add dictations.
Editing an existing dictation
In the modify menu, several functions are provided to work on a stored dictation. The modify menu is available only in the MENU MODE.
- Move the slide switch to » ▼ STOP «.
- Select the desired dictation with the navigation buttons » ◀▶« (see „Select dictation and listen to it“).
- Press the left selection button » ↩ ↙, to enter the modify menu.
- Select between the Delete »X«, Insert »«, Data list »« Priorityon » PR«, Postpone »« or Lock » functions.
- According to your selection you will be guided to the menu items described in the "Deleting a dictation" or "Recording" chapters.
- Press the left selection button » ↩« to close the menu.
text_image
MOQTY Delete 5 X -Display or modify data set in the dictation.
In the modify menu, additional data e.g. patient- or client data can be assigned to each individual dictation by means of the data set-function. The data can be assigned to the respective dictation by means of a scanner when patient-numbers or folder numbers are administered through barcodes in order to avoid mismatches. See chapter „The Menu / Data list“.
- Move the slide switch to » ▼ STOP «.
- Select the desired dictation by means of the navigation button » ◀▶« (see „select and listen to a dictation“).
Press the left selection button »←« in the MENU MODE, to enter the modify menu.
- Select from the display the data set function »
- A dictation which already includes data is highlighted with the „ID“ symbol. It is displayed on the right side above the dictation time indicator.
- The symbols» «appear on the display.
» « – Show or change data set of the dictation.
- Confirm with the right selection button in order to view further data of the data set. - Firstly the ID can be viewed by means of the left navigation button, and the individual data by means of the right navigation button.
- Confirm the data set which shall be entered in the active dictation by means of the right selection button or press the » « button, if you only like to read the data.
» « – Allocation or indication of a data set of the corresponding barcode or RFID.
The functions are only available in combination with DIGTA Scan 404* or DIGTA RFID 414*.
- Hold the scanner near a barcode or RFID-tag and press the right selection button » «.
- The successful reading of the ID is indicated by a signal tone.
The corresponding data set will appear on the display.
- Confirm it with the right selection button in order to view additional data of the data set.
- Firstly the ID can be viewed by means of the left navigation button, and the individual data by means of the right gation button.
- Confirm the data set which shall be entered in the active dictation by means of the right selection button or press the »←« button, if you only like to read the data.
» « – Delete a data set of the dictation
- A prompt appears and you will be asked whether you really want to delete the entire dictation »?«. If so, confirm it by pressing the right selection button »√«. The data set is deleted. There is no data set stored in the current dictation anymore. The data set in the data list remains and can be assigned to another dictation.
- An assigned data set in the dictation is marked with the symbol »ID« and is displayed above of the time indicator.
MODIFY MENU
Setting a priority to a dictation
Notes:
In the DSS standard, the priority levels ranging from 1 (high priority) to 16 (no priority) are selectable. The dictation machine can allocate for each assigned author an individual maximum of author priority to a dictation. The presetted priority for the author Dict is 15.
The dictation machine should be configured with the corresponding PC software. Transfer your author name together with a maximum priority smaller than 16 to your dictation machine. The installation of the dictation machine software configuration within a network is carried out by a system administrator.
text_image
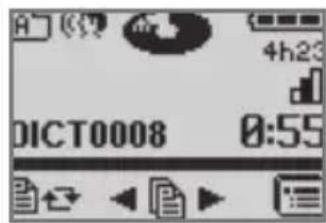
A 4h23 DICT0008 0:55- Move the slide switch to » ▼ STOP «.
- Select the chosen dictation with the navigation buttons » ◀▶« (see „Select and listen to a dictation).
- Press the left selection button » 🔍, to go to the Modify menu.
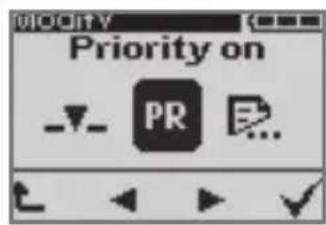
- Select the »Priority on« priority function from the display.
- The dictation is marked with a »PR«, displayed above the time data.
- If the selected dictation already has a priority you can erase it with the »Priority off« menu item.
text_image
MODIFY Priority on PR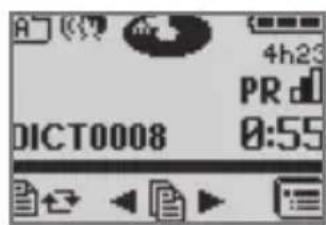
text_image
A 4h23 PR DICT0008 0:55MODIFY MENU
Postpone a dictation
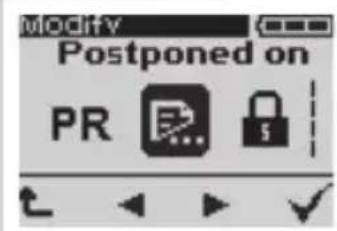
You can prevent the automatic PC transfer of a dictation (via DSS mover) with the postponed function in the Modify menu item. Postpone uncompleted dictations before transferring completed dictations to the transcription office by connecting the dictation machine via USB.
- Move the slide switch to » ▼ STOP «.
- Select the chosen dictation with the navigation buttons » ◀▶« (see „Select and listen to a dictation).
- Press the left selection button » ↩, to go to the Modify menu.
- Select the » 📄.« function (postponed on) with the navigation buttons » ◀▶ « and confirm with the right selection button » ✕.
- The dictation name is displayed inversely.
- The dictation is postponed, that is not being transferred by the DSS mover.
- Press the left selection button » ↩«, to exit the menu.
text_image
MODIFY Postponed on PR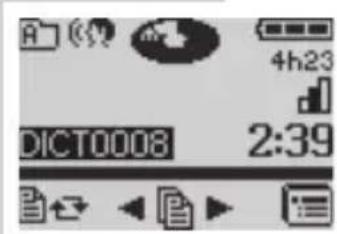
text_image
4h23 DICT0008 2:39MODIFY MENU
Dictation lock
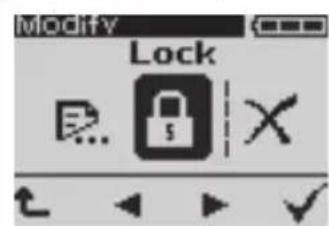
The dictation lock helps to avoid that your dictations are unintendedly modified or deleted. It doesn't only work in the dictation machine but it activates the write/erasure protection in the dictation accompanying note. With such a lock the whole Grundig Business Systems PC dictation system only allows to modify or delete a dictation, if this attribute is deactivated on the PC or in the dictation machine.
- Move the slide switch to » ▼ STOP «.
- Select the folder in which your dictation is located (see "Saving a dictation, selecting a folder").
- Select the desired dictation using the navigation buttons »◀▶«. The selected dictation name appears in the display.
- Press the left selection button »←« to change the menu.
- Select the dictation lock symbol » 🔍 « on the right using the navigation buttons » ◀▶ «.
- Confirm with the right selection button » √«.
- If the dictation is locked you only can select unlock the dictation » in the Modify menue »
text_image
Modify Lock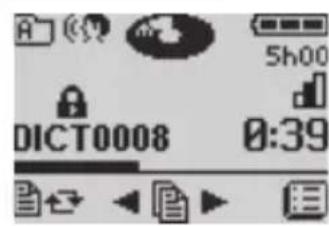
text_image
5h00 DICT0008 0:39DELETING A DICTION
Deleting an entire dictation
Herein is the cancelling in the MENU MODE described. Please read the contents item "Deleating of a dictation" provided in the Quick Reference Guide when you prefer to operate in the EASY MODE.
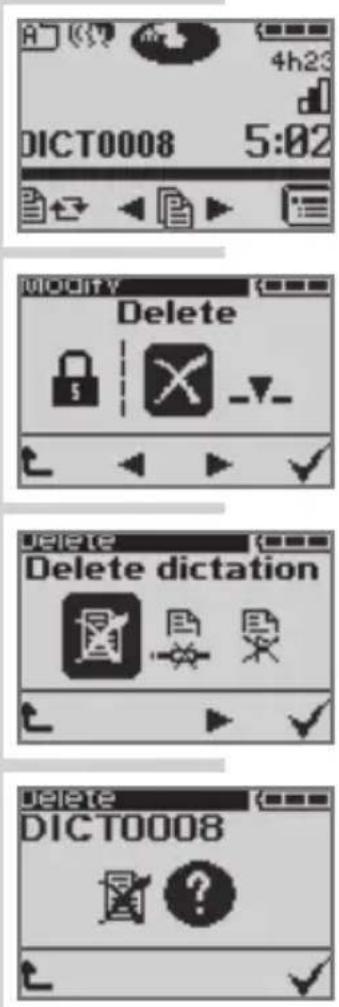
- Move the slide switch to » ▼ STOP «.
- Select the folder in which your dictation is located (see „Saving dictations, selecting a folder“).
- Select the desired dictation with the navigation buttons » ◀▶«. The selected dictation name appears in the display.
- Press the left selection button » 📄, to change the menu.
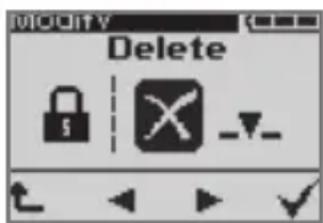
- Confirm the Deleting function » ✗« to change the menu with the right selection button » ✕.
- Confirm the » ☒ « function in the submenu with the right selection button » √ to delete the selected dictation.
- Confirm the » ?« query for final deletion of the complete dictation with the right selection button » . The dictation is deleted now.
- If you would not like to delete the dictation, press the left selection button » ↗«.
DELETING A DICTATON
Deleting the contents of a folder
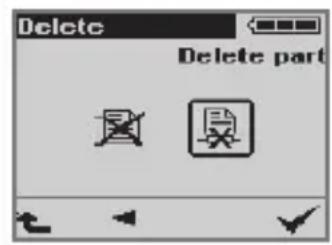
In the MENU MODE you not only can delete individual dictations but also the contents of a selected folder or the contents of all folders.
text_image
Delete- Move the slide switch to » ▼ STOP «.
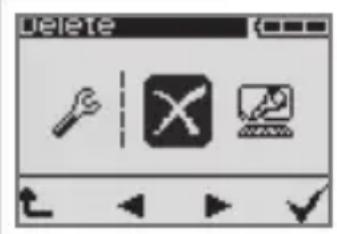
- Select the main menu featuring the »« symbol with the right selection button.
- Select the menu command » ✗« and confirm with the right selection button » √.
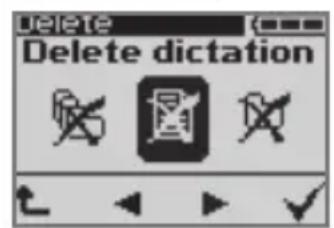
- The following symbols will appear in the display:
✗ – Delete selected dictation
- Delete selected folder
- Delete all folders
Note:
If there are more than one author the symbols for »Delete folder ✗« and »All folders ✗ are not displayed. This ensures that dictations from another user are not accidentally deleted.
- Using the navigation buttons » ◀▶« select the icon for the desired function and confirm by pressing the right selection button » √.
- Confirm the » ?« query for final deletion of the selected folder or all folders with the right selection button »√. The dictation is deleted now.
- If you would not like to delete the dictation, press the left selection button »↑«.
text_image
delete Delete dictation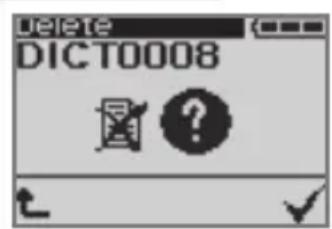
text_image
DELETE DICT0008Deleting a part of a dictation
text_image
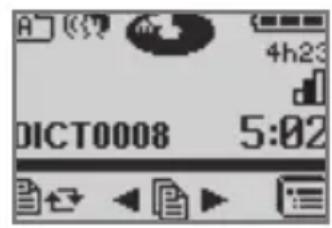
A 4h23 DICT0008 5:02- Move the slide switch to » ▼ STOP « in the MENU MODE.
- Select the folder in which your dictation is located (see "Saving a dictation, selecting a folder").
- Select the desired dictation using the navigation buttons »◀▶«. The selected dictation name appears in the display.
- Move the slide switch to »▶ START« and to »▼ STOP « at the desired position in the dictation.
- Press the left selection button »→« to change the menu.
- Confirm the Deleting function » ✗« to change the menu with the right selection button »√.
- Select the » 🚫️« symbol in the submenu that now appears and confirm by pressing » ✅.
- Press the right selection button » P1« to set the starting position of the text to be deleted.
- Using the slide switch, now search for the desired end position of the text to be deleted.
- Press the right selection button » P2« to set the end position.
- Press the right selection button » ✗« once again. The selected part is deleted.
- If you would not like to delete the part of the dictation, press the left selection button » ↗«.
text_image
Delete Delete part
text_image
MARKS 4h16 DICT0008 2:39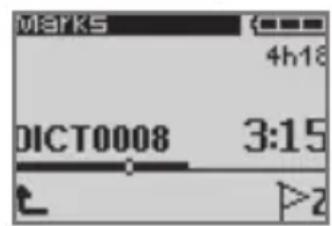
text_image
MARKS 4h:16 DICT0008 3:15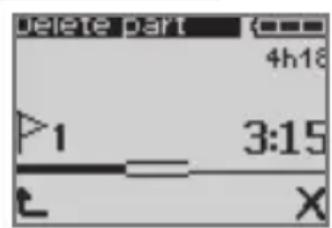
text_image
delete part 4h16 1 3:15 X
text_image
FolderFunctions in the menu at a glance
- Press the right selection button » 📄 « in the MENU MODE. With the navigation buttons » ◀▶ « you may select the following functions and confirm them with » ✅
✗ – Delete; delete the current dictation, delete all dictations in the current folder, delete all dictations in all folders.

- Selecting a folder (main folder and subfolder A, B, C, D or E); for sorting new dictations and playing back the dictations stored in the various folders.

– Data list-functions (are only available when the data list was monitored or read in):
- Delete data list.
– Search for the data set by means of the scanner. - Select a data set for a new dictation.
- "Enable" data list in the workflow.

- Scanner-functions (only with DIGTA Scan 404* or DIGTA RFID 414* available):

- Delete barcode/RFID.
- Scan barcode/RFID
- Search for the corresponding dictation of the barcode/RFID.
- Enable scanner in workflow.
- Programming of the barcode-reader.

- Activate workflow functions (group, typist, dictation type, priority, No./reference).

- Switch functions:

- Set microphone sensitivity.
- Voice activation (if enabled the dictation will be automatically suspended if it is interrupted).
USB connection or only if manually selected.
- Preselect time when the energy saving, non-operative state shall be activated automatically. The Digta will completely switch off 30 minutes later.
- Switch off audio signals.
- Switch display lighting on/off.
- PC file transfer occurs either automatically via
- Switch off the speakers for play-back with earphones in the Digta Station*.
- Changing the fast forward / rewind speed.
- Selects the functions of the foot control for recording or play-back
- Changing the automatic backspace time.
- Set an index or 1.5 fold play-back speed with the right selection button during play-back.
1-9 – Dictation position number indicator on/off.
- Time indicator on/off.
31:2
01:59 – Modify date and time format
ID
123AB – Display of ID-contents (barcode) on/off.

- Settings; here is where you can change the basic settings of the device:
- Information about serial number and firmware version.

- Selection of the DSS type (DSS Standard "SP", DSS Pro "QP") and encryption.
- Change date/time.

Reset dictation counter to "1".
PIN – Change individual identification number (PIN).
- Reformat the data storage device.
Caution: data loss!
All dictations and other files will be erased.
- Restore the default settings. Caution: data loss!
All dictations, files and all settings will be erased.
^A B Selection of the display language.
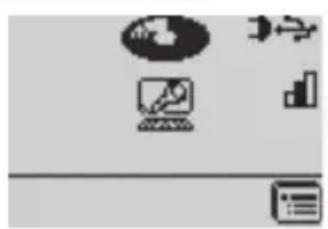
Functions available if the device is connected to a PC:

-USB parallel operation
The PC identifies the device as USB removable medium for dictation/file transfers. Additional USB audio and USB HID: Activate the dictation machine as PC microphone (without recording), when connected to a PC, for example for direct dictation to the Grundig Business Systems PC software or to a voice recognition system.
natural_image
Pure electrical circuit lines without any symbols
- USB powered
The PC doesn't recognize the device; for record/play-back like under rechargeable battery* operation .
Note:
If there are more than one author the menu item „Factory setting“ is not available and the „Formatting“ menu point is only visible if there are no dictations (.DSS/.DS2) on the Digta.
To be able to format the Digta ensuring that no other dictations are accidentally deleted, the user has to transfer all dictations to the PC first.
Data list
This function enables you to record dictations related to an ID (e.g. patient- or client number, also scanned barcode or RFID recognition) with text information.
This information is created on your PC in the CSV format (comma separated values), e.g. via Excel, stored under the name „ids.csv“ and transferred to the Digta’s panel directory (see »Carrying out a firmware update«).
This information is scanned in after switching on the dicta-tion machine again.
Example:
The values are separated through commas/semicolons. The first line contains the field names. These values may be inside of quotation marks.
Search for the data set by means of the scanner:
If an identification number (ID) exists as barcode or RFID tag (e.g. on an x-ray photograph or on an envelope folder), your dictation machine is able to display the corresponding text information and to allocate them to a dictation (with DigtaSCAN 404* or DigtaRFID 414*).
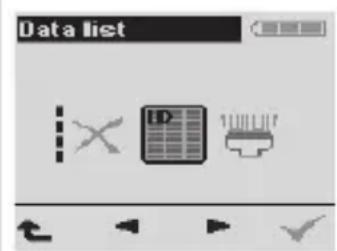
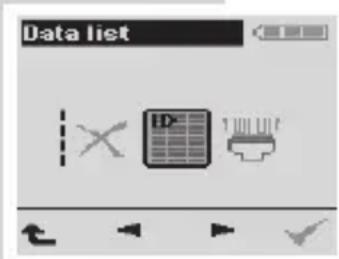
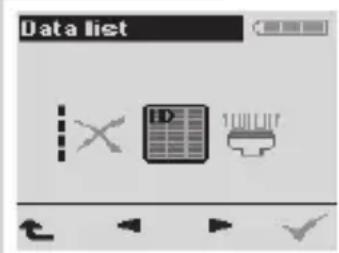
- Select with the navigation buttons » ◀▶ « the menu item „data list“ » and confirm it with the right selection button » √.
- Select with the navigation button »◀▶« the menu item »Scan ID« and hold the scanner near a barcode or RFID-tag and press the right selection button »√«. -The successful reading of the ID is indicated by a signal tone. The corresponding data set will appear on the display.
text_image
Data list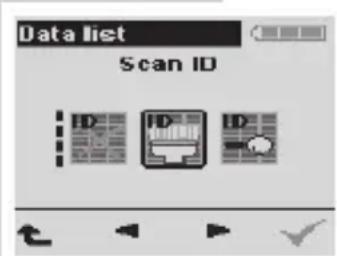
text_image
Data list Scan ID ID ID+ IDTHE MENU
- »[No found]« is displayed in case that the scanned barcode or RFID-tag is not allocated to a dictation.
- Confirm with the right selection button » √«, in order to view additional data of the data set.
- Firstly the ID can be viewed by means of the left navigation button and the individual data by means of the right navigation button.
- In case that you like to start a new dictation in which this data set shall be entered, confirm it with the right selection button „NEW“.
- Move the slide switch to »▶ START«.
- The dictation machine will start the recording.
Or press the »√« button, if you only like to read the data.
Select data set for a new dictation:
- Select with the navigation buttons »◀▶« the menu item „data list“ » and confirm it with the right selection button » √.
- Select with the navigation buttons »◀▶« the menu item »Select« and confirm it with the right selection button »√«.
- Select with the navigation buttons »◀▶« the desired data set and confirm it with the right selection button in order to view additional data of the data set.
-Firstly the ID can be viewed by means of the left navigation button and the individual data by means of the right navigation button.
- In case that you like to start a new dictation in which this data set shall be entered, confirm it with the right selection button „NEW“.
- Move the slide switch to »▶ START«.
– The dictation machine will start the recording.
Or press the »√« button, if you only like to read the data.
text_image
Data list ID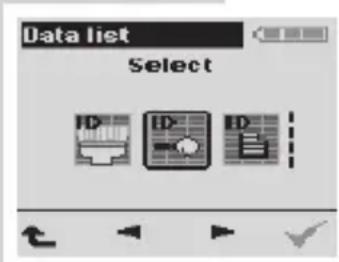
text_image
Data list Select ID ED ID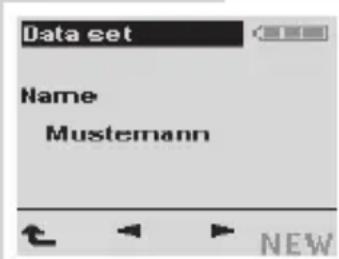
text_image
Data set Name Mustemann NEWDeletion of the data list:
Note:
text_image
Data list ID 1000000000000000000000000000000000000000000000000000000000000000000000000000000000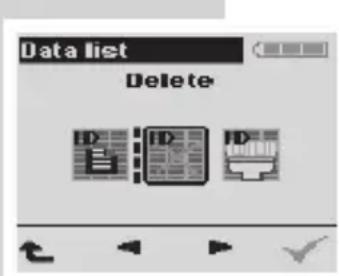
text_image
Data list Delete ID ID IDThis function enables the deletion of the entire data list. The data list functions are unavailable afterwards until a new data list has been read in.
- Select with the navigation buttons »◀▶« the menu item „data list“ » [icon]« and confirm it with the right selection button » √.
- Select with the navigation buttons »◀▶« the menu item »Delete« and confirm it with the right selection button » √«.
- Confirm the cancellation with the right selection button »√«.
THE MENU
Group
The »Group« function is used to assign your dictation to a specific group or department.
text_image
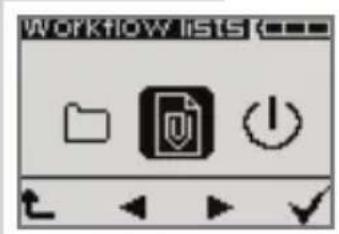
WORKFLOW lists- Go to Workflow lists »« and confirm with the right selection button »√.
- Select the »Group 🎯« menu item and confirm with the »√ button.
- Select »On request 📁«, »No entry 🔊or »Automatic
text_image
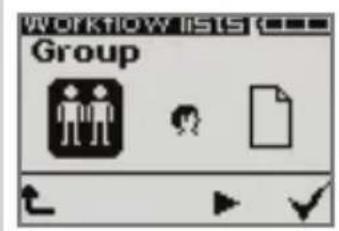
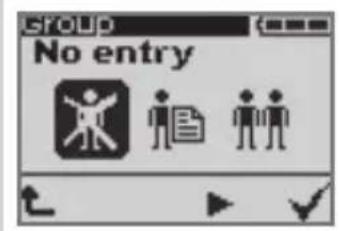
WORKFLOW lists Group- »On request«: a group may be selected for each new dictation;
- »No entry«: no group selected;
- »Automatic«: each new dictation has the same group.
- Confirm your selection with the » √« button.
text_image
GROUP No entryNote:
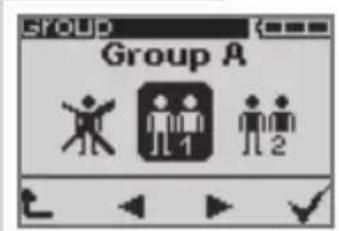
For a new dictation, or if you have selected the »Automatic« function, you select your group from the list. »No entry ✕« appears in the display if no groups were defined.
Confirm with the »√« button.
You may create individual preallocations for the list using the PC software.
text_image
GROUP A 1 2THE MENU
Typist
The »Typist« function is used to select the transcriber who will receive your dictation.
text_image
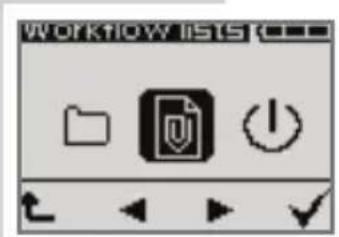
WORKFLOW lists- Go to Workflow lists »« and confirm with the right selection button »√.
- Select the »Typist 🔊« menu item and confirm with the »√ button.
- Select »On request 🔍«, »No entry «or »Automatic «
text_image
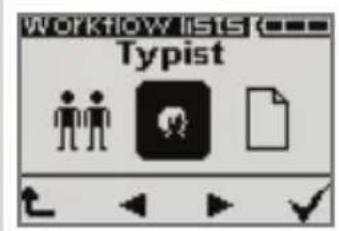
WORKFLOW lists Typist- »On request«: A selection of transcribers will be offered for each new dictation;
- »No entry«, no typist is chosen for the dictation;
- »Automatic«, each new dictation will be assigned to the same transcriber.
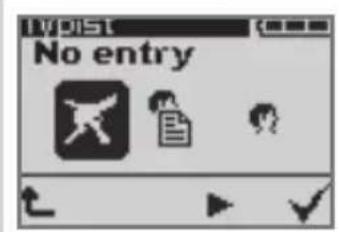
- Confirm your choice with the » √« button.
text_image
No entryNote:
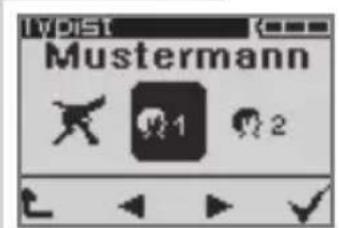
If you have a new dictation, or if you have selected the »Automatic« function, you select your transcriber from the list with the navigation buttons ▶▶«. »No entry ×appears in the display if no transcribers were defined.
text_image
MUSTERMANN 1 2Confirm with the »√« button.
You may create individual preallocations for the list using the PC software.
THE MENU
Dictation type
The »Dictation type« function is used to select the template to be used for the dictation: for eg. fax, letter, or report.
text_image
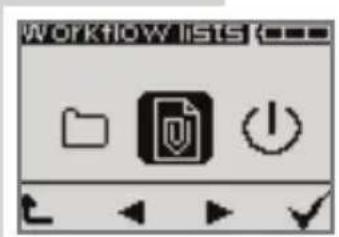
WORKFLOW lists- Go to Workflow lists »« and confirm with the right selection button »√.
- Select the »Dictation type □« menu item and confirm with the » √ button.
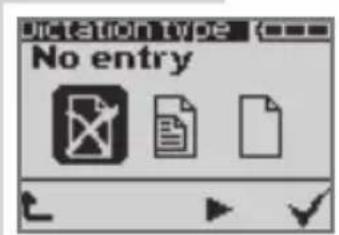
- Select »On request 📋«, »No entry 🔊 or »Automatic 🔊«.
text_image
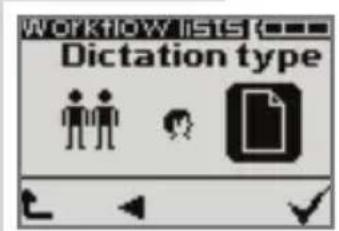
Workflow lists Dictation type- »On request«: A selection of formats will be offered for each new dictation;
- »No entry«, no dictation type was chosen;
- »Automatic«, each new dictation shows the same dictation type.
text_image
Dictation type No entry- Confirm your choice with the » √« button.
Note:
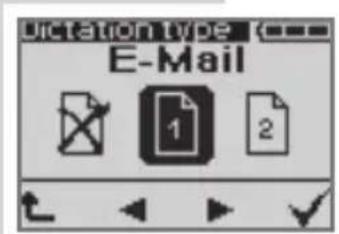
For a new dictation, or if you have selected the »Automatic« function, you select your dictation type from the list with the navigation buttons »▶«. „No entry” » appears in the display if no dictation types were defined.
Confirm with the »√« button.
You may create individual preallocations for the list using the PC software.
text_image
E-MailTHE MENU
Priority
With the function »Priority« you can determine if the new dictation shall have priority because it urgently needs to be typed before the other dictations.
The dictation is marked with »PR« and is displayed above the time data.
Notes:
In the DSS standard, the priority levels ranging from 1 (high priority) to 16 (no priority) are selectable. The dictation machine can allocate for each assigned author an individual maximum of author priority to a dictation. The presetted priority for the author Dict is 15.
The dictation machine should be configured with the corresponding PC software. Transfer your author name together with a maximum priority smaller than 16 to your dictation machine. The installation of the dictation machine software configuration within a network is carried out by a system administrator.
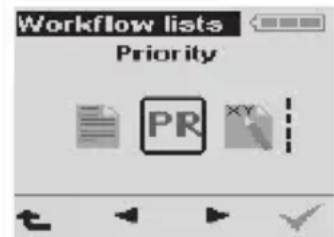
- Go in the menu item workflow lists » « and confirm it with the right selection button » √.
- Select the menu item »Priority PR« and confirm it with the button »√«.
- Select the priority settings by means of the navigation button » ◀▶«.
PR- You may select between »no priority« and »with priority« (level of an author's maximum priority) when starting a new dictation.
PR – Priority is not set when starting a new dictation.
- Confirm it with » √«.
text_image
Workflow lists Priority PR XY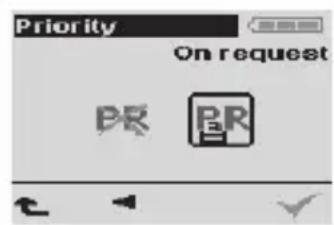
text_image
Priority On request PR PRTHE MENU
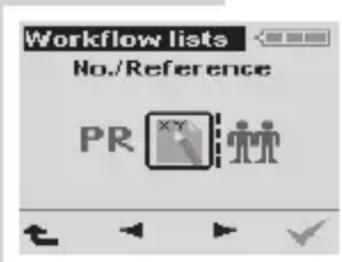
No./Reference
text_image
Workflow lists No./Reference PR XYThe function »No./Reference« enables to input up to 16 characters for this dictation – for example: folder number or patient number.
- Go in the menu item workflow lists » « and confirm it with the right selection button » √.
- Select the menu item »No./Reference »« and confirm it with the button »√.
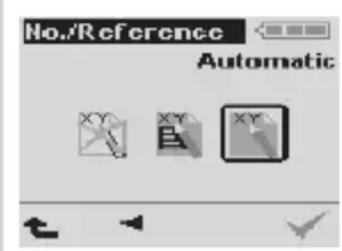
- Select by means of the navigation button »◀▶« between »Automatic«, »On request« or »No entry«.
- Automatic - each new dictation has the same number or reference.
text_image
No./Reference Automatic- On request - the input of characters is put at disposal for each new dictation.
- No entry - no number/reference has to be selected for each new dictation.
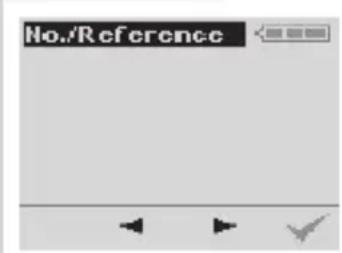
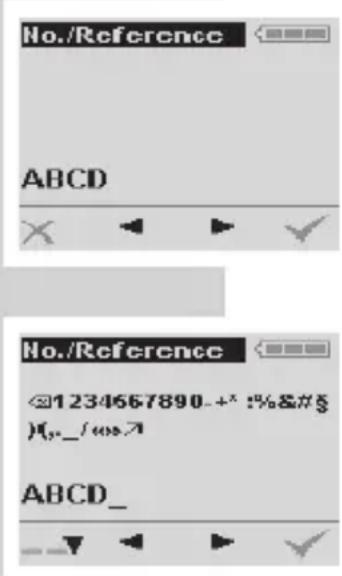
- When having chosen the function »On request« in a new dictation, an empty display field will be shown for the first time. When having entered a no./reference in the previous dictation, then this will be displayed also in the next dictation. You can either accept it or delete it. Press the navigation button »◀▶« in order to access the selective list including the numbers and references.
- Select by means of the navigation button »◀▶« the character. For acceptance, confirm it with the »__▼« button.
Note:
In order to improve the reference selection list, the system administrator may restrict the set of characters, for example, if only numbers (patient numbers) are accepted.
text_image
No./Reference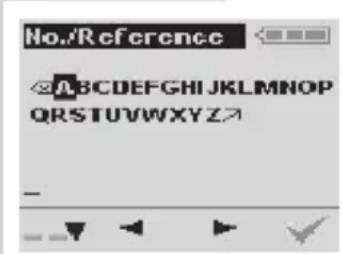
text_image
No./Reference A B C D E F G H I J K L M N O P Q R S T U V W X Y Z >THE MENU
text_image
No./Reference ABCD No./Reference #1234667890-+* :%&#§ )(_/_/cos.7) ABCD_- Repeat the entry for additional characters and, at the end, confirm them with the » « button.
- Confirm the entry with the »√« button or delete the entry with the »« button.
Notes:
Numerics and special characters are available in the second subdirectory of the reference set. For this purpose, select by means of the navigation button »◀▶« the sign »« and confirm it with the »« button. Select the same sign »« again to return to the last directory.
Select by means of the navigation button »◀▶« the sign »◀ and confirm it with the »_ _▼« button in order to delete the last adopted character.
THE MENU
Microphone sensitivity
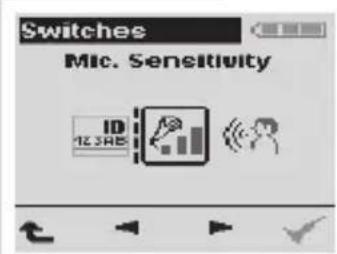
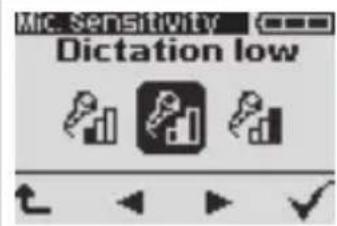
You can select one of three levels of noise sensitivity for your microphone.
text_image
Switches MIC. Sensitivity ID 12345- Go to the menu item » 📁« and confirm with »√.
-
Set the sensitivity of your microphone using the navigation buttons » ◀▶«.
-
Recommended for loud speakers. Prevents overmodulation for dictations which are processed by a voice recognition system.
- Normal setting for dictations.
- Conferencing. The machine can still record accurately if it is positioned on a conference table.
- Confirm with » √ «.
text_image
Micro Sensitivity Dictation lowTHE MENU
Voice activation
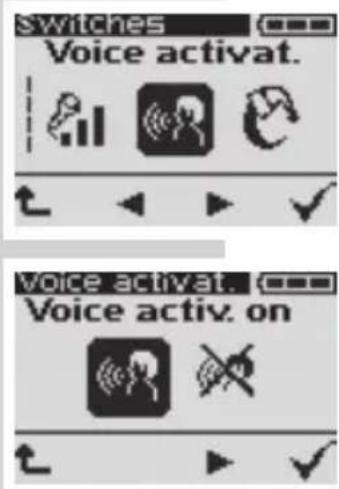
If the function “Voice Activation” is active, the recording will be interrupted if there is a pause in speaking in a quiet environment. If the dictation machine does not turn off, select a lower microphone sensitivity, for example for normal dictation or persons who speak loudly. As soon as the speaker starts to speak again, the recording will continue.
text_image
Switches Voice activat. Voice activat. Voice activ. on- Go to the menu command » « and confirm with »√«.
- Select » « (Voice Activation ON) or » (Voice Activation OFF).
- Confirm with » √«.
THE MENU
Automatic power off
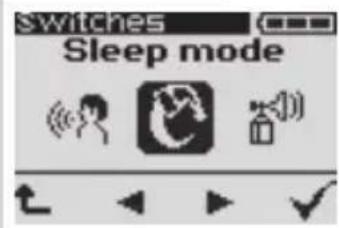
With the „Sleep mode“ » « function you determine whether the device turns to a power-saving "sleep mode" after some minutes or has to be switched off manually. The device will be immediately switched on again as soon as any key is pressed.
text_image
Switches Sleep modeMove the On/Off switch to the »OFF/HOLD« position to switch off the device completely. If you don't switch off the machine manually it will switch off itself after about 30 minutes. Move the On/Off switch to »OFF/HOLD« and then again to »ON« to switch on the device again.
text_image
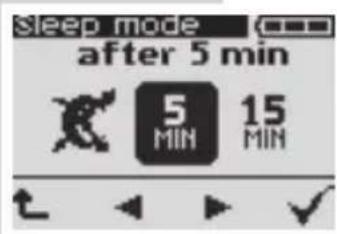
sleep mode after 5 min 5 MIN 15 MIN- Select the menu item » « and confirm with the right selection button » √.
- Using the navigation buttons »◀▶« select the time („Never“»«, » «,» « or » «) to determine after which time the device shall turn to the power saving "sleep mode".
- Confirm with the right selection button » √«.
- In the sleep mode date and time is displayed like a screen saver.
27.04.2007 11:07:32
THE MENU
Audio signals
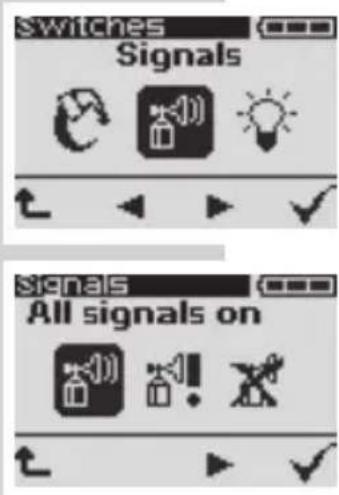
The »Audible signals« function » enables you to turn the acknowledgement and signal tones on and off.
- Select the menu item » 📋« and confirm with the right selection button » «.√
- Use the navigation buttons » ◀▶ « to switch on all signals » or only the warning signals » or to switch off all signals » Confirm your choice with the right selection button ».
text_image
Switches Signals All signals onNote:
If all signals are switched off you will not hear a signal when the memory is full or the rechargeable battery* is flat.
If you dictate without looking at the display, the device may switch off with no signal tone, and you may not notice.
If only the warning signals are switched on there won't be any special blips, neither the readiness signal after switching on nor the info and index signals.
THE MENU
Illumination
text_image
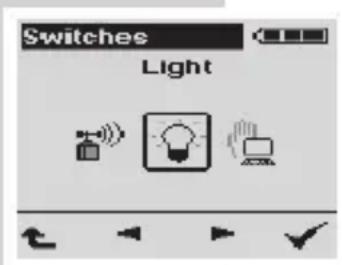
Switches LightThis function enables you to turn the display lighting on and off.
- To do this go to the menu item „Light“ » « and confirm it with the button».
- Using the navigation buttons » ◀▶« select the seconds („off“, »15 seconds« or »30 seconds«). The selected function is displayed inversely. Even in switched on mode the backlighting only remains on for several seconds, to save energy.
- Confirm it with » √«.
THE MENU
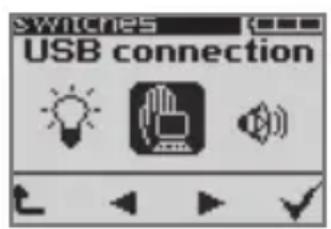
USB connection automatic / manual
You can choose whether the dictation machine automatically switches to USB parallel operation when connected to a PC's USB connection or whether you want to activate this function manually.
text_image
Switches USB connection- Select the menu item »« and confirm with the right selection button »√.
- Select »MAN. CONNECT« (manual USB/parallel operation) and confirm with the right selection button »√«.
- The dictation machine remains in dictation mode when USB connected. The PC supplies it with power.
- Select »AUTO CONNECT« (automatic USB parallel operation) and confirm with the right selection button »√«.
- If the dictation machine is already switched on when connected to USB the USB parallel operation » [icon]« sets up automatically. The computer identifies the device as removable medium. USB audio and USB HID are activated. Now you can both transfer data between PC and dictation machine, and use the dictation machine as USB microphone.
THE MENU
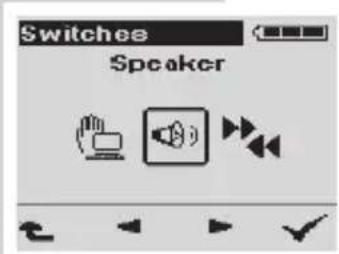
Speaker
You may switch off the loudspeaker of your dictation machine with this function if you want to listen to your dictations via headphones connected to the Digta Station*.
text_image
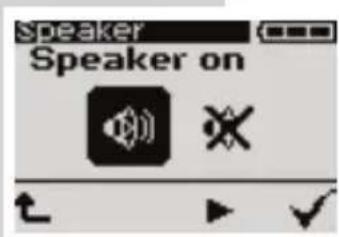
Switches Speaker- Select the menu item » ◆« and confirm with the right selection button »√.
- Select » « (Speakers ON) or » (Speakers OFF).
- Confirm with the right selection button » √«.
text_image
Speaker Speaker onNote:
The speaker of the dictation machine automatically switches off if an earphone with earphone connection is plugged on.
SETTINGS IN THE MENU
Fast forward / rewind
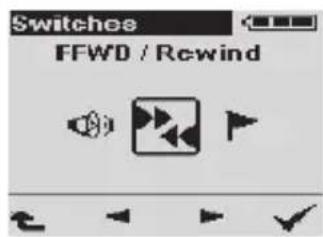
This function allows you to set the speed for fast forward and rewind. You can select very slow, slow and fast.
- Go to menu item »FFWD/Rewind »« and confirm with »√«.
- Use the navigation buttons » ◀▶« to select the speed. The selected function turns black.
33% – Very slow FFWD/Rewind speed (approx. 1/3 of the fast setting) 66% – Slow FFWD/Rewind speed (approx. 2/3 of the fast setting) 100% – Fast FFWD/Rewind
- Confirm with » √«.
text_image
Switches FFWD / Rewind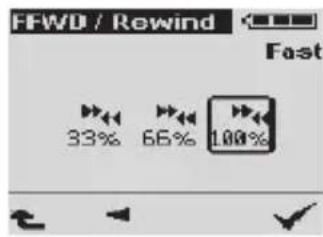
text_image
FFWD / Rewind Fast 33% 66% 100%Foot control
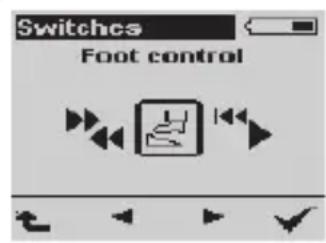
The »Foot control« function allows you to select whether the foot control* is used for transcription mode or hands-free dictation.
text_image
Switches Foot control- Select the menu item » « and confirm with the right selection button ».
- Use the navigation buttons » ◀▶« to select "Record" »◀« or "Play-back" »◀« and confirm with the right selection button »√...
Foot control assignment during recording
The pedals on the foot control* are designed for hands-free dictation.
Left pedal
- Rewind;
Middle pedal
- Press briefly to switch recording on or off (same function as the red recording button » ▲ DICT« on the dictation machine);
- Hold down (approx. 1.5 seconds) for a new dictation. The red recording indicator lights up and a new dictation name, e.g. »DICT0002« displayed (same function as the »new« button on the dictation machine);
Right pedal
- Start/stop recording and play-back (same function as the slide switch on the dictation machine).
Note:
Select the fast forward function using the button on the dictation machine.
Automatic backspace settings only apply in transcription mode. In hands-free dictation mode, the right pedal does not perform automatic backspaces.
THE MENU
Foot control assignment during play-back
The pedals on the foot control* are designed for transcription operation.
Left pedal
- Rewind;
Middle pedal
- Fast forward;
Right pedal
- Start/stop play-back.
SETTINGS IN THE MENU
Automatic backspace
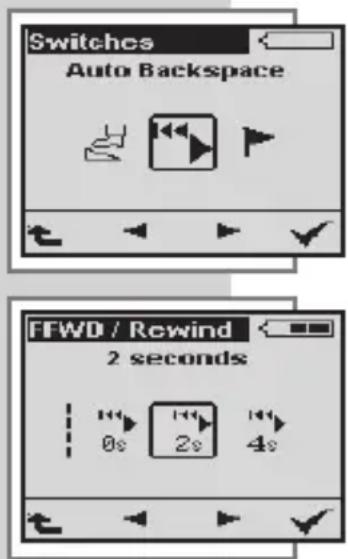
Here you can set the length of automatic backspace to between 0 and 10 seconds. Every time play-back begins, the current position is rewound by the specified time, and play-back begins from there.
text_image
Switches Auto Backspace FFWD / Rewind 2 seconds 0s 2s 4sNote:
The »Auto Backspace» menu item is only visible if the machine is in the Digta Station*. The automatic back-space function is only available when the foot control is set to play-back. In hands-free dictation mode (foot control set to record), the right pedal does not perform automatic backspace.
- Go to menu item »Auto Backspace ▶« and confirm with »√.
- Use the navigation buttons » ◀▶« to select the duration of the automatic backspace. The selected function turns black.
- Automatic backspace off. Normal setting for play-back.
^14 - 2, 4, 6, 8, 10 seconds. Duration of play-back from the most recent dictation position.
- Confirm with » √«.
THE MENU
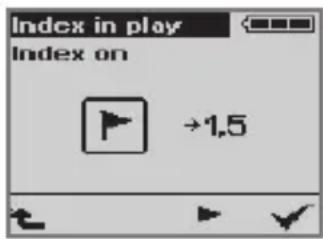
Setting an index during play-back
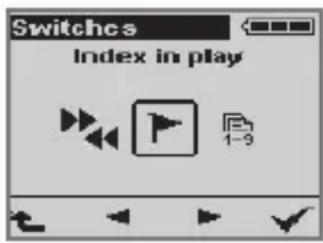
You may choose whether the right selection button change the speed or sets an index during play-back.
text_image
Switches Index in play- Select the menu item » « "Index While Play" and confirm with the right selection button » √.
- Select the Index function » « or Change Speed function 1,0 / 1,5 » 1,5« and confirm with the right selection button » √.
text_image
Index in play Index on →1,5THE MENU
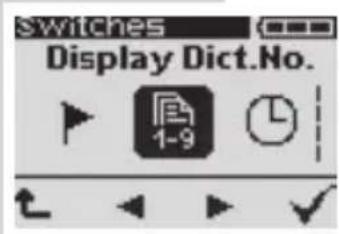
Dictation position number
text_image
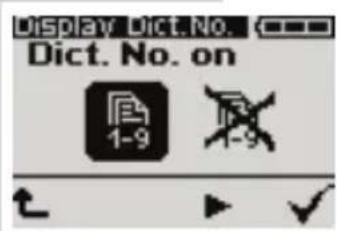
Switches Display Dict.No. 1-9The dictation position number indicates where in the current folder the selected dictation is located. You are additionally shown the total number of dictations in the folder. This function allows you to switch off the position indicator to improve overview on the display during recording or playback. To activate/deactivate the indicator, proceed as follows:
- Select the menu item » 1-9 « and confirm with the right selection button » √.
- Select » 1-9 « (Dict.No. on) or » (Dict.No. off).
- Confirm with the right selection button » √«.
text_image
Display Dict.No. Dict. No. on 1-9 1-9Note:
The dictation position number is not displayed in the EASY MODE.
THE MENU
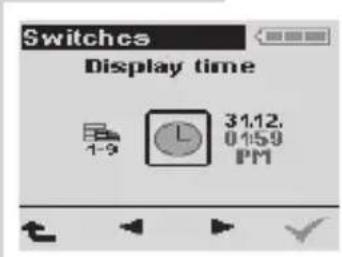
Time indicator
text_image
Switches Display time 3:12. 0:59 PM 1-9This function allows you to switch off the time indicator to improve overview on the display during recording or playback. To activate/deactivate the indicator, proceed as follows:
- Select the menu item » L « and confirm with the right selection button »√.
- Select » L « (Time on) or » (Time off).
- Confirm with the right selection button » √«.
Note:
The time is not displayed in the EASY MODE
THE MENU
Date format
This function serves for setting a date format.

text_image
Switches Date format L 01:12 01:59 PM ID 127AB- Go in the menu item "date format" » 31.2 01:59 « and confirm it with the button » √. - Select by means of the navigation button » ◀▶« between the following formats:
31.12. - European date format with 24-h display.
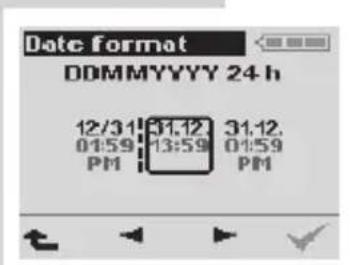
text_image
Date format DDMMYYYY 24 h 12/31 01:59 13:59 01:59 PM 31.12 31.12 01:59 01:59 PM-3142 European date format with 12-h display. -12/31 American date format with 24-h display. -12/31 American date format with 12-h display.
- Confirm the selected date format with the right selection button »√.
THE MENU
Display ID
With this function you can set the ID display format.
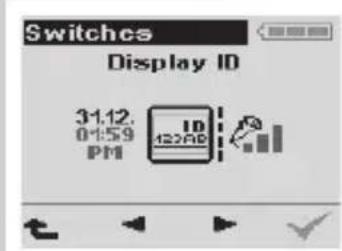
text_image
Switches Display ID 31.12. 0:59 PM ID 42000- Go to the menu item "Display ID" » ID 123AB « and confirm it with »√.
- Select by means of the navigation button » ◀▶« between the 2 display possibilities:
ID – Display as symbol "ID"
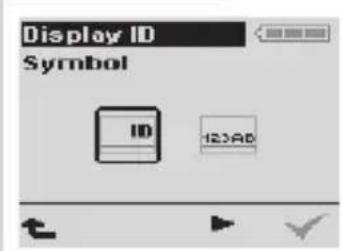
text_image
Display ID Symbol ID 123AD- Alphanumeric display of ID based on the dictation name, for example, barcode in numerics.
- Confirm the selected display format with the right selection button »√.
THE MENU
Version
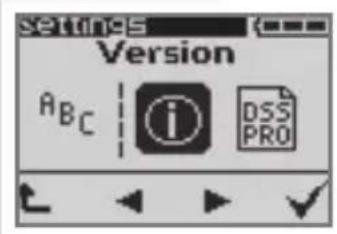
text_image
Settings Version A B C i DSS PROUsing the »Version« function, the version (firmware) of the machine's software is displayed.
- Go to the » ⓘ« menu item and confirm with » √.
- The serial number of your dictation machine and the version number of the firmware (software) appear in the display.
Note:
For information on new software versions call the »Configuration => Update Server« function in the PC software or visit us on our Website:
www.grundig-gbs.com.
THE MENU
DSS Pro
This function makes for the quality and storage capacity of your dictations. DSSPro allows to set the quality and encryption of dictations separately.
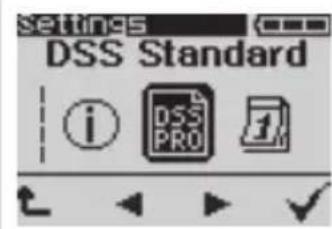
text_image
DSS Standard i DSS PRO iQuality Play (QP): 10 minutes recording require 2 MB, especially suitable for voice recognition. File ending ».DS2«.
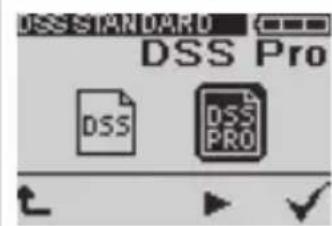
Standard Play (SP): 10 minutes recording require 1 MB, saving memory for listening and typing dictations in the typing department. File ending ».DSS«.
- Select the DSS standard » □□« menu point and confirm with »√.
- Select between DSS » « and DSS Pro » and confirm with »√.
- More setting options are only available (eg quality, encryption) if you select DSS Pro. DSS-Pro dictations are not displayed in the DSS mode.
- Select between quality » □ and encryption then » □ and confirm with » √.
- These settings affect the recording quality of the dictation.
- Select between Quality Play »« and Standard Play »« and confirm with »«.√
- In the menu of the dictation encryption you have the same menu items as for the workflow lists. Select between »no entry ««, »on request «« and »automatically « and confirm with »«.
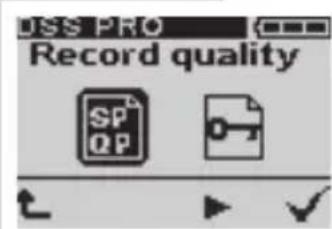
text_image
ISS PRO Record quality SP QP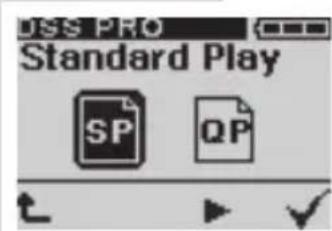
text_image
MSS PRO Standard Play SP QP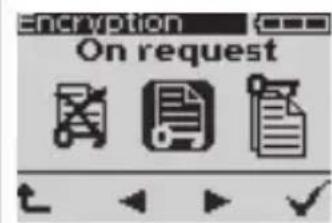
text_image
Encryotion On requestTHE MENU
Time, date
The time and date a dictation is recorded are indicated for each dictation (PC display only).
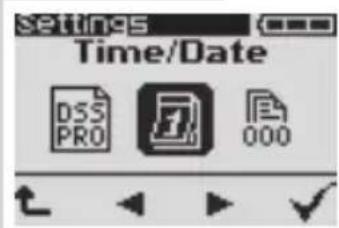
text_image
settings Time/Date DSS PRO 1 000- Go to the menu command » 1« and confirm with »√«.
- You can now enter or change the year, month, day, hours and minutes successively using the navigation buttons »▼▲«. The current function is shown on white background.
- Confirm each of your settings with » √«. The setting is saved, and the next point is activated.
• End your settings with » √«. - To change your settings, go back to the menu command » 1«.
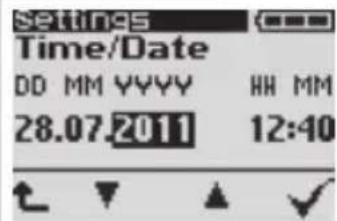
text_image
Settings Time/Date DD MM YYYY HH MM 28.07.2011 12:40THE MENU
Dictation counter
Using the »Dictation counter« function, you can reset the dictation counter. The dictation counter is able to count till 9999. You should not reset the counter too often to avoid conflicts with dictations having the same name and being stored on the PC.
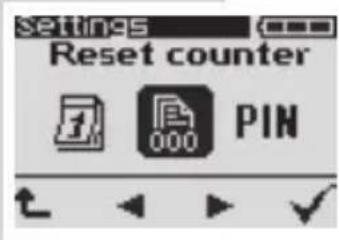
text_image
settings Reset counter 1 000 PIN- Go to the » 000« menu item and confirm with »√.
• The » 📄« and » symbols appear in the display. - Confirm with » √«.
- The next new dictation then has the lowest free number (for eg.: »DICT0005«).
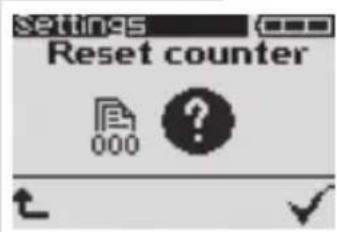
text_image
Settings Reset counter 000 ?THE MENU
Modifying the PIN
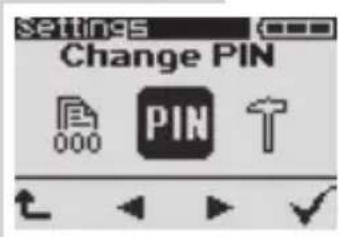
text_image
Settings Change PIN 000 PIN ↑ t ↓ ▶ ✓The personal identification number (PIN) protects the dictation machine against unauthorized use. The factory settings are 0000. Do only enter a sequence of digits known to yourself. You have to enter the PIN each time you switch on the dictation machine as well as each time you reactivate it from the "Sleep mode".
- Select the »PIN« menu item and confirm with the right selection button »√.
- Enter the old PIN via the navigation buttons » ◀◀◀ (confirm the digits with the right selection button » ✅)
– Each entered PIN will be overwritten through a " * " symbol for protection reasons.
- Enter the new PIN via the navigation buttons with the right selection button »√«) and repeat entering the new PIN for security reasons.
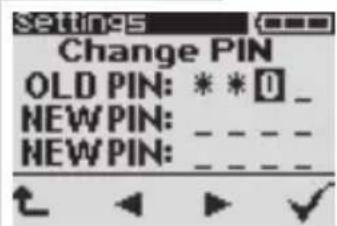
text_image
Settings Change PIN OLD PIN: * * 0 _ NEW PIN: _ NEW PIN: _ _ _ ↑ ▶ ▶ ✓THE MENU
Formatting
With the »Formatting« function you reformat the internal memory of your dictation machine or a replaceable, external memory card.
Note:
If a list of several authors is installed this function is only available if there are no dictations in the memory. This ensures that dictations from another user are not accidentally deleted.
Caution data loss! This function will delete all files and dictations on your dictation machine.
- Select the Format » 1 « menu item in the settings menu and confirm with the right selection button » «.√
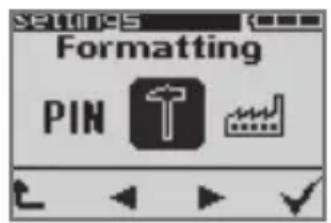
text_image
Formatting PIN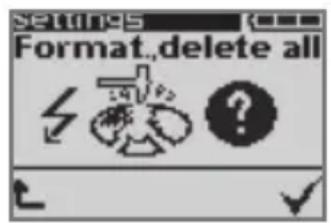
text_image
Settings Format, delete all lightning bolt + + ?
text_image
Settings Format, delete allNote:
Make sure an external memory card is plugged in if you do not want to delete the internal memory.
- Confirm the complete formatting » ƒ» « of the memory or the memory card with the right selection button » √
- An egg-timer appears during the formatting process; the progress is illustrated by means of a status bar.
Directories and files with administrative data are created on the internal memory or the external memory card as well. For this reason not the entire memory capacity is available for recording dictations.
Note:
The internal memory and the external memory card may not be formatted as a removable disk with a PC formatting function.
Default settings

text_image
Settings Factory setting ↑ A B CUsing the »Factory setting« function, you restore the factory settings of the machine.
Note:
If a list of several authors is installed this function is only available if there are no dictations in the memory. This ensures that dictations from another user are not accidentally deleted.
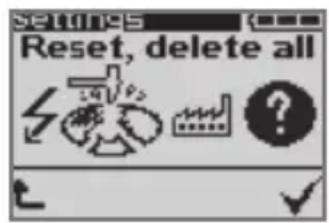
text_image
Settings Reset, delete all ?Caution data loss! This function will delete all data and settings on your dictation machine!
Your device will be reset to the following settings:
EASY MODE;
Folder – main folder;
Microphone sensitivity – Dictation (normal setting for dictations);
Voice Activation – off;
Switch off automatically – after 5 minutes;
Audio signals – all audio signals on;
Lighting - 15 seconds;
Date, Time - 01.01.2009, 00:00;
Workflow lists – Typist, dictation type, group, No./reference automatic, priority off;
USB connection – automatic;
Speaker— on;
FFWD / rewind – Fast;
Foot control – Recording;
Auto Backspace – Automatic backspace off;
Index in play-back – off, right selection button for speed change;
Dictation position number – on;
Time indicator – on;
Date format – European, 24 hours;
Display of ID - ID-symbol;
THE MENU
Dictation counter - 1;
PIN – retained, not reset to 0000;
DSS/DSS Pro – DSS
Language – Englisch
All dictations will be deleted; Preallocation for the dictation accompanying note will be reset to »No entry«. The author's name will be set to »DICT«.
Language
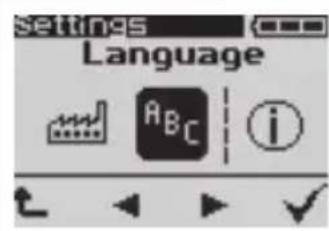
text_image
Settings Language A B C iThis function makes for the language of the menu display.
- Select the » ^a Bc« language menu item and confirm with the right selection button »√.
- Select the desired language with the navigation buttons » ◀▶« and confirm with the right selection button » √«.
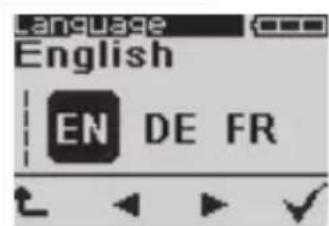
text_image
Language English EN DE FRThe Digta Station* serves as communication interface between the Digta and the PC, as charging unit and as Digta stand. A foot control and an earphone may be connected to the Digta Station* (not included in delivery).
USB interface
You can exchange data via the USB interface (green indicator at the Digta Station*) of the PC.
Additionally you may use a USB audio / HID function to dictate into the Grundig Business Systems PC software or in voice recognition systems.
Foot control
It's possible to plug in a foot control for hands-free dictations.
Charging unit, power supply
When plugging the power supply* (yellow indicator at the Digta Station*) the rechargeable battery* is charged in the Digta. The foot control and the earphone are supplied by the power supply* and may be used without connecting a PC via USB.
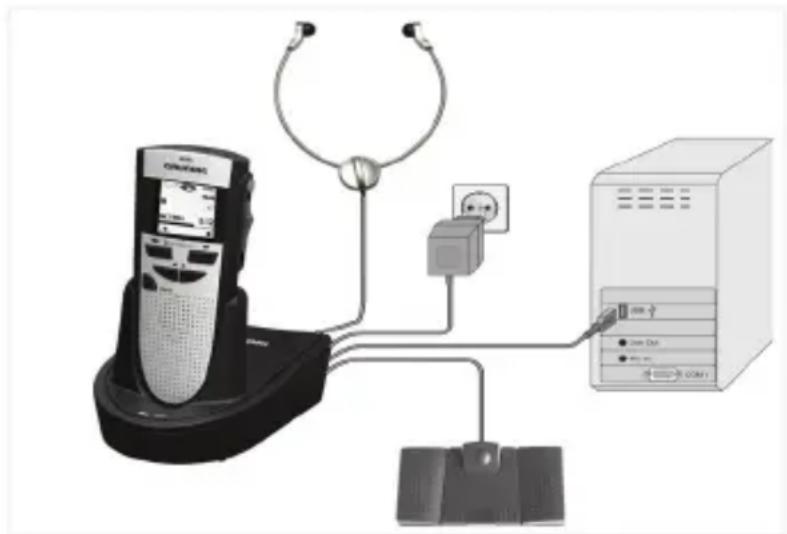
text_image
Diagram showing connections between a remote control unit, a switch, power outlet, and a computer tower with labeled ports.* Special extras
COMMUNICATION WITH THE PC.
The Grundig Business Systems PC software
The Grundig Business Systems PC software allows you to transfer your dictations to your PC. You immediately have an overview of all your work and can also listen to the dictations on your notebook. Send your dictations to a speech recognition system – or send voice mail through a connected mail system.
If your office organization uses the digital dictation system from Grundig Business Systems the Digta and the PC software will make you a mobile member on the dictation network. You have all author and transcriber addresses at your fingertips for sending dictations. Your typing pool is perfectly organized with dictations identified by dictation type, deadline, and priority. If all of your dictations have the same priority, simply connect the USB cable to your Digta. All dictations will be sent to the preset transcriber and your Digta will then be immediately available for further dictations.
System requirements
Pentium processor (500 MHz or higher)
Operating systems:
WIN 2000 SP4 Rollup1
WIN XP SP2
WIN Vista
WIN 7
USB 1.1 or 2.0 serial interface
For e-mail connection: MAPI-compatible mail system
(for eg. Microsoft Outlook)
COMMUNICATION WITH THE PC
Connecting and separating the dictation machine and the PC
- Use the USB cable to connect the switched off dictation machine to the USB interface at the PC via the »PC/USB« port.
- The dictation machine begins to charge the rechargeable batteries. The green LED is blinking!
- Move the On/Off switch to »ON« to switch on the dictation machine.
- Now you are prompted for the PIN.
Warning:
Disconnect the USB interface via the task bar, as otherwise the transfer may not be complete.
Note:
The Grundig Business Systems PC software can only be connected to one dictation machine at a time. If you connect a second dictation machine to the USB interface, the PC will not detect it, i.e. Windows will only display one removable disk drive.
USB parallel operation
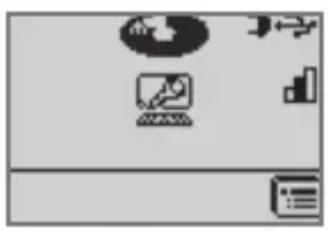
natural_image
Generic desktop interface icons including a laptop, document, and charts (no readable text or symbols)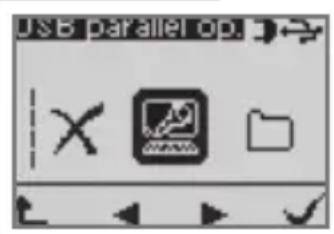
text_image
USB parallel op X D:\Users\123409\123409\123409\123409\123409\123409\123409PC file transfer
- Connect the dictation machine to the PC via the USB interface.
- If the dictation machine is already switched on the USB parallel operation mode »« sets up automatically. The computer identifies the device as removable medium and as USB audio/HID device.
Now you can transfer data between PC and dictation machine.
- Select USB parallel operation » in the main menu if "Auto connect" is switched off and confirm with the » button (see chapter "USB connection automatic / manual").
COMMUNICATION WITH THE PC.
natural_image
Generic desktop application icons including a laptop, monitor, and spreadsheet (no text or symbols)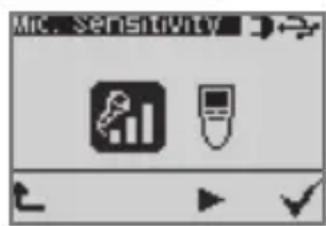
text_image
MIC Sensitivity
natural_image
Computer desktop icons including a globe, monitor, and keyboard (no readable text or symbols)PC microphone operation, USB Audio, USB HID
- Use the USB cable to connect the dictation machine to the USB interface at the PC via the »PC/USB« socket.
- Move the On/Off switch to »ON« to switch on the dictation machine.
- Press the » 📄 « button to do the microphone settings (the current settings are displayed on the right edge) You can set the microphone sensitivity via » 📋« (see chapter „The menu / Microphone sensitivity“).
- Select a sound program on your PC now, e.g. a Grundig Business Systems dictation software, a voice recognition system or the Windows audiorecorder.
- Start the recording in your sound program and speak the message.
- The red LED at the dictation machine lights up, the disc symbol is spinning.
- Press the » ✗« button and hold on pressing it to mute the microphone.
- No signal is transferred to the recording software, i.e. a voice recognition system no longer recognizes any sounds. The red LED is blinking and the disc symbol stops spinning.
If play-back is running on your sound program or voice recognition program, the green light emitting diode lights up and you will listen to the recordings from the speakers of the Digta.
If you are using the dictation machine as PC microphone of the Grundig Business Systems dictation software, the keys and slide switch of the dictation machine are programmed with functions of the dictation software (USB-HID).
COMMUNICATION WITH THE PC
With the supplied software "AdapterServer" shortcuts and PC functions may be allocated to the user controls of the dictation machine for PC microphone operation. Install the Adapter server and find out more about the configuration options in its help function or its PDF instruction manual.
Configuration of the dictation accompanying note
The accompanying note for the dictation, as it is called, contains various information such as the author's name, the transcriber's name and the type of dictation which are included with each DSS dictation. You can enter such information into the completed dictation using the PC software. If you want to send all your dictations with the same information, you can configure your dictation machine accordingly.
If you are a member of a pre-installed dictation network, you will find all available settings in the PC software under »Configuration«. If you are a single user without connection to a local network, you can create users, dictation types and groups in the PC software in the »Settings« menu with the function »General Settings«. You will then be able to send your name as author, the maximum author priority, 20 transcribers, 20 dictation types and 20 group designations to your dictation machine under »Configuration«. When you turn on your dictation machine, your name as author will be briefly displayed instead of »DICT«. The accompanying note for the dictation may be individually filled in for each new dictation via the workflow lists.
FIRMWARE UPDATE
The firmware update may be used to keep your dictation machine in step with the latest developments (firmware = device software). You will find the current firmware version in the Internet. The enclosed CD includes the firmware current at the time of delivery.
Carrying out a firmware update
- Switch on the PC and start Windows.
- Use the USB cable to connect the dictation machine to the PC.
- Switch on the dictation machine.
- The » symbol appears on the display of the device and the dictation machine is identified by the PC as a removable disk.
- You will find the
»gh0422.hex«
file on the »www.grundig-gbs.com« website under Support/Download/Firmware/Digta422/ZIP, as well as in the »Firmware\Digta0422« folder on the provided CD.
Copy this file to the »System« folder in the dictation machine drive (removable disk).
- The dictation machine's recording LED flashes during transfer. Wait until data transfer is complete.
- Then, from the task bar, select the function „Safely Remove Hardware“, as otherwise the transfer may not be complete.
natural_image
Generic desktop application icons including a laptop, document, and charts (no readable text or symbols)FIRMWARE-UPDATE
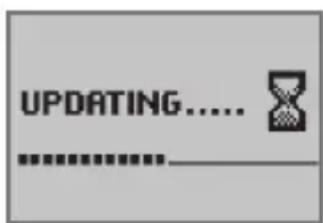
text_image
UPDATING......- Disconnect the USB plug from the dictation machine.
- Confirm » LOAD UPDATE« with the » √ button.
Do not interrupt the loading process for any reason. This could make the dictation machine inoperative.
- Then format the memory in the dictation machine (see „The menu / Formatting").
Note:
If you wish to load an old firmware once again, press the »new« button and the right selection button simultaneously when switching the DigtaSonic 422 on.
DIGTA SCAN 404 BARCODE READER
Using barcodes
You can scan a barcode for each new dictation. The detected codes are stored in the header of a DSS file in the "Topic" field, and thus displayed in the note which accompanies the dictation. Other programs which evaluate the DSS header (for example a database system), can classify the dictations using the codes.
The scanned codes can then be displayed or automatically processed by software that analyzes the DSS header – e.g. a database system.
The detected codes are displayed by the PC software supplied with the portable dictation machine and by the desktop software:
– in the overview of the accompanying note for the dictation (see also “Dictation accompanying note” in the program help)
- in the dictation list (if the "Topic" field is enabled, see "Sorting" in the program help).
Note:
We offer a software development kit (SDK) for integrators who want to evaluate the note accompanying the dictation, for example in order to create links to database entries.
DIGTA SCAN 404 BARCODE READER
Plugging in
Both mechanically and electrically, the Digta Scan connection is designed in the same way as a memory card.
Note:
Only plug in or unplug the Digta Scan when the portable dictation machine is switched off.
- Plug the Digta Scan into your dictation machine as depicted below:
Note:
Make sure that the latch on the back of the Digta Scan snaps securely in.
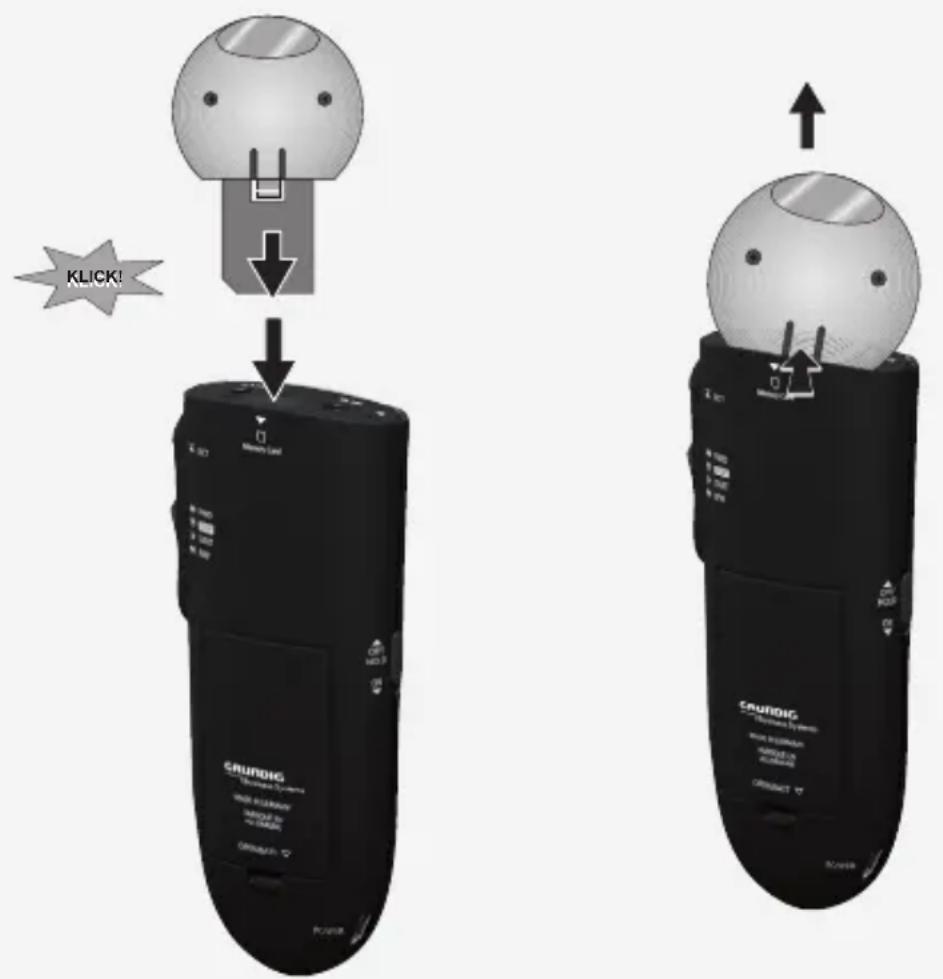
text_image
Klick! CRUNDIG CRUNDIG System OFF-10000000 RETURN ON CRUNDIG CRUNDIG CRUNDIG System OFF-10000000 RETURN ON CRUNDIG CRUNDIG CRUNDIG CRUNDIG CRUNDIG CRUNDIG CRUNDIG CRUNDIG CRUNDIG CRUNDIG CRUNDIG CRUNDIG CRUNDIG CRUNDIG CRUNDIG CRUNDIG CRUNDIG CRUNDIG CRUNDIG CRUNDIG CRUNDIG CRUNDIG CRUNDIG CRUNDIG CRUNDIG CRUNDICDIGTA SCAN 404 BARCODE READER
Unplugging
- Remove the locking screw (if present).
- Press the latch on the back of the Digta Scan. The Digta Scan is unlocked and you can now pull it out of the memory card slot.
See the illustration on previous page.
DIGTA SCAN 404 BARCODE READER
Switching the Digta Scan on and off
- The Digta Scan must be inserted and latched into the portable dictation machine. Only when the Digta Scan is plugged in are the associated menu items available on the dictation machine.
- Switch on the dictation machine.
- Push the slide switch to » ▼ STOP «.
- Press the » ≡« button.
- Use the navigation buttons »◀▶« to select the main menu »◀« and then press the »√ button.
- Use the navigation buttons »◀▶« to select the sub-menu »◀« and then press the »√ button.
- Use the navigation buttons »◀▶« to select »« or »× and then press »«.
- » «, when you create dictations with the »new« button, you are prompted to scan. You can now scan in a barcode and store it in the dictation accompanying note.
- », when you create dictations with the »new« button, you are not prompted to scan even though the Digta Scan is plugged in.
Note:
The selected setting is retained even if the Digta Scan is removed from the portable dictation machine. However, you can only change the setting when the Digta Scan is attached.
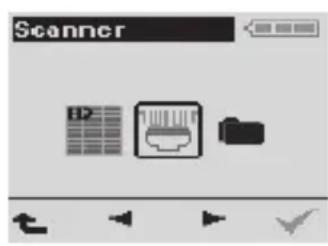
text_image
Scanner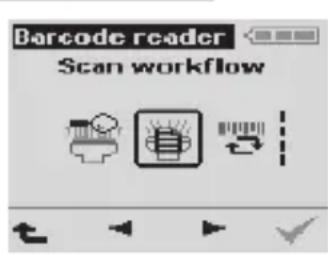
text_image
Barcode reader Scan workflow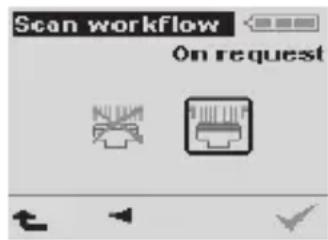
text_image
Scan workflow On requestDIGTA SCAN 404 BARCODE READER
Scanning a barcode for a new dictation
The Digta Scan must be connected to the portable dicta-tion machine, enabled and configured for the barcodes you are using.
- Switch on the dictation machine.
- Push the slide switch to » ▼ STOP «.
- Press the »new« button.
- If you do not want to scan a barcode into the dictation accompanying note, press the »» ↗« button and continue with your dictation as usual.
- If you want to scan a barcode, point the barcode reader at the barcode as pictured and press the »√« button.
- The device now scans the code with a red laser beam. The machine acknowledges the successful reading of the code with a single signal tone, and the laser beam shuts off.
- The scanned barcode appears in the display.
- If you want to include the barcode as displayed in the dictation, press the »√« button.
- If you do not want to include the barcode in the dictation, press the » ↗« button and continue with your dictation as usual.
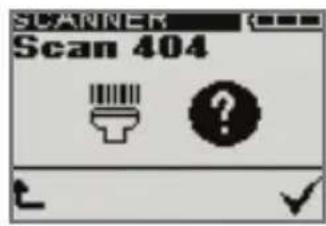
text_image
SCANNER Scan 404 ?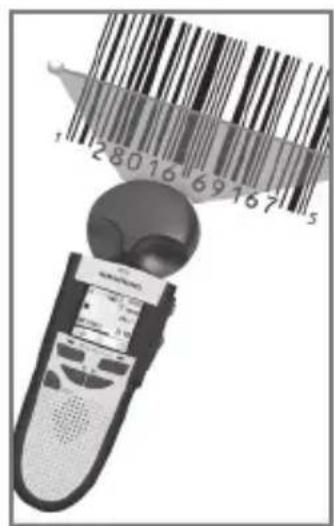
text_image
128016691675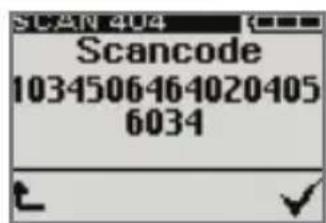
text_image
Scancode 1034506464020405 6034DIGTA SCAN 404 BARCODE READER
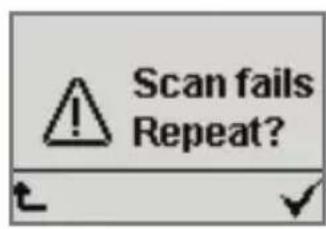
text_image
Scan fails Repeat?Note:
If the machine cannot read a code, it emits a double signal and displays the message »Scan fails Repeat«.
Confirm the error message and repeat the scan procedure with »√« or cancel it and continue dictating without barcodes by pressing »←«.
Notes:
A maximum of 32 digits (two lines) of the scanned barcode can be displayed.
Barcodes that you have scanned and included in dictations with »√« are stored in the "Topic" field in the new dictation's accompanying note.
Displaying a barcode for a dictation
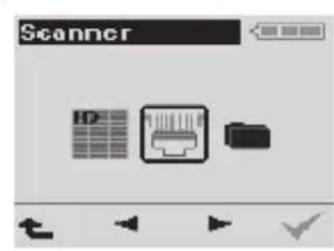
text_image
Scanner- Push the slide switch to » ▼ STOP«.
- Use the navigation buttons »◀▶« to select the dicta- tion.
- If the dictation has a barcode, »ID« is displayed.
- The barcode is displayed.
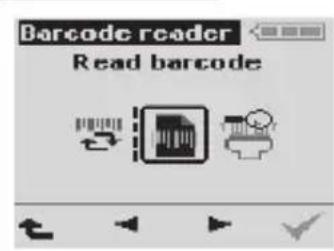
text_image
Barcode reader Read barcode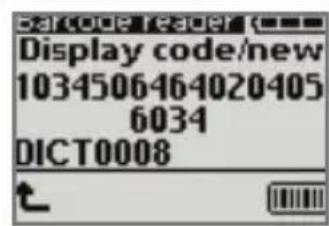
text_image
barcode reader Display code/new 1034506464020405 6034 DICT0008DIGTA SCAN 404 BARCODE READER
Scanning a barcode for an existing dictation
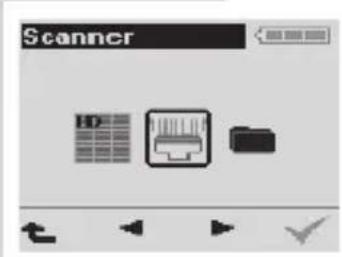
text_image
Scanner- Switch on the dictation machine.
- Push the slide switch to » ▼ STOP «.
- Use the navigation buttons » ◀▶« to select the dicta- tion for which the barcode is to be scanned.
- Press the right button »
- Use the navigation buttons »◀▶« to select the main menu »◀« and then press the »√ button.
- »[icon]« and »↑« appear in the display, along with the number of the dictation.
- Point the reader at the barcode and press the button.
- The device now scans the code with a red laser beam. The machine acknowledges the successful reading of the code with a single signal tone, and the laser beam shuts off.
- The scanned barcode appears in the display.
- If you want to include the barcode as displayed in the dictation, press the »√« button.
- »ID« is shown in the status bar under the number of the dictation.
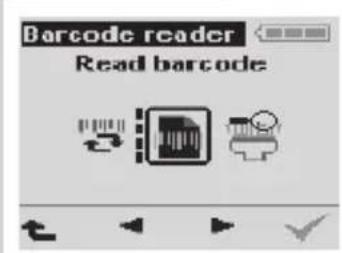
text_image
Barcode reader Read barcode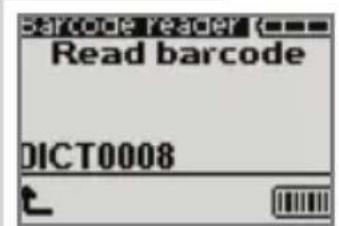
text_image
Read barcode DICT0008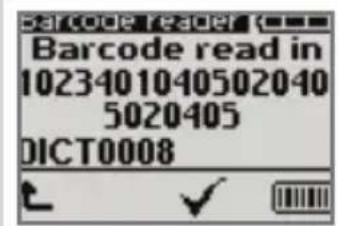
text_image
Barcode reader Barcode read in 1023401040502040 5020405 DICT0008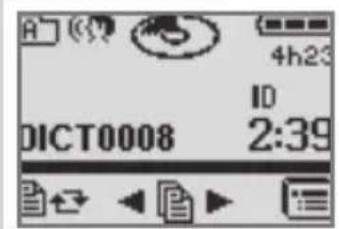
text_image
A 4h23 ID DICT0008 2:39DIGTA SCAN 404 BARCODE READER
Searching for a dictation belonging to barcode
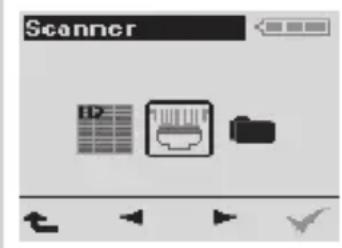
text_image
Scanner- Switch on the dictation machine.
- Push the slide switch to » ▼ STOP«.
- The scanned barcode appears in the display.
- The number of the dictation is shown under the barcode.
- To listen to the dictation, press » √« again and push the slide switch to »▶ START«.
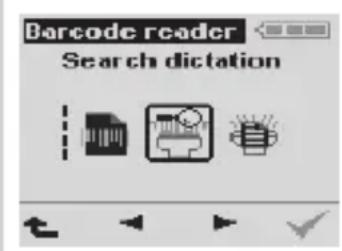
text_image
Barcode reader Search dictation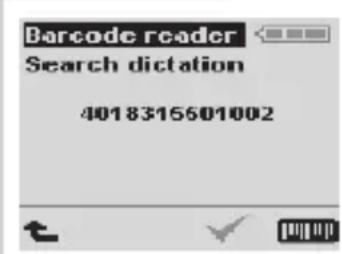
text_image
Barcode reader Search dictation 4018315601002DIGTA SCAN 404 BARCODE READER
Deleting a barcode from a dictation
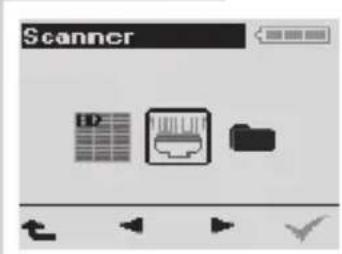
text_image
Scanner- Push the slide switch to » ▼ STOP«.
- Use the Unavigation buttons » ◀▶« to select the dicta- tion whose barcode is to be deleted.
- The barcode and the dictation number are displayed.
- Press » √ « to delete the barcode.
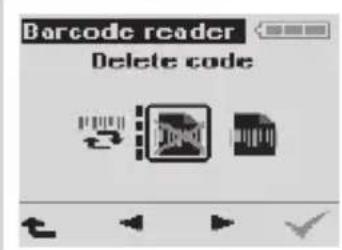
text_image
Barcode reader Delete code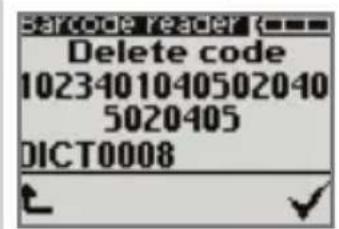
text_image
Delete code 1023401040502040 5020405 DICT0008Configuring the Digta Scan barcode reader
Default symbologies
In the default setting, only barcode symbology EAN-13 is enabled.
If you use different symbologies, you can configure the Digta Scan to work with them.
If you would like to optimize the code recognition, we recommend that you enable only those symbologies that you actually use. The lower risk of confusion increases the recognition accuracy.
Programming code table
We provide a table with programming codes in barcode format.
You can open this PDF table with Acrobat Reader*.
You can print the required programming codes and then use them to configure the barcode reader. If the table is not supplied with your Digta Scan or you need codes it does not contain, please visit our Internet download centre:
http://www.grundig-gbs.com
Our Internet site also lists our Customer Service address and hotline number.
* Download for free at http://www.adobe.de/products/acrobat/readstep.html
DIGTA SCAN 404 BARCODE READER
Preparing settings
You can change the symbology settings (see also “Default symbologies”) as follows:
- Print out the required programming codes from the programming code table.
- There are usually two programming codes displayed for the usable barcode symbologies; the upper for activation (ENABLE) and the lower for deactivation (DISABLE).
- Use a laser printer, for example, in order to obtain a legible printout.
DIGTA SCAN 404 BARCODE READER
Setting the Digta Scan barcode reader

text_image
Scanner- The Digta Scan must be inserted and latched into the portable dictation machine (see also “Plugging in, Unplugging”).
- Only when the Digta Scan is plugged in are the associated menu items available on the dictation machine.
- Switch on the dictation machine.
- Push the slide switch to » ▼ STOP «.
- Press the » ≡« button.
- Use the navigation buttons » ◀▶ « to select » 📄« and then press the » √ button.
- Use the navigation buttons » ◀▶« to select » 📋
- The »Programming« menu function appears in the display.
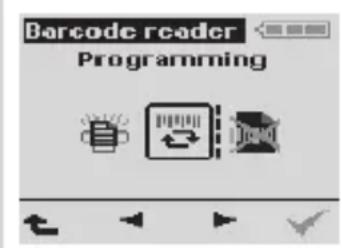
text_image
Barcode reader ProgrammingNote:
»X«, see also “Restoring the default settings”.
- Scan in the programming code with the » button.
- The machine acknowledges the successful reading of the code with a single signal tone.
- You can scan any number of programming codes consecutively with the »kit button.
Note:
If the machine cannot read a code, it emits a double signal and displays the message »Scan fails Repeat ?«. Confirm the error message with »√«.
- Once you have made all the settings, press the »↑« button to quit the menu.
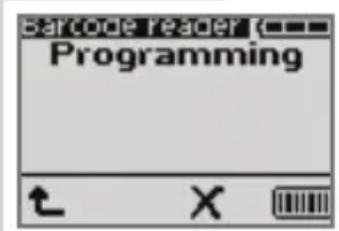
text_image
BarCode Reader Programming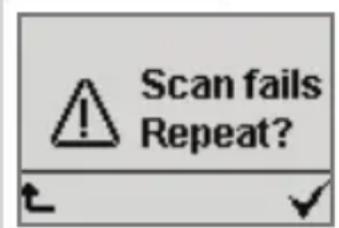
text_image
Scan fails Repeat?DIGTA SCAN 404 BARCODE READER
Restoring the default settings
You can restore the Digta Scan's default settings.
If you do so, all barcode symbologies are disabled except for EAN-13.
- The Digta Scan must be inserted and latched into the portable dictation machine (see also “Plugging in, Unplugging”).
- Only when the Digta Scan is plugged in are the associated menu items available on the dictation machine.
- Switch on the dictation machine.
- Push the slide switch to » ▼ STOP «.
- Press the » ≡« button.
- Use the navigation buttons »◀▶« to select » 📁« and then press the »√ button.
- Use the navigation buttons » ◀▶ « to select »
- The »Programming« menu function appears in the display.
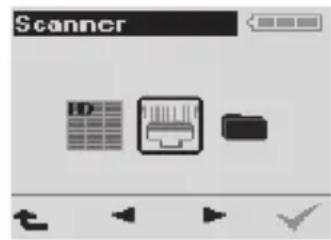
text_image
Scanner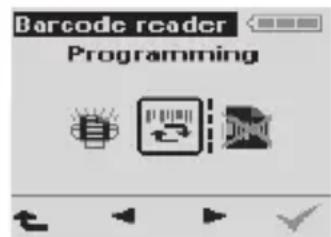
text_image
Barcode reader Programming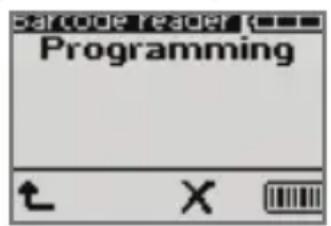
text_image
Barcode reader Programming t X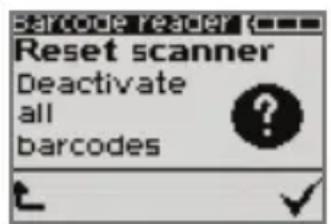
text_image
Barcode reader Reset scanner Deactivate all barcodes- Press the » X« button.
- »Deactivate all barcodes ?« appears in the display.
- Press the »√« button to leave only symbology EAN-13 enabled. Press the »←« button if you would like to keep the other symbologies enabled.
- Once you have made all the settings, press the »↑« button to quit the menu.
Using RFID codes
RFID codes are located on RFID labels (TAG).
natural_image
Abstract geometric shape with a central square and irregular outline, no text or symbols present.You can scan a RFID code for each new dictation. The detected codes are stored in the header of a DSS file in the “Subject” field, and thus displayed in the note that accompanies the dictation. Other programs that evaluate the DSS header (for example a database system) can classify the dictations according to the scanned codes.
The detected codes are displayed by the PC software included with the portable dictation machine and by the desktop software:
– in the overview of the accompanying note for the dictation (see also “Dictation accompanying note” in the program help)
- in the dictation list (if the "Subject" field is enabled, see "Sorting" in the program help).
Connecting and removing the RFID reader
The same procedure is used as with barcode reader 404. See the Chapter “Plugging in” and “Unplugging”.
RFID READER DIGTA RFID 414
Turning the RFID Reader on and off
- The RFID Reader must be plugged into the portable dictation machine and locked.
Only if the RFID Reader is plugged in will you be able to select the associated menu items available on the dictation machine. - Switch on the dictation machine.
- Push the slide switch to » ▼ STOP «.
- Press the » ≡« button.
- Use the navigation buttons »◀▶« to select » 📄« and then press the »√ button.
- Use the navigation buttons »◀▶« to select »◀« and then press the »√ button.
- Use the navigation buttons »◀▶« to select »« or »« and then press »OK«.
- » «, when you create a dictation with the »new« button, you will be prompted to it. You can now scan a RFID code and store it in the dictation accompanying note.
- » «, when you create a dictation with the »new« button, you will not be prompted to scan it, although the RFID Reader is connected.
Note:
The selected setting is retained even if the RFID Reader is temporarily removed from the portable dictation machine. However, you can only use or change the setting if the RFID Reader is connected.
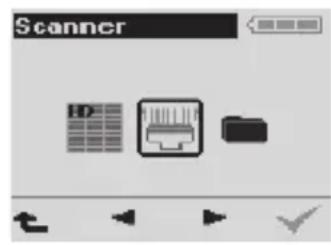
text_image
Scanner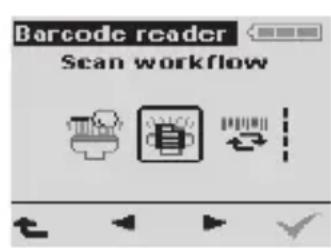
text_image
Barcode reader Scan workflow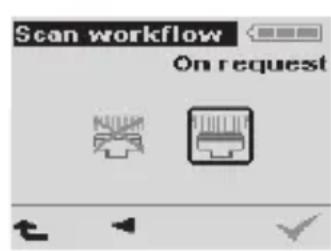
text_image
Scan workflow On requestRFID READER DIGTA RFID 414
Scanning a RFID code for a new dictation
The RFID Reader is connected to the portable dictation machine and activated.
- Switch on the dictation machine.
- Push the slide switch to » ▼ STOP «.
- Press the »new« button.
- » « and » appear in the display.
- If you do not want to scan a RFID code into the dictation accompanying note, press the » ↗« button and continue with your dictation as usual.
- If you wish to scan a RFID code, hold the RFID Reader directly at the label with the RFID code (see illustration) and press the »√« button.
- The device will now scan the RFID code. If the RFID code was successfully scanned, the device will acknowledge this by emitting a single tone.
- The RFID code appears in the display.
- If you want to include the RFID code as displayed in the dictation, press the »√« button.
- If you do not want to include the RFID code in the dictation, press the »L« button and continue with your dictation as usual.
Note:
If the machine cannot read the RFID code, it emits a double signal tone, and the message »Scan fails Repeat ?« appears in the display. You can now repeat the scan with the »√« button or cancel it with the »◀ button and dictate without a RFID code.
text_image
SCANNER RFID 414 ?
natural_image
Top-down view of a remote control device with open buttons and a black handle (no visible text or symbols)
text_image
Scancode 1456024656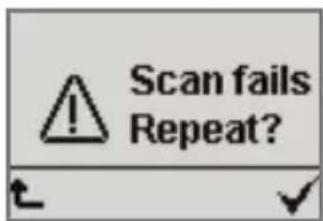
text_image
Scan fails Repeat?RFID READER DIGTA RFID 414
Notes:
A maximum of 32 digits (two lines) of the scanned RFID code can be displayed.
RFID code that you have scanned and included in dictations with »√« are stored in the “Topic” field in the new dictation’s accompanying note.
Additional functions
The RFID Reader has the same functions as the barcode reader.
See the chapters on the barcode reader for further information on operation. The menu is located under »«.
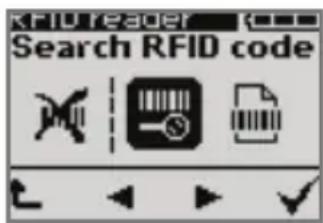
text_image
RFID reader Search RFID code– Displaying the RFID code for a dictation;
- Scanning the RFID code for an existing dictation;
– Searching for a dictation belonging to RFID code;
– Deleting the RFID code from a dictation.
MESSAGES, ERROR NUMBERS
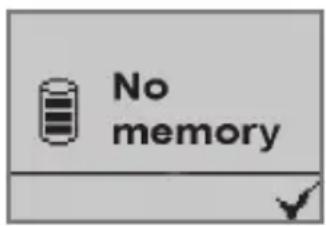
text_image
No memory1537 »Dictation cannot be created« – Error in the file system of the internal memory or the external memory card.
Remedy: Format the internal memory or memory card.
1538 »Dictation cannot be created« – Error in the file system of the internal memory or the external memory card.
Remedy: Format the internal memory or memory card.
1570 »Index/Info full« – The maximum permitted quantity of information or indices has been reached. It is not possible to add more information or indices.
Remedy: Delete information or an index.
1584 »NOT SUPPORTED DSS FORMAT« – A dictation in this DSS format cannot be played back.
Remedy: Play back the dictation on another dictation machine or on the PC. If available load new firmware which is able to play back this DSS format.
1585 »NOT SUPPORTED DSS FORMAT« – The folder you selected doesn't contain a dictation in the supported DSS format.
Remedy: Select another folder with the dictation in another DSS format. Play back the dictation on another dictation machine or on the PC. If available load new firmware which is able to play back this DSS format.
1610 »Delete other files?« – When deleting entire folders or formatting the memory, the machine finds files that are not DSS dictations and cannot be displayed (e.g. ds2, doc).
Remedy: Cancel the function if you do not want to
MESSAGES, ERROR NUMBERS
delete these files. Transfer the files to a computer and then perform the deletion or formatting function.
1611 »PLAY-BACK ONLY« – The dictation machine is set to play-back with foot control and is in the Digta Station. Dictations are protected from being edited.
Remedy: Use the »Foot control« menu function to set the device to record in the Digta Station. Or remove the machine from the Digta Station.
1612 »Data list wrong format« – Failures were noted during the reading process. The data list has not been transferred.
Remedy: Please check the contents of the ids.csv-file, if semicolons, commas or word wraps are missing. The individual data is limited to a maximum of 256 characters. The columns of the data set are limited to 128.
1613 »Data list too long« – The data list cannot be read in because the size of the data list is too large.
Remedy: Check the size of the ids.csv file. The maximum file size is 16 K Bytes. The number of columns is limited to 128.
2821 »Duplicate name after renaming« – A dictation is to be renamed. There is however already a dictation with this name.
Example: There are the dictations DICT0001.dss and DICT0001.ds2. The dictation DICT0001.dss should be encrypted afterwards. It would then also be named DICT0001.ds2.
Remedy: Connect the dictation device to the PC via USB. Rename the first dictation with the help of DigtaSoft or Windows Explorer. Then encrypt the second dictation.
MESSAGES, ERROR NUMBERS
8321 »BATTERY LOW« – Battery voltage too low for updating the firmware.
Remedy: Recharge the batteries or operate the dictation machine powered from the USB port on your PC.
8322 »BATTERY LOW« – Battery voltage too low for formatting.
Remedy: Recharge the batteries or operate the dictation machine powered from the USB port on your PC.
8323 »BATTERY LOW« – Battery voltage too low for restoring the default settings..
Remedy: Recharge the batteries or operate the dictation machine powered from the USB port on your PC.
9734 »FILE READ ONLY« – Dictation lock (write/erase protection) activated.
Remedy: Disable dictation lock in the Delete menu. Disable write/erase protection in the accompanying note of the dictation.
9746 »STARTBMP ERROR« – Defective start logo.
Remedy: The start logo file is unlike startbmp.bmp or it contains errors. Use another revised startbmp.bmp file
9749 »DELETE NOT POSSIBLE« – Error when deleting a dictation.
Remedy: Delete via USB with DigtaSoft or Windows Explorer on your PC.
9750 »NO MEMORY« – Memory full > Recording terminated.
Remedy: Delete some dictations. Delete other files (for eg. .doc, .ppt) if existing.
MESSAGES, ERROR NUMBERS
9751 »NO MEMORY« – Recording has not started because of a full memory.
Remedy: Delete some dictations. Delete other files (for eg. .doc, .ppt) if existing.
9753 »FIRMWARE INCORRECT« – The gh0422.hex firmware file contains false data (e.g. firmware of another device).
Remedy: Perform an update with another gh0422.hex.
9756 »NO MEMORY« – Partial deletion has not started, since there is insufficient memory for temporary storage.
Remedy: Delete a different dictation first. Delete any foreign files (e.g. doc, ppt).
9758 »NO PART TO DELETE« – Partial deletion is not possible.
Remedy: Select a section for deletion.
9762 »FILE READ ONLY« – Erasure-protected dictations are in the folder to be deleted.
Remedy: Disable the dictation lock in the Delete menu. Disable write/erase protection in the accompanying note for the dictation.
9782 »DEL PART WITH INDEX« – The dictation section marked for deletion contains an index. For this reason, this section of the dictation cannot be deleted.
Remedy: Delete the index and then the dictation section.
9795 »NO MEMORY« – Not enough free memory.
Remedy: Delete dictations to have more memory available for the desired functions.
9796 »FILE READ ONLY« – The dictation lock (write /
MESSAGES, ERROR NUMBERS
erasure protection) is activated.
Remedy: Disable the dictation lock in the Delete menu. Disable write/erase protection in the accompanying note for the dictation.
9801 »INSERT TO INFO FORBIDDEN« – The current position of the dictation is contained in an information. It is not possible to insert into information.
Remedy: Delete the information and dictate a new one.
17674 »CARD NOT SUPPORTED« – If you use MultiMediaCards/SecureDigital Cards (MMC/SD) with insufficient writing speed, »Card not supported« appears in the display.
Remedy: Use a Digta Card by Grundig Business Systems.
17936 »UPDATE FILE ERROR« – Error of the firmware update.
Remedy: File error of the firmware gh0422.hex (false check sum). Update with another gh0422.hex file.
17937 »UPDATE VERSION ERROR« – This version of the firmware file is not loadable on this Digta.
Remedy: Update with another version of the gh0422.hex file.
17940 »FAT Error!« – The directory of the files could not be stored in the memory. Maybe the recording function was still active when removing the memory card.
Remedy: Switch the device off and switch it back on again. When this message pops up again, all dictations have to be deleted through formatting the memory.
17944 »DOWNGRADE, NO UPDATE« – The firmware ver-
MESSAGES, ERROR NUMBERS
sion to be loaded in the Digta is older than the current version of the Digta.
Remedy: If you wish to load an old firmware, press the »new« button and the right selection button simultaneously when switching the Digta on.
17990 »FAT NOT SUPPORTED« – The internal memory or external memory card has been formatted incorrectly (e.g. FAT32).
Remedy: Format the internal memory or external memory card.
17991 »MEDIA NOT SUPPORTED« – The MMC/SD memory card is not supported, e.g. a card with more than 2 GB.
Remedy: Use a Digta Card by Grundig Business Systems.
17992 »MEDIA DAMAGED« – The internal memory or external memory card is faulty.
Remedy: Replace old MMC/SD cards with new Digta Cards. If the internal memory is faulty, the machine has to be repaired.
17993 »CARD NOT SUPPORTED« – If you use MultiMediaCards/SecureDigital Cards (MMC/SD) with a too low writing speed »card not supported!« appears in the display.
Remedy: Use a Digta Card from Grundig Business Systems.
26181 »WRITE TOO LONG« – Writing to the internal memory or external memory card during dictation takes too long due to faulty memory cells. The memory is too old.
Remedy: You can continue using the machine if the message does not occur frequently. Replace old
MESSAGES, ERROR NUMBERS
MMC/SD cards with new Digta Cards.
---- »EXT NO PIN PROTECTION« – Dictations on external memory cards (Digta Card) cannot be protected using the PIN/PUK* function.
Remedy: Press the right-hand selection button »√« to confirm that you want to use an external memory card without PIN* protection.
---- »DEVICE LOCKED« – The PIN was entered incorrectly nine times.
Remedy: Enter PUK.
---- »NO FIRMWARE« – If an old firmware version is needed (when the machine is switched on, the right selection key and the “new” button are pressed at the same time ) no firmware file is found.
Remedy: Copy a file with the name gh0422.hex into the SYSTEM folder and start the load of the old version afterwards.
All messages with different numbers and the display "UNKNOWN ERROR":
Turn the dictation machine off and then back on. If the machine does not turn on normally, take out the batteries and then reinsert them. Turn the machine then back on. If the error message still appears, please contact your dealer or technical customer service. You can help the customer service solve your problem much more quickly if you report the steps taken to produce the error and the error number displayed.
Hotline, E-Mail: www.grundig-gbs.com under Support/Contact info