ES-155 - Iron Home Electric - Free user manual and instructions
Find the device manual for free ES-155 Home Electric in PDF.


| Product Type | Steam Iron |
| Brand | Home Electric |
| Model | ES-155 |
| Water Tank Capacity | 0.3 L |
| Power Consumption | 2200 W |
| Power Rating | 230 V AC, 50/60 Hz |
| Soleplate Material | Stainless Steel |
| Steam Control | Adjustable (0 to max) |
| Spray Function | Yes |
| Power Steam Function | Yes (extra steam shot) |
| Self-Clean Function | Yes |
| Minimum Heating Time | Approx. 60 seconds |
| Indicator Light | Yes (heating status) |
| Swivel Cord Protection | Yes |
| Soft Grip Handle | Yes |
| Safety Features | Auto shut-off not specified; manual shut-off recommended |
| Warranty | 2 years |
| Dimensions (approx.) | Not specified in manual |
| Weight (approx.) | Not specified in manual |
Frequently Asked Questions - ES-155 Home Electric
User questions about ES-155 Home Electric
0 question about this device. Answer the ones you know or ask your own.
Ask a new question about this device
Download the instructions for your Iron in PDF format for free! Find your manual ES-155 - Home Electric and take your electronic device back in hand. On this page are published all the documents necessary for the use of your device. ES-155 by Home Electric.
USER MANUAL ES-155 Home Electric
natural_image
Exterior view of a modern office building (no signage)Dampfbügeleisen
Steam Iron
natural_image
Diagram of a fish-shaped object with internal components and a labeled section '2' (no text or symbols on the diagram itself)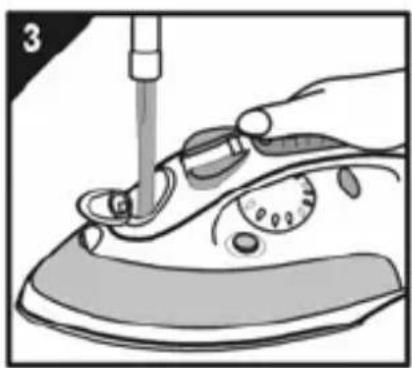
natural_image
Illustration of a hand using a power tool to press down a small iron on an iron (no text or symbols visible)ABBILDUNGEN
natural_image
Illustration of a mechanical device with a sunburst effect and tool, no text or symbols present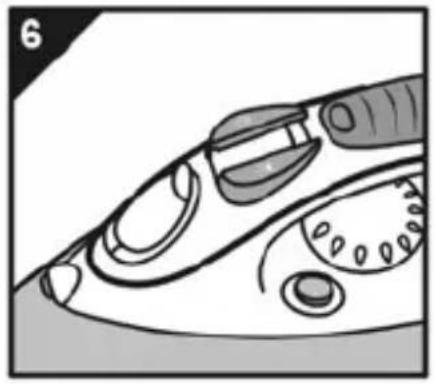
natural_image
Illustration of a hand holding a small object with multiple circular features (no text or symbols)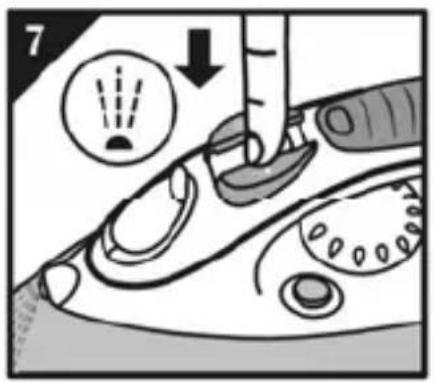
natural_image
Illustration of a hand holding a small object with circular features, possibly a device or tool (no text or symbols visible)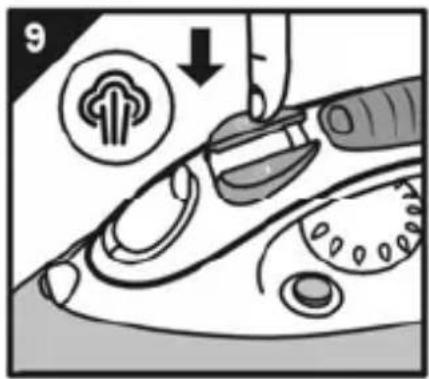
natural_image
Illustration of a hand using a power iron to clean or wash the floor, with no text or symbols present.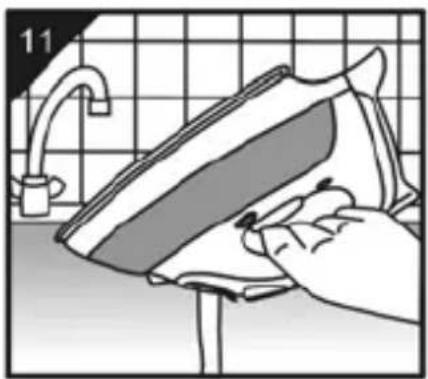
natural_image
Illustration of a hand using a iron on a kitchen sink, with a grid background and faucet (no text or symbols)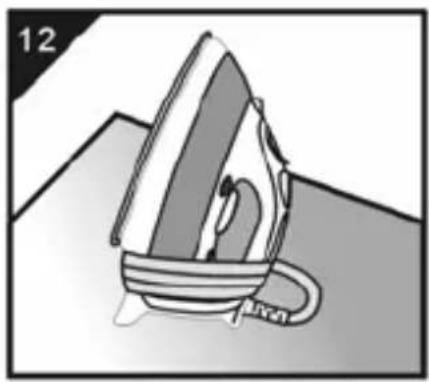
natural_image
Illustration of a steam iron with a curved handle, no text or symbols presentÜBERSICHT
natural_image
Symbolic representation of a trash bin with crossed lines and a horizontal bar below (no text or labels)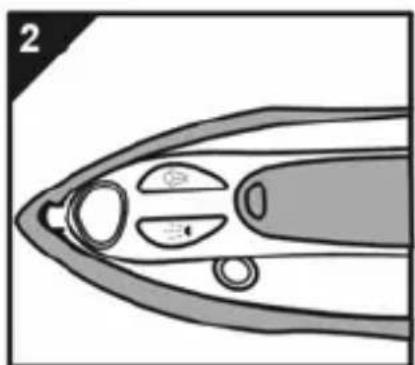
natural_image
Diagram of a fish-shaped object with internal components and no visible text or symbols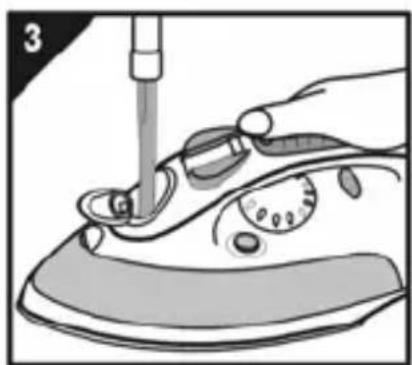
natural_image
Illustration of a hand using a tool to press iron on an iron, no text or symbols presentOVERVIEW
natural_image
Illustration of a mechanical device with a sunburst effect and tool, no visible text or symbols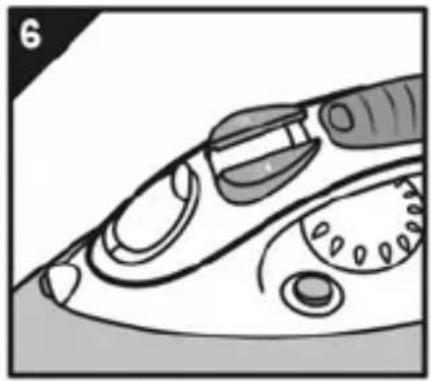
natural_image
Illustration of a hand holding a small object with multiple circular features, possibly a tool or device (no text or symbols visible)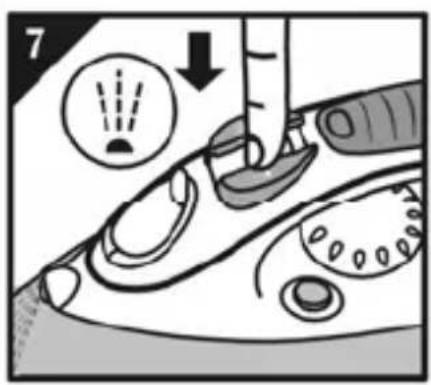
natural_image
Illustration of a hand holding a small tool or device with no visible text or symbols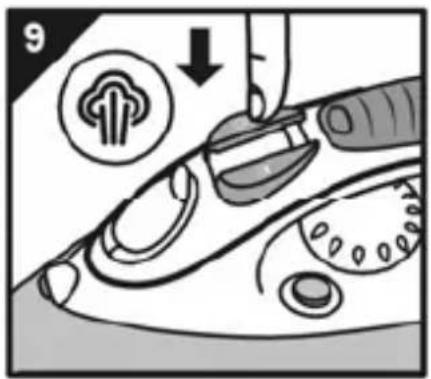
natural_image
Illustration of a hand ironing an iron on a surface, with no text or symbols present.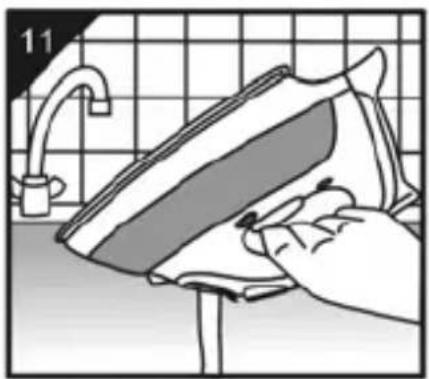
natural_image
Illustration of hands ironing a kitchen using a power iron, with a tiled wall and faucet in the background (no text or symbols)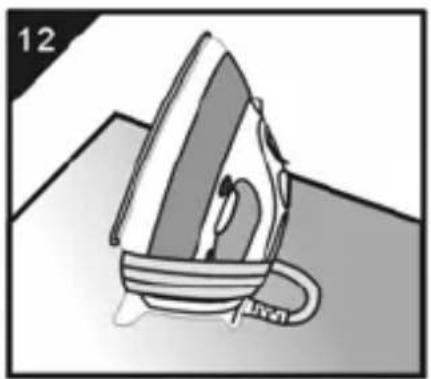
natural_image
Illustration of a steam iron with a handle, no text or symbols presentParts overview (fig. 1)
A Spray nozzle
B Water refill inlet
c Steam control ( ≈ = no steam)
D Spray button
Power Steam button
F Temperature control
G Soft grip handle
H Indicator light
I Swivel cord protection
J Cord
K Water tank
L Stainless steel soleplate
M Self clean button
SAFETY INSTRUCTIONS
• The appliance complies with EU directives 73/23/EWG and 89/336/EWG.
- The appliance may only be connected to alternating current as specified on the rating plate.
- If your home is fitted with a differential current switch, please ensure that it is sensible to pulse trains.
- An electrical appliance is not a toy. Use and store the appliance out of reach of children. Do not let the supply cord hang down.
- Do not leave the appliance unattended while it is connected to the mains supply.
- Electrical appliances generate high temperatures. Always use the handles provided and warn others of the potential dangers (e.g. escaping steam or hot water, especially when ironing vertically.) Never treat clothing while it is worn!!
• Always disconnect the appliance:
– before filling or emptying the water tank;
– before leaving the room (even for a short time);
- before cleaning;
- after use.
- Never unplug the appliance by pulling the cord.
- Only safe and appropriate extension leads should be used.
- Do not immerse the appliance or its supply cord in water.
- Do not use the electrical appliance if:
– the appliance, the supply cord or the cord protector is damaged;
– the appliance has been dropped;
– the appliance is obviously leaking.
In this case the appliance should be returned to the HOME ELECTRIC repair centre (see SERVICE & SUPPORT).
- Repairs to electrical appliances may only be carried out by specialists. Improperly carried out repairs can cause serious danger to users.
- To avoid danger to users, a defective or damaged supply cord may only be replaced by the HOME ELECTRIC repair centre.
- HOME ELECTRIC accepts no liability for damage caused by improper use or operation of the appliance. This appliance is intended for domestic use only.
- When the appliance has reached the end of its operational life, it should be disposed of properly trough the correct channels.
Before first use
IMPORTANT: Remove the protective plastic from the soleplate !!
Connect the supply cord to the mains socket. Heat up the iron to the maximum temperature (without water) and pass the iron over a piece of damp cloth for several minutes to remove any residues from the soleplate.
The iron may give off some smoke when you use it for the first time. This will cease after a short while.
Filling the water tank
CAUTION: Never immerse the iron in water.
- Remove the mains plug from the wall socket.
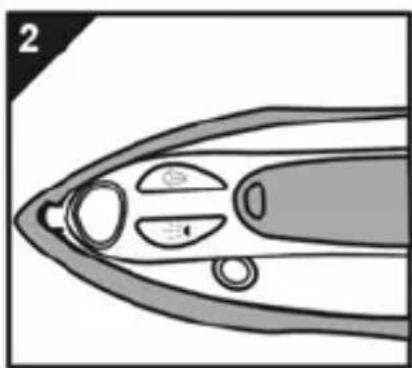
- Set the steam control to position 0 () (=no steam) (fig.2).
- Open the cover of the water tank inlet.
- Fill the water tank with cold tap water up to the maximum level (fig.3).
Achtung:
- Do not fill the water tank beyond the MAX indication.
- Only use clear water. Do not use vinegar, starch, ironing concentrates or chemically descaled water.
- If the tap water in your area is very hard, we advise you to mix it with an amount of distilled water or to use distilled water only.
OPERATION
Set the ironing temperature
- Put the iron on its heel (not on the soleplate).
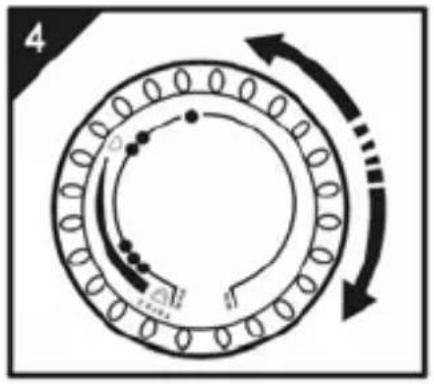
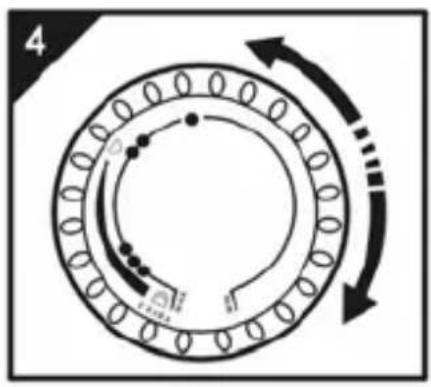
- Set the temperature control on the iron (fig. 4) using the international dot symbols (see control knob / garment label) or by type of fabric:
• Synthetic fabrics (e.g. acrylic, viscose, polyamide, polyester), Silk
•• Wool
••• Cotton, Linen
- Before ironing delicate fabrics, it is recommended to test the ironing temperature on an invisible spot (Inside of hem).
- Sort laundry by type of fabric before ironing.
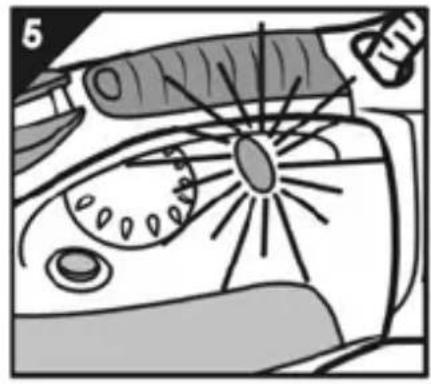
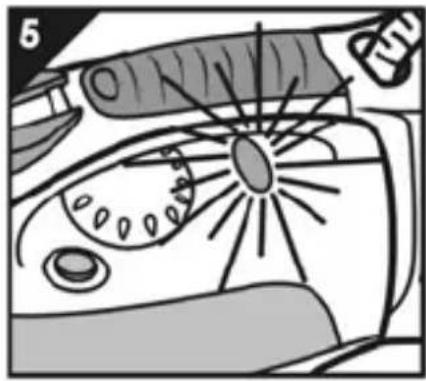
- Plug in the iron, the indicator lights up. indicating the iron is heating up.
- After a while the indicator will go out, showing the iron has reached the set temperature and is ready for use. (fig. 5)
- The indicator will go on and off during ironing.
Steam Ironing
Use the steam control to set the desired amount of steam. (fig. 6) Steam will only be produced properly if the temperature control is set to the read marked area (●● to MAX). Set the steam control only after the iron has reached the set temperature. (Indicator goes off)
- Hold the iron horizontally to start generating steam.
- Interrupt steam generation:
– by setting the iron on its heel,
- by setting the steam control to ✉ (= no steam).
Ironing without steam
Set the steam control to ※ (= no steam) to prevent steam generation.
Water spray function (fig. 7)
Spray water from the tank on the fabric to moisten it. Push the spray button several times to spray water.
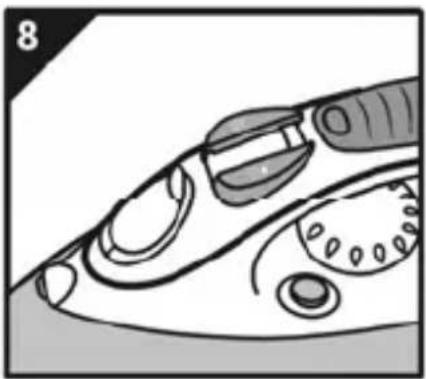
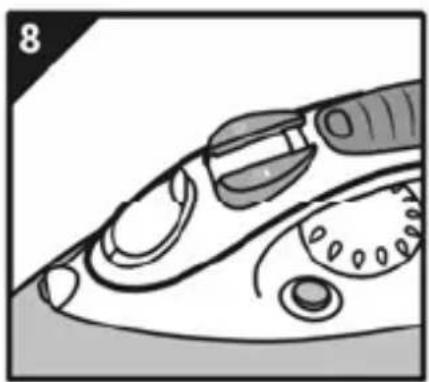
Power steam function (fig. 8 & 9)
By pushing the power steam button, a strong shot of steam is generated. This extra shot of steam can penetrate deeply into the fabric. Allow invervall of at least 4 seconds between steam shots.
Using the steam shot allows you to iron vertically. This is ideal for wrinkle removal from curtains or clothing on hangers.
CAUTION: Never steam or iron clothing being worn.
Never release steam shot to a person.
After ironing
Unplug the iron and pour out the remaining water from the tank. Set the steam control to ✗. Put the iron on its heel and leave it to cool down. (fig. 11)
For storage the supply cord can be wrapped around the heel part after the iron has cooled down. Always store the iron on its heel to protect the soleplate. (fig. 12)
CLEAN & CARE
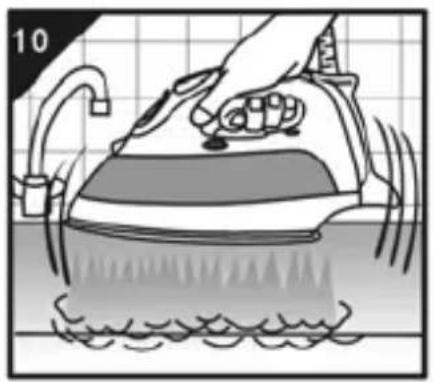
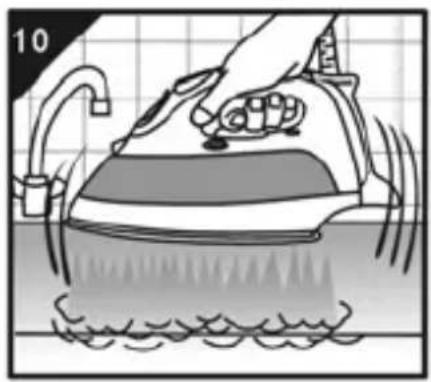
Self clean function (Bild 10)
It is advisable to clean the steam chamber every two weeks (or weekly, if the water in your area is very hard) by activating the self clean function.
How to use the self clean function:
- Fill up the watertank with clear tap water. Do not use any additives (e.g. descaling agents, vinegar, citric acid)
- Plug in the iron and let it heat up to maximum temperature. when the set temperature has been reached, unplug the iron.
- Set the steam control to maximum and hold the iron horizontally over the sink.
- Push and hold the self clean button. great amounts of steam will be expelled, followed by steam mixed with water. This will rinse und flush dirt and scale particles out of the steam chamber.
- Gently shake the iron over the sink until all water is gone from the tank.
- Set the steam control to ✗ and plug in the iron again with temperature set to maximum, to dry the soleplate.
- Unplug the iron and let it cool down completely while set on its heel.
- Residue on the soleplate can be wiped of gently with a soft, damp cloth.
Cleaning and care
- When necessary, wipe the outside of the (cool) iron with a damp cloth, then wipe it dry.
- Flush out the water tank on a regular basis to prevent the build up of scale residue in the tank.
- If the iron has not been used for a long time, heat up the iron with filled water tank and allow it to produce steam at maximum setting for about 1 minute. Also push the power steam button several times to flush out scale and dirt deposits from the water tank and the steam chamber.
- Always empty the watertank after using the iron.
- Do not use any descaling agents.
SERVICE & SUPPORT
| Problem | Possible cause(s) | Solution(s) |
| The iron is plugged in but the soleplate is cold. | There is connection problem. | Check if the plug is connected to the wall socket properly. |
| The temperature control dial has been set to MIN. | Set the temperature control dial to the required temperature. | |
| The iron does not produce any steam. | There is not enough water in the water tank. | Fill the water tank (see 'Filling the water tank'). |
| The steam control dial has been set to position 0( ). | Set the team control dial to position  Steam ironing'. Steam ironing'. | |
| The iron is not hot enough. | Set the temperature control dial to a temperature suitable for steam ironing (●● to MAX).Put the iron on its heel and wait until the pilot light has gone out before you start ironing. | |
| The Extra Steam function does not work | The powerful steam button has not been pressed long enough. | Press and hold the powerful steam button for maximal 5seconds. |
| The Extra Steam function has been used too often in short period. | Wait at least 1 minute before using the Extra Steamfunction again. | |
| The iron is not hot enough. | Set the temperature control dial to a temperature between ●●● and MAX. Put the iron on its heel and wait until the pilot light has gone out. | |
| There is not enough water in the water tank. | Fill the water tank(see' Filling the water tank'). |
SERVICE & SUPPORT
| Problem | Possible cause(s) | Solution(s) |
| Water leaks from the soleplate when I use the ExtraSteam function | The iron is not hot enough. | Set the temperature control dial to a temperature be- tween ●●● and MAX. Put the iron on its heel and wait until the pilot light has gone out. |
| The Extra Steam function has been used too often in a short period. | Wait at least I minute before using the Extra Steam func- tion again(see 'Extra Steam'). | |
| The spray function does not work. | There is not enough water in the water tank. | Fill the water tank(see' Filling the water tank'). |
| Flakes and impurities come out of the soleplate during ironing. | You have been using hard water, which has caused scale flakes to develop inside the soleplate. | Use the Self-Clean function a few times(see' Self-Clean'). |
| Water leaks from the soleplate during ironing. | The set temperature is too low. | Set the temperature control dial to a temperature suitable for steam ironing(●● to MAX). Put the iron on its heel and wait until the pilot light has gone out before you start ironing. |
Specifications
Description: Electric steam iron
Model: ES-155
Water tank capacity: 0,3 L
Minimum heating time: 60 sec.
Power consumption: 2200W (Heating)
Power rating: 230V AC 50/60 Hz
SPECIFICATIONS SUBJECT TO CHANGE WITHOUT NOTICE
For the HOME ELECTRIC Steam Iron we grant a Guarantee of 2 years
For this device we grant a guarantee of 24 months, starting with the date of sale regarding defects due to faulty manufacture or material. Your legal warranty claims according to §439 ff. BGB-E are not affected by this. This guarantee does not accept defects due to inappropriate treatment or use as well as defects which do not influence the function or the value of the Profi Party Pan essentially. Further on we do not grant a guarantee for wear parts or damage in transit as well as for defects due to repairs which have not been effected by us. In case of legitimate claims we will decide wether to repair the device or to send you a new one. Apparent defects have to be indicated within 14 days after delivery. Additional claims will not be accepted.
In order to assert your warranty claims please send the device together with the sales slip carriage paid to the below address. Please contact us before sending the device to us as we do not accept any sending which is not prepaid will not be accepted.
Service hotline: 0180 5 - 22 17 84 (€ 0,14 / Min.) (Germany only)
If the product needs to be sent to the servicecenter, please call service & support to obtain a return sticker
natural_image
Symbolic representation of a trash bin with crossed lines and a horizontal bar below (no text or labels)Disposal
Dispose of the packaging in the proper manner. If at any time in the future you should need to dispose of this product please note that Waste electrical products should not be disposed of with household waste. Please recycle where facilities exist. Check with your Local Authority or retailer for recycling advice.
(Waste Electrical and Electronic Equipment Directive)
HOME ELECTRIC
ES-155
VERSION SW01-2007 REV A
HE-ES-155-A6.PDF
C)
- Dampfbügeleisen
- Steam Iron
- ABBILDUNGEN
- ÜBERSICHT
- OVERVIEW
- Parts overview (fig. 1)
- SAFETY INSTRUCTIONS
- Before first use
- IMPORTANT: Remove the protective plastic from the soleplate !!
- Achtung:
- OPERATION
- Set the ironing temperature
- Steam Ironing
- Ironing without steam
- Water spray function (fig. 7)
- Power steam function (fig. 8 & 9)
- After ironing
- CLEAN & CARE
- Self clean function (Bild 10)
- Cleaning and care
- SERVICE & SUPPORT
- Specifications
- For the HOME ELECTRIC Steam Iron we grant a Guarantee of 2 years
- Disposal
Brand : Home Electric
Model : ES-155
Category : Iron