TR-XQB60-560 - Washing machine Trieste - Free user manual and instructions
Find the device manual for free TR-XQB60-560 Trieste in PDF.


User questions about TR-XQB60-560 Trieste
0 question about this device. Answer the ones you know or ask your own.
Ask a new question about this device
Download the instructions for your Washing machine in PDF format for free! Find your manual TR-XQB60-560 - Trieste and take your electronic device back in hand. On this page are published all the documents necessary for the use of your device. TR-XQB60-560 by Trieste.
USER MANUAL TR-XQB60-560 Trieste
natural_image
White disposable water washing machine with control panel and front panel (no visible text or symbols)- Please carefully read this operation manual before using the product. Please keep this operation manual for your future reference.
CONTENTS
| FIRSTLYYou should know | Safety and precaution......2Parts identification of the washer......5Explanation of washer control panel......6Installation of washer......8Preparation before washing......9 | Preparation before application |
| SECONDLYWhen you want to use | Operation of normal wash program......10Operation of full load of soiled clothes......11Operation of single wash / rinse / spin program....12Operation of other full-automatic wash program...13About procedure of full-automatic wash program..14 | About washing program |
| FURTHEREasier for your operation | Application of wash detergent, softenerand bleacher......15 | Detergent etc |
| IfYou are in trouble | Identifying common troubles of washer......16Following phenomena are not problems ofWasher......17Specifications and technical parametersof washer......17 | Maintenance of washer |
SAFETY AND PRECAUTION
Observe the following items in order to prevent from injuring yourself, to others and the damage of property:

Warning
This indicates serious injury or death to human being may be caused.

Caution
This will remind you that injury to people and damage to property may occur.
Please observe following contents of graphics.

This graphics represents cause attention and detailed cautions will be displayed inside the graphics. △

This graphics represents [operation prohibited], and detailed prohibitive items will be displayed inside the graphics.

This graphic represents [forced execution], and detailed force execution items will be displayed inside the graphics.

Warning
The appliance should be connected to the water mains using new hose-sets and old hose-sets should not be reused.
When the appliance is placed on a carpet, the ventilation openings in the base must not be obstructed.
This appliance is not intended for use by persons (including children) with reduced physical, sensory or mental capabilities, or lack of experience and knowledge, unless they have been given supervision or instruction concerning use of the appliance by a person responsible for their safety.
Young children should be supervised to ensure they do not play with the appliance.
Do not disassembly and assembly the machine without authorization.

No dismantling
natural_image
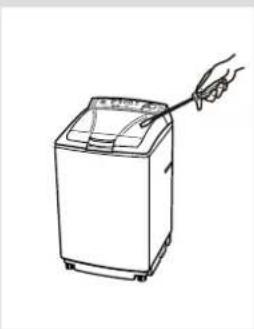
Line drawing of a hand holding a small object above a washing machine (no text or symbols)Do not insert your hand and take out clothes during
spin process until it is fully stopped.
No touching
natural_image
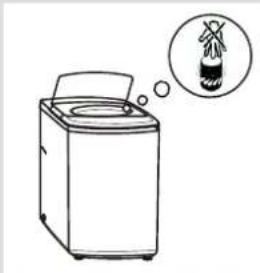
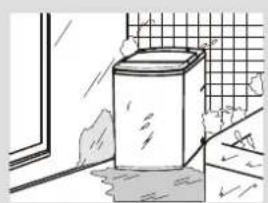
Line drawing of a washing machine with a thought bubble showing a leaf litter (no text or symbols)Do not install the machine in damp and raining environment to avoid electric shocking, catching fire, faults
and distortion accidents.
No dampness
natural_image
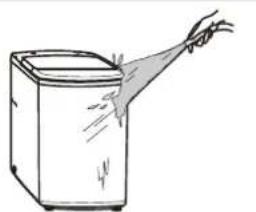
Line drawing of a washing machine in a room with a window and tiled floor (no text or symbols)Do not rinse the machine with water when cleaning. A damped clothes or sponge is recommended for
cleaning purposes.
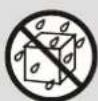
No rinsing
natural_image
Line drawing of a hand sweeping or spreading material from a white appliance (no text or symbols)
Warning
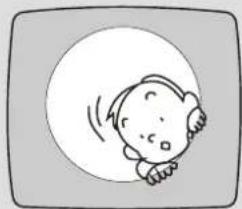
Do not let children climb the machine or peer into the rotating basket to avoid accidents.

Prohibited
natural_image
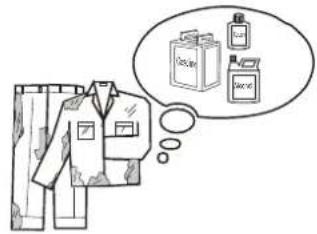
Simple cartoon drawing of a baby with a surprised expression, inside a circular frame (no text or symbols)It is prohibited to wash the clothes damped with kerosene, gasoline, alcohol and other Flammable materials.

Prohibited
text_image
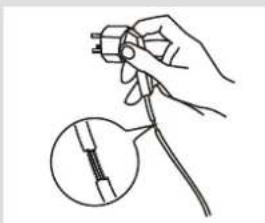
Illustration of a garment with thought bubbles showing product containers labeled 'Recycle', 'Lift', and 'Melt'Do not damage power flexible cord and power plug to avoid electric shocks, short circuit and catching
fire.

Prohibited
natural_image
Hand holding a tool with a magnified inset showing a small cylindrical object (no text or symbols)(Recommendation)
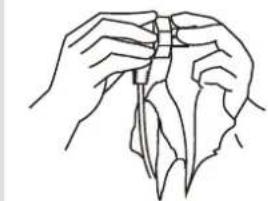
Regularly clean the power plug to remove dust and dirt to avoid contact failure.

natural_image
Line drawing of two hands holding a tool or object, no text or symbols present(Recommendation)
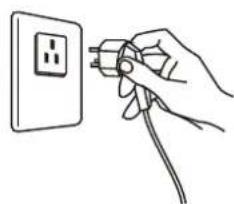
Please pull out plug from the socket if the machine is not in use.
Pull out the plug
natural_image
Hand holding a plug inserted into an electrical outlet (no text or symbols visible)(Recommendation)
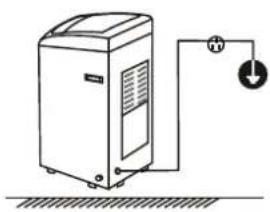
Connect the earth line of socket to avoid electric shocking by accidental
leakage.
(earthing)

Earthing
natural_image
Simple line drawing of a portable air conditioner unit connected to a power outlet (no text or symbols)(Recommendation)
insert the power plug tightly.


natural_image
Line drawing of a hand inserting a plug into an electrical outlet (no text or symbols)Please do not place on the washer burning candle, mosquito-repellent incense,
cigarette and other flammable things, as well as electric stove, air heating fan and other

heating sources.
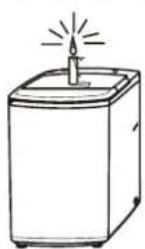
Smoke and fire prohibited
For the correct operation of your washer
machine a Please use 240V AC power source is recommended.

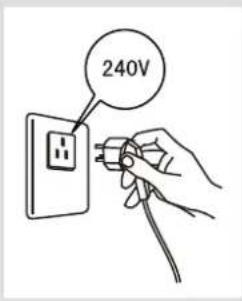
text_image
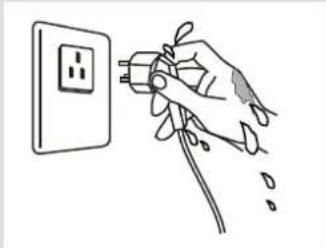
240VPlease do not pull out or insert the plug with wet hands to avoid electric shocking.

Wet hands are prohibited
natural_image
Hand inserting a plug into an electrical outlet (no text or symbols visible)
Caution
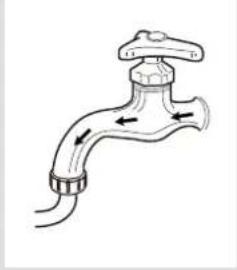
Please ensure that the water inlet pipe is connected and the tap is opened
before washing clothes.

natural_image
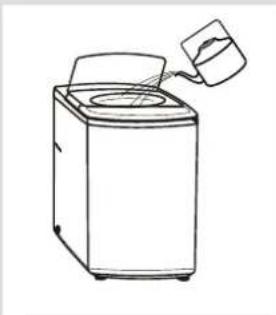
Line drawing of a faucet with arrows indicating flow direction (no text or symbols)The water temperature shall not exceed
50° when washing with warm water.

Prohibited
natural_image
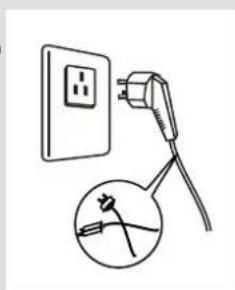
Line drawing of a washing machine with a bucket pouring liquid (no text or symbols)Drawing or legend for "type" plug is required according to IEC 335, clause
.12.5. If power cord is damaged, report to service technician agent or qualified personal to repair it.

Prohibited
natural_image
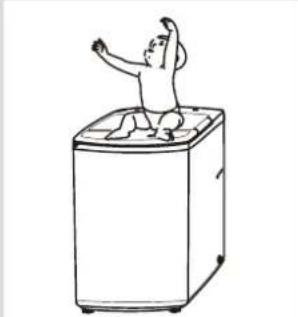
Electrical outlet diagram showing a plug inserted into a socket and wiring, with an inset close-up of the socket (no text or symbols)Do not place heavy weights nor allow
people or children sit or climb over washer cover.

Prohibited
natural_image
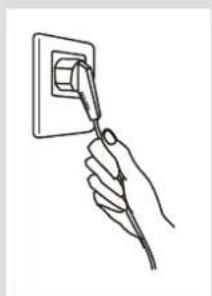
Simple line drawing of a person standing on a large refrigerator (no text or symbols)Do not pull the electric cord
when pulling out the plug.

natural_image
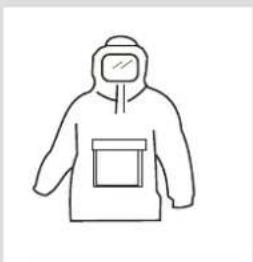
Line drawing of a hand using a power tool to switch an electrical outlet (no text or symbols)Do not wash raincoat, fishing coat and similar clothes in the washer.

Prohibited
natural_image
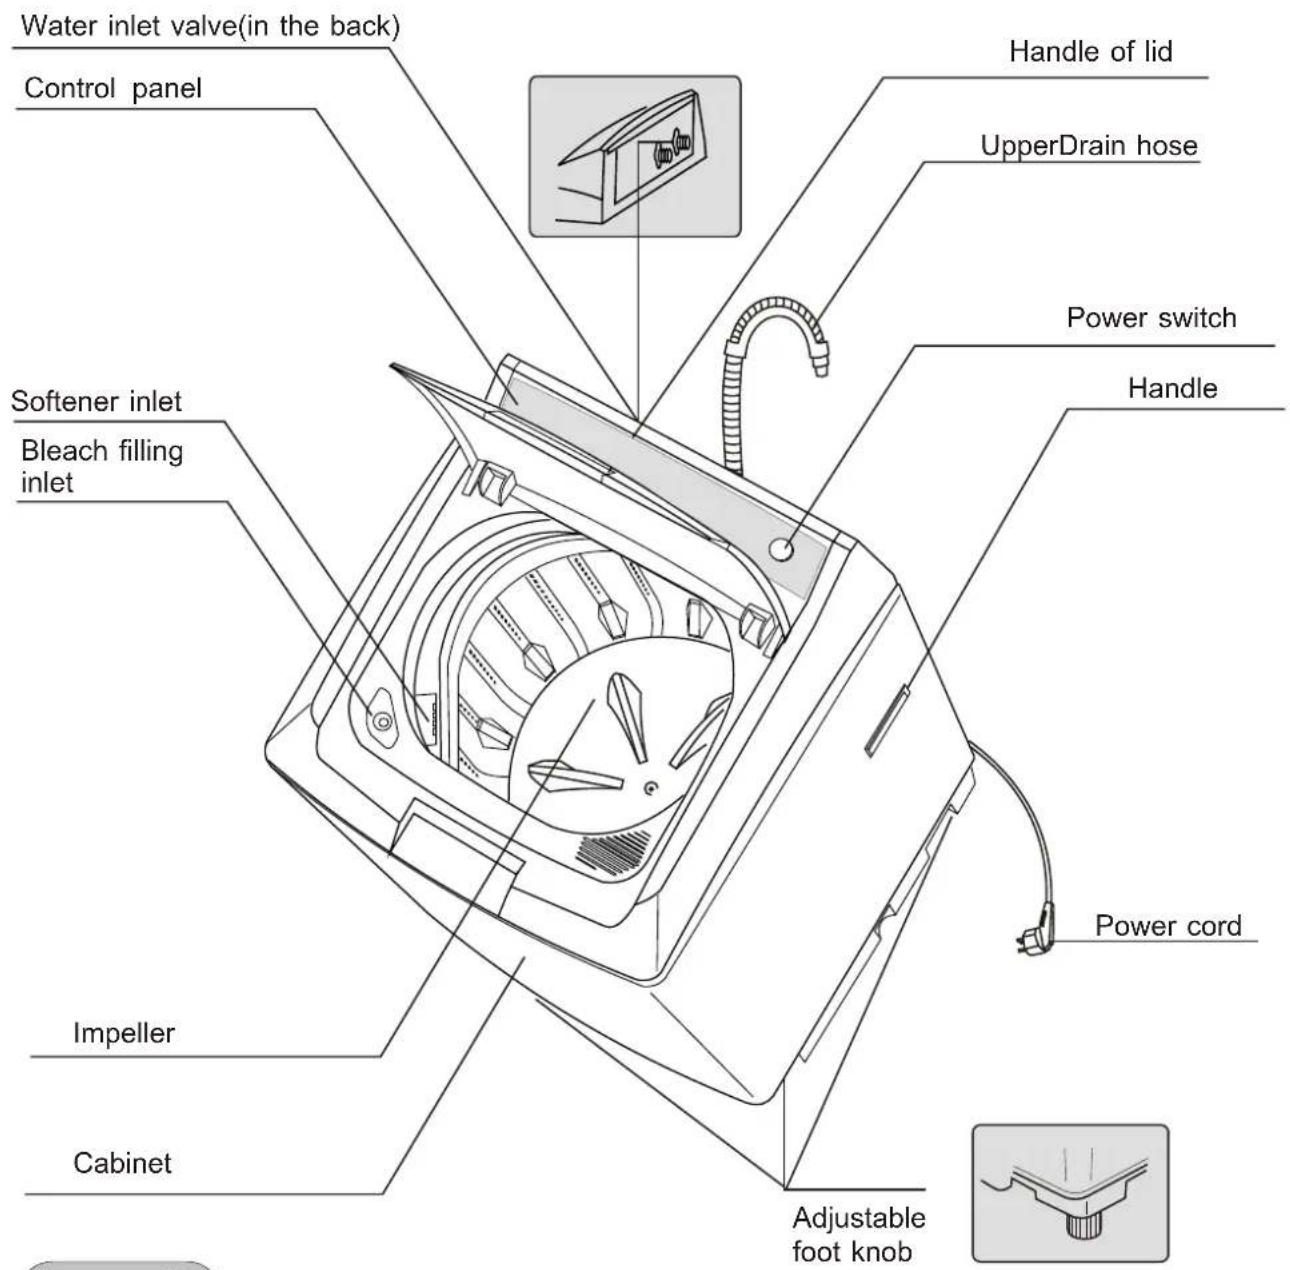
Simple line drawing of a hooded garment with a square button on the chest (no text or symbols)Parts identification of the washer
text_image
Water inlet valve(in the back) Control panel Handle of lid UpperDrain hose Power switch Softener inlet Bleach filling inlet Handle Power cord Impeller Cabinet Adjustable foot knobAccessories
text_image
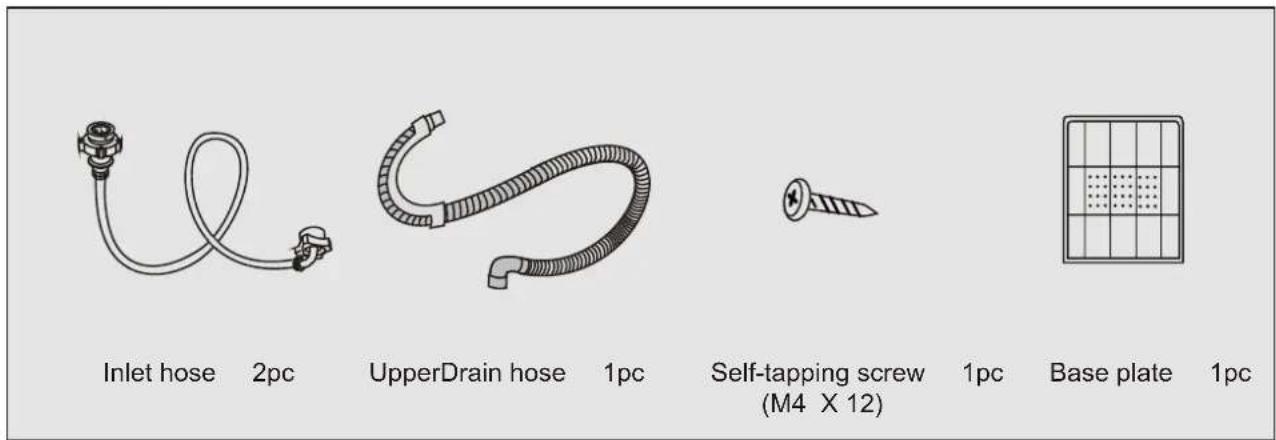
Inlet hose 2pc UpperDrain hose 1pc Self-tapping screw (M4 X 12) 1pc Base plate 1pcExplanation of washer operating panel
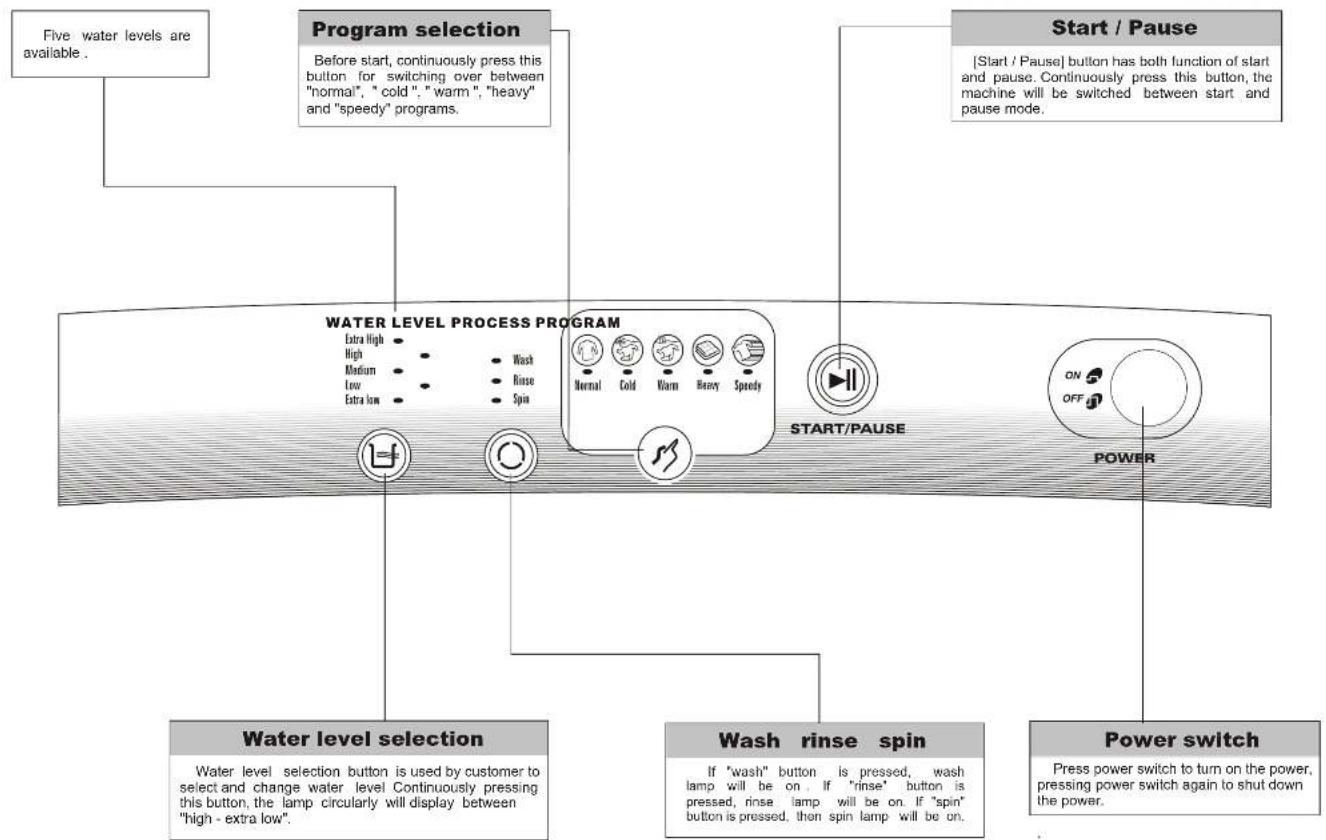
flowchart
graph TD
    A["Five water levels are available."] --> B["Program selection"]
    B --> C["Before start, continuously press this button for switching over between "normal", "cold", "warm", "heavy" and "speedy" programs."]
    B --> D["Start / Pause"]
    D --> E["[Start / Pause"] button has both function of start and pause. Continuously press this button, the machine will be switched between start and pause mode.]
    B --> F["START/PAUSE"]
    F --> G["POWER"]
    H["Water level selection"] --> I["Water level selection button is used by customer to select and change water level Continuously pressing this button, the lamp circularly will display between "high - extra low"."]
    J["Wash rinse spin"] --> K["If "wash" button is pressed, wash lamp will be on, if "rinse" button is pressed, rinse lamp will be on. If "spin" button is pressed, then spin lamp will be on."]
    L["Power switch"] --> M["Press power switch to turn on the power, pressing power switch again to shut down the power."]
Installation of the washer
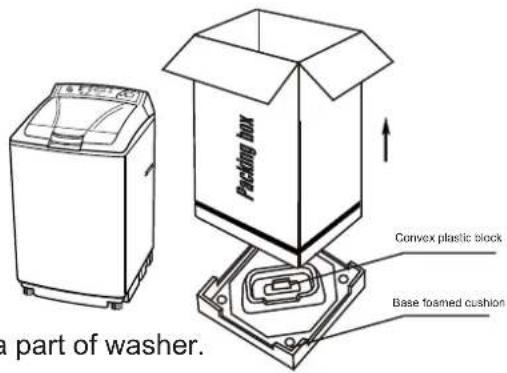
Remove package
! Remove package and take out the bottom board of the cabinet on the foam cover.
! Open the washer's lid and take out accessories.
! Remove the convex plastic block placed at the center of foamed plastic cushion of the packing case.
this is for fixing the washer during shipment rather than a part of washer.
! A trial operation or washing with foamed cushion base is strictly forbidden.
text_image
Packing box a part of washer. Convex plastic block Base foamed cushionInstallation of the bottom board
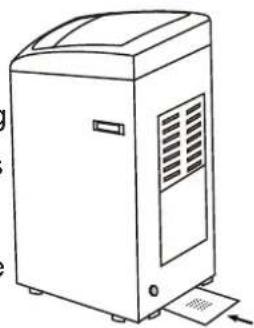
! Tilt the back of washer forward slightly, push bottom board along the base insertion grooves from the back of washer until it is completely in place.
! Fix the bottom board on the base of washer with screws.( There is a small hole in rear side of bottom board ).
natural_image
Line drawing of a portable industrial machine with ventilation slots and a paper outlet (no text or symbols)Installation of drain hose
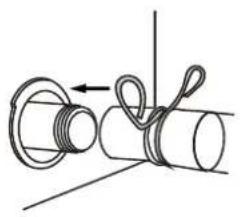
natural_image
Diagram of a mechanical assembly with a rope and cylindrical components (no text or symbols)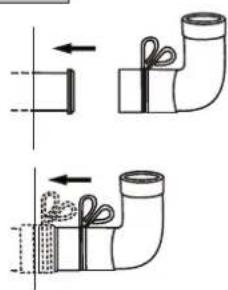
text_image
Technical diagram showing pipe fitting and component assembly with directional arrows indicating movement or forceNote: Use only the new supplied water hose with your new appliance do not use a hose from your existing machine or a hose that has been used previously.
! Completely seat the drain hose over the drain connector. Installation of water inlet hose.
! Fix and tighten it with a hoop. ( As shown in the figure, and you can use a pliers to finish it.)
Installation of water inlet pipe
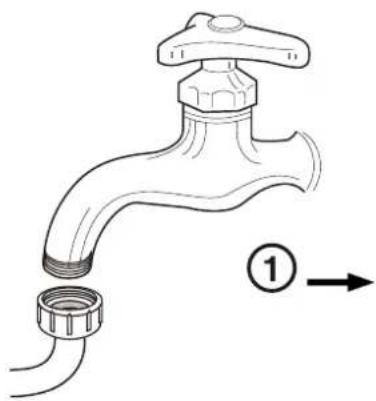
natural_image
Line drawing of a faucet with a pipe fitting and a valve, labeled with number 1 (no text or symbols on the diagram itself)
natural_image
Line drawing of a faucet with a handle and pipe, labeled with number 2 (no text or symbols on the faucet itself)Put the water inlet pipe(which has metallic filtering bag) screw on to the tap.
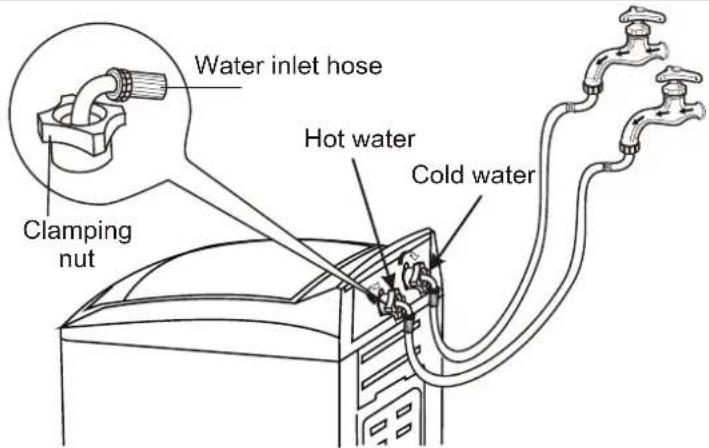
Tightly screw another end of water inlet hose on water inlet valve. (with rubber seal ring inside).
Note: When tightening the clamping nut, evenly apply the force and do not twist the water inlet valve or hose to avoid breaking of water inlet valve joint.
text_image
Water inlet hose Hot water Cold water Clamping nutPreparation before washing
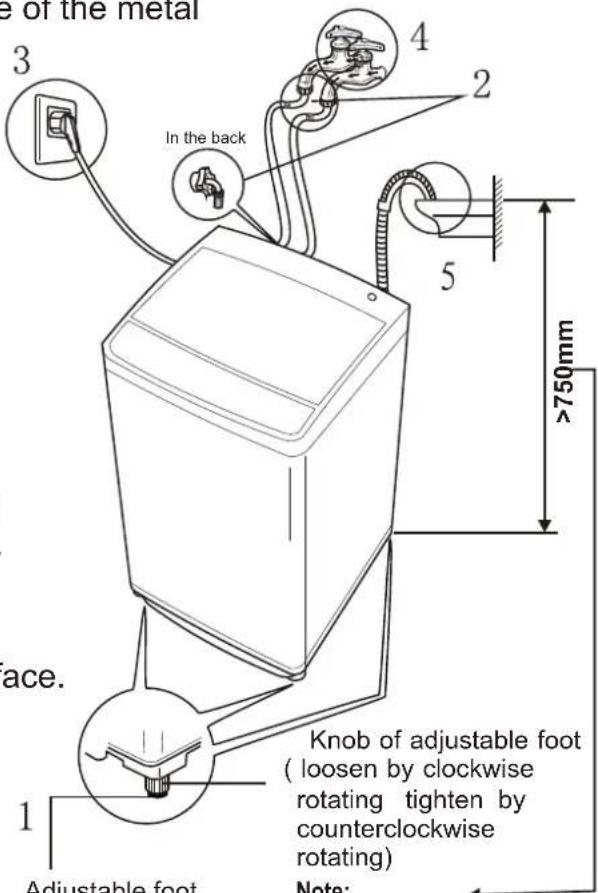
1! Leveling of washer
Before operation, check that the washer is both level and stable on the floor, otherwise the washer barrel will incline and knock against the cabinet,
(Hint: Use a spirit level aligned with the top edge of the metal
casing both at the front and side to check if the machine is level).
Adjust the adjustable feet at the front and right hand side rear of the unit as per the diagram.
To adjust:
a) Loosen the outer grey knob of adjustable foot by turning in a clockwise direction
b) Slightly incline the washer and rotate the black rubber foot clockwise to extend and counter-clockwise to retract.
c) Once the machine is both level and stable on all four corners lock each adjustable foot by rotating the outer grey knob in a counterclockwise direction.
Note: If the floor is severely out of level then correction will need to be made to the floor surface.
2 : Install the hot and cold water inlet hoses.
3 : Connect machine to power outlet.
4 ! Turn on the water supply
5 : Hang the upper drain hose on the side of the laundry sink or tub
6 : Load the washer with a suitable wash load and amount of washing powder
text_image
e of the metal 3 In the back 4 2 5 >750mm ace. 1 Adjustable foot Knob of adjustable foot (loosen by clockwise rotating tighten by counterclockwise rotating) Note:Adjustable foot (extend when clockwise rotating and shorten when counterclockwise rotating)
Knob of adjustable foot (loosen by clockwise rotating tighten by counterclockwise rotating)
Note: The water will overflow when the height of the drain hose under 750mm.
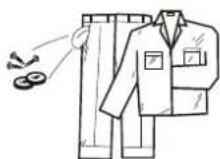
When washing, ensure that all coins, keys and other hard items are removed from wash articles and close zip fasteners to prevent damage to clothes and machine.
Only machine washable items should be put into the washer. Wash delicate items in a suitable wash bag.
Operation of normal wash program

text_image
Normal program WATER LEVEL PROCESS PROGRAM Extra High High Medium Low Extra Low Mesh Horse Spin Normal Cold Moro Power Speedy START/PAUSE ON OFF POWER 2 3 1Description of the normal wash program
! "normal" wash program is the easiest, most convenient and most common washing program.
! Close the lid when machine is running, otherwise, it will automatically stop working during spin process and send out abnormal warning.
!The washer will not work until the filled water reach the set water level.
Preparation before washing:
- Plug in the power cord
- open water tap
- load clothes uniformly
- put in suitable amount of detergent
- close the lid.
1 Press the power switch.
The "normal" program set as default is now ready for washing.
2 Select the proper water level, according to the weight of the clothes.
3 Press "start / pause" button.
"normal" program starts working.
Completion of washing
! Upon completion of washing, the buzzer will buzz continuously for 6 times and then the power will be automatically cut off.
! Close the water tap.
! Although the power can be cut off automatically, however, the as well for safety.mains power switch should be turned off
Operation for full load of soiled clothes
text_image
WATER LEVEL PROCESS PROGRAM Extra High High Medium Low Extra Low - - - - - - - - - - - - - - - - - - - - - - - - - - - - - - - - - - - - - - - - - - - - - - - - - - - - - - - - - - - - - - - - - - - - - - - - - - - - - - - - - - - - - - - - - - - - - - - - - - - - - Warm program START/PAUSE POWER 2 3 1Operation for full load of soiled clothes
! Close the lid when machine is running, otherwise, it will automatically stop working during spin process and send out abnormal warning.
!The washer will not work until the filled water reach the set water level.
Preparation before washing:
- Plug in the power cord
- open water tap
- load clothes uniformly
- put in suitable amount of detergent
- close the lid.
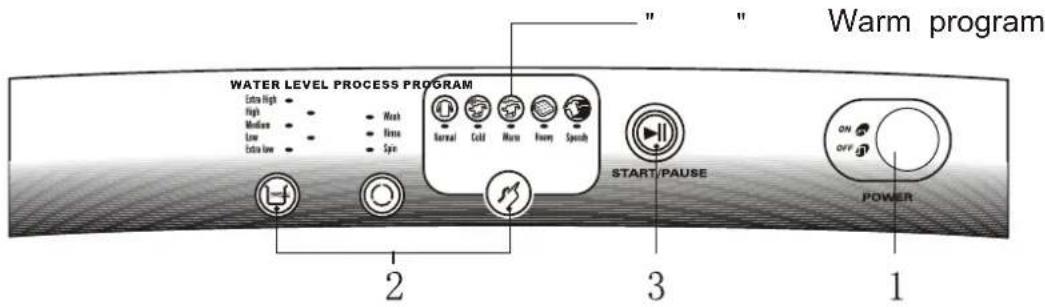
1 Press the power switch.
2 Select the "Warm" program and "High" water level.
3 Press "start / pause" button.
Completion of washing
! Upon completion of washing, the buzzer will buzz continuously for 6 times and then the power will be automatically cut off.
! Close the water tap.
! Although the power can be cut off automatically, however, the mainselbforesafety should be turned off
Operation of single wash / rinse / spin program
text_image
WATER LEVEL PROCESS PROGRAM Extra High High Medium Low Extra Low Mesh Base Spin Normal Cold Moro Power Spasticity START/PAUSE ON OFF POWER 1 2 3 4Introduction to single wash program
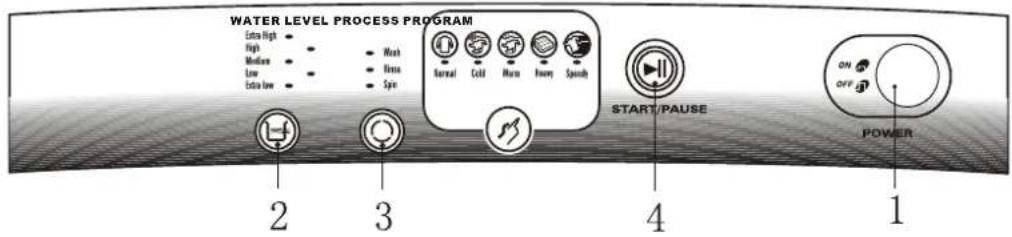
! User can freely select any single process, or any combination of processes among , "wash", "rinse" and "spin" according to the actual requirements.
! Detail operation methods are following:
! single washing -- after switching on the power, select "wash" indicator, The operation for single rinsing and single spin is similar.
! Single washing - spin -- after switching on the power, select "wash" and "spin" indicator, The operation for single rinsing - spin and single washing - rinsing is similar.
Preparation before washing:
- Plug in the power cord
- open water tap
- load clothes uniformly
- put in suitable amount of detergent
- close the lid.
1 Press the power switch.
2 Select the proper water level, according to the weight of the clothes.
3 Select the single washing program required.
4 Press "Start / pause" button. The washer will start to work with the set program.
Completion of washing
! Upon completion of washing, the buzzer will buzz continuously for 6 times and then the power will be automatically cut off.
! Close the water tap.
! Although the power can be cut off automatically, however, the main welbower safety should be turned off
Operation of other full automatic wash program
text_image
WATER LEVEL PROCESS PROGRAM Extra High High Medium Low Extra Low None Name Type Surreal Cold Hum Binary Spindle START/PAUSE ON OFF POWER 1 2 3Introduction to other full automatic washing program
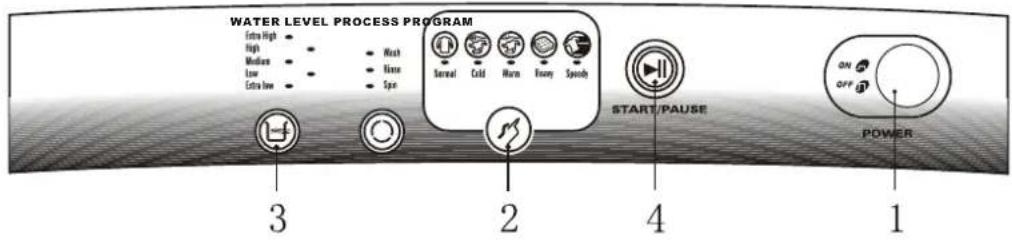
! "cold" program is used for washing the normal Clothes.
! "warm" program is used for washing the clothing cleanly.
! "Heavy" program is used for washing dirtiest or thickest clothing with the strongest water flow.
!"speedy" program is used for washing the clothing not so dirty and the whole washing process will be completed in about 30 minutes.
Preparation before washing:
- Plug in the power cord
- open water tap
- load clothes uniformly
- put in suitable amount of detergent
- close the lid.
1 Press the power switch.
2 Select any one program of "cold" "warm" "heavy", or "speedy" in Program.
3 Select the proper water level, according to the weight of the clothes.
4 Press "Start / pause" button. The washer will start to work with the set program.
Completion of washing
! Upon completion of washing, the buzzer will buzz continuously for 6 times and then the power will be automatically cut off.
! Close the water tap.
! Although the power can be cut off automatically, however, the main power should be turned off
About the procedure of full automatic wash program
| Program Contents | Speedy | Heavy | Warm | Cold | Normal |
| Water Level | Medium|Extra low | High|Extra low | High|Extra low | High|Extra low | High|Extra low |
| Wash Time (minutes) | 10 | 15 | 15 | 15 | 18 |
| Rinsing Times | 1 | 2 | 2 | 2 | 2 |
| Spin Time (minutes) | 3+2 | 5+2 | 5+2 | 5+2 | 5+2 |
| Complete Time (minutes) | 30 - 35 | 55 - 60 | 55 - 60 | 55 - 60 | 62 - 64 |
| Washings (Recommended) | Less dirty Clothes | Thicker clothes | Clothes with more dirt (soiled) | Cleaner Clothes | Normal clothes |
Note: The time required will also vary with water pressures of intake pipe, different clothes textures and different water drain conditions.
Application of detergent, softener and bleach
Application of detergent
The way for placing the washing powder is to directly put it into barrel of the washer. It is necessary to use proper amount of washing powder. Using a big a mount of detergent will generate suds over clothes, therefore rinse process will not eliminate it.
text_image
Filling opening for bleacher Filling opening for softenerApplication of softener
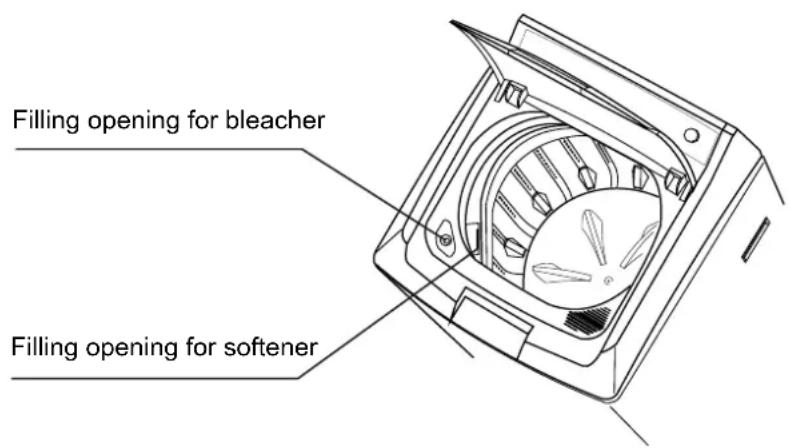
Slowly pour the clothes softener in the inlet softener opening, but washing powder, bleacher and sizing agent should not be filled through this opening. (If the location of the filling opening does not fit the operation, clockwise rotate the spin barrel to change the location of filling opening for softener) The softener can only be used in the whole procedure of washing program, however, the bulking results will be much better when using normal and strong wash program.
The softener will be filled into the washing tub automatically before the final rinsing operation. After the clothing softener is filled, the lid of the washer should not be opened during the spin procedure, otherwise an error will be caused for the automatic filling time of softener so that it can not execute effective functions.
Do not place the clothes softener in filling opening for long time, otherwise it will get solidified resulting in slack filling.
Application of bleacher
Before washing, dilute the bleacher with sufficient water and then fill it through the inlet bleach opening.
The bleacher should not be directly poured into the washing barrel, otherwise it will cause fading of colorful clothes. Please correctly use the bleach according to the application method of bleach supplier.
Standard using amount of water, washing powder and clothes softener
| Rated amount of water (liter) | Extra low MediumLow ---- High ---- Extra high | |||||
| Using amount of washing powder | Fast Program | 10 - 16g | 12 - 19g | 14 - 22g | 16 - 26g | 18 - 30g |
| Normal program | 20 - 32g | 24 - 38g | 27 - 42g | 31 - 47g | 35 - 52g | |
| Using amount of Clothes softener | about 16 ml about 18 ml about 20 ml about 22 ml about 24 ml | |||||
Note: The using amount of washing powder will vary with its different quality.
Maintenance of washer
Please keep the washer with neat appearance and perform correct maintenance to prolong the service life of washer.
Cleaning of water inlet pipe joints
natural_image
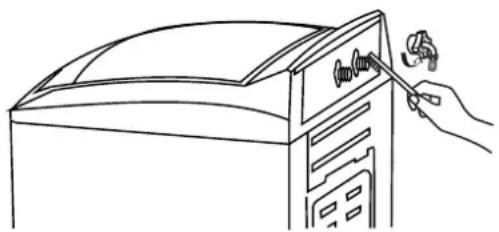
Line drawing of a hand using a tool to adjust or install a device on a computer tower (no text or symbols present)Unscrew and remove the water inlet pipe joint from the washer and clean the filtering screen of inlet valve with brush.
Identifying common troubles of washer
If the supply cord is damaged, it must be replaced by the manufacturer or its service agent or a similarly qualified person in order to avoid a hazard.
List of faults and inspection
| Faults | Inspection Items to be checked |
| No water flows in | ! If the power is off or the fuse is burned out. ! If the water supply is cut off or the water pressure is too low. ! If the inlet hose is properly connected and the water tap is opened. ! If the filtering screen of inlet valve is blocked by dirt. ! If the coil of inlet valve is damaged. (The slight electromagnetic sound is normal phenomenon when the inlet valve is switched on) ! If the "Start / Pause" button is pressed after the power switch is pressed. |
| No washing | ! If the power is off or the fuse is burned out. ! If the power supply voltage is too low. ! If the water amount reaches to the required water level. (The washer will not work until the water amount does not reach the required water level) |
| Abnormal draining | ! If the water drain hose has been very high.. ! If the end of water drain hose is sealed in pond. ! If the internal rubber seal ring of drain valve is blocked by dirt. |
| Abnormal spin | ! If the door lid is closed. ! If all clothing piled largely at one side of barrel or the clothing is excessively placed. ! If the washer is not placed in stable condition or it is placed in inclination state. (The ground is not flat). ! If the motor belt is loosened. |
Note:
During the spin process, if washings are piled at one side of the spin barrel, it will cause unbalance of spin barrel resulting in striking. At this moment, the computer inside the washer will feel this unbalance phenomenon and will automatically correct it (fill in water Washing). However, if unbalance situation is not removed after continuous three corrections, the time buzzer start to alarm, which means the computer auto-correction can not resolve the problem. Then the user has to manually and evenly place the clothing inside the barrel to solve the problem.
Following phenomena are not faults of washer
| Symptom | Causes |
| There is water leaks from the water drain hose when used for first time | This is residual water after the performance test in the factory. |
| Make up water during washing process | During the washing process, the water will be automatically made up when the water level is lower. |
| During the spin process, spin suddenly stops before water filling and rinsing. | This is because the clothes is at one side. So the safety switch starts to work to make up water, rabble while running. The spin process will be continued when the clothes is in balance status. in case of failure of three corrections of the machine. please manually adjust the balance of clothes. |
| The clothes not sufficiently spinned after spin process | The spin efficiency of full automatic washer is a little lower than that of twin tub washer. The heavy and thick part of clothes will cause uneven spin. |
Specifications and technical parameters of washer
| Rated power supply | 240V~50Hz |
| Input power of motor | 420W |
| Rated washing capacity | 6.0kg |
| Rated spin capacity | 6.0kg |
| Overall dimensions | 560 X585 X960 (mm) |
| Application water pressure | 0.03MPa~1MPa |
| Weight of whole machine | 38kg |
| Draining mode | Upper draining |
| Spin mode | Centrifugal spin |
PACKING LIST
| Number | Description | Quantity |
| 1 | Washing Machine | 1 |
| 2 | Inlet Hose | 2 |
| 3 | Upper drain Hose | 1 |
| 4 | Operation manual | 1 |
| 5 | Packing Bag | 1 |
| 6 | Self-tapping Screw Nail | 1 |
| 7 | Bottom Board | 1 |