TRWTL-80 - Washing machine Trieste - Free user manual and instructions
Find the device manual for free TRWTL-80 Trieste in PDF.


User questions about TRWTL-80 Trieste
0 question about this device. Answer the ones you know or ask your own.
Ask a new question about this device
Download the instructions for your Washing machine in PDF format for free! Find your manual TRWTL-80 - Trieste and take your electronic device back in hand. On this page are published all the documents necessary for the use of your device. TRWTL-80 by Trieste.
USER MANUAL TRWTL-80 Trieste
Before using your washing machine, please read this manual carefully and keep it for future reference.
Washing Machine
OWNER'S MANUAL
MODEL:TRWTL-80
Read This Manual
Inside you will find many helpful hints on how to use and maintain your washing machine properly. Just a little preventative care on your part can save you a great deal of time and money over the life of your washing machine. You'll find many answers to common problems in the chart of troubleshooting tips. If you review the chart of Troubleshooting Tips first, you may not need to call for service.
Should your washing machine require servicing under your warranty period please contact Eurotech Design Limited on +64 9 377-7523
Please have your serial number and proof of purchase ready. All warranty work must be authorised by Eurotech Design Ltd.
Notes
Contents
Safety and precautions.... 2
Installation of the washer....5
Preparation before washing....7
Parts identification of the washer....8
Instruction of the washer operation panel....9
Quick start.... 11
The main wash.... 12
Special features.... 13
About the procedure of full automatic wash program.... 15
Cleaning and Maintenance of the washing machine.... 16
Identify usual trouble of washer....17
Malfunction display and solutions.... 18
Technical specifications.... 18
Safety and precautions
Observe the following items in order to prevent from injuring yourself, others and the damage of property:
| Warning | This indicates serious injury or death to human being may be caused. | |
| Caution | This will remind you that injury to people and damage to property may occur. |
Please observe following contents of graphics.
| This graphics represents [cause attention], and detailed cautions will be displayed inside the graphics. △ | |
| This graphics represents [operation prohibited], and detailed prohibitive items will be displayed inside the graphics. Ⓧ | |
| This graphic represents [forcible execution], and detailed forcible execution items will be displayed inside the graphics. ● |
| This appliance is not intended for use by persons (including children) with reduced physical, sensory or mental capabilities, or lack of experience and knowledge, unless they have been given supervision instruction concerning use of the appliance by a person responsible for their safety. Children should be supervised to ensure that they do not play with the appliance. |
| Warning |
| Please do not disassembly and assembly the machine without authorization. |
| No dismantling |
| Please do not insert your hand and take out clothes inside the spin barrel before it is fully stopped. |
| No touching |
| Please do not install the machine in damp and raining environment to avoid electric shocking, catching fire, faults and distortion accidents. |
| No dampness |

Warning
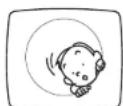
Please do not let children climb the machine or peer into the rotating spin barrel to avoid accidents.

Prohibited
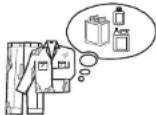
It is prohibited to wash the clothes touching with kerosene, gasoline, alcohol and other flammable materials.

Prohibited
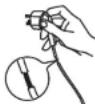
Please do not damage power flexible cord and power plug to avoid electric shocking, short circuit and catching fire.

Prohibited
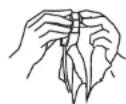
Regularly clean the power plug to remove dust and dirt to avoid contact failure.

Please pull out plug from the socket if the machine is not in use.

Pull out the plug
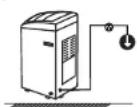
Please well connect the earth line of socket to avoid electric shocking by accidental leakage.
( earthing )

Earthing
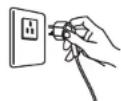
Please insert the power plug tightly.

Please do not place on the washer burning candle, mosquito-repellent incense, cigarette and other
flammable things, as as electric stove, air heating fan and other
heating
sources.
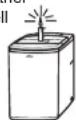

Smoke and fire prohibited
Please use correct power source.

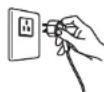
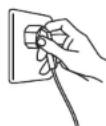
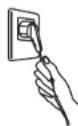
Please do not pull out or insert the plug with wet hands to avoid electric shocking.

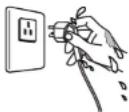
Wet hands are prohibited

Caution
Please ensure that the water inlet pipe is connected and the tap is opened before washing
clothes.

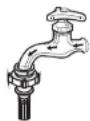
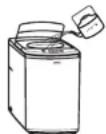
The water temperature shall not exceed 50°C when washing with warm water.

Prohibited
Customers are not allowed to change the power line without permission.

Prohibited
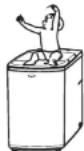
It is strictly prohibited to place children or lay weights on the washer.

Prohibited
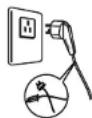
Please do not pull the electric cord when pulling out the plug.

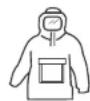
Please do not wash down jacket, raincoat, fishing coat and similar clothes in the washer.

Prohibited
Installation of the washer
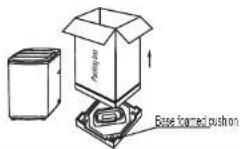
Remove package
- Remove package and take out the bottom board of the cabinet on the foam cover.
- Open the lid of washer's door and take out accessories.
- A trial operation or washing on the foamed cushion is strictly forbidden.
Installation of drain hose


• Completely sleeve the drain hose over the sewer.
• Fix and tighten it with a hoop.
( As shown in the figure )
Placement of water drain hose
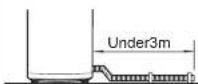
If the water drain hose shall be extended, its length shall not exceed 3 meters, otherwise it will affect the water discharging time.
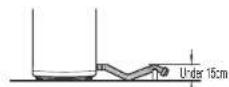
The placed height of water drain hose shall not exceed 15cm.

Do not bend the water drain hose and place it under the washer.
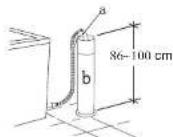
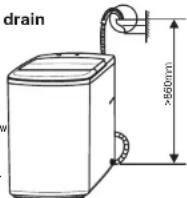
Placement of upper water drain hose
- The height of drain hose ("a") should between 86-100 cm.
- Diameter of "b" should not less than 3 cm, and flow capacity not less than 40 L/Min.
- Before washing machine starts, user should hang up the drain pipe 86-100cm height from the floor.
Installation of water inlet pipe
- Put the water inlet pipe(which has metallic filtering bag) screw on to the tap.
- Tightly screw another end of water inlet hose on water inlet valve. (with rubber seal ring inside). Note: When tightening the clamping nut, evenly apply the force and do not twist the water inlet valve to avoid breaking of water inlet valve joint.
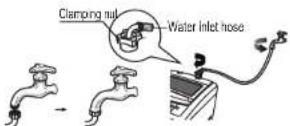
Only for model with double screw thread water inlet pipe
Installation of the washer
Installation of water inlet pipe
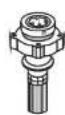

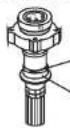
Small ball


Push down the slide jacket to expose the small balls and enable separation of connector socket from speedy connector.

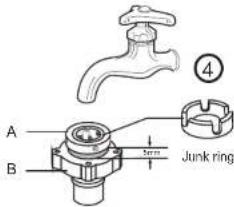
text_image
A B Term Junk ring ④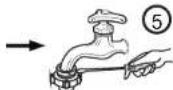
Unscrew four screws of part A and sleeve part A horizontally over the mouth at the end of water tap (the mouth at the end of water tap must be flat and smooth. Flatten it by filing if it is not flat) and push it upward with force making the rubber washer firmly press the plane center of water tap mouth. Then tighten the screw sequentially.
After that, tightly screw on part B.
The connection socket consists of A and B two parts. Before installation, A and B two parts must be unscrewed about 5mm, or directly disconnected. If the bore of water tap is larger, remove the plastic junk ring of part A.
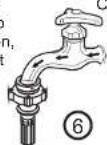
Connect
Push down the slide jacket of speedy connector (4 small balls must be exposed), insert it into the connection socket and then push upward. Release the connection of water tap with speedy connectors completely. If it is required to feed water, simply open the water tap: Close the water tap, push down a slide jacket of speedy connector and pull out the speedy connector.
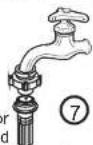
Tightly screw another end of water inlet hose on water inlet valve. (with rubber seal ring inside). Note: When tightening the clamping nut, evenly apply the force and do not twist the water inlet valve to avoid breaking of water inlet valve joint.
Only for model with single screw thread water inlet pipe
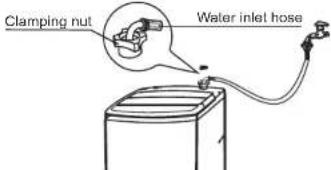
text_image
Clamping nut Water inlet hose
If the supply cord is damaged, it must be replaced by the manufacturer, its service agent or similarly qualified persons in order to avoid a hazard. The instructions for appliances connected to the water mains by detachable hose-sets shall state that the new hose-sets supplied with the appliance are to be used and that old hose-sets should not be reused.
Preparation before washing
1 Adjust the adjustable foot to make the washer be placed stable.
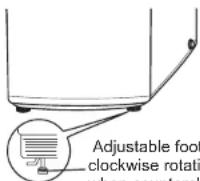
Adjustable foot (extend when clockwise rotating and shorten when counterclockwise rotating)
(Slightly incline the washer first and loosen the adjustable foot knob. Adjust the adjustable foot so as to ensure four corners of washer be steadily contacted with the ground. Then tighten the adjustable foot knob and lock it. If the ground is obviously not flat, correction should be made on the ground surface, otherwise the washer barrel will incline and knock the cabinet)
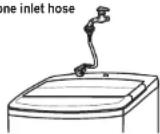
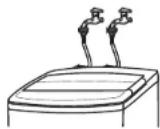
2 Install the water inlet hose.
For one inlet hose
For two inlet hoses
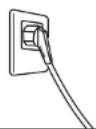
3 Connect with to power source.
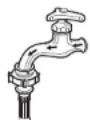
4 Turn on the water supply.
5 Put down the drain hose.
Gravity drain
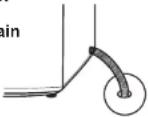
Upper drain
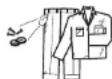
6 Put in clothes and suitable amount of washing powder.
NOTICE

Before washing, please do take out coins, keys and other hard goods, and zip up clothes tightly to prevent them and barrel from damage.
Parts identification of the washer
text_image
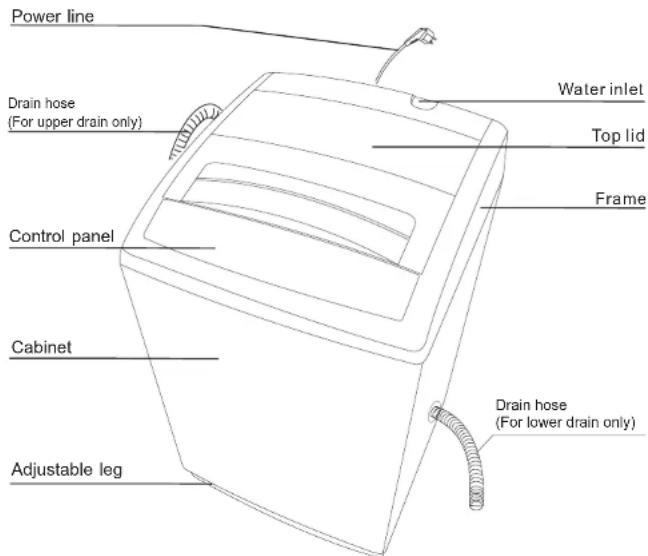
Power line Drain hose (For upper drain only) Control panel Cabinet Adjustable leg Water inlet Top lid Frame Drain hose (For lower drain only)| Accessories | |||
| Fixing ring (1) is used for the fixing in time of the installation of the lower drain hose. | Universal connector | Water inlet hose assembly | Self-tapping screwBase cover |
| Only for lower drain hose | Only for model with single screw thread water inlet pipe | Only for model with double screw thread water inlet pipe | Only for models including base cover |
Please refer to the real material as the attachment
text_image
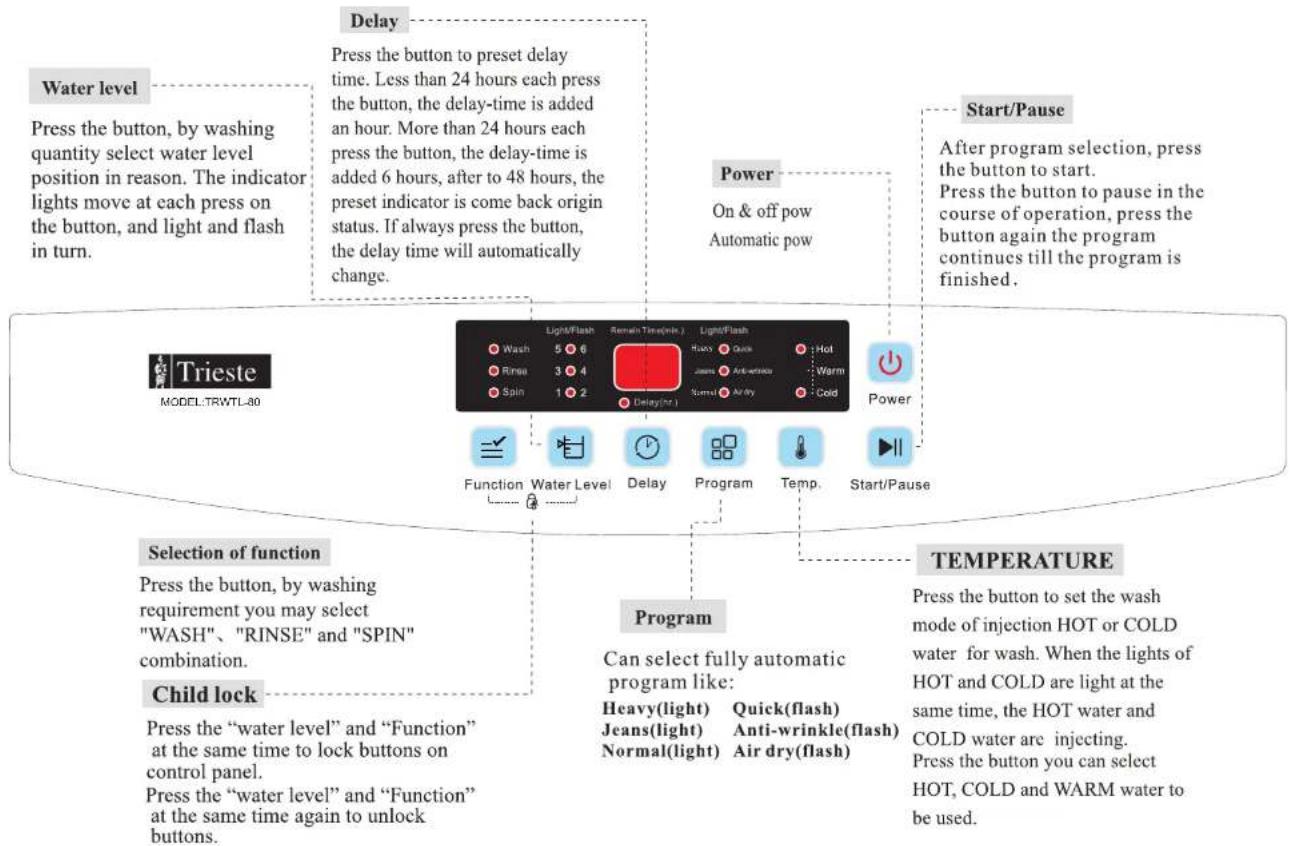
Water level Press the button, by washing quantity select water level position in reason. The indicator lights move at each press on the button, and light and flash in turn. Delay Press the button to preset delay time. Less than 24 hours each press the button, the delay-time is added an hour. More than 24 hours each press the button, the delay-time is added 6 hours, after to 48 hours, the preset indicator is come back origin status. If always press the button, the delay time will automatically change. Power On & off pow Automatic pow Start/Pause After program selection, press the button to start. Press the button to pause in the course of operation, press the button again the program continues till the program is finished. Trieste MODEL:TRWTL-80 Selection of function Press the button, by washing requirement you may select "WASH"、"RINSE" and "SPIN" combination. Child lock Press the "water level" and "Function" at the same time to lock buttons on control panel. Press the "water level" and "Function" at the same time again to unlock buttons. Program Can select fully automatic program like: Heavy(light) Jeans(light) Normal(light) Quick(flash) Anti-wrinkle(flash) Air dry(flash) TEMPERATURE Press the button to set the wash mode of injection HOT or COLD water for wash. When the lights of HOT and COLD are light at the same time, the HOT water and COLD water are injecting. Press the button you can select HOT, COLD and WARM water to be used.* If the drawing is changed, no information anymore.
To protect the control panel, the interval time of power on and off should be not less than 30 seconds.
— 9 —
Quick start
flowchart
graph TD
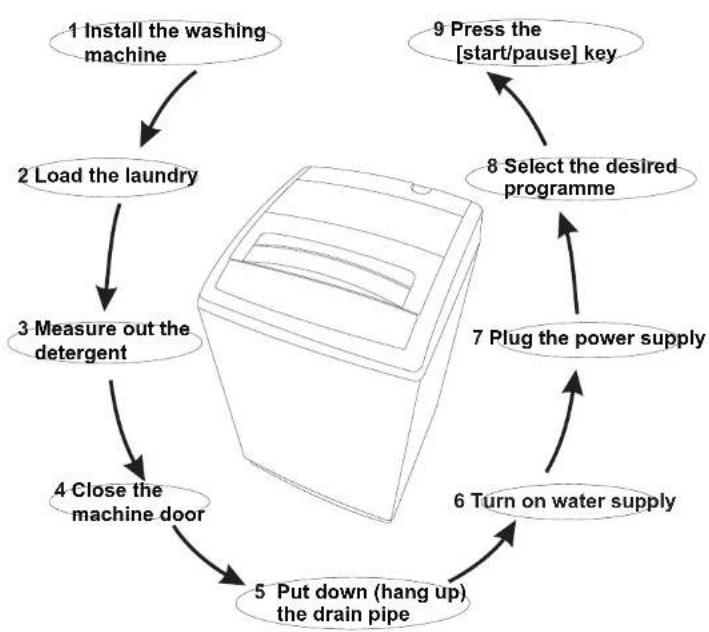
    A["1 Install the washing machine"] --> B["2 Load the laundry"]
    B --> C["3 Measure out the detergent"]
    C --> D["4 Close the machine door"]
    D --> E["5 Put down (hang up) the drain pipe"]
    E --> F["6 Turn on water supply"]
    F --> G["7 Plug the power supply"]
    G --> H["8 Select the desired programme"]
    H --> I["9 Press the [start/pause"] key]
Programme selection
1 Press the POWER button.
2 Select the proper water level and other attached functions.
3 press the start/pause key.
The wash stops
- When the wash stops, the buzzer will buzz continuously for 6 times and then the power will be automatically cut off.
• Turn off the water tap. - Although the power can be cut off automatically, the power plug must be pull out for the safety.
The main wash
Instruction of the Normal program
1.[Normal] wash program is the easiest, most convenient and most common washing program. When the user press the power switch and then press [Start/Pause] button, the normal washing program will start to work. 2.When the washer start to work, the digital tube show the remain time. The indicator light which stand for remaining time is flickering.
Steps in details
- Press the power switch.
- According to the washing amount choose the proper water level.
- Press START/PAUSE button.
Instruction to single wash procedure
1.User may freely select any single procedure, or any combination of procedures among WASH, RINSE and SPIN according to the actual requirements. It is only required to turn off any one or two of these three indicators that not needed by the user. And keep the indicator be on showing the process needed by the user. 2.Single wash -- after switching on the power, turn off RINSE and SPIN two indicators by pressing these two keys. The operation for single rinse and single spin is similar. 3.Single wash-spin -- after switching on the power, turn off RINSE indicator by pressing that key. The operation for single rinse-spin and single wash-rinse is similar.
Use the cleaning solution for twice
- Put the laundry in the first batch and wash powder and press "Function" button to set single "wash" to run.
- Take out the laundry in the first batch after hearing the buzzing sound.
- put in the laundry in the second batch, and run "Wash", "Rinse", "Spin"
- Take out the laundry in the second batch after hearing the buzzing sound.
- Put in the laundry in the first batch and press "Function" button to run "Rinse" and "Spin".

NOTICE
! .Close the lid of the door when machine is running, otherwise, it will automatically stop working during spin process and send out abnormal warning.
! .The washer will not work when the filled water does not reach the set water level.
Special features
Delay time program
Delay time means the preset beginning time of washing.
1. Switch on the power
2. Open the tap and lay the drain hose.
3. Put in the laundry and detergent.
4. Select the proper water level according to the quantity of clothes.
5. Select the functions and programs.
6. Press "DELAY" button to select the beginning time of washing.
7. close the lid and press "START/PAUSE" button.
Confirmation of the delay and inspection
-
After the delay function is started, the corresponding delay light will flash, and other lights are turned off.
-
After the delay function is started, press "Delay" button continuously, you may inspect the preset program and function. Loose the button, the program return to delay status.
Cancel the delay time, or alternate the delay time
- Press "Power" button to cancel the delay time.
- To change the delay time, cancel the delay time first, and then press "Delay" button to reset.
Quick
Wash time is short. Suitable to wash light stained clothes and clothes in summer.
Heavy
Delicate wash, especially for silk fabrics.
Jeans
High wash ability, suitable to wash heavy or serious stained clothes.
Air dry
As for not easily fading, deforming, and non-waterproof clothes, can use the function to dry clothes without heating, and to reach the result of being dried in a room.
Anti-wrinkle
The wash time is short, rinses many time with high water level, thoroughly wash away the garment.
text_image
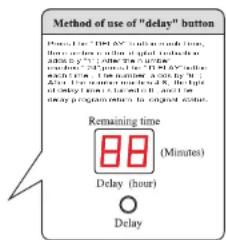
Method of use of "delay" button Please click "TIM 6Y" to account time. It is used to write the input of an app or file. The user's response is: "TIM 6Y" will be done in the time period. This is also taken by "TIM 6Y" with each time. The number of apps is 30, and the time is 120 minutes. At the start of the time, the time is 120 minutes. The delay program returns to account time. Remaining time 88 (Minutes) Delay (hour) DelaySpecial features
Child lock
Press the "Function" and "water level" at the same time to lock buttons on control panel. Press the "Function" and "water level" at the same time again to unlock buttons.
Function of automatic power shut off
- If the machine do not start to work within 10 minutes after powered on, it will power off automatically.
- After end of operation and the buzzer sounding 6 times, it will power off automatically.
Function of adjusting for imbalance
- If the laundry is placed uneven before spinning, it is likely to cause vibration during spinning. The washing machine has a function of adjusting imbalance. When working, the washing machine always inspects operation state automatically. If the spinning vibration is too great, the washing machine automatically starts the adjusting program to balance.
- When the machine adjusts imbalance, rinse light will flash, and the machine will start to inject water to set water level. The machine adjusts imbalance automatically for about 1 minute, then drains water, returns to original spinning slate. If the washing machine can adjust the imbalance twice. If the adjustment has no function, it will alarm.
Fuzzy control function
Standard procedures default implementation fuzzy control function. After startup, such as water level before starting the keys will be cancelled automatically according to the fuzzy control functions; In addition, the fuzzy measure before, if there is no water, tub fuzzy measurement, the water level directly as the default file namely 6 gear levels.
Fuzzy control function is at boot automatically after the determination of cloth is measured, decide the water level. In fuzzy testing process, water circulation flashing lights display, digital pipe display "--".
Power failure memory function
If the power supply becomes off suddenly during operation, the machine remembers the current operation state. When power is on, the machine returns to former operation state automatically.
Only for washers having these two functions
About the procedure of full automatic wash program
| Program | Wash time | Rinse times | Spin time | Total time |
| Heavy | 12 minutes | two times | 5 minutes | 48 minutes |
| Quick | 3 minutes | one time | 1 minutes | 14 minutes |
| Normal | Soak 27 minutesWash 14 minutes | one time | 6 minutes | 68 minutes |
| Jeans | Soak13 minutesWash 4 minutes | two times | 1 minutes | 45 minutes |
| Anti-wrinkle | 12minutes | two times | only drain | 37 minutes |
| Air dry | 58 minutes | 60 minutes |

Notices:
The total time included the time of entering water and the drain time. It can affect the total time that is the pressure of the tap water in your family and the drain speed.
During Normal washing program, it is identified as Efficiency Program.
Cleaning and Maintenance of the washing machine
| End of program | Maintenance | ||
| The washing machine will send off the sound of "You-dou" at the end of any program operation to remind you to take out the laundry or operate it again.After the sound, the washing machine returns to its power-off state with no display and all lights off.Please shut off the tap, pull out the plug when not in use to avoid water leakage or the fire accidents. | Use gentle clothing to wipe off the water and dirt on the surface each time after using the washing machine.Detergent , propellant and other chemicals are not allowed to use so as to avoid any damage to the plastic accessories. | ||
| Clean the water inlet | Clean Of the filter | ||
After long time used the water inlet mesh bag may be blocked with smudgines and should be cleaned according to the following steps:Switch on the power-followed by shutting off the tap .2.Let the washer works for 5 seconds so that water flows into the tub through the water inlet hosedhen turn off the powerUnload the water inlet hose and clean the mesh bag, then restore the water inlet assembly.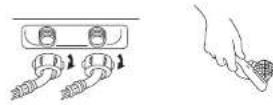 | After using the washing machine for a periodic lease clean it according to the following steps:Take out the lint filter.Open the filler and wash it clean in the water.Restore it and fix it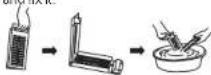 (only for magic filter) (only for magic filter) | ||
| After using the washing machine for a period, clean it according to the following steps:1. Take off the lint filter.Turn over the mesh bag and wash it clean in the water.Restore and fix it.ZDCK](only for normal filter) | |||
| Clean the lint filter in the drain pump (only for having drain filter) | |||
| 1. Drain the water out of the pump,under which use a container to collect. | 2. Loosen the pump cover anticlockwise. | 3. Take out the lint filter. | |
| 4. Clean the filter. | 5. Restore it and adjust the convex place to align at the pump hole. | 6. Tighten the pump cover clockwise. | |

Notes:
If the drain filter is not cleaned at proper time (every 10 times of use). Drain problem could be caused.
Identify usual trouble of washer
When the washer is in trouble, please contact local service office or the sales service department of our company and the customer should not dismantle the machine without permission.
If the washer can not work normally, or appear abnormality or alarms, please check and correct as follows.
List of faults and inspection
| Faults | Inspection Items |
| No water flows in | ● If the power is off or the fuse is burned out.● If the water supply is cut off or the water pressure is too low.● If the inlet hose is properly connected and the water tap is opened.● If the filtering screen of inlet valve is blocked by dirt.● If the coil of inlet valve is damaged. (The slight electromagnetic sound is normal phenomenon when the inlet valve is switched on)● If the "Start / Pause" button is pressed after the power switch is pressed. |
| No washing | ● If the power is off or the fuse is burned out.● If the power supply voltage is too low.● If the water amount reaches to the required water level. (The washer will not work if the water amount does not reach the required water level)● If it is set to "Delay" washing mode. (It will only start to work until the reservation time reached) |
| Abnormal draining | ● If the water drain hose is placed very high.● If the end of water drain hose is sealed in pond.● If the internal rubber ring of drain valve is blocked by dirt. |
| Abnormal spin | ● If the door lid is closed.● If all clothing piled largely at one side of barrel or the clothing is excessively placed.● If the washer is not placed in stable condition or it is placed in inclination state. (The ground is not flat).● If the motor belt is loosened. |
Note: During the de spin process, if washing are piled at one side of the spin barrel, it will cause unbalance of spin barrel resulting in striking. At this moment, the computer inside the washer will feel this unbalance phenomenon and will automatically correct it (fill in water Washing). However, if unbalance situation is not removed after continuous three corrections, which means the computer auto-correction can not resolve the problem. Then the user has to manually and evenly place the clothing inside the barrel to solve the problem.
Malfunction display and solutions
When the washer is in trouble, please contact local service office or the sales service department of our company and the customer should not dismantle the machine without permission.
If the washer can not work normally, and the abnormal indication is shown in the nixie tube window or the machine alarms, please check and correct them as follows.
| Fault | Cause of fault | Indication | Alarm of the buzzing sound | Stopping alarm |
| Alarm for water inlet | Water injection for about 16 minutes, but do not reach preset water level | "E1" flares | The buzzer goes on buzzing for 10 seconds. If the fault is not solved, buzzes again for 10 seconds in every 16 minutes. | Open the lid to deal with faults, then close the lid to stop the alarm. |
| Alarm for opening lid | Open the lid after starting the delay time. Open the lid when the washer is spinning. Open the lid when entering into the child lock state. | "E2" flares | ||
| Imbalance alarm | Checked imbalance for the third time. | "E3" flares | ||
| Drain alarm | Alarm for water drain lime cut. | "E4" flares | ||
| Overflow alarm | After the water reaching the preset water level, water injection doesn't cease. | "E5" flares |
Technical specifications
| Size | 601x625x1000(mm) | Weight of the product | 45kg |
| Rated input power | 560W | Rated capacity of wash and spinning | 8.0kg (dry tube) |
| Rated voltage | 240V~ | Maximum water pressure permitted in the water inlet | 0.6Mpa |
| Rated frequency | 50Hz | Minimum water pressure permitted in the water inlet | 0.1Mpa |