SCD6E - Tumble drier Stirling - Free user manual and instructions
Find the device manual for free SCD6E Stirling in PDF.


User questions about SCD6E Stirling
0 question about this device. Answer the ones you know or ask your own.
Ask a new question about this device
Download the instructions for your Tumble drier in PDF format for free! Find your manual SCD6E - Stirling and take your electronic device back in hand. On this page are published all the documents necessary for the use of your device. SCD6E by Stirling.
USER MANUAL SCD6E Stirling
natural_image
White Stirling air purifier with control panel and side-mounted buttons, shown against a blue abstract background (no visible text or symbols on the device body)Clothes Dryer 6kg
Model Number SCD6E
INSTRUCTION MANUAL
Contents
02 Warranty
03 Welcome
04 Safety Precautions
06 Important Safeguards
08 Features
09 Product Overview
11 Getting Started
13 Installing the Dryer
16 Instructions
18 Operating Instructions
19 Cleaning & Maintenance
20 Control Panel Indicators
21 Trouble Shooting Guide
23 Repair & Refurbished Goods or Parts Notice

text_image
ALDISTIRLING®
Clothes Dryer 6kg
Warranty Details
The product is guaranteed to be free from defects in workmanship and parts for a period of 36 months (dependant on product) from the date of purchase. Defects that occur within this warranty period, under normal use and care, will be repaired, replaced or refunded at our discretion. The benefits conferred by this warranty are in addition to all rights and remedies in respect of the product that the consumer has under the Competition and Consumer Act 2010 and similar state and territory laws.
Our goods come with guarantees that cannot be excluded under the Australian Consumer Law. You are entitled to a replacement or refund for a major failure and for compensation for any other reasonably foreseeable loss or damage. You are also entitled to have the goods repaired or replaced if the goods fail to be of acceptable quality and the failure does not amount to a major failure.
Welcome
Congratulations on choosing to buy a Stirling™ product.
All products brought to you by Stirling™ are manufactured to the highest standards of performance and safety, and, as part of our philosophy of customer service and satisfaction, are backed by our comprehensive 3 Year In Home Warranty. We hope you will enjoy using your purchase for many years to come.
Safety Precautions
To reduce the risk of personal injury or damage to property, basic safety precautions must be observed including the following:
- Read carefully and save all the instructions provided with the appliance.
● Always turn the power off at the power outlet before you insert or remove a plug. Remove by grasping the plug, do not pull on the cord. - Turn the power off and remove the plug when the appliance is not in use and before cleaning.
● Always use the appliance from a power outlet of the voltage (A.C. only) marked on the appliance. - Do not use your appliance with an extension cord unless this cord has been checked and tested by a qualified technician or service person.
- This appliance is not intended for use by persons (including children) with reduced physical, sensory or mental capabilities, or lack of experience and knowledge, unless they have been given supervision or instruction concerning use of the appliance by a person responsible for their safety.
- Never leave the appliance unattended while in use.
- Young children should be supervised to ensure that they do not play with the appliance.
- Do not use the appliance for any purpose other than its intended use.
- Do not place the appliance on or near a flammable or hot object.
- Place the appliance on a flat and even surface.
-
Do not allow the power cord of the appliance to hang over the edge of a table or touch any hot surfaces.
-
Some appliances are “sealed” using tamper proof screws to avoid tampering/maintenance by unskilled or unqualified persons and also for safety reasons.
- Do not operate any electrical appliance if the power cord is damaged or after the appliance has been dropped or damaged in any manner. If damage is suspected, please refer to the warranty card for instructions.
CAUTION:
To reduce the risk of electric shock, do not immerse or expose the product, flexible cord or plug to rain, moisture or any liquid.
Do not use the product near baths, basins or other vessels containing water or other liquids, or when standing in or on damp or wet surfaces.
In the event where the appliance is dropped into water, turn off the power at the power outlet and remove the plug immediately. DO NOT REACH INTO THE WATER TO RETRIEVE IT.
It is important to note that the appliance will have to be inspected by a qualified technician before using it again.
Never allow children to play with electrical equipment
Important Safeguards
- Always read the washing instruction of garments being dried to ensure they are suitable for tumble drying.
- Oil-stained fabric can ignite spontaneously, especially when exposed to heat sources such as in a tumble dryer. The items become warm, causing an oxidant reaction in the oil. Oxidation creates heat. If the heat can not escape, the fabric can become hot enough to catch fire. Piling, stacking or storing oil stained fabric can prevent heat from escaping and so create a fire hazard. Do not place them in the dryer.
- Warning: Never stop a tumble dryer before the end of the drying cycle unless all items are quickly removed and spread out so that the heat is dissipated.
- This dryer has ventilation openings in the front, do not obstruct the openings.
- The dryer must not be installed behind a lockable door, a sliding door or a door with a hinge on the opposite side to that of the tumble dryer in such a way that a full opening of the tumble dryer door is restricted.
- The lint filter has to be cleaned after each use, lint must not be allowed to accumulate around the tumble dryer. NOT CLEANING THE FILTER CAN CAUSE THE DRYER TO OVERHEAT AND POSSIBLY CATCH FIRE.
- The tumble dryer is not to be used if industrial chemicals have been used nearby for cleaning.
- CAUTION This appliance has a risk of fire, do not leave the appliance unattended while in use.
Important Safeguards
- Items such as foam rubber (latex foam), shower caps, waterproof textiles, rubber backed articles and clothes or pillows filled with foam rubber should not be dried in the tumble dryer.
- Fabric softeners, or similar products, should be used as specified by the fabric softener instructions.
- This dryer is not intended to be placed on top of a top loading washing machine.
- If wall mounting the unit be sure to use appropriate fasteners and fittings and make sure the unit is secured correctly on the wall. i.e. Into the stud.
Features
- Multiple drying programs.
- Child saftey lock to prevent children playing with the dryer.
- Crease guard to reduce wrinkles and creases in clothes.
- Upside down wall mountable. Includes wall mounting kit and 2 control panel stickers.
- Reverse tumble drying to help reduce the clothes from tangling during the drying process.
- Simple and easy operation with electronic control panel.
- Easily watch the drying process through the viewing window.
- Removable, easy to clean lint filter.
- Front venting conveniently located on the front panel.
- Durable stainless steel drum for better performance.
- Large 180 degree door opening angle
- Safety switch on door.
- 1500W drying power for efficient drying performance.
Product Overview
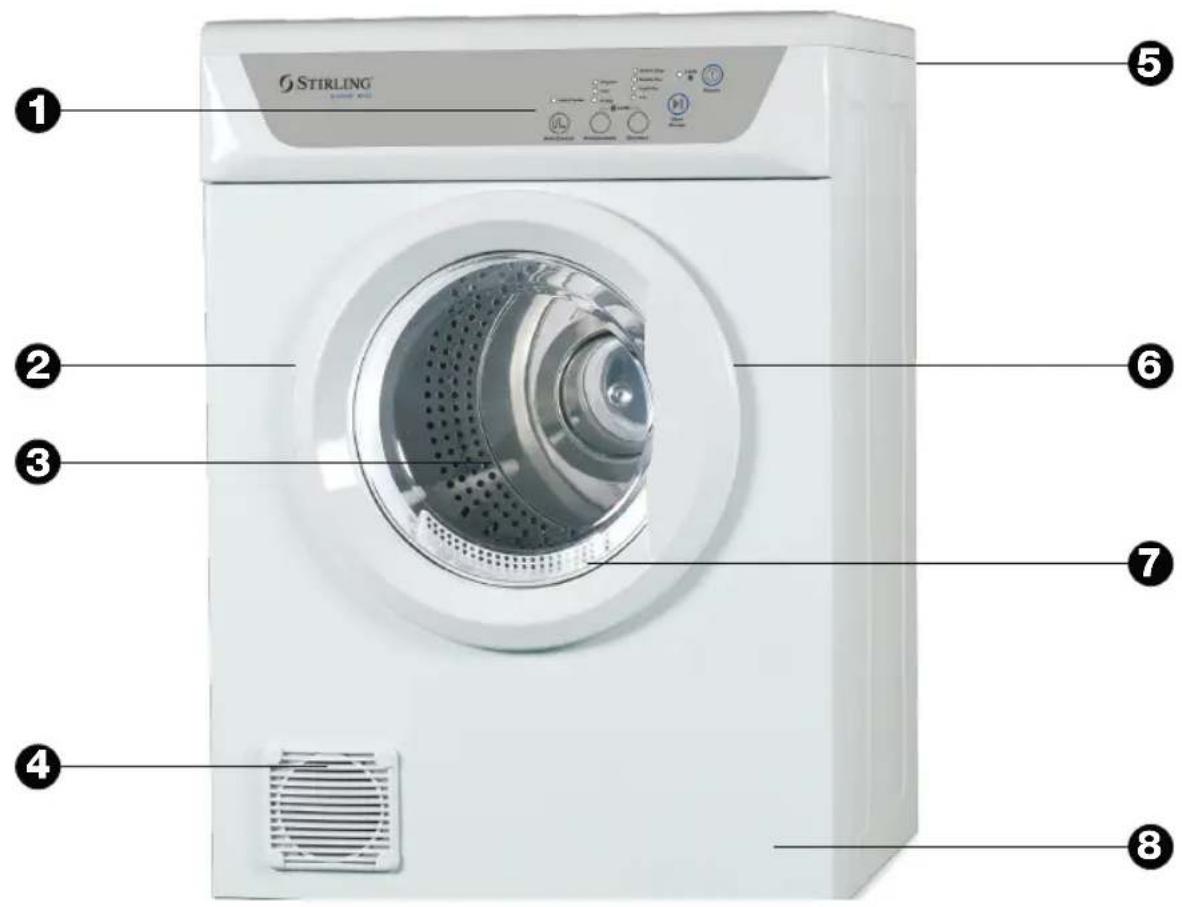
text_image
Stirling ① ② ③ ④ ⑤ ⑥ ⑦ ⑧- Control panel
- Door
- Inner tub
-
Front vent
-
Reset button
- Door lock
- Filter
- Housing
Product Overview (Cont.)
Control panel guide
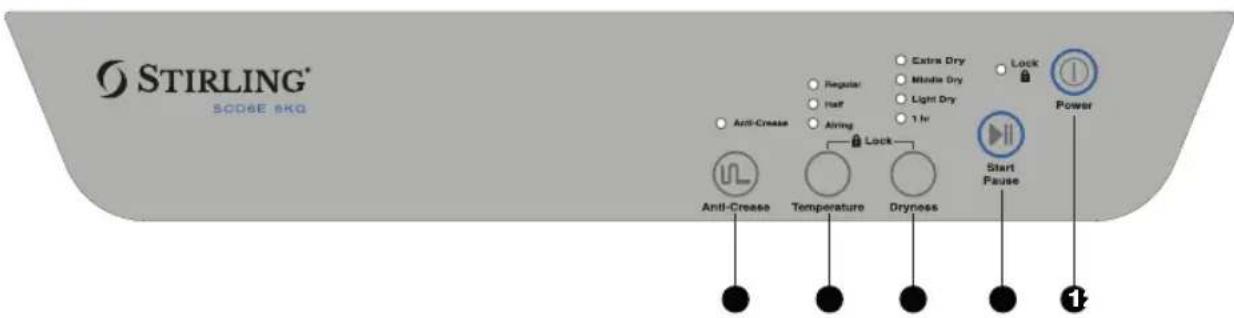
text_image
STIRLING® SODGE 6kQ Anti-Crease Regular! Half Airing Lock Extra Dry Middle Dry Light Dry 1 hr Lock Power Anti-Crease Temperature Dryness Start Pause 1- Power
- Start/Pause
-
Dryness (extra dry/middle dry/light dry/1 hour)
-
Temperature (regular/half/airing)
- Anti-crease
Wall mounting kit

text_image
Dryness Temperature Anti-Crossiss Start Pause Lock Airing Anti-Crossiss Power Lock Light Dry Middle Dry Regular Extra Dry Stirling® SODGE SKO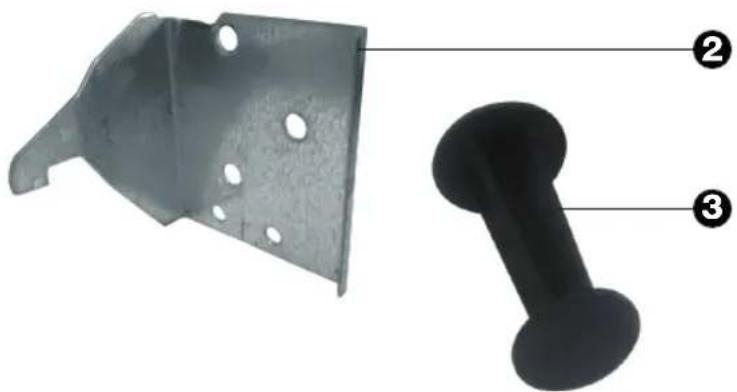
natural_image
Two types of metal bracket components with numbered labels (2 and 3) pointing to different features.- Inverted control panel x 1
- Bracket x 2
- Plastic support x 2
Getting Started
1. Power source and grounding
The dryer employs alternative current with the rated voltage and the rated frequency. When the voltage fluctuates between 10% of the rated voltage, the dryer can work normally. A special power socket for the dryer would be highly recommended for convenience and safety issues. If the supply cord is damaged, it must be replaced by the manufacturer, its service agent or similarly qualified persons in order to avoid a hazard.
2. Precautions
● Do not store or install the dryer where it will be exposed to water or the weather. 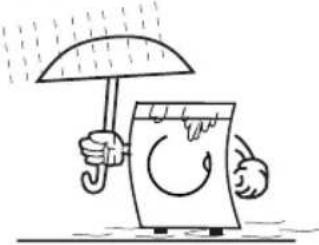 | ● Please install the dryer in a well ventilated area for better air circulation and to avoid over heating. 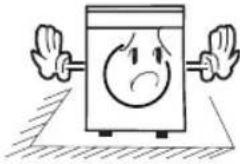 |
● Load slightly damp clothes into the dryer. 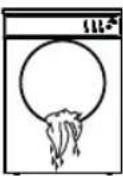 | ● Do not spray combustible aerosols near and/or in the dryer. 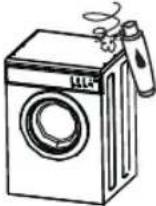 |
● Do not use the dryer to dry clothes containing aerosols or flammable liquids. 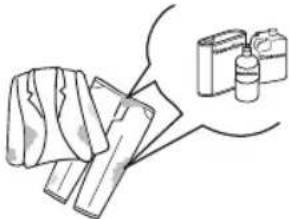 | ● Do not operate if the dryer is damaged, partially dismantled or has missing or broken parts. 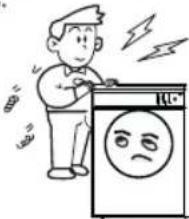 |
● When the dryer is operating, the rear of the unit will be hot. Do not touch the rear of the unit.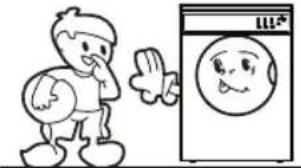 | ● Please do not operate the machine if your feet or hands are wet.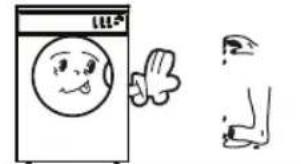 |
● To avoid damaging the control panel, do not place any heavy or hot articles on top of the dryer.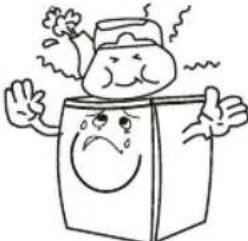 | ● Do not dry raincoats, fluffy clothes, or elastic materials in the dryer.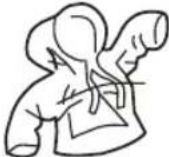 |
● Do not open the dryer door until the program cycle is completed.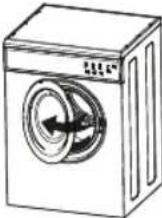 | ● Ensure sufficient air flow by opening a door or window to outside.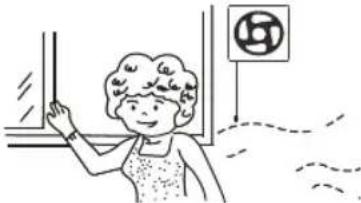 |
Clothes with the following markings on the label must not be loaded into the dryer.     Do not tumble dry Hang for dry Drip dry Flat dry Dry automatically Do not tumble dry Hang for dry Drip dry Flat dry Dry automatically | |
Installing the Dryer
1. Placement
Dryer should be placed in a ventilated area with no less than 10 cm distance from the wall. If placed in a room such as a bathroom, it is suggested that the dryer be installed in a well ventilated room with no obstruction within 1.5m in the front of the dryer.
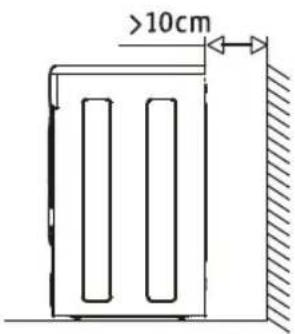
text_image
>10cm2. The horizontal adjustment

Notice:
If the dryer is not installed horizontally ( >2^0 inclination), the dryer will not operate properly.
Notice when installing:
- Do not install the dryer outdoors.
- Do not place the dryer near any flammable objects such as curtains, shelves etc.
- Do not place the dryer near any flammable gas or liquid.
3. Install wall mounting
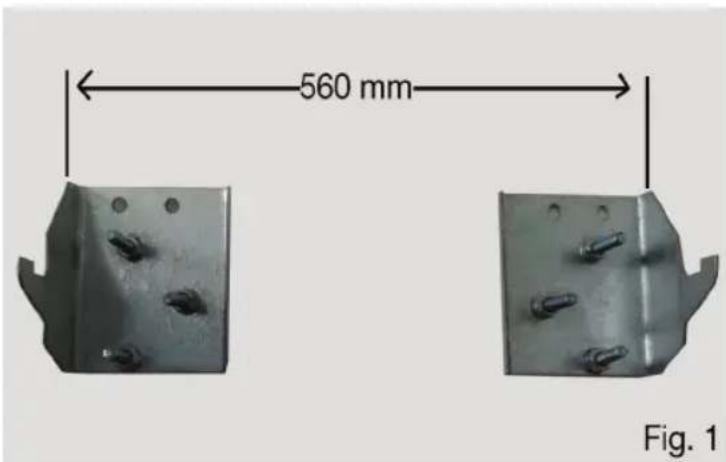
Step 1: Fix two metallic hooks onto the wall which align with the mounting slots of the dryer. (Fig.1)

Notice: Make sure the mounting wall is of sufficient strength to sustain the weight of the unit (45kg) while in use.
If you are unsure you should contact a qualified tradesperson for installation. This dryer is heavy and if not installed correctly it has the potential to fall and cause injuries.
text_image
560 mm Fig. 1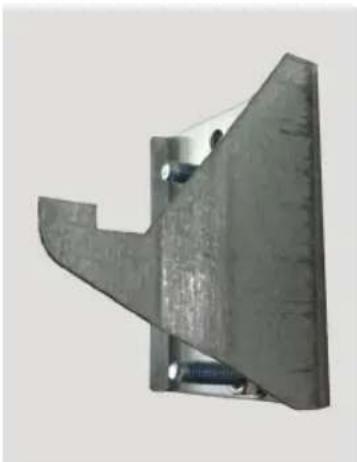
natural_image
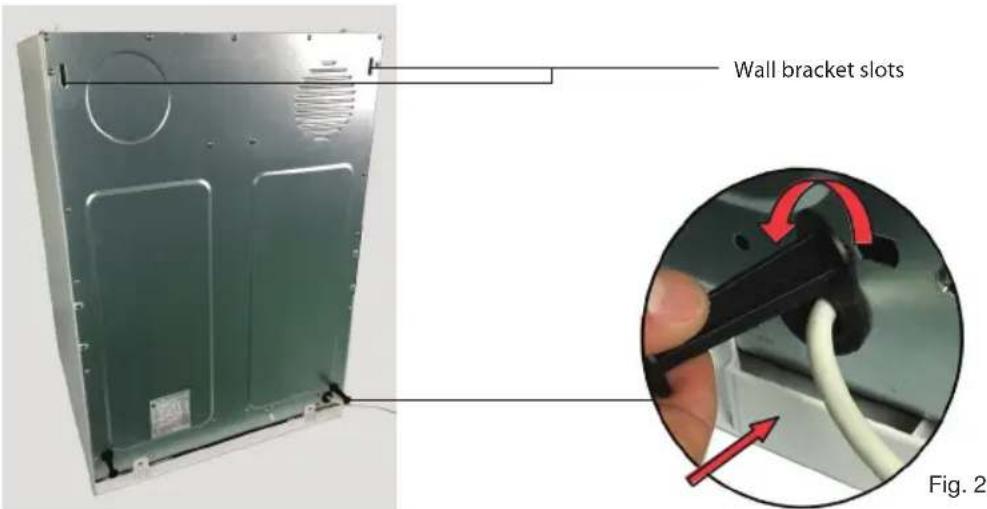
Metal mechanical bracket with mounting holes and bolts (no text or symbols visible)Step 2: Place the plastic supports into their slots located on the bottom corners at the back of the dryer, and turn them 90^ to lock them into position. These help hold the dryer away from the wall and allow sufficient airflow behind the dryer. (Fig.2)
text_image
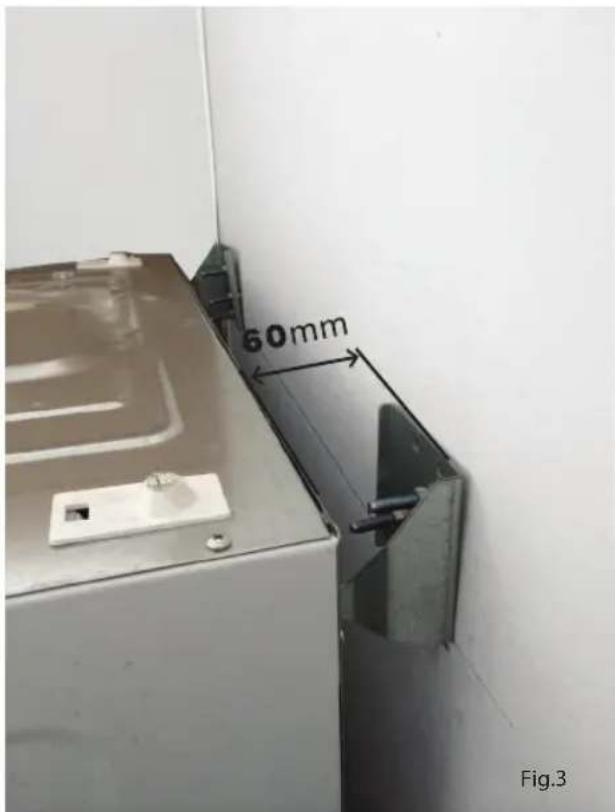
Wall bracket slots Fig. 2Step 3: Carefully raise the dryer and hang it onto the metallic hooks. Slowly release the weight onto the hooks and let the plastic supports rest against the wall. (Fig.3)
Warning: The tumble dryer weight is 32 kg, please obtain assistance.
text_image
60mm Fig.3Step 4: Remove the panel sticker by carefully peeling it back and replace it with the inverted sticker provided.

text_image
Start Pressure Dryness Temperature Anti-Crosses 1 hr Lock Alting Half Regular Anti-Crosses Power Lock Light Dry Middle Dry Extra Dry STIRLING® ACDSE SKGInstructions
1. Preparation before loading clothes into the dryer
- Clothes have to be washed, rinsed and spun dry before loading into the dryer. The dryer is not a washing machine. It will not clean dirty clothes.
- It is recommended to sort the clothes according to heavy and light items as the drying time will be similar.
- Make sure that the patterns/decoration buttons on the clothes can be used in the dryer and will not damage the inner tube of the dryer. Check the clothing labels for more information.
- It is recommended to turn the clothes inside out before loading them into the dryer.
- Make sure that the power plug is correctly inserted and connected before turning on the dryer.
- Never put any sharp or flammable objects into the dryer.
2. Filter
- Make sure that the lint filter is cleaned and in the correct position before operating the dryer.
3. Loading the dryer
- The dryer operates best when the inner tube capacity is 1/2-2/3 full of clothes as this enables air to be circulated evenly throughout the clothes.
- When drying big items, it is recommended to include a few small items.
- When drying delicate items, please include some lint free towels as the towels will protect the delicate items.
- Do not over dry the clothes. Please refer to the labels on the clothes for more information.
The reference weight of DRY clothing (6kg = 6000g)
 | Mixed-fabric clothes (about 800g) | 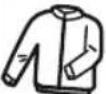 | Jacket (about 800g cotton) |  | Jeans (about 800g) | 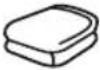 | Towel quilt (about 900g cotton) |
 | Single bedsheet (about 600g cotton) |  | Work clothes (about 1120g) | 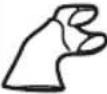 | Sleep wear (about 200g) |  | Long sleeve shirt (about 300g cotton) |
 | Short sleeve shirt (about 180g cotton) |  | Short pants (about 70g cotton) | [5550] | Socks (about 50g mixed-weave) | ||
4. Close the door
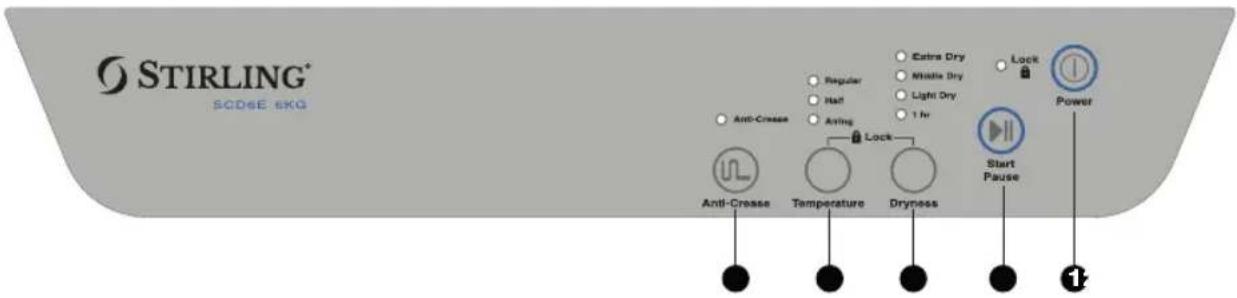
5. Control panel guide
text_image
STIRLING® SCD6E 6KG Anti-Cress Regular Half Arring Lock Dryness Extra Dry Middle Dry Light Dry 1 hr Lock Power Start Pause Anti-Cress Temperature Dryness- Power
- Start/Pause
-
Dryness (extra dry/middle dry/light dry/1 hour)
-
Temperature (regular/half/airing)
- Anti-crease

Notice:
Press “DRYNESS” and “TEMPERATURE” buttons at the same time to enable the “LOCK” function. Please note: When the “LOCK” function is activated, the other buttons will not function. You will have to cancel the “LOCK” function by pressing the “DRYNESS” and “TEMPERATURE” buttons at the same time again before you are able to use the other buttons.
Operating Instructions
1). Press the power button.
2). Select the program cycle by pressing the "DRYNESS" button repeatedly until the indicator light illuminates next to the desired cycle. Please use the appropriate program cycle as indicated on the clothes labels.
3). Select the temperature setting by pressing the "TEMPERATURE" button repeatedly until the indicator light illuminates next to the desired temperature. Please use the appropriate temperature as indicated on the clothes labels.
4). Press the "ANTI CREASE" button if required.
5). Press "START/PAUSE" button to start the program selected. If you wish to pause the cycle, press "START/PAUSE" button again. In the event you would like to add more clothes when the cycle is paused, open the dryer door with care as hot steam will be released. Add the clothes and close the dryer door. Press the "START/PAUSE" button again to resume the cycle. (Note: When the dryer is in the "PAUSED" mode, you will be able to change the program cycle and temperature setting.)
6). To activate the "LOCK" function, press the "DRYNESS" and "TEMPERATURE" buttons at the same time and the lock light will illuminate. To disable the "LOCK" function, press the "DRYNESS" and "TEMPERATURE" buttons at the same time again.
⚠️ Notice: Pressing all the buttons at the same time will cause a short buzz. Dryness function setting
| DRYNESS | Max volume of dry clothing | Temperature | Clothing types | Air-cold | Anti crease | Child lock | Max dry time |
| 1 hour dry | 4.0~6.0kg | full √ | Quick drying clothes | 10min | √ | √ | 70min |
| <4.0kg | half √ | ||||||
| 6.0kg | air-dry √ | Fine fabric and clothing requiring heat to dry | |||||
| light dry | 4.0~6.0kg | full √ | Chemical fibre and small clothing | 10min | √ | √ | 100min |
| <4.0kg | half √ | ||||||
| dry | 4.0~6.0kg | full √ | Cotton weaving and jeans | 10min | √ | √ | 120min |
| <4.0kg | half √ | ||||||
| extra dry | 4.0~6.0kg | full √ | Cotton clothes, jeans and bedsheets | 10min | √ | √ | 180min |
| 2.0~4.0kg | half √ | ||||||
| <2.0kg | full √ | Cotton weaving and jeans | 10min | √ | √ | 80min |
⚠️ Notice: For the last 10 minutes of the cycle, cold air will be circulating inside the dryer.
- The outside temperature and humidity will not affect the drying time.
• Always check the label on the clothes for drying recommendations. - For clothing loads less than 2kg, please select the "extra dry" and "full heat" program.
7). End of program
- A buzzer will sound 6 times at the end of the cycle to indicate that the cycle has finished and clothes can be unloaded. (Note: Please open the dryer door slowly.) The dryer will automatically switch off after the 6th buzzer has gone off.
Cleaning and Maintenance
- Before cleaning the dryer, always make sure that the power has been disconnected from the dryer.
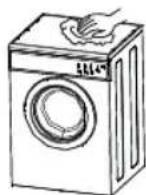
- Accumulated dust and fibre will affect the function of the dryer. It is recommended to clean the filter, cabinet and inside of the dryer by using a soft damp cloth.
- Do not use sharp objects/instruments on the dryer.
- Do not use detergents, abrasive powders, highly perfumed cleaning products, wax polishers or products containing alcohol.
Filter cleaning
-
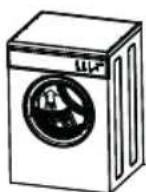
Make sure that the power has been disconnected from the dryer.
-
The filter is located near the dryer door.
-
Remove the filter and clean the filter by discarding the lint and wipe it with a damp cloth.
-
After cleaning the filter, place the filter back into its original place.
Cleaning the outside and inside of the dryer
Use a soft damp cloth to wipe the cabinet, door seal and drum.
- Do not rinse with water directly.
- Do not use neutral scourer wipes.
- Do not use gasoline and alcohol wipes.
Make sure to open the front door for aeration after cleaning the filter and inside the dryer.

Control Panel Indicators
- Warning function
Turn off the dryer, wait for the dryer to cool down
| Fault | Cause of fault | Fault indicator (lights) | Fault indicator (sound) | Solution |
| Exceeded temperature alarm | The inner tube temperature exceeds 63° | “dry”, “extra dry” indicator flash | The buzzer will go off for 10 seconds. If the problem is not rectified or solved, the buzzer will go off every 15 minutes. | Turn off the dryer, open dryer door, wait for the dryer to cool down. |
| Open door alarm | The door has opened during the program | “light dry”, “dry” indicator flash | Close door | |
| Temperature sensor malfunction alarm | Program start sensor open | “1 hour”, “light dry” indicator flash | Reset the dryer by pressing the reset button located on the back of the dryer. If the problem reoccurs contact after sales support | |
| Program start sensor short | “1 hour”, “dry” indicator flash |
2. Auto power-off function
- The dryer will automatically turn off after 10 minutes if no program is selected.
- The dryer will automatically turn off after the 6th buzz has gone off at the end of the cycle.
Trouble Shooting Guide
| Problem | Cause | Solution |
| Dryer won’t start | Power outagePower plug not correctly connectedClothes exceed maximum volume | Wait for power to be restoredCheck the power socket and make sure plug is connected correctly & switched onRemove clothes and check dampness, Max volume of the dryer is 6kg |
| Dryer releasing extensive heat | Lint trap requires cleaningIntake or exhaust passage is obstructed | Clean lint trapClean air intake and exhaust and check for obstructions. (e.g. Curtain) |
| Clothes are still wet after end of cycle | Dryer is overloadedClothes left in dryer too long after the end of the programClothes not sorted properlyWrong temperature for clothes | Make sure the dryer is not too fullRemove clothes when the program has finishedCheck label on clothes |
| Shrinks clothes | Clothes over dried | Reduce the drying time |
| Lint balls on clothing | Synthetic fibre rubbing with each other causes lint which attaches to clothes | Use fabric softener when washing |
| No heat | Temperature fuse is cut | Press the plastic push button at rear of the dryer as shown below |
Note: If there is no heat from the dryer, please press the plastic push button at rear of the dryer to activate the thermostat in order to reheat the element, please see illustration. If the dryer is wall mounted, the button will be located at the bottom rear

natural_image
Close-up of a mechanical component with a white arrow pointing to a small feature on the side (no visible text or symbols)Noise/Sound/Vibration
- It is common that there will be sound/noise/vibrations when the dryer is operating. The noise and vibration are normally caused by the heavy load of wet clothes turning in the dryer. Occasionally, there will be air bumping which is caused by the hot air/steam being released from the exhaust pipe at the bottom of the inner tube. This is ok and there is no need for concern.
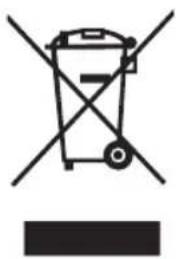
Correct disposal of this product
This marking indicates that this product should not be disposed with other household wastes throughout Australia. Please contact your local council for removal of this product.
natural_image
Symbol of a trash bin with crossed lines indicating no waste or discharge, and a solid black rectangle below (no text or labels)
text_image
ALDISTIRLING®
Clothes Dryer 6kg
Repair and Refurbished Goods or Parts Notice
Unfortunately, from time to time, faulty products are manufactured which need to be returned to the Supplier for repair.
Please be aware that if your product is capable of retaining user-generated data (such as files stored on a computer hard drive, telephone numbers stored on a mobile telephone, songs stored on a portable media player, games saved on a games console or files stored on a USB memory stick) during the process of repair, some or all of your stored data may be lost.
We recommend you save this data elsewhere prior to sending the product for repair.
You should also be aware that rather than repairing goods, we may replace them with refurbished goods of the same type or use refurbished parts in the repair process.
Please be assured though, refurbished parts or replacements are only used where they meet ALDI's stringent quality specifications.
If at any time you feel your repair is being handled unsatisfactorily, you may escalate your complaint. Please telephone us on 1300 554 124 or write to us at:
Global Source Trading
PO Box 3046
Moorabbin East, VIC 3189
info@gstrading.com.au


