
LIIFO 19.2 V - Drill Bavaria - Free user manual and instructions
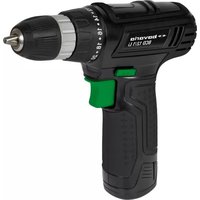
Find the device manual for free LIIFO 19.2 V Bavaria in PDF.


| Product Type | Pneumatic Rotary Hammer (Cordless Drill) |
| Model | Z1C-FA-12 |
| Brand | Bavaria |
| Voltage | 19.2 V |
| Battery Type | Lithium Iron Phosphate (LiFePO4) |
| Battery Capacity | 1.1 Ah |
| Battery Energy | 21.1 Wh |
| Charging Time | Approx. 80 minutes |
| No-Load Speed | 0 - 900 /min |
| Impact Frequency | 0 - 4000 min-1 |
| Max Drilling Diameter (Steel) | 6 mm |
| Max Drilling Diameter (Concrete) | 10 mm |
| Max Drilling Diameter (Wood) | 16 mm |
| Chuck Type | SDS-Plus |
| Weight | 1350 g |
| Sound Pressure Level | 84.6 dB(A) |
| Sound Power Level | 95.6 dB(A) |
| Hand-Arm Vibration | 10.525 m/s2 (K=1.5 m/s2) |
| Torque | 10 Nm |
| Protection Class | II |
| Power Supply Unit Input | 100-240 V~ 50/60 Hz |
| Functions | Hammer drilling, drilling only, reverse rotation |
| Maintenance | Clean with dry cloth; apply grease to chuck |
| Safety Notes | Use with 230V mains; avoid moisture; do not open battery |
| Warranty | 2 years |
| Spare Parts | Replacement battery (article no. 7053697) |
Frequently Asked Questions - LIIFO 19.2 V Bavaria
User questions about LIIFO 19.2 V Bavaria
0 question about this device. Answer the ones you know or ask your own.
Ask a new question about this device
Download the instructions for your Drill in PDF format for free! Find your manual LIIFO 19.2 V - Bavaria and take your electronic device back in hand. On this page are published all the documents necessary for the use of your device. LIIFO 19.2 V by Bavaria.
USER MANUAL LIIFO 19.2 V Bavaria
7049620
Inserting and Removing the Battery 9
Charging the Battery with Power Supply Unit 11
Charging the Battery in the Rotary Hammer 11
Inserting the Tools 12
ON/OFF Trigger 12
Reversing the Rotation Direction 12
Pneumatic Hammer Function 13
Maintenance and Cleaning 13
Technical Data 14
SICHERHEITSHINWEISE
TECHNISCHE DATEN
Please familiarize yourself with the proper usage of the device by reading and following each chapter of this manual, in the order presented. Keep these operating instructions for further reference.
This operating instruction contains important details for handling the device. Please pass it on along with the unit if it is handed over to a third party!
Please read the safety instructions! These instructions will make it easier for you to handle the device and help prevent misunderstandings and possible damage or injury.
Please note the included General Safety Notes and the following safety notes to avoid malfunctions, damage or physical injury:
- Make sure the mains voltage corresponds to the voltage stated on the rating label.
- Persons with limited physical, sensorial or mental abilities are not allowed to use the unit, unless they are supervised for their safety by a qualified person or are briefed by the responsible person how to use the unit.
- Before starting any work on walls, floors or similar, make sure that all power lines in the work area are switched off at the main switchboard. Inspect the proposed drill hole location for any utility lines (e.g. water, gas, power) before drilling. Use a suitable device such as a metal or electricity line detecting device.
- Please notice: Only change the operating mode (drilling/impact drill-ing/chiselling) when the machine is at a complete standstill.
- Only plug the battery charger to 230V mains power. Recharge the battery only with the provided power mains supply unit.
- Protect battery and power supply unit from humidity. Do not operate the battery charger outdoors.
- When not in use and before cleaning and servicing, disconnect the power supply unit from power mains.
• Take special care of the battery. Avoid dropping it onto any hard surface and do not subject it to pressure or any other form of mechanical stress. Keep the battery away from extreme heat and cold. - Do not open or attempt to repair the battery or the power supply unit. If any parts are damage have them repaired by a qualified technician or contact your customer service.
- Only charge, operate and store the battery at an ambient temperature between 10°C and 40°C .
- Important Danger! Never short-circuit the battery or expose it to moisture. Do not store it together with any metal parts which could short-circuit the contacts. The battery could overheat, start burning or explode.
- If the machine was dropped and becomes damaged, immediately switch off the unit and do not use it further. Do not disassemble the unit and do not try to repair it yourself. Contact our customer service.
USING
BEFORE FIRST USE
Unpack the pneumatic impact hammer and the accessory and check all parts for any damage in transit. Dispose of packaging materials or store it out of reach of children. Plastic bags etc. may become a deadly toy for children. Attention! Unplug from the power supply before cleaning, maintaining or when not in use. Use only tool bits with SDS-Plus coupler! If the shank of the tool does not match the coupler on the machine, the tool must not be used!
INSERTING AND REMOVING THE BATTERY
- Slide the battery into the bottom side of the unit until the clips of the releasing buttons (3) lock audibly. Make sure the battery can be inserted easily. Do not force the battery. The battery fits only in one position into the housing.
- For removing the battery, first grasp the battery than, press both releasing buttons inwards and pull down vertically.
CHARGING THE BATTERY WITH POWER SUPPLY UNIT
Charge the battery before first use. Regardless of the charging condition, the Lithium Iron Phosphate battery (Li Fe PO4) can be charged at any time without damaging the cells. If desired you can order a second battery under the article no. 93 54 11.
- Connect the power cord of the power supply unit with a wall socket and the connecting socket of the battery.
- The charging control LED (|8) lights up red and indicates that the battery is charged. When the control LED turns green it indicates that the battery is fully charged. The battery and the power supply unit become warm while charging. This is normal and not a fault. Charging time is approx. 80 minutes for a discharged battery.
- Disconnect the power supply unit from power mains and the battery.
CHARGING THE BATTERY IN THE IMPACT HAMMER
- Connect the power cord of the power supply unit with a wall socket and the connector socket (|5) of the battery through the opening in the housing.
- The charging control LED (18) lights up red and indicates that the battery is charged. When the control LED turns green it indicates that the battery is fully charged. The battery and the power supply unit become warm while charging.
- Disconnect the power supply unit from power mains and the battery.
INSERTING THE TOOLS
The pneumatic impact hammer is equipped with an SDS-Plus drill chuck (17). With this chuck tool changes are executed in a simple and convenient way without needing a wrench.
- Before inserting the tool, pull back the rubber ring of the chuck.
- Now insert the tool. It may be necessary to turn the tool slightly until the slots in the tool are correctly positioned and the tool fits exactly to the rails in the chuck slide. Now the tool can be inserted as far as it will go.
- Now release the rubber ring. The steel ball will now hold the tool in place.
- Check the correct fit by pulling on the tool. You should be able to move the tool, but not able to pull it out.
- To remove the tool, pull back the rubber ring. Now you can pull out the tool.

ON/OFF TRIGGER
- To switch on the impact hammer, press the ON/OFF trigger (12).
- To switch off the impact hammer, release the ON/OFF trigger.
REVERSING THE ROTATION DIRECTION
The rotation direction switch (1) may only be used when the motor is stopped. Therefore the switch is blocked while the ON/OFF trigger (2) is pressed.
Right Hand Direction (Clockwise):
Use for drilling, impact drilling, tightening screws. Press the selector switch for the direction of rotation to the right as far as wit will go.
Left Hand Direction (Counter Clockwise):
For loosening screws. Press the selector switch for the direction of rotation to the left as far as it will go.
PNEUMATIC HAMMER FUNCTION
With the selector switch you can select Hammer Drill Function and Drill Function only without hammer function. The toggle switch engages or disengages the hammer function. Only change-over the function while the motor is at a complete standstill.
- To use the Hammer Drill Function turn the selector switch in direction to the "hammer/drill symbol".
- To drill only and loosen screws, turn the selector switch in direction "screw/drill symbol".
MAINTENANCE AND CLEANING
• Always keep the unit clean, dry and free from oil.
- Use only a dry or slightly moist cloth for cleaning the housing.
- Do not use abrasives or flammable substances such as benzene, solvents, turpentine or similar.
- Regularly clean the space between the rubber ring and the SDS-Plus chuck. First open the rubber ring and remove dust, dirt and grease residues. Apply grease into the space and close the rubber ring.

TECHNICAL DATA
Pneumatic Rotary Hammer
| Model Z1C-FA-12 |
| Tool Chuck SDS-Plus |
| No Load Speed 0 - 900/min. |
| Impact Frequency 0 - 4000 min-1 |
| Sound Pressure Level LpA 84.6 dB(A) |
| Sound Power Level Lwa=95.6 dB(A) K=3dB(A) |
| Hand Arm Vibration 10.525 m/s2 K1.5 m/s2 |
| Weight 1350 g |
| Protection Class II |
| Torque 10 Nm |
| Max. Drilling Size |
| Steel 6 mm |
| Concrete 10 mm |
| Wood 16 mm |
Battery
| Model | Z1C-12-19.2 | |
| Battery Type | Lithium Iron Phosphate Battery Li Fe PO4 | |
| Input Voltage | 19,2 V | |
| Rated Energy | 21,1 Wh | |
| Capacity | 1.1 Ah | |
| Charging Time approx. | 80 Minutes | |
| Replacement Article No. | 7053697 | |
Power Supply Unit
| Model | LLC30-22130001 |
| Rated Input Voltage | 100 V - 240 V~ 50/60 Hz |
DISPOSAL
Dear Customer, please help avoid waste materials.

If you at some point intend to dispose of this article, then please keep in mind that many of its components consist of valuable materials, which can be recycled. Please do not discharge it in the rubbish bin, but check with your local council for recycling facilities in your area.
EG-DECLARATION OF CONFORMITY GB
We, the Batavia GmbH, Blankenstein 230-1b, NL-7943PG Meppel, declare by our own responsibility that the product LIIFO Pneumatic Rotary Hammer, Z1C-FA-12, Item-No 7049620 is according to the basic requirements, which are defined in the European Directives 2006/95/EC Low Voltage Directive (LVD), 2004/108/EC Electromagnetic Compatibility (EMC), 98/37/EC Machinery and their amendments. For the evaluation of conformity, the following harmonized standards were consulted: EN 60745-1:2006, EN60745-2-6:2003+A1:2006+A11:2007, EN 55014-1:2006 EN 55014-2/A1:2001, EN 61000-3-2:2006, EN 61000-3-3:1995+A1+A2, EN 60335-2-29:2004, EN 60335-1:2002+A1+A11+A12+A2+A13, EN 62233:2008.

(Meino Selnen, QA Representative)
Meppel, 14th of August 2009
NOTIZEN | NOTES
2 YEAR WARRANTY

TODAYS SOLUTIONS
LIIFO 19,2 V PNEUMATISCHER
BOHRHAMMER, Z1C-FA-12
LIIFO 19.2 V PNEUMATIC ROTARY
HAMMER Z1C-FA-12
DIESES PRODUKT HAT 2 JAHRE GARANTIE
THIS PRODUCT HAS GOT A 2 YEAR WARRANTY
DIT PRODUCT HEEFT 2 JAAR GARANTIE
CE PRODUIT A 2 ANS DE GARANTIE
Dear Client, if for any reason this product is not working, please ensure you contact our Client Service Centre. Ensure you have your original receipt of purchase. This warranty covers all defects in workmanship or materials in this Batavia product for a two year period from the date of purchase. The warranty does not cover any malfunction, or defect resulting from misuse, neglect, alteration, or repair.
Other European countries | Customer Services Monday till Friday from 8am until 4pm
oo800 66477400


- SICHERHEITSHINWEISE
- TECHNISCHE DATEN
- USING
- BEFORE FIRST USE
- INSERTING AND REMOVING THE BATTERY
- CHARGING THE BATTERY WITH POWER SUPPLY UNIT
- CHARGING THE BATTERY IN THE IMPACT HAMMER
- INSERTING THE TOOLS
- ON/OFF TRIGGER
- REVERSING THE ROTATION DIRECTION
- PNEUMATIC HAMMER FUNCTION
- MAINTENANCE AND CLEANING
- TECHNICAL DATA
- DISPOSAL
- EG-DECLARATION OF CONFORMITY GB
- NOTIZEN | NOTES
- 2 YEAR WARRANTY
Brand : Bavaria
Model : LIIFO 19.2 V
Category : Drill