Duo Power MID717 - Tablet Manta - Free user manual and instructions
Find the device manual for free Duo Power MID717 Manta in PDF.


| Product Type | Tablet |
| Brand | Manta |
| Model | Duo Power MID717 |
| Display Size | 7 inches |
| Dimensions (L x W x H) | 190 x 110 x 10 mm |
| Weight | 300 g |
| Battery Capacity | 3000 mAh |
| Battery Type | Lithium-ion |
| Power Adapter | 5V 1A |
| Processor | Quad-core 1.2 GHz |
| Operating System | Android 4.2 or later |
| RAM | 1 GB |
| Internal Storage | 8 GB |
| Expandable Storage | MicroSD up to 32 GB |
| Rear Camera | 2 MP |
| Front Camera | 0.3 MP |
| Connectivity | Wi-Fi 802.11 b/g/n, Bluetooth 4.0 |
| Ports | Micro USB, 3.5 mm headphone jack |
| Cleaning Instructions | Wipe with a soft, dry cloth. Do not use liquids or sprays. |
| Safety Warnings | Keep away from water and heat sources. Not suitable for children under 3 years. |
| Spare Parts Availability | Contact manufacturer for service options. |
| Manual Format | PDF download on notice-facile.com |
Frequently Asked Questions - Duo Power MID717 Manta
User questions about Duo Power MID717 Manta
0 question about this device. Answer the ones you know or ask your own.
Ask a new question about this device
Download the instructions for your Tablet in PDF format for free! Find your manual Duo Power MID717 - Manta and take your electronic device back in hand. On this page are published all the documents necessary for the use of your device. Duo Power MID717 by Manta.
USER MANUAL Duo Power MID717 Manta
natural_image
Abstract black-and-white circular logo with interlocking curved shapes (no text or symbols)MANTA
Tablet DUO POWER
MID717
Instrukcja obsługi
User's Manual
Bedienungsanleitung
Használati útmutató
Návod k obsluze
Vartotojo instrukcija
INSTRUKCJA OBSŁUGI
Krok 2:
INSTRUKCJA OBSŁUGI
This handbook contains important security measures and the correct use of the product information, in order to avoid accidents. Pls make sure to reading the manual carefully before use the device.
Please don't be in high temperature, moisture or very dust place – Please don't be in high temperature, Especially in summer don't put – the device in the car when Windows closed.
-Avoid fall or Violent collision of the device, don't make the TFT display screen were violent tremor. This could cause TFT display screen abnormal or damage.
Please choose the appropriate volume, Use headphones shoulds not – be too big volume, If feel tinnitus, Lower the volume or stop using it please charge In the following condition,
A. The battery power ICONS shows have no power
B. The system automatically shut off, startup after power off soon
C. Operation buttons no response
When the device in the format or ongoing upload and download file, – please don't suddenly disconnect, This could cause application error.
-For those who because of damage to the product, repair, or other causes of erased the memory, The company shall not be liable for any responsibility, please follow the user manual for the standardized operation to use the device.
-Don't disassemble the product, don't use alcohol. Thinner or benzene to scrubbing products
- Don't use the device one of the place of prohibit to use electronic equipment in regional (such as the plane)
- Please don't using the Tablet PC when you in driving or walking down the street, USB just only be used for data transmission
USER'S MANUAL
The company reserves the right to improve product, products specification and design have any change. The information is subject to changes without prior notice. (This tablet is no waterproof function)
Remark! All pictures in this manual is just for your reference. products specification and design have any change, The information is subject to changes without prior notice.
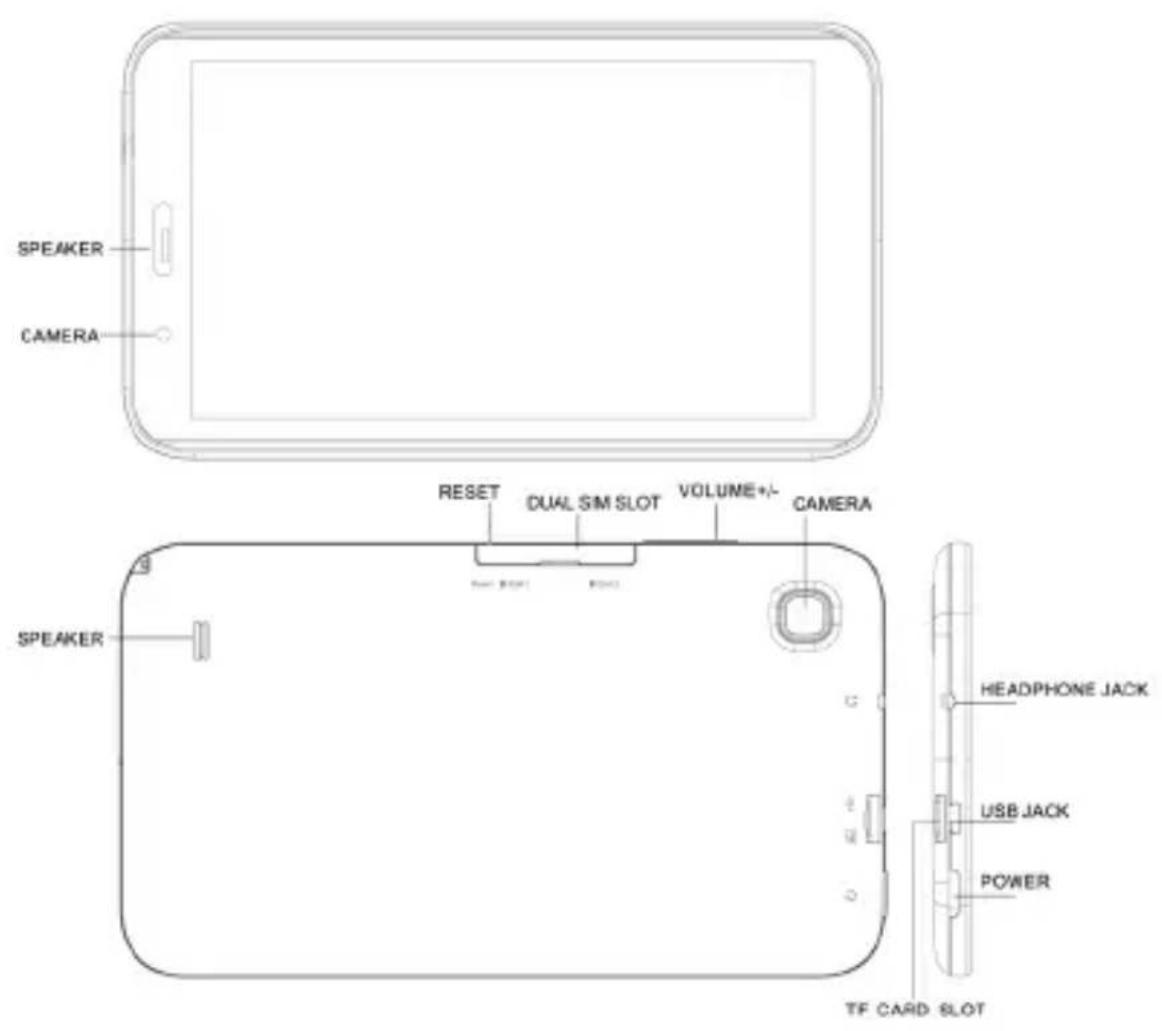
Appearance and button
USER'S MANUAL
Touch panel
7" Capacitive touch panel: In The Operation, to click dragging on the touch panel
POWER
Startup: Long Press and hold the power button, the system will enter the main interface
Shutdown: In the main menu interface, Press the power button about 5 second to shutdown, The system can hint "power off" option, Clike" ok". you can safely shut down.
Lock screen: Short press Power button to lock screen or unlock screen.
Remark!
- When power is empty, system will shut down automatically.
- Illegal turn off the device, restart will scan and restore the disk, it may take longer time to enter into system
Volume +, Volume-
The buttons on top Volume +, Volume-achieve changes in the volume.
Earphone jack
3.5 mm standard earphone jack
TF card – Slot for MicroSD card
Micro USB – you can use it to connect the computer for data transmission and external connection USB flash drive
Remark!
Unless unable to shutdown, otherwise don't use the reset, suggest you to shutdown by normal, if no will easy to damage the machine system.
USER'S MANUAL
First use
Battery management and charge
Before first use, please set the device's battery is fully charged
Just need to connect the adaptor or USB interface, then you can charge
The first two times charging please keep about 6 hours, after that you just need 4 hours to charge.
Remark:
This tablet using Built-in type polymer battery, Charge must be to choose standard adaptor (Input: AC110\~240V 50/60Hz Max: 180MA. Output: DC5.0\~5.5V/1.5A).
During the charging, the battery icon will scroll
When finished charging, battery icon will become green and stop rolling
In order to prolong the service life of the machine, suggest use out battery power before charge it
Remark:
- If you long time don't to use this Tablet, in order to avoid power consumption caused damage, pls charge/ play the battery once a month.
- After low battery shut down, connect DC adaptor, device will remind low battery, charging, need to wait some time until the battery is enough power to enter into main menu.
- Device charging should be in standby status for reach normal charging time.
Because with device and screen consumption, it may cause longer charging time.
USER'S MANUAL
Connection with PC
USB connection
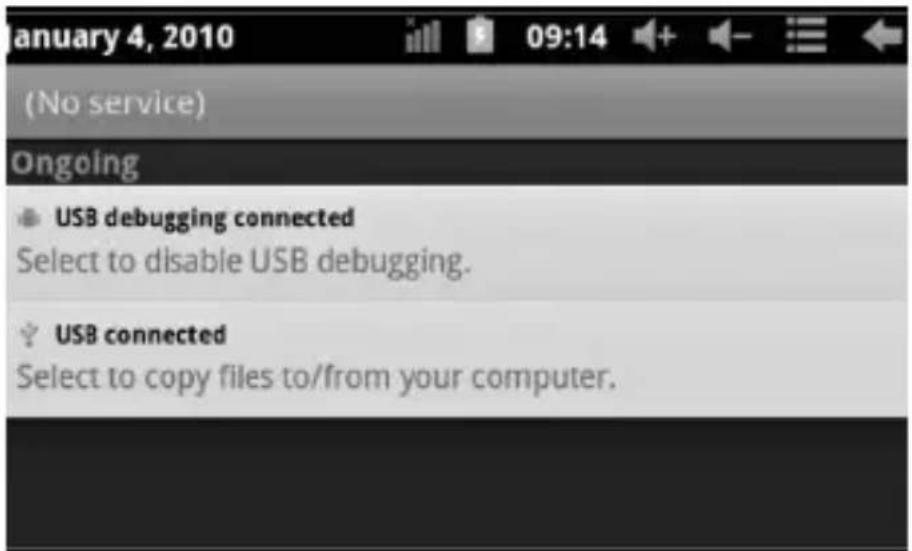
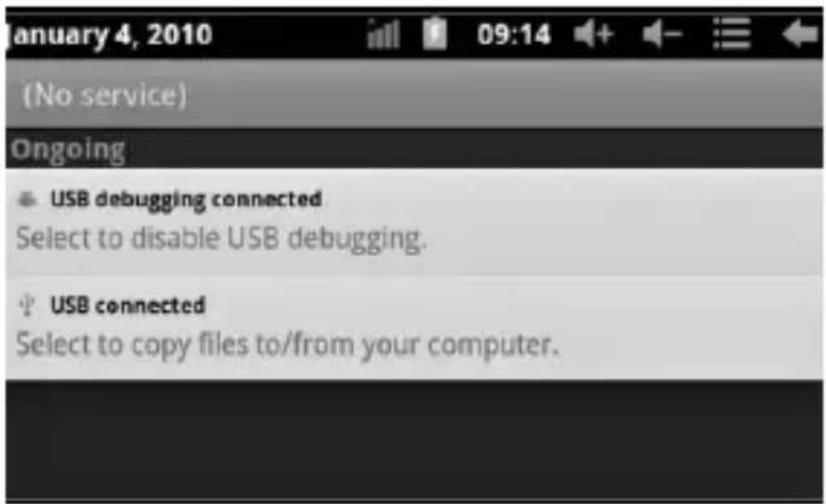
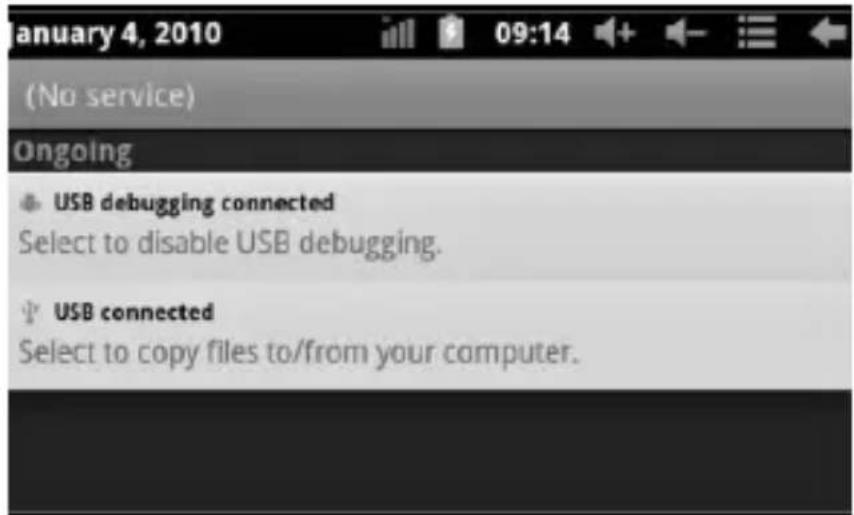
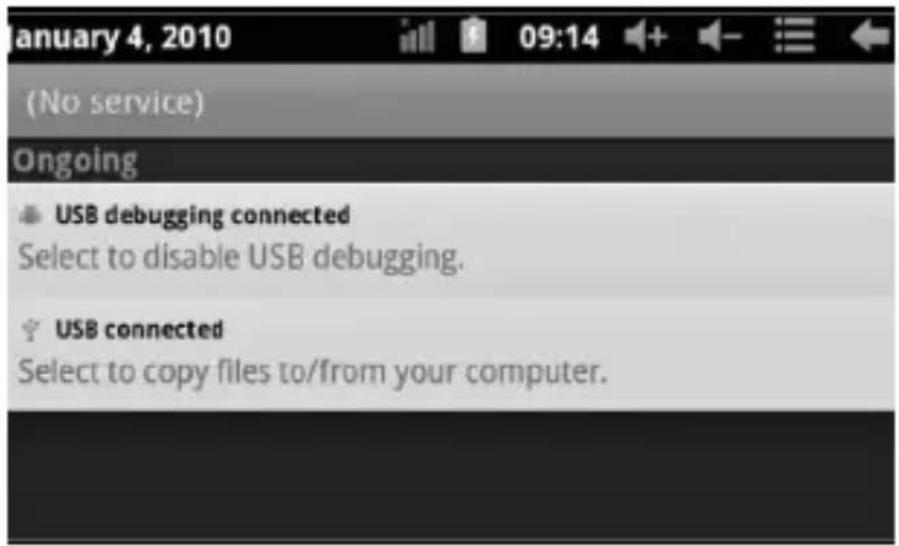
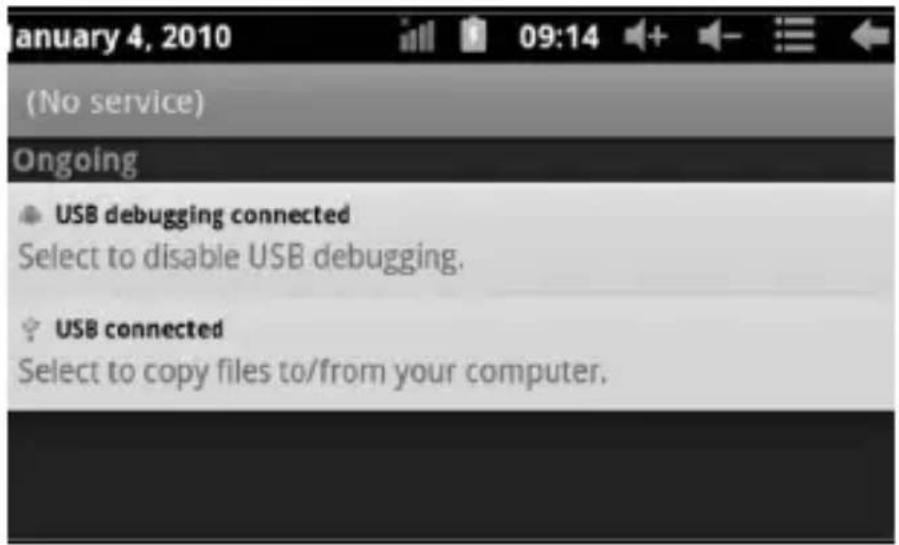
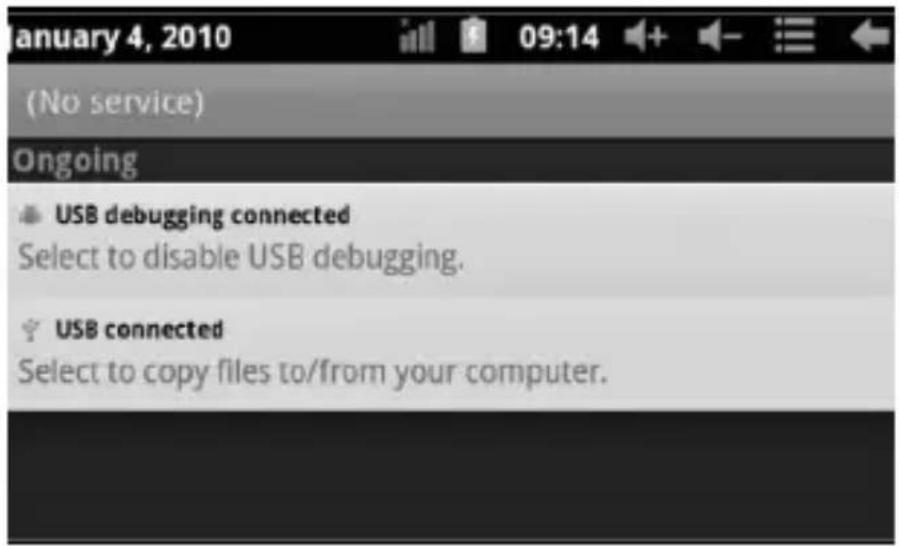
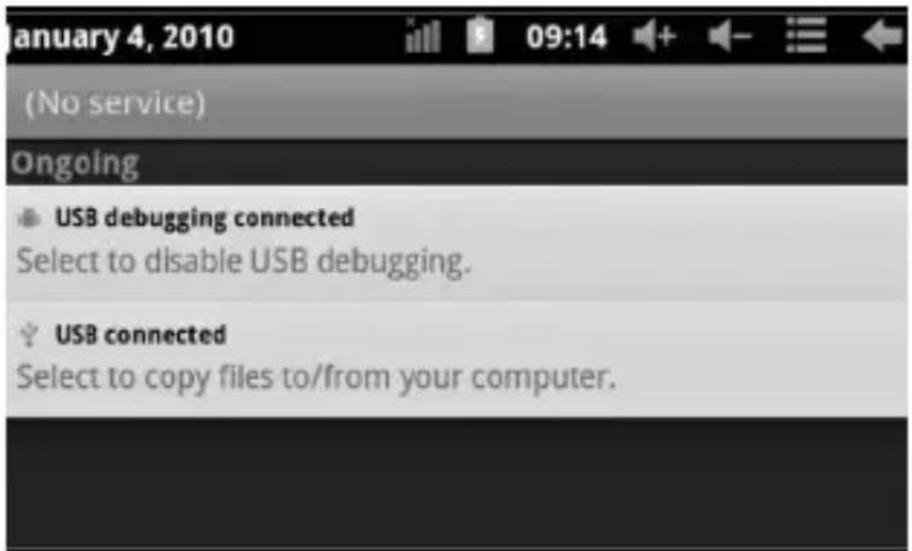
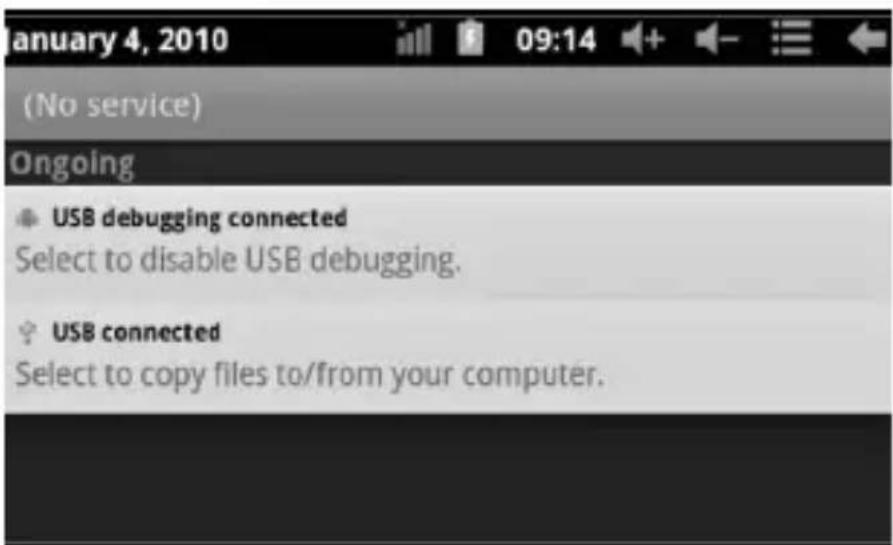
Using USB to connect the MID and PC, the default connection mode is a synchronous mode. You can see this USB icon and then drag the status bar to drop, appeared the following interface:
Step 1:
Step 2:
USER'S MANUAL
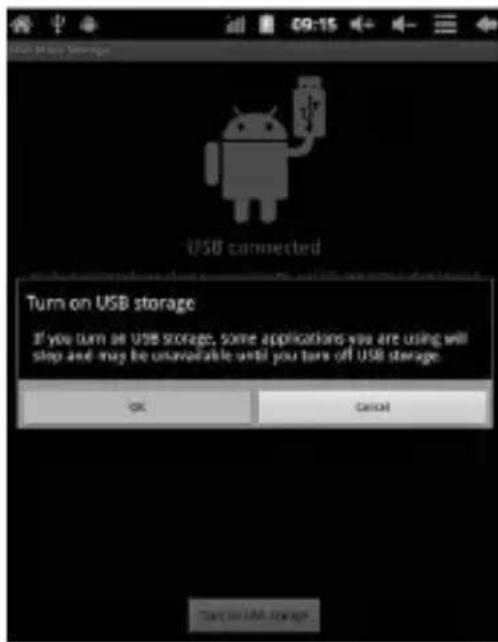
Step 3: According to the above photo, please choose USB connected. Then you can see the following interface:
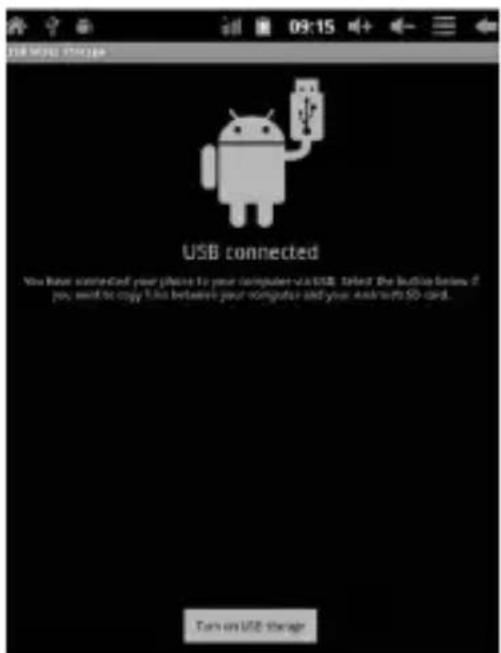
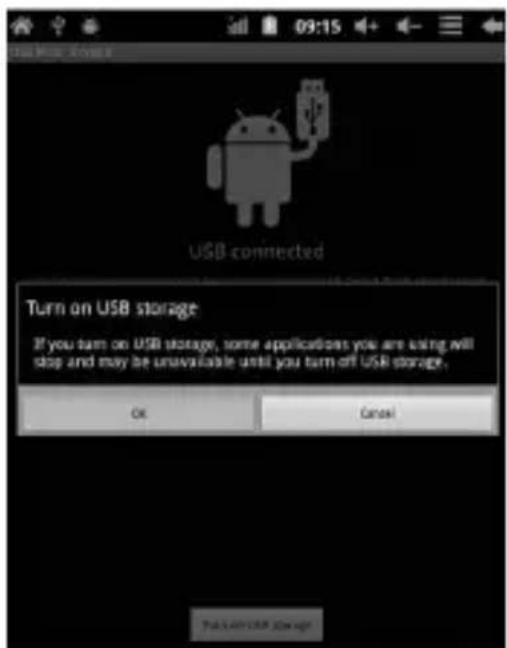
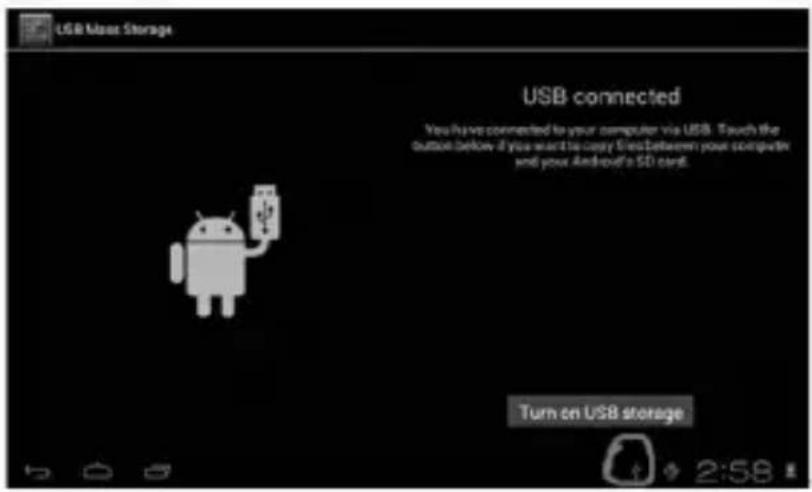
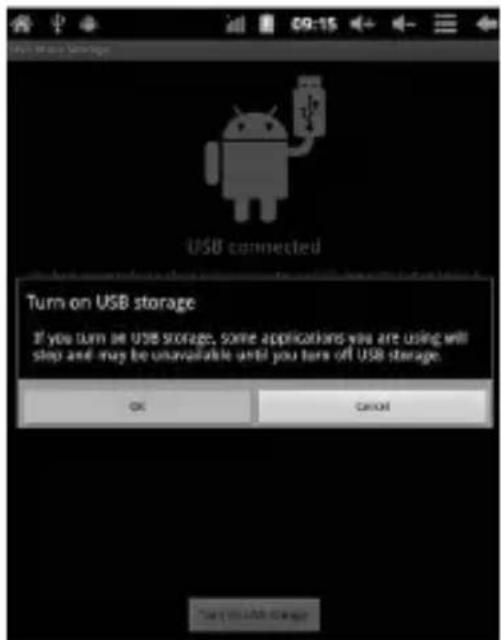
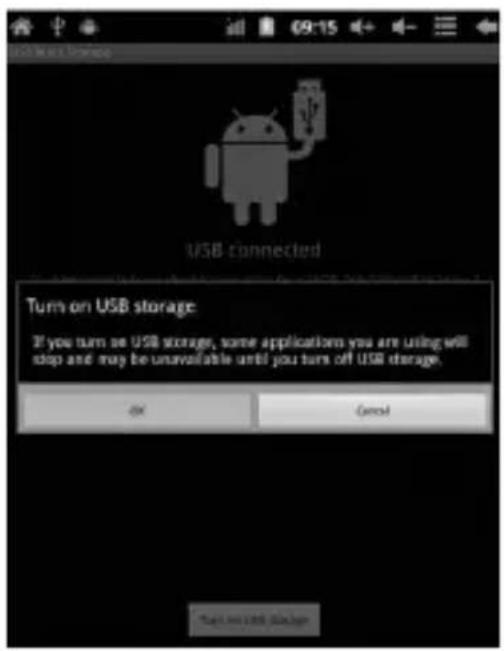
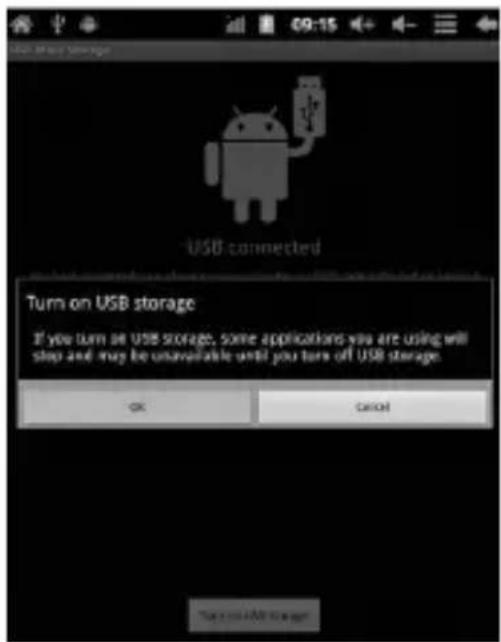
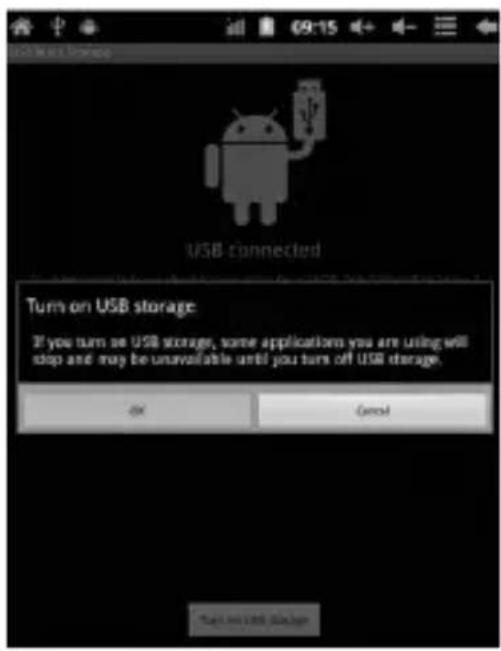
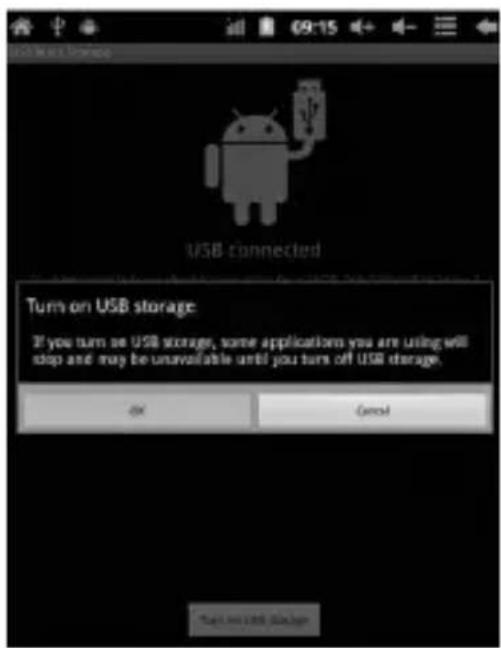
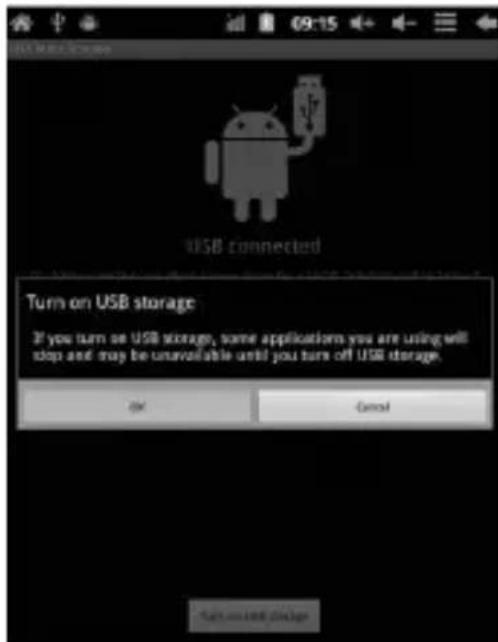
Step 4: Please press "turn on USB storage". Then you will find the following photos:
Please choose "OK". Then USB is connected. "USB is connected": means external memory (SD) loading is completed, and you can see the corresponding letter in the PC terminal.
Use USB cable to connect device to PC, device will pop up the USB connection window, click Turn on USB storage to connect to PC
USER'S MANUAL
Equipment operation interface
Main interface describe
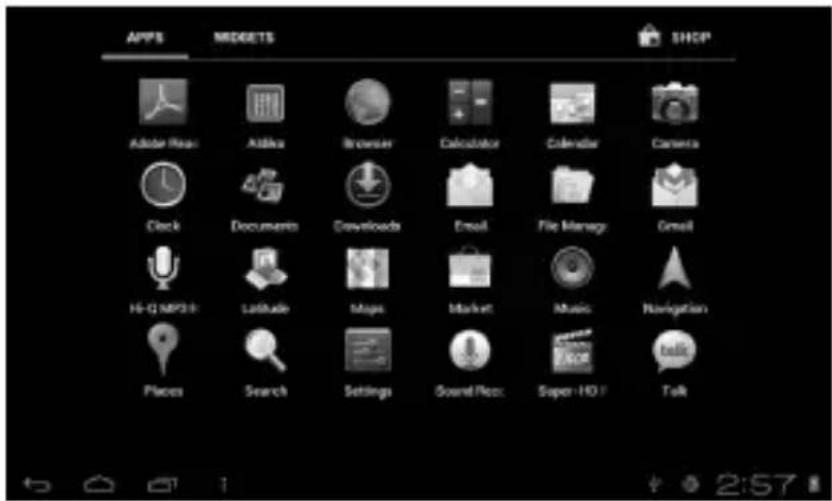
After startup will enter the main interface
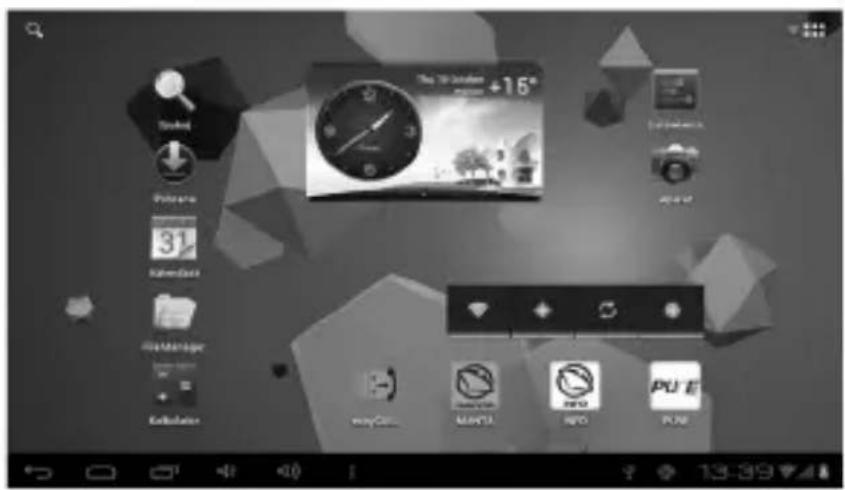
In the main interface, you can:
USER'S MANUAL
Management main interface software ICONS: long press the icons 3 second, after the icons will bigger, then you can drag anywhere in the interface.
Delete icons: long press the icons 3 second, drag the icons to the Recycle Bin icon, once it become red, Loosen your hand, after that you can delete icon
Status bar describe
The status bar below of the screen

From left: BACK, HOME, recent applications. From Right: battery status, time, other icons.
Use touch panel
Device equipped with a 7"touch screen. Following the main touch screen area is described, and describes some of the tips for how to use the touch screen.
No matter which interface you are on the screen, can go back to main screen through pressing the soft key on the bottom right corner of the main screen.
Attention! In different applications, by tapping the back soft key ← on the bottom right corner on the touch screen, you can return to its interface on the upfloor
In different applications, by tapping the menu key on the upper right corner of touch screen, the screen will appear the operation setting interface as follows,
Remark: In the main interface, you can touch the icon to open the APPs
In different browser(file, music, video, pictures), You shift and drag the scroll bar, so that the file list can up or down to roll.
USER'S MANUAL
Problem solution
Device can't to open
1) Check the battery power
2) Connect adaptor first, then check again
3) After charging then can't to open, pls contact with the supplier
After startup the screen or the opening picture has been appeared, the device appear shutdown
1) Power is not enough, please charge
Headset can't hear the voice
1) Pls check the volume whether set to 0
2) Check the music file whether damaged. Try playing other music, if the file have damaged may lead to serious noise or hop sounds.
Can copy file or paly music and so on
1) Pls check between computer and device is correct connection
2) Check the memory storage space is already full
3) Check the USB cable is good or not
4) USB connection is disconnected
Bedienungsanleitung
Hinweis
BEDIENUNGSANLEITUNG
Schritt 2:
HASZNÁLATI ÚTMUTATÓ
2. lépés:
HASZNÁLATI ÚTMUTATÓ
NÁVOD K OBSLUZE
Krok 2:
NÁVOD K OBSLUZE
VARTOTOJO INSTRUKCIJA
2 žingsnis:
VARTOTOJO INSTRUKCIJA
NÁVOD NA OBSLUHU
Krok 2:

NÁVOD NA OBSLUHU
NÁVOD NA OBSLUHU
Крок 2:
European Community Compliance Statement
This equipment is marked with the 0678 symbol and can be used throughout the European community.
This indicates compliance with the R&T TE Directive 1999/5/EC and meets the relevant parts of following technical specifications:
EN 300 328 – Electromagnetic compatibility and Radio spectrum Matters (ERM); Wideband Transmission Systems; Data transport equipment operating in the 2.4 GHz ISM band and using wide band modulation techniques; Harmonized EN covering essential requirements under article 3.2 of the R&TTE Directive
EN 301 489-1 – Electromagnetic compatibility and Radio spectrum Matters (ERM); ElectroMagnetic Compatibility (EMC) standard for ra dio equipment and services; Part 1: Common technical requirements
COMPLIANCE WITH INTERNATIONAL STANDARDS
ETSI EN 301 489-7 – Electromagnetic compatibility and Radio spec trum Matters (ERM); ElectroMagnetic Compatibility (EMC) standard for radio equipment and services; Part 7: Specific conditions for mobile and portable radio and ancillary equipment of digital cellular radio telecom munications systems (GSM and DCS)
EN 301 489-17 – Electromagnetic compatibility and Radio spectrum Matters (ERM); EMC standard for radio equipment and services; Part 17: Specific conditions for 2.4 GHz wideband transmission systems and 5 GHz high performance RLAN equipment
ETSI EN 301 489-24 – Electromagnetic compatibility and Radio spectrum Matters (ERM); ElectroMagnetic Compatibility (EMC) standard for radio equipment and services; Part 24: Specific conditions for IMT-2000 CDMA Direct Spread (UTRA) for Mobile and portable (UE) radio and ancillary equipment
ETSI EN 301 511 – Global System for Mobile communications (GSM); Harmonized EN for mobile stations in the GSM 900 and GSM 1 800 bands covering essential requirements under article 3.2 of the R&TTE directive (1999/5/EC)
ETSIEN 301 908-1 – Electromagnetic compatibility and Radio spectrum Matters (ERM); Base Stations (BS), Repeaters and User Equipment (UE) for IMT-2000 Third-Generation cellular networks; Part 1: Harmonized EN for IMT-2000, introduction and common requirements, covering essential requirements of article 3.2 of the R&TTE Directive
EN 60950-1– Information technology equipment - Safety - Part 1: General requirements
EN 62311:2008 – Assessment of electronic and electrical equipment related to human exposure restrictions for electromagnetic fields (0 Hz-300 GHz) COMPLIANCE WITH INTERNATIONAL STANDARDS
EN
Marking by the symbol indicates that usage restrictions apply.
France - 2.4GHz for Metropolitan France:
In all Metropolitan departments, wireless LAN frequencies can be used under the following conditions, either for public or private use:
Indoor use: maximum power (EIRP*) of 100 mW for the entire 2400-2483.5 MHz frequency band
Outdoor use: maximum power (EIRP*) of 100 mW for the 2400-2454 MHz band and with maximum power (EIRP*) of 10 mW for the 2454-2483 MHz band
Certification information (SAR) The device meets guidelines for ex posure to radio waves
Your device is a radio transmitter and receiver. It is designed not to exceed the limits for exposure to radio waves recommended by international guidelines. These guidelines were developed by the in dependent scientific organization ICNIRP and include safety margins designed to assure the protection of all persons, regardless of age and health.
The exposure guidelines for devices employ a unit of measurement known as the Specific Absorption Rate or SAR. The SAR limit stated in the ICNIRP guidelines is 2.0 watts/ kilogram (W/kg) averaged over 10 grams of tissue. Tests for SAR are conducted using standard operating positions with the device transmitting at its highest certified power level in all tested frequency bands.
This equipment complies with the European Council Recommendation of 12 July 1999 on the Limitation of Exposure of the General Public to Electromagnetic Fields [1999/519/EC].
D
- MANTA
- Tablet DUO POWER
- MID717
- INSTRUKCJA OBSŁUGI
- USER'S MANUAL
- Touch panel
- POWER
- Remark!
- Volume +, Volume-
- Earphone jack
- First use
- Battery management and charge
- Remark:
- Connection with PC
- USB connection
- Equipment operation interface
- Main interface describe
- Status bar describe
- Use touch panel
- Problem solution
- Device can't to open
- Headset can't hear the voice
- Can copy file or paly music and so on
- Bedienungsanleitung
- Hinweis
- HASZNÁLATI ÚTMUTATÓ
- lépés:
- NÁVOD K OBSLUZE
- VARTOTOJO INSTRUKCIJA
- žingsnis:
- NÁVOD NA OBSLUHU
- European Community Compliance Statement
- COMPLIANCE WITH INTERNATIONAL STANDARDS
- EN
- D
Brand : Manta
Model : Duo Power MID717
Category : Tablet