
BBC100 - Camera Brinno - Free user manual and instructions
Find the device manual for free BBC100 Brinno in PDF.


User questions about BBC100 Brinno
0 question about this device. Answer the ones you know or ask your own.
Ask a new question about this device
Download the instructions for your Camera in PDF format for free! Find your manual BBC100 - Brinno and take your electronic device back in hand. On this page are published all the documents necessary for the use of your device. BBC100 by Brinno.
USER MANUAL BBC100 Brinno
natural_image
Exterior view of a Brinno brand camera device (no visible text or symbols on body)TimeLapse HD Video Camera
TLC 200 f1.2
User Manual
www.brinno.com
WELCOME TO BRINNO THE FAMILY!
Welcome to Brinno!!!
natural_image
Simple line drawing of a megaphone with a handle, no text or symbols presentShare your awesome Time Lapse videos with other Brinno fans on our facebook page !!!

text_image
QR code image containing encoded data, no visible human-readable textfacebook.com/Brinnolnc
Register @nline
www.brinno.com/support/register.html

text_image
QR code image containing encoded data, no visible human-readable text
natural_image
Line drawing of a Brinno brand phone with a waving hand (no text or symbols on the device itself)Optional Accessories
natural_image
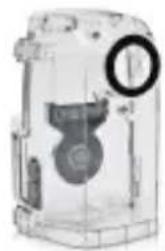
Technical illustration of a mechanical device with no visible text or symbolsWeather Resistant Housing (ATH110)
natural_image
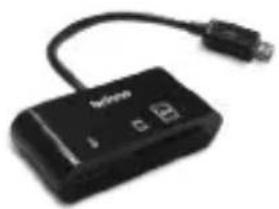
Black USB device with cable and connector (no visible text or symbols)Brinno Reader (ABR100)

Bike Cam Holder (ABH100)
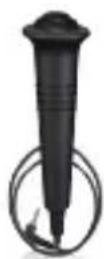
Shutter Line (ATS110)
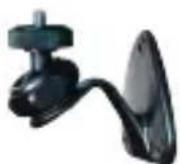
Camera Wall Mount (AWM100)
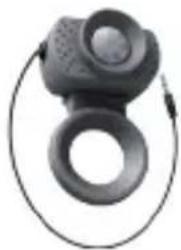
natural_image
Close-up of a black electronic device with circular ports and a coiled cable (no visible text or symbols)Motion Sensor (ATM100)
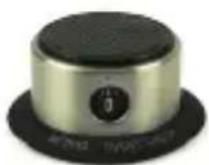
Pan Lapse (ART100)

The Brinno TimeLapse Camera (TLC200 f1.2) uses unique Time Lapse and Power Saving technologies to capture images for days, weeks, or even months. The Brinno TimeLapse Camera TLC200 f1.2 captures photos and stores them as videos making them easy to view. Turn it on, set the time interval, frame your subject, let it run and you have a time lapse video! No fancy equipment, no intervalometer, no complicated gear setups, no time-controlling, no video-making headaches.
If you have any questions or problems setting up your Brinno TimeLapse Camera please contact the sales staff where you purchased our product or email us at Brinno Incorporated directly customerservice@brinno.com Please Visit our website www.brinno.com
Time Lapse Camera TLC200 f1.2 Features

text_image
f1.2 apertureLarge Aperture Wide Ang
Better low light recording and sharper images.

text_image
le View 140° wide angle140°Field of View. A wider area to be recorded creating panoramic images

text_image
AUTO generatedTime Lapse Video
TLC200 f1.2 provides you a 1280x720 resolution video, yes, it's HD video.

natural_image
Battery icon with flexing muscles and lightning bolt symbol (no text or labels)Power Saving
Unique Power Control, means 4 AA batteries can capture 270,000 frames.
natural_image
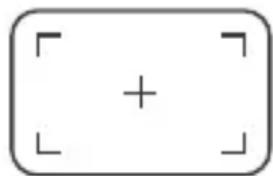
Simple rounded rectangle with a plus sign at center and four corner brackets (no text or symbols)LCD Viewfinder
The 1.44" LCD screen, allows you to easily frame your subject.
natural_image
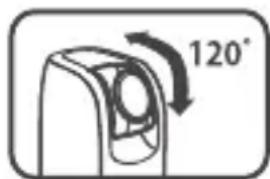
Diagram of a device with a 120° rotation indicator and directional arrow (no text or symbols beyond the label)Rotatable Lens
Provides greater flexibility in targeting your subject!
TLC200 f1.2 Output file format
- [Video Mode] Format AVI. Resolution 1280x 720, 640x 480
Note: The maximum size of each single AVI file ranges between 8,192 to 20,480 frames, depending on the time interval setting. - Still Image Mode] Format JPEG. Resolution 1280x 720, 640x 480
text_image
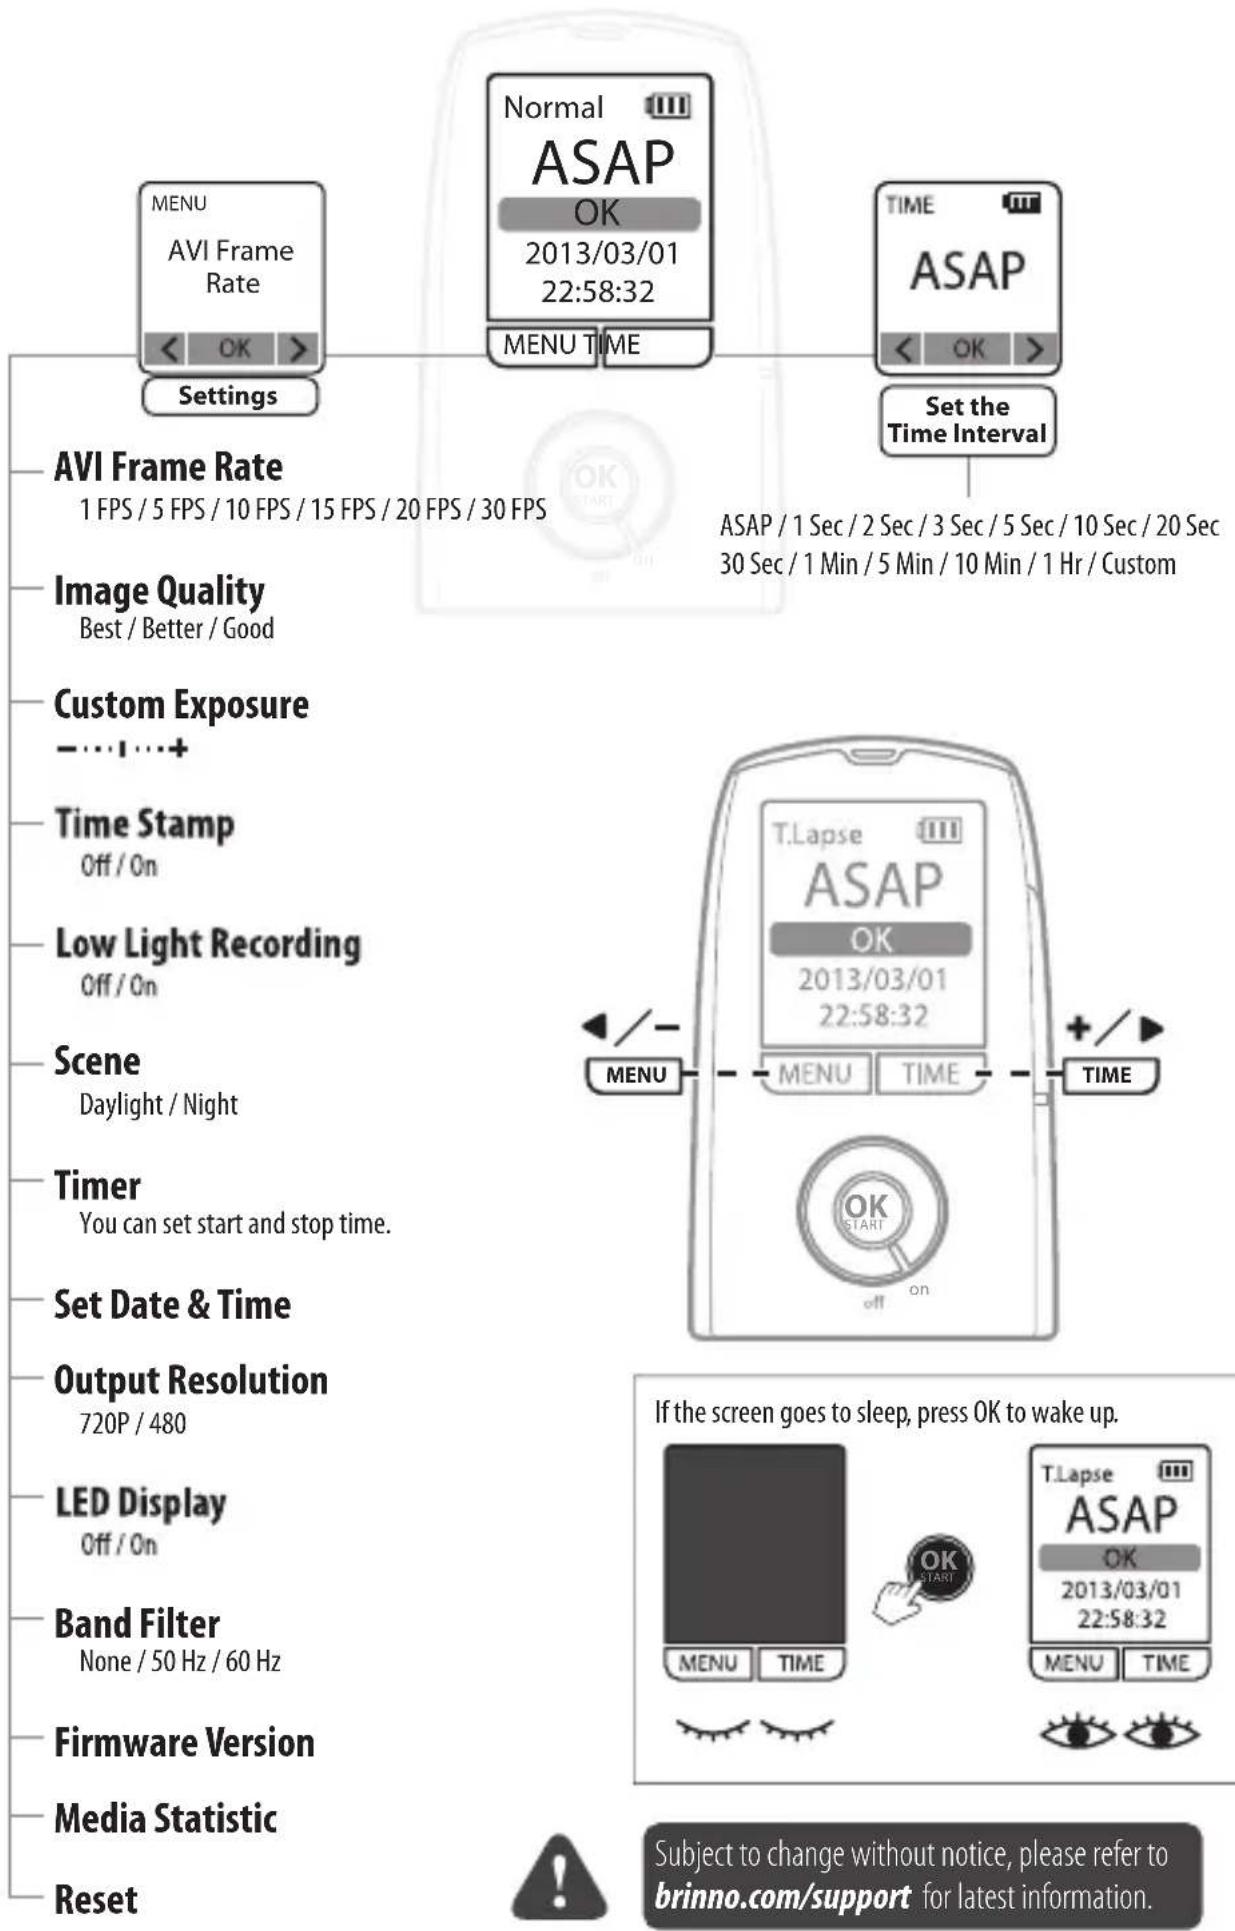
MENU AVI Frame Rate << OK > Settings Normal ASAP OK 2013/03/01 22:58:32 MENU TIME TIME ASAP << OK > Set the Time Interval AVI Frame Rate 1 FPS / 5 FPS / 10 FPS / 15 FPS / 20 FPS / 30 FPS Image Quality Best / Better / Good Custom Exposure -...+. Time Stamp Off / On Low Light Recording Off / On Scene Daylight / Night Timer You can set start and stop time. Set Date & Time Output Resolution 720P / 480 LED Display Off / On Band Filter None / 50 Hz / 60 Hz Firmware Version Media Statistic Reset ASP / 1 Sec / 2 Sec / 3 Sec / 5 Sec / 10 Sec / 20 Sec 30 Sec / 1 Min / 5 Min / 10 Min / 1 Hr / Custom T.Lapse ASAP OK 2013/03/01 22:58:32 +/- MENU MENU TIME TIME OK START OFF ON If the screen goes to sleep, press OK to wake up. T.Lapse ASAP OK 2013/03/01 22:58:32 MENU TIME Subject to change without notice, please refer to brinno.com/support for latest information.Package Contents
text_image
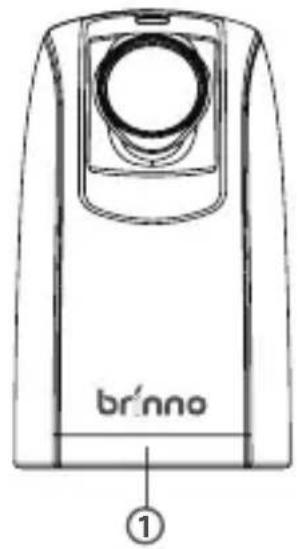
br'nno ①1 TimeLapseCam (TLC200 f1.2)
text_image
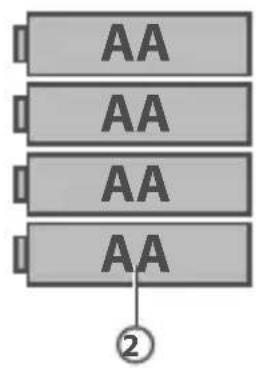
AA AA AA AA ②2 4 AA Batteries

text_image
SD ③3 SD card*
* SD Card may or may not be included, please check the contents list on the package.
Camera Components
Front Back
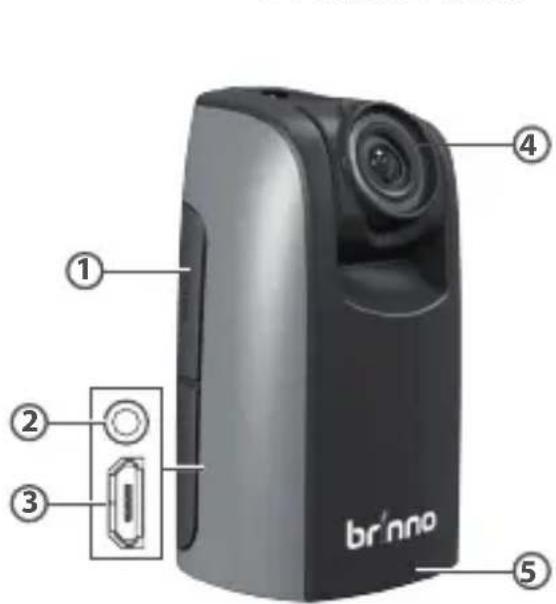
text_image
br'Inno ① ② ③ ④ ⑤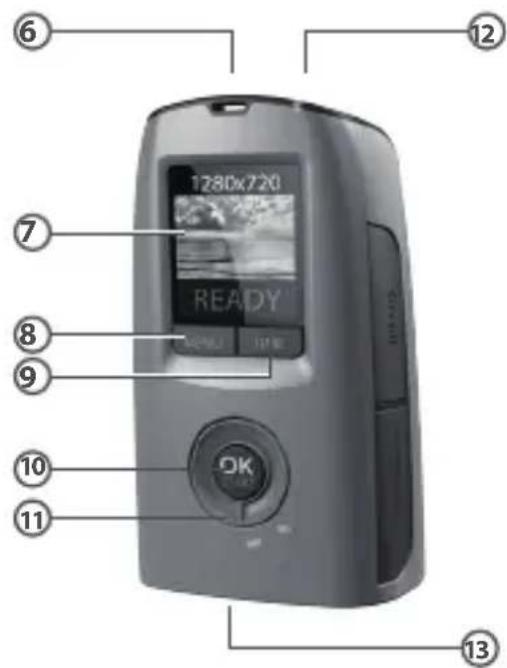
text_image
1280x720 READY OK1 SD Card Cover
2 Connector for Extension Accessories
(For ATS110, ATM100)
3 Connector for Micro USB cable (For extension power supplier, DC 5V)
4 Metal Ring
(for ATM100, ATL045)
5 Battery Door
6 Strap Eyelet
7 LCD Screen
8 MENU (◀) Button
9 TIME (▶) Button
10 OK/ START Button
11 Power Switch
12 LED Indicator
13 Tripod Screw Hole
Display Icons
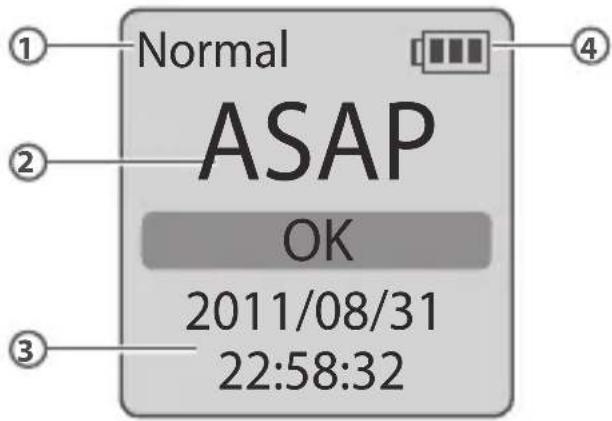
Set Up screen
text_image
Normal ASAP OK 2011/08/31 22:58:32Preview screen
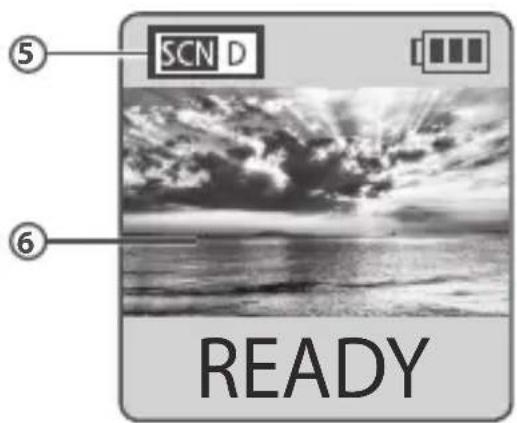
text_image
SCN D ⑤ ⑥ READY
text_image
⑦ BATTERY EMPTY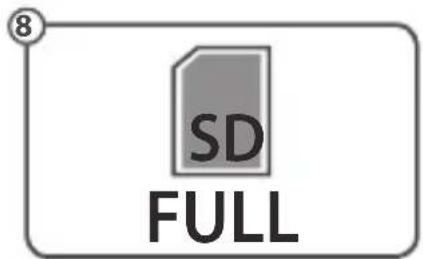
text_image
⑧ SD FULL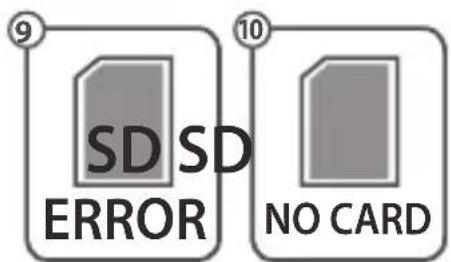
text_image
9 SD SD ERROR 10 NO CARDAt Set Up screen
1 Capture mode
Normal: Time Lapse mode
Shutter: Shutter Line mode
Motion: Motion Activated mode
2 Time interval
Select the pre-set time interval or customize yourself.
3 System date and time
4 Battery level
| Icon | Description |
| (green) | Battery fully charged. |
| (green) | Battery partially discharged. |
| (yellow) | Low battery.Replace as soon as possible. |
| (red) | Out of battery.Replace battery immediately. |
t Preview screen
5 Scene mode
6 Preview image capture window
Status icon
7 Battery Empty
Please replace battery immediately.
8 SD Card Full
Please download files to clear SD card space.
9 SD Card Error
Please replace SD card.
10 No Card
Please Insert SD card.
Initial Step-1 Install Batteries and SD Card
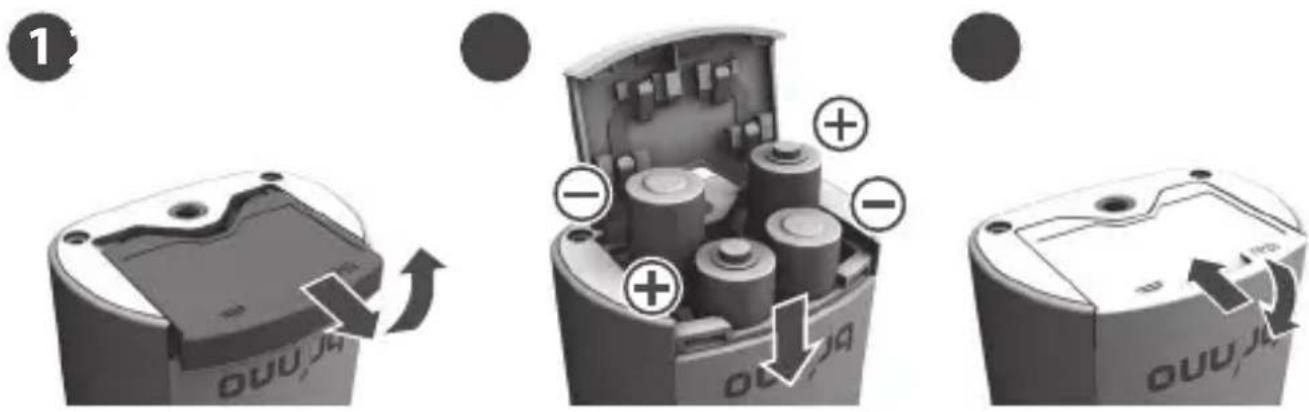
1 Open battery door.
2 Insert 4 AA batteries.
3 Close battery door.
⚠ Be sure the battery cover is locked into place.
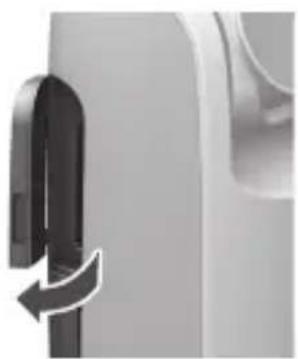
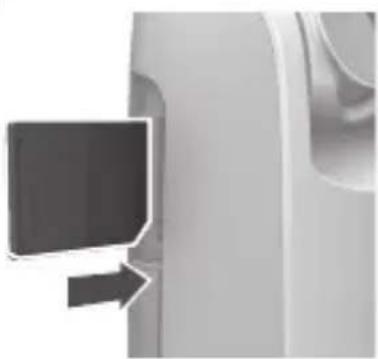
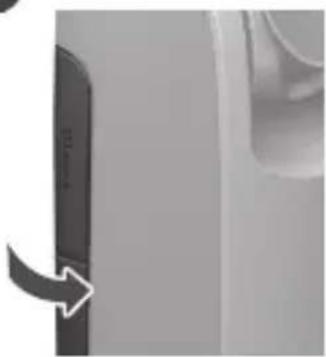
Initial Step-2 Install SD Card
1
natural_image
Close-up of a door handle with a curved arrow indicating left motion (no text or symbols)●
natural_image
Close-up of a white mechanical component with a black rectangular component and an arrow pointing to it (no visible text or symbols)●
natural_image
Close-up of a door panel with a white arrow pointing to the side (no visible text or symbols)1 Open SD card cover.
2 Insert SD card until it clicks into place.
3 Close SD card cover.
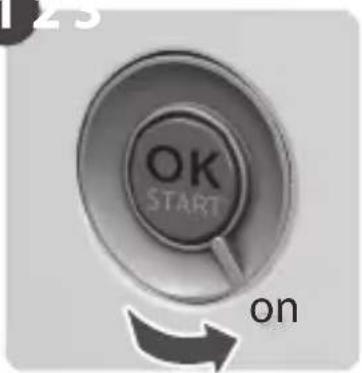
Initial Step-3 Turning the Camera on
1
text_image
OK START on

text_image
SD READING..
Normal

ASAP
OK
2011/08/31
22:58:32
1 Rotate the Power switch to ON position.
2 Process screen
⚠ It may display other information on screen, please refer to page 3.
3 Set Up screen
Now, you can set Date and Time and Time Interval before you use your TimeLapse Camera!
Initial Step-4 Set Date and Time
1
text_image
Normal 2 Sec OK 2011/06/30 23:56:39 MENU TIME2
text_image
MENU Set Date & Time OK3
text_image
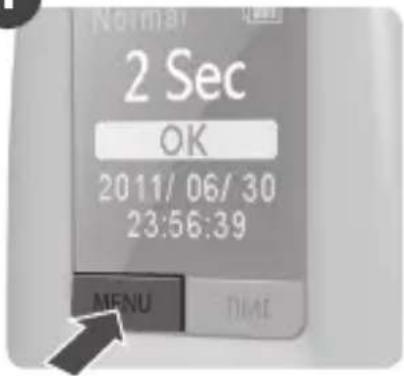
Date & Time 2011/08/31 22:58:32 - + OK: Next1 Press MENU button.
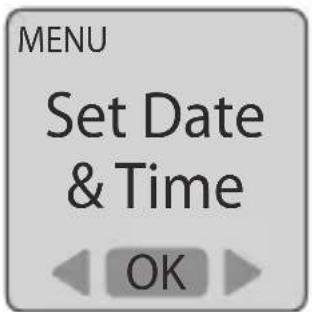
2 Press TIME (▶) to select Set Date & Time (MENU 7/13), and press OK.
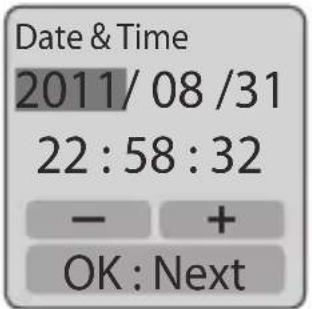
3 At the highlight field, press MENU ( — ) to decrease value, press TIME (+) to increase value, press OK to confirm and go to the next field. When finished press OK to exit set up.
Initial Step-5
Set Time Interval
text_image
1 2 Sec OK 2011/06/30 23:56:39 A##E#T TIME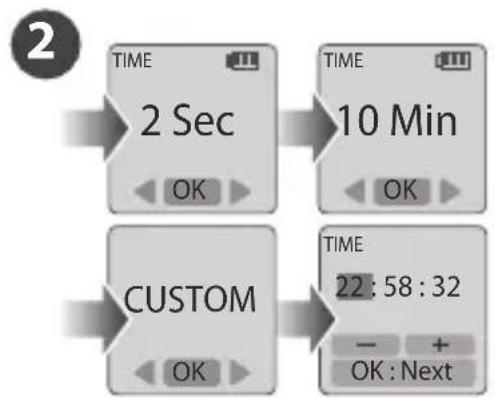
flowchart
graph TD
    A["TIME 2 Sec"] --> B["TIME 10 Min"]
    B --> C["CUSTOM"]
    C --> D["TIME 22:58:32"]
text_image
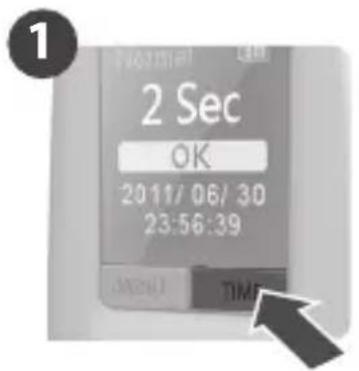
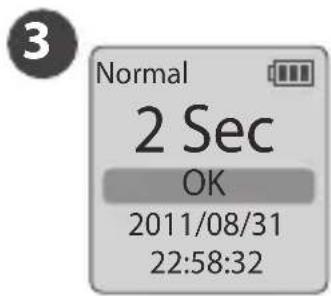
3 Normal 2 Sec OK 2011/08/31 22:58:321 Press TIME button to enter time interval set up.
2 Press MENU (◀) and TIME (▶) to select a pre-set time interval or customize it by yourself. When complete, press the OK Button to confirm and return to the Set up screen.
3 Back to the Set up screen
Now, you are ready to go to Preview screen and start recording your Time Lapse Videos.

About Power Saving
Set up screen Preview screen Turn off LCD
text_image
Normal ASAP OK 2011/08/31 22:58:32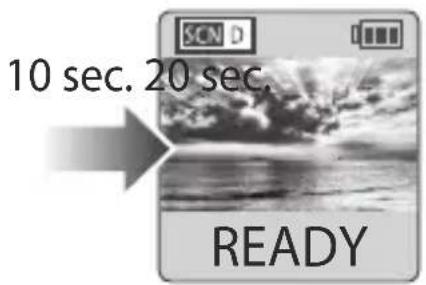
text_image
10 sec. 20 sec. READY
natural_image
Simple gray arrow pointing right, no text or symbols present1 At Set Up Screen
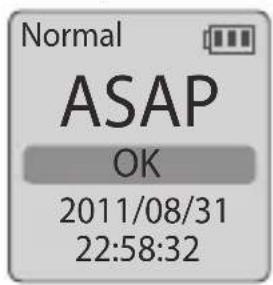
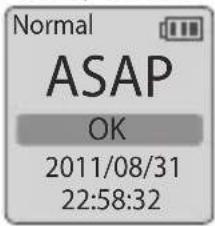
After 10 seconds without activity on the set up screen, the camera will go to Preview screen automatically. You can press the MENU or TIME button to go back to the set up screen.
2 At Preview Screen
After 30 seconds without activity on the set up or preview screen, the LCD screen will turn off automatically to save power. You can press the OK button to wake up the camera.
Start Recording
1
Set up screen Preview screen Recording
text_image
Normal ASAP OK 2011/08/31 22:58:322
text_image
READY REC3
Turn off LCD
text_image
Recording!1 After selecting the time interval, press OK to proceed to the Preview Screen.
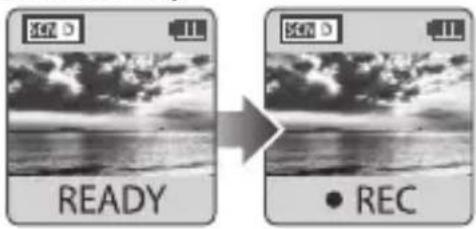
2 On the Preview screen, hold the OK button for 2 seconds to start recording. Preview Screen will show REC at the bottom bar.
3 During the recording period, the LCD panel will turn off to save power.
Stop Recording
1
text_image
OK OFFPreview screen
text_image
READYProcessing2
text_image
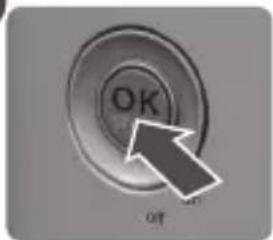
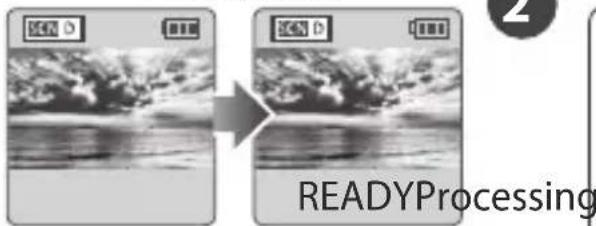
SD1 While recording, hold the OK button until the LCD light turns on and shows the text "Processing", it means the camera is processing the file. When completed the processing it will display the text "Ready" This indicates the recording session is complete.
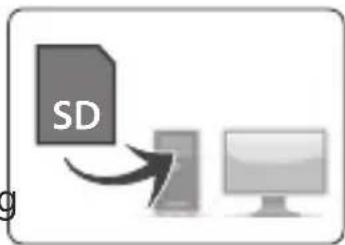
2 Remove the SD card from the camera, and insert it into your computer or laptop to enjoy your amazing Time Lapse Videos!
LED Indicator

natural_image
Close-up of a computer monitor with a glowing indicator light above it (no text or symbols visible)Green LED light: indicates Image capture in process
When the Green LED flashes, the Time Lapse Camera (TLC200 f1.2) is capturing photos.
Red LED light: Low battery level, Low recording space on your SD card
Advanced Menu Setting
AVI Playback Frame Rate
You can change the videos FPS (frames per second) playback with this setting.
1
text_image
MENU AVI Frame Rate OK2
text_image
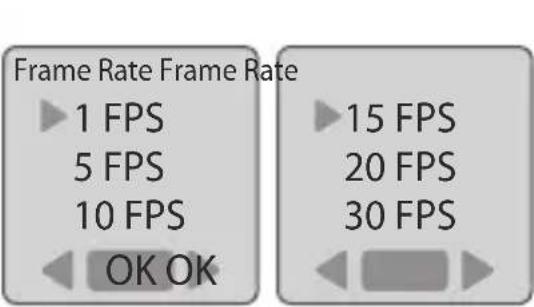
Frame Rate Frame Rate ► 1 FPS 5 FPS 10 FPS ◀ OK OK ► 15 FPS 20 FPS 30 FPS10 FPS (Frames Per Second) means: 10 frames are played in 1 second.
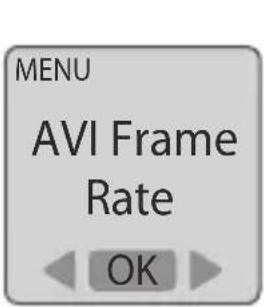
1 Select AVI Frame Rate.
2 What frame rate should I use?
Generally, 10 FPS is suitable for Time Lapse video.
1 FPS: If the video plays at 1 frame per second, the video will not look smooth, and the video length will be longer.
30 FPS: If the video plays at 30 frames per second, the video will look smooth, and the video length will be shorter.
Image Quality
Set the image quality for your camera.
1

text_image
MENU Quality Image Quality OK OK2

text_image
Best Better Good1 Select Image Quality
2 There are three options you can select: Best, Better, Good
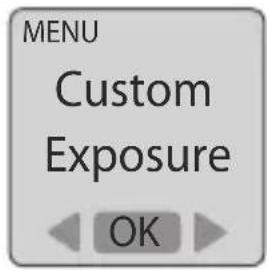
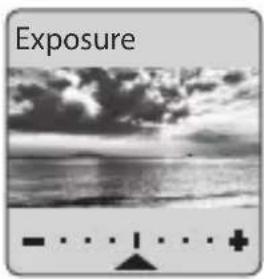
Custom Exposure
Increase or decrease the exposure.
1
text_image
MENU Custom Exposure OK2
text_image
Exposure1 Select Custom Exposure
2 press MENU ( ) and TIME ( ) to increase ( + ) or decrease ( — ) the exposure and press OK to exit.
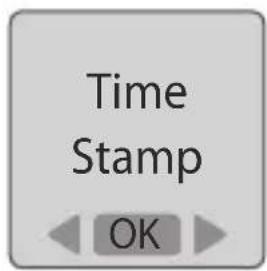
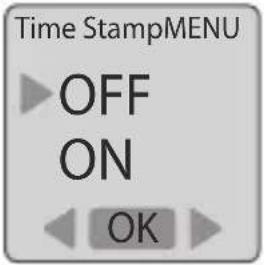
Time Stamp
You can choose if you want to show the time stamp at bottom of your video.
1
text_image
Time Stamp OK2
text_image
Time StampMENU OFF ON OK1 Select Time Stamp.
2 Select OFF or ON.
Low Light Recording
You can choose to enable your camera to keep recording video in a low light environment (< 5 Lux).
1
MENU Low Light
Low Light
Recording
OK OK
2
OFF ON

1 Select Low Light Recording.
2 ON: Allows your camera to record video in a low light environment.
OFF: Your camera will go to sleep in a low light environment.
Scene
Select the scene to fit your Photographic needs.
1
MENU Scene Set
Scene
OK OK
2
Daylight Night

1 Select Scene.
2 There are two options you can select: Daylight, Night.
| Option Description | ||
 | Daylight For | any Daytime photography. |
 | Night | Special setting for Nighttime photography shooting.Low ISO setting, long exposure time. |
Timer
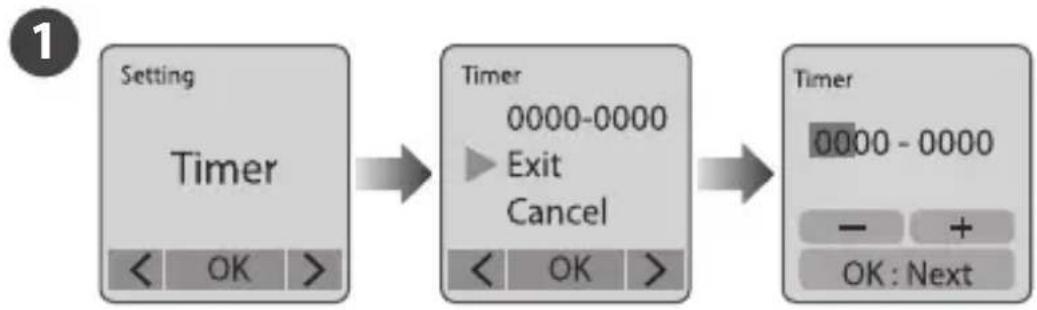
The Timer will allow you to pre-set a recording period. (eg. 8 am – 5 pm)
flowchart
graph LR
    A["Setting Timer"] --> B["Timer 0000-0000 Exit Cancel"]
    B --> C["Timer 0000 - 0000 OK: Next"]
1 Set the start recording time (A area), then set the stop recording time (B area). The time is set in 15 minutes increments. Press MENU to lower the number, press TIME to increase the number and press OK to next column. Or you may select Cancel to disable Timer setting.
e.g.
0600 - 1600 morning to afternoon
1600 - 2330 afternoon to night
2345 - 0500 overnight
0000A - 0000B
flowchart
graph LR
    A["Set up screen T.Lapse 1 Sec OK 2013/03/01 22:58:32"] -->|2 sec.| B["Preview screen READY"]
    B --> C["Recording • REC"]
    C --> D["Recording period"]
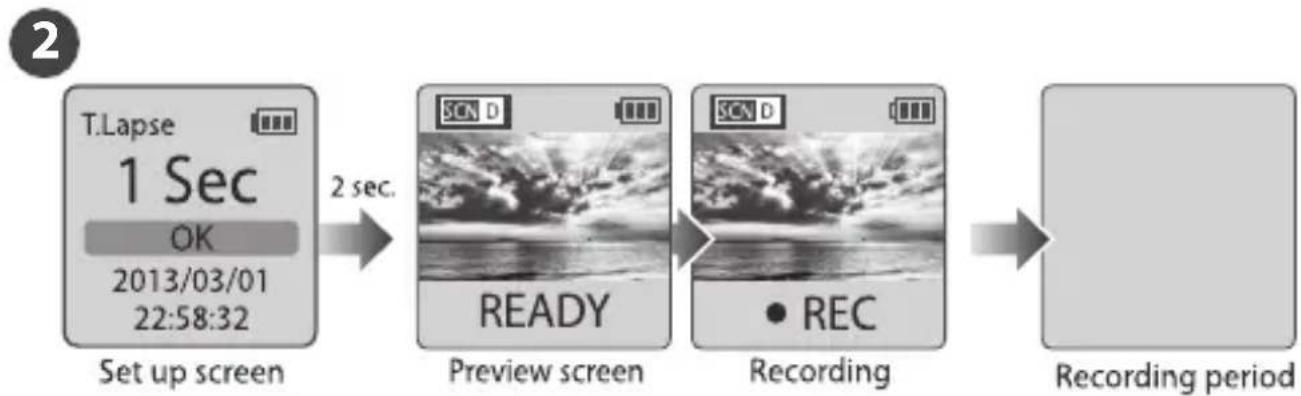
2 After setting up the time, go back to the set up screen then press the OK button to move to the preview screen. Hold the OK button for 2 seconds to start recording. The LCD panel will show REC then turn off to save power. The camera will automatically activate at the start recording time you selected.

ONCE YOU ACTIVATE TIMER, YOUR TIME LAPSE CAMERA WILL ONLY WORK AT THE TIMER SETTING PERIOD.
Set Date and Time
Set the correct date and time for your camera.
1
text_image
MENU Set Date & Time OK2
text_image
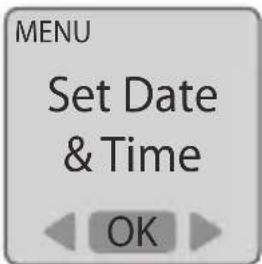
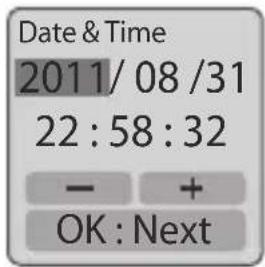
Date & Time 2011/08/31 22:58:32 - + OK : Next1 Select Set Date & Time.
2 At the highlight field, press MENU (—) to decrease the value, press TIME (+) to increase the value, press OK to confirm and go to the next field. When finished, press OK to exit set up.
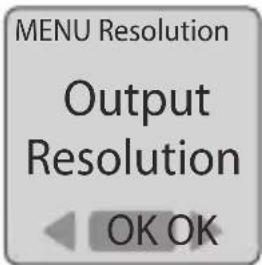
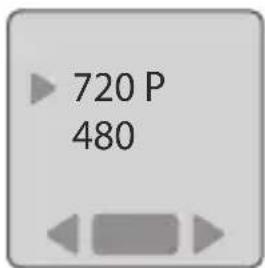
Output Resolution
You can change video resolution with this setting.
1
text_image
MENU Resolution Output Resolution OK OK2
text_image
720 P 4801 Select Output Resolution.
2 There are two options you can select: 720P, 480.
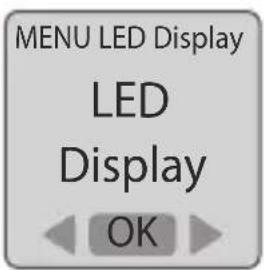
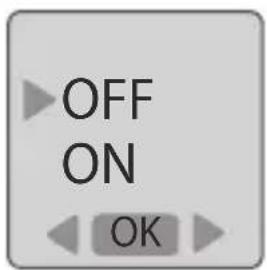
LED Display
You can choose if the LED indicator will flash while capturing each frame, or not flash at all.
1
text_image
MENU LED Display LED Display OK2
text_image
OFF ON OK1 Select LED Display.
2 OFF: During capture period the LED indicator will not flash.
ON: When the camera is capturing a frame, the LED indicator will flash once.
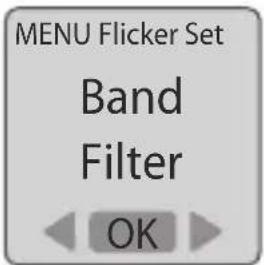
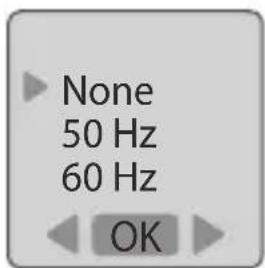
Band Filter
Select the correct fluorescent lighting frequency to match your indoor lighting frequency.
1
text_image
MENU Flicker Set Band Filter OK2
text_image
None 50 Hz 60 Hz OK1 Select Band Filter.
2 None: For outdoor environment.
50 Hz: Europe
60 Hz: USA
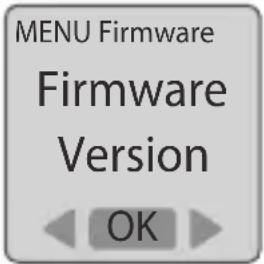
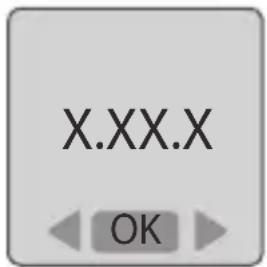
Firmware Version
Display the current firmware version of camera.

text_image
MENU Firmware Firmware Version OK
text_image
X.XX.X OK1 Select Firmware Version.
2 Display the firmware version for 30 seconds, or press the OK button to exit.
Media Statistics
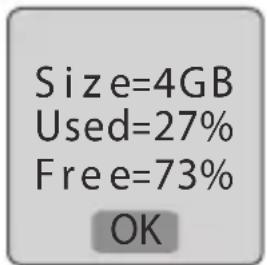
In this mode, the LCD will display the SD card capacity, so you will know how much free space remains on the SD card.


text_image
MENU Media Statistics OK
text_image
Size=4GB Used=27% Free=73% OK1 Select Media Statistics.
2 Display the SD card storage status.
Reset
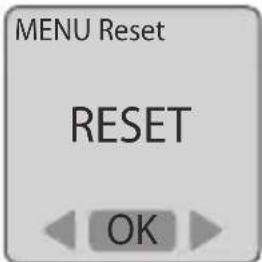
You can reset your camera back to the default setting.

text_image
MENU Reset RESET OK
text_image
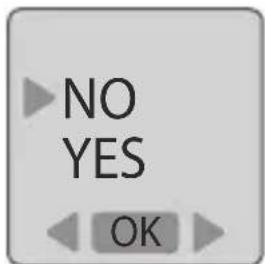
NO YES OK1 Select Reset.
2 Select YES and press the OK button to reset your camera.
Default Settings:
| Function Setting | |
| AVI Frame Rate 10 FPS | |
| Image Quality Better | |
| Time Stamp On | |
| Low Light Recording On | |
| Scene Daylight | |
| Output Resolution 1280x720 | |
| LED Display On | |
| Band Filter None | |
| Time Interval 2 Seconds | |
What Size SD card should I use
| SD card size Stored photos |
| 4 GB SD Card 30,000 |
| 8 GB SD Card 60,000 |
| 16 GB SD Card 120,000 |
| 32 GB SD Card 240,000 |

Based on a selected image quality setting of "Good"
What Settings Should I Use
| Subject Description | Time Interval | Time Lapse Frame Rate | |
| Daily Life | Recording kids, pets all parts of daily life | 1~30 seconds | 10~30 |
| Party | Recording family parties, public events, and happy times all around | 1~10 seconds | 10~30 |
| Traveling | Recording your trips, short and long | 2 sec~ 1 min | 10~30 |
| Plant | Recording Flowers growing, or gardening over a period of time | 1~30 min | 15~30 |
| Construction | Recording a building being built or any construction project | 30 min~ 1 hr | 15~30 |
| Biking | Recording a bike ride or trip | 1 sec | 10~30 |
| Face time lapse | You're the leading character in your time lapse videos | Shutter line | 5 |
Length of Battery Usage
| Time Interval Capture Frames Battery Life | ||
| ASAP | 270000 | 2.2 Days |
| 1 Second | 245000 | 2.8 Days |
| 5 Seconds | 228000 | 13 Days |
| 10 Seconds | 197800 | 23 Days |
| 20 Seconds | 137400 | 32 Days |
| 30 Seconds | 105200 | 36 Days |
| 1 Minute | 61800 | 43 Days |
| 5 Minutes | 14300 | 50 Days |
| 10 Minutes | 9180 | 64 Days |
| 30 Minutes | 3700 | 78 Days |
| 1 Hour | 1800 | |
| 4 Hours | 460 | |
| 24 Hours | 78 | |
Specifications
Camera
Model TLC200 f1.2
LCD Screen 1.44" TFT LCD
Lens Rotating Angle 120°
Waterproof Optional, (In use with Weather Resistant Housing (ATH 110))
Capture Mode
Time Lapse Auto generate Time Lapse video
Stop Motion Optional, (In use with Shutter Line (ATS 110))
Motion Activated Optional, (In use with Motion Sensor (ATM 100))
Optics Lens
Aperture F1.2
Lens type Aspherical Lens
Field of View 140°
Focal Length 18 mm (35 mm equivalent)
Focus Distance 30 cm (Minimum)
Recording
Time Lapse Video Format: AVI
Resolution: 1280 x 720, 640 x 480
Still Image Format: JPEG (only for using Shutter Line)
Resolution: 1280 x 720, 640 x 480
Memory Storage SD Card (Supported up to 32 GB)
Time Interval
ASAP 1\~4 photos per second
Custom From 1 second to 24 hours
Power
Power source Battery: 4 AA Batteries
DC IN: 5V (Micro USB connector)
Battery Life 2.2 Days, at ASAP time interval, captures 270,000 frames
78 Days, at 24 hours time interval, captures 78 frames
Dimension
Size (DxWxH) 64 x 46 x 106 mm
Weight 120 g (without batteries)
Color Green/ Black
Package Contents
TimeLapse Camera (TLC200 f1.2).1 4GB SD card*....1
AA Battery 4 User Manual 1
* SD Card may or may not be included, please check the contents list on the package.