
CHCAN2M - Range hood NORDMENDE - Free user manual and instructions
Find the device manual for free CHCAN2M NORDMENDE in PDF.


| Brand | Nordmende |
| Model | CHCAN2M |
| Product Type | Range hood |
| Installation Type | Built-in (cabinet mount) |
| Dimensions (approximate) | 60 cm width x 50 cm depth x 15 cm height (typical) |
| Weight (approximate) | 8 kg |
| Power Supply | 220-240 V ~ 50/60 Hz |
| Motor Power (approximate) | 120 W |
| Suction Speeds | 3 speeds (low, medium, high) |
| Lighting Type | Incandescent oval bulb max 40W E14 or halogen bulb 20W (GU5.3, ∅50mm) |
| Grease Filter Type | Paper (disposable), sponge (washable), or metallic (washable) – depends on model |
| Charcoal Filter (optional) | Rectangular or bayonet circular; replace every 4 months minimum |
| Ducting Version | Yes, with upper air exit and connection ring (duct not included) |
| Filter Version (recirculation) | Yes, requires carbon filter (if not supplied, must be ordered) |
| Minimum Distance from Hob | 65 cm for electric cookers, 75 cm for gas or mixed cookers (or as per hob instructions) |
| Control Panel | Side-mounted with speed selection and light switch |
| Cleaning Frequency | At least once a month for grease filters and exterior |
| Safety Features | Must disconnect power before cleaning; do not use without grille; no flambé cooking |
| Warranty (typical) | 2 years |
Frequently Asked Questions - CHCAN2M NORDMENDE
User questions about CHCAN2M NORDMENDE
0 question about this device. Answer the ones you know or ask your own.
Ask a new question about this device
Download the instructions for your Range hood in PDF format for free! Find your manual CHCAN2M - NORDMENDE and take your electronic device back in hand. On this page are published all the documents necessary for the use of your device. CHCAN2M by NORDMENDE.
USER MANUAL CHCAN2M NORDMENDE
natural_image
Simple line drawing of a container with a side view labeled A and B3 (no text or symbols on the diagram itself)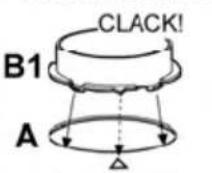
natural_image
Simple line drawing of a mechanical component with circular outline and label L1 (no text or symbols on the diagram itself)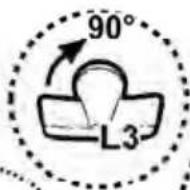
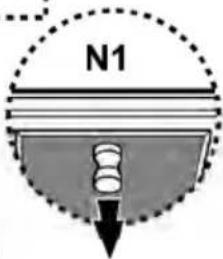
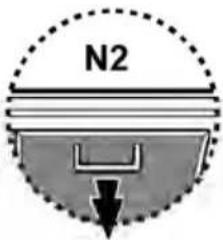
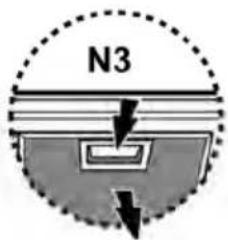
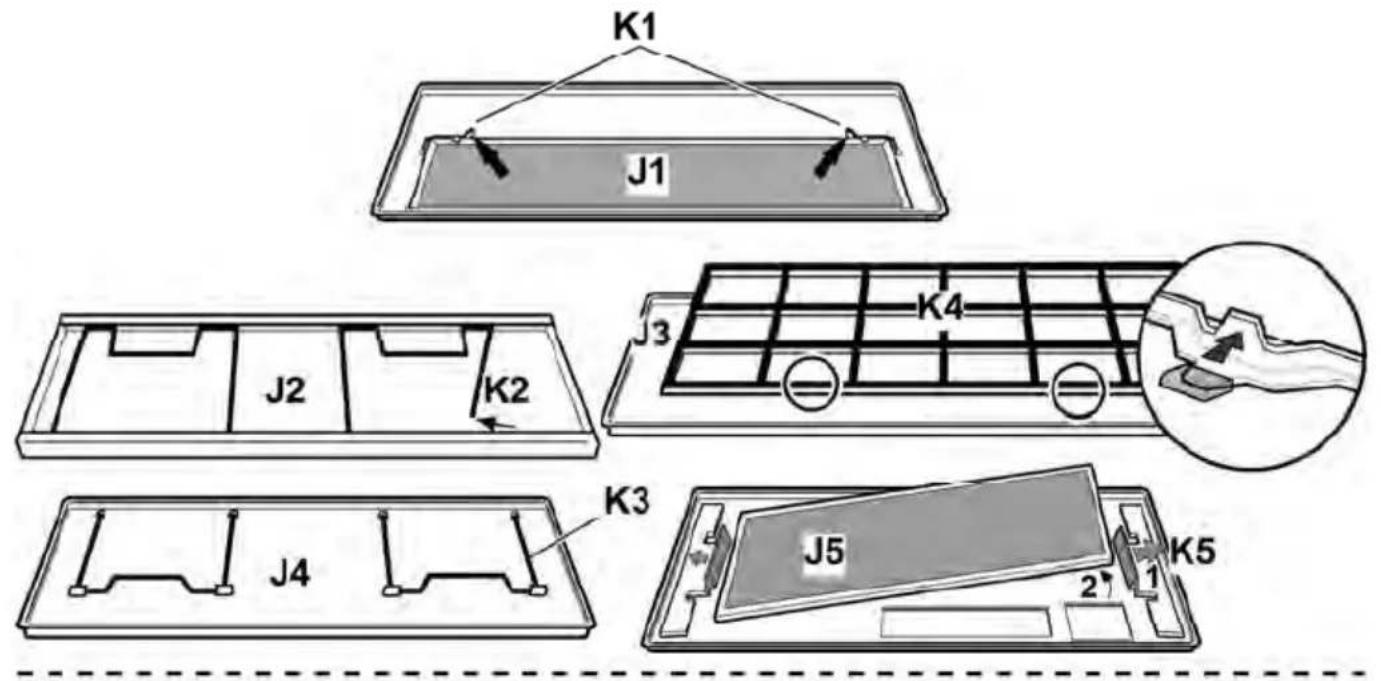
Entfernen des Fettfilters Anti-grease filter release
EN - Instruction on mounting and use
Consult the designs in the front pages referenced in the text by alphabet letters.
Closely follow the instructions set out in this manual. All responsibility, for any eventual inconveniences, damages or fires caused by not complying with the instructions in this manual, is declined.

Caution
WARNING! Do not connect the appliance to the mains until the installation is fully complete.
Before any cleaning or maintenance operation, disconnect the hood from the mains by removing the plug or disconnecting the home mains switch.
Always wear work gloves for all installation and maintenance operations.
The appliance is not intended for use by children or persons with impaired physical, sensorial or mental faculties, or if lacking in experience or know-how, unless they are under supervision or have been trained in the use of the appliance by a person responsible for their safety.
Children should be monitored to ensure that they do not play with the appliance.
Never use the hood without effectively mounted grating.!
The hood must NEVER be used as a support surface unless specifically indicated.
The premises must be sufficiently ventilated, when the kitchen hood is used together with other gas combustion devices or other fuels.
The suctioned air must not be conveyed into a conduit used for the disposal of the fumes generated by appliances that combust gases or other fuels.
The flaming of foods beneath the hood itself is severely prohibited.
The use of exposed flames is detrimental to the filters and may cause a fire risk, and must therefore be avoided in all circumstances.
Any frying must be done with care in order to make sure that the oil does not overheat and burst into flames.
As regards the technical and safety measures to be adopted for fume discharging it is important to closely follow the relations provided by the competent authorities.
The hood must be regularly cleaned on both the inside and outside (AT LEAST ONCE A MONTH, it is in any event necessary to proceed in accordance with the maintenance instructions provided in this manual)..
Failure to follow the instructions as concerns hood and filter cleaning will lead to the risk of fires.
Do not use or leave the hood without the lamp correctly mounted because of the possible risk of electric shocks.
We decline any responsibility for any problems, damage or fires caused to the appliance as the result of the non-observance of the instructions included in this manual.
This appliance is marked according to the European directive 2002/96/EC on Waste Electrical and Electronic Equipment (WEEE). By ensuring this product is disposed of correctly, you will help prevent potential negative consequences for the
environment and human health, which could otherwise be caused by inappropriate waste handling of this product.
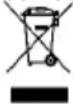
The symbol ■ on the product, or on the documents accompanying the product, indicates that this appliance may not be treated as household waste. Instead it should be taken to the appropriate collection point for the recycling of electrical and electronic equipment. Disposal must be carried out in accordance with local environmental regulations for waste disposal.
For more detailed information about treatment, recovery and recycling of this product, please contact your local council, your household waste disposal service or the shop where you purchased the product.
Use
The hood is designed to be used either for exhausting or filter version.
Ducting version
The cooker hood is provided with an upper air exit A with connection ring B, a discharge tube (not provided) should be mounted on the ring for discharging fumes and vapours externally. Connect the hood and discharge holes on the walls with a diameter equivalent to the air outlet (connection flange). Using the tubes and discharge holes on walls with smaller dimensions will cause a diminution of the suction performance and a drastic increase in noise.
Any responsibility in the matter is therefore declined.
Attention! If the hood is supplied with carbon filter, then it must be removed.
Filter version
When there is no exhaust duct for venting outdoors, you can use a carbon filter.
The air is depurated by the filter and put again in the surrounding. To use the appliance in this version, proceeded as follows:
The air is vented outdoors by a duct, passing through the wall units and connected to the connecting ring.
Attention! If the hood is not supplied with carbon filter, then it must be ordered and mounted.
Installation
The minimum distance between the supporting surface for the cooking vessels on the hob and the lowest part of the range hood must be not less than 65cm from electric cookers and 75cm from gas or mixed cookers.
If the instructions for installation for the gas hob specify a greater distance, this must be adhered to.

Electrical connection
The mains power supply must correspond to the rating indicated on the plate situated inside the hood. If provided with a plug connect the hood to a socket in compliance with current regulations and positioned in an accessible area. If it not fitted with a plug (direct mains connection) or if the plug is not located in an accessible area apply a bi-polar switch in accordance with standards which assures the complete disconnection of the mains under conditions relating to over-current category III, in accordance with installation instructions.
Warning! Before re-connecting the hood circuit to the mains supply and checking the efficient function, always check that the mains cable is correctly assembled.
Mounting
Expansion wall plugs are provided to secure the hood to most types of walls/ceilings. However, a qualified technician must verify suitability of the materials in accordance with the type of wall/ceiling. The wall/ceiling must be strong enough to take the weight of the hood. Do not tile, grout or silicone this appliance to the wall. Surface mounting only.
This hood is designed for fitting in a cabinet or on some other support.
Carry out the following instructions for affixing the cooker hood: Create an opening in the bottom of the cabinet to insert the cooker hood, and drill a hole on the top of the cabinet to fit the discharge tube, connect the cooker hood to an external pipe, predispose the electrical connection, remove the grill or the anti-grease filter, remove the frame C (if provided) by pressing on the two release hooks D (according to the model in possession, the release hook button D may be located externally or inside the cooker hood below the grease filter / grill), insert the cooker hood in the opening (lock in the lateral clasps E if provided by tightening the locking screws F), finally fix the cooker hood to the cabinet with wood screws G supplied. Remount the frame C (if provided), and suction grill H.
Operation
The hood is fitted with a control panel with aspiration speed selection control and a light switch to control cooking area lights.
The switch is located on the side of the suction grill H.
Use the high suction speed in cases of concentrated kitchen vapours. It is recommended that the cooker hood suction is switched on for 5 minutes prior to cooking and to leave in operation during cooking and for another 15 minutes approximately after terminating cooking.
Maintenance
ATTENTION! Before performing any maintenance operation, isolate the hood from the electrical supply by switching off at the connector and removing the connector fuse.
Or if the appliance has been connected through a plug and socket, then the plug must be removed from the socket.
Cleaning
The cooker hood should be cleaned regularly (at least with the same frequency with which you carry out maintenance of the fat filters) internally and externally. Clean using the cloth dampened with neutral liquid detergent. Do not use abrasive products. DO NOT USE ALCOHOL!
WARNING: Failure to carry out the basic cleaning recommendations of the cooker hood and replacement of the filters may cause fire risks.
Therefore, we recommend oserving these instructions.
The manufacturer declines all responsibility for any damage to the motor or any fire damage linked to inappropriate maintenance or failure to observe the above safety recommendations.
Grease filter
Traps cooking grease particles.
If situated inside the support grill, it may be one of the following types:
Paper filter must be replaced once a month or if colouring appears on upper side, in such cases the colouring is evident through the grill openings.
Sponge filter should be washed with hot soapy water once a month and replaced every 5 to 6 washes.
Metallic filter must be cleaned once a month, with non abrasive detergents, by hand or in dishwasher on low temperature and short cycle.
When washed in a dishwasher, the grease filter may discolour slightly, but this does not affect its filtering capacity.
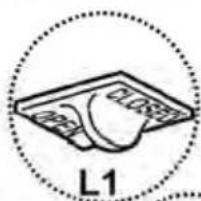
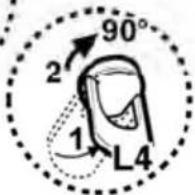
To access the grease filter J open the suction grill H via the release hooks L and free from the supports K.
Some models are provided with a metallic filter M without support grill, these should be washed as described above and removed from their housing by pressing the N handles towards the bottom.
Charcoal filter (filter version only)
It absorbs unpleasant odours caused by cooking.
The saturation of the activated charcoal occurs after more or less prolonged use, depending on the type of cooking and the regularity of cleaning of the grease filter.
In any case it is necessary to replace the cartridge at least every four months.
The carbon filter may NOT be washed or regenerated.
May be one of the following:
Rectangular: position the filter P in order to cover the motor protection grill and turn the handle clockwise until locked-in, for dismounting follow instructions in reverse.
Bayonet Circular-Insert position the filter in the centre (in certain cases use the Z hooks for centring the filter) in order to cover the motor protection grill ensuring that the X reference on the carbon filter corresponds to the Y reference on the conveyor, then turn clockwise; for dismounting follow instructions in reverse.
Replacing lamps
Disconnect the hood from the electricity.
Warning! Prior to touching the light bulbs ensure they are cooled down.
Remove the anti-grease filter support grill or the anti-grease filter to access the lamp area. Remove the damaged lightbulb and replace with an incandescent oval bulb maximum 40W E14.
In the case where model is provided with a halogen lightbulb, replace with halogen bulb of 20W (GU5.3 - ∅50mm).
If the lights do not work, make sure that the lamps are fitted properly into their housings before you call for technical assistance.
LI3PRA Ed. 09/08
Brand : NORDMENDE
Model : CHCAN2M
Category : Range hood