LDR275W - Fridge Lloyd - Free user manual and instructions
Find the device manual for free LDR275W Lloyd in PDF.


User questions about LDR275W Lloyd
0 question about this device. Answer the ones you know or ask your own.
Ask a new question about this device
Download the instructions for your Fridge in PDF format for free! Find your manual LDR275W - Lloyd and take your electronic device back in hand. On this page are published all the documents necessary for the use of your device. LDR275W by Lloyd.
USER MANUAL LDR275W Lloyd
natural_image
Line drawing of a two-tier refrigerator with front and back panels (no text or symbols)Dear Customer
Congratulations on being the proud owner of Lloyd Refrigerator. Your Refrigerator comes with a Lloyd Guarantee of Quality.
Lloyd takes great pride in providing its customers with perfect products that adheres to international quality standards.
Lloyd is committed to provide the ultimate customer satisfaction as nothing brings us greater joy than having satisfied customers of Lloyd.
At Lloyd, feedback and suggestions based on your product usage experience are greatly appreciated.
Please feel free to contact us at perfectservice@lloydmail.com
NIPUN SINGHAL DIRECTOR
General :
This type of refrigerator is widely used in places such as hotels, offices, student dormitories and houses. It is mostly suitable for refrigerating and preserving foods such as fruits and beverages. It provides the advantages of small size, lightweight, low electric consumption and easy use.
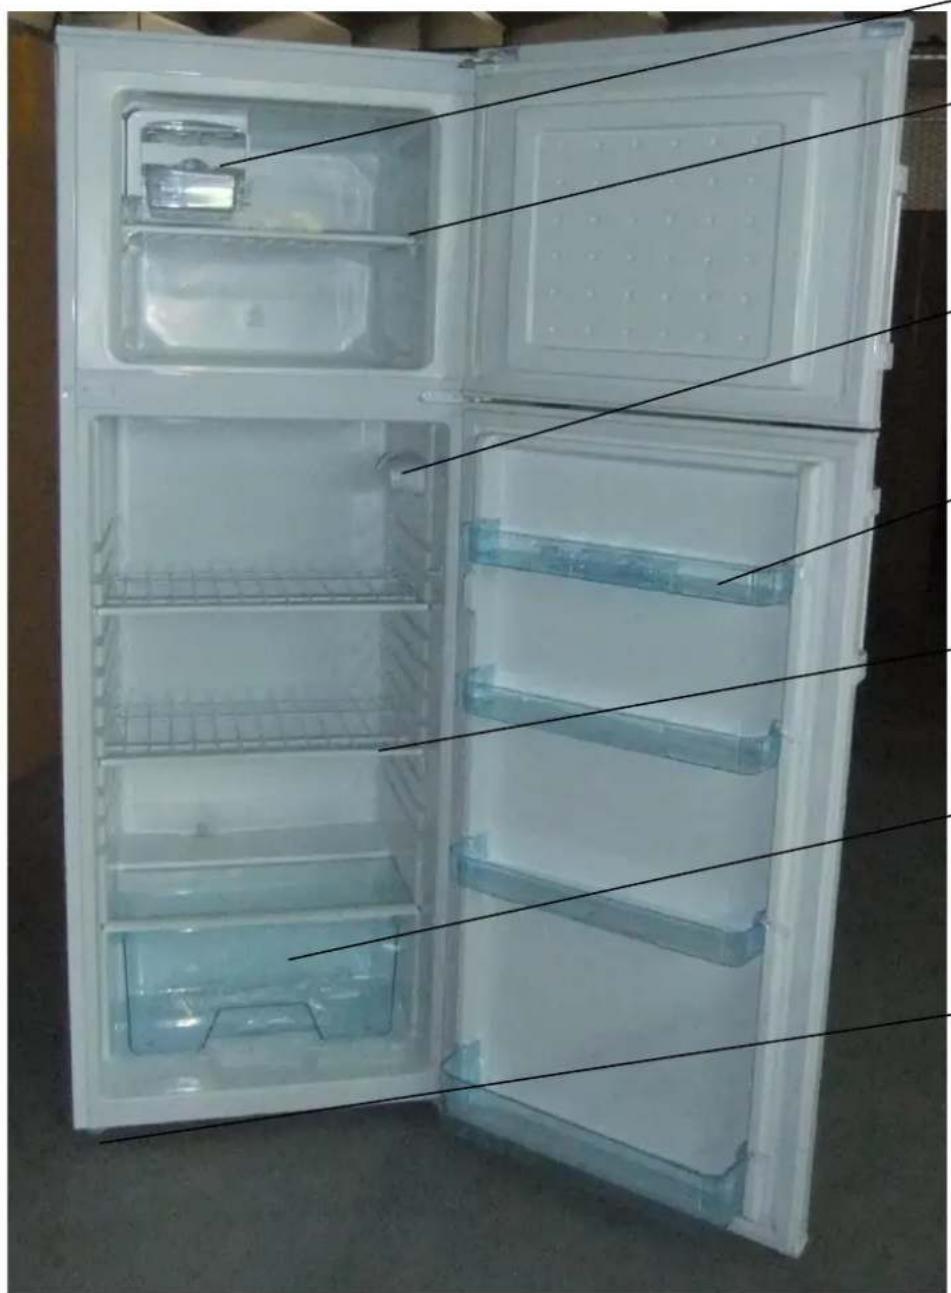
Main configuration :
natural_image
Interior view of a fully open refrigerator with visible door, shelves, and storage compartments (no text or symbols)1 Ice tray
2 Steel shelf
3 Thermostat
4 Plastic pallet
5 Steel shelf
6 Drawer
7 Leveller leg
Remove tapes or any labels from your Freezer before using (except the rating label).
To remove any residue of the tape or glue, rub the area briskly with your thumb.
Tape or glue residue can also be easily removed by rubbing a small amount of liquid dish soap over the adhesive with your fingers. Wipe with warm water and then dry it.
Do not use sharp instruments, rubbing alcohol, flammable fluids, or abrasive cleaners to remove tape or glue. These products can damage the surface of the Freezer.
When moving the Freezer, do not tilt the Freezer beyond 45^ from the upright position.
SPACE REQUIREMENTS:
WARNING: Keep flammable materials and vapours, such as gasoline, away from the Freezer.
Failure to do so may result in hazardous consequences.
To ensure proper ventilation for the Freezer, allow for 200mm space on each
side between the freezer and wall, 200mm space between back of the Freezer and the wall, and 300mm space between the counter top and the roof or ceiling. If you are installing the Freezer next to a fixed wall, leave sufficient space on the hinge side to allow the door to swing open.
Never install the Freezer near heat source and direct sunlight.
ELECTRICAL REQUIREMENT
WARNING: DO NOT REMOVE GROUND PRONG.
DO NOT USE AN ADAPTOR.
DO NOT USE AN EXTENSION CORD.
Failure to follow these instructions can result in death, fire or electrical shock. Before moving the Freezer into its final location, it is important to make sure you have the proper electrical connection.
Recommended Earthing Method
A 220 \~ 240 Volt /50 Hz AC, 10 ampere fuse and properly earthed electrical supply is required. It is recommended that a separate circuit serving only for this appliance be provided. Use a receptacle which cannot be turned off with a switch or pull chain. Do not use an extension cord.
NOTE: Before performing any type of installation, disconnect the Freezer from the electrical source. When you are done, connect the Freezer to the electrical source and reset the control to the desired setting.
LEVELLING
If the Freezer is not levelled during the installation, the doors may not close or seal properly, causing cooling, frost, or moisture problems. It is very important for the
Freezer to be level in order to function properly.
To level your Freezer you may either turn the level leg clockwise to raise that side of the Freezer or turn counter – clockwise to lower that side.
NOTE: Having someone push against the top of the Freezer take some weight off the levelling leg. This makes it easier to adjust the levelling leg.
USE OF THE APPLIANCE
To obtain the best possible results from your Freezer, it is important that you operate it properly.
Temperature Control
The temperature in the freezer is controlled by the thermostat control knob. The thermostat control box is loaded in compressor compartment. Turn the thermostat control knob up or down to regulate the temperature inside the freezer. The markings on control knob indicated from ‘1\~6’ are for the different temperature grades. The temperature decreases from position ‘1’ being the warmest to position ‘6’ being the coldest. The setting “off” means cease work.
For normal use, setting '3' is advised.
Store Frozen Food
When using the freezer for the first time or after defrosting, set the temperature control to set '6' for at least two hours before introducing the food to be stored.
All frozen food products purchased should be placed in the freezer as soon as possible to avoid defrosting.
Storage recommendation printed on the packaging of frozen food by the
manufacturers should be always be followed.
Make sure that the drawer does not interfere with the refrigeration pipeline.
Freezing Fresh Food
Ensure that freezing operations are carried out under the most hygienic conditions as freezing alone does not sterilise food. It is advisable to freeze the food by packing it into separate meal portions and not in bulk. Never put hot or even warm food items into the freezer. Prior to storing the frozen food, pack it in plastic bags, aluminum sheets or freezing containers and place it into the freezer. Refer data sheet at the rear of this booklet for maximum permissible amount in kilograms of fresh food that can be frozen in any 24 hour period with a room temperature of 25 °C. Never store more than the maximum permissible limit.
Note: Do not put bottled food or drinks in the freezer compartment.
For optimum performance, leave enough space in the Freezer compartment for air to circulate around the packages.
ICE TRAY
The ice tray is to make ice cubes. Fill with cold drinkable water to four-fifth of the height of the ice tray, and place it in the freezer. When the cubes are frozen, take the ice tray out and twist it back and forth to separate the ice cubes. Avoid over-bending the ice tray to prevent breakage.
Defrosting
Remove the mains plug from the wall socket, open the door and remove all the food to a cool place. Defrost using a plastic scraper, or let the temperature rise
naturally until it defrosts. Then wipe away the remaining ice and water. After this, plug the freezer back into mains supply.
Note: To avoid damaging the freezing compartment wall, do not use any sharp objects to remove the frost or separate the frozen food.
Cleaning your freezer
Before you start cleaning your freezer, remove the mains plug from the power supply.
Use a clean sponge or soft and a mild detergent in warm water. Do not use abrasive or harsh cleaners.
Hand wash, rinse and dry all surfaces thoroughly.
Do not use cleaning waxes, concentrated detergents, bleaches or cleaners containing petroleum on plastics and rubber parts.
Never use paper towels, window sprays, scouring cleansers or flammable fluids on plastic parts as these can scratch or damage material.
Clean with a cloth soaked in this solution and then dry with a soft cloth.
PROLONGED INACTIVE PERIODS
If the freezer is not in use for a long period of time, proceed as follows:
Disconnect the freezer from the main supply by removing the plug from the wall socket.
Clean and dry the inside as instructed under the heading of 'Cleaning your Freezer'.
Leave the door open to prevent any unpleasant odours from building up while the freezer is not in use.
TROUBLE SHOOTING
In case of malfunction, you can solve many common problems easily.
Your Freezer does not operate...Check if
• The power supply cord is unplugged.
The doors do not close completely...Check if
• The drawers are in position.
• The gaskets are clean.
• The Freezer is level.
The freezer is noisy while running...Check if
- The freezer is level and it is not in contact with another appliance or kitchen furniture.
The freezer does not cool sufficiently...Check if
- If the door has been opened too often, or if it has been left open for a while.
It takes time for the freezer to reach its set temperature.
• The airflow in the rear of the freezer has sufficient clearance.
The following characteristics should not be looked upon as a problem:
• A gentle trickling sound caused by coolant flowing in the pipe.
• Compressor operating at high temperature.
If customers need the door to be changed from Right to left, please contact our service department
WARNING
- The appliance is not intended for use by young children or infirm persons without supervision.
- Young children should be supervised to ensure that they do not play with the appliance.
REQUESTING ASSISTANCE OR SERVICE
Refrigerator door installation guidelines about swapping left & right
1 Remove the four screw caps and two catches with the even-slot screwdriver.
Then disassemble the screws top the fixed befcross-slot screwdriver.

text_image
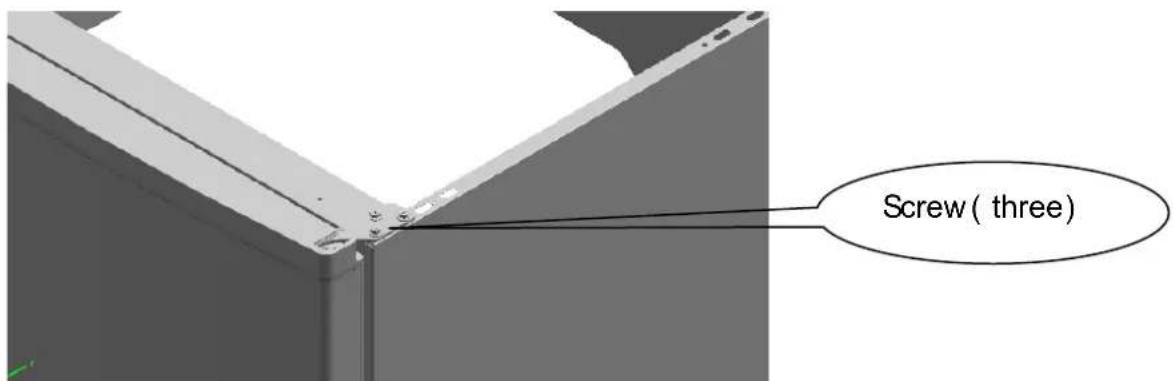
screw cap (four) Catch (two)2 Remove the screws holding the top-hinge with cross-
slot screwdriver.
text_image
Screw ( three )3 Replace the top-hinge and the top-door limit block and the door bearing bush to the other side.
a) Remove the nut with sleeve. Take off the washer then remove the axes to
4 Unscrew the screws holding the bottom-hinge with cross-slot screwdriver and

text_image
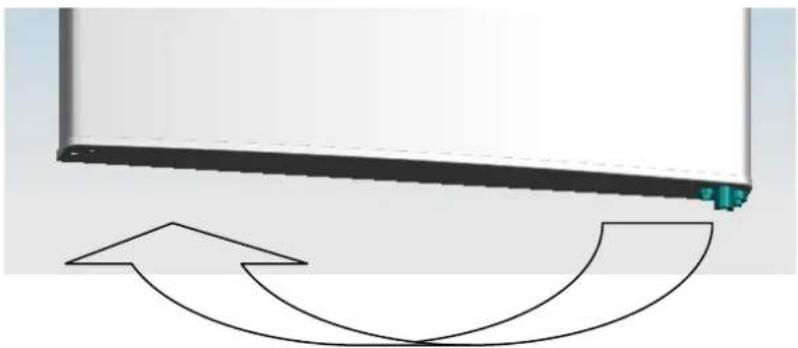
The screws fixed the bottom-hingeNote : the refrigerator incline angle less than 45^ .
5 Replace the bottom door bearing bush and the limit block.
natural_image
Diagram showing a black rectangular object with a green sensor attached, above an arrow indicating upward motion or force direction (no text or symbols present)6 R replace the bottom hinge to the other side then fix it
the other side and fixed.

natural_image
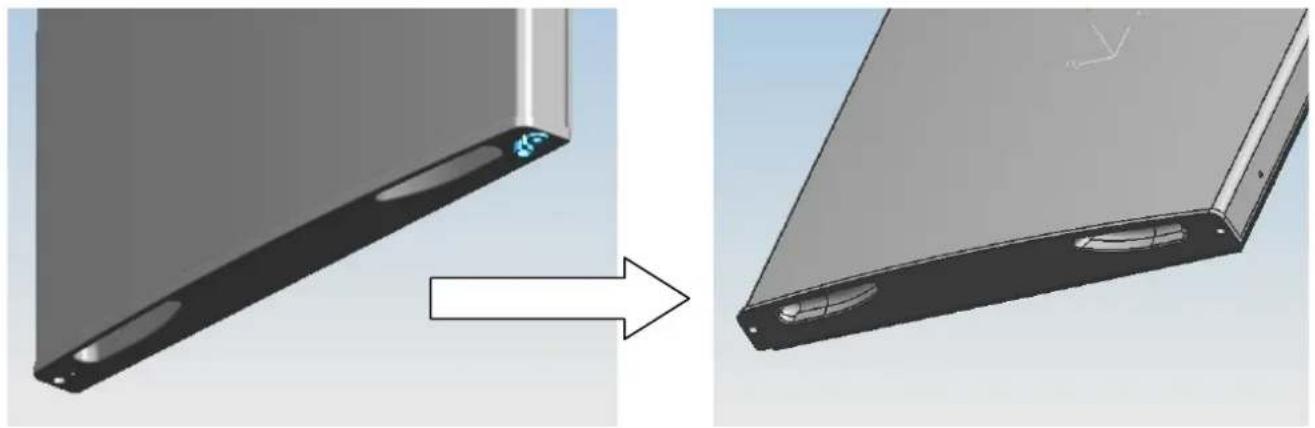
3D mechanical component before and after assembly, showing a curved bracket with mounting holes and a cylindrical shaft (no text or symbols)b) Remove the top door limit block.
natural_image
3D rendering of a device showing a component being processed from an external panel (no text or symbols visible)c) Please take out another door limit block, with screw mounting to the door.
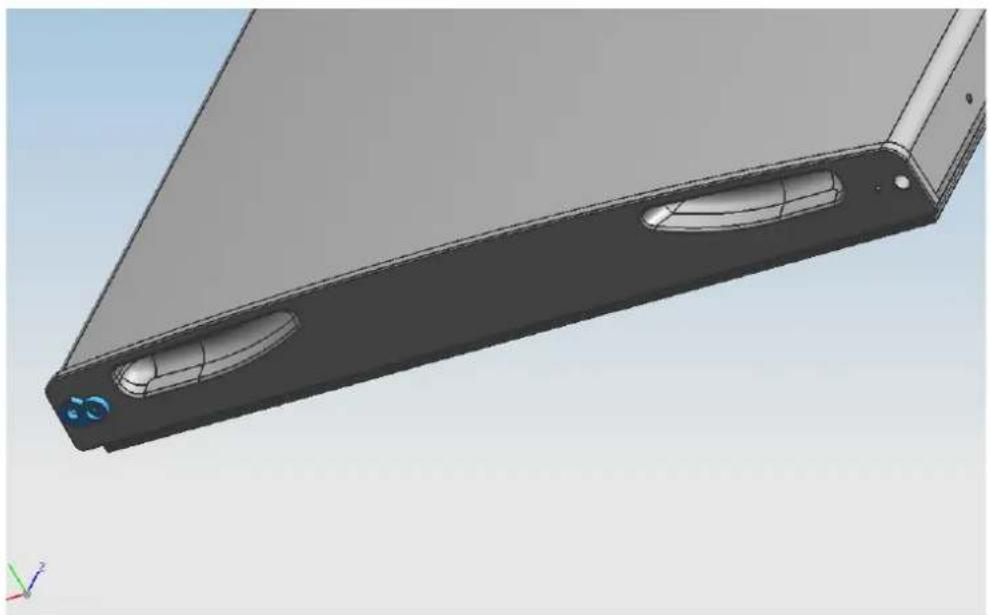
natural_image
3D CAD model of a mechanical component with two recessed slots and a small blue logo, shown without any text or symbols.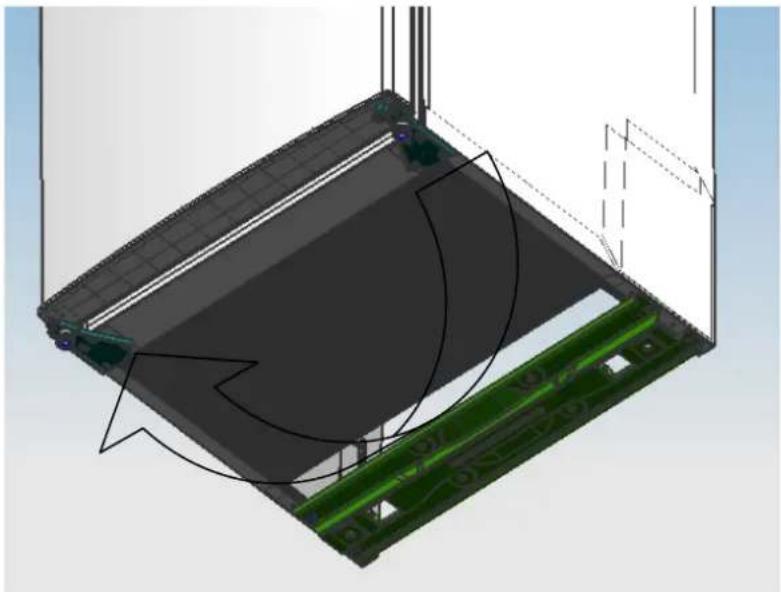
natural_image
3D CAD model of a rectangular electronic component with green circuit board and curved internal structure (no text or symbols)7 Replace the mid-hinge.
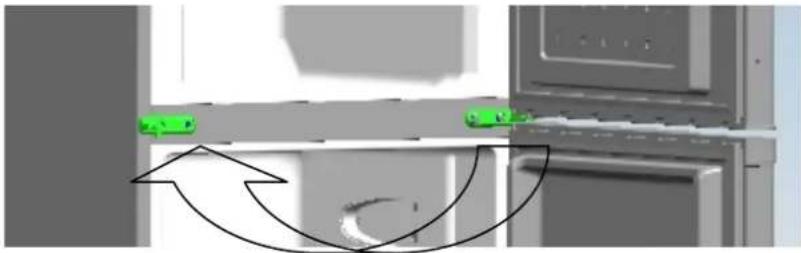
natural_image
Diagram showing a mechanical or electrical component with green directional arrows indicating motion or force, no readable text or symbols present.8 Set the bottom midehiagthe right position, then fix the
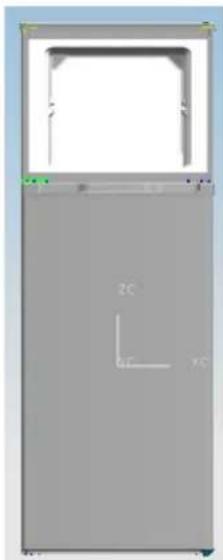
natural_image
3D model of a rectangular enclosure with a cutout and coordinate axes labeled (no text or symbols beyond measurement markers)9 Replace the top -hinge.
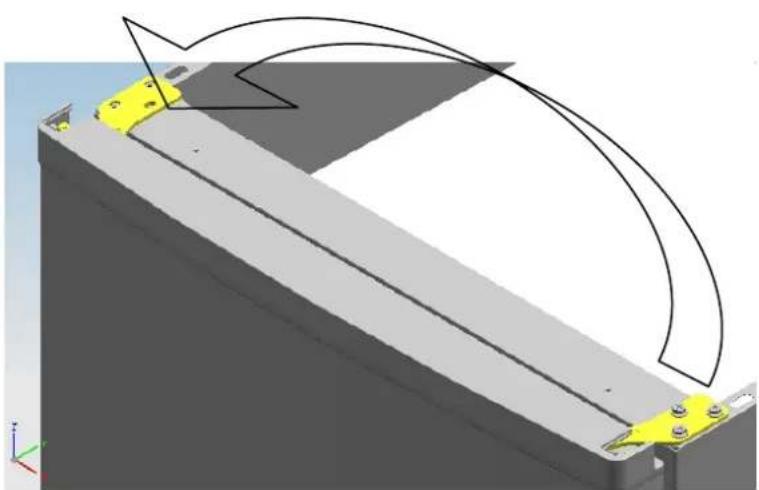
natural_image
3D CAD model of a mechanical bracket with mounting holes and a curved arrow indicating rotation (no text or symbols)10 Set the top to do image handight position, then fix the
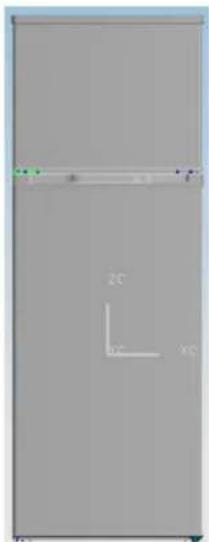
natural_image
Pure diagram of a rectangular panel with labeled dimensions (2C, 3C) and no text or symbols11 Install the four screw caps and two catches to the corresponding position.
- Ensure the appliance is unplugged and empty.
- Adjust the two levelling feet to their highest position.
· We recommend you have someone to assist you.
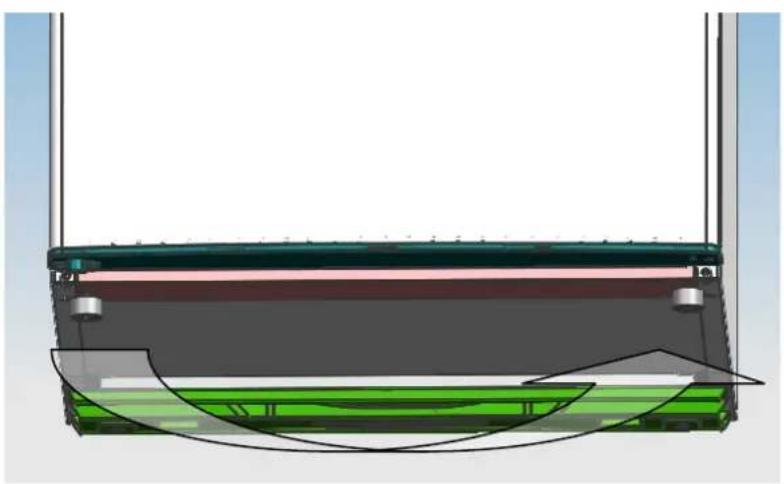
12 Replace the leveller to the other side and adjust it to make sure the cabinet is level.
natural_image
Diagram of a mechanical or electrical component with layered structure and curved arrows indicating motion (no text or symbols)NOTE :
To take the door off, it is necessary to tilt the appliance backward.
Rest the appliance on something solid e.g. a chair just below the top panel.
Do not lay the appliance completely flat as this may damage the coolant system.
| Model LDR275W | |
| Climate Class T | |
| Pretection Against Electric Shock I | |
| Rated Voltage/Frequency 220V-240V~/50Hz | |
| Rated Power(W) 110 | |
| Rated Defrost Power(W) / | |
| Lamp Rated Power(W) MAX 15 | |
| Rated Current(A) 0.85 | |
| Foaming Agent Cyclopentane | |
| Energy Comsumption(kwh/24h) 1.11 | |
| Total Gross Volume(L) 251 | |
| Gross Freezer Volume(L) | / |
| Total Storage Volume(L) | 242 |
| Freezer Storage Volume(L) | 55 |
| Refrigerator Storage Volume(L) | 187 |
| Refrigerant,Amount | R134a,90g |
| Freezing Capacity(kg/24h) | 2.5 |
| Net Weight(kg) | 49 |
| Gross Weight(kg) 53 | |
| Product Dimensions(mm)(wxdxh) | 550x595x1550 |
WARRANTY TERMS AND CONDITIONS
LLOYD ELECTRIC ENGINEERING LIMITED (hereinafter referred to as 'the company') guarantees to the purchaser that this product carries a warranty for the period mentioned below, commencing from the date of purchase. The company will repair or replace free of charge any part or parts of the product, if the defect is due to the faulty material or workmanship. Warranty involves repairing of defective product/parts and does not entitle purchaser for the replacement of complete product.
| Product | Warranty Period | Part Not Covered |
| Refrigerator | Comprehensive - 1 year Compressor - 5 years | Plastic / Glassware / Bulb / Tube |
- This warranty is confined to the first purchaser of the product only.
- Repair or replacement will be carried out through the Company's Service Centres or it's Authorised Service Centres.
- For units installed beyond the municipal limits of the jurisdiction of the authorised service centre/company's service centre, all expenses incurred in collection the unit or part/s thereof from the company's service centre/authorised service centre, as well as expenses incurred in connection with deputing of service personnel/ technicians towards to and fro travel, conveyance and other incidentals etc. will be borne by the customer.
- In the event of repairs/replacement of any part/s of the unit, this warranty will thereafter continue and remain in force only for the unexpired period of the warranty. Moreover, the time taken for repair/replacement and in transit whether under the warranty or otherwise shall not be excluded from the warranty period.
- The company or it's authorised service centre, reserves the right to retain any part/s or component/s replaced at it's discretion in the event of a defect noticed in the equipment during the warranty period.
- (a) Any change of address shall be intimated to concerned service centre for continuation of warranty.
(b) Warranty for the unexpired period shall continue after the product is inspected by the concerned service centre and the product is found free from transit damage. The customer shall have to pay a visiting charge towards inspection, as applicable.
(c) In case of any transit damage, the product shall be repaired by the concerned service centre on charges and warranty for unexpired period to continue. -
The warranty does not cover demonstration/ installation of the product purchased.
-
The company's obligation under this warranty shall be limited to repair or providing replacement of part/s only. The maximum claim /s if entertained by the company will be subject to the maximum retail price of the product purchased or the purchase price, whichever is lower.
- In the event of any unforeseen circumstance, and spares not being available, the company's prevailing depreciation rules will be binding on the purchaser to accept as a commercial solution in lieu of repairs.
- The warranty is issued at New Delhi, and Courts at New Delhi shall have exclusive jurisdiction over matters covered or flowing from this warranty.
- The company's obligation under this warranty shall be limited to repairing or providing replacement of part/s, which are found to be detective.
- Repairs during warranty period shall be carried on "Carry In" basis. Wherein for service the purchaser shall bring the product to the Service Centre with whom the set is registered for warranty service. The warranty does not cover cost of transportation of system from place of installation to the Service Centre.
- The concerned Service Centre will advise the customer whether to effect the repair at site or its Service Centre.
- Any part/s of the system replaced by the company at its discretion shall be with a functionally operative part.
THIS WARRANTY IS NOT APPLICABLE IN ANY OF THE FOLLOWING CASES:
- The warranty card is not duly filled and mailed back to the service centre for registration by the purchaser.
- The completed warranty card and invoice is not presented to authorised personnel at the time of repair.
- The product is not purchased from an Authorised LLOYD dealer.
- The product is not used according to instructions given in the instruction manual.
- Defects caused by improper use as determined by the company personnel.
- Modification or alteration of any nature is made in the electrical circuitry/ or physical construction of the set.
- Installation/ repair work is carried out by persons/agency other than authorised by the company.
- Site (premises where the product is kept) conditions that do not confirm to the recommended operating conditions of the machine.
- The original serial number is removed, obliterated or altered from the machine or cabinet.
- Defects due to cause beyond control like lightning, abnormal voltage, acts of God or while in transit to service centre or purchaser's residence
LLOYD ELECTRIC & ENGINEERING LTD.
Warranty Registration Card
Customer Copy

Serial No.
Customer Details
| Title: | Mr | Ms | Mrs | M/s | ||||
| Name: | ||||||||
| Residence Address: | ||||||||
| Dist: | Pin: | |||||||
| State: | Occupation: | |||||||
| Tel:(____)Code | Res: (____)Code | Fax: | ||||||
| Mobile No: | Email: | |||||||
Product Details
| Model No: | |||||||||||||||
| Serial No | |||||||||||||||
| Please Refer Sticker On Back Cover Of Your Product | |||||||||||||||
| Purchase Date | Day | Month | Year | ||||||||||||
| Bill No. | |||||||||||||||
| Dealer's Name & Address |
| Signature |
I Accept The Terms And Conditions of The Warranty
Customer Signature
Thank you for selecting a World Class product and we assure you that it will perform as per your expectations
We thank you for taking your time to complete this form. All Information Provided by You will be Kept Confidential.
(Please Fill In, Tear off, Fold and Mail this form to Reach us within 10 days of the Product Purchase.)
We welcome your Valuable Suggestions, if any, to Improve our Products and Services :
FOR OFFICE USE ONLY
Customer Code:
Branch:

natural_image
Blank white image with no visible content, text, or symbolsNote: Company Will Not Be Responsible For The Loss Of This Form During Transit.
LLOYD ELECTRIC & ENGINEERING LTD.
LLOYD ELECTRIC & ENGINEERING LTD.
Warranty Registration Card
Service Centre Copy

Serial No.
Customer Details
| Title: | Mr | Ms | Mrs | M/s | |
| Name: | |||||
| Residence Address: | |||||
| Dist: | Pin: | ||||
| State: | Occupation: | ||||
| Tel:(_)Code | Res: (_)Code | Fax: | |||
| Mobile No: | Email: | ||||
Product Details
| Model No: | ||||||||||||||
| Serial No |
Please Refer Sticker On Back Cover Of Your Product
Purchase Date



Bill No.

Dealer's Name & Address
| Signature |
I Accept The Terms And Conditions of The Warranty
Customer Signature
Thank you for selecting a World Class product and we assure you that it will perform as per your expectations
We thank you for taking your time to complete this form. All Information Provided by You will be Kept Confidential.
(Please Fill In, Tear off, Fold and Mail this form to Reach us within 10 days of the Product Purchase.)
We welcome your Valuable Suggestions, if any, to Improve our Products and Services :
FOR OFFICE USE ONLY
Customer Code:
Branch:
Note: Company Will Not Be Responsible For The Loss Of This Form During Transit.
LLOYD ELECTRIC & ENGINEERING LTD.

text_image
LLOYDLIVE THE FUTURE
LLOYD ELECTRIC & ENGINEERING LIMITED
159, Okhla Industrial Estate Phase-III, New Delhi - 110020
Correspondence Address
Plot-2, Industrial Area, Kalkaji, New Delhi - 110019
Email: perfectservice@lloydmail.com
Customer Care Toll Free No.
Gujarat, Madhya Pradesh:1800-2582-583 | Punjab,Haryana,Himachal Pradesh, J&K: 1800-1377-781 Maharashtra,Chattisgarh,Goa:1800-1024-212 | South India:1800-1200-666 | Rest of India:1800-1020-666