
HD 910 Premium - Satellite receiver MEGASAT - Free user manual and instructions
Find the device manual for free HD 910 Premium MEGASAT in PDF.


| Product Type | Satellite Receiver |
| Brand | Megasat |
| Model | HD 910 Premium |
| Dimensions (W x D x H) | 28 x 18 x 5 cm |
| Weight | 0.8 kg |
| Power Supply | 12V DC, 1A |
| Power Consumption | 10 W (max) |
| Video Output | HDMI, Composite (RCA) |
| Audio Output | HDMI, Digital Optical (S/PDIF), RCA |
| Supported Satellite Standards | DVB-S2, DVB-S |
| Maximum Resolution | 1080p Full HD |
| Channel Storage | Up to 4000 channels |
| LNB Input | 1 x F-type (female) for DiSEqC 1.0/1.2 |
| USB Port | 1 x USB 2.0 for recording and media playback |
| Ethernet | Yes (for IPTV or firmware updates) |
| CI+ Slot | 1 x Common Interface for pay-TV modules |
| Remote Control | Included (IR, range ~8m) |
| Operating Temperature | 0°C to 40°C |
| Maintenance | Keep clean with dry cloth; avoid liquids |
| Safety | Use only included power supply; avoid moisture |
| Spare Parts | Remote control and power adapter available |
| Repairability | Easy access to internal fuses, fan (if fitted) |
Frequently Asked Questions - HD 910 Premium MEGASAT
User questions about HD 910 Premium MEGASAT
0 question about this device. Answer the ones you know or ask your own.
Ask a new question about this device
Download the instructions for your Satellite receiver in PDF format for free! Find your manual HD 910 Premium - MEGASAT and take your electronic device back in hand. On this page are published all the documents necessary for the use of your device. HD 910 Premium by MEGASAT.
USER MANUAL HD 910 Premium MEGASAT
HD 910 Premium
Bedienungsanleitung
natural_image
Diagram showing a device with a rectangular component and a separate flat plate with an arrow indicating direction (no text or symbols)natural_image
White satellite dish labeled 'MEGASAT' mounted on a stand (no additional text or symbols visible)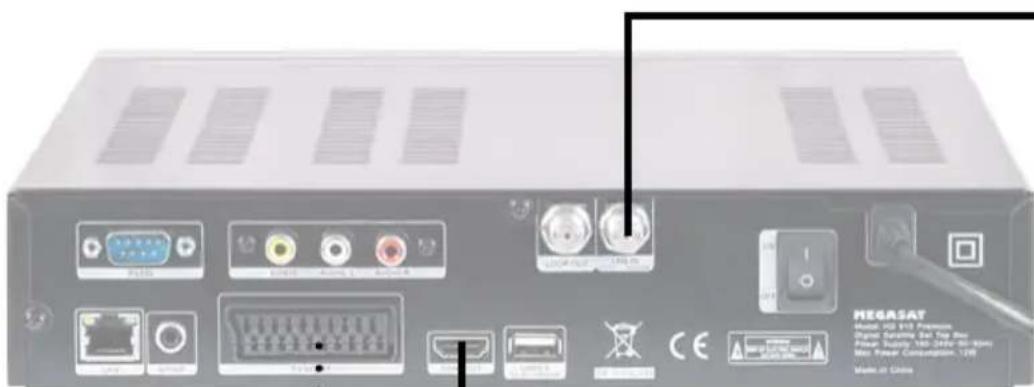
natural_image
Black-and-white image of a flat-screen monitor displaying Earth from space, with no visible text or symbols on the screen.HDMI Kabel
Scart Kabel (optional)
5. Hauptmenü
1. TV Programme
Kalender
1. Spiele
Hinweis:
5.6 Receiver Information
Safety instructions 03
1. Referenz
1.1 Genareal Features 04
1.2 Delivery....04
2. Names and key assignment
2.1 Front view 05
2.2 Rear view 05
2.3 Remote Control 06
3. Common Interface / Cardreader
3.1 CI Slot 07
3.2 Cardreader 07
4. Connecting the set-top box and a hard disk
4.1 Connecting the set-top box....08
4.2 Connecting a hard disk....09
5. Main Menu
5.1 Installation 10
5.2 Channel edit....16
5.3 Settings....19
5.4 Time settings 22
5.5 Advanced 24
5.6 Receiver Informations....27
6. Recording and playback of TV programs
6.1 Recording 28
6.2 Playback (Mediaplayer Menü) 30
7. Additional Information
7.1 Troubleshooting....32
7.2 Specifications....33
7.3 Informations 34
Safety instructions
Please read the manual thoroughly before operating the equipment. In case of incorrect or improper handling, the warranty becomes void.
Power supply: Before start please check the correct operation voltage of the power point. The operating voltage of this device is AC 100 \~ 240V, 50/60Hz.
Overload: Do not overload a wall outlet, extension cord or adapter, neither use damaged power cord or touch it with wet hand as this may result in electric shock.
Liquid: The device shall not be exposed to dripping or splashing water, and that no objects filled with liquids, such as base, shall be placed on the apparatus.
Ventilation: Keep the slots on top of the receiver uncover to allow sufficient airflow to the unit. Do not put the receiver on soft furnishings or carpets. Do not expose the receiver to direct light or do not place it near a heater or in humid conditions. Do not stack other electronic equipments on top of the receiver.
Risk of ssuffocation: Do not let children play with films or other packaging components, there is a risk of suffocation.
Cleaning: Plug out the receiver from the wall outlet before cleaning. Clean the receiver by a soft cloth or mild solution of washing-up liquid (no solvents).
Connection: Disconnect the receiver from the mains when you connect it to satellite LNB or disconnect it from LNB. Failure would possibly cause damage to the LNB.
Location: Put the receiver indoor in order to avoid lightening, raining or sunlight.
Uncover: Do not remove the cover, to reduce the risk of electric shock. Contact qualified and licensed service personnel to repair the receiver, or contact your dealer.
1. Referenz
1.1 General Features
• DVB-S/DVB-S2 Satellite Compliant (MPEG-II / MPEG-IV / H.264)
• DiSEqC 1.0, 1.1, (USALS) compatible
- Alphanumeric display
• Support SCPC & MCPC receivable from C / Ku-band satellite LNB
• Universal, Single, Single S & C band wideband LNBs
- Sensitive Tuner with Loop-
• PAL / NTSC conversion
- Variable aspect ratio (4:3, 16:9) with Pan Vector or Letter Box
• Output resolution: 576p & 576i, 720p, 1080i & 1080p
• To improve HDMI with Upscalefunktion to picture quality
- 8 favorite lists
• Parental Control function
- 5 types of sorting function for channels
- Screen display with full color resolution
- Teletext and subtitle support (OSD)
- 7 days EPG (Electronic Program Guide) for On-Screen Program Information
- multilingual menu
- Multichannel Order
- PVR ready via USB 2.0 and internal SATA connection
• LAN RJ45
- Media Player
• Wi-Fi support (with optional Wi-Fi USB stick)
1.2 Delivery
• Megasat HD 910 Premium
- User manual
- Two remote controls
- Batteries
2. Names and key assignment
2.1 Front view
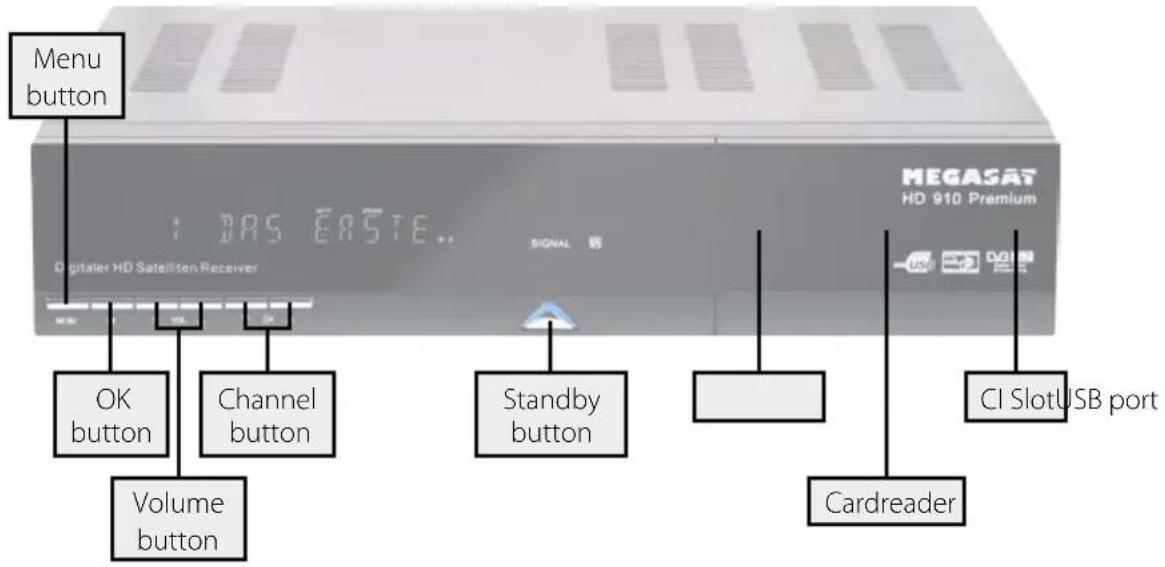
2.2 Rear view
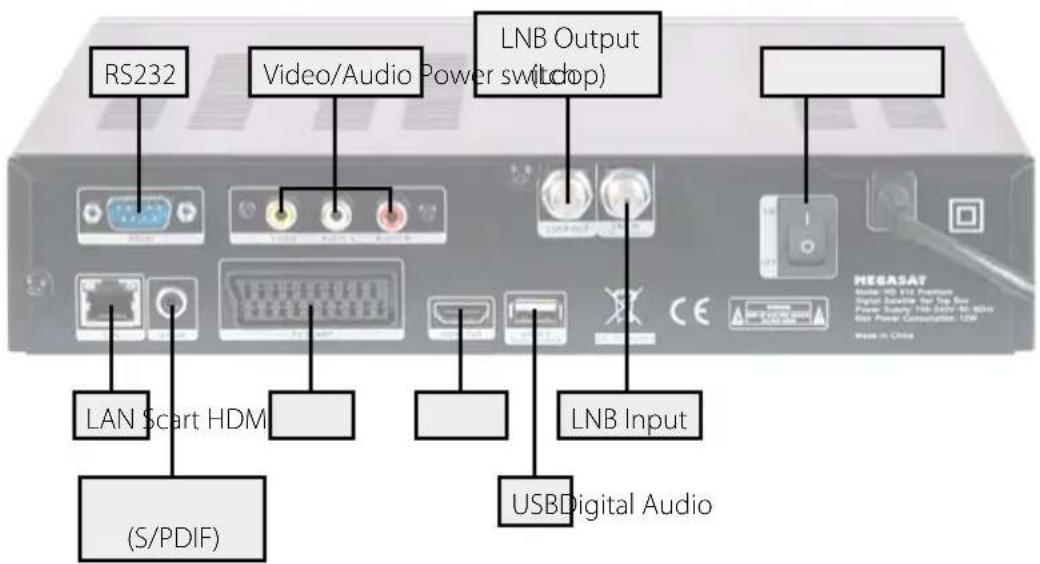
2. Names and key assignment
2.3 Remote control
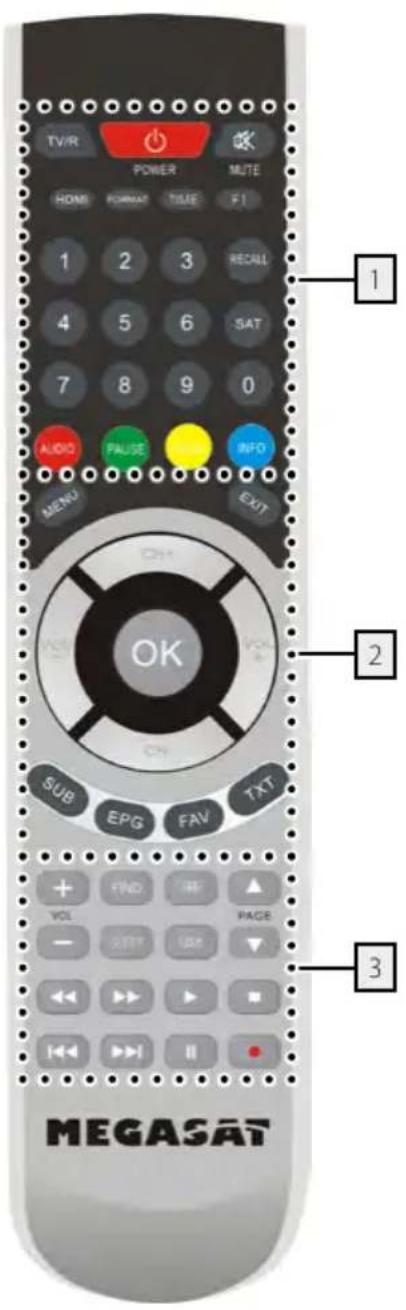
Zone 1
TV/R Switches between TV and radio reception
POWER Turn on/off the unit (Standby)
MUTE Muting the sound
HDMI Change the TV resolution
FORMAT Switching between different display formats
TIME Timer settings
F1 Function key (optional)
NUMERIC KEYS (0\~9) Program Change / Enter numbers
RECALL Switches between the last and current program
SAT Displays the stored satellite list
AUDIO Selection or change the audio track
PAUSE Pauses the current TV picture (still picture)
ZOOM Zoom function of the current program
INFO Displays information of the current program
Zone 2
MENU To access the main menu
EXIT Exits the current menu step by step
CH +/- Switches TV/radio programs (up/down)
VOL + /- Adjust the volume
OK Confirm the current selection / Open the program list
SUB Displaying subtitles (if available)
EPG Displays the EPG (Electronic Program Guide)
FAV Displays the Favorites list (if favorites available)
TXT Displays the teletext of the respective program
Zone 3
VOL + /- Adjust the volume
FIND Quick search of individual programs
OPT option button
PAGE ▲/▼ Scroll page by page
SLEEP Activate Off-Timer (15, 30, 45, 60, 90, 120 min.)
USB Display menus of the USB if a USB device is connected
◀◀ / ▶▶ Fast forward / reverse
|◀◀ / ▶▶| Chapter forward / backward
▶ Start
■ Stop
|| Pause
- Start recording
3. Common Interface / Cardreader
You can receive with your set-top box not only free to air programs, but also encrypted channels if you are in possession of a smart card and a CI module of each program provider.
3.1 CI Slot
1. Inserting the Smartcard into the CI module:
Insert the smart card into the CI module. Make sure that the gold chip of the smart card is facing up.
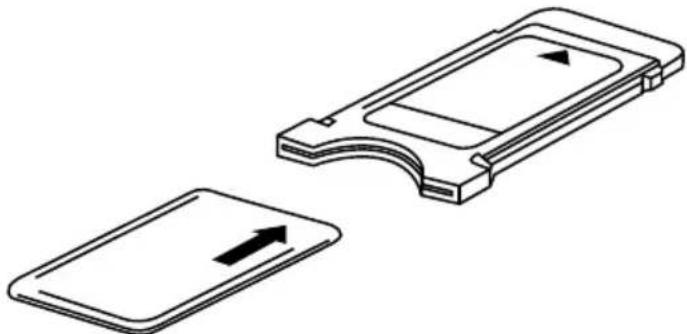
natural_image
Diagram showing a device with a rectangular component and a separate rectangular component with an arrow indicating direction (no text or symbols present)2. Inserting the CI module into the CI slot:
Open the cover on the front right side of the set-top box and insert the CI module into the lower slot. Make sure that the CI module is not tilted. Thus, the CI module is properly seated, you have to push it a little harder at the end. Here, the eject button pushes forward.
3. Removing the CI module from the CI slot:
Press the eject button to the right of the CI module.
3.2 Cardreader
1. Inserting the smart card into the card reader:
Open the cover on the front right side of the set-top box and insert the smart card into the upper slot. Make sure that the gold chip of the smart card is facing up and not tilted the card when inserted.
The integrated card reader supports the following encryption type: CONAX
Note:
For information about each CI modules and smart cards, please contact the relevant Pay TV provider!
4. Connecting the set-top box and a hard disk
4.1 Connecting the set-top box
- Connect the coaxial cable to the LNB. (You can connect an LNB directly to the LNB IN, or more LNBs through a DiSEqC switch or multiswitch.
- Connect the HDMI or Scart cable with your TV.
- Make sure that on your TV is selected corresponding to the input channel (for example, HDMI 1).
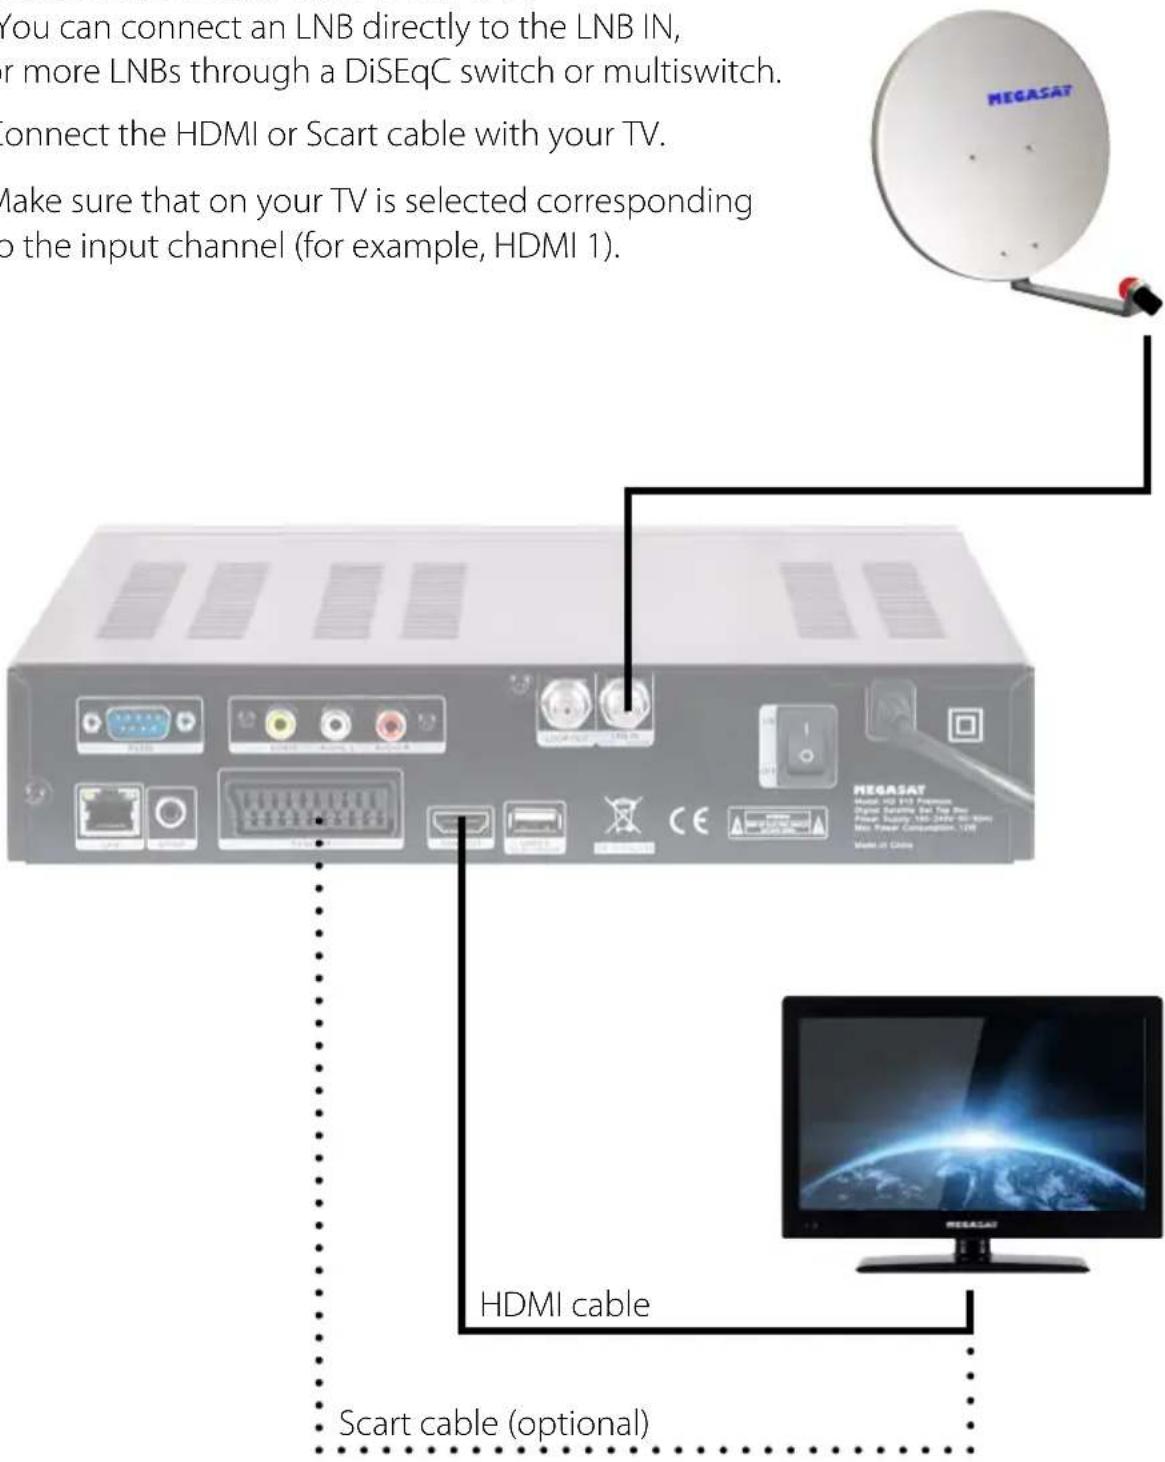
4. Connecting the set-top box and a hard disk
4.2 Connecting a hard disk (optional)
You can connect a external hard drive or flash drive to the USB ports. Alternatively, you can install a 2.5" hard drive into the receiver. When installing an internal hard drive, the front USB connector must be unplugged from the motherboard and replaced with the connection of the internal hard drive bracket. Simultaneous operation of the built-in hard drive and front USB connection is not possible.
Note:
The hard drive must be partitioned and formatted once before installation. Make sure when choosing the hard disk to a low power consumption. Since there are a variety of disks, there may be problems in some models.
- Remove the screws on the back of the housing and open the set-top box cover. You can see inside a mount for the hard drive.
- You can easily attach the hard disk. Slide the hard disk carefully into the holder provided, until the hard drive is firmly seated in the terminal strip.
- Attach the four screws on the hard drive manually using a screwdriver (not with an electrically operated cordless screwdriver). Double-check the correct position of the disk and the connecting cables.
- Close the cover of the set-topb box and turn the screws.
- Reformat the hard drive now through the set-top box. Press the USB button on the remote control, press the RED button (Tools) and select: format the medium.
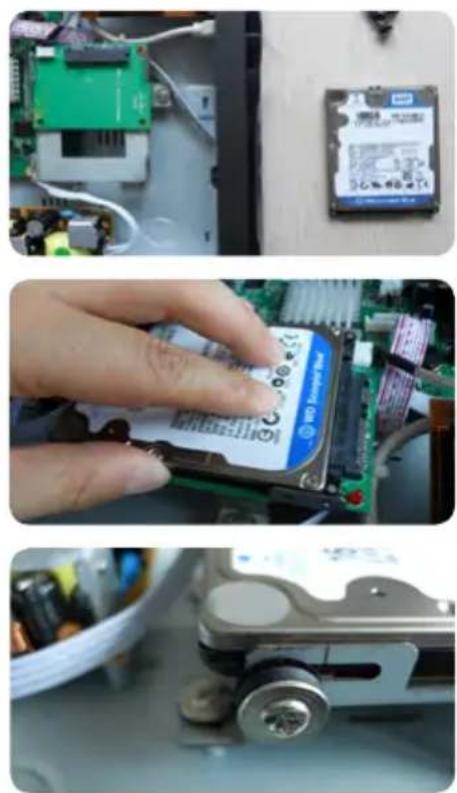
WARNING: During installation, the power supply must be switched off!
The speed of the hard or flash drive, you can see it in the USB menu. USB menu -> PVR settings (BLUE button) -> USB speed (BLUE button). SD = SD programs can be recorded without any problems. HD = HD programs can be recorded without any problems. HD+TMS = HD programs + Timeshift support are guaranteed.
5. Main Menu
After connecting the receiver to other required equipment, turn on the set-top box
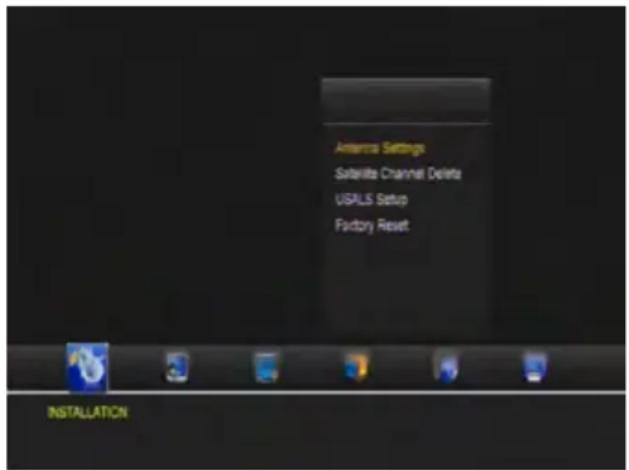
Press the MENU button to enter the menu.
The main menu consists of:
- Installation
- Channel edit
- Settings
- Time settings
- Advanced
- Information
Use the ◀▶ button to select your subject and press OK to confirm your selection and enter that sub menu, press EXIT button you can return to the previous menu.
Hinweis:
Press OK to Enter Dish setup, here you can make Satellite Scan, Satellite Edit, TP Search, TP Edit and other related Functions.
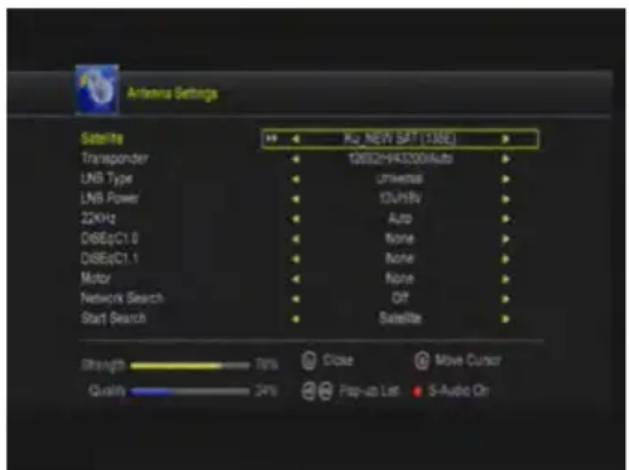
Satellite
Press the OK button to enter the list of preset satellites. Use the ▲▼ buttons to select a satellite, with the ◀▶ buttons you can at select the symbol of the bottom of the screen for editing and to the respective satellite edit.
5. Main Menu
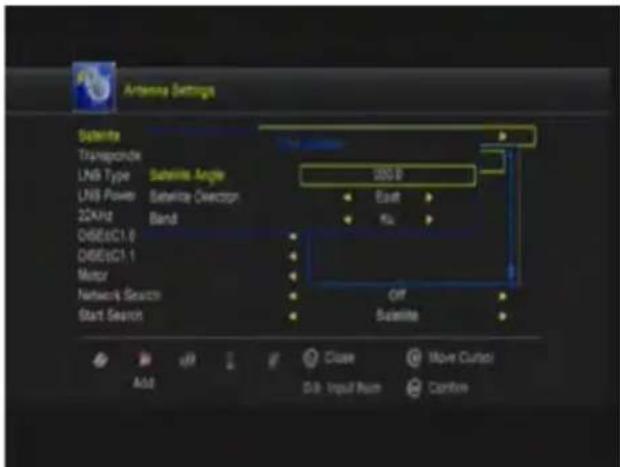
Add satellite:
Add satellite by using the Red key. Here you can input new Satellite angle, Satellite Direction (east, west), Band (ku,c). OK to confirm the setting and this new satellite will be added to the end of the Satellite list.
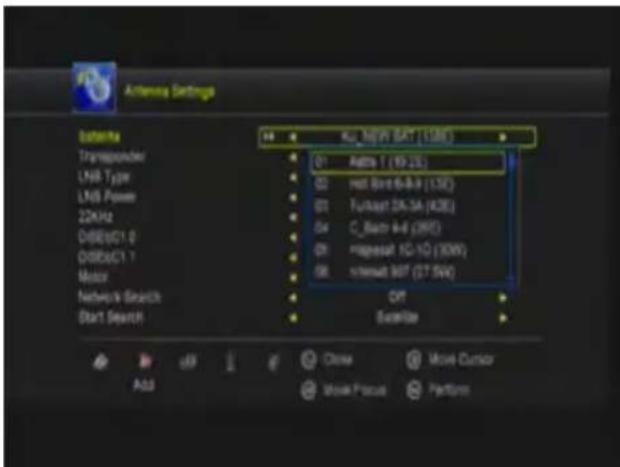
Move satellite:
Select the satellite and press the OK button. You can now enter to move the position of the satellite in a desired position.
Delete satellite:
You can delete the user's satellite. Select the satellite that you want to delete from the satellite list. You will be asked to confirm whether delete the satellite or not. If you press ok key, all the channels in the selected satellite and transponder will be deleted, and the selected satellite will disappear.
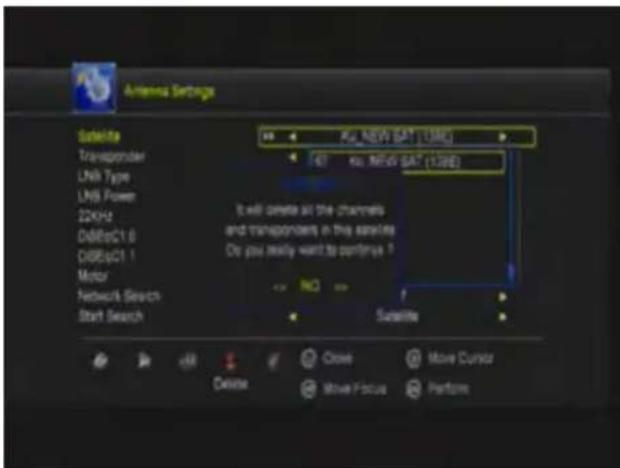
Rename satellite:
Select the satellite then press green button. You can change the satellite's name, angle, direction and band. Input the characters which you want to edit using the browser.
Transponder
Press the OK button to enter the list of preset transponders. Use the ▲▼ buttons to select a transponder, with the ◀▶ buttons you can at select the symbol of the bottom of the screen for editing and to the respective transponder. The processing is performed in the same manner as the processing of the satellite.
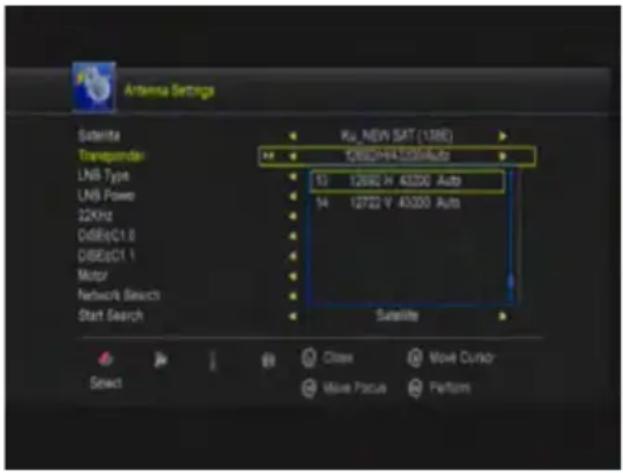
LNB Typ
Here you need to check the LNB typ according to your antenna, set the correct frequency or define yourself. The default setting (Universal) is true in most cases.
Unicable System:
Under the menu item LNB type, you can make the settings for single-cable (unicable). The set-top box is programmable for different unicable systems. Depending on the system can be connected to a system of up to 8 set-to boxes.
Megasat, Kathrein, Technisat and identical devices use the following frequencies:
IF Channel: 1=1284; 2=1400; 3=1516; 4=1632; 5=1748; 6=1864; 7=1980; 8=2096
Inverto and identical systems use the following frequencies:
IF Channel: 1=1076; 2=1178; 3=1280; 4=1382; 5=1484; 6=1586; 7=1688; 8=1790
Under IF Channel You can select up to 8 different frequencies, while each IF channel is automatically assigned a frequency. Note that each frequency may be present only once in your system. The frequencies depend on your cable system and must not be changed arbitrarily. For systems that does not match the pre-programmed frequencies which can under these Adjust the main point frequency.
Note:
Basically, one uses the lowest frequency for the longest cable path to the set-top box.
LNB Power
Here you need to check the LNB power according to your antenna, set the correct frequency or define yourself. The default setting (13V/18V) is true in most cases.
5. Main Menu
22KHz
In case you are using two antennas connected to a 22KHz tone switch box. You can supply either 22KHz by setting "OFF" to select antenna.
DiSEqC 1.0 / DiSEqC 1.1
If you connect antenna to DiSEqC Switch, you need to specify the DiSEqC input to which your selected satellite have been configured.
Motor
Use the ◀▶ buttons to select the control of your motor. If you enable this option and then press OK, you can make further adjustments to the position of the mirror adjust:
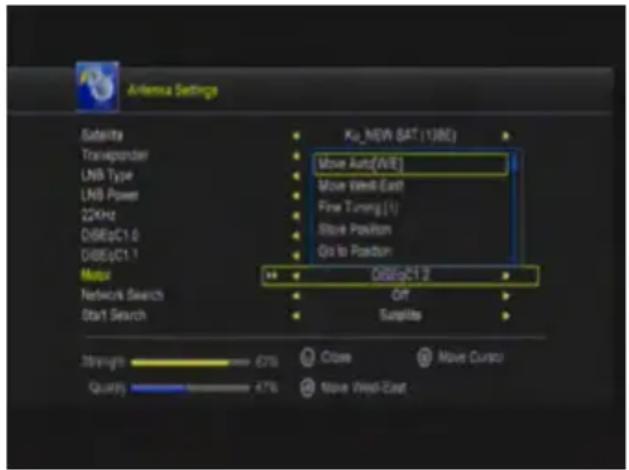
Move Auto [W/E]
Press RIGHT/LEFT button, the dish will be motorized to East/West continuously, it will stop until it find the best signal.
Move Continue
Press RIGHT/LEFT button, the dish will be motorized to East/West continuously until you press LEFT/RIGHT again.
Move Step
Press RIGHT/LEFT button, the dish will be motorized to East/West by step.
Store Position
Save the current position you searched for the selected satellite.
Go to Position
Press OK button to move the dish to the stored position.
Go to Reference
Press OK button to move the dish to 0 position.
Set West Limit
Enable West limit.
Set East Limit
Enable East limit.
Disable Limit
Disable West limit and East limit.
5. Main Menu
Channel search
In this menu item you can select different search options:
- All programs
- Free programs
- HD programs
- SD programs
- TV programs
- Radio programs
- FTA TV programs
- FTA Radio Programs
Start channel search
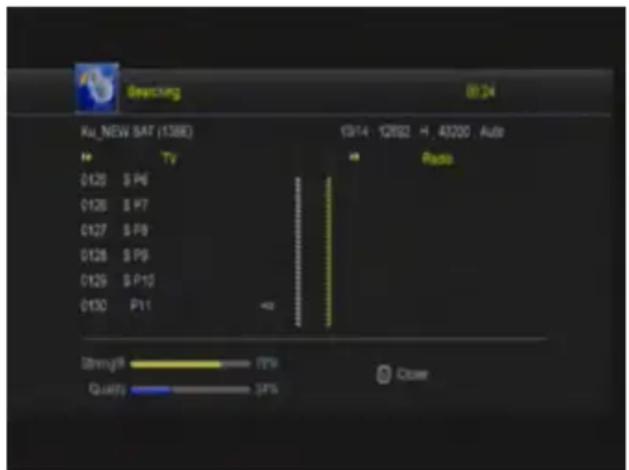
After you have set all the relevant positions in the antenna menu, you can now search for programs. You can use various search functions:
Transponder:
Just look on the selected Transponder.
Satellit:
Searches all stored transponders of the selected satellite.
Multi-Sat:
Scans all selected satellites.
Blind Scan:
Finds the satellites from all transponders, even those that are not stored in the list. This process will take some time to complete.
Multi-Transponer:
Searches for all satellites on the selected transponder.
2. Delete satellite channels
In this menu, you can delete unwanted channels lists matching the selection.
5. Main Menu
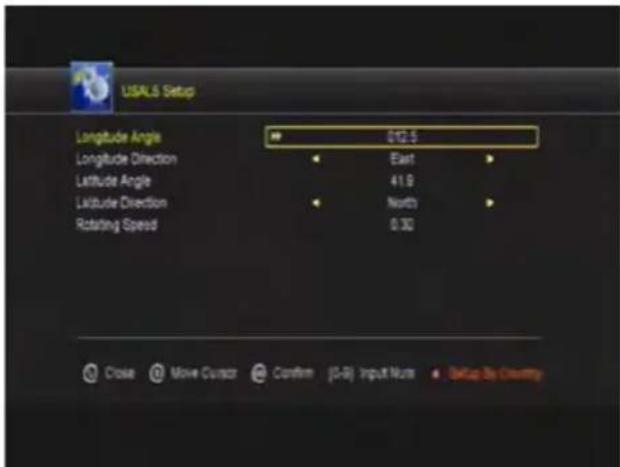
3.USALS setup
In this menu you can adjust to your USALS to operate your antenna with a motor.
4. Factory setting
Here you can delete all settings and channels and set back to factory condition. If the option is selected and confirmed with OK, you are prompted to confirm this. If you select "YES", all data and settings are reset to the factory preset values . All the settings you have made will go irrevocably lost.
5. Main Menu
5.2 Channel edit
Here you can move programs, delete, lock, rename, replace and create favorites lists.
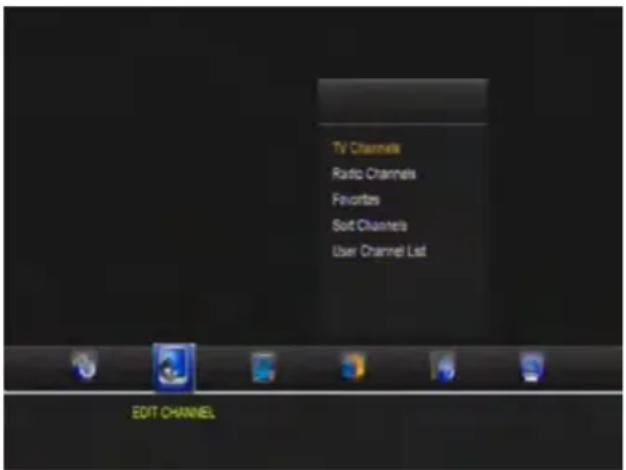
1. TV programmes
Select the menu item TV programs and confirm with OK. At the bottom of the screen there are 4 different symbols available. Use the ◀▶ buttons to select the options.
Move
Press OK to select a program you want to move. To move the program to the position you want, simply press the ▲▼ buttons until you have reached the desired position, or enter the numerical number of the desired court and then confirm with the OK button. Multiple programs to move appears simultaneously, select the program and press the blue button on the remote control. Repeat this process until all desired stations are instantly highlighted. Now select the desired program number and confirm with the OK button.
Delete
Move the cursor to the desired program, which is to be deleted and press the OK button. The selected program is marked with a cross. Repeat the process until all programs are marked to be deleted and then press the Exit button. Confirm the deletion of the programs by selecting "Yes". If you select "No" is deselected and no change is made.
Lock
You can lock a channel. After press OK button, you are prompted to enter a password.
5. Main Menu
Rename
Select the desired program that you want to rename. Press OK to open the editing window. Use the cursor and color keys to select the desired characters. Press OK to confirm your choice.
Exchange
You can replace a program that you select from the Channel List, with another program. Press the OK button, then you will be asked which program you want to the current interchange. Use the number keys to select the desired program number and confirm with OK.
2. Radio programs
Editing the radio programs are in accordance with the instructions of TV programs.
3. Favorites
You can sort programs into different groups, such as news, movies, music, or sports. Select at the bottom of the desired favorite group with the ◀▶ buttons. Then select the desired channel using the ▲▼ buttons and press OK. An icon appears next to the selected program. Repeat the process until all desired channels are assigned the appropriate favorite group.
Note:
To rename a favorite group, press the RED button on the remote control.
4. Favorits Radio
The create the radio favorites list is according to the instructions favorites list.
5. Main Menu
5. Sort channels
In this menu item you can choose different sorting functions:
- Alphabetically
- Transponder
- FTA / encrypted
- Standard
- Favorites
- Provider
- Service ID
6. User channel list
With this option, you can save and load your self-created channel list to the internal memory of the device.
Save channel list:
Select this option by pressing OK. Confirm with „YES“ to save the current channel list at the set-top box. Select „No“ to cancel the process.
Load channel list:
If you make a factory setting, or the channel list accidentally deleted, you can load the previously stored channel list from memory here.
5. Main Menu
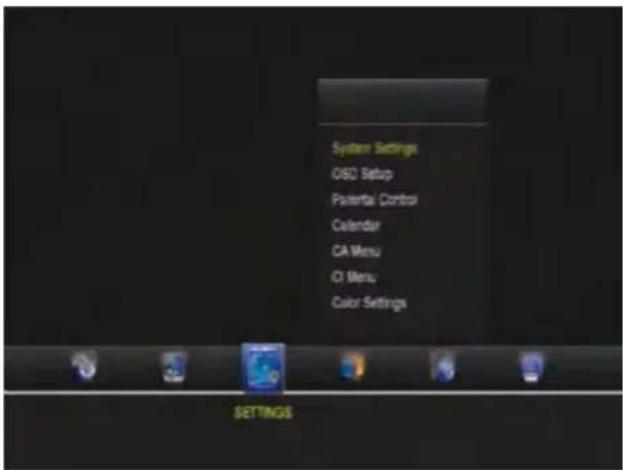
5.3 Settings
Here you can change basic settings of the set-top box.
1. System settings
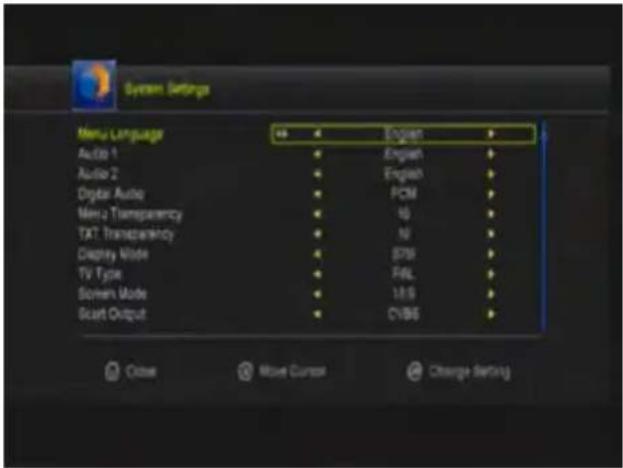
Use the ▲▼ buttons to navigate the menu. With the ◀▶ buttons you change accordingly each point according to your needs. It can be set as follows:
- Menu Language
- Audio 1
- Audio 2
- Subtitle language
- EPG language
- Teletext language
- Digital Audio
• Automatic program change
• Automatic exit the program list - Start Last Viewed program
- Low Power Standby
- Display lighting
- Front Panel Scroll Mode
5. Main Menu
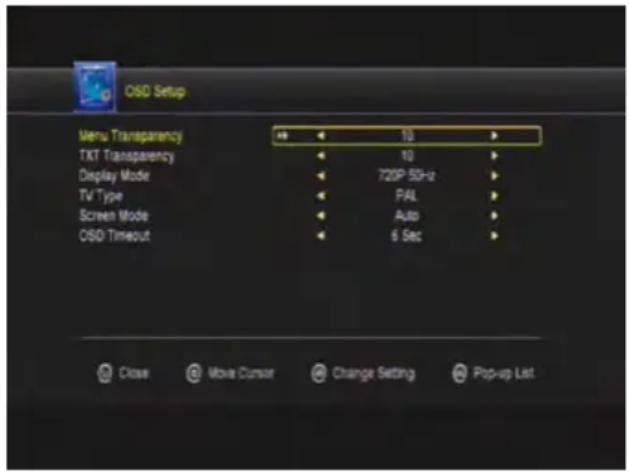
2. OSD settings
Use the ▲▼ buttons to navigate the menu. With the ◀▶ buttons you change accordingly each point according to your needs. It can be set as follows:
- Menu transparency
- Teletext transparency
- Screen resolution
• TV Typ - TV format
- OSD display time
Parental lock
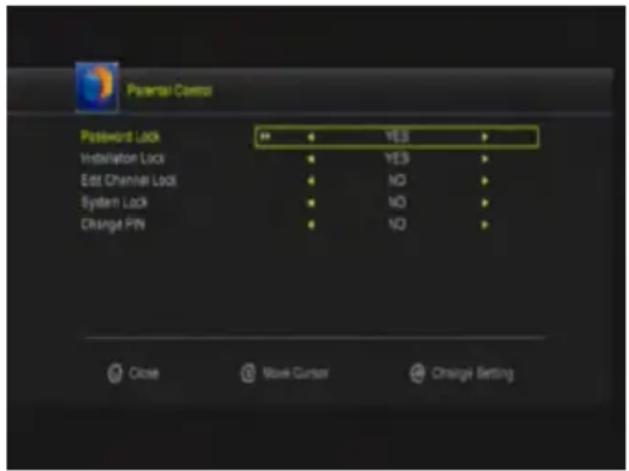
Here you can assign a password to different menu items and programs to prevent children from changing the settings, or not seeing desired programs.
The first menu item „Password Lock“ activates or deactivates the complete child safety. When you activated the lock, you can select individual menus or programs with „yes“ or „no“ to enable or disable.
Calendar
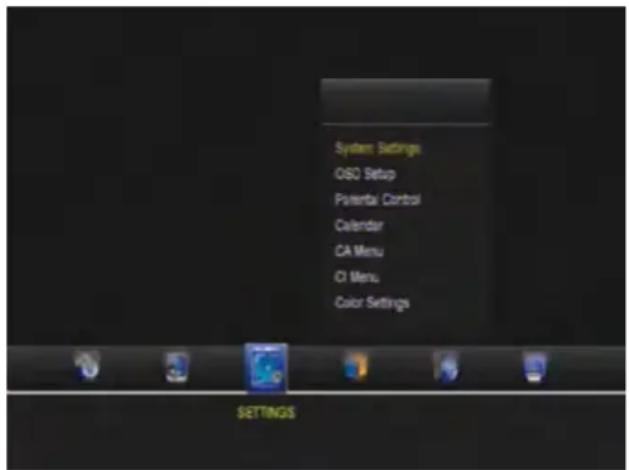
Here you can display a calendar and add notes.
CA Menu
Here you can get information of the Smart Card. This feature is only available if you have plugged a Smart Card in the Conax system.
5. Main Menu
CI Menu
Here you can get information of the CI module. This feature is only available if you have a CI module inserted.
Picture settings
Use the ▲▼ buttons to navigate the menu. With the ◀▶ buttons you change accordingly each point according to your needs. It can be set as follows:
- Brightness
- Contrast
- Saturation
- Standard (resets the settings to the default values.)
5.4 Time settings
In this menu, you can make settings by time and date, set an event or sleep timer and set the automatic shutdown of the set-top box.
1. Time settings
The default time is set to automatic, but it can also be entered manually. Select the time zone of your country and you will get the current time based on TDT (Time and Data Table) in the data stream of the current program.
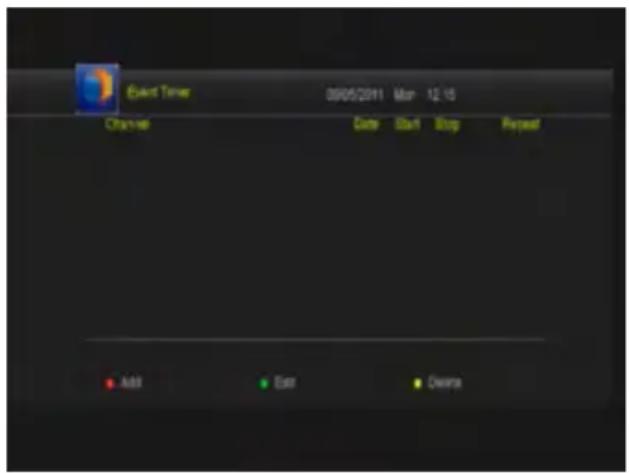
2. Event-Timer
Here you can set the timer to access the program you have selected to determine a time or record. The set-top box switches automatically to the selected time on this channel.
Use the color buttons to enter any settings:
RED: add timer
GREEN: edit timer
YELLOW: delete timer
Note:
A detailed explanation of a recording, please refer to the chapter "Recording and playback of TV programs" on page 28.
5. Main Menu
3. Sleep Timer
Set the desired time after the set-top box should turn off. You can choose between 15, 30, 45, 60, 90 or 120 minutes.
4. Automatic standby switching
Here you can select whether the set-top box should turn off after a certain time. This comes into force, if no operation is performed on the set-top box after a certain time. You can choose between ON (active) or OFF (not active).
5. Automatic shut-off
Here you can set the time after the set-top box should turn off if no operation was performed on the set-top box. You can choose between 1, 2 or 3 hours.
Note:
The factory setting of the set-top box, the automatic shutdown is enabled and the set-top box switches off after 3 hours automatically if no operation was performed.
5.5 Advanced
In this menu, additional functions of the set-top box are offered.
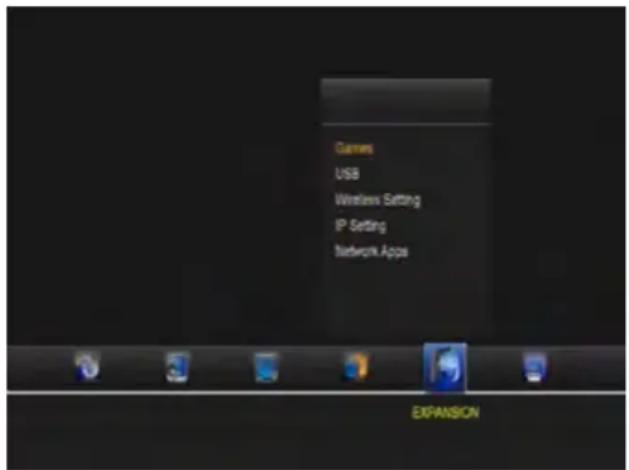
1. Games
Here are some classic games for your pleasure.
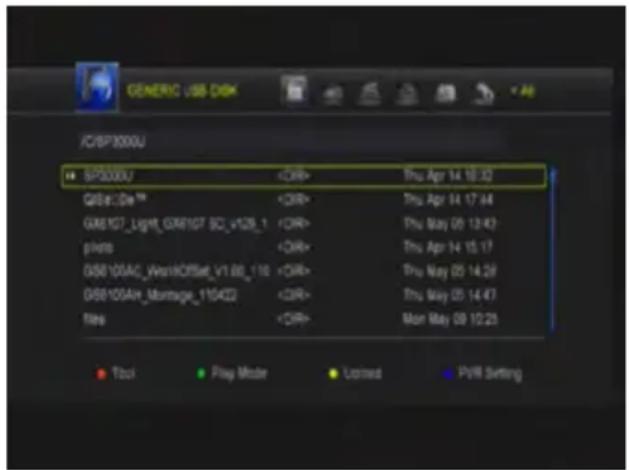
2. USB
USB menu is only active when a suitable USB device is connected or an internal hard drive is installed.
When two USB devices are connected (eg. internal and external), select the required medium and confirm with OK.
You can limit the data that is displayed by selecting with the ◀▶ buttons at the top of one of the symbols:
• All
- PVR
- Movies
- Music
- Pictures
- Software
Note:
At a USB device following formats are supported:
FAT & FAT32, NTFS
5. Main Menu
For more options on the color keys on the remote control. At the bottom of the screen there are four choices available. Then follow the information in the relevant information window.
Tools (RED)
Press the RED button to enter the tool list. Here you may rename, delete, move, copy, create a new folder, sort, and format your USB device.
Playback mode (GREEN)
Press the GREEN button to adjust settings such as repeat and slideshow interval of your photos.
Upload (YELLOW)
Press the YELLOW button to access the upload mode. You can then upload the data on your USB or to your FTP server.
PVR settings (BLUE)
Press the BLUE button to make various settings for your recordings. The following items are available:
- Recording partition (choose the location of the recordings)
- Recording mode (choose between program and transponder)
- Recording typ (TS = Recording video and all soundtrack, as well EPG, teletext and subtitles) (PS = Recording video and current soundtrack)
- Recording time (set the max. recording time)
- Auto Timeshift (a recording is running constantly in the background. By pressing the PAUSE button on the remote control you can stopped a running program and resume it later)
- Buffer size (set the max size of the time shift function)
- Save timeshift (should timeshift recordings are saved or not)
- Start playback (where to start playback, from the beginning or where you have stopped from the last position)
5. Main Menu
3. Wireless
The set-top box supports a Wi-Fi connection via a separately available Wi-Fi USB stick. In this menu you can connect to your wireless home network.
Note:
The wireless setting is only active if a suitable Wi-Fi USB stick is connected.
4. IP settings
Plug an Ethernet cable into the LAN port on the back of the set-top box. If you connect the receiver for the first time to the Internet, press the RED button (IP autom.) And then press the GREEN button (TestLink). If the following is displayed: „The connection to the Internet is OK“, it means that the connection is successful. If you want to assign the IP address manually, turn off the DHCP point and enter your network data accordingly.
The factory default setting of DHCP is OFF, that mean the set-top box to automatically obtain an IP address of your home network.
Note:
The IP setting is only active when an Ethernet cable is connected from your Internet router to the LAN port on the set-top box.
5. Network APPs
In this menu, you have a few Internet deals available:
- FTP download
- Weather
• RSS - Currency Converter
- Stock quotes
- YouTube
- Prayer Times
- Grooveshark
- Google Maps
• IP TV
Note:
The network apps are only available if an Internet connection exists.
5. Main Menu
5.6 Receiver Informations
See information about the software and hardware version of the receiver will be displayed:
- Model
- Hardware version
- Software version
- Software date
- Serial number
- Used channel list
- Used transponder
- Used satellite
6. Recording and playback of TV programs
This point is explained how to record a TV program, play, rename, and delete again. Make sure that a suitable USB device such as USB drive, external or internal hard drive is connected properly.
6.1 Recording
To start a direct recording, press the REC button on the remote control.
The current broadcast is immediately absorbed from that date, as long until you press STOP on the remote control, or the storage medium is full.
To program a broadcast there are two different options:
Option 1 (automatic recording via the EPG):
- Press while the TV operating the EPG button and locate the appropriate program in the EPG menu.
- Then press the RED button to display the Timer menu. Here you can still adjust the recording:
| Timer Menu | |
| Program Displays the current | program to be recorded |
| Date Displays the date of the | recording |
| Start Indicates the start point of | capture |
| Stop Indicates the point at which the recording should be stopped | |
| Repeat 1x (timer run only once) | daily (timer run every day)weekly (timer run every week)Mon-Fri (timer run weekdays from Monday to Friday)Sat-Sun (timer run at the weekend from Saturday to Sunday) |
| Standby after the end YES = The set-top box turns off after recording to standbyNO = The set-top box will be on after recording | |
| Recording YES = The set-top box record with the set values the programNO = The set-top box switches to the set values to the program | |
| Confirm | Here you confirm your settings and activate the timer |
Note:
The settings such as the date or time can be changed using the number buttons on the remote control.
6. Recording and playback of TV programs
Option 2 (manual recording with the timer menu):
- Go to the following Timer menu: Main Menu -> Time Settings -> Event-Timer, or press TIME button on the remote control.
- To add a new timer, press the RED button. Here you can still adjust the recording:
| Timer Menu | |
| Program Displays the current | program to be recorded |
| Date Displays the date of the recording | |
| Start Indicates the start point of capture | |
| Stop Indicates the point at which the recording should be stopped | |
| Repeat 1x (timer run only once) | daily (timer run every day)weekly (timer run every week)Mon-Fri (timer run weekdays from Monday to Friday)Sat-Sun (timer run at the weekend from Saturday to Sunday) |
| Standby after the end YES = The set-top box turns off after recording to standbyNO = The set-top box will be on after recording | |
| Recording YES = The set-top box record with the set values the programNO = The set-top box switches to the set values to the program | |
| Confirm | Here you confirm your settings and activate the timer |
After you have set a timer, it will appear in the timer list. You can now set other timer.
Note:
In the timer list you can edit with the GREEN button a timer, or delete a timer with the YELLOW button.
6. Recording and playback of TV programs
6.2 Playback (Mediaplayer menu)
To play recordings, press the TV while operating the USB button on the remote control. Then open the USB menu.
To access this menu via the main menu, go to Advanced -> USB.
At the top of the screen there are 6 categories to choose from:
- All (displays all files)
- PVR (displays only the recordings)
• Movies (displays only video files, such as mpg)
• Music (displays only music files, such as mp3) - Images (displays only image files, such as jpg)
- Software (displays only software files, such as a software update)
Use the ◀▶ buttons to select a category (in this case PVR). In the first list is displayed the recording folder. Press OK to enter the folder. Here are all the previous recordings with program information and date are displayed. Select a picture with ▲▼ buttons. Once you confirm your selection with OK, the playback of the recording starts.
Explanations of the color buttons:
Press the RED button (tool) to set the following:
- Rename (rename a file)
- Delete (delete a file from the storage medium)
- Move (move a file to another folder)
- Copy to (copy a file to another folder)
- Create a new folder (create a new folder on the storage media)
- Lock file (lock a file by setting a password)
- Sort (sort the files by default, Z to A, date, size)
• Medium format (format the storage medium - FAT or NTFS)
6. Recording and playback of TV programs
Press the GREEN button ( playback mode ) to set the following:
- Loop (the pictures will repeated after playback)
• Picture Interval (Set the duration of 2-10 seconds)
• Picture view mode (Ask here the view mode)
Note:
These settings apply yourself on the reproduction of images.
Press the YELLOW button (upload) to set the following:
- Upload data to USB (copy the software on a USB stick)
- Upload Channel for USB (copies only the channel list to a USB stick)
- Upload All To USB (copies the software and channel list to a USB stick)
- Upload to FTP (copies data to the FTP server)
Press the BLUE button (PVR Settings) to set the following:
- Recording partition (choose the location of the recordings)
- Recording mode (choose between program and transponder)
- Recording typ (TS = Recording video and all soundtrack, as well EPG, teletext and subtitles) (PS = Recording video and current soundtrack)
- Recording time (set the max. recording time)
- Auto Timeshift (a recording is running constantly in the background. By pressing the PAUSE button on the remote control you can stopped a running program and resume it later)
- Buffer size (set the max size of the time shift function)
- Save timeshift (should timeshift recordings are saved or not)
- Start playback (where to start playback, from the beginning or where you have stopped from the last position)
7. Additional information
7.1 Troubleshooting
You might meet abnormal working of this STB with various reasons. Check the following which may help you.
| Problem Possible causes What to do | ||
| LED on the front panel fail to light up/is not lit. | Main supply cable is not connected. | Check if the main supply cable is plugged into the power socket. |
| No picture or sound. Satellite dish | is not aiming to satellite accurately. No signal or weak signal. The LNB is faulty. The cable is faulty. | Adjust the dish. Check the signal strength indicator in one of the channels search submenus. Check the cable connections, LNB and other equipment connected to LNB & receiver, or adjust dish. Replace the LNB. Replace the cable. |
| Bad picture/blocking error Satellite | dish is not aiming to the satellite accurately. Signal too strong. Satellite dish is too small. LNB noise factor too high. The LNB is faulty. | Adjust the dish. Connect an attenuator to LNB input. Change to a larger dish. Change LNB with lower noise factor. Replace the LNB. |
| No startup menu on screen after turning on STB for the first time. | The system is connected by SCART cable and the TV is not in AV/ EXT mode. | Switch the TV to the appropriate AV input. |
| The remote control is not working. | Battery exhausted. Remote control is not aimed correctly STB is in standby mode. | Change the batteries (both). Aim the remote control at the STB. Check that nothing blocks the front panel. Check if LED indicator on the front panel is showing the time, press the power button to switch off standby mode. |
| You have forgotten your password. | Contact the dealer or Service Provider. They will help you set it up again. | |
| Poor picture quality or Less channels in scanning. | Low LNB power or signal loss in cable. | Change the LNB power to 14V/19V in Antenna setup menu. |
7. Additional information
7.2 Specifications
| Tuner & Demodulator | |
| Frequency Range 950 MHz to | 2150 MHz |
| Input Connector F-Type, IEC | 69-24, female |
| Signal Level -25 bis -65 dBm | |
| RF Impedance | 75 Ω, unbalanced |
| IF Band width 55 MHz / 8 Hz (per 5 Msps) | |
| LNB Power & Polarization Vertical : +13 V, 14 V +/-5 %Horizontal : +18 V, 19 V +/-5 %:max. 500 mA Overload Protection | |
| LNB Tone Switch 22 KHz +/- 2 | KHz, 0.6 V +/- 0.2 V |
| DiSEqC Control Version 1.0/1.2 | compatibel, Tone Burst A/B |
| Demodulation QPSK / 8PSK | |
| Symbol Rate 1~45 Ms/s / SCPC, MCPC | |
| FEC Decode 1/2, 2/3, 3/4, 5/6 | and 7/8 with constraint Length K=7 |
| MPEG | |
| Transport Stream MPEG-4/H.2 | 64, MPEG-2 ISO/IEC 13818 |
| Profile Level MPEG-4/AVC, MPEG-2 MP@ML, MP@HL | |
| Input Rate | max. 15 Mbit/s |
| Aspect Ratio 4:3, 16:9 | |
| Video Resolution | 720 x 576, 720 x 480, 1280 x 720, 1920 x 1080 |
| Audio Decoding | MPEG / MusiCam Layer I & II |
| Audio Mode | Single channel / Dual channel / Joint stereo / Stereo |
| Sampling | 32, 44.1 and 48 KHz |
| A/V and Data In/Out Connector | |
| TV SCART | RGB, CVBS, L, R out |
| LNB IF Input F type, IEC 169-24 | weiblich |
| LNB IF Output | F type, IEC 169-24 weiblich |
| Power supply | |
| Input Voltage | 100 - 240 V AC, 50/60 Hz, |
| Power in use max. 12 W | |
| Power in standby | <0,5 W |
| Protection | Separate internal fuse. Input shall have lightening Protection |
| Physical Specifications | |
| Weight (net) ca. 1.5 kg | |
| Operating Temp | 0°C - bis +40°C |
| Storage Temp | -40°C - bis +65°C |
7. Additional information
7.3 Informations
Note:
Weight and dimensions are not absolutely exact values. Technical details can be changed at any time (according to manufacturer) without prior notice.
Declaration of Conformity
This complies with the following directives / standards is confirmed:
Electromagnetic Compatibility Directive 2004/108/EG
EN 55013: 2001 + A1: 2003 + A2: 2006
EN 55020: 2007
EN 61000-3-2:2006 + A1:2009 + A2:2009
EN 61000-3-3:2008
Low Voltage Directive 2006/95/EG
EN 60065: 2002 + A1: 2006 + A11: 2008
Notes
Status: v2.0 April 2014 // Technical changes, misprints and errors reserved.
Megasat Werke GmbH | Industriestraße 4a | D-97618 Niederlauer | www.megasat.tv | info@megasat.tv

- Bedienungsanleitung
- Hauptmenü
- TV Programme
- YES
- Kalender
- Spiele
- Hinweis:
- Receiver Information
- Referenz
- Names and key assignment
- Common Interface / Cardreader
- Connecting the set-top box and a hard disk
- Main Menu
- Recording and playback of TV programs
- Additional Information
- Safety instructions
- General Features
- Delivery
- Front view
- Rear view
- Remote control
- Zone 1
- Zone 2
- Zone 3
- CI Slot
- Inserting the Smartcard into the CI module:
- Inserting the CI module into the CI slot:
- Removing the CI module from the CI slot:
- Cardreader
- Inserting the smart card into the card reader:
- The integrated card reader supports the following encryption type: CONAX
- Note:
- Connecting the set-top box
- Connecting a hard disk (optional)
- WARNING: During installation, the power supply must be switched off!
- Satellite
- Add satellite:
- Move satellite:
- Delete satellite:
- Rename satellite:
- Transponder
- LNB Typ
- LNB Power
- 22KHz
- DiSEqC 1.0 / DiSEqC 1.1
- Motor
- Move Auto [W/E]
- Move Continue
- Move Step
- Store Position
- Go to Position
- Go to Reference
- Set West Limit
- Set East Limit
- Disable Limit
- Channel search
- Start channel search
- Transponder:
- Satellit:
- Multi-Sat:
- Blind Scan:
- Multi-Transponer:
- Delete satellite channels
- 3.USALS setup
- Factory setting
- Channel edit
- TV programmes
- Move
- Delete
- Lock
- Rename
- Exchange
- Radio programs
- Favorites
- Favorits Radio
- Sort channels
- User channel list
- Save channel list:
- Load channel list:
- Settings
- System settings
- OSD settings
- Parental lock
- Calendar
- CA Menu
- CI Menu
- Picture settings
- Time settings
- Time settings
- Event-Timer
- Sleep Timer
- Automatic standby switching
- Automatic shut-off
- Advanced
- Games
- USB
- Tools (RED)
- Playback mode (GREEN)
- Upload (YELLOW)
- PVR settings (BLUE)
- Wireless
- IP settings
- Network APPs
- Receiver Informations
- Recording
- Option 1 (automatic recording via the EPG):
- Option 2 (manual recording with the timer menu):
- Playback (Mediaplayer menu)
- Explanations of the color buttons:
- Troubleshooting
- Specifications
- Informations
- Declaration of Conformity
- Notes
Brand : MEGASAT
Model : HD 910 Premium
Category : Satellite receiver