Unix F plus Solo - Satellite receiver SAB - Free user manual and instructions
Find the device manual for free Unix F plus Solo SAB in PDF.


| Product Type | High Definition Digital Satellite Receiver & Media Player |
| Dimensions (W x H x D) | 220 mm x 46 mm x 169 mm |
| Net Weight | 1.0 kg |
| Power Supply | Free Voltage (100-240 V AC, 50/60 Hz); Max 20 W |
| Main Processor | 450 MHz based CPU |
| Flash Memory | Nor flash: 8 MB x 1; Nand flash: 512 MB x 1 |
| DDR SDRAM | DDR2 128 MB x 2 |
| Tuner Type | DVB-S / DVB-S2, F-type connector, loop through |
| Video Output | HDMI (Full HD 1080p), SCART (CVBS/RGB), RCA (CVBS), Component (CVBS) |
| Audio Output | HDMI (stereo or Dolby Digital), RCA (L/R), S/PDIF coaxial (digital audio or Dolby Digital bitstream) |
| Connectivity | USB 2.0 Host (1), Ethernet RJ-45 (10/100M), RS-232C (115.2 kbps), DiSEqC 1.0/1.1/1.2/USALS |
| Conditional Access | Conax embedded card reader (1 slot) |
| Media Playback | AVI, MKV, MPG, TS, WMA, WMV, M2TS, FLV, DAT, ASF, MP3, JPEG |
| Internet Services | YouTube, SHOUTcast Radio, Picasa, RSS Reader, Weather Forecast, FTP download |
| PVR Functions | Time Shift, Recording (one channel while time-shifting another), Record Manager via USB HDD |
| Software Upgrade | Via USB, RS-232, or Internet (SPARK online service) |
| Special Features | Linux-based, SPARK online platform, Plugin support, EPG, Teletext, Subtitle, Parental Lock, Sleep Timer, Zoom (up to x16), Multi-language OSD |
| Cleaning | Turn off power; clean cabinet, panel, and remote with soft cloth lightly moistened with mild detergent solution |
| Safety Precautions | Do not open cabinet; refer servicing to qualified personnel; avoid water/liquid exposure; ensure ventilation; protect power cord; use specified replacement parts |
Frequently Asked Questions - Unix F plus Solo SAB
User questions about Unix F plus Solo SAB
0 question about this device. Answer the ones you know or ask your own.
Ask a new question about this device
Download the instructions for your Satellite receiver in PDF format for free! Find your manual Unix F plus Solo - SAB and take your electronic device back in hand. On this page are published all the documents necessary for the use of your device. Unix F plus Solo by SAB.
USER MANUAL Unix F plus Solo SAB
High Definition Digital Satellite
Receiver and Media Player
Weather Forecast&RSS Reader Functions
Online User's Manual&F.A.Q.
Software Upgrade support via USB, RS232
or Internet
High Definition digital satellite
Receiver&Media Player
Conax Embedded Card Reader
FullHD 1080P Output via HDMI
YouTube, SHOUTcast Radio, and Picasa
Compatible
CONTENTS
1 SAFETY PRECAUTIONS......4
2 INTRODUCTION....5
3 FEATURES....5
4 REMOTE CONTROL....7
5 FRONT PANEL....9
6 REAR PANEL....9
7 CONNECTING YOUR SYSTEM....9
8 BASIC OPERATIONS....11
9 MENU "CHANNEL" 16
9.1 ORGANIZING SERVICES 16
9.2 ORGANIZING FAVOURITES....17
9.3 ORGANIZING TIMER....18
10 MENU "INSTALLATION"....19
10.1 SATELLITE INSTALLATION....19
10.1.1 EDIT....19
10.1.1.1 LNB 19
10.1.1.2 DiSEQC 19
10.1.1.3 22K....19
11.1 IN "SYSTEM" MENU: 21
11.2 PVR/HDD SETTING....26
11.3 NET SETTING....27
11.4 UPGRADE....28
12 MENU "CONDITIONAL ACCESS" 29
13 SPARK....29
13.1MESSAGE 29
13.2 UPGRADE SOFTWARE....29
13.3 WEATHER FORECAST 30
13.4 FAQ....30
13.5 USER MANUAL 30
13.6.E-BOOK....30
13.7 CONFIG 30
14 MENU "FILE LIST" 31
14.1 FILE LIST....31
14.2 STORAGE INFORMATION 31
15 MENU "DOWNLOAD" 31
15.1 BROWSE SERVER....31
15.2 DOWNLOADING LIST 32
15.3 DOWNLOADED LIST 32
16 MENU "PULG IN" 33
17 MENU "NET WORKING"....33
17.1. YOUTUBE....33
17.2. SHOUTCAST 34
17.3.PICASA 34
17.4.Rss 35
18 TROUBLE SHOOTING 36
19 SPECIFICATIONS....37

DOLBY
DIGITAL
Manufactured under license from Dolby Laboratories.
Dolby and the double-D symbol are trademarks of Dolby Laboratories.
1 Safety precautions
CAUTION:

The lightning flash with arrowhead symbol, within an equilateral triangle, is intended to alert the user to "dangerous voltage" and to prevent from a risk of electric shock.
CAUTION
RISK OF ELECTRIC SHOCK DO NOT OPEN
Warning:
To reduce the risk of electric shock, don't open the cabinet. Refer servicing to qualified personnel only.

The exclamation point within an equilateral triangle is intended to alert the user to important operating and maintenance (servicing).
WARNING: Do not use this STB where contact with or immersion in water is a possibility. Do not use near flower vase, washbowls, kitchen sinks, laundry tubs, swimming pools, etc.
WARNING: Do not put the candle or lamp stand on the cabinet; otherwise, there is the danger of fire.
WARNING: The unit should be connected to a power supply only of the type described in the operating instructions or as marked on the unit. If you are not sure of the type of power supply (for example, 120 or 230 V) to your home, consult your local dealer or local power company.
WARNING: This product install diodes. Do not open the cabinet or touch any parts in the inner mechanism. Consult your local dealer for technical service if the opening is required.
Note: To ensure proper use of this product, please read this User manual carefully and retain for further reference.
Note: This product install diodes. Do not open the cabinet to avoid the unit direct exposure to radiation.
Unit Cleaning: After the unit power is turned off, you can clean the cabinet, panel and remote control with a soft cloth lightly moistened with a mild detergent solution.
Attachments: Never add any attachments and/or equipment without the manufacturer consent; as such additions may result in the risk of fire, electric shock, or other personal injury.
Locating: Slots and openings in the cabinet are provided for ventilation to protect it from overheating. Do not block these openings or allow them to be blocked by placing the STB on a bed, sofa, or other similar surface, nor should it be placed over a radiator or heat register.
Power-Cord Protection: Place the power-supply cord out of the way, where it will not be walked on. Please take special attentions to cords at plugs, convenience receptacles, and the point where they exit from the unit.
Object and Liquid Entry: Never put objects of any kind into this STB through openings, as they may touch dangerous voltage points or short-out parts that could result in a fire or electric shock. Never spill any liquid on the STB.
Note: Moisture may be formed on the lens In the following conditions:
- when the unit is suddenly moved from a cold environment or an air-condition room to a warm place.
– immediately after a heater has been turned on.
– in a steamy or very humid room.
If the moisture forms inside the unit, it may not operate properly. To correct this problem, turn on the power and wait about two hours for the moisture to evaporate.
Parts Replacement: When the unit parts need to be replaced, user should make sure the service technician use the replacement parts specified by the manufacturer or having the same characteristics as the original part. Unauthorized replacement may put the unit In the risk of fire, electric shock or other hazards.
Safety Check: After all the maintenances and repairs are done, user is required to request the service technician to conduct the overall safety check to ensure the machine is In the proper condition.
2 INTRODUCTION
Thank you for purchasing the HD Receiver.
This HD Receiver is fully compliant with the international DVB standard and thus transmits digital images, sounds, information guides and teletext directly to your TV through the broadcasting.
Now you can comfortably see and receive digitally transmitted music, news, movie and sports broadcasts in your office or at your home.
In service search section, both the automatic service search method and the manual search mode are provided. You can save up to Endless TV and Radio services and work around with the favorite, Lock, Delete, Move and Sort functions.
The menu is very modern and supports multiple languages. All functions can be carried out using the remote control and some of the functions can also be carried out using the front panel. The HD Receiver is easy to use and adaptable for future advances. Please be aware that new software may change the functions of the HD Receiver.
If you have any difficulties concerning the operation of your HD Receiver, please refer to the relevant section of this manual, including the 'Troubleshooting'. This Manual will provide you with useful information on using the HD Receiver.
3 FEATURES
● MPEG-Fully DVB-S / DVB-S2 HD compliant
● Endless channels (TV and Radio) programmable
● Multilingual menu text support
- Channel list editing
● Favourite channel list editing
● True-color On-Screen Display (OSD)
● Full Picture In Graphic (PIG) function
● Electronic Program Guide (EPG) for on screen channel information
- Subtitle supported
● Teletext supported by software emulation
● Parental lock facility by channel and program event
● Program and Channel information transfer from receiver to receiver
English
● S/PDIF for digital audio or Dolby digital bitstream output
● DiSEqC 1.0, 1.1, 1.2 and USALS
● HDMI HD Video/Audio Output
- USB 2.0 Host
● LED Display for service information
- RTC (Real-Time-Clock)
- Time Shift
- Video Recording
● Recording one channel and Time Shifting another channel (optional)
- Conax Embedded Card Reader
● FullHD 1080p output via HDMI
● AVI, MKV, MPG, TS, WMA, WMV, M2TS, FLV, DAT, ASF, MP3 playback
- YouTube, SHOUTcast Radio, and Picasa Compatible
● Weather forecast & Rss Reader Functions
● Software Upgrade support via USB, RS232 or Internet
● Endless possibilitier with Plug-In support
● Message, FAQ and User Manual support
- Download files from FTP server
- Base on LINUX
4 Remote Control
text_image
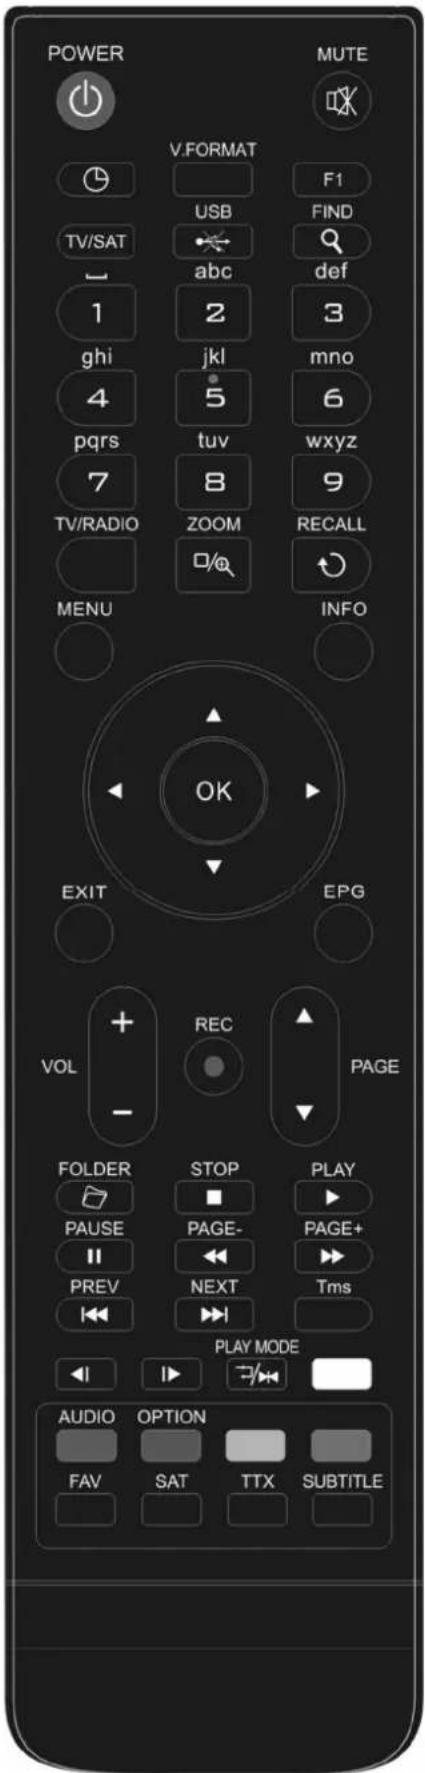
POWER V.FORMAT USB F1 TV/SAT abc find def 1 2 3 ghi jkl mno 4 5 6 pqrs tuv wxyz 7 8 9 TV/RADIO ZOOM RECALL menu INFO OK EXIT EPG VOL REC PAGE FOLDER STOP PLAY PAUSE PAGE- PAGE+ PREV NEXT Tms PLAY MODE AUDIO OPTION FAV SAT TTX SUBTITLEYou can power on/off the receiver, operate on screen menu, and use a variety of hot key function.

To switch your receiver on from standby or standby to on.

Used to enable or disable the audio
NUMERIC KEYS
Used to select channels or enter programming parameters
首/ musical (TV / RADIO)
Receiver switches between TV and Radio mode.
(ZOOM)
Press Key select zoom times, from X1 to X16.
RECALL
Return to the previous menu or status.
TV/SAT
Receiver switches between TV and receive mode.
INFO (INFORMATION)
To display channel status or various program information of current service.
EPG(Electronic Program Guide)
Display the Programs guide on screen when available.
MENU
Displays the Main Menu on the screen, or return to the previous menu or status.
EXIT
Cancel the user selection and return to the viewing mode from a menu.
OK
To select menu option, or to updated on entry.
<,> KEY
To adjust volume level, or to move cursor left or right in the menu.
^,v KEY
To change channels, or to move cursor up or down in the menu.
PAGE ▲/PAGE ▼
To move up the cursor to the next or previous page
in the menu or channel list.
●REC
To start recording.
Has different functions per menu.
Teletext
Shows teletext information of the current channel supports.
Subtitle
Subtitle Display.
(FIND)
Use to prompt find channels sort by character.
TIMER
Press timer key you can setup up the Standby time.
V. FORMAT
Press P/N button to switch the display mode among "By source", "By native TV", "480i", "480P", "576i", "576p", "720P" and "1080i".
FAV(FAVORITE)
To set receiver to the favorite server mode,
display the favorite channel.
FOLDER
Press this button to enter the Record Manager menu directly.
AUDIO(Red Key)
Audio channels setup, to select audio mode; Left, Right, Stereo, Mono.
OPTION(GREEN KEY)
Shows NVOD information of the current channel supports.
SAT
Display the satellite list at normal picture.
Play Mode
Select the play mode in MP3 or JPEG player.
English
USB
To remove the USB Hard Disk safely.
TMS(Time Shift)
Press this button to display Time Shift info bar.
▶ Play
To play the MP3, JPEG, or Record files.
■ Stop
To stop the Time Shift, recording, or MP3/JPEG player.
|| PAUSE
Used to select the freeze function.
Press once to freeze the screen picture.
← FB
To start Fast Backward function.
FF
To start Fast Forward function.
SB
No function
SF
No function
PREV
To play the former file in play list.
To jump the head place in timeshift playback.
NEXT
To play the next file in play list.
To jump the end place in timeshift playback.
5 Front panel
POWER KEY: To switch the receiver power on/stand by
MENU KEY: Displays the Main Menu on the screen, or return to the previous menu or status.
<,> KEY: To adjust volume level, or to move cursor left or right in the menu.
^, v KEY : To change channels, or to move cursor up or down in the menu
OK KEY: To see TV/Radio channel list, or to confirm in the menu.
Remote Sensor: Detects infrared signal from remote control unit
Display: (LED type) Indicates operating status of receiver
POWER Indicator: while the receiver is power on and at standby mode.
Card Slot: One slot CA Interface for Conax, Insert the smart card chip side up!
6 Rear Panel
text_image
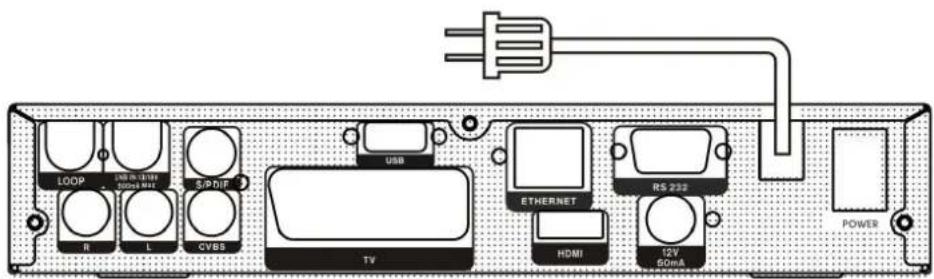
LOOP USB IN 100mA 50mA 842 SIP DIF USB R L CVBS TV ETHERNET HDMI RS 233 12V 50mA POWERPlease refer to the diagram above for all possible connections of your receiver Do not connect the unit to the mains socket until all other connections have been made and checked. Your configuration can vary depending on model
LOOP: This enables the connection of another receiver.
LNB IN : This port is to connect the coaxial cable from satellite antenna.
AUDIO R/L : These RCA connectors are used to connect any external audio amp or system.
TV: This is used to connect your TV through SCART cable.
HDMI: Audio and Video output socket for TV set with HDMI Input Jack only.
CVBS: Component video output socket for TV set.
S/PDIF: Audio output socket for speaker set with PDIF.
USB: USB 2.0 Host, connect to USB hard disk, or flash disk
RS 232C: This is used to connect your receiver to a computer through a serial cable.
0/12A 50MA: This is used to Connectors 12V to an external 0V/12V switch.
POWER: To switch ON/OFF the receiver power supply.
ETHERENT: This is used to connect internet.
7 Connecting Your System
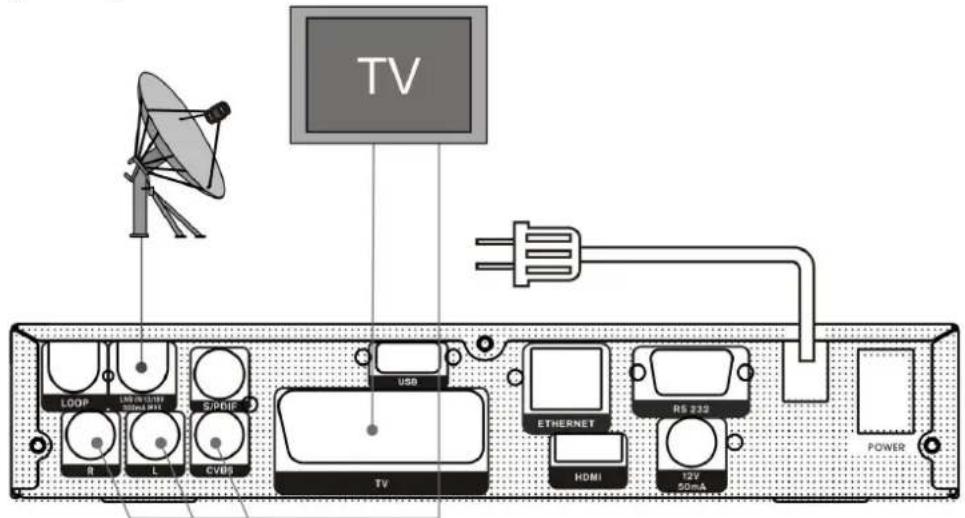
There are three ways to connect the receiver to your existing TV system. We recommend using one of the following cases for the best result:
-
If you have a high definition television set, you should use a HDMI cable for best result, Plug one end of the cable into the HDMI socket on the receiver, and the other end into the matching socket on your television. In this case, you do not have to make audio connections because the HDMI connector can output stereo audio or Dolby digital audio.
-
Connect one end of SCART cable to the TV (SCART) jack on the back of the receiver and the other end to a SCART jack on your TV.
English
- Connect one end of RCA cable to the RCA jack on the back of the receiver and the other end to a RCA jack on your TV.
text_image
TV LOOP LINT 1000 SPEE RV L CVBS USB TV ETHERNET HDMI RS 232 T22 50mA POWERFinally connect the coaxial cable from the operator to the CVBS jack on the receiver.
With External Audio / Hi-Fi System
To connect any external Audio Hi-Fi system, the receiver has been provided with two RCA connectors at the back of the receiver marked with Audio L and R.
Connect an RCA stereo cable from the AUDIO L, R jacks on the back of the receiver to the LINE, AUX, SPARE OR EXTRA input jacks on your Hi-Fi System.
7.1 TV with Motorized System (DiSEqC 1.2)
Connect one end of your coaxial cable to the LNB IN connector on the receiver and the other end to the REC or Receiver connector on the DiSEqC 1.2 motor.
Connect the coaxial cable from the LNB to the LNB connector on the DiSEqC 1.2 motor.
All our receivers are designed to be DiSEqC 1.0 and DiSEqC 1.2 compatible.
This allows multiple antennas to be connected to the receiver at the same time.
If you have two or more fixed antennas or LNBs, then we recommend you use a DiSEqC 1.0 switch.
Connect the coaxial cable from the first LNB to the LNB 1 or LNB A input connector of the DiSEqC switch.
Do the same for any other LNBs that you have.
connect the other end to the LNB IN socket on the receiver.
To the digital receiver, you can connect either a single satellite antenna directly or LNB of multi-feed equipment.
8 Basic operations
Turn on STB
First, press the [POWER] to turn on the unit.
When the STB is first used, there will play the first channel from the default Channel List. If the STB is not first used, STB will play the same channel as last time before turning off.
? Frequently Asked Question
Q: The power of my STB has been turned on and not in Standby mode, but the TV screen showed nothing:
A: Make sure the TV set has been set to the correct video input (not the TV channels). For example, if you have connected the unit with the Video1 input of the TV set, the TV set has to be switched to Video1.
Q: The power of my STB has been turn on and not in Standby mode, but the TV screen showed nothing except popup window with "No Signal" information.
A: That means the channel, which you select, is no signal. Check connection of signal cable or contact operator.
Power
- Press [POWER] Key can enter the Standby state
- In Standby state, press [POWER] Key again can call back the unit and go on play the previous channel
- User can also disconnect the device's main power to end the Standby state.
Channel Up/Channel Down
In full screen, press [/] to change channel.
Volume Up/Volume Down
In full screen, press [/] or [vol+/vol-] to adjust volume.
Number
In full screen, use number key and press [ENTER] on the Remote Control Unit to change channel.
Mute
- Press [MUTE] key to mute the sound and the screen will show up mute OSD.
- Press [MUTE] key again to restore sound.
Pause
text_image
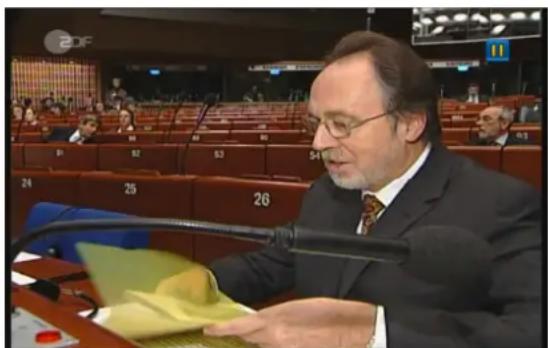
Photo of a man speaking at a podium in a conference hall, with visible seat numbers and a BDF logo in the background.- In playing mode, press [ PAUSE] key, the picture will be paused, but the sound of the channel will still continues.
- Press [PLAY] key, the screen's picture will skip over to the current playing picture, and the sound of the channel will corresponding playing.
Recall
Press [RECALL] key will directly switch to the previous channel that you played before current channel.
Favourite
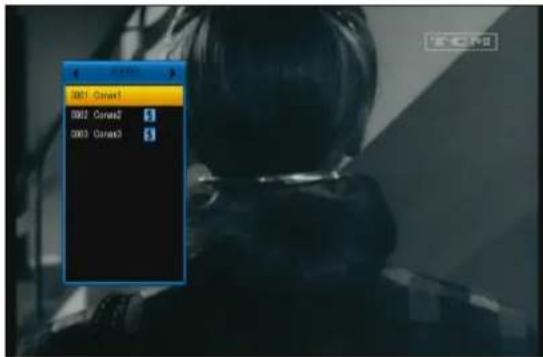
- In full screen, press [FAV(FAVORITE)] key, it will display a window of "Favorite Group" on the left of the screen, which you can watch like below:
text_image
OK1 Cancel OK2 Cancel2 OK3 Cancel3- You can press [←/→] keys to select
different "Favorite Group".
Pressing [Page+/Page-] keys can implement the "Page up/Page down" function
- Press [Exit] key to exit the current window.
SAT
-
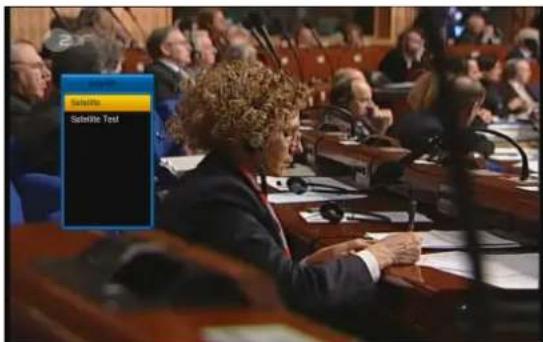
In full screen, press [SAT] key, it will display a window of "satellite Group" on the left of the screen, which you can watch like below:
-
You can press [↑/↓] keys to select different "Favorite Group".
-
Press [Exit] key to exit the current window.
text_image
Selective Selective Text? Frequently Asked Question
Q: Why the screen displays "No Favorite Channel", after pressing [FAV(FAVORITE)] key?
A: It is because that you haven't set any channels as "favorite channel". Please refer to Favorite
Audio
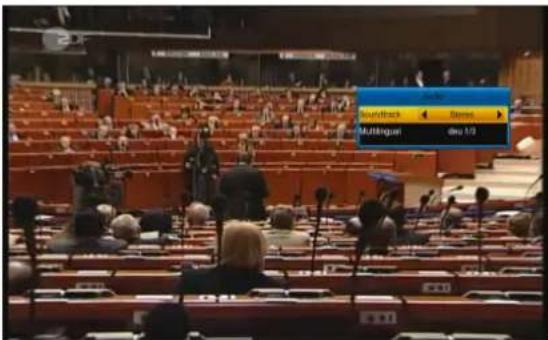
- In full screen, press [AUDIO] key can open the "Audio" window on the screen.
text_image
Soundtrack Times Multingran day 13-
You can modify the audio track by press [/] key and modify the audio mode by press [/] key.
-
Mode: Left/Right/Stereo/Mono
Information
text_image
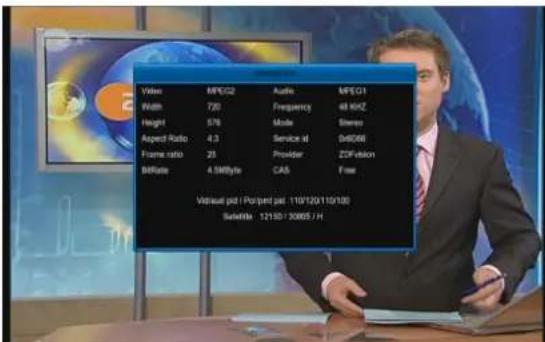
Value MPEQ2 Audio MPEQ1 Width 720 Frequency 48 kHz Height 576 Mode Stereo Aspect Ratio 4.3 Service id 04866 Frame ratio 25 Provider ZDFvision BitRate 4.5MByte CAS Free Virtual pad / Porquet pad 110/12G/110/100 Satellite 12130 / 30865 / HIn full screen, press [i(INFORMATION)] key can open infobar ,press again to display EPG information screen, then press [red] key to display information screen, in the window shows the parameters of current channel.
EPG
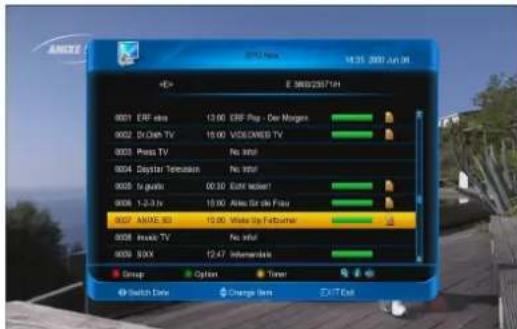
- The STB has an Electronic Program Guide (EPG) to help you navigate channels through all the possible viewing options. The EPG supplies information such as channel listings and starting and ending times for all available channels.
Press [EPG] key to display Program Guide.
English
text_image
ANGEX E 380023671H 4× E 380023671H 0001 EBF mini 13:00 EBF Pop - De Morgan 0002 Dr Class TV 15:00 VOLUMES TV 0003 Pass TV No mini 0004 Capstar Tereusian No mini 0005 In guilla 00:30 Euro later! 0006 1-2-3 hr 15:00 Atlas St de Fau 907 ANGEX 80 12:00 Wave Up Farborne 0008 Inalic TV No mini 0009 SXX 12:47 Infraerisk Group Option Timer Switch Date Change Item EXIT Out- Press [ENTER] key in each item can see more detail information.
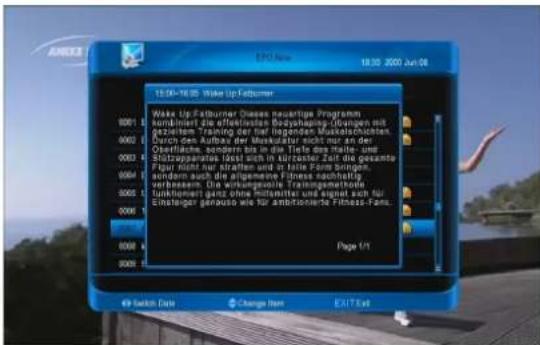
-
Press [RED] key to open the "Group" window. You can press [/] key to move highlight and press [ENTER] key to select group of channels.
-
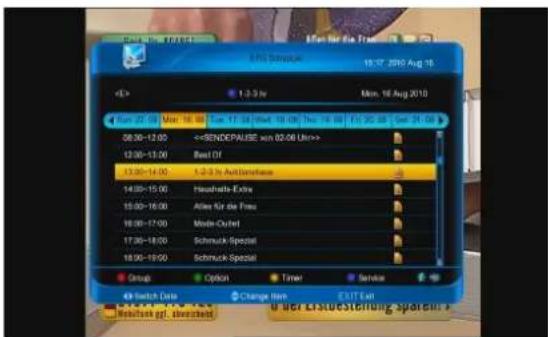
Press [GREEN] key to open "Options" window. You can press [↑/↓] key to move highlight and press [ENTER] key to select EPG events display mode: Now EPG, Next EPG, More, Schedule.
text_image
19.17 2006 Aug 15 MOS Software 19.17 2006 Aug 15 <4> 1:3:3 Iv Min. 18 Aug 2010 Run 22:19 Max 16:00 Sun 17:00 Wed 18:00 Thu 19:00 Fri 20:00 Sat 21:00 08:00-12:00 <-
Press [YELLOW] key to open "Timer" window. User can save a timer as he want. More about timers You can read in Organizing Time
-
Press [REC] key to directly add timer for recording event.
- In EPG menu, press [EXIT] to close EPG screen.
TV/RADIO
In TV mode, pressing [TV / RADIO)] key can switch to Radio mode. In Radio mode, press [TV / RADIO)] key to switch to TV mode.
TV List
- In full screen, press [ENTER] key to enter "TV List".

text_image
FAT AI FAV Satellite A-Z Provider CAS HD Satellite 12100 / H / 30005 MDS/Veterguan Info Free Unknown BNT ZDF 0002 ZDF/Enkanal 0003 ZDF/Enkanal 0004 ZDF/Enkanal 0005 Sut 0006 KKa 0007 EuroGenes 0008 Europort EPS New Property Sort Exit/Ext 4th Switch home Change item- Press [BLUE] key to open the "Sort" window. There are five kinds of sorting ways.
- Press [GREEN] key to recall shortcut to EPG actual event details.
- Press [YELLOW] key to enable shortcut to channel parameters edition.
- Press [/] key to move highlight and press [ENTER] key to play the highlighted channel.
- Press [Page+/Page-] key to page up and page down.
- Press [EXIT] key to exit the channel list.
Sleep
- This function can set sleep timer. When you set a sleep timer and the time arrive, the system will enter to standby automatically.
- Press [ (SLEEP)] key to switch the mode between Sleep Timer Off /10 /30/60/90/120 minutes.
Page Up/Page Down
English
- In Channel list, press [Page+/Page-] key can page up and page down the channel list.
TXT
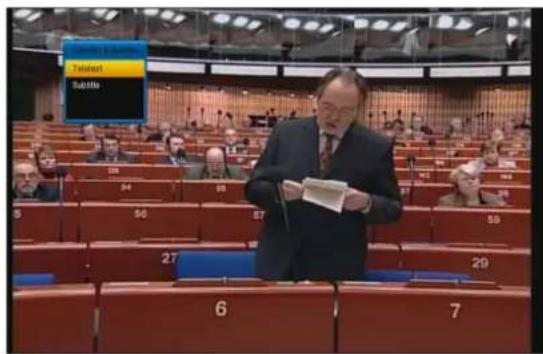
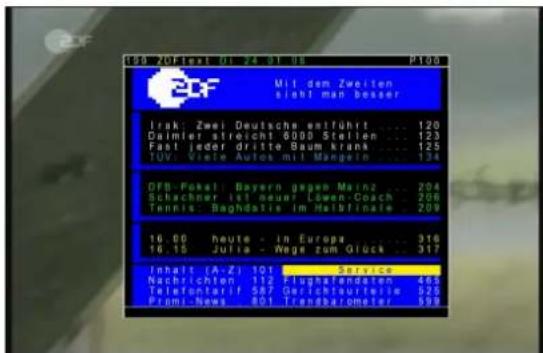
- Press [YELLOW] key in full screen, you can open teletext &subtitle menu and choose teletext, then press [ENTER] key on the channel which has teletext information.
text_image
Talent Sutter- If the channel has no teletext information, it will show "No Teletext" on the screen.
- Press [YELLOW] key in full screen, you can open teletext &subtitle menu and choose subtitle, then press [ENTER] key on the channel which has subtitle information.
- If the channel has no subtitle information, it will show "No subtitle" on the screen.
Find
text_image
Channel Name 7nd channel by name 0005 Found Channels OK! ZFPV 0002 ZUR 0003 ZDProfessional 0004 ZDProfessional 0005 ZDProfessional OK! OK! OK! OK! OK! OK! OK! OK! OK! OK! OK! OK! OK! OK! OK! OK! OK! OK! OK! OK! OK! OK! OK! OK! OK! OK! OK! OK! OK! OK! OK! OK! OK! OK! OK! OK! OK! OK! OK! OK! OK! OK! OK! OK! OK! OK! OK! OK! OK! OK! OK! OK OK! OK! OK! OK! OK! OK! OK! OK! OK! OK! OK! OK! OK! OK! OK! OK! OK! OK! OK! OK! OK! OK! OK! OK! OK! OK! OK! OK! OK! OK! OK! OK! OK! OK! OK! OK! OK! OK! OK! OK! OK! OK! OK! OK! OK! OK! OK! OK! OK! Ok! OK! Ok! OK! Ok! OK! Ok! OK! Ok! OK! Ok! OK! Ok! OK! Ok! OK! Ok! OK! Ok! OK! Ok! OK! Ok! OK! Ok! OK! Ok! OK! Ok! OK! Ok! OK! Ok! OK! Ok! OK! Ok! OK! Ok! OK! Ok! OK! Ok! OK! Ok! OK! Ok! OK! Ok! OK! O OK! O OK! O OK! O OK! O OK! O OK! O OK! O OK! O OK! O OK! O OK! O OK! O OK! O OK! O OK! O OK! O OK! O OK! O OK! O OK! O OK! O OK! O OK! O OK! O OK! O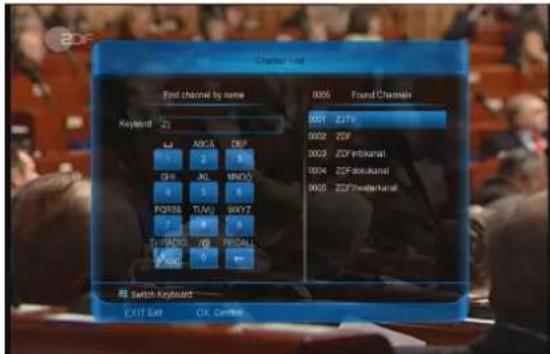
text_image
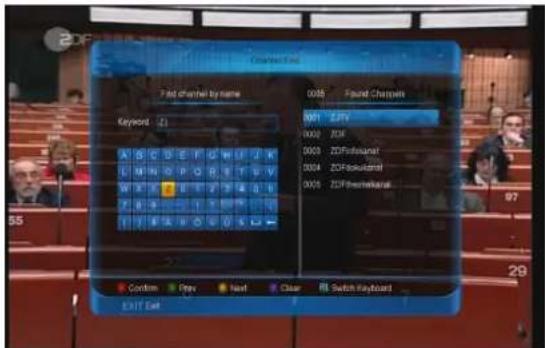
Chassis Font Find channel by name 0005 Found Channels Keyword 21 001 ZIF 002 ZIF 003 ZCFybnkanal 004 ZCFybnkanal 005 ZCFybnkanal 01 02 03 04 05 06 07 08 09 10 11 12 13 14 15 16 17 18 19 20 21 22 23 24 25 26 27 28 29 30 31 32 33 34 35 36 37 38 39 40 41 42 43 44 45 46 47 48 49 50 51 52 53 54 55 56 57 58 59 60 61 62 63 64 65 66 67 68 69 70 71 72 73 74 75 76 77 78 79 80 81 82 83 84 85 86 87 88 89 90 91 92 93 94 95 96 97 98 99 100 R5 Switch Keyboard EXIT Diet OK Center- Press[(AND)] key in full screen can open the "Channel Find" window. You can presrd then press number keys to input the seles [ , , , ] keys to move highlight and press [ENTER] key or press [F1] key to switch keyboacted symbol or letter into the dialogue.
- After input each character, the program list on the left will search the channel according your input, and list the matched channel.
- Press [red] button,Move highlight to you select channel and press [ENTER] key to switch channel from the channels list fdirectly.
Zoom
text_image
Zoom HelpEnglish
- The [ (ZOOM)] key allows you to magnify a certain area on the images
- Press [ (ZOOM)] key again, the image will enlarge rotate as x1, x2, x4, x6, x8, x12, x16.
- In "x2 \~ x16" mode, using [←,→,↑,↓] keys to move the image center area you want to see.
- In zoom mode, press [EXIT] to close "Zoom" Window.
NVOD
Press [GREEN] key in full screen, it display NVOD menu if it has NVOD.Or it will show"no option channel".
TV/SAT
Press [TV/SAT] key can switch between TV mode and STB mode
Menu
Press [MENU] key can open the menu, exit the current menu to last menu or close the window.
Video Format
Press [V.FORMAT] key under Full Screen playback continuously press this key, system will switch its outputting video resolution by sequence "
Auto N/P-> 480-> 576-> 720-> 1080".
Time Shift
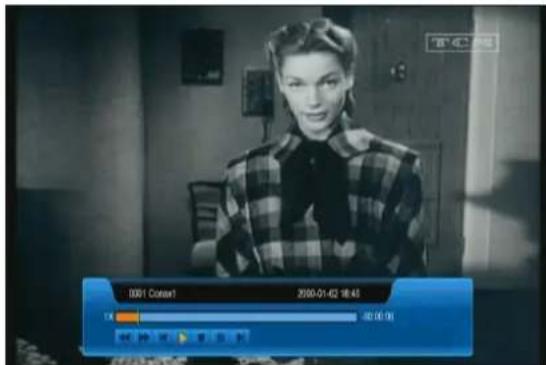
- If you connect the USB HDD, and enable the Time Shift function in the menu "Main Menu/USB/PVR Setting/Time Shift", it will start the Time Shift function automatically after you switch the program, and when you press the [play] button the Time Shift info bar will displayed as the following picture:
text_image
00:1 Cootar! 2000-01-02 18:43 18:43 00:00:01- You can press [] button to pause the video
- You can press []on[] button to Fast Backward or Fast Forward.
- Press [] or [] button to jump to different position
- Press [] button to exit the playback.
a) Record
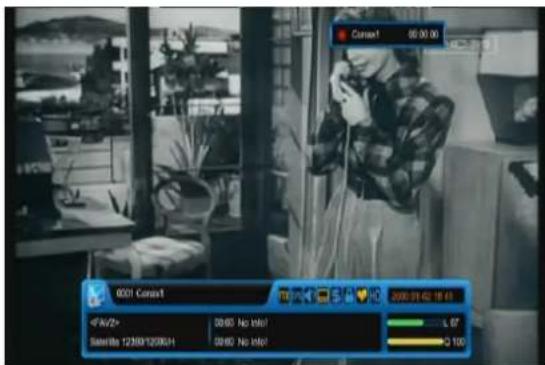
- If you connect the USB HDD, You can press [☐] button to start record function, as following picture:
text_image
0001 Contact 4W/2> 00:00 No Info! Satellite 1236912590H 00:00 No Info 2001.07.02 18:03 0:07 Q 100- Press [] button to display the record info bar when you recording.
- Press [] button again to pause the record time.
English
natural_image
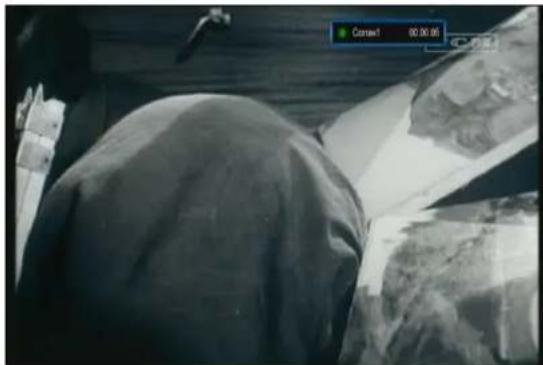
Close-up of a person's torso wearing a dark garment, with another person partially visible in the background (no text or symbols)- You can press [] button to pause the video.
- You can press [] or [] button to Fast Backward or Fast Forward.
- Press [] or [] button to jump to different position.
- Press [] button to stop the recording.
b) Exit
Press [EXIT] key can exit the current menu to last menu or close the window
quickbar
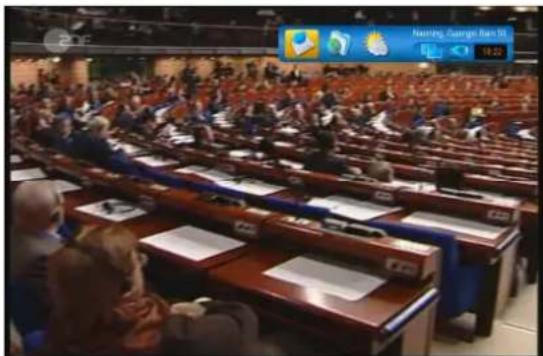
In full screen press [F1] button to enter quickbar, like below:
text_image
Photo of a large assembly hall with attendees seated in rows, featuring a digital display showing 'Morning, Summer, Fall' and icons.It show weather message, time and state of NET and USB, and has shortcut to enter to "weather" menu. It also has message box.
9 Menu "Channel"
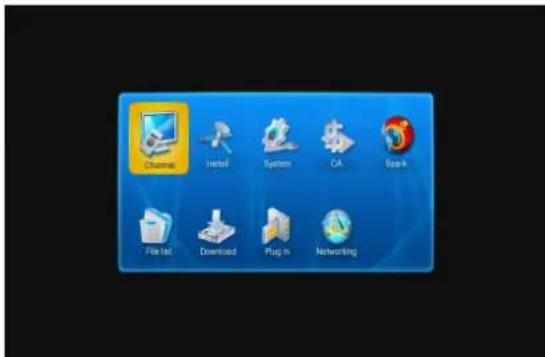
When you press [Menu] key to enter menu, there will display the picture like below:
text_image
Install System CA Spark File list Download Plug in Networking- Press [↑/↓] and [←/→] key to select menu pages among channel, Install,, System, CA, Spark, file list, download and plug in.
- Press [ENTER] key to enter the selected item.
text_image
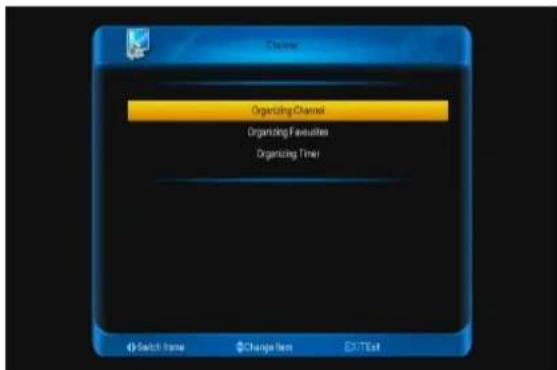
Organizing Channel Organizing Favorites Organizing Timer Switch home Change Item EXIT ExitIn "channel" menu:
- Press [↑/↓] key to select menu items among Organizing channel, Organizing Favourites and Organizing Timer.
- Press [ENTER] key to enter the selected item.
9.1 Organizing Services
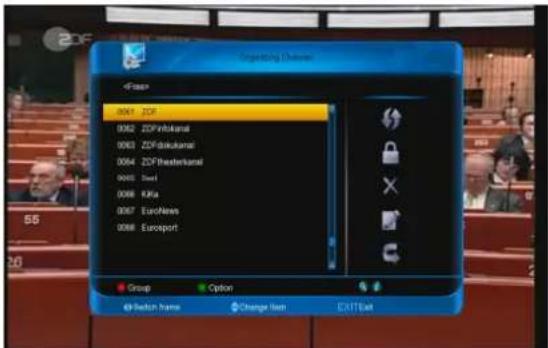
When you enter to "Organizing Channel" menu, there will display the screen like below.
English
text_image
Signifying Channels- You can move highlight by press [/] keys and press [ENTER] key to confirm to preview the current highlighted program in the left side preview window.
- You can press [Page+/Page-] keys to implement the Page Up/Page Down function.
- You can use [←/→] key to switch between list of channels and list of channel edit functions – Move, Lock, Delete, Rename, Skip.
- Press color key can implement the corresponding function – Group, Options, Find.
- You can press [Exit] key to enter full screen playing mode.
9.1.1. Move
You can reorder and move the service to the preferred position. Mark the desired services using [ENTER] button, use [] button to choose Move mode and press [ENTER] button, then use [/] buttons to move and press [ENTER] button to confirm.
9.1.2. Lock
You can restrain and lock the services. Mark the desired services using [ENTER] button, use [] and [/] button to choose Lock mode and press [ENTER] button to confirm.
9.1.3. Delete
You can delete the services. Mark the desired services using [ENTER] button, use [] and [/] button to choose Delete mode and press [ENTER] button to confirm.
9.1.4. Rename
Mark the service you want to rename, use [ENTER] button to select one Rename item, use [→] and [↑/↓] button to choose rename icon and press [ENTER] button to display keyboard, and rename it. After renaming it press [red] button on keyboard to save.
9.1.5. Skip
You can restrain and Skip (hide) the services. Mark the desired services using [ENTER] button, use [] and [/] button to choose Skip mode and press [ENTER] button to confirm.
9.1.6. Group (RED)
It is very useful to select services with different Groups.
9.1.7 Options (GREEN)
It is very convenient function to Mark the desired services with different options.
9.1.8 Find
It is an item to locate certain service by name quickly. Press [button] button to display the "Channel Find" submenu, use keyboard to enter service name and press [red] button to complete input and select the desired services.
9.2 Organizing favourites
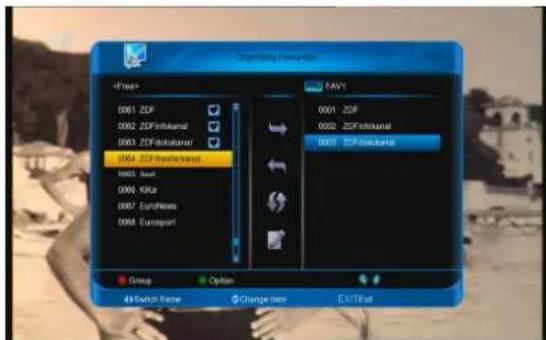
When you enter to "Organizing favourites" menu, there will display the screen like below.
text_image
Organizing Preference #Flow 0001 ZDF 0002 ZDFinktakandel 0003 ZDFdoktakandel 0004 ZDFfondsbankel 0005 Eurobank 0006 KIRa 0007 Eurobank 0008 Eurobank FAV1 0001 ZDF 0002 ZDFinktakandel 0003 ZDFfondsbankel Group OptionSwitch Name Change Item Exit/Exit
- You can move highlight by press [/] keys in the left and right side list window.
English
- You can press [Page+/Page-] keys to implement the Page Up/Page Down function.
- You can use [/] key to switch between list of all channels at the left, list of channel in actual selected FAV list at the right and edit functions in the middle of the screen – Add, Remove, Move, Rename.
- Press color key to implement the corresponding function – Group, Options, Find (described in previous chapter).
- Press FAV(FAVORITE) key when cursor is active in left or right window, to choose actual FAV list.
- You can press [EXIT] key to enter full screen playing mode.
9.3 Organizing Timer
In "Organizing timer" menu, there will display the screen like below.
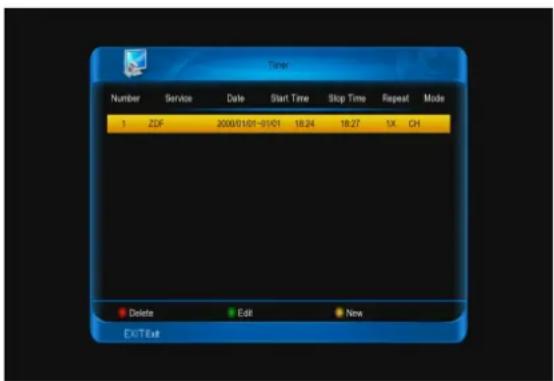
text_image
Timer Number Service Date Start Time Stop Time Repeat Mode 1 ZDF 2000/01/01-01/01 18:24 18:27 1X CH Delete Edit New EXIT Exit- You can move highlight by press [/] keys and press [ENTER] key to confirm to the desired items.
- Press color key to implement the corresponding function --Delete, Edit, New.
- You can press [EXIT] key to enter full screen playing mode.
When you enter to "timer configuration" Menu, you will see a screen like below:
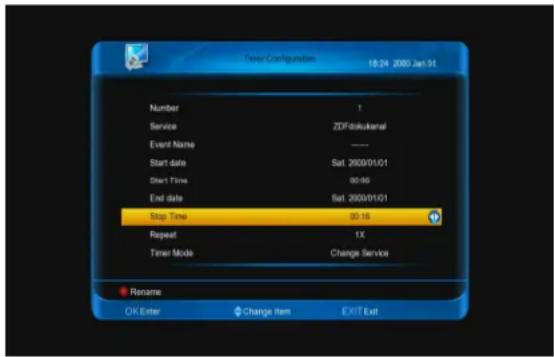
text_image
Timer Configuration 18:24 2000 Jan 01 Number 1 Service ZDFokukanal Event Name ---- Start date Sat. 2000/01/01 Start Time 90:00 End date Sat. 2000/01/01 Stop Time 90:16 Repeat 1X Timer Mode Change Service Rename OK Enter Change Item EXIT Exit- Number: Display the order of current item.
- Service : Show the channel, if you want change, press [ENTER] key.
- Event name: Show event default name, you also press [red] key to rename it.
- Start date: Show start date of event, you can press number keys to change it.
- Start time: Show start time of event, you can press number keys to change it.
- End date: Show end date of event, you can press number keys to change it.
- End time: Show end time of event, you can press number keys to change it.
- Repeat: Show the event transact times, press [left/right] key to switch among once, everyday, a week, workday, weekend.
- Timer mode: Type of the event, it has change service and HDD record.
10 Menu "Installation"
When you enter to "Installation" menu, there will display the screen like below:
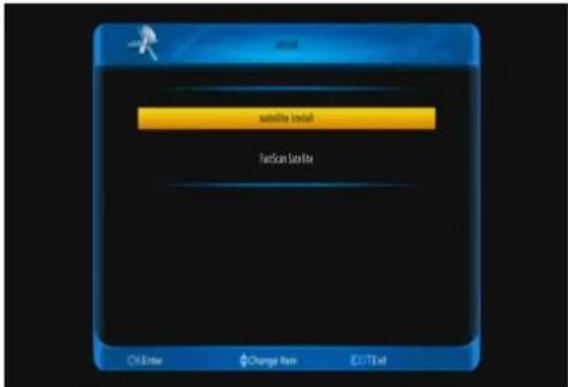
text_image
satellite Install FastScan Site Use OK Enter Change from OUT/Ext10.1 Satellite Installation
- Satellite: Press [ENTER] key to enter the Satellite list.
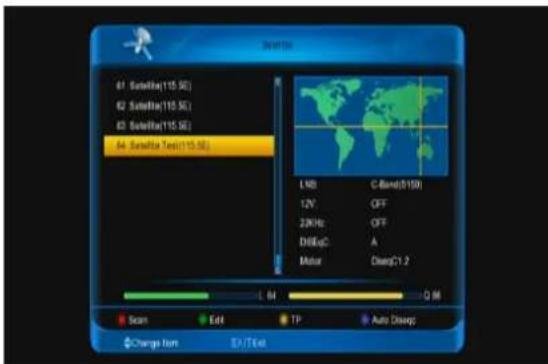
text_image
61 Satellite(115 SE) 62 Satellite(115 SE) 63 Satellite(115 SE) 64 Satellite Test(115 SE) LND C-Band(0159) 12V OFF 20Hz OFF DBExp:A Motor Disag*1.2 04 0 M Scan Edit TP Auto Disagc Change from 7/1 at- Press [/] key to select satellite. Press [Page+/Page-] key to page up or page down.
In this menu:
Press [GREEN] button to rename for this satellite.
Press [GREEN] button to enter into "edit satellite" Menu.
Press [YELLOW] button to enter into "Transponder" Menu.
Press [BLUE] button to auto Diseqc.
10.1.1 Edit
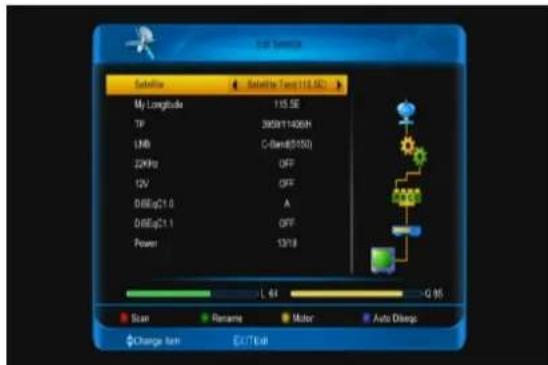
In "satellite" menu, press [GREEN] key to enter into "edit satellist" menu. In this menu. Press [RED] button to scan channels.
Press [GREEN] button to rename for this satellite.
Press [YELLOW] button to enter into "motor" Menu.
Press [BLUE] button to auto Diseqc.
10.1.1.1 LNB
In this item, press [/] to switch among "C-Band(5150)", "KU Band(11300)" "One Cable L", "One Cable
H", "Uni(9750/10600)", "Uni(9750/10750)", "Low Band(9750)", and "High Band(10600)" mode.
text_image
Satellite Satellite Path (115 SE) My Longitude TIF LNB 22KHz 12V 0.6MgC: 0 0.6MgC: 1 Power 13/18 L 64 G 95 Scan Rename Motor Auto Diagec Change from Exit Exit10.1.1.2 DiSEqC
DiSEqC: You can use [/] key to switch options. There are several options for your selection:
- OFF: without DiSEqC.
• 1/4, 2/4, 3/4, 4/4: 4 ports DiSEqC
• 1/16, 2/16....16/16: 16 ports DiSEqC
10.1.1.3 22K
You can use [←/→] key to switch "ON / Off". When this item is switched to "ON", receiver will receive TV and radio input signal from 22K port. If the item is switched to "Off", the receiver will receive all signal from 0K port.
Note:
When you choose LNB type "Universal", you cannot modify 22K.
10.1.1.4 0/12V (Optional)
You can use [/] key to switch "0V / 12V". When this item switches to "12V", receiver will receive TV and radio input signal from 12V port. If the item switches to "0V", the receiver will receive all signals from 0V port.
10.1.1.5 Power
In "Polarity" item, [←/→] key to switch or press [ENTER] key to enter list for selection among "OFF", "13", "18", "13/18", "13.5", "18.5" and "13.5/18.5".
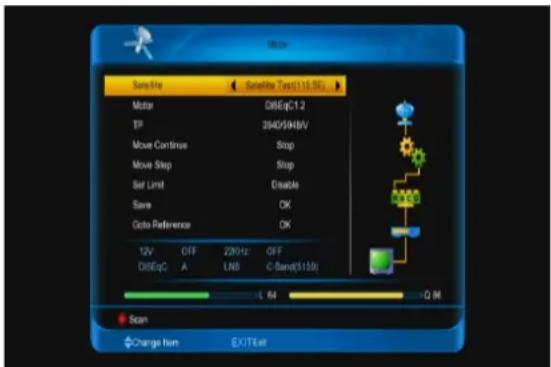
10.1.1.6 Motor
Motor: In "motor" item, you can press [←/→] key to switch "OFF/ DiSEqC 1.2 / USALS" Functions.
text_image
Noise Satellite Test(110.56) Motor DiseEqC1.2 TP 394D/594B/V Move Continue Stop Move Step Stop Set Limit Disable Save OK Geto Reference OK 12V OFF 220Hz OFF DiseEqC:A LNB C-Band(515b) L 64 Q M Scan Change Init EXITExtIn "Satellite" item, press [←/→] key to switch satellite that you want to scan or press [ENTER] key to enter satellite list for selection.
10.1.2 Edit TP
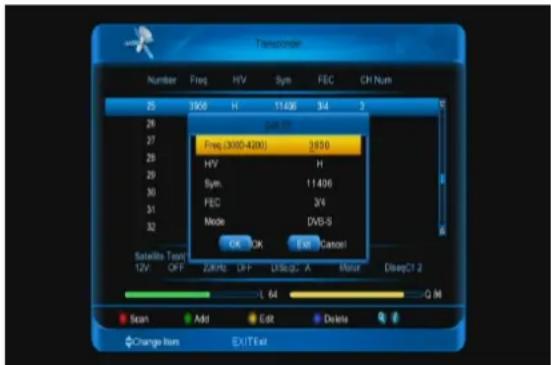
When you enter to "Transponder" menu, there will display the screen like below:
text_image
Transceiver Number Freq HV Sym FEC CH Num 25 3006 H 11406 3/4 3 Satellite 26 27 Freq (3000-4200) 2810 28 HV H 29 Sym 11406 30 PEC 3/4 31 Mode DVD-S 32 OK OK Exit Cancel Satellite Tores 12V OFF ZK/V2 LFP LFS/U2:A Motor DireeC1 2 L 64 Q M Scan Add Delete Change Item EXIT Ext-
In "Transponder" menu, you not only can use [↑/↓] key to select transponder but also can use [Add] and [Delete] functions.
-
When you press [GREEN] key, it will display "New TP" in "Transponder" menu; You should set the parameters of "Frequency" and "Symbol Rate" for this new transponder. The parameters of "TP Frequency" and "Symbol Rate" can set by number keys. The available range are "3000\~13450 MHz" and "1000\~45000Ks/s".
- When you press [yellow] key, it will display Edit TP menu, you could rejigger the parameters of TP
-
When you press [blue] key, there will show up a warning message for reminding whether you will delete the current transponder or not. If you select "Yes", the current transponder will be deleted, and the total account of transponder will reduce 1 correspondingly.
-
For the existed transponder, you also can use number keys to modify the parameters of "TP Frequency" and "Symbol Rate".
-
When you complete your modification, Press [RED] key, it will show up a dialog to ask you scan mode, program type, scan type
English
and NIT Search on/off. After you set up, press [ENTER] key to start scanning.
- In the "TP Scan" item, press [EXIT] key to exit the scanning and save the current parameters.
10.1.3 Single Scan
- Press [RED] key, it will show up a dialog to ask you scan mode (means you want to scan all channels or only scan free channels), program type (means you want to scan all channels or only scan TV/Radio channels), scan type (means preset scan, that is searching the existed TP. Automatic Scan means blind scan. It is no need existed TP info) and NIT Search on/off. After you set up, press [ENTER] key to start scanning.
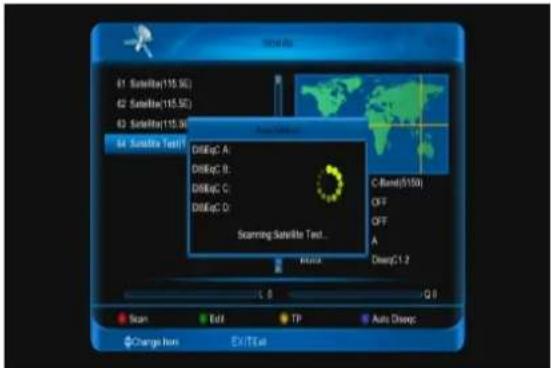
10.1.4 Auto Diseqc
This function will try to analyze Your dish/LNB configuration and automatically scan for founded settings.
text_image
41 Satellite(15.5 SE) 42 Satellite(15.5 SE) 43 Satellite(15.5 SE) 44 Satellite Test DWIEgC A: DWIEgC B: DWIEgC C: DWIEgC D: Scanning Satellite Test... C Band(5150) OFF OFF A Deep(1.2 Q 0 Scan Edit TP Auto Deepc Change from EXITat10.2 FastScan Satellite
text_image
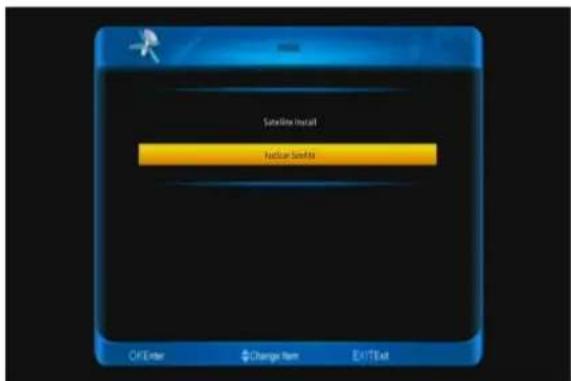
Sunline Install Next Step Install Off Enter Change Item EXITExitIn this menu, you can search the channels fast by set the following parameters:
Provider: can select the provider according your situation.
Search Type: you can select the search type as HD or SD.
Auto DiSEqC: if set to ON, it will check the signal automatically, and find the signal from which port of the DiSEqC switch.
LCN: if set to ON, the channel number will display according the information from the stream, if set to OFF, the channel number will display normally.
11 Menu "System"
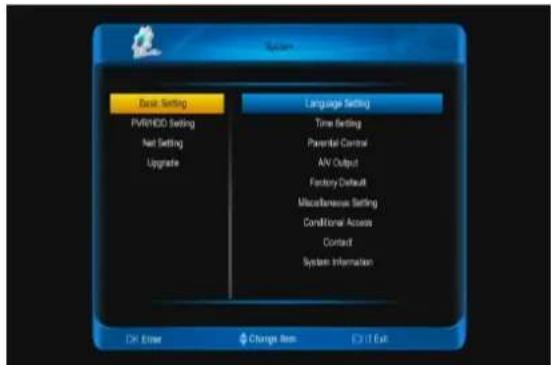
When you enter to "system" menu, you will see the screen like below:
text_image
Basic Setting PWR/HDD Setting Net Setting Upgrade Language Setting Time Setting Parental Control AV Output Factory Default Macrolabesse Setting Conditional Access Contact System Information OK Enter Change Item EXIT Exit11.1 In "system" menu:
-
Press [↑/↓] and [←/→] keys to select menu items among basic setting, PVR/HDD setting, Net setting, upgrade and them's submenu
-
Press [ENTER] key to enter the selected item.
basic setting
11.1.1. Language
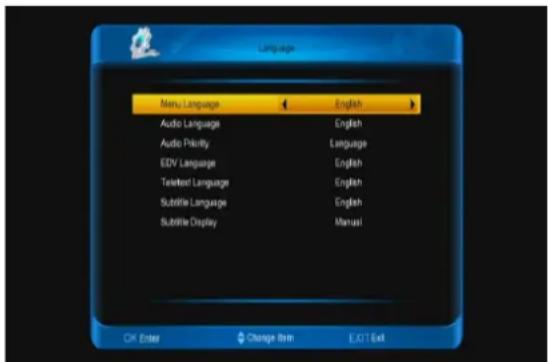
When you enter to "Language" menu, you will see the screen like below:
text_image
Language Menu Language English Audio Language English Audio Priority Language EDV Language English Texted Language English Subtitle Language English Subtitle Display Manual OK Enter Change Item Exit Exit- Menu Language: Press [←/→] keys to select OSD menu language.
- Audio Language: Some channels have more than one audio language for choosing; by this function you can set the first audio for this channel. If the playing channel has the same audio as the "First Audio" you set, system will play this audio language as default. If the channel hasn't the suited audio language, then the default language of current channel will be played automatically. The selections of audio languages include: English, French, German, Russian, Arabic, Portuguese, Turkish, Spanish, Polish and Italian.
- Audio Priority: You can select the Audio Priority among Dolby and Language. If Dolby mode is selected, AC3 audio track will be played even if track language not correspond to selected one in above functions – First and Second Audio.
- EDV Language: Press [←/→] keys to select EPG language.
- Subtitle Language: It is an item for changing the language of the Subtitle.
As long as the services support it, the Subtitle language is changeable by subtitle menu on full screen.
The supported language can be changed without any notice.
- Teletext Language: Press [←/→] keys to select TXT language.
As long as the services support it, the Teletext language is changeable by teletext menu on full screen.
The supported language can be changed without any notice.
- Subtitle display: Press [←/→] keys to select subtitle display model. if set "auto", it will automatically display subtitle in has subtitle stream, or it need press [yellow] key and select subtitle to display.
- You can press [EXIT] key to enter full screen playing mode.
11.1.2. Parental Control
You can set a password for anyone who wishes to operate in the "Installation" menu. And you can also set the password for the lock channels. (How to set the lock channel please refer to LOCK) Here will show you how to setting and how to revising the password.
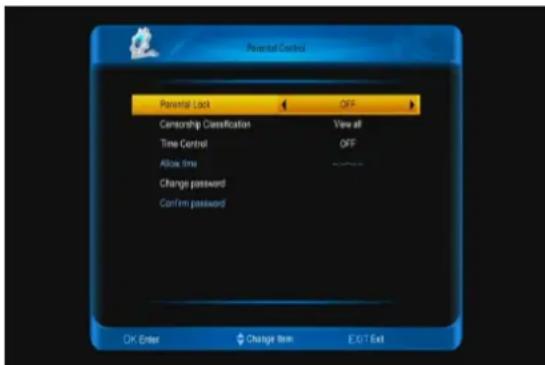
- In "Parental Control" function, if "Parental Lock" is ON, press [ENTER] key, there will pop an dialogue for you to input the password. When you input the correct password, you will see a screen like below:
text_image
Personal Controls Personal Lock OFF Censorship Classification View all Time Control OFF Allow time - Change password Confirm password OK Enter Change Item EXIT Exit- Parental Lock determining that when user wish to enter menu, whether have to input Password or not. If the setting of "Parental Lock" is "Yes" which means user have to key in password, set "No" means unlock.
- Censorship Classification Lock determining that when user wish to lock channels, If the setting is "view all", play channels not need password. If it setting "lock all", play channels with password.Setting 7,12,15,18,these are determining that different stream,whether have to input password.
- Time control is "off", it not need password to play channel. If it setting "on", channels are not need input password in allow time, or all channel are need input password to watch.
- New Password is used for revising password; you can input the new password in this item by using number keys directly. After you filled in 4 digital numbers, the highlight will auto skip to Confirm Password and ask you to input the new password again. If the password is correct, the screen will show up a message of "Change password successfully".
- You can press [EXIT] key to enter full screen playing mode.
11.1.3. Time setting
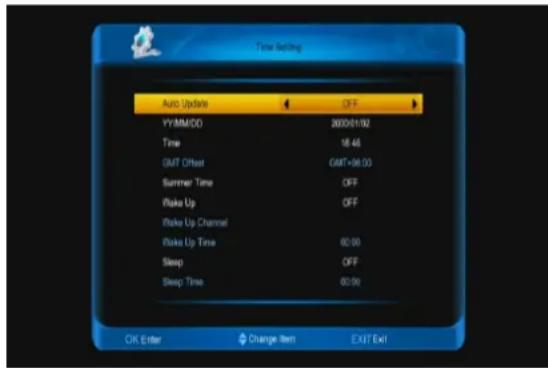
When you enter to "Time Setting" menu, you will see the screen like below:
text_image
Time Setting Auto Update OFF YY/MM/DD 2000/01/02 Time 16:48 GMT Offset GMT+06.00 Summer Time OFF Wake Up OFF Wake Up Channel Wake Up Time 60:00 Sleep OFF Sleep Time 60:00 OK Enter Change Item EXIT Exit- Auto update: this item is use setting date and time of STB. if it setting "on", the time as the same with current channel. or it need manual setting date and time.
- GMT Offset: This item is valid only when the setting of "auto update" is "On". You can press [←/→] keys to switch "GMT Offset" value, and the range is "-12:00 \~ +12:00", increase each half hour progressively.
- Summer: You can press / to control Summer time on or off.
- Date and Time: items are valid only when the "auto update" setting is "off". You can use number keys to input directly.
If the current channel provides the correct time information, you will see the current time while you enter "Time" menu. If the channel doesn't provide time information, you have to input the date and time information manually.
- Wake up/sleep: Config the STB turn on and off. If these are setting on, the stb will turn on/off at the wake up time/sleep time. If set wake up channel, it turn on at the channel, or it at the last channel before stb turn off.
- Press [EXIT] key to draw back from "Time Setting" menu.
11.1.4. A/V Output
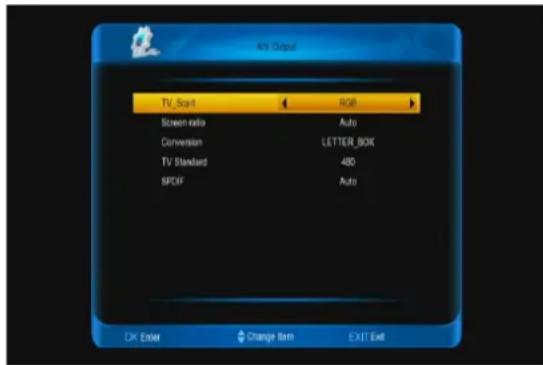
When you enter to "A/V Output" menu, you will see the screen like below:
text_image
MY Output TV_Salt RGB Screen ratio Auto Conversion LETTER_BOK TV Standard 480 SPDF Auto DK Enter Change Bit EXIT Exit- User can switch display resolution in view mode using [V.FORMAT] button. Also Display Mode is for switching the system outputting video resolution. Move highlight on it and press left or right key, it will switch video resolution circularly by the sequence "480<->576<->720<->1080<->Auto N/P". Auto N/P means system will set the video output resolution according to the program it's playing, different resolution programs switching perhaps will makes TV screen flickering.
- Screen ratio is for switching the screen aspect ratio mode. Now we provide below options: 4:3 / 16:9/ Auto. You can press [←/→] key to select each mode circularly. 16:9 will provide user pillar box mode it means user use 16:9 TV to display but need to see a 4:3 full display picture. System will force press wide screen picture to be narrow and there're black band on left and right site. Auto means system won't do any aspect ratio translation, 16:9 picture source will be good display on a 16:9 TV but will be too narrow on a 4:3 TV, and 4:3 picture source will be too wide in a 16:9 TV but will be good display in a 4:3 TV.
-
Video Output: Press [←/→] to select CVBS or RGB.
-
Conversion :Press [←/→] to select LETTER_BOX, PAN_SCAN, COMBINED or IGNORE.
- SPDIF is for setting the both SPDIF and PCM audio output mode, it has options PCM and Auto. You can press [Left/Right] Key to select each mode circularity. PCM Out means system will decode no PCM audio track data to be PCM, digital audio decoder or HDMI TV will get PCM digital audio data. Auto means system will detect which the connected HDMI TV can decode and then output that data. If HDMI TV can decode AC3, system just output RAW data, if HDMI TV can decode PCM only, system will just decode AC3 or PCM to be PCM and then output.
- Press [EXIT] key to draw back from "A/V Control" Menu.
11.1.5. factory default
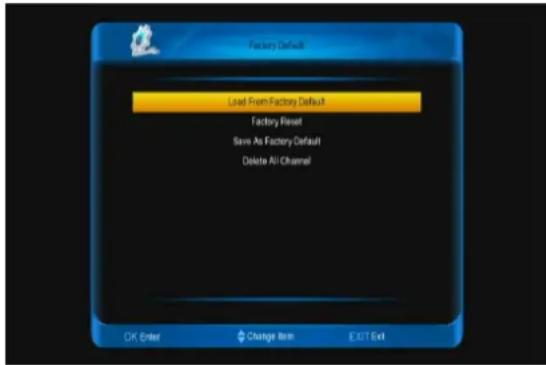
When you input to "factory default" menu, you will see a screen like below:
text_image
Factory Default Load From Factory Default Factory Reset Save As Factory Default Delete All Channel OK Enter Change Item EXIT Exit- Load from factory default: When you press [ENTER] key, it displays a warning information, select "yes" to come back factory default.
- Factory reset: When you want to come back the factory default, press [ENTER] key on this item.
English
- Save As Factory default: when you want save current database as default database, press [ENTER] key on this item.
- Delete All Channel: This item to use delete all channels.
- Press [EXIT] key to draw back main menu.
? Frequently Asked Question
Q: IF I incautiously delete all channels, what should I do?
A: There are two ways to restore:
To re-search all channels in "Installation" function.
Use "Default Value" function to restore all channels in "Tools" function
11.1.6. Miscellaneous setting
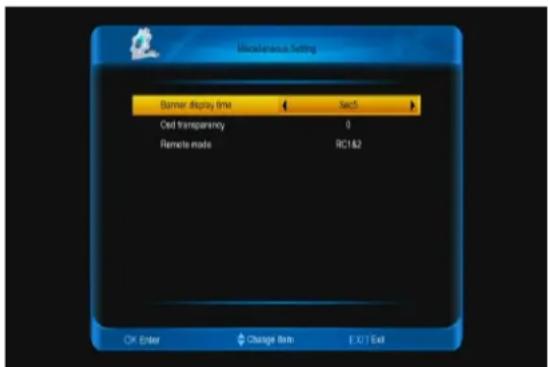
When you input to "Miscellaneous Setting" menu, you will see a screen like below:
text_image
Macromedia Setting Banner display time Sec5 Ced transparency 0 Remote mode RC1&2 OK Enter Change Back EXIT Exit- Banner display Time: When you switch channels in full screen, there will show up some information about current channel on the lower of the screen. And regarding to the duration of these information show up on the screen, you can press [/] key to set the time. The range of the duration is 1 – 20 seconds.
- OSD Transparency: You can set the transparency of OSD. You can press [/] key to select the values. There are 4 levels of
transparency, 25%, 75%, and 100% and "0" (means no transparency function).
- Remote mode: Enables to set remote mode is RC1, RC2 or RC1\$2.
- Press [EXIT] key to draw back from the "Miscellaneous Setting" menu.
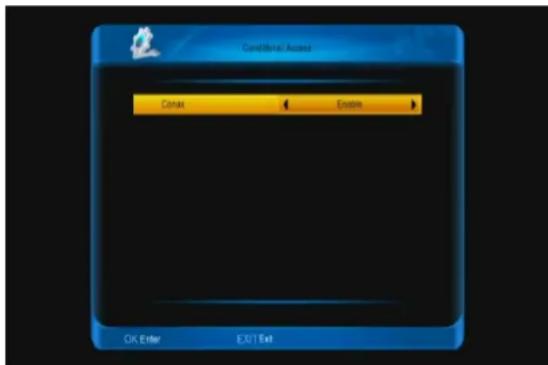
11.1.7. Conditional Access
When you enter to "Conditional Access"
Menu, you will see a screen like below:
text_image
Conditional Access Comax Ensign OK Enter EXIT Exit- Conax: Control conax block whether or not useableness.
- Press [EXIT] key to draw back from the "conditional access" menu.
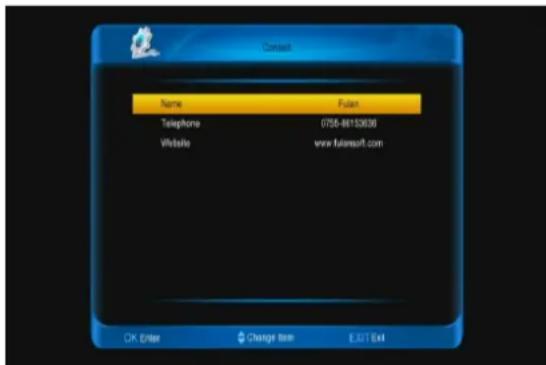
11.1.8. contact
When you enter to "contact" menu, you will see a screen like below:
text_image
Consult Name Fuliant Telephone 0758-86153630 Website www.fuliresoft.com OK Enter Change Item EXIT Exit- Name: This item to use note provider's name. Press [ENTER] key to enter to the selected item. Press [ENTER] key to enter to the selected item. press [red] button to confirm.
- Telephone: This item to use note provider's telephone. Press [ENTER] key to
English
enter to the "contact rename" menu, press numeric keys input number, then press [red] button to confirm.
-
Website: This item to use note provider's website. Press [ENTER] key to enter to the "contact rename" menu, press [up/down] [left/right] key to move highlight and press [ENTER] key to input characters, then press [red] button to confirm.
-
Press [EXIT] key to come back contact.
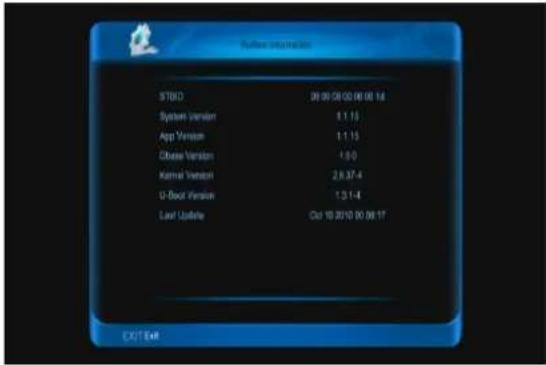
11.1.9. System information
When you enter to "system information" menu, you will see a screen lick below:
text_image
Faster information STBD 08:00:08 00:00:00 14 System Version 8.1.13 App Version 1.1.13 Obese Version 4.9.0 Kernel Version 2.8.37.4 U-Boot Version 1.3.1-4 Lead Userfile Cst 10 2010 00 08:17 OUT Exit-
This menu to show prarameters about the STB.
-
Press [ENTER] key to draw back to "system information"
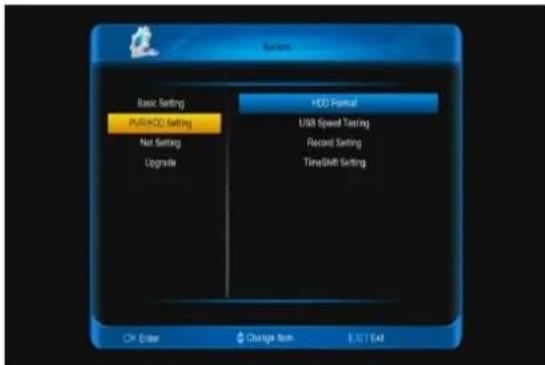
11.2 PVR/HDD Setting
When you enter to "PVR/HDD Setting" menu, you will see a screen like below:
Note:
If no USB Hard Disk insert to the receiver this menu is not available.
text_image
Basic Setting PUSHOD Setting Net Setting Upgrade HDD Festival USB Speed Testing Record Setting TimeShift Setting OK Enter Change Event EUT Exit-
Press [↑/↓] key to select menu items among HDD Format, USB Speed Testing, Record Setting, Timeshift Setting.
-
Press [ENTER] key to enter the selected item.
11.2.1. HDD Format
In HDD Format menu, you will see a screen like below:

text_image
H2O System Mevada! Atragesis File System Ext Available 263,438 GB Used 3,743 GB Used% 2% RAM disk does not support formatting or partition manage! Format Disk Partition Manage OK Enter Change Item EXIT Exit-
Press [red] button and select the file system between win 95 FAT 32 and ext3 ,then press [ENTER] to straight format disk.
-
Press [green] button to partition for the disk then format disk. In this submenu. Press [green] key to add a new subarea. Press [yellow] key to delete a subarea. Press [red] key to save and partition the disk. The end, press [blue] key to format disk.
Note: If you format the HDD, all the files include JPEG and the record files will be deleted from the HDD.
11.2.2. Usb speed testing
When you enter to "Usb speed testing" menu. You will see the write speed and read speed of you disk, according this information you can know what operation your disk can support. like below:
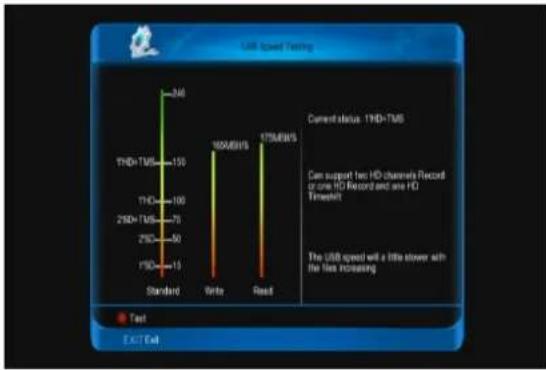
bar
USB Speed Testing | Status | Current status: 1THD-TMS | |---|---| | Standard | 246 | | Write | 100/80% | | Read | 175/80% | The USB speed will a little stower with the lines increasing. Can support two HD channels Record or one HD Record and are FD Timestamp. Exit Exit11.2.3. Record Setting
When you enter to "Record Setting" menu, you will see a screen like below:
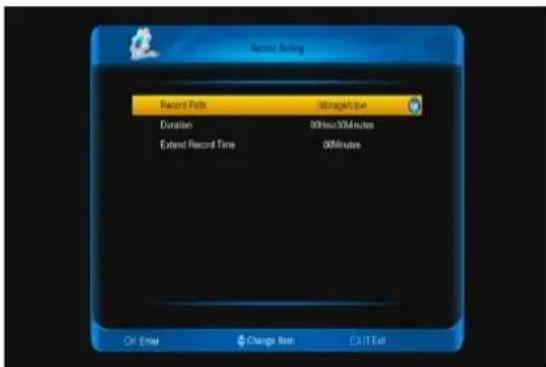
text_image
Record Setting Record Path IntragsPer Duration 00/arc/30Minutes Extend Record Time 00Minutes OK Edit Change Bit EXIT Exit- Record Path: Using change path of record file save.
- Duration: Press [left/right] key to switch the time of the record.
- Extend record time: Using add time for the record at the fist and end. Press [left/right] key to switch the time.
- Press [EXIT] key to come back.
11.2.4. TimeShift Setting
When you enter to "TimeShift Setting" menu, you will see a screen like below:
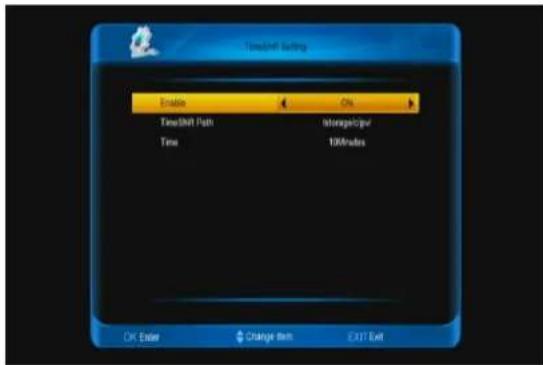
text_image
TimeShift Setting Enable On TimeShift Path Time StorageCover 100Mbps OK Enter Change Item EXIT Exit- Enable: Press [left/right] key to switch on or off. If it on, this function automatism run when in full screen or change channel. Or this function is of bid.
- TimeShift Path: Using change the path of timeshift file save.
- Time: Press [left/right] key to set timeshift time.
- Press [EXIT] key to come back the "pvr/hdd setting" menu.
11.3 Net setting
When you enter to "Net setting" menu, you will see a screen like below:
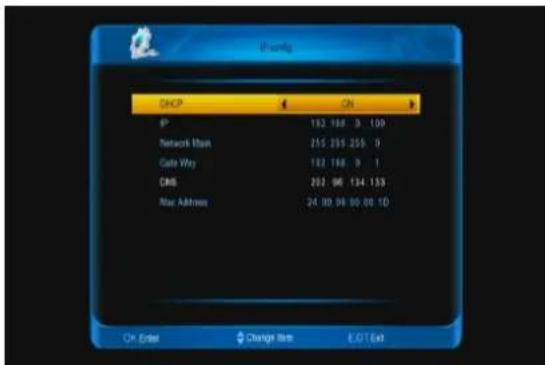
text_image
Windows DHCP IP 192.168 9 109 Network Mask 255.259.259.9 Gate Way 192.168 9 1 DNS 202.96.134.133 Mac Address 24.00.00.00.00.10 OK Enter Change Item EORT Exit- DHCP: Press [left/right] button to set it on or off. If it on, stb will auto get the IP, network mask, gate way and DNS in has DHCP function net. Or it need manual config with number keys.
- Press [EXIT] key to come back.
11.4 Upgrade
When you enter to "Upgrade" Menu.
- Press [/] key to select menu items between backup system to hdd and upgrade from USB.
- Press [ENTER] key to enter the selected item.
11.4.1. Backup system to HDD
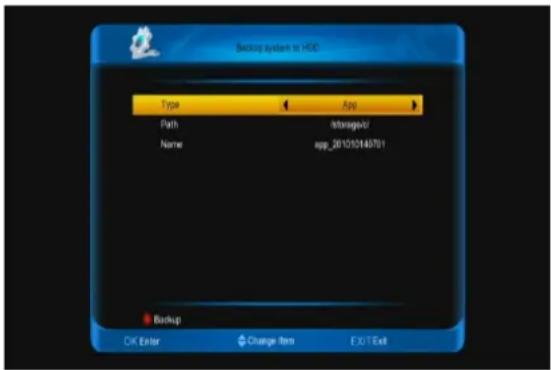
When you enter to "Backup system to HDD" menu, you will see a screen like below:
text_image
Backup System to HDD Type App Path s/msga/v Name spp_201010140701 Backup OK Enter Change Item F\G\T Exit- type: It the type of the backup file.
Press [left/right] key to change among App, Database and App+Database. - Path: It the place of the file save. Press [ENTER] key to switch it.
- Name: Press [ENTER] key to rename for the file.
11.4.2. Upgrade from USB
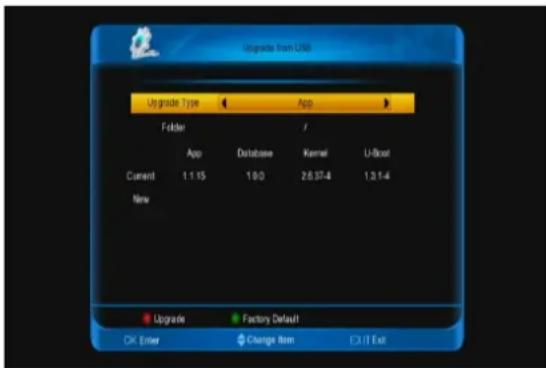
When you enter to "Upgrade from USB" menu, you will see a screen like below:
text_image
Upgrade from USB Upgrade Type App Folder / Apo Database Kernel U-Boot Current 1.1.15 190 2.6.37-4 1.3.1-4 New Upgrade Factory Default OK Enter Change Item EXIT ExitIn this menu you can select the Upgrade type among app (no channel list), database, app + database. You can select the appropriate upgrade file on "Upgrade type" item. After you select the "Upgrade type" and "folder", press [red] button, the receiver can upgrade automatically.
If you want come back to factory default, press [green] key.
12 Menu "Conditional Access"
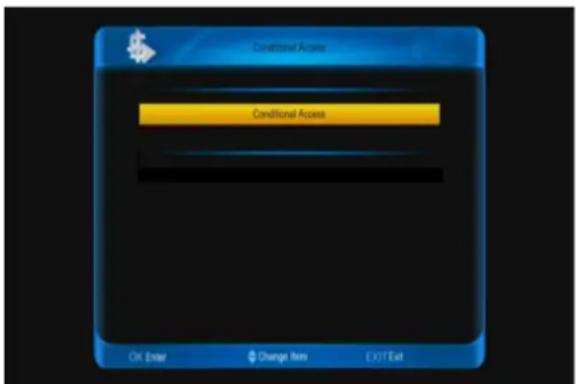
- When you enter to "Conditional Access" menu, you will see a screen like below:
text_image
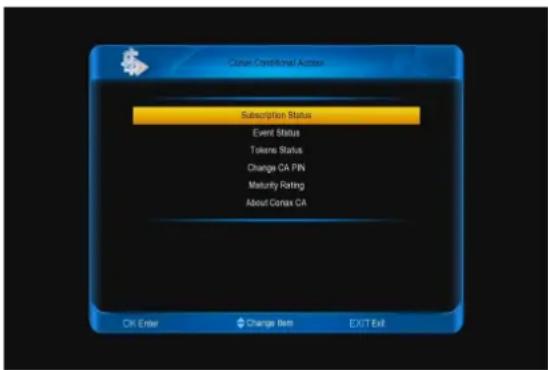
Conditional Access Conditional Access OK Enter Change Item EXIT ExitReceiver provide one CA slot for user to use. Receiver has build in smart card module with CONAX system. By using cards in this system provided by operators, it is possible to watch many scrambled channels coded in this system. This menu shows detailed information about card inserted into card reader module. It allows inserted according to help messages visible on the bottom of the screen.
text_image
Custom Conditional Access Subscription Status Event Status Tokens Status Change CA PIN Maturity Rating About Conex CA OK Enter Change Item EXIT ExitNote: All information showed in this menu and submenu are coming from inserted card. In case if anything is wrong, it could be card problem. After inserting the card correctly at any time, a message-box will show on the screen with message about detecting the
card, in "card info" menu all available information will be displayed.
13 spark
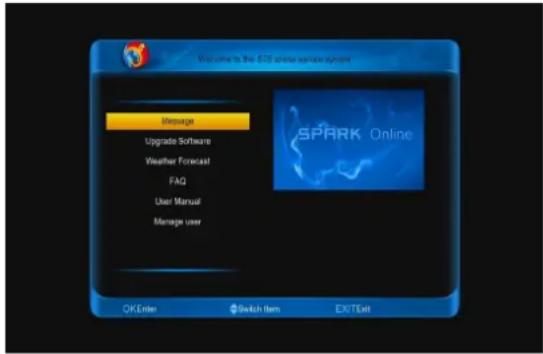
In main menu, choose spark icon and press [ENTER] button to enter to online menu. Press [ENTER] button to enter child menu. Press [up/down] button to switch item.
text_image
Welcome to the SPARK online service system Message Upgrade Software Weather Forecast FAQ User Manual Manage user OK Enter Switch Item EXITExit13.1 message
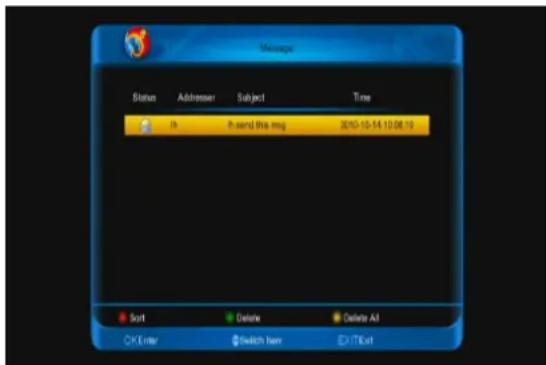
When you enter to "message" menu, you will see a screen like below:
text_image
Message Status Addresser Subject Time Irk"Ik send this msg 2010-10-14 10:08:10 Sort Delete Delete All OK Enter Switch Item EXIT/ExtYou can see the message list. Ppress [ENTER] button to see the infomation of the message that the highlight message. Press [red] button to sort messages. Press [green] button to delete message. Press [yellow] button to delete all messages in list.
13.2 Upgrade software
When you enter to "Upgrade software" menu,
English
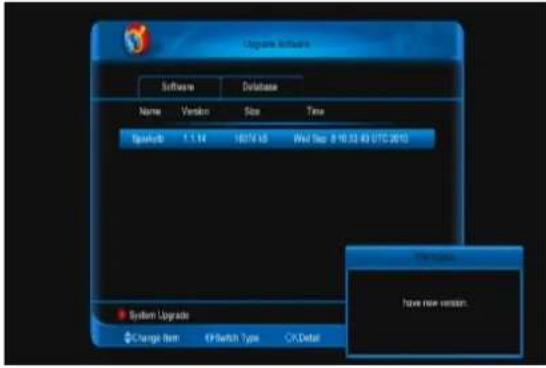
you will see a screen like below:
text_image
Upgrade Software Software Database Name Version Size Time Spark3b 1.14 1674 KB Wall Sup: 8 10 32 83 UTC 2015 System Upgrade Change Item IP Switch Type CP Detail Have new version.Press [left/right] button to switch the type in software list and database list.
Press [up/down] button to choose item.
Press [red] button to upgrade with choose item.
Press [ENTER] button to display information of highlight item.
13.3 Weather forecast
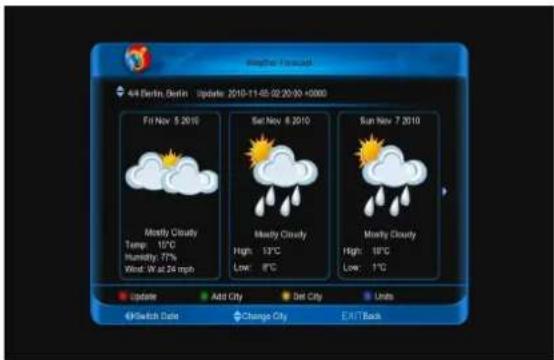
When you enter to "Weather forecast" menu, you will see a screen like below:
text_image
Weather Forecast 4/4 Berlin, Berlin Update: 2010-11-05 02:30:00 +0000 Fri Nov 5 2010 Mostly Cloudy Temp: 10°C Humidity: 77% Wind: W at 24 mph Sat Nov 8 2010 Mostly Cloudy High: 13°C Low: 8°C Sun Nov 7 2010 Mostly Cloudy High: 16°C Low: 1°C Update Add City Det City Units @Switch Date Change City EATTBackPress [left/right] button to switch date.
Press [up/down] button to change city.
Press [red] button to update the data
Press [green] button to add city.
Press [yellow] button to delete the current city.
Press [blue] button to change units.
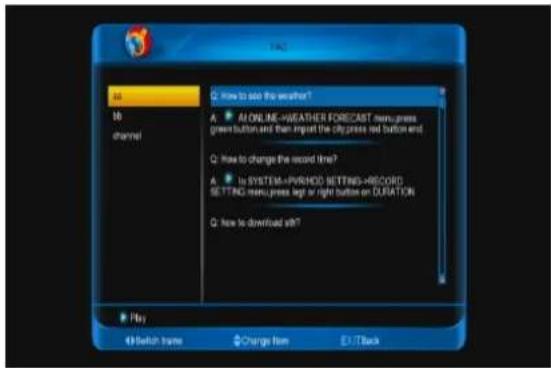
13.4 Faq
When you enter to "Faq" menu, you will see a screen like below:
text_image
142 36 10 channel Q: How to ask the weather? A: ALONLINE=WEATHER FORECAST menu press green button and then import the city press net button and Q: How to change the record time? A: Is SYSTEM=PRHOOD SETTING=RECORD SETTING menu press left or right button on DURATION Q: How to download off? Play 49 switch home Charge item EXITBlackPress [left/right] button to switch frame.
Press [up/down] button to change item.
Press [ENTER] or [play] button to download and play video at has video item.
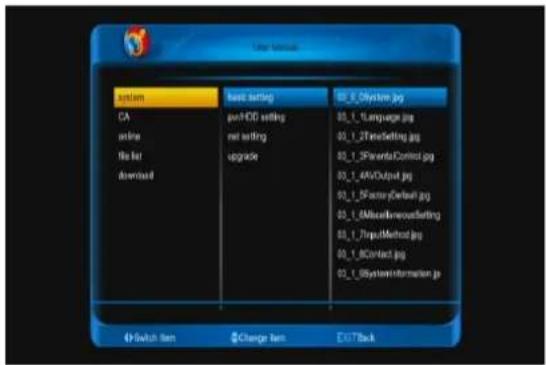
13.5 User manual
When you enter to "User manual" menu, you will see a screen like below:
text_image
system CA online Label Download best setting pvHDD setting net setting upgrade 02_0_Dystem.jpg 02_1_Tanguage.jpg 02_1_2TimeSetting.jpg 02_1_SformationControl.jpg 02_1_AVOOutput.jpg 02_1_SFactorDefault.jpg 02_1_MiscellaneousSetting 02_1_TripMethod.jpg 02_1_BContact.jpg 02_1_USystemInformation.jpg 4 Switch item $Change item EXITBackPress [left/right] button to switch item.
Press [up/down] button to change item.
Press [ENTER] button to play picture at right column.
13.6. E-book
In E-book menu:
Press [left/right] button to switch frame.
Press [up/down] button to change item.
Press [ENTER] button to play E-book like USER MANUAL.
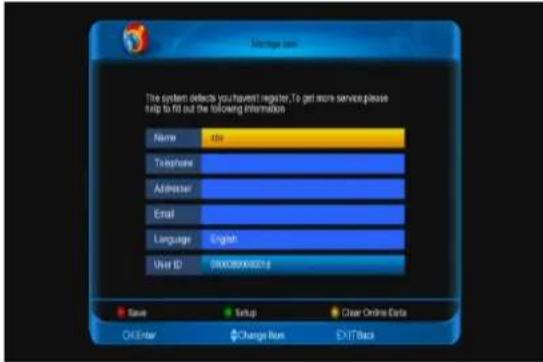
13.7 config
When you enter to "Manage user" menu, you will see a screen like below:
English
text_image
Mortgage card The system defects you haven't register. To get more service please help to fill out the following information Name size Telephone Addresser Email Language English User ID: 800280083214 Save Setup Clear Online Data OKEnter Change Run EXIT/BackPress [ENTER] button to enter edit name, telephone, addresser, email, language.
Press [red] button to login and save.
Press [green] button to setup sth.
Press [yellow] button to clear online data and reboot.
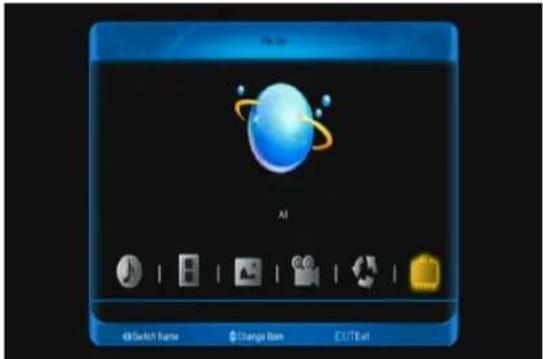
14 Menu "file list"
If you enter to the "file list" Menu, you will see the picture like the below:
text_image
File Up AI @Switch home Change Item EXIT ExitNote:
If no USB Hard Disk insert to the receiver this menu is not available.
14.1 File List
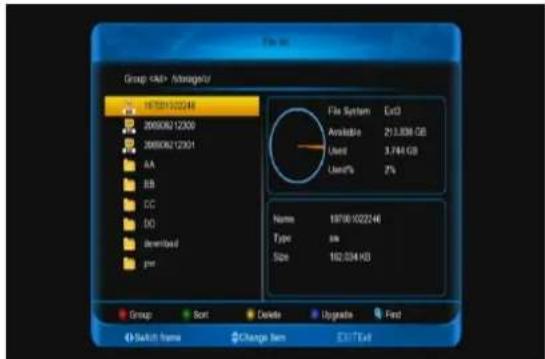
In this menu you can check the files and folders of the USB storage, and you can view files from 6 categories: Music, Record, picture, movie, Software, All.
14.2 Storage Information
Press [ENTER] button to enter the HDD Information menu like the below picture, in
this menu you can see the details information about the HDD.
text_image
GroupIf you want to change the type of the file list display. press [red] button.
Press [green] key to sort for the file list.
Press [yellow] key to delete the files that you want.
In software file, press [blue] key to upgrade.
Press [find] key to find the file.
15 Menu "download"
In main menu, choose download icon and press [ENTER] to enter to download menu.
15.1 Browse server
Press [red] button to switch among browse server, downloading list and downloaded list. Press [green] button to select the server or file.
Press [yellow] button to config the max number of allow download.
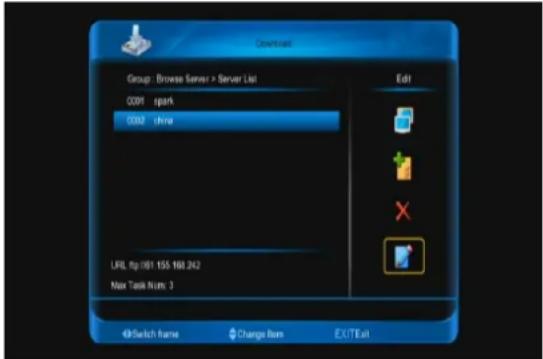
When you enter to "browse server /server list" menu, you will see a screen like below:
text_image
Download Group : Browse Server > Server List 0091 spark 0002 thrw Edit URL http://81-155-160.242 New Task Num: 3 @Switch Name Change Item EXITExitPress [right] button to select connect icon, and press [ENTER] button to connect the server that you select.
Press [right] button to select add icon, and press [ENTER] button to enter to add server menu. and do next
Press [right] button to select delete icon, and press [ENTER] button to delete the server that you select
Press [right] button to select edit icon, and press [ENTER] button to edit the server that you select, then do next.
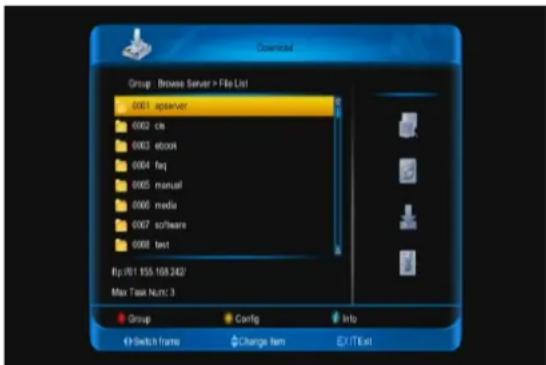
When you enter to "In browse server /file list menu" menu, you will see a screen like below:
text_image
Download Group: Browse Server > File List 0001 apserver 0002 cla 0003 ebook 0004 feq 0005 manual 0006 media 0007 software 0008 text flp://f1.155.168.242/ Max Task Num: 3 Group Config Info Switch frame Change item EXITExtPress [right] button to select disconnect icon, and press [ENTER] button to disconnect the server.
Press [right] button to select refresh icon, and press [ENTER] button to refresh the file list.
Press [right] button to select connect icon, and press [ENTER] button to connect the server that highlight.
Press [right] button to select download icon, and press [ENTER] button enter to "information" menu, then do next and press [red] button to confirm.
Press [info] button or press [right] button to select info icon, and press [ENTER] button to display the information of the file that you highlight
15.2 Downloading list
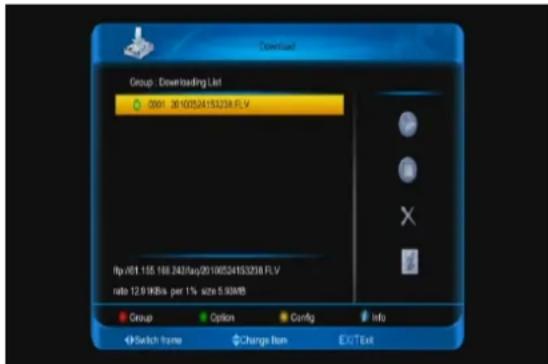
When you enter to "Downloading list" menu, you will see a screen like below:
text_image
Download Group: Downloading List 0001 20100524153238.FLV ftp://01.155.168.242/faq/20100524153238.FLV rate 12.9 KBps per 1% size 5.93KB/ Group Option Config Info Switch frame Change Item EXIT ExitPress [right] button to select start icon, and press [ENTER] button to start download the role that you select
Press [right] button to select stop icon, and press [ENTER] button to stop download the role that you select
Press [right] button to select delete icon, and press [ENTER] button to delete download the role that you select
Press [info] button or press [right] button to select info icon, and press [ENTER] button to display the file that highlight.
15.3 Downloaded list
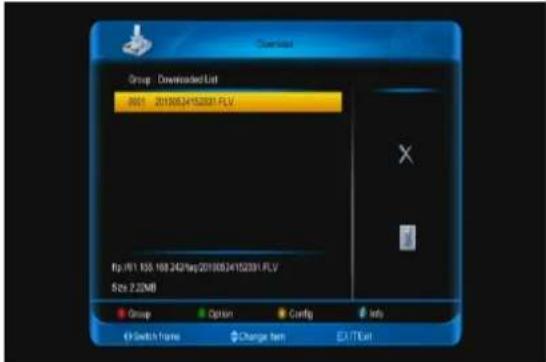
When you enter to "Downloaded list" menu, you will see a screen like below:
English
text_image
Download Group: Downloaded List 201 2010034152001 FLV File: J61.150.168.242/Reg2010034152001 FLV Size: 2.22MB Group Option Config Info €Switch Frame Change Item Exit/ExitPress [right] button to select delete icon, and press [ENTER] button to delete the role that you select
Press [info] button or press [right] button to select info icon, and press [ENTER] button to display the file that highlight.
16 Menu "Pulg in"
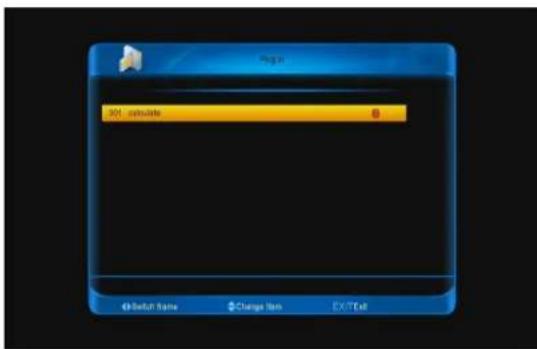
This menu is allow user install software by self. It support the number of software by the hardware. It only has a calculate at first. When you enter to "pulg in" Menu, you will see a screen like below:
text_image
Regin 301 calculate 8 Delete Name $Change Item EX'Tell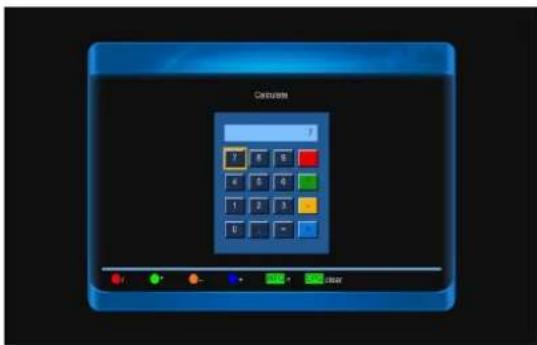
text_image
C#VALUE! 7 8 9 10 11 12 13 14 15 16 17 18 19 20 21 22 23 24 25 26 27 28 29 30 31 32 33 34 35 36 37 38 39 40 41 42 43 44 45 46 47 48 49 50 51 52 53 54 55 56 57 58 59 60 61 62 63 64 65 66 67 68 69 70 71 72 73 74 75 76 77 78 79 80 81 82 83 84 85 86 87 88 89 90 91 92 93 94 95 96 97 98 99 100- Press [up/down] and [left/right] keys then press number and color keys to input Pree [ENTER] key to enter calculate interface at
"calculate" Item.
- press [ENTER] key to input you need, or immediacy.
- If you need clear input, press [EPG] key.
- Press [EXIT] key to come back.
17 Menu "Net working"
17.1. youtube
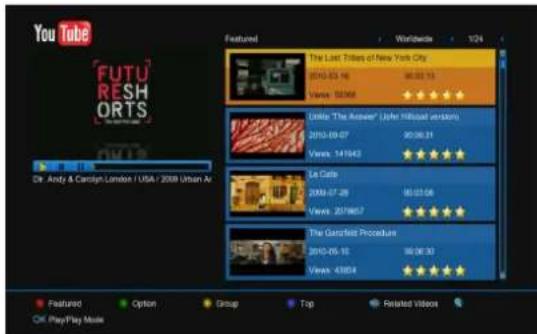
This menu is some internet applications. "youtube" can play stream media in "www.youtube.com". When you enter to this menu, you will see a screen like below:
text_image
YouTube FUTU RESH ORTS Dr. Andy & Carolyn London / USA / 2008 Urban Av Featured Worldwide 1/24 The Last Titles of New York City 2010-03-16 96:03:15 Views: 55368 Only "The Answer" (John Ireland) version 2010-09-07 96:06:21 Views: 141942 La Cate 2009-07-28 96:03:06 Views: 2019657 The Garfield Procedure 2010-05-12 96:06:30 Views: 43854 Featured Option Group Top Related Videos OK PlayPlay Music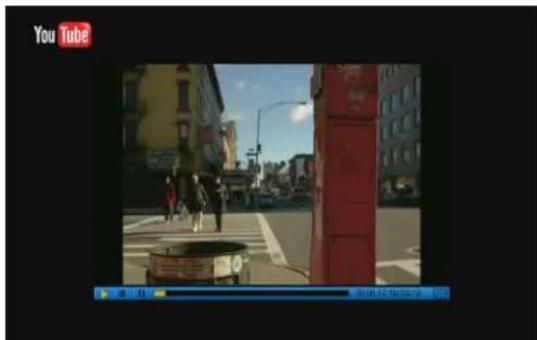
- Press [up/down] key to move highlight.
- Press [ENTER] key on one item, it will be play pertinent video. The video will show on top left corner. Press [ENTER] again, it only has video in mid of screen. Now press [zoom] key, the video will play in full screen.
- Press [vol+/vol-] to control volume.
- Press [pause] key to pause video, or press [stop] key to stop play.
- Press [red] key to display the featured video.
- Press [green] key to sort of site and
English
duration. The site has Germany, worldwide, Poland and so on. Duration has all time, this week, this month and so on.
- Press [yellow] key to switch group. These are game, news, tech, move and so on.
-
Press [blue] key to display the top video. These are top favourites, top rated, most views, most recent and so on.
-
Press [REC] key to display relate videos about the highlight video.
-
Press[QFIND)] key in full screen can open the "Find" window. You can presrd then press number keys to input the seles [←,→,↑,↓]keys to move highlight and press[ENTER]key or press [F1] key to switch keyboacted symbol or letter into the dialogue.Then press [red] key to find.
17.2. Shoutcast
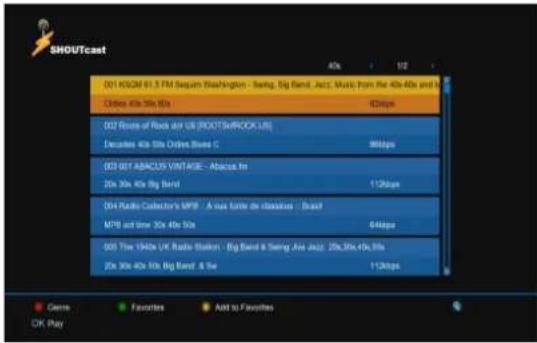
This menu is radio in "www.shoutcast.com", when you enter to this menu, you will see a screen like below:
text_image
SHOUTcast 021 HOGM 61.5 FM Sequim Washington - Swing, Big Band, Jazz, Music, From the 40x-40x and 30x Cibbs 40x 50x 60x 420bps 022 Rooms of Rocks and UK (ROOTSeWROCK US) Decades 40x 50x Cibbs Blues C 980bps 023 027 ABACIO VINTAGE - Abacus In 20x 30x 40x Big Band 1120bps 034 Radio Collector's MPB - A max torke de classuses - Brand MPB and time 30x 40x 50x 640bps 025 Time 1940s UK Radio Station - Big Band & Swing Area Jazz 20x30x40x50x 20x 30x 40x 50x Big Band & The 1120bps ● Genre ● Favorites ● Add to Favorites OK Play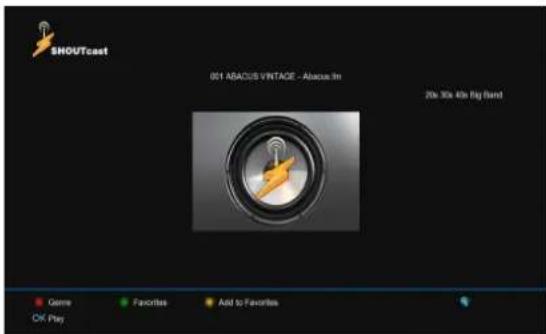
text_image
SNOUTcast 001 ABACUS VINTAGE - Abacus 3m 20x 30x 40x Big Band Game Favorites Add to Favorites OK Play- Press [up/down] key to move highlight.
- Press [ENTER] key to play the audio.
-
Press [vol+/vol-] to control volume.
-
Press [stop] or [EXIT] key to stop radio.
- Press [red] key to switch class.
- Press [yellow] key to add highlight item to favourite.
- Press [green] key to show favourite radio.
- Press [yellow] key in favorites menu to delete the highlight favourit radio.
- Press [find] key to find radio.
17.3. Picasa
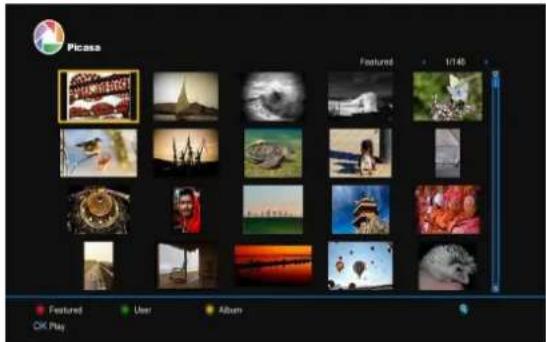
This menu is picture in "www.picasa.com", when you enter to this menu, you will see a screen like below:
text_image
Picass Featured 1/140 OK Play Featured User Album
natural_image
Rows of hanging orange fruits under a clear sky, no text or symbols visible- Press [up/down] key to move highlight.
- Press [ENTER] key to show the picture in full screen.
- Press [left/rifght] key to switch picture.
- Press [EXIT] key to come back.
- Press [red] key to show the featured pictures.
- Press [green] key to show the user's album of the highlight picture.
- Press [yellow] key to display the album of the highlight picture.
- Press [find] key to find picture.
17.4. Rss
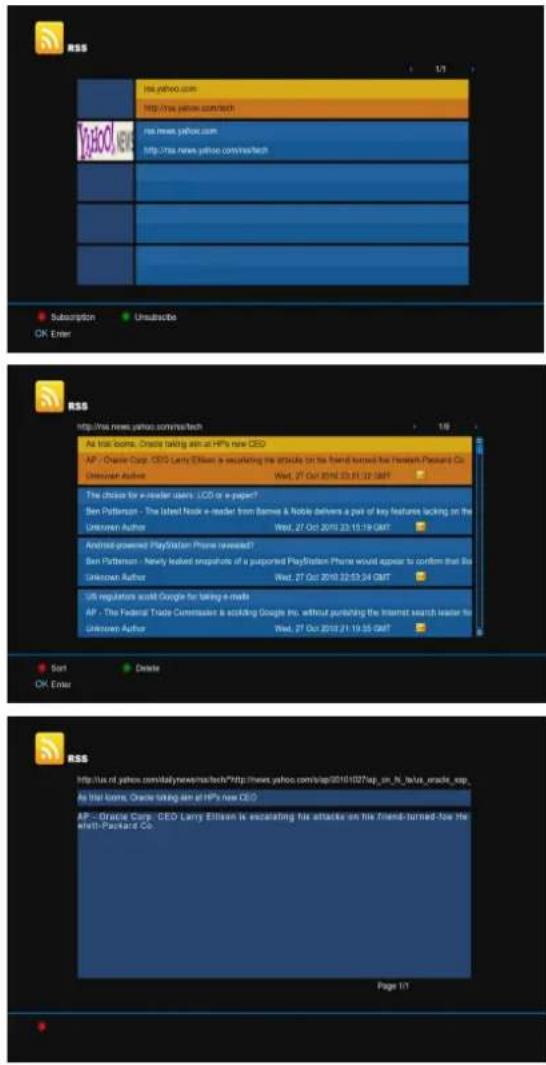
This menu is display rss web. When you enter to this menu, you will sea a screen like below:
text_image
网易客 1/1 http://rss.yahoo.com/cheng YuOLO NEWS http://rss.yahoo.com/news/cheng Subscription Unsubscribe OK Enter 网易客 http://rss.news.yahoo.com/news/cheng As trial books, Oracle taking aim at HP's new CEO AP: Oracle Corp. CEO Larry Eilison is escalating the articles for his friend turned for Newark Packard Co. Unknown Author Wed, 27 Oct 2010 23:15:19 GMT The choice for e-reader users: LCD or e-paper? Ben Patterson - The label Note e-reader from Barnes & Noble delivers a pair of key features lacking on the Unknown Author Wed, 27 Oct 2010 23:15:19 GMT Android-powered PlayStation Phone revealed? Ben Patterson - Newly leaked snapshot of a supported PlayStation Phone would appear to confirm that Be Unknown Author Wed, 27 Oct 2010 23:15:19 GMT US regulators could Google for taking e-mails AP - The Federal Trade Commission is scrolling Google Inc. without punishing the internet search leader for Unknown Author Wed, 27 Oct 2010 21:19:55 GMT Sort Delete OK Enter 网易客 http://rss.news.yahoo.com/news/cheng/ http://news.yahoo.com/sip/2010/1027/ep_un_h_fetus_orade_exp_ As trial books, Oracle taking aim at HP's new CEO AP: Oracle Corp. CEO Larry Eilison is escalating his attacks on his friend-turned-for He with-Packetd Co. Page 1/1- Press [red] key to add rss web.
- Press [green] key to delete the rss web of highlight.
- Press [up/down] key to move the highlight.
- Press [ENTER] key to display the summary of the new that highlight.
- Press [EXIT] key to come back.
18 Trouble Shooting
If you suspect there is a fault with your receiver, please check the following trouble shooting guide before calling authorized service agent.
Warning! Under no circumstances attempt to repair the receiver yourself. Tampering with the receiver may result in fatal electric shock and will invalidate your warranty.
| Symptom | Possible cause |
| Settings you made in the menu have not change | The receiver lost power before being able to enter into standby modeSome of the Settings saved by user can be deleted partly or fully |
| No signal The level of signal is | weakLNB is out of orderThe cable from the LNB or Terrestrial is incorrectly Connected (short circuit or open circuit)The position of dish is aligned incorrectly |
| Receiver is on but no picture or sound except the following messages (NO TV program) | Channel is not availableChannel is scramble |
| Receiver not responding to remote control unit | RCU batteries are dead or inserted incorrectlyThe RCU is pointing toward wrong direction |
| Poor picture Quality The level of Signal strength is low | |
| No sound The cable is connected | incorrectlyThe Volume level is lowMuting function is active |
| No display on the LED Display | The power cord is not plugged in correctly. |
| No picture on the screen Receiver is in Standby modeRCA Jack or cable is not connected firmly to the video output port of televisionIncorrect channel or video output is selected on televisionBrightness level of your TV set is incorrectly defined | |
19 Specifications
| SYSTEM RESOURCES | |
| Main Processor | 450M Hz based CPU |
| Flash Memory | Nor flash:8MB X 1 ; Nand flash:512MB X 1 |
| DDR SDRAM | DDR2 128MB x 2 |
| Tuner/Front-end(Optional) | |
| Tuner Type | DVB-S / DVB-S2 |
| Input Connector F-type, Connector, Female | |
| Loop Through F-type, Connector, Female | |
| Signal Level -65 to -25 dBm | |
| LNB Power & Polarization | Vertical: +13V/+14V |
| Horizontal: +18V/+19V | |
| Current: Max. 500mA | |
| Overload Protection | |
| 22KHz Tone Frequency: 22±1KHz | |
| Amplitude: 0.6±0.2V DiSEqC Control | |
| Version 1.0, 1.1 1.2, USALS Available | |
| Demodulation QPSK, 8PSK | |
| Input Symbol Rate 2-45 Mbps, Convolution Code Rate | |
| 1/2, 2/3, 3/4, 5/6,7/8,1/4,1/3,2/5,3/5,4/5,8/9,9/10 and Auto | |
| POWER SUPPLY | |
| Input Voltage | Free Voltage (100~240V AC, 50/60Hz) |
| Power Consumption | 20W MAX |
| MPEG TS A/V Decoding | |
| Transport Stream | MPEG-2, H.264 |
| Input Rate | Max.120Mbit/s |
| Aspect Radio | 4:3, 16:9, Letter Box |
| Video Decoding | MPEG-2, MP@ML, MPEG-4 part 10/H264 |
| Video Resolution | 720*480P/I, 720*576P/I, 1280*720p,1920*1080i, 1920*1080p |
| Audio Decoding | MEPG-1 layer I/II, Mpeg2 layerII, Dolby digital |
| Audio Mode | Left / Right / Stereo/ Mono |
| Sampling Rate | 32, 44.1 and 48KHz |
| A/V & DATA INPUT/OUTPUT | |
| TV-SCART | Video CVBS/RGB output |
| Audio L/R output | |
| RCA A/V | Video CVBS output |
| Audio L/R output | |
| S/PDIF | Coaxial, Digital Audio or Dolby Digital Bit Stream Output |
| RS-232C | Transfer rate 115.2Kbps |
| 9 pin D-sub Type | |
| RJ-45 | 10M/100M |
| USB | One USB 2.0 slot Compatible for Host |
| HDMI | VER1.2 |
| Type A | |
| PHYSICAL SPECIFICATION | |
| Size[W*H*D] | 220mm*46mm*169mm |
| Net Weight | 1.0KG |
| Operation Temperature | 0°C~+45°C |
| Storage Temperature | -10°C~+70°C |
| Storage Humidity | 5%~95% RH (Non-Condensing) |