HTC 2442 HD - Television XORO - Free user manual and instructions
Find the device manual for free HTC 2442 HD XORO in PDF.


| Product Type | LED TV with integrated DVD player |
| Brand | Xoro |
| Model | HTC 2442 HD |
| Screen Size | 24 inches (61 cm diagonal) |
| Screen Resolution | 1920 x 1080 pixels (Full HD) |
| Backlight Type | LED (Edge) |
| Dimensions with Stand | 605 x 156 x 426 mm (W x D x H) |
| Dimensions without Stand | 605 x 54 x 383 mm (W x D x H) |
| Weight (approx.) | 4.5 kg (estimate) |
| Power Supply | DC 12V via external power adapter |
| Power Consumption (On) | 31 W |
| Power Consumption (Standby) | 0.4 W |
| Energy Efficiency Class | B |
| Tuner Types | DVB-S/S2 (satellite), DVB-T (terrestrial), DVB-C (cable), Analog |
| Inputs | HDMI, VGA, SCART, YPbPr, AV (mini), USB 2.0, CI/CI+ slot |
| Outputs | Coaxial digital audio, headphone jack |
| Built-in DVD Player | Slot-in drive (12 cm discs) |
| Recording Function | PVR recording to USB (FAT32), Time Shift |
| Media Playback | JPEG, BMP, PNG (photos); MP3, WMA, WAV, AAC (music); AVI, MPG, MP4, VOB, MOV, MKV, TS, M2T, TRP (video) |
| Speaker Output | 2 x 3 W |
| Wall Mount | VESA 100 x 100 mm |
| Operating Temperature | 0°C to 40°C |
| Operating Humidity | 5% to 90% |
Frequently Asked Questions - HTC 2442 HD XORO
User questions about HTC 2442 HD XORO
0 question about this device. Answer the ones you know or ask your own.
Ask a new question about this device
Download the instructions for your Television in PDF format for free! Find your manual HTC 2442 HD - XORO and take your electronic device back in hand. On this page are published all the documents necessary for the use of your device. HTC 2442 HD by XORO.
USER MANUAL HTC 2442 HD XORO
FREE TO CHOOSE INNOVATIONS
XORO®
HTC 2242 HD & HTC 2442 HD
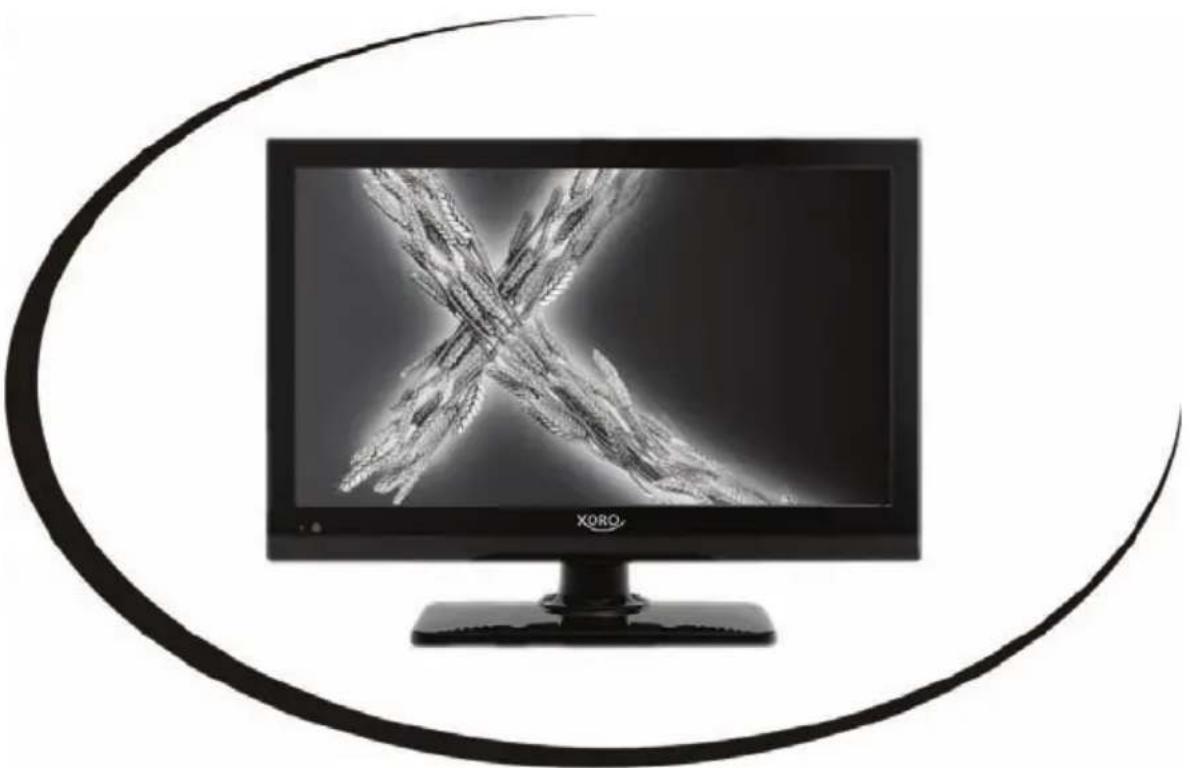
Bedienungsanleitung
User Manual
Sicherheitshinweise
SCART, VGA, S/PDIF 24
AV IN, HDMI, YPbPr 25
CI/Cl+ Modul 26
USB 27
Tägliche Bedienung
Sicherheitshinweise
Recycling & Umwelt
Batterien

Hinweis:
1) LED
Hinweise:
Stromversorgung
Empfehlung:
Kabel: Analog + Digital
Antenne: Digital
| Nr. | Auflösung | Frequenz (V) |
| 1 720 X 400 70 Hz | ||
| 2 640 X480 60 Hz | ||
| 3 | 800X600 | 60 Hz |
| 4 | 1024X768 | 60 Hz |
| 5 | 1280X1024 | 60 Hz |
| 6 | 1440X900 | 60 Hz |
| 7 | 1680X1050 | 60 Hz |
| 8 | 1920X1080 | 60 Hz |
Abspielen
Musik abspielen
Empfang
Analog TV (INPUT Analog TV)
- MPEG-1/2: MP2 / MPA
• Sampling Frequenz: 8 - 48 kHz (MP3)
Technically unlimited
M A S
Elektronik AG
FREE TO CHOOSE INNOVATIONS
XORO®
HTC 2242 HD & HTC 2442 HD
User Manual
Safety information
Safety information's 5
Notes
Recycling 8
In the box 9
Service contacts 9
Mounting the Stand 10
Connectors
Rear Side 11
Front Side....12
The Remote Control
Insert Battery 13
Operation range 13
Buttons 14
Initial Installation....16
Connection
SCART 22
HDMI 22
YPbPr 22
AV IN 22
VGA 22
Coaxial....23
Headphone 23
Cl / Cl + 24
USB....25
Important Buttons....26
EPG....28
RECORDER....28
Preparing the USB storage.... 30
Format....30
Time Shift Size.... 30
Direct Recording 31
Time Shift Function.... 31
Media-Player
Connecting USB 32
Photos 33
Music....34
Movie 35
Text 36
Settings
Main Menu 38
Channel Setting 40
Picture Setting 41
Sound Setting 43
Time Setting 44
Options....45
Lock Setting 45
TV Troubleshooting 46
DVD Player
Getting into DVD mode.... 48
Important buttons and there functions 48
Data memories with Music-, JPEG or Video files 53
DVD Setup....54
Troubleshooting DVD....57
Specification
General Specifications.... 58
Pixel Errors 58
Energy Consumption 59
Limited Warranty....60


The lightning flash with an arrowhead symbol within an equilateral triangle is intended to alert the user of the presence of un-insulated "dangerous voltage" within the product's enclosure that may be of sufficient magnitude to constitute a risk of electric shock to persons.
The exclamation point within an equilateral triangle is intended to alert the user of the presence of important operating and maintenance (servicing) instructions in the literature accompanying the appliance.

THIS DEVICE COMPLIES WITH PART 15 OF THE FCC RULES. OPERATION IS SUBJECT TO THE FOLLOWING TWO CONDITIONS: (1) THIS DEVICE MAY NOT CAUSE HARMFUL INTERFERENCE, AND (2) THIS DEVICE MUST ACCEPT ANY INTERFERENCE RECEIVED. INCLUDING INTERFERENCE THAT MAY CAUSE UNDESIRED OPERATION.
User Manual
- All the safety and operating instructions should be read before the product is operated.
- Retain Instructions - The safety and operating instructions should be retained for future reference.
- All warnings on the product and in the operating instructions should be adhered to.
- All operating and use instructions should be followed.
Laser
This Digital Video Disc Player employs a Laser System of the class 1.
- Make sure the device is shut down prior to opening player lid.
- Do not open the appliance. Do not attempt to dismantle the appliance.
- In order to avoid any danger: Have service work only carried out by the manufacturer or an authorized service workshop.
- Visible laser radiation when open and interlocks defeated.
- Use of controls or adjustments or performance of procedures other than those specified herein may result in hazardous radiation exposure.
Operation
- Receiving analogue or digital TV broadcast.
- Playing of Video DVD, Video CD or Audio-CD. USB and card reader are part of the internal DVD-Player.
- Connecting external devices by HDMI, video components (YUV), SCART, coaxial or VGA.
- Record DVB-T broadcast on USB storage.
- Using Time Shift function with connected USB storage.
- Playback of media contents from USB storage, supports HD resolutions up to 1080p
- No other operation are allowed.
Power Supply
- Never touch the plug with wet hands.
- The device can be operated only with the number of voltage described on the back. If you do not know the current you ask an electrician.
- To prevent overloading, you have many more devices on the same wall.
- If you want to pull the plug out of the plug socket, always pull directly on the plug. Never pull on the cable as it could tear.
- Make sure that the power cable is not bent, caught or run over and that it does not come into contact with heat sources.
- Make sure that the power cable is not wound around the device while in operation.
- Never place the machine on the power cable while it is being operated.
- Only use extension cables that are designed for the power consumption level of the machine.
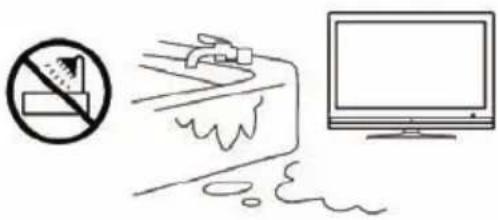
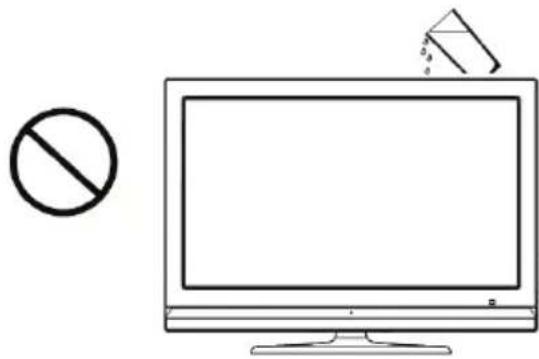
- Keep the appliance away from rain and any moisture.
- Only operate the machine if the electrical voltage stated on the type plate beneath the machine agrees with the voltage on your plug socket. The wrong voltage can destroy the machine.
- Do not stand vases etc. on the appliance.
- Water could seep into the appliance.
- Do not open the appliance.
- Pull out the mains plug if the appliance is not to be used over a longer period of time.
- Take care that nobody can trip over the power supply cable.
Antenna
DVB-S
The TV is designed for the connection to a regular satellite dish.
- Please have the satellite dish installed by a technician to insure a perfect function and avoid damage.
- The Satellite dish will have to be grounded.
- If the dish fails to take the precise position, it will cause signal disturbance or other problems. Please have the antenna measured by a technician.
- Please employ high quality antenna cable.
- If the LNB is too old, it might not be suitable for receiving current satellite program. Please choose a LNB which fits all programs. (These LNBs bear often the label “Digital” or “Universal”).
Please get informed of the correct dish position and program list from the web page of the satellite operators or from specialized stores.
DVB-T
- Unplug the power cord cable from the mains outlet before connecting or disconnecting the DVB-T to/from the antenna, otherwise both might be damaged.
- If an outside antenna or cable system is connected to the product, be sure the antenna or cable system is grounded so as to provide some protection against voltage surges and built-up static charges.
- Pull out the antenna connection if the appliance is not to be used over a longer period of time.
Operation and Position
-
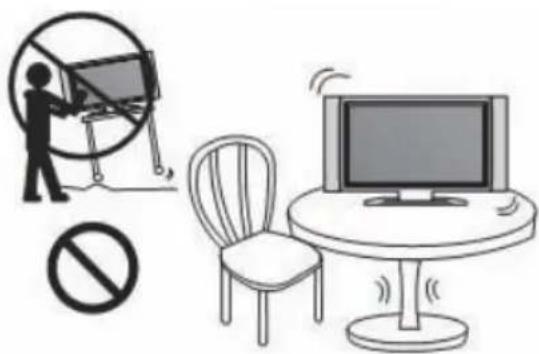
Do not place this product on an unstable cart, stand, tripod, bracket, or table. The product may fall, causing serious injury to a child or adult, and serious damage to the product
-
Protect the device against weather influences, moistures and high temperature.
-
Never spill liquid of any kind on the product.
-
During playback, the disc rotates very fast. Do not open or do not move the player during playback. Otherwise the disc can be damaged.
-
Do not connect accessories on the player which are not defined by the manufacture.
-
Any mounting of the product should follow the manufacturer's instructions, and should use a mounting accessory recommended by the manufacturer.
-
A product and cart combination should be moved with care. Quick stops, excessive force, and uneven surfaces may cause the product and cart combination to overturn.
-
The internal player or a connected DVD-Player is able to show a still image on the TV screen or monitor over an unlimited period of time. This can cause damage to the screen. It is therefore advisable to activate the screen saver. Or switch the player off, if the device is not in use.
-
Do not uses the device permanent in the 4:3 mode. This can cause damage to the screen.
-
Do not increase the volume when the device is just playing very quiet sections. This cold damage the speaker if very loud passages starts all of a sudden after the quiet section.
-
Place only 12 cm CDs or DVDs into the tray.
-
Switch the device off by the Off/On switch if it is not going to used for a longer period of time.
-
Disconnect the main plug during thunderstorms.
-
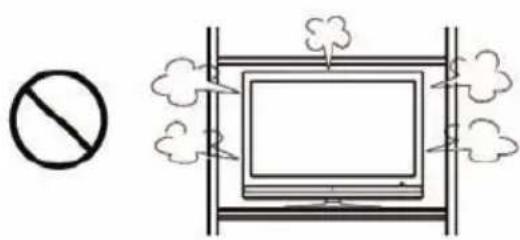
Slots and openings in the cabinet are provided for ventilation and to ensure reliable operation of the product and to protect it from overheating, and these openings must not be blocked or covered.
-
The openings should never be blocked by placing the product on a bed, sofa, rug, or other similar surface.
-
This product should not be placed in a built-in installation such as a bookcase or rack unless proper ventilation is provided or the manufacturer's instructions have been adhered to.
-
Do not expose the device and the remote control to direct sunlight.
-
If an outside antenna or cable system is connected to the product, be sure the antenna or cable system is grounded so as to provide some protection against voltage surges and built-up static charges.
Defect
-
Servicing - Do not attempt to service this product yourself as opening or removing covers may expose you to dangerous voltage or other hazards. Refer all servicing to qualified service personnel.
-
Damage Requiring Service - Unplug this product from the wall outlet and refer servicing to qualified service personnel under the following conditions:
a. When the power-supply cord or plug is damaged.
b. If liquid has been spilled, or objects have fallen into the product.
c. If the product has been exposed to rain or water.
d. If the product does not operate normally by following the operating instructions.
Adjust only those controls that are covered by the operating instructions as an improper adjustment of other controls may result in damage and will often require extensive work by a qualified technician to restore the product to its normal operation.
e. If the product has been dropped or damaged in any way, and
-
When the product exhibits a distinct change in performance this indicates a need for service.
-
When replacement parts are required, be sure the service technician has used replacement parts specified by the manufacturer or have the same characteristics as the original part.
Unauthorized substitutions may result in fire, electric shock, or other hazards.
- Please read in the section Troubleshooting our service address and phone number.
- Nicotine can be destroyed the electronically components and can pollute the LCD TFT panel.
Pixel Errors
The pixel errors (bright, dark pixel, line defects and brightness differences) defined in the specifications describe the maximum allowed defects in type and number, which are excluded from warranties.
Recycling Information
Recycling of electronic devices
This product is designed and manufactured with high quality materials and components which can be recycled and reused.
This symbol means that electrical and electronic equipment, at their end-of-life, should be disposed of separately from your household waste.
Please, dispose of this equipment at your local community waste collection/recycling centre. In the European Union there are separate collection systems for used electrical and electronic product. Please, help us to conserve the environment we live in!
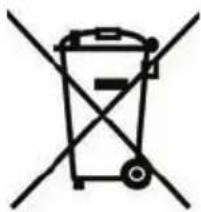
Recycling of plastic parts
The material recycling symbol on the plastic parts denotes that they are recyclable. Dispose them not with the normal household waste.

Green Dot
The “Grüne Punkt” denotes that the MAS Elektronik AG pays a duty to the “Society for Waste Prevention and Secondary Resource Generation”.

Batteries
-
The batteries can be returned free of charge after use in the shop or in their immediate vicinity.
-
The consumer is legally obliged to return of used batteries.
-
The icons on batteries are with one of the two following characters, consisting of a strikethrough trashcan and the chemical symbol of heavy metals decisive for classification as contaminant-laden.
-
Both symbols have the same meaning.
-
Batteries that contain pollutants are characterised by chemical symbols: Pb = battery contains lead, Cd = battery containing cadmium, Hg = battery contains mercury.
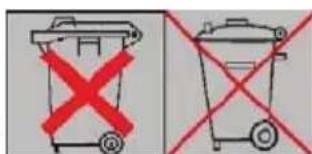
Every consumer is legally obliged to make these batteries with a collection of his church or in the trade so that they can be conveyed to an environmentally
sound disposal. We discard used batteries for you free of charge and environmentally. Simply return them to us.
In the box
Following accessories should be in the box:
• HTC 2242HD or 2442HD LED-TV
- Remote Control
- Manual
- Power adapter
- Stand
- Mini AV cable
- Mini YPbPr cable
If any of the accessories are missing, then contact your dealer as soon as possible. Keep all the original packaging in case you need to return the set to the dealer.
Contacts of XORO customer service
Per Telefon: 040 - 77 11 09 17 (Mo-Fr, 9.00 - 18.00)
Per eMail:support@ersservice.de
Per Fax: 040 - 76 73 35 15
It is our pleasure to help you in case of questions on utilisation or functional problems.
Please also take note of the trouble shooting at the end of this manual.
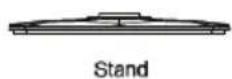
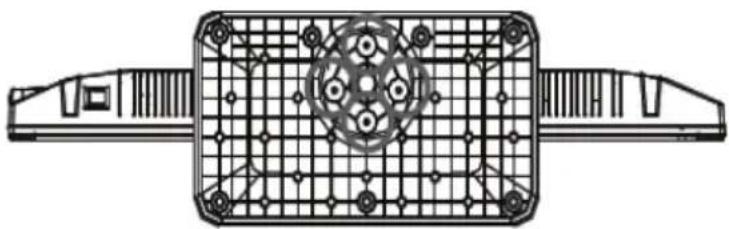
The TV is delivered with an un-mounted stand. Before you uses the TV set, please mount the stand.
- Unpack carefully the TV set from the gift box. Following parts are delivered.
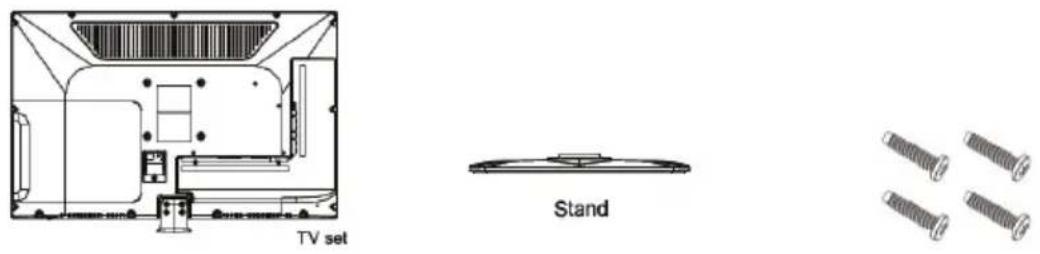
- Place the TV screen down on a stable surface to avoid any damage to the TV. Fix the stand to TV with the screws.
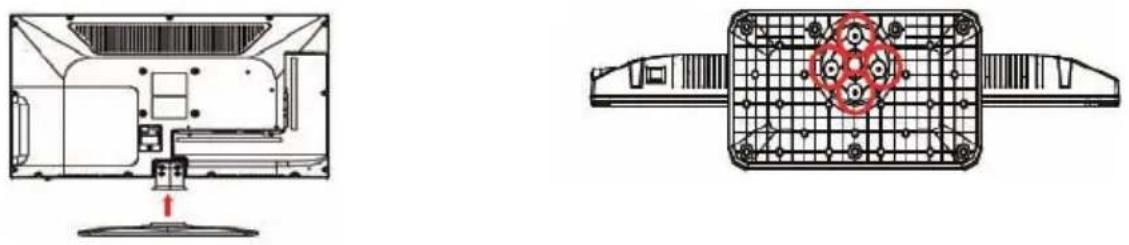
Notes:
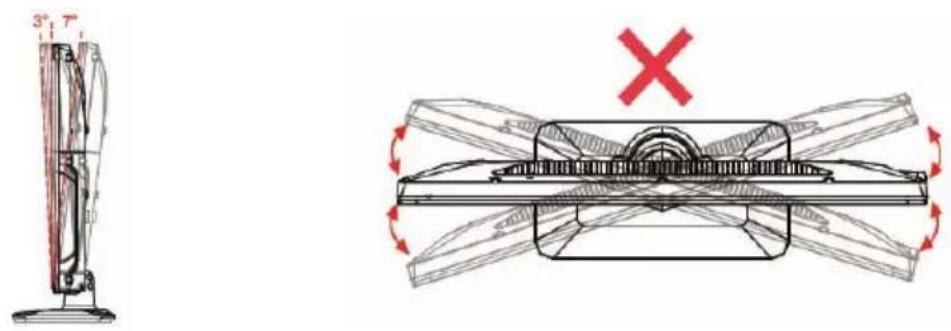
The maximal tilting angle is 3° forward and 7° backward. The TV is not titlabe in any other direction.
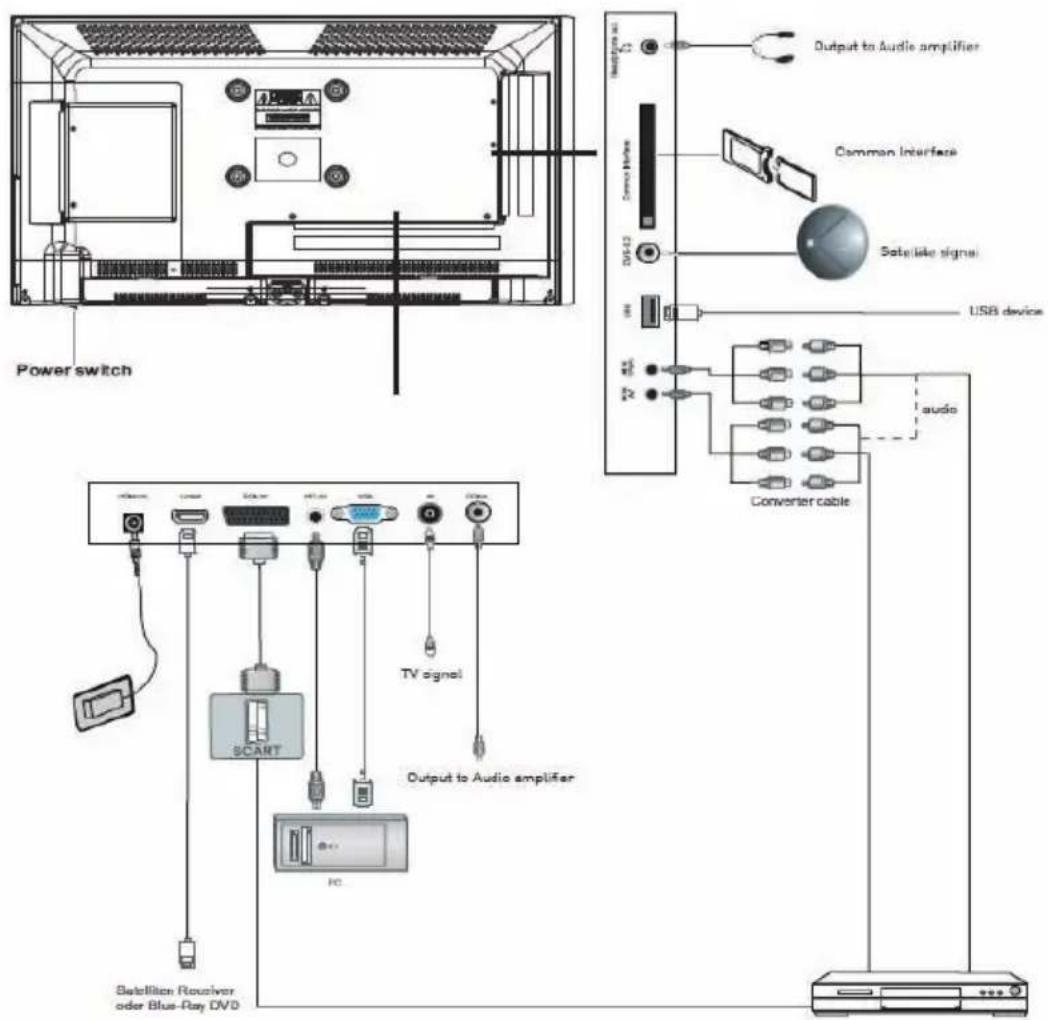
Rear Connection Panel
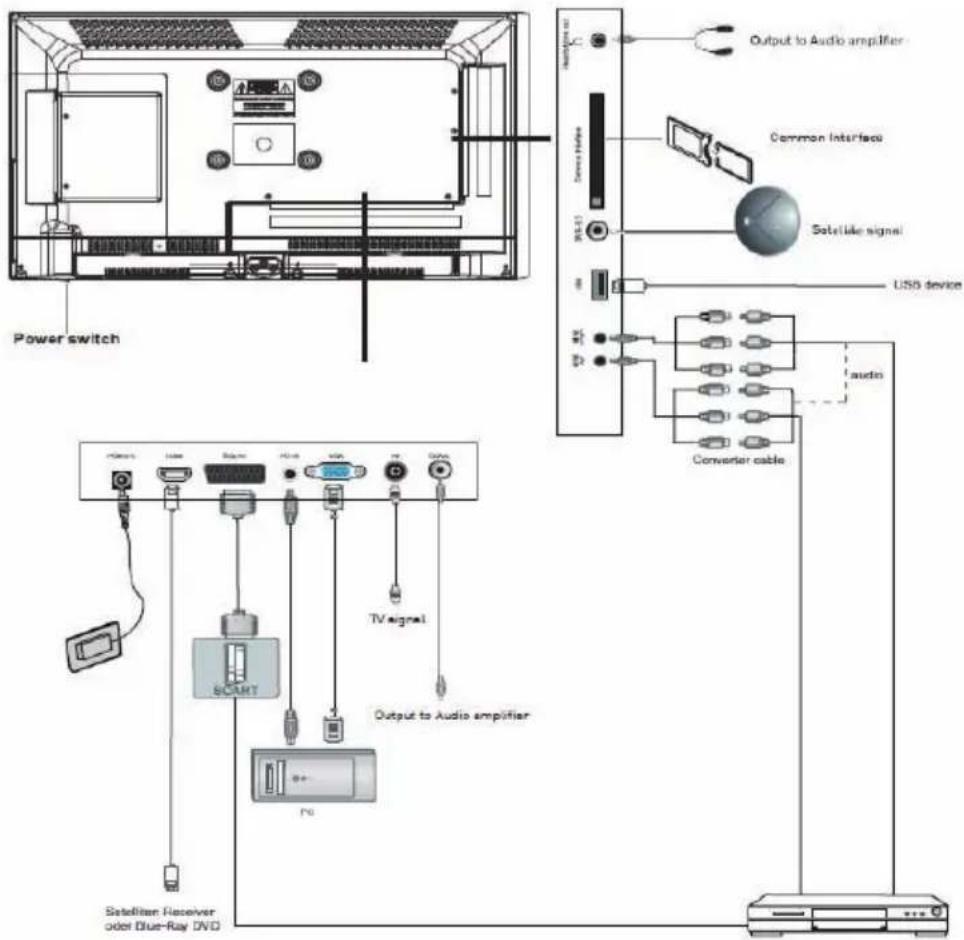
| Name | Function Description |
| POWER | Connect to power supply |
| HDMI | Connect to the HDMI output of your DVD or Satellite Box |
| DVB-S2 | Connect to Satellite signal |
| VGA (PC IN) | Connect to the PC VGA output to display PC graphics |
| PC-IN | PC Audio input |
| Mini YPbPr | Connect to the YPbPr output on external devices |
| Mini AV | Connect to AV output on external devices |
| SCART | Connect to the SCART input / output of external devices |
| RF | Connect to TV signal cable |
| Headphone | Connect Headphone |
| CI | CI slot (Pay as you view card slot) |
| Coax | Output to audio amplifier |
| USB | Media playback and PVR |
Front Side
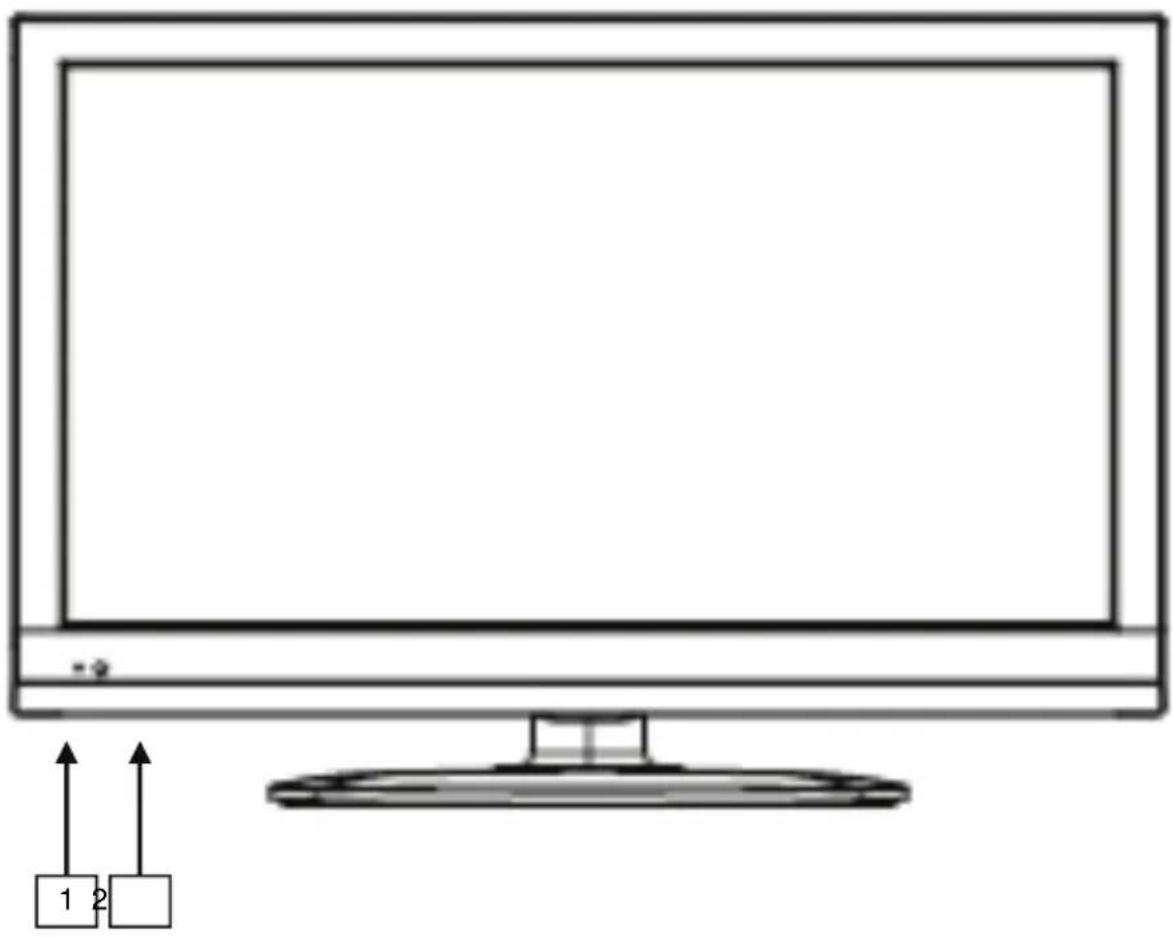
1. LED Indicator
Green indicates that the device is on. RED for stand-by. RED/Green in turn: RVR recording running (only in stand by)
2. Infrared receiver
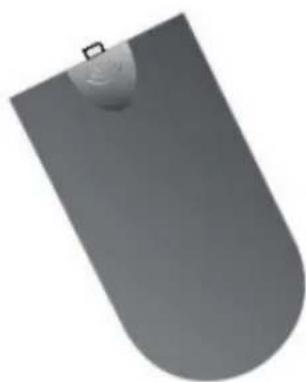
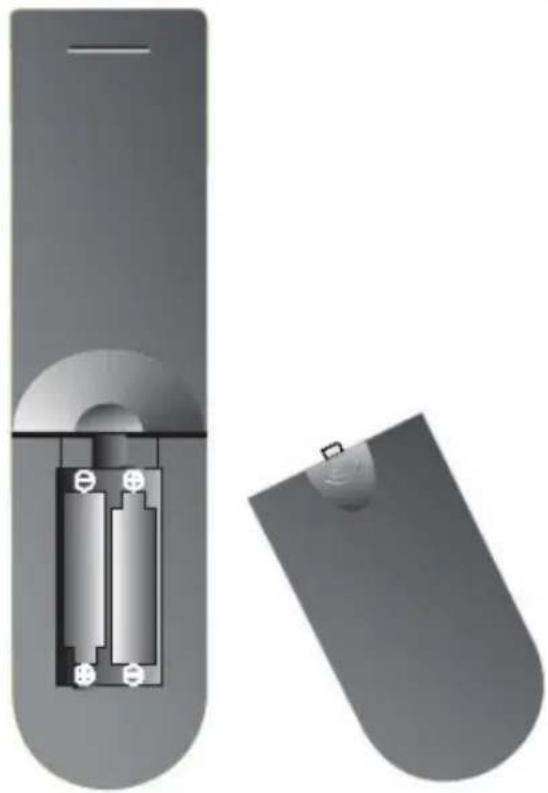
Insert battery into the remote control
Insert the batteries in the remote control:
- Open the cover.
- Insert the batteries. Make sure to match - and +.
- Close the cover
Notes on batteries:
Improper use may cause battery leakage and corrosion.
Please follow the instructions below:
- Do not insert the batteries in the wrong direction
- Do not use different types of batteries together
- If you do not use the remote control for a long time, remove the batteries
- If the remote control operates not correctly, replace the batteries
- If battery leakage occurs, wipe the battery liquid from the battery compartment, then insert new batteries
- Make sure that the used batteries are disposed properly according to you local regulations.
Operation range
Point the remote control at the IR:
- Within about 5 m
- With an angle about 30 grade in both direction.
Notes:
- Do not expose the IR of the device to a strong light source or direct sunlight.
- Direct the remote control at the infrared receiver (IR) of the player
- Do not drop the remote control.
- Do not spill water or put anything wet on it.
- Do not disassemble the remote control.
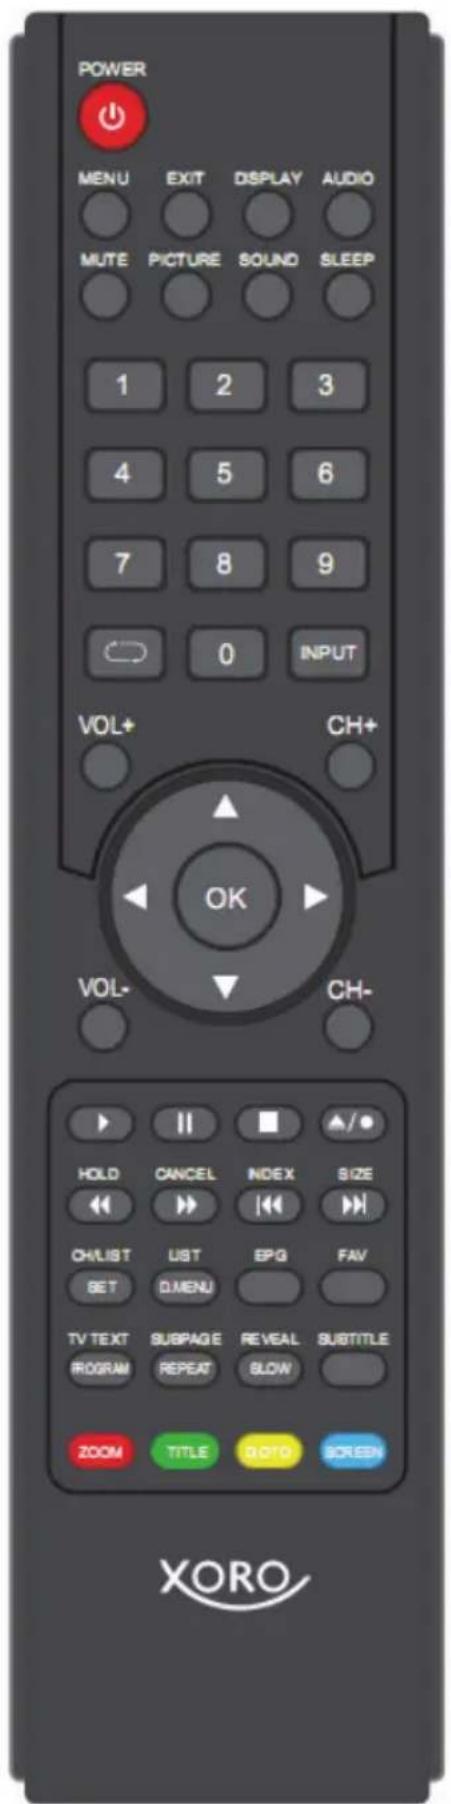
ENG14
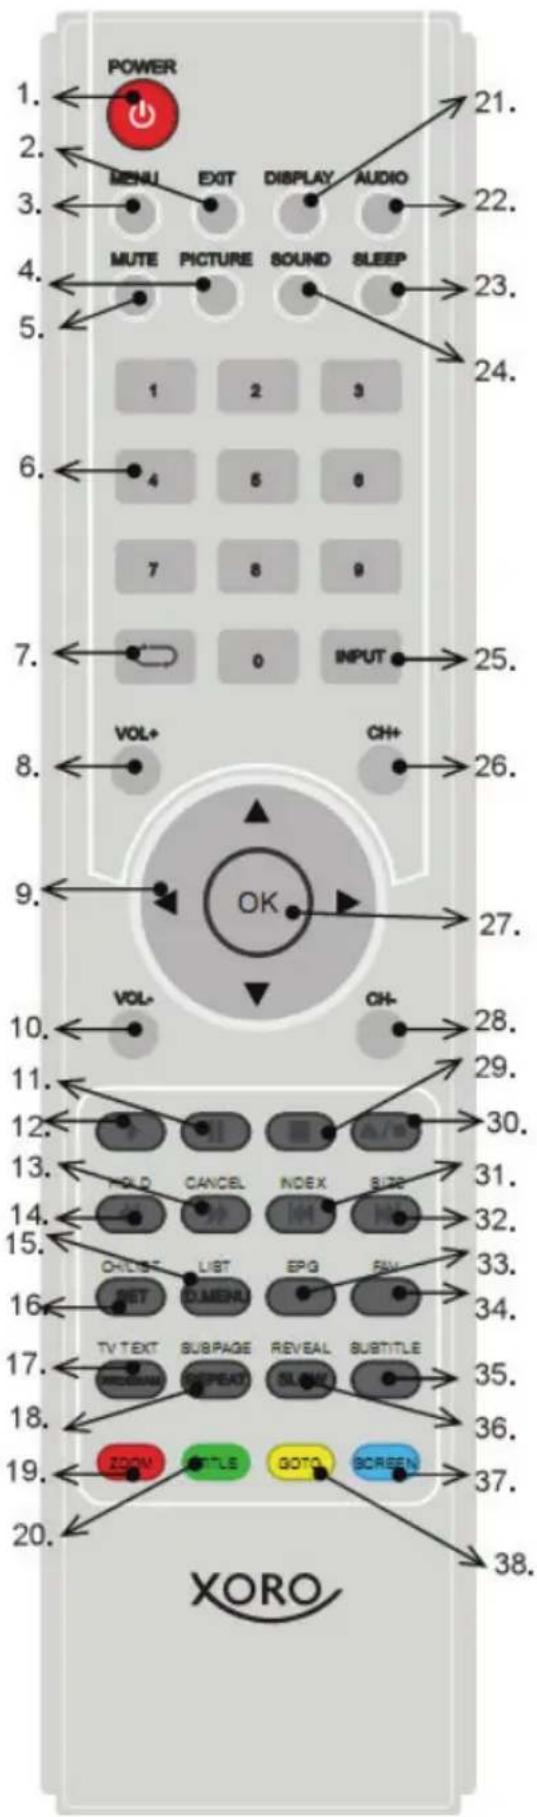
To display in a better view the picture of the remote control is inverted.
Buttons of the remote control:
ATV: Analogue TV Tuner
DTV: Digital TV Tuner
DVD: DVD Player
REC: Recorder
USB: Media-Player
-
POWER button
-
Exit button
-
MENU button for LCD settings
-
Picture mode button (PICTURE)
-
MUTE button
-
Numeric buttons (0 .. 9)
-
ATV + DTV: RECALL button
-
Increase Volume (VOL+)
-
Navigation cross (Up, Down, Left, Right)
-
Decrease Volume (VOL-)
-
DVD + USB: Pause button (||); REC: Time Shift button
-
DVD + USB: Play button (>)
-
ATV + DTV: Hide Videotext (CANCEL); DVD + REC + USB: Fast Forward button (>>)
-
ATV + DTV: Hold Videotext (HOLD): DVD + REC + USB: Fast Rewind button (<<)
-
REC: Recording list button (LIST); DVD: Video-DVD Menu button (D.MENU)
-
ATV + DTV: Channel list button (CH/LIST); DVD: Setup setting button (SET)
-
ATV + DTV: Videotext button (TV TEXT); DVD: Program Play button (PROGRAM)
-
ATV + DTV: Videotext subpage button (SUBPAGE); DVD + USB: Repetition button (REPEAT)
-
Aspect Ratio button (RED) for sources; ATV + DTV: Red function button for Videotext; LCD: Function button; DVD: Zoom function button
-
DTV: Schedule list button (GREEN); ATV + DTV: Green function button for Videotext; LCD: Function button; DVD: Video DVD Title button (TITLE)
Buttons of the remote control:
ATV: Analogue TV Tuner
DVB-T: Digital TV Tuner
DVD: DVD Player
REC: Recorder
USB: Media-Player
-
Information button (DISPLAY)
-
Audio button for DTV + USB + DVD
-
Sleep Timer button (SLEEP)
-
Sound mode button (SOUND)
-
Sources button (INPUT)
-
ATV + DTV: Channel up button (CH+)
-
Confirmation button (OK)
-
ATV + DTV: Channel down button (CH-)
-
DVD + USB: Stop button; REC: Stops recording
-
REC: Record button; DVD: Open/Close the tray
-
ATV + DTV: Videotext Index Page button (INDEX); DVD + USB: Previous file or Chapter button (|<<)
-
ATV + DTV: Zoom of Videotext (SIZE); DVD + USB: Next file or chapter button (>>|)
-
DTV: EPG button
-
ATV + DTV: Favourite button (FAV)
-
DTV + DVD: Subtitle button (SUBTITLE)
-
ATV + DTV: Shows hidden Videotext pages (REVEAL); DVD + USB: Slow motion button (SLOW)
-
ATV + DTV: Blue function button for Videotext; LCD: Function button; USB: Screen off button. DVD: Angle Function
-
ATV + DTV: Yellow function button for Videotext; LCD: Function button; DVD: Goto button (GOTO)
Receiving signal types
The TV is designed to receive digital satellite signal (DVB-S/S2 also in HD), digital terrestrial (DVB-T MPEG2/MPEG4 HD) and digital cable signals (DVB-C also in HD). Analogue terrestrial signals are not available any more in Germany.
Cable and digital terrestrial TV
Connect the DVB-T antenna or your connector for cable TV with the ANT IN.

Notes:
- DVB-T: It is not in all regions possible to receive DVB-T signal with a indoor antenna. Please consult a technician.
• DVB-T: The TV could not power supply the antenna. - Cable: In most of the cable networks, private broadcasters offer only encryped programs. You may need a CI+ module and a subscription card. Please get more information at the broadcasters.
- Cable: Old installation (antenna socket, switch plates, amplifier) are sometimes not suitable for digital TV. Please consult a technician.
Satellite
Screw the F-plug of the antenna cable to the LNB IN.
Power supply
Connect the DC 12V IN jack to a power plug with the power adapter. The LED indicator on the front of the TV turns red.
Please connect further devices (DVD-player, Computer, recorder etc.) after completion of the initial installation to make the process as simple as possible.
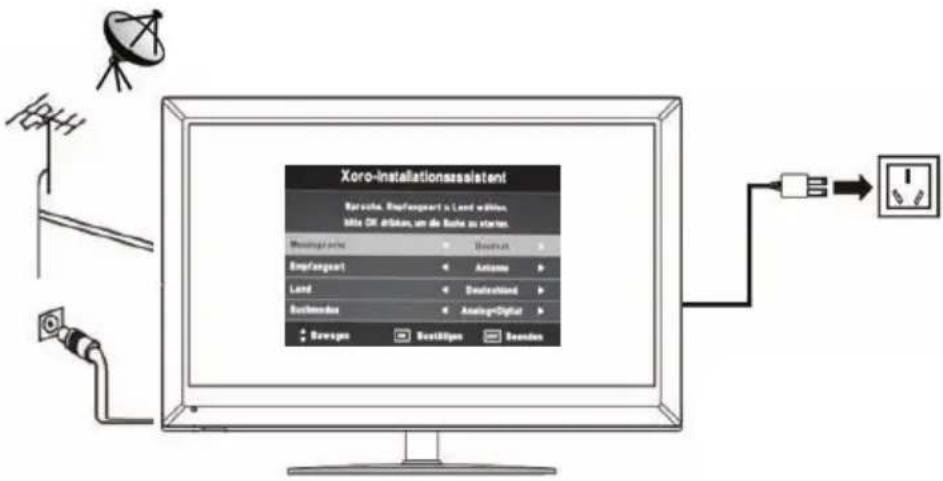
After you have connected the TV to antenna, cable and power, press the Stand by button on the remote control or Power on the TV.
The TV needs some time for the start up. The LEC indicator on the front turns green. And the „XORO Installation Assistant“ will be shown on the screen.
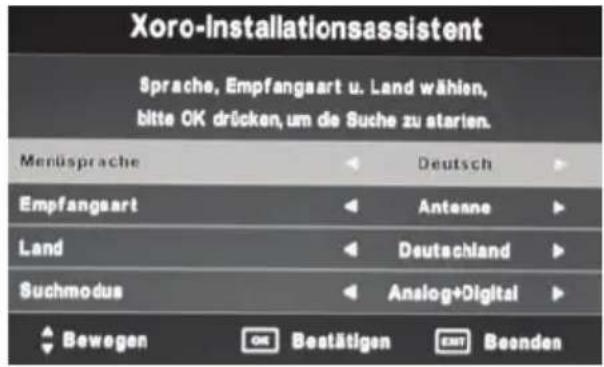
- If the "XORO Installation Assistant" does not appear, please refer to page 45 to load the initial factory settings.
Navigate with ▲/▼ to choose an option and make input with ◀/▶. After you have set all parameters, press OK to continue the installation.
Language
Here you can define the language of on-screen display.
Type
Please select you receive cable, air (terrestrial) or satellite signals.
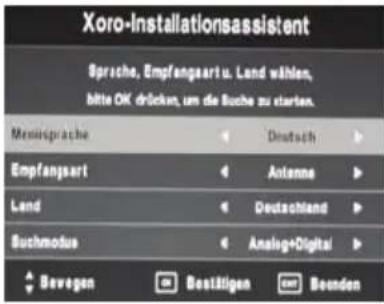
Please select the country where you use the TV.
Tune Type
You can define here whether the channel scan searches only digital or also analogue broadcasts.
Recommendation:
Cable: Analogue+Digital
AIR: Digital
Satellite: Digital (analogue is not available)
Press OK. If you have chosen terrestrial and cable TV, the channel scan starts.
If you have selected Satellite, you will be asked whether to load the pre programmed channel list. A program list for the Satellite ASTRA 19.2° has been prepared in the software. German broadcasters top this list.
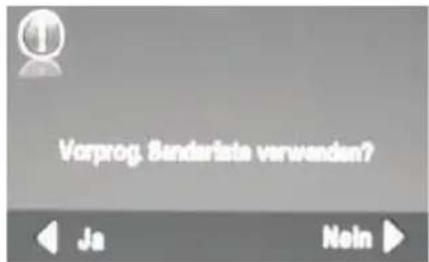
Press the arrow button „Left“ to load this list.
Press the arrow button „Right“ to run a channel scan yourselves.
It takes a couple of seconds to load the list, please be patient. You can watch TV immediately after loading the list.

If you can not receive any program, please check the connection and antenna settings.
If you do not receive programs over Astra 19.2°, you will have to run a channel scan yourselves.
If you have chosen not to use the pre programmed channel list, there will appear a menu for dish set up on the screen.
You will have to informed of following points to make a successful satellite channel scanning.
- Which Satellite does your antenna orient?
If you have more than one antenna or one antenna with more than one LNB, you will have to know which type of switch (Toneburst or DISEqC) is employed and to which port is each Antenna LNB connected.
Please ask the installer, if any of the parameter is not known. If you live in a rental house or apartment, please ask the renter.
Example:
The most satellite antenna orients satellite ASTRAS 19.2° and has a “universal” or “Digital” LNB. We recommend the pre programmed list in the case.
If you would not like to use the pre programmed list, the common setup for ASTRA 19.2° is as following:
Satellite: 019.2E Astra 1H.
LNB Type: 09750/10600
LNB Voltage: On
22KHz: AUTO
Tonebust: None
DiSEqC 1.0: None
DiSEqC 1.1: None
Motor: None
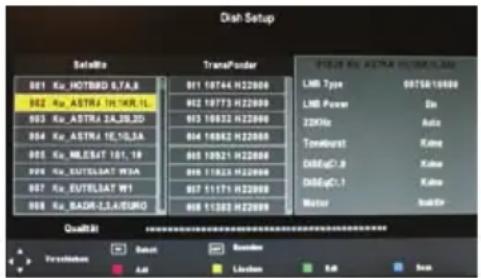
On the left side of the screen there is a list of satellites for which the TV is pre programmed.
Settings of the chosen satellite is displayed on the right side. The Transponder is listed in the middle.
Process:
- Select the first satellite to be set up with ▲ / ▼.
- Press the OK button. The chosen satellite is marked with a hook, confirming this satellite will be considered in the coming channel scan.
- Press the button ▶ twice to access to right side.
- Select the option with ▲ / ▼ and change the parameter with ◀/ ▶
- Press ◀ to get back to the left side and EXIT after the settings having been done.
- If your satellite system can receive signals from a number of satellites, select a further satellite with ▲ / ▼. Press OK and define the parameter on the right side.
- Repeat this procedure for all satellites available.
Notes:
• After you have set up the chosen satellite, a rough estimation of the signal strength will be shown on the lower part of the menu.
- If a satellite is missing on the list, press the RED button. A dialogue winter appears, input the value for Longitude, East/West and frequency, and name the new satellite. If you have added a new satellite, please choose "Blind Scan" in the coming channel scan. If you add a satellite to the list, there will be no display of the signal quality for this satellite, in spite of correct setting. Signal quality could only be displayed for satellites saved under the transponder list.
- Add new transponder with the RED button. Alternatively select the "blind scan" to seach for new broadcaster.
Antenna Setting—Explanation of the parameter
LNB Typ: define the oscillator frequency for your LNB. Please take the correct value from the manual of your LNB (standard:09750/10600)
LNB Voltage: This parameter defines the storm voltage of the antenna, and signal from horizontal or vertical polarized transponder will be received. The setting will only have to be changed in very rare cases. A false setting will result in missing program or no signal reception at all. (standard: On)
22KHz: The receiver can switch the LNB with 22 KHz signals for the reception of another frequency band. The setting will only have to be changed in very rare cases. A false setting will result in missing program or no signal reception at all. (standard: Auto)
Toneburst: Tone burst switcher has two input ports, enabling the connection of 2 antennas or LNB to the receiver. If you have a Tone burst switcher, you will have to select one of the both connections (A or B) for the satellite chosen on the left side.
DiSEqC: DiSEqC switcher has up to 16 input ports enabling the connection of multiple antennas or LNB to the receiver. If you have a DiSEqC switcher, you will have to select one of connections for the satellite chosen on the left side. Please check which version (1.0, 1.1) could be supported in the manual of your switcher.
Motor: Rotatable Antennas require extended configurations. We recommend professional installation from a technician. Please set up according to your antenna. You can open further set up windows with the RED and the GREEN button.
After the set up has been done for all reachable satellites, please press the BLUE button to open the menu for channel scan.
There appears a window showing “channel Scan” upon pressing the BLUE button on the manu of the Satellite Setting.
On this Window you can make three entries to affect the scan result.
Search Mode:
- Standard: The receiver scans channels according to a pre-programmed list. This search process goes fast without being able to find programs on new transponders.
- Blind search: The receiver scans every possible frequency. It takes a little bit more time than standard scan. However it is possible to find programs from unknown transponders.
- Network: The receiver scans channels according to a pre-programmed list. The frequency of a new transponder could be found out through analysis of the known transponders. The scan process is shorter than “blind scan”, but there might be possibly missing programs.
- Please employ "Blind Scan". It takes a little bit longer, but will result in a complete program list.
- If you have added a new satellite on the menu of Satellite Setting, please employ "Blind scan", for there is no transponder list available for the newly added satellite. There is no "Blind scan" option in case of UniCable system.
- Program Tpye:
- All programs: both free and encrypted programs (Pay TV) will be added to the program list during the channel scan.
- FTA (free): The channel scan saves only free programs.
- Service Type:
- All: The channel scan saves both TV and Radio programs.
- Digital TV: The channel scan saves only TV programs.
- Radio: The channel scan saves only Radio program.
Polarisation:
• Auto: searches both horizontal and vertical positioned broadcasters (recommended)
• H: searches only horizontal positioned broadcasters
• V: searches only vertical positioned broadcasters
Press the OK button to start the Channel scan.
After the channel scan is completed, live picture of the first found channel will be shown on the screen.
SCART Input
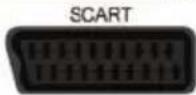
Audio- and Video signals from a VCR or a setup box can be transmitted by SCART. Please connect a SCART cable with the SCART input on the HTC TV set and with the SCART output on the VCR or setup box.
Press the INPUT button, choose „SCART“ in the popup window and confirm by the OK button.
HDMI
HDMI transmits digital audio and video signals.
Supported resolution:480i, 480p, 576i, 576p, 720p, 1080i, 1080p (24Hz, 50Hz, 60Hz)
Supported audio formats: PCM (stereo)
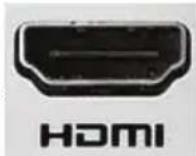
Please press the INPUT button, choose „HDMI” in the popup window and confirm by the OK button.
Y Pb Pr
You can connect further multimedia terminals with the TV via YPbPr. Plug one end of the video adapter cable into the YPbPr jack on the TV, and the other ends (3-wire video components) to the RCA jack of your multimedia device.
Please pay attention to the coloured coding of the cable, inputs jacks (adapter cable) and the video output jacks (source):
- "Y" with the green wire or RCA plug
- "Pb" with the blue wire or RCA plug
- "Pr" with the red wire or RCA plug
With this kind of connection only video signals are transmitted. For listening sound on the TV you should establish also a sound connection. You can take the AV IN port for the sound.
Please press the INPUT button, choose „YPbPr“ on the popup window and confirm by the OK button.
AV IN
You can connect further multimedia terminals with the TV via AV IN.
Please press the INPUT button, choose „AV IN“ on the popup window and confirm with OK.
VGA
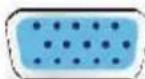
You can use the TV set as a PC monitor by using the VGA interface. Please connect a VGA cable with the VGA input of the TV set and with the PC.
With this kind of connection only video signals are transmitted. For listening sound on the TV you should establish also a sound connection. Please connect the white and red wire of the 2-pin component cable with the AUDIO OUT (source) and the stereo jack with the "PC IN" plug of the TV set.
PC-IN

VGA


Notes:
- Before you connect the HTC TV set with the PC, please change the graphic resolution of the PC to:
| 1 720 X 400 70 Hz | |||
| 2 640 X 480 60 Hz | |||
| 3 | 800X600 | 60 | Hz |
| 4 | 1024X768 | 60 | Hz |
| 5 | 1280X1024 | 60 | Hz |
| 6 | 1440X900 | 60 | Hz |
| 7 | 1680X1050 | 60 | Hz |
| 8 | 1920X1080 | 60 | Hz |
- Please establish the connection and switch to „PC-VGA“ input.
• For displaying the best results, please uses the native resolution of the TV LCD panel:
• HTC 2242HD/ HTC2442HD —> 1920 x 1080 Pixel
Digital Coaxial Sound output
The specifications of DVB broadcast allows to transmit Stereo and/or Dolby Digital sound. To output the Dolby Digital sound you can connect the TV set with a digital amplifier via COAXIAL OUT and listen the sound by a connected speaker set.
Coax

Earphone
You can connect the a headphone on the TV set. Please insert the 3.5 phone jack into the headphone connector.
Headphone

CI or Cl+ Module
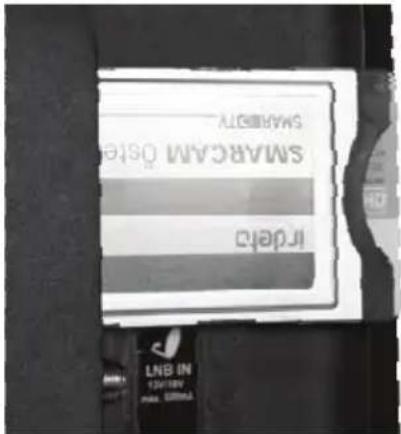
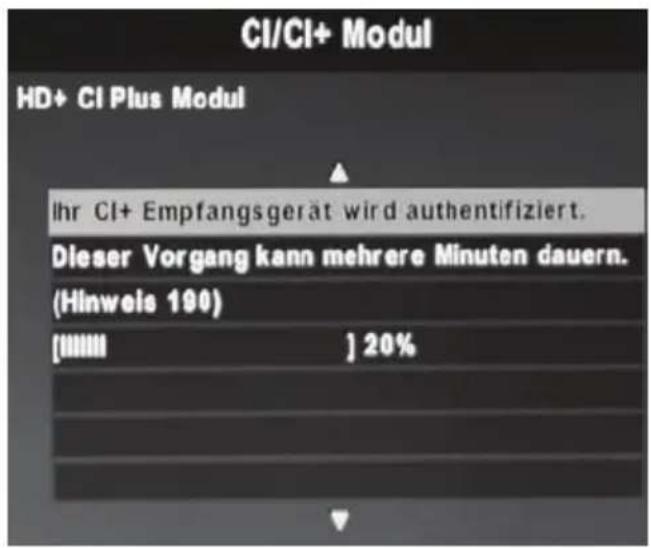
The TV has a slot for CI or CI + module. You can decrypt pay-TV programs with the module. The modules are available at Pay-TV broadcasters or specialized shops. The smart cards are provided generally by the broadcasters. Modules and smart cards are not part of the delivery.
Please insert the module as illustrated about 2-3cm into the slot. Please push a little harder at the end, and you will feel a slight resistance.
Notes:
- Please insert the module after the channel scan and other settings have been completed.
- It might take a couple of minutes to activate the module and the smart cards. The module scans the TV each time when the TV is powered on.
Notes on Cl+:
• The broadcaster can forfeit or limit recording/Time Shift with a CI+ module.
- Recordings of programs using CI+ are saved encrypted on the USB devices. The recordings could not be viewed with another device.
- The limitation are designated by the broadcasters. The manufacturer does not have influence on this matter.
- A CI/CI+ module can generate screen messages. Please refer to the manual of your module.
The TV might take some time to scan a newly connected the USB device.
Please do not remove USB during play back or recording.
Please press the INPUT button, choose „USB“ on the popup window and confirm by the OK button
USB
Following USB devices are supported:
- USB storage
• Max. capacity 1TB - File system media player: FAT32, NTFS
- File system PVR recording: FAT32
Notes:
- USB Storage up to 1TB will be supported. USB storage of larger capacity could also be used. However the capatability of these USB storages with HRS8530 could not be guaranteed.
- There are a variety of USB storages on the markt. Not all of them conform the specification of USB storage. If your USB storage could not be read by the TV, please try another USB storage.
- If a USB device could not be read any more, please carry out a data storage medium analysis with your computer or format the storage again.
- USB storages requiring higher electric current than 500mA (0,5A) do not conform the specification of USB storage. These USB storage could possibly not work smoothly together with HRS8530.
- Please always save all data on the USB before connection to the TV.
- A sufficient writing– and reading speed of the USB storage is necessary for recording HD programs or use the Time-Shift function. In case of problems in recording or Time-Shift, please try a USB storage of higher writing– and reading speed.
Important Buttons
Important buttons and there functions
Set DVB Mode
Press the INPUT button and select the corresponding source, DVB-T (Digital Terrestrial TV), DVB-C (Digital cable TV), DVB-S (Digital satellite TV) or ATV (Analogue Cable TV). Confirm with OK.
Notes: Programmed timers will be deleted if you switch among DVB-T, DVB-C and Satellite (DVB-S2).
Channel List
Press the OK button or the CH/LIST button as illustrated on the remote control to access the channel list. Navigate with ▲/▼ in this list and make the selection with OK. Press EXIT to close the channel list.
Change TV channel
Press CH− or CH+ to make channel switch.
Select TV Channel
Input number of the wished channel with the numerical buttons.
Previous TV channel
Press the button as illustrated above to go back to the previous TV channel.
Change the Volume
By pressing the VOL- or VOL+ buttons you can adjust the volume.
TV / Radio
Press the OK button to display the channel list. To switch between TV and radio, then press the button repeatedly until the radio list appears. Make a selection with ▲ / ▼ and confirm with OK.
Note:
Digital Radio will be not transmitted in every country.
EPG
Press EPG button to show the EPG information. For detailed information about the EPG please refer the section about EPG.
Note: EPG has not function under Analogue Cable TV.
Favourite list
If you have defined a favourite list containing your favourite TV or Radio channels, you have a quick access to this favourite list by pressing the FAV button.
Important buttons and there functions
Subtitle
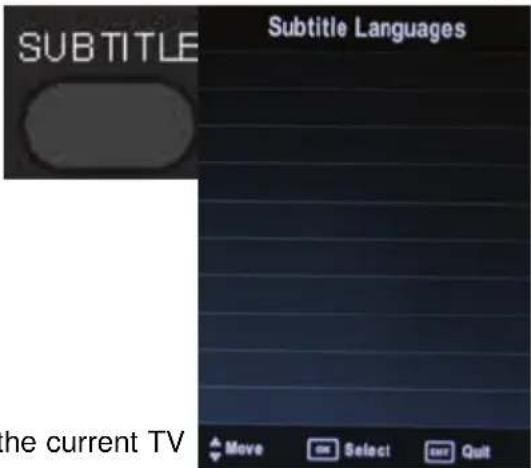
Press SUBTITLE button to turn on or off the subtitle on the screen. This function can be activated, if the service is provide by the broadcaster. In case subtitles are supported, they will be listed on the popup window. You can choose the subtitle and confirm with the OK button.
Note:
Subtitles are not supported in every country.
This button has no function under Analogue Cable TV.
Tele- / Videotext
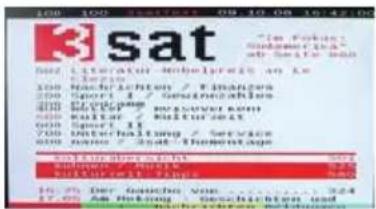
Press TV/TEXT button to view the videotext information of the current TV program.
- TV/TEXT button starts and ends the Videotext window
- REVEAL button shows hidden Videotext pages
- HOLD button holds on the Videotext page during the scan.
- SIZE button zooms the Videotext window.
-
SUBPAGE button shows the sub-pages of Videotext
-
INDEX button makes a quick access to the index page (normally page 100)
-
RED, GREEN, YELLOW and BLUE buttons allow the quick access to to specific pages.
Audio Language or another Audio Track
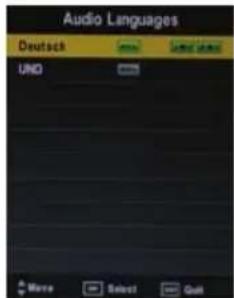
Press AUDIO button to change the audio language or the audio track output. After pressing the AUDIO button a popup window appears on the screen, where you can select the preferred audio language or sound mode by using the ▲/▼ buttons. Confirm the selection by pressing the OK button.
Note:
- Some broadcaster supports different languages or sound modes.
- Analogue Cable TV supports only two audio tracks.
Information
Press the DISPLAY button during the live picture and detailed information are appears on the screen. Beside the TV program title, time, date, duration time of the current program title, resolution of the broadcast and whether videotext is available, you can see the detailed EPG information of the current TV program. With the ▲/▼ buttons you can browse all EPG information, if more than one page is available. By pressing the ▶ button you gets information about the next TV program and their EPG information.

The electronic program guide (EPG) can be activated by pressing the EPG button with the exception in Analogue cable TV mode. The EPG window is organized in three sections:
LEFT Sort criteria (Time or channel), Date with Time and Channel List RIGHT Detailed EPG information of the highlighted Program BOTTOM Buttons for operation
Sort criteria
EPG will be sorted after either Time or Channel. Switch between Time and Channel with ◀ or ▶.
Time
TV programs from all broadcasters at this very moment are listed.
You can make program switch with ▲/▼ and scroll the pages with ◀ or ▶.
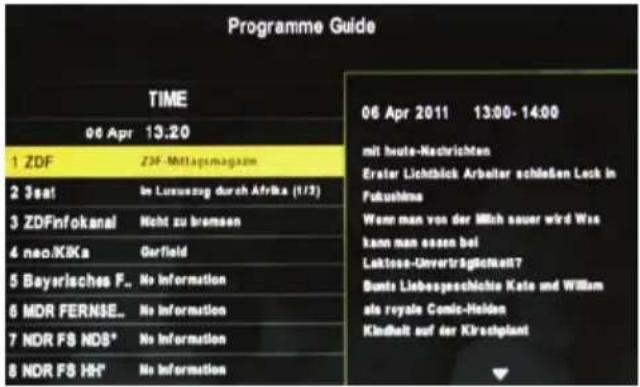
TV programs of a certain channel in the coming 7 days are displayed. Scroll the pages with ◀ or ▶. Navigate to the channel name on the first page and switch among channels with ◀ or ▶.

The operation buttons are listed in the bottom line.
INDEX
Pressing INDEX button brings the cursor to the sort criteria (Time or Channel) on upper left side of the page.
RECORD (▲/●)
Press the ● button to start record programming. There appears a popup window with parameters of the recording.
GREEN
If you watch a particular program regularly, you can have the TV powered on at the given time. Press the GREEN button and define the parameters on the pop-up window. Move the crusor on this window with ▲ or ▼ and make the input with ◀ or ▶.
YELLOW
Press the YELLOW button to display Timer programming list. Delete a Timer entry on this list with the RED button.
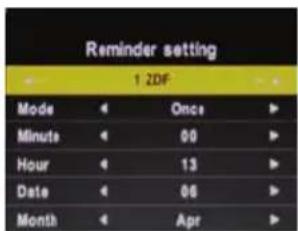
With the MENU button you can go back a lever higher. Press the EXIT button to exit the EPG window completely and you get to the live image of the active channel.
Preparing of the USB Storage
In DTV Mode Only
PVR function allows the unit to record live DTV program and make it available for reviewing at any time.
NOTE:
- Before start recording a program, please make sure the external USB device is connected.
- When PVR function is in progress, please don't unplug the power and the external USB device at will.
• The recording will be automatically stopped if there is no or little space on the storage.
Preparation of USB Storage for Recording
After connecting the memory, press the MENU button on the remote control and select with the arrow keys to select Channel. Press OK to move the cursor to the sub menu.
Press DOWN arrow key until you reach the sub PVR File System. Press OK to open the menu. The menu PVR File System appears on the screen.
The submenu PVR File System contains the option for Select Disc, Check PVR File System, USB Disc, Format, Time Shift Size and Speed.

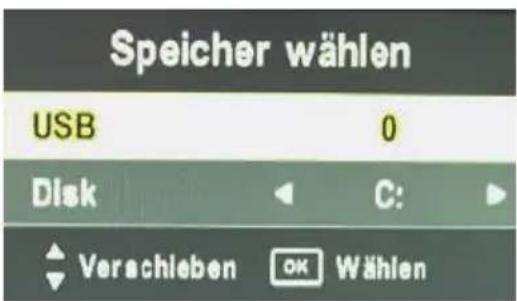
Select Disk
Select a disk to store the recorded file. Press the ▲▼ button to select Select Disk or volume and press the OK button to prompt a sub-menu.
Check PVR File System
Press the ▼ button to select Check PVR File System and press the OK button to start them.
After checking the file system, at item "Check PVR File System" a "Success" will be displayed indicating the file system in the USB disk connected has been checked and is ready for recording.
If the USB disk does not have a PVR File System, there will prompt a message asking the user to format it.
Format
Press the ▲▼ button to select Format and press the OK button to prompt a sub-menu.
WARNING
- All data on the connected device will be lost if you confirm to format.
- It is strongly recommended that the USB device is dedicated only for this unit. Various external data contain
in the USB device might damage DVR file system and requires formatting.
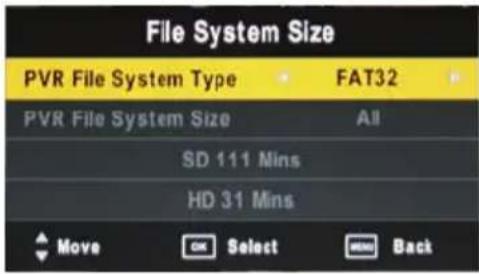
PVR File System Type
The item PVR File System Type is highlighted and press the ◀▶ button to choose the File System and press the OK button to start the formatting.
FAT32
This file system is compatible with all computers, so that the disc be read after admission.
Hi Speed FS
Hi Speed FS is compatible to FAT32.
Recording speed is optimized through pre-allocation of the space for recording and Time Shift.
Time Shift Size
After the disk format is finished, you will have the possibility of defining memory space for Timeshift purpose on the pop-up window.
The item Time Shift Size is highlighted, press the ◀▶ button to make the input.
Press the ▼ button to highlight OK and press OK to confirm and return.
Speed
Once USB device is checked, the USB data transfer rate will be displayed.
Recording program
- Connect a USB storage to the USB port
- Make sure, that the USB storage is prepared for recording.
- The system records a transport stream with the suffix TS.
Select the desired program then press the ▲/● button on the remote control to start recording and a progress bar and further operational possibilities will be displayed.
Press the ◀▶ buttons to choose one option and confirm with OK.

PLAY Starts the playback of the recording from the beginning. The recording continues in the background.
PAUSE Pause of playback
STOP Stops the playback (not the recording itself). Two times STOP ends the recording.
<< Fast Rewind with the speeds of x2, x4, x8 and x16 times
Fast Forward with the speeds of x2, x4, x8 and x16 times
|< Jumps 30 seconds backward
| Jumps 30 seconds forward
Playing recorded program
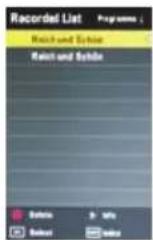
You can play the selected program in the recorded list.
Press the LIST button on the remote control to enter the Recorded List, as shown:
Press the LIST button repeatedly to sort the files after Program name, Channel or Time.
Information about a recorded file
Press the ▲▼ button to select desired file and press the DISPLAY or ▶ to display the information of the file.
![[DATE] 2011/04/08 [TWE] 11:48:09 [DURATION] 6050:00:12 [PROGRAMME NAME] Reich und Sachin [CHANNEL NAME] 1 ZDF [PROGRAMME DESCRIPTION] US-Peige 8911Steffy schlägt SE einen...](/content/2026/05/777829/images/87af0edfb4b295ece6c87132e94f1ae6d563c06b6a7eb385fc27777c8f7e050f.jpg)
Playback
Press the ▲▼ button to select desired file and press the OK button to playback selected file. While playing, you can see a playback progress bar as shown below.
Playback function
<< / >> Fast Rewind or Forward |<< / >>| Jumps 30 seconds backwards or forwards
STOP Stops the playback
PAUSE Pause of the playback

Recording from EPG
Press the EPG button and select the program to be recorded with the navigation buttons. Press the RECORD button and define the parameter on the pop-up window. After your confirmation with the OK button, the new entry could be found on the Timer list.
Time Shift Function
This function allows you to pause and fast forward/rewind normal Live DTV viewing at any time without missing any of the live broadcast, provided that a USB storage device is connected. During viewing a DTV program, press the II button on the remote control to pause live TV. Press the ▶ to resume the play back.. Further operation possibilities prompt upon pressing the PLAY/PAUSE button are similar to those in case of recording.
This unit is designed with a USB port so that you can connect your USB device and playback the files in the USB device.
• The recognition speed of a USB storage device may depend on each device.
- Please do not turn off the TV or unplug the USB device when the connected USB storage device is working. When such device is suddenly separated or unplugged, the stored files or the USB storage device may be damaged.
- Please do not connect the USB storage device which was artificially manoeuvred on the PC. The device may cause the product to malfunction or fail to be played. Use only a USB storage device with normal music files or image files.
- Some USB storage devices may not be supported or operated smoothly.
• If the name of a folder or file is too long, it might not be displayed or recognized.
- Please backup the important file because a data of USB device may be damaged. Data management is consumer's responsibility.
Connecting the USB device
Enjoy the photo, music, movie and text stored in the USB device. In USB device, you can not add a new folder or delete the existing folder.
- Connect the USB device to the USB PORT on the unit.
- Turn on the unit and press the INPUT button to enter the source menu.
- Press the ▲▼ button to select USB and press the OK button to enter the menu.
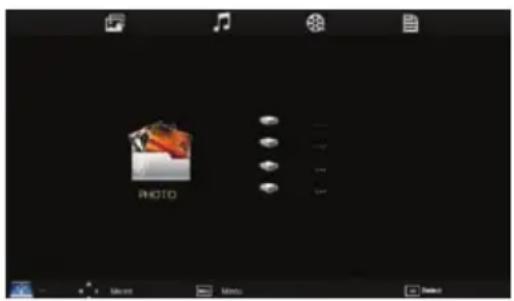
- Within this menu, press the ◀▶ button to select PHOTO, MUSIC, MOVIE or TEXT and press the OK button to enter.
- Press the EXIT button to return to the previous menu.
USB
Playing Photos
It's possible to playback photo files (*.jpg, *.bmp, *.png) stored on USB device.
The On Screen Display may be different from your set. Images are an example to assist with the TV operations. Optimal resolution of the pictures are resolutions of 1280x720 or 1920x1080 pixel. Other resolutions are displayed according the aspect ratio.
-
Press the ◀▶ button to select PHOTO and press the OK button to enter.
-
Press the ▲▼ button to select the folder and press the OK button to enter, as shown.
-
Press the ▲▼ button to navigate and the photo selected can be previewed on the right window, as shown below.
-
To create a playlist, press the OK button on each picture. All selected picture showing a tick mark.
-
Press the Play (▶II) button to display the picture in full screen mode. If you have created a play list, the play list will be displayed. The last chosen picture will top the list, and rest of the list will be arranged according to the order you choose the pictures.
-
Press the STOP button to end the full screen mode and the TV goes back to the file browser view.
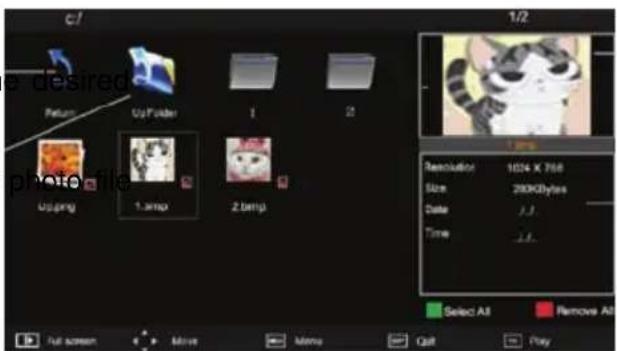
In full-screen mode you have following operational possibilities. Press the ◀▶ button to select one of the functions in the bar and execute it with the OK button.

The operation bar will fade out upon pressing the EXIT button.
If you press the ▲▼ button in full screen mode in playlist, the play list or the complete files list appears on the screen. Here you can select a picture and display them by pressing the OK button.
Enjoying Music
It's available to playback the music files in the formats MP3, WMA, WAVE and AAC from the USB device.
- Press the ◀▶ button to select MUSIC and press the OK button to enter.
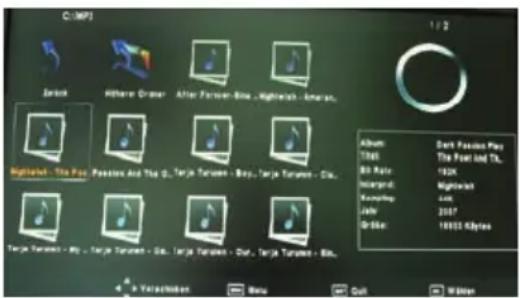
- Press the ▲▼ button to select the desired folder and press the OK button to enter, as shown below.
- Press the ▲▼ button to select music file and the music selected can be played automatically, as shown below.
- You can create a play list when you press the OK button on each selected music file. Press the ▶ (PLAY) button to start displaying the music in full size.
- When one or more music files are marked, the marked music will be played in sequence. For example, if you want to listen to only one music repeatedly, just mark the music only and play it.
- If no music files are marked, all the music in the folder will be played in sequence.
- During playing in full size, press the || button to pause playback and press the ▶ (PLAY) button to resume. Press the |<< or >>| button to select previous/next file.
- During playing in full size, press the << or >> button to activate fast backward or forward playback and press the ▶ (PLAY) button to resume.
- Press the ■ (STOP) button to stop playback and go back to the music file list from the full sized screen.
Overview after scanning folders of the USB storage. The cursor stays a couple of seconds on one music file, and the playback starts automatically.
Full screen view after pressing the ▶ (PLAY) button on a selected music file.
On the right side of the window you can see the playlist or the whole folder.
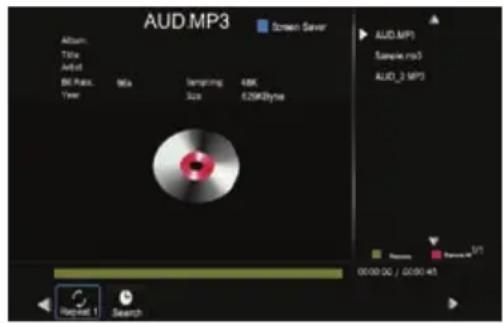
Note:
During the music playback you can switch off the screen. Press the BLUE button (SCREEN) on the remote control
Enjoying Movie
You can playback the movie files in the formats AVI, MPG, MP4, VOB, MOV, MKV, TS, M2T, and TRP) in the USB device.
Limitations:
The media player supports the playback of popular MPEG-2 codices (MPG, M2T) up to a resolution of 1920 x 1080p.
Operation:
- Press the ◀▶ button to select MOVIE and press the OK button to enter.
- Press the ▲▼ button to select the desired folder and press the OK button to enter.
- Press the ▲▼ button to select movie file and the movie selected is playing automatically on the right window.
- When a movie is selected, use the OK button to mark or unmark the movie. Press the ▶ (PLAY) button to start displaying the movie in full size.
- When one or more movie files are marked, the marked movie will be played in sequence.
- If no movie files are marked, all the movie in the folder will be played in sequence.
- During playing in full size, press the || button to pause playback and press the ▶I(PLAY) button to resume. Press the |<< or >>| button to select previous/next file.
- During playing in full size, press the << or >> button to activate fast backward or forward playback and press the ▶ (PLAY) button to resume.
- Press the ■ (STOP) button to stop playback and go back to the movie file list from the full sized screen.
During the playback of a video in full screen mode, you could press twice the menu button to have an operation bar with many options shown on the screen.
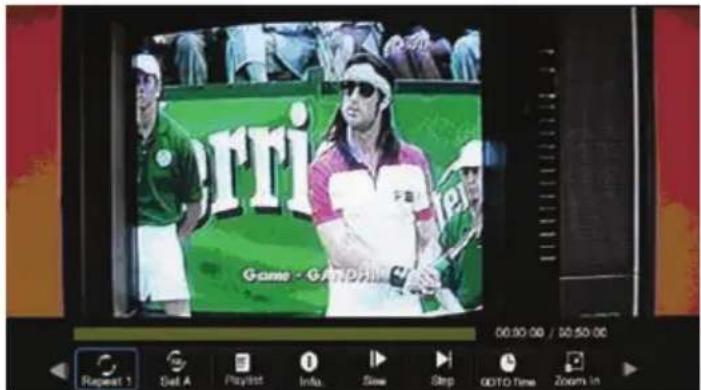
HD Media-Player
Operation bar
Press the ◀▶ button to select one option in bar and execute the function with the OK button.

REPEAT Activates the repetition mode
Set A Segment repetition
Playlist Shows the playlist
Info Display information of the current file
Slow Slow motion playback
Step Stepwise playback
Goto Time Go to a certain part defined by time
Zoom In Increases the size of the video
Zoom Out Decrease the size of the video
Aspect Ratio Switches the aspect ratio
Move View functions only in combination with Zoom In to move the picture
Repeat mode
Here you can change the repetition mode. The options are repeat single file, All files or off.
Information
Shows information about the current video file on the right side of the screen.
A-B Segment
Start the segment playback in a loop function. Press OK button to set the first pint (A) and wait a while to press again the OK button to mark the second point (B). The segment will be playback in a loop function. To exit the segment playback press the OK button again.
Goto Time
Here you can insert a time index and than by execute the device jumps to this time index.
Aspect Ratio
If the video appears in full screen with a wrong aspect ratio, than you can fix them with this option.
Text playback
The LCD Tv can playback text files. The operation bar helps to navigate into the text files.

Supported Formats
GMC is not supported!
Main Menu
Press the MENU button to access the main menu.
Navigate with ◀ or ▶ on this main menu consisting of following categories: Channel, Picture, Sound, TIME, OPTION and Lock. The highlighted category will be displayed together with the first page of its sub menu.
Main Menu
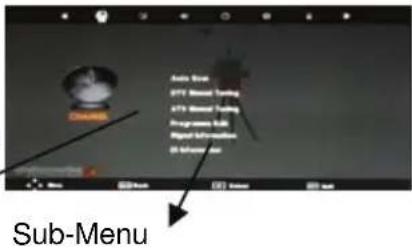
You can enter a category by pressing ▼ or OK, moving the cursor onto the sub-Menu. Navigate with ▼ or ▲ on the sub-menu to mark an option and Press OK or ▶ to open a further window for the input.
Press MENU to go back a level higher on the menu. Press EXIT to quit the menu.
Channel
The channel settings includes the options for Auto Scan, DTV Manual Tuning, ATV Manual Tuning, Programme Edit, Signal Information, CI Information, Start Record, Recorded List, Recorded Mode, Schedule List and PVR File System.
Auto Scan
With this setting you can search the TV broadcast station for DVB-T, DVB-C, DVB-S and analogue cable TV. You will be asked to input a password. The default password is 0000. Please refer to the detailed description on page 18.
Notes:
- If you have selected "Cable", you will be offered to make further settings as "search method", "Frequency", "Network ID" and "symbol". Please change the settings only if you are required by your cable supplier. Otherwise please leave "Full" for "Search method" and "Auto" for "Symbol".
- A simplified search run is offered for Satellite. Please select the correct satellite before starting the search run. If the search result is not satisfying, please run the channel scan with the menu Antenna Settings.
Antenna Settings
This menu is only active if you have pressed INPUT button and chosen "Satellite" as source. Please refer to page 19 for detailed information.
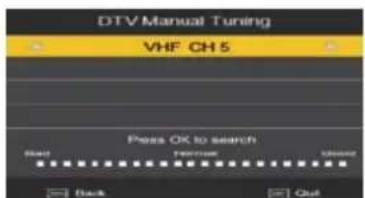
DTV Manual Tuning
You can search DVB-T, DVB-C and analogue programs after the inputted parameters. For DVB-S signals, please carry out the manual tuning with the menu “Antenna Settings”.
DVB-T (INPUT DVB-T)
Please carry out the manual tuning if you know on which frequency are the signals transmitted.
- You can change the channel by using ◀ or ▶ buttons. So you can define on which channel the search shall run.
- Starts the searching by the OK button.
To leave the DTV manual tuning, press the EXIT or MENU button.
Analogue TV (IPUT Analogue TV)
Frequency and transmission system will have to be known to you to run manual tuning for Analogue TV.
ON the ATV Manual Tuning menu
Line 1: define the position for the newly found channel
Line 2: define the transmission system of the broadcaster (BG for cable TV in Germany)
Line 3: you can switch among saved channels here
Line 4: Start the search run. You can define the direction of the search run with ◀ / ▶
Line 5: Start the search run scanning more frequency points. You can define the direction of the search run with ◀ / ▶.
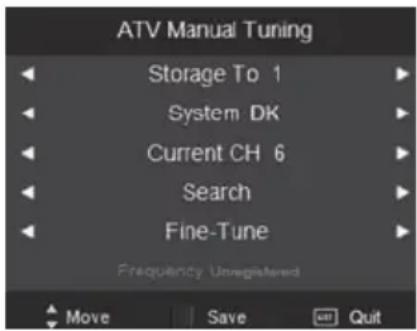
Save the newly found programs with the RED button.
Quit the manual tuning with EXIT or MENU.
Channel
Programme Edit
The option “Programme Edit” includes settings for Moving and sorting, delete, Skip channels and define Favourites.
Move a TV channel
You can construct your personal channel list with this function.
- With the ▲/▼ buttons you can choose the TV channel to be moved.
- Press the YELLOW button and the highlight gets thicker.
-
To leave the setting press the EXIT button.
-
Move the TV channel with the ▲/▼ buttons to the wished position.
-
Press the OK or YELLOW button to confirm and save the new position. The yellow highlight takes the original form.
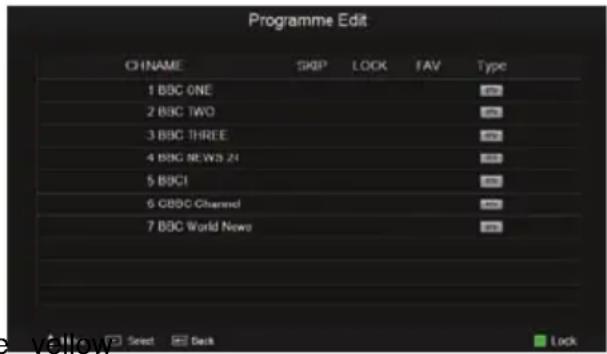
Define TV Channels as Favourites
Here you can construct your personal favourite list which could be accessed by pressing FAV.
- With the ▲/▼ buttons you can choose a TV channel to be added into the favourite list.
- Press the FAV button and the chosen channel is now marked with a heart symbol.
- You can define this way further channels as favourite.
- To leave the setting press the EXIT button.
Note:
If you want to delete a favourite TV channel from the favourite list, navigate to the TV channel marked with a heart symbol and press the FAV button. The heart symbol is deleted and this TV channel can not seen anymore on the favourite list.
Skip a TV Channel
With this option you can define single TV channel which will be skipped in channel switch with the CH+ or CH- buttons. These channels could not be reached by direct input of the channel number. You can reach these channels only through selection on the channel list. This definition is reversible at any time.
- With the ▲/▼ buttons you can choose the TV channel, which shall be skipped.
- Press the BLUE button and to mark the channel with beside the a forbidden symbol.
- To leave the setting press the EXIT button.
Rename a TV Channel (only by analogue TV channel possible)
With this option you can rename single analogue TV channel and define a new label.
- With the ▲/▼ buttons you can choose the TV channel, which shall be renamed.
- Press green button, with the ▲/▼ buttons you can browse the letters on each place.
- With the ◀ or ▶ buttons you can go to the next position.
- Save the new label of the TV channel by pressing the MENU button.
- To leave the setting press the EXIT button.
Delete a TV Channel
With this option you can delete single TV channel from the TV list.
- With the buttons you can choose the TV channel, which shall be skipped.
- Press the RED button and the TV channel will be deleted directly.
Channel
Signal Information
Displays some signal information of the current TV Channel
CI Information
Enter the Setup menu of your CI Module. Please read the Manual of the module for details.
Record Start
Starts immediately the recording of the current channel, when an USB storage is connected.
Recorded List
Shows the recordings in a list.
Recorded Mode
Here you can programme the recording.
Schedule List
Display the timer programming list.
PVR File System
Prepares the USB storage for recording. For detailed description please refer to page xx.
Picture
The picture settings includes option for “Picture Mode”, “Contrast”, “Brightness”, “Colour”, “Sharpness”, “Tint”, “Colour Temperature”, “Red”, “Green”,
"Blue", "Aspect Ratio", "Noise Reduction" and "Screen".
Operation in picture setting:
◀ ▶ adjust the value
MENU return to picture setting menu
EXIT quit the setting menu
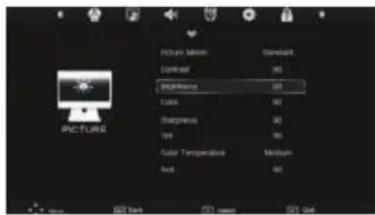
Aspect Ratio
- 16:9 - The picture is every time in full screen mode, independent from the supported aspect ratio.
- 4:3 - The picture view is 4:3 and shows on the left and right side a black bar, independent from the supported aspect ratio.
- Auto - The view is defined by the supported aspect ratio and the adjustment is automatically. By 16:9 is the picture in full screen and by 4:3 show the screen the black bars on the right and left side.
- Zoom 1 - This option can be used for an 4:3 aspect ratio. The picture is zoomed into full screen by keeping the aspect ratio. Parts of the picture will be cut-off (specially on the top or bottom side) and can not seen anymore.
- Zoom 2 - This option can be used for an 16:9 widescreen or cinemascope picture. The picture is zoomed into full screen by keeping the aspect ratio. Parts of the picture will be cut-off (specially on the right and left side) and can not seen anymore.
- Panorama - Display 4:3 content on 16:9 screen with
Picture
By every source except the internal DVD-Player you can change the aspect ratio by pressing the ASPECT button on the remote control.
Note:
Do not use the 4:3 aspect ratio every time to avoid possible damage on the TFT LCD screen.
Noise Reduction
- Off Noise reduction is off
- Low The TV set produces a little noise reduction
• Middle Middle strength of noise reduction
• High Strong strength of noise reduction - often with too much sharpness - Default Standard option for noise reduction
Note:
Adjust the noise reduction according to your own impression.
SCREEN
If you use the VGA input, you have several additional options for the adjustment of the picture. These options are reachable under SCREEN.
Press the ▶ button to get access to the SCREEN options. The sub-options are:
- Auto Position
• Horizontal Position - Vertical Position
- Size
- Phase
Auto Position
You can use the Auto adjust option to synchronizes the picture from the PC VGA port in an optimal way. Press the ▶ button to synchronizes the screen display.
Horizontal and Vertical Position
With these option you can adjust the VGA picture manually on the screen. Press the ◀ or ▶ buttons and the picture shifts to high and width.
Size
Press the ◀ or ▶ buttons to change the size of the VGA picture on the screen, until a stable image is obtained.
Phase
Use ▶ or ▶ buttons to adjust the phase of the ADC sampling clock relative to the H-sync signal, until a stable image is obtained.
Save the new settings by pressing the MENU button.
To leave the setting press the EXIT button.
Sound
The sound settings includes options for "Sound Mode", "Treble", "Bass", "Balance", "Auto Volume", "Surround Sound" and "SPDIF Mode".
Sound Mode
With the ◀ or ▶ buttons you can select the sound mode. The preset options are Music, Movie, Sport and Standard.
Treble and Bass
With the ◀ or ▶ buttons you can select the level treble and bass.
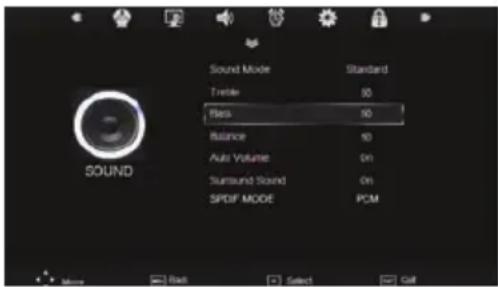
Balance
With the ◀ or ▶ buttons you can select the balance.
Auto Volume
With this option you can activate an automatic damping of the volume in case of very loud sound passage. This mode is like a Night Mode. With the ◀ or ▶ buttons you can activate or deactivate the damping.
Surround Sound
This option activates the surround effects by the sound output. With the ◀ or ▶ buttons you can activate or deactivate the surround sound.
SPDIF Mode
Here you can switch off and on the digital sound output. If on, than you can choose among AUTO and PCM and off.
TIME
The Time settings includes the options for "Clock", "Off Time", "On Time", "Sleep Timer", "Auto Sleep" and "Time Zone".
Clock
Choose the clock setting with the ▼ button and start to change the clock by pressing the OK button. An additional popup window appears on the screen.
With the ▲/▼ buttons you can choose every sub-option. With the
◀ or ▶ buttons you can change the options. The sub-options are Date, Month, Year, Hour and Minute.
Press the OK button to save the changes.
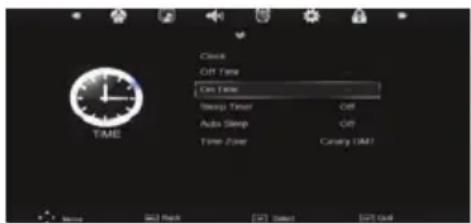
Off Time of the TV
With this option you can program the TV set for automatically switch off. Start the option by pressing OK or ▶ and a new popup window appears on the screen. There you can define each setting to program the off time. The settings are:
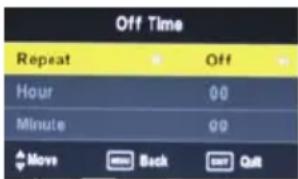
- Repeat Here you can define the cycle of the off time Once, Every Day, Monday-Friday etc.
• Hour - Define the clock in hour (e.g. 18 o'clock)
• Minute - Define the clock in minutes (e.g. 15 minutes)
Time setting
On Time of the TV set
With this option you can program the TV set for automatically switch on. Start the option by pressing OK or ▶ and a new popup window appears on the screen. There you can define each setting to program the on time. The settings are:
- Activate
Here you can define the cycle of the on time Once, Every Day, Monday-Friday etc. - Hour - Define the clock in hour (e.g. 18 o'clock)
- Minute - Define the clock in minutes (e.g. 15 minutes)
• Volume - Here you can define the volume level by switch on the HTC TV set
• Source - Here you can define the source, in which the HTC TV set starts at On Time.
Sleep Timer
With the option you can program switching off the TV set in the given time.
Note:
You can also start the Sleep Timer by pressing the SLEEP button on the remote control. By repeatedly pressing the SLEEP button you can change the presets minutes.
Auto Off
With this option you can activate or deactivate the automatic switch-off, the TV set. If this function is activated, the TV will be switched off after 4 hours without any user interaction.
Time Zone
With this option you can set the Time Zone. If you have defined by the initial installation the country, the Time Zone is defined already.
The Option Settings includes the "Language", "Audio language", Subtitle language", "OSD Duration", "Country" and the "Factory Default".
You can change each setting by using the ◀ or ▶ buttons.
Option
OSD Language
Here you can select the language for the OSD.
Audio language 1, 2
You can select here the audio language. Some broadcast TV stations supports multi-lingual TV programs. The second audio language will be taken if the first is not available.
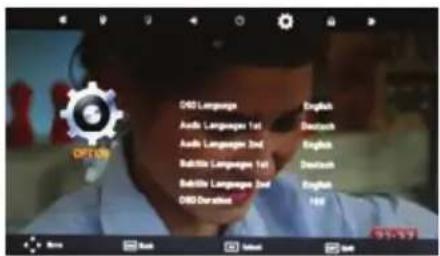
Option
Subtitle language 1,2
You can select here the subtitle language. Some broadcast TV stations supports subtitles in TV programs. The second subtitle language will be taken if the first is not available.
OSD Duration
Here you can define how long does a menu or a prompt stay on the screen.
Country
Here you can define the country. The country setting has influence on other options, like Time Zone or searching ATV and DTV channels.
With this option you can load and reset the factory default settings. All personal settings are deleted.
Lock
The LOCK settings includes the option for "Lock Channel", "Set Password", "Block Program" and the "Parental Guidance", and "Hotel Setting".
Before you can change the settings, you have to insert the preset password if you enter into the menu. The password is "0 0 0 0"
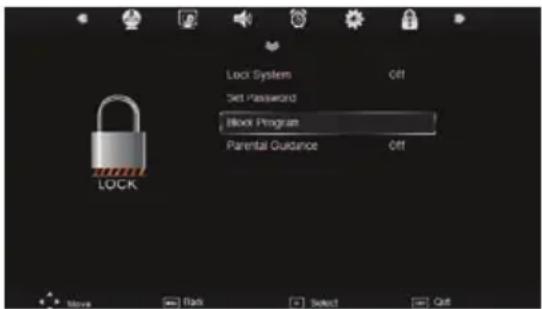
Lock Channel
With this option you can lock a channel.
Set Password
With this option you can change the preset password. Please insert the new password and confirm the new password again.
Block Program
With this option you can block single TV channels. After starting the option the channel list appears on the screen. With the ▲/▼ buttons you can choose TV channel which you want to block. To block a channel please press the GREEN button on the remote control. On the chosen TV channel appears a lock symbol. Save the settings by pressing the MENU button.
The block TV channel can not choose anymore.
Parental Guidance
With this option you can define the level of the parental control. The parental control can be only than active when the TV broadcaster supports this function.
Check the following guide for the possible cause of a problem before contacting service.
Technical Support of Xoro/MAS:
| Problem Solution | |
| TV won’t switch on | Check the mains cable is connected properly to both the mains supply and the mains adapterCheck the cable from the mains adapter is connected properly to the set.The electronic circuit may have reset. Pull the plug out, wait for 60 seconds, then plug back again. |
| No picture | Check the aerial or other input is connected properly.Check that the correct input is selected, using the INPUT button.Check the brightness and contrast settings in the Picture Setting. |
| No sound | Check that the VOLUME isn’t turned down, or the MUTE button pressed.Check that the audio cables are connected to the correct inputs. |
| Picture is wrong colour | Check that the correct input is selected, using the INPUT button. |
| The picture is unstable when used with a PC | Check the Picture Setting and adjust the view by Auto Adjust match the video output settings of the PC. |
| There are a few coloured spots on the screen | High resolution LCD screens often have a small number of faulty pixels.This is normal and within the bounds of our quality control checks. |
| Picture with wrong scaling | The LCD has the wrong aspect ratio. Please press the RED button to switch the aspect ratio from 16:9 to 4:3. |
| Symptom | Correction |
| No DVB-T reception | Switch the player into the DVB-T mode.No DVB-T reception in your region.Realign the antenna. Please pay attention to the direction of the antenna tower.Please use an active indoor aerial or a roof antenna.Retry the Auto Scan. |
| Picture freezes | Realign the antenna. Please pay attention to the direction of the antenna tower.Please use an active indoor aerial or a roof antenna. |
| Strong mosaics or artefacts | Realign the antenna. Please pay attention to the direction of the antenna tower. |
| No searching possible | Realign the antenna. Please pay attention to the direction of the antenna tower.Control the Country selection |
| No Audio or no second audio language | Press theAUDIObutton. Many TV broadcaster supports just only one language. |
| No subtitles | Press theSUBTITLEbutton. Many TV boradcaster does not support subtitles. |
Press the INPUT button on the remote control and choose DVD for using the internal DVD Player.
The DVD Slot-In loader opens and produces now some noise. The Slot-In loader is on the left side of the TV. Place the disc with the printed side to the rear into the loader and push very slightly to the right side. You can see the silver side. The loader moves in the disc automatically and reads the disc information.
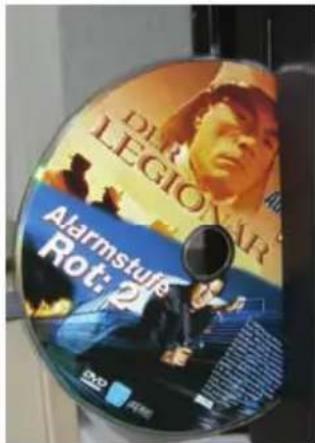
Notes:
- If the disc is inserts with the wrong side, than the loader tries to read the disc. This procedure needs more time than in a normal way. The loader can not read the disc content and displays the message "No disc" and moves out the disc.
- To be able to eject a CD or DVD it is necessary to enable the DVD mode. Otherwise the pressing of the OPEN/CLOSE button (▲) will be without function. Switch on the unit and press the SOURCE button and choose "DVD" in the source menu. Now the TV is in DVD mode.
Functions
An On Screen Display (OSD) indicator will be displayed at the upper part TV screen when certain functions are executed, or when pressing the OSD button on the remote control.
The OSD indicator is a user friendly interface designed to display the status of playback type. When a different disc is loaded (DVD, CD, Music ready); the OSD indicator bar will be different.
The OSD bar will appear automatically if it is activated by pressing the DISPLAY button, Press the DISPLAY again and a new status bar will appear. Press DISPLAY a third time and the OSD bar will disappear. When OSD indicator bar appears, press other button, the OSD indicator bar will disappear automatically.
Video-DVD Title
While playing a DVD, press the TITLE button return to the DVD disc title menu.
DVD Menu
While playing a DVD, press the D.MENU button return to the DVD disc menu.
Functions
Open/Close
To open and close the disc tray, press the OPEN button on the back panel or the ▲/● button the remote.
Notes:
- Single chapter DVD or single track CD cannot skip
• Please pay attention that the silver side of the disc is in front of you - Please insert only 12 cm disc into the DVD-Player
Play/Pause
Press ▶ to play the disc.
Press II to pause (still picture). Press II again or ▶ to resume playback.
Stop
Press STOP button to stop in two modes:
- Press STOP button once. Stop memorizes the interrupt position and the OSD shows PRESTOP. Resume play by pressing PLAY button.
- Press STOP button twice completely stop disc. The OSD shows "STOP" and the ▶ button will start play back from the very beginning.
Next Chapter / Track
Press this button skip advance DVD chapter or CD track.
Previous Chapter / Track
Press this button skip backward DVD chapter or CD track.
Fast Backward/Fast Forward
Press this button to fast backward through the disc. Repeatedly press the button.
Press this button to fast forward through the disc. Repeatedly press the button will increase the search speed.
Notes:
- The changes in speed by fast backward or fast forward are from Normal —> x2 —> x4 —> x8 —> 16 —> x32 —> Normal
- The player is muted in fast forward or fast backward this mode.
- Player will not fast forward or fast backward during WARNING section of a DVD disc
Function
Numeric Buttons
Numerical key pad (Random Program access)
- To direct access a DVD chapter or a CD track, input the desired DVD chapter or CD track number using the numerical key pad.
- Input data for the DVD disc start menu or the player's setup menu.
Audio Track
While playback a DVD disc, press AUDIO button repeatedly to select the desired audio sound track. A DVD disc may contains up to 8 selectable audio sound tracks.
Subtitle
While play a DVD disc, press SUBTITLE button repeatedly to select the desired subtitle, A DVD disc may contains up to 32 selectable subtitles.
Note:
DVD disc start menu may contains set up of angle, Subtitle and Audio soundtrack selection. You may do the selection in the disc start menu.
Search / Goto
- Press the GOTO button (Yellow) and than you get access to the GOTO function.
- Select with the Cursor buttons (◀ or ▶) the desired menu point. You can select Title, Chapter/Track or Time. Uses the numeric button to choose for example the time index.
- Press the OK button to confirm them.
- The playback continues from the given time, chapter/track or title.
Function
Repeat Mode
Press PEPEAT button repeatedly to select the repeat mode. Press more than one times the REPEAT button and the repetition mode changes depending on the kind of content.
In Video-DVD mode
Chapter, Title, All
REP. CHAPTER Repeat chapter
REP. TITLE Repeat title
REP. OFF Repeat off
In Data mode (JPEG, MP3, WMA, Video files)
REP. Track Repeat track
REP. FOLDER Repeat folder
REP. ALL Repeat disc
REP. OFF Repeat off
VCD, SVCD, AUDIO CD
REP. 1 Repeat track
REP. ALL Repeat disc
REP. OFF Repeat off
Note:
Some DVD discs do not allow repeat function.
Zoom
Press the ZOOM button repeatedly TV Screen display:
ZOOM x2 -> ZOOM x3 -> ZOOM x4 -> ZOOM x1/2 -> ZOOM x 1/3 -> ZOOM x 1/4 -> Z OFF
When playback the JPEG
While display the zoom x2, x3, x4, press direction button to move picture position.
Function
Program
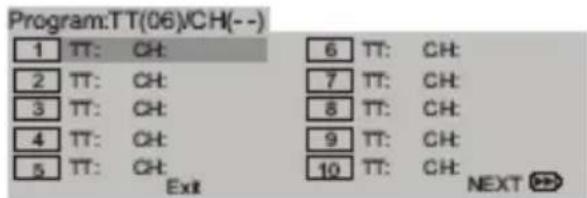
Press the PROG button. The Program menu displays on the screen.
Using the numbered button, select the items you want in the order you want them programmed in.
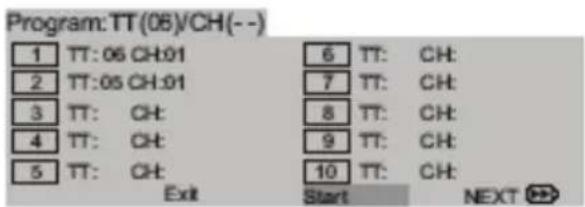
Single track number with digit „0“ in front, for example „05“,
Move the cursor by pressing the navigation buttons to select START.
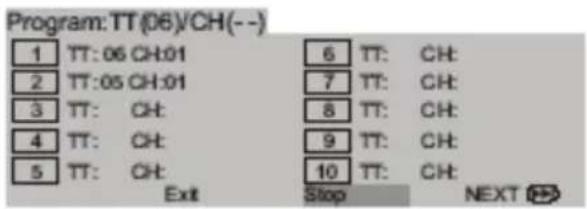
To resume normal playback from programmed playback, please press the PROG button again and navigate to the STOP field in the program menu and confirm by ENTER.
Notes:
- Program menu can be activated only when a disc is in the player.
- When the program menu appears, the setup menu setting is forbidden.
Data memory with Music, JPEG or Video files
Insert the a disc and the player will auto search the directories saved Video/Music/JPEG files.
Data Disc with Pictures, Music or Videos
- The DVD Player supports pictures in JPEG format.
- The DVD-Player supports music files in MP3 and WMA formats.
- The DVD-Player supports video files in various formats.
Navigation in the file browser
- Press UP or DOWN to select a folder or a file.
- Press OK or PLAY to view folder contents.
- To see the next page in the file browser, please
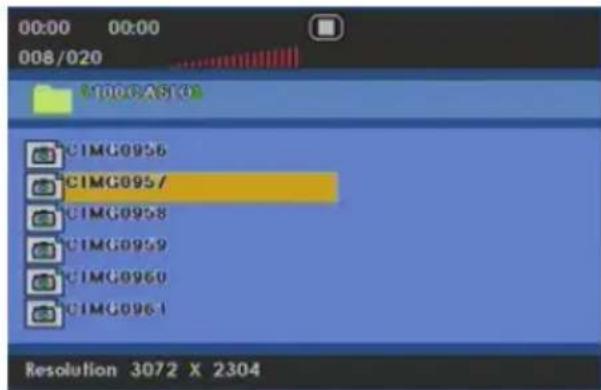
press the RIGHT or LEFT navigation button. The player scrolls the next entries in the file browser.
- Press the PROG button and the player changes the "File" and "Folder" view into a complete file list. All files which before was sorted into folders are now in a file list. To cancel the file list view, press the PROG button again and the normal "File" and Folder" view appears on the screen.
Video files compatibility with this player is limited as follows:
- Available resolution size of the MPEG-1, MPEG-2 and MPEG-4 file is under 720x576 (W x H) pixel.
- The file name of the MPEG-1, MPEG-2 and MPEG-4 file subtitle is available by 10 characters.
- If the number of the screen frame is over 30 per second, this unit may not operate normally.
- If the video and audio structure of recorded file is not interleaved, either video or audio is outputted.
- Playable MPEG-1, MPEG-2 and MPEG-4 file are ".avi", ".mpg", ".mpeg".
- Different MPEG-4 codices are supported. There must be encoded with are MPEG-4 part 2 (MPEG-4 SP/ASP) standard.
- No video files with a codec VC-1, H.264 or any container of MP4, MKV, 3GP or QT not supported by the player.
-
Supported Audio formats in MPEG-x files are:
-
MPEG-4: AC3, MP3
- MPEG-1/2: MP2 / MPA
• Sampling Frequency: 8 - 48 kHz (MP3) - Bit rate: 8 to 320 kbps (MP3)
External Subtitles
You can display MPEG-4 subtitles during playback of the MPEG-4 video if the file name for the subtitle is similar to the video file name:
- Movie.avi / Movie.ger.srt / Movie.eng.srt
By pressing the SUBTITLE button you can switch to a second subtitle.
Note:
Following subtitle formats are supported: Sami (smi), Micro DVD (sub), Subrip (srt) and Subviewer Version 2 (sub).
Press the SET button to enter the player's setup menu. Setup menu is a facility for the owner to adjust the detail setting of the player. For the detail of Setup menu see "SET UP MENU" of this instruction manual. Various features of the player can be adjusted in the SETUP menu.
- Press DVD SET button and SETUP menu appears.
- Press the UP/DOWN button to highlight the desired menu.
- Press OK or ▶ to enter the sub menu and make the selection.
- Press ◀ to close the sub menu and save the selection.
The General Menu includes the options for "TV Display", "OSD Language", "Screen Saver" and "Last Memory".
General Setup
OSD Language
Here you can select the default OSD language for the DVD part.
TV Display
-
4:3 Pan Scan: It is suit to the common size TV. When playing, the picture will be cut. so that the TV screen is filled with the picture.
-
4:3 Letter box: when the player connect to the commonly size TV, please select the type. The top and bottom of TV screen will display black frame.
-
16:9 Wide Screen: When the player connects to the wide screen TV.
-
Wide Squeeze: The best choice if you want to display the correct aspect ratio by 16:9 or 4:3 content.
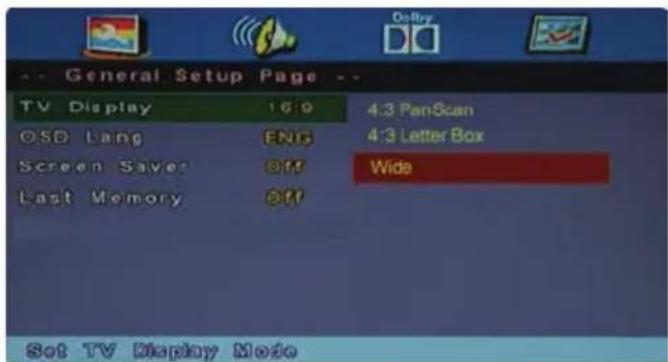
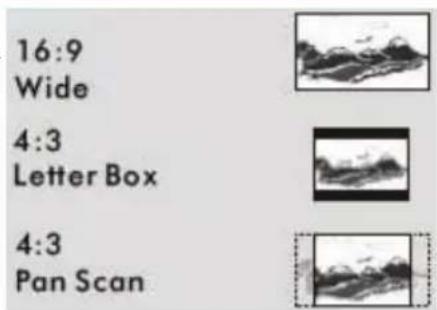
Screen Saver
This function is used to turn the screen saver On or Off.
On: In STOP, PAUSE or No DISC mode, if no actions are performed about 3 minutes, the Screen Saver will be activated.
Off: Screen Saver is disabled.
Last Memory
If "Last Memory" is enabled, the DVD-Players stores the playback position when you use the STOP button to stop DVD Playback. The Player resumes playback from the stored position when you start playback again. (This function may not be available on all DVD).
Audio setup
The AUDIO Setup Page has only one option ("Speaker Setup") with a sub-option "Downmix".
Press the OK button and then opens the submenu "Downmix".
Downmix
This options allows you to set the stereo analogue output of your DVD Player.
Lt/Rt
Select this option if your DVD Player is connected to a Dolby Pro Logic decoder.
Stereo
Select this option when output delivers sound from only the two front speakers.
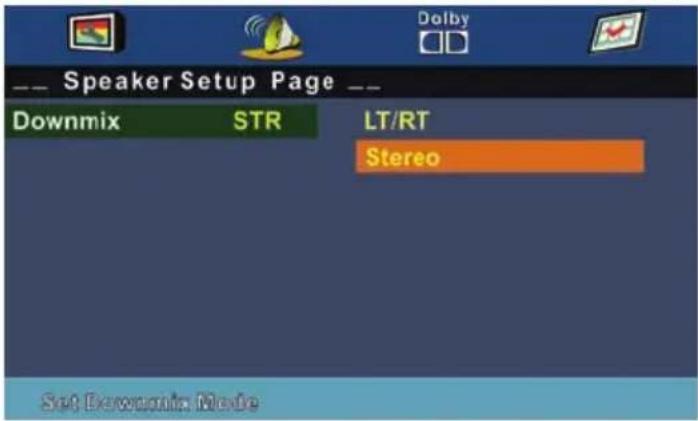
Dolby Digital Setup
Dynamic
To optimize the dynamic sound output high volume outputs are softened, enabling you to watch your favourite movie without disturbing others.
The levels for dynamic selection: Full, 7/8, 3/4, 5/8, 1/2, 3/8, 1/4, 1/8 and Off.
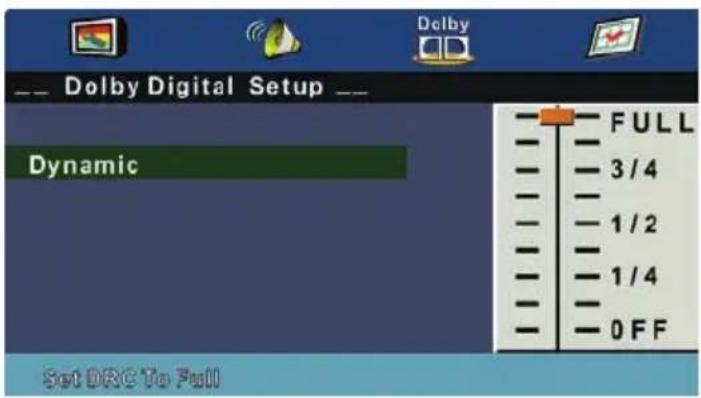
Preference Page
The options included in Preference page are: "TV Type", "Audio", "Subtitle", "Disc Menu", "Parental", "password" and "Default".
Note:
Some Preference features could not be selected during playback.
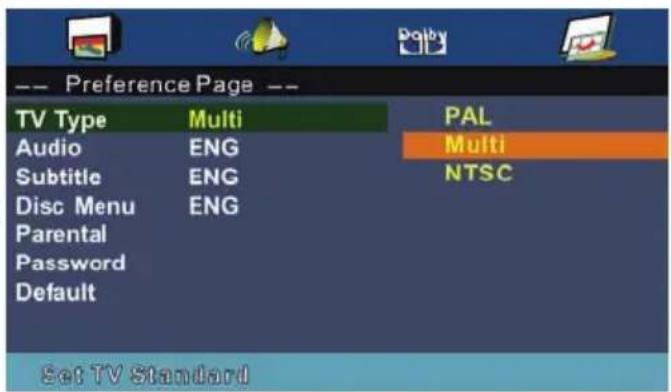
Preference Page
TV Type
There are NTSC / PAL / MULTI three modes, and choose one mode according your TV mode. If the TV mode is not suitable as the DVD player screen will blink and become colorless.
Audio, Subtitle and Disc menu
These options set the Audio, Subtitle and Disc menu language fit for you.
• Audio (disc 's soundtrack / languages)
- Subtitle (disc 's subtitles / languages)
• Disc Menu (disc 's menu / languages)
Parental
DVD video discs equipped with the parental lock function are rated according to their content. The contents allowed by a parental lock level and the way a DVD video disc can be controlled may vary from disc to disc. For example, if the disc allowed, you could edit out violent scenes unsuitable for children and replace them with more suitable scenes, or lock out playback of the disc all together.
Ratings
• KID Safe - Kids material. Recommended especially for children and viewers of all ages.
• 2 G - General Audience. Recommended as acceptable for viewers of all ages.
• 3 PG - Parental Guidance suggested.
• 4 PG13 - Material is unsuitable for children under age 13.
- 5-6 PG-R - Parental Guidance-Restricted. Recommended that parents restrict children under 17 from viewing or allow to view only when supervised by a parent or adult guardian.
• 7 NC17 - No children under age 17. Not recommended viewing for children under age 17.
• 8 ADULT - Mature material. Should be viewed only by adults due to graphic sexual material, violence or language.
Note:
Some DVDs are not encoded with a rating though the movie rating may be printed on the Disc cover. The rating level feature does not work for such Discs.
Password
This feature is used for Parental Control. Enter your four digit password when a hint is displayed on the screen. The default password is 123456.
- Insert the old password
- Insert the new password.
- Confirm the new password
- Navigate to and press ENTER button.
Default
Setting the 'Default' function will reset all options and your personal settings to the factory defaults and all your personal settings will be erased.
Caution!
When this function is activated, all settings will be reset to factory defaults.
Our custom service will help you. Did you already read the Troubleshooting pages?
Technical custom service of Xoro/MAS:
| Symptom | Correction |
| No sound | ·Ensure that the equipment is connected properly·Ensure that the input settings for the TV and stereo system are proper.·Please make sure, that the audio track exists on the disc. |
| No picture | ·Ensure that the equipment is connected properly·Ensure that the LCD is on. |
| No playback | ·Condensation had formed, please wait 1 or 2 hours to allow the player dry out·Wrong disc, please use only DVD, CD or ISO Data disc·The disc may be dirty and require cleaning.·Ensure that the disc is installed with the label side up.·The disc has too mny scratches.·The DVD+/-RW should be finalized.·Wrong region code by the Video-DVD·Cancel the parental lock function or change the parental lock level. (The Pre-set password is 123456). |
| Interference or scrolling | ·Check TV type is correct: PAL/NTSC.·Adjust the vertical hold on your TV. |
| No subtitles | ·Subtitles appear only with disc which contain them·Wrong MPEG-4 subtitle format·Please rename the MPEG-4 subtitle to the same movie file name (for example movie.avi and movi.srt) |
| General HTC 2242 HD HTC 2442HD | ||
| Supply Voltage: DC 12V (Supplied by PSU) | ||
| Dimensions (with Stand, mm) 527*156*382 605*156*426 | ||
| Dimensions (without Stand, mm) 527*51*339 605*54*383 | ||
| Wall Holder | VESA 100 | VESA 100 |
| Operating conditions: Temperature 0-40°C, Humidity: 5-90% | ||
| Tuner | ||
| Digital TV: | Input Frequency: DVB-S2(950MHz - 2150MHz), VHF (174MHz - 230MHz), UHF (474MHz - 862MHz)Modulation: DVB-T:COFDM 2K/8K QPSK, 16QAM, 64QAM, DVB-C:16-256QAM, DVB-S2:QPSK, 8PSKData rate: 1 Msym/S - 45 Msym/s (DVB-S2)Code Rates: 1/2, 3/5, 2/3, 3/4, 4/5, 5/6, 8/9, 9/10Video System: MPEG 1, MPEG-2, , H.264 video decodingSound System: MPEG 1 layer 1/2 MPEG-2 layer 2Antenna Supply Voltage : 13/18V, max. 500mA | |
| Analog TV: Video System: PAL, SECAMSound: BG, DK, I, L/L', NICAM/A2Receiving: VHF (174MHz - 230MHz), UHF (474MHz - 862MHz)Impedance: 75OhmBandwith: 7MHz, 8MHz | ||
| Inputs: | AV: PAL/NTSC/SECAM 1Vp-p@75ohmYPbPr: Y:1Vp-p@75ohm,PbPr:0.7Vp-p@75ohm (max 1080p)HDMI with DHCP: Standard TMDS Max. 1080P SCART: CVBS&RGB Input, CVBS OutputVGA: H: 30-75KHz V: 56-75Hz 0.7Vp-p@75ohm Max 1920X1080@60HzUSB: USB 2.0 CI/Cl+ Slot | |
| Speaker: | 2x3W | |
| Screen | ||
| Technology: | Liquid Cristal Display | |
| Resolution: | 1920 x 1080 Pixel (Full HD) | |
| Backlight: | LED (Edge) | |
| Size: | 54,6cm (21,5") | 60,97cm (24") |
| DVD Player: | SLOT-In Drive (12cm CD/DVD only) | |
Pixel Error
The pixel errors (bright, dark pixel, line defects and brightness differences) defined in the specifications describe the maximum allowed defects in type and number, which are excluded from coverage.
Bright Dot ≤ 3
Dark Dot ≤ 6
Bright + Dark Dots ≤ 6
Power Consumption HTC 2242 HD
Trade Mark: Xoro
Model Name: HTC 2242 HD
Energy Efficiency Class: B
Visible Screen Diagonal: 21,5"/54,6cm
Power Consumption (On-Mode, Picture Mode "Standard"): 29W
Energy consumption 43kWh per year, based on the power consumption of the television operating 4 hours per day for 365 days. The actual energy consumption will depend on how the television is used.
Power Consumption (Stand By): 0,4W
Screen resolution (physical): 1920 x 1080 pixel
Peak luminance ratio: 73%
Power Consumption HTC 2442 HD
Trade Mark: Xoro
Model Name: HTC 2442 HD
Energy Efficiency Class: B
Visible Screen Diagonal: 24"/61cm
Power Consumption (On-Mode, Picture Mode "Standard"): 31W
Energy consumption 46kWh per year, based on the power consumption of the television operating 4 hours per day for 365 days. The actual energy consumption will depend on how the television is used.
Power Consumption (Stand By): 0,4W
Screen resolution (physical): 1920 x 1080 pixel
Peak luminance ratio: 71%
Limited Warranty
In case the products delivered are not free from defects in material or workmanship, MAS Elektronik AG has the right to either repair or replace the defective product at its choice. MAS Elektronik AG manufactures and repairs goods using Technically unlimited

M A S
Elektronik AG
components which are new or equivalent to new in accordance with industry standards and practice. The warranty for wearing parts (e.g. rechargeable batteries) is limited to 6 months.
In case the device is equipped with internal data storage (e.g. hard disc drive, Flash drive), the customer is responsible to backup his data before sending the device. MAS Elektronik AG is not liable for any data loss on returned devices. MAS Elektronik AG reserves the right to reset returned devices to factory defaults. Please note your personal settings for this reason.
MAS Elektronik AG is not liable for any accessories not belonging to original package content such as DVDs, hard disc drives, Flash storage devices, batteries, etc.
This limited warranty covers the warranty requirements set by authorities in your country. This limited warranty only is valid in the country the product was purchased.
This limited warranty does not cover finishes, accessories or batteries, nor does it cover damage resulting from accident, misuse, abuse, dirt, water, battery leakage, tampering, servicing performed or attempted by unauthorized service agencies. This limited warranty does not cover damages resulting from firmware upgrades. Only in case of firmware upgrades needed to add functions promised at time of purchase, such damages are covered by this limited warranty. For a correct and frictionless completion of warranty or repairs you need a RMA No. You may obtain a RMA on the internet at www.mas.de/FAQ or by telephone.
Please send the device in its original packing material, all standard accessories and a copy of the invoice, a description of defect and the RMA No. to following address. Please note the RMA number clear and in large numbers on the outer package.
MAS Elektronik AG
Pollhornbogen 19
21107 Hamburg
Germany
Support
e-mail: support@ersservice.de
Hotline: +49 (0) 40 - 77 11 09 - 17
Fax: +49 (0) 40 - 76 73 35 - 15
FREE TO CHOOSE INNOVATIONS

XORO by MAS Elektronik AG
Pollhornbogen 19
21107 Hamburg
Deutschland
Tel: +49(040) 77 11 09 17
Fax: + 49(040) 76 73 35 15
xoro@mas.de
www.xoro.de
DE: V1_2
ENG: V1_2
FS: -
© by MAS Elektronik AG



- XORO®
- SICHERHEITSHINWEISE
- TÄGLICHE BEDIENUNG
- RECYCLING & UMWELT
- BATTERIEN
- LED
- HINWEISE
- STROMVERSORGUNG
- ABSPIELEN
- MUSIK ABSPIELEN
- EMPFANG
- ANALOG TV (INPUT ANALOG TV)
- SAFETY INFORMATION
- NOTES
- MOUNTING THE STAND 10
- CONNECTORS
- THE REMOTE CONTROL
- INITIAL INSTALLATION....16
- CONNECTION
- IMPORTANT BUTTONS....26
- EPG....28
- RECORDER....28
- MEDIA-PLAYER
- SETTINGS
- TV TROUBLESHOOTING 46
- DVD PLAYER
- SPECIFICATION
- USER MANUAL
- LASER
- OPERATION
- POWER SUPPLY
- ANTENNA
- DVB-S
- DVB-T
- OPERATION AND POSITION
- DEFECT
- PIXEL ERRORS
- RECYCLING INFORMATION
- RECYCLING OF ELECTRONIC DEVICES
- RECYCLING OF PLASTIC PARTS
- GREEN DOT
- BATTERIES
- IN THE BOX
- CONTACTS OF XORO CUSTOMER SERVICE
- REAR CONNECTION PANEL
- FRONT SIDE
- LED INDICATOR
- INFRARED RECEIVER
- INSERT BATTERY INTO THE REMOTE CONTROL
- OPERATION RANGE
- BUTTONS OF THE REMOTE CONTROL
- RECEIVING SIGNAL TYPES
- CABLE AND DIGITAL TERRESTRIAL TV
- SATELLITE
- LANGUAGE
- TYPE
- TUNE TYPE
- EXAMPLE
- PROCESS
- ANTENNA SETTING—EXPLANATION OF THE PARAMETER
- SEARCH MODE
- POLARISATION
- SCART INPUT
- HDMI
- Y PB PR
- AV IN
- VGA
- DIGITAL COAXIAL SOUND OUTPUT
- EARPHONE
- CI OR CL+ MODULE
- NOTES ON CL
- IMPORTANT BUTTONS
- IMPORTANT BUTTONS AND THERE FUNCTIONS
- SET DVB MODE
- CHANNEL LIST
- CHANGE TV CHANNEL
- SELECT TV CHANNEL
- PREVIOUS TV CHANNEL
- CHANGE THE VOLUME
- TV / RADIO
- EPG
- FAVOURITE LIST
- SUBTITLE
- TELE- / VIDEOTEXT
- AUDIO LANGUAGE OR ANOTHER AUDIO TRACK
- NOTE
- INFORMATION
- SORT CRITERIA
- INDEX
- RECORD (▲/●)
- GREEN
- YELLOW
- PREPARING OF THE USB STORAGE
- IN DTV MODE ONLY
- PREPARATION OF USB STORAGE FOR RECORDING
- SELECT DISK
- CHECK PVR FILE SYSTEM
- FORMAT
- WARNING
- PVR FILE SYSTEM TYPE
- FAT32
- HI SPEED FS
- TIME SHIFT SIZE
- SPEED
- RECORDING PROGRAM
- PLAYING RECORDED PROGRAM
- INFORMATION ABOUT A RECORDED FILE
- PLAYBACK
- PLAYBACK FUNCTION
- RECORDING FROM EPG
- TIME SHIFT FUNCTION
- CONNECTING THE USB DEVICE
- PLAYING PHOTOS
- ENJOYING MUSIC
- ENJOYING MOVIE
- LIMITATIONS
- HD MEDIA-PLAYER
- OPERATION BAR
- REPEAT MODE
- A-B SEGMENT
- GOTO TIME
- ASPECT RATIO
- TEXT PLAYBACK
- SUPPORTED FORMATS
- MAIN MENU
- CHANNEL
- AUTO SCAN
- ANTENNA SETTINGS
- DTV MANUAL TUNING
- DVB-T (INPUT DVB-T)
- ANALOGUE TV (IPUT ANALOGUE TV)
- ON THE ATV MANUAL TUNING MENU
- PROGRAMME EDIT
- MOVE A TV CHANNEL
- DEFINE TV CHANNELS AS FAVOURITES
- SKIP A TV CHANNEL
- RENAME A TV CHANNEL (ONLY BY ANALOGUE TV CHANNEL POSSIBLE)
- DELETE A TV CHANNEL
- SIGNAL INFORMATION
- CI INFORMATION
- RECORD START
- RECORDED LIST
- RECORDED MODE
- SCHEDULE LIST
- PVR FILE SYSTEM
- PICTURE
- NOISE REDUCTION
- SCREEN
- AUTO POSITION
- HORIZONTAL AND VERTICAL POSITION
- SIZE
- PHASE
- SOUND
- SOUND MODE
- TREBLE AND BASS
- BALANCE
- AUTO VOLUME
- SURROUND SOUND
- SPDIF MODE
- TIME
- CLOCK
- OFF TIME OF THE TV
- TIME SETTING
- ON TIME OF THE TV SET
- SLEEP TIMER
- AUTO OFF
- TIME ZONE
- OPTION
- OSD LANGUAGE
- AUDIO LANGUAGE 1, 2
- SUBTITLE LANGUAGE 1,2
- OSD DURATION
- COUNTRY
- LOCK
- LOCK CHANNEL
- SET PASSWORD
- BLOCK PROGRAM
- PARENTAL GUIDANCE
- FUNCTIONS
- VIDEO-DVD TITLE
- DVD MENU
- OPEN/CLOSE
- PLAY/PAUSE
- STOP
- NEXT CHAPTER / TRACK
- PREVIOUS CHAPTER / TRACK
- FAST BACKWARD/FAST FORWARD
- FUNCTION
- NUMERIC BUTTONS
- AUDIO TRACK
- SEARCH / GOTO
- ZOOM
- WHEN PLAYBACK THE JPEG
- PROGRAM
- DATA MEMORY WITH MUSIC, JPEG OR VIDEO FILES
- DATA DISC WITH PICTURES, MUSIC OR VIDEOS
- NAVIGATION IN THE FILE BROWSER
- VIDEO FILES COMPATIBILITY WITH THIS PLAYER IS LIMITED AS FOLLOWS
- EXTERNAL SUBTITLES
- GENERAL SETUP
- TV DISPLAY
- SCREEN SAVER
- LAST MEMORY
- AUDIO SETUP
- DOWNMIX
- LT/RT
- STEREO
- DOLBY DIGITAL SETUP
- DYNAMIC
- PREFERENCE PAGE
- TV TYPE
- AUDIO, SUBTITLE AND DISC MENU
- PARENTAL
- RATINGS
- PASSWORD
- DEFAULT
- CAUTION
- PIXEL ERROR
- POWER CONSUMPTION HTC 2242 HD
- POWER CONSUMPTION HTC 2442 HD
- LIMITED WARRANTY
- XORO BY MAS ELEKTRONIK AG
Brand : XORO
Model : HTC 2442 HD
Category : Television