
GK 1000 - Contact grill Rommelsbacher - Free user manual and instructions
Find the device manual for free GK 1000 Rommelsbacher in PDF.


| Type of product | Gas Contact Grill |
| Brand | Rommelsbacher |
| Model | GK 1000 |
| Fuel | Butane gas cartridges (not included) |
| Ignition | Piezo automatic |
| Maximum flame temperature | High (adjustable) |
| Burner | Single burner with adjustable flame |
| Cooking surface | Grill plate (non-stick coated, optional accessory) |
| Drip pan | Removable, dishwasher safe |
| Safety system | Pressure-sensitive, automatic shut-off on overheating |
| Usage | Outdoor only |
| Installation | Cartridge insertion, lock lever |
| Flame control | Ignition knob with max to start |
| Air control | Adjustable for flame height |
| Clean burner head | Removable by unscrewing center screw |
| Storage | Store cartridges in cool dry place, below 50°C |
| Accessories | Stove top grill (model GA 300/GG 2000) optional |
| Dimensions (approx.) | 30 x 25 x 15 cm |
| Weight (approx.) | 2.5 kg |
| Warranty | Loss if inappropriate use |
| Included | Drip pan, burner head, casing |
Frequently Asked Questions - GK 1000 Rommelsbacher
User questions about GK 1000 Rommelsbacher
0 question about this device. Answer the ones you know or ask your own.
Ask a new question about this device
Download the instructions for your Contact grill in PDF format for free! Find your manual GK 1000 - Rommelsbacher and take your electronic device back in hand. On this page are published all the documents necessary for the use of your device. GK 1000 by Rommelsbacher.
USER MANUAL GK 1000 Rommelsbacher
natural_image
Abstract red geometric pattern with vertical lines inside a circle (no text or symbols)ROMMELSBACHER
natural_image
Blue mobi quick cooktop with skewers on a steamer, surrounded by fresh bell peppers and vegetables (no text or symbols visible on main subject)We are very pleased that you chose this high-value product. Its easy operation, the great variety possible uses will inspire you, too, for sure. To make you will have lots of pleasure with your gas cooker for a long time, we carefully read and to follow these notes.
For Your Safety:
- These gas appliances may only be used outdoors! - Keep out of direct sunl Avoid the proximity of other heat sources and shelter from strong winds - Put the gas cooker on a solid and even base and make sure the lateral di between the appliance and all surrounding walls or other high items is cm. Please provide for unhindered air circulation underneath the applianc - Keep sufficient distance to all com bustibles.
- Parts of the appliance will become hot during usage. For this reason pl attention to the possible risk of burning when touching it. Children are of the dangers which might occur when using gas appliances. For this re children away and never leave the appliance unattended when operating it inappropriate use will result in loss of guarantee.
To Start:
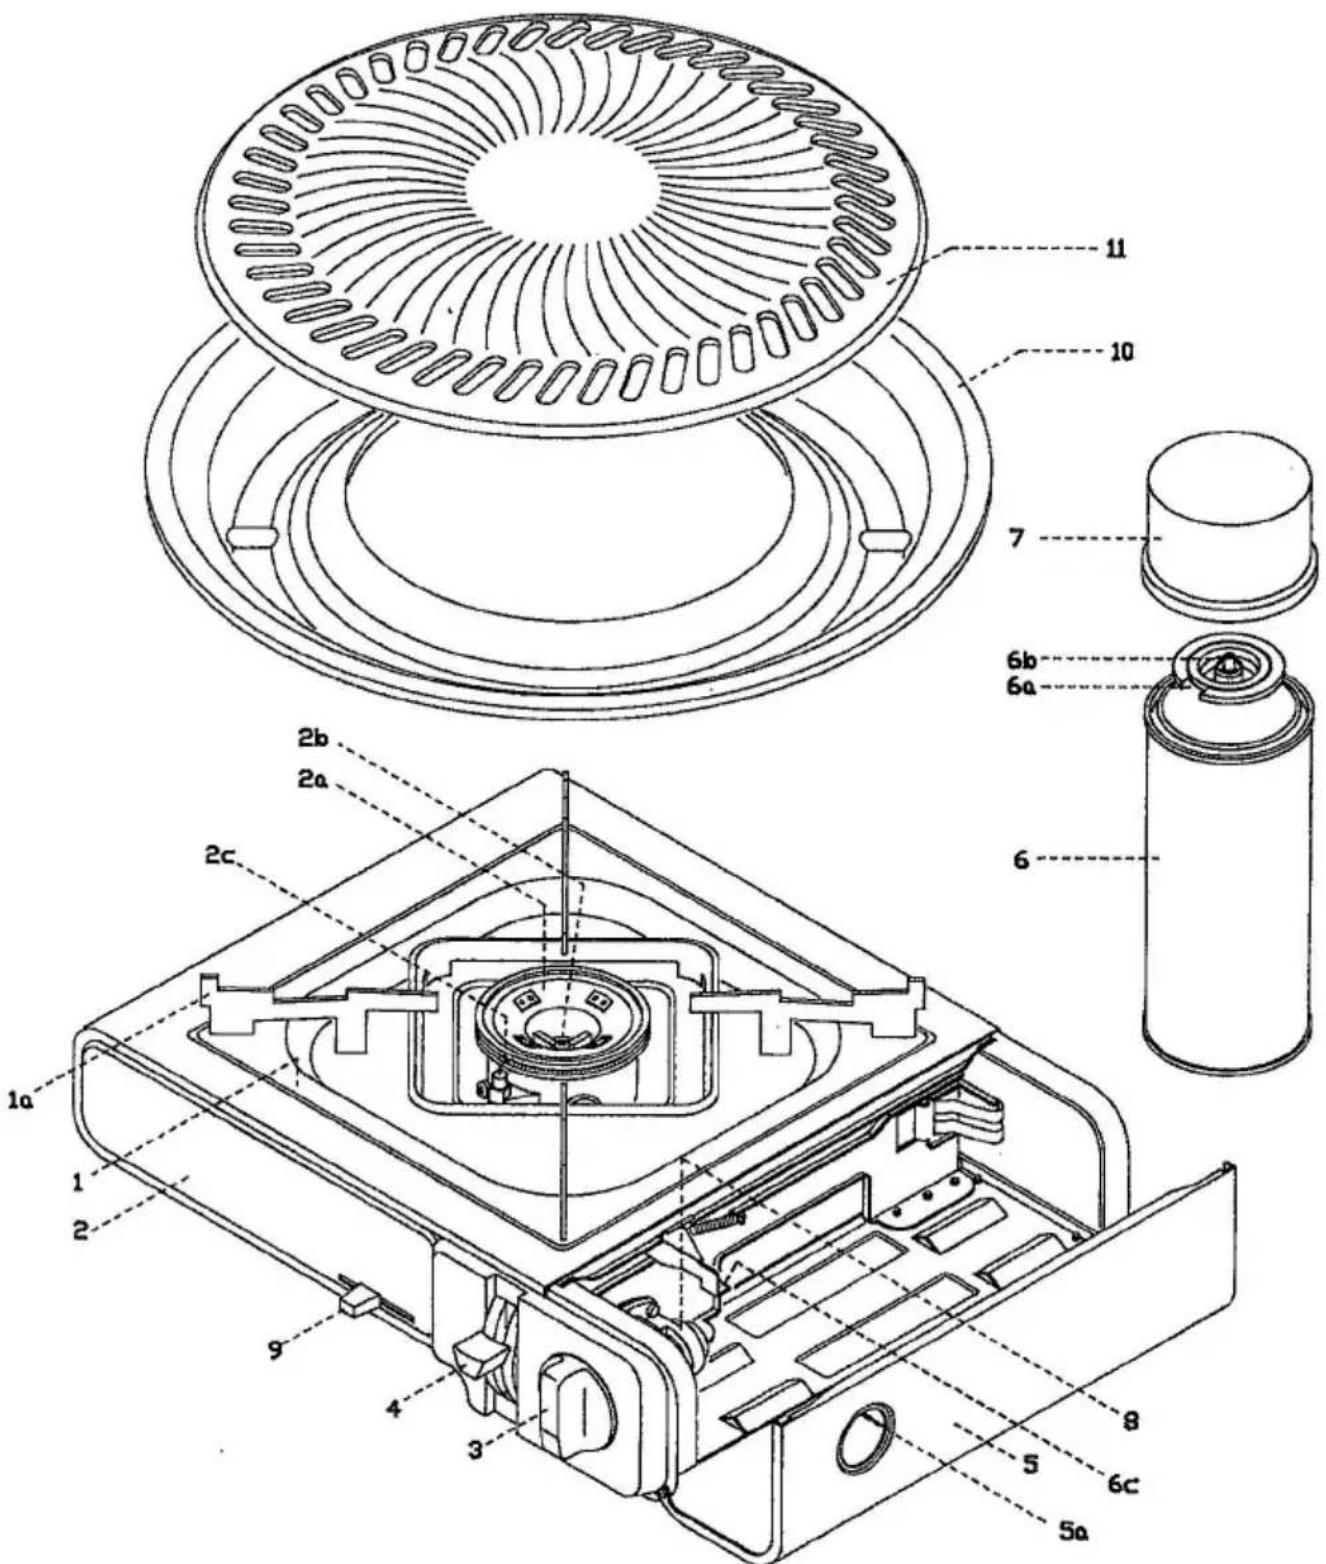
- The drip pan (1) is packaged upside down for reasons of space. Therefore turn it over first and insert it into the casing (2) with the pan supports - Set the ignition knob (3) to o and the lock lever (4) in the upper position.
- Now open the cover to expose the cartridge storage area (5) by pulling the lid upwards at the position which is marked with 5a.
- Only use fuel cartridges which are intended for this appliance and follow the instructions printed on the can.
- Remove the protection cap (7) of a gas cartridge (6) and put in safe-keeping. Note notch cut in rim at top of can (6a). With notch up, slide top of cartridge into cartridge storage area tow ard front of cooker until the lever (6c) on cooker fits into the notch and can rest squarely on fuel rack.
- Lock the lock lever (4) and check to ensure the gas outlet pin (6b) snugs against the respective opening at the fuel control unit (8). A hissing smell indicates that gas is released -in this case immediately lift the lock lever back to 0 FF and remove the gas cartridge.
- Please wait for gas which might have been released to dissipate completely before re-inserting the gas cartridge.
- Turn ignition knob counter-clockwise to the left past MAX to ignition (START) until you hear the click of the automatic ignition system and the flame ignites. Close cover.
- Check whether the flame is burning. If it fails to ignite, re-position the ignition knob to o and repeat the ignition procedure.
D uring U se:
- Always make sure that the flame won't go out so that no unburned gas will be released.
- Attention: Butane gas is heavier than air and could collect in low spots. Open flame or sparks could ignite the gas. If you note or assume that unburned is released, immediately set the ignition knob to o, lift the lock lever back to 0 FF and wait for released gas to dissipate completely before re-ignitising
- Do not use pots or pans larger than the drip pan since overheating of the cartridge storage area may occur otherwise.
- Never operate the gas cooker without drip pan. Do not carry around during usage.
- Make sure that burner head won't be soiled by overflowing food.
- Adjust flame with the ignition knob as to make sure that energy won't be wasted.
- The air control lever adjusts the height of the flame -depending on the texture of the bottom of pot.
If the flame goes out during usage, this can have various reasons.
Attention: In this case always switch the ignition knob back to o and lift t lever back to 0 FF before eliminating the cause!
- The gas cartridge is empty insert a new cartridge.
- The pressure-sensitive safety device which is contained in the fuel control unit has picked up because appliance is overheated let gas cooker cool sufficient and re-ignite.
- Flam e went out because of winds wait for gas which m ight have been released and has not been burned to dissipate and re-ignite.
- Burner head (2a) is soiled with overflowing food let the appliance cool and clean the burner head in accordance with our following tips for care and clear
After U se:
- Set the ignition knob to o and wait until the flame goes out. Then lift the back to 0 FF and remove the gas cartridge always.
Recap the gas cartridge and store can in cool, dry place. Storage temperature exceed 50°C. Caution: When cars or mobile homes are in direct sunlight, high temperature can result!
Care And Cleaning:
- -Clean the casing with a dam p cloth and a mild dishw ashing detergent. Do not immerse the appliance in water! -The drip pan can cleaned with a soluti disw ashing detergent or in the dishw asher.
- -Burner head can be removed by unscrewing the center screw (2b). Then clean the gas exits with a soft brush. Also check the distance between the point of ignition plug and the burner head, which should be around 2-3 mm.
H ob To D dispose The G as Cartridge:
- -M ake sure the gas cartridge is completely empty (by shaking can). Then hand to the collection center for used metal. Put the protection cap into plastic container.
Attention: In no case throw the cartridge into open fires!
Stove Top Grill:
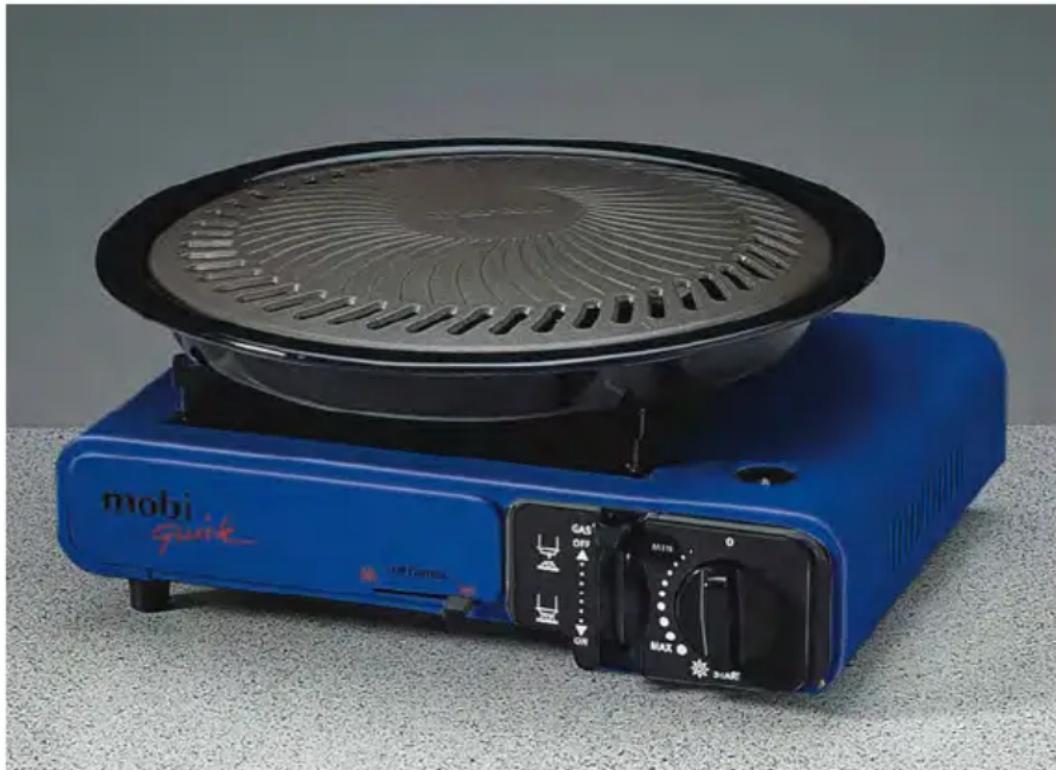
- Model GG 2000 is equipped with non-stick coated stove top grill in the standard version, which expands the variety of uses even more.
- First ignite the gas cooker as described and adjust the flame.
- Pourapproximately1/2lofw aterintow aterpan (10), place the grill surface (11) on top and put both on the drip pan. Make sure the stove top grill is positive correctly and the flame does no contact the bottom of the water tray.
- Prior to first use grease grill surface, for all further grilling operations this is not necessary anymore.
- The stove top grill is slightly locked with the drip pan. However, the appliances should be protected against shocks during grilling.
- Preheat the stove top grill for approximately 3 m in. Afterwards place food on grill.
- Enjoy healthy and pure grilling pleasure since excess fats drip into the water pan instead of burning. Sm ell and fum e w on't occur, and your food will be perfectly tender because of the rising steam.
- Clean the entirely cool stove top grill with a solution of dishwashing detergent or in your dishwash asher. However, avoid abrasive cleaners, metal utensils and aggressive cleaning pads.
- You can purchase the stove top grill also separately (model name: GA 300), thus completing your gas burner subsequently.
Have fun with your MO BI QUICK!
natural_image
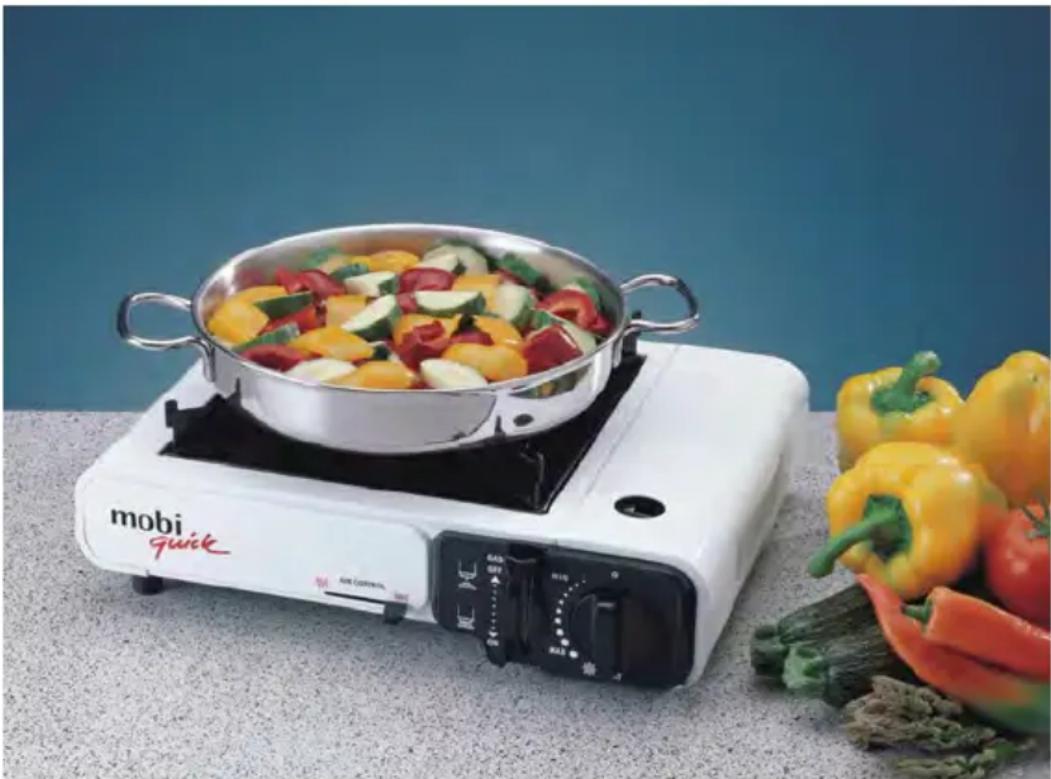
White mobi quick cooktop with a pot of mixed vegetables on a stovetop, surrounded by fresh vegetables and a blue background (no text or symbols on the main subject)G askocher G κ 1000
natural_image
Blue mobi quick electric stove with a circular fan and control panel (no visible text or symbols on the device itself)Gasgrill Set
G G 2000
natural_image
Symbol of a trash bin with crossed lines indicating no waste or discharge, and a solid black rectangle below (no text or labels)
Brand : Rommelsbacher
Model : GK 1000
Category : Contact grill