
Upper Body Unit - Fitness Equipment TUNTURI - Free user manual and instructions
Find the device manual for free Upper Body Unit TUNTURI in PDF.


| Product Type | Upper body exercise machine |
| Brand | Tunturi |
| Model | Upper Body Unit |
| Dimensions | 100 cm (W) x 70 cm (D) x 150 cm (H) |
| Weight | 30 kg |
| Maximum User Weight | 100 kg |
| Resistance Type | Dual adjustable resistance bands |
| Resistance Levels | 5 adjustable levels |
| Main Functions | Chest press, shoulder press, lat pulldown, bicep curl, tricep extension |
| Power Supply | None (manual operation) |
| Frame Material | Heavy-duty steel |
| Seat Adjustment | Vertical and horizontal adjustable seat |
| Maintenance | Wipe with damp cloth; check bolts regularly |
| Safety Features | Stable base with rubber feet, safety lock mechanism |
| Spare Parts Availability | Available through Tunturi customer service |
| Repairability | Modular design for easy part replacement |
| General Information | Designed for home gym; suitable for upper body strengthening |
| Included Accessories | Instruction manual, resistance bands, assembly tools |
| Warranty | 2 years limited warranty |
Frequently Asked Questions - Upper Body Unit TUNTURI
User questions about Upper Body Unit TUNTURI
0 question about this device. Answer the ones you know or ask your own.
Ask a new question about this device
Download the instructions for your Fitness Equipment in PDF format for free! Find your manual Upper Body Unit - TUNTURI and take your electronic device back in hand. On this page are published all the documents necessary for the use of your device. Upper Body Unit by TUNTURI.
USER MANUAL Upper Body Unit TUNTURI
Upper Body Unit
Owner's Manual
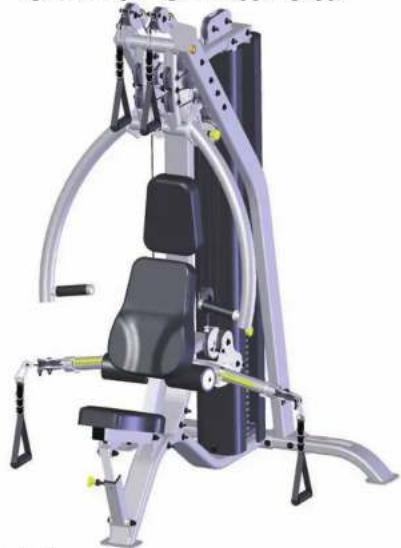
natural_image
3D rendering of a modern gym machine with adjustable arm and seat (no text or symbols visible)Record Serial Number Here
Platinum by Tunturi www.Tunturi.com
Instructions
Congratulations on the purchase of your new 4 in 1 Strength Station. This gym will provide you with a lifetime of enjoyment to meet your strength training needs. Platinum by Tunturi strives to build the best quality multi-station gyms and to package these gyms in such a way to avoid any damage during shipping.
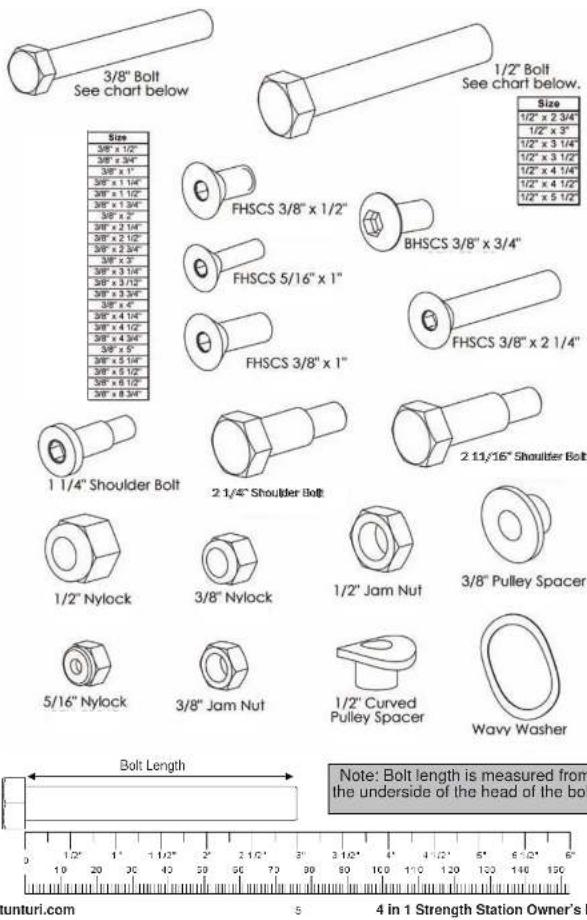
In order to get started with your assembly you should first familiarize yourself with this manual. It is recommended that you read through each step thoroughly before you begin. Begin by opening your boxes and separating all of your parts. Verify that all parts are accounted for and have no damage. When all parts are accounted for, you may begin your assembly. Some items may have been pre-assembled for your convenience. Please note that hardware quantities shown reflect total quantities for your gym and may not reflect actual quantities in each bag. Assemble your gym on a solid level surface. This will ensure the best possible performance, function, and safety for the gym and your workout.
Assemble your gym according to the step by step instructions found in this manual. Failure to do so will void your warranty and may result in personal injury. After assembly, you should check each station to ensure correct operation. If a problem arises, no check your assembly with those instructions to verify correct assembly. If you are unable to correct a problem or have questions with your assembly please contact your authorized Tunturi dealer.
Warning
Platinum by Tunturi has built this gym to give you a safe, effective and enjoyable workout. However, there is a risk assumed by individuals who use this type of equipment. It is very important that all warnings and instructions are road and followed before beginning any exercise program. It is also very important to road and follow the preventative maintenance schedule described in this manual. If any of the warning labels or stickers are worn, faded, torn, scratched or missing they should be replaced immediately. WARNING: There is a risk assumed by individuals who use this type of equipment. To minimize risk always follows these rules.
1) It is essential that you consult with your physician before beginning any exercise program.
2) Inspect equipment before each use for loose, worn, or frayed parts (including cables, nuts and bolts). Replace parts at first signs of wear (use only genuine TUNTURI replacement parts). Use of equipment that is damaged, worn, frayed or not completely assembled on a solid level surface may result in injury.
3) Make sure all adjustment pins are fully engaged before using equipment.
4) Keep all parts of the body and clothing outside the path of any moving parts of the gym. Be alert to the possibility of injury. Do not be careless.
5) Minors and children should not be allowed to play on or around this gym.
6) If you have any questions on proper use or maintenance of this gym, do not hesitate to call your local PLATINUM BY TUNTURI distributor or PLATINUM BY TUNTURI at www.Tunturi.com
Table of Contents
| ____ | Page | ____ | Page | ||
| Instructions | Functional Arm Cable Routing 20-21 | ||||
| Parts | Listing | Weight Stock Descalls and Serial Number 32 | |||
| Hardware | Comparison | Cable Tension, Adjustments, and Comparison 23-25 | |||
| Main Frame Assembly | 9-13 | Final Assembly and Troubleshooting 25 | |||
| Cable Routing | 14-17 | Maintenance | 27 | ||
| Upholstery | Floor PCB Layout 28 | ||||
| Functional Arm Option | 19 | Contact 29 | |||
Platinum by Tunturi
2
4 in 1 Strength Station Owner's Manual
Frame Components
| ITEM NO. | DESCRIPTION | QTY |
| 1 | Right Vortoal Support | 1 |
| 2 | Reay Base | 1 |
| 3 | Middle Frame Assembly | 1 |
| 4 | Front Base Support | 1 |
| 5 | Top Swivel Pulley Holder | 2 |
| 6 | Left Vortex Support | 1 |
| 7 | Top Wight Plate | 1 |
| 8 | Shroud | 2 |
| 9 | Guide Rod Holder | 1 |
| 10 | Guide Rod | 2 |
| 11 | Weight Stack Plate | 19 |
| 12 | Rubber Donut | 2 |
| 13 | Right Swing Arm Assembly | 1 |
| 14 | Left Swing Arm Assembly | 1 |
| 15 | Right Press Arm Assembly | 1 |
| 16 | Left Press Arm Assembly | 1 |
| 17 | 1" Arm Shaft | 1 |
| 18 | Spacer | 1 |
| 19 | Seal Frame Assembly | 1 |
| 20 | Back Chrome Adjustment | 1 |
| 21 | 8" Telespar | 1 |
| 22 | 10" Chrome Adjustment | 1 |
| 23 | Axle | 1 |
| 24 | Press Arm Cable Lockout | 1 |
| 25 | Criss-Cross Free Floater | 1 |
| 26 | Free Floater | 2 |
| 27 | 4-1/2" Pulley Cover | 2 |
| 28 | 1-1/4" Pulley Spacer | 6 |
| 29 | 3-1/2" Pulley Cover | 8 |
| 30 | Middle Frame Connector Plate | 2 |
Accessories
| ITEM NO. | DESCRIPTION | QTY |
| S1 | Wight Stack Full Pin | 1 |
| S2 | Press Arm Lock | 1 |
| S3 | Strap Handle | 2 |
Upholstery
| ITEM NO. | DESCRIPTION | QTY |
| 34 | Bottom Pad | 1 |
| 35 | Head Pad | 1 |
| 36 | Back Pad With Lumbar | 1 |
| 37 | 7" Upholstery Roller 2 |
Cables
| ITEM NO. | DESCRIPTION | QTY |
| 38 | Weight Stock to Cable Tie Out | 1 |
| 39 | Floating Pulley Cable | 1 |
| 40 | Lat Pull to Cable Lockout | 2 |
| 85 | Lat Pull to Functional Arm | 2 |
Hardware
| ITEM NO. | DESCRIPTION | QTY |
| 41 | Bowled Loveler | 2 |
| 42 | Wavy Washer | 4 |
| 43 | 1" Snap Ring | 4 |
| 44 | 3/8" Jam Nut | 2 |
| 45 | HCS 3/8" 16 x 2-1/2" | 2 |
| 46 | HCS 3/8" 16 x 5" | 4 |
| 47 | HCS 3/8" 16 x 5-1/4" | 6 |
| 48 | 3/8" Flat Washer | 74 |
| 49 | 3/8" Lock Washer | 14 |
| 50 | 3/8" Nylnick | 37 |
| 51 | HCS 3/8" 16 x 3/4" | 2 |
| 52 | HCS 3/8" 16 x 1/2" | 4 |
| 53 | FHSCS 3/8" 16 x 3/4" | 2 |
| 54 | Shaft Collar | 2 |
| 55 | Shoulder Bolt 1/2" 13 x 4-1/4" | 1 |
| 56 | Shoulder Bolt 1/2" 13 x 3-1/2" | 1 |
| 57 | HCS 3/8" 16 x 3" | 2 |
| 58 | 1/2" Flat Washer | 2 |
www.tunturi.com
3
4 in 1 Strength Station Owner's Manual
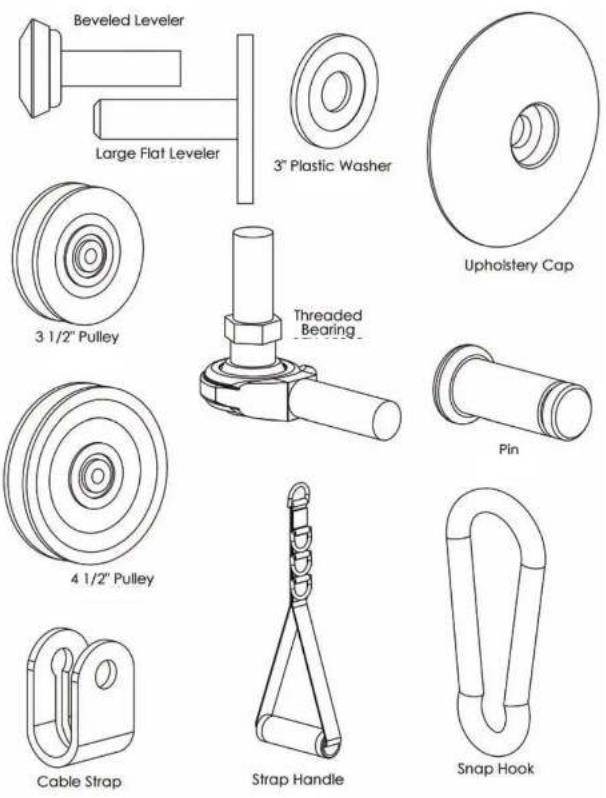
Functional Arm Components
| ITEM NO. | DESCRIPTION Qty | |
| 74 | Functional Arm Mount 1 | |
| 75 | User Right Functional Arm 1 | |
| 76 | User Left Functional Arm 1 | |
| 77 | Functional Arm Seivel Pulley 2 |
Functional Arm Hardware
| ITEM NO. | DESCRIPTION Qty | |
| 79 | 3/8" Flat Washer | 16 |
| 80 | 3/8" Nylon | 14 |
| 81 | 3 1/2" Pulley | 8 |
| 82 | HCS 3/8"-16 x 2-1/4" | 8 |
| 83 | HCS 3/8"-16 x 2"-6 |
Functional Arm Accessories
| ITEM NO. | DESCRIPTION Qty | |
| 84 | Step Handlc | 2 |
Cables
| ITEM NO. | DESCRIPTION Qty | |
| 85 - Lat | Pull to Functional Arm 2 |
Tools Required
• 1/2" Wrench
• 9/16" Wrench
- 0/16" Batchot
- 2/4" Wrench
2/4" Botohot
- 3/4 Hatcher
• Allen Wrench Set
- Tape Measure
- Snap Ring Pliers
Platinum by Tunturi
4
4 in 1 Strength Station Owner's Manual
Contact
Benelux
Accell Fitness Berelux
Koningsbellweg 51
1329 AE ALMERE
The Netherlands
Tel: 131 36 5480050
Fax: +31 38 5460055
Scandinavia
Accel Fitness Scandinavia
Varusmeslarintie 28
20361 TURKU
Finland
Tel: +358 10 2733 200
Fax: +358 2513 313
Germany
Accell Fitness North America Inc.
30 Hayward Ave. Suite 2
N2C 2E4
Kitchener, ON Canada
Tel. 1-888-388-6887
Fax: 1-519-576-2521
www.accellfi.tness.com
www.tunturi.com
www.tunturi.com
29
4 in 1 Strength Station Owner's Manual
natural_image
Technical line drawing of a mechanical lifting device with no visible text or symbols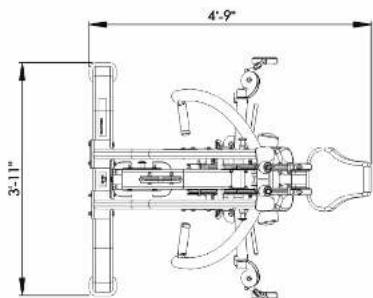
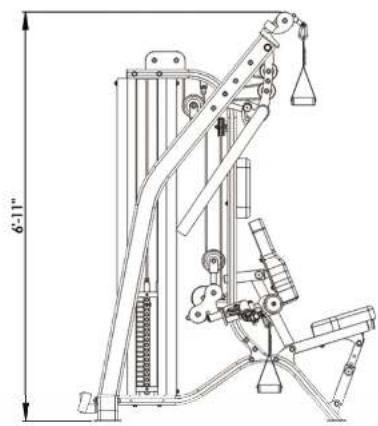
Layout Diagram
The with Leg Press has a layout dimension of 3'-11" (width) x 4'-9" (length) x 6'-11" (height). There should be a minimum of 18", preferably 24", of working space around the entire unit.
Platinum by Tunturi
28
4 in 1 Strength Station Owner's Manual
[NO TEXT]
The image is too blurry to recognize any text content.
Platinum by Tunturi
5
4 in 1 Strength Station Owner's Manual
[NO TEXT]
Preventive Maintenance
Platinum by Tunturi strives to give you the very best in quality, performance and safety through carefully engineered designs and excellent workmanship. In order to maintain this high level of quality the preventative maintenance schedule below should be followed.
Clean upholstery, grips, and roller pads with miki soap and water generally after every use. The guide rods, chrome slides and frame should be cleaned with a cotton cloth. Upon cleaning the guide rods, a thin layer of Silicone or Teflon gel should be applied to each rod to ensure a glass smooth performance.
An overall inspection should be done before each workout. If the warning and safety decals are worn or have been removed they should be replaced immediately. The cables and cable systems should be inspected for signs of wear and proper tension. In order to check cables properly you should carefully run the cable through your fingertips, checking for signs of wear, cracks, burs and thinning spots. Replace any part at first signs of wear. Cables should be adjusted for proper tension. See assembly instructions for this detail. All hardware, stops, and adjustments should be checked and tightened as required.
The guide mids on your machine should be cleaned and lubricated regularly. This will ensure a glass smooth performance from your weight stack. A thin layer of either Silicone or Teflon gel should apply to each md. Each pillow block bearing and flange bearing has a grease fittings that must be lubricated regularly. Use general purpose bearing grease and follow the schedule below.
Although cables should be inspected daily, it is important that ALL cables be replaced as directed in the schedule below. Please note that at any first sign of wear the cable should be replaced immediately.
If there are any questions concerning maintenance, please contact your local Tunturi dealer or contact Platinum by Tunturi directly at
www.Tunturi.com
| Daily | Weekly | Monthly | Quarterly | |
| Clean | ||||
| Upholatary X | ||||
| Hand Grips X | ||||
| Roller Pads X | ||||
| Guide Rods | X | |||
| Chrome Slides | X | |||
| Frame | X | |||
| Inspect | ||||
| Overall | X | |||
| Safety Decals | X | |||
| Cables | X | |||
| Cable Tension | X | |||
| Pulleys | X | |||
| Hardware | X | |||
| Stops | X | |||
| Upholatary | X | |||
| Hand Grips | X | |||
| Frame | X | |||
| Bushings | X | |||
| Bearings | X | |||
| Lubricate | ||||
| Guide Rods | X | |||
| Bearings | 1 | |||
| Replace | ||||
| Cables | 3 | |||
www.tunturi.com
27
4 in 1 Strength Station Owner's Manual
The image is too blurry to recognize any text content.
Final Assembly and Troubleshooting
IMPORTANT - Check These Components Before Using Gym:
- Position the cable guard tab on the Pulley Cover so that the tab prevents the cable from coming out of it's track on the 3 1/2" Pulley. An example of this positioning can be seen in the figure to the right. The cable guard tab should be positioned so that it is in the middle of the cable wrap on the 3 1/2" Pulley, between points "A" and "B". This will allow better protection and prevent the cable from rubbing the cable guard tab. Refer to Steps 8, 9, 12, and 13.
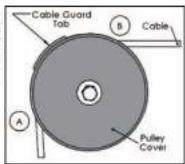
Pulley Cover
- Each Cable with a threaded bolt on either end must be threaded at least 1/2" into its attachment, whether it be a Free Floater, Lockout Free Floater, or the Top Plate of the weight stack. Each must also be secured with a 1/2" Jam Nut to ensure a safe and proper connection. Refer to Steps 6, 7, 8, 9, 12, and 13. See Figures below.
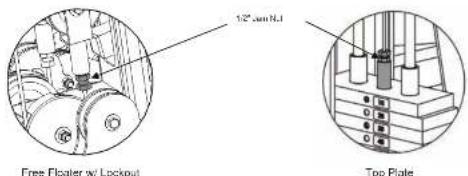
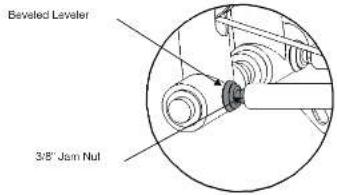
- Each Adjustment Leveler must be threaded 1/2" into its counterpart. Each must be secured with a 3/8" Jam Nut to ensure a safe proper connection. Refer to Steps 3, 6, 9, 12, and 13. See Figures below.
Platinum by Tunturi
26
4 in 1 Strength Station Owner's Manual
[NO TEXT]
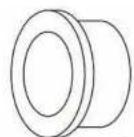
1" Bronze Bushing
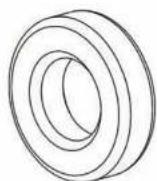
1" ID Bearing

1/2" Lock Washer (Black)
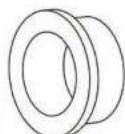
1" Bronze Bushing x 1/2 L
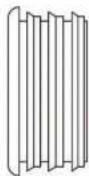
2" Round Plastic Cap
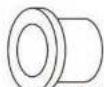
5/8" Bronze Bushing
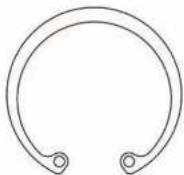
2" Internal Snap Ring

1" Inner Plastic Cap

1/2" Bronze Bushing
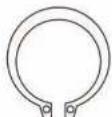
1" Snap Ring

Snap Ring

Cable Pivot Bushing

1/2" Snap Ring
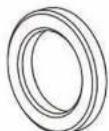
1/4" Sleeve

Short 1/2" Bushing
www.tunturi.com
7
4 in 1 Strength Station Owner's Manual
The image is too blurry to recognize any text content.
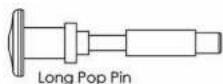
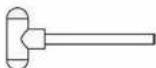
Magnetic Weight Stack Pin

Plastic Cap
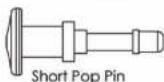
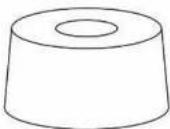

Rubber Donut
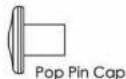

3/8" Curved Washer

3/8" Flat Washer

1/2" Flat Washer
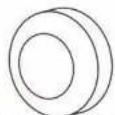
Screw Cap Cover
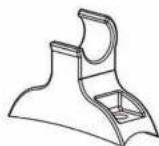
Mounting Bracket
Items not shown
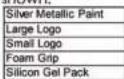

3/8" Lock Washer
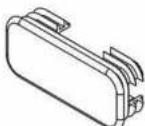
1 3/4" x 4" Rectangular Cap

6" Rubber Grips (Yellow)
Platinum by Tunturi
B
4 in 1 Strength Station Owner's Manual
Cable Comparison Chart
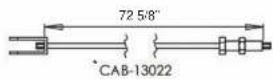
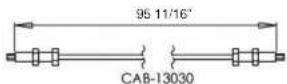
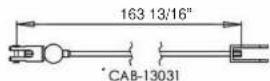
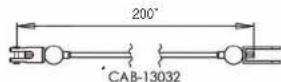
Cables
| ITEM NO. | DESCRIPTION | QTY |
| 38 | Weight Stack to Cable Tie Out | 1 |
| 39 | Floating Pulley Cable | 1 |
| 40 | Lat Pull to Cable Lockout 2 | |
| 86 | Lat Pull to Functional Arm | 2 |

Note: Cables CAB-13022, CAB-13031, and CAB-13032 have removable Cable Strap (BFH-50227)
ends to make cable routing easier. The Cable Strap ends can be found packaged with the hardware.
www.tunturi.com
25
4 in 1 Strength Station Owner's Manual
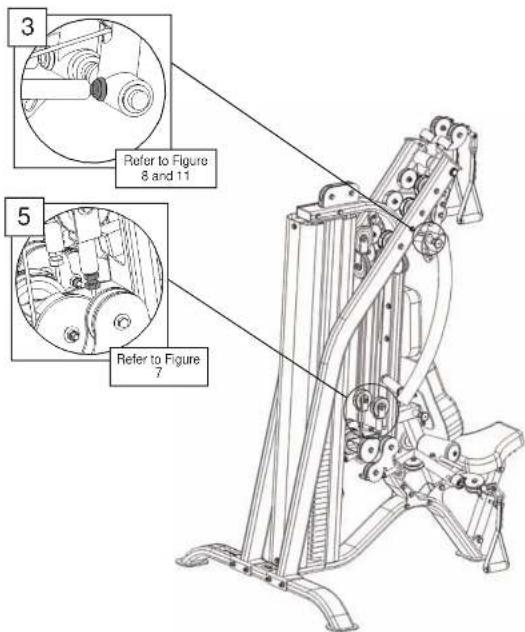

Note: All levelers should have at least 1/2" of the threads threaded in to its counterpart. It is very important that the 3/8" Jam Nut be wrench tightened to the counterpart to ensure that the leveler does not back out of the counterpart.
Platinum by Tunturi
24
4 in 1 Strength Station Owner's Manual
[NO TEXT]

PLEASE FOLLOW ALL DIRECTIONS VERY CAREFULLY FOR PROPER INSTALLATION.
Step 1:
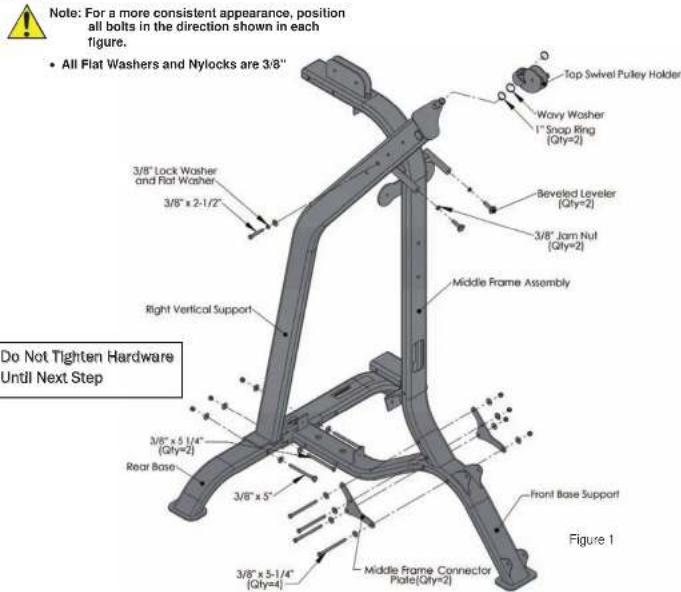
| Item # | Description Qty | |
| 1 | Right Vertical Support | 1 |
| 2 | Roar Base | 1 |
| 3 | Middle Frame Assembly | 1 |
| 4 | Front Base Support | 1 |
| 5 | Top Swivel Pulley Holder | 1 |
| 30 | Middle Frame Connector Plate | 2 |
| 41 | Beveled Leveler | 2 |
| 42 | Wavy Washer | 1 |
| 43 | 1" Snap Ring | 2 |
www.tunturi.com
| Item # | Description Qty | |
| 44 | 3/8" Jam Nut 2 | |
| 45 | HCS 3/8"-16 x 2 1/2" 1 | |
| 46 | HCS 3/8"-16 x 5" 1 | |
| 47 | HCS 3/8" 16 x 5 1/4" 6 | |
| 48 | 3/8" Flat Washer 15 | |
| 49 | 3/8" Lock Washer 1 | |
| 50 | 3/8" Nylock 7 |
g
4 in 1 Strength Station Owner's Manual
The image is too blurry to recognize any text content.
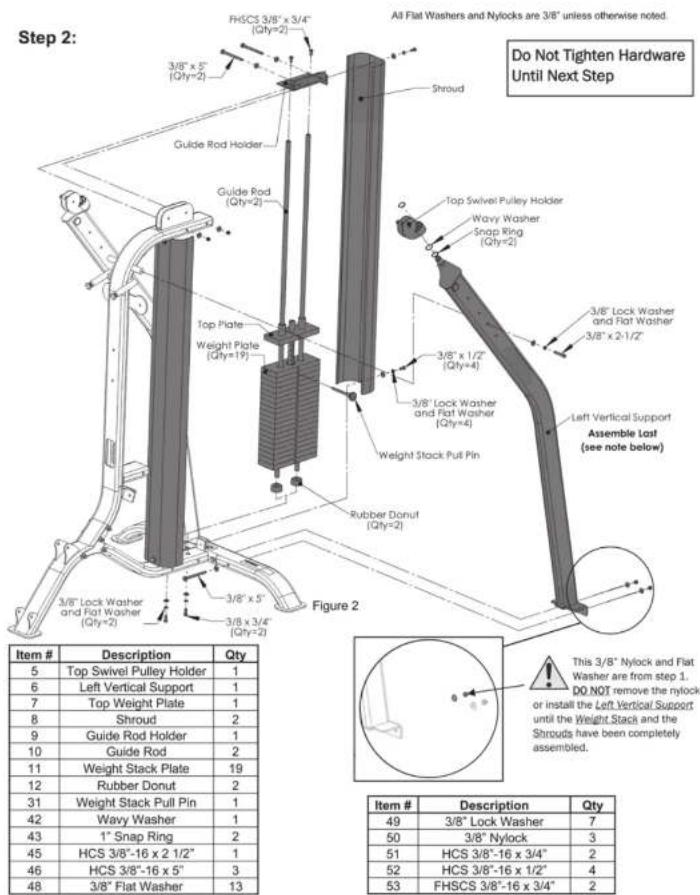
Platinum by Tunturi
10
4 in 1 Strength Station Owner's Manual
[NO TEXT]
Cable Adjustments
- Adjust cables to proper tension from any of the locations shown below.
- How to Begin: In order to get the proper tension in your cables, it is recommended that you follow the sequence 1-6 as shown on pages 24 and 25. The numbers for this sequence can be found in the upper left corner of each of the detailed views. Each detailed view below will refer you to the original Figure for more detailed information. Follow the detailed information found in each referenced figure.
- Note: If the top plate raises off of the second plate in the weight stack, then the cable tension is too light. You will need to take some of the tension out to lower the Top plate flush with the second plate.
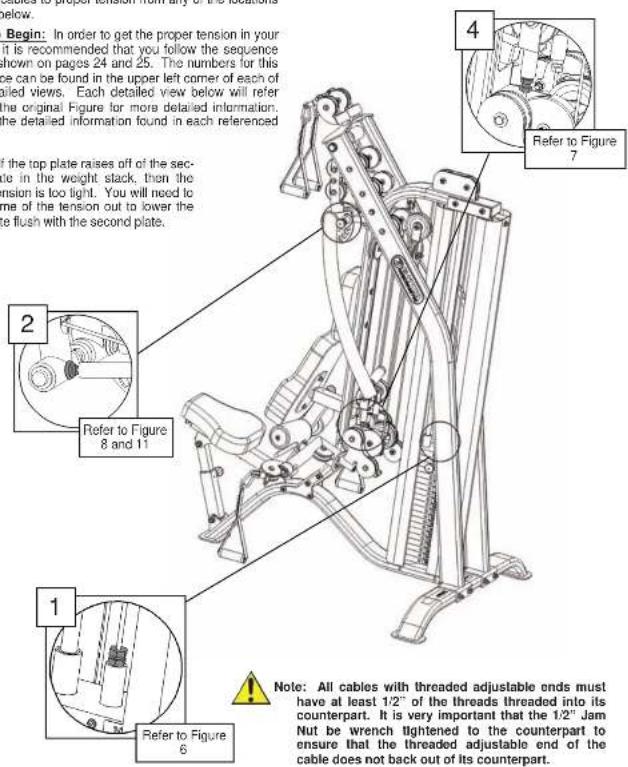
www.tunturi.com
23
4 in 1 Strength Station Owner's Manual
[NO TEXT]
Step 14:
Weight Stack Decals:
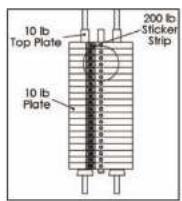
200lb Stack (Standard)
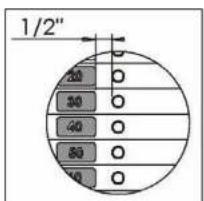
Guide Rod Lubrication:
- Clean guide rods with a lint-free cloth and apply a thin layer of silicon lubricant to each guide rod. This will ensure a glass smooth performance from your weight stack.
Serial Number:
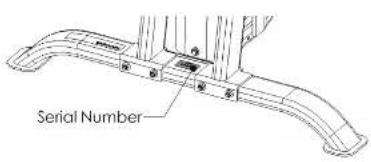
- Record your serial number on the front of this manual and keep for your records. The serial number can be found on the back of the cage as seen in the figure.
Platinum by Tunturi
22
4 in 1 Strength Station Owner's Manual
[NO TEXT]
Step 3:
Make Sure All Hardware Is Tightened Before Next Step.
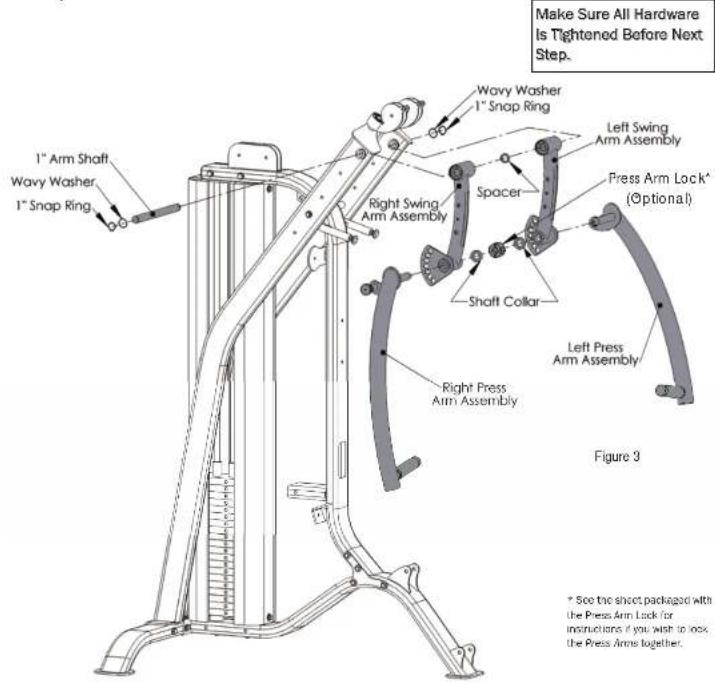
| Item # | Description Qty | |
| 13 | Right Swing Arm Assembly 1 | |
| 14 | Left Swing Arm Assembly 1 | |
| 15 | Right Press Arm Assembly 1 | |
| 16 | Left Press Arm Assembly 1 | |
| 17 | 1"Arm Shaft 1 | |
| 18 | Spacer 1 |
www.tunturi.com
| Item # | Description Qty | |
| 32 | Press Arm Lock (Optional) 1 | |
| 42 | Wavy Washer | 2 |
| 43 | 1" Snap Ring | 2 |
| 54 | Shaft Collar | 2 |
All Flat Washers and Nylocks are 30° unless otherwise noted.
11
4 in 1 Strength Station Owner's Manual
The image is too blurry to recognize any text content.
Step 4:
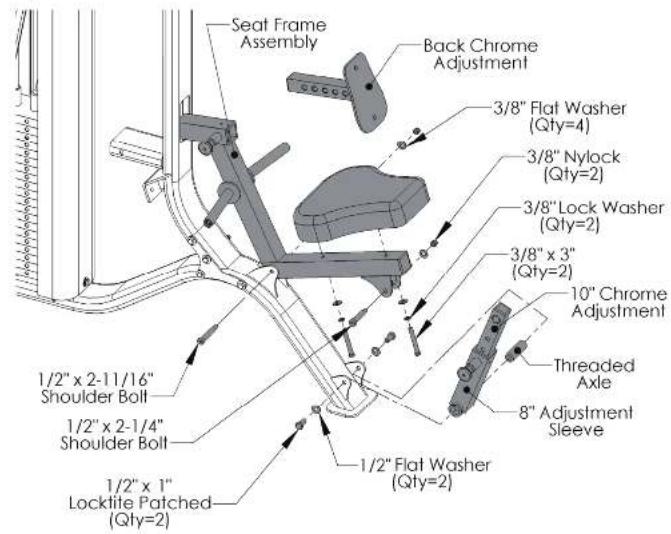
Figure 4
| Item # | Description Qty | |
| 34 | Bottom Pad 1 | |
| 19 | Seat Frame Assembly 1 | |
| 20 | Back Chrome Adjustment 1 | |
| 21 | 8" Adjustment Sleeve 1 | |
| 22 | 10" Chrome Adjustment 1 | |
| 23 | Threaded Axle 1 | |
| 48 | 3/8" Flat Washer | 2 |
| 49 | 3/8" Lock Washer 2 | |
| 55 | 1/2"-13 x 1"(Locksite Patched) | 1 |
| 56 | 1/2" x 2 11/16" Shoulder Bolt | 1 |
| 57 | HCS 3/8"-16 x 3" | 2 |
| 58 | 1/2" Flat Washer | 2 |
| 50 | 3/8" Nylock X 7.2t | 2 |
| 74 | 1/2" x 2 1/4" Shoulder Bolt | 1 |
Platinum by Tunturi

Note: Make sure the
Bottom Pad is bolted on
before the Seat Frame Assembly is installed.
All Flat Washers and Nylocks are 3/8' unless otherwise noted.
12
4 in 1 Strength Station Owner's Manual
[NO TEXT]
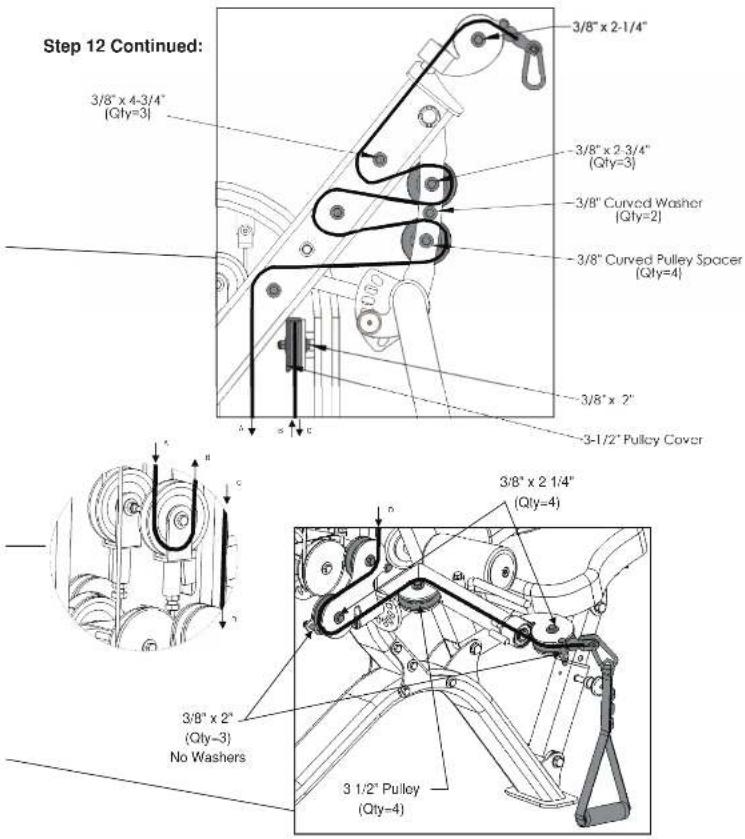
Step 13: Repeat for alternate side of . Use same Bill of Materials from Step 12
for Step 13. Use CAB-13032, Lat Pull to Functional Arm.
At Flat Washers and Nylcocks are 300° unless otherwise closed.
www.tunturi.com
21
4 in 1 Strength Station Owner's Manual
The image is too blurry to recognize any text content.
Step 12:
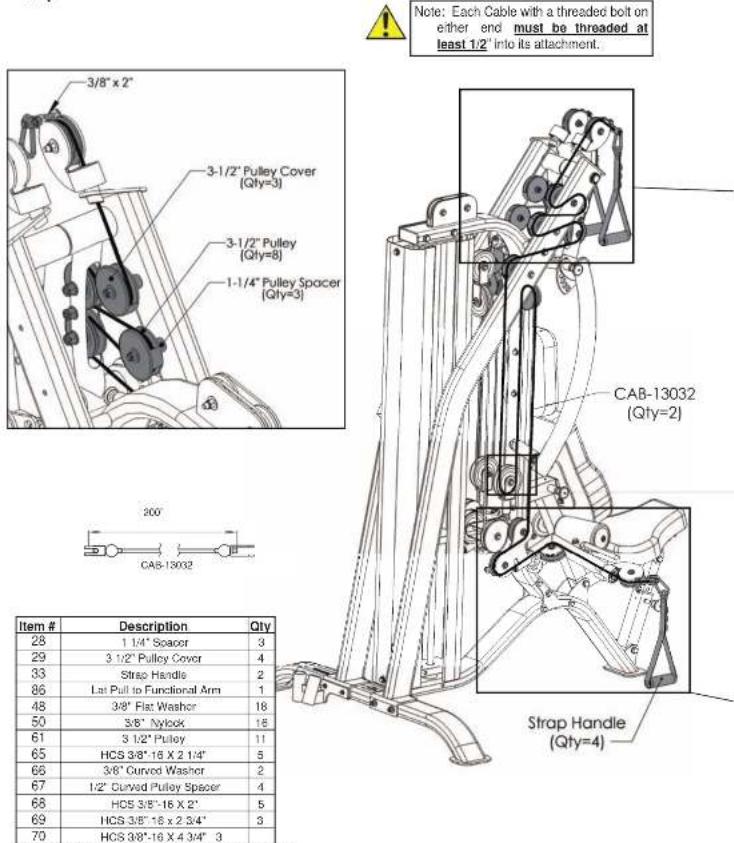
All Fix Washers and Nylacks are 300 ^st unless otherwise noted.
Platinum by Tunturi
20
4 in 1 Strength Station Owner's Manual
[NO TEXT]
Step 5:

NOTE: If Functional Arm Option is purchased then skip this step
![3/8" x 1-1/4" [Qty=2] Press Arm Cable Lockout Figure 5](/content/2026/05/777216/images/7c47cb8aab31da8fa4731a2e04167e2651944bb1edf32fbe12b18a5bbc94a9b6.jpg)
All Flex Washers and Nylon are 3/8" unless otherwise noted.
www.tunturi.com
| Item # | Description | Qty |
| 24 | Press Arm Cable Lockout | 1 |
| 48 | 3/8" Flat Washer | 4 |
| 50 | 3/8" Nylock | 2 |
| 60 | HCS 3/8"-16 x 1 1/4" | 2 |
13
4 in 1 Strength Station Owner's Manual
The image is too blurry to recognize any text content.
Cable Routing
Step 6:
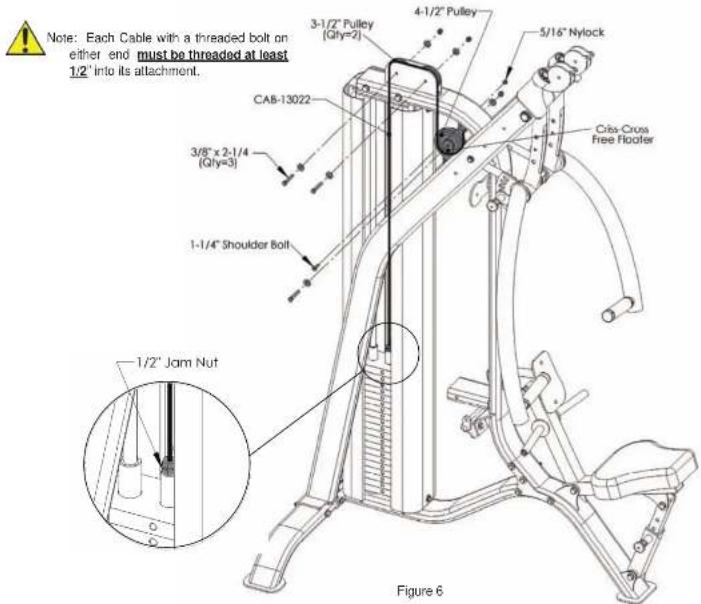
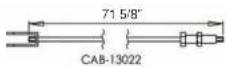
All Fat Washers and Nylocks are 3.9" unless otherwise noted.
Platinum by Tunturi
| Item # Description Qty | ||
| 25 | Criss-Cross Free Floater 1 | |
| 38 | Weight Stack to Cable Tie Cut | 1 |
| 48 | 3/8" Flat Washer 6 | |
| 50 | 3/8" Nylock 3 | |
| 61 | 3 1/2" Pulley 2 | |
| 62 | 4 1/2" Pulley 1 | |
| 63 | 1 1/4" Shoulder Bolt 1 | |
| 64 | 5/16" Nylock 1 | |
| 65 | HCS 3/8"-16 x 2 1/4" | 3 |
14
4 in 1 Strength Station Owner's Manual
Functional Arm Option
Step 11:
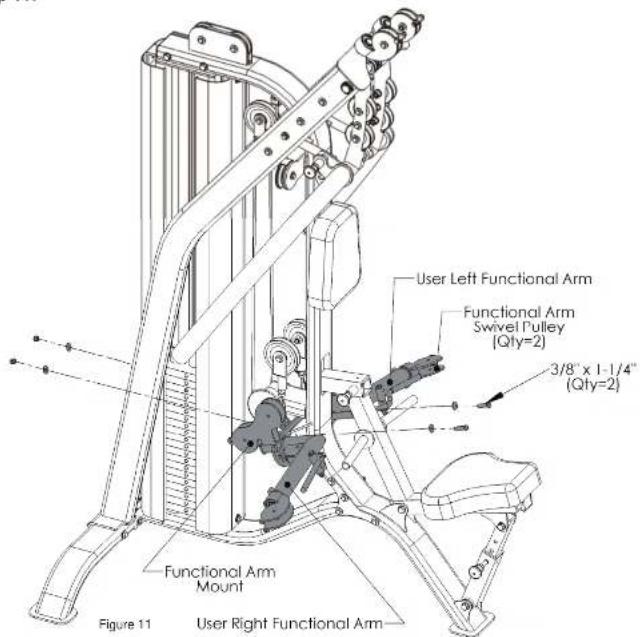
All Flex Washers and Mylocks are 3/9" unless otherwise noted.
www.tunturi.com
| Item # | Description | Qty |
| 74 | Functional Arm Mount 1 | |
| 75 | User Right Functional Arm | 1 |
| 76 | User Left Functional Arm | 1 |
| 77 | Functional Arm Swivel Pulley | 2 |
| 48 | 3/8" Flat Washer | 4 |
| 50 | 3/8" Nylock | 2 |
| 60 | HCS 3/8"-16 x 1 1/4" 2 |
19
4 in 1 Strength Station Owner's Manual
Step 10:
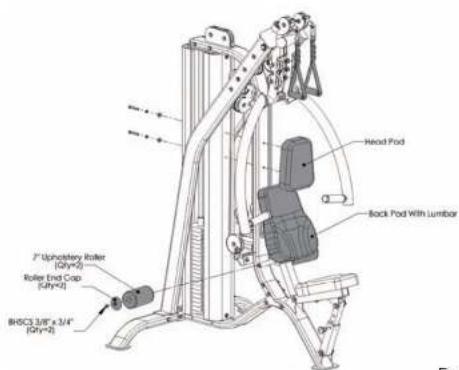
Figure 10
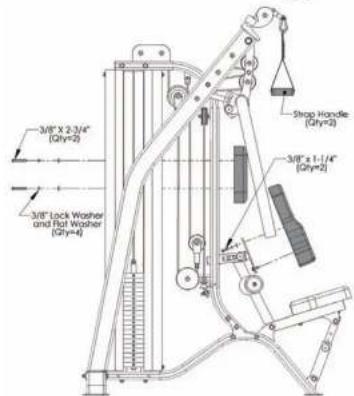
| Item # | Description | Qty |
| 33 | Strap Handle | 2 |
| 35 | Head Pad | 1 |
| 36 | Back Pad With Lumbar | 1 |
| 37 | 7" Upholstery Roller | 2 |
| 48 | 3/8" Flat Washer | 4 |
| Item # | Description | Qty |
| 49 | 3/8" Lock Washer | 4 |
| 60 | HCS 3/8"-16 x 1 1/4" | 2 |
| 69 | HCS 3/8"-16 x 2 3/4" | 2 |
| 71 | Roller End Cap | 2 |
| 72 | BHSCS 3/8"-16 x 3/4" 2 |
Platinum by Tunturi
All Flat Washers and Nylocks are 3/8" unless otherwise noted.
18
4 in 1 Strength Station Owner's Manual
[NO TEXT]
Step 7:
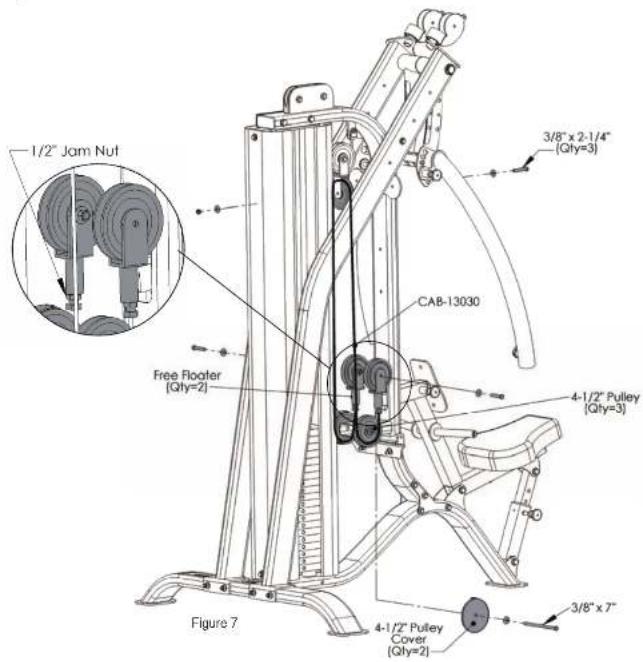
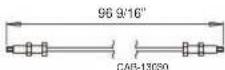
All Flex Washers and Mylocks are 3/9" unless otherwise noted.
www.tunturi.com
| Item # | Description | Qty | |
| 26 | Free Floater 2 | ||
| 27 | 4 1/2" Pulley Cover 2 | ||
| 39 | Floating Pulley Cable | 1 | |
| 45 | HCS 3/8"-16 x 2 1/4" | 3 | |
| 48 | 3/8" Flat Washer | 8 | |
| 50 | 3/8" Nylock | 4 | |
| 62 | 4 1/2" Pulley | 5 | |
| 73 | HCS 3/8"-16 x 7" | 1 |
15
4 in 1 Strength Station Owner's Manual
The image is too blurry to recognize any text content.
Step 8:

Note: If Functional Arm Option is purchased skip this step
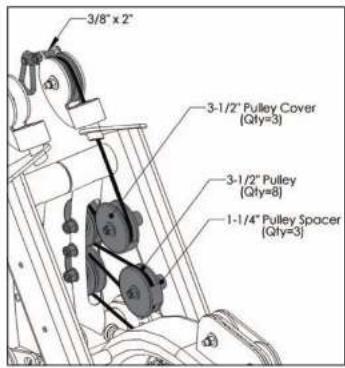
Note: Each Cable with a threaded bolt on either end must be threaded at least 1/2' into its attachment.
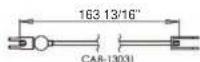
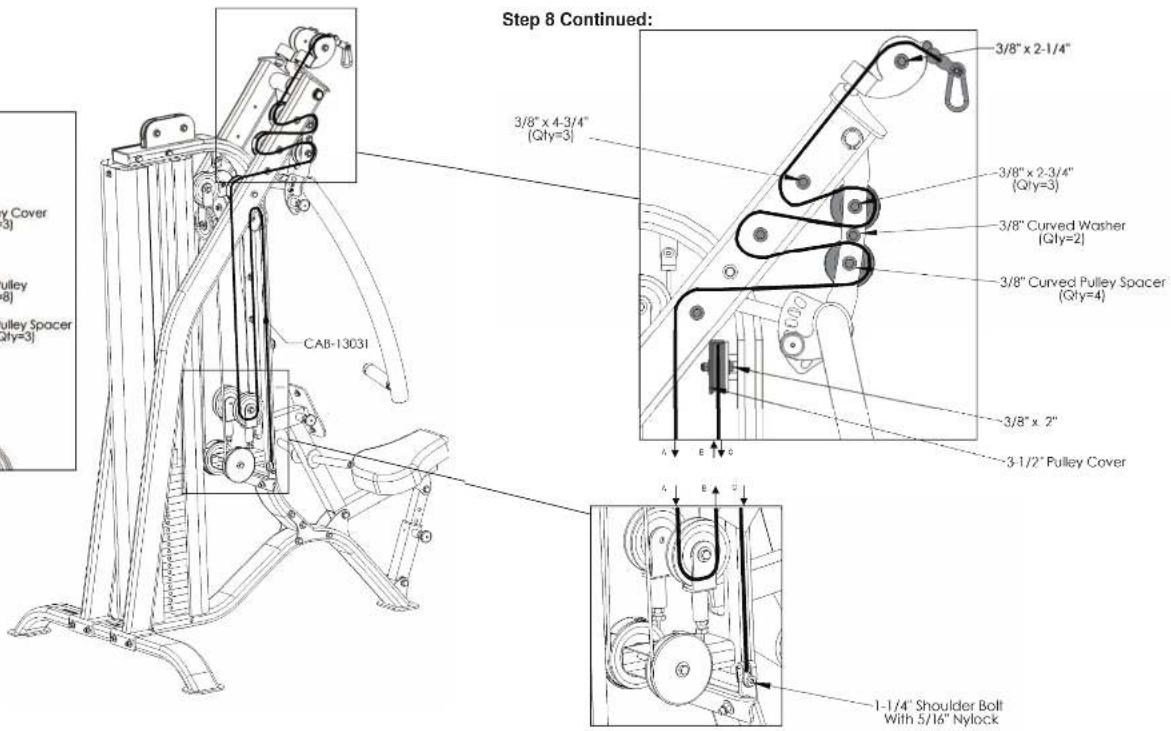
All Flat Washers and Nylocks are 3/8" unless otherwise noted.
| Item # | Description Qty | |
| 40 | Lat Pull to Cable Lockout 1 | |
| 28 | 1 1/4" Pulley Spacer 3 | |
| 29 | 3 1/2" Pulley Cover 4 | |
| 48 | 3 8" Flat Washer 10 | |
| 50 | 3 8" Nylock 9 | |
| 61 | 3 1/2" Pulley 7 | |
| 63 | 1 1/4" Shoulder Bolt 1 |
Platinum by Tunturi
| Item # | Description Qty | |
| 64 5 | 16" Nylock 1 | |
| 66 | 3/8" Curved Washer | 2 |
| 67 | 3/8" Curved Pulley Spacer | 4 |
| 68 | HCS 3/8"-16 x 2" | 2 |
| 69 | HCS 3/8"-16 x 2 3/4" | 3 |
| 65 | HCS 3/8"-16 x 2 1/4" | 1 |
| 70 | HCS 3/8"-16 x 4 3/4" | 3 |
4 in 1 Strength Station Owner's Manual
Step 9: Repeat for alternate side of . Use same Bill of Materials from Step 8 for Step 9. Use CAB-13031, Lat Pull to Cable Lockout.
41 Flat Washers and Mylocks are 30" unless otherwise noted.
www.tunturi.com
17
4 in 1 Strength Station Owner's Manual
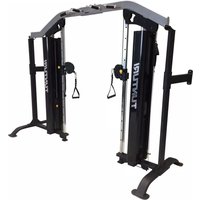


Brand : TUNTURI
Model : Upper Body Unit
Category : Fitness Equipment