
KW-1 - Remote control toy XciteRC - Free user manual and instructions
Find the device manual for free KW-1 XciteRC in PDF.


User questions about KW-1 XciteRC
0 question about this device. Answer the ones you know or ask your own.
Ask a new question about this device
Download the instructions for your Remote control toy in PDF format for free! Find your manual KW-1 - XciteRC and take your electronic device back in hand. On this page are published all the documents necessary for the use of your device. KW-1 by XciteRC.
USER MANUAL KW-1 XciteRC
natural_image
Side profile of a green tracked military tank with visible tracks, turret, and engine (no text or symbols)35522000 KW-1 Standard M 1:16
35523000 KW-1 Sound & Smoke M 1:16
35524000 KW-1 Pro M 1:16
Inhalt
Decals anbringen....13
Raucherzeuger 14
natural_image
Illustration of two armored figures observing a tank with a mounted device (no text or symbols)text_image
Diagram illustrating military tank firing with arrows indicating movement and components like battery, rocket, and fuel.natural_image
Illustration of two figures: one holding a rifle and the other with a dog, both without any text or symbols.natural_image
Illustration of a person holding a tank with a explosion symbol and a no-smoking sign (no text or symbols on the main image)text_image
Cartoon illustration showing a person using a traffic officer to crash on a wet road, with a car and tank nearby, and a no-smoking symbol.text_image
R R R R R R R R R R R R R R R R R R R R R R R R R R R R R R R R R R R R R R R R R R R R R R R R R R R R R R R R R R R R R R R R R R R R N N N N N N N N N N N N N N N N N N N N N N N N N N N N N N N N N N N N N N N N N N N N N N N N N N Notext_image
Illustration showing a cartoon character eating, with a no-smoking symbol and checkered items nearby.text_image
Diagram showing a hand pressing a mechanical component with lightning bolts and a prohibition symbolnatural_image
Illustration of two cartoon figures with a megaphone and a tank, one emitting smoke (no text or symbols)natural_image
Diagram of a battery cell with no visible text or symbols, featuring a prohibition sign (no text or labels present)text_image
Safety warning illustration showing a person lying on a stretcher with a 'no' symbol indicating no obstruction.text_image
Illustration showing a person crashing with a 'no' symbol, indicating no pollution or violation.natural_image
Illustration of a boat spraying water with a pink prohibition symbol (no text or labels)natural_image
Illustration of a tank with grass and a prohibition symbol (no text or labels)text_image
Illustration of a tank with debris and a prohibition symbol, indicating no chemical hazard or toxicity.natural_image
Line drawing of a rectangular electronic device with a coiled cable and connector (no text or symbols)Ladegerät 230 V AC
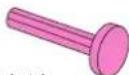
Schutzkappe
natural_image
Diagram of a device with a pink arrow pointing to a component, no text or symbols presentnatural_image
Technical line drawing of a mechanical component with a cable inserted (no text or symbols)text_image
EC 2V MGA Anatural_image
Technical line drawing of a tracked vehicle chassis with visible track, battery, and sensor components (no text or labels)
ACHTUNG:
natural_image
Mechanical assembly diagram showing a motor with control panel and gear mechanism (no text or labels)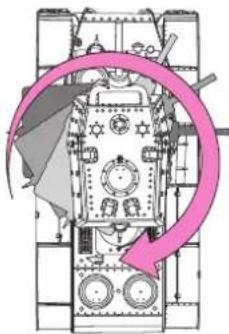
natural_image
Technical diagram of a tank interior with no visible text or symbolsRechtsdrehung
natural_image
Side profile illustration of a tracked military tank with visible tracks and turret (no text or symbols)
ACHTUNG:
natural_image
Technical line drawing of a mechanical assembly with no visible text or symbols
Caution
natural_image
Line drawing of a tank with visible tracks and wheels, no text or symbols presentnatural_image
Technical diagram of a mechanical assembly with no visible text or symbols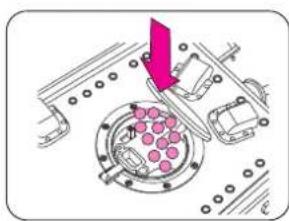
natural_image
Diagram of a mechanical assembly with a central component and a red arrow pointing to it (no text or symbols present)② Luke schliessen.
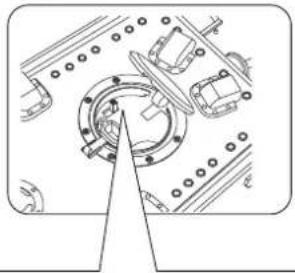
natural_image
Technical diagram of a mechanical assembly with no visible text or symbolsnatural_image
Side profile illustration of a military tank with visible turret and tracks (no text or symbols)text_image
Technical diagram showing eight different types of cable or wire connection components with numbered labels.9 Zubehör anbringen
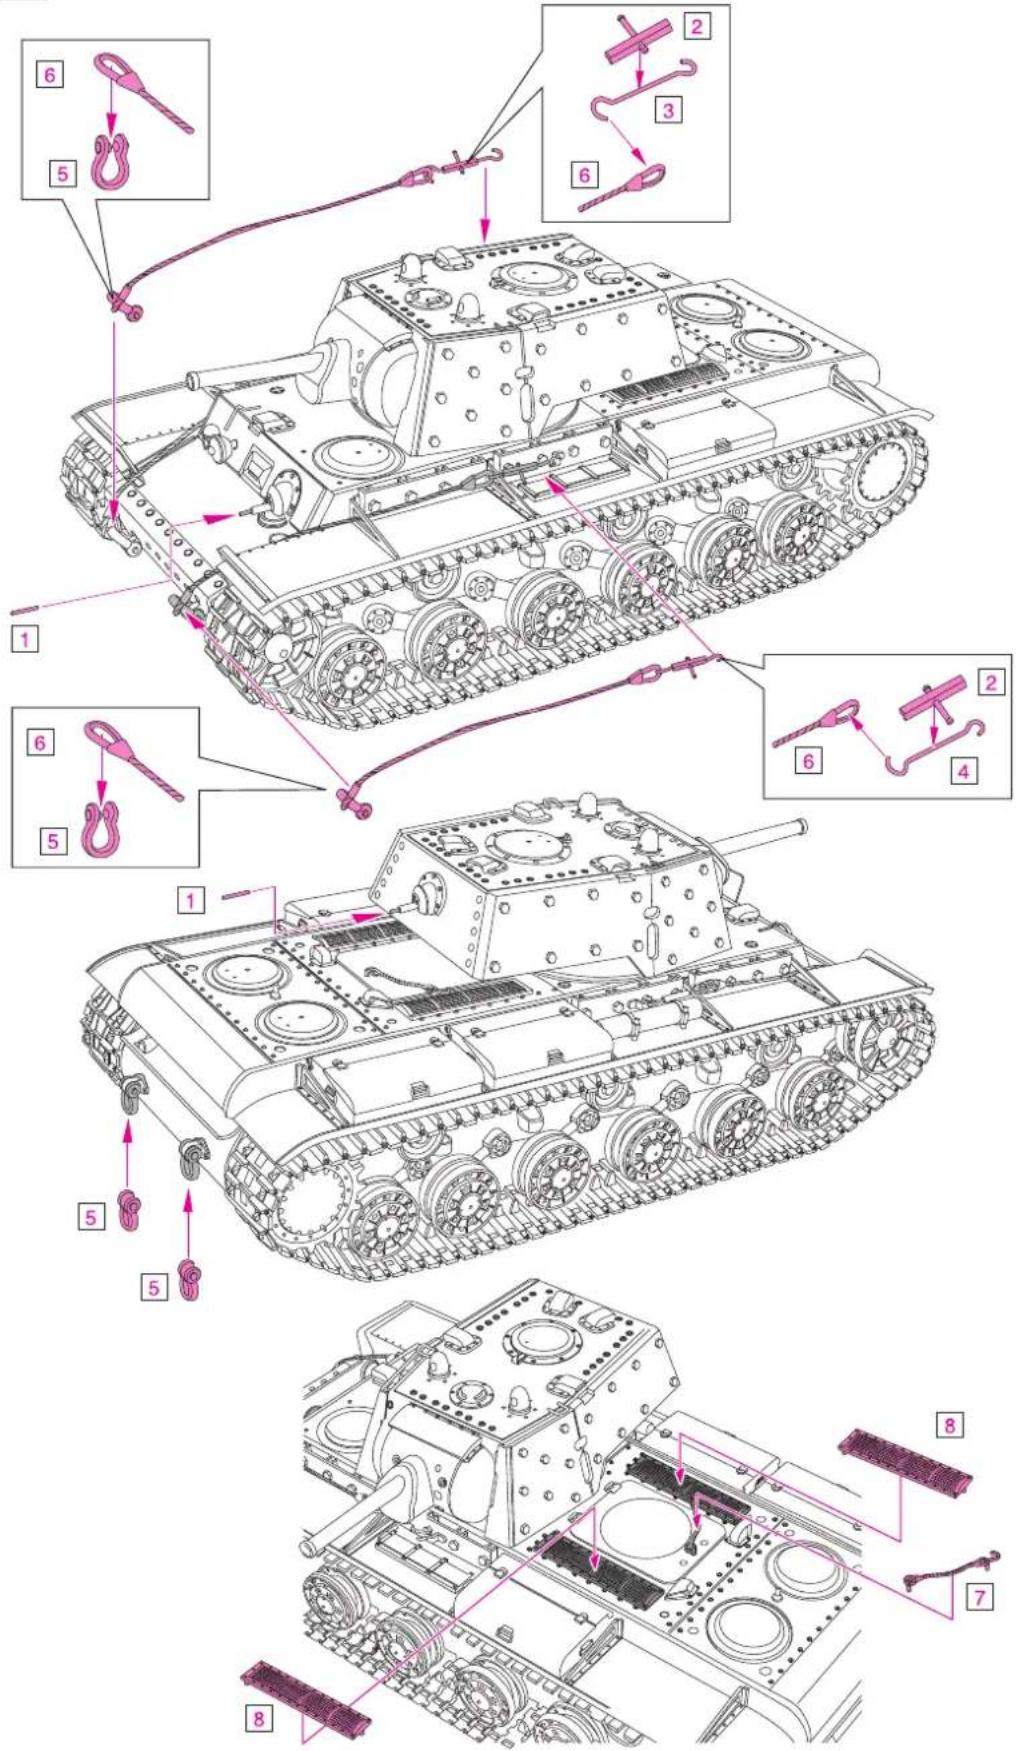
text_image
Technical diagram of a tracked military tank with numbered components and assembly instructions in Chinese10 Decals anbringen
natural_image
Illustration of hands operating a mechanical component with a pink arrow indicating rotation (no text or symbols)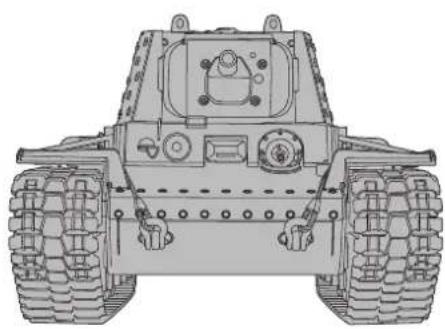
natural_image
Front view of a tracked military vehicle with multiple tires and control panels (no visible text or symbols)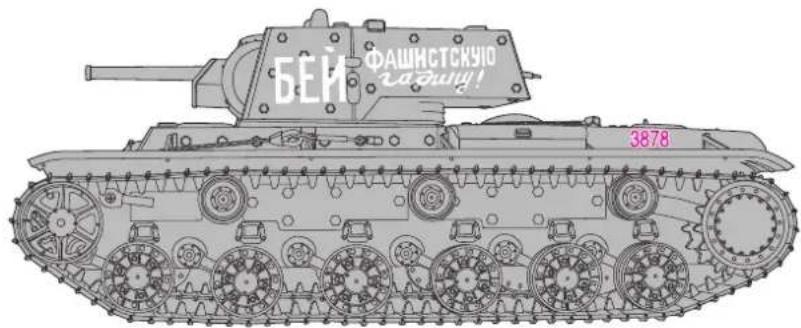
text_image
БЕЙ ФАШИСТСКУЮ радицу! 3878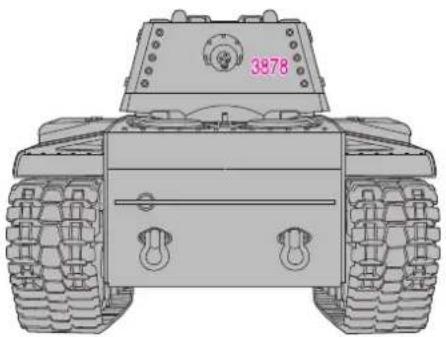
natural_image
Front view of a tracked military vehicle with visible tires and front-mounted sensor (no text or symbols)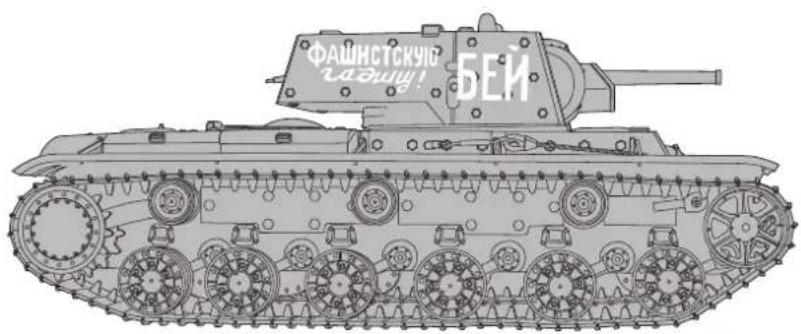
text_image
ФАШНСТСКУЮ ЧАШИЯ! БЕЙRaucherzeuger
- Cd = Cadmium
- Pb = Blei
• Hg = Quecksilber - Li = Lithium
DE
Summary
Intended Usage 19
Scope of delivery 19
Required accessories 19
Explanation of Symbols 19
WARNINGS AND SAFETY NOTES 19
Handling precautions for batteries or rechargeable batteries....20
Charging the Battery: 21
Overview 22
Insert the batteries....23
Transmitter · Operation 24
Operation 25
Turret control 26
How to load bullets....27
Accessories installation....28
How to stick mark seals 29
Smoking Set....30
Additional Manual for the Standard Version 31
Repairs, Spare parts....32
Specifications 32
Environmental Protection Notes....32
Notes on battery law 32
Declaration of conformity....33
Legal information
This manual is a publication of
All rights including translation, reproductions of any kind, such as photocopying, microfilming or storage in electronic data processing equipment, without the written permission of the publisher, reproduction in whole or part, is prohibited.
This manual corresponds to the technical status of the product at time of printing, changes in technology and equipment reserved. From the text and illustrations of this manual no claims can be derived.
NO LIABILITY FOR PRINTING ERROR! SUBJECT TO CHANGE!
The latest version of this manual can be found on the Internet at www.XciteRC.de
© Copyright 2013 by XciteRC-Modellbau GmbH & Co. KG
Thank you for purchasing the KW-1 model of XciteRC. This manual contains important instructions for operating your new model. Therefore, please read all instructions in this manual thoroughly before using the model, so that you can operate your model safely.
All company and product names mentioned are trademarks of their respective owners. All rights reserved.
Intended Usage
The KW-1 is extensively constructed and electrically driven ready to run battle tank including motor and speed controller. The control is wireless with the included remote control. The model may only be operated on a suitable and sufficiently large area without obstacles. The product is not a toy and not suitable for children under 14 years of age, by children under 14 years the maintenance and operation of the model must be supervised by an adult.
Read and observe all warnings and safety instructions in this manual and on the packaging before operating!
This manual is part of this product. It contains important information for handling this product. Keep the manual for future reference and also it must be strictly kept and passed on the subsequent sale of the model to the buyer. Failure to follow the operating instructions and the safety instructions may invalidate the warranty.
Scope of delivery
RTR vehicle, pre-assembled
Transmitter
7.2 V NiMH battery and suitable charger
Manual
Required accessories
8x AA batteries for the transmitter
Hobby knife
Forceps
Needle-nosed pliers
Explanation of Symbols

WARNING: These instructions must be strictly observed by the operator! Failure to follow these instructions may interfere with the safe function. These notes are also for your own safety and that of other people!
ATTENTION: this information must be observed by the operator! Failure to follow these instructions can cause damage of many sorts, and the loss of warranty etc.
Information or advice, by which a smooth operation is ensured.


Instructions for care and maintenance to ensure a long duration of life of the product.
WARNINGS AND SAFETY NOTES
The following safety instructions must be strictly observed. For property damage, personal injury or consequential damage caused by improper use or non-observance of the safety instructions the XciteRC Modellbau GmbH & Co. KG accepts no liability. In these cases, the warranty becomes void.
Move your model always with the maximum caution and responsibility, otherwise it may cause damage to other property or even physical injury. We therefore recommend to secure the operation with a third party liability insurance. If you already have a liability insurance policy, check before start-up the model, whether radio-controlled models are covered by a corresponding amount.

The product contains small parts that can cause injury if swallowed, and must therefore be kept away from children under 3
- The product is not a toy and not suitable for children under 14 years.
- The operation of radio-controlled models requires practice. In the beginning operate your new model therefore with extra caution and familiarize yourself with the response to your commands.
- ⚠️ WARNING: The safe operation requires concentration and quick reaction. Do not operate your model if you are tired or under the influence of drugs or alcohol – risk of accident and injury!
- ⚠️ WARNING: The control of this model is done via radio signals, which can be influenced by the environment. This may cause a suddenly loss of control of your model. Operate your model therefore only with sufficient light within line of sight and in an open area, away from cars, traffic and people – risk of accident and injury!
- Do not operate your model during a thunder storm or near radio towers or power lines.
- Radio remote controlled models may not be operated at any public space by implication (streets, roads, squares or lakes). Before operation please ask where the operation is allowed. This also applies to private property, here the consent of the owner is required.
- ⚠️ WARNING: Keep your fingers or loose clothing or hair away from the rotating parts or wheels - risk of injury!
- Always switch on the transmitter first, then the model. Ⓔ NOTE: during the operation of the transmitter must remain switched on!
EN
- Never operate your model with low transmitter batteries, because this reduces the range of your model dramatically.
- If the drive battery is empty, the model first slow down until it no longer reacts properly to your commands. Stop the operation and change the drive battery or charge it again.
- Pay attention to the instructions and warnings for this and any other equipment used by you (chargers, rechargeable battery packs, etc.).
- ⚠️ WARNING: Keep packaging material, small parts, chemicals and electrical components away from children – risk of accident and injury!
- ATTENTION: Do not drive against obstacles that the model cannot overcome, and stay on full throttle. This can destroy the motor, speed controller or the transmission!
- The model and the transmitter may be neither get humid nor wet, especially the electronic components (receiver, speed controller, servo) and, if used, lithium batteries, are not waterproof! The model may not be used in the rain (or heavy fog), do not drive in wet grass or through puddles or snow.
- ⚠️ WARNING: Fire or explosion due to moisture in lithium batteries!
- Plastic parts (eg. suspension and body) is less flexible and can break more easily at cold temperatures (below 10^ ).
- The modification of the model is not permitted for safety and CE approval regulations, which applies in particular to the transmitter, receiver and speed controller. Maintenance or repairs using original replacement parts are excluded.
- The gears in the servo are made very precisely and with low tolerances, but also very small. Therefore never turn the front wheels by hand, which can seriously damage the servo.
• After use, first turn off the model and then the transmitter.
- WARNING: remove the drive battery from the model and transmitter after use. Store the model never with built-in battery. Fire hazard!
- Store batteries separately on a non-combustible surface.
- The drive components (motor and speed controller) or the car battery may become hot during operation. ⚠️ WARNING: Risk of burns! Let these components cool down completely after the operation (and also before each battery change)!
Operation of the model is performed solely at the risk of the operator. Only a careful and deliberate operation protects against physical injury and damage to property.
Handling precautions for batteries or rechargeable batteries
- Keep batteries away from children! Never let batteries unattended, as they can be swallowed by children or pets!
- Use only the recommended or equivalent type of batteries / rechargeable batteries.
- ⚠️ WARNING: do not expose batteries / rechargeable batteries to heat or throw into fire - fire or explosion hazard!
- ⚠️ WARNING: insert batteries / rechargeable batteries with the correct polarity, no short-circuiting - fire or explosion hazard!
- If possible, always replace all batteries at the same time, never use new and used batteries and batteries with different charge levels simultaneously.
- Do not use defective or damaged batteries or rechargeable batteries – fire hazard! Risk of chemical burns on contact with skin, use protective gloves!
- ⚠️ WARNING: Do not attempt to recharge non-rechargeable batteries in a charger - fire or explosion hazard!
- Remove the rechargeable batteries from the device before charging.
- Charging may take place only with a suitable charger for the type of battery on a fireproof surface and under constant adult supervision – fire hazard!
- Immediately remove used batteries from the devices.
NOTE: NiMH batteries must be checked at least every 3 months and, if necessary, recharged, otherwise because of the typical self-discharge they may get deep discharged and damaged! Therefore, better use so-called RTU batteries with a very low self-discharge.
NOTE: note the specified storage voltage for lithium batteries. Is a completely full or empty lithium battery time stored for a longer time, it can be damaged.
The XciteRC Modellbau GmbH & Co. KG cannot monitor the proper use of the battery or batteries you use, therefore, the warranty is excluded due to incorrect charging or discharging.

This RC (remote controlled) battle tank is not a toy but a tank model controlled with radio signals. It's motor air gun and plastic BB bullets are very powerful with a shooting range of 20 to 30m. Please use carefully to avoid hurts. Please read through the following cautions before use.

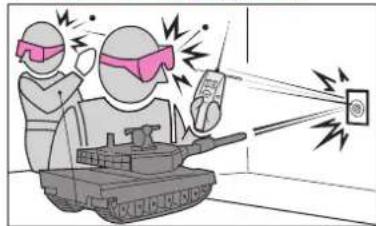
Please have goggles on.
natural_image
Illustration of two cartoon characters in protective gear interacting with a tank and a device, emitting laser beams (no text or symbols)All people in the spot should have goggles on when shooting. Please note that the bullet may rebound when it hits something hard. (Make sure no passerby will be hurt.)
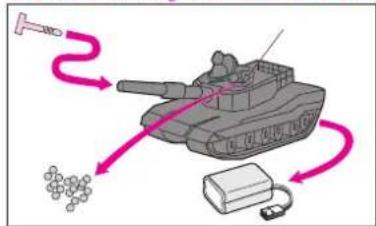
Set the shooting switch to OFF after use.
text_image
Diagram illustrating a tank with force application and mechanical components, showing motion arrows and particle arrangement.Set the main switch to OFF after playing.
① Set the shooting switch to OFF.
②Insert the protective cap into the gun muzzle.
①Remove the BB bullets. (Turn the tank upside
④Remove the batteries. (Otherwise, the batteries
may discharge by themselves and cause leakage.

Caution: Do not shoot at people or animals.

natural_image
Illustration of a military scene with a tank, a dog, and a robot holding a radio; no text or symbols present.Do not aim the gun at or shoot at people or animals. Otherwise, you may possibly be punished for bodily injury.

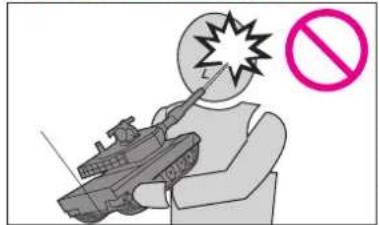
Caution: Never look into the gun muzzle.
text_image
Illustration showing a tank with a explosion and a prohibition symbol, likely related to military or civilian incidents.To protect your eyes, never try to look into the gun muzzle, whether there is bullet inside or not. Please also note that accidental shooting may be triggered when the radio signal is poor.

Caution: Do not play the tank on the roads.
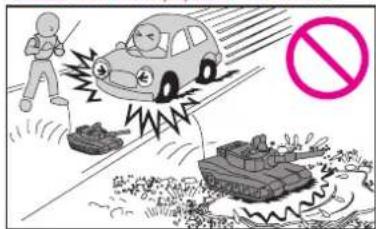
text_image
Cartoon illustration showing a person standing on a vehicle with a large 'no' symbol, another tank, and a broken road, implying traffic or collision.Do not play on the roads to avoid traffic accidents. Besides, do not play on water pit, sands, or carpet to avoid malfunction of the tank.

Caution: Never shoot in a place where there are people or cars passing by.
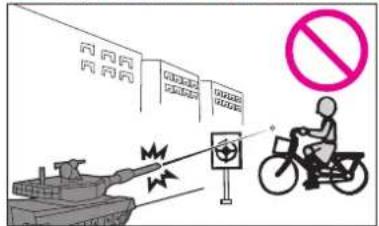
text_image
Diagram illustrating traffic safety with a tank, police station, and a cyclist, featuring a no-smoking symbol.If there are other people or cars passing by, shooting may cause danger to them. Do not shoot in such places.

Caution: Prevent part swallowing by little children.
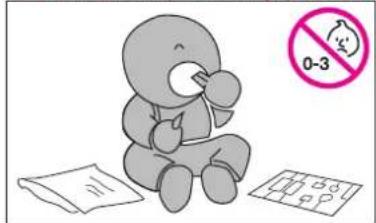
text_image
Illustration showing a cartoon character eating, with a no-smoking symbol (0-3) and a grid of icons below.
WARNING:
CHOKING HAZARD – Small parts. Not for Children under 3 years. For Age 3 & up.

Caution: Do not put hands into the wheels or the caterpillars.
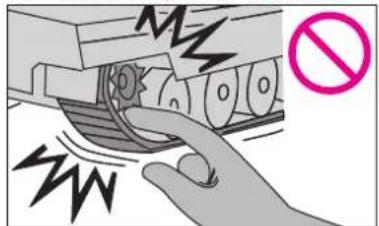
text_image
Diagram showing a hand pressing a mechanical component with lightning bolts and a prohibition symbolDo not put the hands into the wheels or the caterpillars to avoid hurts. Do not touch the wheels or the caterpillars when holding the tank to avoid hurts by misoperation.

Caution: Do not wave the antenna about or get the face too close to it.
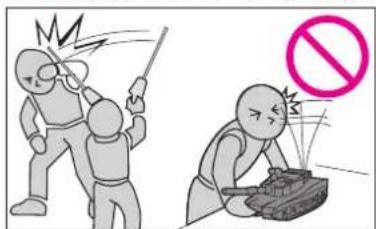
text_image
Illustration showing two cartoon figures with a warning sign: one holding a stick and the other operating a tank.The end of the antenna is dangerous to the eyes. Do not wave the antenna around or get the face too close to it. Besides, if the antenna breaks, the sharp end may be extremely dangerous, please refer to the after-sales service center for (charged) replacement.

Caution: Make sure the batteries are correctly installed to avoid burn hurt.
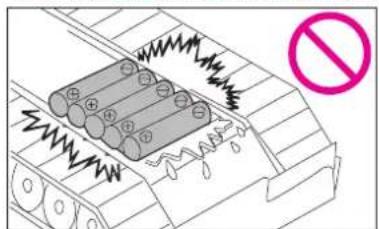
text_image
Diagram showing battery arrangement with lightning bolts and a prohibition symbolAlkaline batteries should be used carefully. Never make incorrect +/- installation. Otherwise, the battery may break and cause leakage, causing danger of burn hurt.

Caution: The company will not be responsible for any hurt or accident caused by user's misuse alteration or disassembly of the product And we will not repair products that have been altered or disassembled by the user;
- Do not point the gun muzzle at fragile or other easily breakable articles, such as glass, lamp, electric appliance, tableware, or furniture.
- Bullets other than the specified BB bullets may easily cause blockage. Do not put any other bullets or other articles into the bullet hatch or the gun muzzle.
- Keep the manual properly. If it is lost, please contact us for a mail order.
- Never try to disassemble or alter the product to avoid malfunction or danger.
- Because malfunction may be caused when the tank or the remote controller is immersed in the water or gets wetted, stop using immediately and remove all
- Do not expose the tank or the remote controller to strong sunlight. Otherwise, they may be deformed or cannot function correctly.
Charging the Battery:
Before the first use of your new model the drive battery needs to be charged with the included charger.
WARNING: Charge may occur only with the supplied charger on a fireproof surface and under constant adult supervision - fire or explosion hazard!
For charging remove the battery from the vehicle.
WARNING: Make sure to read all safety instructions regarding the use of rechargeable batteries. Also, if necessary, further safety instructions in the manual for your used charger.
- Plug the AC wall charger into an appropriate mains socket 230 V/50 Hz.
- Now connect the white connector of drive battery to the jack of the charger. ⚠️ WARNING: the connector is polarized, note the shape of the connectors. The connector must engage with slight pressure, you not use any force - fire hazard!
- The battery now will be charged. The charging time is approx. 4.5 hours.
- ⚠️ WARNING: Unplug the battery at latest after 4.5 hours, so it will not overcharge - risk of fire!
- Unplug the AC adapter.
Caution: This battle tank is for indoor use only! Please avoid the following misuses.
This tank is a precisely-made product and should be used with care. Avoid bumping or dust or sand or stone entering the body or the wheels. (The same requirements for the remote controller) (Otherwise, all related expenditure would be born by the user!)
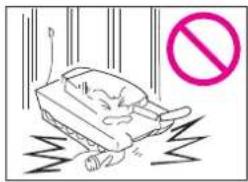
text_image
Safety warning illustration showing a person falling with a broken object and a 'no' symbol indicating no hazard.Violent shocks caused by fall or bump may lead to malfunction.
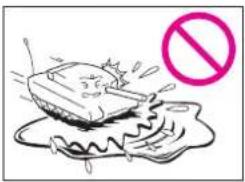
text_image
Illustration showing a person breaking down a large object with a 'no' symbol, indicating no violation or prohibition.Do not play the tank in a place where it could easily get wetted. (The remote controller should also be kept dry.)
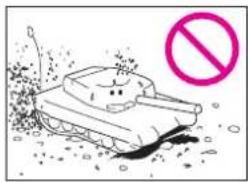
natural_image
Illustration of a tank spraying water with a no-smoking symbol (no text or labels)Do not play the tank on sands or other uneven surfaces or in a place with too much dust.
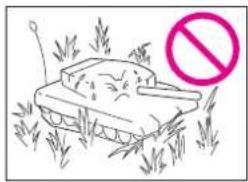
text_image
Illustration of a tank with grass and a prohibition sign, indicating no chemical hazard or safety warning.Do not play the tank on lawn or other places that may cause excessive resistance.
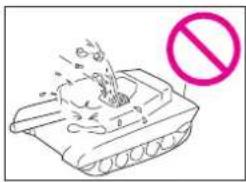
text_image
Illustration of a tank with smoke and a prohibition symbol, indicating no chemical hazard or safety warning.Do not put articles other than the specified BB bullets into the bullet hatch.

Caution

Keep yourself safe when using tools.
Battery-related caution
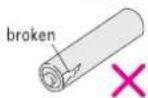
Do not use broken batteries to avoid short circuit.
⚠️ Please wear goggles to ensure safe play.
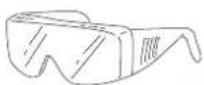
■ Articles to be purchased (controller's batteries)
● 8X AA Batteries (For controller)
Set content
Remote controller
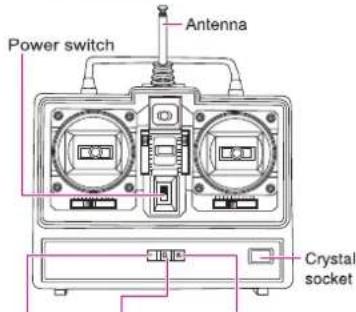
text_image
Power switch Antenna Crystal socketStart-up / quench button
Machine-gun shooting switch
Cannonball shoot
emulational sound
and rebound
vibration
Check to make sure the tank functions correctly before installation of the accessories.
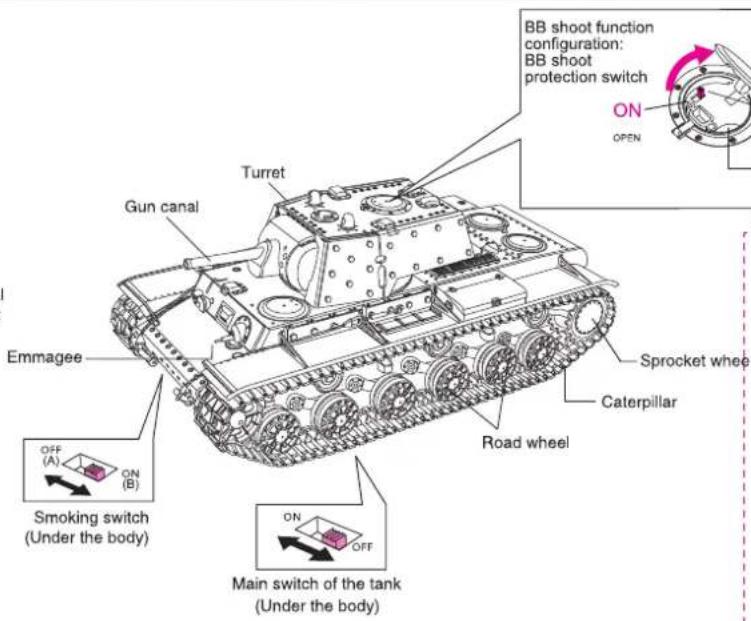
text_image
BB shoot function configuration: BB shoot protection switch ON OPEN Turret Gun canal Emmagee Sprocket wheel Caterpillar Road wheel OFF (A) ON (B) Smoking switch (Under the body) ON OFF Main switch of the tank (Under the body)Special for BB shoot
BB bullet
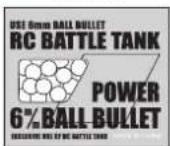
Target
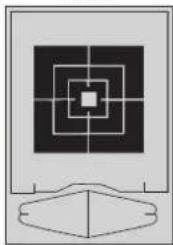
natural_image
Pure geometric diagram with concentric squares and crosshairs, no text or symbols present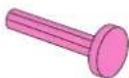
Protective cap
ACCESSORY BOX (Included the oneself accessory class)
Antenna

Paster
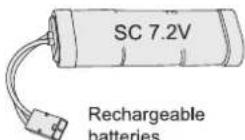
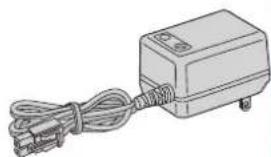
natural_image
Line drawing of a rectangular electronic device with a coiled cable and connector (no text or symbols)7.2V 400mA Transformer
(Make sure the cap is always set on the muzzle except when shooting.)
Check to make sure the tank functions correctly before installation of the accessories.

Warning
If the connection is made the opposite, battery leakage or device malfunction may be caused.
Charge
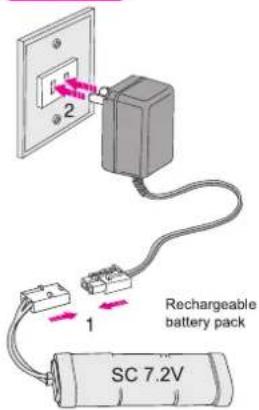
text_image
2 Rechargeable battery pack 1 SC 7.2VPlease read the charging instructions and safety warnings!

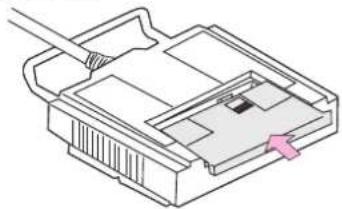
① Press down the PUSH on the battery cover and remove it at the same time. (Make sure the switch is on OFF position.)
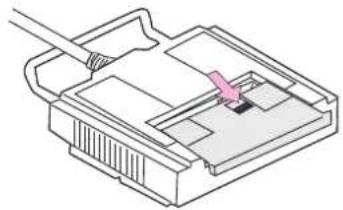
natural_image
Diagram of a device internal structure with a cable inserted, showing no text or symbols③ Replace the cover.
natural_image
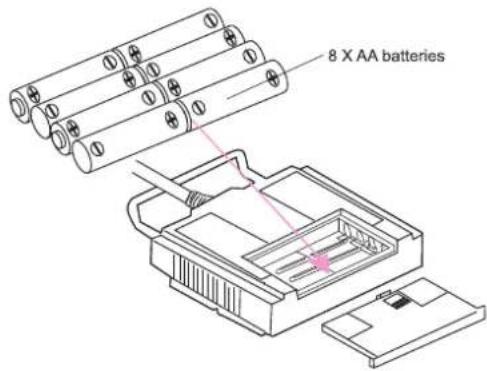
Diagram of a device's internal structure with a pink arrow pointing to a component (no text or symbols)② Load in the battery correctly.
Caution: The polarity of the battery you install must be the same as shown in the battery cover
text_image
8 X AA batteriesCaution: When turning on power, the remote controller should be first turned ON. When turning off power, the tank should be first turned OFF. If the sequence is not followed, the tank may suddenly rush forward.

BATTERY (TANK)
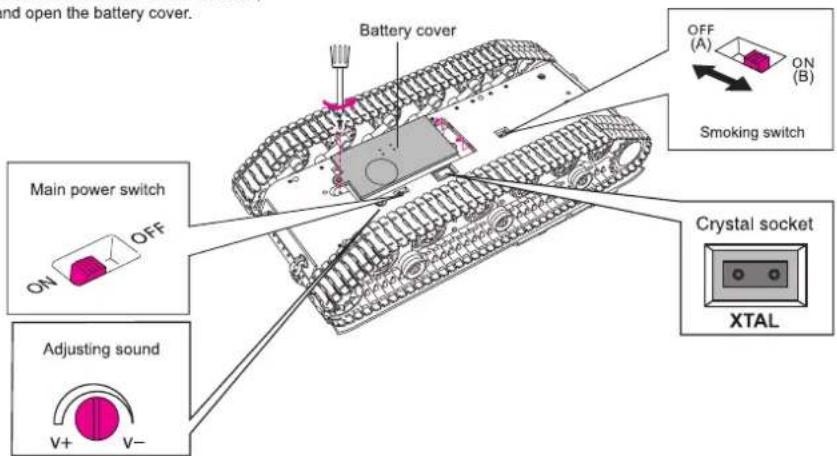
① Undo the screw with the screwdriver, and open the battery cover.
text_image
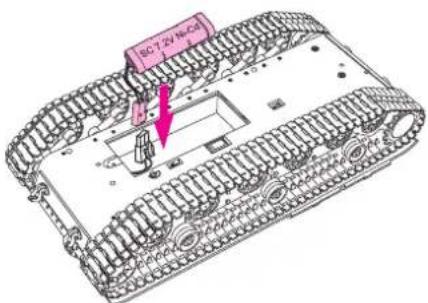
and open the battery cover. Battery cover OFF (A) ON (B) Smoking switch Main power switch ON OFF Adjusting sound V+ V- Crystal socket XTAL② Load in the battery.
③ Insert the claws properly to replace the cover, assemble the battery cover, tighten the screw.
text_image
EC-1 ZV NC-04 A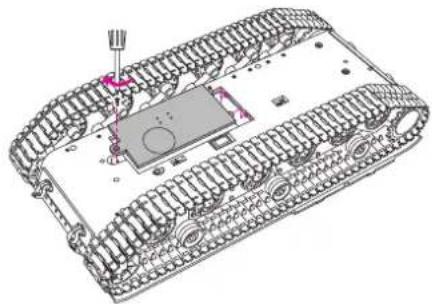
natural_image
Technical line drawing of a tracked vehicle chassis with visible track, battery, and sensor components (no text or labels)
ACHTUNG:
You can't control the tank when the headlight is flashing. By contraries, you can control the tank when the headlight isn't flash.
4 HOW TO OPERATE
- Switch the remove control to "ON" firstly, then switch the button on the button of the tank to "ON". Press the "start-up" button, the tank sounds simulative starting motor sound. Please wait 5 minutes, the headlight and taillight can not flare (headlight and taillight long-playing shine), so the tank goes into operate state and emits smoking. You can control the smoking switch to emits smoking or not. Remove the smoking switch to "OFF" for close emits smoking. Remove the smoking switch to "ON" for emits smoking.

text_image
Headlight Smoking switch (under the body) OFF (A) ON (B)- In normal state, press the "machine-gun shooting switch" G button, the tank sounds simulative shooting sound. Press the BB shoot joy stick K, the tank sounds simulative cannonball sound and it backwards at the same time. The player can adjust the simulative shooting sound and the simulative cannonball sound.
Warning
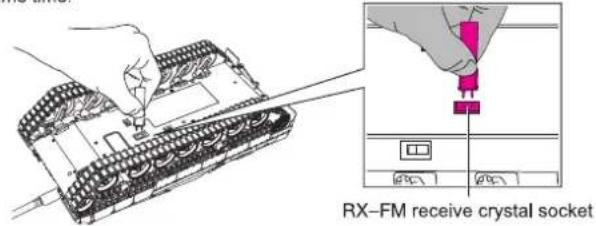
Replace the crystal socket, nip the paster of crystal socket on the tank, pull out the crystal socket.
Bombard and rebound: Body bouncing back with sound.
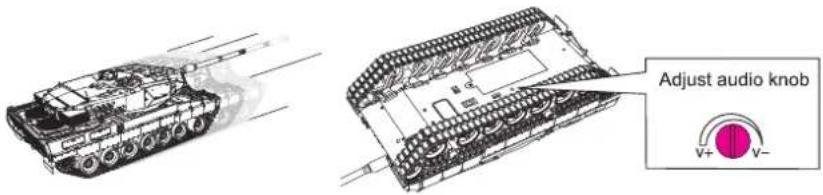
text_image
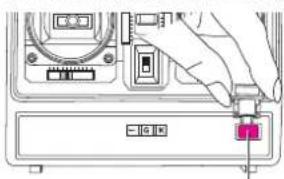
Adjust audio knob V+ V-- Pass different frequency must change different crystal socket, the player can change different crystal socket. The remote controller and the tank both have a crystal socket. Once the frequency is set on the tank, the tank can only accept control signals sent from a remote controller whose frequency is also set to the same. The special function makes it possible for some tanks to play on the same ground at the same time.
text_image
Diagram showing a hand inserting a component into a device with labeled buttons and portsTX emission crystal socket
text_image
RX-FM receive crystal socketEspecial indication: You can adjust the forward/backward lever for make the tank in action less state when the tank forwards /backwards without control it. You can adjust the steering trim lever for make the tank forward /backward by straight. The tank turns right according the steering trim lever remove left; the tank turns left according the steering trim lever remove right.
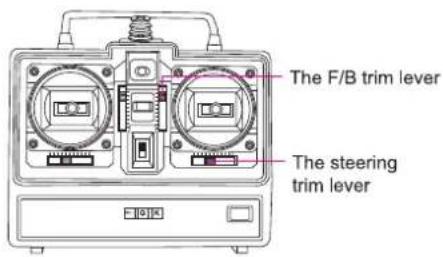
text_image
The F/B trim lever The steering trim lever
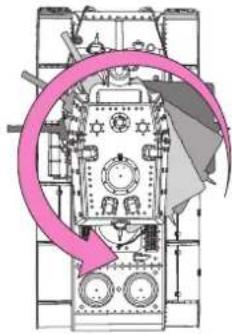
HOW TO CONTROL SUPER SPINS
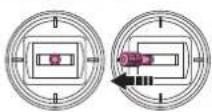
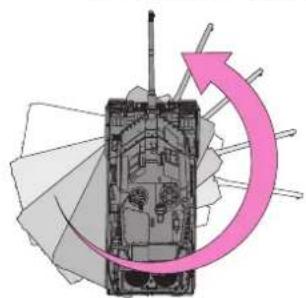
What is "Super Spin"? A kind of spin of the tank performed by controlling the two caterpillars to run at the opposite directions.
Super Left Spin
Turn the right joy stick to the left side.
natural_image
Illustration of a tank interior with directional arrows indicating flow or movement (no text or symbols)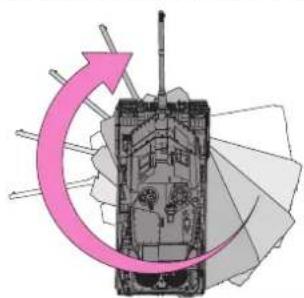
natural_image
Illustration of a tank with arrows indicating rotation or movement (no text or symbols)Super Right Spin
Turn the right joy stick to the right side.
Warning
When control is interfered by other radio waves or the control signals are not strong enough, the tank may not act correctly and may shoot accidentally. Immediately stop tank running and shooting in such circumstances. (Remember to turn off the switch inside the turret and put the protective cap onto the gun muzzle.)
Caution
Whenever the turret turns to its limit at the back of the tank, the clutch functions and prevents further turning of the turret. It's normal phenomenon. Do not try to force the turret to turn any further to avoid damage.
Caution
BB shoot function configuration: The maximum shooting range of the RC tank is 25m, which may differ according to actual shooting conditions, such as vertical angle of the gun and wind speed.
Warning
● Make sure the environment if safely when shoot BB bullet.
● People in the shooting spot should all wear goggles.
● Sometimes bullet remains inside the tank but you think no bullet remains. It's dangerous because the bullet may be shot out accidentally.
● After use, remember to put the protective cap onto the gun muzzle, turn off the main switch and the shooting switch on the tank, remove BB bullets and batteries, and store them in a safe place.
Caution
Turret should stay horizontal when shooting.
According to the design of the turret, if the left side or the back side of the turret is lower than their counter sides, bullets can not be loaded and shooting becomes impossible.

HOW TO CONTROL TURRET
First turn on the remote controller then turn on the tank when turning on power. Sequence for turning off power is the opposite.
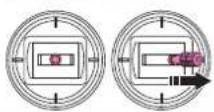
Turret Left Turn
Press the joy stick for turret to turn left.
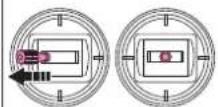
natural_image
Technical diagram of a mechanical device with no visible text or symbols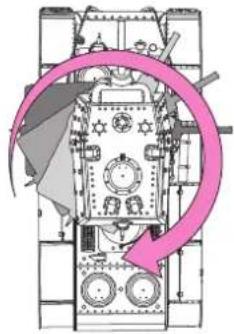
natural_image
Technical diagram of a mechanical device with no visible text or symbolsTurret Right Turn
Press the joy stick for turret to turn right.
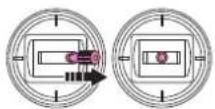
※The clutch functions whenever the turret reaches this limit and it cannot turn any further.
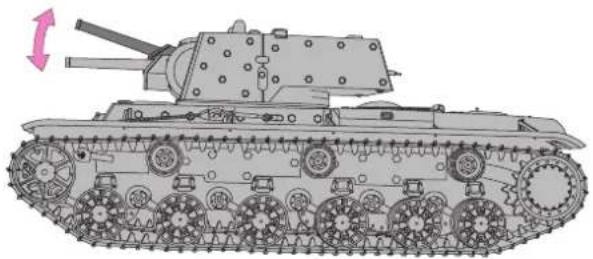
Gun Up/Down
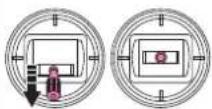
Press the GUN
UP/DOWN joy stick.
※ The gun can continuously and alternately move up and down when the joy stick is kept pressed.
natural_image
Side profile illustration of a tracked military tank with visible tracks and turret (no text or symbols)BB SHOOT
To shoot, press the BB SHOOT joy stick.
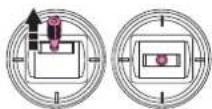
Push up the BB shoot lever.
※ Shooting continues when the joy stick are kept pressed.
Caution
● Shooting with protective cap on the gun muzzle may cause damages to the inner mechanism.
Caution
The gun cannot shoot when the shooting switch inside the turret are set to OFF.
※ The BB shooting indicator will light up right before the bullet is shot out.
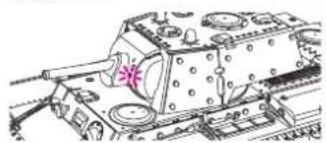
natural_image
Technical line drawing of a tank assembly (no text or symbols visible)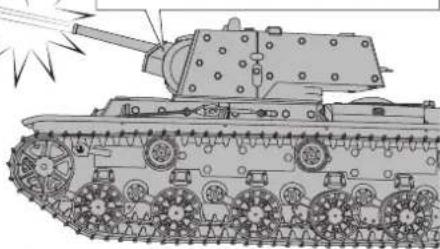
natural_image
Line drawing of a military tank with visible tracks and turret (no text or symbols)● To prepare for shooting, load in BB bullets as shown in 7P⑦, turn on the shooting switch and remove the protective cap.
Suggestion: Operations can be combined to simulate actual tank moves.
Run + Turret Turn + Gun Up/Down = The tank runs with turret turning and gun moving up and down
Examples Run + Turret Turn + BB Shoot = The tank runs with turret turning and gun shooting BB bullets.
Turn + Turret Turn + BB Shoot = The tank turns with turret turning and gun shooting BB bullets.
※You can think out other new combinations.
Caution
Combinations consume more battery power.
Caution
● Once shot out, the BB bullet becomes dirty and not suitable for reuse.


- If BB bullets with dirt or tiny sand on are used in the gun, the gun barrel may easily be blocked and the inner mechanism may be damaged.
- Improper loading of bullets may lead to malfunction.
- If the bullets used weigh over 0.2g, they won't be shot far enough.
- If dirt or dust gets into the bullet hatch, the rolling of the bullets may be disturbed, making shooting difficult or even impossible. In such circumstances, turn the tank up side down for the bullet hatch to face down and slightly shake for the dirt or dust to fall out. If necessary, you can also remove the cover of the turret and blow into the gap to clean up the dirt before loading in bullets.
7 HOW TO LOAD BB BULLETS
① Open the bullet hatch and put in about 35 BB bullets.
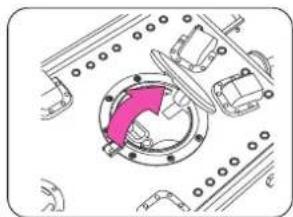
natural_image
Technical diagram of a mechanical assembly with no visible text or symbols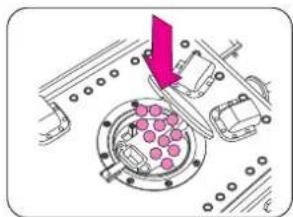
natural_image
Mechanical assembly diagram showing a rotating component with a highlighted arrow (no text or symbols)② Close the bullet hatch.

natural_image
Technical diagram of a mechanical assembly with no visible text or symbolsThe shooting switch (safety device) is normally kept OFF. Only for shooting can it be set ON.
③ Set the shooting switch to ON.
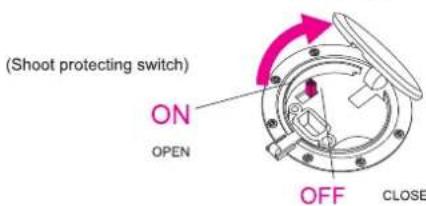
text_image
(Shoot protecting switch) ON OPEN OFF CLOSEUse of the following bad bullets may lead to internal damages.

BB of a diameter over 6mm

(1)

BB of uneven surface
※briefing of hop-up system

Ballistic trajectory with hop-up system

Ballistic trajectory without hop-up system
■ Flying distance becomes much longer, as the picture shows.
natural_image
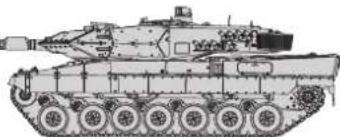
Side profile illustration of a military tank with visible turret and tracks (no text or symbols)The RC tank is equipped with hop-up system.
Influenced by the system, the shot out BB bullet will forcefully spin back while running forward at high speed, generating climbing power to go further ahead.
8 HOW TO SET UP TARGET
● Enjoy shooting using the attached target.
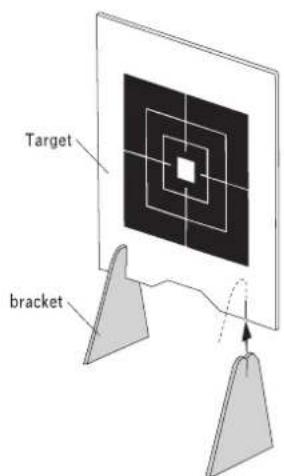
text_image
Target bracket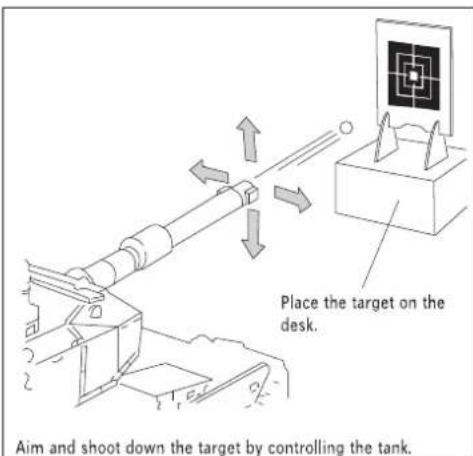
text_image
Place the target on the desk. Aim and shoot down the target by controlling the tank.● Firmly insert the target to the holding gaps on the supports.

Aim at the bull's eye from the back of the tank before shooting. Fire during the aiming moves of the gun to shot down the target.
EN
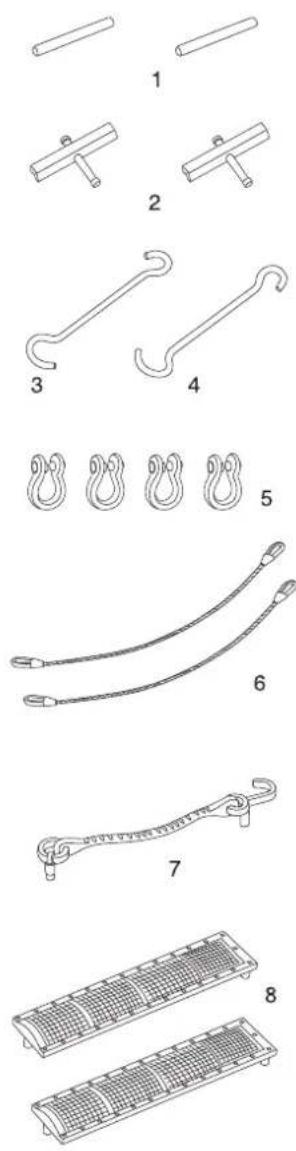
ACCESSORY BOX
text_image
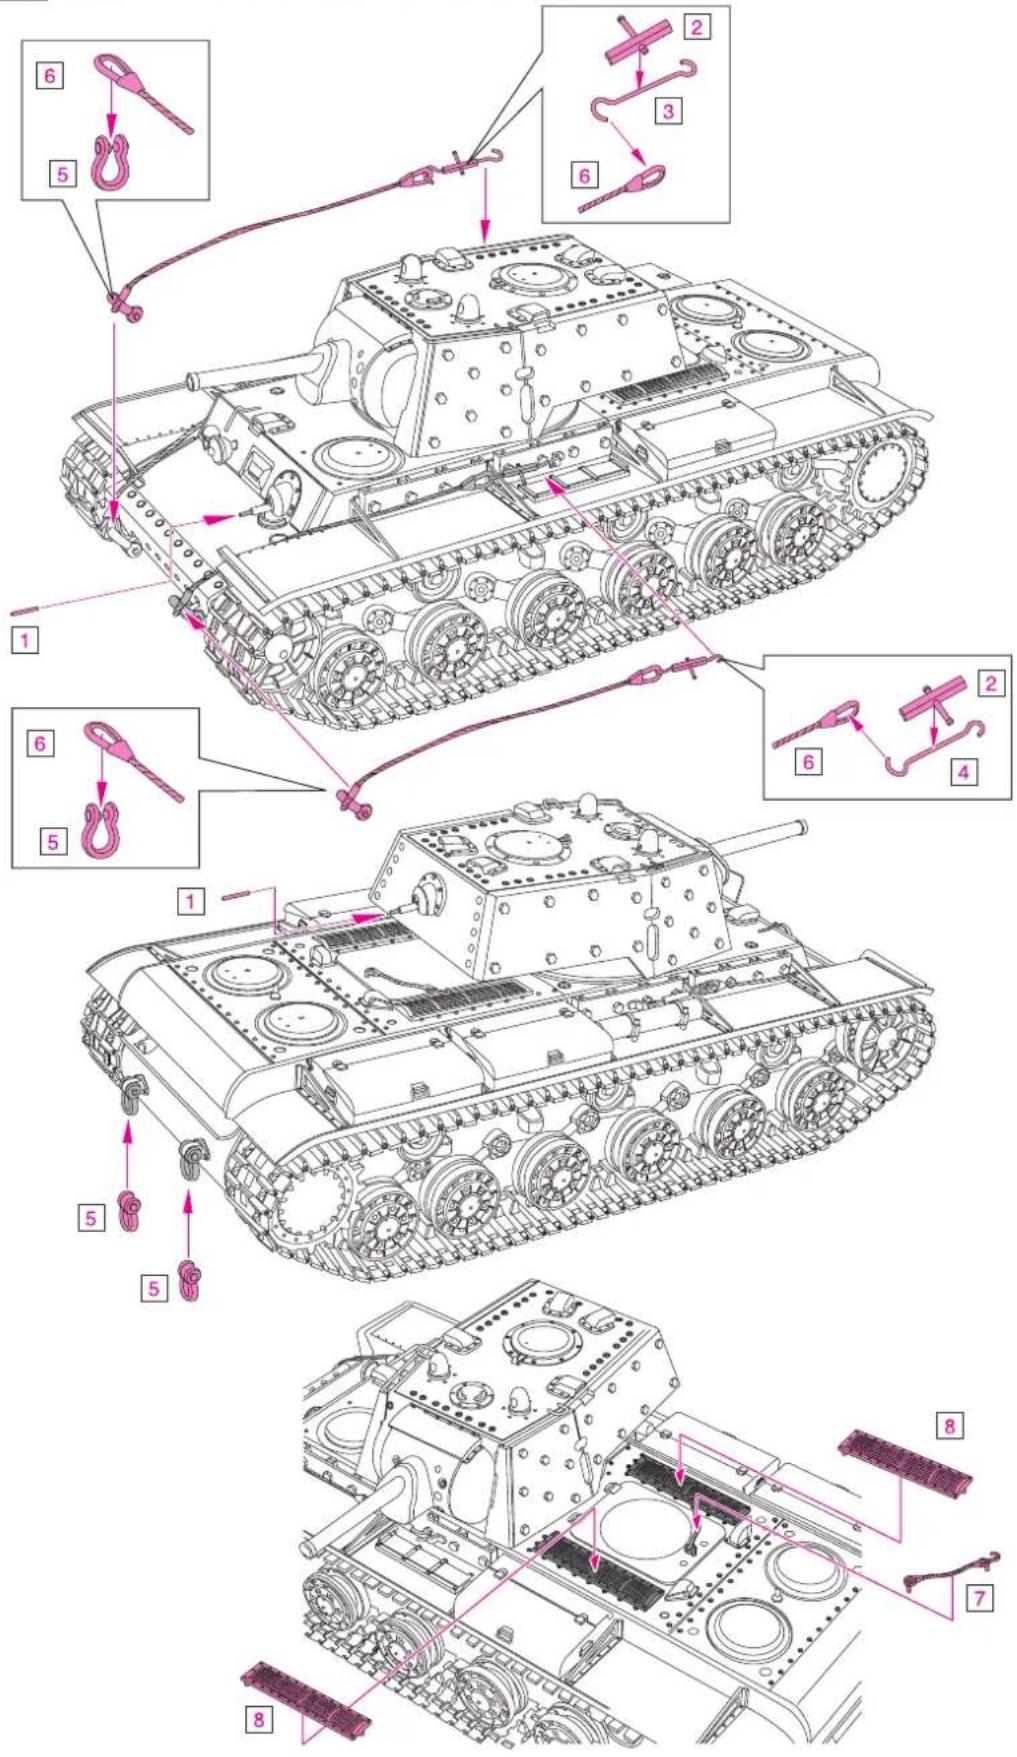
Technical diagram showing eight different types of mechanical or electrical components with numbered labels.9 HOW TO INSTALL ACCESSORIES
text_image
Technical diagram of a tracked tank with numbered parts and component annotations in Chinese10 HOW TO STICK MARK SEALS
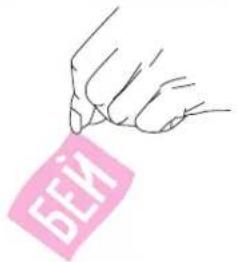
- Take the proper seal with a pair of forceps.
text_image
SEK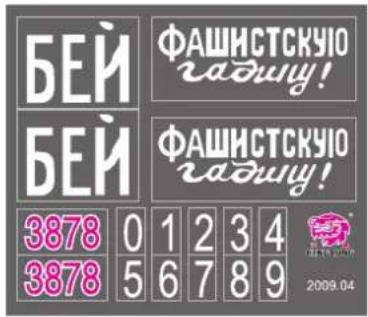
text_image
БЕЙ ФАШИСТСКУЮ гадшу! БЕЙ ФАШИСТСКУЮ гадшу! 3878 0 1 2 3 4 3878 5 6 7 8 9 2009.04- Stick the mark to you need the position, then pressing down the paster.
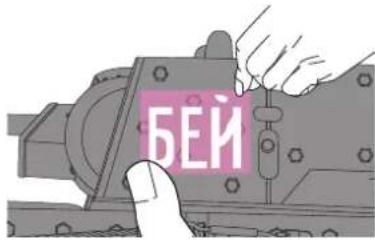
text_image
БЕЙ- After wait for 15 minutes, then tears down the transparent film.
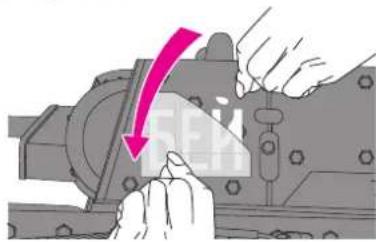
natural_image
Illustration of hands operating a mechanical component with a pink arrow indicating rotation (no text or symbols present)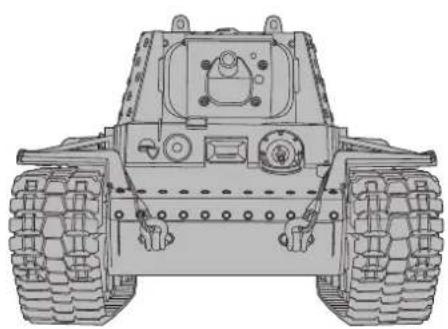
natural_image
Front view line drawing of a tracked vehicle with multiple tires and control panels (no text or symbols)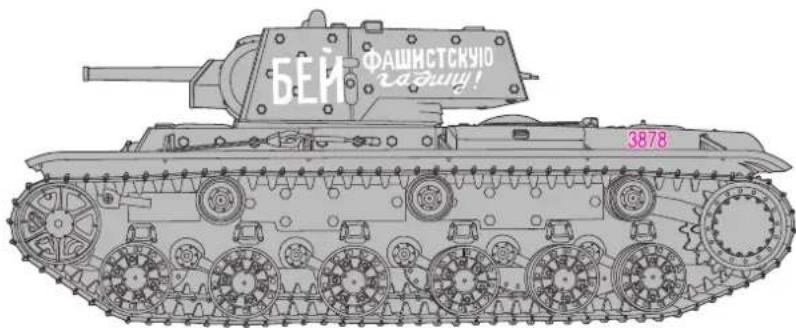
text_image
БЕЙ ФАШИСТСКУЮ ГАДШУ! 3878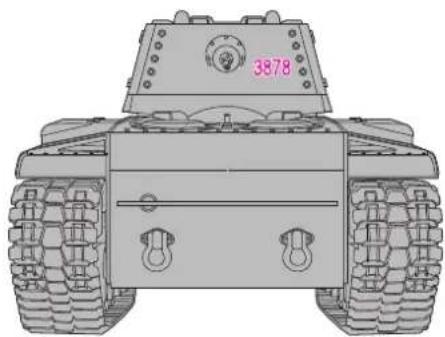
natural_image
Front view of a tracked military vehicle with visible tracks and turret (no text or symbols)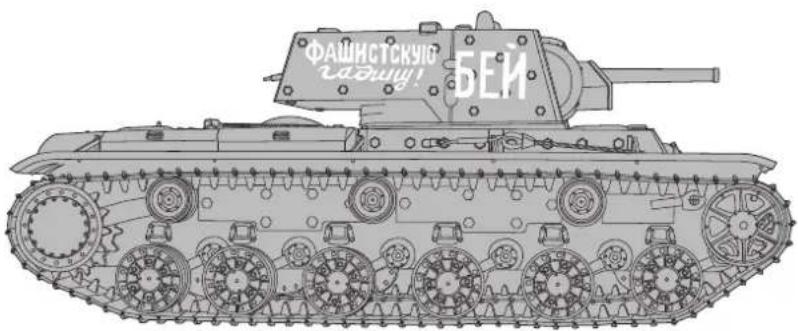
text_image
ФАШИСТСКУЮ ЧАДЩУ! БЕЙAs shown, the pasters are according to originally product stick method, however, other pasters decorates at will for the user.
OPERATING INSTRUCTIONS ABOUT SMOKING SET (only #35523000 and #35524000)
EN
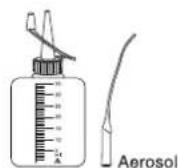
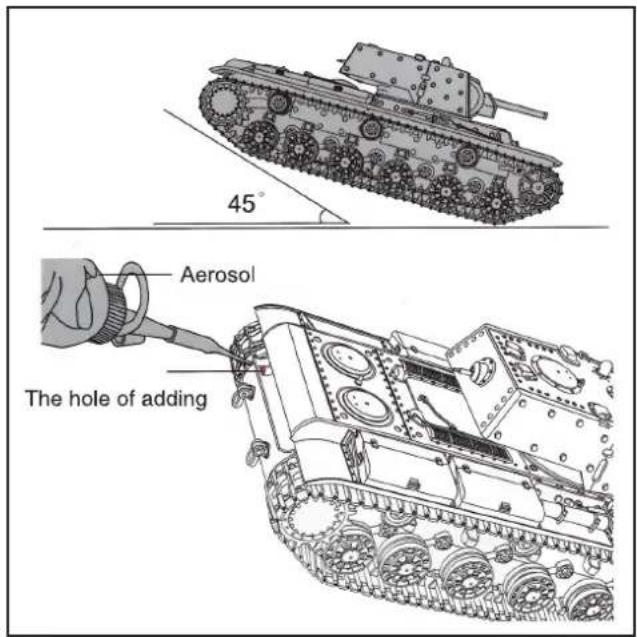
There is litter aerosol in tank at factory. You must add 2-3 ml. Aerosol for the first time use, the 2-3 ml. aerosol can use about 2 hours .(This indicates the aerosol have exhaust when you smell singe smell within 2 hours. So you must add the aerosol to avoid malfunction of the smoking set). You must add 5-6 ml. Aerosol for use about 2 hours every time except the first time use .

Add aerosol, it is important to level raise the rear of the tank around 45 degrees, and stay a while after adding to the flow of the central tank can smoke aerosol device.
text_image
45° Aerosol The hole of adding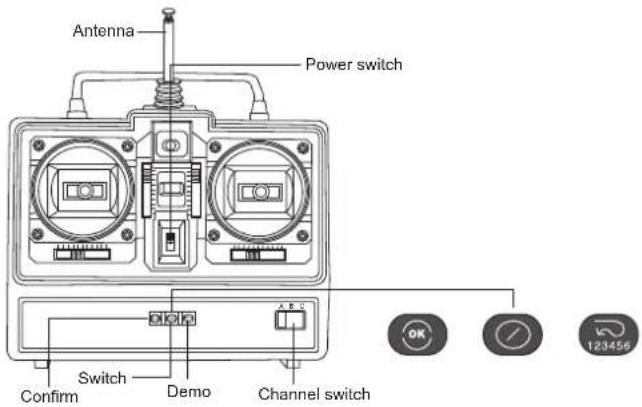
text_image
Antenna Power switch Confirm Switch Demo Channel switch ABC OK ✓ 123456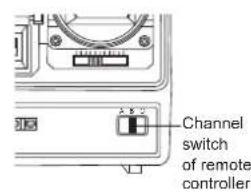
text_image
Channel switch of remote controller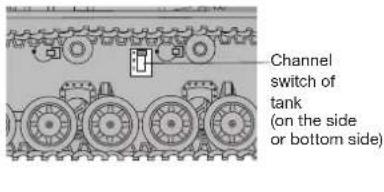
text_image
Channel switch of tank (on the side or bottom side)- When Ⓞ is pressed once in normal operation state, the PROG indicator turn red and the Headlight and the Rearlight on the tank start to flash continuously, indicating a programming state. The player can now use function keys in a desired sequence to program moves of the tank. After the programming, press Ⓞ to set the program, and the tank can then move according to the program. If Ⓞ is pressed when the tank is performing programmed moves, the tank will stop all moves and the program is stored. At this time, if the player press Ⓞ once again, the tank will repeat the program that has just been edited, while use of other function keys will initiate a new programming to overwrite the existing program. The player can use Ⓞ to switch the tank back to normal state. The PROG indicator will turn yellow accordingly and the Headlight and the Rearlight on the tank will both flash once.
| One pressing | [Forward] | [Backward] | [Forward left turn] | [Forward right turn] | [Backward left turn] | [Backward right turn] | [Turret left spin] | [Turret right spin] | [Turret aim] | [Turret shoot] |
| Time | 1s | 1s | 0.25s | 0.25s | 0.25s | 0.25s | 0.25s | 0.25s | 0.25s |
- There are six DEMO programs preset in the toy available for use by the player. To use the preset programs, the player can press down and one corresponding key of the 6 direction keys at the same time. In normal state, pressing and one of the six direction keys at the same time will switch the tank to DEMO state and to perform the preset program. The tank will return to normal state after finishing all moves in the program. But the player can also use to terminate the program and switch the tank back to normal state.
DEMO (The 6 DEMO programs are as follows:)
- The remote controller and the tank both have a Channel switch. The player can shift the switch to choose a proper channel between 3 channels, 0, 1, and 2. Once the channel is set on the tank, the tank can only accept control signals sent from a remote controller whose channel is also set to the same. (For example, if the Channel switch on the tank is set to 1, the Channel switch on the remote controller should also be set to 1. Otherwise, the player will not be able to control the tank.) This special function makes it possible for some tanks to play on the same ground at the same time.
Cautions
Fast flash and slow flash: If both the Headlight and the Rearlight flash slowly (about 2Hz), it means that tank lacks power and the batteries need to be replaced. If they flash fast, it means that the tank has entered programming state.
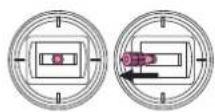
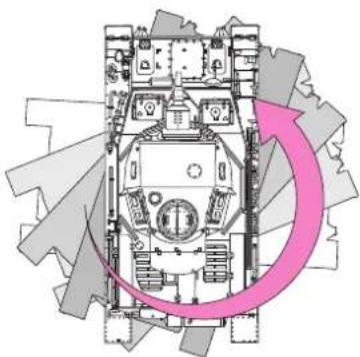
HOW TO CONTROL SUPER SPINS
What is "Super Spin"? A kind of spin of the tank performed by controlling the two caterpillars to run at the opposite directions.
Super Left Spin
natural_image
Cross-sectional diagram of a military vehicle showing internal components and a pink circular arrow indicating rotation or cycle (no text or symbols present)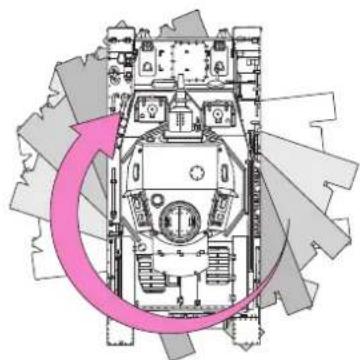
natural_image
Technical diagram of a tank with gear and internal components, showing no text or symbolsSuper Right Spin 右超信地旋区

Repairs, Spare parts
Normal wear and defective parts that result from an accident, are excluded from the warranty. These include in particular: for car models: bald tires, worn parts and drive gears, or bent / broken suspension, chassis or bodywork ship models: damaged or broken propellers, torn superstructure airplanes: damage due to improper transport or crash
EN
If you find a part that is defective in material or workmanship right after opening the package, return - before you used it – to your dealer or directly to us and we will send you a replacement.
For the KW-1 some parts are available as spares. In case of problems or questions, please contact your dealer or: XciteRC Modellbau GmbH & Co. KG - Service, Autenbachstrasse 12, D-73035 Göppingen, Phone +49 7161 40 799 50 Email: service@xciterc.de
Spare parts for the KW-1 you may order in your local hobby shop or online at http://www.XciteRC.de
Specifications
| Length 425 mm | |
| Width 206 mm | |
| Height approx. 170 mm | |
| Weight approx. 2342 - 3555 g | |
| Transmitter 27/40 MHz | |
| Transmitter range approx. 35 m | |
Environmental Protection Notes
The symbol of the crossed out dust bin on the product or packaging indicates that this product must be disposed of separately from normal household waste. In order to avoid harmful effects on the environment and human health in the disposal of electrical and electronic equipment and the re-use or recycling are possible. You have the opportunity to submit electrical and electronic equipment free of charge at an appropriate collecting point in your area. Please check with your city or town across
the available depot. You also have the option to return old electrical and electronic equipment which has been purchased from us. We will then perform a proper recycling or reuse.
Possibly contained batteries must be removed from the product and disposed of at the appropriate collecting point.
Notes on battery law
According to the German Battery Act (BattG) the one who sells batteries (and accumulators etc.) or devices containing batteries, we are obliged to draw your attention to the following:
Batteries and rechargeable batteries should not be disposed of with household waste but you are legally obliged to return used batteries. Batteries can contain contaminants that could harm the environment or your health if improperly stored or disposed of. Batteries also contain important raw materials such as iron, zinc, manganese or nickel and can be recycled.
You can send us back the batteries after use either sufficient postage:
returned free of charge or in close proximity (eg in trade or municipal collection). The levy is limited to points of sale to end-users for the disposal of such waste batteries and customary amounts, which the distributor as new batteries in his range or has done.
Batteries containing pollutants are marked with a sign, a crossed-out rubbish bin, and the chemical symbol of the pollutant-heavy metal.
This crossed-out bin means that you must not dispose of batteries with household waste.
Among these characters, see also the following symbols have the following meanings:


- Cd = cadmium
- Pb = plumbium
- Hg = mercury
- Li = lithium
CE
DE Die XciteRC Modellbau GmbH & Co. KG erklärt hiermit, dass dieses Produkt den grundlegenden Anforderungen und anderen relevanten Vorschriften der Richtlinie R&TTE 1999/5/EC sowie RoHS 2011/65/EC entspricht.
Die ausführliche Konformitätserklärung finden Sie im Internet unter www.XciteRC.com beim jeweiligen Produkt unter dem Link Konformitätserklärung oder per E-Mail: info@xciterc.de.
EN The XciteRC Modellbau GmbH & Co. KG declare that this product complies with the essential requirements and other relevant regulations of the directives R&TTE 1999/5/EC and RoHS 2011/65/EC.
The detailed Declaration of Conformity can be found at www.XciteRC.com at the respective product link Declaration of Conformity or via E-mail: info@xciterc.de.
FR La société XciteRC Modellbau GmbH & Co. KG déclare que cet article est conforme aux directives CE R&TTE 1999/5/EC and RoHS 2011/65/EC.
Vous trouverez la déclaration de conformité détailée sur internet, sous www.XciteRC.com, sur la page de l'article en question, sous le lien de la Déclaration de conformité ou e-mail: info@xciterc.de.
EN
| 2018 | 2017 | 2016 | 2015 | 2014 | 2013 | 2012 | 2011 | 2010 | 2009 | 2008 | 2007 | 2006 | 2005 | 2004 | |
| (1, 2, 3) | (1, 2, 3) | (1, 2, 3) | (1, 2, 3) | (1, 2, 3) | (1, 2, 3) | (1, 2, 3) | (1, 2, 3) | (1, 2, 3) | (1, 2, 3) | (1, 2, 3)) | (1, 2, 3) | (1, 2, 3) | (1, 2, 3) | ||
| (1, 2, 3) | (1, 2, 3) | (1, 2, 3) | (1, 2, 3) | (1, 2, 3) | (1, 2, 3) | (1, 2, 3) | (1, 2, 3) | (1, 2, 3) | (1, 2) | (1, 2) | (1, 2) | (1, 2) | (1, 2) | ||
| (1, 2, 3) | (1, 2, 3) | (1, 2, 3) | (1, 2, 3) | (1, 2, 3) | (1, 2, 3) | (1, 2, 3) | (1, 2, 3) | (1, 2) | (1, 2) | (1, 3) | (1, 3) | (1, 3) | (1, 3) | ||
| (1, 2, 3) | (1, 2, 3) | (1, 2, 3) | (1, 2, 3) | (1, 2, 3) | (1, 2, 3) | (1, 2, 3) | (1, 2) | (1, 2) | (1, 2) | (1, 3) | (1, 3) | (1, 3) | (1, 3) | ||
| (1, 2, 3) | (1, 2, 3) | (1, 2, 3) | (1, 2, 3) | (1, 2, 3) | (1.5), (1.5), (1.5), (1.5), (1.5), (1.5), (1.5), (1.5), (1.5), (1.5), (1.5), (1.5), (1.5), (1.5), (1.5), (1.5), (1.5), (1.5), (1.5), (1.5), (1.5), | ||||||||||
| (1, 2, 3) | (1, 2, 3) | (1, 2, 3) | (1, 2, 3) | (1, 2, 3) | (1.5), (1.5), (1.5), (1.5), (1.5), (1.5), (1.5), (1.5), (1.5), and (1.5), (1.5), (1.5), (1.5), (1.5), (1.5), (1.5), (1.5), (1.5), (1.5), (1.5), (1.5), (1.5), (1.5), (1.5). | ||||||||||
| (1, 2, 3) | (1, 2, 3) | (1, 2, 3) | (1, 2, 3) | (1, 2, 3) | (1.5), (1.5), (1.5), (1.5), (1.5), (1.5), (1.5), (1.5), (1.5), or (in the final data). | ||||||||||
| (1, 2, 3) | (1, 2, 3) | (1, 2, 3) | (1, 2, 3) | (1, 2, 3) | (1.5), (1.5), (1.5), (1.5), (1.5), (1.5), (1.5), (in the final data). | ||||||||||
| (1, 2, 3) | (1, 2; ) | (1, 2; ) | (1; ) | (1; ) | (0; ) | ||||||||||
| (0; ) * * * * * * * * * * * * * * * * * * * * * * * * * * * * * * * * * * * * * * * * * * * * * * * * * * * * * * * * * * * * * * * * * * * * * * * * * * * * * * * * * * * * * * * * * * * * * * * * * * * * | |||||||||||||||
| (0; )* )* )* )* )* )* )* )* )* )* )* )* )* )* )* )* )* )* )* )* )* )* )* )* )* )* )* )* )* )* )* )* )* )* )* )* )* )* )* )* )* )* )* )* )* )* )* )* )* )* ) ^a (a,b,c,d,e,f,g,h,i,j,k,l,m,n,o,r,s,t,v,w,v,w,v,w,v,w,v,w,v,w,v,w,v,w,v,w,v,w,v,w,v,w,v,w,v,w,v,w,v,w,v,w,v,w,v,w,v,w,v,w,v,w,v,w,v,w,v,w,v,w,v,w,v,w,v,w,v,w,v,w,v,w,v,w,v,w,v,w,v,w,v,w,v,w,v,w,v,w,v,w,v,w,v,w,v,w,v,w,v,w,v,w,v,w,v,w,v,w,v,W,K,K,K,K,K,K,K,K,K,K,K,K,K,K,K,K,K,K,K,K,K,K,K,K,K,K,K,K,K,K,K,K,K,K,K,K,K,K,K,K,K,K,K,K,K,K,K,K,K,K,K,K,K,K,K,K,K,K,K,K,K,K,K,K,K,K,K,K,K,K,K,K,K,K,K,K,K,K,K,K,K,K,K,K,K,K,K,K,K,K,K,K,K,K,K,K,K,K,K,K,L,M,N,O,R,R,R,R,R,R,R,R,R,R,R,R,R,R,R,R,R,R,R,R,R,R,R,R,R,R,R,R,R,R,R,R,R,R,R,R,R,R,R,R,R,R,R,R,R,R,R,R,R,R,R,R,R,R,R,R,R,R,R,R,R,R,R,R,R,R,R,R,R,R,R,R,R,R,R,R,R,R,R,R,R,R,R,R,R,R,R,R,R,R,R,R,R,R,R,R,R,R,R,R,\{a\} ,{b\} ,{c\} ,{d\} ,{e\} ,{f\} ,{g\} ,{h\} ,{i\} ,{j\} ,{k\} ,{l\} ,{m\} ,{n\} ,{o\} ,{p\} ,{q\} ,{r\} ,{s\} ,{t\} ,{u\} ,{v\} ,{w\} ,{x\} ,{y\} ,{z\} ,{u\} ,{w\} ,{x\} ,{y\} ,{z\} ,{u\} ,{w\} ,{x\} ,{y\} ,{z\} ,{u\} ,{w\} ,{x\} ,{y\} ,{z\} ,{u\} ,{w\} ,{x\} ,{y\} ,{z\} ,{U}\} , {U}\} , {U}\} , {U}\} , {U}\} , {U}\} , {U}\} , {U}\} , {U}\} , {U}\} , {U}\} , {U}\} , {U}\} , {U}\} , {U}\} , {U}\} , {U}\} , {U}\} , {U}\} , {U}\} , {U}\} ,{U}\} , {U}\} , {U}\} , {U}\} , {U}\} , {U}\} , {U}\} , {U}\} , {U}\} , {U}\} , {U}\} , {U}\} , {U}\} , {U}\} , {U}\} , {U}\} , {U}\} , {U}\} , {U}\} , {U}, | |||||||||||||||
XciteRC®