
CAL H240 - Watch CITIZEN - Free user manual and instructions
Find the device manual for free CAL H240 CITIZEN in PDF.


User questions about CAL H240 CITIZEN
0 question about this device. Answer the ones you know or ask your own.
Ask a new question about this device
Download the instructions for your Watch in PDF format for free! Find your manual CAL H240 - CITIZEN and take your electronic device back in hand. On this page are published all the documents necessary for the use of your device. CAL H240 by CITIZEN.
USER MANUAL CAL H240 CITIZEN
Thank you for your purchase of this Citizen watch.
Before using the watch, read this instruction manual carefully to ensure correct use.
After reading, be sure to store this manual in a safe place should it be needed for future reference.
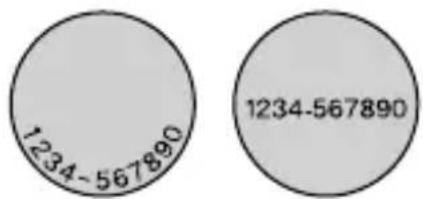
To determine the movement number
Your watch features a case number engraved on the case back (refer to figure to the right).
The first four characters of the case number represent the movement caliber number of the watch.
In the example on the right, “1234” is the movement number.
Engraving position example
text_image
1234-567890 1234-567890The engraving position may differ depending on watch model.
Safety precautions
This manual may contain certain safety advisories. Your watch should be used in accordance with these advisories at all times to ensure optimal enjoyment of your watch and to prevent injury to yourself, other persons and/or damage to property.
■ Safety advisories are categorized and depicted in this manual as follows:
| ⚠️ DANGER | Highly likely to cause death or serious injury |
| ⚠️ WARNING | May cause serious injury or death |
| ⚠️ CAUTION | May or will cause minor or moderate injury or damage |
- Important instructions are categorized and depicted in this manual as follows:
 | Warning (caution) symbol followed by instructions that should be followed and/or precautions that should be observed. |
 | Warning (caution) symbol followed by prohibited use and/or operation advisory. |
Prior to the watch being shipped from the manufacturing plant, its glass, case, metal band, and metal parts of the clasp are covered with stickers to protect them from getting fingerprints or scratches during transit from the plant to the store.
If the watch is worn without first removing these stickers, perspiration or moisture may enter the gaps between the protective stickers and the parts, which may result in a skin rash and/or corrosion of the metal parts.
For this reason, please be sure to peel off the stickers before wearing the watch.
Before using the watch
The following must be done before using the watch:
- Checking the power reserve -Page 16
Check the charge level of the watch.
● Setting the World Time Page 18
Select the city or time difference for which you want to indicate the time and date.
- Checking the time signal reception Page 17
Check the result of the time signal reception.
natural_image
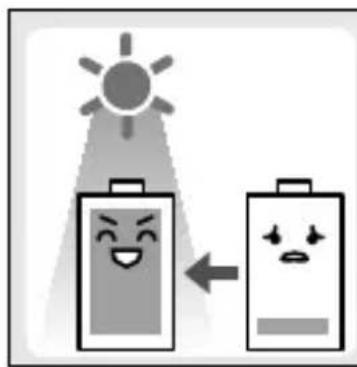
Illustration of two batteries with smiling faces under a sun, connected by an arrow (no text or symbols)This watch has a rechargeable cell which is charged by exposing the dial to light such as direct sunlight or fluorescent lamps.
Expose the dial to light regularly to charge the watch. For details of charging, see pages 10 to 15.
Table of contents
Before using the watch ....4
Component identification......8
Recharging your watch .....10
Checking the power reserve .....16
Checking the time signal reception 17
Setting the World Time ......18
Notes on the time signal reception 26
Receiving the time signal manually (On demand reception) .....34
Switching Summer Time and standard time ....36
Adjusting the time/calendar manually....42
Checking and correcting the current reference position ....46
Troubleshooting......50
Resetting the watch —All Reset .... 54
Eco-Drive (solar powered) Watch Handling Precautions ...... 56
Water resistance ....60
Precautions and usage limitations 63
Maintenance......68
Information 69
Specifications....70
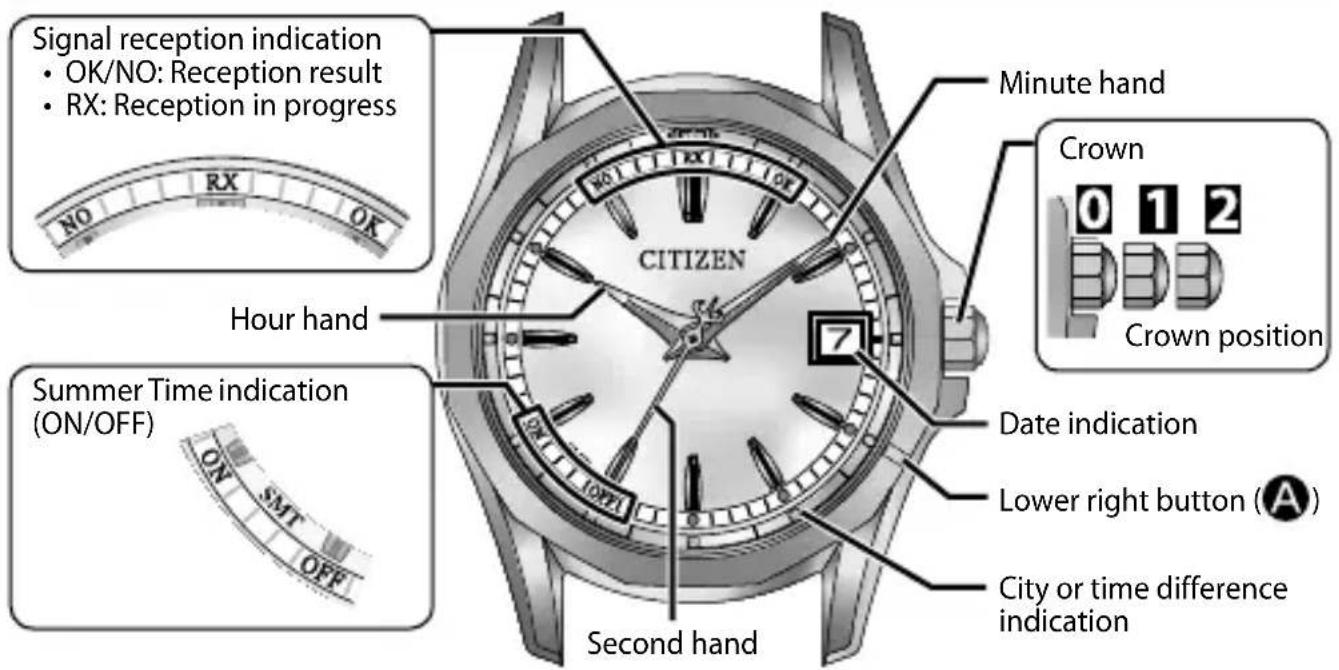
Component identification
text_image
Signal reception indication • OK/NO: Reception result • RX: Reception in progress Minute hand Crown 0 1 2 Crown position Hour hand 7 Summer Time indication (ON/OFF) ON SMT OFF Date indication Lower right button (A) Second hand City or time difference indicationThe illustrations in this instruction manual may differ from the actual appearance of your watch.
How to use the screw down crown and screw down push button
Some models feature a screw down crown and/or screw down push button. Locking the crown and/or button prevents accidental operation. These must be unlocked prior to using certain features of your watch such as setting the time or date.
| Unlock Lock | ||||
| Screw down crown | 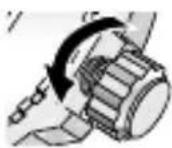 | Rotate the crown counterclockwise until it releases from the case. | 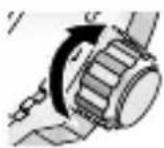 | Push the crown in to the case. With gentle pressure towards the case, rotate the crown clockwise to secure it to the case. Be sure to tighten firmly. |
| Screw down push button | 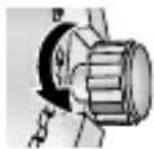 | Rotate the locking screw counterclockwise, and loosen until it stops. | 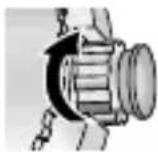 | Rotate the locking screw clockwise, and tighten firmly. |
Some models feature a recessed button. Press the button with a narrow-tipped object such as a wooden toothpick.
Recharging your watch
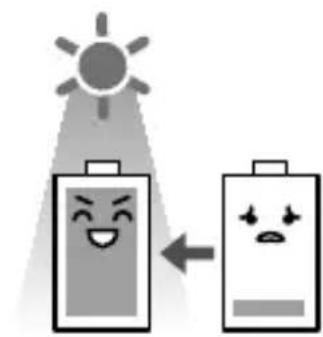
This watch has a rechargeable cell which is charged by exposing the dial to light, such as direct sunlight or fluorescent lamps.
After taking off the watch, put it in a location where the dial is exposed to bright light, such as by a window.
natural_image
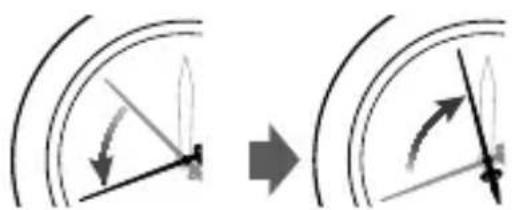
Illustration of two batteries with smiling faces under a sun, connected by an arrow indicating battery charging (no text or symbols)The charge of the watch is low if the second hand rotates counterclockwise when you check the power reserve (page 16) or the time signal reception (page 17).
You can operate the watch as usual.
However, the watch needs to be charged.
natural_image
Diagram showing two curved arrows with directional arrows, one increasing and the other decreasing (no text or symbols)After rotating counterclockwise ...
Indicates the reception result
In addition, for optimal performance, perform the following:
- Expose the watch with the dial facing towards direct sunlight for five to six hours at least once a month.
- Before storing the watch in a dark place for an extended period of time, be sure to charge it fully.
Caution
- When the watch is regularly covered with long sleeves, it may not be charged sufficiently. Try to keep the watch exposed to light sufficient for charging.
- Do not charge the watch at a high temperature (about 60^ or higher).
Charging time by environment
Below are the approximate times required for charging when exposing the watch dial to light continuously. Please use this table as a reference only.
| Environment | Under direct sunlight or cloudy weather | 20 cm (7-7/8 inches) away from a fluorescent lamp (30 W) | Interior lighting |
| Illuminance (Lx) | 10000 to 100000 3000 500 | ||
| Charging time for the second hand to move normally for one day | 4 to 14 minutes 40 | minutes 4 hours | |
| Charging time for the second hand to start moving normally when the rechargeable cell is empty | 1.5 hours to 4 hours | 12 hours 80 hours | |
| Charging time for the rechargeable cell to become fully charged when the rechargeable cell is empty | 25 to 60 hours 150 hours | * | |
*To charge the rechargeable cell fully, it is recommended to expose the dial to direct sunlight. A fluorescent lamp or interior lighting does not have sufficient illumination to charge the rechargeable cell fully.
- When fully charged, the overcharging prevention function works automatically. The accuracy or parts of the watch will not be affected by extra charging.
Run time
Fully charged to fully discharged:
Approximately six months (at normal operation)
Approximately three years (with power save feature)
Power reserve upon insufficient charge warning function (page 14):
Approximately six days
When the watch reaches a low charge state—insufficient charge warning function
When the power reserve becomes low, the second hand moves once every two seconds—This is the insufficient charge warning function. Charge the watch by exposing the dial to light.
- When the watch is sufficiently charged, the second hand will move normally.
- If you have not charged the watch for six days or more since the insufficient charge warning movement began, the watch will run out of power and stop.
text_image
CITIZCaution
Even when the second hand moves once every two seconds, the current time and date are indicated. However, operations and signal reception are not possible.
Power save feature
When the watch is not exposed to light for more than seven days, such as when you store it in the dark, the minute hand and second hand automatically stop to save power. However, the watch still keeps the time.
- When the crown is in position 1 or 2, the power save feature will not activate.
- The power save feature can not be activated manually.
To cancel the power save feature
When the watch is exposed to light sufficient for charging, the power save feature is automatically canceled and normal time indication will resume.
After the power save feature is canceled, you should receive the time signal manually. See pages 34 and 35.
- The power save feature cannot be canceled by operating the crown or buttons.
Checking the power reserve
text_image
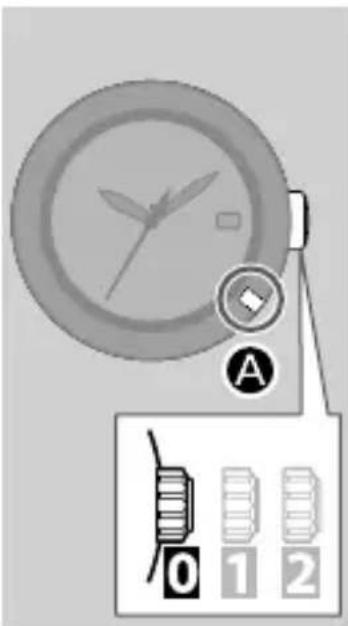
Diagram showing a clock with directional arrow and labeled icons for battery, battery pack, and battery level indicators.1. Ensure that the crown is in position ☐ 2. Press the lower right button Ⓐ briefly.
The second hand moves to indicate the power reserve.
| The second hand indicates “OK” or “NO” | The watch is sufficiently charged. |
| The second hand rotates counterclockwise, then indicates “OK” or “NO” | The charge of the watch is low. Charge the watch. See pages 10 to 15. |
- “OK” and “NO” indicate the reception result of the time signal and no relationship to the power reserve.
3. Press the lower right button briefly to finish the procedure.
The current time is indicated.
- The current time will be indicated automatically after 10 seconds even without pressing the button.
Checking the time signal reception
text_image
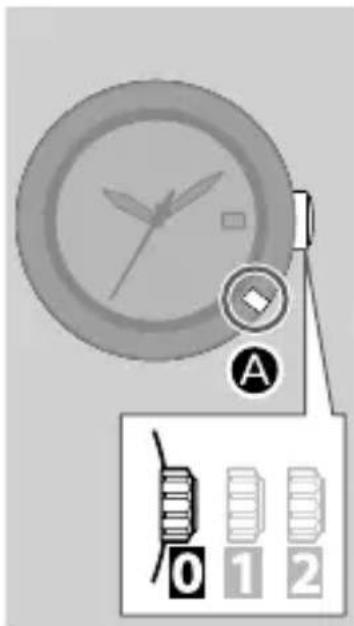
Diagram showing a clock with directional arrows and labeled buttons, alongside a toolbar with icons for reading or testing.- Ensure that the crown is in position ⚠
- Press the lower right button Ⓐ briefly.
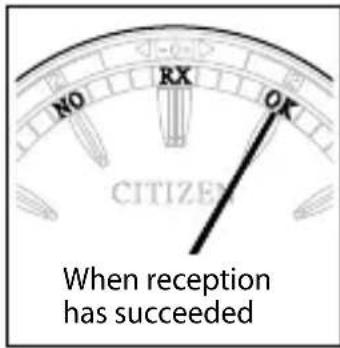
The second hand indicates the reception result.
| OK | Reception has succeeded. |
| NO | Reception has failed. |
When reception has failed, see page 32.
- Press the lower right button Ⓐ briefly to finish the procedure.
The current time is indicated.
- The current time will be indicated automatically after 10 seconds even without pressing the button.
text_image
NO RX OK CITIZEN When reception has succeededSetting the World Time
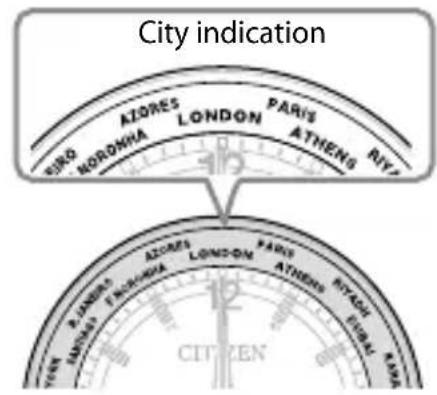
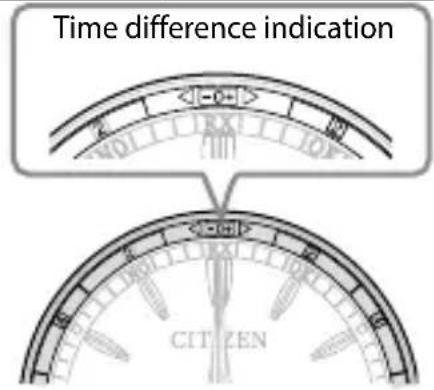
By setting the city or time difference from UTC, the local time and date is shown. Select the city or time difference to indicate the current time and date.
- Whether you select the city or time difference depends on the appearance of your watch.
Watch appearance for setting the city Watch appearance for setting the time difference
text_image
City indication SIRO NORDHIA AZORES LONDON PARIS ATHENG RIVI AZORES LONDON PARIS ATHENG RIVI CITIENSee pages 19 and 22 to 25. See pages
text_image
Time difference indication CITI ZEN20 to 25.
Setting the city
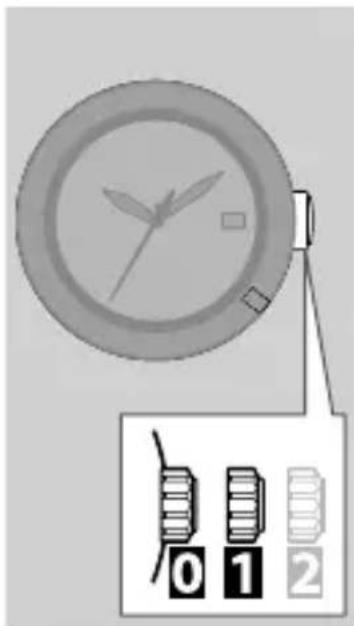
text_image
Diagram showing a clock with three buttons labeled 0, 1, and 2, alongside a zoomed-in view of the clock.Select the city for which you want to indicate the time and date.
1. Pull the crown out to position 1
The second hand moves and indicates the city currently selected.
2. Rotate the crown to select the city for which you want to indicate the time and date.
- For details of the selection of cities, see pages 23 to 25.
• Each time you select a city, the time and date of the city you have selected will be indicated.
3. Push the crown in to position to finish the procedure.
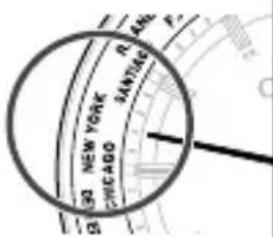
text_image
30 NEW YORK CHICAGO R HUNTAGE PWhen "New York" (47 seconds position) is selected
After setting the World Time, check the displayed time—Summer Time or standard time. (See pages 36 to 41.)
Setting the time difference
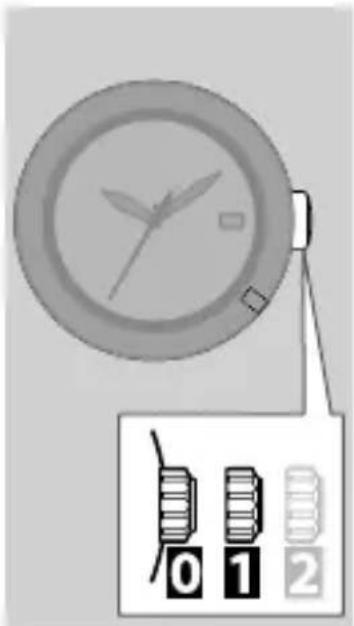
text_image
Image showing a clock with hands holding two labeled buttons (0, 1, 2) below it.1. Pull the crown out to position 1
The second hand moves and indicates the time difference currently selected.
2. Rotate the crown to select the time difference.
- You can select the time difference from UTC in the range of -11 hours to +12 hours, in 1 hour increments.
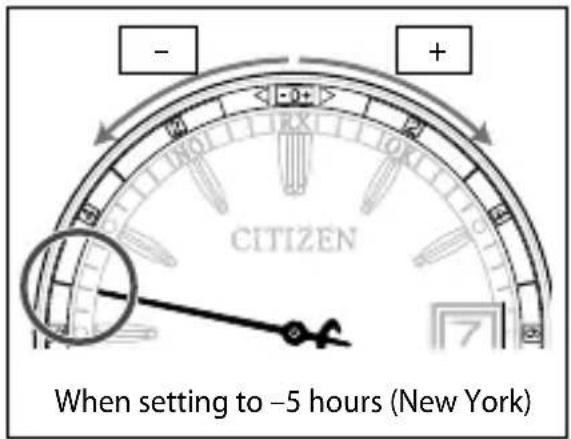
text_image
- + CITIZEN When setting to -5 hours (New York)3. Push the crown in to position to finish the procedure.
- Be sure to set the time difference from UTC. To show the summer time, change the display after setting the time difference. (See pages 36 to 41.)
• See the tables on pages 23 to 25 for the time differences for typical cities.
Setting the World Time
Table of selectable cities/time differences
- The signal station changes depending on the selected city/time difference.
- Cities out of receivable range cannot receive the signal though a signal station is assigned in the list.
- For cities indicated by*, the watch shows Summer Time/standard time in common.
- For cities indicated by**, the watch shows Summer Time/standard time in common.
- The time difference in the table below is based on UTC.
- The standard time for each area or country may change according to their situation.
- The indications in the table below are written differently on some models.
- When you use the watch in a place which is not shown in the table below, select the city in the same time zone as the city you want to indicate.
Setting the World Time
| Typical city | Time difference | City indication or second hand position Signal from... | |||
| * London 0 London LON 0 | Germany | ||||
| * Paris +1 Paris PAR 3 | |||||
| * Athens +2 Athens ATH 5 | |||||
| Riyadh +3 Riyadh RUH 8 | |||||
| Dubai | +4 | Dubai | DXB | 10 | |
| Karachi | +5 | Karachi | KHI | 13 | China |
| Dhaka | +6 Dhaka DAC 15 | ||||
| Bangkok | +7 | Bangkok | BKK | 17 | |
| Beijing | +8 Beijing BJS 20 | ||||
Continued on the next page
Setting the World Time
| Typical city | Time difference | City indication or second hand position Signal from... | |||
| Tokyo | +9 | Tokyo | TYO | 22 | Japan |
| Sydney +10 Sydney SYD | 25 | ||||
| Noumea +11 Noumea NOU | 27 | ||||
| Auckland +12 Auckland AKL | 30 | ||||
| Midway Island | -11 | Midway | MDY | 33 | USA |
| Honolulu | -10 | Honolulu | HNL | 35 | |
| ** Anchorage | -9 Anchorage ANC 38 | ||||
| ** Los Angeles | -8 L.Angeles LAX | 40 | |||
| ** Denver | -7 | Denver | DEN | 43 | |
| ** Chicago | -6 Chicago CHI | 45 | |||
| ** New York | -5 | New York | NYC | 47 | |
Setting the World Time
| Typical city | Time difference | City indication or second hand position Signal from... | ||
| Santiago -4 Santiago SCL | 50 | USA | ||
| Rio de Janeiro -3 R.Janeiro RIO | 52 | |||
| Fernando de Noronha | -2 F.Noronha FEN | 55 | Germany | |
| * Azores (Ponta Delgada) | -1 Azores PDL | 57 | ||
Notes on the time signal reception
Receiving the time signal
There are three ways to receive the time signal:
- The second hand indicates the reception result (OK/NO). (See page 17.)
| Methods Explanations | |
| Automatic reception | Receives the signal at 2:00 a.m. every day. If reception is unsuccessful, the watch tries to receive at 3:00 a.m. and 4:00 a.m. |
| On demand reception | Receives the signal when you want to adjust the time and date. See page 34. |
| Recovery automatic reception | Automatically receives the signal once after charging when the watch stops due to insufficient charge. |
* These reception methods are possible only when the crown is in position 0.
- The watch will not receive the time signal when in a low charge state as indicated by the second hand moving in two second increments (the insufficient charge warning). Charge the watch before reception.
Notes on the time signal reception
- The automatic reception function and recovery automatic reception function cannot be deactivated.
- Even when this watch receives the time signal successfully, the accuracy of the displayed time will be dependent on the reception environment and internal processing.
- If the watch is not able to receive the signal, it will operate normally within an accuracy range of ± 15 seconds per month.
When receiving the time signal
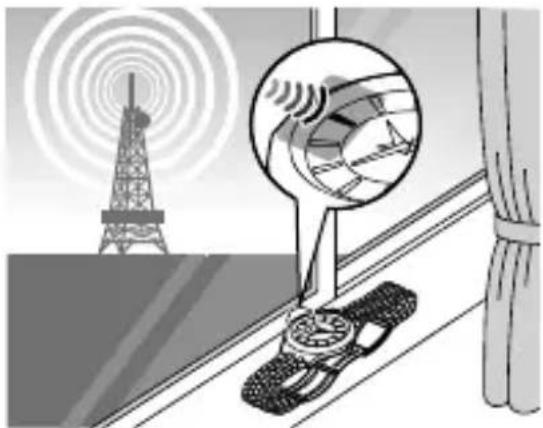
Remove the watch and place it on a stable surface where it can receive the signal better, such as next to a window.
- The reception antenna is located at the 9:00 position of the watch. Place the watch with the 9:00 position facing toward the station.
- Do not move the watch during time signal reception.
natural_image
Illustration of a smart car with sensor detection overlay, showing signal waves and Eiffel Tower (no text or symbols)Note on the time signal
This watch receives the time signal from one of the five signal stations located in four regions. The receivable signal stations are listed as follows:
| Signal stations Kind of the time signal | |
| Fukushima station, Japan | JJY |
| Kyushu station, Japan | |
| Fort Collins station, Denver, Colorado, USA WWVB | |
| Mainflingen station, Southeast Frankfurt, Germany DCF77 | |
| Shangqiu station, Henan, China BPC | |
Refer to the maps on pages 29 to 31 to see the locations of the signal stations and their receivable area roughly.
- Either signal station in Japan is automatically selected for receiving the JJY signal (Automatic selection of time signal stations).
Approximate receivable area
The receivable range is often affected by the receiving environment, weather, and season. Use the diagram only as an approximate value.
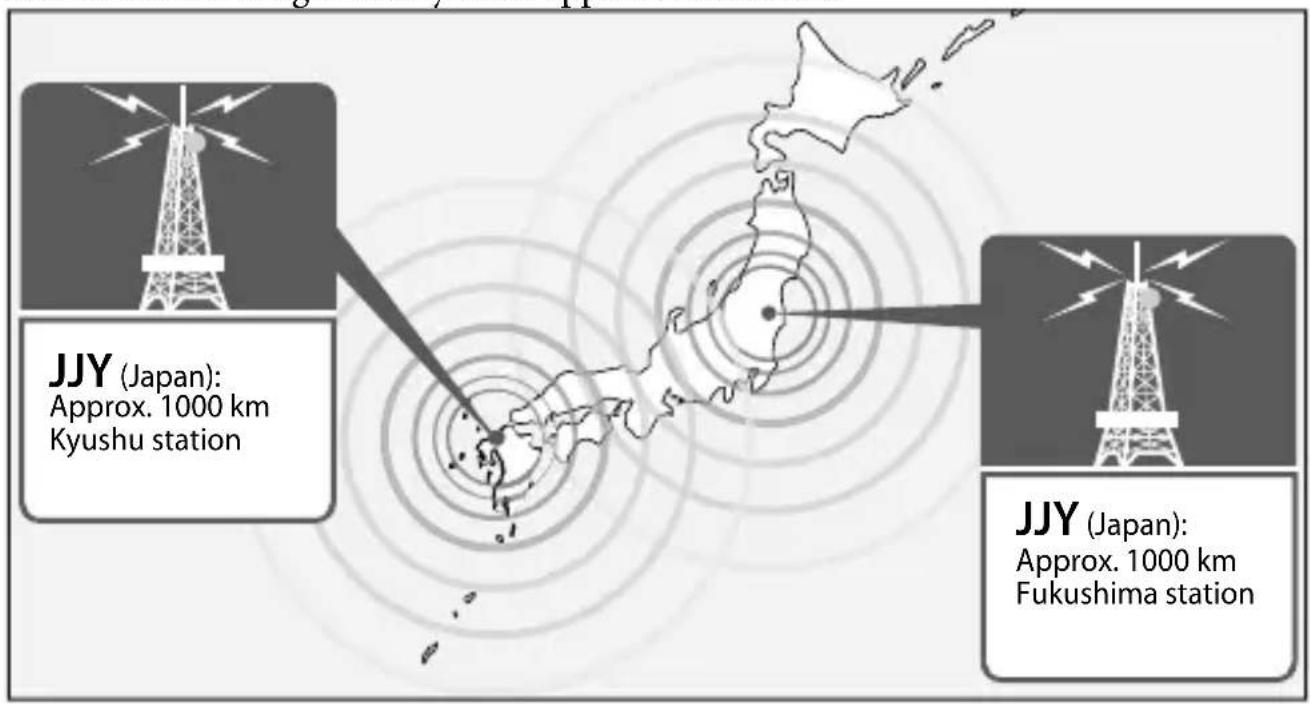
text_image
JJY (Japan): Approx. 1000 km Kyushu station JJY (Japan): Approx. 1000 km Fukushima stationContinued on the next page

Notes on the time signal reception
The receivable range is often affected by the receiving environment, weather, and season. Use the diagram only as an approximate value.
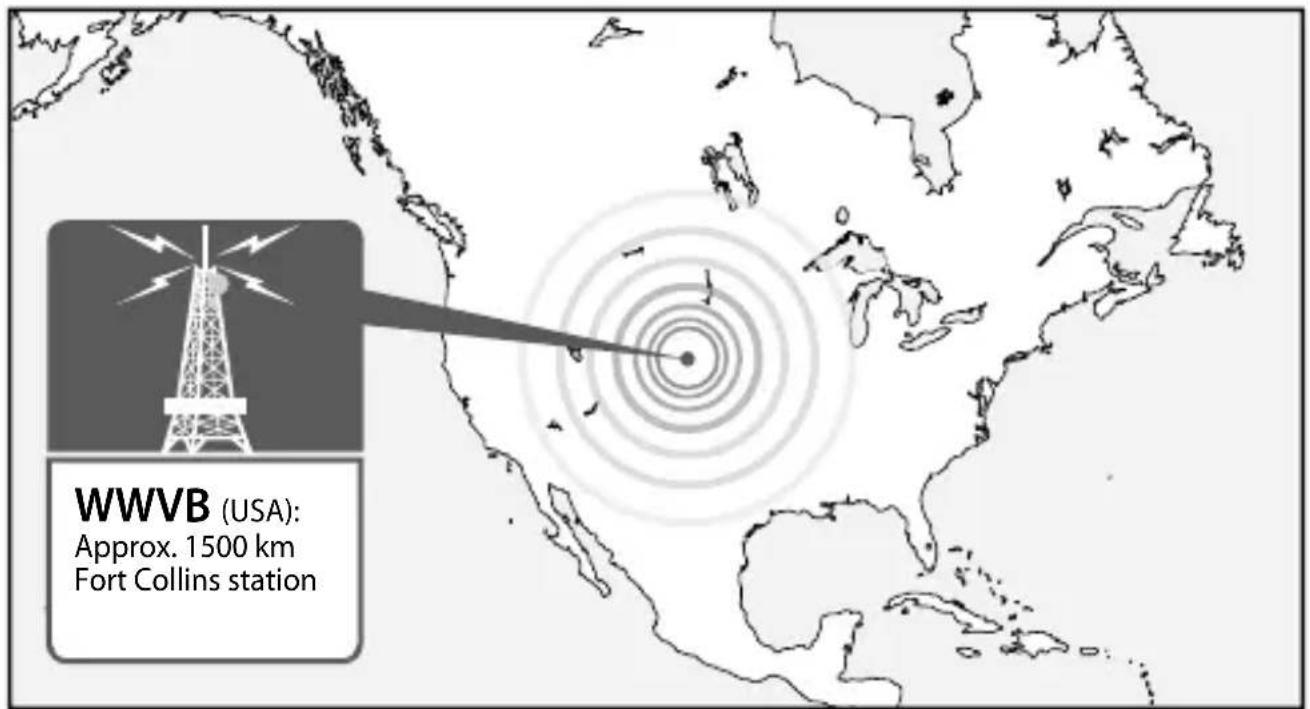
text_image
WWVB (USA): Approx. 1500 km Fort Collins stationNotes on the time signal reception
The receivable range is often affected by the receiving environment, weather, and season. Use the diagram only as an approximate value.
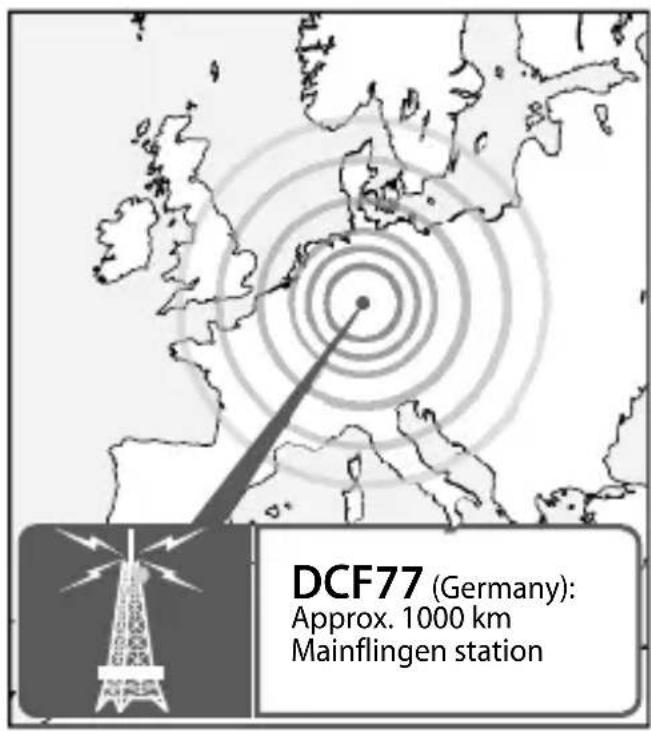
text_image
DCF77 (Germany): Approx. 1000 km Mainflingen station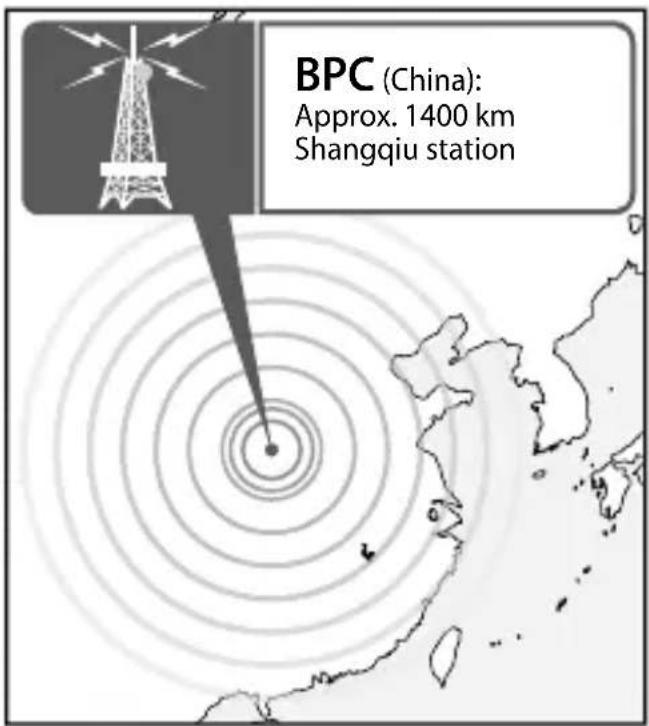
text_image
BPC (China): Approx. 1400 km Shangqiu station
When signal reception is poor
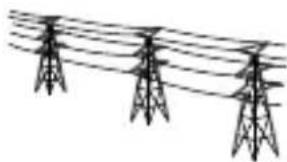
High-tension electrical lines or other structures near your house may block the path to the signal station. This may result in a poor environment for receiving the time signal. With reference to pages29 to 31, search for a better place for reception. Then, attempt to receive the time signal following the procedure on pages34 and 35.
- If the window contains a wire netting in it, open the window or change the location for better reception.
Poor reception areas
It may be difficult to receive the time signal properly under certain environmental conditions or in areas susceptible to radio noise.
Extremely hot or cold • locations
Inside vehicles•
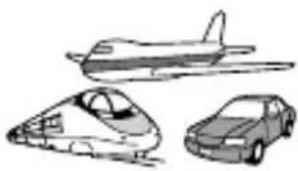
natural_image
Illustration of three vehicle types: a high-speed train, a modern airplane, and a sedan (no text or symbols)Near electrical equipment or • office appliances
Near high-tension electrical • lines, railway overhead wires or communication facilities
Inside reinforced concrete • buildings, between tall buildings, mountains, or underground
Near mobile phones that are in • use
natural_image
Three identical electricity pylon towers aligned with parallel lines (no text or symbols)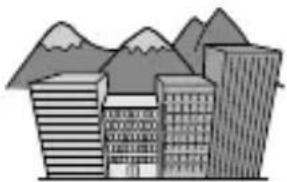
natural_image
Illustration of a city skyline with mountains in the background (no text or symbols)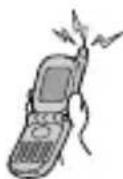
Receiving the time signal manually (On demand reception)
text_image
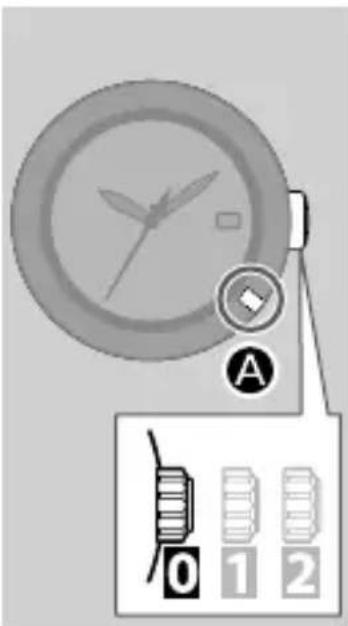
Diagram showing a clock with directional arrow and labeled icons for battery, battery pack, and storage unitYou can adjust the watch by receiving the time signal any time when the time and date are not correct or the reception result is "NO."
- The watch will not start to receive if the second hand is moving once every two seconds (this is the insufficient charge warning). Charge the watch beforehand.
- Before starting reception, confirm that the appropriate city or time difference is selected for receiving the signal. See pages 18 to 25.
1. Ensure that the crown is in position
2. Press and hold the lower right button Ⓐ for two or more seconds.
The second hand moves to "RX" and the watch starts receiving.
After receiving the time signal, the second hand will move normally.
- It takes from two to fifteen minutes to complete the time signal reception.
| Successful signal reception | The time will be updated and the watch will resume normal operation. |
| Failed signal reception | Normal operation resumes with the previously set time. |
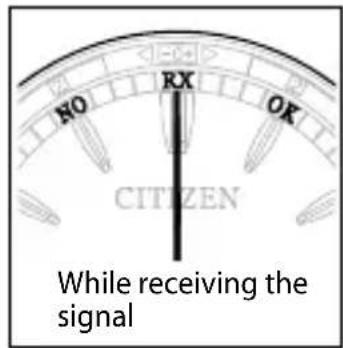
text_image
NO RX OK CITIZEN While receiving the signal
To cancel the reception
Press and hold the lower right button Ⓐ for two or more seconds.
Cancel the reception and the current time will be indicated.
Switching Summer Time and standard time
Summer Time is a system adopted in some countries/areas to gain an extra hour of daylight during summer by advancing clocks by one hour.
- The summer time rules may change depending on the country or area.
- While the summer time is in effect, some time signals include the summer time check signal.
- By receiving the time signal, the watch automatically switches between Summer Time and standard time in accordance with the summer time check signal (automatic switching function).
- Before and after the summer time season, confirm the watch shows Summer Time or standard time correctly.
Checking the time currently shown
Check whether the watch shows Summer Time or standard time.
text_image
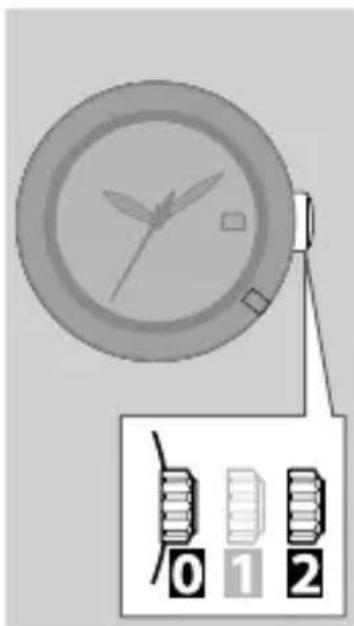
Diagram showing a clock with three buttons labeled 0, 1, and 2, alongside a zoomed-in view of the clock.1. Pull the crown out to position
The second hand moves and indicates which time is currently shown.
| ON | Summer Time is shown |
| OFF | The standard time is shown |
2. Push the crown in to position ☐ to finish the procedure.

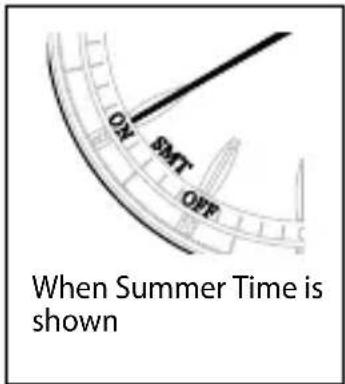
text_image
ON BMT OFF When Summer Time is shownTo change the time to show, see page38.
Changing the time to show
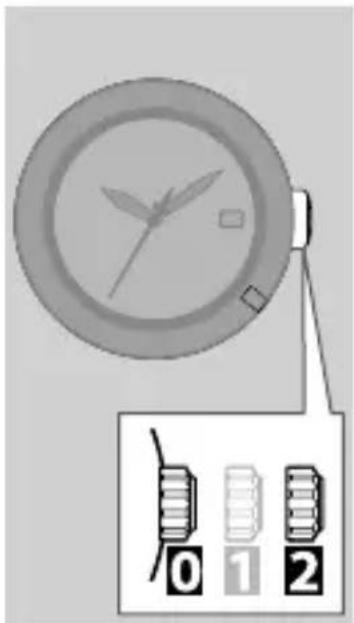
text_image
Diagram showing a clock with hands and two labeled buttons (0, 1, 2) below it, likely indicating timer or timer function.- Pull the crown out to position 2
- Rotate the crown to change the time to show.
To show Summer Time:
Rotate the crown to the right to select "ON."
To show the standard time:
Rotate the crown to the left to select "OFF."
- If you show the standard time manually, the watch will not show Summer Time when receiving the time signal. See page 40.
- Push the crown in to position to finish the procedure.
(The time shown for each city>
The watch shows and memorizes Summer Time/standard time in common for the following cities/time differences in each area so you do not need to change them for each city/time differences.
- If you show the standard time manually for a city/time differences, the watch always shows the standard time for that city/time difference regardless of the time shown for others in the same area.
| Areas receiving the signal from USA Areas receiving the signal from Germany | |||
| City Time | difference | City Time | difference |
| Anchorage/ANC (Anchorage),L. Angeles/LAX (Los Angeles),Denver/DEN (Denver),Chicago/CHI (Chicago),New York/NYC (New York) | -9-8-7-6-5 | London/LON (London),Paris/PAR (Paris),Athens/ATH (Athens),Azores/PDL(Azores/Ponta Delgada) | 0+1+2-1 |
For cities/time differences other than those listed above, the time shown last is memorized for each.
Switching Summer Time and standard time
To cancel the automatic switching function
If you manually show the standard time in step 2 on page 38, the automatic switching function is deactivated and the watch will not show Summer Time by signal reception. If you are in an area that receives the summer time check signal but does not adopt Summer Time, deactivate the automatic switching function.
To activate the automatic switching function again
Select "ON" in step 2 on page38 to show Summer Time.
- This operation also activates the automatic switching function.
- If you activate the automatic switching function when Summer Time season is not in effect, receive the time signal to show the standard time.
Adjusting the time/calendar manually
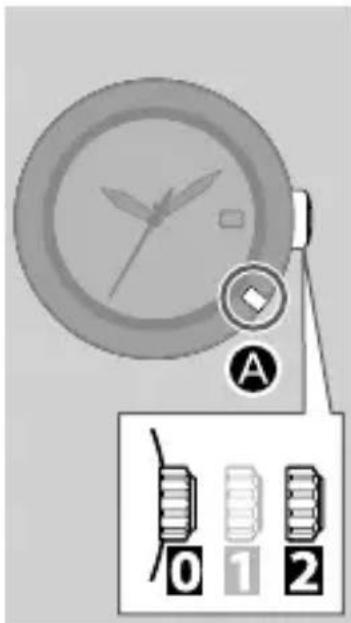
text_image
Diagram showing a clock with directional arrow and labeled buttons 0, 1, 2 for device selection or status indication.- Pull the crown out to position 2
- Press the lower right button A briefly.
The second hand moves to the 0 second position.
-
Rotate the crown to adjust the minute.
-
The second hand rotates around once and the minute hand moves one minute.
- When it passes “0:00:00,” the date advances by one day.
Be aware of the AM/PM status when you adjust the time. -
If you spin the crown quickly a few times, the hand will move continuously. To stop it, rotate the crown in either direction.
-
Press the lower right button briefly.
The hour hand moves slightly.
-
Rotate the crown to adjust the hour and date.
-
The hour hand and the date indication work together.
-
If you spin the crown quickly a few times, the hand will move continuously. To stop it, rotate the crown in either direction.
-
Press the lower right button briefly.
The second hand indicates the current setting of the month and year.
- Rotate the crown to adjust the month and year.
• See pages 44 and 45 for how to read the month and year.
- Push the crown in to position to finish the procedure.
The time and date are indicated.
Adjusting the time/calendar manually
Month and year indications
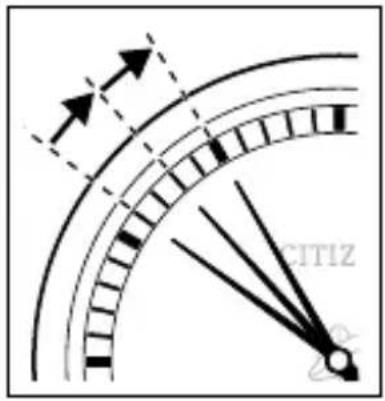
The year and month are indicated by the second hand when you adjust the time and calendar manually. The date is corrected automatically at the end of each month if the number of years passed since the last leap year and month are set correctly.
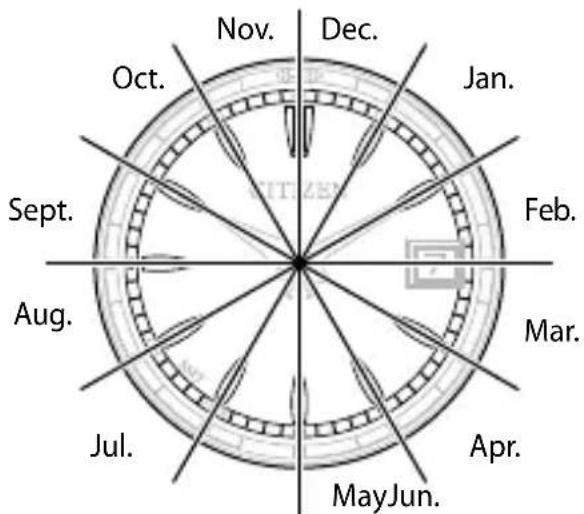
The position of the second hand shows the month.
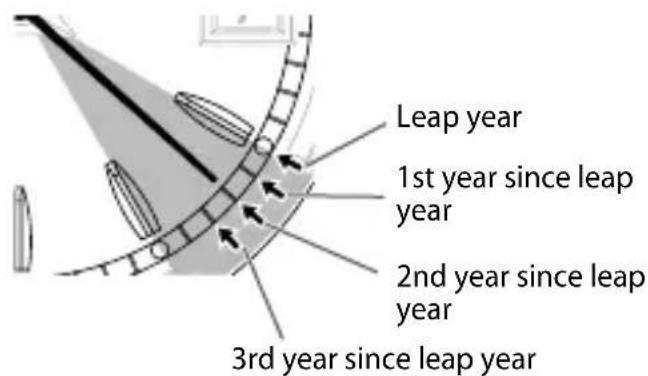
text_image
Leap year 1st year since leap year 2nd year since leap year 3rd year since leap yeare.g. When it is April in the second year since the last leap year.
Each minute mark denotes the number of years since the last leap year.
Adjusting the time/calendar manually
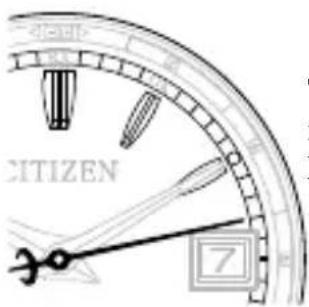
text_image
CITIZEN 7The figure shows February in the 3rd year since the last leap year.
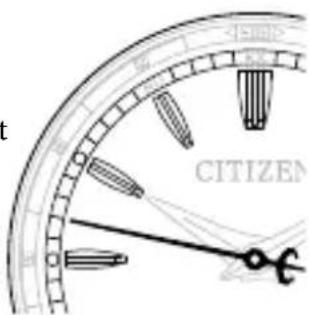
text_image
t CITIZENThe figure shows September in the 2nd year since the last leap year.
Quick reference chart for the number of years passed since the last leap year
| Indication of the second hand Passed year Year | |
| Hour marker Leap year 2012, 2016, 2020 | |
| 1st min. marker 1st year 2013, 2017, 2021 | |
| 2nd min. marker 2nd year 2014, 2018, 2022 | |
| 3rd min. marker 3rd year 2011, 2015, 2019 |
Checking and correcting the current reference position
If the time or date is not shown correctly even after proper reception of the time signal, check whether the reference position is correct or not.
What is the reference position?
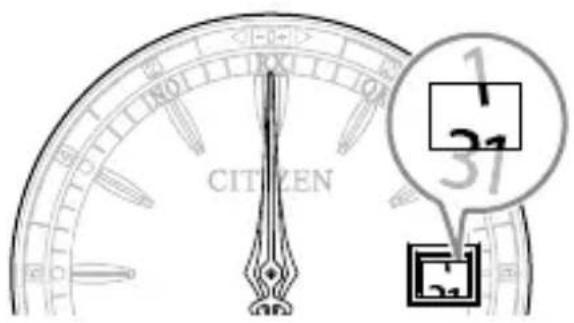
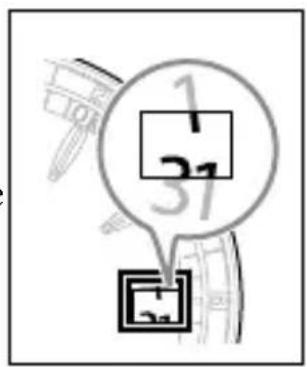
The base position for all the hands to indicate the time and date.
- For the time indication: "0:00:00"
- For the date indication: Between "31" and "1"
If the time and date indications are off from the correct reference position, the watch will not indicate the time and date correctly.
Correct reference position
text_image
Digital clock face with 'CITIZEN' and a magnified inset showing numbers 1, 2, 3, 4, 5, 6, 7, 8, 9, 10, 11, 12, 13, 14, 15, 16, 17, 18, 19, 20, 21, 22, 23, 24, 25, 26, 27, 28, 29, 30, 31, 32, 33, 34, 35, 36, 37, 38, 39, 40, 41, 42, 43, 44, 45, 46, 47, 48, 49, 50, 51, 52, 53, 54, 55, 56, 57, 58, 59, 60, 61, 62, 63, 64, 65, 66, 67, 68, 69, 70, 71, 72, 73, 74, 75, 76, 77, 78, 79, 80, 81, 82, 83, 84, 85, 86, 87, 88, 89, 90, 91, 92, 93, 94, 95, 96, 97, 98, 99, 100Checking and correcting the current reference position
text_image
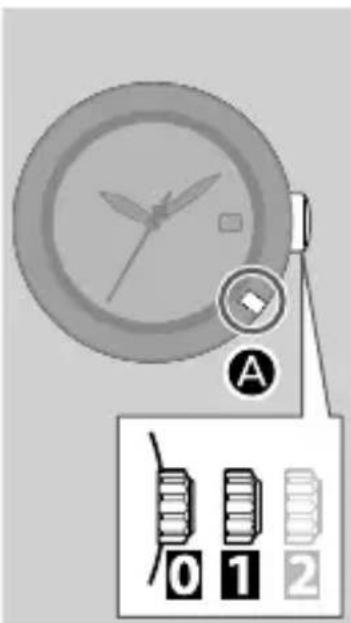
A 0 1 21. Pull the crown out to position 1
2. Press and hold the lower right button for five or more seconds.
All hands and the date indication move to indicate the current reference position.
- No operations are available while the hands and date indication are moving.
| Reference position | Next operation |
| Correct | Push the crown in to position 0 to finish the procedure.(You do not need to correct the reference position.) |
| Incorrect Correct the reference position.(Proceed to step 3 on page 48.) | |
Continued on the next page

Checking and correcting the current reference position
text_image
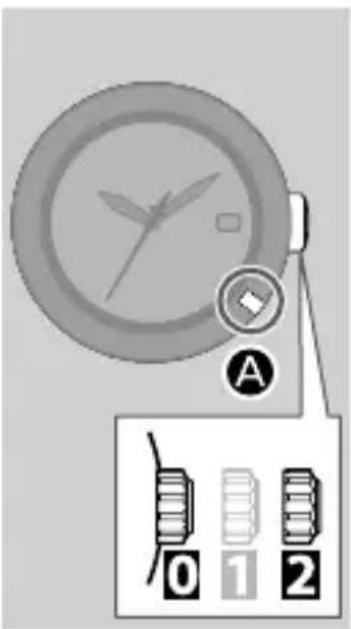
Diagram showing a clock with directional arrows and labeled parts 0, 1, 2, alongside a device icon labeled A.3. Pull the crown out to position
The hour hand moves slightly.
4. Rotate the crown to adjust the hour hand to the "0:00:00" position and the date indication to the halfway between "31" and "1."
• The hour hand and the date indication work together.
- If you spin the crown quickly a few times, the hand will move continuously. To stop it, rotate the crown in either direction.

text_image
1 31- Press the lower right button briefly.
The minute hand and second hand move slightly.
- Rotate the crown to adjust the minute hand and second hand to the "0:00:00" position.
- If you spin the crown quickly a few times, the hands will move continuously. To stop them, rotate the crown in either direction.
- Push the crown in to position to finish the procedure.
Correction of the reference position is finished and the time is indicated.
Troubleshooting
If you have a problem with your watch, check the table below.
Symptoms Remedies Page
Problems with time signal reception.
| Reception is unsuccessful in a receivable area. | Push the crown in to position0. | - |
| Check the World Time setting. | 18 to 25 | |
| Avoid things likely to interfere with the time signal and place the watch with the 9:00 position facing toward the station. | 27 and 32 | |
| Do not move the watch until the reception has finished. | 27 | |
| When the second hand moves once every two seconds, the watch cannot receive the time signal. Charge the watch. | 10 to 15 |
Troubleshooting
Symptoms Remedies Page
| The correct time and date are not indicated after successful reception. | Check the World Time setting. | 18 to 25 |
| Check and correct the current reference position. | 46 to 49 |
The hands do not work properly.
| The second hand rotates counterclockwise when you check the reception result. | Charge the watch. | 10 to 15 |
| The second hand moves once every two seconds. | Charge the watch. | 10 to 15 |
| All hands stop moving. | Push the crown in to position. | - |
| Charge the watch by exposing it to direct sunlight for five to six hours. | 10 to 15 |
Continued on the next page

Troubleshooting
Symptoms Remedies Page
The hands do not work properly.
| The hands start turning rapidly as you take the watch out of the case. | The watch is canceling the power save feature. Wait until the rapid movement stops. | 15 |
The time and/or date is incorrect.
| The time and/or date is incorrect. | Check the World Time setting. | 18 to 25 |
| Check and correct the current reference position. | 46 to 49 | |
| Receive the time signal manually to adjust the time and date. | 34 and 35 | |
| Set the time and date manually. | 42 to 45 | |
| Summer Time is not shown. | Select “ON” manually or receive the time signal. | 36 to 41 |
Troubleshooting
Symptoms Remedies Page
| The time is incorrect even though the Wold Time setting is correct and the signal reception was successful. | Check the displayed time—Summer Time or the standard time—and change it if necessary. | 36 to 41 |
| Check and correct the current reference position. | 46 to 49 | |
| The date changes at around 12:00 p.m. | Receive the time signal manually to adjust the time and date. | 34 and 35 |
| Adjust the time by 12 hours manually. | 42 to 45 |
Others
| The hands do not move even if the watch is charged. | Charge the watch by exposing it to direct sunlight for five to six hours.If the problem is not solved after charging, contact your nearest Authorized Citizen Service Center. | 10 to 15 |
Troubleshooting
Resetting the watch—All Reset
text_image
Diagram showing a clock with directional arrows and labeled buttons, alongside icons for battery, switch, and battery pack.The watch may not work properly if it is affected by strong shock or static electricity; the hands do not stop or the watch does not work though the watch is sufficiently charged. In this case, perform All Reset.
Caution
- Be sure to charge the watch fully before performing All Reset. (Pages 10 to 15)
- After performing All Reset, the settings change as follows. You must correct the current reference position, then World Time setting and time before using the watch.
• Calendar: January (leap year)
• World Time City: London
Time difference: ±0 hours (UTC)
- Summer time: "OFF" for all cities/time differences (automatic switching)
Troubleshooting
-
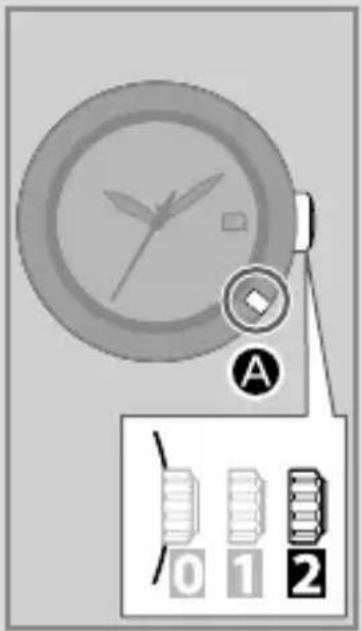
Pull the crown out to position 2.
-
Press the lower right buttons Ⓐ for seven or more seconds, then release them. The second hand moves to the “0” second position, the hour hand and date indication move slightly, and the watch is reset.
- If the hands do not move, perform step 2 again.
After performing All Reset
You must set the watch again following the procedure below.
1. Correct the current reference position.
After performing All Reset, the watch is in reference position correction mode.
See from step 4 on page 48.
2. Set the World Time.
See pages 18 to 25.
3. Adjust the time/calendar.
- When adjusting by receiving the time signal manually:
→ See pages 34 and 35.
- When adjusting manually:
→ See pages 42 to 45.
Eco-Drive (solar powered) Watch Handling Precautions
- Please note that if you wear long sleeves, the watch may stop as a result of being covered by your sleeve and blocked from the light.
- When you take off the watch, try to place it in as bright a location as possible. This will ensure that it will continue to run properly.
Eco-Drive (solar powered) Watch Handling Precautions

CAUTION Recharging Precautions
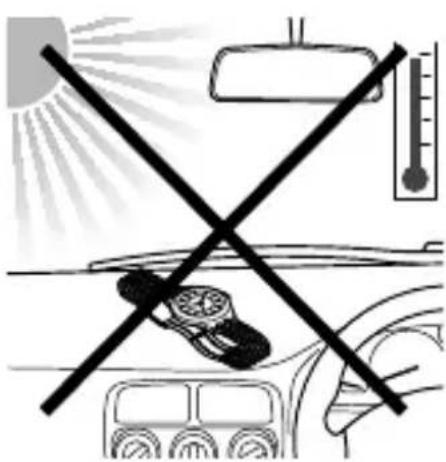
- Do not charge your watch at high temperatures (60°C/140°F) as this may cause damage to sensitive components and the watch to malfunction.
Examples:
- Charging the watch too close to a light source which generates a large amount of heat such as an incandescent lamp or halogen lamp.
* When charging your watch under an incandescent lamp, be sure to leave 50 cm (19-11/16 inches) distance between the lamp and the watch to avoid excessive heat. Never use a halogen lamp for recharging as these generate excessive heat.
- Charging the watch in a location where the temperature may become extremely high such as on the dashboard of a vehicle.
text_image
Diagram showing car safety with crossed-out vehicle, thermometer, and sunlight in background
Eco-Drive (solar powered) Watch Handling Precautions
- Your watch features a cell that does not need regular replacement.
However, after an extended period of time, power consumption may increase due to deterioration of lubrication in the movement. This may result in shorter than expected run time. Be sure to have your watch regularly inspected by an Authorized Service Center.
Note: Regular maintenance is not covered under the terms of the warranty.

WARNING Handling of Rechargeable Cell
- The rechargeable cell should never be removed from the watch.
If for any reason it becomes necessary to remove the rechargeable cell from the watch, keep out of the reach of children to prevent accidental swallowing.
If the rechargeable cell is accidentally swallowed, consult a doctor immediately.
- Do not dispose of the rechargeable cell with ordinary garbage. Please follow the instructions of your municipality regarding collection of batteries to prevent the risk of fire or environmental contamination.

WARNING Use Only the Specified Rechargeable Cell
- Never install a conventional battery in your watch. Only use the specified rechargeable cell. Your watch is designed to operate only with the original type of rechargeable cell. It is not designed to run or be used with a conventional type of battery. Installing such a battery may result in overcharging which may cause the battery to burst. This can cause damage to the watch and injury to the wearer.
If for any reason the rechargeable cell needs replacement, be sure to use only the original type rechargeable cell. We recommend contacting your nearest Authorized Service Center for this service.
Water resistance

WARNING Water Resistance
- Refer to the watch dial and the case back for the indication of the water resistance of your watch. The following chart provides examples of use for reference to ensure that your watch is used properly.
(The unit "1bar" is roughly equal to 1 atmosphere.)
- WATER RESIST(ANT) × × bar may also be indicated as W.R. × × bar.
| Name | Indication | Specification |
| Dial or Case back | ||
| Non-water resistant Non-water resistant | ||
| Everyday-use water resistant watch | WATER RESIST(ANT) | Water-resistant to 3 atmospheres |
| Upgraded everyday use water-resistant watch | WATER RESIST(ANT)5 bar | Water-resistant to 5 atmospheres |
| WATER RESIST(ANT)10/20 bar | Water-resistant to 10 or 20 atmospheres | |
| Water-related use | |||||
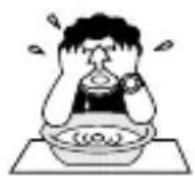 | 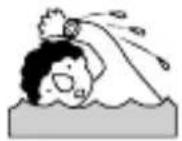 | 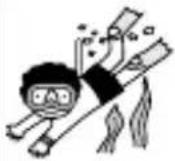 | 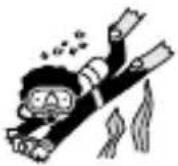 | 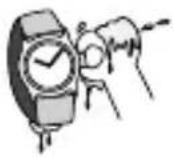 | |
| Minor exposure to water (washing face, rain, etc.) | Swimming and general washing work | Skin diving, marine sports | Scuba diving using an air tank | Operate the crown or button when the watch is wet | |
| NO NO NO NO NO | |||||
| OK NO NO NO NO | |||||
| OK OK NO NO NO | |||||
| OK OK OK NO NO | |||||
Water resistance
- Non-water resistant watches cannot be used underwater or in environments in contact with water.
- Water-resistance for daily use (to 3 atmospheres) means that the watch may be worn while washing your face or in the rain, but is not to be immersed in water.
- Upgraded water-resistance for daily use (to 5 atmospheres) means that the watch may be worn while swimming, but is not to worn while skin diving.
- Upgraded water-resistance for daily use (to 10/20 atmospheres) means that the watch may be worn while skin diving, but not while scuba or saturated diving using helium gas.
- For a metallic, plastic or rubber watchband, wash any dirt off with water. Remove the small amounts of dirt trapped between the crevices of the metallic band with a soft brush. If your watch is not water resistant, be sure not to get the case of the watch wet.
Precautions and usage limitations

CAUTION To Avoid Injury
- Be particularly careful when wearing your watch while holding a small child, to avoid injury.
- Be particularly careful when engaged in strenuous exercise or work, to avoid injury to yourself and others.
- DO NOT wear your watch while in a sauna, jacuzzi or other location where it may become excessively hot. This may result in burns to the wearer and/or malfunction of your watch.
- Be careful when putting on or taking off your watch since there is a risk of pinching your skin or damaging your fingernails depending on the manner in which the band is fastened.

CAUTION Precautions
- Do not adjust the length of the band by yourself. If you fail to perform the work properly, the watch may fall off, or an injury may occur during adjustment. Consult the shop where you purchased the watch or your nearest Authorized Citizen Service center.
If you purchase a product which is sold with a special tool for band adjustment, you may carefully adjust the band yourself. - Always wear your watch with the crown pushed in to the normal position. If your crown is a screw down type, be sure it is properly screwed down (locked) to the case.
- Do not operate the crown or any buttons when the watch is wet. This may allow the entrance of moisture and cause damage to sensitive components.
- If water enters the watch or the watch fogs up and does not clear up even after a long time, consult Authorized Service Center for inspection and/or repair.
- If a watch of upgraded water resistance for daily use is immersed in sea water or subjected to excessive perspiration, thoroughly rinse with fresh water and wipe completely dry with a soft cloth.
- If seawater enters the watch, place the watch in a box or plastic bag and immediately take it in for repair. Otherwise, pressure inside the watch will increase, and parts (crystal, crown, push button, etc.) may come off.
Precautions and usage limitations
- A rubber type strap may become stained by dyes or soils found in clothing and other accessories. Since these stains may become permanent, take caution when wearing your watch with items that may transfer color (articles of clothing, purses, dyed bracelets, etc.).
- Solvents, moisture and perspiration may cause the strap to deteriorate. Be sure to replace a strap that has become dried, brittle, or cracked to prevent loss due to strap failure.
- The watch may stop or the function of the watch may be impaired in extremely high or low temperature. Do not use the watch in places where the temperature is outside the operating temperature range as stated in the specifications.
- The integrated circuits (IC) used in quartz watches are sensitive to static electricity. Please note that the watch may malfunction if exposed to intense static electricity.
- Analog type quartz watches are powered by a motor that utilizes a small magnet. The operation of this motor can be disturbed if the watch is subjected to magnetic items resulting in the malfunction of the watch. Do not allow the watch to come into close proximity to magnetic items such as “health” bracelets or necklaces, coin trays, latches found in cabinets and refrigerators, certain clasps of handbags and cell phone pouches, cell phone speakers, certain sporting accessories, MRI equipment, etc.
Precautions and usage limitations
- Avoid dropping the watch or subjecting it to other strong impact. It may cause malfunctions and/or performance deterioration as well as damage to the case and bracelet.
- If paint thinner, benzene or other solvents or products containing these solvents (including gasoline, nail-polish remover, cresol, bathroom cleaners and adhesives, water repellent, etc.) are allowed to come in contact with the watch, they may cause discoloration, deterioration and damage materials of the watch. Be careful when handling these chemicals. Contact with mercury such as that used in thermometers may also cause discoloration of the band and case.

CAUTION Always Keep Your Watch Clean
- Rotate the crown while it is pressed in fully and press the buttons periodically so they do not become stuck due to accumulations of foreign matter.
Note: Do not operate the crown or any buttons when the watch is wet.
- The case and band of the watch come into direct contact with the skin in the same manner as undergarments. Corrosion of the metal or unnoticed soiling such as that caused by perspiration and dirt can soil sleeves and other portions of clothing. Keep your watch clean at all times.
Precautions and usage limitations
- The case and band of the watch come in to direct contact with the skin. This may result in unnoticed accumulations of dirt and foreign matter caused by normal wear. Accumulated matter may cause rust, discoloration, and premature wear. Be sure to regularly clean your watch with a soft cloth. If severe accumulations occur, you may need to have your case and/or bracelet professionally cleaned.
- In some instances, accumulations of dirt and foreign matter may cause skin reactions. This may also occur due to certain allergies beyond our control. If this occurs, immediately discontinue use of your watch and consult your physician.
- Leather, cloth, and other natural skin straps may become discolored or brittle from moisture, perspiration and/or accumulated dirt. To maximize the life of your strap, be sure to keep your leather band clean and dry by wiping it with a soft cloth each day.

CAUTION Caring for Your Watch
- Wipe any dirt or moisture such as perspiration from the case and crystal with a soft cloth.
- If you will not be using your watch for an extended period of time, carefully wipe off any perspiration, dirt or moisture and store in a proper location, avoiding locations subject to excessively high or low temperatures and high humidity.
Maintenance
Daily maintenance
- Rotate the crown while it is pressed in fully and press the buttons periodically so they do not become stuck due to accumulations of foreign matter.
- Wipe off dirt, perspiration, and water from the case and glass with a clean soft cloth occasionally.
- To clean a metal, plastic, or rubber watchband, wash away dirt with water. Use a soft brush to remove dust and dirt stuck in the gaps in a metal band.
- Do not use a polishing type of cloth as this may damage the surface and certain treatments.
- Do not use solvents (thinner, benzine, etc.), as they may damage the finish.
Periodical inspections
Your watch needs an inspection once every two or three years for safety and longer usage. To keep your watch water-resistant, the gaskets and other components need to be replaced regularly. Other parts need to be inspected and replaced if necessary.
Always ask for genuine Citizen parts upon replacement.
Information
The time signal
The time signal is broadcast almost continuously 24-hours a day, but may occasionally be interrupted due to maintenance. The broadcasting conditions of the time signal can be checked on the station web site.
The time signal has no effect on the human body or medical equipment.
About the Watch with Luminous Paint
Your watch may feature luminous treatment to the dial and hands to aid you in reading the watch in dimly lit environments. This luminous treatment stores light from both natural and artificial sources. It is free from any radioactive substance or any other material that may be harmful to the environment or human body.
- The light emission of the luminous material gradually decreases as time passes.
- The duration and amount of light emitted will vary depending on the brightness, type of and distance from the light source, exposure time and amount/size of luminous treatment.
- When not exposed to a light source, light emission from the luminous treatment will start off bright and gradually diminish over a period of hours. The duration of visible light emission will vary with type of and duration of light exposure as well as size of luminous features of your watch.
Specifications
| Model | H240 | Type | Analog solar-powered watch |
| Timekeeping accuracy (without the time signal reception) | Within ±15 seconds per month when worn at normal operation temperatures (between +5°C and +35°C) | ||
| Operating temperature range | -10°C to +60°C | ||
| Display functions | • Time: Hours, minutes, seconds• Calendar: Date | ||
| Maximum run time from full charge | • Fully charged to fully discharged: Approximately six months (at normal operation) Approximately three years (with power save feature)• Power reserve upon insufficient charge warning function: Approximately six days | ||
| Battery | Rechargeable cell (lithium button cell), 1pc. | ||
Specifications
| Additional functions | Solar power functionPower reserve indicationOvercharging prevention functionInsufficient charge warning function (two-second interval movement)Energy saving function (power save feature)Receiving time signal (automatic, on demand, recovery automatic)Confirming reception status (RX)Automatic selection of time signal stations (JJY only)Indicating the result of the last reception (OK/NO)Summer Time (ON/OFF)City setting (24 cities) or correcting the time differencePerpetual calendar (until February 28th, 2100) |
Specifications are subject to change without prior notice.
CE
This product follows the provisions of EMC(2004/108/EC) amended by the Directive 93/68/EEC
EMC EN61000-6-1:2007
EN61000-6-3:2007
Model No.EC1 *
Cal.H240
CTZ-B8155