
CAL G910 - Watch CITIZEN - Free user manual and instructions
Find the device manual for free CAL G910 CITIZEN in PDF.


User questions about CAL G910 CITIZEN
0 question about this device. Answer the ones you know or ask your own.
Ask a new question about this device
Download the instructions for your Watch in PDF format for free! Find your manual CAL G910 - CITIZEN and take your electronic device back in hand. On this page are published all the documents necessary for the use of your device. CAL G910 by CITIZEN.
USER MANUAL CAL G910 CITIZEN
Thank you for your purchase of this Citizen watch.
Before using the watch, read this instruction manual carefully to ensure correct use.
Parts identification .... 2
Notes on modes of this watch ..... 4
Checking the reference position of the hands 6
Adjusting the watch 8
Adjusting the date ..... 13
Adjusting the year/month .....14
Using the chronograph .....16
Checking the time by sounds (Minutes repeater)....18
Adjusting the reference position ...20
Using the tachymeter .....22
Notes on charging your watch .....24
Troubleshooting....27
Precautions....30
Maintenance....38
Information....39
Specifications ....40
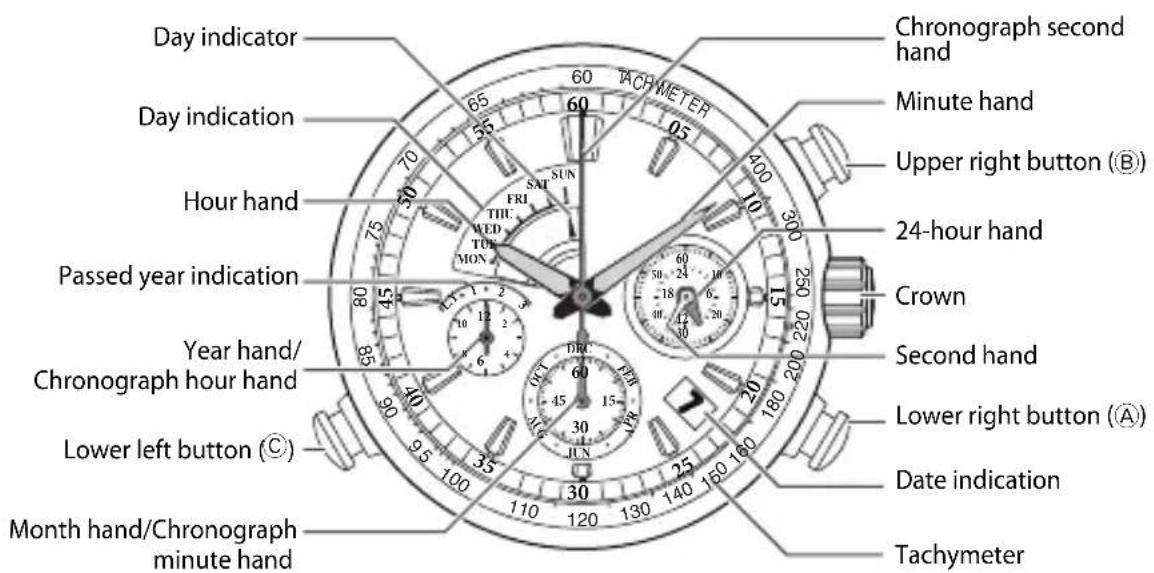
Parts identification
text_image
Day indicator Day indication Hour hand Passed year indication Year hand/ Chronograph hour hand Lower left button (C) Month hand/Chronograph minute hand Chronograph second hand Minute hand Upper right button (B) 24-hour hand Crown Second hand Lower right button (A) Date indication Tachymeter- The illustrations in this instruction manual may differ from the actual appearance of your watch.
How to use the screw down crown and screw down push button
Some models feature a screw down crown and screw down push button.
Locking the crown and button prevents accidental operation. Unlock them when you want to operate the watch.
| Unlock Lock | ||||
| Screw down crown | 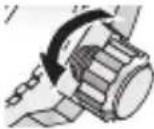 | Rotate the crown counterclockwise until it releases from the case. | 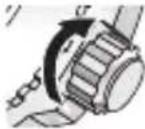 | After pushing the crown in to the position 0, rotate the crown clockwise while pushing it in, and tighten firmly. |
| Screw down push button | 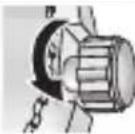 | Rotate the locking screw counterclockwise, and loosen until it stops. | 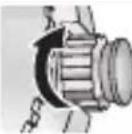 | Rotate the locking screw clockwise, and tighten firmly. |
- Unlocking is not required when a standard crown and button are equipped.
Notes on modes of this watch
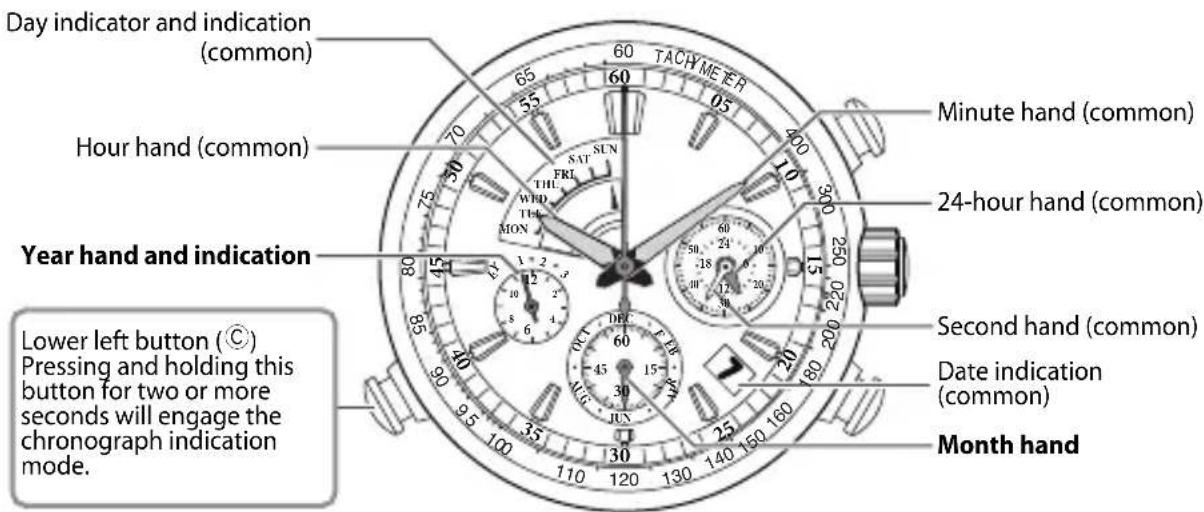
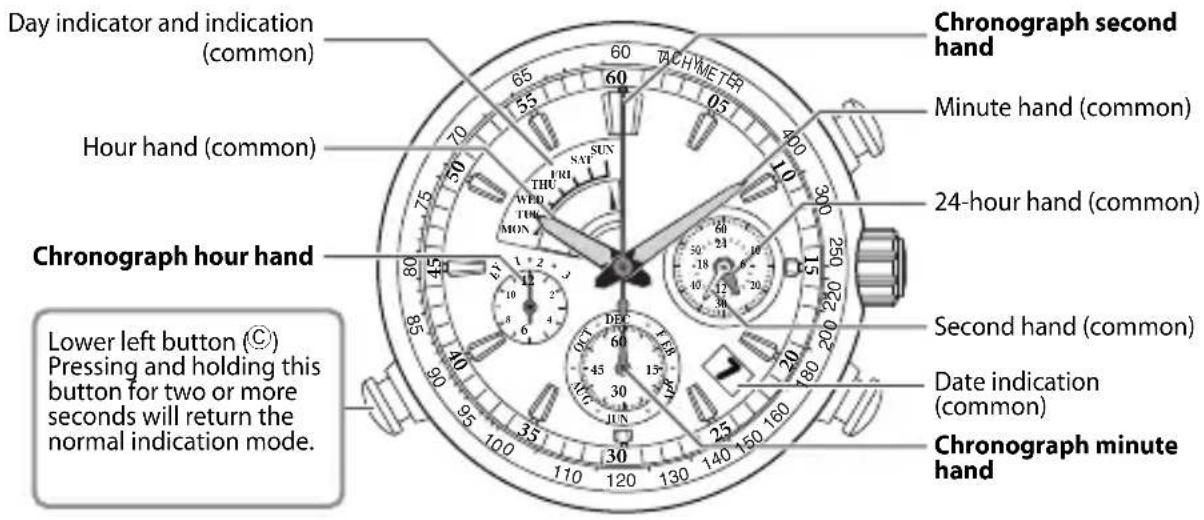
There are two modes for hand indications in this watch; one is for checking the calendar and the other is for using the chronograph.
For checking the calendar—Normal indication mode
text_image
Day indicator and indication (common) Hour hand (common) Year hand and indication Lower left button (©) Pressing and holding this button for two or more seconds will engage the chronograph indication mode. Month hand Date indication (common) Second hand (common) 24-hour hand (common) Minute hand (common)For using the chronograph—Chronograph indication mode
text_image
Day indicator and indication (common) Hour hand (common) Chronograph hour hand Lower left button (©) Pressing and holding this button for two or more seconds will return the normal indication mode. Chronograph second hand Minute hand (common) 24-hour hand (common) Second hand (common) Date indication (common) Chronograph minute hand- In this manual, all the explanations start from the normal indication mode of this watch.
Checking the reference position of the hands
If the reference position is incorrect, the time and calendar are not indicated properly. See the next page to confirm the correct reference position.
text_image
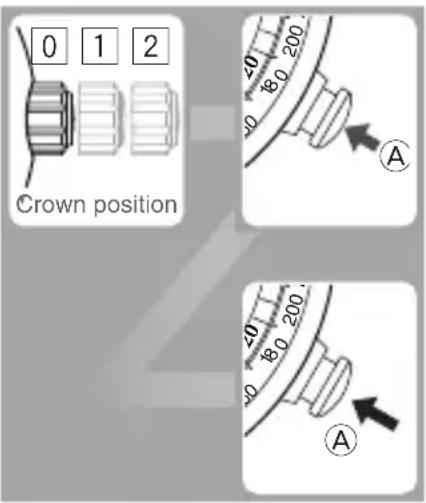
0 1 2 Crown position 40 200 A 40 200 A- Ensure that the crown is in position 0 when the watch is in the normal indication mode.
- Press and hold the lower right button (A) for two or more seconds.
The current time of sub-watch is shown. For in-depth information on the sub-watch, see page 8.
- Sub-watch is working though the hands do not move.
- Press the lower right button (A) again.
The current reference positions of the following items are shown: year hand, month hand, chronograph second hand, and date indication.
- Press any button to finish the checking.
- The normal indication mode resumes in two minutes when no operation is done.
Notes on the correct reference position
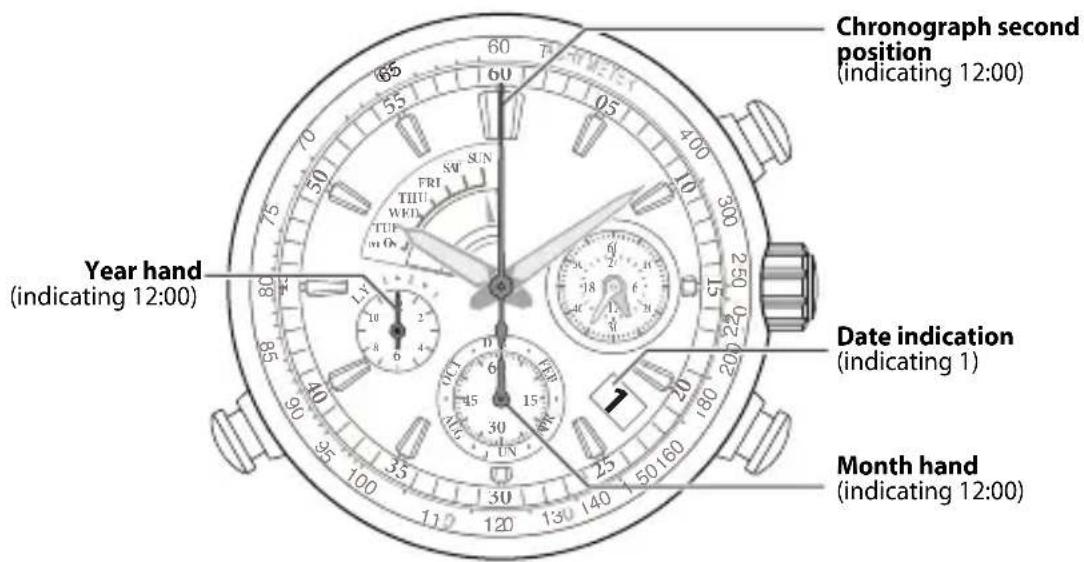
The correct reference position for all the items is shown below. If items are not in the correct reference position, refer to page 20 for the adjustment.
text_image
Chronograph second position (indicating 12:00) Year hand (indicating 12:00) Date indication (indicating 1) Month hand (indicating 12:00)Adjusting the watch
This watch consists of two built-in clocks—the main-watch and the sub-watch. Each controls the functions of the hands in a different manner.
For details on the assignment of the functions to the main-watch and the sub-watch, refer to the table to the right.
The main-watch and sub watch are adjusted separately.
If the sub-watch is not synchronized to the main-watch, the tones of the minutes repeater will not synchronize with the time on the main-watch (large hour and minute hands).
| Hands and indications Main-watch Sub-watch | ||
| Year/Minute/Second hands | √ | |
| Day indication | √ | |
| 24-hour hand | √ | |
| Year hand and indication | √ | |
| Month hand | √ | |
| Date indication | √ | |
| Minutes repeater | √ | |
- This watch shows the year indication as the number of years passed since leap year. It is not the actual year.
For the most accurate setting, first adjust the sub-watch and then synchronize the main-watch with the time on the sub-watch.
text_image
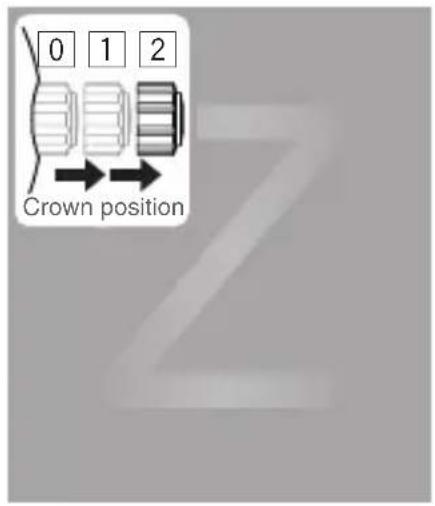
0 1 2 Crown position1. Pull the crown out to position 2 when the second hand indicates 12:00.
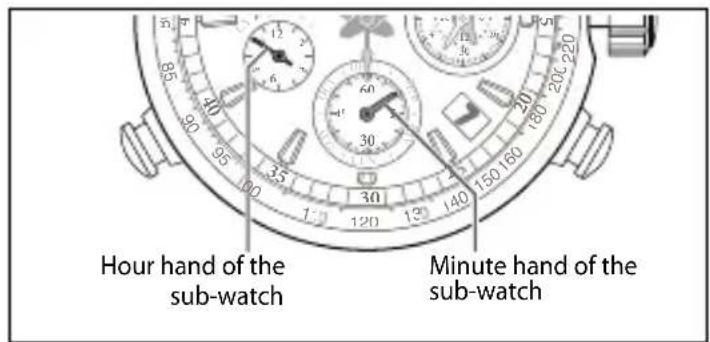
Both the main-watch and the sub-watch stop, and the current time of the sub-watch is shown.
text_image
Hour hand of the sub-watch Minute hand of the sub-watche.g. When it is 10:09.
Continued to the next page
text_image
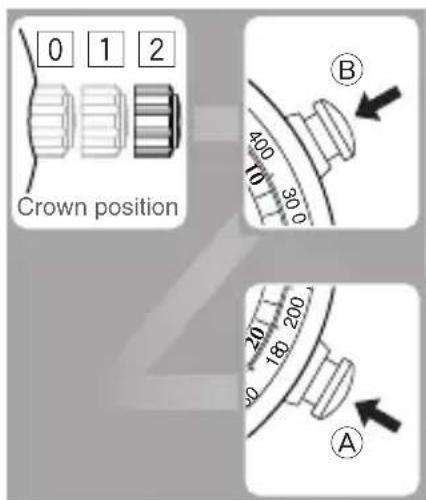
0 1 2 Crown position B 400 10 30 0 20 18 200 A2. Adjust the hour and minute hands by pressing the lower or upper right button (A) or (B).
• Each time you press the lower or upper right button (A or B), the minute hand moves counterclockwise or clockwise. The movement of the hour hand is linked with the minute hand.
- If you press and hold the button, the minute and hour hands move continuously.
- The chronograph second hand indicates the a.m. or p.m. reference. When the hand points to 12, a.m. time is indicated. When the hand points to 1, p.m. time is indicated.
- While adjusting, year/month/date are not changed.
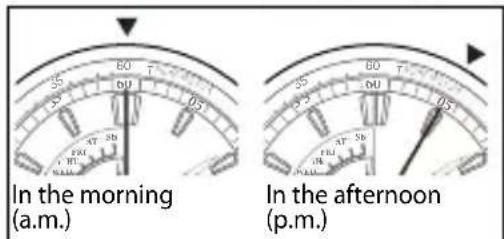
text_image
In the morning (a.m.) In the afternoon (p.m.)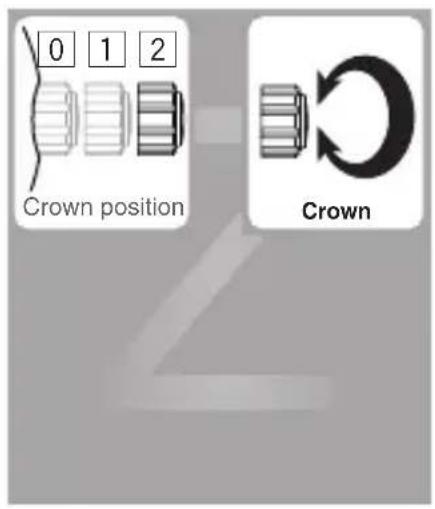
text_image
0 1 2 Crown position Crown3. Adjust the time and the day of the main-watch by rotating the crown.
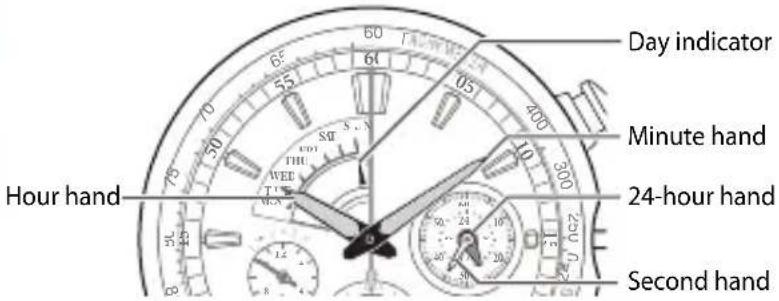
text_image
Day indicator Minute hand 24-hour hand Hour hand Second hand- The movement of the hour hand/24-hour hand/day indicator is linked with the minute hand.
- You may rapidly advance the day by repeatedly rotating the crown to move the hour and minute hands between 10:00 p.m. and 1:00 a.m.
Continued to the next page
text_image
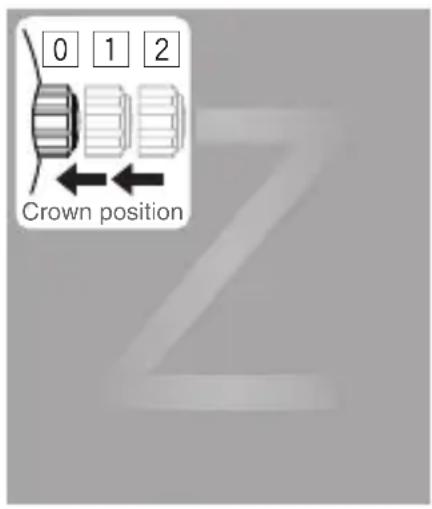
0 1 2 Crown position4. Push the crown in to position 0 to start the watch.
Both the main-watch and the sub-watch start simultaneously, and the second hand starts to move.
- The second of the sub-watch starts from 0-seconds when the crown is pushed in to position 0.
Adjusting the date
text_image
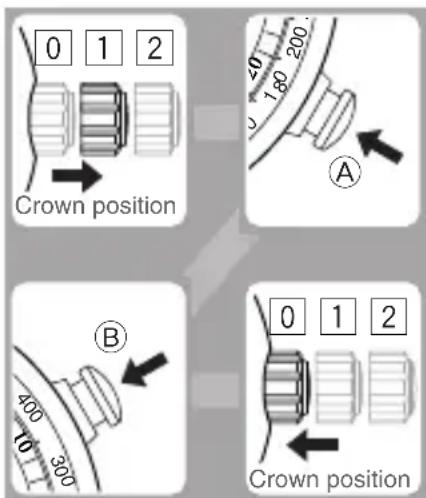
0 1 2 Crown position 40 180 200 A ② 400 10 300 Crown position 0 1 2- Pull the crown out to position 1. The watch does not stop.
- Adjust the date by pressing the lower or upper right button (A or B).
• Each time you press the lower or upper right button (A) or (B), the date goes backward or forward day by day.
- The date will change continuously by pressing and holding either button. To stop the movement, press the lower or upper right button (A) or (B).
- Push the crown in to position 0.
- If the date changes at noon, adjust the time of the sub-watch referring to page8.
Adjusting the year/month
text_image
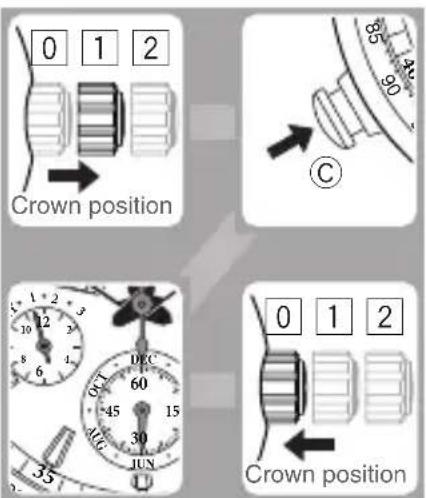
0 1 2 Crown position C 0 1 2 Crown position- Pull the crown out to position 1.
The watch does not stop.
-
Adjust the year and month by pressing the lower left button (©).
-
If you press and hold the button, the year and month change continuously.
-
The movement of the year hand is linked with the month hand.
• See the next page about the year/month indications. -
Push the crown in to position 0.
About the year hand
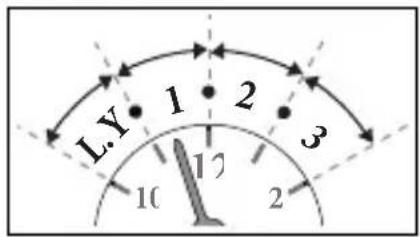
The year hand indicates the year as the number of years passed since leap year.
text_image
L.Y. 1 2 3 10 17 2| Indication Passed year Year | ||
| L.Y Leap year | 2012, 2016 | |
| 1 1st year 2009, 2013 | ||
| 2 2nd year 2010, 2014 | ||
| 3 3rd year 2011, 2015 | ||
The first year passed since from leap year is shown on the illustration above.
About the month hand
radar
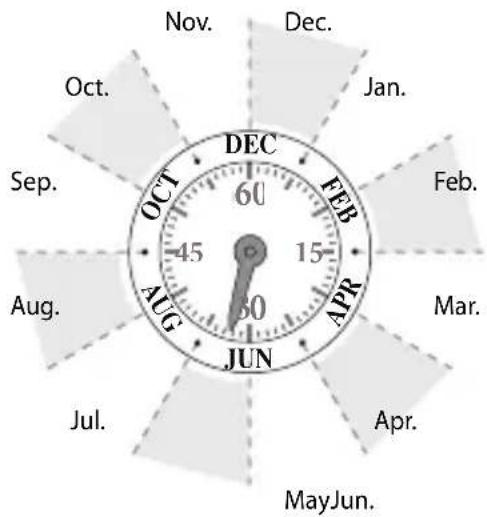
| Month | Value | |---|---| | Jun | 60 | | Jul | 45 | | Aug | 40 | | Sep | 35 | | Oct | 30 | | Nov | 25 | | Dec | 20 | | Jan | 15 | | Feb | 10 | | Mar | 5 | | Apr | 0 | | May | 0 | | Jun | 0 | | Jul | 0 | | Aug | 0 | | Sep | 0 | | Oct | 0 | | Dec | 0 |June is indicated on the illustration above.
Using the chronograph
You can record up to 12 hours in increments of 0.25 seconds.
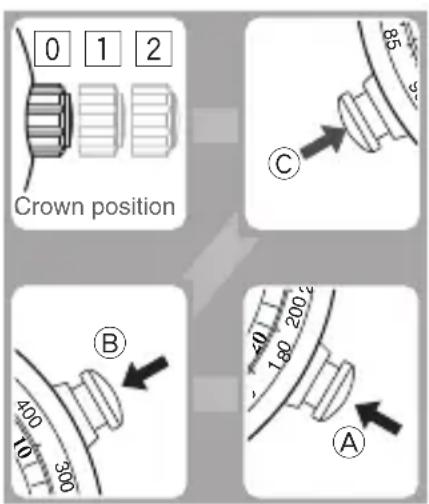
- Ensure that the crown is in position 0.
- Press and hold the lower left button (©) for two or more seconds to change to the chronograph indication mode.
The chronograph second hand turns around.
- Press the upper right button (B) to start timing.
The chronograph second hand starts timing.
- The chronograph second hand stops after timing 12 hours.
- Press the upper right button (B) to stop timing.
The recorded time is shown.
- Pressing the upper right button (⑧) restarts timing from the recorded time.
To record lap times
The lap time is shown by pressing the lower right button (A) while timing.
The timing goes on though the hands are paused.
The indication for the current timing is shown by pressing the button again.
To record the best time and the second best time
The best time is shown by pressing the lower right button (A) while timing.
The second best time is shown by pressing the upper right button (B) after pressing the lower right button (A).
To reset the chronograph to zero
After stopping the chronograph timing by pressing the upper right button (B), press the lower right button (A).
The chronograph second hand moves to 12:00 when the chronograph is reset.
To change to the normal indication mode, press and hold the lower left button (©) for two or more seconds.
Checking the time by sounds (Minutes repeater)
The chime tells the current time by the tones and the number of times.
- Minutes repeater operates from the sub-watch time. It does not distinguish from morning (a.m.) or afternoon (p.m.) time.
- You cannot use the minutes repeater when using the chronograph.
text_image
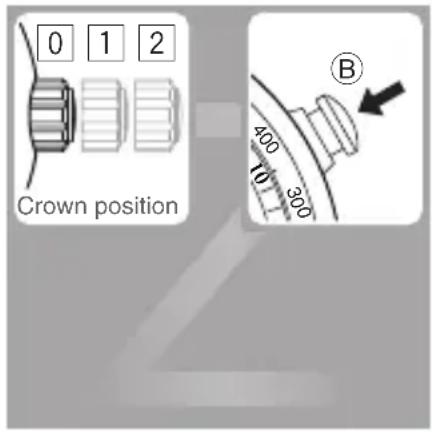
0 1 2 Crown position 400 10 300 B- Ensure that the crown is in position 0.
- Press the upper right button (B) for two or more seconds.
The minutes repeater sounds the chime for the current time.
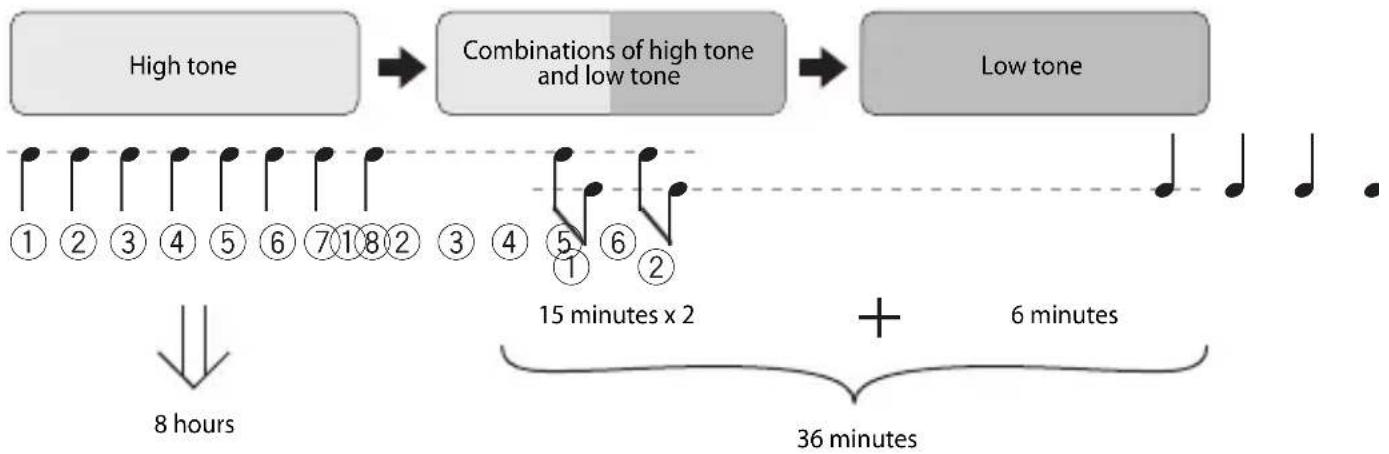
| Tones | Meanings |
| High | Hour |
| Low | Minute |
| Combinations of high tone and low tone | 15 minutes |
About the sounds of the minutes repeater
The minutes repeater, for example, tells 8:36 in the following way:
flowchart
graph TD
    A["High tone"] --> B["Combinations of high tone and low tone"]
    B --> C["Low tone"]
    D["15 minutes x 2"] --> E["+ 6 minutes"]
    F["36 minutes"] --> E
    G["8 hours"] --> D
To stop the sound
Press any button.
Adjusting the reference position
• See page 11 to check the correct position for each item.
text_image
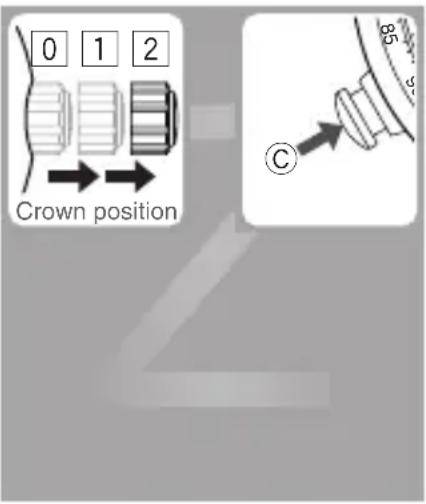
0 1 2 Crown position 85 C- Pull the crown out to position 2. All the hands and indications stop.
- Press and hold the lower left button (©) for five or more seconds.
The hands start to move rapidly to show the current reference position.
- Each time you press the lower left button (©), the item selection changes in the following order: Year/Month hands → Chronograph second hand → Date → To the beginning
- The selected item moves a little to indicate the selection item is active for adjustment.
text_image
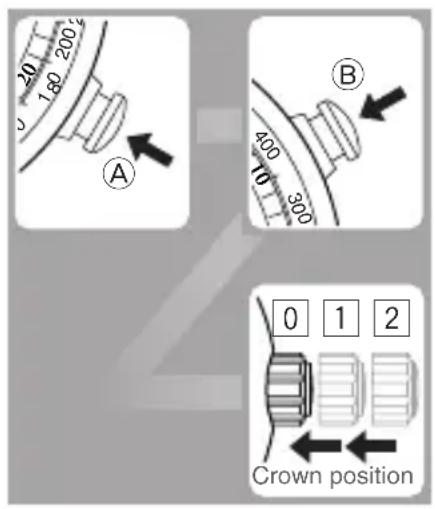
20 180 200 2 A 400 10 300 B 0 1 2 Crown position- Adjust the current reference position of the selected item by pressing the upper or lower right button (A or B).
• See page7 to check the correct position for each item.
- Each time you press the lower or upper right button (A or B), the minute hand moves counterclockwise or clockwise.
- The active item starts to move continuously by pressing and holding either button. To stop the movement, press any button.
- When adjusting the date, center the date indication in the window.
-
Repeat steps 2 and 3 to adjust the other items.
-
Push the crown in to position 0.
You have now completed adjusting the reference position.
Using the tachymeter
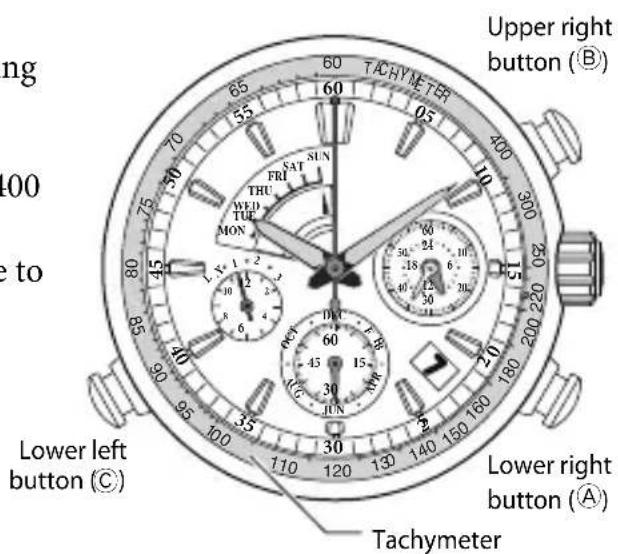
The tachymeter easily enables you to calculate the average speed by recording the time to travel one kilometer.
- You can measure the approximate average speed from 60 km/h up to 400 km/h.
- When using the tachymeter, change to the chronograph indication mode.
- Some models do not feature the tachymeter.
text_image
Upper right button (®) FRI SAT SUN THU WED TUE MON Lower left button (©) Lower right button (®) TachymeterTo measure an average speed
Read the value on the tachymeter after recording a lap time.
text_image
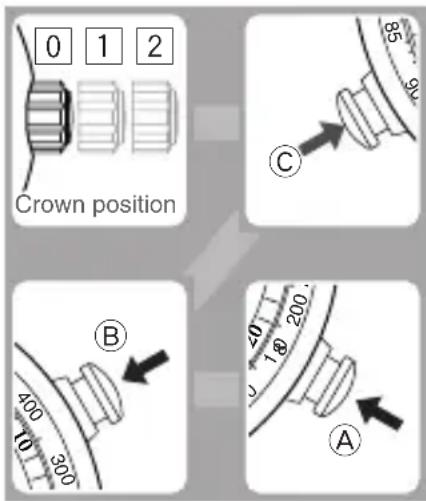
0 1 2 Crown position C B A- Ensure that the crown is in position 0.
- Press and hold the lower left button (©) for two or more seconds to change to the chronograph indication mode.
- Press the upper right button (B) to start timing.
The chronograph second hand starts timing. - Stop timing at the point one kilometer away from the starting point by pressing the upper right button (B).
The chronograph second hand indicates the approximate average speed on the tachymeter.
To reset the chronograph
Press the lower right button (A).
Notes on charging your watch
This watch has a rechargeable cell which is charged by exposing the dial to light such as direct sunlight or fluorescent lamps.
For optimal performance:
- Expose the watch with the dial towards direct sunlight for several hours at least once a month.
- After taking off the watch, put it in a position so that the dial is exposed to bright light, such as by a window.
- Before storing the watch in a dark place for an extended period of time, be sure to charge it fully.
When the watch is regularly covered with long sleeves, it may not be charged sufficiently. Try to keep the watch exposed to light sufficient for charging.
Do not charge the watch at a high temperature (about 60^ C/140°F or higher).
When the watch reaches a low charge state—insufficient charge warning function
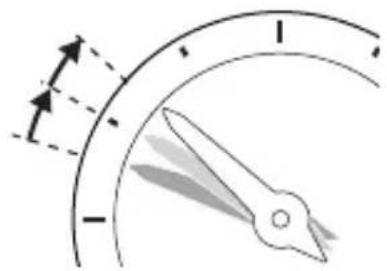
When the power reserve becomes low, the second hand moves once every two seconds—This is the insufficient charge warning function. Charge the watch by exposing the dial to light.
• After the watch is charged, the second hand will move normally. See page26.
- If you have not charged the watch for four days or more since the insufficient charge warning movement began, the watch will run out power and stop.
Caution
When the second hand moves once every two seconds, you cannot use any functions—chronograph, minutes repeater, etc.—except the time indication.
natural_image
Simple line drawing of a clock face with an arrow indicating upward motion (no text or symbols)Continued to the next page
Charging time by environment
Below are the approximate times needed for charging when exposing the watch dial to light continuously.
Please use this table as a reference only.
| Environment Illuminance (Lx) | Charging time to work for one day | Charging time to start working normally when the rechargeable cell is empty |
| Under direct sunlight or cloudy weather | 10000 to 100000 3 to 12 minutes 40 minutes to 2 hours | |
| 20 cm under a fluorescent lamp (30 W) | 3000 40 minutes 5 hours | |
| Interior lighting | 500 4 hours 35 hours |
Your watch will run approximately 12 months from a full charge.
Troubleshooting
If you have a problem with your watch, check the table below.
Symptoms Remedies Page
The hands do not work properly.
| The second hand moves once every two seconds. | Charge the watch. | 24 |
| All hands stop moving. | Push the crown in to position 0. | - |
| Charge the watch by exposing it to direct sunlight for five or six hours. | 24 |
The time and/or date is not correct.
| The time and/or date is wrong. | Adjust the time and/or date. | 8 - 13 |
| The day changes around at noon. | Adjust the a.m./p.m. setting of the main-watch. | 8 - 12 |
| The date changes around at noon. | Adjust the a.m./p.m. setting of the sub-watch. | 8 - 12 |
Continued to the next page
Symptoms Remedies Page
Minutes repeater
| The sounds of the minutes repeater do not synchronize the time indication. | Synchronize the sub-watch with the main-watch. | 8 - 12 |
| The minutes repeater does not sound. | Push the crown in to position0. | - |
| Change the mode to the normal indication mode. | 4,5 | |
| Charge the watch. | 24 |
Others
| The watch does not move even if the watch is charged. | Charge the watch by exposing it to direct sunlight for five or six hours.Though the trouble is not solved after charging, contact your nearest Authorized Citizen Service Center. | 24 |
Resetting the watch
The watch may not work properly if it is affected by static electricity or shock. In this case, you must reset the watch. Fully charge the watch before resetting.
text_image
0 1 2 Crown position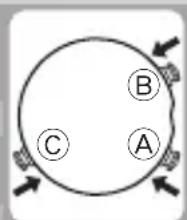
flowchart
graph TD
    A["A"] --> B["B"]
    B --> C["C"]
    C --> A
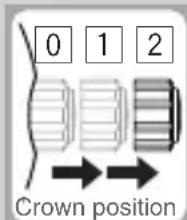
- Pull the crown out to position 2. All the hands and indications stop.
- Press all buttons (A, B, and C) simultaneously.
The confirmation tone sounds and the watch is reset.
After resetting the watch
You must fully set the watch again in the following procedures:
- Adjust the reference position correctly. See page 20.
- Adjust the time/calendar. See pages 8 to 15.
Precautions
Warnings
Handling the rechargeable cell
- Do not remove the rechargeable cell. If it is removed, keep the rechargeable cell out of the reach of children to prevent ingestion.
- If the rechargeable cell is swallowed, consult a doctor and seek medical treatment.
Cautions
About charging
- Excessively high temperature when charging the watch may cause discoloration and deformation of the components, and result in malfunction of the movement.
- Do not charge the watch at a high temperature (about 50^ / 122^ or higher).
Example:
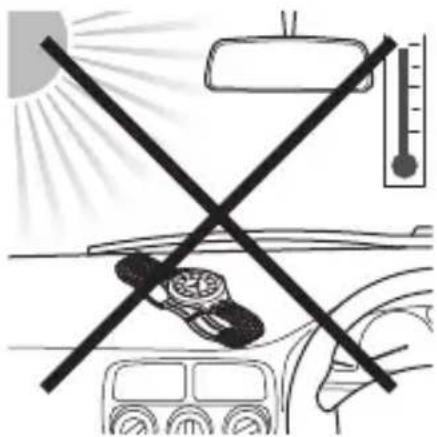
- charging the watch too close to light such as an incandescent lamp or halogen lamp (Halogen lights are not recommended for charging due to their high heat output.)
- charging the watch in locations where the temperature may become extremely high—such as on the dashboard of a vehicle
text_image
Diagram illustrating car safety cross with a crossed-out car, steering wheel, and thermometer, alongside a sunlit vehicle.To avoid injury
- DO NOT wear the watch where the temperature becomes extremely high—such as in a sauna. The watch may become hot and burn the skin.
To avoid malfunction
- DO NOT use the watch where the temperature is lower or higher than the operating temperature specified in this manual. Doing so may cause the watch to malfunction or stop.
-
DO NOT place the watch nearby any materials generating a strong magnetic field such as:
-
magnetic health equipment such as a magnetic necklace
- a magnetic latch of a refrigerator door
- a magnetic clasp on a handbag
- a magnetic coin tray
- speakers of a mobile phone
– electromagnetic cooking devices
They may interfere with function of the movement in the watch causing it to stop or operate erratically.
- DO NOT place the watch on or nearby household appliances that generate static electricity such as Televisions or computer monitors. The timekeeping may be affected.
- DO NOT apply any strong shock, for example, by dropping it onto a hard floor.
- Avoid using the watch where it may be exposed to chemicals or corrosive gases. If solvents, such as thinners or benzine, or substances containing such solvents come in contact with the watch, discoloration, melting, cracking, etc. may occur. The case, band, or other parts may become discolored if the watch comes into contact with some household chemicals mercury that may be found in thermometers.
Warnings on water-resistance performance
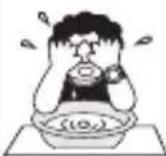
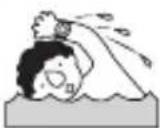
- Water-resistance for daily use: This type of watch is resistant to minor exposure to water such as accidental splashing. For example, you may wear the watch while washing your face; however, it is not designed to be used underwater.
- Upgraded water-resistance for daily use (tested to 5 bar): This type of watch is resistant to moderate exposure to water. You may wear the watch while swimming; however, it is not designed to be used for skin diving.
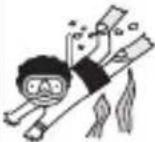
- Upgraded water-resistance for daily use (tested to 10 or 20 bar): This type of watch may be used for skin diving; however, it is not designed to be used for scuba or saturation diving.
- Before use, confirm the water-resistance level of your watch indicated on the dial and case, referencing the table on the next page. (The unit “bar” is roughly equal to 1 atmosphere.)
- “WATER RESIST(ANT) xx bar” may also be indicated as “W.R. xx bar.”
| Examples of use | |||||
| Names | Indication (Case or back) | Specifications | Minor exposure to water (washing face, rain, etc.) | Moderate exposure to water (washing, kitchen work, swimming, etc.) | Marine sports (skin diving) |
 |  |  | |||
| WATER RESIST(ANT) or no indication | WATER RESIST(ANT) | Water resistant for daily use | √ | — | — |
| WR 50 or WATER RESIST 50 | WATER RESIST(ANT) 5 bar | Water resistant to 5 atmospheres | √ | √ | — |
| WR 100/200 or WATER RESIST 100/200 | WATER RESIST(ANT) 10/20 bar | Water resistant to 10/20 atmospheres | √ | √ | √ |
Cautions on exposure to water
- Be sure to use the watch with the crown pressed in fully (normal position) to ensure the water resistance. If the crown of your watch is the screw down crown, be sure to tighten it completely.
- Do not operate the crown or buttons when the watch is wet.
- If water has penetrated the watch, or if the inside of the glass is fogged up and does not become clear in a day, take the watch to your dealer or Citizen Service Center for repair. Leaving the watch in such a state will rust the internal parts and cause malfunction.
- If seawater penetrates the watch, place the watch in a box or plastic bag and immediately take it in for repair. Otherwise, the pressure inside the watch will increase, and parts (glass, crown, buttons, etc.) may come off.
- If the watch is used in seawater, rinse with fresh water afterward and wipe with a dry cloth after each use.
Keep your watch clean
- Keep your watch clean to prevent rust or dirt building up as this may stain your clothes, damage the watch or appear as black residue on your wrist. Depending on use, occasional cleaning of the exterior of your watch may be necessary.
- Wipe dirt off the leather band with a soft and dry cloth to prevent it from discoloring.
Maintenance
Daily maintenance
- Rotate the crown while it is pressed in fully and press the buttons periodically so they do not become stuck due to accumulations of foreign matter.
- Wipe off dirt, perspiration, and water from the case and glass with a clean soft cloth occasionally.
- To clean a metal, plastic, or rubber watchband, wash away dirt with water. Use a soft brush to remove dust and dirt stuck in the gaps in a metal band.
- Do not use a polishing type of cloth as this may damage the surface and certain treatments.
- Do not use solvents (thinner, benzine, etc.), as they may damage the finish.
Periodical inspections
Your watch needs an inspection once every two or three years for safety and longer usage. To keep your watch water-resistant, the gaskets and other components need to be replaced regularly. Other parts need to be inspected and replaced if necessary.
Always ask for genuine Citizen parts upon replacement.
Information
Luminous dials and hands
The paint on the dial and hands helps you with reading the time in a dark place. The luminous paint stores light (daylight or artificial light) and glows in a dark place.
It is free from any radioactive substance or any other material harmful to a human body or environment.
- The light emission gradually becomes weaker as time passes.
- The duration of the light (“glow”) will vary depending on the brightness, types of and distance from a light source, exposure time, and the amount of the paint.
- The paint may not glow and/or may dissipate quickly if exposure to light was not sufficient.
Specifications
| Model | G910 | Type | Analog solar-powered watch |
| Timekeeping accuracy | Within ±15 seconds per month on average (when worn at normal temperatures between +5°C/41°F and +35°C/95°F without the time signal reception) | ||
| Operating temperature range | -10°C/14°F to +60°C/140°F | ||
| Display functions | Time: Hours, minutes, seconds, 24 hoursCalendar: Day, date, passed year since leap year, monthChronograph: Hours, minutes, secondsMinutes repeater: Hours, minutes | ||
| Battery duration without recharging | Fully charged to fully discharged: Approx. 12 monthsTwo seconds interval movement to stopping: Approx. four days | ||
| Battery | Rechargeable cell, 1pc. | ||
| Additional functions | Solar power functionOvercharging prevention functionInsufficient charge warning function (two-second interval movement)Chronograph (up to 12 hours by 0.25 seconds)Minutes repeater (hour and minute)Perpetual calendar (until February 28th, 2100)Checking/correcting reference position | ||
Specifications are subject to change without prior notice.