USER MANUAL SSN1700 STEAMJET HOOVER
This cleaner should only be used for domestic cleaning, as described in this user guide. Please ensure that this guide is fully understood before operating the appliance. Use only attachments recommended or supplied by Hoover.
When using cleaning tools, always steady the product with your other hand. This will ensure the product does not fall while in use.
WARNING: Danger of scalding. This product is very hot when used. Avoid any contact with steam.
WARNING: Electricity can be extremely dangerous. This appliance must be earthed. This plug is fitted with a 13 amp fuse (UK only).
IMPORTANT: The wires in the mains power lead are coloured in accordance with the following code: Blue - Neutral, Brown - Live.
AFTER USE: Switch the cleaner off and remove the plug from the electricity supply. Always switch off and remove the plug before cleaning the appliance or attempting any maintenance task.
SAFETY WITH CHILDREN, ELDERLY OR THE INFIRM: This appliance is not intended for use by persons (including children) with reduced physical, sensory or mental capabilities, or lack of experience and knowledge, unless they have been given supervision or instruction concerning use of the appliance by a person responsible for their safety. Children should be supervised to ensure that they do not play with the appliance.
HOOVER SERVICE: To ensure the continued safe and efficient operation of this appliance, we recommend that any servicing or repairs are only carried out by an authorised Hoover service engineer.
IT IS IMPORTANT THAT YOU DO NOT:
- Leave the cleaner unattended while switched on. Unplug by pulling on the cord.
- Handle the plug or product with wet hands.
- Use detergents or liquids other than water inside the product.
- Direct steam towards equipment containing electrical components, such as the interior of ovens.
- Put the cleaner in water or other liquids.
- Position the cleaner above you when cleaning the stairs. Use your cleaner out of doors.
- Do not spray or pick up flammable liquids, cleaning fluids, aerosols, or their vapours, as this may cause a risk of fire or explosion.
- Do not stand on the power cord or wrap it around your arms or legs when using the cleaner.
- Do not use the appliance to clean or direct steam towards people, animals, or plants.
- Do not continue to use your cleaner if it appears to be faulty. If the power cord is damaged, stop using the cleaner IMMEDIATELY. To avoid a safety hazard, an authorised Hoover service engineer must replace the power cord.
GETTING TO KNOW YOUR CLEANER
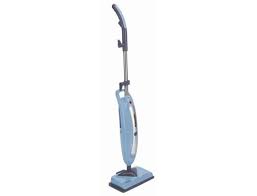
A. Cleaner main body
B. Handle
C. Steam Release Trigger
D. Power Cord
E. Upper cord Clip
F. Lower cord clip
G. On/Off Button
H. On Indicator Light (Blue)
I. Steam Ready Indicator Light (Green)
J. Floor Brush
K. Floor Head
L. Floor brush Release Pedal
M. Clean Water Tank
N. Textile Pad (x2)
O. Carpet Glider
P. Hard Water Filter
ASSEMBLING YOUR CLEANER
Remove all components from the packaging.
- Insert the handle into the cleaner main body until it locks into position. [2]
- Assemble the main body of the cleaner to the floor brush. [3]
- Assemble the cleaner with floor brush to the floor head. [4]
USING YOUR CLEANER
- Remove the clean water tank up and out from the cleaner main body. [5]
- Twist the cap anti-clockwise and remove. [6]
- Fill the clean water tank with cold tap water. Replace cap. [7] Do not add any chemicals, detergents, or perfumes to the clean water tank.
- Re-fit the clean water tank to the cleaner ensuring the hard water filter is in place.
- Attach a textile pad to the base of the floor head. [8]
IMPORTANT: Always unplug the cleaner when adding water or changing a textile pad.
NOTE: Wash the textile pad prior to use to remove any lint.

Steam cleaning hard floors
NOTE: Always sweep or vacuum the floor prior to use to remove any loose dirt or debris.
IMPORTANT: Do not use the cleaner without a textile pad attached to the floor head.
NOTE: Do not use the carpet glider when cleaning hard floors.
- Plug the steam cleaner into the main power. The blue ON light will illuminate.
- After a few seconds the green Steam Ready light will illuminate indicating the cleaner is ready for use.
- Recline the cleaner by placing a foot on the floor head and lowering the main body towards the floor. [9]
- To produce steam press the Steam Trigger Button. [10]
- Move the cleaner slowly backwards and forwards paying particular attention to high traffic areas. [11]
Steam cleaning hard floor - intensive clean
Use the triangular floor brush on hard floors that require deep cleaning. Please note that there is no mop to allow the steam to be aimed directly at the surface to clean more intensely. The area will have to be mopped separately.
NOTE: Always sweep or vacuum the floor prior to use to remove any loose dirt or debris.
- Remove the floor brush from the floor head by pressing the release pedal at the rear. Lift the cleaner with floor brush attached out of the floor head. [12]
- Plug the steam cleaner into the main power. The blue ON light will illuminate. After a few seconds the green Steam Ready light will illuminate indicating the cleaner is ready for use.
- Recline the cleaner by placing a foot on the floor brush and lowering the main body towards the floor. [13]
- To produce steam press the Steam Trigger Button. [10]
- Move the cleaner slowly backwards and forwards paying particular attention to high traffic areas. [14]
Refreshing carpets
NOTE: Always sweep or vacuum the floor prior to use to remove any loose dirt or debris.
IMPORTANT: Do not use the cleaner without a textile pad attached to the floor head.
- Attach the carpet glider to the floor head. [15]
- Plug the steam cleaner into the main power. The blue ON light will illuminate.
- After a few seconds the green Steam Ready light will illuminate indicating the cleaner is ready for use.
- Decline the cleaner by placing a foot on the floor head and lowering the main body towards the floor. [9]
- To produce steam, press the Steam Trigger Button. [10]
- Move the cleaner slowly backwards and forwards, paying particular attention to high traffic areas. [11]
CLEANER MAINTENANCE
IMPORTANT: ALWAYS ENSURE THE CLEANER HAS FULLY COOLED DOWN BEFORE PERFORMING ANY MAINTENANCE TASKS.
Empty the water tank
- Unplug the cleaner from the main power and ensure the unit has cooled.
- Remove the clean water tank from the main body of the cleaner. [5]
- Twist the cap anti-clockwise and remove. [6]
- Empty any excess water from the tank. [16] Replace the cap and return to the cleaner.
Removing and cleaning the textile pad
- Unplug the cleaner from the main power and ensure the unit has cooled.
- If necessary, remove the carpet glider, then peel the textile pad from the floor base. [17]
- Wash the textile pad in a washing machine with a mild detergent at a maximum temperature of 40°C.
IMPORTANT: Do not use bleach or fabric softener when washing the textile pad.
Replacing the hard water filter
The cleaner is fitted with a hard water filter. If you live in an area of hard water, the filter will discolour over time. Depending on the water hardness and frequency of use, the filter should be changed every 6 months.
- Unplug the cleaner from the main power and ensure the unit has cooled.
- Remove the clean water tank from the main body of the cleaner. [5]
- Lift the hard water filter out of the cleaner. [18] Replace with a new filter.
- Reassemble the clean water tank to your cleaner.
Note: The condition of the filter will affect the cleaner performance.
TROUBLESHOOTING
Should you have a problem with the product, complete this simple user checklist before calling your local Hoover service.
The steam stick will not switch on.
- Check the unit is plugged in.
- Check the power cord.
The steam stick is not producing steam.
- There may be no water in the clean water tank.
- The tank may not be fitted correctly.
The textile pad won't pick up dirt. - The cleaning pad may already be saturated with dirt and needs to be washed. Refer to the Maintenance section.
CLEANING FAQs
When is steamjet ready? In approximately 30 seconds.
Can I use steamjet on all floor surfaces? On all hard floors like marble, ceramic, stone, linoleum, sealed hardwood floors and parquet.
Does steamjet emit steam automatically? No, to produce steam you should press the steam/ sweep trigger button under the handle.
Can I use it vertically? No, steamjet can be used only on horizontal floor surfaces.
Can I put detergents or other chemicals inside the tank? No, you would damage the product.
What if in the city where I live the water is very hard? You can use filtered water or you will have to change the filter cassette more often. If you find very weak steam, check steam orifice, you can descale it by inserting small tools into steam orifice if necessary.
When is it time to change the filter cassette? How do you notice it? It depends on the water hardness. Normally 6 months. You will notice that the colour of yellow resin inside the filter cassette becomes a bit dull.
How long will one tank of water last before needing to be refilled? Approximately 20 minutes if you press continuously the trigger.
Is the mop washable? Yes, it can be washed by hand or in the washing machine with a mild detergent at max temperature 40°C. Do not use bleach or fabric softener.
How often should I replace the mop? It depends on different factors above all how hard the floor is. The best way to understand when to change the mop is when the mop is still dirty after having washed it or if you notice that it doesn't perform like before.
Hoover spares and Consumables
Always replace parts with genuine Hoover spares. These are available from your local Hoover dealer or direct from Hoover. When ordering parts always quote your model number.
Consumables
Textile Pad: 35601330
Filter: 35601335
Hoover Service
Should you require service at any time, please contact your local Hoover Service Office.
Quality
Hoover's factories have been independently assessed for quality. Our products are made using a quality system which meets the requirements of ISO 9001.
The Environment:
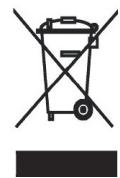
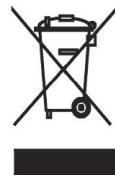
This appliance is marked according to the European Directive 2002/96/EC on Waste Electrical and Electronic Equipment (WEEE). By ensuring this product is disposed of correctly you will help prevent potential negative consequences for the environment and human health, which could otherwise be caused by inappropriate waste handling of this product.
The symbol on the product indicates that this product may not be treated as household waste. Instead it shall be handed over to the appliance collection point for recycling of electrical and electronic equipment. Disposal must be carried out in accordance with the local environmental regulations for waste disposal. For more detailed information about treatment, recovery and recycling of this product, please contact your local city office, your household waste disposal service or the shop where you purchased the product.
Your Guarantee
The guarantee conditions for this appliance are as defined by our representative in the country in which it is sold. Details regarding these conditions can be obtained from the dealer from whom the appliance was purchased. The bill of sale or receipt must be produced when making any claim under the terms of this guarantee.
Subject to change without notice.

IMPORTANT SAFETY REMINDERS
How long until the steam jet is ready? In approx. 30 seconds.
MAINTENANCE OF THE VACUUM CLEANER
BEFORE YOU START CLEANING
TECHNICAL MAINTENANCE OF THE VACUUM CLEANER
ATTENTION! BEFORE PERFORMING TECHNICAL MAINTENANCE OF THE VACUUM CLEANER, MAKE SURE THAT IT HAS COMPLETELY COOLED DOWN.
Empty the water reservoir
- Disconnect the vacuum cleaner from the power supply and make sure that the unit has cooled down.
- Remove the water reservoir from the vacuum cleaner body. [5]
- Turn the cap counterclockwise and remove it. [6]
- Remove any remaining water from the reservoir. [16] Put the cap back on and return it to the vacuum cleaner.
Remove and clean the textile pad.
- Disconnect the vacuum cleaner from the power supply and make sure that the unit has cooled down.
- Attach the carpet nozzle to the floor head. [17]
- Wash the textile pad in a washing machine with a mild detergent at a maximum temperature of 40°C.
IMPORTANT! Do not use the appliance for dry vacuuming without a dust bag.
Replacing the filter for hard floors
A filter for hard floors is installed in the vacuum cleaner. If you live in an area with hard water, the filter will eventually become clogged. Depending on the hardness of the water and the frequency of use, the filter should be replaced every 6 months.
- Disconnect the vacuum cleaner from the power supply and make sure it is switched off.
- Remove the water reservoir from the vacuum cleaner body. [5]
- Remove the filter for hard floors from the vacuum cleaner. [18] Replace it with a new filter.
- Reinstall the water reservoir into the vacuum cleaner.
Note: The condition of the filter will affect the performance of the vacuum cleaner.
TROUBLESHOOTING
If you have any difficulties using this product, please fill out this simple user questionnaire before contacting your local Hoover service center.
The steam generator does not turn on.
- Check that the plug is inserted into the socket.
- Check the power cord.
The steam generator does not produce steam.
However, the reservoir may not be filled with water. The reservoir may not be properly filled.
The fabric pad does not collect dirt. The pad may become saturated with dirt and may need to be rinsed. Refer to the "Maintenance" section.
FREQUENTLY ASKED QUESTIONS ABOUT CLEANING:
When does the steam jet come out? Approximately within 30 seconds.
Can I use the steam jet on all surfaces? On all hard surfaces, such as marble, ceramic, stone, linoleum, parquet, and hardwood floors.
Does the steam jet come out automatically? No, to make the steam jet come out, you need to press the steam trigger button located on the handle.
Can I use it on vertical surfaces? No, the steam jet can only be used on horizontal surfaces.
Can I add cleaning agents or other chemical substances to the reservoir? No, you will damage it.
What to do if the water in my city is hard? You can use filtered water or you can install the filter module. If you notice that the steam jet is weak, check the steam nozzle - it may be necessary to remove limescale with a descaling agent.
When should I change the filter module? How do I know? It depends on the hardness of the water. Usually once every 6 months. You will notice that the amount of resin inside the filter module decreases/lightens.
How long does the water reservoir last when it needs to be refilled?
Approximately 20 minutes if you press the trigger continuously.
Can I wash the pad? Yes, it can be washed by hand or in a washing machine with a mild detergent at a maximum temperature of 40°C. Do not use bleach or fabric softeners.
How often should I change the pad? It depends on various factors, but mainly on the type of surface. The best way to know if you should change the pad is if it remains dirty even after washing or does not work as well as before.
IMPORTANT INFORMATION
Spare parts and consumables for Hoover appliances
When replacing parts, use only genuine Hoover spare parts and consumables. They can be purchased from your local Hoover dealer or directly from Hoover. When ordering spare parts, be sure to quote the model number of the vacuum cleaner.
Consumables
Cloth filter: 35601330
Filter: 35601335
Hoover servicing
At any time, when servicing of the vacuum cleaner is required, call your local Hoover service department.
Quality
Hoover products undergo a strict quality control process. Our products are manufactured using quality systems that meet the requirements of ISO 9001.
Environment:
This device is marked in accordance with European Directive 2002/96/EC on waste electrical and electronic equipment (WEEE). By ensuring proper disposal of this electrical appliance, you will help prevent potential negative consequences for the environment and human health, which could otherwise be caused by inappropriate waste handling.
The marking on this device indicates that it must not be disposed of as unsorted municipal waste. It must be taken to a designated collection point for recycling of electrical and electronic equipment. Disposal must be carried out in accordance with local regulations for waste disposal. For more detailed information about recycling, recovery, and reuse of this device, please contact your local city office, your household waste disposal service, or the shop where you purchased the device.
Your guarantee
The guarantee conditions for this household electrical appliance are determined by the representative in the country where this appliance is sold. You can obtain more detailed information about these conditions from the dealer who sold the appliance. When submitting a claim under the terms of this guarantee, proof of purchase or receipt for the sold goods must be presented.
Changes may be made without notice.
SAFETY INSTRUCTIONS