8000AP - Hi-Fi Audiolab - Free user manual and instructions
Find the device manual for free 8000AP Audiolab in PDF.


User questions about 8000AP Audiolab
0 question about this device. Answer the ones you know or ask your own.
Ask a new question about this device
Download the instructions for your Hi-Fi in PDF format for free! Find your manual 8000AP - Audiolab and take your electronic device back in hand. On this page are published all the documents necessary for the use of your device. 8000AP by Audiolab.
USER MANUAL 8000AP Audiolab
text_image
digital analoguo tape 5 t bypass mobile balance mute standby active channels HDMI HDMI HDMI 8000AP audiolab
text_image
CAUTIONS RUB OF ELECTRONIC SHOCK 30 NOT OPEN OFF 5.1 Input L R LS RS C SUB Analogou Inputs L R VOR SAT TV AUX IN OUT Analogue Outputs L LS C LB R RS SUB RB Digital Inputs G0 DVD HDMI-OUT HOMI-1 HOMI-2 DIGITAL AudiOLAB MODEL 8000AP Llc AUDIOLAB HUNT/ASSON UNITED WINDSORF/RESOUR RS2328000AP
User Instructions
audiolab
Statutory & Safety Information
text_image
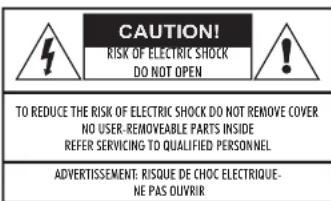
CAUTION! RISK OF ELECTRIC SHOCK DO NOT OPEN TO REDUCE THE RISK OF ELECTRIC SHOCK DO NOT REMOVE COVER NO USER-REMOVEABLE PARTS INSIDE REFER SERVICING TO QUALIFIED PERSONNEL ADVERTISSEMENT: RISQUE DE CHOC ELECTRIQUE- NE PAS OLIVIR
This symbol indicates that there are important operating and maintenance instructions in the literature accompanying this unit.
This symbol indicates that dangerous voltage constituting a risk of electric shock is present within this unit.
IMPORTANT SAFETY INFORMATION
Read these instructions.
Keep these instructions. In the event that you pass the product to a third party this instruction manual should be provided along with the product.
Heed all warnings.
Follow all instructions.
Do not use this apparatus near water.
Clean only with dry cloth.
Do not block any ventilation openings.
Install in accordance with the manufacturer's instructions
Do not install near any heat sources such as radiators, heat registers, stoves, or other apparatus (including amplifiers) that produce heat.
Do not defeat the safety purpose of the polarized or grounding type plug. A polarized plug has two blades with one wider than the other. A grounding type plug has two blades and a third grounding prong. The wider blade or the third prong are provided for your safety. If the provided plug does not fit into your outlet, consult an electrician for replacement of the obsolete outlet.
Protect the power cord from being walked on or pinched, particularly at plugs, convenience receptacles, and the point where they exit from the apparatus.
Use only attachments/accessories specified by the manufacturer.

Use only with a cart, stand, tripod, bracket, or table specified by the manufacturer, or sold with the apparatus. When a cart is used, use caution when moving the cart/apparatus combination to avoid injury from tip-over.
Unplug this apparatus during lightning storms or when unused for long periods of time.
Refer all servicing to qualified service personnel. Servicing is required when the apparatus has been damaged in any way, such as power-supply cord or plug is damaged, liquid has been spilled or objects have fallen into the apparatus, the apparatus has been exposed to rain or moisture, does not operate normally, or has been dropped.
Warning: To reduce the risk of fire or electrical shock, do not expose this product to rain or moisture. The product must not be exposed to dripping and splashing and no object filled with liquids such as a vase of flowers should be placed on the product. No naked flame sources - such as candles - should be placed on the product.
Caution: Changes or modifications not expressly approved by the manufacturer could void the users authority to operate this device.
This equipment has been tested and found to comply with the limits for a Class B digital device, pursuant to port 15 of the FCC rules. These limits are designed to provide reasonable protection against harmful interference in a residential installation. This equipment generates, uses and can radiate radio frequency energy and, if not installed and used in accordance with the instructions, may cause harmful interference to radio or television reception, which can be determined by tuning the equipment off and on, the user is encouraged to try to correct the interference by one or more of the following measures:
• Re-orientate or re-locate the receiving antenna.
- Increase the separation between the equipment and the receiver.
- Connect the equipment into an outlet on a circuit different from that to which the receiver is connected.
Consult the dealer or an experienced radio/TV technician for help.
Mains supply and safety

Class II construction double insulated. These products must not be connected to earth.
Power Cord: An AC power cord is normally supplied with a mains plug suitable for your area. If you have any doubts, consult your dealer about obtaining a suitable power cord.
Mains Supply: The mains voltage of Audiolab units is shown on the rear panel. If this does not match the voltage in your area, consult your dealer. The mains supply fuse is on the rear panel. If it has broken, check for any obvious cause before replacing the fuse with one of the correct rating and type. The fuses for all areas are type T (time lag) AL 20mm.
The fuse values are: 220-240V: T1.0A 100-120V: 1.6A
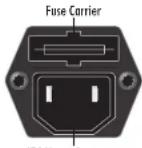
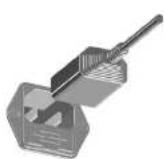
The fuse is located in a slide-in carrier which also contains a spare fuse. The carrier can only be pulled out after the IEC power cord is unplugged. When the carrier is opened the first fuse is the spare. Remove and solely dispose of the blown fuse before replacing it.
Important notice to UK users
The appliance cord is terminated with a UK approved mains plug fitted with 43 A fuse. If the fuse needs to be replaced, an ASTA or BSI approved BS1362 fuse rated at 3A must be used. If you need to change the mains plug, remove the fuse and dispose of this plug safely immediately after cutting it from the cord.
Connecting a Mains Plug
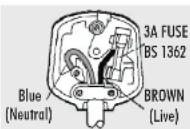
The wires in the mains lead are coloured in accordance with the code: Blue: NEUTRAL Brown: LIVE
As these colours may not correspond to the coloured markings identifying the terminals in your plug, proceed as follows:
The Blue wire must be connected to the terminal marked with the letter N or coloured BLUE or BLACK. The BROWN wire must be connected to the terminal marked with the letter L or coloured BROWN or RED.
Audiolab 8000AP User Manual
Contents:
Statutory and Safety Information .... IFC
Introduction - Players and Formats 2
Unpacking 3
Speaker Placement and Preliminary topics. 3
Controls and Connectors 4
Audio and Video Connections 5
Other Connections 6
System Connection Diagram 7
Remote Handset. 8
Setting Up the 8000AP 9
Main Menu - Setting Speaker Sizes 9
Main Menu - Setting Speaker Distances 10
Main Menu - Setting Speaker Levels 11
Main Menu - Analogue Mode Setup Options 11
Main Menu - 5.1 input bypass options ..... 11
Main Menu - Setting HDMI input options....11
Main Menu - Other options 12
Operation - Introduction 13
Digital Inputs and Screen Displays 13
Analogue Inputs and Screen Displays 14
Volume and Balance Controls 15
Night Mode 15
Forced Stereo 15
Switching off the Display 15
The Qset Menu -1 16
Care and Cleaning. 19
Service Addresses 19
Warranty....19
Specifications 20

2.2.1.3.4.5.6.7.8.9.10.11.12.13.14.15.16.17.18.19.20.21.

DIGITAL·EX PROLOGICUX


"HDMI, the HDMI Logo and High-Definition Multimedia Interface are trademarks or registered trademarks of HDMI Licensing LLC."
Manufactured under licence from Dolby Laboratories. 'Dolby', 'Pro Logic', 'AC-3' and the double-D symbol are trademarks of Dolby Laboratories.
Confidential Unpublished Works. ©1992-1997 Dolby Laboratories, Inc. All rights reserved.
Manufactured under licence from Digital Theater Systems, Inc. US Pat. No. 5,451,942 and other world wide patents issued and pending. 'DTS' and 'DTS Digital Surround' are trademarks of Digital Theater Systems, Inc. ©1996 Digital Theater Systems, Inc. All rights reserved.
The HDCD system is manufactured under licence from Pacific Microsonics, Inc. This product is covered by one or more of the following patents: USA 5,479,168; 5,638,074; 5,640,161; 5,808,574; 5,838,274; 5,854,600; 5,872,531; Australia 669114. Other patents pending.
Introduction - Players and Formats
DVD Players
There are many DVD players on the market and very many formats - more are added all the time, some useful, many not. Your existing DVD player will support many formats but almost certainly not all. Equally the Audiolola 8000A supports the vast majority of formats but again, not all although every popular format is supported including most High Definition and audiophile formats. Before using the 8000AP please read your DVD and other digital player handbooks to ascertain which formats your player will support.
A Note on High Definition Players
Blu-Ray and HD-DVD (BD/HD) players will offer some or all of the following formats:
Linear PCM - up to 8 channels of uncompressed audio (LPCM), BD
Dolby Digital 5.1-channel surround sound.
DTS Digital Surround 5.1 channel surround sound DTS-HD
DTS-HD Master
Dolby Digital Plus
Dolby True HD
The 8000AP is HDMI 1.2a compliant and HDMI 1.3 compatible and will in most circumstances allow you to enjoy all of the above formats.
Cycling the processor's Mode Key will display all the formats available with the current combination of player and disc. In other words the formats available at any time will depend both on the format support built into your player than actual disc you are playing.
To play uncompressed Linear PCMSet your BD/HD player to output PCM (typical player settings are 'Auto' or PCM). From the disc, select either the LPCM, Dolloy True HD or DTS-HD Master Audio sound track.
Note. Dolby True HD and DTS-HD Master Audio are "lossless compressed audio formats". In other words they are uncompressed Linear PCM (LPCM) tracks 'zipped up' rather like a .zip file on a computer. The built in codec in your BD/HD player will "un-zip" the file and pass the uncompressed LPCM stream on to the 8000AP.
Audiolab 8000AP Supported Formats
The 8000AP features four types of input: Stereo Analogue; 5.1 analogue; SPDIFdigital (optical and coaxial); HDMI. All these inputs (with the exception of 5.1 analogue) have processing options. The following lists detail the various options that can be applied to the various inputs. It should be stressed that in the case of digital sources, the more esoteric formats are all optional - all DVD discs offer basic multi-channel processing and the 8000AP caters for all of those.
Analogue Inputs
| Encoded Format | Decoding OptionsDefault in Bold |
| Analogue 2.0(None or PraLogic) | StereoPLlx Movie/MusicDTS NEO:6 Cinema/Music |
| Analogue 5.1Pass through | None |
HDMI Inputs
| Encoded Format | Decoding OptionsDefault in Bold |
| PCM 2 Channel | StereoPLL(x) Movie/Music |
| PCM 3-8 Channel | Multi-ChannelStereo Downmix |
| SPDIF | As SPDIF (below) |
SPDIF Digital Inputs - Optical and Coaxial
| Encoded Format | Decoding OptionsDefault in Bold |
| Dolby Digital5.x + EX | Dolby Digital 5.xDolby Digital EXDolby Digital + PLIx Movie/MusicStereo Downmix |
| Dolby Digital5.x | Dolby Digital 5.xDolby Digital EXDolby Digital + PLIx Movie/MusicStereo Downmix |
| Dolby Digital2.0 + Surround | StereoPLII(x) Movie/Music |
| Dolby Digital2.0 | StereoPLII(x) Movie/Music |
| DTS ES (discrete) | DTS ES (discrete)DTS 5.xStereo Downmix |
| DTS ES (matrix) | DTS ES (matrix)DTS 5.xStereo Downmix |
| DTS | DTSDTS ES (matrix)Stereo Downmix |
| DTS 2.0 | DTS 2.0DTS NEO:6 Cinema/Music |
| DTS 96/24 | DTS 96/24 (5.x)DTS 96/24 Stereo Downmix |
| PCM(None or ProLogic) | StereoPILI(x) Movie/MusicDTS NEO:6 Cinema/Music |
| HDCD | Stereo |
1: Preliminaries
Unpacking
Unpack the product fully. The carton should contain:
The Audiolab 8000AP integrated amplifier
- One IEC power cord suitable for your area
10 One Remote Handset with two AAA batteries
60 This instruction manual.
If any item is missing or damaged report this to your dealer as soon as possible.
Retain the packing for future safe transport of your amplifier. If you dispose of the packing, do so with regard to any recycling regulations in your area.
Placement
Place the processor on a sturdy shelf or table.
The 8000AP is designed to run warm during normal operation - even when put into standby.
Do not place anything on top of the unit. If you are using an equipment rack ensure the 8000AP has sufficient space to allow adequate ventilation and is on its own shelf.
Before you connect the 8000AP to the mains, ensure your mains voltage corresponds to the rating plate on the rear of the product. If in double, consult your dealer. If you move house to an area which has a different mains voltage seek advice from an Audiolab appointed dealer or a competent service technician.
Make sure you locate the unit so that the front panel is in view as otherwise the infrared-remote handset will not work.
Before Starting
Your 8000AP 's performance is determined by the care you take in setting your system up: not merely the processor but all connected sources, amplification and loudspeakers.
Before setting up your processor, review all the handbooks for your existing equipment and confirm that those items are set up correctly. Have a variety of music and video software on hand - you will need them. You will also need a tape measure, and ideally a sound level (SPL) meter.
Loudspeaker Placement
The 8000AP is a 7.1 channel processor. It allows the connection of seven channels: front left, front centre, front right, surround left, surround right, back left and back right, plus a subwoofer channel.
All speakers (with the exception of the subwoofer) should be arranged around your normal viewing/listening position. Don't worry if you are unable to position your speakers at ideal distances from your preferred listening position, the 8000AP can be set up to take account of different distances.
The subwoofer can be placed almost anywhere, but we recommend you experiment to obtain the best result.
Here is the Dolby Labs recommended speaker placement for 7.1 channel reproduction. Speaker placement is important and dependent on room circumstances but this layout is a very good starting point. If you are using a 5.1 or 6.1 layout, adjust accordingly. (If you are using back channels, we strongly recommend that you use a 7.1 layout with two rear speakers rather than a 6.1 layout which only uses one.)
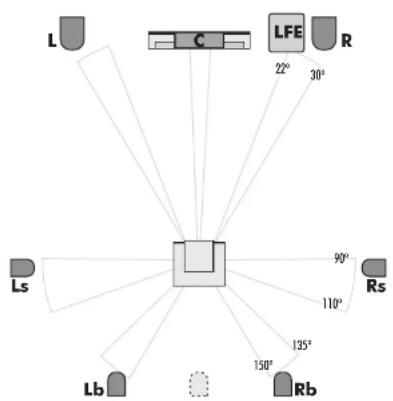
text_image
L C LFE R 22° 30° 90° 110° Rs Ls Lb 150° RbPage 3
Phase
Phase is critical in a multi-channel environment. Make sure that your loudspeakers are properly connected.
If you are using different amplifiers:
Some power amplifiers invert the phase - in a mixed system it is just possible that even if all the loudspeakers are properly connected one or more may be out of phase.
All Audiolab power amplifiers are phase coherent so even if you are using different series, the loudspeakers will always be in phase. provided they are properly connected.
Some subwoofers have adjustable phase control, others have a phase inverting switch. You may have to use these controls during the setup procedure. Consult the subwoofer handbook for more information.
Gain and Efficiency
The 800CAP is adjustable across a wide range of volume levels so differences in gain (in power amplifiers) and efficiency (in loudspeakers) can be fully compensated. All Audiolab amplifiers, irrespective of their output power feature the same gain parameters.
Try not to set the subwoofer input volume too high or you may overload the input. Again refer to your subwoofer handbook.
2: Controls and Connectors
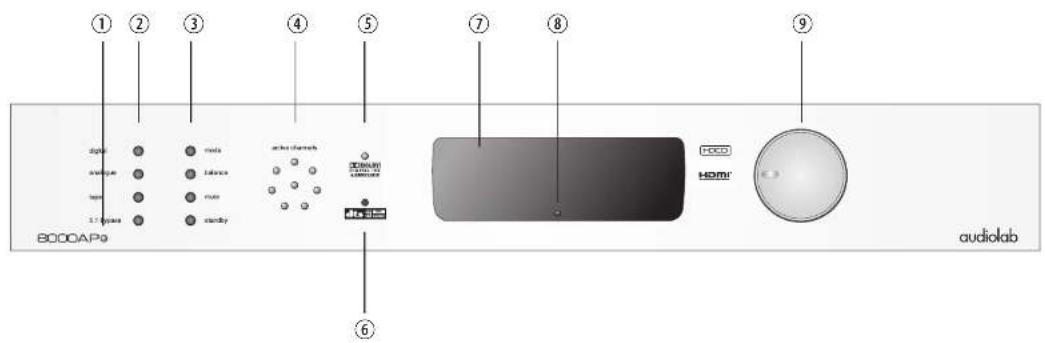
text_image
① ② ③ ④ ⑤ ⑦ ⑧ ⑨ B000AP9 audio balance micro standby audiokamp HOMI HCCO audiokab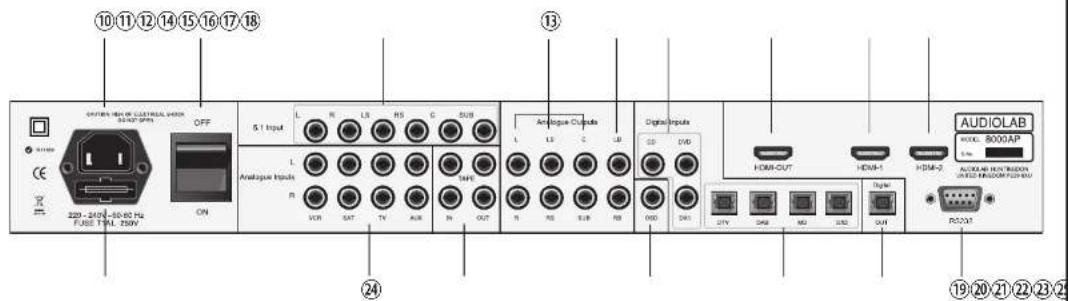
text_image
10 11 12 14 15 16 17 18 OFF S T Input L R LS RS C 500 Analogue Inputs R L OR SAT TV AUX IN OUT Analyogue Outputs Digital Inputs 3D DVD HDMI-OUT HDMI-1 HDMI-2 AUDIOLAB MODEL 9000AP ACADEL HTR ROAD WIRE CHINA PROCESSED 220-240V-50.60 Hz FUSE HTML 250V 24 Digital 22V DSB MD DRL GAM RDC32X1 power/standby LED
2 input buttons
3 mode buttons
4 channel indicators
5 Dolby mode indicator
6 dts mode indicator
7 remote control sensor
8 display screen
9 volume knob
9 fuse carrier
10 IEC mains input socket
11 mains on/off switch
12 external 5.1 input
13 analogue 5.1 outputs
14 back outputs (for 7.1)
15 coaxial digital inputs
16 HDMI output
17 HDMI 1 input
18 HDMI 2 input
19 RS232 (service only)
20 optical digital output
21 optical digital inputs
22 composite video output ^4 (for on-screen setup only)
23 tape input/output
24 stereo analogue inputs mains input fuse25
3: Audio and Video Connections
Analogue Inputs and Outputs
Standard Analogue Inputs
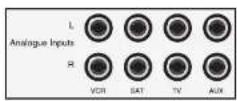
Your 8000AP has four regular analogue stereo inputs VCR, SAT, TV, and AUX. These are electrically identical and may be used for any analogue stereo audio source.
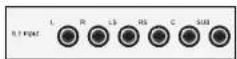
There is a 5.1 analogue input, fol: R: LS: RS: C: SUB connection of a multi channel SACD or DVD Audio player. This input is a straight-line pass-through input. The output appears unchanged at the 5.1 outputs of the 8000AP.
These inputs should be connected to a suitable line output on the source component using quality, screened, RCA phono interconnects.
Analogue Outputs
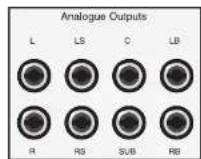
The 8000AP can be configured to any multi-channel combination, from stereo to full 7.1 output. That (Front Left), R (Front Right), Left Surround) (Right Surround), C
(Centre), (LBft Back) and (NBght Back) outputs should be connected to the appropriate line inputs of your AV power amplifier using quality, screened RCA phono interconnects.
The SUB output should be connected to the line input of your subwoofer using a high quality, well screened RCA phono interconnect. Tale care not to run the interconnect parallel with mains wiring and other potential interference sources.
Tape Input and Output
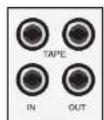
The TAPE OUT is a line-level output of the currently selected stereo analogue input. It is unaffected by the volume control. This should be connected to the input of a suitable recorder.
The TAPE IN should be connected to the analogue output of a recorder. If you have a three head recorder you can compare the original and recorded sound during recording
Digital Inputs and Outputs
Coaxial Digital Inputs
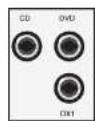
Your 8000AP has three identical coaxial digital inputs - CD, DVD, DX1(Digital Aux 1). These should be connected to the SPDIF digital output on the source component using a quality, screened, coaxial digital cable.
Make sure all system components are disconnected from the mains before making or changing system connections!
Optical Digital Inputs
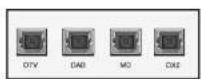
Your 8000AP has four optical inputs - DTV, DAB, MD, DX2(Digital Aux 2). These should be connected to the TOSLINK output on the source component using a quality, optical cable. All connections are electrically identical
Optical Digital Output
The signal at DIGITAL OUT is an unmodified copy of the currently selected digital source, i.e. it is unaffected by the volume control or processing mode. It is not possible to route an analogue source to the digital output. This should be connected to a digital recorder such as a DAT or MD recorder.
HDMI Connections
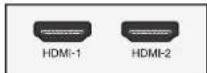
There are two HDMI inputs. These should be connected via an HDMI interconnect to the output of a DVD player or other AV streaming device. They are identical.
The audio component of the HDMI input is stripped off and routed through the processor. The processed output appears at the analogue outputs of the 8000AP.
The HDMI output may be connected to an HDMI input on your TV screen.
Apart from conducting the mandatory handshaking protocols the video component of the HDMI signal is not processed by the 8000AP. The video signal that appears at your TV is entirely dependent on your DVD player or other source. To get the best video result you should consult the handbooks of the video source component and the TV.
HDMI interconnects carry very high frequencies and levels of information. For optimum results use high quality interconnects and ensure that they are as short as possible.
HDMI-DVI cables: A DVI enabled graphics card may be connected to the HDMI input of the 8000AP. Likewise the HDMI output may be connected to the DVI input of a Computer monitor. In both cases a HDMI-DVI converter will be required. There are very real problems with computer graphics cards and monitors when passing High Definition Video signals. Even if they support HD, the lack of High Definition Copy Protection (HDCP) circuitry in many products means that HD signals will be blocked or downgraded to standard definition video. If you are contemplating these connections consult your manuals before proceeding.


4: Other Connections
On Screen Display Connections
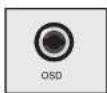
There is a composite video output labelled OSD. This connection is purely for viewing the Setup menu on your TV screen.
Connect a single RCA video interconnect from the OSD socket of the 8000AP to the Composite Video (CVBS) input on your TV screen. Once you have set up your 8000AP you may disconnect this cable as basic system parameters can be set up from the front panel of the 8000AP.
RS232
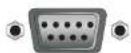
The RS 232 connection is for applying patches and upgrades to the software and is specifically for the use of appointed qualified service agents. This connection should never be used in normal operation.
Mains Input
Before connecting the 8000AP to the mains supply make sure that all the other connections to your AV system have been properly and securely made. Switch the mains supply at the wall socket and then using the cable supplied, connect the socket on the back of your 8000AP to an AC supply outlet. The 8000AP has been designed to remain connected to power at all times to optimise its sonic performance. The 8000AP will automatically switch into standby when first connected to power.
The principal means of disconnection from the mains is the on/off switch located on the rear panel. This must be kept unobstructed and freely operable at all times.
Page 6
5: Basic System Connections
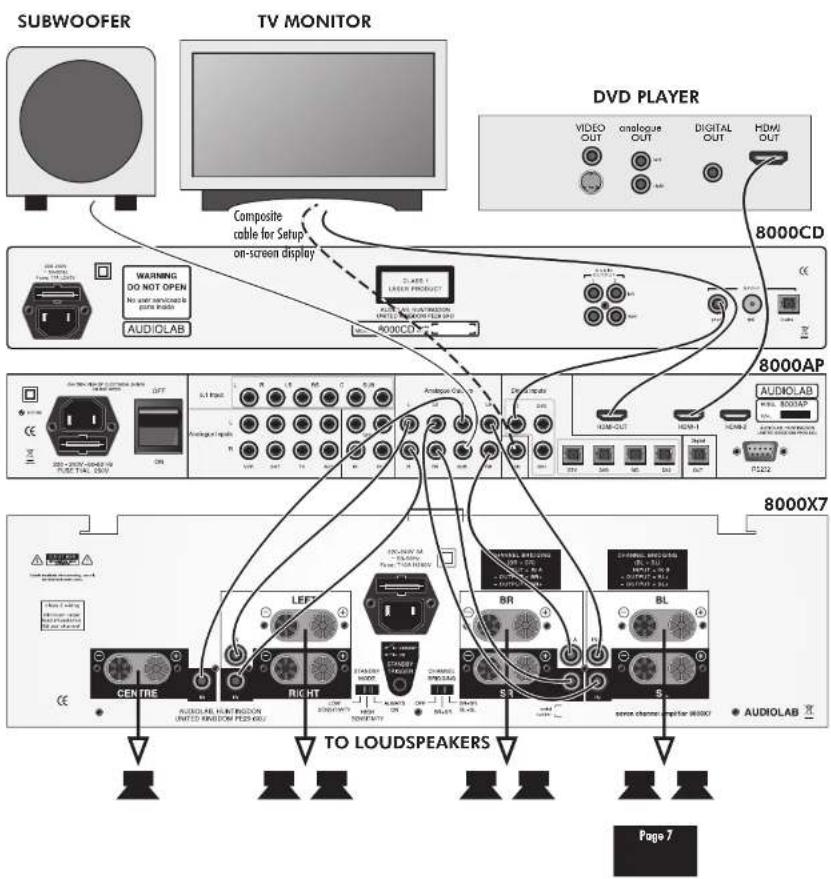
flowchart
graph TD
    A["Subwoofer"] --> B["TV Monitor"]
    B --> C["Composite cable for Setup on-screen display"]
    C --> D["8000CD"]
    D --> E["8000AP"]
    E --> F["8000X7"]
    F --> G["TO LOUDSPEAKERS"]
    G --> H["Page 7"]
Audio/Visual Connections
You will need a source of audio-visual signals such as a DVD player to feed into your 8000AP
CD Players and standard DVD players should be connected via the Digital SPDIF inputs (optical or co-axial). You will need a single RCA digital cable for co-axial inputs or a TOSLink optical cable for optical connections.
Tuners and other analogue sources should be connected via a screened stereo RCA phono interconnect to the Analogue stereo inputs.
HDMI enabled DVD players may be connected to the HDMI input for audio and video signals via an HDMI cable - for optimum signal transmission this cable should be as short as practicable.
Picture Connections
The TV screen may be connected to the 8000AP via the HDMI out socket. This will route video signals from the HDMI player to the TV with minimal processing from the 8000AP. Again keep the HDMI interconnect as short as possible.
If you are using a screen resolution of 1080p ensure that the input and output cables are HDMI approved - consult your dealer for advice.
A composite input on the TV screen may be connected to the OSD socket on the 8000AP via a single RCA phono lead. This is solely for the purpose of viewing the setup menu of the 800AP on the TV screen.
Amplifier Connections
Finally connect the line outputs of the 8000AP to the power amplifier (and subwoofer). You can connect any amplifier from regular 2 channel stereo to a full 7 channel system. All interconnects are RCA phono.
The connection diagram on this page shows a typical 7.1AV system connected to source and amplification components.
Always ensure that all components in your AV system are switched off and disconnected from the mains supply before making or changing any connections.
6: Remote Handset
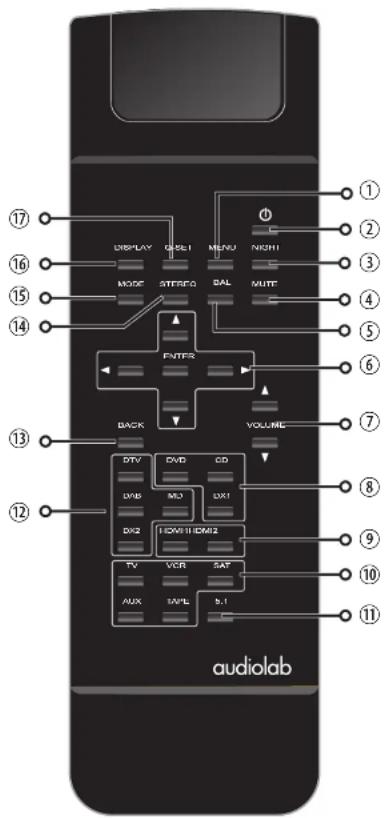
text_image
⑰ ⑦ DISPLAY QSEL1 MENU NIGHT ② ⑥ MODE ATTREQ SAL MUTF ③ ⑤ ⑬ ENTER ⑦ BACK VOLUME ⑧ ⑫ DVV DVD CD ⑨ DVB MO DX1 ⑪ DX2 IOWII HDMI2 ⑩ TV VCR SAT ⑪ AUX SAML 5.1 audiolab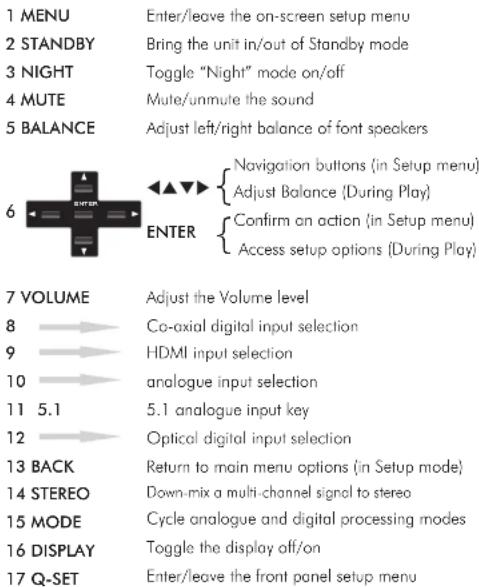
text_image
1 MENU 2 STANDBY 3 NIGHT 4 MUTE 5 BALANCE 6 7 VOLUME 8 → 9 → 10 → 11 5.1 12 → 13 BACK 14 STEREO 15 MODE 16 DISPLAY 17 Q-SET Enter/leave the on-screen setup menu Bring the unit in/out of Standby mode Toggle "Night" mode on/off Mute/unmute the sound Adjust left/right balance of font speakers Navigation buttons (in Setup menu) Adjust Balance (During Play) Confirm on action (in Setup menu) Access setup options (During Play) Adjust the Volume level Co-axial digital input selection HDMI input selection analogue input selection 5.1 analogue input key Optical digital input selection Return to main menu options (in Setup mode) Down-mix a multi-channel signal to stereo Cycle analogue and digital processing modes Toggle the display off/on Enter/leave the front panel setup menuFitting Batteries
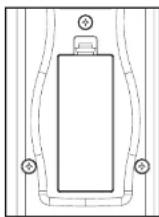
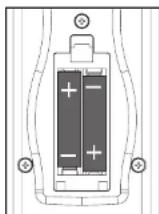
Open the cover. Unwrap the supplied AAA batteries and place them in the battery compartment with the polarity as shown. Replace the cover.
Always use AAA batteries and always replace them in sets. Never mix old and new batteries. Very weak batteries can leak and damage the handset. Replace them in good time!
Do NOT short circuit batteries or throw them into water, the general rubbish or a fire. Dispose of used batteries with regard to recycling regulations in your area.
1: Open the battery compartment cover
2:Insert 2AAA batteries
3: Replace the cover
Handset Operation
Point the handset at the 8000AP display window and press the relevant key. The handset should be within 15 metres of the 8000AP and there must be a clear line of sight between the two units.
7a: Setting Up the 8000AP - 1
Getting Started
Read this manual thoroughly so you get to understand the main controls of the 8000AP and how they work.
- Make sure your power amplifier/s are switched off.
- Switch on all source units (and the TV monitor if used).
- Connect the 8000AP to the mains power and switch on.
- Switch the unit on via tye mains switch on the rear panel.
The power LED will illuminate, the front panel display window will show the Model No and the software version.
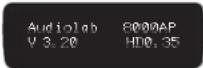
The 8000AP will then go into Standby.
To bring the unit out of standbyPress the kStandby the handset or the front panel.
- Now switch on the power amplifier/s.
Configuring the 8000AP
On Screen Display Menu
When setting up your unit for the first time the process will be simplified if you run the On-screen Setup you enter all the essential parameters required.
Once the required settings are input and saved, you may alter them at any time. Changes will be retained when the unit is switched off or even if the mains power is removed, provided they have been saved.
You must connect your television to the OSD output in order for the on-screen information to be displayed.
QSet (Quick set)
The QSet menu enables you to set basic parameters of the 8000AP from the front panel without using a TV connection. NOTES:
The QSet menu is intended for use when the 8000AP is operational. The OSD set-up menus contain items absent in the QSet menu and vice versa, so both menus should be enabled if you wish to take advantage of the full range of set up possibilities featured in the 8000AP.
Entering and Navigating the Set Up Menu
The on-screen set-up menus are operated by the handset.
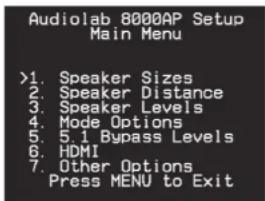
• To enter set-up mode, press the MENU key.
text_image
Audiolab 8000AP Setup Main Menu >1. Speaker Sizes 2. Speaker Distance 3. Speaker Levels 4. Mode Options 5. 5.1 Bypass Levels 6. HDMI 7. Other Options Press MENU to ExitIf the Menu screen does not appear: You may need to set the TV system in the QSet menu. Refer to Page 19
NAVIGATING THE MENUS
Press the ▲▼ keys to navigate the cursor to the desired option. Press ENTER to access the sub-menu
Press BACK to jump back up to the front page
Press the MENU key to exit the OSD menu and save the setting.
If you have not made any changes to your settings you will simply exit the on-screen menu system.
NOTE: The 8000AP factory settings allow you to operate your system "straight out of the box" but the unit will not perform at its best until you fully set it up. Also the pre-set configurations may not correspond to your system.
Loudspeaker set-up
You will be asked to enter which speakers are present in your system, whether they are "Large" or "Small". If you select "Large" the full bass range will be delivered to the speakers. If you select "Small" you will be asked to enter the frequency at you wish to cross them over to the sub-woofer. (refer to your loudspeaker manuals for details)
- Press the ▲▼keys to select "Speaker Sizes"
- Press ENTER
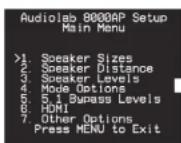
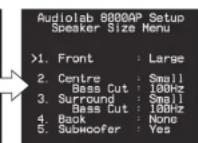
- Press the ▲▼keys to select "Speaker Sizes"
- Press the ◀▶keys to toggle Largoor Small
If you selectLarge: No further action is needed.
If you select Small: You will be asked to set the boss cut frequency:
- Press ◀▶to select 50Hz, 80Hz, 100Hz, 120Hz.
- Now press ▲▼to select Centre.
Do you have a centre speaker?
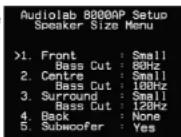
If you select Large for the front speakers you may select Large, Small, or None
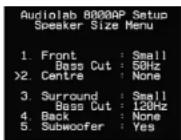
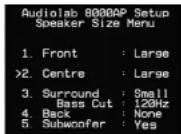
If you select Small for the front speakers you may only select Small or None
After setting up the size and bass parameters of the centre speaker:
7b: Setting Up the 8000AP - 2
- Press the ▲▼ keys to select "Surround".
- Press ENTER
| Audiolab 8000AP SetupSpeaker Size Menu | |
| 1. Front | Large |
| 2. Centre | Large |
| >3. Surround | SmallBass Cut: 120Hz |
| 4. Back | None |
| 5. Subwoofer | Yes |
If you have set the front speakers to Large: you will be able to select Large, Small or None for the surrounds.
If you have set the front speakers to Small: you will be able to selectSmall orNone for the surrounds.
After setting up the size and bass parameters of the surround speakers:
- Press the ▲▼ keys to select "Back"
- Press ENTER
| Audiolab 8000AP SetupSpeaker Size Menu | |
| 1. Front | Large |
| 2. Centre | Small |
| Bass Cut | 100Hz |
| 3. Surround | Small |
| Bass Cut | 120Hz |
| >4. Back | 2 Small |
| 5. Subwoofer | Yes |
By default the Back speakers are fixed at Small with predetermined bass cut-off at 100 Hz. You can select None, One (for 6.1), or Two (for 7.1).
After setting up the size and bass parameters of the back speakers:
- Press the ▲▼ keys to select "Subwoofer"
- Press ENTER
- Select Yes/ No
| Audiolab 8000AP SetupSpeaker Size Menu | |
| 1. Front | : Large |
| 2. Centre | : Small |
| Bass Cut | : 100Hz |
| 3. Surround | : Small |
| Bass Cut | : 120Hz |
| 4. Back | : 2 Small |
| >5. Subwoofer | : Yes |
Loudspeaker Distances
- Press BACKo jump back up to the front page
- Press the ▲▼keys to select "Speaker Distance".
- Press ENTER
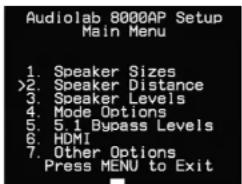
text_image
Audiolab 8000AP Setup Main Menu 1. Speaker Sizes >2. Speaker Distance 3. Speaker Levels 4. Mode Options 5. 5.1 Bypass Levels 6. HDMI 7. Other Options Press MENU to Exit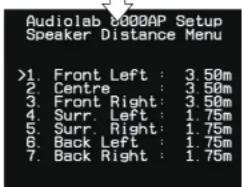
text_image
Audiolab 8000AP Setup Speaker Distance Menu >1. Front Left : 3.50m 2. Centre : 3.50m 3. Front Right : 3.50m 4. Surr. Left : 1.75m 5. Surr. Right : 1.75m 6. Back Left : 1.75m 7. Back Right : 1.75mThese measurements are used by the 8000AP in surround modes to correct for delays in sound reaching your ears due to differences in the distance between each speaker and the listening position.
Use the ▲▼ keys to select the loudspeaker and the ▶▶ keys to vary the distance. The distance can be set from 0 to 10 metres in units of 25cm. A speaker entered asone will have no distance shown on the screen.
Speaker Calibration
Speaker calibration is essential to achieve a correctly centred sound image; follow it carefully. We suggest you use a sound level (SPL) meter; otherwise you can set up the levels by ear- you will have to be careful to match the output levels for each speaker to sound equally loud.
- Press to BACK jump up to the front page
- Press the ▲▼ keys to select Speaker Levels.
- Press ENTER
- Press the ◀▶ keys to select
text_image
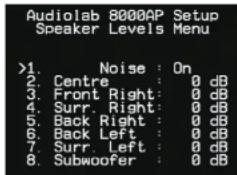
Audiolab 8000AP Setup Speaker Levels Menu >1. Noise : On 2. Centre : 0 dB 3. Front Right : 0 dB 4. Surr. Right : 0 dB 5. Back Right : 0 dB 6. Back Left : 0 dB 7. Surr. Left : 0 dB 8. Subwoofer : 0 dBNoise On
You will hear a burst of white noise from the Left Front speaker. The volume at the Left Front speaker sets the reference level for the calibration. All levels must be set to this reference. Individual levels can be varied by up to +/- 10dB.
When the noise generator is turned on, the volume automatically goes to -30dB. This master level may be adjusted to suit your system with the volume control on the front panel or via the handset. Do not adjust the volume during calibration after the level is established.
Using a Sound Level Meter: Set the meter to 'C' weighting with 'slow' response and to read 75dB SPL at centre scale. Place the meter at ear level at youseated listening position. Point the microphone at the ceiling. Adjust the Volume level so the sound level meter reads75dB. Select each speaker in turn. Adjust the relative channel levels on-screen using the ▶ keys on the handset until the sound level meter reads 75dB on all channels.
Set Up By Listening- Sit in your normal seated listening position. With the Volume▲▼ keys, set the Left Front speaker to the equivalent to normal conversation. Now select each speaker in turn and adjust the on-screen level using the◀▶ keys on the handset to sound the same as the Left Front speaker. During this process you may have to re-visit some loudspeakers to reset the level.
Do not adjust the volume control during the calibration. Setting up the Subwoofer input level:
Leave the subwoofer level on the screen at 0dB. Adjust the subwoofer's volume control to sound as close to the reference Left Front speaker as you can. Now trim the on-screen subwoofer level with the ◀▶ keys on the handset. The object is to get the subwoofer level as close to 0dB as possible.
7c: Setting Up the 8000AP - 3
Checking the Setup levels
- Press the ◀ keys to select Noise Off
- Press the SETUP key to exit setup mode
You should now listen to some music on all your selected channels to establish that the levels are correctly set.
Listening to sources - Connect a multichannel source [i.e DVD player]
- Select the input with the proper key on the remote control Typical DVD source material is 5.1
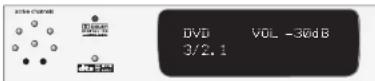
The player screen will indicate the input selected, the default mode of the information on the DVD and the volume. In the example above, the 800AP is receiving a DTS encoded signal in 5.1 mode
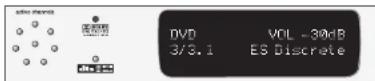
The Active channel lights tell you which outputs have audio present. The number of channels in the source material is indicated on the display i.e. 3/2.1 = 3 front, 2 surround and 1 LFE channel.
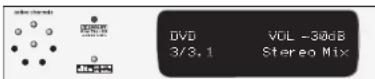
Press the MODE key on the handset or the front panel to cycle the mode options for the current source material
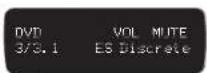
When receiving DTS ES Discrete (6.1) the display will look like this:
Stereo Mix
When you have all the channels in your system operational, you can trim the levels using the QSet facility. This will save you having to flip back and forth between the Setup screen and the DVD picture (see P 16-17)
Mode Setup Options
- Press toMENU
display the
setup front
page - Press the ▲▼
keys to select
Mode Options - Press ENTER
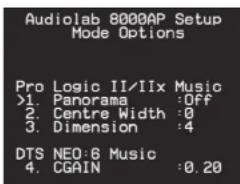
text_image
Audiolab 8000AP Setup Mode Options Pro Logic II/IIx Music >1. Panorama :Off 2. Centre Width :0 3. Dimension :4 DTS NEO:6 Music 4. CGAIN :0.20Dolby Pro Logic II
creates five full-bandwidth output channels from 2-channel sources. Two different modes are available:
Pro Logic II Movie is pre-configured by Dolby.
Pro Logic II Music can be adjusted as follows:
Panorama mode extends the front stereo image to include the surround speakers for a 'wraparound' effect with side wall imaging. This is effective for recordings which have strong left or right-channel elements in the mix.
Adjustment: On/Off
Centre Width Control allows the sound of the centre-channel to be apportioned between the centre channel loudspeaker and the left/right front loudspeakers, from 'no sound' in the centre to 'full' centre performance. Adjustment: L/R :0-6 - 3 is mid point
Dimension Control allows to move the sound field towards the front or the rear, depending on how much spatial effect there is in a stereo recording.
Adjustment: L/R :0-6 - 3 is mid point
DTS Neo:6 Musicis a post processing mode providing up to seven sound channels from stereo matrix material. The CGain adjustment controls the amount of subtraction of derived centre channel material from L and R channels.
Adjustment: GGains 0.0-055
NOTE: Setting mode options will only be effective if you have multi-channel loudspeakers. If you have only two (i.e. stereo) speakers the mode will always default to stereo, regardless of the mode options set.
5.1 Input Bypass Level Setup
Use this screenonly if you are using an external analogue 5.1 source, such as a laserdisc player connected via its analogue outputs. You cannot enable the back speakers in this mode
- Press MENUo display the setup page.
- Press the ▲▼ keys to select 5.1 Bypass Input Levels
- Press ENTER
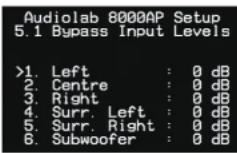
This screen is similar to the Speaker Levels Menu except that there is no sound generator. Determine the levels by ear with a suitable source. We recommend you set the levels to be identical to the Speaker levels menu and proceed from there.
HDMI Setup
- Access the HDMI Menu
- Press ENTER
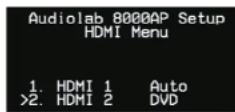
This menu allows you to map an HDMI source input to any digital input. This routes the video portion of the HDMI signal to the TV but disables the audio portion. The audio connection is made from the source component to the digital input of your choice - optical or co-axial as needed.
Why would you want to do this?
- You have a source e.g. A PC, with a DVI output: you can connect the video to the 8000AP via a DVI-HDMI cable and connect the SPDIF output to a digital input on the 8000AP. You can now watch DVDs or stream audio or A/V content via the 8000AP.(See Page 5 for HDCP issues).
7d: Setting Up the 8000AP - 4
Other Options
- Press toMENU display the setup page.
- Press the keys to select Other Options
- Press ENTER
Audiolab 8000AP Setup Other Options
PCM / Analogue : Stereo >1. Bass Mgr: Normal
- DAC Filter : Slow
- Upsampling :OFF
- System RESET : NO
Bass Manager
This is a special setting for 2ch. PCM / analogue only and does not otherwise affect the normal working of the Bass manager. If you want subwoofer output from stereo material when using large front speakers use this setting The choices are:
Normal - No subwoofer out from stereo material when L & R speakers are set to Large.
L+R to Subwoofer. The low bass output of both channels is mixed to mono and fed to the subwoofer.
If your speakers are large truly full range models you may prefer the purist view and disable the subwoofer in Stereo. As always, personal preferences will come into play.
DAC Filter
You can set the DAC filter fast Slow.
The first has better technical performance and best attenuation of spurious signals but sounds "mechanical" to many people. The following was improved group delay characteristics and a gentler roll off but could result in higher spurious noise levels.
Upsampling
Upsampling applies only to Audio PCM or HDCD streams. The default setting is "Off". Setting upsampling "On" pushes the noise spectrum further up the band resulting in an increased "airy" sound which many prefer. We suggest you listen with upsampling on and off and choose accordingly.
System Reset
Select YES to reset the system setup parameters to factory defaults. After a short pause the 8000AP responds with the message "DONE" and the default status is re-established.
8a: Operation
Switching On and Off
- Make sure your power amplifier/s are switched off.
- Switch on all source units (and the TV monitor if used).
- Connect the 8000AP to the mains power and switch on.
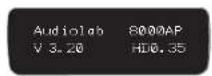
- Switch the unit on via tye mains switch on the rear panel. The Power LED illuminates, the display shows the Mode and the software version. The 8000AP will then go into Standby.
- Bring the unit out of Standby: Press the Standby the handset or the front panel.
- Now switch on the power amplifier.
• To set the 8000AP to Standby: Press the Standby the handset or the front pane
When switched out of Standby, the last input and volume level used is re-selected. If the volume was set to a high level when last used the unit will power on at a safe volume of -20dB.
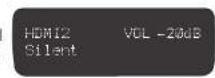
Selecting a Digital Input
There are three digital co-ax inputs BMDjoGD, DX1 optical inputs DTV, DAB, MD, DX2.
There are also two HDMI input HDMI1, HDMI2
A digital sourcemay be selected by pressing the appropriate input keys on the remote handset or by pressing the digital button on the front panel until the desired source is shown in the display window.
The selected digital source is automatically connected to the digital output DIGITAL OUT
If the source is switched off or disconnected or has no active audio: 'Silent' appears in the window.
Note: The titles of the digital inputs are descriptors: the digital co-axial inputs are identical as are the digital optical inputs and the two HDMI inputs.
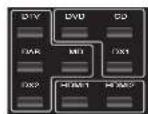
digital

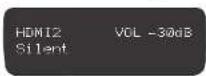
Digital Screen Displays
When a detectable digital format is received by the 8000AP the screen will display the input, the receiving format and the number of channels received. Examples of typical screen displays are given on Page12 and in the next column.
Basic 5.1Format
Dolby/DTS indicators
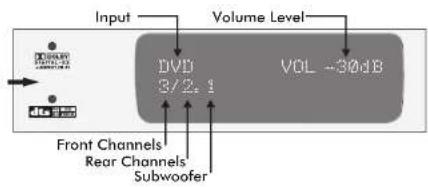
text_image
Input Volume Level DVD 3/2.1 VOL ~30dB Front Channels Rear Channels SubwooferDTS Extended Format
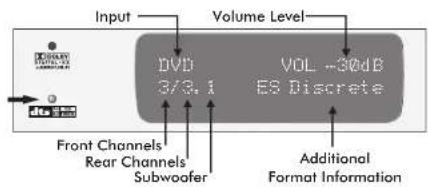
text_image
Input Volume Level DVD 3/3.1 VOL -30dB ES Discrete Front Channels Rear Channels Subwoofer Additional Format InformationDolby Extended Format
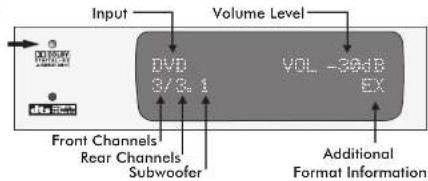
text_image
Input Volume Level DVD 3/3.1 VOL -20dB EX Front Channels Rear Channels Subwoofer Additional Format InformationHDMI PCM Format
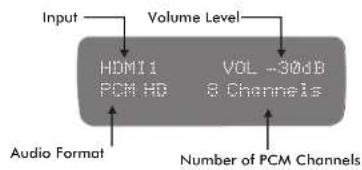
text_image
Input Volume Level HOM11 PCM HD VOL -30dB 8 Channels Audio Format Number of PCM Channels8b: Operation - 2
Digital Modes
The 8000AP will detect and display the format of the source material received. Press the MODE key on the handset or front panel to cycle through the options relevant to that format. For example, when receiving Dolby Digital 3/2.1 (5.1) you have the option to apply "EX" processing to create a back channel or "Stereo Downmix" if you just want to listen to 2 channels.
If, for any given input source, a mode option is changed the 8000AP will remember this change and use the last option applied whenever the same encoded material is detected.
Selecting an Analogue Input
There are four Analogue inputs: VCR, SAT, TV, AUX. Additionally there is a TAPET and a input.1 bypass
An analogue source may be selected by pressing the appropriate input keys on the remote handset or by pressing the analogous front panel until the desired source is shown in the display window.
Note: The titles of the analogue inputs are descriptors: all the analogue inputs are identical as are the digital optical inputs and the two HDMI inputs.
The TAPE input allows a tape monitor function (if you have a three head recorder). This enables you to compare the quality of a tape recording to the original at the time of recording. The selected analogue input, the left and right channel of the 5.1 input or the left and right channel of a processed digital signal are connected to the oTAPEOUTyou select the relevant input.
You may listen to the analogue tape input by pressing the tape key on the remote control, or the tape button on the front panel of the 8000AP.
The 5.1 input routes the 5.1 analogue inputs on the rear panel directly to the volume control on the 8000AP. When you select this input you will hear a relay operate as the input is selected and all processing functions are disabled.
When this input is selected you can only alter the volume and balance. You can also trim the channel parameters via the OSD menu.
analogue


tape


5.1 bypass

Analogue Screen Displays and Modes
The four regular analogue inputs and the Tape input all operate in the same way.
The basic operating mode is 2 Channel Stereo.
Pressing the MODE button will invoke several matrixed post processing modes. With the exception of Dalby PLII Movie and DTS Neo 6 Cinema, parameter adjustments for the other modes can be accessed in the Setup menu(Sde Page 11).
NOTE: The options available will reflect only your chosen loudspeaker configuration. For example, if you only have Stereo loudspeakers or have enabled only the Front loudspeakers the available options will default to Stereo only.
5.1 bypass input
All processing modes are disabled when this input is selected
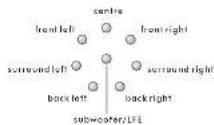
Active Channels
The Active channel lights tell you which outputs, at any given moment, have audio present.
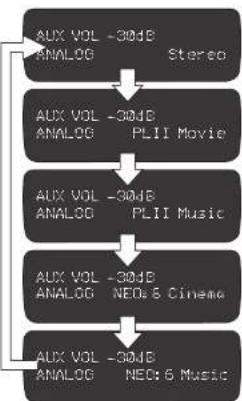
flowchart
graph TD
    A["AUX VOL -30dB ANALOG"] --> B["AUX VOL -30dB ANALOG"]
    B --> C["AUX VOL -30dB ANALOG"]
    C --> D["AUX VOL -30dB ANALOG"]
    D --> E["AUX VOL -30dB ANALOG"]
    E --> F["AUX VOL -30dB ANALOG"]
    F --> G["NEO & Music"]
    H["Stereo"] --> A
    I["PLII Movie"] --> B
    J["PLII Music"] --> C
    K["NEO & Cinema"] --> D
    L["NEO & Music"] --> E
5.1 Bypass VOL -30dB
Page14
8c: Operation - 3
Volume Control
The VOLUMESVOLBredtredset

control the level of all connected loudspeakers. They do not affect the TAPE or DIGITAL OUT sockets
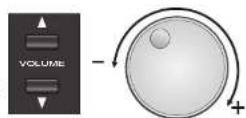
Turn the VOLUME kwise to increase the volume or anticlockwise to decrease the volume in 1 dB steps. When you reach either end of the volume range, you will still be able to rotate the knob but the volume will stop changing.
The volume is alterable from (ve90dB) to +15dB
(veryd). The Volume level appears in the display. If you go below -90dB the 800CAP will mute and the word MUTE will appear in the display.
Note: The 8000AP remembers the volume when put into Standby and returns to this volume when next switched on. If the last used volume is above -20dB, the 8000AP will power on at a level of -20dB. This eliminates surprises caused by a high previous volume setting.
Mute
To mute all speaker outputs press the MUTE button on the front panel or the mute key on the remote control. To restore the volume press MUTE again.
Note: If you have turned the volume down manually below the -90dB mark, the MUTE display will not turn on or off when you press theMUTE key.
The 8000AP mutes momentarily whenever you change inputs or undertake certain functions.
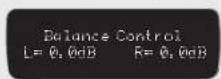
Altering the Front Speakers Balance
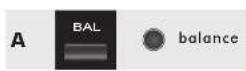
Press the BALANCE key on the front panel or the remote control to enter Balance Mode
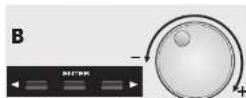
Alter the balance to the Right or Left by rotating the Volume knob or the Left/Right ◀ keys on the handset Keeping the ◀ keys hold down will move the sound progressively further left or right
Press the BALANCE key on the front panel or the remote control to exit Balance Mode
If you do nothing, after a short period the 8000AP will automatically exit Balance Mode.


Night Mode
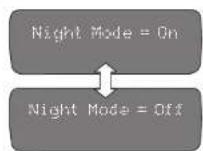
This mode works with Dolby Digital or DTS Digital Surround sources which include Night Mode control parameters. Night Mode reduces the dynamic range for quieter listening, so that you can comfortably hear quieter passages at lower volume levels -low levels are boosted, high levels are cut.
Press NIGHT MODE on the handset to toggle Night Mode On or Off
Night Mode will remain active until it is switched off. Always switch this mode off after use.
Forced Stereo Operation
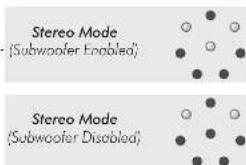
Pressing the STEREO key on the handset down-mixes a multi-channel signal to a stereo (front left/right) signal only (the stereo signal is created from all channels).
The subwoofer will appear in the Active Channels display if the Front speakers have been set to Small or if the bass management in the Setup menu has been set to L+R—to Sub.
Display On/Off
Pressing the DISPLAY key on the handset switches the display off and on. When the 8000AP is operational and the display is switched off only the Standby light remains on to show the unit is active.
If you set the 8000AP to Standby when the display is switched off, when you bring the unit out of Standby the display will restore.
text_image
Stereo Mode (Subwoofer Enabled) Stereo Mode (Subwoofer Disabled)The best way is to use QSet to trim the system. If you are making adjustments to the setup so you can play a disc that is not properly set up, or you are listening in a location that is not the main listening seat, set the parameters back to their original values at the end of the session.
QSet Menus
Set Speakers and sizesIf "small" set bass cut-off frequency Set speaker distances from the listening position
Set speaker levels as perceived from the listening position LipSync. Alter the delay between audio and video signals
OSD. Select NTSC or PAL for the OSD display.
Entering and Navigating the QSet Menu
• To enter the QSet menu, presQSEThe handset.
- Press the key to move down through the menus
- Press the ▲ey to move up through the menus
- Press the ◀▶ keys to select a parameter within a menu
• To leave the QSet menu, press the QSET key.
Setting Loudspeaker Sizes
Press QSet
Set Front Speaker Size
Press the keys to toggle
If you select Small:
(Qset) Sizes Front = Large
Large Small
(Qset) SIZES Front= Small 50Hz
Press the keys to set
50Hz, 80Hz, 100Hz, 120Hz
After you have set the Front Speaker Sizes:
Press the▼key
Set the Centre Speaker
(Qset) SIZES Centre = Large
Press the keys to toggle
Large, Small None
If you select Small:
(Qset) SIZES Centre = Small 50Hz
Press the keys to set
50Hz, 80Hz, 100Hz, 120Hz
If you have no Cer
speaker or you want to disable it:
Press the keys until you reach "None"
(0set) SIZES Centre = None
After you have set the Centre Speaker Size:
Press the▼ey
Set Surround Speakers
Press the ▶ to toggle
If you select Small:
Press the keys to set
50Hz, 80Hz, 100Hz, 120Hz
If you have no Surrounds or you want to disable them:
Press the helps until you reach "None"
(Qset) SIZES Surround = None
After you have set the Surround Speakers Size:
Press the▼ey
Set Back Speakers
Press the keys to select
(Qset) SIZES Back = 1 Small
of, 2 None
Back effects speakers are permanently set to "Small"
(Qset) SIZES Back = 2 Small
(Qset) SIZES Back = None
Press the ▼ey
Is there a subwoofer?
(Qset) SIZES Subwoofer = Yes
Press the keys to set the Subwoofer to or YesNo
Setting Speaker Distances and Levels
Distances are set in metres from the listening seat. Starting with the Front Left speaker, the menu enables you to go round the room setting each speaker in turn. The sequence is:
Front Left: Centre: Front Right:
Surr. Left: ← Back Left: ← Back Right: ← Surr. Right
If a speaker is set to Nonle Not appear in the list
Press the▼ey
Set Front Left Speaker
(Qset) Distances Front Left = 3.50 m
Press the keys to set the distance. You can set distances from 0.5m to 10 metres in 25cm steps.
When you have set the Front Left speaker:
Press the ▼ key to move to the next loudspeaker and repeat the procedure to set all loudspeaker distances in sequence.
If you have two Back speakers: You will be prompted to set the distance from each speaker to the listening seat
If you have only one (Centre Back) speaker:
(Qset) Distances LeftBack= 1.75 m
After setting up all the Loudspeaker distances:
Press the▼ey
Press to put the noise on/off
(Qset) Levels Noise = Off
If you select On You will hear a burst from the Left Front Speaker.
(Qset) Levels Noise = On
The default noise level is -30dB. This level will not appear when you switch the generator on. Move the Volume Knob or alter the volume level at the handset to trigger the level display.
(Qset) Levels Noise = On -29dB
9b: The Qset Menu - 2
Setting Speaker Levels
The Front Left loudspeaker determines the reference level. All the other speaker levels are established as variations up or down from this level. If for any reason you change the reference level you will need to re-set all the loudspeakers. The levels of all loudspeakers are set in order
Front Left (ref):→ Centre:→ Front Right:→ Surr. Right: Subwoofer:← Surr. Left:← Back Left:← Back Right
If a speaker is set to Nonib not appear in the list. Set a comfortable level for the Left Front Speaker.
Press the▼key
(Qset) Levels Centre = 0 dB
Press the to adjust the level of each loudspeaker to be the same as the Front Left loudspeaker. Individual speaker levels can be adjusted by up to +/- 10dB.
When you have set one speaker:
Press the ▼ key to move to the next loudspeaker and repeat the procedure to set all loudspeaker levels in sequence.
If you have two Back speakers: You will be prompted to set the relative level of each speaker.
If you have only one (Centre Back) speaker:
(Qset) Levels LeftBack = 0 dB
After setting up all the Loudspeaker levels:
Press the▼key
(Qset) Levels Subwoofer = 0 dB
if you are trimming the subwoofer. Press the 📄 to set the level to be the same as the Front Left loudspeaker If you are establishing the level and have not already set up the subwoofer in the Setup Menu. Follow the procedure described on Page10
We suggest you follow the procedures described on Page 12 when setting Loudspeaker Levels.
Lip-Sync Adjustment
Lip-sync adjustment will mainly be needed in the following circumstances.
1 Some modern flat panel screens have heavy amounts of video processing which adds delay, hence the need to delay the audio so the picture and sound match.
2 Occasionally there are lip-sync problems, even with 'correctly' synchronized soundtracks. This may be because of poor dubbing which cannot be compensated for as the delay is erratic.
Press the▼key
(Qset) Lip Sync Delay = 0 ms
Press the ◀▶ keys to adjust the delay from 0 - 500ms
NOTE: The selected lip-sync delay will remain even after the 8000AP is switched off if you have adjusted the lip-sync because of programme irregularities you should reset it to the correct value (or the default setting) immediately you have finished listening to the affected programme.
Finally, after setting all he system parameters:
Press the QSET key on the handset to exit the Qset screen.
On Screen Display Adjustment
The default TV system for the On Screen Display is PAL. If you have an NTSC TV set (or have inadvertently set the OSD to NTSC in a PAL area) the Menu Screen may not be visible. Press QSET on the handset to enter the QSet menu.
Press the ▼ key to move down through the menus until you reach the final screen (Foot) ASP BAL/NTSC
(Qset) OSD PAL/NTSC Mode = PAL.
Press the ◀▶ keys to toggle the TV system from PAL to NTSC Press the QSET key on the handset to exit the Qset screen.
10 Troubleshooting:
Until you are familiar with the operation of your 8000AP, you may experience occasional difficulties. This guide will help you overcome the most likely issues.
No lights on the unit
Check that:
- the mains lead is plugged in and that the outlet to which it is connected to is switched on.
• the mains switch on the 8000AP is ON.
No response/poor response to handset commands
Check that:
• the 8000AP is switched on.
• there are fresh batteries in the remote control.
- the 8000AP's display window is visible and you are pointing the remote control towards it.
No on-screen display
Check that:
- your television is on and switched to display the output from the 8000AP.
• the correct video input is selected at the TV.
- the correct TV system is enabled (see Page 17)
No sound
Check that:
- the correct source is selected.
• the volume is turned up to a reasonable level
• the output is not muted. - your source and power amplifier(s) are connected correctly and switched on.
The Mute function does not work
Check that:
- the volume has not been turned fully down to the mute position.
Sound is poor quality / distorted
Check that:
- all cables are making good connections. If necessary, switch off the power, then withdraw the connector and plug it back in again, then switch on the power.
- you have set the speaker type to suit your system.
• Night Mode is not enabled.
The sound does not co-incide with the picture
Check that:
- if you are using a flat screen TV the Lip-Sync is adjusted correctly.
The front panel display is blank
Check that:
- The display is not turned off. Press the display display key on the remote control.
Sound comes from only some of your loudspeakers
Check that:
- the 8000AP is set up to use all the speakers in your system.
- a suitable surround sound source is selected and playing.
- if you are playing a digital source, the player is outputting multi-channel data.
• the display indicates that the disc is multi-channel. - you have not selected the 'stereo' down-mix mode.
• the speaker balance is correct. - all amplifiers are switched on.
11: Service & Warranty
Care & Cleaning
While cleaning is in progress the AC power cord must be unplugged from the AC power supply socket.
Grease or dirt on the equipment may be removed with a soft, lint-free cloth slightly moistened with a mild solution of warm water and detergent or washing-up liquid. Do not use any other solutions or solvents.
If you have any queries regarding the use of Audiolab equipment, consult your dealer.
Servicing
Servicing of Audiolab products should only be carried out by authorised service agents. If service is required the equipment should be returned, securely packaged, preferably using original packaging, to your dealer.
In the UK equipment may be returned to the IAG Service Centre. In the USA equipment may be returned to the Service address shown on this page.
Always telephone before returning any equipment.
A note should be enclosed with your name, address, telephone number, and a brief description of the reason for return.
If you require Service outside the Warranty period, do not hesitate to contact your dealer.
Service Address - UK
IAG Service Centre
Unit 4, St Margaret's Way
Stukeley Meadows Industrial Estate
Huntingdon Cambs
PE29 6EB
England
Tel:+44(0)1480 45256 Fax:+44(0)1480 413403
Service Address - USA
IAG America, Inc.
8440 154th Avenue NE
Redmond, Washington 98052
USA
Tel: +1 425 861 3909 Fax: +1 425 861 3906
Service Address - ASIA
IAG. Room 2310 - 2311, Press Building, Shennan Road C, Shenzhen, China.
Tel: +86-755-82091200 Fax: +86-755-82091205
Audiolab limited warranty
Audiolab Ltd. warrants this product, subject to the terms and conditions below, to be free from defects in materials and workmanship. During the warranty period Audiolab will repair or replace (at Audiolab's option) this product, or any defective part in this product, if it is found to be defective due to faulty materials, workmanship or function. The warranty period may vary from country to country.
Terms and conditions:
The warranty starts on the date of purchase (or the date of delivery if this is later).
You must provide proof of purchase / delivery before work can be carried out. Without this proof, any work carried out will be chargeable to you.
All work will be carried out by Audiolab or its authorised agents or distributors. Any unauthorised repair or modification will void this warranty.
If any part is no longer available it will replaced with a functional replacement part.
Any parts that are replaced will become the property of Audiolab.
Any repair or replacement under this warranty will not extend the period of warranty.
This warranty is valid only in the country of purchase, applies only to the first purchaser and is not transferable.
The following are not covered:
- Products on which the serial number has been removed, altered or otherwise made illegible.
• Normal wear and tear and cosmetic damage.
• Transportation or installation of the product.
- Accidental damage, faults caused by commercial use, acts of God, incorrect installation, connection or packaging, misuse, neglect or coreless operation or handling of the product which is not in accordance with Audiolabs user instructions.
- Equipment that has been operated in conjunction with unsuitable, inappropriate or faulty apparatus.
- Repairs or alterations carried out by parties other than Audiolab or its authorised agents or distributors.
- Products not purchased from an Audiolab authorised dealer.
- Products that were not new at the time of original purchase.
• Products sold 'as is', 'as seen' or 'with all faults'.
Repairs or replacements as provided under this warranty are the exclusive remedy of the consumer. Audiolab shall not be liable for any incidental or consequential damages for breach of any express or implied warranty in this product. Except to the extent prohibited by law, this warranty is exclusive and in lieu of all other warranties whatsoever, both express and implied, including, but not limited to, the warranty of merchantability and fitness for a practical purpose.
This warranty provides benefits that are additional to and do not affect your statutory rights as a consumer.
Some countries and US states do not allow the exclusion or limitation of incidental or consequential damages or implied warranties so the exclusions in the paragraph above may not apply to you. This warranty gives you specific legal rights, and you may have other statutory rights, which vary from state to state or country to country.
How to claim:
To obtain warranty service contact the Audiolab authorised dealer from which you purchased this product. Do not despatch goods without the prior agreement of the dealer, Audiolab or their authorised distributors.
If asked to return products for inspection and/or repair, pack carefully, preferably in the original cartons or packaging affording an equal degree of protection, and return prepaid. If unsuitable packaging is used, Audiolab may make a charge for the supply of new packaging.
Insurance is recommended as goods are returned at owner's risk. Audiolab or their authorised distributors cannot be held liable for loss or damage in transit.
Packing, insurance and freight on the return journey will be paid by Audiolab or their authorised agents or distributor if corrective work proves to be necessary.
12: 8000AP Specifications
Digital Inputs
| Frequency Response | 10Hz - 20KHz (+0.2dB)5Hz - 75KHz (-3dB) |
| Distortion (THD) | < 0.002% (0dBFS @ 1KHz)16bit, Fs = 44.1KHz, B/W 2GHz- 20KHz |
| Dynamic Range | >103dB |
Analogue Inputs
| Input Sensitivity | 0dBu (775mV); Max 3.5V Unity Gain (1) with Vol. Level at 0dB |
| Frequency Response | 10Hz - 20KHz (±0.2dB)5Hz - 24KHz (= 3dB) |
| Distortion (THD) | < 0.003% (rel. 2V@1kHz)Bandwidth = 20Hz - 20KHz |
| Dynamic Range | 100dB |
5.1 Bypass Input
| Input Sensitivity | 0dBu (775mV); Max 3.5V Unity Gain (1) with Vol. Level at 0dB |
| Frequency Response | 10Hz - 20KHz (+0.2dB)5Hz - 100KHz (+ 3dB) |
| Distortion (THD) | < 0.001% (rel. 2V@1kHz) |
| Dynamic Range | >110dB |
Analogue Outputs
| Output Level | 0dBu (775mV)Max 3.5V |
| Volume Control | 90dB to +15dB in 1dB steps, Channel imbalance < 0.1dB |
Video Outputs
| HDMI Connection | HDMI 1.2a compliantHDMI 1.3 compatibleMax resolution 1080pHDCP compatible |
| Composite OSD | 1.5Vp-p, 75 QPAL or NTSC |
General
| Mains Voltage | 90 - 100 V / 110 - 120 V / 220 - 240V (marked on the rear of the unit) |
| Power Consumption | 15W Operational < 7W Standby |
| Dimensions overall [WxHxD] | 445 mm x 75 mm x 338 mm |
| Weight | Net: 5.76 Kg shipping: 7.38 Kg |
Audiolub reserves the right to alter design and specification without notice. Specification may vary for different countries.
Key Features
DSP: Dual DSP, Cirrus Logic CS494003, 24Bit front end / 32Bit Post processing
D/A converters: 24Bit / 192KHz bit-stream
Adjustable D/A filter response
A/D converters: 24Bit / 48KHz bit-stream
Upsampling: 2x (on Digital PCM & HDCD)
Audio Processing Modes:
Dolby Digital
Dolby Digital EX
Dolby Pro Logic II
Dolby Pro Logic IIx
DTS
DTS ES Matrix
DTS ES Discrete
DTS 96/24
DIS NEO:6
PCM Stereo (24bit / 192KHz)
HDCL
2 Ch PCM 24Bil / 192KHz via HDMI
8 Ch. PCM 24Bit / 96KHz via HDMI
5.1 Analogue Bypass
Video:
HDMI max resolution 1080p
OSD (On Screen Display) Composite Video (PAL/NTSC)
Connectivity:
2 HDMI inputs and 1 HDMI output
3 Coaxial Digital SPDIF inputs
4 Optical Digital SPDIF inputs
1 Optical Digital SPDIF output
5 Analogue Inputs via RCA phono connectors
8 Analogue Outputs (7.1) via RCA phone connectors
1 Analogue Tape Output via RCA phono connector
6 Analogue Inputs (5.1 Bypass) via RCA phone connectors
1 OSD (On Screen Display) output (Composite Video)
1 RS232 Communications port
Separate Analogue and Digital Power Supply with 10
Regulated Supplies.