DMS 7680 - Hi-Fi System CMX - Free user manual and instructions
Find the device manual for free DMS 7680 CMX in PDF.


User questions about DMS 7680 CMX
0 question about this device. Answer the ones you know or ask your own.
Ask a new question about this device
Download the instructions for your Hi-Fi System in PDF format for free! Find your manual DMS 7680 - CMX and take your electronic device back in hand. On this page are published all the documents necessary for the use of your device. DMS 7680 by CMX.
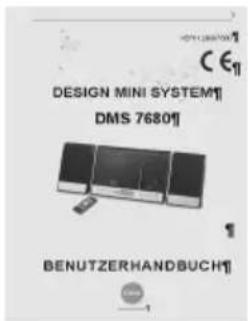
USER MANUAL DMS 7680 CMX
natural_image
Three black electronic devices with a CD and remote control unit, no visible text or symbols on the devices themselves.
USER MANUAL

CREATE MORE XITEMENT
Imprint
All rights reserved. Any reproduction without consent of cmx® is prohibited.
cmx® reserves the right to modifications of the device.
Designed by cmx® in Europe | Assembled in China
TM©2008 cmx electronics
CONTEXTS
1. GENERAL ...... - 1 -
1.1. Safety Precautions ...... - 1 -
1.2. Disposal of Waste Electronic Equipment ...... - 2 -
1.3. Battery Disposal ...... - 2 -
1.4. Copyright ...... - 2 -
1.5. Hearing Protection....- 2 -
1.6. Cleaning and Maintenance....- 3 -
2. FEATURES....-4-
3. LOCATION OF CONTROLS - 5 -
3.1. Main Unit - Front....- 5 -
3.2. Main Unit - Rear ...... - 6 -
3.3. Remote control ...... - 7 -
4. PREPARATION....-9 -
4.1. Connections....- 9 -
4.2. Insert Battery ...... - 10 -
4.3. Set Current Time....- 10 -
5. CD PLAYER - 12 -
5.1. Insert CD / MP3 CD....- 12 -
5.2. CD / MP3 CD Playback....- 12 -
5.3. Program CD/ MP3 Tracks ...... - 13 -
6. RADIO - 14 -
6.1. Save radio stations....- 14 -
6.2. Access saved radio stations....- 14 -
7. SOUND SCENARIOS....- 15 -
7.1. Bass....- 15 -
7.2. Effect....- 15 -
8. FURTHER FUNCTIONS ...... - 16 -
8.1. Timer....- 16 -
8.2. Sleep Timer ...... - 17 -
8.3. ID3 Tags for MP3 Tracks....- 18 -
8.3.1. Further Operation ...... - 18 -
9. EXTERNAL COMPONENTS....- 19 -
9.1. Connect Earphones....- 19 -
9.2. USB 2.0 - 19 -
9.3. SD and MMC memory card reader ...... - 20 -
9.4. AUX - 20 -
9.4.1. AUX input on front panel - 21 -
9.4.2. AUX input on rear panel - 22 -
10.FURTHER OPERATION - 23 -
11. TROUBLESHOOTING - 24 -
12.WARRANTY....- 26 -
12.1. Warranty Procedure ...... - 26 -
12.2. Warranty has expired ....- 27 -
12.3. Shipping the Unit ...... - 27 -
- IN THE BOX ...... - 29 -
- TECHNICAL SPECIFICATIONS ...... - 30 -
1. General
1.1. Safety Precautions
Only connect to mains power supply (230 Volt/50 Hz).
Do not place containers filled with water on top of the device.
Do not place the device in close proximity of water (e.g. sink, wash basin, etc.). The device can fall into the water and cause a short circuit.
The device consumes some power during standby operation. For zero power consumption disconnect from mains power supply.
Place the device on a stable surface to prevent it from tipping over and causing damages or injuries.
⚠️ Condensation can form if the device is placed in cold surroundings. Leave the device for at least one hour in standby mode.
Keep at least 10 cm distances at top and rear and 5cm at the sides for proper ventilation to avoid overheating.
Do not subject the device to direct sunlight or high temperatures; this can result in fire.
1.2. Disposal of Waste Electronic Equipment
natural_image
Simple line drawing of a trash bin with two crossed lines indicating no waste or prohibition (no text or symbols)
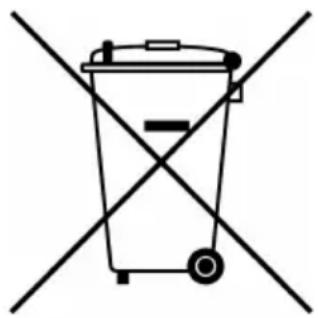
Your product is manufactured from high quality raw materials and should be recycled.
Ask your municipality for collecting points for waste electronic equipment.
Do not dispose of old appliances with the household waste.
The symbol on the product, the instructions for use or the packing will advert about the methods for disposal.
1.3. Battery Disposal
The law requires returning exhausted batteries to public collection points or the dealer.
Do not dispose of exhausted batteries with the household waste.
1.4. Copyright
It is illegal to copy, send, exhibit, broadcast via cable, publicly show or rent copyrighted materials without consent.
1.5. Hearing Protection

Select a moderate volume to protect your hearing.
Only turn the volume to a level where you can still hear ambient noise.
1.6. Cleaning and Maintenance
Cleaning the Casing
Clean the casing with a dry cloth.
Before cleaning disconnect from mains power supply.
Do not clean with liquid cleaning agents or a wet cloth; this can cause a short circuit.
Cleaning CDs
Clean CDs with a soft cloth from the center to the edge.
Do not use solvents or abrasive cleaning agents.
Do not use pointed or sharp utensils for cleaning; this will damage the CD.
Cleaning the Laser
Dust or dirt can collect on the laser pick-up. Only use a commercially available special cleaner.
Before cleaning disconnect from mains power supply.
Do not clean with liquid cleaning agents or a wet cloth; this can cause a short circuit.
2. Features
This HiFi system – DMS 7680 can play all Audio CDs and MP3 CDs.
Music playback is also possible via USB port and SD card reader.
You can play MP3 files by connecting your portable MP3 player to one of the two AUX inputs.
⚠️ Purchase the AUX cable separately.
3. Location of Controls
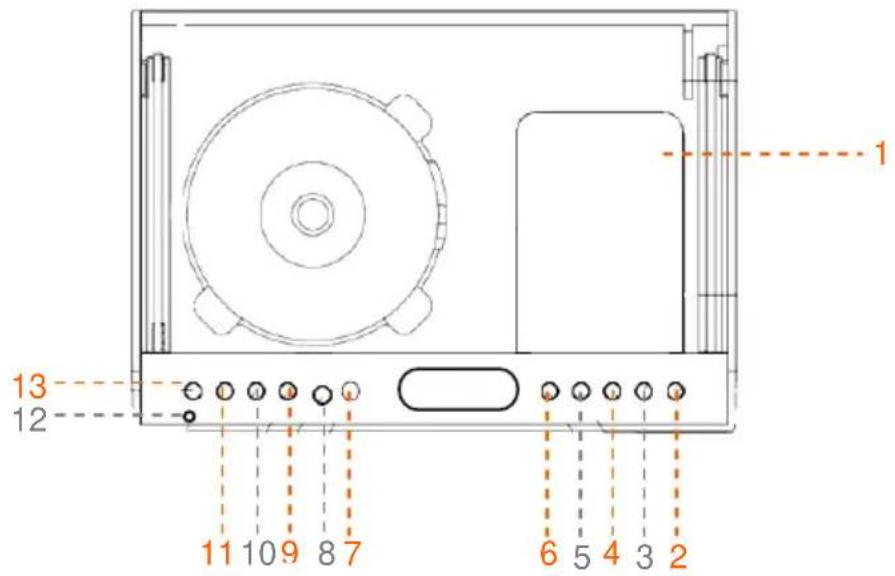
3.1. Main Unit - Front
text_image
1 13 12 11 10 9 8 7 6 5 4 3 2| 1 | MP3 tray / AUX input | Port for MP3 player / USB stick |
| 2 | OPEN/CLOSE | Open and close CD drive |
| 3 | ▶II / ST./MONO | CD: Start and pause playbackRADIO: Selector - stereo/mono |
| 4 | ■/BAND | CD: Stop playbackRADIO: Toggle between AM/FM |
| 5 | ▶TUNER | CD: Fast forward / next trackRADIO: Select frequency / station down |
| 6 | ◀TUNER | CD: Rewind / previous trackRADIO: Select frequency / station down |
| 7 | Infrared sensor | for remote control |
| 8 | VOL-UP | Increase volume |
| 9 | VOL-DN | Decrease volume |
| 10 | CLOCK-ADJ MEMORY | Set clock / program mode |
| 11 | FUNCTION | Function selector CD, AUX, RADIO, USB,SD |
| 12 | LED | Status indicator |
| 13 | STANDBY | On/Off |
©
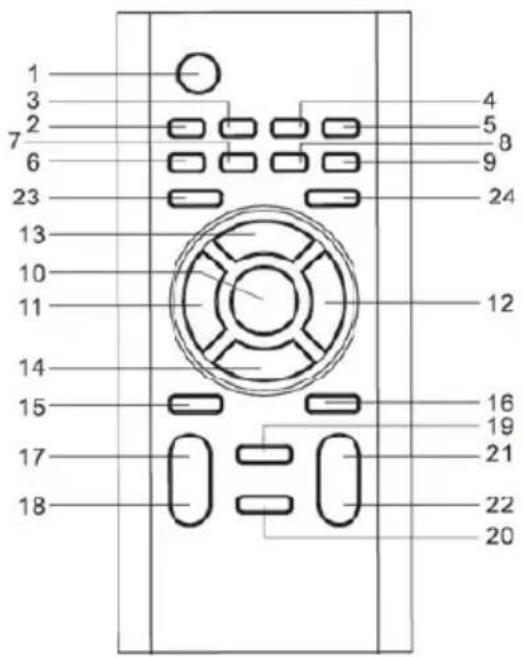
3.3. Remote control
text_image
1 3 2 7 6 23 13 10 11 14 15 17 18 4 5 8 9 24 12 16 19 21 22 201 POWER On/Off
2 TUNER Select radio function
3 PLAY/MODE Select playback mode
4 SLEEP Select sleep timer
5 OP/CL Open and close CD drive
6 USB Select playback from MP3 player / USB stick
7 CD Select playback from CD player
8 SD Select playback from SD memory card
9 AUX Select playback from MP3 player / USB stick
10 ID3 DISPLAY Display song title
11 Previous track
12 Next track
12 MEM UP/FOlder UP Next Station memory
Skip to next folder
14 MEM-DN/FOLDER-DN Previous station memory
Skip to previous folder
©
4. Preparation
4.1. Connections
Follow these steps to connect the system:
Step 1
L R
L
R
Step 2
- Connect the speaker cables to the speaker jacks.
- Connect the mains power cable first to the system and then to a wall outlet.
The system is in standby mode and the status indicator lights up red.
Disconnect the system from mains power supply during extended periods of non-use; it consumes a certain amount of power in standby mode.
Only use a power adapter with input 230 Volt/50 Hz and output 12V 1.25A.
Further information regarding connections see in chapter 9.
4.2. Insert Battery
The battery compartment is at the rear of the remote control.
- The CR2025 button cell is already inserted in the remote control before delivery.
- Remove the plastic strip to activate the battery.
To change the button cell insert the battery observing the polarity (+ and -), as marked inside the battery compartment.
The lifetime of the battery is approximately 6 months with normal use.
To avoid damage remove the battery from the remote control during extended periods of non-use.
4.3. Set Current Time
- Turn the system off.
- Press the PROGRAM CLOCK ADJ button on the remote control or CLOCK ADJ. MEMORY on the system.
- Press ◀ or ▶ on the remote control to set the hour.
- Press the PROGRAM CLOCK ADJ button on the remote control or CLOCK ADJ. MEMORY on the system.
The minute display flashes.
- Press ◀ or ▶ on the remote control to set the minute.
-
Press the PROGRAM CLOCK ADJ button on the remote control or CLOCK ADJ. MEMORY on the system.
-
The current time is now set.
The settings are deleted if you disconnect the system from mains power supply and in case of power failure.
5. CD player
5.1. Insert CD / MP3 CD
- Press the OPEN/CLOSE button to vertically open the CD drive.
- Insert a CD with the label up and carefully press it down onto the ball bearing spindle.
- Press the OPEN/CLOSE button to close the CD drive.
Do not close the CD drive manually; this can cause damage to the mechanism.
5.2. CD / MP3 CD Playback
This system can play CDs / MP3 CDs in different playback modes.
- Press the PLAY/MODE button on the remote control to select the desired mode.
| Setting | Playback |
| Repeat Repeat current track | |
| Repeat Folder Repeat all tracks in the current folder | |
| Repeat All Repeat all tracks on the CD | |
| Random or Shuffle Repeat all tracks on the CD in random order | |
5.3. Program CD/ MP3 Tracks
You can program your own playlist with up to 20 tracks.
- During CD / MP3 CD playback press the STOP button before programming.
- Press the PROGRAM CLOCK ADJ button on the remote control or CLOCK ADJ. MEMORY on the system until 00 P—01 is displayed.
- Press ◀◀ or ▶▶ on the remote control until the desired track is displayed.
- Press the PROGRAM CLOCK ADJ button on the remote control or CLOCK ADJ. MEMORY on the system.
- Repeat steps 2 and 3 to program further tracks.
Your programming was successful if "MEMORY" is displayed.
⚠️ See chapter 10 for further settings.
6. Radio
6.1. Save radio stations
You can save the current station or the frequency to one of the station memories. You can save up to 20 stations to the memory.
- Press the MEM-UP/FOLDER UP button until "01" is displayed.
- Press ◀ or ▶ on the remote control until the desired frequency is displayed.
- Press the PROGRAM CLOCK ADJ button on the remote control or CLOCK ADJ. MEMORY on the system.
The radio station was successfully saved to the station memory! - Press the MEM-UP/FOLDER UP button again to save the next station.
- Repeat steps 1 through 3 to save further radio stations.
6.2. Access saved radio stations
Press the MEM-UP/FOLDER-UP or MEM-DN/FOLDER-DN button to select a radio station.
7. Sound Scenarios
7.1. Bass
You can boost the bass for a more dynamic sound.
- Press the BASS button on the remote control.
“BASS” is displayed.
7.2. Effect
Repeatedly press the EQ button to select the desired sound scenario. Select between the following sound scenarios:

Flat

Pop

Rock

Jazz

Classic
In FLAT mode the equalizer is deactivated.
8. Further Functions
8.1. Timer
Wake up with music at a preset time.
The system turns on in the previously selected mode (CD, RADIO, USB, SD or AUX-IN).
Example:
If you listened to music from your MP3 player this mode will be selected for the timer.
If you previously listened to music from your USB stick, please leave it connected to the system for the timer to turn it on!
⚠ Ensure that the current time is properly set.
Select the music mode (CD, RADIO, USB, SD or AUX).
If selecting "USB", "SD" or "AUX" do not disconnect the corresponding device.
-
Press the POWER button on the remote control to turn the system off.
-
Press the PROGRAM CLOCK ADJ button on the remote control or CLOCK ADJ. MEMORY on the system.
-
Press ◀ or ▶ on the remote control to set the hour.
-
Press the PROGRAM CLOCK ADJ button on the remote control or CLOCK ADJ. MEMORY on the system.
- Press ◀◀ or ▶◀ on the remote control to set the Minute.
- Press the PROGRAM CLOCK ADJ button on the remote control or CLOCK ADJ. MEMORY on the system.
- The display shows "DISABLE"; press ➤ to activate the timer.
- The display shows "ENABLE".
The settings are deleted if you disconnect the system from mains power supply and in case of power failure.
8.2. Sleep Timer
This system comes with a sleep timer to automatically turn it off after a preset time.
- Press the SLEEP button to set the minutes for the auto off timer.
| 90 | MIN |
| 80 | MIN |
| 70 | MIN |
| 60 | MIN |
| 50 | MIN |
| 40 | MIN | |
| 30 | MIN | |
| 20 | MIN | |
| 10 | MIN |
8.3. ID3 Tags for MP3 Tracks
The display can show text information.
- Press the ID3 DISPLAY button.
- The display shows ID3 ON.
8.3.1. Further Operation
Procedure
Operation
Deactivate ID3 tags Press the ID3 DISPLAY button.
ID3 OFF is displayed.
9. External Components
9.1. Connect Earphones
- Connect your earphones or headphones.
The speakers are muted if earphones are connected.
To avoid hearing problems do not use earphones or headphones for an extended period of time.
Increased sound pressure from earphones or headphones can cause hearing loss.
⚠️ See chapter 10 for further settings.
9.2. USB 2.0
Extend your system by connecting your MP3 player or USB stick.
Do not disconnect the device when “USB” mode is selected.
- Connect your MP3 player or USB stick.
- Press the FUNCTION button until "USB" is displayed.
- Press the PLAY button to start playback.
To avoid damage only disconnect the device after pressing the STOP button and selecting a different mode with the FUNCTION button.
9.3. SD and MMC memory card reader
Extend your system by inserting an SD or MMC memory card in the card reader.
Do not disconnect the device when “SD” mode is selected.
- Insert the SD or MMC card in the card reader.
- Press the FUNCTION button until "SD" is displayed.
- Press the PLAY button to start playback.
To avoid damage only disconnect the device after pressing the STOP button and selecting a different mode with the FUNCTION button.
⚠️ See chapter 10 for further settings.
9.4. AUX
Connect external audio devices, such as MP3 players, via their audio output to this system and play your songs via this system.
9.4.1. AUX input on front panel
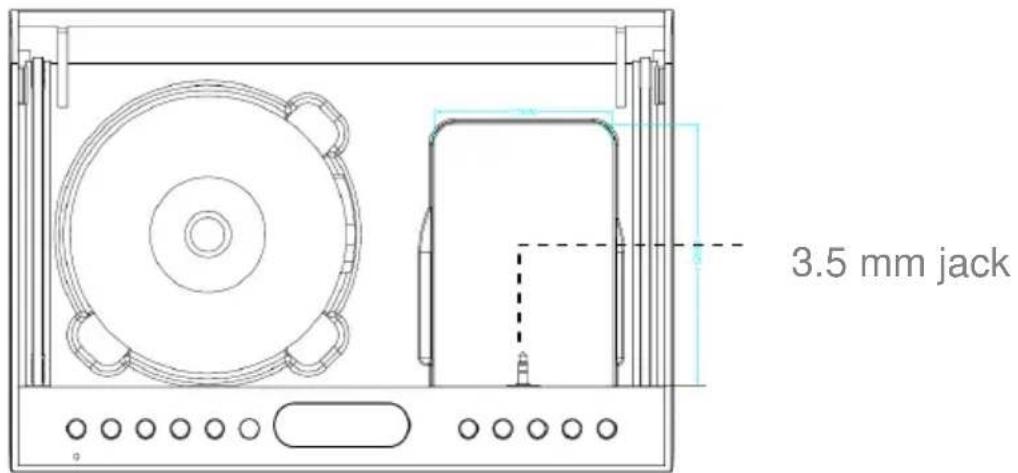
There is an AUX input on the front panel to connect your MP3 player or USB stick to the 3.5mm jack.
text_image
3.5 mm jack- Connect your MP3 player to the 3.5mm jack.
- Adjust the volume on the system.
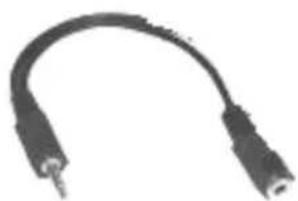
- Please use the supplied 5 cm AUX cable if your MP3 player fits to the jack but you cannot close the compartment.
- Connect the 5cm AUX cable to the jack. Connect the other side of the cable to your MP3 player.
The system plays the music from your MP3 player as long as its batteries last.
Charge your MP3 player regularly to use this function.
9.4.2. AUX input on rear panel
You can use the AUX input at the rear in case your MP3 player is too big for front connection.
Do not disconnect the device when “AUX” mode is selected.
-
Turn on your MP3 player and select your favorite song.
-
Press the FUNCTION button until "AUX" is displayed.
-
Press the PLAY button to start playback.
To avoid damage only disconnect the device after pressing the STOP button and selecting a different mode with the FUNCTION button.
⚠️ See chapter 10 for further settings.
10. Further Operation
This operation you have for CD playback and for external components (SD / MMC / USB).
| Procedure | Operation |
| Stop playback Press the STOP button. | |
| Pause | Press thePress again to resume playback. |
| Skip mode | Press ➤ or ◀ during playback or pause modes. |
| Skip to next folder Press the FOLDER button. | |
| Skip 10 tracks ahead | Press the Track+10 button. |
| Skip 10 tracks back | Press the Track-10 button. |
PLAY/
11. Troubleshooting
Contact the service hotline or use the contact form on the homepage in case of problems with the system that are not dealt with here.
| Malfunction Solution | |
| “No disc” | ■ Insert a CD.■ Insert a finalized CD-RW or CD-R.■ Insert the CD with the label up.■ Try another CD or clean the CD. |
| Bad reception | ■ Increase the distance to TV set or DVD player.■ Point the antenna in a different direction. |
| System does not respond. | ■ Disconnect from mains power supply and reconnect after a few seconds. |
| Bad playback quality. | ■ Ensure the speakers are properly connected.■ Check the CD for damages. |
| No sound. | ■ Ensure the speakers are properlyconnected.■ Increase the volume.■ Disconnect the earphones.■ Deactivate MUTE mode. |
| Remote control does not work. | ■ Decrease the distance to the system.■ Exchange the battery.■ Point the remote control towards the system's IR sensor. |
| No CD playback. | ■ Check your CD for damages or scratches.■ Insert the CD with the label up. |
| USB stick / SD memory card does not work | ■ Use a different USB stick or SD card to check the function. |
12. Warranty
This system comes with a 24-month warranty from the date of purchase.
Please keep your purchase documents!
In case of manufacturing or material defects the warranty consists of rectification of defects or exchange.
The warranty does not include damages or
malfunctions due to improper use
wear and tear
repairs by third parties
The warranty does not include
display damage
firmware update
accidental damage.
Repair does not extend the warranty period.
12.1. Warranty Procedure
In case of malfunctions, please contact:
Your dealer
Service hotline
- Austria: +43 0720 502671 – please dial with the zero!
○ Germany: +49 (0)180 166 66 264 621
○ Switzerland: +41 (0) 848 00 3322
Contact form – www.cmx-electronics.com
12.2. Warranty has expired
Please contact us by phone or contact form in case your warranty has expired. We will help you!
Please inform us about the following:
Unit type
Purchase date
Malfunction
12.3. Shipping the Unit
To ensure a quick response, please observe the following in case you send us the unit:
Send unit plus accessories
Send postage free to service center
Attach purchase documents
Attach filled-out warranty card
Error description
Example for error description
Wrong
Correct
Unit is defective Unit does not respond
Unit malfunctions Unit cannot be switched on
Sender information: Name, address, ZIP code, city and phone number and e-mail address
13. In the box
Please contact your dealer directly in case one of the accessories is missing or damaged.
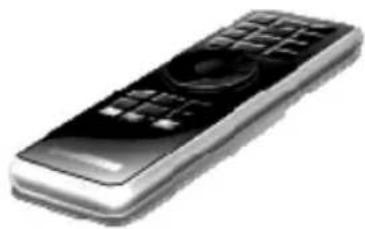
Images are representative pictures for reference only!
natural_image
Exterior view of a modern remote control with black and silver casing (no visible text or symbols)
remote control button cell
natural_image
Close-up of a black USB cable with two leads (no text or symbols visible)
text_image
CMX BASIL 2. Siena Cautavia and Europe, and Brazil 1. 2015-2016 • 2017-2018 • 2018-2019 • 2019-2020 • 2020-2021 • 2021-2022 • 2022-2023 • 2023-2024 • 2024-2025 • 2025-2026 • 2026-2027 • 2027-2028 • 2028-2029 • 2029-2030 • 2030-2031 • 2031-2032 • 2032-2033 • 2033-2034 • 2034-2035 • 2035-2036 • 2036-2037 • 2037-2038 • 2038-2039 • 2039-2040 • 2040-2041 • 2041-2042 • 2042-2043 • 2043-2044 • 2044-2045 • 2045-2046 • 2046-2047 • 2047-2048 • 2048-2049 • 2049-2050 • 2050-2051 • 2051-2052 • 2052-2053 • 2053-2054 • 2054-2055 • 2055-2056 • 2056-2057 • 2057-2058 • 2058-2059 • 2059-2060 • 2060-2061 • 2061-2062 • 2062-2063 • 2063-2064 • 2064-2065 • 2065-2066 • 2066-2067 • 2067-2068 • 2068-2069 • 2069-2070 • 2070-2071 • 2071-2072 • 2072-2073 • 2073-2074 • 2074-2075 • 2075-2076 • 2076-2077 • 2077-2078 • 2078-2079 • 2079-2080 • 2080-2081 • 2081-2082 • 2082-2083 • 2083-2084 • 2084-2085 • 2085-2086 • 2086-2087 • 2087-2088 • 2088-2089 • 2089-2090 • 2090-2091 • 2091-2092 • 2092-2093 • 2093-2094 • 2094-2095 • 2095-2096 • 2096-2097 • 2097-2098 • 2098-2099 • 215 cm AUX cable warranty card
text_image
DESIGN MINI SYSTEM DMS 7680 BENUTZERHANDBUCHuser manual
- Technical specifications
| CD Player | |
| Formats | Audio CD / Audio CD-R / Audio CD-RWMP3 CD / MP3 CD-R / MP3 CD-RW |
| Frequency range 100 Hz ~ 16 kHz | |
| S/N ratio 50 dB | |
| Radio | |
| Frequency bands AM / FM & FM Stereo | |
| Frequencies | AM 522 – 1620 kHzFM 87.5 – 108 MHz |
| Connectors | |
| Inputs | 2 x AUXUSB 2.0 |
| Outputs 3,5 mm headphoneSpeakers (left / right) | |
| Card reader | SD cardsMMC cards |
| Speakers | |
| Power output max. 400 Watts PMPO | |
Dimensions 122 x 202 x 93 mm
General
Power consumption 15 Watts
Mains power AC 230 V \~ 50 Hz
Dimensions 408 x 202 x 96 mm

text_image
cmx®CREATE MORE XITEMENT
www.cmx-electronics.com