
AudioMaster BT90 - Hi-Fi System TECHNISAT - Free user manual and instructions
Find the device manual for free AudioMaster BT90 TECHNISAT in PDF.


| Product Type | 2.1 Virtual Surround Sound System |
| Model | AudioMaster BT90 |
| Brand | TechniSat |
| Soundbar Speakers | Built-in stereo speakers |
| Subwoofer | Wireless (5.8 GHz) or wired, max 200W |
| Soundbar Power Consumption | 100-240V~ 50/60Hz, 150W |
| Subwoofer Power Consumption | 100-120V~ or 200-240V~ 50/60Hz, max 200W, standby <0.5W |
| Bluetooth Version | 2.0+EDR (or higher) |
| Bluetooth Codec | aptX |
| Audio Inputs | 1x Optical (Toslink), 1x Coaxial, 1x Analogue RCA (AUX) |
| Audio Outputs | 1x Wired Subwoofer (SUB OUT) |
| Remote Control | Includes CR2032 battery |
| Display | Multifunctional blue LED |
| Sound Modes | Stereo, Surround (virtual) |
| Equalizer Presets | 3 (EQ1 for wall-mount, EQ2 for free-standing, EQ3 for shelf) |
| Automatic Power (WAK) | Yes, responds to TV/DVD input signals |
| IR Learning Function | Yes |
| Mounting Options | Wall-mountable (soundbar) or free-standing |
| Cleaning | Dry cloth only; no harsh chemicals |
| Warranty | 24 months (legal) |
| Safety Certifications | CE, RoHS, Class II protection |
Frequently Asked Questions - AudioMaster BT90 TECHNISAT
User questions about AudioMaster BT90 TECHNISAT
0 question about this device. Answer the ones you know or ask your own.
Ask a new question about this device
Download the instructions for your Hi-Fi System in PDF format for free! Find your manual AudioMaster BT90 - TECHNISAT and take your electronic device back in hand. On this page are published all the documents necessary for the use of your device. AudioMaster BT90 by TECHNISAT.
USER MANUAL AudioMaster BT90 TECHNISAT
TechniSat
Deutsch
natural_image
Line drawing of a TV setup with monitor, control panel, and small box (no text or symbols)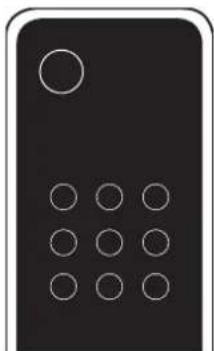
natural_image
Black rectangular device with a white circular button and nine circular holes arranged in a 3x3 grid (no text or symbols)TV-Fernbedienung
Deutsch
Datum: 01. September 2014
Name: Harald Brück
Welcome to the world of pure music
We are delighted that you have chosen a TechniSat loudspeaker. Our products combine high quality components with many years of development experience and meticulous production methods. In order to get the best out of your loudspeaker you need to observe a few points, as detailed in the Operating Instructions.
We hope you enjoy listening to pure music!
Contents
Safety advice...... Page 27
Unpacking...... Page 32
Installation Page 32
Breaking in Page 32
Setting up the remote control ......Page 33
Connection Terminal Page 33
Connection Page 34
Operation Page 35
Playback via Bluetooth® Technology...... Page 36
Display indications ...... Page 37
Extended functions ...... Page 38
Pairing your subwoofer (initial Installation) Page 40
IR learning function......Page 40
Automatic on and off (WAK mode) ...... Page 42
Troubleshooting Page 44
Declaration of conformity ...... Page 47
Further information......Page 48
Service note ...... Page 49
License information...... Page 51

The user is responsible for the proper operation of the AudioMaster BT 90. TechniSat cannot accept any responsibility for damages or accidents caused by inappropriate positioning or connection.
Safety advice

Please follow the safety advice when positioning and maintaining your AudioMaster BT 90.
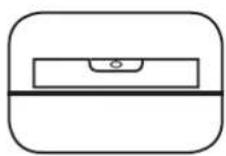
Choose a level surface

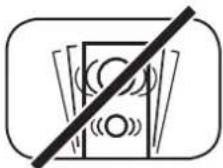
Avoid moisture Avoid vibrations
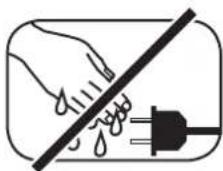
Never touch the power cable with wet hands

Do not discard in household rubbish

Avoid direct sunlight

Protect against extreme cold
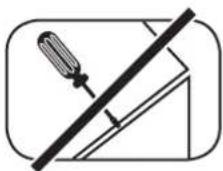
Do not open housing
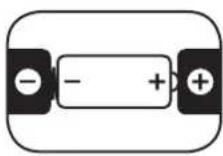
Ensure correct polarity for battery and remote operation
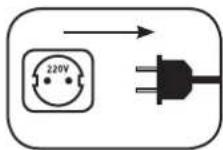
Ensure easy access to the mains plug

Keep away from heat sources
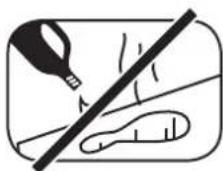
Do not use aggressive, alcohol-based or abrasive cleaning agents

Do not reach inside the speaker
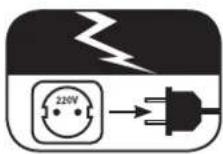
Unplug the device during thunderstorms

In case of overload turn the volume down
English
Important Safety Instructions

Notices
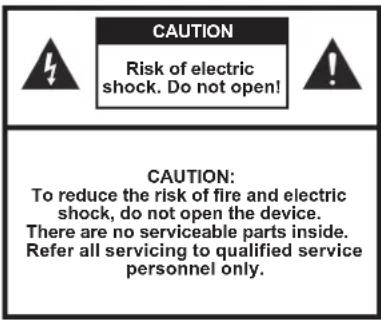
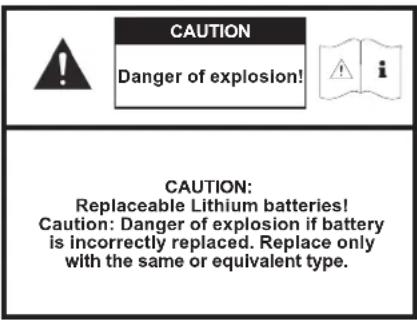

Read and follow all instructions. Keep these instructions. Heed all warnings.
Use this apparatus only in moderate climates (not in tropical climates).
Indoor use only. Do not use outdoors or in humid rooms.
To reduce the risk of fire and electric shock, do not expose this apparatus to rain or moisture.
Do not use this apparatus near water.
The apparatus shall not be exposed to dripping or splashing.
Strong fluctuations in temperature lead to condensation (water droplets) forming inside the apparatus. Wait until the moisture has evaporated before starting up the apparatus (min. 3 hours).
Objects filled with liquids (such as vases) shall not be placed on the apparatus.
No naked flame source, such as lighted candles, should be placed on or beside the apparatus.
| Do not install the apparatus near any heat sources such as radiators, heat registers, stoves or other apparatus (incl. amplifiers) that produce heat. |
| Prevent exposure to direct sunlight. |
| Observe a free space of at least 5cm around the apparatus. |
| Do never defeat the safety purpose of a polarized or ground plug: A polarized plug has two blades with one wider than the other. The wide blade is provided for your safety. When the provided plug doesn't fit into your outlet, consult an electrician for replacement of the obsolete outlet. |
| To prevent electric shock, do not use the plug with an extension cord, receptacle or other outlet unless the blades can be fully inserted to prevent blade exposure. |
| Never touch signal- and power cords with wet hands. |
| Protect the power cord from being walked on or pinched particularly at plug, convenience receptacles and the point where they exit from the apparatus. |
| Where the mains plug or an appliance coupler is used as the disconnect device, the mains plug of the power cord or appliance coupler shall be remain readily operable. |
| Unplug this apparatus during lightning storms or when unused for long periods of time. |
| To completely disconnect this apparatus from the mains, disconnect the supply cord plug from the receptacle. |
| Power down the apparatus before connecting or disconnecting any cable. |
| Always pull the plugs and not the cables. |
| Install this apparatus in accordance with the manufacturer's instructions. |
| Always choose a level surface. The apparatus has to be in perfect vertical alignment. |
English
Important Safety Instructions

Notices
Do not use force on operating elements, connections and cables.
The apparatus may only be operated with the voltage and frequency specified on the apparatus or the name plate.
Do not insert any objects or body parts into the apparatus openings. Live components inside the enclosure could get touched and/or damaged. This could lead to short circuiting, electric shock and fire.
Only use attachments and accessories specified by the manufacturer and / or provided with the apparatus.
Use only with a cart, stand, tripod, bracket, or table specified by the manufacturer, or sold with the apparatus. When a cart is used, use caution when moving the cart/apparatus combination to avoid injury from tip-over.

Clean the apparatus only with a clean, dry cloth.
Do not use aggressive, alcohol-based or abrasive cleaning agents.
To reduce the risk of electric shock, do not open the housing! There are no serviceable parts inside.
Refer all servicing to qualified service personnel. Servicing is required when the apparatus has been damaged in any way, such as power supply cord or plug is damaged, liquid has been spilled or objects have fallen into the apparatus, the apparatus has been exposed to rain or moisture, does not operate normally, or has been dropped.
Do not make any modification to the apparatus or the accessory. Unauthorized alterations may affect the safety, regulatory compliance or the system performance. In this case, the operating licence/warranty can expire.
Turn down the volume level immediately if sound distortions, such as unnatural knocking, beating or high-frequency clicking can be heard.
To prevent possible hearing damage, do not listen at high volume levels for long periods.

| Keep new and used batteries away from children. If the battery compartment does not close securely, stop using the product and keep it away from children. | |
| The remote control supplied with this product contains a coin/button cell battery. If the coin/button cell battery is swallowed, it can cause severe internal burns in just 2 hours and can lead to death! | |
| If you think batteries might have been swallowed or placed inside any part of the body, seek immediate medical attention. | |
| Batteries must be inserted correctly, as shown on the polarity imprint. Incorrectly replaced batteries might cause damage. | |
| Please keep the environmental aspects of battery disposal in mind. Batteries must be disposed of at a battery collection point. | |
| Batteries shall not be exposed to excessive heat such as sunshine, fire or the like. | |
| Only use batteries or rechargeable batteries specified for this apparatus. | |
| The batteries supplied are not rechargeable batteries and may therefore not be recharged. | |
| The apparatus and/or the accessory bag may contain small parts that may be a choking hazard. Therefore not suitable for children under age 3. |  |
| This symbol is intended to alert the user to the presence of uninsulated dangerous voltage within the product's enclosure that may be of sufficient magnitude to constitute risk of fire and electric shock. |  |
| This symbol is intended to alert the user to the presence of important operating and maintenance instructions in the literature accompanying this product. | [GKST] |
| This symbol denotes equipment with Class II Protection Rating. These devices are deemed to be fully protected against the risk of electric shock during normal use by means of double or reinforced insulation, and therefore require no earth conductor. |  |
English
Unpacking
Unpack the box carefully and check that all the following parts are present:
• 1x AudioMaster BT 90 – Soundbar
• 1x AudioMaster BT 90 – Subwoofer
• 1x Remote control inc. battery
- 2x Mains cable
• 1x Optical digital audio cable
• 1x Stereo RCA-cable
• 1x Digital RCA-cable
Installation
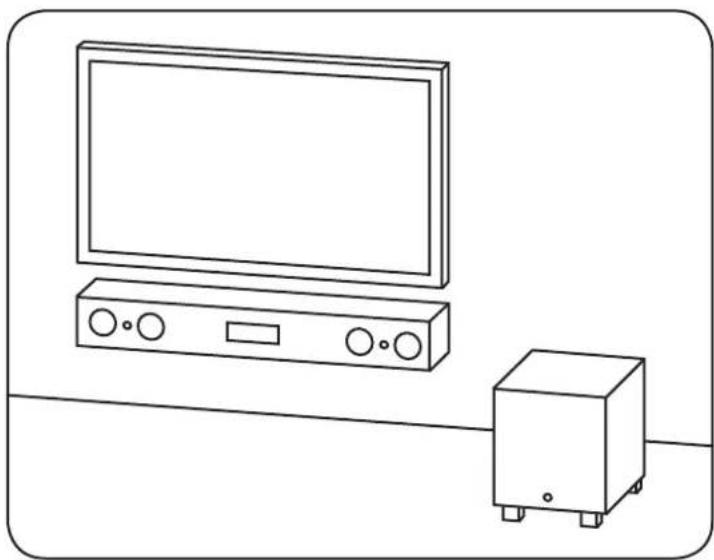
In case of wall-mounting the Soundbar should be positioned below the flat-screen TV. In connection with a free-standing flat-screen TV it should be positioned in front of the flat-screen TV. The subwoofer can be set up anywhere in the room. However, the distance between the Soundbar and the sub - woofer should not exceed 10 m.
Breaking in
Maximum sound quality requires a breaking-in time of 15 - 20 operating hours.
- During this time operate the loudspeaker at normal volume
- Avoid high noise levels
- Listen to a variety of music
natural_image
Line drawing of a TV setup with monitor, control panel, and small box (no text or symbols)Setting up the remote control
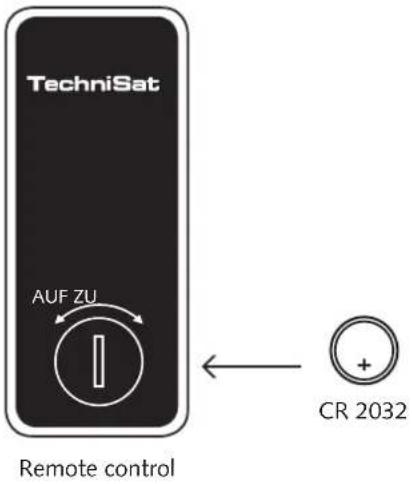
The remote control comes with a battery already installed. Simply remove the protective film to activate. When replacing the battery ensure that it is correctly inserted according to the polarity markings (+/-). Only use the battery specified for this system (CR 2032).
Note
The battery provided is designed for test use and may therefore have a shorter lifespan.
Connection Terminal
flowchart
graph TD
    A["4"] --> B["DVD DIGITAL COAXIAL"]
    B --> C["L"]
    B --> D["R"]
    C --> E["SUB OUT"]
    D --> F["5"]
    G["TV DIGITAL OPTICAL"] --> H["3"]
    I["Service"] --> J["100-240V-50/60Hz 150W"]
    K["6"] --> L["Service"]
Soundbar
![SUB IN [WIRED] 7 SUB IN - MODE WIRELESS [POWER AUTO] WIRED [POWER AUTO] 8 SERVICE 6 100-120V~ or 200-240V~ 50/60Hz MAX. 200W STANDBY <0.5W 1](/content/2026/05/770672/images/bf498ed609e7c4fb4bab1825a0baab01c45c00ef578e492665aa81c532eabb28.jpg)
Connections
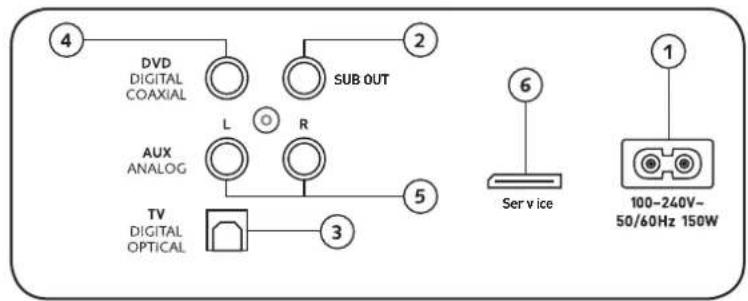
1 Power inlet
2 Output - ext. subwoofer (optional)
B Input - TV (optical)
4 Input - DVD (coaxial)
5 Input - AUX (analogue)
6 Jack service (TechniSat)
7 Input - SUB IN (wired)
8 Input selector switch (wireless/wired)
Subwoofer
English
Connection
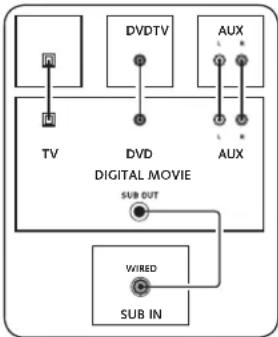
Please ensure that all electrical components are switched off before connecting. Your AudioMaster BT 90 has three optional inputs. In principle it is enough to connect one of these inputs to your TV and all further devices to your TV. To achieve the best possible sound we recommend that you connect your satellite receiver, Blu-Ray or DVD player directly to the AudioMaster BT 90. The following options are possible, depending on the type and fittings of the source used:
TV - Digital input (optical)
Modern TV devices have an optical audio output (Toslink). Connect this with the input marked "TV" on the AudioMaster BT 90. This connection guarantees optimal signal transmission and best sound quality.
DVD - Digital input (coaxial)
To transmit the sound signal connect the digital coaxial output of your Blu-Ray or DVD player with the jack marked "DVD" on the AudioMaster BT 90. To transmit the picture signal your player must also be connected to the TV. The input marked "DVD" on the AudioMaster BT 90 can be selected if your TV does not have an optical output.
AUX – Analogue input
If your TV only has an audio output marked "Pre-Out" then connect it using the shielded stereo RCA cable plugged into the analogue input on the AudioMaster BT 90 marked "AUX". Otherwise this input can be used to connect video recorders or game consoles.
SUB - WIRELESS
In wireless operation the Soundbar and the subwoofer are connected via a high-end transmission path. A frequency of 5.8 GHz guarantees robust, loss-free data transmission. Once the Soundbar has been switched on the subwoofer is activated and the radio connection made automatically. The input selector switch of the subwoofer needs to be set to "wireless" (factory setting). When the Soundbar is switched off, the LED on the subwoofer starts to flash red and after a minute the subwoofer also switches off.
flowchart
graph TD
    TV["TV"] --> DVD["DVD"]
    DVD --> DigitalMovie["DIGITAL MOVIE"]
    DigitalMovie --> SubOut["SUB OUT"]
    DigitalMovie --> SubIn["SUB IN"]
    SubOut --> Wired["WIRED"]
    SubIn --> Wired
    DigitalMovie --> Aux1["AUX"]
    DigitalMovie --> Aux2["AUX"]
    DigitalMovie --> Aux3["AUX"]
SUB OUT - WIRED
You can use this output to connect the wireless subwoofer of the AudioMaster BT 90 via a cable. The input selector switch on the subwoofer needs to be set to "wired, Power on" if you want the subwoofer to stay permanently switched on or "wired, Power auto" if it should switch itself on or off with or just after the Soundbar. The SUB OUT output is not active in the factory setting and needs to be activated using the remote control. See Page 36 "Extended functions".
Operation
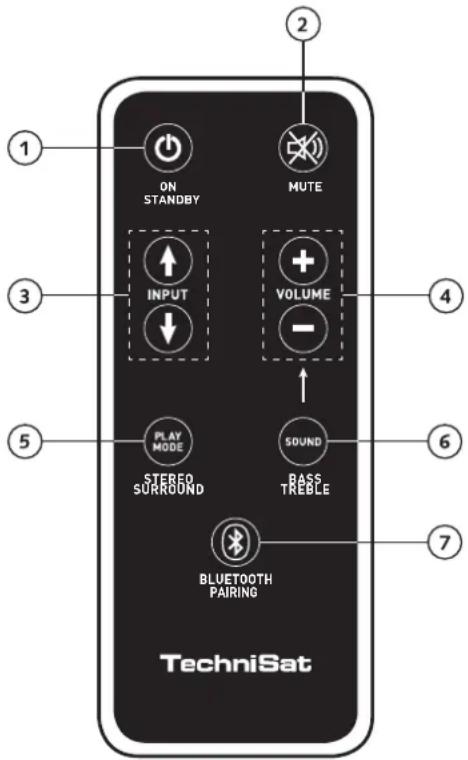
1 Power
On – LED shines green
Standby – LED shines red
2 Mute
3 Input
4 Volume
5 Play Mode
Stereo - for music
Surround – virtual surround sound for home cinema
6 Sound
Bass – Adjustment via Volume control (+6... -9 dB)
Treble – Adjustment via Volume control (+6... -6 dB)
7 Bluetooth® Pairing
Connection with a Bluetooth ^® Wireless Technology enabled source
Memory Function
After the AudioMaster BT 90 has been temporarily disconnected from the mains it automatically returns to the last mode selected. All settings (e.g. volume) remain in place.
English
Remote control
English
Playback via Bluetooth® Technology
Registration requirements
- The Bluetooth® function must be activated on the mobile end device
- The mobile end device must support Bluetooth® standard 2.0 at least
- The mobile end device must be within range of the AudioMaster BT 90 (max. 10 m)
Registration process
- Select BT input
- Press the "Bluetooth® Pairing" button
- BTP appears on the display
- You now have 30 seconds to register your mobile end device
- Start the search run on your mobile end device
- Select "AudioMaster BT 90" as the playback device
- Once confirmed, the connection will be made automatically and will appear as CON in the display
- If the connection fails the message FRI will appear
- If the mobile end device requires an access code enter 0000
-If 015 appears in the display, your mobile end device is out of range or logged out

BT



BTP

- AudioMaster BT 90 -

CONFRI
Operating a mobile end device
- The device most recently connected to the AudioMaster BT 90 connects automatically when the Bluetooth®-function is activated and the input for Bluetooth® playback has been selected. In this case the message CON will appear.
- Start the playback of a medium on your mobile end device and the sound will automatically be generated by the AudioMaster BT 90.
Note: The AudioMaster BT 90 can control up to three Bluetooth ^® devices.
Display indications
The AudioMaster BT 90 has a multifunctional display that lights up blue for a few 5 seconds in response to a remote control command. The possible readouts and their meanings are shown below. The standby mode of the AudioMaster BT 90 is indicated by a red LED light. When your AudioMaster BT 90 is in operation this LED is green. If there is no connection between the subwoofer and the Soundbar the LED light will flash red.
Input

Soundmode

Playmode

Bluetooth

English
Extended functions
The menu for extended sound functions offers you the chance to correct out-of-synch play-back, to activate the output for a wired external subwoofer, to adjust the playback to suit the location and to switch the Dolby function "Dynamic Range Compression" on or off.
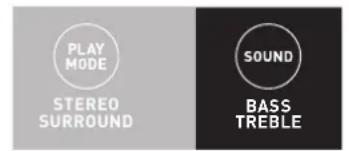
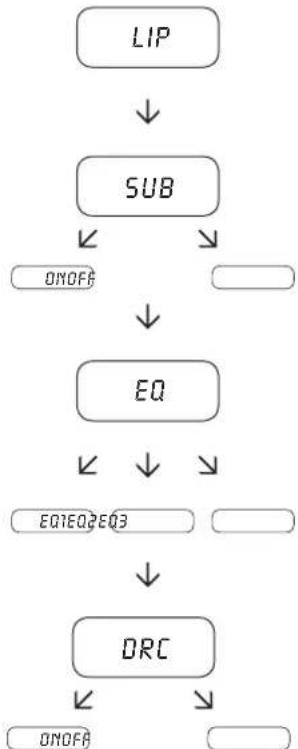
If you press and hold the key marked "Sound" on the remote control for longer than 3 seconds you will enter the "Extended functions" menu and the display LIP will appear on the Soundbar.
You can now use the Volume +/- keys to delay the playback in 10 ms steps.
Press the "Sound" key briefly once more and the display SUB will appear.
The Volume +/- keys can also be used to switch the output for a wired operation of the subwoofer on or off. In the "ON" position the SUB OUT output (wired) is active while in the "OFF" position it uses the wireless connection.
Note: If the subwoofer is supposed to be operating via transmission path (wireless) at a later time again, the SUB OUT needs to be deactivated.
English
Press the "Sound" key again briefly one more time and the display EQ will appear.
Now use the Volume +/- keys to choose between three pre-set equalizer settings to adjust the playback to suit the location.
EQ1 for a wall-mounting of the AudioMaster BT 90 below the flat-screen TV (factory setting).
EQ2 for a set-up where the AudioMaster BT 90 is positioned in front of a flat-screen TV.
EQ3 for a set-up where the AudioMaster BT 90 is in a rack or a shelf.
When the "Sound" key is pressed again the display changes to ORC.
"Dynamic Range Compression" is a setting option created by Dolby Laboratories. When activated, the dynamic range of Dolby encoded data streams can be automatically reduced, which also reduces differences in volume. This makes it possible to enhance quiet tones and suppress loud ones.
The Volume +/- keys can be used to switch the ORC function on or off.
Exit menu
Press and hold the "Sound" key again for longer than 3 seconds to exit the "Extended functions" menu.
If the Soundbar does not receive any input instruction from the remote control within a period of 30 seconds the menu navigation returns automatically to normal mode.
flowchart
graph TD
    A["LIP"] --> B["SUB"]
    B --> C["EQ"]
    C --> D["DRC"]
    D --> E["ON/OFF"]
    B --> F["ON/OFF"]
    C --> G["EQ1EQ2EQ3"]
    D --> H["ON/OFF"]
©
©
English
Automatic on and off (WAK mode)
The AudioMaster BT 90 has a mode (WAK mode) in which the device responds to signals at the TV and DVD input.
The AudioMaster BT 90 automatically switches off as soon as there is no longer a signal at the TV or DVD input, e.g. when the connected TV has been switched off. The AudioMaster BT 90 switches off with a delay of approx. 30 seconds.
If a signal is detected at the last selected TV input, e.g. because a connected TV device is switched on, the AudioMaster BT 90 automatically switches on.
However, the AudioMaster BT 90 does not switch on automatically by turning on the TV-set, when the DVD input has been selected before the automatic turning off and vice versa.
Enabling/disabling WAK mode:
1 Press and hold the MUTE button from the switched on AudioMaster BT 90 until WAK is shown on the display.
2 Press the +/- volume buttons to switch the function on or off. ____ or OFFON is shown on the display.
3 Press and hold the MUTE button again to exit the menu.
Please note the following when WAK mode is enabled:
When WAK mode is enabled, the AudioMaster BT 90 is in an extended standby mode so that it can respond to signals at the TV or DVD input. If the AudioMaster BT 90 is switched into standby using the supplied remote control, it no longer responds to a signal at the inputs. To be able to switch on and off automatically, the AudioMaster BT 90 has to be switched on again first using the supplied remote control.
Please also note that the "Sound" button on the TV's original TechniSat remote control does not work with the AudioMaster BT 90 when WAK mode is enabled. Please see the applicable section of the instruction manual for your TechniSat TV for further details.
Since the AudioMaster BT 90 is in an enhanced Standby mode while activating the WAK mode, the power requirement is typically greater than the power requirement in the normal Standby mode.
English
Troubleshooting
Here is an overview of the most common problems. If you have any further questions please contact your TechniSat dealer, call our Service Hotline on +49 (0) 3925/9220-1800 or send us an e-mail at www.technisat.de/kontakt (contact form)
| Problem Possible cause | Solution | |
| Soundbar does not turn on and the LED does not light up. | Power cable not connected to the power outlet and/or Soundbar. | Check connection. |
| Subwoofer does not turn on and the LED does not light up. | Power cable not connected to the power outlet and/or subwoofer. | Check connection. |
| Subwoofer LED flashes red. | No wireless transmission to Soundbar. Too far apart. | Reduce the distance. Change the installation position. |
| Subwoofer not connected to Soundbar. See Chapter “Registering your Subwoofer”. | ||
| SUB OUT on Soundbar set to “ON”. Transmission path deactivated. | Switch SUB OUT in extended menu to “OFF”. | |
| Subwoofer does not play, LED green. | Input selector switch set to “WIRED”. | Change input selector switch to “WIRELESS”. |
| Soundbar does not respond to remote control. | The battery is empty. Replace battery, observe correct polarity at insertion. | |
| Sound reproduction too soft. | Volume of AudioMaster BT 90 or source device set too low. | Increase the volume using the “Volume” button. Increase the volume of the source device. |
English
| Problem Possible cause | Solution | |
| No sound reproduction. | Source device not producing any signal. Digital output on the source device not activated.Volume control is set to zero. | Please refer to device instructions and activate digital output resp. increase volume level. |
| Cable not correctly connected / faulty cable. Check cable connection, maybe replace the RCA cable. | ||
| AudioMaster BT 90 hums. | Signal lines from source device to AudioMaster BT too long. | Use a shorter signal cable. |
| Used signal cable is not shielded or the shielding has been damaged (defective). | Exchange signal cable by a shielded one. | |
| Ground loop (ripple pickup) generated. A ground loop can be generated when two or more devices connected via a signal line (cinch) are plugged into separate sockets (e.g. amplifier and computer). Plug all devices connected to the AudioMaster BT 90 into a multiple socket output using safety plugs. | ||
| Another piece of equipment on the same circuit has no interference suppression (e.g. fridge). | Switch off possible sources of interference to test. Unplug the device concerned to see if the humming noise disappears or connect the source of interference to a different circuit (L1, L2 or L3). (Where necessary take advice from your electrician.) Insert a special “ferrite common mode filter” (available from specialist retailers) between the amplifier and the AudioMaster BT 90 to eliminate the humming. Turn the power plug round to reduce the so-called ripple voltage (particularly important if the source device is not earthed). | |
English
| Problem Possible cause | Solution | |
| No playback via Bluetooth® wireless technology. | There is no connection between the AudioMaster BT 90 and the mobile end device. | Connect your mobile end device as described on page 34. |
| The mobile end device is paired but no playback takes place. | The mobile end device must be connected again. | |
| You are out of range. | ||
| Set the volume on the mobile end device to maximum. | ||
| Increase the volume of the AudioMaster BT 90. | ||
| Ensure that interference sources like a WLAN router or laptop are not set up in direct proximity of the AudioMaster BT 90. | ||
| Concurrent operation of WLAN and Bluetooth® from a mobile end device is not possible without interferences in most cases (Disable WLAN at your mobile device). |
EU – Declaration of Conformity
CE marking
We, Manufacturer / Importer
TechniSat Digital GmbH · TechniPark · 54550 Daun · Germany
TechniSat
confirm and declare under our sole responsibility that the product
AudioMaster BT 90
(2.1 Virtual-Surroundsound System with Wireless Subwoofer (5.8 GHz), 3 Signal Inputs, Bluetooth ^® functionality (2.4 GHz) and one Subwoofer Output, internal Universal Mains Power Supply and Infrared Remote Control)
is in conformity with the directives of the European Parliament and of the Council
Directive 1999/5/EC (Radio and Telecommunications Terminal Equipment)
Directive 2006/95/EC (Low Voltage Directive)
Directive 2011/65/EU (Restriction of the use of certain Hazardous Substances)
Directive 2002/96/EC (Waste of Electric and Electronic Equipment)
Directive 2009/125/EC (Ecodesign requirements for Energy-related Products)
Operation is permitted within all countries of the European Union.
A complete Declaration of Conformity is placed at: www.technisat.com/audiomasterbt
Authorized Signature:

Date: September 01 ^st 2014
Name: Harald Brück
Function: Head of technical department
English
Further Information
Information for "normal use"
The AudioMaster BT 90 is designed for indoor use and must not be used outdoors or in wet conditions. The devices must not be modified or altered in any way. Connect the AudioMaster BT 90 up as described in the instructions and pay attention to the warning notices. Only operate the device with the mains voltage and frequency specified on the rating plate.
Information about environmentally friendly operation
(Use the stand-by function to minimise electricity usage and operating costs)
To reduce the electricity usage of the device when not in use press the "On/Standby" button. This saves electricity.
For a complete Declaration of Conformity please refer to: http://www.technisat.de/audiomasterbt

All electrical and electronic equipment sold in the European Union must carry a CE mark to show that the device in question complies with the legal requirements (e.g. electromagnetic compatibility or safety requirements).

In line with the regulations governing the disposal of old electrical and electronic equipment, all devices that carry this symbol should not be disposed of in general household waste. Please contact your local recycling centre or the local authorities to find out about free disposal where applicable. This serves to protect the environment and public health as well as saving (scarce) resources through recycling.
DEU SERVICEHINWEISE
This product has been quality-tested and is covered by the legally required warranty period of 24 months from the date of purchase. Please keep the receipt in a safe place as proof of purchase.
Attention! Please contact our Technical Hotline first if you encounter a problem with this device: Mon. - Fri. 8am - 8pm, Tel. 03925/92201800. If the device needs to be sent to us for any reason, please only use the following address:
Manufactured under license from Dolby Laboratories. Dolby and the double-D symbol are registered trademarks of Dolby Laboratories.

Bluetooth
Bluetooth®:
The Bluetooth® word mark and logos are registered trademarks owned by Bluetooth SIG, Inc. and any use of such marks by TechniSat is under license. Other trademarks and trade names are those of their respective owners.

dts TruSurround
For DTS patents, see http://patents.dts.com.Manufactured under license from DTS Licensing Limited. DTS, the Symbol, & DTS and the Symbol together are registered trademarks, and DTS TruSurround is a trademark of DTS, Inc. © DTS, Inc. All Rights Reserved.

aptX®:
The aptX ^® software is copyright CSR plc or its group companies. All rights reserved. The aptX ^® mark and the aptX logo are trade marks of CSR plc or one of its group companies and may be registered in one or more jurisdictions.

dts Digital Surround
For DTS patents, see http://patents.dts.com. Manufactured under license from DTS Licensing Limited. DTS, the Symbol, & DTS and the Symbol together are registered trademarks, and DTS Digital Surround is a trademark of DTS, Inc. © DTS, Inc. All Rights Reserved.
TechniSat is a registered trademark owned by TechniSat Digital GmbH Postfach 560 54541 Daun www.technisat.de
TechniSat
www.technisat.de
RUX。
- Deutsch
- Welcome to the world of pure music
- Contents
- Safety advice
- English
- Important Safety Instructions
- Notices
- Unpacking
- Installation
- Breaking in
- Setting up the remote control
- Note
- Connection Terminal
- Connections
- Connection
- TV - Digital input (optical)
- DVD - Digital input (coaxial)
- AUX – Analogue input
- SUB - WIRELESS
- SUB OUT - WIRED
- Operation
- Power
- Mute
- Input
- Volume
- Play Mode
- Sound
- Bluetooth® Pairing
- Memory Function
- Playback via Bluetooth® Technology
- Registration requirements
- Registration process
- Operating a mobile end device
- Display indications
- Extended functions
- Exit menu
- Automatic on and off (WAK mode)
- Enabling/disabling WAK mode:
- Please note the following when WAK mode is enabled:
- Troubleshooting
- EU – Declaration of Conformity
- TechniSat
- AudioMaster BT 90
- Further Information
- Information for "normal use"
- Information about environmentally friendly operation
- (Use the stand-by function to minimise electricity usage and operating costs)
- DEU SERVICEHINWEISE
- Bluetooth®:
- aptX®:
Brand : TECHNISAT
Model : AudioMaster BT90
Category : Hi-Fi System