
MC-DX40 - Hi-Fi System TEAC - Free user manual and instructions
Find the device manual for free MC-DX40 TEAC in PDF.


| Product Type | Hi-Fi System with CD/MP3/WMA playback, USB, FM/AM radio, AUX input |
| Brand | TEAC |
| Model | MC-DX40 |
| Amplifier Output Power (L+R) | 10 W + 10 W |
| Amplifier Output Power (Subwoofer) | 15 W |
| Frequency Response (Amplifier) | 50 Hz - 20,000 Hz |
| CD Player Frequency Response | 20 Hz - 20,000 Hz (±1 dB) |
| CD Player Signal-to-Noise Ratio | 55 dB |
| Radio FM Frequency Range | 87.50 - 108.00 MHz (50 kHz step) |
| Radio AM Frequency Range | 522 - 1,629 kHz (9 kHz step) |
| Speaker Type | Full range flat type, 4 ohms |
| Subwoofer Impedance | 8 ohms |
| Main Unit Dimensions (W x H x D) | 247 x 169.5 x 83 mm |
| Speaker Dimensions (each, W x H x D) | 210 x 169.5 x 85 mm |
| Subwoofer Dimensions (W x H x D) | 170 x 220 x 325 mm |
| Main Unit Weight (Net) | 1.3 kg |
| Speaker Weight (each) | 0.6 kg |
| Subwoofer Weight (Net) | 4.8 kg |
| Power Requirements | 230 V AC, 50 Hz |
| Power Consumption | 74 W |
| Supported Discs | CD-DA, CD-R/RW (finalized), MP3/WMA CDs |
| USB Compatibility | USB 1.1 Full Speed, FAT16/32, up to 500 files |
| Remote Control Battery | CR2025 (3V) |
| Wall Mountable | Main unit and speakers (brackets included) |
| Special Features | RDS, PTY search, sleep timer, programmable playback, shuffle, repeat, bass/treble control, headphone jack |
Frequently Asked Questions - MC-DX40 TEAC
User questions about MC-DX40 TEAC
0 question about this device. Answer the ones you know or ask your own.
Ask a new question about this device
Download the instructions for your Hi-Fi System in PDF format for free! Find your manual MC-DX40 - TEAC and take your electronic device back in hand. On this page are published all the documents necessary for the use of your device. MC-DX40 by TEAC.
USER MANUAL MC-DX40 TEAC
The lightning flash with arrowhead symbol, within an equilateral triangle, is intended to alert the user to the presence of uninsulated “dangerous voltage” within the product’s enclosure that may be of sufficient magnitude to constitute a risk of electric shock to persons.

The exclamation point within an equilateral triangle is intended to alert the user to the presence of important operating and maintenance (servicing) instructions in the literature accompanying the appliance.
IMPORTANT SAFETY INSTRUCTIONS
1) Read these instructions.
2) Keep these instructions.
3) Heed all warnings.
4) Follow all instructions.
5) Do not use this apparatus near water.
6) Clean only with dry cloth.
7) Do not block any ventilation openings. Install in accordance with the manufacturer's instructions.
8) Do not install near any heat sources such as radiators, heat registers, stoves, or other apparatus (including amplifiers) that produce heat.
9) Do not defeat the safety purpose of the polarized or grounding-type plug. A polarized plug has two blades with one wider than the other. A grounding type plug has two blades and a third grounding prong. The wide blade or the third prong are provided for your safety. If the provided plug does not fit into your outlet, consult an electrician for replacement of the obsolete outlet.
10) Protect the power cord from being walked on or pinched particularly at plugs, convenience receptacles, and the point where they exit from the apparatus.
11) Only use attachments/accessories specified by the manufacturer.
12) Use only with the cart, stand, tripod, bracket, or table specified by the manufacturer, or sold with the apparatus. When a cart is used, use caution when moving the cart/apparatus combination to avoid injury from tip-over.
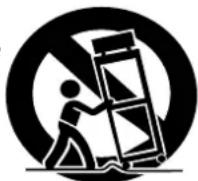
13) Unplug this apparatus during lightning storms or when unused for long periods of time.
14) Refer all servicing to qualified service personnel. Servicing is required when the apparatus has been damaged in any way, such as power-supply cord or plug is damaged, liquid has been spilled or objects have fallen into the apparatus, the apparatus has been exposed to rain or moisture, does not operate normally, or has been dropped.
- Do not expose this apparatus to drips or splashes.
- Do not place any objects filled with liquids, such as vases, on the apparatus.
- Do not install this apparatus in a confined space such as a book case or similar unit.
- The apparatus draws nominal non-operating power from the AC outlet with its POWER switch in the off position.
- The apparatus should be located close enough to the AC outlet so that you can easily grasp the power cord plug at any time.
- The main plug is used as the disconnect device, the disconnect device shall remain readily operable.
- An apparatus with Class I construction shall be connected to an AC outlet with a protective grounding connection.
- Batteries (battery pack or batteries installed) shall not be exposed to excessive heat such as sunshine, fire or the like.
- Excessive sound pressure from earphones and headphones can cause hearing loss.
WARNING: TO PREVENT FIRE OR SHOCK HAZARD, DO NOT EXPOSE THIS APPLIANCE TO RAIN OR MOISTURE.
CAUTION
● DO NOT REMOVE THE EXTERNAL CASES OR CABINETS TO EXPOSE THE ELECTRONICS. NO USER SERVICEABLE PARTS ARE WITHIN!
- IF YOU ARE EXPERIENCING PROBLEMS WITH THIS PRODUCT, CONTACT TEAC FOR A SERVICE REFERRAL. DO NOT USE THE PRODUCT UNTIL IT HAS BEEN REPAIRED.
- USE OF CONTROLS OR ADJUSTMENTS OR PERFORMANCE OF PROCEDURES OTHER THAN THOSE SPECIFIED HEREIN MAY RESULT IN HAZARDOUS RADIATION EXPOSURE.
Contents
Thank you for choosing TEAC. Read this manual carefully to get the best performance from this unit.
IMPORTANT SAFETY INSTRUCTIONS....2
Contents 4
Before Using the Unit 4
Speaker Installation 5
Connection....6
Discs 8
MP3 and WMA....9
Remote Control Unit 9
Unit Functions....10
Basic Operation....12
CD/MP3
Listening to a disc....14
Playback USB device 15
Basic Playback 16
Folder Search (MP3/WMA only)....17
Shuffle Playback....17
Programmed Playback 18
Repeat Playback 19
Radio
Listening to the Radio....20
Preset Tuning....21
RDS....22
RDS (PTY Search)....22
PTY 23
AUX
Listening to an External Source 23
Setting the Clock....24
Setting the Timer 25
Specifications....27
Troubleshooting....28
Before Using the Unit
Read this before operation
- As the unit may become warm during operation, always leave sufficient space around the unit for ventilation.
Do not install the subwoofer in a confined space such as a case or similar. - The voltage supplied to the unit should match the voltage as printed on the rear panel. If you are in any doubt regarding this matter, consult an electrician.
- Choose the installation location of your unit carefully. Avoid placing it in direct sunlight or close to a source of heat. Avoid locations subject to vibrations and excessive dust, heat, cold or moisture.
- Do not place the unit on any other electronic components.
- Do not open the cabinet as this might result in damage to the circuitry or electrical shock. If a foreign object should fall into the unit, contact your dealer or service company as soon as possible.
- When removing the power plug from a wall outlet, always pull directly on the plug. Do not pull on the line cord.
- To keep the laser pickup clean, do not touch it and always close the CD door after each use.
- Do not attempt to clean the unit with chemical solvents as this might damage the finish. Use a clean, dry, lint-free cloth.
- Keep this manual in a safe place for future reference.
CAUTION: DO NOT MOVE THE UNIT DURING PLAYBACK
During playback, the disc rotates at high speeds. Do NOT lift or move the unit during playback. Doing so may damage the disc or the unit.
WHEN MOVING THIS UNIT
When changing places of installation or packing the unit for moving, be sure to remove the disc. Moving this unit with the disc loaded may result in malfunction or other damage.
Speaker Installation
You can mount the main unit and/or the left and right speakers on a wall. Or you can stand the speakers in vertical position.
Precautions
- Be aware that the length of the cables are approximately 2 m. Do not attempt to mount the main unit and the speakers too far from the subwoofer.
- To hook the speakers on the wall, drill holes into solid wall support, such as wooden frame or concrete wall.
- TEAC supplies the wall mounting brackets as a convenience to the product owner. Consult your local building codes and exercise all necessary caution when mounting these brackets. If you are unsure how to use the supplied brackets, consult with a local tradesmen or building supply expert.
To hook on the wall
- Fix the metal brackets on the rear panel of the speakers using the supplied screws.
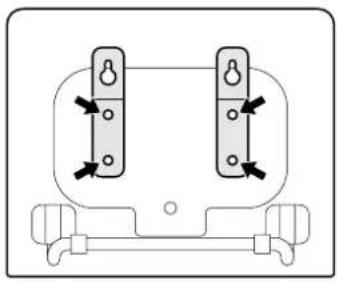
natural_image
Pure electrical circuit lines without any symbols- Use the supplied guide sheet to mark the exact drilling points on the wall.
- Drill holes in the wall at the marked points.
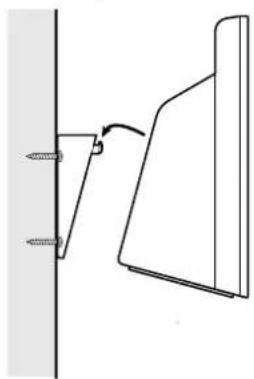
- Secure the plastic bracket for the main unit on the wall using four commercially available screws.
- Screw two commercially available screws on the position of each speaker.
Leave about 3 mm space between the screw's head and the wall.
-
Before going on, make connections between the subwoofer and the speakers by referring to pages 6-7.
-
Carefully hang the main unit on the screws of the bracket for main unit, and hang the speakers onto the screws on the wall.
Main unit Speaker
natural_image
Simple line drawing of a mechanical bracket with a pull rod and arrow indicating rotation (no text or symbols)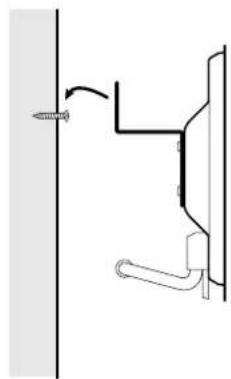
natural_image
Pure mechanical diagram showing a screw fastening attached to a vertical wall (no text or symbols)Note:
Ensure that the speaker locks onto the hooks and that the hooks are strong enough to support the weight before removing your hands.
To stand the speakers in the vertical position
You can stand the speakers in the vertical position.
- Remove the screws to detach the speaker stand.
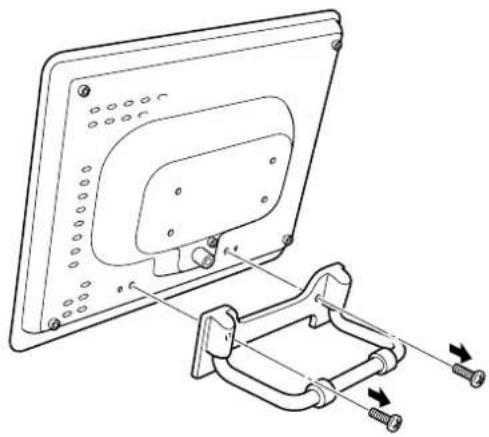
natural_image
Technical line drawing of a computer monitor with attached bracket and screw base (no text or symbols)- Reattach the stand in the vertical position.
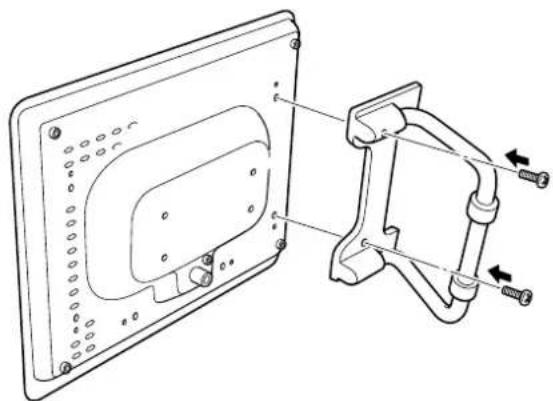
natural_image
Technical line drawing of a mechanical assembly with mounting holes and a clamping bracket (no text or symbols)Connection
CAUTION:
● Turn off the power of all the equipment before making connections.
- Read instructions of each component you intend to use with this unit.
- Be sure to insert each plug securely. To prevent hum and noise, do not bundle the connection cords with the power cord.
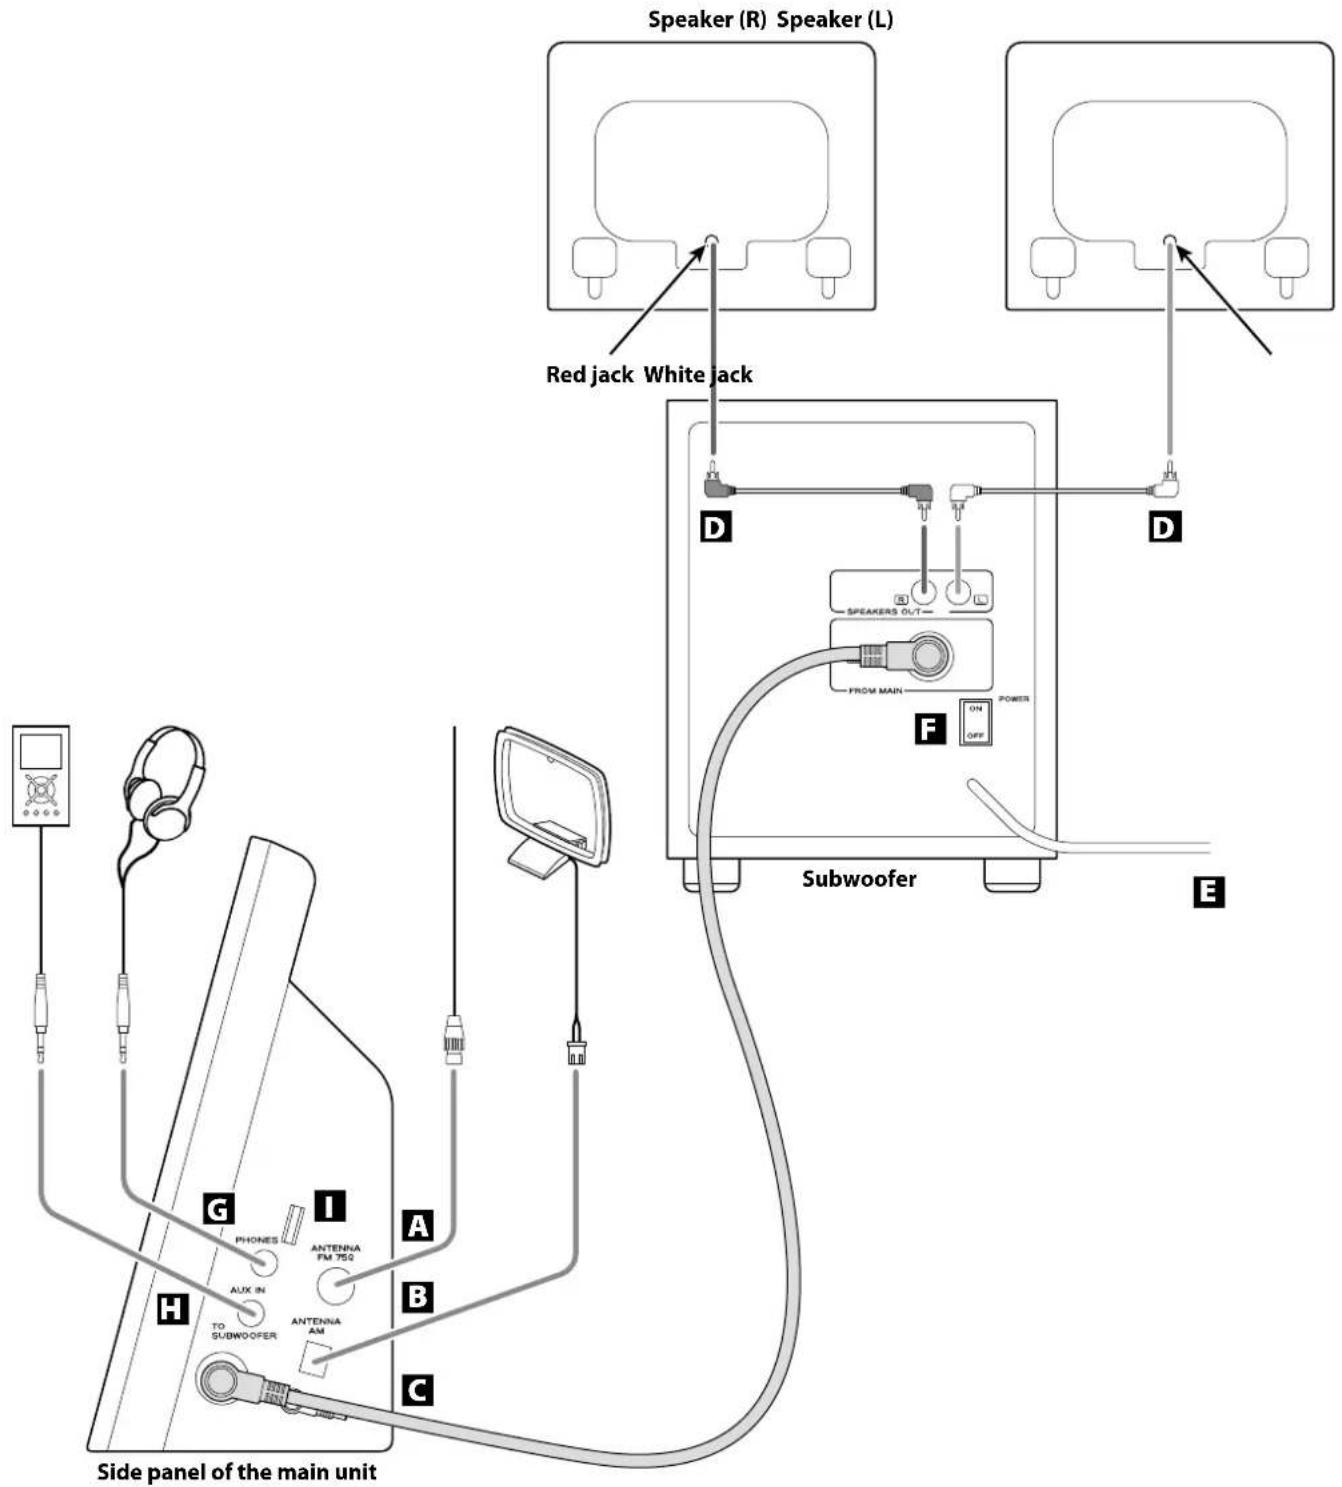
A FM Indoor Antenna
Connect the supplied lead-type FM antenna to this jack. Extend the lead and attach it to a window frame or wall with a thumbtack, where the reception is best.
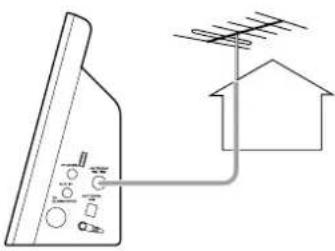
FM Outdoor Antenna
In an area where FM signals are weak, it will be necessary to use an outdoor FM antenna. Generally, a 3-element antenna will be sufficient; if you live in an area where the FM signals are particularly weak, it may be necessary to use one with 5 or more elements.
- Disconnect the FM indoor antenna when using an outdoor antenna.
B AM loop antenna
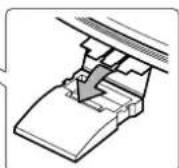
Connect the supplied AM loop antenna to this jack. To stand the loop antenna on a surface, insert the tab in to the slot in the antenna base.
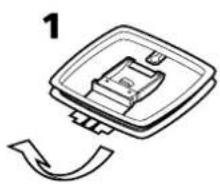
natural_image
Simple line drawing of a mechanical component with a curved arrow indicating rotation (no text or symbols)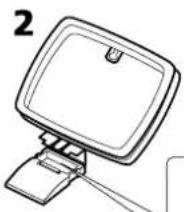
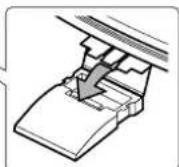
Position the antenna in the direction which gives the best reception.
Keep all other wires such as power cords, speaker wires or connecting wires as far away as possible from the antenna.
C Subwoofer
Connect the "TO SUBWOOFER" and the "FROM MAIN" sockets using the supplied cable.
- Connect the Connectors in the direction as figured.
D SPEAKERS
Connect the left speaker's plug to L, and the right speaker's plug to R using the supplied speaker cables.
- Do not connect anything other than the supplied speakers to these terminals.
E AC Power Cord
Be sure to connect the power cord to an AC outlet which supplies the correct voltage.
Hold the power plug when plugging or unplugging the power cord. Never pull or yank on the power cord.
POWER switch of the Subwoofer
Use this switch to turn the system on or off.
- If the power switch of the subwoofer turned off, the clock will be reset.
G Headphones
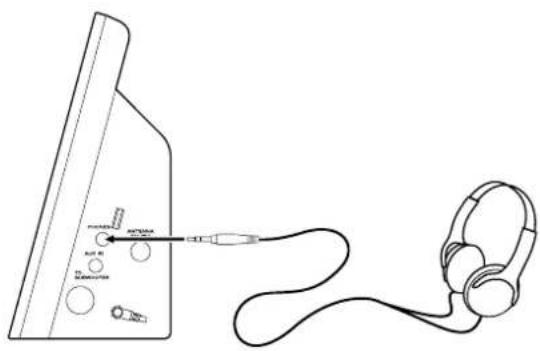
For private listening, first reduce the volume level to minimum. Then insert the plug from your headphones into the PHONES jack, and adjust the volume using the VOLUME buttons. The sound from the speakers is cut off while the headphone jack is inserted.
CAUTION
Always lower the volume level prior to plugging in your headphones. TO AVOID DAMAGING YOUR HEARING - Do not place your headphones on your head until after you have plugged them in.
H AUX IN
You can connect a portable audio player or other audio device to this jack.
Connect the LINE OUT or PHONES jack (audio output jack) of your audio device using the commercially available stereo mini plug cable.
When using the PHONES jack of your mini player, you must adjust the volume of the mini-player or you may hear no sound from your MC-DX40.
Reserved jack
Discs
Discs which can be played on this unit:
- Conventional audio CDs bearing the CD-DA logo on the label:

• Properly finalized CD-R and CD-RW discs
- MP3/WMA CDs
Note:
- Depending on the quality of the disc and/or the condition of the recording, some CD-R/CD-RW discs may not be playable.
- Copy-protected discs and other discs which do not conform to the CD standard may not play back correctly in this player. If you use such discs in this unit, TEAC Corporation and its subsidiaries cannot be responsible for any consequences or guarantee the quality of reproduction. If you experience problems with such non-standard discs, you should contact the producers of the disc.
- Always place the disc on the disc tray with the label side uppermost. (Compact discs can be played or recorded only on one side.)
- To remove a disc from its storage case, press down on the center of the case and lift the disc out, holding it carefully by the edges.
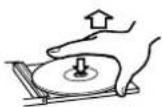
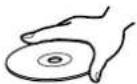
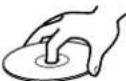
How to remove the disc How to hold the disc
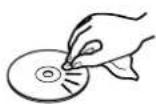
- Should the disc become dirty, wipe the surface radially (from the center hole outward towards the outer edge) with a soft, dry cloth:
- Never use such chemicals as record sprays, antistatic sprays or fluid, benzine or thinner to clean the discs. Such chemicals will do irreparable damage to the disc's plastic surface.
- Discs should be returned to their cases after use to avoid dust and scratches that could cause the laser pickup to "skip".
- Do not expose discs to direct sunlight or high humidity and temperature for extended periods. Long exposure to high temperatures will warp the disc.
- Do not play any disc that is warped, deformed or damaged. Playing such discs may cause irreparable harm to the playing mechanisms.
- CD-R and CD-RW discs are more sensitive to the effects of heat and ultraviolet rays than ordinary CDs. It is important that they are not stored in a location where direct sunlight will fall on them, and which is away from sources of heat such as radiators or heat-generating electrical devices.
- Use a soft oil-based felt-tipped pen to write the information on the label side. Never use a ball-point or hard-tipped pen, as this may cause damage to the recorded side.
- Never use a stabilizer. Using commercially available CD stabilizers with this unit will damage the mechanisms and cause them to malfunction.
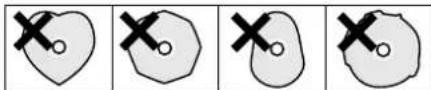
- Do not use irregular shape CDs (octagonal, heart shaped, business card size, etc.). CDs of this sort can damage the unit:
natural_image
Four-panel diagram showing a heart shape with cross marks, each panel containing a small circle and an X symbol (no text or labels)- If you are in any doubt as to the care and handling of a CD-R/CD-RW disc, read the precautions supplied with the disc, or contact the disc manufacturer directly.
MP3 and WMA Remote Co
- This unit can play MP3 and WMA files recorded on a CD-R, CD-RW, and MP3 files on a USB storage device.
- File names of MP3 or WMA should be alphanumeric characters. This unit cannot display symbols and full-size or double-byte characters (such as Japanese, Chinese, etc.) correctly. Also, be sure to use the file extension. (".mp3" for MP3 files, ".wma" for WMA files.)
- MP3 files are mono or stereo MPEG-1 Audio Layer 3 format. This unit can play MP3 files with sampling frequency 44.1 kHz or 48 kHz, bit-rate 320 kbps or less.
- This unit can play WMA files with sampling frequency 44.1 kHz, bit-rate 192 kbps or less. WMA means Windows Media Audio.
- Audio encoded at 128 Kbps should sound close to regular audio CD quality. Although this player will play lower bit-rate MP3 tracks, the sound quality becomes noticeably worse at lower bit rates.
Disc
- The disc must be finalized in order to play.
• The CD-ROM must be ISO 9660 compatible. - When more than 255 files are recorded on the disc, the unit might not be able to play it correctly.
USB
● This unit supports USB 1.1 FULL SPEED (12Mbps).
- This unit can play MP3 files recorded in various external USB storage devices such as USB flash memory or HDD. The HDD must be formatted FAT 16 or FAT 32, but not NTFS.
- When more than 500 files are recorded on the USB memory, the unit might not be able to play it correctly.
- This unit might not be able to play MP3 memory player via the USB.
ol Unit
The provided Remote Control Unit allows the unit to be operated from a distance.
When operating the remote control unit, point it towards the remote sensor on the front panel of the unit.
- Even if the remote control unit is operated within the effective range, remote control operation may be impossible if there are any obstacles between the unit and the remote control.
- If the remote control unit is operated near other products which generate infrared rays, or if other remote control devices using infrared rays are used near the unit, it may operate incorrectly. Conversely, the other products may also operate incorrectly.
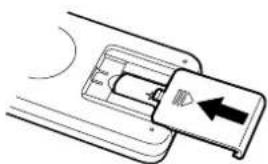
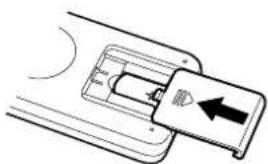
Battery Installation
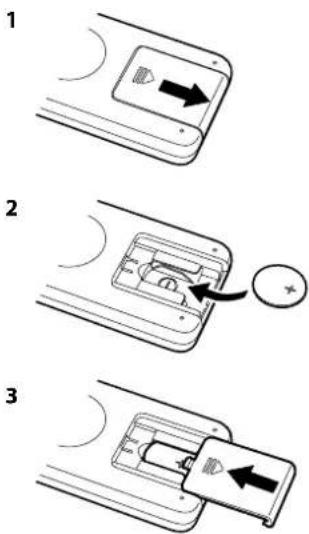
1 Remove the battery compartment cover.
2 Put in the lithium battery (CR2025, 3V) with the positive side (⊕) facing outside.
3 Close the cover.
Battery Replacement
If the distance required between the remote control unit and main unit decreases, the battery is exhausted. In this case, replace the battery with a new one.
Precautions concerning batteries
Do not heat or disassemble batteries and never dispose of old batteries by throwing them in a fire.
flowchart
graph TD
    A["STANDBY/ON"] --> B["TIMER"]
    B --> C["SLEEP"]
    C --> D["FM/AM"]
    D --> E["FS"]
    E --> F["FS"]
    F --> G["FS"]
    G --> H["FS"]
    H --> I["TM MODE"]
    I --> J["SHUFFLE"]
    J --> K["REPEAT"]
    K --> L["MP3"]
    L --> M["RDS"]
    M --> N["D"]
    N --> O["L"]
    O --> P["H"]
    P --> Q["TUNING ↑ PLAY/PAUSE"]
    Q --> R["PRESET/FOLDER"]
    R --> S["STOP"]
    S --> T["K"]
    T --> U["BASS"]
    U --> V["TREBLE"]
    V --> W["VOLUME"]
    W --> X["+"]
    X --> Y["M"]
    Y --> Z["-"]
    Z --> AA["g"]
    AA --> AB["TEAC RC-1195"]
Note:
To simplify explanations, instructions in this manual refer to the names of the buttons and controls on the front panel only. Associated controls on the remote control will also operate similarly.
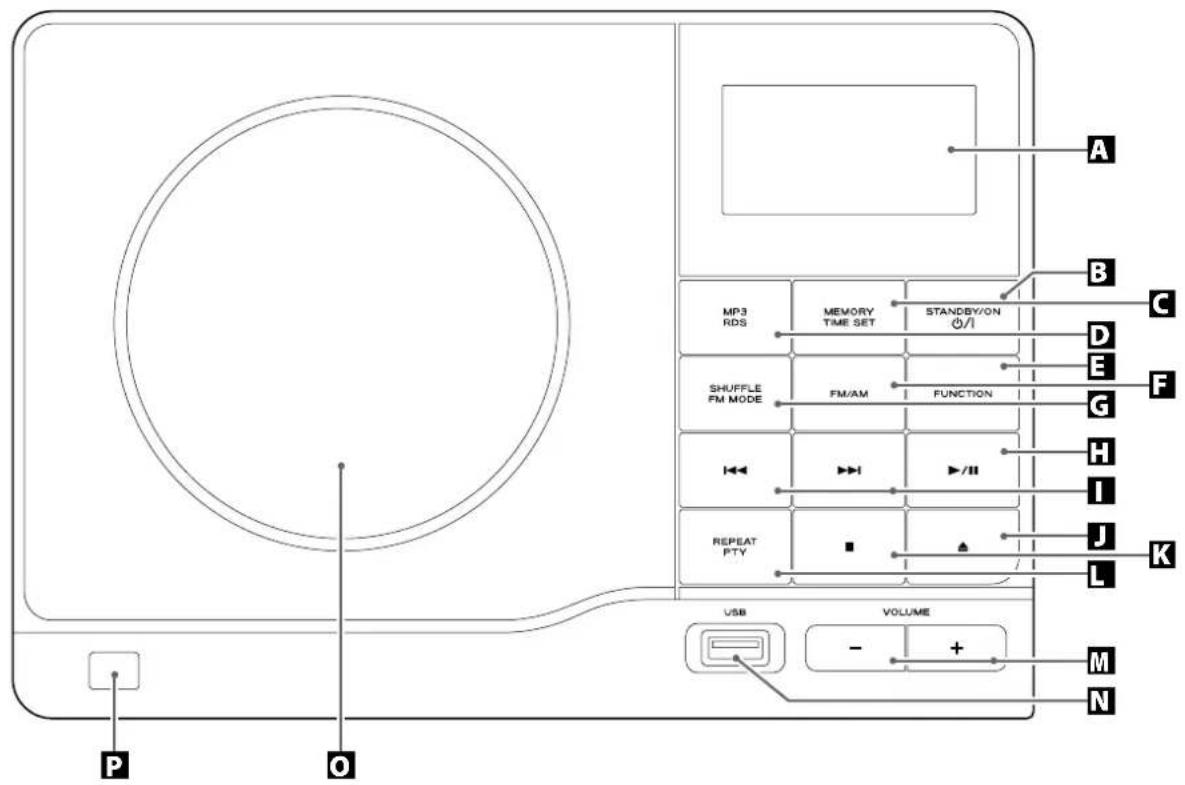
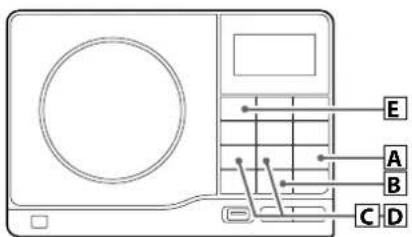
A display
B STANDBY/ON ( )0/1
Use this button to turn the unit on or standby.
The main unit is powered via the subwoofer. You need to first turn on the subwoofer.
When the main unit is in the standby mode, the power indicator of the Subwoofer is orange.
When the unit is turned on, the indicator turns blue.
C MEMORY/TIME SET
In CD mode, use this button to program tracks or files.
In Radio mode, use this button to preset stations.
This button is also used for clock adjustment.
D MP3/RDS
During playback of a MP3/WMA file, use this button to change what information is displayed.
In FM mode, use this button to select an RDS mode.
E FUNCTION
Use this button to select a source (CD, USB, Radio or AUX).
FM/AM
Use this button to select FM or AM.
G SHUFFLE/FM MODE
In CD or USB mode, use this button to turn on and off the shuffle playback.
In FM mode, use this button to select Stereo or Mono.
H play/pause (▶/II)
In CD or USB mode, use this button to start or pause playback.
skip/tuning (|◄◄/►►I)
In CD or USB mode, momentarily press these buttons to skip tracks. Hold down these buttons to search for a part of a track.
In Radio mode, use these buttons to tune in a station.
In Standby mode, these buttons are used to adjust the clock and set the timer.
open/close (▲)
In CD mode, use this button to open and close the CD door.
K stop (■)
In CD or USB mode, use this button to stop playback.
L REPEAT/PTY
In CD or USB mode, use this button to set the repeat function.
In FM mode, use this button to select PTY.
M VOLUME (-, +)
Press the + or the - button to adjust the volume.
N USB terminal
This USB terminal supports USB 1.1.
CD door
P Remote Sensor
When operating the remote control unit, point it towards here.
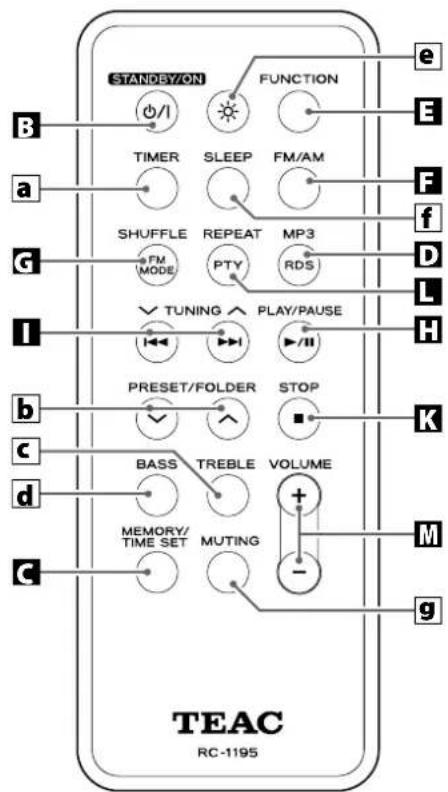
a TIMER
Use this button together with the skip buttons (◀◀/▶▶) to set the timer.
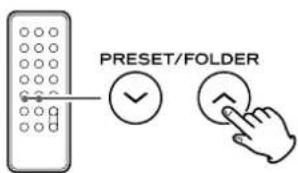
b PRESET/FOLDER (, ↗
In Radio mode, use these buttons to select a preset station.
During playback of a MP3/WMA file, use these buttons to select a folder in the disc.
c TREBLE
Use this button and the VOLUME buttons to adjust the level of high frequency sound range.
d BASS
Use this button and the VOLUME buttons to adjust the level of low frequency sound range.
e dimmer ()
Use this button to change the brightness of the front panel display.
f SLEEP
Use this button to set sleep timer.
g MUTING
Use this button to mute the sound.
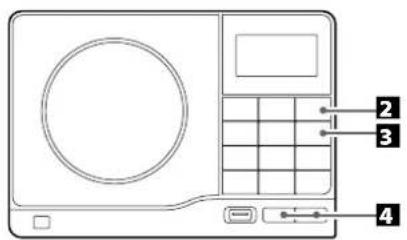
1 Turn on the subwoofer.
(Rear panel of the subwoofer)
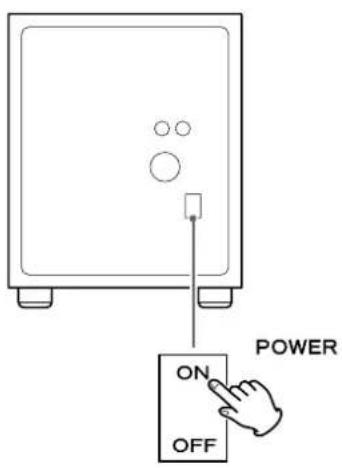
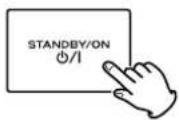
2 Press the STANDBY/ON button ( ) on the main unit.
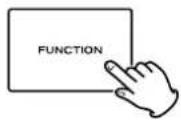
3 Select a source by pressing the FUNCTION button.
CD/Stop
No Disc
- 50MHz FM
AUX
0:00
USB
Not connected
- To listen to an external source connected to the AUX IN jack, select AUX.
- In AUX mode, the display always shows the clock.
- If you press and hold the TIME SET button for 2 seconds in CD or Radio mode, the clock will be displayed for a few seconds.
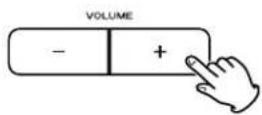
4 Play the source and adjust the volume using the VOLUME buttons.
Muting
To mute the sound temporarily, press the MUTING button. Press the MUTING button again to restore the sound.
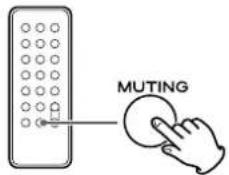
● While muting is engaged, "Muting" blinks on the display.
- If you change the volume during the muting, the muting will be canceled.
- When the function is changed during the muting, the muting will be cancelled.
Headphones
For private listening, first reduce the volume level to minimum. Then insert the plug from your headphones into the PHONES jack, and adjust the volume using the VOLUME buttons. The sound from the speakers is cut off while the headphone jack is inserted.
natural_image
Line drawing of a device with headphones connected to a speaker (no text or symbols present)CAUTION
Always lower the volume level prior to plugging in your headphones. TO AVOID DAMAGING YOUR HEARING - Do not place your headphones on your head until after you have plugged them in.
Sleep Timer
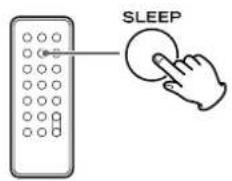
Repeatedly pressing the SLEEP button permits setting an interval (from 90 down to 10 minutes) after which you want the unit to automatically turn off and shift into Standby mode.

Dimmer
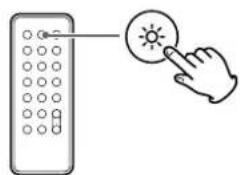
You can dim the display using the dimmer button ().
natural_image
Illustration of a hand interacting with a button and a keypad (no text or symbols)- This function will be cancelled when the STANDBY/ON button is pressed.
Tone Control
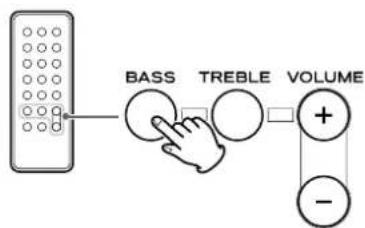
flowchart
graph TD
    A["Remote Control"] --> B["BASS"]
    B --> C["TREBLE"]
    C --> D["VOLUME"]
    D --> E["+"]
    D --> F["-"]
1. Press the BASS or TREBLE button.
To adjust the level of low frequency sound range, press the BASS button.
To adjust the level of high frequency sound range, press the TREBLE button.
2. Within 2 seconds, press the VOLUME buttons to change the setting.
The level can be adjusted from -4 to +4.
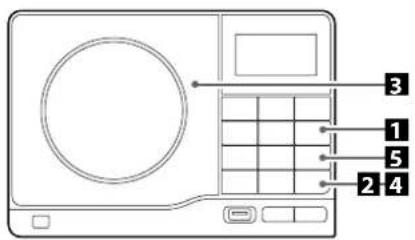
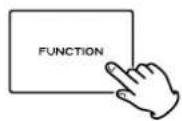
1 Press the FUNCTION button to select "CD".
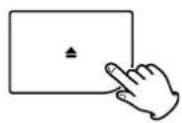
2 Press the open/close button (▲).
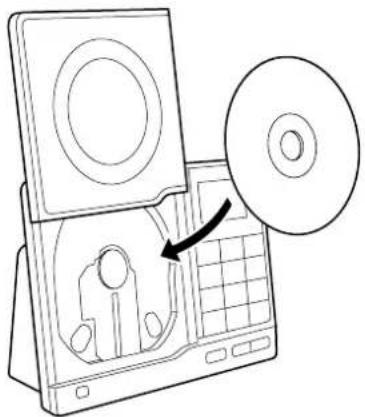
3 Put a disc onto the center spindle of the player with the label side facing you.
Press the disc onto the spindle until a slight "click" is heard indicating the disc is mounted correctly.
natural_image
Line drawing of a CD or DVD device with an open rear panel and a circular inset showing internal components (no text or symbols)● Never put more than one disc onto the spindle at a time.
- Ensure that the disc is correctly mounted on the spindle and locked in place.
4 Press the open/close button (▲) to close the CD door.
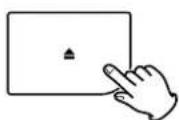
- It takes a few seconds for the unit to load the disc. No buttons will work during loading. Wait until the total number of the tracks and the total play time of the disc are displayed.
- When no disc is loaded in the CD player, "No Disc" is displayed.
Audio CD
The total number of the tracks and total play time of the disc are displayed.
CD/Stop
T015 43:08
MP3/WMA disc
The total number of files of the disc is displayed. "MP3" is displayed even if the playback file is WMA.
MP3/Stop
Total file 0144
5 Press the play/pause button (▶/III) to start playback.
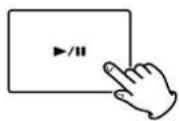
Disc playback starts from the first track/file.
Audio CD
CD/Play
T001 00:42
current track number elapsed time of the current track
MP3/WMA disc
MP3/Play
T003 00:42
current file number
- MP3/WMA files recorded out of folders are automatically put in the "000" (root) folder, and playback starts from the first file of the "000" (root) folder.
- If there are folders that has no MP3/WMA file, this unit skips them.
- When the playback of all the tracks/files has finished, the unit stops automatically.
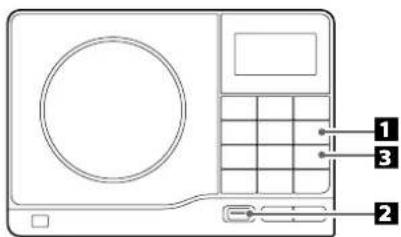
This unit can not play the files in a mass storage hard disk.
1 Press the FUNCTION button to select "USB".
"Not connected" will be displayed if no USB device is connected. If a USB memory device is connected, the unit will enter the pause mode at the biggining of the first file after loading the USB memory device.
2 Connect an USB memory device to the USB port on the front panel of the unit.
The unit will enter the pause mode at the beggining of the first file after loading the USB memory device.
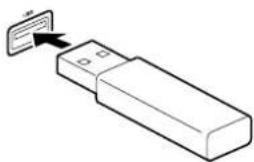
natural_image
Illustration of a USB device with an arrow pointing to its internal card (no text or symbols present)- It may take several minutes to load the USB memory device depending on the number of files and folders.
- If an iPod shuffle is connected to this port, it can not be played.
When the STOP button (■) is pressed, the display shows the total number of files.
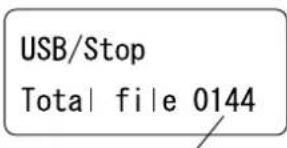
total number of files
3 Press the play/pause button (▶/III) to start playback.
Playback starts from the first file.
- MP3/WMA files recorded out of folders are automatically put in the "ROOT" folder, and playback starts from the first file of the ROOT folder.
- If there are folders that has no MP3/WMA file, this unit skips them.
- When the playback of all the tracks/files has finished, the unit stops automatically.
A To suspend playback temporarily (pause mode)
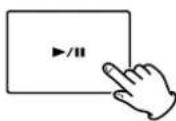
Press the play/pause button (▶/■) during playback. Playback stops at the current position and "Pause" is displayed. To resume playback, press the play/pause button (▶/■) again.
B To stop playback
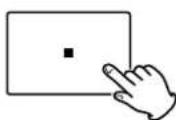
Press the stop button (■) to stop playback.
C To skip to the next or a previous track
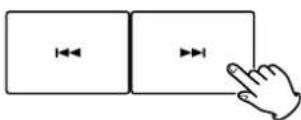
During playback, press the skip button (I◄◄ or ►►I) repeatedly until the desired track is found. The selected track will be played from the beginning.
In the stop mode, press the skip button (I◀◀ or ▶▶▶1) repeatedly until the track you want to listen to is found. Press the play/pause button (▶/▶) to start playback from the selected track.
- When the I◄◄ button is pressed during playback, the track being played will be played from the beginning. To return to the beginning of the previous track, press the I◄◄ button twice.
- During programmed playback, the next or previous track in the program is played.
D Search for a part of a track
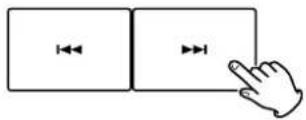
During playback, hold down the skip button (◀◀ or ▶▶▶) and release it when the part you want to listen to is found. During searching, "Search" is displayed.
E To display MP3/WMA information
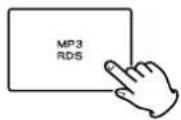
During playback of an MP3/WMA file, each time the MP3 button is pressed, the information about the current track is changed as follows:
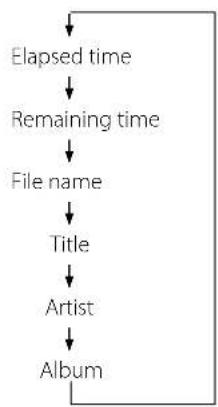
flowchart
graph TD
    A["Elapsed time"] --> B["Remaining time"]
    B --> C["File name"]
    C --> D["Title"]
    D --> E["Artist"]
    E --> F["Album"]
During playback of an MP3/WMA disc, press the MP3 button for more than 1 second. The information about the current track is displayed scrolling. To cancel scrolling, press the MP3 button again.
UNKNOWN appears when the unit cannot read the information.
Folder Search (MP3/WMA only)
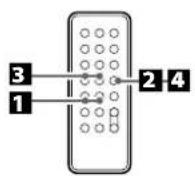
While in stop or playback mode, you can select and playback a desired folder or a desired file in a folder.
1 Press the FOLDER buttons (/) to select a folder.
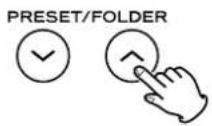
The order of the folders may changed depending on the hierarchy of the folders.
2 Press the play/pause button (▶/II).
3 If you want to select a file, press the skip button (|◀◀ or ▶▶▶).
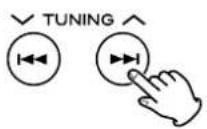
- You can select a file in the selected folder.
4 Press the play/pause button (▶/II).
Playback starts from the selected file.
Shuffle Playback
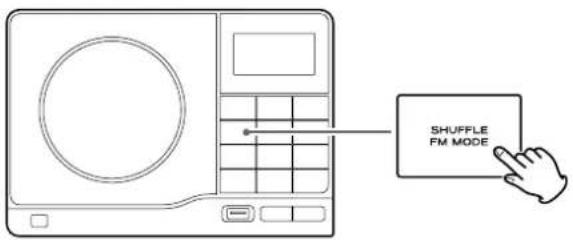
The tracks/files can be played randomly. Press the SHUFFLE button during playback or when in the stop mode. "Shuffle" will then appear in the display.
-
If you press the ▶▶▶1 button during shuffle playback, next track/file will be randomly selected and played.
If you press the ◀◀ button, next track/file will be randomly selected and played.
A track cannot be replayed during shuffle playback. -
Shuffle playback does not work during programmed playback.
- If one of the following buttons is pressed, shuffle mode will be cancelled:
SHUFFLE, stop (■), FUNCTION, FM/AM STANDBY/ON, open/close (▲)
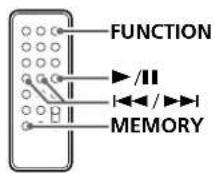
Up to 32 tracks/files can be programmed in the desired order.
- Set a disc before programming.
- Files in an USB memory device cannot be programmed.
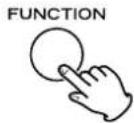
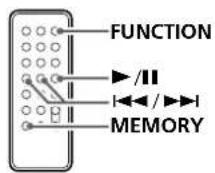
1 Press the FUNCTION button to select "CD" or "USB".
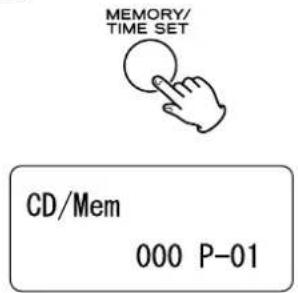
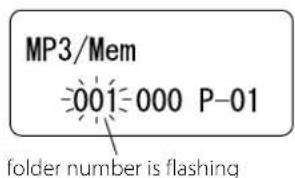
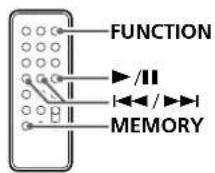
2 Press the MEMORY button.
"Mem" is displayed.
CD
MP3
- To cancel the program mode, press the stop button (■).
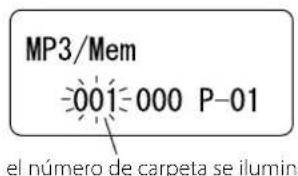
3 Press the skip button (|◀◀ or ▶▶▶) repeatedly to select a MP3/WMA folder, then press the MEMORY button.
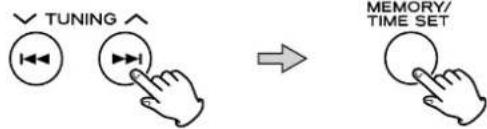
MP3
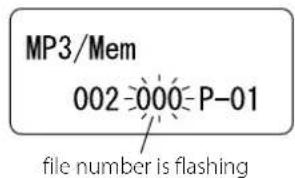
- MP3 files recorded out of folders are in the "001" (ROOT) folder.
- Skip this step when playing an audio CD.
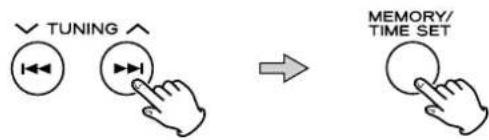
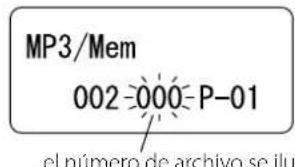
4 Press the skip button (|◀◀ or ▶▶▶) repeatedly to select a track, then press the MEMORY button.
flowchart
graph LR
    A["√TUNING"] --> B["←"]
    B --> C["▶"]
    C --> D["→"]
    D --> E["○"]
    E --> F["MEMORY/TIME SET"]
CD
CD/Mem 000 P-02
MP3
MP3/Mem -001-000 P-02
The track/file is programmed, and "P-02" is displayed.
- Repeat steps 3 and 4 to program more tracks/files.
- You can program up to 32 tracks.
5 When the selection of track numbers is completed, press the play/pause button (▶/II) to start program playback.
PLAY/PAUSE
- When the playback of all the programmed tracks/files has finished, or if you press the stop button (■), the "Mem" indicator will go off and the program mode will be cancelled. Still the program is retained in memory.
You can return to the programmed playback by pressing the MEMORY button and the play/pause button (▶/■). - Shuffle function does not work during programmed playback.
- When there is a folder which contains the files other than MP3 and WMA (such as JPEG files) is included in a disc, the program may not function correctly. Program the MP3 and WMA files only.
Repeat Playback
To check the programmed order
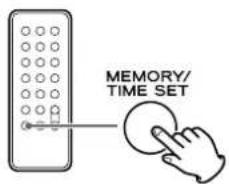
In the stop mode, press the MEMORY button repeatedly. The track number and program number will be shown on the display.
To add a track to the end of the program
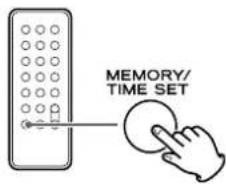
In the stop mode, press the MEMORY button repeatedly until "00" or "000" appears on the display. Select a track number using the skip button (I◄◄ or ►►1) and then press the MEMORY button. The track is added to the end of the program.
To overwrite the program
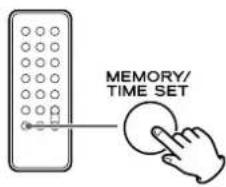
In the stop mode, press the MEMORY button repeatedly until the program number to be changed appears on the display. Select a new track number using the skip button (I◄◄ or ►►I) and then press the MEMORY button.
To clear program
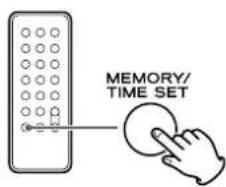
If one of the following buttons is pressed, the programmed contents will be cleared:
open/close (▲), FUNCTION, FM/AM, STANDBY/ON
- If the unit is disconnected from the power supply, the programmed contents will be cleared.
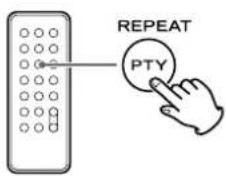
Every time the REPEAT button is pressed, the mode is changed as follows:
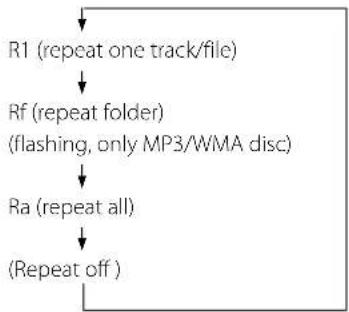
flowchart
graph TD
    A["R1 (repeat one track/file)"] --> B["Rf (repeat folder)<br>(flashing, only MP3/WMA disc)"]
    B --> C["Ra (repeat all)"]
    C --> D["(Repeat off)"]
- When the stop button (■) is pressed the repeat mode is cancelled.
- During the programmed playback, "Rf" cannot be selected.
Repeat one track/file (R1)
The track/file being played will be played repeatedly. If you select another track/file in R1 mode, the track/file you selected will be played repeatedly.
If you select R1 mode in the stop mode and select a track/file, the selected track/file will be played repeatedly.
Repeat folder (Rf) (Only MP3/WMA disc)
All the tracks or files in the folder will be played repeatedly. If you select another folder in Rf mode, the tracks/files in the folder will be played repeatedly.
Repeat all (Ra)
All the tracks or files will be played repeatedly.
- In the program mode, the programmed contents are played repeatedly.
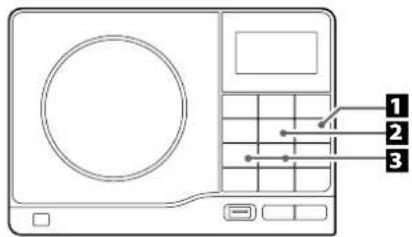
1 Press the FUNCTION button to select "Radio".
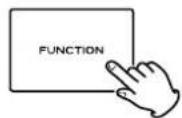
- You can also use the FM/AM button to select "Radio".
2 Press the FM/AM button to select FM or AM.
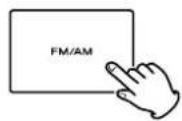
3 Select the station you want to listen to (auto selection).
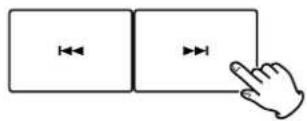
Hold down the TUNING/PRESET button (◀◀ or ▶▶▶) for more than 0.5 seconds.
When a station is found, the tuning process will stop automatically.
If you want to stop the tuning process, press the TUNING/PRESET button (I◄◄ or ►►1).
Selecting stations which cannot be tuned automatically (manual selection)
When the TUNING/PRESET button (I◄◄ or ►►I) is pressed momentarily (0.5 second or less), the frequency changes by a fixed step.
Press the TUNING button repeatedly until the station you want to listen to is found.
FM MODE button
Pressing this button alternates between STEREO mode and MONO mode.
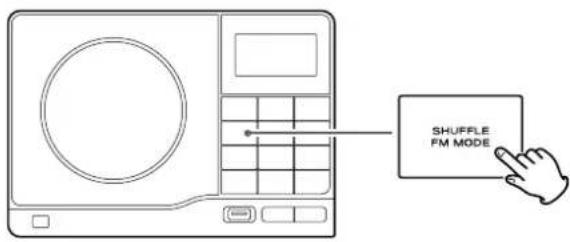
Auto (stereo)
FM stereo broadcasts are received in stereo and the "St" appears in the display.
- If the sound is distorted the signal is not strong enough for good stereo reception. In this case, it automatically changes to Mono mode.
Mono
To compensate for weak FM stereo reception, select this mode. "Mo" is displayed. Reception will now be forced to monaural, reducing unwanted noise.
If the reception is poor
AM broadcast
Rotate or relocate the AM antenna to find the best position for AM stations.
FM broadcast
Extend and rotate the FM antenna until you receive the stations clearly.
In an area where FM signals are weak, it will be necessary to use an outdoor FM antenna (see page 7).
Preset Tuning
You can store 30 FM and 30 AM stations into preset memory.
1 Tune in a station you want to listen to (see steps 1 to 3 of page 20).
2 Press the MEMORY button.
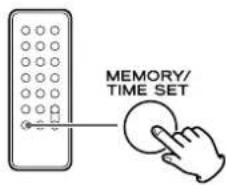
Preset Save

3 Within 3 seconds, select a preset channel to store station using the PRESET buttons of the remote control unit.
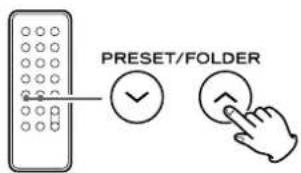
Preset channel
Preset Save

4 Within 5 seconds, press the MEMORY button.
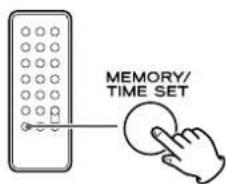
The station is stored.
To store more stations, repeat steps 1 to 4.
How to select preset stations
1 Press the FM/AM button to select a band.
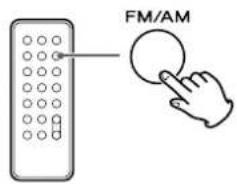
2 Press the PRESET button repeatedly until the desired preset station is found.
RDS
The Radio Data System (RDS) is a broadcasting service which allows stations to send additional information along with the regular radio programme signal.
RDS works on the FM waveband in Europe only.
1 Tune in an FM station (see steps 1 to 3 of page 20).
2 Press the RDS button.
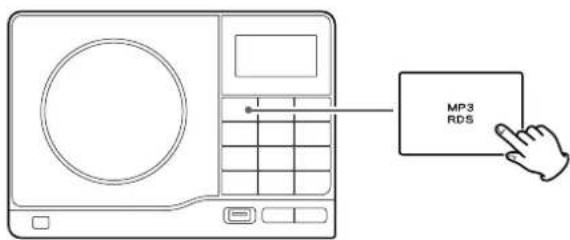
Each time the RDS button is pressed briefly, the RDS mode is changed as follows:
PS (Programme Service name)
When you select PS, "PS" will blink for about 4 seconds and then PS or a station's name will be displayed. If there is no PS data, the frequency will be displayed.
PTY (Programme Type)
When you select PTY, "PTY" will blink for about 4 seconds and then the programme type will be displayed.
RT (Radio Text)
When you select RT, "RT" will blink for about 4 seconds and then the news of stations composed of up to 64 symbols will be displayed.
If there is no CT/PTY/RT data, RDS mode will be switched to PS mode automatically.
The clock setting will be automatically adjusted according to the CT data. If you tune in an RDS station broadcasting incorrect CT data, the clock might be wrongly adjusted, and that may eventually affect the timer operation.
No matter which RDS mode is selected, the unit receives CT data and adjusts the clock.
To turn on or off the CT mode, press and hold the RDS button for more than 10 seconds.
RDS (PTY Search)
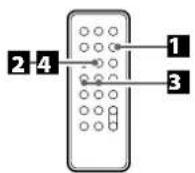
A station can be searched by this function.
1 Select FM by pressing the FM/AM button.
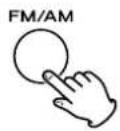
2 Press the PTY button.
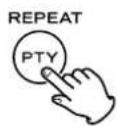
"PTY SEL" appears on the display.
3 Select the desired PTY programme using the skip button (|◀◀ or ▶▶▶).
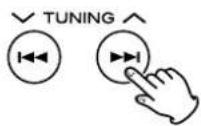
You can select from 31 kinds.
4 Press the PTY button.
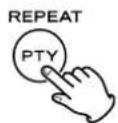
Searching will start.
- When the programme that you have selected is found, searching will stop and the programme type will be displayed.
- If the same program type is not found during PTY Search, it will stop at the beginning frequency.
- If you want to stop searching, press the PTY button.
PTY
NEWS : brief announcements, events, public opinion, reports, actual situations.
AFFAIRS : a kind of suggestion including practical announcements other than news, documents, discussion, analysis and so on.
INFO : daily information or reference such as weather forecast, consumer guide, medical assistance and so on.
SPORT : sports related programs.
EDUCATE : educational and cultural information.
DRAMA : all kinds of radio concert and serial drama.
CULTURE : all aspects of national or local culture including religious events, philosophy, social science, language, theatre, and so on.
SCIENCE : programs on natural science and technology.
VARIED : popular programs such as quiz, entertainment, private interview, comedy, satire and so on.
POP M : program on commercial, practical and popular songs, and sale volume of discs, etc.
ROCK M : practical modern music generally composed and played by young musicians.
M.O.R.M : popular music usually lasting for less than 5 minutes.
LIGHT M : classical music, instrumental music, chorus, and light music favored by non-professionals.
CLASSICS : orchestra including great operas, symphony, chamber music and so on.
OTHER M : other music styles (Rhythm & Blues, Reggae, etc.)
WEATHER : weather reports, forecast
FINANCE : financial reports, commerce, trading
CHILDREN : children's programs
SOCIAL : social affairs
RELIGION : religious programs
PHONE IN : program in which the public expresses its view by phone.
TRAVEL : travel reports
LEISURE : programs concerning recreational activities
JAZZ : jazz music
COUNTRY : country music
NATION M : national music
OLDIES : music from the so-called golden of popular music
FOLK M : folk music
DOCUMENT: documentaries
TEST
ALARM : a program notifying an emergency or a natural disaster.
Listening to an External Source
Connect the output jack of your audio device (ex: the PHONES jack of a portable audio player) to the AUX IN jack of the MC-DX40 using the commercially available stereo mini plug cable.
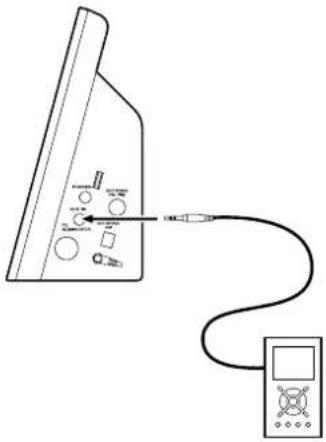
natural_image
Diagram showing a device connected to a cable with a sensor or probe inserted (no text or symbols present)2 Press the FUNCTION button to select "AUX".
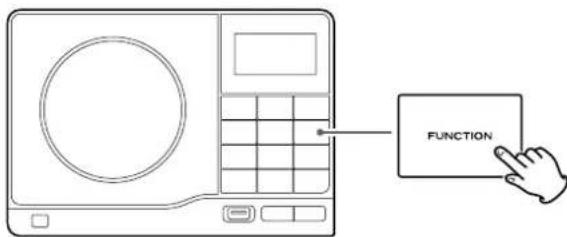
3 Play the source, and adjust the volume using the VOLUME buttons of the MC-DX40 and the audio device.
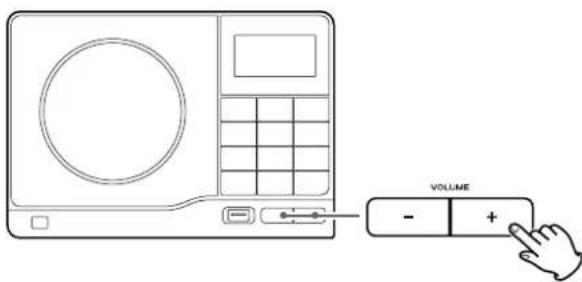
When using the PHONES jack of your player, you must adjust the volume of the player or you may hear no sound from your MC-DX40.
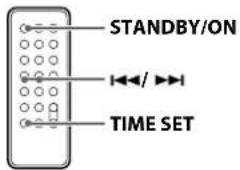
If the power switch of the subwoofer turned off, the clock will be reset.
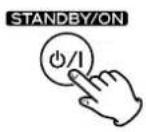
If the unit is on, press the STANDBY/ON button () to turn it standby.
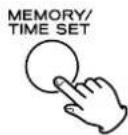
2 Press and hold down the TIME SET button.
The "hour" value blinks.
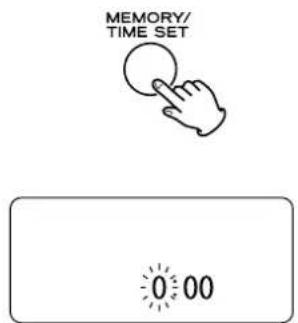
- If no button is pressed for 10 seconds, the time setting mode will be cancelled.
3 Press the skip button (|◀◀ / ▶▶|) to set the current hour.
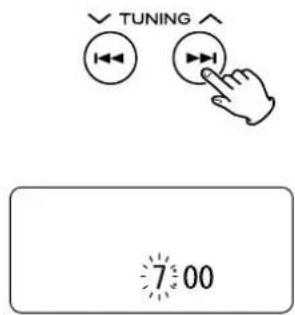
4 Press the TIME SET button.
The "minute" value blinks.
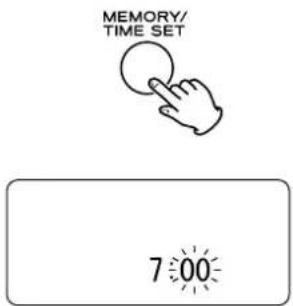
5 Press the skip button (|◄◄/►►|) to set the current minute.
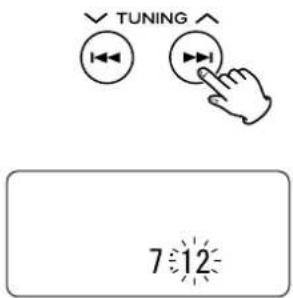
6 Press the TIME SET button.
The clock starts.
Setting the Timer 1
- The unit can be programmed to turn on and off at a specified time.
- Adjust the clock before setting the timer.
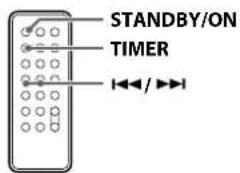
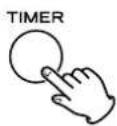
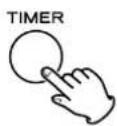
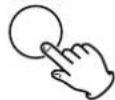
1 Press and hold the TIMER button until "TimerOn" appears on the display.
TimerOn

Radio Vol 10
The "hour" value starts flashing.
- When no button is pressed for 60 seconds, the timer setting mode will be cancelled.
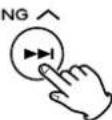
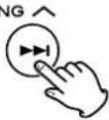
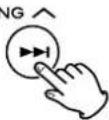
2 Press the skip button (|◄◄ /►►|) to set the start time (hour), and then press the TIMER button.
TimerOn

Radio Vol 10


TimerOn

Radio Vol 10
The "minutes" value starts flashing.
3 Press the skip button (1◄◄/►►) to set the start time (minute), and then press the TIMER button.
TimerOn

Radio Vol 10


TimerOff

Radio Vol 10

"TimerOff" appears on the display and the "hour" value starts flashing.
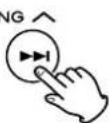
4 Press the skip button (|◄◄/►►|) to set the stop time (minute), and then press the TIMER button.
TimerOff

Radio Vol 10


TimerOff

Radio Vol 10

The "minutes" value starts flashing.
5 Press the skip button (|◄◄ /►►|) to set the stop time (hour), and then press the TIMER button.
TimerOff

Radio Vol 10


TimerOff
7:30
-Radio-Vol 10

Setting the Timer 2
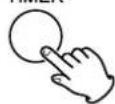
6 Press the SKIP button (|◄◄/►►|) to select a source (Radio, CD or USB), and then press the TIMER button.
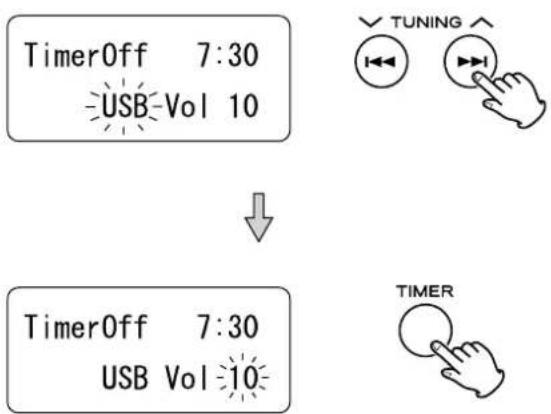
- "AUX" cannot be selected.
7 Press the SKIP button (|◄◄/►►|) to set the volume, and then press the TIMER button.
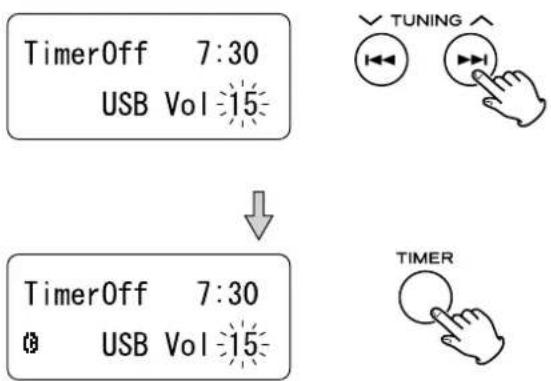
Setting the timer is now completed and the timer is turned on. Your timer on/off setting is displayed in order.
8 Prepare the source.
If you selected "Radio" in step 6 tune in a station. If you selected "CD" in step 6 set a disc. If you selected "USB" in step 6 connect an USB memory device.
9 Press the STANDBY/ON button to turn the unit off (standby).
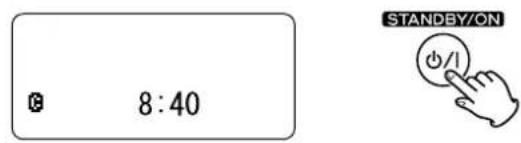
The clock and the TIMER indicator are displayed. The unit will turn on and off at the specified time every day.
Do not forget to turn the unit off (standby), or the timer will not work.
If the power switch of the subwoofer turned off, the clock will be reset. Do not turn off the subwoofer, or the timer will not work.
- Playback volume will gradually increase up to your set volume when the unit is turned on by timer.
- If the source is set to "USB" but no USB memory device is connected, the unit will turn on into Radio mode.
- If the source is set to "CD" but no disc is set, the unit will turn on into Radio mode.
- When the source is set to "Radio" and the unit turns on, it will tune in to the station you selected last time.
To turn on or off the timer
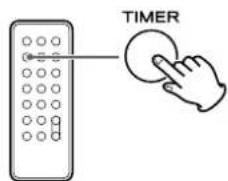
Press the TIMER button once, and during the timer settings being displayed press again to turn it on or off.
Specifications
AMPLIFIER section
Output Power (L+R) 10 W + 10 W
Output Power (Subwoofer) 15 W
Input Sensitivity....500 mV
Frequency Response 50 to 20,000 Hz
Radio Section (FM)
Frequency Range .... 87.50 to 108.00 MHz (50 kHz step)
Sensitivity (S/N30dB) 10 dBμV/m
Radio Section (AM)
Frequency Range ....522 to 1,629 kHz (9kHz step)
Sensitivity (S/N20dB) 54 dBμV/m
CD PLAYER Section
Frequency Response....20 to 20,000 Hz (±1 dB)
Signal-to-Noise Ratio 55 dB
Wow and Flutter ....Unmeasurable
SPEAKER
Type....Full range flat type
Impedance 4 ohms
SUBWOOFER
Impedance 8 ohms
GENERAL
Power Requirements....230 V AC, 50 Hz
Power Consumption 74 W
Dimension (W x H x D)
Main Unit 247 x 169.5 x 83 mm
L & R Speakers 210 x 169.5 x 85 mm
Subwoofer....170 x 220 x 325 mm
Weight (Net)
Main Unit....1.3 kg
L & R Speakers 0.6 kg each
Subwoofer....4.8 kg
Standard Accessories
Remote control unit (RC-1195) x 1
Battery for remote control unit (CR2025) x 1
Subwoofer cable x 1
Speaker cable x 2
FM antenna x 1
AM antenna x 1
Wall mounting bracket for speaker x 4
Wall mounting bracket for main unit x 1
Screw x 8
Guide sheet for wall mounting x 1
Owner's manual x 1
Quick guide for connection x 1
Warranty card x 1
- Design and specifications are subject to change without notice.
● Weight and dimensions are approximate.
● Illustrations may differ slightly from production models.
If you have problems with your system, look through this chart and see if you can solve the problem yourself before calling your dealer or TEAC service center.
General
No power
→ Check the connection to the AC power supply. Check and make sure the AC source is not a switched outlet and that, if it is, the switch is turned on. Make sure there is power to the AC outlet by plugging another item such as a lamp or fan into the outlet.
No sound from speakers.
→ Select the source by pressing the FUNCTION button.
→ Check the connection to the speakers.
→ Adjust the volume.
→ Pull out the headphone's plug from the PHONES jack.
→ If "Muting" is blinking, press the MUTING button.
The sound is noisy.
The unit is too close to a TV or similar appliances. Install the unit apart from them, or turn them off.
Remote control does not work.
→ Press the STANDBY/ON switch to turn the unit on.
→ When the battery has run out, put in a new one.
→ Use remote control unit within the range (5 m) and point at the front panel.
→ Clear obstacles between the remote control unit and the main unit.
→ If a strong light is near the unit, turn it off.
CD Player
Will not play.
→ Load a disc with the playback side facing away.
→ If the disc is dirty, clean the surface of the disc.
→ A blank disc has been loaded. Load a prerecorded disc.
→ Depending on the disc, etc. it may not be possible to play back CD-R/RW discs. Try again with another disc.
→ You cannot play back unfinalized CD-R/RW discs. Finalize such a disc in a CD recorder and try again.
Sound skips.
→ Place the unit on a stable place to avoid vibration and shock.
→ If the disc is dirty, clean the surface of the disc.
→ Do not use scratched, damaged or warped discs.
Radio
Cannot listen to any station, or signal is too weak.
→ Tune in the station properly.
→ Rotate the FM or AM antenna for the best reception position.
Though the FM broadcast is stereo, it sounds monaural.
→ Switch the FM mode to STEREO using the FM MODE button.
If normal operation cannot be recovered, unplug the power cord from the outlet and plug it again.
Beware of condensation
When the unit (or a disc) is moved from a cold to a warm place, or used after a sudden temperature change, there is a danger of condensation; vapor in the air could condense on the internal mechanism, making correct operation erratic or impossible. To prevent this, or if this occurs, leave the unit for one or two hours with the power turned on. The unit will stabilize at the temperature of its surroundings.
Maintenance
If the surface of the unit gets dirty, wipe with a soft cloth or use diluted mild liquid soap. Never spray liquid directly on this unit. Apply your cleaner to your cleaning cloth and wipe gently. Be sure to remove any excess completely. Do not use thinner, benzene or alcohol as they may damage the surface of the unit. Allow the surface of the unit to dry completely before using.
Information for Users on Collection and Disposal of Old Equipment and used Batteries
These symbols on the products, packaging, and/or accompanying documents mean that used electrical and electronic products and batteries should not be mixed with general household waste. For proper treatment, recovery and recycling of old products and used batteries, please take them to applicable collection points, in accordance with your national legislation and the Directives 2002/96/EC and 2006/66/EC.
By disposing of these products and batteries correctly, you will help to save valuable resources and prevent any potential negative effects on human health and the environment which could otherwise arise from inappropriate waste handling.
For more information about collection and recycling of old products and batteries, please contact your local municipality, your waste disposal service or the point of sale where you purchased the items.
[Information on Disposal in other Countries outside the European Union]
These symbols are only valid in the European Union. If you wish to discard these items, please contact your local authorities or dealer and ask for the correct method of disposal.
Note for the battery symbol (bottom two symbol examples):
This symbol might be used in combination with a chemical symbol. In this case it complies with the requirement set by the Directive for the chemical involved.

Pb
Inhalt
natural_image
Pure electrical circuit lines without any symbolsnatural_image
Simple line drawing of a mechanical bracket with a pull rod and arrow indicating rotation (no text or symbols)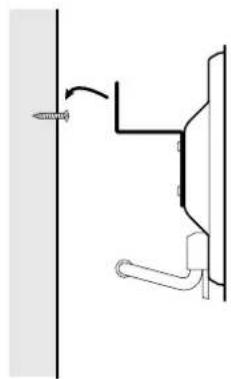
natural_image
Simple line drawing of a mechanical or electrical component with a screw and lever, no text or symbols present.Hinweis:
natural_image
Technical line drawing of a computer monitor with attached bracket and screw base (no text or symbols)natural_image
Technical line drawing of a mechanical assembly with mounting holes and a clamping bracket (no text or symbols)Anschließen
ACHTUNG
natural_image
Simple line drawing of a mechanical component with a curved arrow indicating direction (no text or symbols)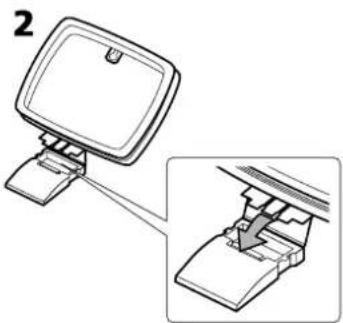
natural_image
Diagram of a computer monitor with an inset showing its internal structure (no text or symbols)natural_image
Diagram of a device interior with a circular button and arrow indicating direction (no text or symbols)3
natural_image
Diagram showing a device being inserted into a device (no text or symbols present)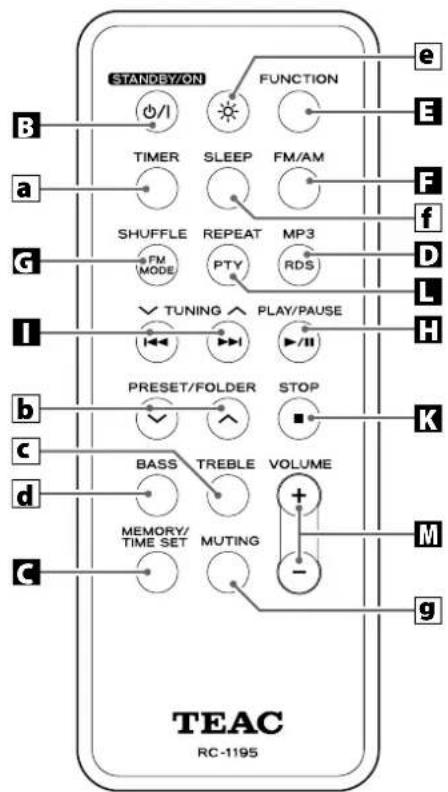
flowchart
graph TD
    A["STANDBY/ON"] --> B["TIMER"]
    B --> C["SLEEP"]
    C --> D["FM/AM"]
    D --> E["FS"]
    E --> F["FS"]
    F --> G["FS"]
    G --> H["FS"]
    H --> I["TM"]
    I --> J["SHUFFLE"]
    J --> K["REPEAT"]
    K --> L["MP3"]
    L --> M["RDS"]
    M --> N["D"]
    N --> O["L"]
    O --> P["FL"]
    P --> Q["TUNING"]
    Q --> R["PLAY/PAUSE"]
    R --> S["H"]
    S --> T["STOP"]
    T --> U["K"]
    U --> V["BASS"]
    V --> W["TREBLE"]
    W --> X["VOLUME"]
    X --> Y["M"]
    Y --> Z["G"]
    Z --> AA["C"]
    AA --> AB["MEMORY/TIME SET"]
    AB --> AC["MUTING"]
    AC --> AD["-"]
Hinweis:
natural_image
Line drawing of a device with earphones connected to a cable, showing ports and wiring (no text or symbols)ACHTUNG
natural_image
Illustration of a hand interacting with a touchscreen device (no text or symbols present)natural_image
Line drawing of a CD or DVD device with an arrow pointing to its front panel (no text or symbols present)natural_image
Diagram of a USB device with an arrow pointing to its internal label (no text or symbols present)CD
CD/Mem 000 P-02
MP3
MP3/Mem 001-000 P-02
Preset Save

natural_image
Diagram showing a device connected to a power cord with a cable, no text or symbols presentBIJ HET VERPLAATSEN VAN DIT APPARAAT
natural_image
Pure electrical circuit lines without any symbolsnatural_image
Simple line drawing of a mechanical bracket with a pull rod and arrow indicating rotation (no text or symbols)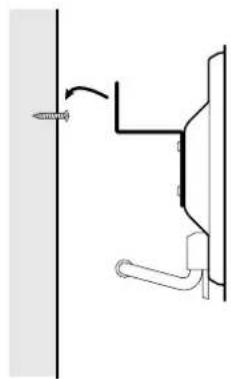
natural_image
Pure mechanical diagram showing a screw fastening attached to a vertical wall (no text or symbols)Opmerking:
natural_image
Technical line drawing of a computer monitor with attached bracket and screw base (no text or symbols)natural_image
Technical line drawing of a mechanical assembly with mounting holes and a clamping bracket (no text or symbols)Aansluiting
LET OP:
B AM Iusantenne
natural_image
Four-panel diagram showing a heart-shaped object with cross marks, each paired with a separate irregular shape (no text or symbols)natural_image
Diagram of a device interior with a circular button and an arrow indicating direction (no text or symbols)3
natural_image
Diagram showing a device being inserted into a device with an arrow indicating direction (no text or symbols present)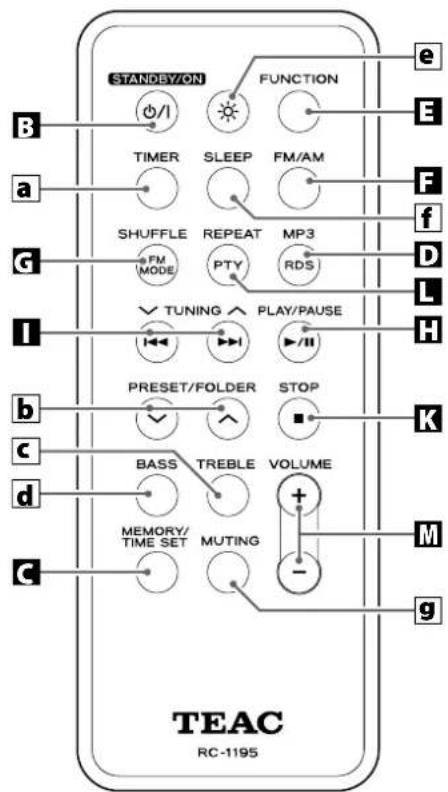
flowchart
graph TD
    A["STANDBY/ON"] --> B["TIMER"]
    B --> C["SLEEP"]
    C --> D["FM/AM"]
    D --> E["FS"]
    E --> F["FS"]
    F --> G["FS"]
    G --> H["FS"]
    H --> I["TM"]
    I --> J["SHUFFLE"]
    J --> K["REPEAT"]
    K --> L["MP3"]
    L --> M["RDS"]
    M --> N["D"]
    N --> O["L"]
    O --> P["H"]
    P --> Q["TUNING"]
    Q --> R["PLAY/PAUSE"]
    R --> S["STOP"]
    S --> T["K"]
    T --> U["BASS"]
    U --> V["TREBLE"]
    V --> W["VOLUME"]
    W --> X["+"]
    X --> Y["M"]
    Y --> Z["-"]
    Z --> AA["g"]
    AA --> AB["TEAC RC-1195"]
Opmerking:
natural_image
Line drawing of a portable electronic device connected to an earphone (no text or symbols present)LET OP:
natural_image
Illustration of a hand interacting with a touchscreen device (no text or symbols present)natural_image
Line drawing of a CD/DVD device with an arrow pointing to its internal components (no text or symbols present)SHUFFLE, stop (■), FUNCTION, FM/AM STANDBY/ON, open/close (▲)
MP3
MP3/Mem
002-000-P-01
CD
CD/Mem
000 P-02
MP3
MP3/Mem
-001-000 P-02
open/close (▲), FUNCTION, FM/AM, STANDBY/ON
Preset Save 1
PS (Programme Service name)
natural_image
Diagram of a device with a cable and connector, showing no text or symbolsnatural_image
Pure electrical circuit lines without any symbolsnatural_image
Simple line drawing of a mechanical assembly with two screws and an angled component (no text or symbols)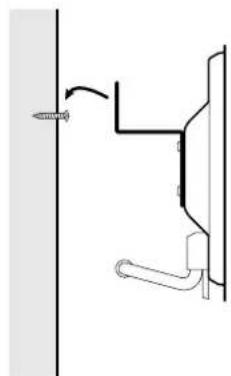
natural_image
Pure technical diagram showing a screw fastening on a vertical surface with a bracket and pipe (no text or symbols)Nota:
natural_image
Technical line drawing of a mechanical assembly with mounting holes and a bracket (no text or symbols)natural_image
Technical line drawing of a mechanical assembly with mounting holes and a clamp (no text or symbols)Conexión
PRECAUCIÓN:
natural_image
Simple line drawing of a device component with a curved arrow indicating rotation (no text or symbols)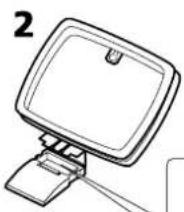
natural_image
Four-panel diagram showing a heart shape with cross marks, each panel containing a small circle and an X symbol (no text or labels)natural_image
Diagram of a mechanical component with an arrow indicating direction, no text or symbols present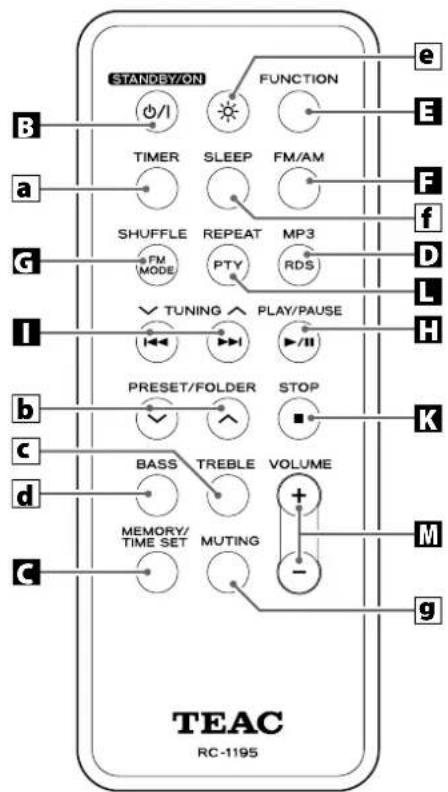
flowchart
graph TD
    A["STANDBY/ON"] --> B["TIMER"]
    B --> C["SLEEP"]
    C --> D["FM/AM"]
    D --> E["SHUFFLE"]
    E --> F["REPEAT"]
    F --> G["MP3"]
    G --> H["PTY"]
    H --> I["RDS"]
    I --> J["TUNING"]
    J --> K["PLAY/PAUSE"]
    K --> L["PRESERT/FOLDER"]
    L --> M["STOP"]
    M --> N["BASS"]
    N --> O["TREBLE"]
    O --> P["VOLUME"]
    P --> Q["+"]
    Q --> R["METRORY/TIME SET"]
    R --> S["MUTING"]
    S --> T["-"]
    T --> U["g"]
    U --> V["K"]
    V --> W["THEAC RC-1195"]
Nota:
natural_image
Line drawing of a device with earphones connected to a cable, showing ports and wiring (no text or symbols)PRECAUCIÓN
natural_image
Illustration of a hand clicking a button on a keyboard (no text or symbols present)natural_image
Line drawing of a CD/DVD device with an open rear panel and a circular component, showing no text or symbols.natural_image
Illustration of a USB device with an arrow pointing to its internal label (no text or symbols present)SHUFFLE, stop (■), FUNCTION, FM/AM STANDBY/ON, open/close (▲)
CD
MP3
CD
CD/Mem 000 P-02
MP3
MP3/Mem 001-000 P-02
open/close(▲), FUNCTION, FM/AM, STANDBY/ON
Preset Save

natural_image
Diagram showing a device connected to a cable with a sensor or probe inserted (no text or symbols present)TEAC AMERICA, INC. 7733 Telegraph Road, Montebello, California 90640 Phone: (323) 726-0303
TEAC CANADA LTD. 5939 Wallace Street, Mississauga, Ontario L4Z 1Z8, Canada Phone: (905) 890-8008
TEAC MEXICO, S.A. De C.V Rio Churubusco 364, Colonia Del Carmen, Delegación Coyoacàn, CP 04100, México DF, México
Phone: (5255)5010-6000
TEAC UK LIMITED
Unit 19 & 20, The Courtyards, Hatters Lane, Watford, Hertfordshire, WD18 8TE, U.K. Phone: (0845) 130-2511
TEAC EUROPE GmbH Bahnstrasse 12, 65205 Wiesbaden-Erbenheim, Germany Phone: 0611-71580
This appliance has a serial number located on the rear panel. Please record the model number and serial number and retain them for your records.
Model number Serial number

- IMPORTANT SAFETY INSTRUCTIONS
- CAUTION
- Contents
- Thank you for choosing TEAC. Read this manual carefully to get the best performance from this unit.
- CD/MP3
- Radio
- AUX
- Before Using the Unit
- Read this before operation
- CAUTION: DO NOT MOVE THE UNIT DURING PLAYBACK
- WHEN MOVING THIS UNIT
- Speaker Installation
- Precautions
- To hook on the wall
- Note:
- To stand the speakers in the vertical position
- Connection
- CAUTION:
- A FM Indoor Antenna
- FM Outdoor Antenna
- B AM loop antenna
- C Subwoofer
- D SPEAKERS
- E AC Power Cord
- POWER switch of the Subwoofer
- G Headphones
- H AUX IN
- Reserved jack
- Discs
- Discs which can be played on this unit:
- MP3 and WMA Remote Co
- Disc
- USB
- ol Unit
- Battery Installation
- Battery Replacement
- Precautions concerning batteries
- A display
- B STANDBY/ON ( )0/1
- C MEMORY/TIME SET
- D MP3/RDS
- E FUNCTION
- FM/AM
- G SHUFFLE/FM MODE
- H play/pause (▶/II)
- skip/tuning (|◄◄/►►I)
- open/close (▲)
- K stop (■)
- L REPEAT/PTY
- M VOLUME (-, +)
- N USB terminal
- CD door
- P Remote Sensor
- a TIMER
- b PRESET/FOLDER (, ↗
- c TREBLE
- d BASS
- e dimmer ()
- f SLEEP
- g MUTING
- Turn on the subwoofer.
- Press the STANDBY/ON button ( ) on the main unit.
- Select a source by pressing the FUNCTION button.
- Play the source and adjust the volume using the VOLUME buttons.
- Muting
- Headphones
- Sleep Timer
- Dimmer
- Tone Control
- Press the BASS or TREBLE button.
- Within 2 seconds, press the VOLUME buttons to change the setting.
- Audio CD
- MP3/WMA disc
- Press the FUNCTION button to select "USB".
- Connect an USB memory device to the USB port on the front panel of the unit.
- Press the play/pause button (▶/III) to start playback.
- A To suspend playback temporarily (pause mode)
- B To stop playback
- C To skip to the next or a previous track
- D Search for a part of a track
- E To display MP3/WMA information
- Folder Search (MP3/WMA only)
- Press the FOLDER buttons (/) to select a folder.
- Press the play/pause button (▶/II).
- If you want to select a file, press the skip button (|◀◀ or ▶▶▶).
- Press the play/pause button (▶/II).
- Shuffle Playback
- Press the FUNCTION button to select "CD" or "USB".
- Press the MEMORY button.
- Press the skip button (|◀◀ or ▶▶▶) repeatedly to select a MP3/WMA folder, then press the MEMORY button.
- Press the skip button (|◀◀ or ▶▶▶) repeatedly to select a track, then press the MEMORY button.
- When the selection of track numbers is completed, press the play/pause button (▶/II) to start program playback.
- Repeat Playback
- To check the programmed order
- To add a track to the end of the program
- To overwrite the program
- To clear program
- Repeat one track/file (R1)
- Repeat folder (Rf) (Only MP3/WMA disc)
- Repeat all (Ra)
- Selecting stations which cannot be tuned automatically (manual selection)
- FM MODE button
- Auto (stereo)
- Mono
- If the reception is poor
- AM broadcast
- FM broadcast
- Preset Tuning
- How to select preset stations
- RDS
- PS (Programme Service name)
- PTY (Programme Type)
- RT (Radio Text)
- RDS (PTY Search)
- PTY
- Listening to an External Source
- Setting the Timer 1
- Press and hold the TIMER button until "TimerOn" appears on the display.
- Press the skip button (|◄◄ /►►|) to set the start time (hour), and then press the TIMER button.
- Press the skip button (1◄◄/►►) to set the start time (minute), and then press the TIMER button.
- Press the skip button (|◄◄/►►|) to set the stop time (minute), and then press the TIMER button.
- Press the skip button (|◄◄ /►►|) to set the stop time (hour), and then press the TIMER button.
- Setting the Timer 2
- To turn on or off the timer
- Specifications
- AMPLIFIER section
- Radio Section (FM)
- Radio Section (AM)
- CD PLAYER Section
- SPEAKER
- SUBWOOFER
- GENERAL
- Standard Accessories
- No power
- No sound from speakers.
- The sound is noisy.
- Remote control does not work.
- CD Player
- Will not play.
- Sound skips.
- Cannot listen to any station, or signal is too weak.
- Though the FM broadcast is stereo, it sounds monaural.
- Beware of condensation
- Maintenance
- Information for Users on Collection and Disposal of Old Equipment and used Batteries
- [Information on Disposal in other Countries outside the European Union]
- Note for the battery symbol (bottom two symbol examples):
- Inhalt
- Hinweis:
- Anschließen
- ACHTUNG
- BIJ HET VERPLAATSEN VAN DIT APPARAAT
- Opmerking:
- Aansluiting
- LET OP:
- B AM Iusantenne
- Nota:
- Conexión
- PRECAUCIÓN:
- PRECAUCIÓN
Brand : TEAC
Model : MC-DX40
Category : Hi-Fi System