
P-Touch 2310 - Label printer BROTHER - Free user manual and instructions
Find the device manual for free P-Touch 2310 BROTHER in PDF.


| Product Type | Label Printer |
| Brand | Brother |
| Model | P-Touch 2310 |
| Dimensions (W x D x H) | 7 3/5 in x 9 1/2 in x 2 1/2 in (194 mm x 242 mm x 65.5 mm) |
| Weight | 1.83 lb (830 g) without tape cassette and batteries |
| Power Supply | Eight AA alkaline batteries or optional AC adaptor (model AD-60) |
| Auto Power Off | After 5 minutes of inactivity (30 minutes when connected to a computer) |
| Print Head | 128 dots / 180 dpi |
| Tape Widths Supported | 1/4 in (6 mm), 3/8 in (9 mm), 1/2 in (12 mm), 3/4 in (18 mm), 1 in (24 mm) |
| Character Sizes | 6, 9, 12, 18, 24, 36, 42 points plus 52 points (capitals only) |
| Maximum Lines | Up to 6 lines depending on tape width |
| Memory Capacity | 300 characters in up to 10 files (99 characters per file) |
| Display | LCD, 10 characters x 2 lines with indicators |
| Keyboard | 51 keys |
| Font Settings | 4 fonts (FONT 1, FONT 2, FONT 3, FONT 4) |
| Character Styles | Normal, Bold, Outline, Shadow, Italic, combinations, and Vertical |
| Additional Functions | Underline, Frame, Tape Margin, Alignment, Mirror Printing, Length, Auto Cut, Numbering, Repeat Printing, Stamp, Memory |
| Connectivity | USB (for connection to PC or Mac) |
| Software | P-touch Editor (included on CD-ROM, Windows/Mac) |
| Print Head Cleaning | Use dry cotton swab; if needed, use isopropyl alcohol |
| Safety Precautions | Use only Brother TZ tapes; avoid dust, direct sunlight, high temperatures/humidity; do not use organic solvents; do not touch cutter edge |
| Accessories | TZ tape cassettes, stamp kit, AC adaptor, carrying case, head cleaner |
Frequently Asked Questions - P-Touch 2310 BROTHER
User questions about P-Touch 2310 BROTHER
0 question about this device. Answer the ones you know or ask your own.
Ask a new question about this device
Download the instructions for your Label printer in PDF format for free! Find your manual P-Touch 2310 - BROTHER and take your electronic device back in hand. On this page are published all the documents necessary for the use of your device. P-Touch 2310 by BROTHER.
USER MANUAL P-Touch 2310 BROTHER
- Read this User's Guide before you start using your P-touch.
- Keep this User's Guide in a handy place for future reference.
natural_image
Line drawing of a digital telephone with keypad and control panel (no text or symbols)INTRODUCTION
Thank you for purchasing the P-touch 2300/2310!
Your new P-touch will allow you to create labels and stamps for any need. Its versatility enables you to design custom labels by choosing from a variety of frame designs and from many characters sizes and styles. In addition, the five tape widths (1/4" (6 mm), 3/8" (9 mm), 1/2" (12 mm), 3/4" (18 mm) and 1" (24 mm)) and variety of tape colors allow you to print personalized labels, useful for color-coded filing.
You no longer have to worry about urgent tasks that require professional printing. In the office, the factory, the lab and the home, the quality and performance of the P-touch 2300/2310 makes it an extremely practical machine.
Finally, as you may want to refer to this User's Guide occasionally, we suggest that you keep it in a handy place.
(The PT-2300 and the PT-2310 models are equipped with the same functions; however, only the PT-2310 includes a carrying case and additional tape.)
FCC NOTICE
This equipment has been tested and found to comply with the limits for a Class B digital device, pursuant to Part 15 of the FCC Rules. These limits are designed to provide reasonable protection against harmful interference in a residential installation. This equipment generates, uses, and can radiate radio frequency energy and, if not installed and used in accordance with the instructions, may cause harmful interference to radio communications. However, there is no guarantee that interference will not occur in a particular installation. If this equipment does cause harmful interference to radio or television reception, which can be determined by turning the equipment off and on, the user is encouraged to try to correct the interference by one or more of the following measures:
- Reorient or relocate the receiving antenna
- Increase the separation between the equipment and receiver.
- Connect the equipment into an outlet on a circuit different from that to which the receiver is connected.
- Consult the dealer or an experienced radio/TV technician for help.
- Changes or modifications not expressly approved by Brother Industries, Ltd. could void the user's authority to operate the equipment.
Patent numbers and patent publication numbers which are related to this product are as below:
USP4839742 USP4983058 USP5120147
USP4927278 USP5009530
USP4976558 USP5069557
CONTENTS
Getting Started
GENERAL DESCRIPTION .... 1
GENERAL PRECAUTIONS.... 2
BATTERIES 3
OPTIONAL AC ADAPTOR.... 4
TAPE CASSETTE 5
CONNECTING THE P-TOUCH TO A COMPUTER 6
INSTALLING P-TOUCH EDITOR 7
STARTING P-TOUCH EDITOR.... 16
ATTACHING LABELS 19
PRINT HEAD & ROLLERS.... 20
For Your Information
POWER KEY....21
CURSOR KEYS 21
CODE, ALT & SHIFT KEYS 22
SPACE KEY 25
RETURN KEY 25
TAB FUNCTION 26
DELETE KEY 28
LINE OUT FUNCTION.... 29
CLEAR FUNCTION 30
ACCENT FUNCTION 32
SYMBOL FUNCTION.... 33
AUTO FORMAT FUNCTION 35
STAMP FUNCTION.... 36
FONT FUNCTION 39
SIZE & WIDTH FUNCTIONS.... 40
STYLE FUNCTION 42
UNDERLINE FUNCTION 44
FRAME FUNCTION.... 45
TAPE MARGIN FUNCTION 46
HORIZONTAL ALIGNMENT FUNCTION 47
MIRROR PRINTING FUNCTION.... 48
LENGTH FUNCTION.... 49
AUTO CUT FUNCTION.... 51
PRINT KEY 52
FEED & CUT FUNCTION.... 52
NUMBERING FUNCTION 53
REPEAT PRINTING FUNCTION 54
MEMORY FUNCTIONS.... 56
TROUBLESHOOTING....60
ERROR MESSAGE LIST....61
SPECIFICATIONS 64
ACCESSORIES 65
Getting Started
GENERAL DESCRIPTION
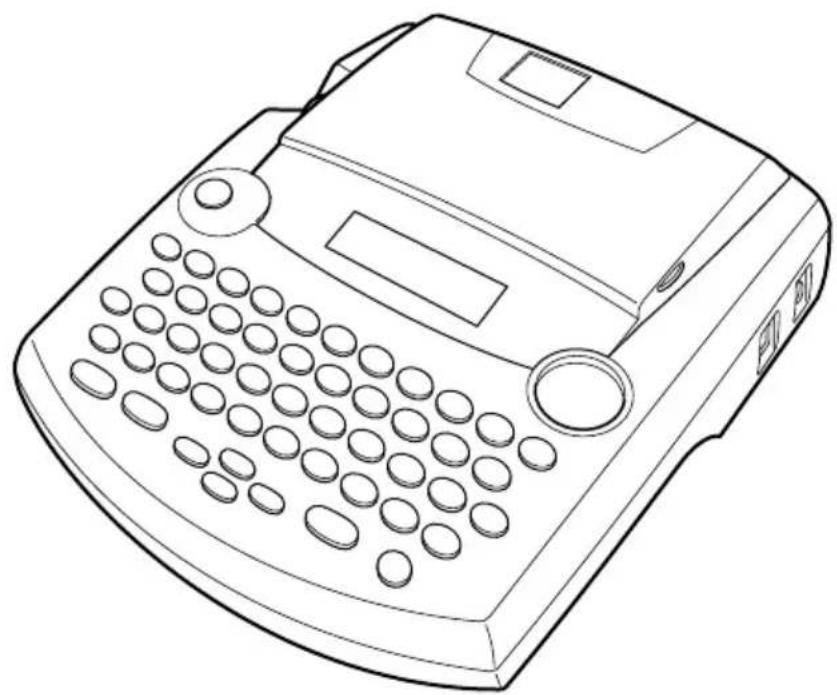
TOP VIEW
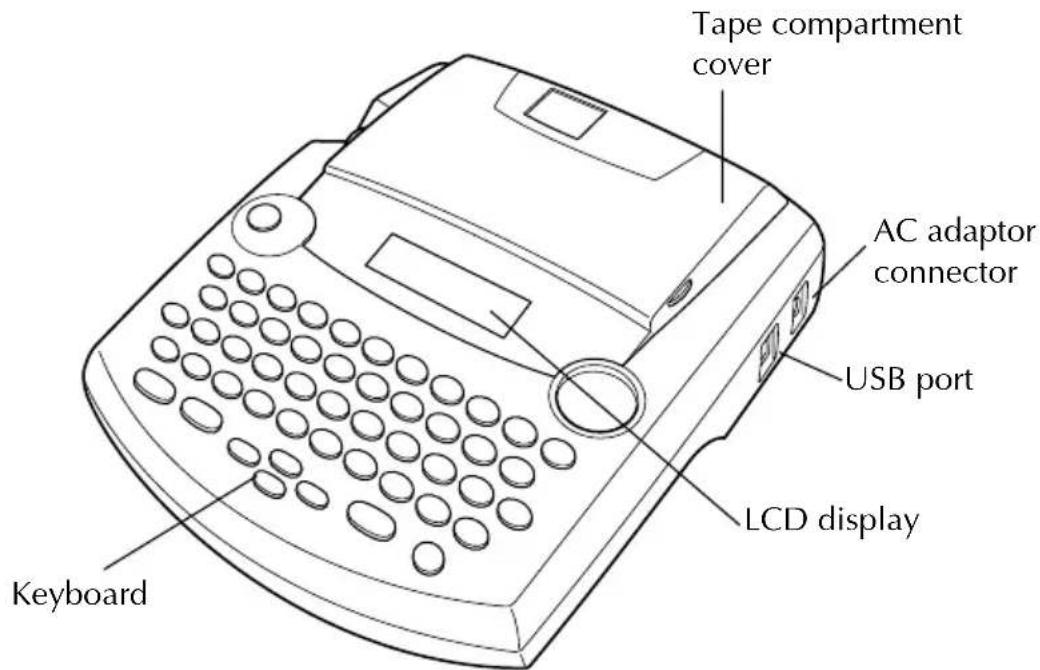
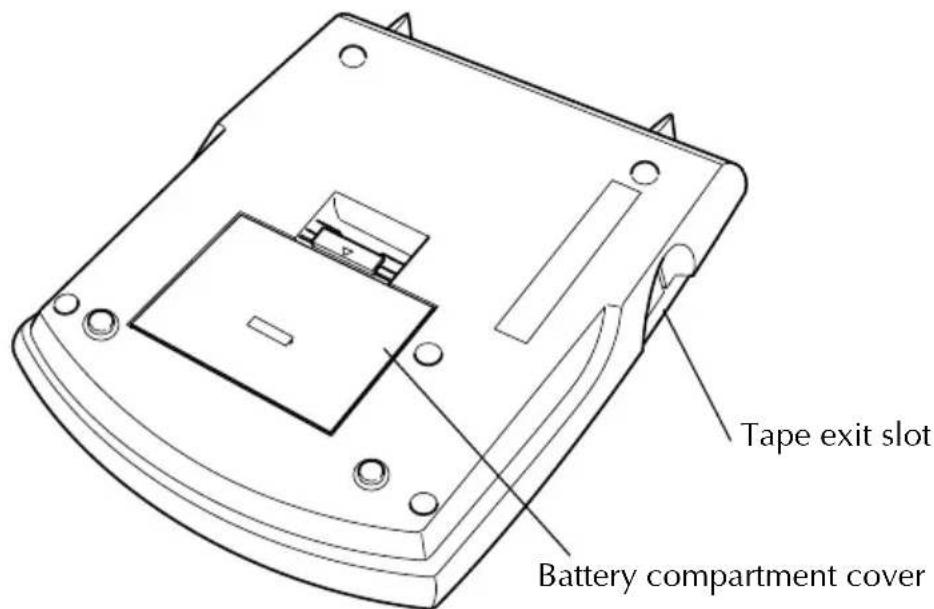
BOTTOM VIEW
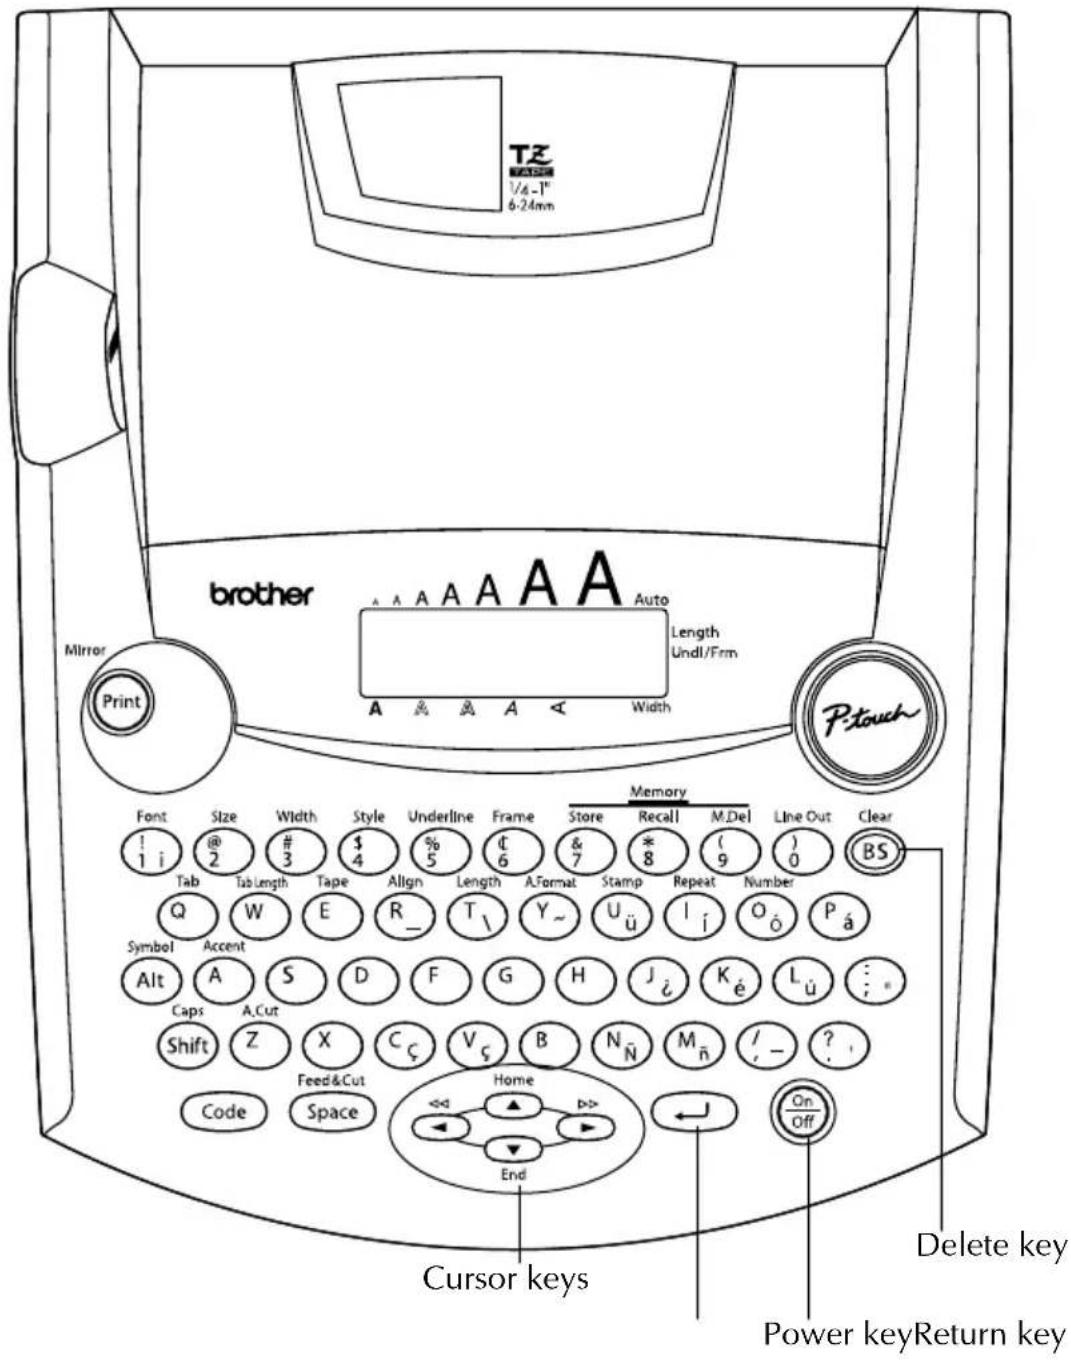
KEYBOARD & LCD DISPLAY
GENERAL PRECAUTIONS
- Use only Brother TZ tapes with this machine. Do not use tapes that do not have the mark.
- Do not pull on the tape being fed from the P-touch. This may damage the tape cassette.
-
Do not use the machine in dusty places, and keep it out of both direct sunlight and rain.
-
Do not expose the machine to high temperatures or high humidity. Never leave it on the dashboard or in the back of your car.
- Do not leave any rubber or vinyl on the machine for an extended period of time. Doing so may cause staining.
- Do not clean the machine with alcohol or other organic solvents. Use a soft, dry cloth only.
- Do not put any foreign objects into or anything on the machine.
- To avoid injuries, do not touch the cutter's edge.
- Use only the AC adaptor (model AD-60) designed exclusively for this machine. Use of any other adaptor will void the warranty.
● Do not try to disassemble the AC adaptor. - When the machine is not being used for a long period of time and it is not necessary to keep the text files stored in the memory, disconnect the AC adaptor, and remove the batteries to prevent them from leaking and damaging the machine.
- When the AC adaptor is connected, unplugging the adaptor from the electrical outlet before unplugging it from the machine can delete all text files in the memory, even if batteries are installed.
- Use eight AA alkaline batteries in this machine.
BATTERIES
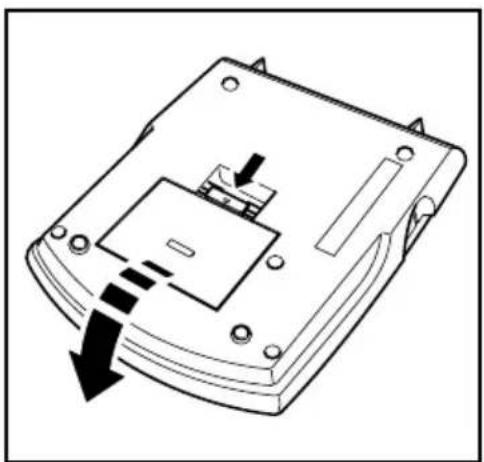
This portable machine can be used anywhere by installing eight (8) AA alkaline batteries. When you change the batteries, always replace all eight at the same time.
To change the batteries:
① Remove the battery compartment cover on the back of the machine.
② If batteries are already installed, remove them.
③ Insert eight new AA alkaline batteries, making sure that their poles point in the correct direction.
4 Attach the battery compartment cover.

Be sure to insert the new batteries within five minutes of removing the old ones, otherwise the text shown in the display and any text files stored in the memory will be lost (unless the machine is plugged into an AC outlet with the AC adaptor).
Remove the batteries and disconnect the AC adaptor if you do not intend to use this machine for an extended period of time. When the power is disconnected, all text shown in the display and stored in the memory will be lost.
If the batteries are not installed with their positive and negative poles pointing in the correct direction, the batteries may leak, overheat or burst, or the print head may overheat.
natural_image
Diagram of a device casing with internal components and directional arrows indicating movement (no text or symbols)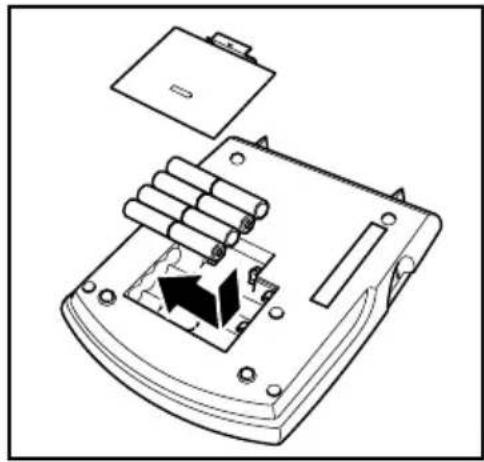
natural_image
Technical line drawing of a mechanical device with internal components and a highlighted section (no text or symbols)OPTIONAL AC ADAPTOR
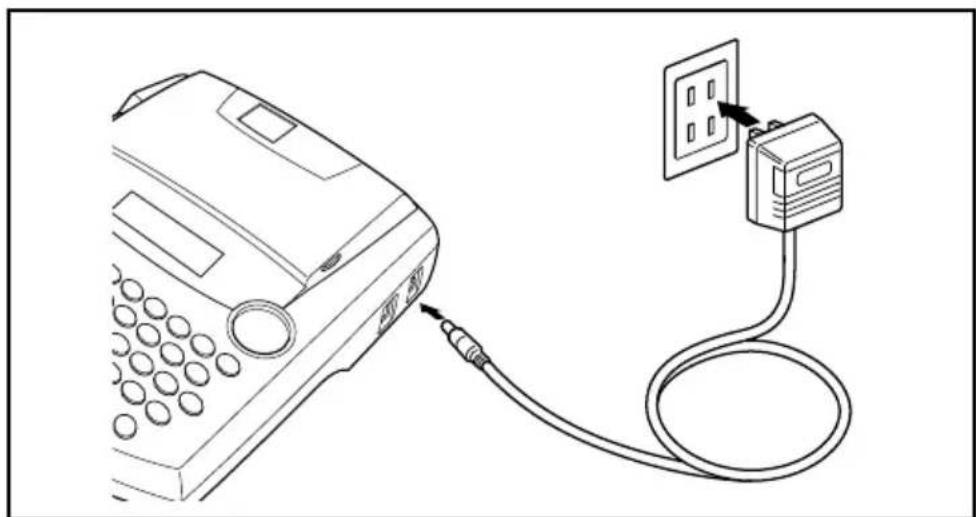
The AC adaptor (model AD-60) allows you to use this machine wherever there is an electrical outlet.
To connect the optional AC adaptor:
① Insert the plug on the adaptor cord into the connector marked DC IN 9.5V on the right side of the machine.
② Insert the plug on the adaptor into the nearest standard electrical outlet.
Only use the AC adaptor designed exclusively for this machine.
Remove the batteries and disconnect the AC adaptor if you do not intend to use this machine for an extended period of time. When the power is disconnected, all text shown in the display and stored in the memory will be lost.
When the AC adaptor is connected, unplugging the adaptor from the electrical outlet before unplugging it from the machine can delete all text files in the memory, even if batteries are installed.
It is recommended that you use the AC adaptor when printing large fonts on 1" (24 mm)-wide tape since this operation can quickly drain the batteries.
natural_image
Line drawing of a telephone receiver connected to a wall-mounted electrical outlet (no text or symbols)TAPE CASSETTE
A single TZ tape cassette is supplied with this unit. However, since TZ tape cassettes are available for this machine in a wide variety of colors and sizes, it is possible to make distinctive color-coded and stylized labels.
In addition, this machine has been designed to allow you to change the tape cassettes quickly and easily.
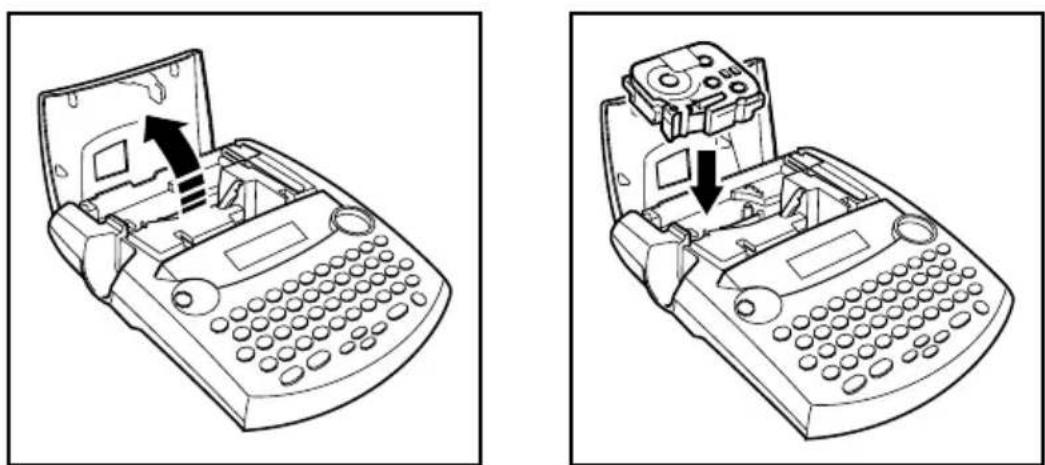
To change the tape cassette:
① Lift open the tape compartment cover. The installed cassette is also released.
② If a tape cassette is already installed, remove it by pulling it straight up.
③ If the ink ribbon in the other tape cassette is loose, use your finger to wind the toothed wheel in the direction of the arrow on the cassette until there is no slack in the ribbon. Also, make sure that the end of the tape feeds under the tape guides.
If you are using a new tape cassette provided with a stopper, be sure to remove the stopper.
4 Insert the tape cassette firmly into the tape compartment, making sure that the entire back of the cassette touches the bottom of the compartment.
When inserting the tape cassette, make sure that the inner ribbon does not catch on the corner of the metal guide.
⑤ Close the compartment cover, then turn on the machine if it is off.
6 Hold down Code and press Space once to advance the tape and remove any slack.
CONNECTING THE P-TOUCH TO A COMPUTER
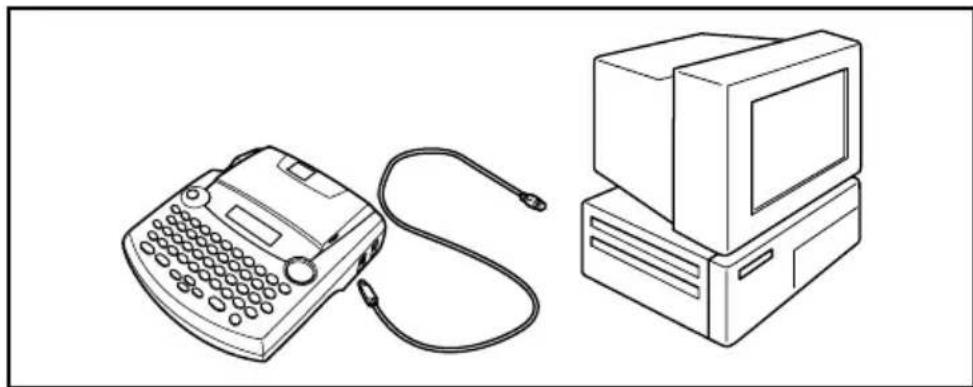
This machine is equipped with a USB port, allowing you to connect the P-touch to your IBM PC-compatible or Macintosh computer, and print labels and stamps created using the P-touch Editor software.

The P-touch Editor software and the printer driver must be installed before the P-touch is connected to the computer or turned on. Follow the installation procedure on pages 7 through 16 to install the P-touch Editor software and the printer driver, and connect the P-touch to the computer when you are instructed to do so.
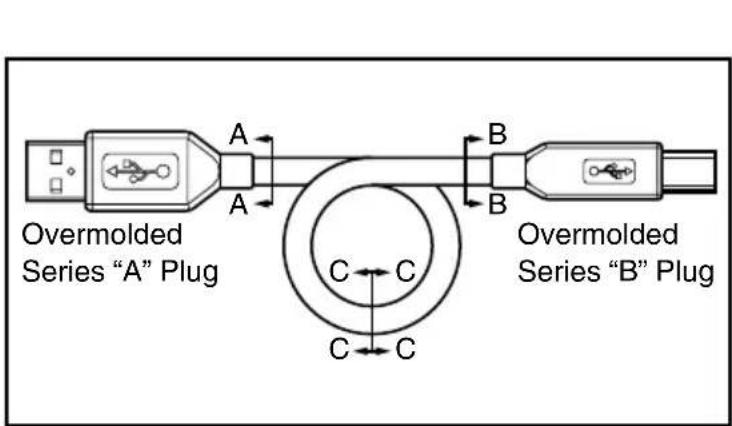
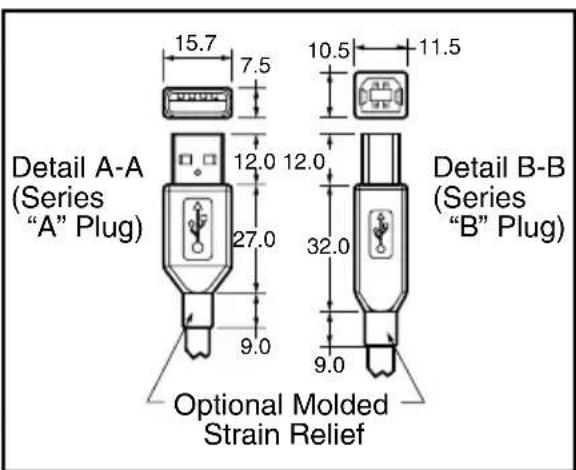
A USB interface cable is not included with the PT-2300/2310. When connecting the P-touch to a computer, use a standard USB cable (high-speed compatible with series A and B connectors).
To connect the P-touch to the computer:
1 Insert the flat (A) connector on the USB cable into the USB port on the computer.
② Insert the square (B) connector on the USB cable into the USB port on the right side of the P-touch.
③ Turn on the P-touch.
natural_image
Line drawing of a vintage office setup with a landline telephone and a desktop computer (no text or symbols)
The USB cable needed for connecting the P-touch to the computer is not included. Be sure to use a cable that meets the following specifications.
INSTALLING P-TOUCH EDITOR
The P-touch Editor software adds even more illustration and layout features to the label-making possibilities available with your PT-2300/2310.
[Unreadable]
Do not connect the PT-2300/2310 to the computer before installing the P-touch Editor software, otherwise it may not be installed correctly. Be sure not to connect the PT-2300/2310 until you are instructed to do so.
On an IBM PC-Compatible Computer
To install the P-touch Editor software:
① Check that your system configuration meets the following requirements.
Computer: IBM PC or compatible
Operating system: Microsoft® Windows® 2000 or pre-installed with Microsoft® Windows® 98/98SE/Me
Hard disk free space: At least 20 MB
A few hundred megabytes of additional free space may be needed when printing long labels or large amounts of data.
Available memory: Minimum 32 MB
Monitor: VGA or higher graphics card
USB port
CD-ROM drive
2 Insert the P-touch Editor Version 3.1 CD-ROM into the computer's CD-ROM drive. A dialog box automatically appears, allowing you to select what to install.
If the dialog box does not automatically appear, double-click "My Computer" on the desktop, double-click the icon for the CD-ROM drive containing the CD-ROM, and then double-click "Ptsetup.exe" to display the dialog box.
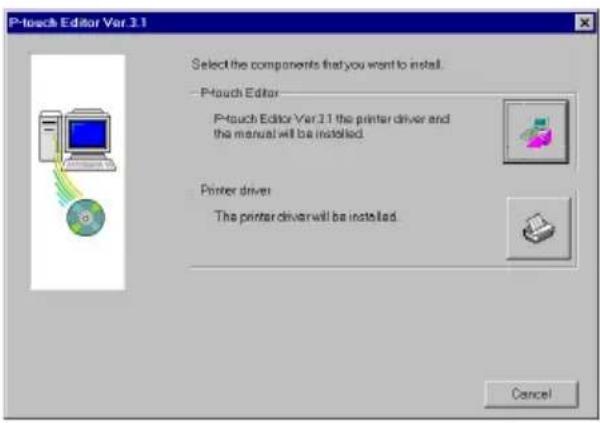
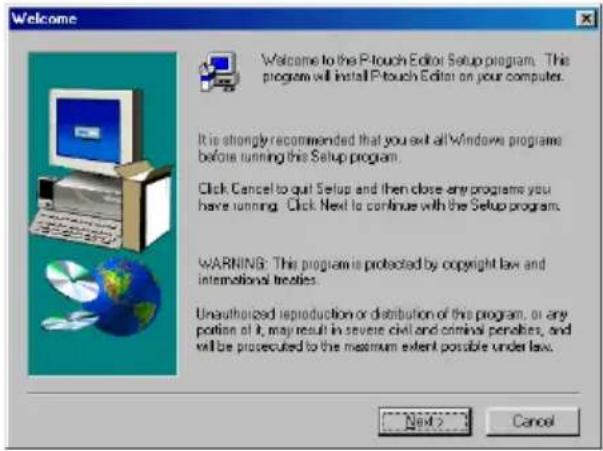
③Click the top button (P-touch Editor). The InstallShield® Wizard for installing the P-touch Editor software starts up, and then the Welcome dialog box appears.
To install just the printer driver, click the lower button (Printer driver). The first Driver Setup dialog box appears, informing you that the PT-2300/2310 printer driver will be installed.
Continue with the procedure in To install the USB printer driver on page 10.
![Driver Setup (Brother PT-2300/2310) The following driver will be set up. Brother PT-2300/2310 Warning: Do not connect or turn on the Brother PT-2300/2310 until you are directed to. To continue, click [Next]. Setup will begin.](/content/2026/05/770474/images/77beafaf9df5f097d9a3c52639eecc8bec4b4399dc5f920ddd099ef8eff0f09f.jpg)
④ Carefully read the contents of the dialog box, and then click the Next button to continue. The User Information dialog box appears.
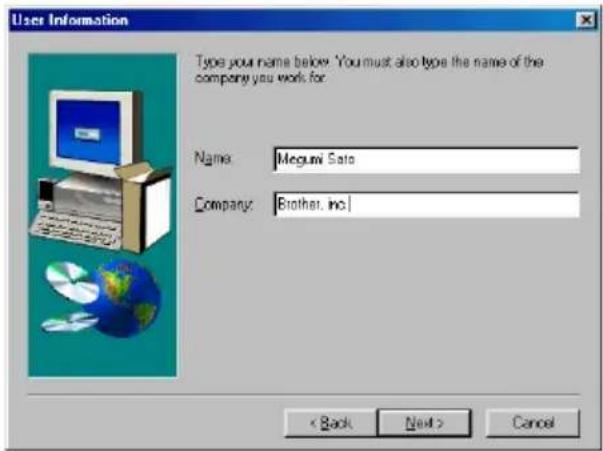
⑤Type the necessary information into the appropriate boxes (If the information has already been registered in Windows ^® , it will automatically appear.), and then click the Next button. A dialog box appears, asking for confirmation of the entered information.
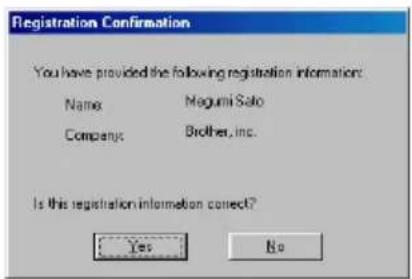
©
1) Select which options to install.
Editor: The P-touch Editor Version 3.1 software
Clip Art: The illustrations for the P-touch Editor Version 3.1 Clip Art function
Fonts: The 13 fonts
Auto Format
Templates: The templates for the Auto Format function
User's Guide: The User's Guide (HTML) for the P-touch Editor Version 3.1 (The User's Guide can also be viewed from the CD-ROM.)
Help: The help files for P-touch Editor Version 3.1
If the Change button can be clicked while an option is selected, sub-components can be selected. Click the Change button to display the Select Sub-components dialog box, and then select the sub-components that you wish to install by putting a check mark beside them. If certain options or sub-components are not installed, some P-touch Editor functions may not be available. After selecting the desired sub-components, click the Continue button.
2) Click the Next button to begin installation.
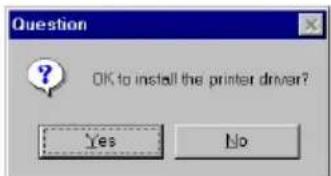
⑧ After P-touch Editor is installed, a dialog box appears, allowing you to select whether or not to install the printer driver.
To install the printer driver, click the Yes button. The first Driver Setup dialog box appears, informing you that the PT-2300/2310 printer driver will be installed.
Continue with the procedure in To install the USB printer driver below.
If the printer driver is already installed, click the No button, restart the computer, and then remove the CD-ROM from the CD-ROM drive.
![Driver Setup (Brother PT-2300/2310) The following driver will be set up Brother PT-2300/2310 Warning: Do not connect or turn on the Brother PT-2300/2310 until you are directed to. To continue, click [Next] Setup will begin.](/content/2026/05/770474/images/c8669a6bd871558e47d53e2a6700a5db9099d234bcde4bcda16ba841d864a7df.jpg)
To install the USB printer driver:
With Plug-and-Play, new devices connected to the system are detected, and their drivers are automatically installed. If the PT-2300/2310 is to be connected through the USB port, its driver will be installed with Plug-and-Play. Be sure to read the installation instructions described below before installing the file supplied on the CD-ROM.
Be sure not to connect the PT-2300/2310 until you are instructed to do so.
①Click the Next button. A dialog box appears, instructing you to connect the PT-2300/2310 to the computer.
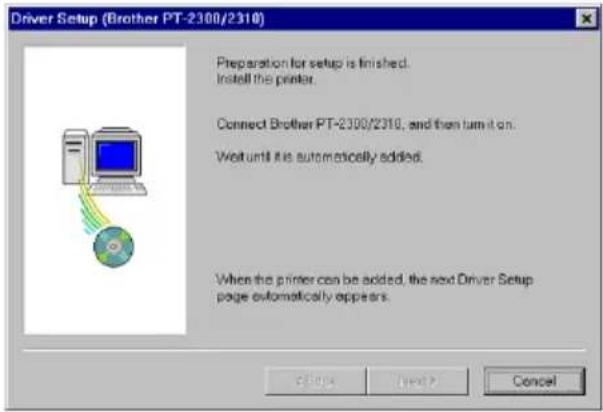
②Connect the PT-2300/2310 to the computer using a USB interface cable as described on page 6, and then turn on the PT-2300/2310. A dialog box appears, showing that the printer driver has been installed.
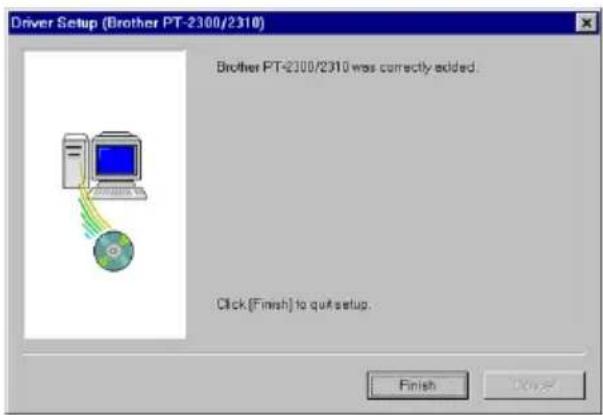
③Click the Finish button. A dialog box appears, showing that installation is finished.
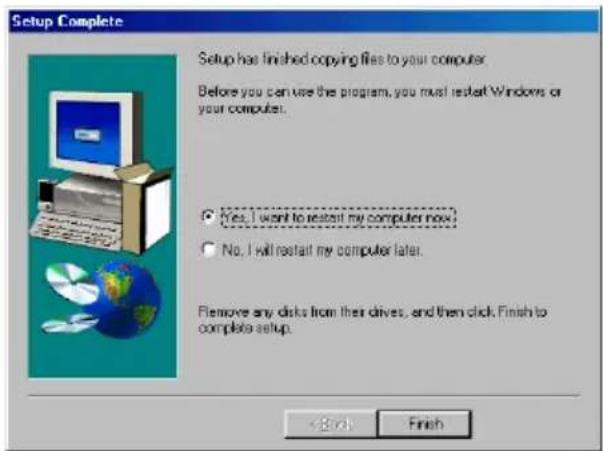
4 Select "Yes, I want to restart my computer now.", click the Finish button to restart the computer, and then remove the CD-ROM from the computer.
To replace, add or delete the printer driver:
①Turn off the PT-2300/2310, and then disconnect it from the computer.
② Insert the P-touch Editor Version 3.1 CD-ROM into the computer's CD-ROM drive. A dialog box automatically appears, allowing you to select what to install.
If the dialog box does not automatically appear, double-click "My Computer" on the desktop, double-click the icon for the CD-ROM drive containing the CD-ROM, and then double-click "Ptsetup.exe" to display the dialog box.
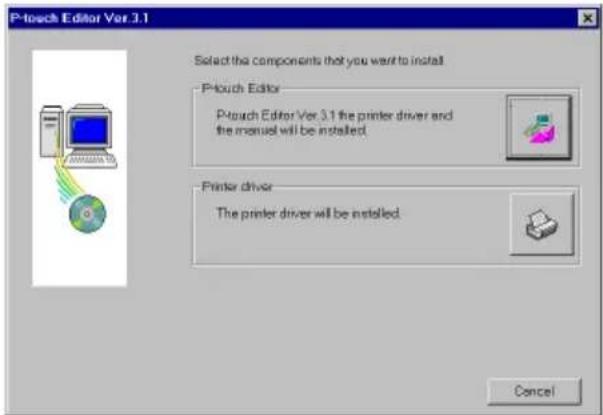
③Click the bottom button (Printer driver). A Driver Setup dialog box appears, allowing you to select whether to replace, add or delete the PT-2300/2310 printer driver.
4 Select the desired operation, and then click the Next button.
If "Replace with new Brother PT-2300/2310" is selected, the previously installed printer driver is deleted, and replaced with a new one. Select this option when upgrading the printer driver, or when running Windows 2000 and changing to a PT-2300/2310 with a different serial number.
![Driver Setup (Brother PT-2300/2310) Brother PT-2300/2310 is currently installed. Replace with new Brother PT-2300/2310? ○ Replace with new Brother PT-2300/2310 ○ Add Brother PT-2300/2310 ○ Delete Brother PT-2300/2310. Worling: Do not connect or turn on the Brother PT-2300/2310 until you are directed to. Make your selection, and then click [Next] Setup will begin Cancel Next > Cancel](/content/2026/05/770474/images/b8abf56a78aecacd0c3d489ca9d8169c7812abdb17989a162de17308686d0ab5.jpg)
If "Add Brother PT-2300/2310" is selected, a new printer driver is added. With a USB connection on Windows® 98/Me, only a port is added without adding it as a new printer. Select this option when connecting and using multiple PT-2300/2310s with the same computer.
⑤If "Replace with new Brother PT-2300/2310" or "Add Brother PT-2300/2310" was selected: A dialog box appears, instructing you to connect the PT-2300/2310 to the computer.
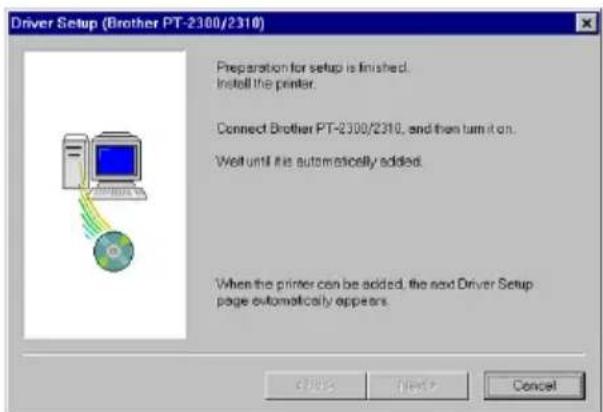
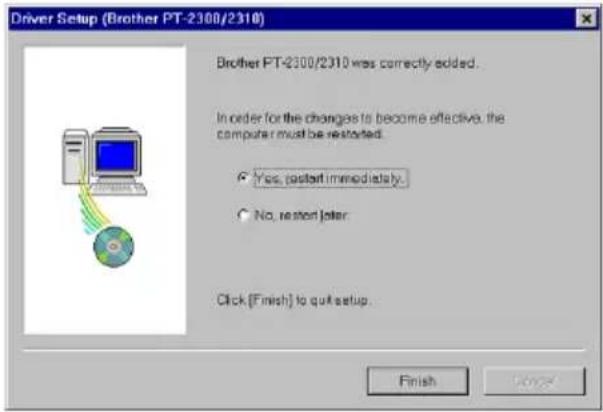
Connect the PT-2300/2310 to the computer using a USB interface cable as described on page 6, and then turn on the PT-2300/2310. A dialog box appears, showing that the printer driver has been installed.
Select "Yes, restart immediately.", and then click the Finish button to restart the computer.
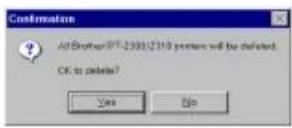
If "Delete Brother PT-2300/2310" was selected: A dialog box appears, asking for confirmation to delete all PT-2300/2310 printer drivers.
Click the Yes button. A dialog box appears, showing that the printer drivers have been deleted.
Click the Finish button.
If a dialog box appears, explaining that the computer should be restarted, select the option for restarting the computer, and then click the Finish button.
![Driver Setup (Brother PT-2300/2310) Brother PT-2300/2310 was correctly deleted. Click [Finish] to quit setup. Finish Cancel](/content/2026/05/770474/images/284d6c7704841aee62420a69e7b2761cc0a66c05ffabccda00f84d7e43df6ccc.jpg)
On a Macintosh Computer
The Mac version of the software is for a Mac with an English operating system. If the software is installed on a Mac with an operating system in a different language, the software may not run properly.
To install the P-touch Editor software:
①Check that your system configuration meets the following requirements.
Computer: Macintosh, Power Macintosh or iMac
Operating system: Mac OS 8.6 or later
*This software is only compatible with Mac OS X classic.
Hard disk free space: At least 20 MB
A few hundred megabytes of additional free space may be needed when printing long labels or large amounts of data.
Available memory free space: Minimum 24 MB
USB port
CD-ROM drive
*The application is supplied on a CD-ROM; therefore, the computer should be equipped with a CD-ROM drive.
②Connect the PT-2300/2310 to the Macintosh using a USB interface cable. Be sure to leave the PT-2300/2310 turned off.
③Turn on the Macintosh.
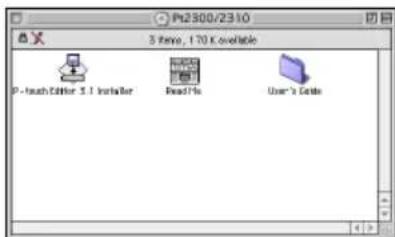
4 Insert the P-touch Editor Version 3.1 CD-ROM into the computer's CD-ROM drive.
⑤Double-click the P-touch Editor 3.1 Installer icon in the folder that appears.
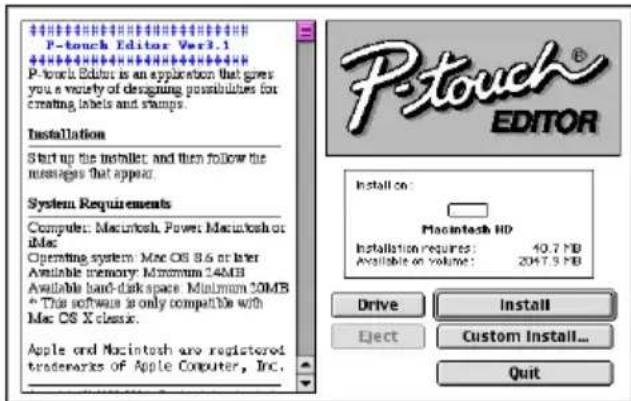
⑥ After the installer starts up, select the installation method.
- For a basic installation
Clicking the Install button immediately starts installing the most basic options. (Some clip art illustrations are not installed.)
About 20 MB of available hard-disk space is needed to begin installation. In order to install all options, about 120 MB of available hard-disk space is needed. If enough hard-disk space is available, click the Install button.
- For a Custom installation
Clicking the Custom Install button displays a dialog box that allows you to select which options to install.
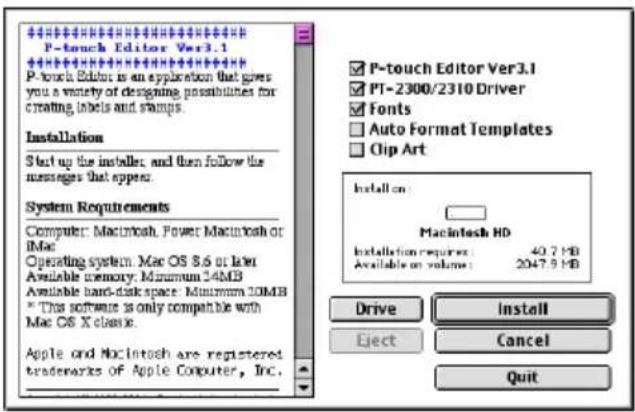
Only the options with a check mark beside them are installed. Select the options that you wish to install, and then click the Install button.
In order to print from the PT-2300/2310, "PT-2300/2310 Driver" must be selected for installation.
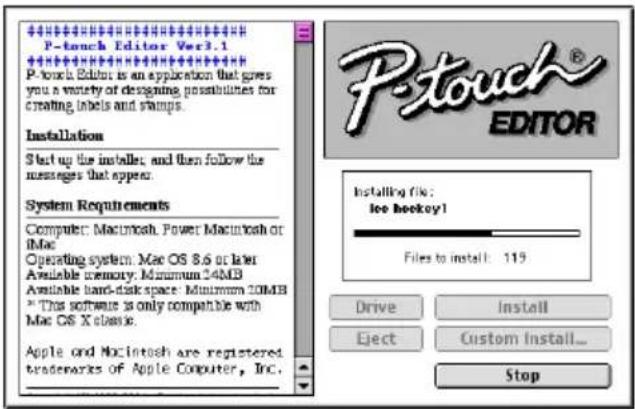
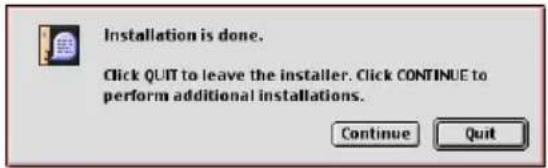
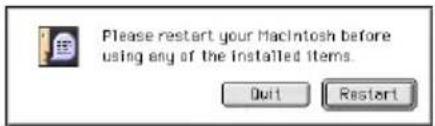
⑦When the installation is finished and the following dialog box appears, click the Quit button.
⑧ When the dialog box appears, asking if you wish to restart the computer, click the Restart button to restart the computer.
To select the PT-2300/2310 as the printer:
①Turn on the PT-2300/2310.
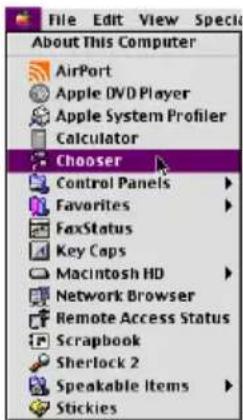
②Pull down the Apple menu and select "Chooser" to display the Chooser window.
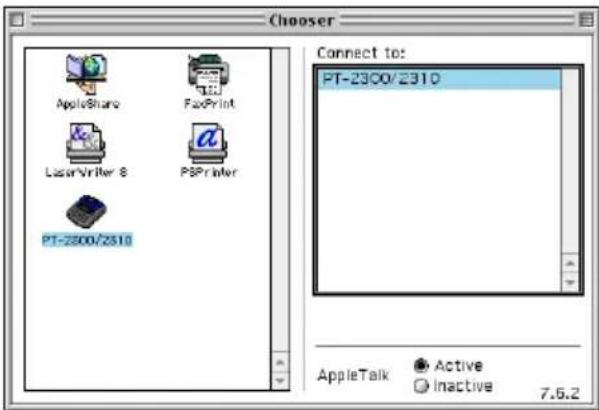
③In the list on the left, click the PT-2300/2310 icon. Then, select the appropriate printer from the list on the right.
④ Close the Chooser window to confirm your settings.
To delete P-touch Editor Version 3.1 and the printer driver:
When deleting the printer driver, be sure that the P-touch is turned off and unplugged.
①Drag the P-touch Editor Ver3.1 folder to the Trash icon.
②In the System Folder, open the Extensions folder.
③Drag the PT-2300/2310 icon and the USB PT-2300/2310 Extension icon to the Trash icon.
④ In the System Folder, open the Preferences folder.
⑤Drag the PT-2300/2310 Prefs icon to the Trash icon.
STARTING P-TOUCH EDITOR
The P-touch Editor application makes it easy for anyone to design and print labels for almost any need imaginable.
On an IBM PC-Compatible Computer
To start up P-touch Editor:
- By clicking the P-touch Editor icon:
- Double-click the "P-touch Editor 3.1" icon in the "P-touch Editor 3.1" group window.
- With the Start button:
①Click the Start button in the taskbar to display the Start menu.
②Select "Programs".
③Select "P-touch Editor 3.1".
④ Click "P-touch Editor 3.1".
- With Windows Explorer:
① Start up Windows Explorer.
②Select the drive and directory where P-touch Editor is installed.
③Double-click "Ptedit3.exe".
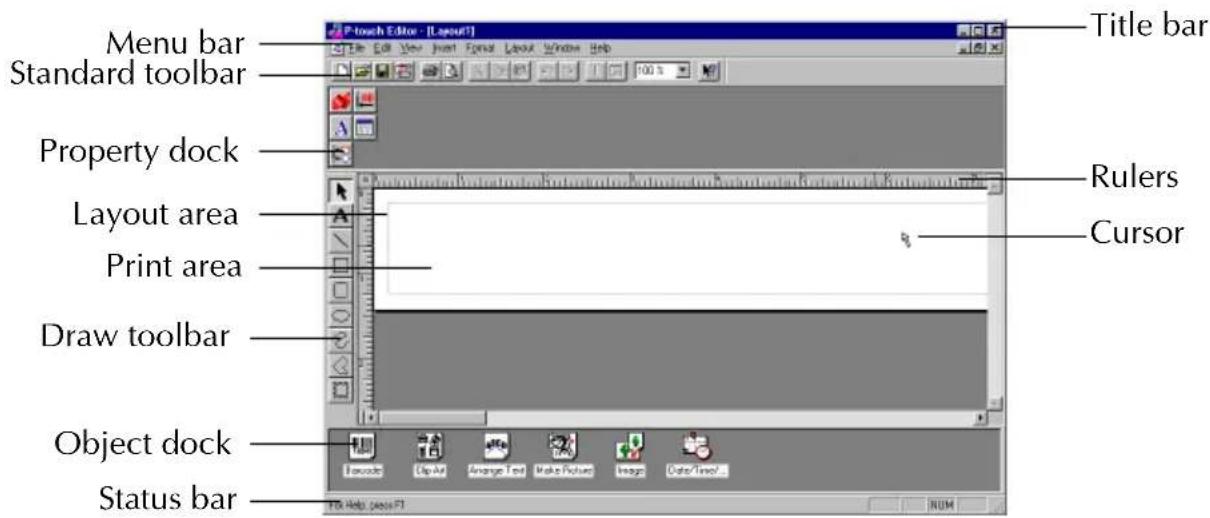
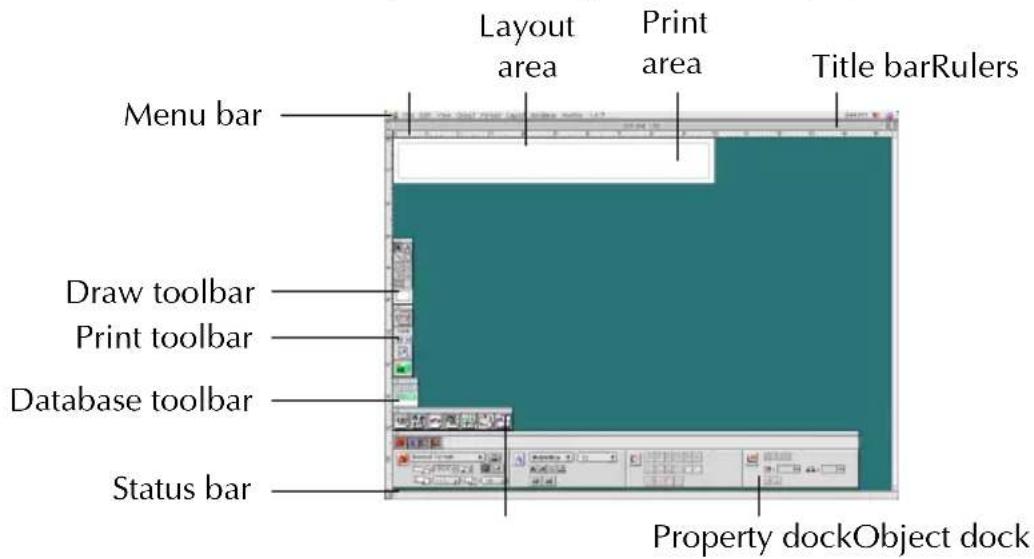
After P-touch Editor is started, the following window is displayed.
On a Macintosh Computer
To start up P-touch Editor:
●Double-click the "P-touch Editor Ver3.1" icon in the "P-touch Editor Ver3.1" folder installed on the computer.
After P-touch Editor is started, the following window is displayed.
Notes on Usage
Barcodes
Keep the following points in mind when using P-touch Editor Version 3.1 to print barcodes.
- Barcodes should be printed on white tape. If other colors of tape are used, the barcode reader may not be able to read the barcode correctly.
- Be sure to test the barcode reader to make sure that it can read printed barcodes in the environment where you plan to use them. In some cases, the barcodes are not read correctly.
- The QR Code protocol can only be used with English. If data in any other language is entered, the barcode may not be read correctly.
Databases
Keep the following points in mind when using the database functions of P-touch Editor Version 3.1.
For general details, refer to the User's Guide supplied on the P-touch Editor Version 3.1 CD-ROM.
- The database function of P-touch Editor Version 3.1 (Windows version) uses database files that are compatible with Microsoft Access 97. By upgrading P-touch Editor Version 3.1 using a program available on the CD-ROM, P-touch Editor will become compatible with Access 2000. Refer to the Readme file located at English\Ptouch\Editor\Ac2k on the CD-ROM (the folder name for French is “Francais”), and start up the program.
- P-touch Editor Version 3.1 can import files other than mdb files, such as csv files. Files saved as csv files with an application such as Microsoft Excel can be used with P-touch Editor. Refer to the User's Guide supplied on the P-touch Editor Version 3.1 CD-ROM for more details.
- Using a function available with Microsoft Access 97, Excel files can be linked to mdb files. With this function, data changed in Excel is automatically updated with the P-touch Editor.
ATTACHING LABELS
LAMINATED TAPE
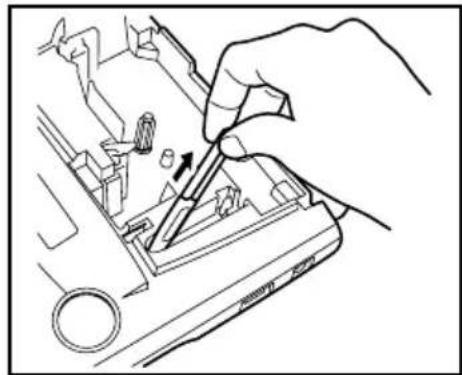
The enclosed stick enables you to easily remove the backing from labels printed on laminated tapes.
① Hold the tape in your left hand, with the printed surface facing up, and hold the stick in your right hand.
②Pass the tape halfway through the long narrow hole in the stick.
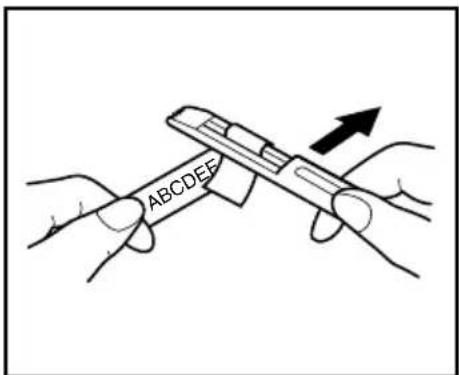
③Turn the stick three-quarters of a turn towards you and pull the stick away from you as shown below.
④ Peel off the label backing.
natural_image
Hand using a tool to adjust or install electronic components on a device (no text or symbols visible)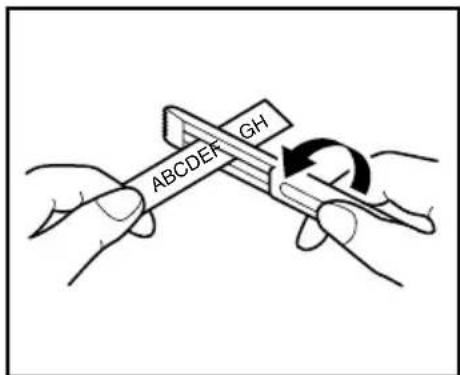
FABRIC TAPE
Fabric tape is used to attach a piece of fabric printed with your text onto garments using an iron. After printing the text onto fabric tape and cutting off the label using scissors, place the label on an ironed garment at the location where you wish to attach it in such a way that the printed text can be read correctly. Cover the label with another piece of cloth and use an iron set to a medium-high temperature (320 to 356 °F (160 to 180 °C)) to press down firmly for 10 to 15 seconds. For more details, refer to the instructions included with the fabric tape cassette.
STAMP TAPE
Refer to pages 36 through 38 for a detailed explanation on using the stamp tape to make stamps.
Occasionally, specks of dust or dirt become attached to the machine's print head and rollers. This is particularly likely when you are using the unit outdoors or in a very dusty environment. If a section of the print head is covered with dust, a blank horizontal streak may appear through the label text. Therefore, as with a tape recorder, the machine's head may need to be cleaned from time to time.
To clean the print head and rollers:
①Turn off the machine.
② Open the tape compartment cover, then remove the tape cassette if one is installed. The print head and rollers are located in the tape compartment.
③Print head: Use a dry cotton swab to gently wipe the print head with an up-and-down motion.
Rollers: Use a dry cotton swab to wipe each roller with an up-and-down motion while rotating them with your finger.
4 Install a tape cassette, close the tape compartment cover, and then try printing again.
⑤ If a blank streak still appears in the label, repeat steps ③ and ④ using a cotton swab dipped in isopropyl (rubbing) alcohol.
If none of the above works, contact your service representative.
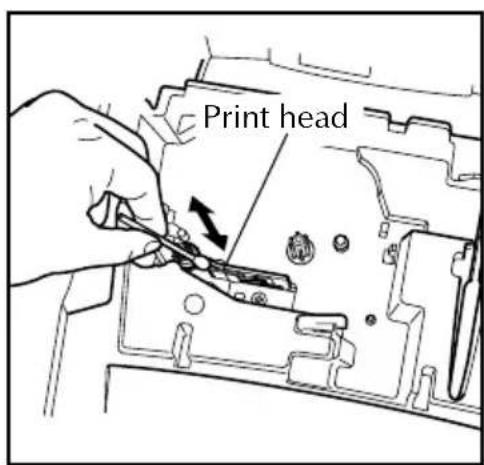
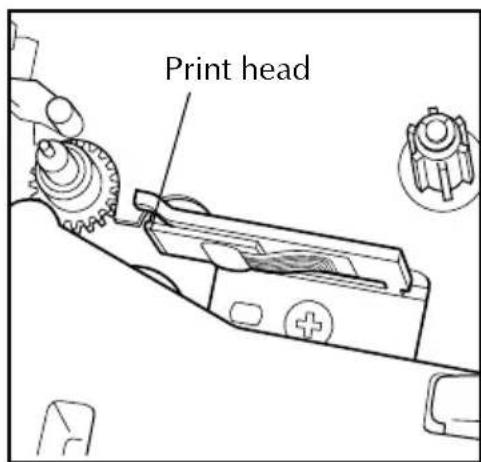
The print head can be cleaned more easily if the optional print head cleaning cassette (TZ-CL4) is used.
For Your Information
POWER KEY
The power key (On Off) is located in the lower-right corner of the keyboard. If batteries have been installed or the machine has been plugged in using the optional AC adaptor, the previous session's information is displayed when the machine is turned on. This feature allows you to stop work on a label, turn off the machine, and return to it later without having to re-enter the text.
The machine will automatically turn off if no key is pressed within 5 minutes (30 minutes if the machine is connected to a computer). The machine's internal memory stores the current session's information and displays it when you turn on the machine again.
To turn on the machine:
- Press . The previous session's information appears in the LCD display.
To turn off the machine:
- Press . The current session's information is stored in the internal memory.
CURSOR KEYS
The machine's LCD display shows two rows of 9 characters; however, the text that you create can be up to 99 characters long. You can review and edit your text by using the cursor keys to move the cursor so that different parts are shown in the display.
LEFT CURSOR KEY
To move the cursor one character to the left:
●Press ▲ once.
To move the cursor several characters to the left:
●Hold down ◀ until the cursor moves to the desired position.
To move the cursor to the beginning of the current line:
●Hold down Code and press
RIGHT CURSOR KEY
To move the cursor one character to the right:
●Press ▶ once.
To move the cursor several characters to the right:
●Hold down ▶ until the cursor moves to the desired position.
To move the cursor to the end of the current line:
●Hold down Code and press ▶.
UP CURSOR KEY
To move the cursor up to the previous line:
●Press Home ▲ once.
If the cursor is in the first line of text, it will move to the beginning of the line.
To move the cursor up several lines:
●Hold down ▲ until the cursor moves to the desired position.
To move the cursor to the beginning of the entire text:
●Hold down Code and press ▲.
DOWN CURSOR KEY
To move the cursor down to the following line:
●Press ▼ End once.
If the cursor is in the last line of text, it will move to the end of the line.
To move the cursor down several lines:
●Hold down ▼ until the cursor moves to the desired position.
To move the cursor to the end of the entire text:
●Hold down Code and press ▼ End.
CODE, ALT & SHIFT KEYS
Most characters can be entered simply by pressing their keys. However, to use special functions or to enter capital letters, accented characters and some symbols, the following special keys are necessary.
CODE KEY
To use a function printed above a key:
- Hold down Code and press the key immediately below the desired function.
EXAMPLE
To start the Symbol function:
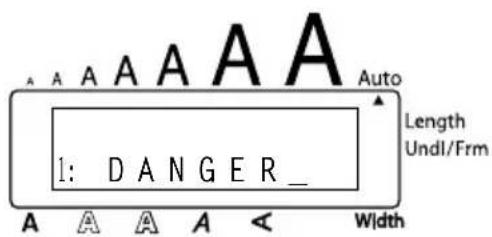
●Hold down Code and press Symbol Alt once.
ALT KEY
To type in characters printed in color on the right-hand side of the keys:
- Hold down Alt and press the key of the desired character written in color. The Alt indicator on the left side of the display comes on while Alt is held down.
EXAMPLE
To type in “-”:
- Hold down Ⓜ and press /, - once. The Alt indicator comes on while Ⓜ is held down.
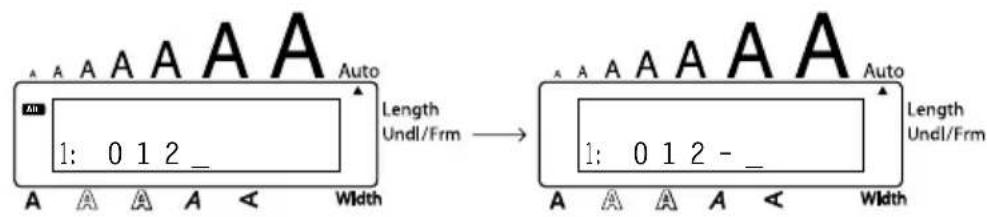
SHIFT KEY
To type in a capital letter or a symbol printed in the top left-hand corner of a key:
●Hold down Caps Shift and press the key of the desired letter or symbol.
EXAMPLE
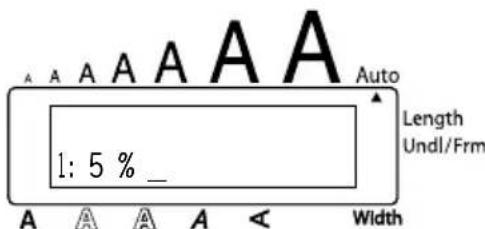
To type in “%”:
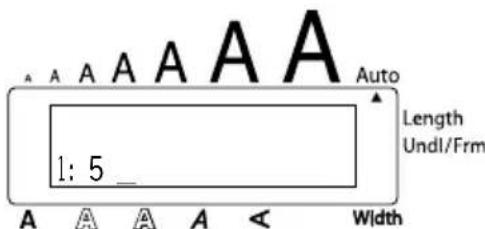
●Hold down Caps Shift and press Underline % 5.
The Caps mode is similar to holding down Caps Shift. It allows you to type capital letters continuously.
To type in many capital letters:
① Hold down Code and press Caps Shift. The Caps indicator on the left side of the display comes on.
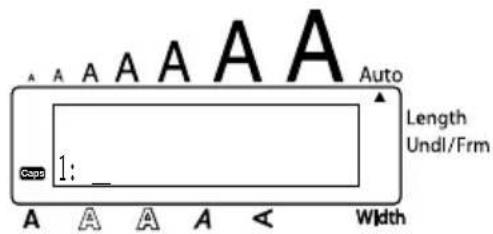
②Press the keys of the desired letters or symbols.
③ To exit Caps mode, hold down Code and press Caps Shift. The Caps indicator goes off.
SPACE KEY
The Space key (Feed&Cut) lets you add blank spaces between characters in your text. It is different from the right cursor key (▶), which just moves the cursor without adding blank spaces.
To add a space:
●Press Feed&Cut Space.
EXAMPLE
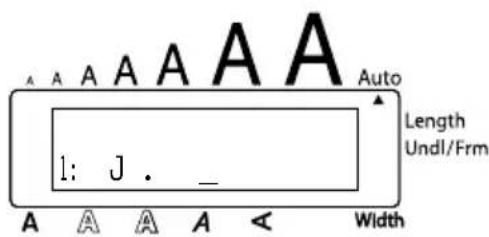
To add a space:
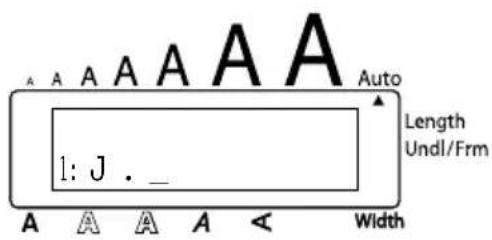
●Press Feed&Cut Space.
RETURN KEY
Like on a typewriter or word processor, this machine's return key (←) is used to end a line of text and start another one. When you have finished entering one line, press the return key to make a new line and move the cursor to it.
The text can only contain a maximum of six lines. If you press ⏻ when six text lines already exist, the error message "6 LINE LIMIT!" will appear.
| Tape widths Maximum number of lines that can be printed | |
| 1/4" (6 mm) 2 | |
| 3/8" (9 mm) 2 | |
| 1/2" (12 mm) 3 | |
| 3/4" (18 mm) 6 | |
| 1" (24 mm) 6 | |
| Stamp 3/4" (18 mm) 3 | |
| Stamp 1" (24 mm) 5 | |
The return key can also be used to select an item from a list (e.g., add a symbol or accented character to the text) or to apply a selected setting.
Some questions asking you to confirm a command may appear on the LCD display, especially when the function that you have chosen will delete or affect files. In these cases, pressing is like answering "yes".
To answer "no", press BS. Refer to DELETE KEY on page 28.
To add a new line:
- Press ⬇. The return mark (←) appears to indicate the end of the line.
To select an item from a list:
-Press ←.
To answer "yes":
-Press ←.
TAB FUNCTION
This function allows you to separate sections of a line of text by adding tabs. This enables you to create perfectly aligned columns without having to type in several spaces. All tabs have the same length and are measured from either the beginning of the line or the previous tab if there is more than one. The tab length can be set between 0.0" and 11.8" (0.0 and 30.0 cm).
The text can contain no more than 50 tabs. If 50 tabs have already been added to the text when ☐ is pressed, the error message “TAB LIMIT!” appears.
| Part No. | Product | Price |
| 8667 | Printer | 300 |
| 122960 | Fax | 100 |
To set the tab length:
① Hold down Code and press Tab Length once. The current tab length is displayed.
② Press ▲ or ▼ until the desired length is displayed or use the number keys to type in the length.
To change the units (inches or centimeters) used to display the tab lengths, press M_ until the desired units are displayed.
③Press ←.
To add a tab:
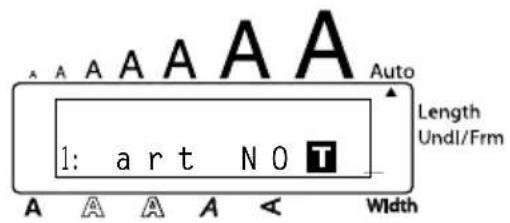
- Hold down Code and press Tab once. The tab mark (T) appears in the text to indicate the position of the tab.
If the text in front of a tab extends past the point where the next section of text should start, the text will instead start at the following tab position.
For example, if the tab length is set to 1.2" (3.0 cm) and the following text is typed in:
1: ABCTDEFTGHI↓ 2: JKLMNOPQRSTU
the label shown below will be printed
ABC DEF GHI JKLMNOPQRST U
Margin Tab (1.2" (3.0 cm)) Tab (1.2" (3.0 cm)) Margin
EXAMPLE
To set the tab length to 1":
① Hold down Code and press W once.
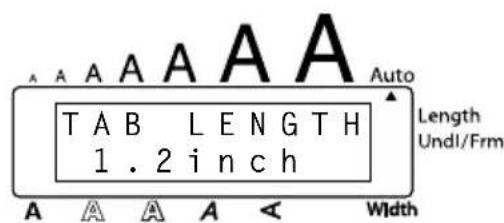
② Press ▼ End until 1.0 is displayed.
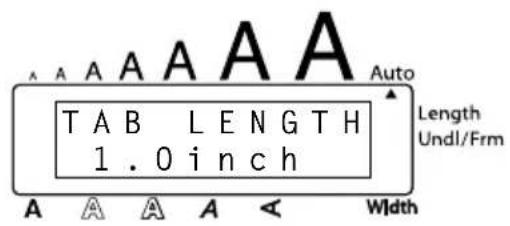
③Press ←.
To add a tab:
●Hold down Code and press Tab Q once.
DELETE KEY
The delete key ( ) allows you to remove characters to the left of the cursor's current position. It differs from the left cursor key ( ), which only moves the cursor without deleting any characters.
The delete key can also be used to quit most functions and return to the previous display without changing the text.
Some questions asking you to confirm a command may appear on the LCD display, especially when the function that you have chosen will delete or affect files. In these cases, pressing is like answering "no".
To answer "yes", press ↙. Refer to RETURN KEY on page 25.
To delete one character:
1 Press ◀◀, ▶▶, ▲ or ▼ End to position the cursor below the character immediately to the right of the character that you wish to delete.
②Press BS once.
To delete a sequence of characters:
1 Press ◀, ▶, ▲ or ▼ End to position the cursor below the character immediately to the right of the last character that you wish to delete.
② Hold down BS until all of the characters that you wish to delete are deleted.
To quit a function without changing your text:
●Press BS to return to your text.
To answer "no":
●Press Clear BS.
LINE OUT FUNCTION
With the Line Out function, you can easily remove an entire line of text.
To delete a line of text:
① Press ◀◀, ▶▶, ▲ Home or ▼ End to position the cursor within the line of text that you wish to delete.
②Hold down Code and press Line Out 0 once.
Each time 0 is pressed while is held down, one line of text is deleted.
EXAMPLE
To delete "012-345-6789":
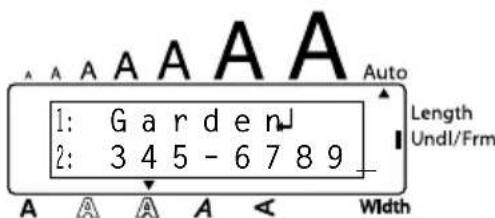
●Hold down Code and press Line Out 0 once.
CLEAR FUNCTION
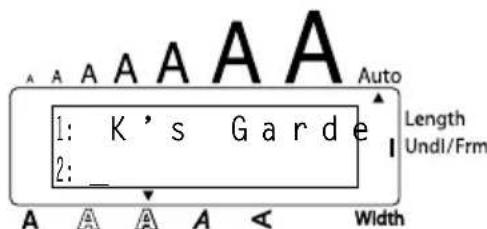
When clearing the display before entering new text, the Clear function can be used to choose whether all of the text is erased and all format functions (Font, Size, Width, Style, Underline, Frame, Tape margin, Alignment, Tab length, Mirror printing, and Length) are returned to their default settings, or whether just the text is erased.
To delete all of the text and return all formats to their default settings:
① Hold down Code and press Clear BS.
2 Press Home or ▼ until TXT&FORMAT is selected (flashing).
To return to the text without erasing anything, press ③ Press
EXAMPLE
To clear the text and formats:
① Hold down Code and press Clear BS.
② Press Home until TXT&FORMAT is flashing.
③Press
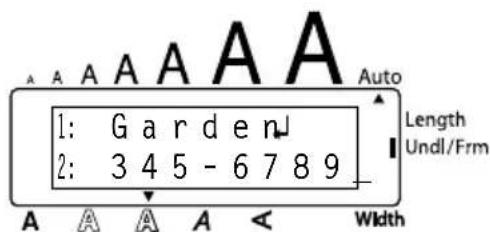
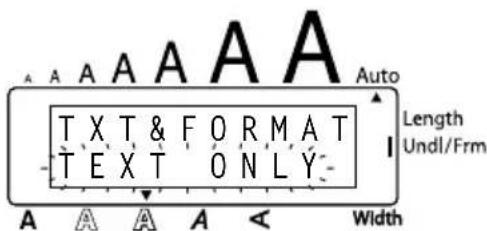
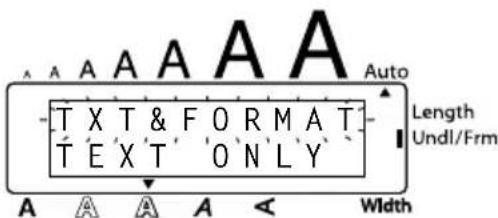
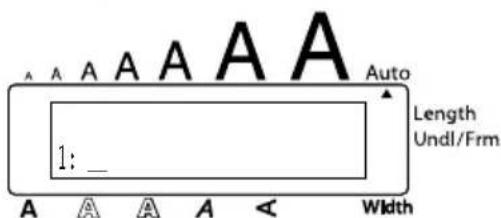
To delete just the text:
① Hold down Code and press Clear BS.
2 Press Home or ▼ until TEXT ONLY is selected (flashing).
To return to the text without erasing anything, press BS.
③Press
EXAMPLE
To clear just the text:
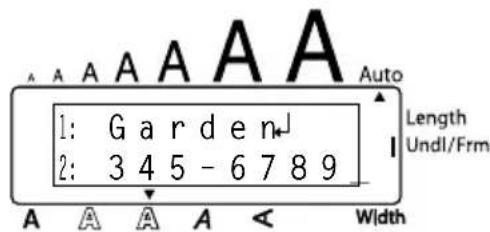
① Hold down Code and press Clear BS.
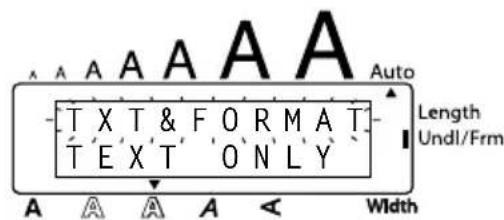
② Press ▼ End until TEXT ONLY is flashing.
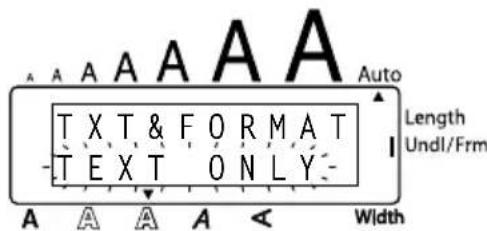
③Press
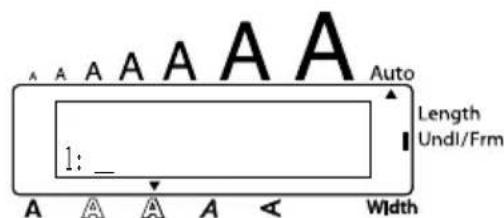
ACCENT FUNCTION
The Accent function can also be used to add accented characters to your text. Many of these characters can also be typed in using the Symbol function.
The accented characters are grouped according to the capital or small letter that they are combined with. The following accented characters are available:
To type in an accented character:
Hold down Code and press A. The message "ACCENT a - u / A - U?" appears on the display.
②Press the key of the letter in the desired accented character.
To type a capital letter, hold down Caps Shift (or hold down Code and press Caps Shift to turn on Caps mode) before pressing the letter key.
3 Press ◀ or ▶ until the desired accented character appears enlarged within the frame in the middle of the display.
4Press ↙. The accented character is added to the text.
To type in a series of accented characters, hold down Code before pressing ←. Then, continue adding accented characters by selecting them as explained in steps ② and ③, and holding down Code while pressing ←. Press just ← after selecting the last character in the series.
EXAMPLE
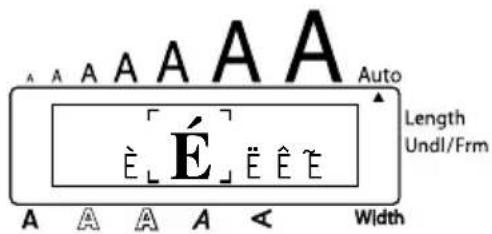
To add the accented character "É":
① Hold down Code and press A.
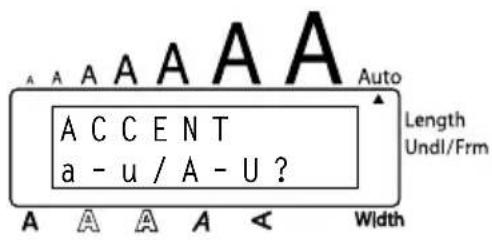
② Hold down Caps Shift and press Tape E.
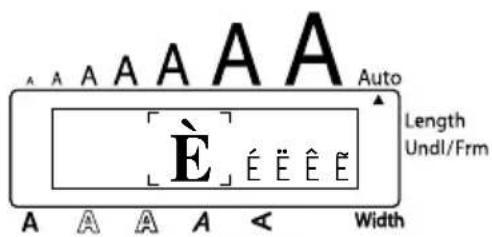
③ Press ▶ until É appears in the frame.
SYMBOL FUNCTION
In addition to the letters, symbols and numerals on the key tops, there are 53 additional marks available with the Symbol function.
The following symbols are available:
| Group Symbol | ||||||||||
| 1 Ü | Æ | æ | Ã | ã | e~Ê | Õ | õ | ° | • | TM |
| 2 | + | × | ÷ | =§ | 2 | 3 | 2 | 3 | 4[ ] | |
| 3 | ↑ | ↓ | → | ← | ||||||
| 4 | wheelchair | |||||||||
| 5 | ♥ | ★ | ||||||||
To type in a symbol:
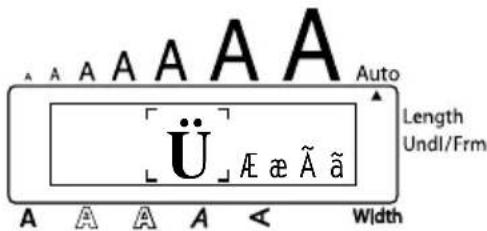
① Hold down Code and press Alt. A row of symbols appear in the display. ② Press Home or ▼ to display different rows of symbols and press ◀ or ▶ until the desired symbol appears enlarged within the frame in the middle of the display.
③Press ↙. The symbol is added to the text.
To type in a series of symbols, hold down Code before pressing ←. Then, continue adding symbols by selecting them as explained in steps ② and ③, and holding down Code while pressing ←. Press just ← after selecting the last symbol in the series.
EXAMPLE
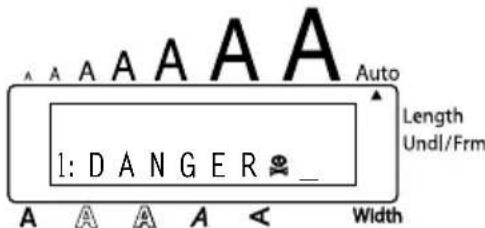
To add the symbol “臭:
① Hold down Code and press Symbol Alt.
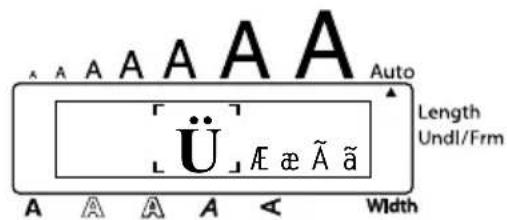
② Press Home or ▼ until the row containing “◀ appears, then press ◀ or ▶ until “◀ appears in the frame.
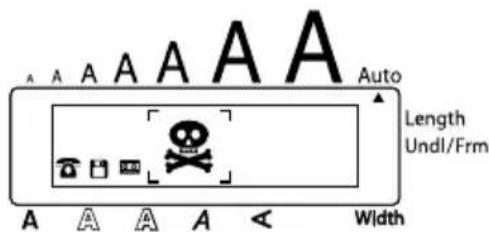
③ Press
AUTO FORMAT FUNCTION
With the Auto Format function, you can select from a variety of preset formats perfect for your specific need. This function automatically adjusts the label length, tape margins and horizontal alignment without changing the text or any other formats, allowing you to create labels faster and easier.
The following preset formats are available:
| Auto Format setting | Label length setting | Tape margin setting | Horizontal alignment setting |
| DEFAULT OFF FULL LEFT | |||
| 3.5”FLOPPY 2.8” (7.0 cm) NONE CENTER | |||
| miniDV 1.7” (4.3 cm) NONE CENTER | |||
| VHS SPINE 5.5” (14.0 cm) NONE CENTER | |||
| VHS 3.0” (7.7 cm) NONE CENTER | |||
| VCR8mm CASE 3.6” (9.2 cm) NONE CENTER | |||
| VCR8mm 2.9” (7.3 cm) NONE CENTER | |||
| VHS-C SPINE 1.8” (4.5 cm) NONE CENTER | |||
| VHS-C | 2.3” (5.8 cm) NONE | CENTER | |
| AUDIO CASSETTE | 3.5” (8.9 cm) NONE | CENTER | |
| DAT CASSETTE 2.2” (5.6 cm) NONE CENTER | |||
| MINI DISK | 2.0” (5.2 cm) NONE | CENTER | |
| ORGANIZER L | 3.2” (8.2 cm) NONE | CENTER | |
| ORGANIZER S | 2.6” (6.5 cm) NONE | CENTER | |
| FILE LONG | 7.2” (18.3 cm) NONE | CENTER | |
| FILE SHORT | 3.7” (9.4 cm) NONE | CENTER | |
To select a preset format:
1 Hold down Code and press Y\~ once. The currently selected setting appears in the display.
②Press Home or ▼ End to select the desired setting.
To return to default settings, press Space.
③Press ← to apply the selected setting.
The Length indicator comes on if any setting other than DEFAULT is selected.
EXAMPLE
To select the AUDIO CASSETTE setting:
① Hold down Code and press A.Format Y\~.
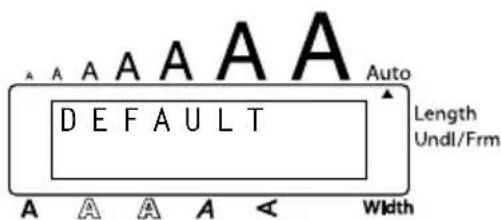
② Press Home or ▲▼ until the AUDIO CASSETTE setting is displayed.
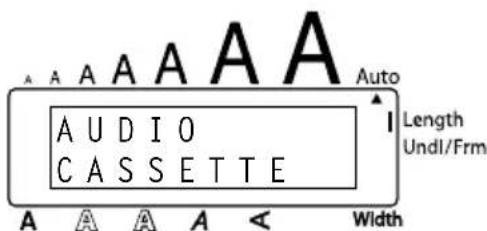
③Press
STAMP FUNCTION
The Stamp function allows you to quickly and easily create your own stamp stencil films for customized stamps. After inserting a stamp film cassette, select this function to automatically center the text and adjust the tape length and margins to a perfect format for the pre-inked stamp film holders. Since the stamp holder is reusable, just make a new stamp stencil film and replace the one in the holder.
To make a stamp:
①Type in the text, and then insert a medium (3/4" (18-mm)-wide) or a large (1" (24-mm)-wide) stamp film cassette.
② Hold down Code and press U _ü once. The message "STAMP FORMAT?" appears in the display.
3 Press ⬇. The text is automatically formatted for the installed stamp: centered within the preset message area with the tape length and margins automatically adjusted.
4Press Mirror to cut the text out of the stamp stencil film.
⑤After the stamp stencil film is cut off, remove the backing paper from the stamp stencil film and affix it to the ink pad of a stamp film holder.
After setting the stamp format for a large (1" (24-mm)-wide) stamp cassette, be sure to use the Clear function to return all format functions to their default settings (TXT&FORMAT) before creating the next label.
EXAMPLE
To cut a stamp:
① Enter the text and insert a stamp film cassette in the tape compartment.
② Hold down Code and press Stamp U ü.
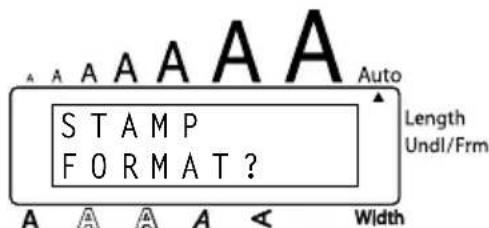
③Press
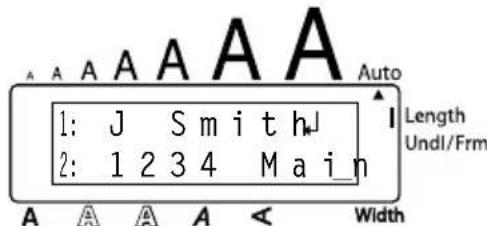
4 Press Mirror to engrave the stamp stencil film, and then automatically cut off.
To affix a stamp:
⑤ Remove the stamp frame from around the stamp film holder ink pad, one side at a time, then remove the protective seal covering the ink pad and the backing paper from the stamp stencil film.
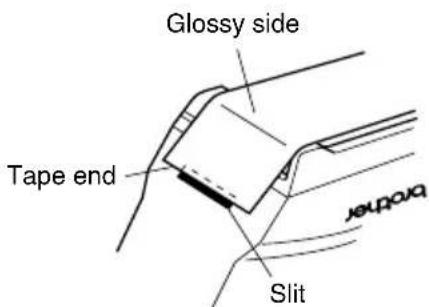
⑥With the glossy side of the stamp stencil film upward, align one of its ends with the slit on the side of the stamp film holder.
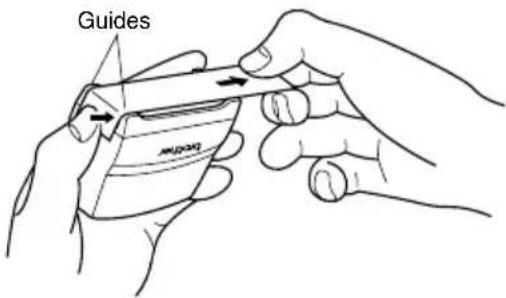
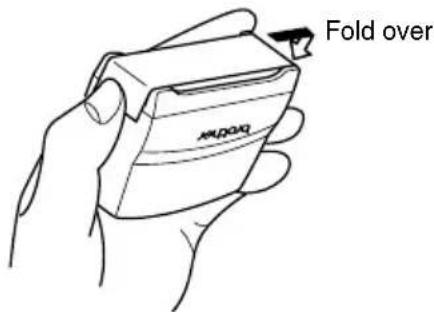
⑦Hold the end of the stamp stencil film in place with your thumb, then pass the tape through the guides while pulling it tight.
⑧Fold the other end of the stamp stencil film over the other side of the stamp film holder and hold it in place with your finger.
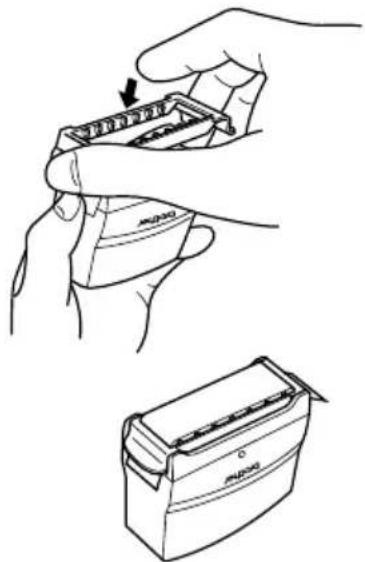
⑨ Fit the stamp frame over the stamp stencil film and push it into place.
natural_image
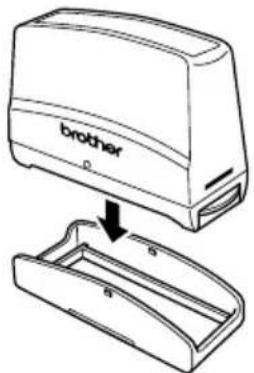
Illustration of hands assembling a mechanical component with an arrow indicating the process (no text or symbols present)10 Insert the stamp film holder straight into its cap. Be sure that the stamp is correctly covered in order to prevent ink spills.
FONT FUNCTION
With the Font function, you can choose one of four fonts for your text.
The following font settings are available:
| FONT 1 | FONT 2 | FONT 3 | FONT 4 |
The default font setting is FONT 1.
To change the font setting:
① While holding down Code, press 1 once, and keep Code held down to display the current font setting.
② While still holding down Code, continue pressing Font i until the desired font setting is displayed.
③ Release Code to apply the selected font setting to the entire text.
EXAMPLE
To select the FONT 2 font setting:
① While holding down Code, press once, and keep Code held down.
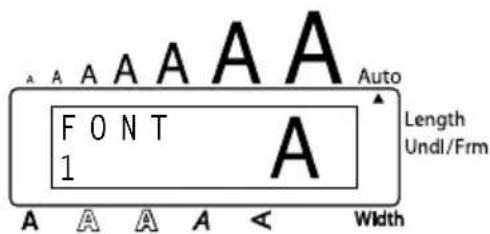
2 While still holding down Code, continue pressing Font 1 i until FONT 2 is displayed.
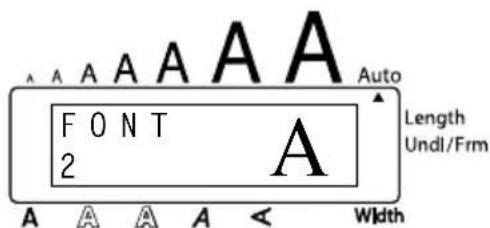
③ Release Code.
SIZE & WIDTH FUNCTIONS
The character size can be adjusted using both the Size and Width functions. Since the character size that can be used depends on the width of the tape, the following table shows the character sizes that can be used with each tape width.
| Tape widths Sizes (in points) | |
| 1/4” (6 mm) 6, 9, | 12 |
| 3/8” (9 mm) 6, 9, | 12, 18 |
| 1/2” (12 mm) 6, 9, | 12, 18, 24 |
| 3/4” (18 mm) 6, 9, | 12, 18, 24, 36, 42 |
| 1” (24 mm) 6, 9, | 12, 18, 24, 36, 42 |
The default size setting is AUTO and the default width setting is MEDIUM. The currently selected size setting is always shown by the indicators above the display. In addition, when a width setting other than MEDIUM is selected, the Width indicator comes on.
With the AUTO size setting, the machine compares your text with the width of the installed tape and automatically adjusts the characters to the largest possible size. However, seven other point sizes are also available, and each can be printed with any of the three width settings.
| Size setting (in points) | Width setting NARROW | Width setting MEDIUM | Width setting WIDE |
| 6 | ABC | ABC | ABC |
| 9 | ABC | ABC | ABC |
| 12 | ABC | ABC | ABC |
| 18 | ABC | ABC | ABC |
| 24 | ABC | ABC | ABC |
| 36 | ABC | ABC | ABC |
| 42 | ABC | ABC | ABC |
To change the size setting:
① While holding down Code, press @2 once, and keep Code held down to display the current size setting.
② While still holding down Code, continue pressing @ 2 until the desired size setting is displayed.
The current size setting is shown by the size indicators at the top of the display.
③ Release Code to apply the selected size setting to the entire text.
With the AUTO setting selected and 3/4" (18-mm) or 1" (24-mm)-wide tape installed, text consisting of just one line of only capital letters (and no accented characters) will be printed with a character size of 52 points. If 1/2" (12-mm)-wide tape is installed, the text will be printed with a character size of 29 points.
EXAMPLE
To select the 24 point size setting:
1 While holding down Code, press @2 once, and keep Code held down.
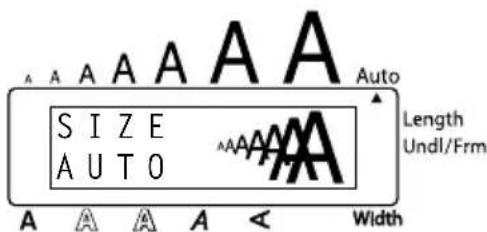
② While still holding down Code, continue pressing Size @ 2 until 24 is displayed.
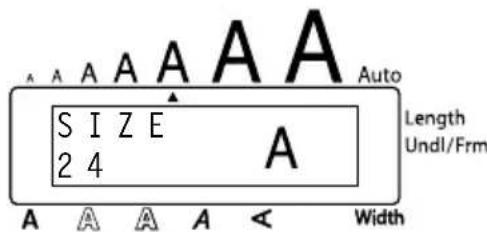
③ Release Code.
To change the width setting:
① While holding down Code, press #3 once, and keep Code held down to display the current width setting.
② While still holding down Code, continue pressing #3 until the desired width setting is displayed. The Width indicator comes on when a setting other than MEDIUM is selected.
③ Release Code to apply the selected width setting to the entire text.
EXAMPLE
To select the WIDE width setting:
① While holding down Code, press #3 once, and keep Code held down.
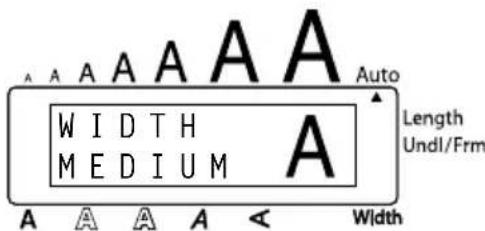
2 While still holding down Code, continue pressing Width #3 until WIDE is displayed.
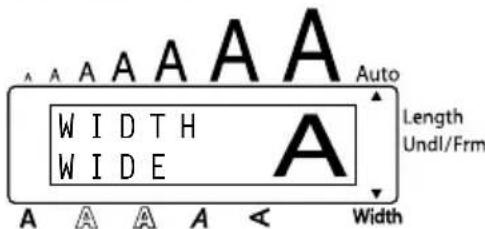
③ Release Code.
STYLE FUNCTION
You can choose from nine different character styles to apply to your text.
Characters printed using the smaller sizes may be difficult to read if certain style settings (e.g., I+SHAD) are selected.
The following style settings are available:
NORMAL, BOLD, OUTLINE, SHADOW, ITALIC, I+BOLD (italic & bold), I+OUTL (italic & outline), I+SHAD (italic & shadow), VERT (vertical)
The default style setting is NORMAL. The style indicator at the bottom of the display shows the current style setting when any setting other than NORMAL is selected.
Refer to Reference at the end of this section for samples of the available settings.
To change the style setting:
① While holding down Code, press \$4 Style once, and keep Code held down to display the current style setting.
② While still holding down Code, continue pressing Style \$4 until the desired style setting is displayed.
The current style setting is shown by the style indicator at the bottom of the display. 3 Release Code to apply the selected style setting to the entire text.
EXAMPLE
To select the I+SHAD style setting:
① While holding down Code, press \$4 once, and keep Code held down.
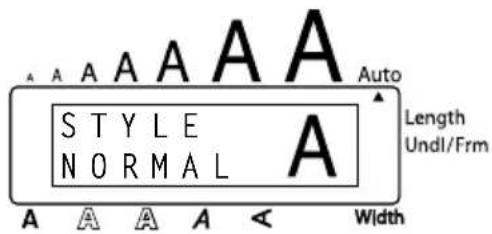
② While still holding down Code, continue pressing Style \$4 until I+SHAD is displayed.
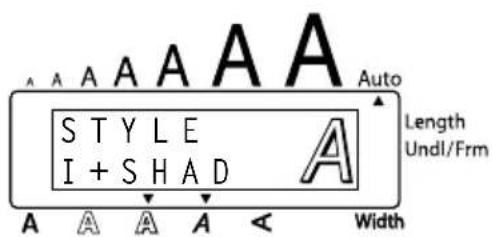
③ Release Code.
REFERENCE
| Font setting | Style setting | ||||
| NORMAL BOLD OUTLINE SHADOW ITALIC | |||||
| FONT 1 |  |  |  | 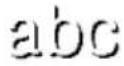 | 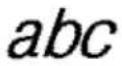 |
| FONT 2 |  |  |  | 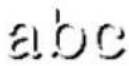 | 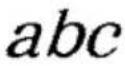 |
| FONT 3 |  |  |  |  |  |
| FONT 4 |  |  |  |  |  |
| Font setting | Style setting | |||
| I+BOLD I+OUTL I+SHAD | VERT | |||
| FONT 1 | 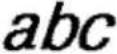 | 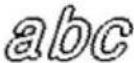 |  |  |
| FONT 2 | 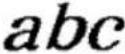 | 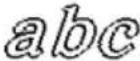 | 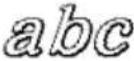 |  |
| FONT 3 |  | 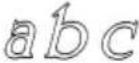 |  |  |
| FONT 4 | 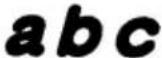 |  |  |  |
UNDERLINE FUNCTION
You can emphasize your text by underlining it.
The default underline setting is OFF. When the Underline function is set to UNDL ON, the Undl/Frm indicator on the right side of the display comes on.
UNDL ON
ABC
To turn on or off the Underline function:
Underline
1 While holding down Code, press %5 once, and keep Code held down to display the current underline setting.
2 While still holding down Code, continue pressing 5 until the desired underline setting is displayed.
The Undl/Frm indicator comes on when the UNDL ON setting is selected.
3 Release Code to apply the selected underline setting to the entire text.
EXAMPLE
To select the UNDL ON underline setting:
1 While holding down Code, press %5 once, and keep Code held down.
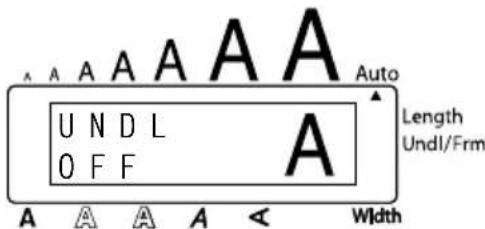
2 While still holding down Code, continue pressing Underline 5 until UNDL ON is displayed.
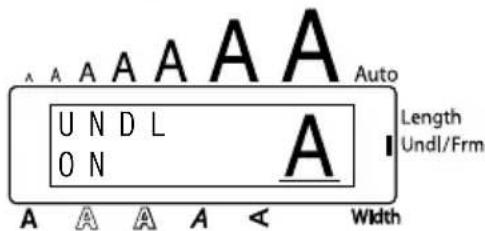
③ Release Code.
FRAME FUNCTION
With the Frame function, you can choose from various frames and highlights to design a more decorative or emphasized label.
The default setting is FRAME OFF; however, the following six settings are also available.
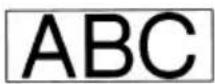 |  | 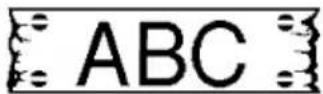 |
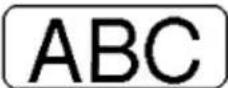 | 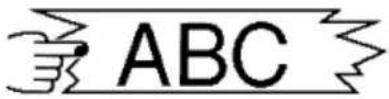 | 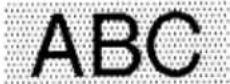 |
When any setting other than FRAME OFF is selected, the Undl/Frm indicator on the right side of the display comes on.
To change the frame setting:
1 While holding down Code, press 6 once, and keep Code held down to display the current frame setting.
② While still holding down Code, continue pressing Frame until the desired frame setting is displayed.
The Undl/Frm indicator comes on when any setting other than FRAME OFF is selected.
③ Release Code to apply the selected frame setting to the entire text.
EXAMPLE
To select the candy frame setting:
① While holding down Code, press ⑥ once, and keep Code held down.
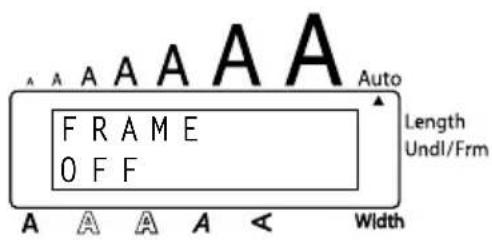
② While still holding down Code, continue pressing ④ until the candy frame is displayed.
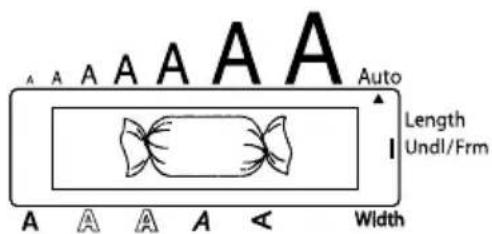
③ Release Code.
TAPE MARGIN FUNCTION
The Tape margin function allows you to adjust the size of the margins on the left and right sides of your text.
The default tape margin setting is FULL; however, three other settings are also available.
FULL (1" (24 mm margins))
NARROW (1/3" (8 mm margins))
NONE (1/6" (4 mm margins))
HALF (1/2" (12 mm margins))
When a setting other than FULL is selected, extra tape is fed out before printing starts. The extra tape is cut off if the Auto cut function is set to ON, so that the left and right margins are equal.
To change the tape margin setting:
① While holding down Code, press E once, and keep Code held down to display the current tape margin setting.
② While still holding down Code, continue pressing Tape until the desired tape margin setting is displayed.
③ Release Code to apply the selected tape margin setting to the entire text.
EXAMPLE
To select the HALF tape margin setting:
① While holding down Code, press Tape E once, and keep Code held down.
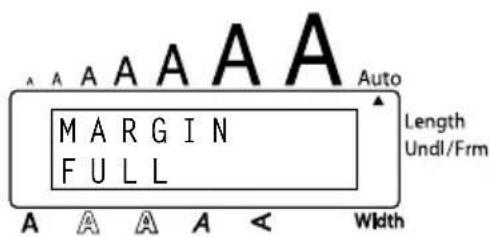
② While still holding down Code, continue pressing Tape until HALF is displayed.
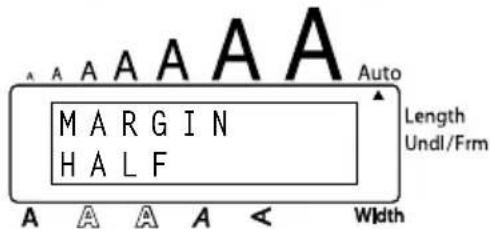
③ Release Code.
HORIZONTAL ALIGNMENT FUNCTION
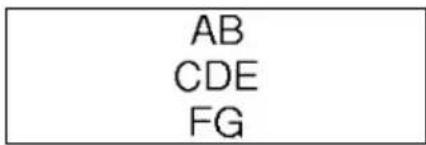
You can choose to align the text in one of three ways. In addition, if the Length function was used to set the length of the label, the text will align within the label according to the selected horizontal alignment setting.
The default setting is LEFT; however, two other settings are also available.
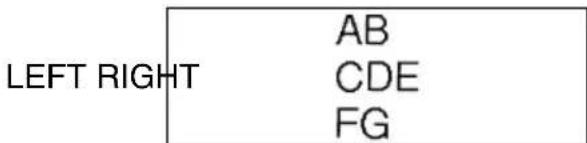
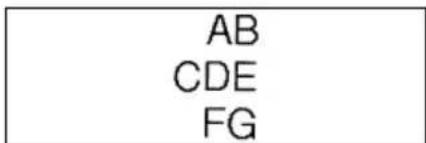
CENTER
To change the horizontal alignment setting:
1 While holding down Code, press R once, and keep Code held down to display the current horizontal alignment setting.
2 While still holding down Code, continue pressing Align R_ until the desired horizontal alignment setting is displayed.
3 Release Code to apply the selected horizontal alignment setting to the entire text.
EXAMPLE
To select the RIGHT horizontal alignment setting:
① While holding down Code, press Align R once, and keep Code held down.
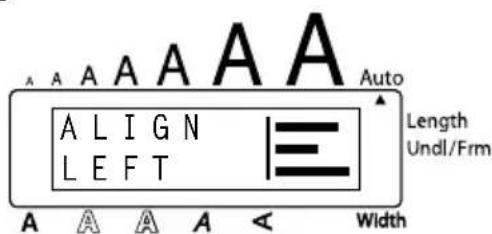
② While still holding down Code, continue pressing Align R_ until RIGHT is displayed.
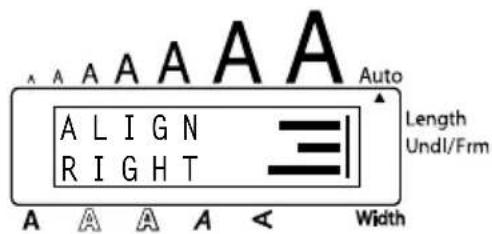
③ Release Code.
MIRROR PRINTING FUNCTION
With this function, you can print your text so that the characters can be read from the tape side of the tape. If mirror-printed labels are attached to glass or some other clear material, they can be read correctly from the opposite side.
When using the Mirror printing function, the text should be printed on clear tape. The default mirror printing setting is OFF.
ON
ABC
To turn on or off the mirror printing setting:
1 While holding down Code, press Mirror Print once, and keep Code held down to display the current mirror printing setting.
2 While still holding down Code, continue pressing Mirror until the desired mirror printing setting is displayed.
3 Release Code to apply the selected mirror printing setting to the entire text.
EXAMPLE
To select the ON mirror printing setting:
① While holding down Code, press Mirror Print once, and keep Code held down.
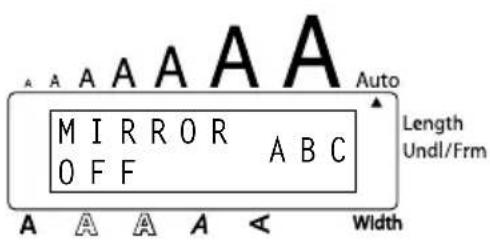
② While still holding down Code, continue pressing Mirror Print until ON is displayed.
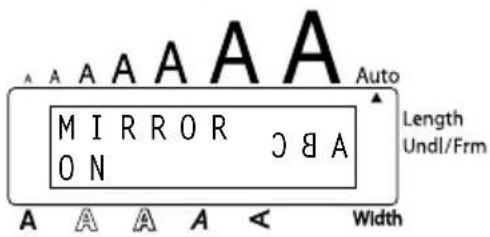
③ Release Code.
LENGTH FUNCTION
Although the length of the printed label automatically adjusts to fit the length of the entered text, there may be times when you will want to make a label with a specific length. The Length function allows you to set the label length between 1.6" and 11.8" (4.0 cm and 30.0 cm).
The default length setting is OFF. When the Length function is set to ON, the Length indicator on the right side of the display comes on.
To turn on or off the Length function:
1 While holding down Code, press T once, and keep Code held down to display the current length of the label (the text and both margins) briefly, then display the current label length setting (ON or OFF).
② While still holding down Code, continue pressing Length until the desired label length setting is displayed.
The Length indicator comes on when ON is selected.
3 Release Code. If ON was selected, the current label length setting is displayed.
4 Press Home or ▲ to select the desired length or use the number keys to enter a length.
To change the units (inches or centimeters) used to display the label length, press M_ until the desired units are displayed.
To change the length in 1" (1.0-cm)-steps, hold down either ▲ or ▼, and then release the key when the desired setting is displayed.
⑤Press ←.
EXAMPLE
To select a label length of 5":
① While holding down Code, press T once, and keep Code held down.
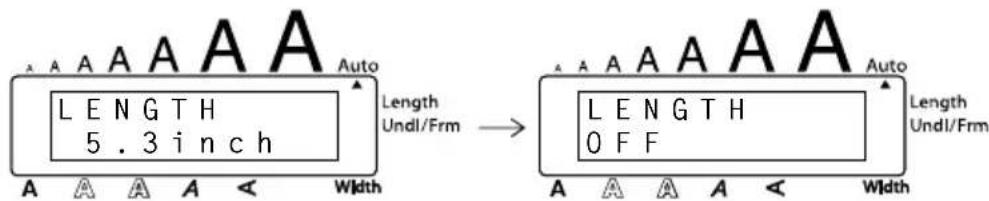
② While still holding down Code, continue pressing until ON is displayed.
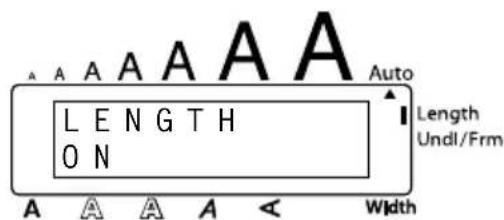
③ Release Code.
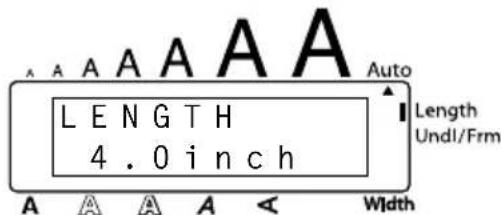
4 Press Home until 5.0inch is displayed.
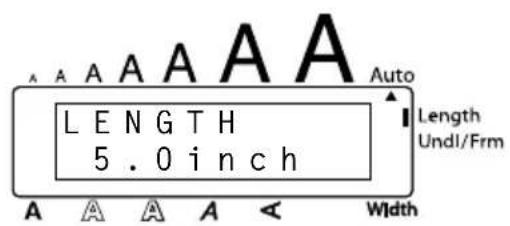
⑤Press
AUTO CUT FUNCTION
The Auto cut function allows you to set whether or not the machine will automatically cut off each label after it is printed. Turn on the Auto cut function before starting to print in order to cut off the labels automatically after printing them.
To turn on or off the Auto cut function:
After printing a label with the Auto cut function set to OFF, hold down Code and press Feed&Cut Space once to feed the tape, then cut it.
① While holding down Code, press Z once, and keep Code held down to display the current auto cut setting.
2 While still holding down Code, continue pressing A.Cut Z until the desired auto cut setting is displayed.
③ Release Code to apply the selected auto cut setting.
EXAMPLE
To turn on the Auto cut function:
① While holding down Code, press Z once, and keep Code held down.
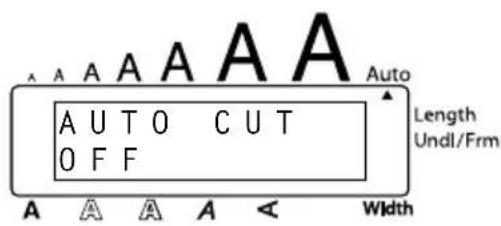
② While still holding down Code, continue pressing
A.Cut Z until ON is displayed.
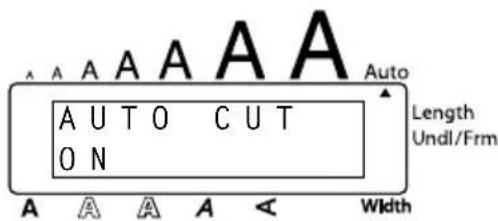
③ Release Code.
PRINT KEY
After you have entered your text and chosen the desired format settings, you are ready to print.
If the Auto cut function is set to ON, the label will automatically be cut off after it is printed.
To print a label:
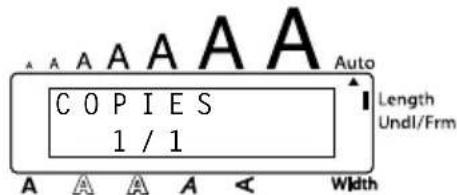
- Press Print once. The message "COPIES" followed by the number of the label being printed is displayed.
EXAMPLE
To print a label and cut it off:
●Press Mirror Print once.
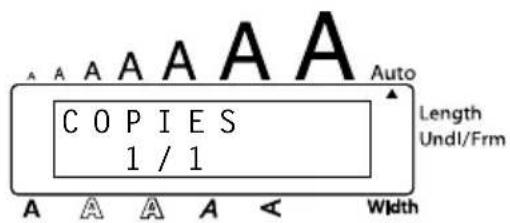
FEED & CUT FUNCTION
The Feed & Cut function is used to feed out 1" (24 mm) of tape and automatically cut it off, for example after printing with the Auto cut function set to OFF or when printing has been interrupted.
To feed and cut off 1" (24 mm) of tape:
● Hold down Code and press Space once. 1" (24 mm) of tape is fed out and cut off.
NUMBERING FUNCTION
This function can be used to print many copies of the same text while increasing a certain number in the text by 1 after each label is printed.
To use the Numbering function:
1 Press ◀◀, ▶▶, ▲ Home or ▼ End to position the cursor below the number that you wish to increase.
② Hold down Code and press Number. The message "NUMBER UNTIL" appears in the display with the current setting.
③ Press a number key between 1 i and 9 (or press ▲ or ▼ End) to select the last number that is to be printed.
To cancel the Numbering, hold down Code and press Number (or press just BS).
4 Press Mirror (or ←) to begin printing the labels. The number of each copy is displayed while it is being printed.
If the Auto cut function is set to ON, each label is automatically cut off after it is printed.
EXAMPLE
To print three labels with numbers 1, 2 and 3:
① Position the cursor below "1".
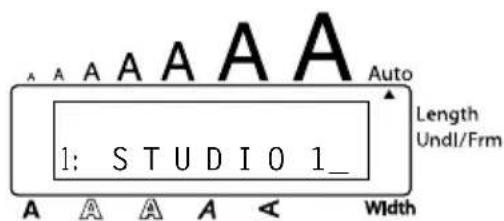
② Hold down Code and press Number
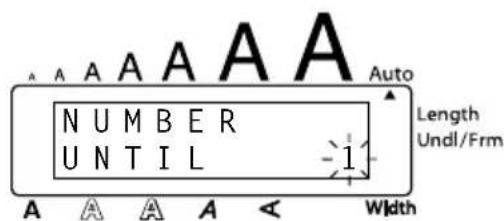
③ Press

4 Press

(or ↙ ).
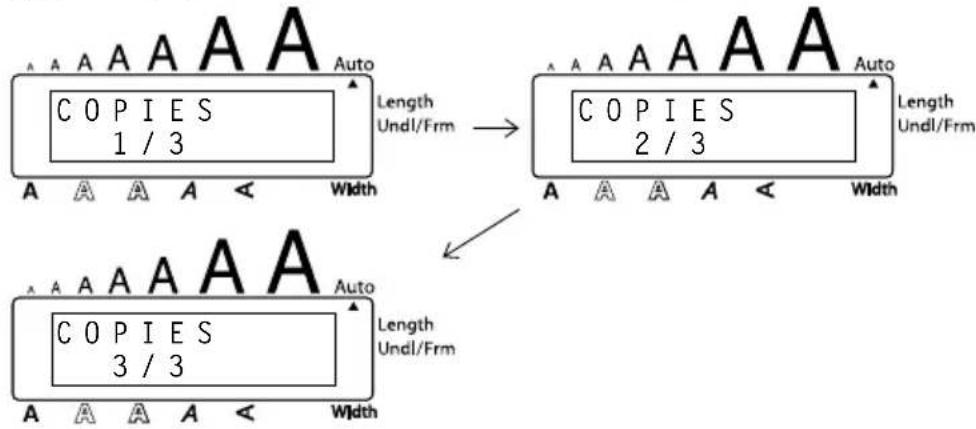
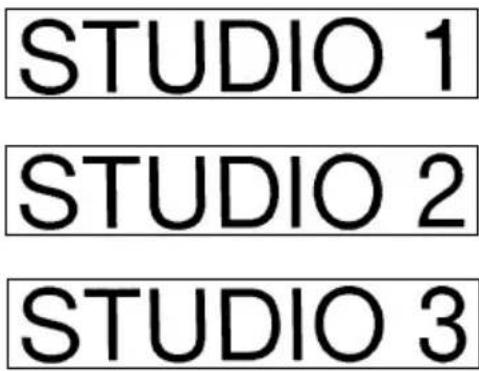
REPEAT PRINTING FUNCTION
This function allows you to print up to 9 copies of the same text.
To use the Repeat printing function:
1 Hold down Code and press _i . The message "COPIES" appears in the display with the current setting.
② Press a number key between 1 i and 9 (or press ▲ or ▼ End) to select the number of copies that are to be printed.
To cancel the Repeat printing, hold down Code and press 1 (or press just BS).
3 Press Mirror (or ←) to begin printing the labels. The number of each copy is displayed while it is being printed.
If the Auto cut function is set to ON, each label is automatically cut off after it is printed.
EXAMPLE
To print three copies of a label:
① Hold down Code and press Repeat
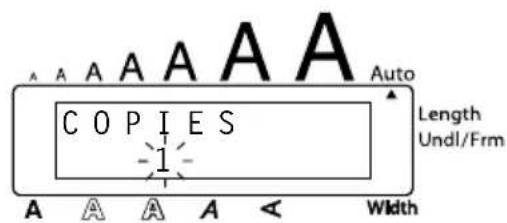
2Press Width #3.
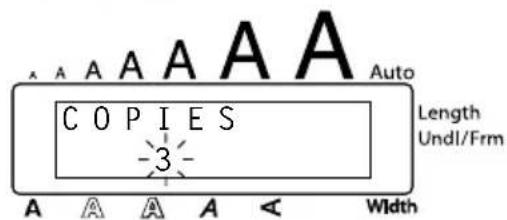
③ Press Mirror (or ↻).
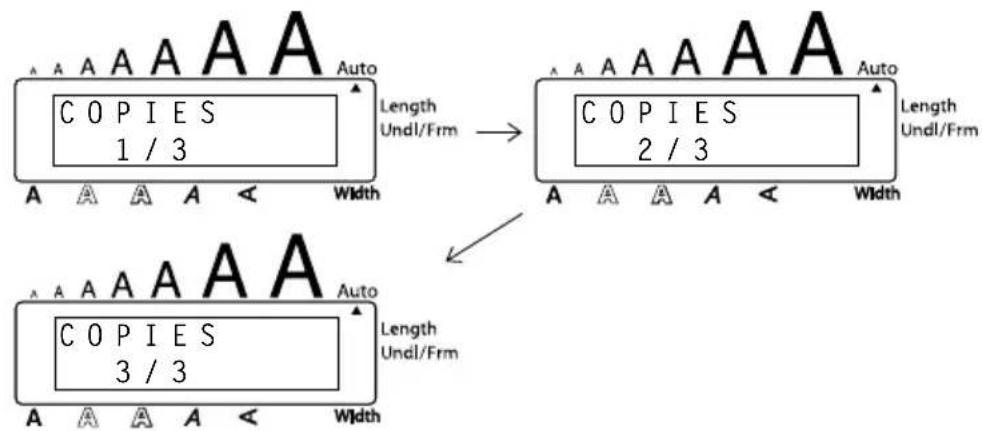
If the Auto cut function is set to ON, each label is automatically cut off after it is printed.
| Bill ReynoldsABC Transport29 South Main St.Los Angeles, CA 88888 | Bill ReynoldsABC Transport29 South Main St.Los Angeles, CA 88888 | Bill ReynoldsABC Transport29 South Main St.Los Angeles, CA 88888 |
MEMORY FUNCTIONS
You can use the memory to store your most frequently used text files. The text remains in the memory, along with its formatting, even after all characters are removed from the display
using the Clear function (holding down Code and pressing BS).
When each file is stored, it is given a number to make recalling it easier. Up to 10 text files or as much as 300 characters can be stored in the memory. (A single text file can have a maximum of 99 characters.)
Since a copy of the stored text file is recalled when the Recall function is used, the text can be edited or printed without changing the originally stored file. When a file is no longer needed or more space is necessary, the Memory delete function can be used to delete it.
When inserting new batteries, be sure to insert the new ones within five minutes of removing the old ones, otherwise any text files stored in the memory will be lost (unless the machine is plugged into an electrical outlet with the AC adaptor).
STORING TEXT
To store a text file:
① Hold down Code and press Store & 7. The message "STORE" appears on the display with the currently selected file number.
If 300 characters have already been stored, the error message "MEMORY FULL!" appears in the display. If this occurs, an existing text file must be deleted before the new one can be stored.
To quit the Store function without storing the text, hold down Code and press &7 (or press just BS).
② Press a number key (or press ▲ or ▼) to select the file number where you wish to store the text.
3 Press ↻. The text is stored under the selected file number and the text previously shown in the display reappears.
If a file is already stored under the selected file number, the message "OVERWRITE?" appears in the display and you must decide whether or not to overwrite it (delete it from the memory and store the new one).
To overwrite the stored file with the new one:
- Press ⬇ to delete the previously stored file and store the new one under the selected number.
To go back and choose another file number without overwriting the text file, press Clear BS, and then select a different file number.
RECALLING TEXT
To recall a text file:
① Hold down Code and press *8. The message “RECALL” appears on the display with the file number and beginning of the most recently stored or recalled text.
To quit the Recall function without recalling text, hold down Code and press *8 (or press just BS).
2 Press a number key (or press ▲ or ▼ End) to select the file number containing the text that you wish to recall. The text stored under the selected file number is shown.
To see other parts of the selected text file, press ◀◀ or ▶▶.
To display the text stored under other file numbers, press ▲ or ▼ End, or the key of a different file number.
3 Press ⬇. Any text previously entered in the display is erased and the text stored under the selected file number is recalled into the display.
DELETING A FILE
To delete a text file:
1 Hold down Code and press M.Del 9. The message "CLEAR" appears on the display with the file number and beginning of the most recently stored or recalled text.
To cancel the Memory delete function without deleting the text file, hold down Code and press (or press just BS).
2 Press a number key (or press ▲ or ▼ End) to select the file number containing the text that you wish to delete. The text stored under the selected file number is shown.
To see other parts of the selected text file, press ◀ or ▶.
To display the text stored under other file numbers, press ▲ or ▼ End, or the key of a different file number.
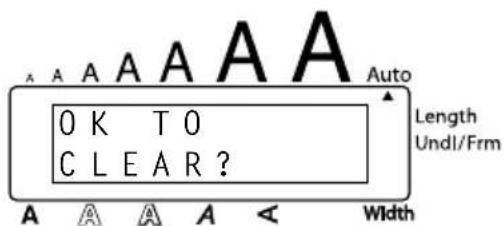
③Press ⬇. The message "OK TO CLEAR?" appears.
To go back and select a different text file, press BS.
4 Press ← to delete the text file that was selected.
To store text under file number 4:
① Hold down Code and press Store & 7.
![STORE [-0,-] A A A A < Width Auto Length Undl/Frm](/content/2026/05/770474/images/9bfae41af52b3ab03d398c24404cbd7b05650b8ddc00842d451f6efe0ff012ea.jpg)
②Press Style 4
![STORE [-4] A A A A < Width Auto Length Undl/Frm](/content/2026/05/770474/images/811da1ec0f799cb9cd247bf51a0dc4310884f649e55b993897bab8c5c5e1492c.jpg)
③Press
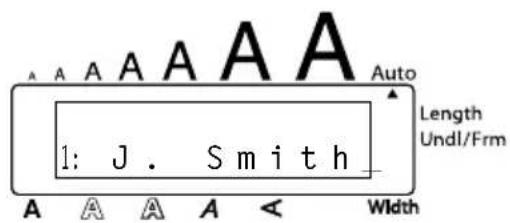
To recall the text from file number 1:
① Hold down Code and press Recall 8.
![A A A A A A Auto RECALL [9] J. Smit Length Undl/Frm A A A A < Width](/content/2026/05/770474/images/e90d58449db79cd2c209dff1c3c1db5429aa0b7b5d8c8c4f8323bc546b4ed6e8.jpg)
2Press Font 1 i.
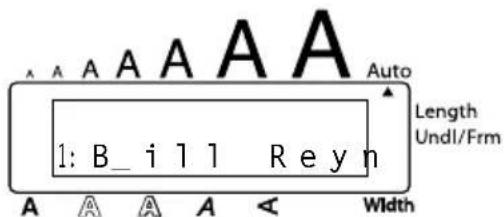
![A A A A A A Auto RE CALL [1] Bill Re Length Undl/Frm Width A A A A <](/content/2026/05/770474/images/c821a4be463b7a48438fc8b434d7d15b95385464bd2a7e6066a9e1add8560240.jpg)
③Press
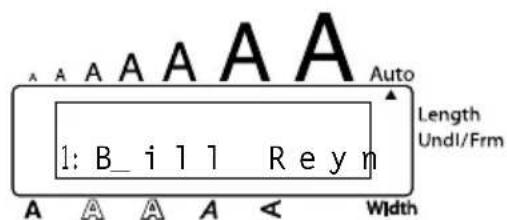
To delete the text stored under file number 4:
① Hold down Code and press M.Del (9).
![A A A A A A C L E A R [ 1 ] B i l l R e A A A A < Width Auto Length Undl/Frm](/content/2026/05/770474/images/397fe759ba3073610eef5c3a7587ba5a0fd726ee9b6ec2028bd169fd08f1d22b.jpg)
②Press Style 4
![A A A A A A C L E A R [ 4 ] J . S m i t A A A A < Width Length Undl/Frm Auto](/content/2026/05/770474/images/d1a22bdf577c35f19312a9fdf0f95b10dfce0eff629c2616c26dcc4726344db3.jpg)
③Press
4Press
TROUBLESHOOTING
| Problem Remedy | |
| 1. The display stays blank after you have turned on the machine. | Check that the AC adaptor is connected correctly.If you are using alkaline batteries, check that they are correctly inserted.If the batteries are low, replace them with new ones. |
| 2. The machine does not print or the printed characters are blurred. | Check that the tape cassette has been inserted properly.If the tape cassette is empty, replace it with a new one.Make sure that the tape compartment cover has been closed. |
| 3. The text files that you stored in the memory are no longer there. | If the batteries are low, replace them with new ones. |
| 4. The printed characters are not formed properly. | If you are using alkaline batteries, they may be low. Try using the AC adaptor or replace the batteries with new ones. |
| 5. A blank horizontal line appears through the printed label. | Clean the print head as explained on page 20. |
| 6. Striped tape appears. • You have reached the end of the tape.Replace the tape cassette with a new one. | |
| 7. The machine has “locked up” (i.e., nothing happens when a key is pressed). | Turn off the machine, and then while holding down Code and Align, turn the machine back on. The text and formats in the display and all text files stored in the memory are erased. |
ERROR MESSAGE LIST
| Error Message Cause Remedy | ||
| 6 LINE LIMIT! | This message appears if six lines already exist when you pre  . . | Limit the number of lines to six. |
| BATTERIES WEAK! | This message appears when the installed alkaline batteries become weak. | Replace the batteries or use the AC adaptor. |
| BUFFER EMPTY! | This message appears if you hold down Code and press (  no text has been entered in the display.This message appears if you try to print or store a text file in the memory, but no text has been entered in the display. no text has been entered in the display.This message appears if you try to print or store a text file in the memory, but no text has been entered in the display. | Enter some text before starting the function.Enter text before printing or storing. |
| BUFFER FULL! | This message appears if you try to enter a character, symbol, return or space after 99 characters have already been entered. | Delete some existing text so that more text can be entered. |
| CAN'T HERE | This message appears if the cursor is at the end of the text when you hold down Code and press |  . . | Move the cursor below a number before holding down  and pressing | and pressing |  . . |
| CASSETTE CHANGED! | This message appears if the tape cassette is changed while the P-touch is receiving data from the computer. | Cancel the print job, install the correct tape cassette, and then try printing again. |
| CHANGE ADAPTOR! | This message appears if a high-voltage adaptor is being used. | Remove the high-voltage adaptor and connect the adaptor designed exclusively for this machine. |
| COOLING DOWN | This message appears when the print head is used extensively (for example, when printing multiple copies of a large amount of text). | Wait until printing continues. |
| CUTTERERROR! | This message appears if the tape cutter is closed when you try to print or feed the tape. | Turn the P-touch off, then on again. |
| EEPROMERROR! | This message appears if a checksum error occurred when the P-touch was turned on or if the keyword was damaged and it failed to initialize. | Contact your service representative. |
| INTERFACEERROR! | This message appears if an error occurs while data is being sent from the computer to the P-touch. | Cancel the print job, and then try printing again. |
| INVAL.CHRS! | This message appears if the cursor is not below a number when you hold down Code and press Number. | Move the cursor below a number before holding down Code and pressing Number. |
| LENGTHLIMIT! | This message appears if the text is longer than 3' 3 1/3" (1 meter) when you try to print.This message appears if the Length function is used to set a label length that is less than 1.6" (4.0 cm) or more than 11.8" (30.0 cm).This message appears if the Tab Length function is used to set a tab length that is more than 11.8" (30.0 cm). | Shorten the text to less than 3' 3 1/3" (1 meter) before trying to print.Set the label length between 1.6" (4.0 cm) and 11.8" (30.0 cm).Set the tab length so that it is less than 11.8" (30.0 cm). |
| LINELIMIT! | This message appears if the number of lines in the text is greater than the maximum number of lines possible for the installed tape. | Reduce the number of lines or install a tape of greater width. |
| MEMORYFULL! | This message appears if you try to store a text file after 300 characters have already been stored in the memory. | Delete an unwanted file to make room for the new one. |
| NOFILES! | This message appears if you try to recall or delete a text file from the memory when none are stored. | Store a text file first. |
| NO TAPE! | This message appears if you try to print a label or feed the tape when no tape cassette is installed. | Install a tape cassette and try again. |
| REPLACE BATTERIES! | This message appears if the installed alkaline batteries are about to run out. | Replace the batteries or use the AC adaptor. |
| ROM PROBLEM! | This message appears if there is a problem with the machine's read only memory. | Contact your service representative.Turn off the machine, and then while holding down Code and Align , turn the machine back on. |
| SOLDER X This | message appears if there is a problem with the machine's software. | Contact your service representative. |
| TAB LIMIT! | This message appears if 50 tabs have already been added to the text when you press [6x75] | Limit the number of tabs in the text to 50. |
| TEXT TOO HIGH! | This message appears if the size of the text is larger than the width of the installed tape. | Reduce the size of the characters or install a wider tape. |
| TEXT TOO LONG! | This message appears if the length of the text is longer than the label length that has been set using the Length function. | Delete some of the text, reduce the character width or increase the set label length. |
SPECIFICATIONS
HARDWARE
Input Device: Keyboard - 51 keys
LCD: 10 characters × 2 lines (semi-graphical) 20 indicators (including Alt and Caps)
Print Tape: Pressure-sensitive, Adhesive-based 26' 3" (8 m) long Five widths available: 1/4" (6 mm) 3/8" (9 mm) 1/2" (12 mm) 3/4" (18 mm) 1" (24 mm)
Power Supply: Eight AA alkaline batteries (AM3, LR6) or optional AC adaptor (model AD-60) Auto power-off if no key is pressed for 5 minutes
Print Head: 128 dot / 180 dpi
Dimensions: 7 3/5" (W) × 9 1/2" (D) × 2 1/2" (H) (194 × 242 × 65.5 mm)
Weight: 1.83 lbs (830 g) (without a tape cassette and batteries installed)
SOFTWARE
Buffer Size: Maximum 99 characters Maximum six lines
Memory Size: 300 characters
Character Size: Six sizes (6, 9, 12, 18, 24, 36 and 42 points) + 52 point (capital letters only) All are available in narrow, medium and wide widths
Print Styles: Normal, Outline, Bold, Shadow (each can be combined with Italic), and Vertical
ACCESSORIES
●Supplies
Obtain tape cassettes from your nearest authorized dealer.
Use only Brother TZ tapes with this machine. Brother cannot be held responsible for trouble caused by the use of unauthorized supplies. Do not use tapes that do not have the mark.
| Stock No. | Description | QTY/ PACKAGE | PRICE |
| 1" (24mm)-wide laminated tapes | |||
| TZ-151 Black characters on clear adhesive 1 22.99 | |||
| TZ-251 Black characters on white adhesive 123.99 | |||
| TZ-451 Black characters on red adhesive 1 23.99 | |||
| TZ-651 Black characters on yellow adhesive 123.99 | |||
| TZ-252 Red characters on white adhesive 1 23.99 | |||
| TZ-354 Gold characters on black adhesive 126.99 | |||
| TZ-355 White characters on black adhesive 1 26.99 | |||
| TZ-B51 Black characters on fluorescent orange adhesive 128.99 | |||
| TZ-S151 | Industrial (strong adhesive) black characters on clear adhesive | 1 25.99 | |
| TZ-S251 | Industrial (strong adhesive) black characters on white adhesive | 125.99 | |
| 3/4" (18mm)-wide laminated tapes | |||
| TZ-141 Black characters on clear adhesive 1 18.99 | |||
| TZ-145 White characters on clear adhesive 120.99 | |||
| TZ-241 Black characters on white adhesive 1 20.99 | |||
| TZ-242 Red characters on white adhesive 120.99 | |||
| TZ-243 Blue characters on white adhesive 1 20.99 | |||
| TZ-344 Gold characters on black adhesive 123.99 | |||
| TZ-345 White characters on black adhesive 1 23.99 | |||
| TZ-441 Black characters on red adhesive 120.99 | |||
| TZ-541 Black characters on blue adhesive 1 20.99 | |||
| TZ-545 White characters on blue adhesive 123.99 | |||
| TZ-641 Black characters on yellow adhesive 1 20.99 | |||
| TZ-741 Black characters on green adhesive 120.99 | |||
| TZ-B41 Black characters on fluorescent orange adhesive 1 24.99 | |||
| TZ-M41 Black characters on clear (matte) adhesive | 120.99 | ||
| TZ-WB41 | Black characters on Bugs Bunny adhesive | 1 23.99 | |
| TZ-WT41 | Black characters on Taz adhesive | 123.99 | |
| TZ-WS41 | Black characters on Tweety & Sylvester adhesive | 1 | 23.99 |
| TZ-S141 | Industrial (strong adhesive) black characters on clear adhesive | 121.99 | |
| TZ-S241 | Industrial (strong adhesive) black characters on white adhesive | 1 21.99 | |
| 1/2" (12mm)-wide laminated tapes | |||
| TZ-131 Black characters on clear adhesive 116.99 | |||
| TZ-231 Black characters on white adhesive 1 17.99 | |||
| TZ-232 Red characters on white adhesive 117.99 | |||
| TZ-334 Gold characters on black adhesive 1 20.99 | |||
| TZ-335 White characters on black adhesive 120.99 | |||
| TZ-631 Black characters on yellow adhesive 1 17.99 | |||
| TZ-S131 | Industrial (strong adhesive) black characters on clear adhesive | 118.99 | |
| TZ-S231 | Industrial (strong adhesive) black characters on white adhesive | 1 18.99 | |
| 3/8" (9mm)-wide laminated tapes | |||
| TZ-121 Black characters on clear adhesive 114.99 | |||
| TZ-221 Black characters on white adhesive 1 16.99 | |||
| TZ-325 White characters on black adhesive 118.99 | |||
| TZ-421 Black characters on red adhesive 1 16.99 | |||
| TZ-S121 | Industrial (strong adhesive) black characters on clear adhesive | 117.99 | |
| TZ-S221 | Industrial (strong adhesive) black characters on white adhesive | 1 17.99 | |
| 1/4" (6mm)-wide laminated tapes | |||
| TZ-111 Black characters on clear adhesive 112.99 | |||
| TZ-211 Black characters on white adhesive 1 14.99 | |||
| TZ-315 White characters on black adhesive 117.99 | |||
| TZ-S111 | Industrial (strong adhesive) black characters on clear adhesive | 1 15.99 | |
| TZ-S211 | Industrial (strong adhesive) black characters on white adhesive | 115.99 | |
Special tapes
| Stock No. | Description | QTY/ PACKAGE | PRICE |
| TZ-SE4 | black characters on 3/4" (18 mm) security adhesive 1 2 | 9.99 | |
| TZ-FA3 | blue characters on 1/2" (12 mm) fabric adhesive 124.99 |
Stamp kit
| Stock No. | Description | QTY/ PACKAGE | PRICE |
| SK-LB | Stamp-making kit for Large stamp with black ink 1 39.99 | ||
| SK-MB | Stamp-making kit for Medium stamp with black ink | 137.99 | |
| SH-LB | Additional stamper for Large stamp with black ink | 1 27.99 | |
| SH-MB | Additional stamper for Medium stamp with black ink | 124.99 |
Options
| Stock No. | Description | QTY/PACKAGE | PRICE |
| TZ-CL4 Head & Roller cleaner 1 20.99 | |||
| AD-60 AC | Adaptor 124.99 | ||
| 6994 Protective carrying case 1 $24.99 | |||
* For purchasing accessorises on the Internet, please visit our website: http://www.brothermall.com
BROTHER CONTACT INFORMATION
Service Center Locations
If you need a local service center, please call 1-800-284-HELP (4357)
to locate the authorized service center closest to you.
Note: Be sure to call the Service Center before your visit.
Service centers do not provide operational assistance. See "Operational Assistance".
Operational Assistance
For technical and operational assistance you may call Brother Customer Service at: Voice 1-877-4-PTouch, or Fax 1-901-379-1210
Assistance on the Internet
For product information and downloading the latest drivers: http://www.brother.com For purchasing accessories and certain Brother products: http://www.brothermall.com
Accessories and Supplies
To order Brother accessories or supplies by Visa, MasterCard, Discover or American Express you may call toll tree 1-888-879-3232, or complete the order form In your user's guide and fax both sides of the form to 1-800-947-1445
For purchasing accessories on the Internet: http://www.brothermall.com
To order by mail or pay by check, Please complete the accessory order form and mail it along with payment to:
Brother International Corporation
Attn: Consumer Accessory Division
P.O. Box 341332
Bartleft, TN 38133-1332
Fax-Back System
Brother Customer Service has installed an easy to use Fax-Back System so you can get instant answers to common technical questions and product information for all Brother products.
This system is available 24 hours a day, 7 days a week. You can use the system to send the information to any fax machine, not just the one you are calling from.
Please call 1-800-521-2846 and follow the voice prompts to receive faxed instructions on how to use the system and an index of Fax-Back subjects.
P-TOUCH ACCESSORY ORDER FORM
Dear Customer:
This order form is provided for your convenience should your retailer not stock the item(s) needed. To order by mail, send this completed form along with proper payment to the address below OR credit card holders: Call toll-free 1-888-879-3232, fax completed order form to 1-800-947-1445, or visit our web site at http://www.brothermall.com. Please refer to the Accessories listing in your User's Guide for stock no. and price.
| Stock No. | Description Price Quantity Total | ||
Subtotal
Name:
Accessory Subtotal: \$
Address: AZ, CA, CO,
CT, FL, GA, IL, LA,
City:
MA, MD, MI, MN, MO, NC, NJ,
State/Zip: \$
NV, NY, OH, PA, TN, TX, VA, WA
Daytime Phone:
residents add applicable sales tax
Shipping/Handling Options
SEND ORDER FORM TO: Please choose one:
Brother International Corp.
Attn: Consumer Accessory Div.
P.O. Box 341332
Bartlett, TN38184-1332
- Standard (\$5.00)
- 2nd day air freight (\$8.75) Mandatory for all deliveries outside of the continental U.S. (Alaska, Hawaii, Puerto Rico, Virgin Islands & Canada)
- All other overseas orders (\25.00) \
TOTAL DUE (US dollars) \$
Method of payment (Check one)
( ) Visa ( ) MasterCard ( ) Discover ( ) American Express ( ) Check/Money Order
Account Number
Expiration Date
Signature
* Prices subject to change without notice.
BROTHER CONTACT INFORMATION
Service Center Locations
If you need a local service center, please call 1-800-284-HELP (4357)
to locate the authorized service center closest to you.
Note: Be sure to call the Service Center before your visit.
Service centers do not provide operational assistance. See "Operational Assistance".
Operational Assistance
For technical and operational assistance you may call Brother Customer Service at:
Voice 1-877-4-PTouch, or Fax 1-901-379-1210
Assistance on the Internet
For product information and downloading the latest drivers: http://www.brother.com
For purchasing accessories and certain Brother products: http://www.brothermall.com
Accessories and Supplies
To order Brother accessories or supplies by Visa, MasterCard, Discover or American Express you may call toll tree 1-888-879-3232, or complete the order form In your user's guide and fax both sides of the form to 1-800-947-1445
For purchasing accessories on the Internet: http://www.brothermall.com
To order by mail or pay by check, Please complete the accessory order form and mail it along with payment to:
Brother International Corporation
Attn: Consumer Accessory Division
P.O. Box 341332
Bartleft, TN 38133-1332
Fax-Back System
Brother Customer Service has installed an easy to use Fax-Back System so you can get instant answers to common technical questions and product information for all Brother products.
This system is available 24 hours a day, 7 days a week. You can use the system to send the information to any fax machine, not just the one you are calling from.
Please call 1-800-521-2846 and follow the voice prompts to receive faxed instructions on how to use the system and an index of Fax-Back subjects.
P-TOUCH ACCESSORY ORDER FORM
Dear Customer:
This order form is provided for your convenience should your retailer not stock the item(s) needed. To order by mail, send this completed form along with proper payment to the address below OR credit card holders: Call toll-free 1-888-879-3232, fax completed order form to 1-800-947-1445, or visit our web site at http://www.brothermall.com. Please refer to the Accessories listing in your User's Guide for stock no. and price.
| Stock No. | Description Price Quantity Total | ||
Subtotal
Name:
Accessory Subtotal: \$
Address: AZ, CA, CO,
CT, FL, GA, IL, LA,
City:
MA, MD, MI, MN, MO, NC, NJ,
State/Zip: \$
NV, NY, OH, PA, TN, TX, VA, WA
Daytime Phone:
residents add applicable sales tax
Shipping/Handling Options
SEND ORDER FORM TO: Please choose one:
Brother International Corp.
Attn: Consumer Accessory Div.
P.O. Box 341332
Bartlett, TN38184-1332
- Standard (\$5.00)
- 2nd day air freight (\$8.75) Mandatory for all deliveries outside of the continental U.S. (Alaska, Hawaii, Puerto Rico, Virgin Islands & Canada)
- All other overseas orders (\25.00) \
TOTAL DUE (US dollars) \$
Method of payment (Check one)
( ) Visa ( ) MasterCard ( ) Discover ( ) American Express ( ) Check/Money Order
Account Number
Expiration Date
Signature
* Prices subject to change without notice.
TECLA DE RETORNO....22
TABULACIÓN....23
TECLA DE BORRADO (DEL) 24
natural_image
Diagram of a device casing with internal components and directional arrows indicating movement (no text or symbols)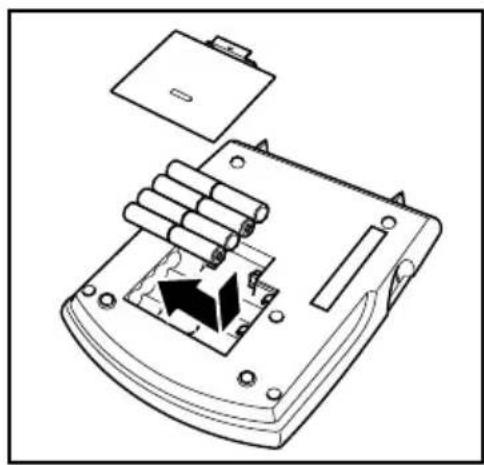
natural_image
Technical line drawing of a device with battery, switch, and internal components (no text or symbols)ADAPTADOR DE CA OPCIONAL
natural_image
Line drawing of a telephone receiver connected to a wall-mounted electrical outlet (no text or symbols)CASETES DE CINTA
natural_image
Line drawing of a vintage typewriter with open lid and keyboard, showing internal mechanism (no text or symbols)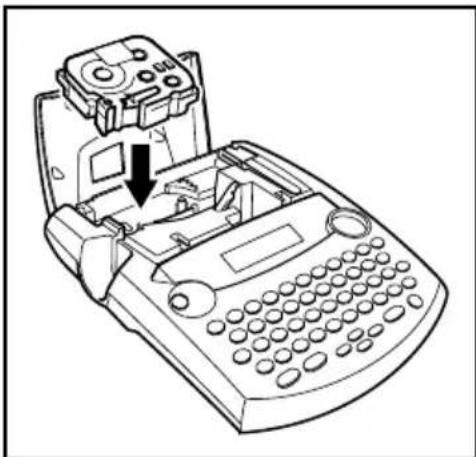
natural_image
Line drawing of a vintage typewriter with a key inserted, showing internal components and a downward arrow indicating a drop (no text or symbols present)natural_image
Line drawing of a vintage office setup with a landline telephone, cord, and desktop computer (no text or symbols)Editor: El software P-touch Editor Version 3.1
Para sustituir, agregar o eliminar el controlador de impresora:
![Driver Setup (Brother PT-2300/2310) Brother PT-2300/2310 was correctly deleted. Click [Finish] to quit setup.](/content/2026/05/770474/images/0b00116f4c1426655d215ca82cca53de0c016fc2da6c2effce8e5c1a505cf2af.jpg)
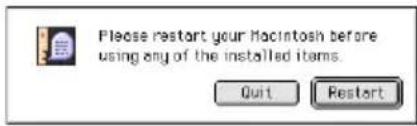
natural_image
Line drawing of a hand using a tool to adjust or install electronic components (no text or symbols visible)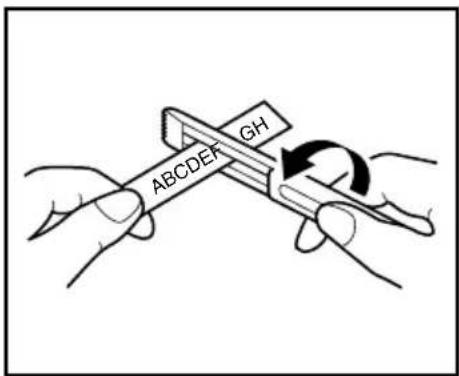
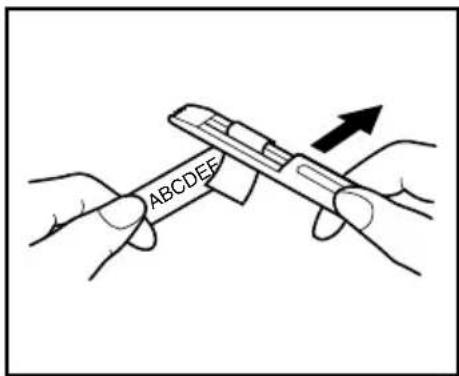
CINTAS DE TELA
TECLA DEL CURSOR HACIA ARRIBA
1: ABCTDEFTGHI 2: JKLMNOPQRSTU
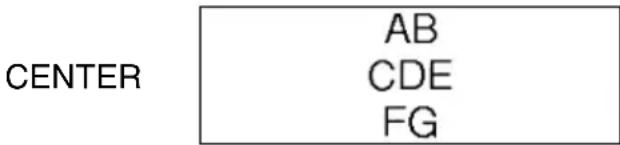
(194 × 242 × 65.5 mm)
Peso: 1.83 lbs (830 g) (sin casete de cinta ni pilas instalados)
SOFTWARE
Brother International Corporation
Attn: Consumer Accessory Division
P.O. Box 341332
Bartleft, TN 38133-1332
( ) Visa ( ) MasterCard ( ) Discover ( ) American Express ( ) Cheque/Giro postal
Brother International Corporation
Attn: Consumer Accessory Division
P.O. Box 341332
Bartleft, TN 38133-1332
( ) Visa ( ) MasterCard ( ) Discover ( ) American Express ( ) Cheque/Giro postal
- INTRODUCTION
- FCC NOTICE
- CONTENTS
- Getting Started
- For Your Information
- GENERAL DESCRIPTION
- KEYBOARD & LCD DISPLAY
- GENERAL PRECAUTIONS
- BATTERIES
- To change the batteries:
- OPTIONAL AC ADAPTOR
- To connect the optional AC adaptor:
- TAPE CASSETTE
- To change the tape cassette:
- CONNECTING THE P-TOUCH TO A COMPUTER
- To connect the P-touch to the computer:
- INSTALLING P-TOUCH EDITOR
- On an IBM PC-Compatible Computer
- To install the P-touch Editor software:
- Auto Format
- To install the USB printer driver:
- To replace, add or delete the printer driver:
- On a Macintosh Computer
- - For a basic installation
- - For a Custom installation
- To select the PT-2300/2310 as the printer:
- To delete P-touch Editor Version 3.1 and the printer driver:
- STARTING P-TOUCH EDITOR
- To start up P-touch Editor:
- Notes on Usage
- Barcodes
- Databases
- ATTACHING LABELS
- LAMINATED TAPE
- FABRIC TAPE
- STAMP TAPE
- To clean the print head and rollers:
- POWER KEY
- To turn on the machine:
- To turn off the machine:
- CURSOR KEYS
- LEFT CURSOR KEY
- RIGHT CURSOR KEY
- UP CURSOR KEY
- DOWN CURSOR KEY
- CODE, ALT & SHIFT KEYS
- CODE KEY
- EXAMPLE
- ALT KEY
- SHIFT KEY
- To type in many capital letters:
- SPACE KEY
- RETURN KEY
- To add a new line:
- To select an item from a list:
- TAB FUNCTION
- To set the tab length:
- To add a tab:
- DELETE KEY
- To delete one character:
- To delete a sequence of characters:
- To quit a function without changing your text:
- To answer "no":
- LINE OUT FUNCTION
- To delete a line of text:
- CLEAR FUNCTION
- To delete just the text:
- ACCENT FUNCTION
- To type in an accented character:
- To add the accented character "É":
- SYMBOL FUNCTION
- To type in a symbol:
- To add the symbol “臭:
- AUTO FORMAT FUNCTION
- To select a preset format:
- To select the AUDIO CASSETTE setting:
- STAMP FUNCTION
- To make a stamp:
- To cut a stamp:
- To affix a stamp:
- FONT FUNCTION
- To change the font setting:
- To select the FONT 2 font setting:
- SIZE & WIDTH FUNCTIONS
- To change the size setting:
- To select the 24 point size setting:
- To change the width setting:
- To select the WIDE width setting:
- STYLE FUNCTION
- To change the style setting:
- To select the I+SHAD style setting:
- UNDERLINE FUNCTION
- To turn on or off the Underline function:
- To select the UNDL ON underline setting:
- FRAME FUNCTION
- To change the frame setting:
- To select the candy frame setting:
- TAPE MARGIN FUNCTION
- To change the tape margin setting:
- To select the HALF tape margin setting:
- HORIZONTAL ALIGNMENT FUNCTION
- To change the horizontal alignment setting:
- To select the RIGHT horizontal alignment setting:
- MIRROR PRINTING FUNCTION
- To turn on or off the mirror printing setting:
- To select the ON mirror printing setting:
- LENGTH FUNCTION
- To turn on or off the Length function:
- To select a label length of 5":
- AUTO CUT FUNCTION
- To turn on or off the Auto cut function:
- To turn on the Auto cut function:
- PRINT KEY
- To print a label:
- FEED & CUT FUNCTION
- To feed and cut off 1" (24 mm) of tape:
- NUMBERING FUNCTION
- To use the Numbering function:
- To print three labels with numbers 1, 2 and 3:
- REPEAT PRINTING FUNCTION
- To use the Repeat printing function:
- To print three copies of a label:
- MEMORY FUNCTIONS
- STORING TEXT
- To store a text file:
- To overwrite the stored file with the new one:
- RECALLING TEXT
- To recall a text file:
- DELETING A FILE
- To delete a text file:
- To store text under file number 4:
- To recall the text from file number 1:
- To delete the text stored under file number 4:
- TROUBLESHOOTING
- ERROR MESSAGE LIST
- SPECIFICATIONS
- HARDWARE
- SOFTWARE
- ACCESSORIES
- ●Supplies
- BROTHER CONTACT INFORMATION
- Service Center Locations
- Operational Assistance
- Assistance on the Internet
- Accessories and Supplies
- Fax-Back System
- P-TOUCH ACCESSORY ORDER FORM
- Subtotal
- Shipping/Handling Options
- Method of payment (Check one)
- ADAPTADOR DE CA OPCIONAL
- CASETES DE CINTA
- Para sustituir, agregar o eliminar el controlador de impresora:
- CINTAS DE TELA
- TECLA DEL CURSOR HACIA ARRIBA
Brand : BROTHER
Model : P-Touch 2310
Category : Label printer