
P-Touch 530 - Label printer BROTHER - Free user manual and instructions
Find the device manual for free P-Touch 530 BROTHER in PDF.


| Product Type | Label Printer |
| Brand | Brother |
| Model | P-Touch 530 |
| Dimensions (W x D x H) | 221 x 253 x 87 mm (8.7 x 10.0 x 3.4 inches) |
| Weight | 1.2 kg (2.6 lbs) |
| Power Supply | 8 AA alkaline batteries or optional AC adapter (model AD-60) |
| Display | 112 x 32 dot LCD with 23 indicators |
| Print Head | 128 dots, 180 dpi |
| Supported Tape Widths | 6 mm, 9 mm, 12 mm, 18 mm, 24 mm, 36 mm |
| Number of Built-in Fonts | 5 |
| Character Sizes | 6, 9, 12, 18, 36, 48 point + AUTO |
| Text Styles | Normal, Bold, Outline, Solid, Shadow, Outline+Shadow, Striped; each combinable with Italic |
| Memory Capacity | Up to 1,000 characters |
| Max Lines per Label | 7 |
| Max Blocks per Label | 5 |
| Auto Power Off | After 5 minutes of inactivity |
| Bar Code Generation | Supported (CODE 39, I-2/5, EAN13, EAN8, UPC-A, UPC-E, CODABAR) |
| Color Printing | Yes (with optional color ink and tape cassettes) |
| Stamp Creation | Yes (with optional stamp kit) |
| Print Head Cleaning | Use a dry cotton swab; for stubborn dirt, use isopropyl alcohol |
Frequently Asked Questions - P-Touch 530 BROTHER
User questions about P-Touch 530 BROTHER
0 question about this device. Answer the ones you know or ask your own.
Ask a new question about this device
Download the instructions for your Label printer in PDF format for free! Find your manual P-Touch 530 - BROTHER and take your electronic device back in hand. On this page are published all the documents necessary for the use of your device. P-Touch 530 by BROTHER.
USER MANUAL P-Touch 530 BROTHER
natural_image
Line drawing of a rectangular electronic device with a curved top and side slots (no text or symbols)USER'S GUIDE
- Read this User's Guide before you start using your P-touch.
- Keep this User's Guide in a handy place for future reference.
brother®
Thank you for purchasing the P-touch 530/550!
With your new P-touch, you can create labels and stamps for any need. Select from the many frames, character sizes and styles to design beautiful custom labels and stamps. In a addition, the variety of tape and ink colors available allow you to print personalized labels, useful for color-coding.
You no longer have to worry about urgent tasks that require professional printing. In the office, the factory, the lab or the home, the quality and performance of the P-touch 530/550 makes it an extremely practical machine.
Finally, as you may want to refer to this User's Guide occasionally, we suggest that you keep it in a handy place.
FCC NOTICE
This equipment has been tested and found to comply with the limits foe a Class B digital device, pursuant to 15 of the FCC Rules. These limits are designed to provide reasonable protection against harmful interference in a residential installation. This equipment generates, uses, and can radiate radio frequency energy and, if not installed and used in accordance with the instructions, may cause harmful interference to radio communications. However, there is no guarantee that interference will not occur in a particular installation. If this equipment does cause harmful interference to radio or television reception, which can be determined by turning the equipment off and on, the user is encouraged to try to correct the interference by one or more of the following measures:
Reorient or relocate the receiving antenna.
Increase the separation between the equipment and receiver.
Connect the equipment into an outlet on a circuit different from that to which the receiver is connected.
Consult the dealer or an experienced radio/TV technician for help.
The enclosed interface cable should be used in order to ensure compliance with the limits for a Class B digital device.
Changes or modifications not expressly approved by Brother Industries, Ltd. Could void the user's authority to operate the equipment.
This product is covered by one or more of the following patents.
USP4839742 USP4983058 EP315369 GB2223740
USP4922063 USP5009530 EP322918
USP4927278 USP5069557 EP322919
USP4966476 USP5120147
USP4976558
CONTENTS
ABOUT THIS MANUAL.... 1
QUICK REFERENCE GUIDE
BEFORE YOU START
MACHINE DIAGRAM....8
GENERAL PRECAUTIONS .... 10
BATTERIS....11
OPTIONAL AC ADAPTOR....12
TAPE CASSETTE 13
ATTACHING LABELS....16
PRINT HEAD AND ROLLERS....19
LEARNING THE ROPES
INTRODUCTION 22
NAME TAG EXAMPLE 23
EQUIPMENT LABEL EXAMPLE 30
ADDRESS LABEL EXAMPLE 36
STORAGE SHELF LABEL EXAMPLE 45
FOR YOUR INFORMATION
INTRODUCTION 54
FINDING YOUR WAY....55
On/Off KEY 56
CURSOR KEYS 57
Code/Alt/Shift KEYS AND Caps MODE 59
Space KEY 62
RETURN KEY 63
New Block FUNCTION....66
Cancel KEY 68
BS (BACKSPACE) KEY 71
Line Out FUNCTION....72
Clear FUNCTION....73
Symbol FUNCTION 75
Accent FUNCTION 78
Barcode FUNCTION....80
Zoom KEY 85
Contrast KEY 86
Label length FUNCTION 87
Auto Formats Key 88
Area KEY AND ALL FUNCTION....97
Font KEY 100
Size AND Width KEYS.... 102
Style KEY 104
Undl/Frm (UNDERLINE/FRAME) KEY 107
Color KEY 109
Format KEY 110
GLOBAL FRAME FUNCTION 112
FRAME COLOR FUNCTION.... 113
STYLE COLOR FUNCTION.... 114
LENGTH FUNCTION.... 116
FEED (TAPE FEED) FUNCTION.... 117
H.ALI (HORIZONTAL ALIGNMENT) FUNCTION 118
VERT (VERTICAL PRINTING) FUNCTION.... 119
MIRROR (MIRROR PRINTING) FUNCTION.... 120
UNIT FUNCTION.... 121
Print KEY AND Tape Cut KEY 122
COLOR PRINT FUNCTION 123
Stamp FUNCTION 125
Special Print FUNCTION.... 128
Seq. Numbering FUNCTION 130
Store, Recall AND M.Del KEYS.... 134
ERROR MESSAGE LIST 139
TROUBLESHOOTING 146
MACHINE SPECIFICATIONS.... 147
FEATURES 148
INDEX 149
ACCESSORIES.... 152
ABOUT THIS MANUAL
Although the P-touch 530/550 is easy to use, we suggest that you read this manual carefully before starting. This manual consists of a reference guide and three chapter:
QUICK REFERENCE GUIDE This guide provides quick and simple instructions on setting up and using the machine.
BEFORE YOU START This chapter provides basic information concerning the tape cassettes, power supplies, and labels.
LEARNING THE ROPES The easy-to-follow practice sessions in this chapter are designed to help you become familiar with the machine's operations.
FOR YOUR INFORMATION This handy reference chapter contains detailed explanations of all the machine's features.
The Quick Reference Guide contains all the information you need to immediately begin using this machine for making simple labels. Please read the brief Before You Start chapter for more details on the setup and care of the machine.
If this is your first time using a P-touch or if you would like to brush up on some techniques, we suggest you work through the exercises in Learning the Ropes. If you have detailed questions about specific features, the For Your Information chapter will provide you with the answers.
We hope you enjoy using your P-touch 530/550.
QUICK REFERENCE GUIDE
Power Supply (Refer to pages 11 and 12 for details.)
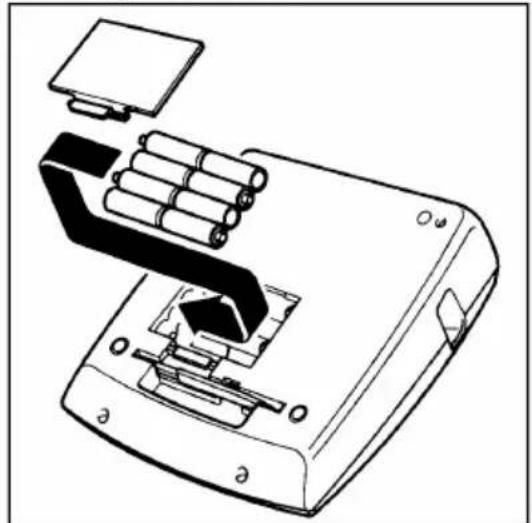
Inserting the Batteries
natural_image
Technical line drawing of a mechanical device with battery pack and clamped components (no text or symbols)Remove the battery cover on the back of the machine and insert eighth AA alkaline batteries.
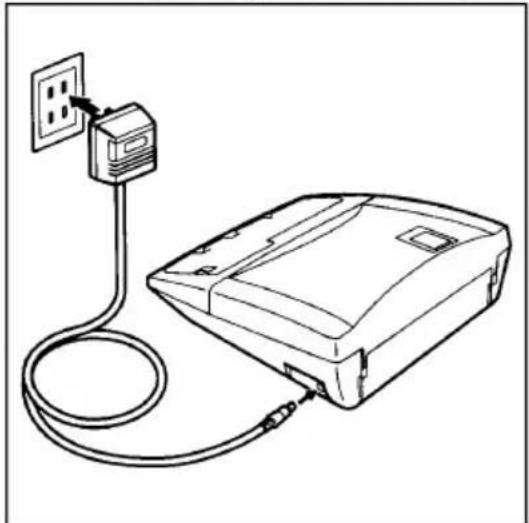
Connecting the Optional AC Adaptor
natural_image
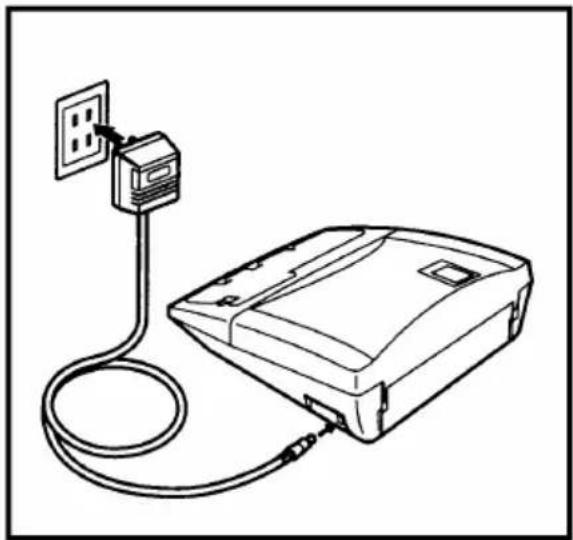
Line drawing of a portable electronic device connected to a power outlet (no text or symbols)Insert the adaptor plug (model AD-60, sold separately) into the jack on the machine, then insert the AC adaptor into the outlet.
Tape Cassettes (Refer to pages 13 to 15 for details.)
natural_image
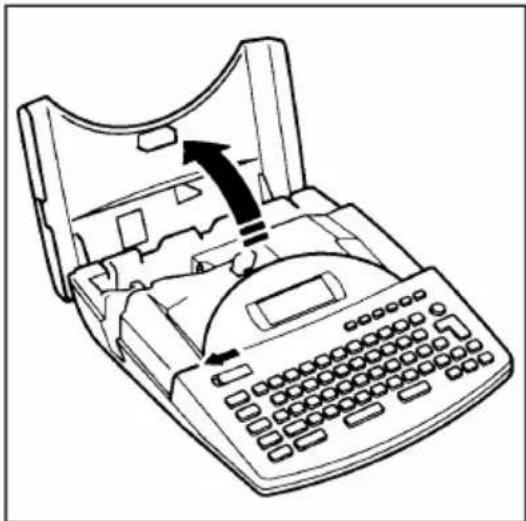
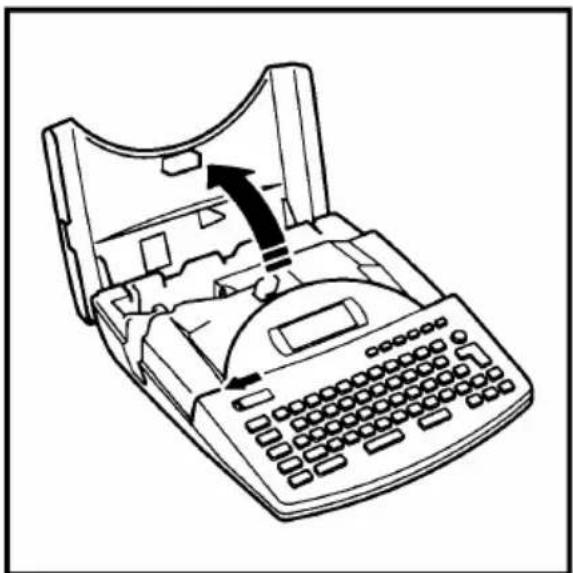
Line drawing of a typewriter with an open lid and keyboard, showing internal components without any text or symbols.- Slide the cover release lever to the left, then lift open the cover.

natural_image
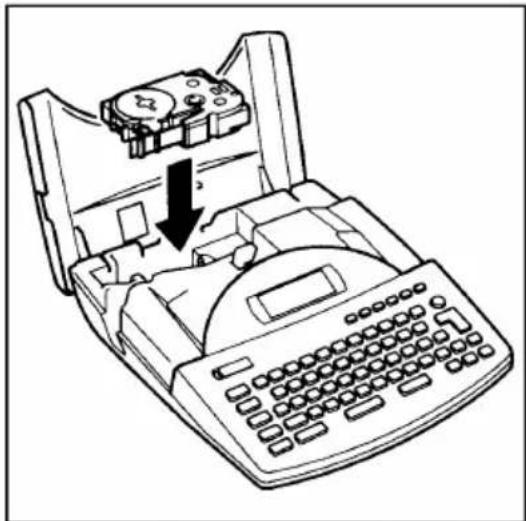
Line drawing of a telephone handset with a device inside, showing internal components and a downward arrow indicating motion (no text or symbols)- Insert a TZ tape cassette, then close the cover.
Making Simple Labels
Mr. J. Smith
-
Press On Off
-
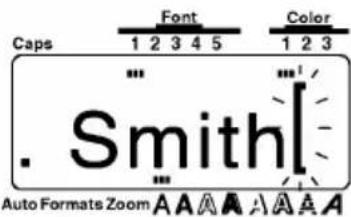
Type in "Mr. J. Smith".
a. Press + _ .
b. Press R, ?, then Space.
c. Press Shift + J. Next, press ?., then Space.
d. Press Shift + S. Then, press M, I, T and finally H.
- After entering the text, print out the label.
Press Special Print
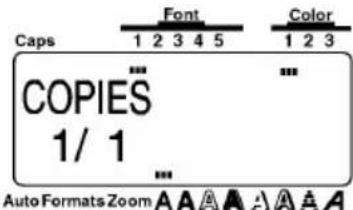
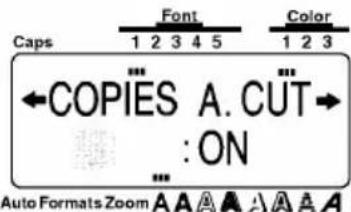
To print multiple copies of the same label, press Code + Special Print and use Home and End to set the number of copies to be printed, then press New Block.
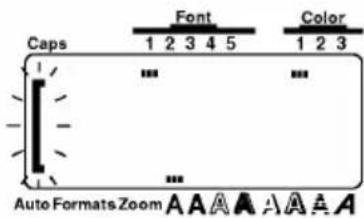
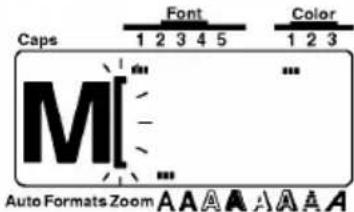
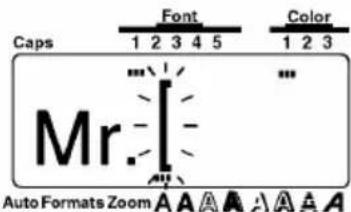
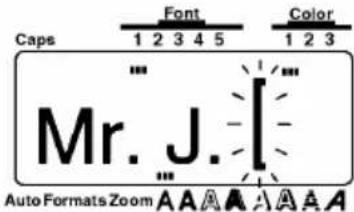
4. Affix the label
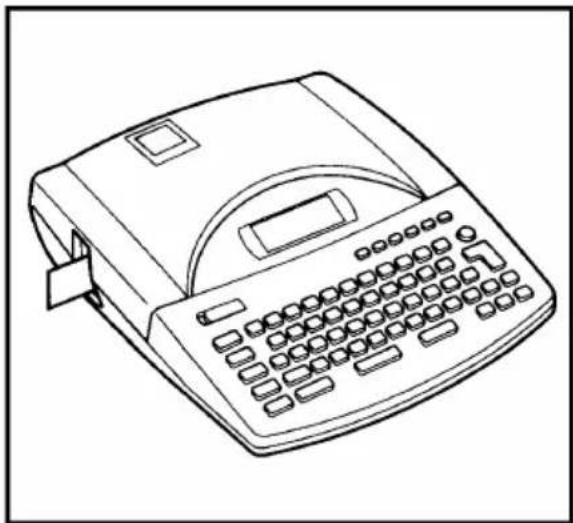
a. After the label is printed and automatically cut, remove it from the tape exit slot.
natural_image
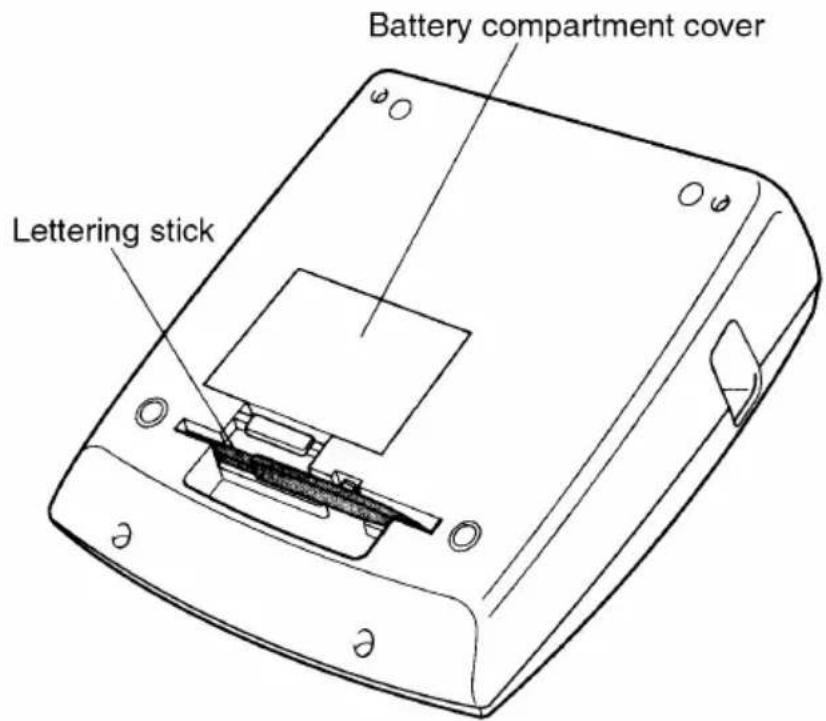
Line drawing of a vintage typewriter with keyboard and display (no text or symbols)b. Use the enclosed lettering stick to remove the backing from the label.
The lettering stick is attached to the bottom of the P-touch.
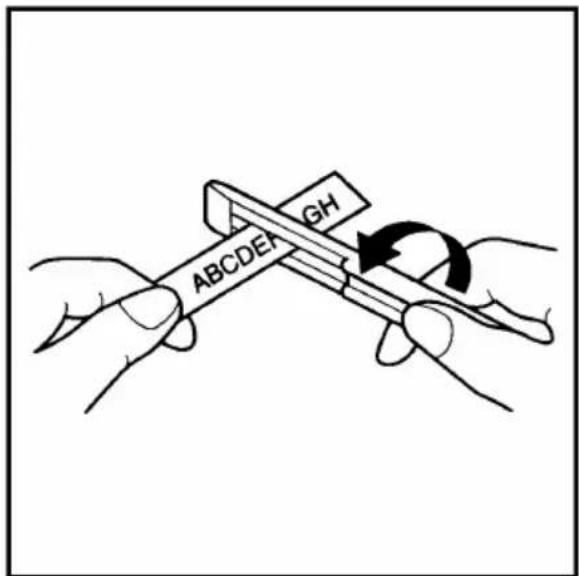
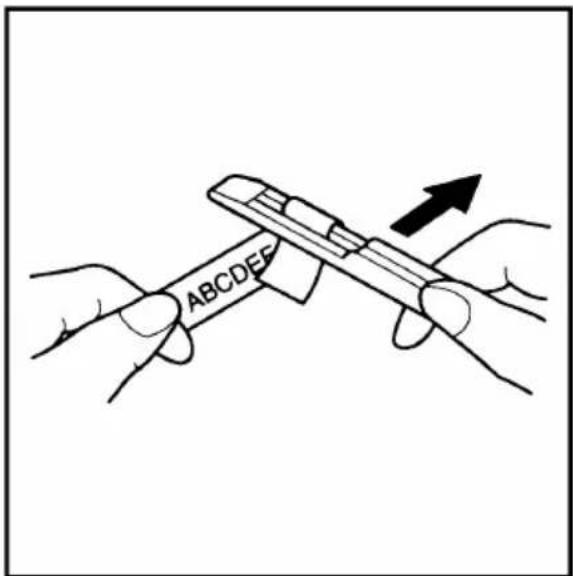
c. Attach the label at the desired position.
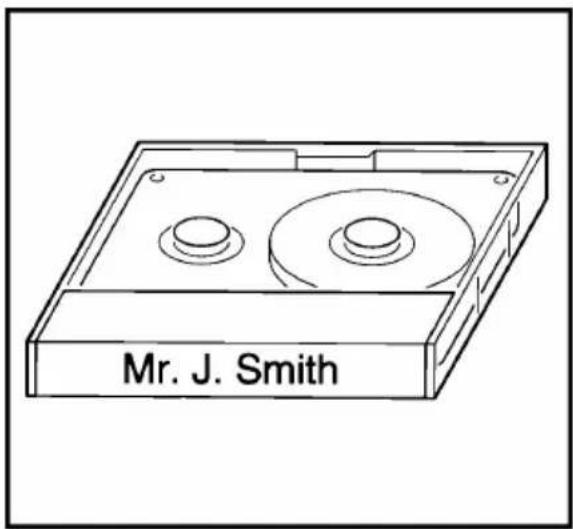
Demo printing ( To print a demo label, press Code + D.)
P-TOUCH EXTRA
Electronic Labeling System Easy, Beautiful & Versatilel
Since four different demo labels are available, the label that is printed depends on the width of the installed tape.
Before You Start
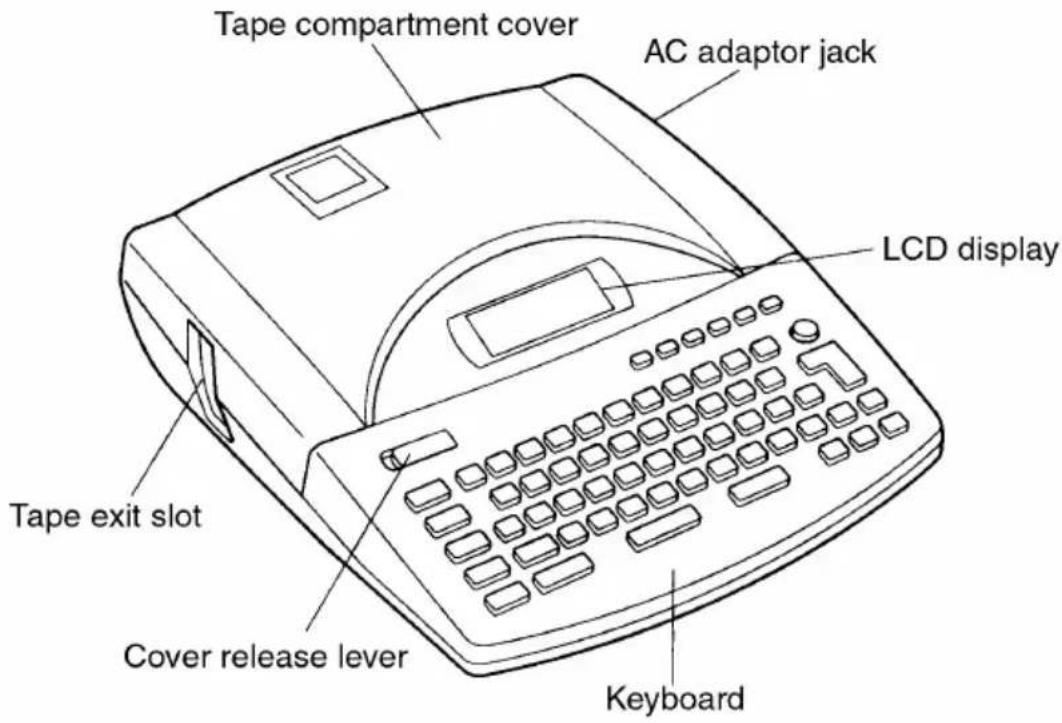
MACHINE DIAGRAM
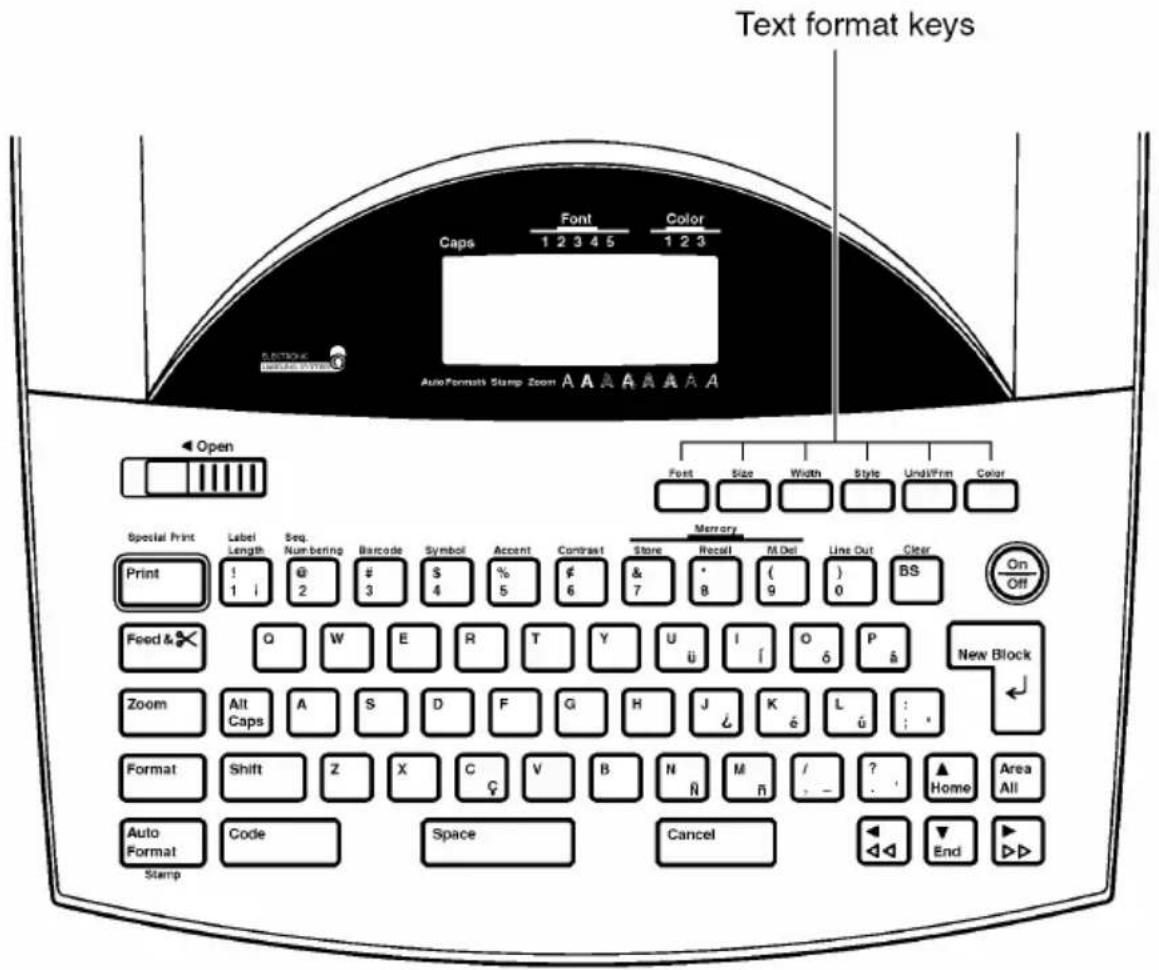
KEYBOARD
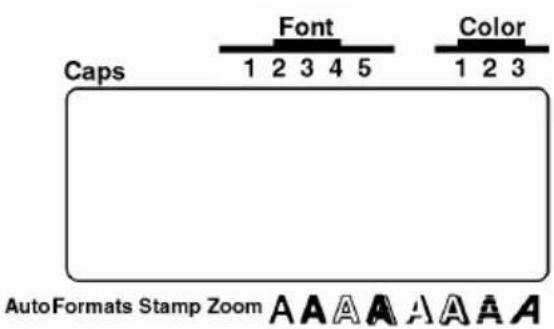
LCD DISPLAY
P-touch 530
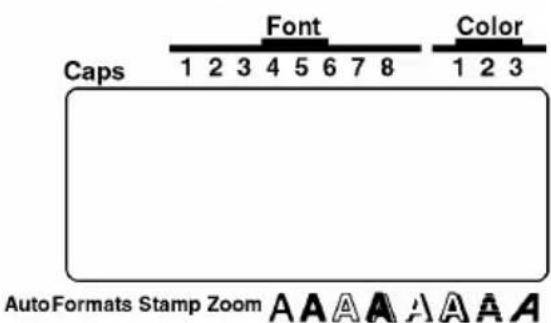
P-touch 550
FEATURES
A clear protective film has been affixed to the LCD display to prevent it from being scratched or damaged. Before operating the machine, remove the film.
* Use only Brother TZ tapes with this machine. Do not use tapes that do not have the mark.
* Do not pull on the tape being fed from the P-touch. Doing so may damage the tape cassette.
* Avoid using the machine in extremely dusty place. Keep in out of both direct sunlight and rain.
* When printing a label, a horizontal line appears on your label, this may be an indication that dust is on the print head. To clean the print head, gently rub a cotton swab over the print head to remove dust. (See page 19.)
* Be sure tape is properly fed through tape guidelines before installing a tape into the machine. (See page 15.)
* Do not expose the machine to high temperatures or high humidity. Never leave it on the dashboard or in the back of your car.
* Do not leave any rubber or vinyl on the machine foe an extended period of time. Doing so may cause staining.
* Do not put any foreign objects onto or into the machine.
* To avoid injuries, do not touch the cutter's edge.
* When inserting new batteries, be sure to do so within five minutes of removing the old ones, otherwise all text files will be lost (unless the machine is plugged into an AC outlet with the AC adapter).
* Use only the AC adapter (model AD-60) designed exclusively for this machine. Use of any other adapter will void the warranty.
* When the machine is not being used for a long period of time and it is not necessary to keep the text files stored in the memory, disconnect the AC adapter, and remove the batteries to prevent them from leaking and damaging the machine.
* If the adapter is removed from the AC outlet before unplugging in from the machine, the text files in the memory will not be deleted if the batteries are correctly installed.
* Use only AA alkaline batteries in this machine.
©
OPTIONAL AC ADAPTOR
The AC adaptor (Model AD-60) allows you to use this machine anywhere a standard electrical outlet is available.
TO CONNECT THE AC ADAPTOR:
① Insert the small plug on the adaptor into the jack marked DC IN 9.5V on the right side of the machine.
② Insert the large plug into the nearest standard electrical outlet.
Only use the AC adaptor designed exclusively for this machine.
If the adaptor is removed from the AC outlet before unplugging it from the machine, the text files in the memory will not be deleted if batteries are correctly installed.
It is recommended that the AC adaptor be connected before printing large fonts and bar codes on 3/4"(18-mm)-, 1"(24-mm)- or 1 1/2"(36-mm)-wide tape since these operations can quickly drain batteries.
natural_image
Line drawing of a portable electronic device connected to a power outlet (no text or symbols)TAPE CASSETTES
A single TZ tape cassette is supplied with this unit. However, since TZ tape cassettes as well as color printing ink and tape cassettes are available for this machine in a wide variety of colors and sizes, it is possible to make distinctive color-coded and stylized labels. In addition, this machine has been designed to allow you to change the tape cassettes quickly and easily.
TO CHANGE A TZ TAPE CASSETTE:
① Slide the cover release lever to the left, then lift open the tape compartment cover.
② If a tape cassette is already installed, remove it by pulling it straight up.
③ If the ink ribbon in the other tape cassette is loose, use your finger to wind the toothed wheel in the direction of the arrow on the cassette until there is no slack in the ribbon. Also, make sure that the end of the tape feeds under the tape guides.
If you are using a new cassette, first remove the stopper.
4 Insert the tape cassette firmly into the compartment, making sure that the entire back of the cassette touches the bottom of the compartment.
When inserting the tape cassette, make sure that the inner ribbon does not catch on the corner of the metal guide.
⑤ Close the compartment cover, then press On to turn on the machine if it is off.
6 Press Feed & once to remove any slack in the tape and cut off the excess.
natural_image
Line drawing of a typewriter with an open lid and keyboard, showing internal components (no text or symbols)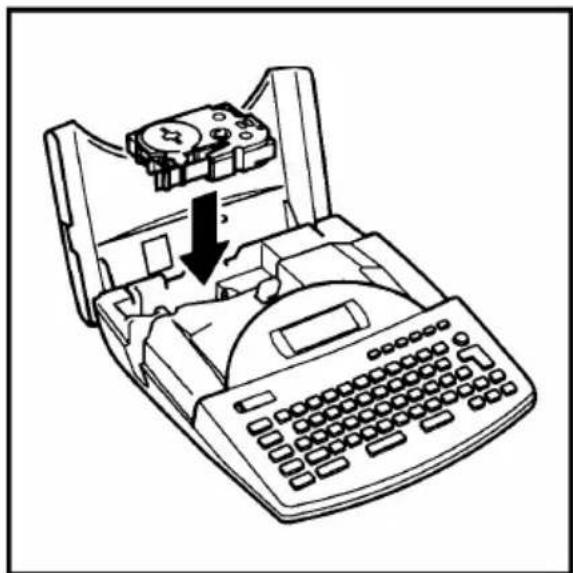
natural_image
Line drawing of a telephone handset with a downward arrow indicating compression or disassembly (no text or symbols present)TO CHANGE THE COLOR PRINTING INK AND TAPE CASSETTE:
① Slide the cover release lever to the left, then lift open the tape compartment cover.
② If a tape cassette is already installed, remove it by pulling it straight up.
③ Insert the ink cassette straight down into the cassette.
If the ribbon in the ink cassette is loose, use your finger to wind the toothed wheel in the direction of the arrow on the ink cassette until there is no slack in the ribbon.
If you are using a new tape cassette, remove the adhesive tape from the end of the tape and pull out about 1/2" (12-mm) of label tape.
If you are using an old tape cassette, be sure that the is correctly fed. (for details, refer to page 15.)
4 Insert both the ink and tape cassettes firmly into the compartment, making sure that the entire back of the cassettes touch the bottom of the campartment.
When inserting the cassettes, make sure that the ink ribbon does not catch on the corner of the metal guide and that the tape does not catch on the cutter.
⑤ Close the compartment cover, then press On to turn on the machine if it is off.
6 Press Feed & once to remove any slack in the tape and cut off the excess.
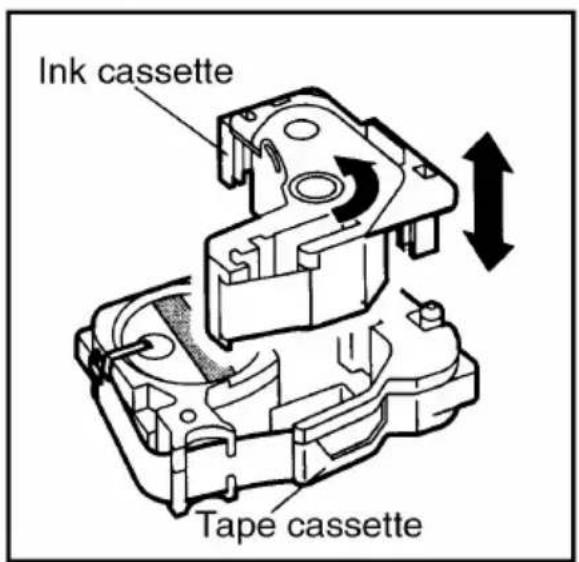
Feeding the tape through the cassette
① Remove the tape and ink cassettes from the machine, then take the ink cassette out of the tape cassette.
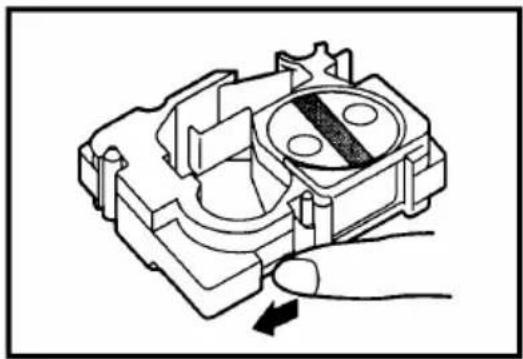
② Guide the tape into the cassette case.
If there is only a little tape left in the cassette, pull out more and feed it into the slot.
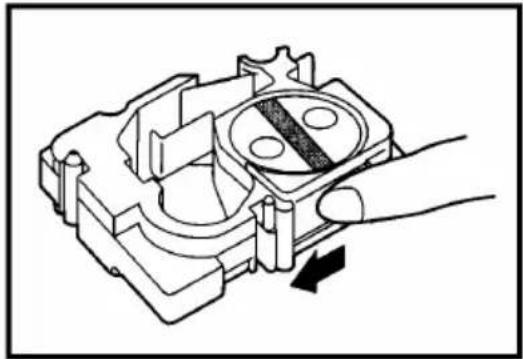
natural_image
Mechanical assembly diagram showing a hand pressing a button into a housing component (no text or symbols)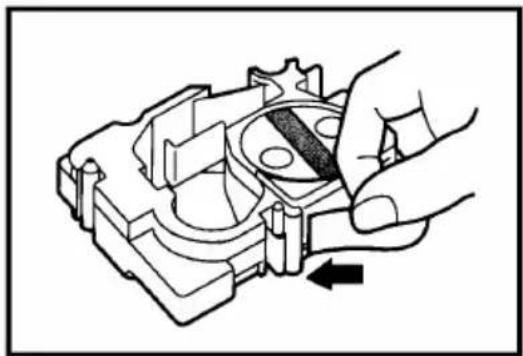
natural_image
Mechanical assembly diagram showing a hand operating a gear-like component with a rotating shaft (no text or symbols)③ Guide the end of the tape through the slot and around the cassette case.
natural_image
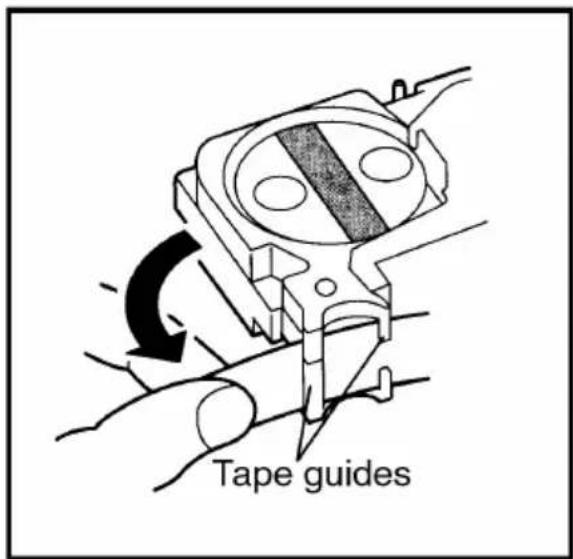
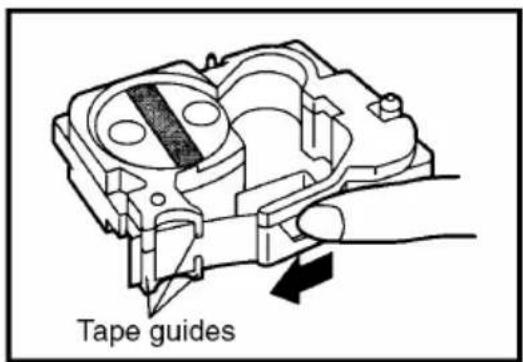
Mechanical component diagram showing a piston assembly with a hand pressing a button (no text or symbols)④ Slide the tape under the tape guides.
Make sure the tape feeds under the tape guides.
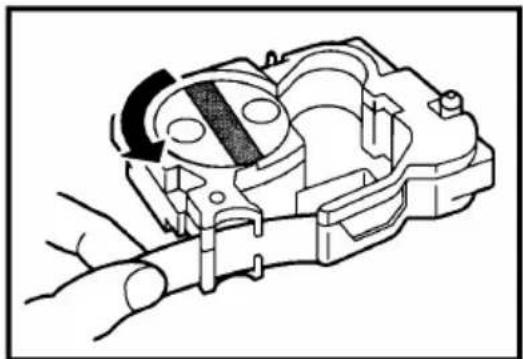
⑤ Hold the end of the tape and turn the tape roll counterclockwise to remove any slack.
natural_image
Technical line drawing of a mechanical assembly with a hand operating a tool (no text or symbols present)ATTACHING LABEL
LAMINATED TAPE
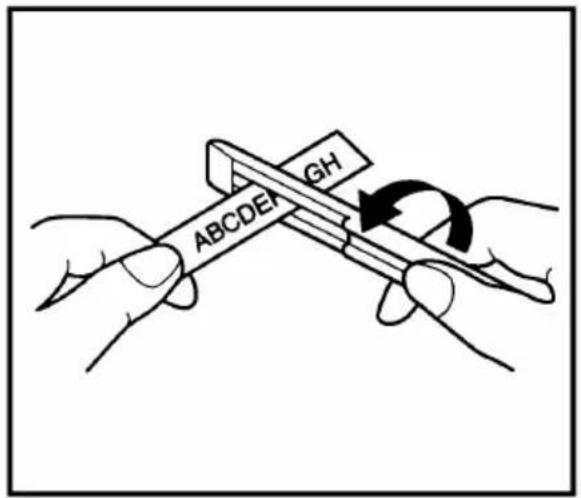
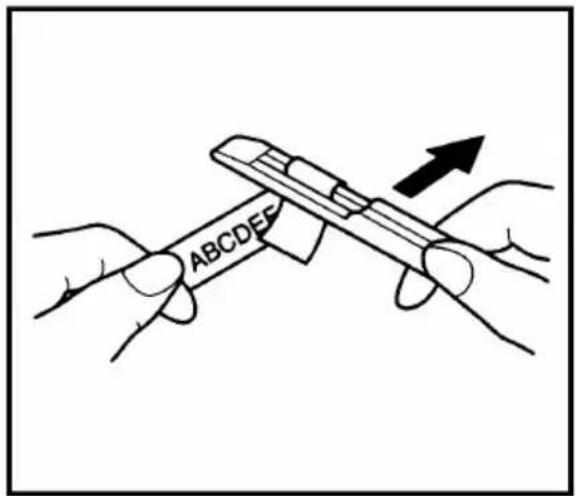
The enclosed lettering stick enables you to easily remove the backing from labels printed on laminated tapes.
① Hold the tape in your left hand, with the printed surface facing up, and hold the lettering stick in your right hand.
② Pass the tape halfway through the long narrow hole in the stick.
③ Turn the stick three quarters of a turn towards you and pull the stick away from you as shown below.
④ Peel off the label backing.
NON-LAMINATED TAPE
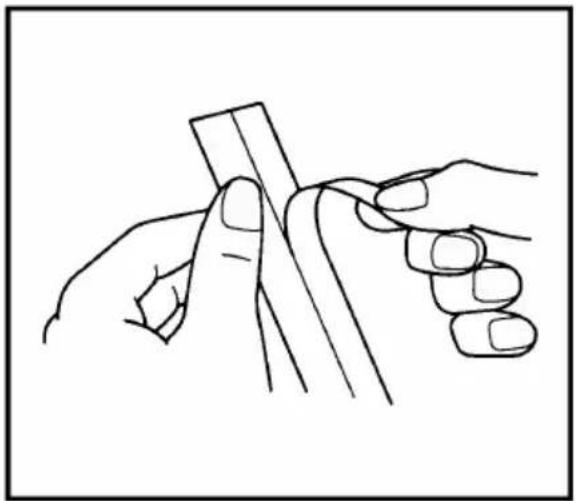
Labels printed on non-lamenated tapes can be folded in half so that the inside edges of the two backing pieces come off the label, enabling the backing to easily be peeled off.
natural_image
Line drawing of two hands holding a thin, elongated object (no text or symbols)INSTANT-LETTERING TAPE (RUB-ON TRANSFERS)
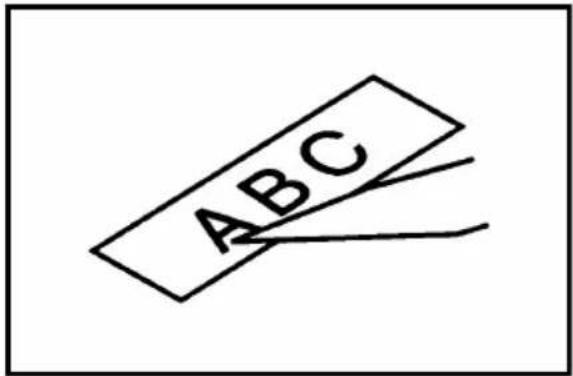
Instant-lettering tape can be used to transfer your text onto paper. After printing the text onto instant-lettering tape and cutting off the labels, position it on a sheet of paper. By simply rubbing the instant lettering tape's non-printed side with the enclosed lettering stick, you can transfer the text directly onto the paper.
Hold the tape very firmly and to not move it while rubbing the tape.
IRON-ON TRANSFER TAPE
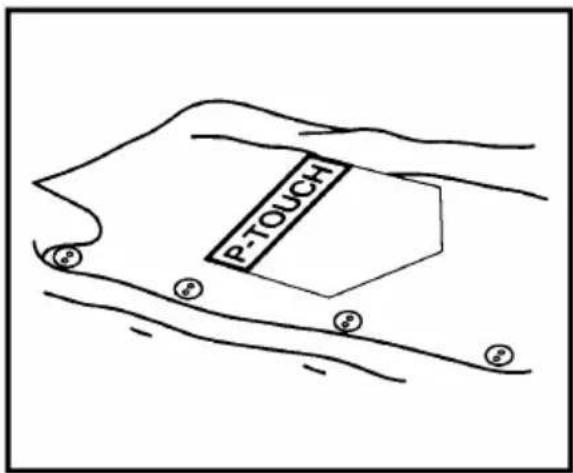
Iron-on transfer tape can be used to transfer your text onto germents using an iron.
Although the iron-ons are non-toxic, you should maintain the usual precautions and not place them in your mouth.
Do not store iron-on transfer tape cassettes in areas exposed to direct sunlight, high humidity or dust.
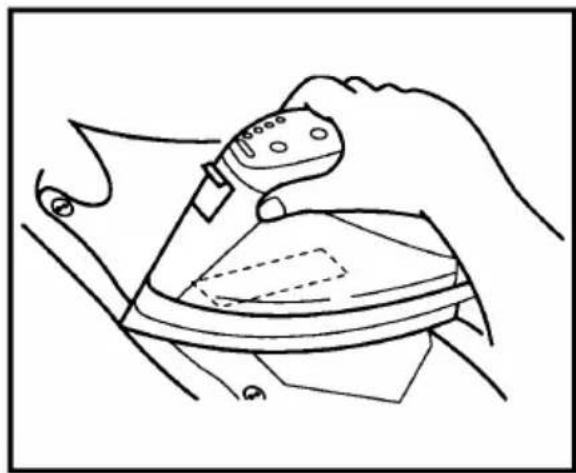
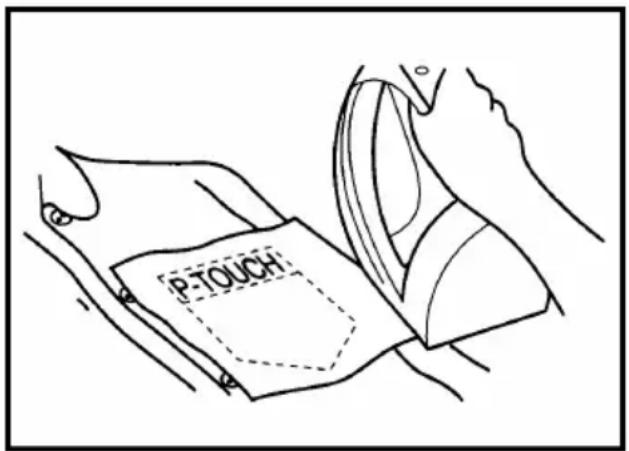
① Insert an iron-on transfer tape cassette, press 📋 to print the text, then cut off the label.
② Iron the garment to flatten it before transferring the text.
③ Place the label on the garment at the location where you wish the text to be transferred.
④ Set the iron to cotton 150 to 180°C (302 to 356°F), then press down on the label with the iron for about 15 seconds.
⑤ Allow the iron-on transfer to cool (for about 60 seconds), then carefully remove the backing paper.
natural_image
Line drawing of a hand using a handheld device to clean or inspect the interior space (no text or symbols)
White garments made from 100% cotton with a plain (smooth) surface are best for making iron-on transfers.
You can also make transfers to garments made from 100% linen or cotton/polyester blends as long as they have a plain (smooth) surface.
The iron-on will not adhere properly to any cloth with a rough surface, such as pile or denim, or with a waterproof surface. Hart-sensitive materials, such as nylon, acetate or other similar fibers, are unsuitable as they may be damaged when they are pressed with an iron at a high temperature.
Press the iron straight down onto the cloth. Do not move the iron while pressing, otherwise the label may move out of place.
After the backing tape has been removed, the transferred iron-on may appear glossy. In addition, some white spots may have appeared on the label if it was touched while the backing tape was peeled off. These can be removed by ironing over the iron-on transfer with a piece of cloth placed between it and the iron.
The iron-on transfer will have a white background on colored cloth.
Since the transferred iron-on cannot be removed once it is applied, make all transfers with care.
Washing
Garments with iron-on transfers can be washed over 20 times if the iron-on has been transferred correctly. Normal biological and non-biological household detergents may be used.
The iron-on may become discolored if the garment is placed in bleach for an extended length of time.
Be careful that hard objects such as buckles or buttons do not come into contact with the iron-on in the wash.
Do not dry clean garments which have had iron-on transfers applied.
Drying
Garments with iron-on transfers may be dried either inside or outside out.
Do not tumble dry. The transfers will come off and may stick to other items of clothing.
Ironing
Iron garments with transfers using normal temperature settings.
Be sure to place a piece of cloth between the iron and label when you iron over it to prevent the label from sticking to the iron.
PRINT HEAD AND ROLLERS
Occasionally, specks of dust or dirt become attached to the machine's print head and rollers. This is particularly likely when you are using the unit outdoors or in a very dusty environment. If a section of the print head is covered with dust, a blank horizontal streak may appear through the text in the printed label.
Therefore, as with a tape recorder, the machine's head may need to be cleaned from time to time.
TO CLEAN THE PRINT HEAD
① Turn off the machine.
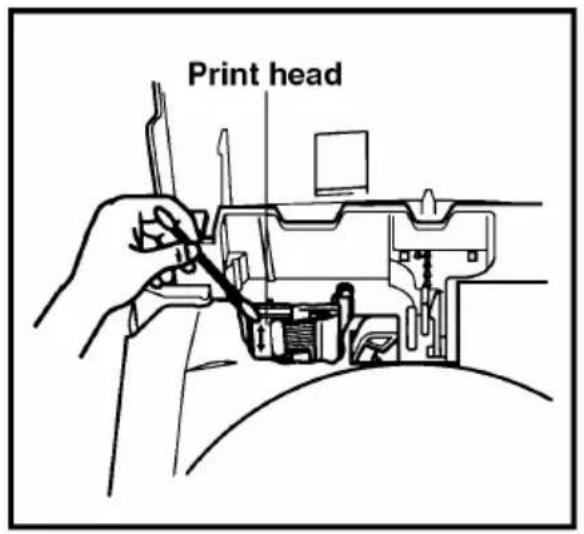
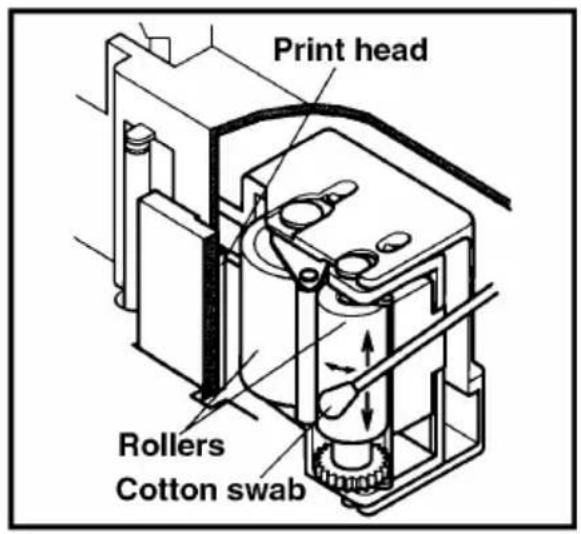
② Open the tape compartment cover, then remove the tape cassette if one is installed. The print head and rollers are located in the tape compartment.
③ Print head: Use a dry cotton swab to gently wipe the print head with an up-and - down motion.
Rollers: Use a dry cotton swab to wipe each roller with an up-and-down motion while rotating them with your finger.
④ Try printing again.
If dust still remains:
⑤ Repeat step ③ using a cotton swab dipped in isopropyl (rubbing) alcohol.
If none of the above works, contact your service representative.
Learning the Ropes
INTRODUCTION
In Learning the Ropes, you will find a series of label-making examples. As the example labels become increasingly more complex, you will learn how to use the more advanced features of the machine. The first exercise consists of creating a simple one-line name tag. The second, an equipment instruction label, takes advantage of several additional machine capabilities. The third is a four-line address label. Finally, the storage shelf label shows you how to use the unit's more expert functions.
If you are a first-time user, we suggest that you work through these exercises to become acquainted with the various features of this machine. Since they do not require much time, they can be done in four separate practice sessions or all at once.
The Learning the Ropes examples is constructed as shown below:
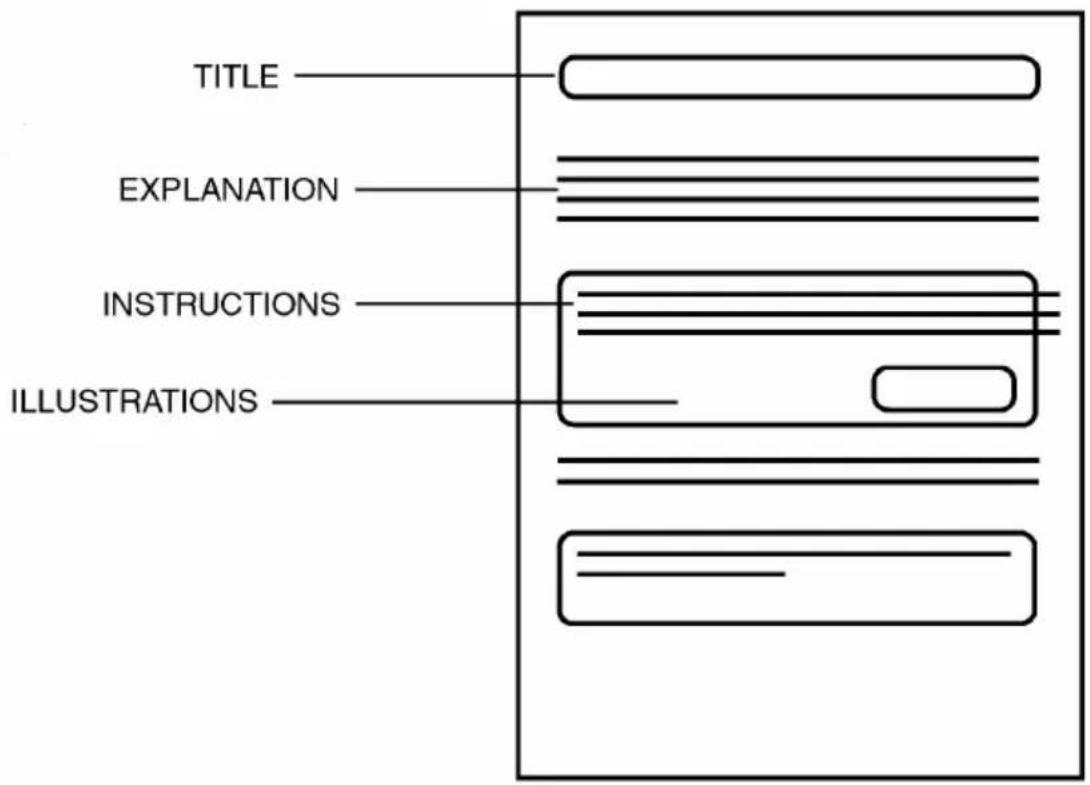

Although the P-touch 530 display is shown in the examples, the operation does not change for the P-touch 550.
To best use this training section, simply follow the flow of the practice sessions. Read the background explanations, then follow the instructions, checking that your results match the illustrations provided. If you would like more detailed information about a particular point, simply check in the For Your Information chapter.
Now, let's see how easy it is to make beautiful labels with the P-touch 530/550!
NAME TAG EXAMPLE
After you have inserted the batteries and the enclosed tape cassette as explained in the Before You Start chapter, we can practice using some of the basic functions of your P-touch 530/550. We must first begin by turning on the power to the machine.
To turn on the machine:
① Press On in the top right-hand corner of the keyboard. When this machine is first turned on, its display is in WYSIWYG mode.
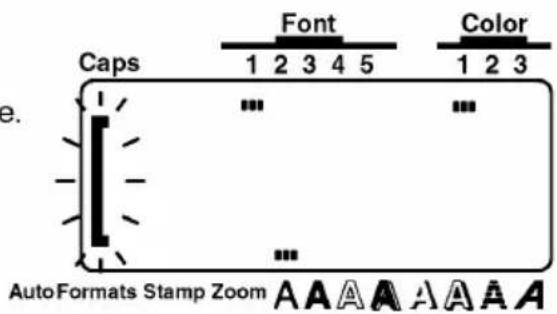
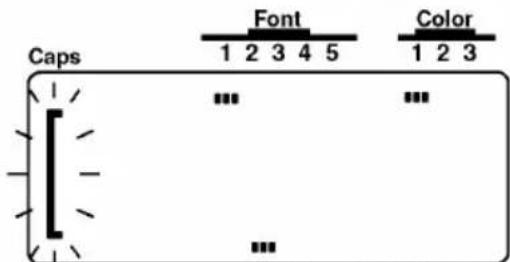
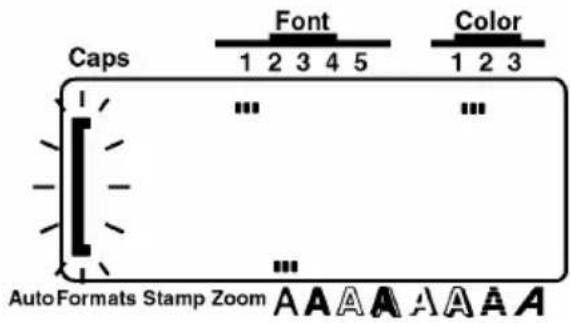
The WYSIWYG (what-you-see-is-what-you-get) mode allows you to see exactly how the label would appear if it were printed. The flashing bracket that appears on the display is called the "cursor". Its is like a pointer which shows your current position and lets you select characters in your text.
The text you create may sometimes be longer then what this machine's LCD can display at one time. Therefore, the cursor must be moved to show the other parts of the text. Pressing the left cursor key (◀◀) moves the cursor to the left so that the part of the text on the left side can be seen; pressing the right cursor key (▶◀◀) moves the cursor so that the part of the text on the right side can be seen.
Some format settings are indicated by the rectangles which appear at the top and bottom of the display. The default settings (the settings when the machines is turned on for the very first time) have been pre-programmed into the machine and represent the most common settings for labels. However, you can design your own label to have any format that you wish. Detailed explanations of the formats can be found on page 97 to 120 of For Your Information.
Your P-touch 530/550 is also equipped with an Auto Formats function, which allows you to make labels more quickly and easily then if you formatted the text yourself. With this function, simply, select from the many preset label templates that are available and enter the text to create labels which are already formatted with certain fonts, styles and other layout settings. For more details on this function, refer to the Auto Formats KEY section on pages 88 to 96.
In this first example, we will use the most basic functions of your P-touch to print simple name tag shown below.
John Smith

The label in this example was made using a 12 " (12-mm)-wide tape cassette.
ENTER THE TEXT
For this label, we will begin by typing “JOHN SMITH”, then later we will edit the text and change its format. Typing on the P-touch is just like typing on a typewriter or a computer. Since, at first, we want all of the text to be in capital letters, we will use the Caps mode, which Allows us to enter many capital letters quickly. The Caps indication in the top left-hand corner of the display lights up when the machine is in Caps mode.
To enter Caps mode:
② Hold down Code and press Alt Caps until the Caps indicator lights up.
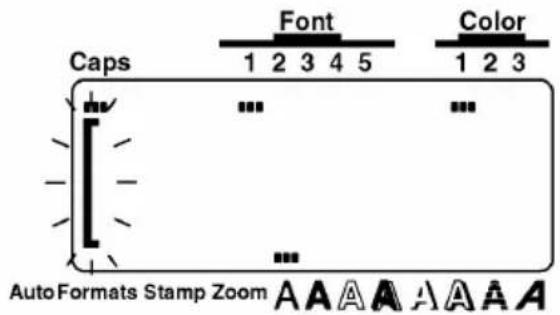
Now, we can type in the first name.
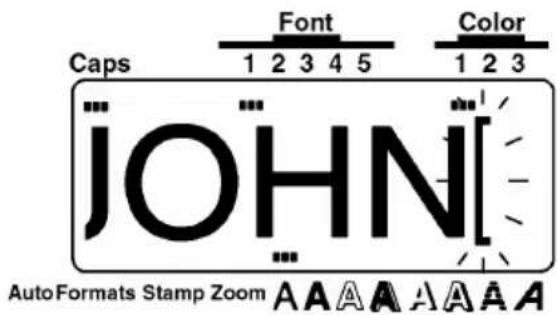
To type in the text "JOHN":
③ Press _i , _ , , and then _ once each.
In Caps mode, all letters are automatically entered as capital letters.
Aiso like on a typewriter or computer keyboard, the Space key (Space) allows you to add blank spaces to the text.
To add a space:
④ Press Space once.
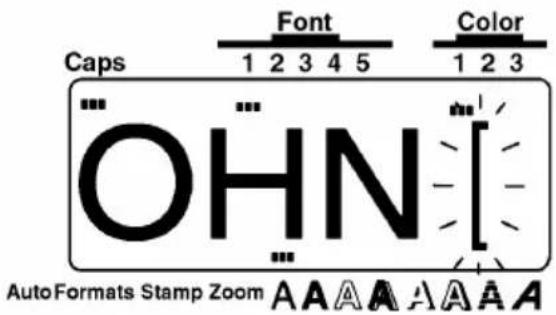
Then, type the last name (SMITH) to finish entering the taxt.
To type in "SMITH":
5 Press , _ , _f , , and then once each.
Whenever the entered text is longer then what can fit in the LCD display, part of it will move off the end of the display and can only be seen by moving the cursor.
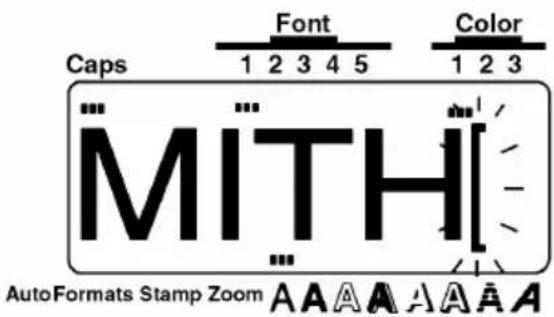
Now that we are finished entering capital letters, we can exit Caps mode.
To exit Caps mode:
⑥ Hold down Code and press All Caps until the Caps indicator goes off.
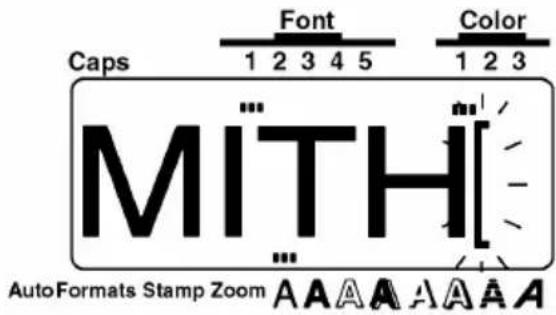
EDITING THE TEXT
Once you have entered the text, you can easily edit it to change or correct it. For detailed explanations of the text editing keys and functions, refer to pages 71 through 73.
The backspace key (BS) allows you to erase characters from your text. Pressing BS once deletes the characters immediately to the left of the cursor's current position and moves the characters after the deleted character one space to the left.
The difference between the backspace key (BS) and the left cursor key (44) is that the left cursor key only moves the cursor without changing the text.
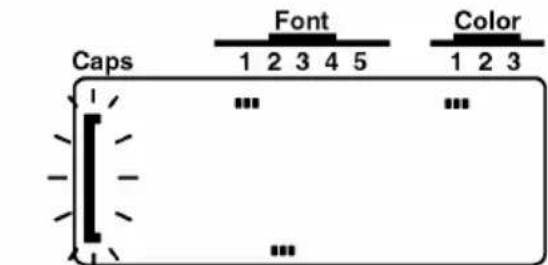
To change "SMITH" to "Smith":
⑦ Press Clear BS four times until "MITH" is erased.
AutoFormats Stamp Zoom AAAAAA
⑧ Press _ , _i , , and then once each.
Since the machine is no longer in Caps mode, all letters are entered in lower-case.
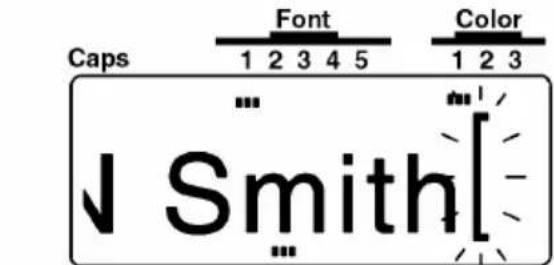
AutoFormats Stamp Zoom AAAAAA
To change "JOHN" to "John":
⑨ Press □ until the cursor is to the right of "N".
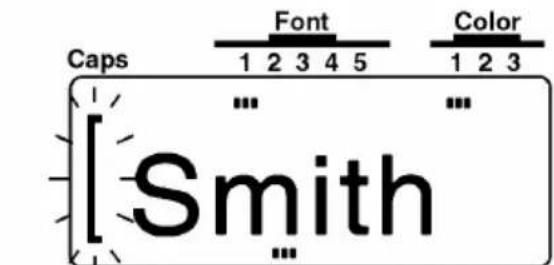
AutoFormats Stamp Zoom AAAAAA
10 Press ☐ three times until "OHN" is erased.
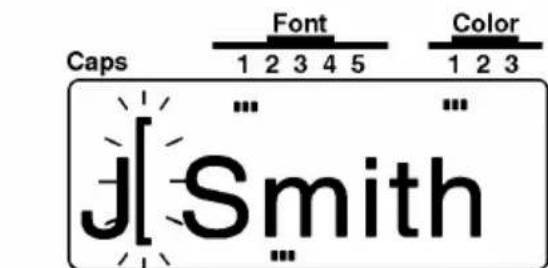
AutoFormats Stamp Zoom AAAAAA
11 Press , , and then once each.
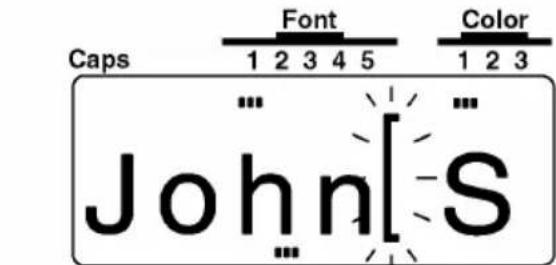
AutoFormats Stamp Zoom AAAAAA
FORMATTING THE TEXT
Using the text format keys below the display (☐, ☐, etc.), the text format setting can be changed either before or after the text is entered. If the text that we entered were printed now, the default text format settings world be used (Font1, medium width, A [normal] style, AUTO size, no underlining/framing and printed in COLOR 1). For more details on the text formats, refer to pages 97 through 109.
For this example, though, let's decorate our label by changing the font of the text. If we would want to change the font of just a part of the text, we would use the Area and cursor keys to select the part of it. However, since we want to change the font for all of the text, we will use the All function to select all of it. Then, we can use to select the desired font.
To change the font of all of the text:
12 Hold down Code and press Areas All.
With the All function, all of the text is automatically highlighted.
13 Press □ until the Font indicator appears below Font2.
14 Press New Block
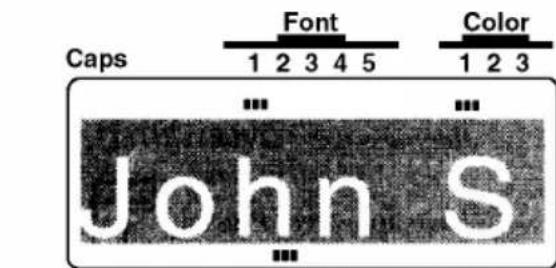
AutoFormats Stamp Zoom AAAAAA
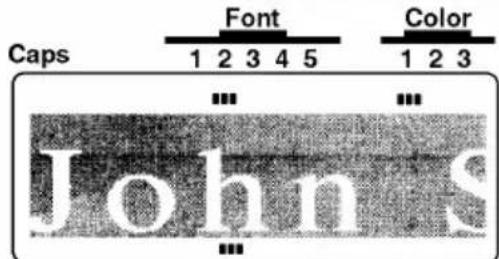
AutoFormats Stamp Zoom AAAAAA
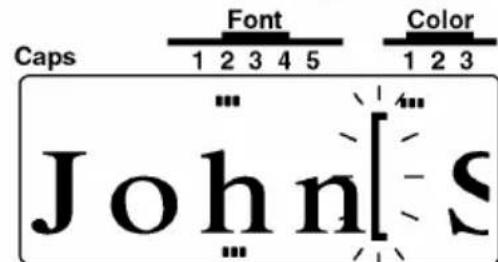
AutoFormats Stamp Zoom AAAAAA
STORING THE TEXT
Next, let's look at how to store text files so that they can be recalled later and either edited or printed. Detailed explanation of the machine's memory can be found in Store, Recall AND M.Del KEYS on pages 134 to 138.
To start the text as file number 1:
15 Hold down Code and press & 7.
16 Press ▲ Home or ▼ End until the number 1 is displayed.
⑰ Press NewBlock. The text is stored as file 1 and can be recalled at any time.
If test had already been stored as file 1, the message "OVERWRITE?" would have appeared. Pressing New Block would then erase the old file and save the new one as file 1. Otherwise Cancel should be pressed to stop the operation.
![Caps Font Color 1 2 3 4 5 1 2 3 STORE [0] AutoFormats Stamp Zoom A A A A A A A A](/content/2026/05/770473/images/050813fb35fd0f219fc7f5715682e4d79967f50e39e29c7442eaefce0e6014bb.jpg)
![Caps Font Color 1 2 3 4 5 1 2 3 STORE [ ] AutoFormats Stamp Zoom A A A A A A A A](/content/2026/05/770473/images/3b0fa4b8775c5d44b77402dd3c6e4c897402d453da2b794a1f4387fbb2d22103.jpg)
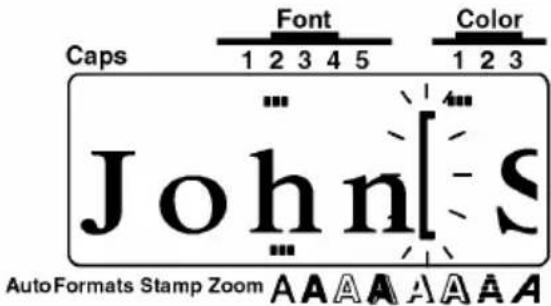
When text is stored in the memory, all of its format settings are also stored with it. Therefore when the text file is recalled, the format settings for the stored text file are also recalled.
PRINT THE TEXT
Since our text is finished, we can print it. If we used the default settings pre-programmed into the P-touch for the Special Print function, we could print one whole copy of the label, which would automatically be cut after printing is finished.
EQUIPMENT LABEL EXAMPLE
Now that we know how to enter, edit and print text, we can practice creating a multi-line label. In this example, we will also learn how to use the Special Print and the Format key functions to print three copies of the copier label shown below.
Place original face down.
For repairs, call
Service Dept.:123-4567
The label in this example was made using a 12 " (12-mm)-wide tape cassette.
CLEARING THE DISPLAY
Before entering our new text, we must first erase the text that is shown in the display from the previous time that the machine was used. When we clear the display, all of the text formats (font, size, width, style, underline/framing and color) and the Format key functions return to their default settings.
To clear the display for a new label:
① Hold down

and press

② Press

Auto Formats Stamp Zoom

Auto Formats Stamp Zoom

ENTERING THE TEXT
This time, since we don't want all of the text to be in capital letters, we will enter the capital letters in the text while holding down Shift. The Caps indicator in the top left-hand corner of the display lights up when the machine is in Caps mode.
To type in "Place original face down." :
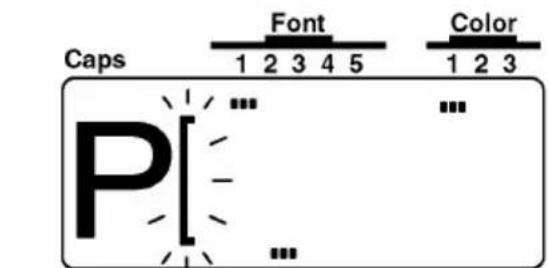
③ Hold down Shift and press P_ , then release Shift.
④ Type "lace original face down".
⑤ Press ? .
AutoFormats Stamp Zoom AAAAAA
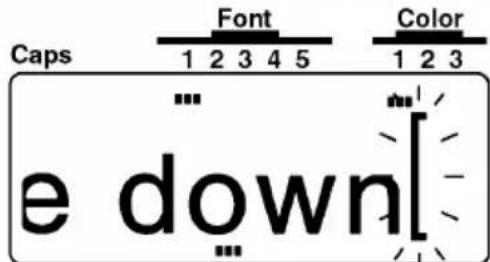
AutoFormats Stamp Zoom AAAAAA
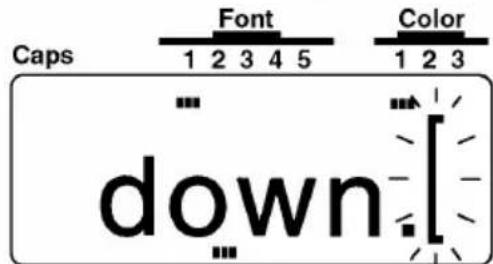
AutoFormats Stamp Zoom AAAAAA
In a multi-line label, the return key (New Block) can be used to end one line and start the next one.
To type in the second and third lines:
⑥ Press line. to move the cursor to the next
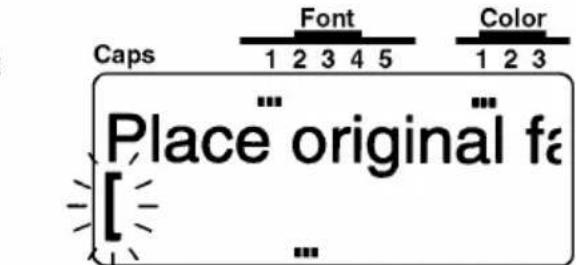
Auto Format Stamp Zoom A A A A A A A
⑦ Type in "For repairs, call.
To type in "F", hold down Shift and press F. Since the text is longer then the LCD display, the first characters of the two lines move off the display to the feet.
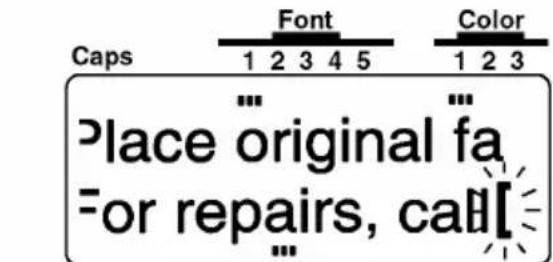
AutoFormats Stamp Zoom AAAAAA
⑧ Press New Blocks to move the cursor to the text line.
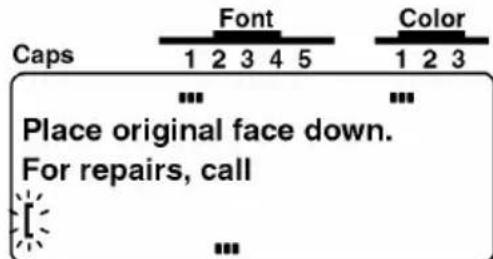
AutoFormats Stamp Zoom AAAAAA
⑨ Type in "Service Dept.:".
To type in ": ", hold down and press : .
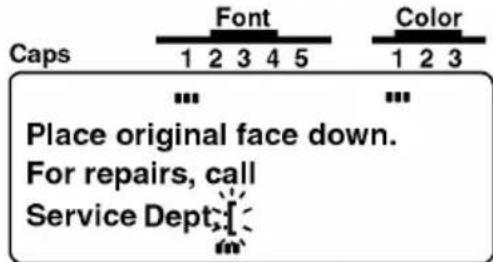
AutoFormats Stamp Zoom A A A A A A A
10 Press Space, then type in "123-4567".
To type in "-" , hold down Alt Caps and press
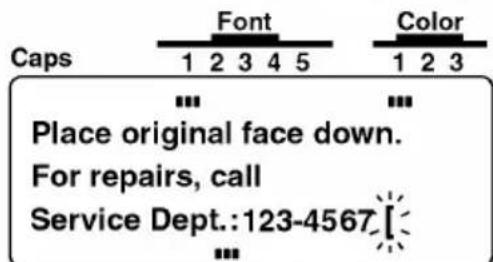
AutoFormats Stamp Zoom AAAAAAAA
FORMATTING THE TEXT
Since our text is entered as we wish, we can begin changing its format to put a frame around the text and align each text line in the center. Pressing the Format key (Format) allows you to view the current label formats. These settings can only be applied to the entire text. For detailed explanations of the label format functions, refer to pages 110 through 121 of For Your Information.
If you wish to leave all of the label format settings unchanged and return to the text, press Cancel. A detailed explanation of the Cancel key can be found on pages 68 to 70 of For Your Information.
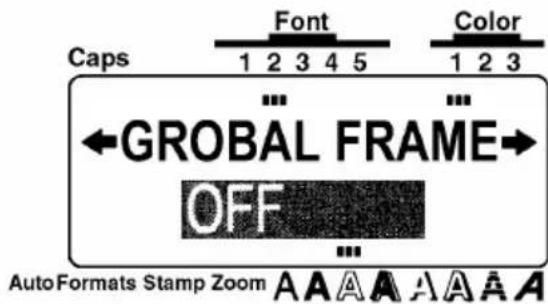
For this label, though, let's assume we want to put a frame around all of the text and center it horizontally. Therefore, we must press Format and change the GLOBAL FRAME and H.ALI (horizontal alignment) function settings.
To change the label formats:
⑪ Press Format.
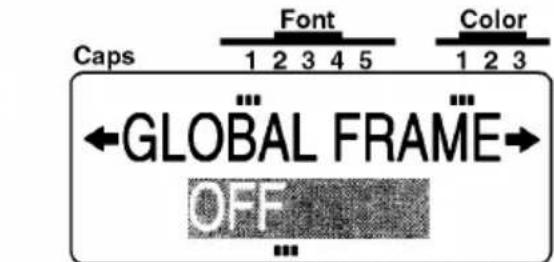
The OFF setting of GLOBAL FRAME is highlighted. The highlighting is like a cursor. It shows which function can be changed; items can only be changed when their setting is highlighted.
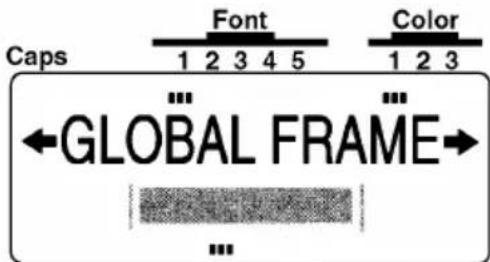
12 Press ▲ or ▼ until the box setting (□) is selected for the GROBAL FRAME function.
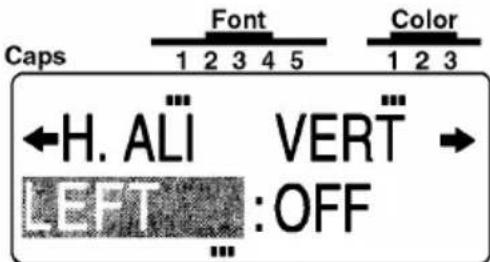
13 Press ▶ or ▶ until the highlight is immediately under the H.AL1 (horizontal alignment) function.
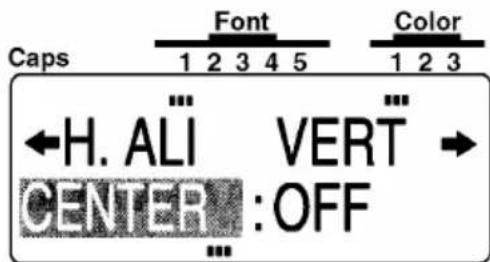
14 Press ▲ Home or ▼ End until the CENTER setting is selected.
AutoFormats Stamp Zoom AAAAAA
AutoFormats Stamp Zoom AAAAAA
AutoFormats Stamp Zoom AAAAAA
AutoFormats Stamp Zoom A A A A A A A
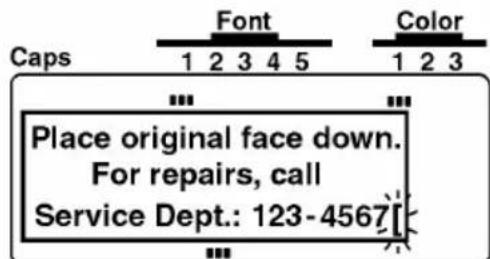
AutoFormats Stamp Zoom AAAAAA
PRINT THE TEXT
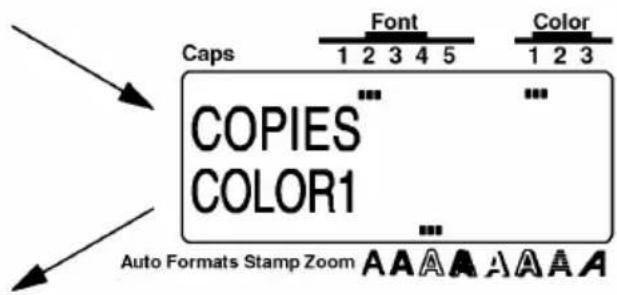
Suppose we wish to print three copies this label. To do this, we would use the COPIES parameter of the Special Print function. For more details on the Special Print function parameters, refer to pages 128 and 129.
To print three copies of the label:
16 Hold down Code and press Print
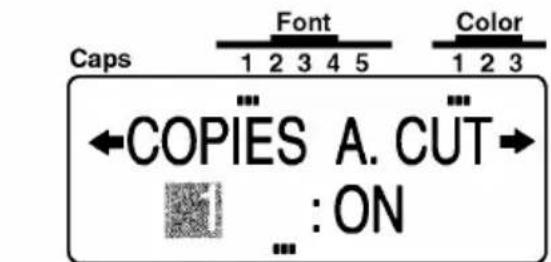
AutoFormats Stamp Zoom AAAAAA
⑰ Press ▲ Home or ▼ End until the COPIES parameter is set to 3.
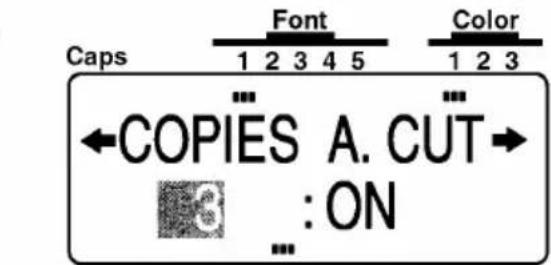
AutoFormats Stamp Zoom AAAAAA
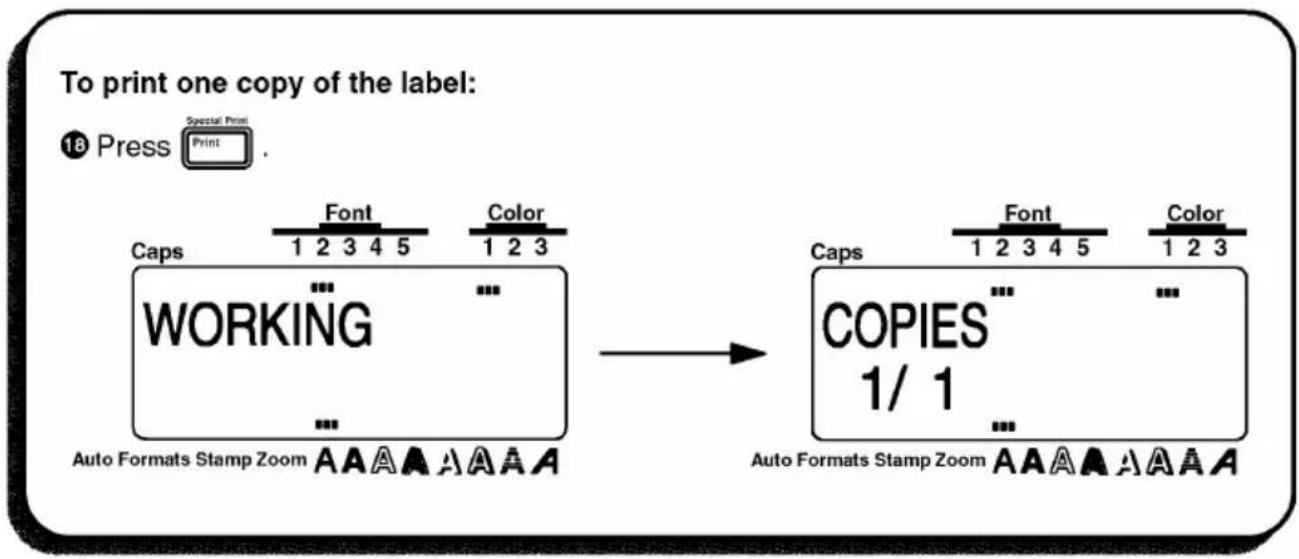
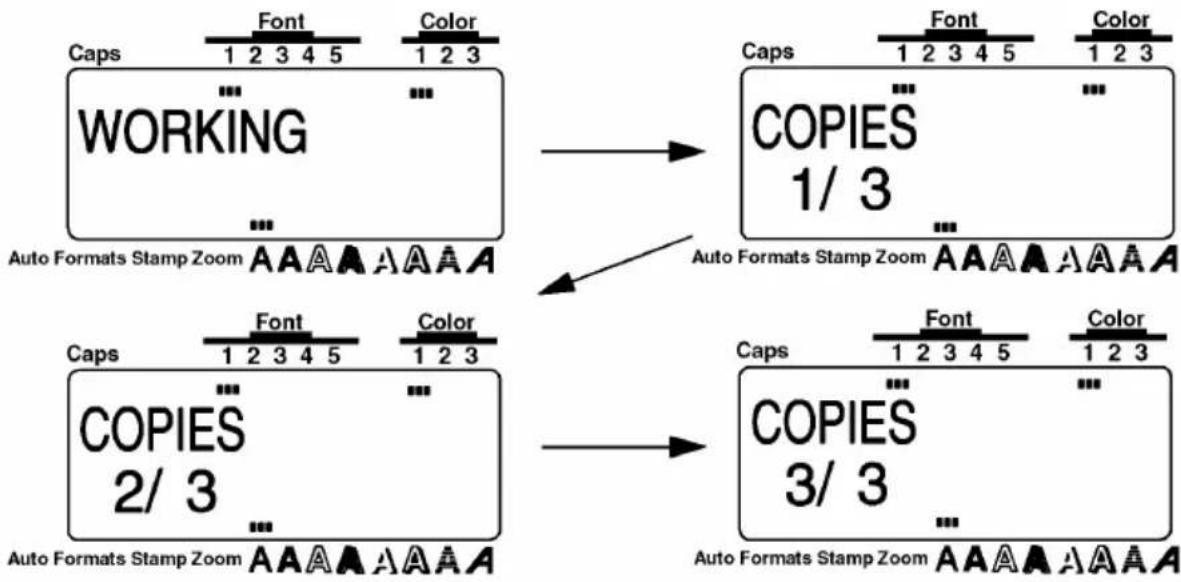
18 Press New Block. Three copies of the copier label are printed and cut off.
Since you may not want to use too much tape for an example, you can press Cancel to quit printing and return to WYSIWYG mode. However, the COPIES parameter will remain set to 3.
flowchart
graph TD
    A["WORKING"] --> B["CAPS 1 2 3 4 5"]
    C["COPIES 1/3"] --> D["CAPS 1 2 3 4 5"]
    E["COPIES 2/3"] --> F["CAPS 1 2 3 4 5"]
    G["Auto Formats Stamp Zoom"] --> H["→"]
    I["Auto Formats Stamp Zoom"] --> J["→"]
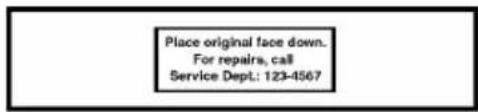
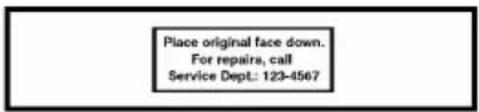
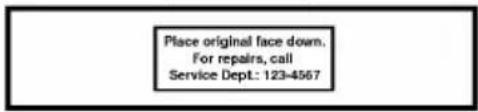
If the A.CUT parameter of the Special Print function was set to OFF, the three labels would be printed together. To make three separate labels, use scissors to cut them apart.
Place original face down. For repairs, call Service Dept.: 123-4567
Place original face down. For repairs, call Service Dept.: 123-4567
Place original face down. For repairs, call Service Dept.: 123-4567
ADDRESS LABEL EXAMPLE
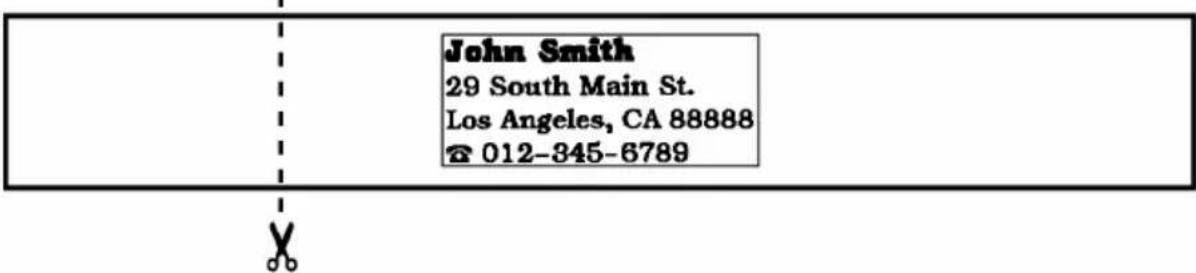
In this example, we will recall our name tag text file, change it into a multi-line address label, then print using the color printing functions. We will also use some of the other text format keys to emphasize part of the text.
John Smith
29 South Main St.
Los Angeles, CA 88888
012-345-6789
The label in this example can be printed on 3/4"(18-mm)-, 1"(24-mm)- or 1-1/2" (36mm)-wide tape.
RECALLING TEXT
Since we saved the name tag text in the memory, we can recall it to edit it. If we had not saved the text, it would be lost and we would have to type it in again. When we recall test from the memory, any text that was shown in the display is deleted.
To recall the name tag text file:
① Hold down Code and press
Since file 1 is the last file that was used, it is the one that is displayed. Otherwise we would need to press ▲ Home or ▼ to select our desired files.
![Caps 1 2 3 4 5 Font Color 1 2 3 RECALL [ 1 ] Joh AutoFormats Stamp Zoom A A A A A A A A](/content/2026/05/770473/images/f9263e70cc68e8011fd569c85e787d18fd497f98879df4bee6d1d68e676a5dc1.jpg)
② Press New Block
Before the recalled text is dispalyed, any text that was in the dispaly from the previous time that the machine was used is erased.
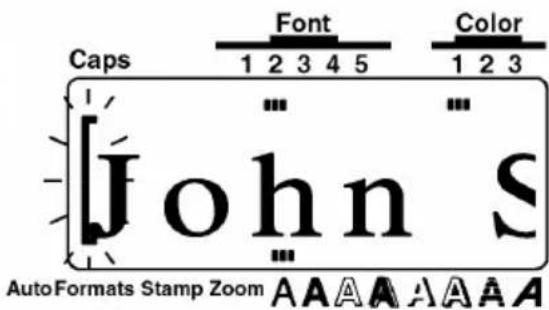
ENTERING THE TEXT
Now, we can type in the address and telephone number for our label.
To type in the address:
③ Hold down Code and press ▶.
④ Press New Block
⑤ Type "29 South Main St." and press
⑥ Type "Los Angeles, CA 88888" and press New Block
To add the telephone symbol ( ☐ ):
⑦ Hold down Code and press Symbol \$ 4.
⑧ Press ▲ Home or ▼ End until the row containing the telephone symbol is displayed.
![Caps 1 2 3 4 5 Smith AutoFormats Stamp Zoom A A A A A A A A Caps 1 2 3 4 5 John Smith [ ] AutoFormats Stamp Zoom A A A A A A A A Caps 1 2 3 4 5 John Smith South Main St. AutoFormats Stamp Zoom A A A A A A A A Caps 1 2 3 4 5 John Smith 29 South Main St. Los Angeles, CA 88888 AutoFormats Stamp Zoom A A A A A A A A Caps 1 2 3 4 5 John Smith 29 South Main St. Los Angeles, CA 88888 AutoFormats Stamp Zoom A A A A A A A A Caps 1 2 3 4 5 John Smith 29 South Main St. Los Angeles, CA 88888 AutoFormats Stamp Zoom A A A A A AA AA AA AA Caps 1 2 3 4 5 John Smith 29 South Main St. Los Angeles, CA 88888 AutoFormats Stamp Zoom A A A A A AA AA AA AA Caps 1 2 3 4 5 John Smith 29 South Main St. Los Angeles, CA 88888 AutoFormats Stamp Zoom A A A A A AA AA AA AA](/content/2026/05/770473/images/62b5b1539a2fd87906e3a52e281734eab2379f62f336308e965134ee8eab9ed4.jpg)
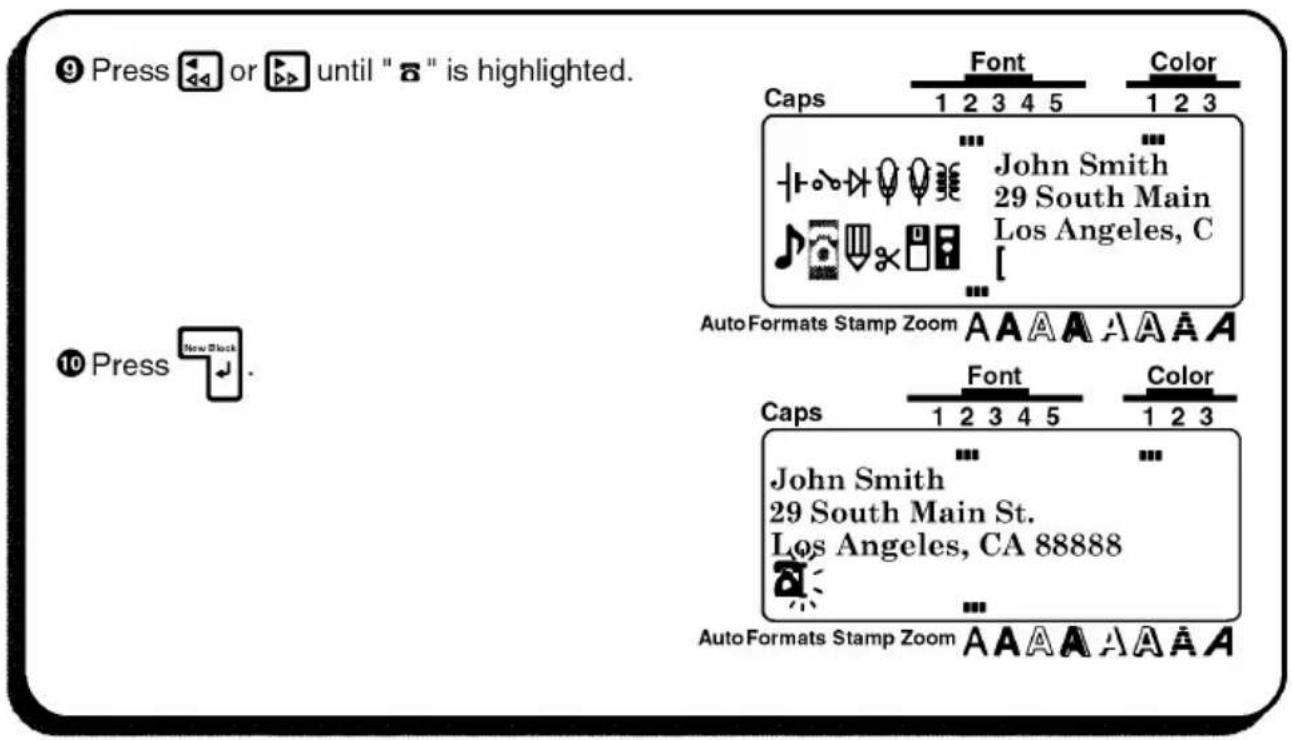
Since the text is displayed in the WYSIWYG mode, it starts to become small and difficult to read when too many lines are entered. Therefore, we will use the zoom function so that we can see the text more clearly.
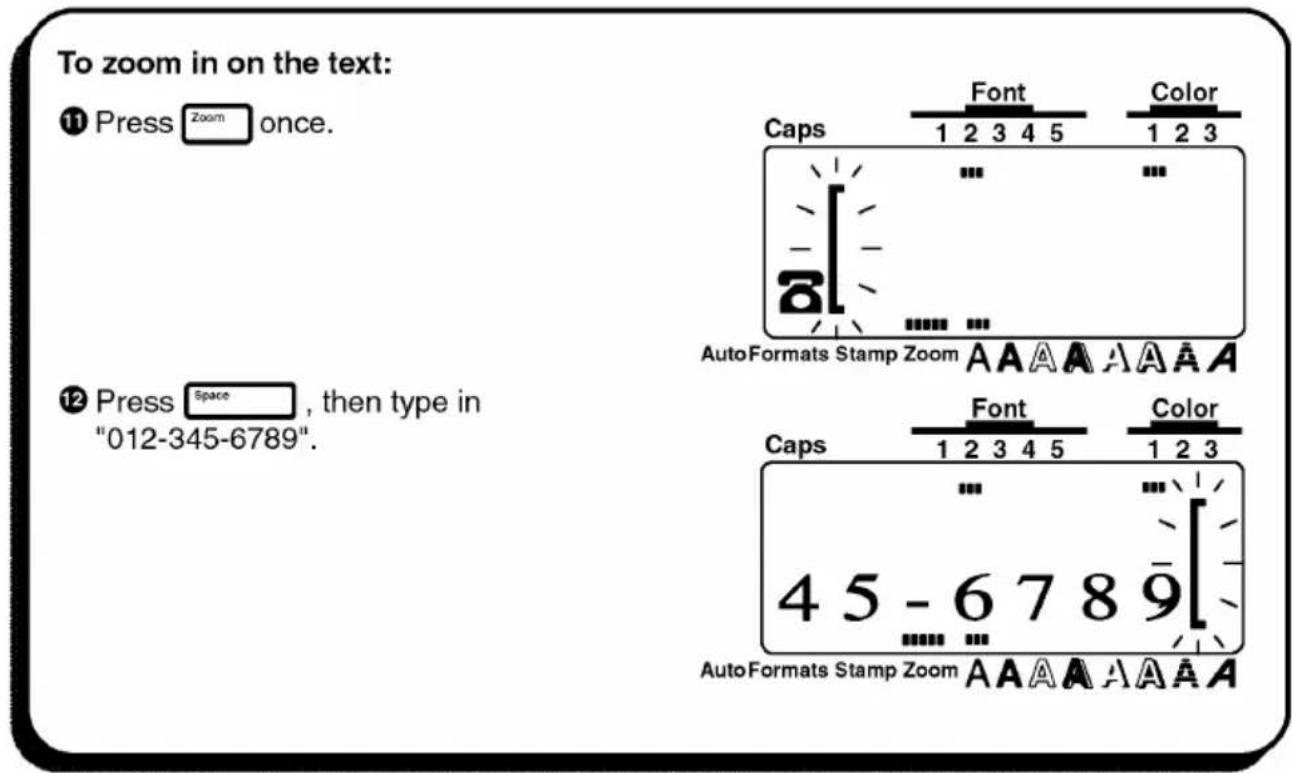
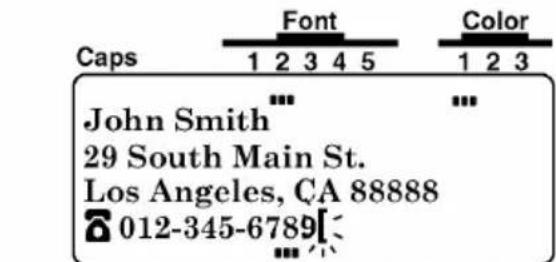
To zoom out from the text:
13 Press Zoom twice (or press just Cancel) to return to WYSIWYG mode.
AutoFormats Stamp Zoom AAAAAA
FORMATTING THE TEXT
We have already practiced changing the text format for the entire text with the All function. However, with the Area key (AreaAll) and the cursor keys, you can select just a part of the text, and then change just its format. We will use this key to change the style of the name in our address label. For more details, refer to pages 97 through 109.
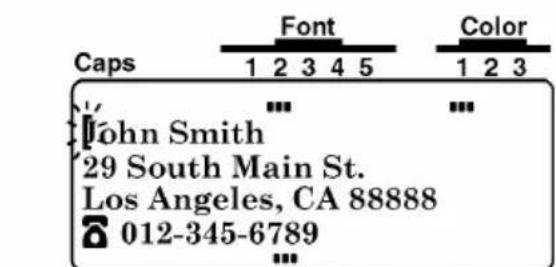
To select the name:
14 Press ▲ and ◀ until the cursor is to the left of "J" inthe name.
AutoFormats Stamp Zoom AAAAAA
15 Press Area All.
The "J" will be highlighted, showing that it will be included in the selected text.
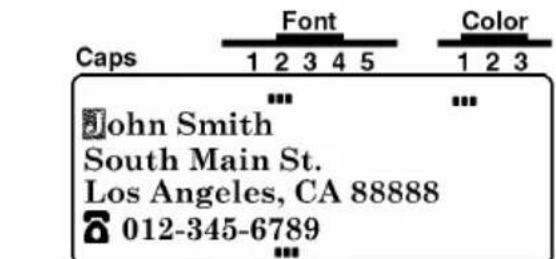
AutoFormats Stamp Zoom AAAAAA
16 Hold down Code and press to highlight "John Smith".
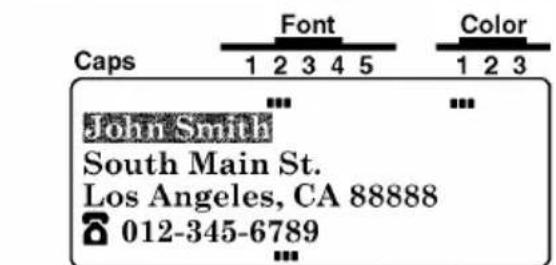
AutoFormats Stamp Zoom A A A A A A A
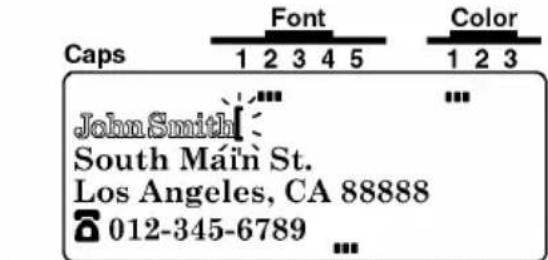
To change the style of the name:
17 Press □ until the text is displayed in the outline style. (The indicator above A appears.)
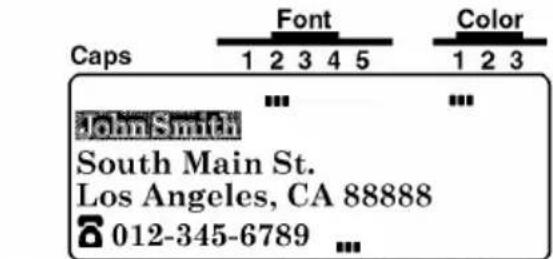
AutoFormats Stamp Zoom AAAAAA
AutoFormats Stamp Zoom AAAAAA
The text format settings could also have been chosen before the text was entered. In this way, the selected settings would remain until they are changed again.
Next, we can use the Format key to add a frame all around our address label text.
To add a frame around the entire text:
20 Press ▲ or ▼ until the box setting (☐) is selected.
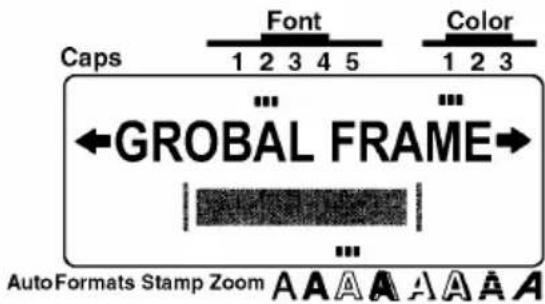
Since we've used the outline style and added a frame to our text, we must set two more functions before we can print with the color printing function. The FRAME COLOR function is used to select the color setting for the frame, underlines and shadings in the txt; the STYLE COLOR function is used to close the color setting for the parts of the characters that are normally left blank when styles other then A (normal), A (bold), A (italic) or A & A (italic & bold) are used. For more details on these functions, refer to page 113 through 115.
To change the FRAME COLOR and STYLE COLOR functions:
21 Press ▶ or ▶ until the highlight is immediately under the FRAME COLOR function.
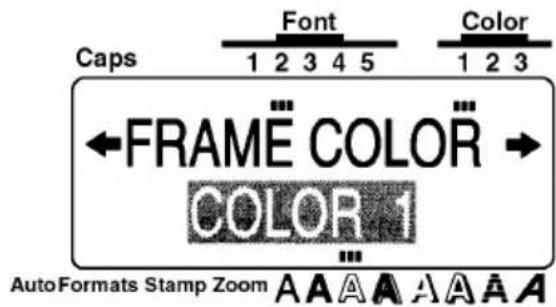
22 Press ▲ Home or ▼ End until the COLOR2 setting is selected.
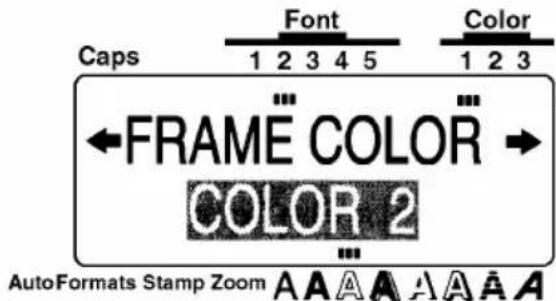
23 Press ▲ or ▶ until the highlight is immediately under the STYLE COLOR function.
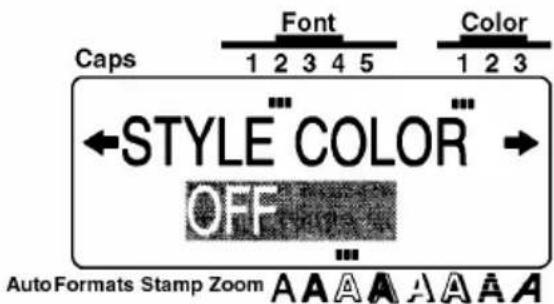
24 Press ▲ Home or ▼ End until the COLOR3 setting is selected.
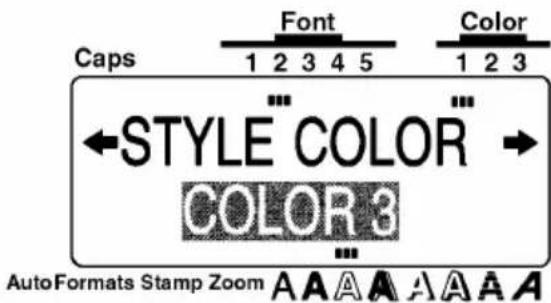

Press

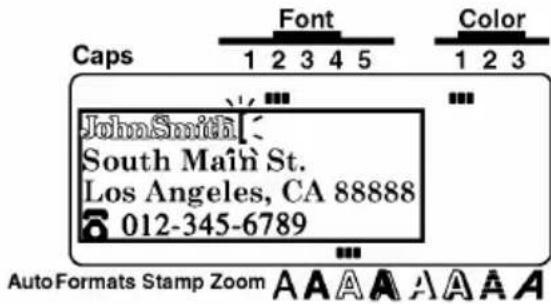
PRINTING THE TEXT
Now, let's assume we wish to print a copy of this label in color. Therefore, we must decide which ink colors will be used for COLOR1, COLOR2 and COLOR3. For this example, let's fill in the name with red (COLOR2) and print the frame in blue (COLOR3). We will print the rest of the text, which has default setting (COLOR1), in black. For more details on color printing, refer to pages 123 to 124.
To print a copy of the label in color:
26 Insert a black ink cassette into a color printing tape cassette, then open the tape compartment cover and install the cassettes.
27 Press Feed & to align the tape end with the edge of the tape cassette.

Press

Since more then two color settings have been selected and color printing ink and tape cassettes have been installed, the COLOR PRINT function is automatically turned on when Special Print is pressed.
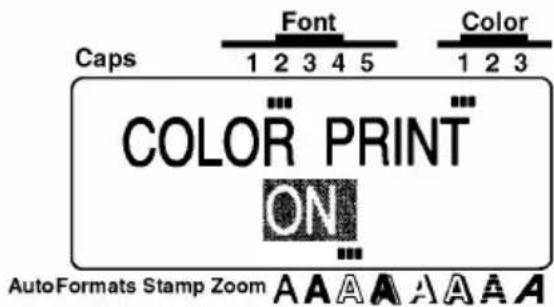

Press

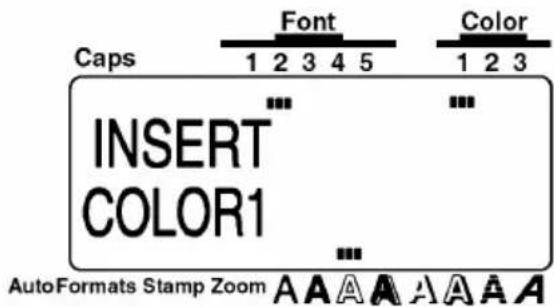
30 Make sure that the black ink cassette is installed in the tape compartment and that the cover is closed, then press New Black.
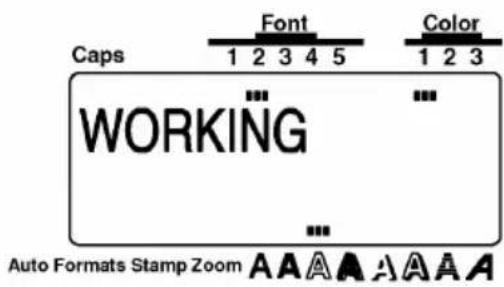
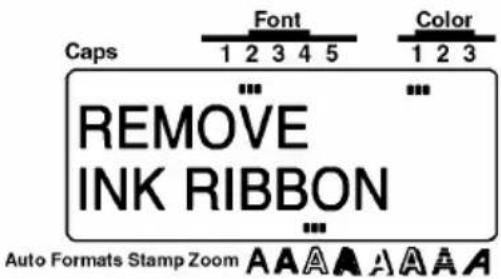
31 Open the tape compartment and remove the black ink cassette, press New Block. Rewind the tape roll using your finger to turn it anti-clockwise until the tape and aligns with the tape cutter.
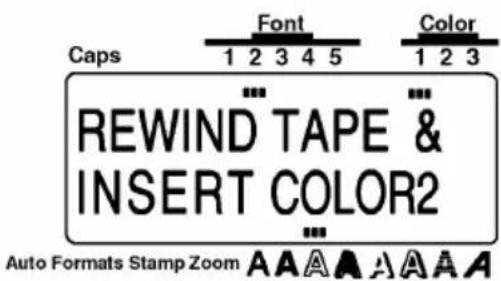
32 Install the red ink cassette, then close the tape campartment and press

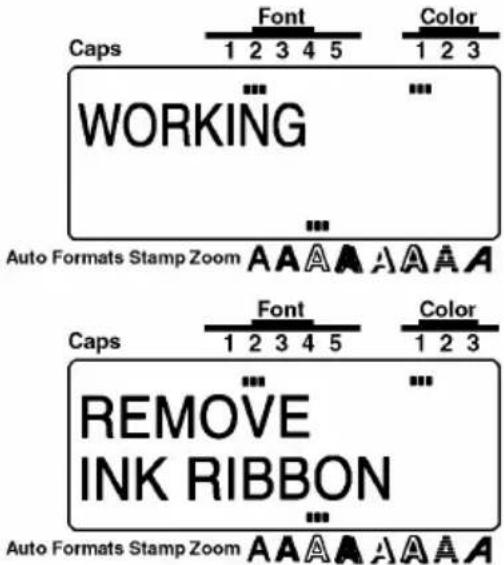
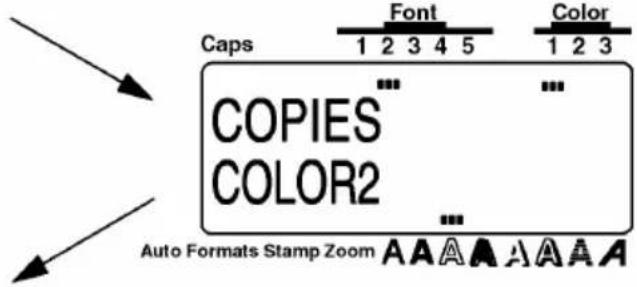
33 Open the tape compartment and remove the red ink cassette, press New Brook. Rewind the tape roll using your finger to turn it clockwise until the tape end aligns with the tape cutter.
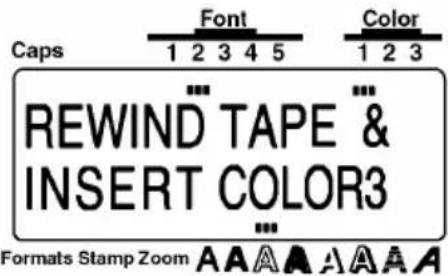
34 Install the blue ink cassette, then close the tape compartment and press
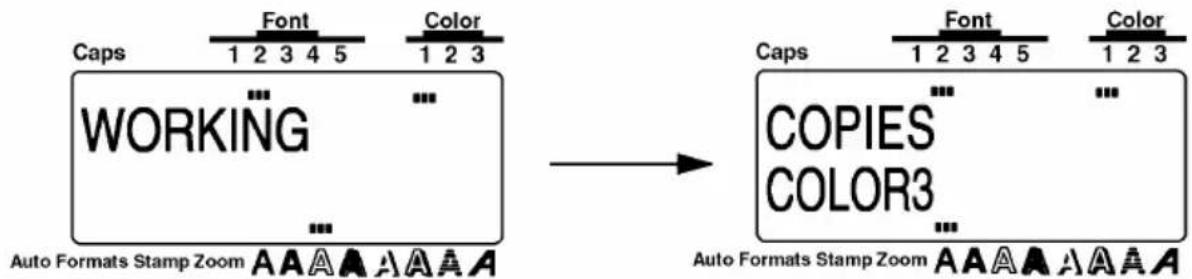
35 After the label is cut off, use scissors to cut along the two printed dots to make equal margins.
STORAGE SHELF LABEL EXAMPLE
In this final example, we will practice using the New Block function as will as more specialized features, such as the Barcode and Seq. Numbering (sequential numbering) functions, in order to make the following two labels which could be used to describe objects stored on a shelf.
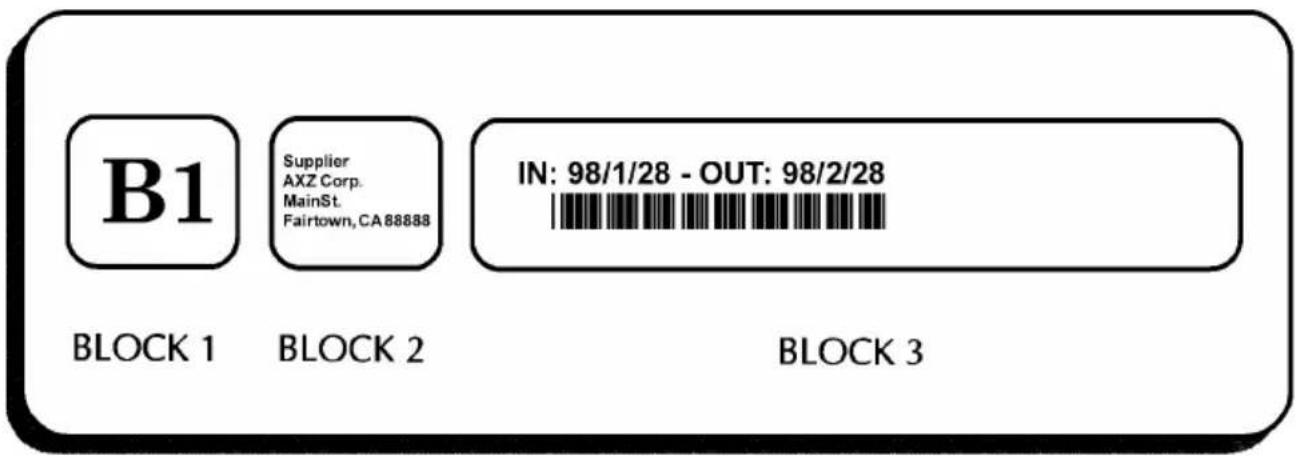
B1 Supplier AXZ Corp. IN: 98/1/28 - OUT: 98/2/28 Main St. Fairtown, CA 88888
B2 Supplier AXZ Corp. IN: 98/1/28 - OUT: 98/2/28 Main St. Fairtown, CA 88888
The label in this example can be printed on 34 " (18-mm)-, 1" (24-mm)- or 1-1/2" (36-mm)-wide tape.
Each time the number of lines changes, a new block of text must be created. Therefore, the text for our label must be entered in three separate blocks as shown below. With the WYSIWYG mode, making complex multi-block labels is easier since you can see exactly how the label would appear if it were printed.
CLEARING THE DISPLAY
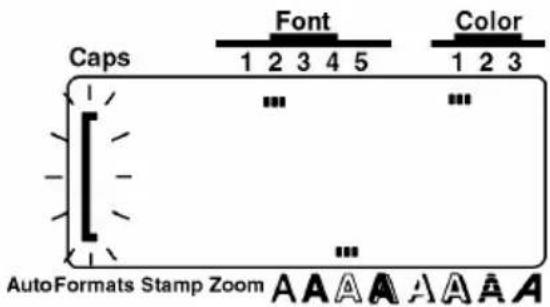
Again, we must first erase the text that is shown in the display from the previous time that the machine was used.
To Clear the display for a new label:
① Hold down Code and press BS.

ENTERING THE TEXT
Now, we can begin entering the storage shelf label text. Since we know that we want to use a different font for the first block, we can select the new font before entering the text.
To type in the first block of text using Font 2:
③ Press □ until the Font indicator appears below Font 2.
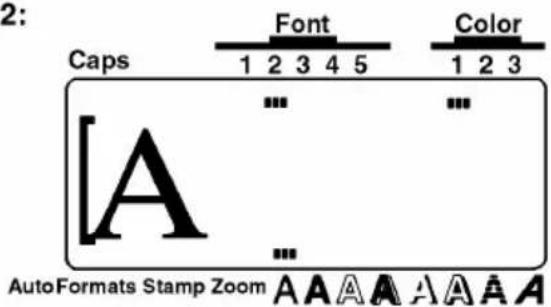
④ Type in "B1".
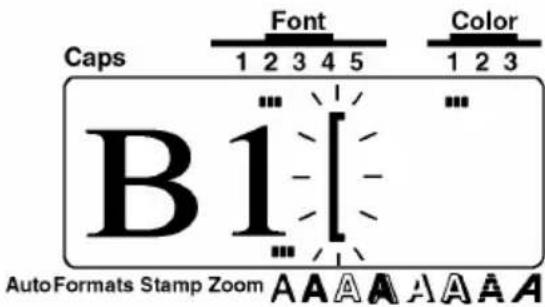
Since we now want to change from a one-line to a four-line block, we will use the New Block function. A detailed explanation of multi-block labeling can be found in New Block FUNCTION on pages 66 and 67.
To type in the second block of text:
⑤ Hold down Code and press New Elects.
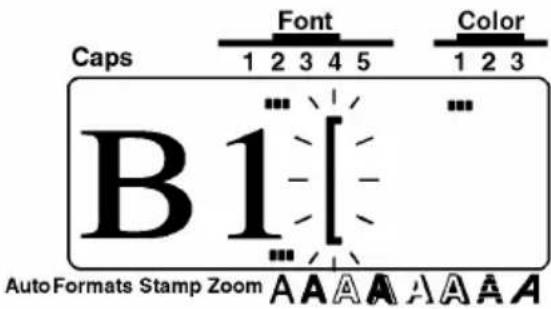
⑥ Press □ until the Font indicator appears below Font 1.
![Caps Font Color 1 2 3 4 5 1 2 3 B1[A] AutoFormats Stamp Zoom A A A A A A A](/content/2026/05/770473/images/61e23053d74bab6bd23b3c64f686bbb1a164a370b6b57a1e4c80772497061b20.jpg)
⑦ Type in "Supplier:", "AXZ Corp." and "Main St.", pressing New Block after each line.
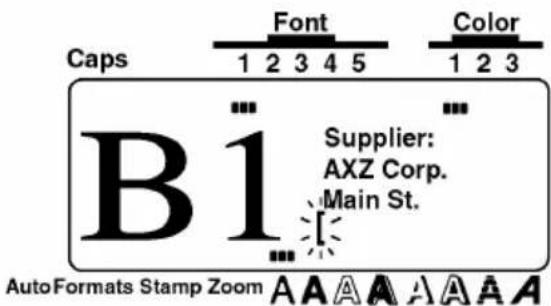
To zoom in on the text and type in the last line:
⑧ Press Zoom once.
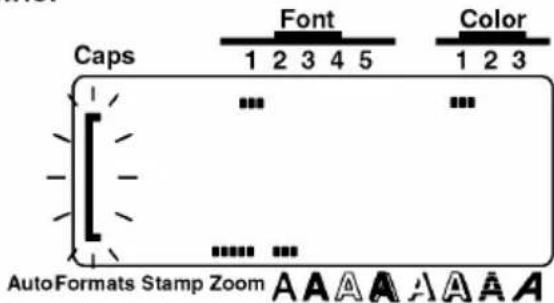
⑨ Press Zoom twice (or press just Cancel) to return to WYSIWYG mode.
⑩ Type in "Fairtown, CA 88888".
⑪ Hold down Code and press New Block
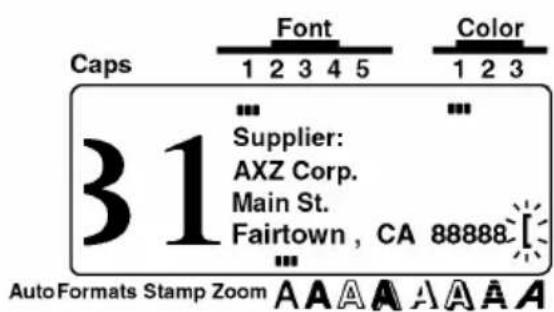
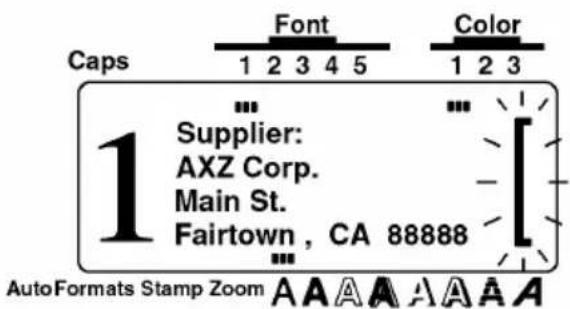
To ty in the third block of text:
⑫ Type "IN: 98/1/28 - OUT: 98/2/28"
and press New Block
The cursor will move to the second line and the last characters of the line will move off the display.
To move the cursor quickly from block to block, hold down Shift and press ▶ or ▶.
A detailed explanation of these operations can be found in CURSOR KEYS on pages 57 and 58.
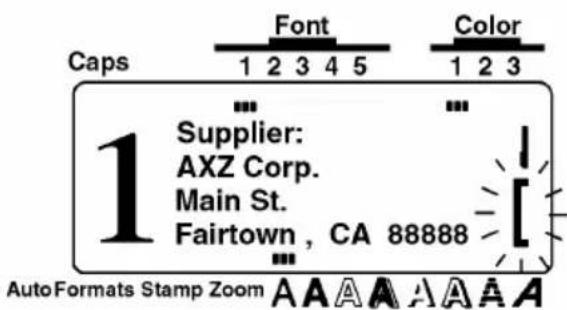
Now, we must enter the last part of the text, the bar code. Although there are many settings for bar codes, let's use protocol CODE 39, which has an unspecified (free) number of digits. More details on the Barcode function can be found on pages 80 to 84.
To add a bar code:
13 Hold down Code and press 8 3.
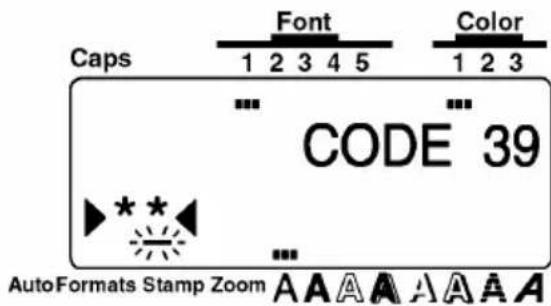
If we wished to use a different protocol or change any of the default bar code settings, we could press Format and use the cursor keys to change the parameter settings. However, since we will use the default settings for this example, we can immediately input our bar code data.
To enter the bar code data:
⑭ Type in "1584724".
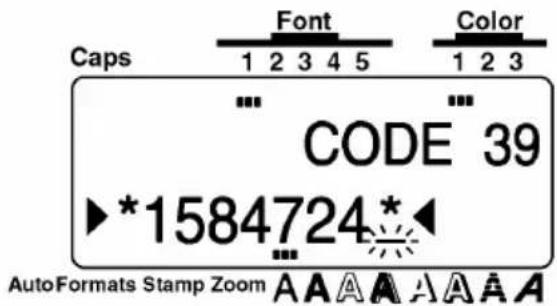
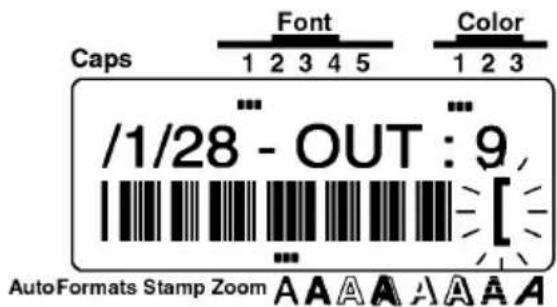
PRINTING THE TEXT
Finally, let's assume that we want to put labels on two different shelves (B1 and B2) while keeping the same bar code. To do this, we can use the Seq. Numbering (sequential numbering) function to print two copies of our label while automatically increasing the shelf number after each label is printed. More details can be found in Seq. Numbering FUNCTION on pages 130 to 133.
To print using the Seq. Numbering function:
16 Press ▲ Home and ▼ until the cursor is to the left of "1".
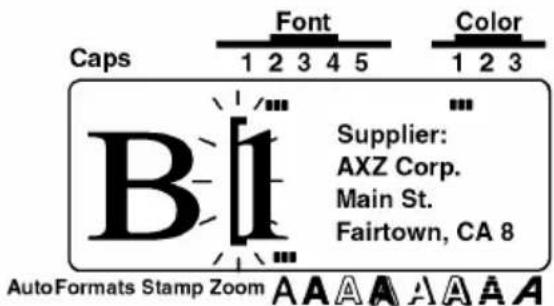
⑰ Hold down Code and press ②.
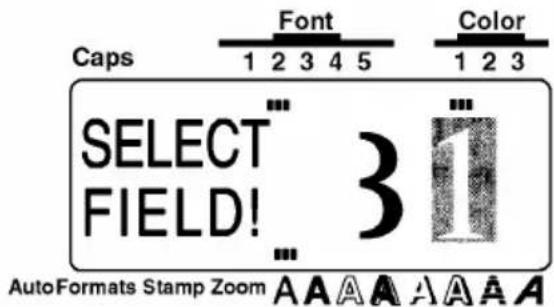
18 Since we only want "1" in the numbering
field, press New Black
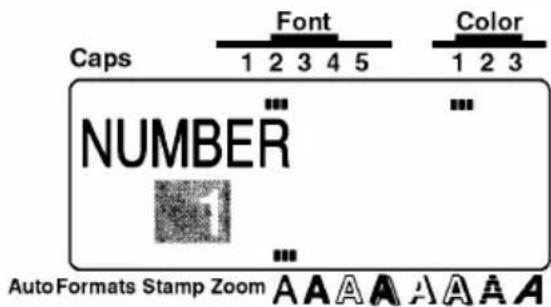
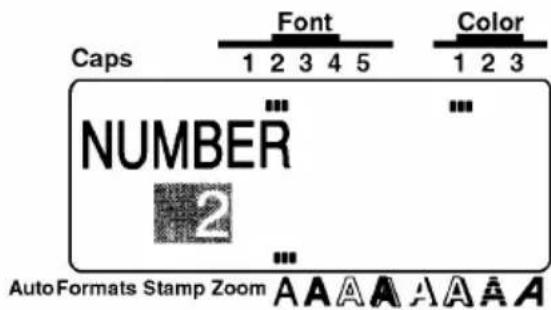
19 Press ▲ Home or ▼ End until the NUMBER setting is set to 2.
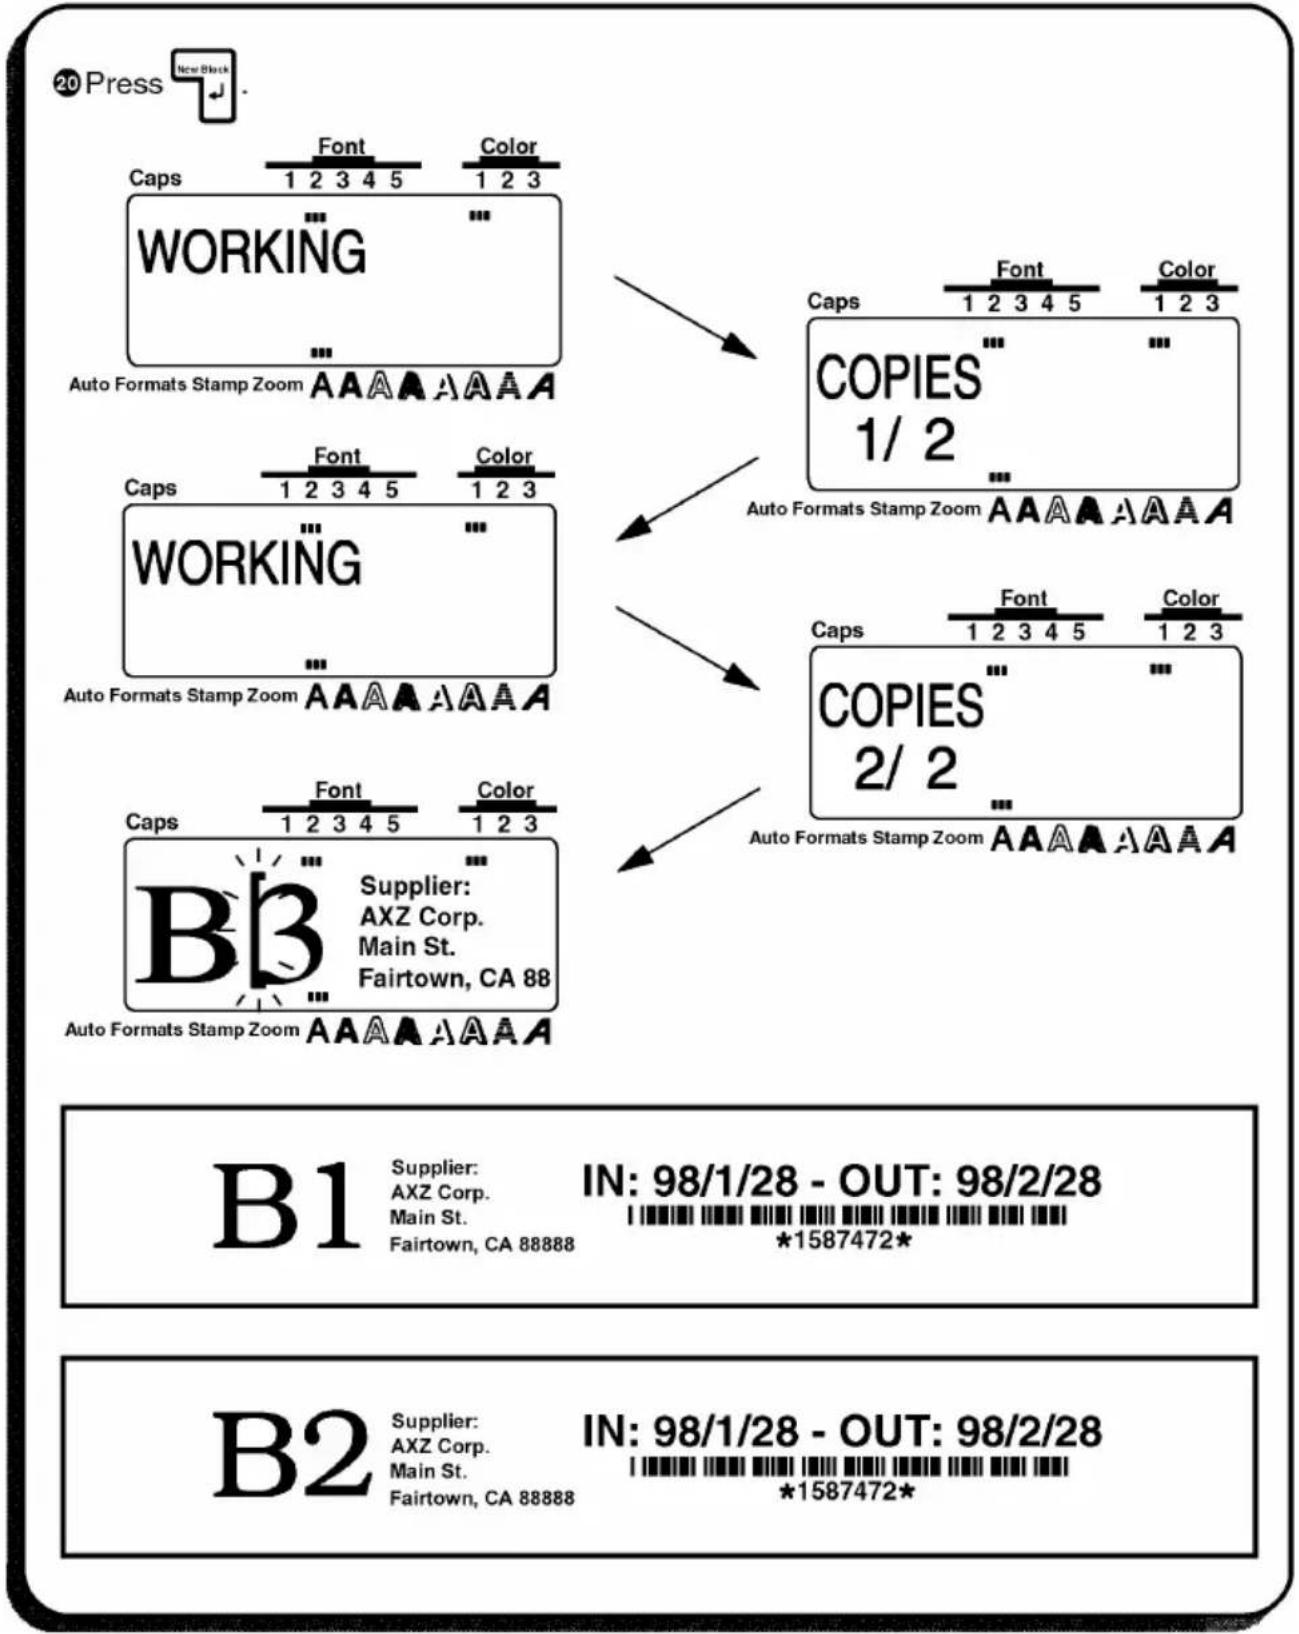
With these four examples, we have covered most of the basic features of your P-touch 530/550 so that you can begin creating your own customized labels. If you have questions about any of the functions, refer to the appropriate explanation in the For Your Information chapter.
For Your Information
INTRODUCTION
In this chapter, you will find detailed explanations for all of the machine's features. Each topic is given its own section, making this reference chapter easy to use.
Operational examples of most features can also be found in the Learning the Ropes practice sessions. If you are a first-time P-touch user, we suggest that you work through those exercises before starting to make labels on your own.
This For Your Information chapter provides supplementary information. When you have a question about a particular key or function, locate that topic in the FINDING YOUR WAY contents list and turn to the page indicated.

Although the P-touch 530 display is shown in the examples, the operation does not change for the P-touch 550.
FINDING TOUR WAY
This For Your Information chapter gives detailed explanations of all of this machine's features. The following list shows which topics are covered and on which page an explanation of their operation can be found.
PAGE
On/Off key 56
INPUTTING AND EDITING
Cursor key 57
Code/Alt/Shift keys
and Caps mode 59
Space key 62
◀ (return) key
New Block function 66
Cancel key 68
BS (backspace) key 71
Line Out function 72
Clear function 73
Symbol function 75
Accent function 78
Barcode function 80
DISPLAYING
Zoom key 85
Contrast function 86
Label Length function 87
FORMATTING
Auto Format key 88
Area key and All function 97
Text Formats:
Font key 100
Size and Width keys 102
Style key 104
Undl/Frm (underline/frame) key 107
Color key 109
PAGE
Format key 110
Label Formats:
GROBAL FRAME function 112
FRAME COLOR function 113
STYLE COLOR function 114
LENGTH function 116
FEED (tape feed) function 117
H.ALI (horizontal
alignment) function 118
VERT (vertical printing) function 119
MIRROR (mirror printing)
function 120
UNIT function 121
PRINTING
Print key and Feed &
× (tape cut) key
COLOR PRINT function 123
Stamp function 125
Special Print function 128
Seq. Numbering
(sequential numbering) function 130
MEMORY FUNCTIONS
Store, Recall and M.Del keys 134
On/Off KEY
BACKGROUND
The On/Off key (On/Off) is located in the top right-hand corner of the machine's keyboard. If batteries have been installed or the machine has been plugged in using the optional AC adaptor, the previous session's information is displayed when the machine is turned on. This feature allows you to stop work on a label, turn off the machine, and return to it later without having to re-enter the text.

When changing the batteries, be sure to insert the new ones within five minutes of removing the old batteries, otherwise the text shown in the display and any text files stored in the memory will be lost (unless the machine is plugged into an AC outlet with the AC adaptor.
If the adaptor is removed from the AC outlet before unplugging it from the machine, the text files in the memory will not be deleted if batteries are correctly installed.
The machine will automatically turn off if no key is pressed within 5 minutes. The machine's Internal memory stores the current session's information and displays it when you turn on the machine again.
OPERATION
- The turn on the machine, press On Off. The previous session's information appears on the LCD display.
- To turn off the machine, press On Off. The current session's information is stored in the internal memory.
CURSOR KEY
BACKGROUND
The four cursor keys (◀, ▶, ▲, ▲ and ▼) can be used to perform two different operations: to move the cursor and make a selection. The cursor, which appears as either a bracket ( [ ) or an underline ( _ ), can be moved using the cursor keys to any point in your text so that you can display or edit it. To make a selection, use the cursor keys to move the highlight or flashing highlight over the characters or setting that you want to choose.
OPERATION
LEFT CURSOR KEY
- To move the cursor one space or character to the left, press once. If the cursor is positioned at the beginning of a line when this key is pressed, the cursor moves to the end of the previous line.
- To move the cursor to the beginning of the current line of text, hold down and press.
- To move the cursor to the beginning of the current text block, hold down Shift and press [44]. If the cursor is already positioned at the beginning of a text block when these keys are pressed, the cursor moves to the beginning of the previous block.
RIGHT CURSOR KEY
- To move the cursor one space or character to the right, press ▶ once. If the cursor is positioned at the end of a line when this key is pressed, the cursor moves to the beginning of the text line.
- To move the cursor to the end of the current line of the text, hold down Code and press ▶.
- To move the cursor to the beginning of the next text block, hold down Shift and press ▶.
UP CURSOR KEY
- To move the cursor to the character in the line directly above the cursor's current position, press ▲ Home once.
- To move the cursor to the beginning of the entire text, hold down Code and press ▲ Home
DOWN CURSOR KEY
- To move the cursor to the character in the line directly below the cursor's position, press ▼ ▼ ▼ once.
• To move the cursor to the end of the entire text, hold down Code and press End
Code/Alt/Shift KEYS AND Caps MODE
BACKGROUND
Most characters can be entered simply by pressing their keys. However, to use special functions or to enter capital letters, accented characters and some symbols, the following special keys are necessary.
Code KEY
OPERATION
- To use a function printed in yellow (P-touch 530) or pink (P-touch 550) above a key, hold down Code and press the key for the function that you wish to use.
EXAMPLE
To start the Symbol function:
- Hold down Code and press \$4.
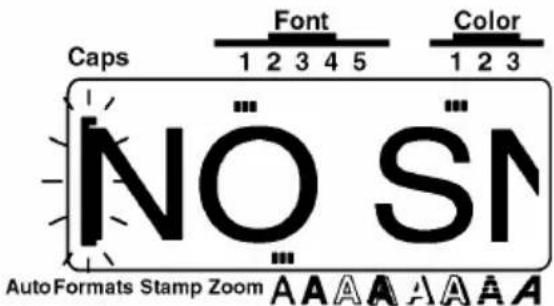
![Caps Font Color 1 2 3 4 5 1 2 3 +×÷±= \ [ ] { }< NO AutoFormats Stamp Zoom A A A A A A A A](/content/2026/05/770473/images/c5774f9b3a85b77250f36cb412d292a8273d99c597165ab4e1290178906eebf6.jpg)
Alt KEY
OPERATION
- To type in a character printed in orange (P-touch 530) or blue (P-touch 550) on a key, hold down Alt Caps and press the key of the character that you wish to type in.
To type in the capital letter of a character printed in blue, hold down Shift (or hold Code down and press Ait Caps to enter Caps mode) before pressing the key of the desired character.
EXAMPLE
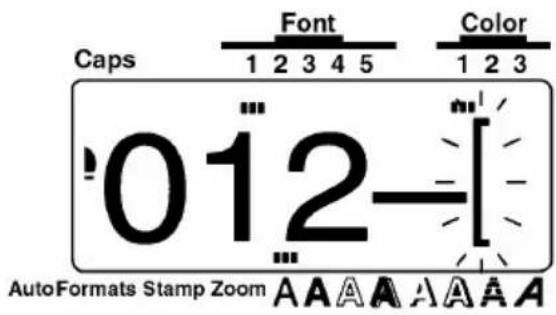
To type in "-":
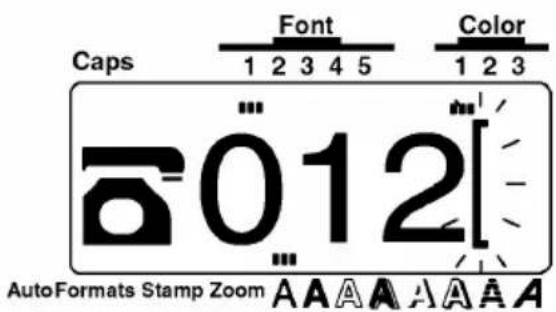
- Hold down Ait Caps and press f - .
Shift KEY
OPERATION
- To type in a capital letter or the symbol printed in the top-hand corner of a key, hold down [Shift] and press the key of the character that you wish to type in.
EXAMPLE
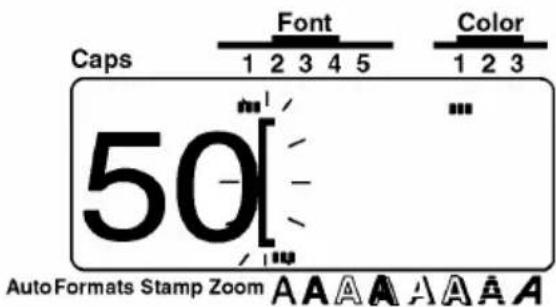
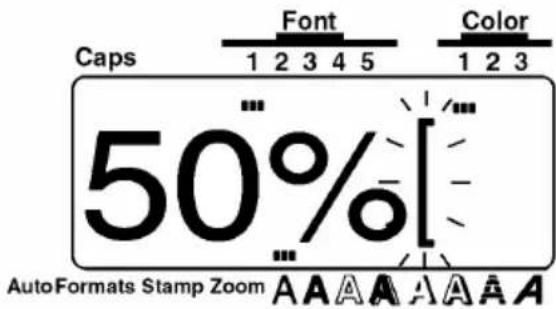
To type in "%":
- Hold down Shift and press Account % 5.
Caps MODE
OPERATION
- To enter Caps mode and type in a series of capital letters, hold down Code and press Alt Caps. The Caps indicator in the top left-hand corner of the LCD display lights up.
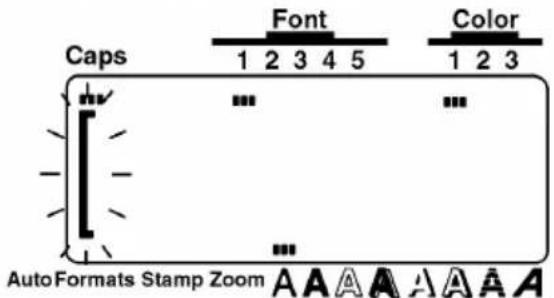
The unmber --- not the symbol about it --- is typed in, unless Shift is hold down while a number key is pressed.
To type lowercase letters while the Caps indicator is lit, hold down Shift while pressing the key of the desired character.
- To exit Caps hold down Code and press Alt Caps. The Caps indicator goes off.
Space KEY
BACKGROUND
The Space key (Space) lets you add blank spaces anywhere in your text. It is different from the right cursor key (▶), which just moves the cursor through the text without adding blank spaces.
OPERATION
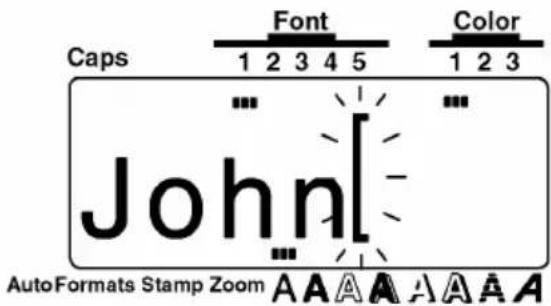
• To type in a blank space, press Space
EXAMPLE
To insert a space:
- Press Space
(RETURN) KEY
BACKGROUND
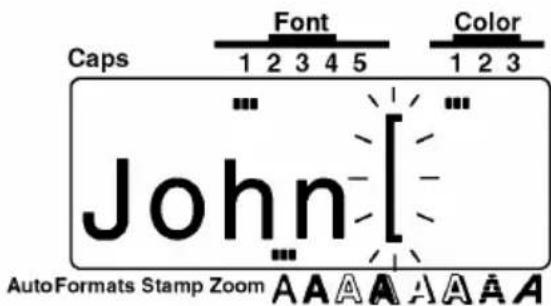
The return key (New Block) has three different functions.
ENDING A LINE OF TEXT
Once you have finished entering a line of the text, press the return key to create a new line and move the cursor to its beginning.
A single block of text can only contain the maximum number of lines shown in the table below. If the block already contains the maximum number of lines when you press the return key, the error message "LINE LIMIT!" will appear.
| Type widths | Maximum number of lines that can be entered |
| 1/4" (6 mm) | 2 |
| 3/8" (9 mm) | 3 |
| 1/2" (12 mm) | 3 |
| 3/4" (18 mm) | 5 |
| 1" (24 mm) | 7 |
| 1 1/2" (36 mm) | 7 |
MARKING A SELECTION
The return key can also be used to add a selected character to the text (e.g., when using the Symbol or Accent functions) or to apply the selected settings (e.g., when using Format).
CONFIRMING AN OPERATION
Sometimes questions asking you to confirm an operation may appear on the LCD display, especially when the function that you have chosen will delete or affect files. In these cases, pressing the return key is like answering "yes".
To answer "no", press Cancel. Refer to Cancel KEY on pages 68 to 70.
OPERATION
- To add a new line of text, press New Book
EXAMPLE
To add a second line:
- Press

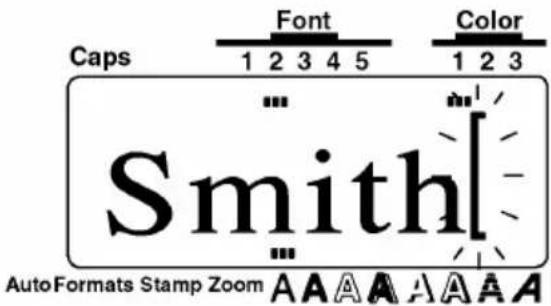
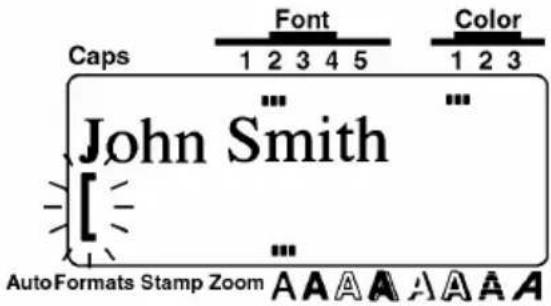
OPERATION
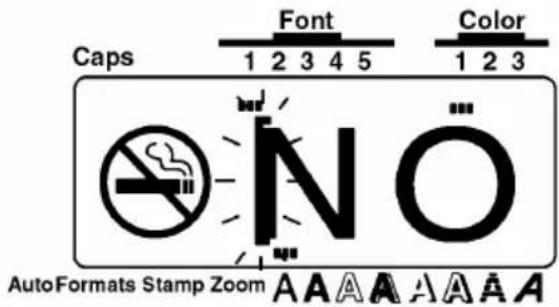
• To apply a selected item, press

EXAMPLE
To add the symbol "©" to the text:
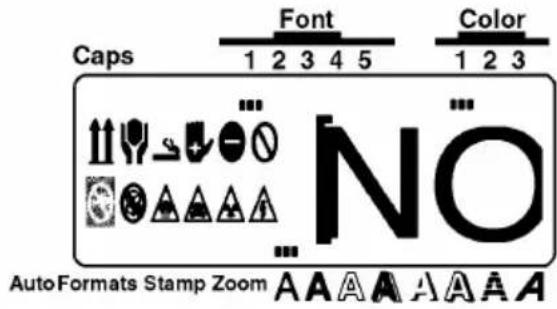
- Press
OPERATION
• To answer "yes", press

EXAMPLE
To clear the display using the Clear function:
- Press
New Block FUNCTION
BACKGROUND
Any time the number of lines in a section of the label changes, the New Block function must be used to create a new block. Creating a new block is different from local formatting, which only changes the style within a line or group of lines.
Compare thses two labels:
AXZ CORP. (123)456-7890
This is simply a single-block, single-line label with local formatting. After all the text has been typed in, the position "(123) 456-7890" has been assigned a smaller character size.
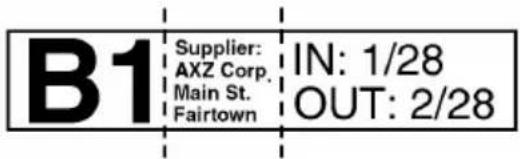
This is a multi-block label. The first position of this label is a single line, the second is four lines and the third, two lines. The New Block function must be used to enter text like this.

A single label can only contain a maximum of five blocks. If the cursor is located in the fifth block when Code is held down and New Block is pressed, the error message "5 BLOCK LIMIT!" will appear.
If the cursor is positioned in the middle of a text block when Code is held doen and is pressed, the block splits into two and the character on the right of the cursor becomes the beginning of the next block.
OPERATION
- To add a new block, hold down Code and press New Block
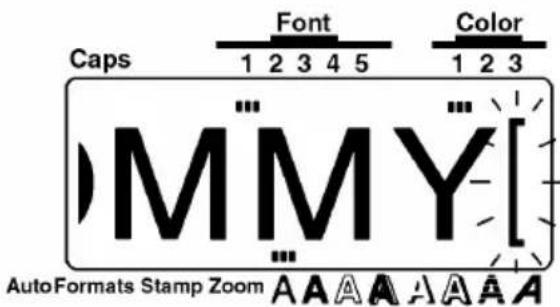
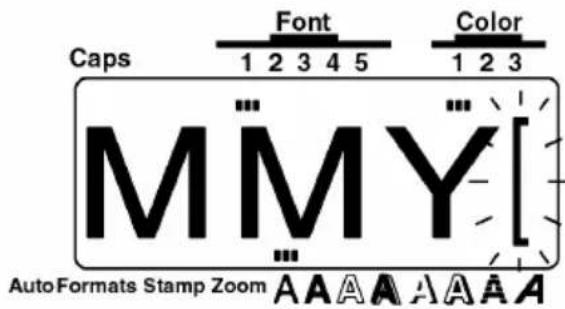
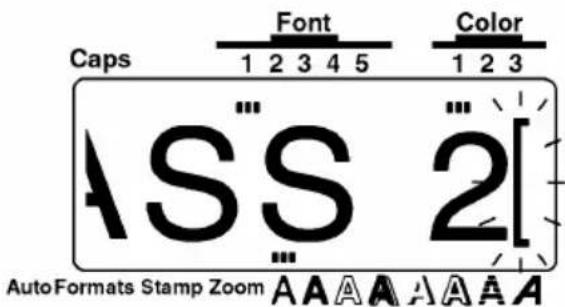
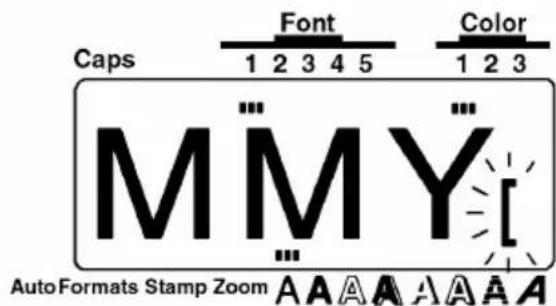
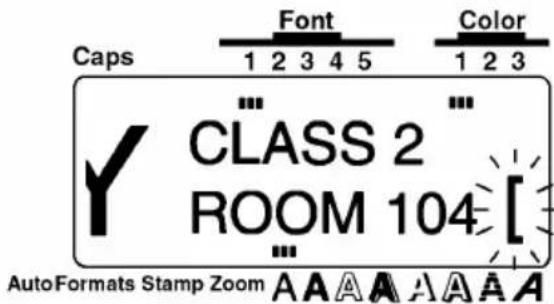
To make the label
TOMMY CLASS 2 ROOM 104 :
① Type "TOMMY".
② Hold down

and press

③ Type "CLASS 2".
4 Press

⑤ Type "ROOM 104".
Cancel KEY
BACKGROUND
The Cancel key (Cancel), located in the bottom row of the keyboard, has two basic functions.
QUITTING AN OPERATION WITHOUT CHANGING THE TEXT
In general, pressing Cancel returns you to the previous screen or operation without changing the text (e.g., if you begin using a function but letter decide that you do not want to continue or if an error message is displayed).
REJECTING AN OPERATION
Sometimes questions asking you to confirm an operation may appear on the LCD display, especially when the function that you have chosen will delete or affect files. In these cases, pressing Cancel is like answering "no".
To answer "yes", press NewBank. Refer to ← (RETURN) KEY on pages 63 to 65.
OPERATION
• To quit an operation, press Cancel
EXAMPLE
To quit the Format function without changing the label format:
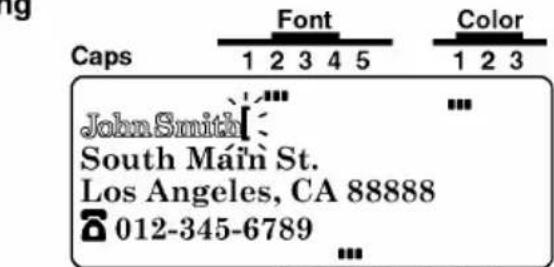
AutoFormats Stamp Zoom AAAAAA
① Press Format to begin changing the label format functions.
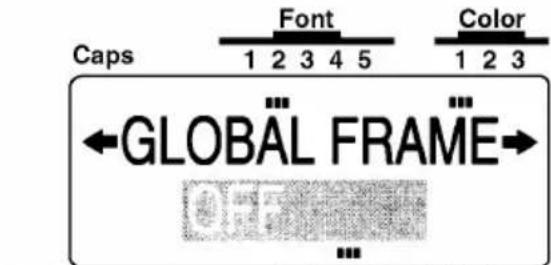
AutoFormats Stamp Zoom A A A A A A A
② Press Cancel
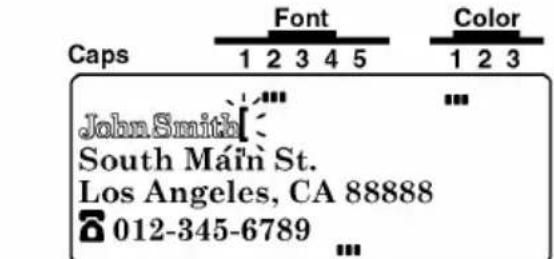
AutoFormats Stamp Zoom AAAAAA
OPERATION
- To answer "no", press Cancel
EXAMPLE
To cancel the Clear function:
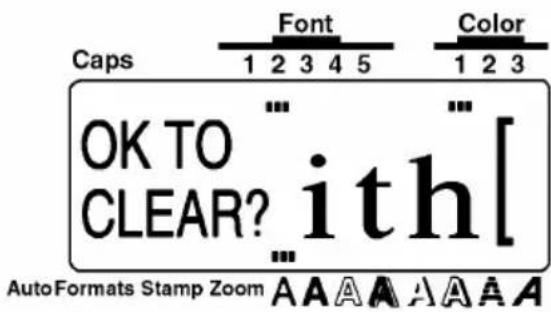
- Press Cancel.
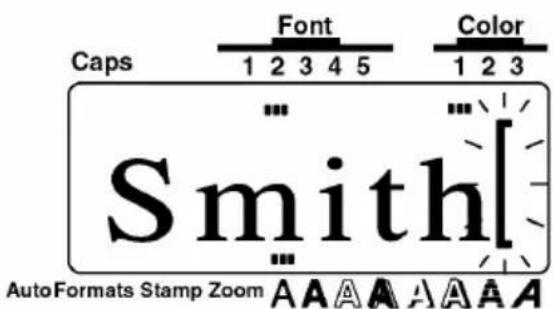
BS (BACKSPACE) KEY
BACKGROUND
The backspace key (85) allows you to remove characters to the left of the cursor's current position. It differs from the left cursor key (44), which only moves the cursor without deleting any characters.
OPERATION
TO DELETE A CHARACTER:
① Press ▼, ▶, ▲ or ▼ to position the cursor immediately to the right of the character you want to delete.
② Press 85.
EXAMPLE
To delete "East":
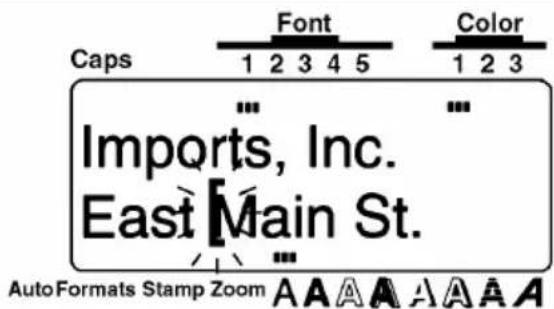
① Press B6 five times.
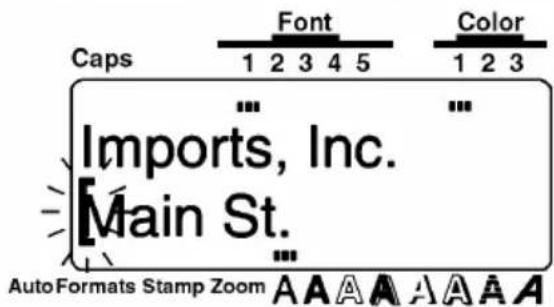
To join the two lines together:
② Press BS once.
Line Out FUNCTION
BACKGROUND
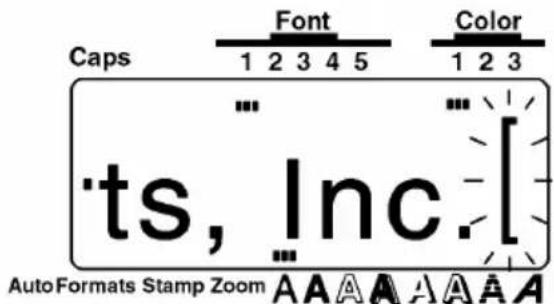
The Line Out function allows you to remove entire lines of the text easily.
OPERATION
TO DELETE A LINE OF TEXT:
① Press ▼, ▶, ▲ or ▼ to position the cursor in the line that you want to delete.
② Hold down Code and press Line Out 0
EXAMPLE
To delete "East Main St.":
- Hold down Code and press Line Out
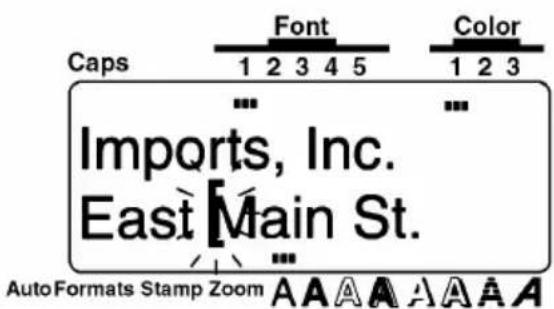
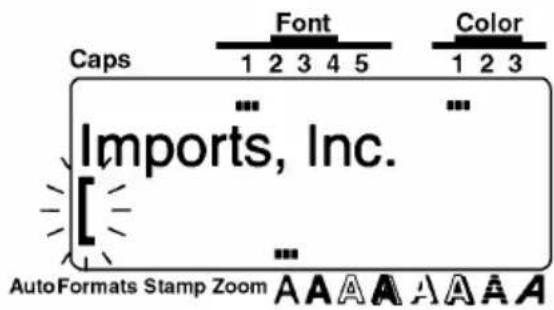
Clear FUNCTION
BACKGROUND
The Clear function is used to remove all characters from the display, and return all text formats selected (using □, □, □, □, □ and □) and label formats selected (using Format) to their default setting. In other words, the display is completely emptied. You can then begin entering new text and formatting it.
OPERATION
TO ERASE ALL OF THE TEXT AND RETURN ALL FORMATS TO THEIR DEFAULT SETTINGS:
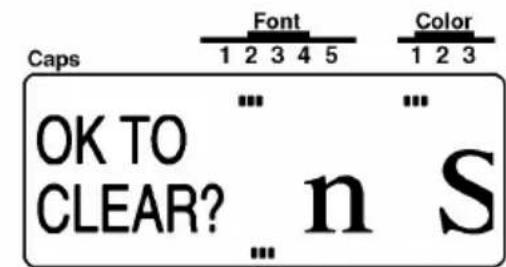
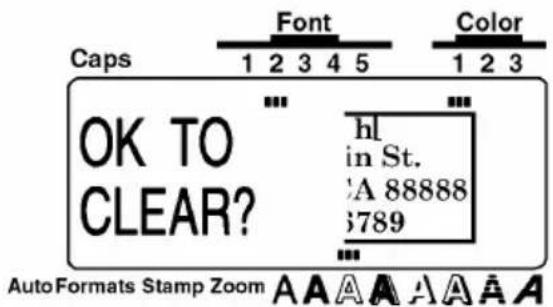
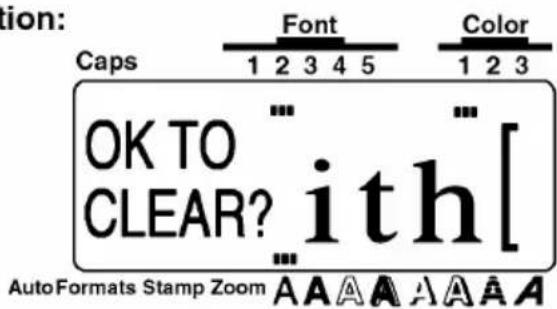
① Hold down Code and press B5. The message "OK TO CLEAR?" appears on the display.
The cursor can be located anywhere in the text.
② Press New Block
To stop the text from begin erased, press Cancel. Refer to Cancel KEY on pages 68 to 70.
EXAMPLE
To clear the display:
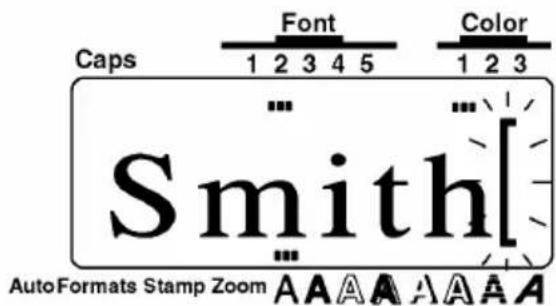
① Hold down Code and press BS.
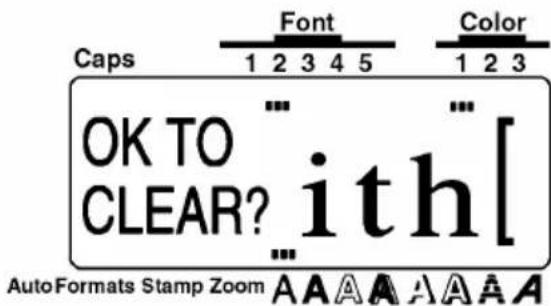

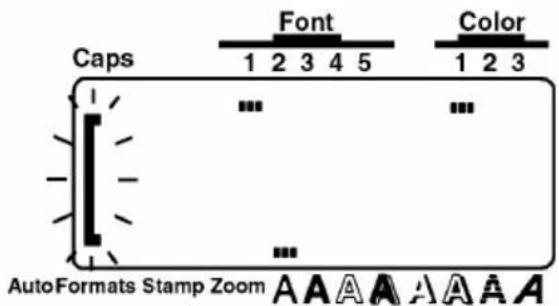
Press

Symbol FUNCTION
BACKGROUND
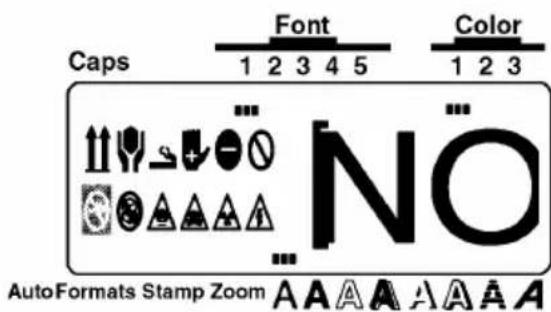
In addition to the letters, symbol and numerals on the key tops, there are 257 additional characters available with the Symbol function. After these characters are added to the text, they can be treated like any other character and be formatted or deleted.
OPERATION
TO TYPE IN A SYMBOL:
① Hold down Code and press Symbol 5 4. Some symbols appear on the display.
② Press ▲ Home or ▼ End until the symbol that you want to use appears on the display.
③ Press ▲ or ▶ until the desired symbol is highlighted.
4 Press NewBlock. The selected symbol is added to the text.
To enter a sequence of symbols, hold down Code before pressing New Block. Continue adding symbols to your text by selecting them, then holding down Code while pressing New Block. Press just New Block after the last symbol in the sequence is chosen. Symbols is cannot be typed in to a bar code.
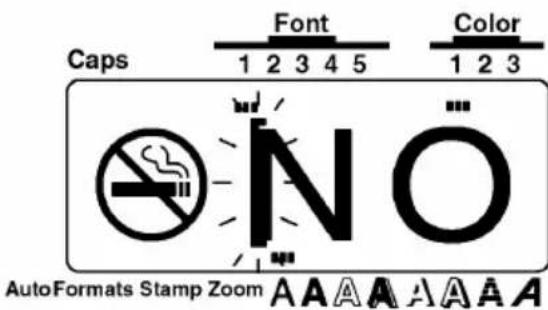
To add the symbol "":
① Hold down

and press

② Press ▶ until " 🔍 " is highlighted.
③ Press New Block
![Caps Font Color 1 2 3 4 5 1 2 3 +×÷±= \ [ ] { }< NO AutoFormats Stamp Zoom A A A A A A A A](/content/2026/05/770473/images/77915b0f72187e6349849317ba334f4e77de8e5ed224cd39f1a4e1081e3d023d.jpg)
| • + × ÷ ± = \ [ ] { } < |
 |
 |
 |
 |
 |
 |
 |
 |
 |
 |
 |
 |
 |
 |
 |
 |
 |
 |
 |
 |
 |
 |
 |
Accent FUNCTION
BACKGROUND
When writing in other languages, accented character, which consist of a letter and a diacritical mark, are often used. The accented characters of the Accent funtion are grouped according to the capital or lowercase letter that they are combined with. The following accented characters are available:
| Letters | Accented characters | Letters | Accented characters |
| a | äààâãæ | i | ïíì |
| A | ÄÄÄÄÄÄÆ | I | ïíì |
| c | Ç | n | ñ |
| C | Ç | N | Ñ |
| d | ð | o | öööööøe |
| D | Đ | O | ÖÓÖÖÖÖ∅E |
| e | ëéèêê | u | üúùû |
| E | ËÉÈÊÉ | U | ÜÚÙÛ |
Several accented characters can be typed in directly while holding down Alt Caps (fefer to page 54).
OPERATION
TO TYPE IN AN ACCENTED CHARACTER:
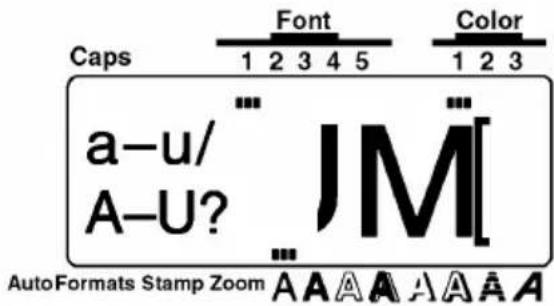
① Hold down Code and press % 5. The message "a -- u / A -- U?" appears on the display.
② Press the key of the letter in the desired accented character.
To type in a capital letter, hold down Shift while pressing the letter key.
③ Press ▲ or ▶ until the desired accented character is highlighted.
4 Press New Block. The selected accented character is added to the text.
To enter a sequence of accented characters, hold down Code before pressing New Block. Continue adding accented characters to your text by selecting them, then holding down Code while pressing New Block. Press just New Block after the last accented character in the sequence is chosen.
To add the accented character "É":
① Hold down Code and press 5
② Hold down Shift and press E.
③ Press ▶ until "É" is highlighted.
④ Press New Block
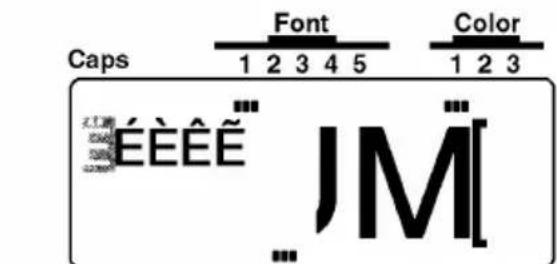
AutoFormats Stamp Zoom AAAAAA
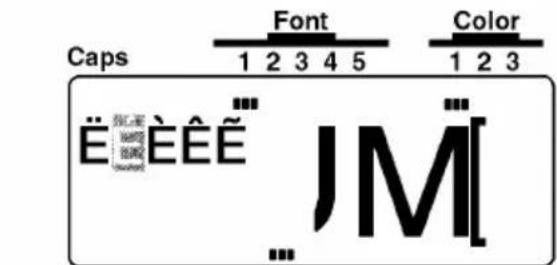
The Barcode function, which allows you to add bar codes to your printed labels, is one of this machine's most advanced features.
This section will explain how to enter a bar code into your text. It is not intended as a comprehensive introduction to the concept of bar coding. For more detailed information, place consult one of the many reference books available.
Since this machine is not specifically designed for special bar code label-making, some bar code readers may not be able to read the labels.
Bar code should be printed on labels with back ink on a white background.
Four different parameters enable you to create custom bar codes.
| Parameters | Settings |
| PROTOCOL | CODE 39, 1-2/5, EAN13, EAN8, UPC-A, UPC-E, CODABAR, EAN128*, CODE128*ISBN 5*, ISBN 2**Only available on the P-touch 550 |
| WIDTH(bar code width) | LARGE, SMALL |
| UNDER#S | ON, OFF |
| (numbers printed below bar code) | |
| CHECK DIG. (check digit) | OFF, ON |
The default settings are CODE 39 PROTOCOL, LARGE WIDTH, the UNDER#S se to ON, and CHECK DIG. set to OFF.
It is recommended that bar codes be printed with the FEED (tape feed) function set to FULL and the bar code WUDTH parameter set to LARGE; otherwise, bar codes may be difficult to read.
OPERATION
TO CREATE A BAR CODE
① Hold down Code and press
To change the data or parameters of a bar code that has already been created, position the cursor in the middle of the bar code mark before holding down Code and pressing 8, then change the bar code data or its parameters.
Selecting the bar code parameter settings
② Press Format.
To continue creating a bar code without changing any of its parameter settings, press Cancel.
③ Press ▶ or ▶ until the parameter setting that you want to change is highlighted.
4 Press ▲ Home or ▼ End until the desired setting is displayed.
To select the default setting, press Space.
⑤ Repeat ateps ③ and ④ until all parameters are set as you wish.
6 Press New Block
Entering the bar code data
⑦ Type in the new bar code data or edit the old data.
Adding a special character to the bar code data
8 Press ▲ or ▶ until the cursor is below the character to the right of the position where you want to add the special character.
⑨ Hold down Code and press \$4.
10 Press ▲ Home or ▼ End until the desired special character is displayed.
The following symbols can only be entered when using protocols EAN 128 or CODE 128.
| VALUE CHARACTER VALUE | CHARACTER VALUE | CHARACTER | |||
| 3 # 69 ENQ 87 ETB | |||||
| 4 $ 70 ACK 88 CAN | |||||
| 11 + 71 BEL 89 EM | |||||
| 28 < 72 BS 90 SUB | |||||
| 29 = 73 HT 91 ESC | |||||
| 30 > 74 LF 91 { | |||||
| 32 @ 75 VT 92 FS | |||||
| 59 [ 76 FF 92 | | |||||
| 60 \ 77 CR 93 GS | |||||
| 61 ] 78 SO 93 } | |||||
| 62 ~ 79 SI 94 | RS | ||||
| 63 _ 80 DLE 94 ~ | |||||
| 64 | NUL | 81 | DC1 | 95 | US |
| 64 ` 82 DC2 95 DEL | |||||
| 65 | SOH | 83 | DC3 | 96 | FNC3 |
| 66 | STX | 84 | DC4 | 97 | FNC2 |
| 67 | ETX | 85 | NAK | 100 | FNC4 |
| 68 | EOT | 86 | SYN | 102 | FNC1 |
The following symbols can only be entered when using protocols CODE 39 or CODABAR.
| SYMBOL | CHARACTER |
| 1 | + |
| 2 | $ |
11 Press New Block to add the selected special character to the bar code data.
To return to entering the bar code data without adding a special character, press Cancel.
Adding the bar code to your text
12 Press New Block
To create a bar coide with protocol EAN 128:
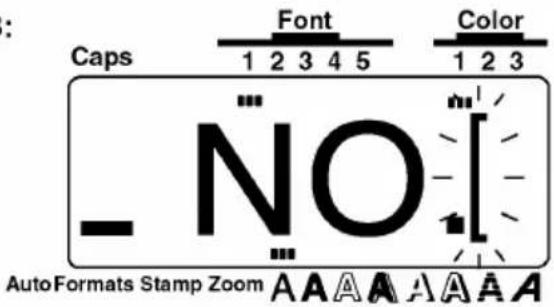
① Hold down Code and press
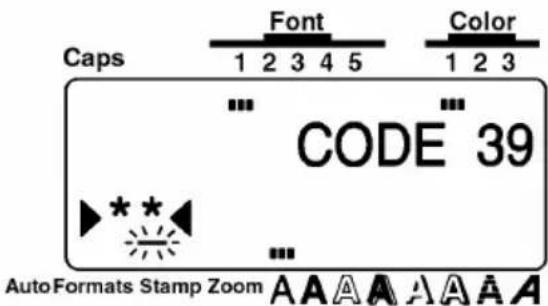
② Press Format.
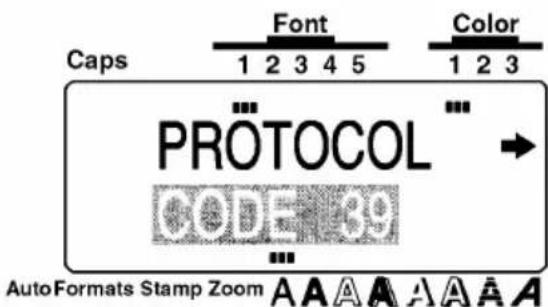
③ Press ▲ Home until the PROTOCOL parameter is set to EAN 128.
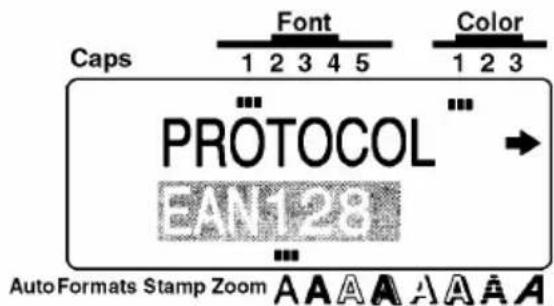
④ Press New Block
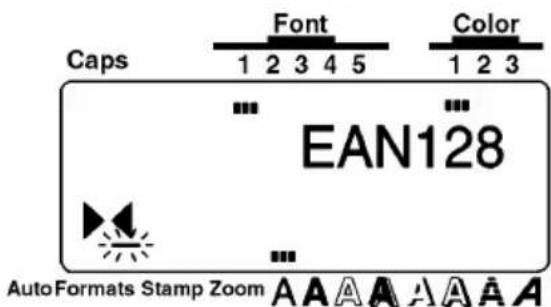
⑤ Type in the bar code data "123456".
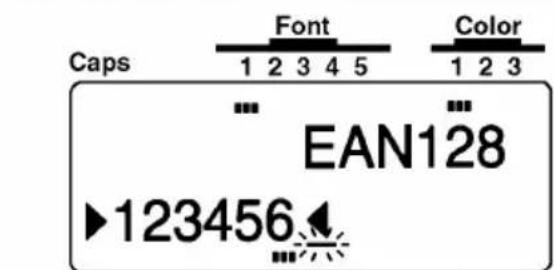
AutoFormats Stamp Zoom AAAAAA
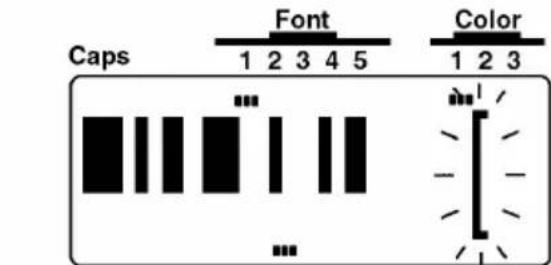
AutoFormats Stamp Zoom AAAAAA
Zoom KEY
BACKGROUND
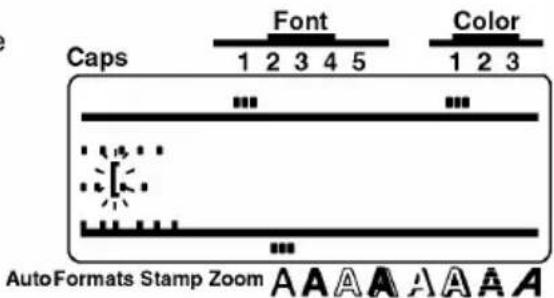
Normally, text is entered and displayed in the WYSIWYG (what-you-see-is-what-you-get) mode, which shows you exactly how the label world apper if it were printed. With the Zoom key, however, you can zoom in to see the text in detail, or you can zoom out to see how the text would fit on the printed label.
OPERATION
TO USE THE ZOOM FUNCTION:
① Press Zoom once to enlarge the text. The Zoom indicator at the bottom of the display lights up.
To return the display to WYSIWYG mode, press Cancel at any time.
② Press Zoom again to shrink the text. The Zoom indicator stays lit.
3 Press Zoom one more time to return the display to WYSIWYG mode. The Zoom indicator goes off.
EXAMPLE
To zoom in on and out from the text:
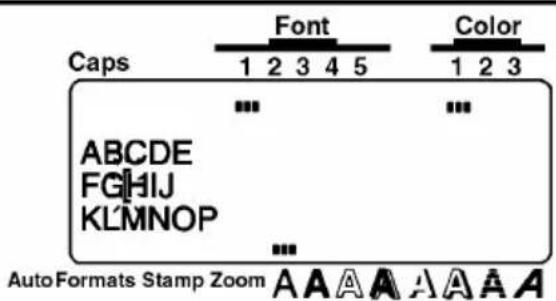
① Press Zoom. The display zooms in on the text.
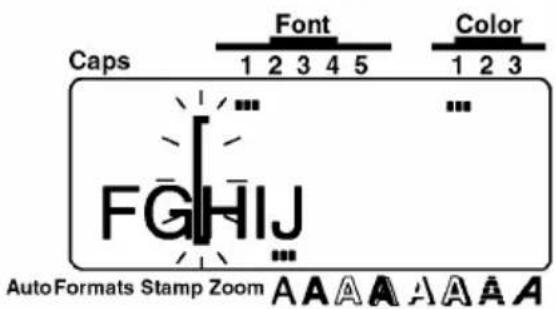
② Press Zoom. The display zooms out from the text.
Contrast FUNCTION
BACKGROUND
This function is used to make the LCD display lighter or darker. The Contrast function can be used from the WYSIWYG display mode or while using the auto formats or Stamp functions.
OPERATION
TO CHANGE THE CONTRAST:
① Hold down Code and press Contrast # 6.
② Press ▶ or ▶ to adjust the contrast.
To reset the contrast to its default setting, press Space (or hold down Code and press Space).
③ Press New Block
EXAMPLE
To adjust the display contrast:
① Hold down Code and press
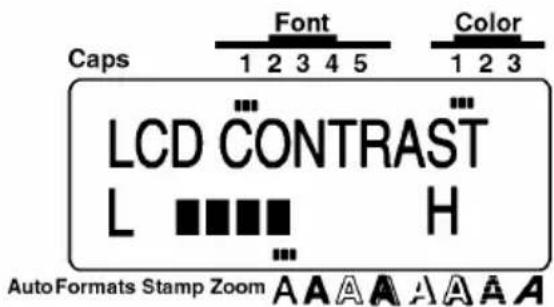
② Press ▶ or ▶ to adjust the cotrast, then press New Stock.
Label Length FUNCTION
BACKGROUND
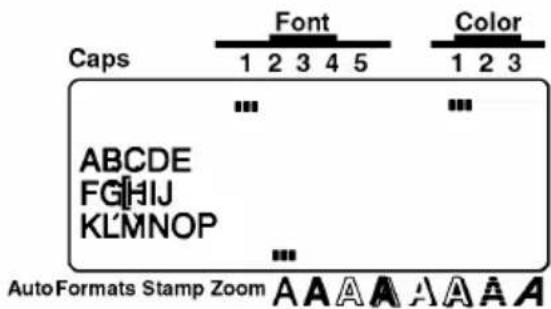
This function is used to display the length of the label in either inches or centimeters depending on the setting of the UNIT function. For more information on changing the units that are used when displaying the length, see UNIT FUNCTION on page 121.
OPERATION
- To display the length of the label, hold down Code and press
To return to the WYSIWYG display mode, press Cancel.
EXAMPLE
To display the length of the label:
- Hold down Code and press
Auto Formats KEY
BACKGROUND
The Auto Formats key (Auto Formats) is located in the lower left-hand corner of the keyboard. After pressing this key, simply select a preset template and enter test in each of the template's entries to create labels for a variety of uses, such as addressing envelopes and identifying floppy disks or audio and video cassettes. This function makes label-making faster and easier then formatting the text yourself. For a list of label templates and their entries, refer to pages 91 through 96.
OPERATION
TO USE THE AUTO FORMATS FUNCTION:
① Press Auto Formats. The Auto Formats indicator lights up.
If text has already been entered in the display, the message "OK TO CLEAR TEXT BUFFER?" appears. Press New Block to delete the text. If the Auto Formats indicator was already lit when Auto Formats was pressed, you can choose either the NEW TEXT setting to create new text, or the EDIT TEXT setting to edit the currently displayed text. Press Home or End to select the desired setting, then press New Block
Selecting a template for creating new text
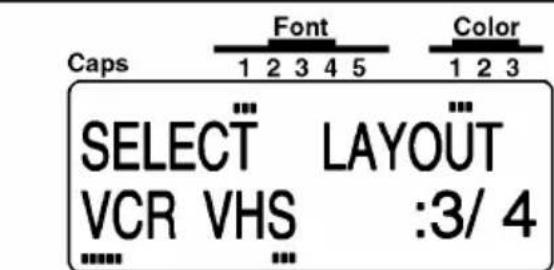
② Press ▲ Home or ▼ End until the template that you want use is displayed.
③ Press New Block
Entering or editing text in the template
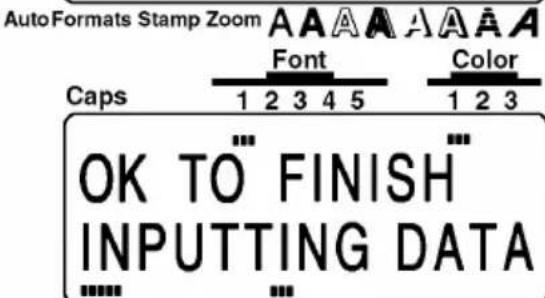
④ For each entry, type in the text, then press 📄. When 📄 is pressed after entering the text for the last entry, the message "OK TO FINISH INPUTTING DATA" appears.
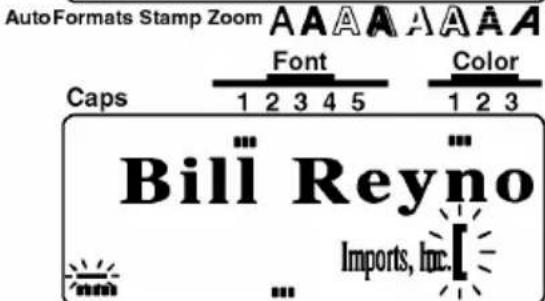
⑤ Press New Block to return to the WYSIWYG display mode.
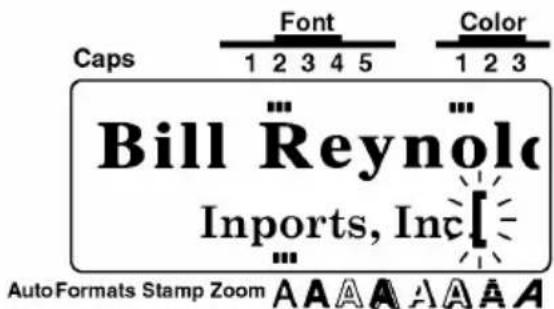
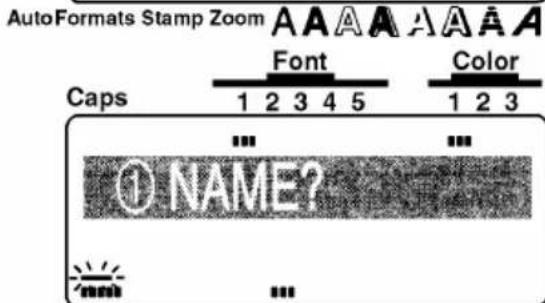
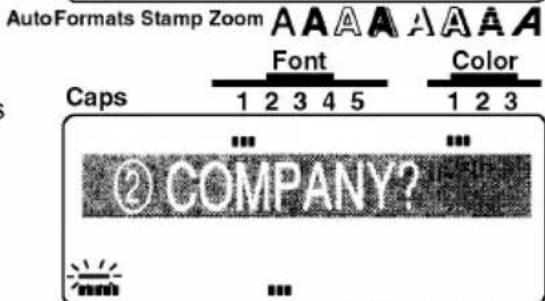
To quickly create a name tag:
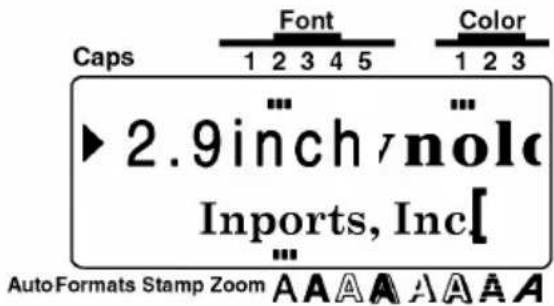
① Press Auto Formats. The Auto Formats indicator lights up.
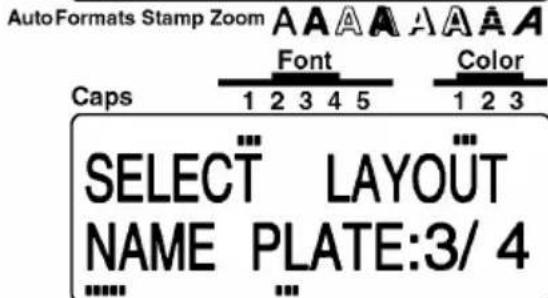
② Press ▲ or ▼ until the template "NAME PLATE" is displayed.
④ Type in the name "Bill Reynolds", then press
⑤ Type in the company name "Imports, Inc.", then press New Black
⑥ Press New Block to return to the WYSIWYG display mode.

| Preset Label Templates Entries | |
| A. VCR VHS (3/4" (18mm)) | 1. SYMBOL? 4. DURATION2. TITLE? 5. REC. MODE?3. SNB-TITLE? 6. DATE? |
| B. VCR 8mm-1 (3/8" (9mm)) | 1. SYMBOL? 4. DATA?2. TITLE? 5. REC. MODE?3. SUB-TITLE? |
| C. VCR 8mm-2 (1.2" (12mm)) | 1. SYMBOL? 4. DURATION?2. TITLE? 5. REC. MODE?3. SUB-TITLE? 6. DATE? |
| D. VCR VHSC-1 (1/2" (12mm)) | 1. TITLE? 2. SUB-TITLE? |
| E. VCR VHSC-2 (3/4" (18mm)) | 1. SYMBOL? 4. DURATION?2. TITLE? 5. REC. MODE?3. SUB-TITLE? 6. DATE? |
| F. AUDIO-1 (1/4" (6mm)) | 1. SYMBOL? 3. SUB-TITLE?2. TITLE? |
| G. AUDIO-2 (3/8" (9mm), 1/2" (12mm)) | 1. SYMBOL? 3. SUB-TITLE?2. TITLE? |
| H. AUDIO-3 (3/8" (9mm), 1/2" (12mm)) | 1. SYMBOL? 2. TITLE? |
| I. NAME PLATE (3/4" (18mm), 11/2" (36mm)) | 1. NAME? 2. COMPANY? |
| J. ADDRESS (3/4" (18mm),1" (24mm), 11/2" (36mm)) | 1. NAME? 3. ADDRESS2?2. ADDRESS1? 4. ADD.3/TEL? |
| K. EQUIPMENT (3/4" (18mm), 1" (24mm), 11/2" (36mm)) | 1. TITLE? 3. NUMBER?2. NAME? |
| L. EQUIPMENT (1/2" (12mm)) | 1. TITLE? 3. NAME?2. SUB-TITLE? 4. NUMBER? |
| M.SLIDE (1/2" (12mm)) | 1. TITLE? 3. SUB-TITLE?2. DATE? |
| N. PRICE (3/4" (18mm), 1" (24mm),11/2" (36mm)) | 1. NAME? 2. PRICE? |
| O. SALE PRICE (3/4" (18mm), 1" (24mm), 11/2" (36mm)) | 1. NAME? 3. NEW PRICE?2. OLD PRICE? |
| P. FILE LONG (3/4" (18mm), 1" (24mm), 11/2" (36mm)) | 1. TITLE? |
| Q. FILE LONGV (3/4" (18mm), 1" (24mm), 11/2" (36mm)) | 1. TITLE? |
| R. FILE SHORT (3/8" (9mm), 1/2" (12mm), 3/4" (18mm), 1" (24mm), 11/2" (36mm)) | 1. TITLE? |
| S. FLOPPY 3.5" (3/4" (18mm), 1" (24mm), 11/2"(36mm)) | 1. TITLE? 3. NAME?2. SUB-TITLE? |
| T. FLOPPY 5" (3/4" (18mm), 1" (24mm), 11/2"(36mm)) | 1. TITLE? 3. NAME?2. SUB-TITLE? |
SAMPLES
A. VCR VHS (3/4" (18 mm))

CHAMPION'S CUP
MEN'S SINGLE
90min
STANDARD
AUG.5,1995
B. VCR 8mm-1 (3/8" (9 mm))

A SNOWY DAY
Mick's first ski experience
JAN.3,1995
Valdisel
C. VCR 8mm-2 (1/2" (12 mm))

Kelly's 1st Birthday
Birthday Party
120 min
SLOW
Jan. 10, 1965
D. VCR VHSC-1 (1/2" (12 mm))

JOE & ANN'S WEDDING
St. Michael's Church
E VCR VHSC-2 (3/4" (18 mm))

JOE & ANN'S WEDDING
St. Michael's Church
120min
NORMAL
11.6,'95
F. AUDIO-1 (1/4" (6 mm))

FAVORITE LOVE SONGS
Mari
G. AUDIO-2 (3/8" (9 mm))

FAVORITE LOVE SONGS
Mari
AUDIO-2 (1/2" (12 mm))

FAVORITE LOVE SONGS
Mari
H. AUDIO-3 (3/8" (9 mm))

OLDIES(1960 - 1970)
AUDIO-3 (1/2" (12 mm))

OLDIES(1960 - 1970)
I. NAME PLATE (3/4" (18 mm))
Bill Reynolds
ABC INTERNATIONAL CORP.
NAME PLATE (1" (24 mm))
Bill Reynolds
ABC INTERNATIONAL CORP.
NAME PLATE (1 1/2" (36 mm))
Bill Reynolds
ABC INTERNATIONAL CORP.
J. ADDRESS (3/4" (18 mm))
Smith's Rent-A-Bike
29 Green Road
Los Angeles, CA 88888
123-456-7890
ADDRESS (1" (24 mm))
Smith's Rent-A-Bike
29 Green Road
Los Angeles, CA 88888
123-456-7890
ADDRESS (1 1/2" (36 mm))
Smith's Rent-A-Bike
29 Green Road
Los Angeles, CA 88888
123-456-7890
K. EQUIPMENT (3/4" (18 mm))
PROPERTY OF
SALES & MARKETING DIV.
0312
EQUIPMENT (1" (24 mm))
PROPERTY OF
SALES & MARKETING DIV.
0312
EQUIPMENT (1 1/2" (36 mm))
PROPERTY OF
SALES & MARKETING DIV.
0312
L. EQUIPMENT (1/2" (12 mm))
| PROPERTY OF | SALES & MARKETING DIV. |
| NUMBER | 0235 |
M. SLIDE (1/2" (12 mm))
HAWAII ISLAND
AUG.15.1994
ISO: 70
N. PRICE (3/4" (18 mm))
LABEL PRINTER
\$249
PRICE (1 1/2" (36 mm))
LABEL PRINTER
\$249
PRICE (1" (24mm))
LABEL PRINTER
\$249
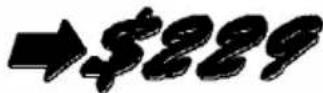
O. SALE PRICE (3/4" (18 mm))
LABEL PRINTER
\$249
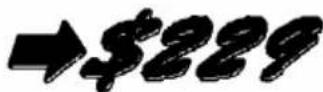
SALE PRICE (1" (24 mm))
LABEL PRINTER
\$249
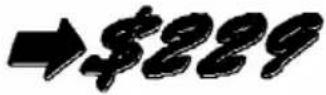
SALE PRICE (1 1/2" (36 mm))
LABEL PRINTER
\$249
P. FILE LONG (3/4" (18 mm))
'94 MARKET RESEARCH①
FILE LONG (1" (24 mm))
'94 MARKET RESEARCH①
FILE LONG (1 1/2" (36 mm))
'94 MARKET RESEARCH①
Q. FILE LONGV (3/4" (18 mm))

FILE LONGV (1" (24 mm))

FILE LONGV (1 1/2" (36 mm))

R. FILE SHORT (3/8" (9 mm))
SALES RESULTS (1)
FILE SHORT (1/2" (12 mm))
SALES RESULTS (1)
FILE SHORT (3/4" (18 mm))
SALES RESULTS (1)
FILE SHORT (1" (24 mm))
SALES RESULTS (1)
FILE SHORT (1 1/2" (36 mm))
SALES RESULTS (1)
S. FLOPPY 3.5" (3/4" (18 mm))
DAILY FAX (5)
9/94 - Preset
J. Smith
FLOPPY 3.5" (1" (24 mm))
B DAILY FAX (5)
9/94 - Preset
J. Smith
FLOPPY 3.5" (1 1/2" (36 mm))
B DAILY FAX (5)
9/94 - Preset
J. Smith
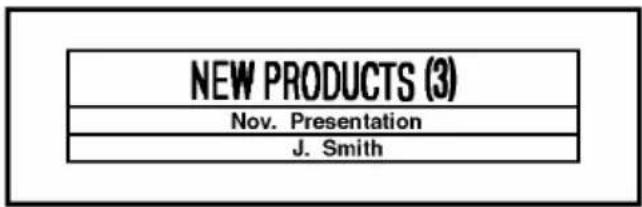
T. FLOPPY 5" (3/4" (18 mm))
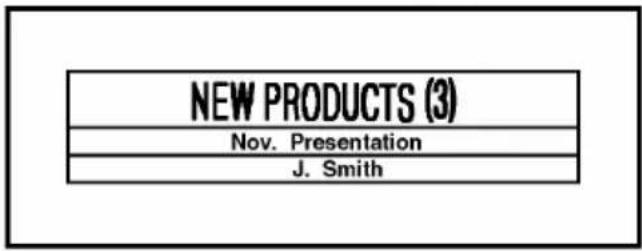
NEW PRODUCTS (3)
Nov. Presentation
J. Smith
FLOPPY 5" (1" (24 mm))
FLOPPY 5" (1 1/2" (36 mm))
Area KEY AND All FUNCTION
BACKGROUND
You can make more decorative labels using the text format keys (☐, ☐, ☐, ☐, ☐, and ☐) to change the appearance of part or all of the characters in your text either before or after you have entered them. After the text is entered, use the All function to select all of the text, or press Area and use ▲, ▶, ▲ and ▼ to select part of the text for formatting. Since the text can be displayed with the WYSIWYG mode, you can see exactly how the label will appear before it is printed. (For mode details on the text format keys, refer to pages 100 through 109.)
When the entire text is removed from the display with the Clear function, all text formats (font, size, width, style, underline/frame and color) will return to their default settings.
OPERATION
TO SELECT THE TEXT FORMAT BEFORE ENTERING THE TEXT:
① Press the text format key for the format that you want to change. The sample letter (A) appears on the right side of the cursor.
② Keep pressing the text format key until the "A" is formatted as you wish or the desired setting is displayed.
To select the default setting for a certain text format, hold down Shift while pressing the corresponding text format key.
To change all text formats to thier default settings, hold down Code and press Space. To select the previous text format setting, hold down Code while pressting the corresponding text format key.
③ If you want to change other text formats, repeat steps 1 and 2 until all of the desired text formats are set.
④ Enter the text. All of the text that you enter is displayed with the selected format.
TO CHANGE THE TEST FORMAT AFTER ENTERING THE TEXT: Changing the text format for all of the text
① Hold down Code and press Areas All. All of the text is highlighted.
To quit the operation without changing the tax format, press Cancel (or hold down Code and press Area All) at any time.
② Press the text format key (for the format that you want to change) until the text is displayed with the text format setting that you want.
To select the default setting for a certain text format, hold down Shift while pressing the corresponding text format key.
To change all text formats to their default settings, hold down Code and press Space. To select the previous text format setting, hold down Code while pressing the corresponding text format key.
③ If you want to change other text formats, repeat step ② until all of the desired text formats are set.
4 Press New Book. All of the text is displayed with the selected text formats.
Changing the text format for only part of the text
① Press 🔊, 🔒, 🔗 or ⬇ to position the cursor on the left side of the first character whose text format setting you want to change.
② Press Area All. The first character to the right of the cursor is highlighted.
To puit the operation without changing the text format, press Cancel (or Area All) at any time.
③ Press ▲, ▶, ▲ or ▼ to highlight all characters whose text format setting you want to change.
4 Press the text format key (for the format that you want to change) until the text is displayed with the format setting that you want.
To select the default setting for a certain text format, hold down Shift while pressting the corresponding text format key.
To change all text formats to their default settings, hold down Code and press Space. To select the previous text format setting, hold down Shift while pressing the corresponding text format key.
⑤ If you want to change other text formats, repeat step ④ until all of the desired text formats are set.
6 Press NewBlock. The chosen text is displayed with the selected text formats.
EXAMPLE
To select the second smallest character size and the italic and bold styles for all of the text:
① Hold down Code and press Area All.
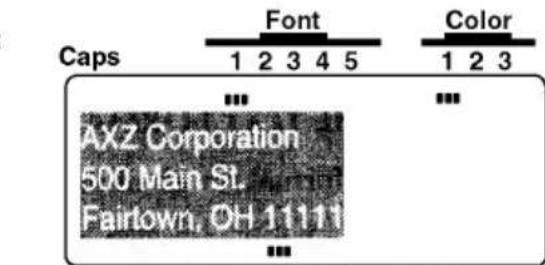
AutoFormats Stamp Zoom AAAAAAA
② Press □ until the text is displayed in the second smallest size setting (9 points).
③ Press □ until the text is displayed in the bold (A) and the italic (A) style settings and their indicators light up.
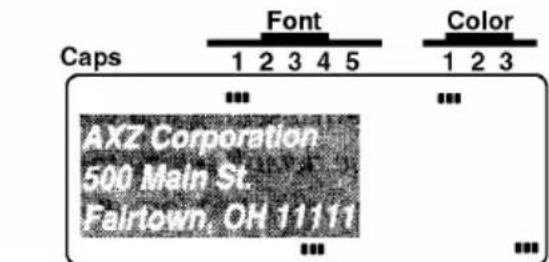
AutoFormats Stamp Zoom AAAAAA

Press

To underline the company name:
⑤ Hold down

and press

⑥ Press

⑦ Press ▶ until the company name "AXZ Corporation" is highlighted.
8 Press □ until the company name is underlined.
9 Press

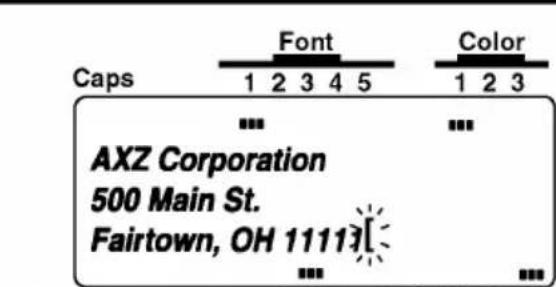
AutoFormats Stamp Zoom AAAAAAA
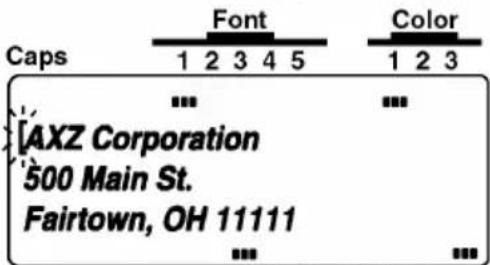
AutoFormats Stamp Zoom AAAAAA
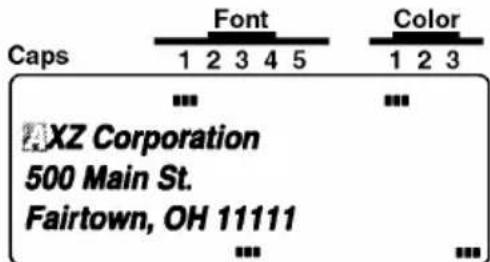
AutoFormats Stamp Zoom AAAAAA
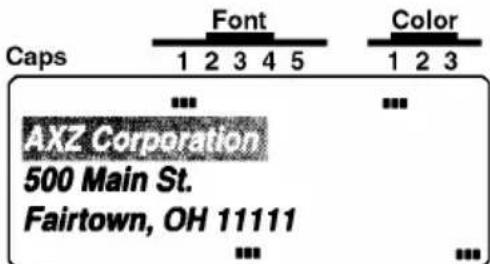
AutoFormats Stamp Zoom A A A A A A A
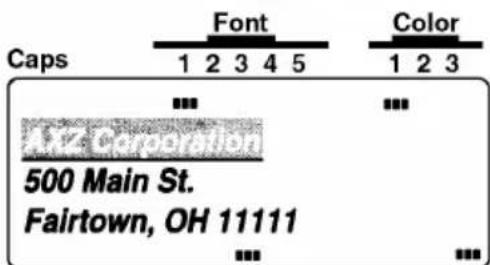
AutoFormats Stamp Zoom AAAAAAA
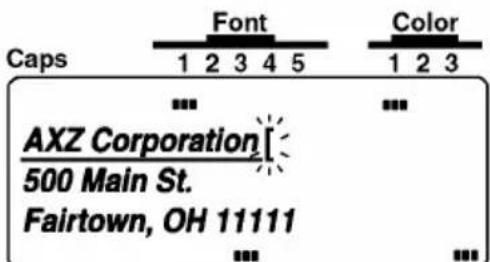
AutoFormats Stamp Zoom AAAAAA
Font KEY
BACKGROUND
With the Font key (☐), you can change the font of your text to onr of the meny the are available.
The following font settings are available on the P-touch 530:
Font 1 (Helsinki), Font 2 (Brussels), Font 3 (Calgary), Font 4 (US), Font 5 (Belgium)
The following font settings are available on the P-touch 550:
Font 1 (Helsinki), Font 2 (Brussels), Font 3 (Calgary), Font 4 (US), Font 5 (San Diego),
Font 6 (Florida), Font 7 (Istanbul), Font 8 (Bermuda)
The selected font setting for the cursor's current position is shown by the Font indicator at the top of the display. The default font setting is Font 1 (Helsinki). Refer to SAMPLES at the end of this section for samples of the available settings.
OPERATION
TO SELECT A FONT BEFORE ENTERING TEXT:
① Press □, ▶, ▲ or ▼ to move the cursor to the position where you want to begin using a different font setting.
② Press □ until the sample character (A) is displayed with the font setting that you want to use. The currently selected font is shown by the Font indicator at the top of the LCD display.
③ Enter the new text.
TO CHANGE THE FONT OF A SELECTED AREA:
① Select the text by holding down Code and pressing Area to select all of the text, or by pressing Area and using ▲, ▶, ▲ or ▼ to select only a part of it.
② Press ☐ until the text is displayed with the font setting that you want to use. The currently selected font is shown by the Font indicator at the top of the LCD display.
③ Press New Block . The chosen text is displayed with the selected font.
SAMPLES
| P-touch 530 | P-touch 550 | Font Name | Font Samples |
| Font 1 | Font 1 | Helsinki | ABCDE |
| Font 2 | Font 2 | Brussels | ABCDE |
| Font 3 | Font 3 | Calgary | ABCDE |
| Font 4 | Font 4 | US | ABCDE |
| Font 5 | Not available | Belgium | ABCDE |
| Not available | Font 5 | San Diego | ABCDE |
| Not available | Font 6 | Florida | ABCDE |
| Not available | Font 7 | Istanbul | ABCDE |
| Not available | Font 8 | Bermuda | ABCDE |
Size AND Width KEYS
BACKGROUND
The character size can be adjusted using both the Size (☐) and Width (☐) keys. With the AUTO size setting, the machine compares your text with the width of the installed tape and automatically adjusts the characters to the largest possible size. However, seven other point sizes are available and each can be printed in narrow, medium or wide characters.
The default size setting is AUTO and the default width setting is medium. When the AUTO size setting is selected, "AUTO" appears in the top left-hand corner of the display. Refer to SAMPLE at the end of this section for samples of the available settings.

When the SPLIT parameter of the Special Print function is set ON, the text will automatically be printed in a larger character size. Refer to Special Print FUNCTION on pages 128 to 129 for more details.
Since the character size that can be used depends on the width of the tape, the following table shows the character sizes that can be used with each tape width.
| Tape width Sizes (in point) |
| 1 1/2” (36 mm) 6, 9, 12, 18, 24, 36, 48 |
| 1” (24 mm) 6, 9, 12, 18, 24, 36, 48 |
| 3/4” (18 mm) 6, 9, 12, 18, 24, 36 |
| 1/2” (12 mm) 6, 9, 12, 18, 24 |
| 3/8” (9 mm) 6, 9, 12, 18 |
| 1/4” (6 mm) 6, 9, 12 |
OPERATION
TO SELECT A SIZE & WIDTH BEFORE ENTERING TEXT:
① Press ▲, ▶, ▲ or ▼ to move the cursor to the position where you want to begin using a different character size or width setting.
2 Press □ until the sample character (A) is displayed with the character size setting that you want to use, and press □ until the sample character is displayed with the desired width setting.
③ Enter the new text.
TO CHANGE THE SIZE & WIDTH OF A SELECTED AREA:
① Select the text by holding down Code and pressing Area to select all of the text, or by pressing Area and using ▲, ▶, ▲ Home or ▼ to select only a part of it.
② Press □ until the text is displayed with the character size setting that you want to use, and press □ until the text is displayed with the desired width setting.
③ Press New Block. The chosen text is displayed with the selected font.
SAMPLES
| WIDTHSIZE | Wide | Medium | Narrow |
| 48 pt | ABC | ABC | ABC |
| 36 pt | ABC | ABC | ABC |
| 24 pt | ABC | ABC | ABC |
| 18 pt | ABC | ABC | ABC |
| 12 pt | ABC | ABC | ABC |
| 9 pt | ABC | ABC | ABC |
| 6 pt | ABC | ABC | ABC |
Style KEY
BACKGROUND
You can choose to apply one of 14 different styles to create a more decorative label. The following style setting are available:
A (normal)
A (italic)
A (bold)
A & A (italic & bold)
A (outline)
A & A (italic & outline)
A (solid)
A & A (italic & solid)
A (shadow)
A & A (italic & shadow)
A (outline + shadow)
A & A (italic & outline + shadow)
A (striped)
A & A (italic & striped)
The selected style setting for the cursor's current position is shown by the style indicators at the bottom of the display. The default setting is A (nermal). Refer to SAMPLES at the end of this section for samples of the available setting.
Characters printed using the smaller size settings may be difficult to read if certain style settings (e.g., italic & shadow) are selected.
OPERATION
TO SELECT A STYLE BEFORE ENTERING TEXT:
① Press ▲, ▶, ▲ Home or ▼ to move the cursor to the position where you want to begin using a different style setting.
2 Press □ until the sample character (A) is displayed with the style setting that you want to use. The currently selected style is shown by the style indicators at the bottom of the LCD display.
③ Enter the new text.
TO CHANGE THE STYLE OF A SELECTED AREA:
① Select the text by holding down Code and pressing Area All to select all of the text, or by pressing Area All and eusing ▶, ▶, ▶ Home or ▶ End to select only a part it.
② Press □ until the text is displayed with the style setting that you want to use. The currently selected style is shown by the style indicators at the bottom of the LCD display.
③ Press NewBlock . The chosen text is displayed with the selected style.
SAMPLES
| A (normal) | A (bold) | A (outline) | A (solid) | A (shadow) | A (outline+ shadow) | A (striped) | |
| Helsinki | ABC | ABC | ABC | ABC | ABC | ABC | ABC |
| Brussels | ABC | ABC | ABC | ABC | ABC | ABC | ABC |
| Calgary | ABC | ABC | ABC | ABC | ABC | ABC | ABC |
| US | ABC | ABC | ABC | ABC | ABC | ABC | ABC |
| Belgium^1 | ABC | ABC | ABC | ABC | ABC | ABC | ABC |
| San Diego^2 | ABC | ABC | ABC | ABC | ABC | ABC | ABC |
| Florida^2 | ABC | ABC | ABC | ABC | ABC | ABC | ABC |
| Istanbul^2 | ABC | ABC | ABC | ABC | ABC | ABC | ABC |
| Bermuda^2 | ABC | ABC | ABC | ABC | ABC | ABC | ABC |
^1 This font is not available on the P-touch 530.
^2 These fonts are not available on the P-touch 550.
| A (italic) | A & A (italic & bold) | A & A (italic & outline) | A & A (italic & solid) | A & A (italic & shadow) | A & A (italic & outline+ shadow) | A & A (italic & striped) | |
| Helsinki | ABC | ABC | ABC | ABC | ABC | ABC | ABC |
| Brussels | ABC | ABC | ABC | ABC | ABC | ABC | ABC |
| Calgary | ABC | ABC | ABC | ABC | ABC | ABC | ABC |
| US | ABC | ABC | ABC | ABC | ABC | ABC | ABC |
| Belgium^1 | ABC | ABC | ABC | ABC | ABC | ABC | ABC |
| San Diego^2 | ABC | ABC | ABC | ABC | ABC | ABC | ABC |
| Florida^2 | ABC | ABC | ABC | ABC | ABC | ABC | ABC |
| Istanbul^2 | ABC | ABC | ABC | ABC | ABC | ABC | ABC |
| Bermuda^2 | ABC | ABC | ABC | ABC | ABC | ABC | ABC |
^1 This font is not available on the P-touch 530.
^2 These fonts are not available on the P-touch 550.
Undl/Frm (UNDERLINE/FRAME) KEY
BACKGROUND
With the Undl/Frm key (☐), you can choose from a variety of highlights for emphasizing part of your text. The default setting is plain text without any of the following underline/frame settings.
Box

Dots
Lattice

Rounded box

Bricks

Diamond grid

Underline
Square grid
Stripes
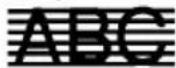
Strike-out

Checks
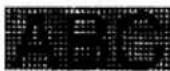
Cubes
OPERATION
TO SELECT AN UNDERLINE/FRAME SETTING BEFORE ENTERING TEXT:
① Press ▼, ▶, ▲ or ▼ to move the cursor to the position where you want to begin using a different underline/frame setting.
② Press □ until the sample character (A) is displayed with the underline/frame setting that you want to use.
If an underline, frame or shading has already been applied to the text, only the settings that can be combined with them are shown.
③ Enter the new text.
TO CHANGE THE UNDERLINE/FRAME SETTING FOR A SELECTED AREA:
① Select the text by holding down Code and pressing Area to select all of the text, or by pressing Area and using ▲, ▶, ▲ Home or ▼ to select only a part of it.
② Press □ until the text is displayed with the underline/frame setting that you want to use. If an underline, frame or shading has already been applied to the selected text, only the settings that can combined with them are shown.
3 Press NewBlock . The chosen text is displayed with the selected underline/frame.
Color KEY
BACKGROUND
With the Color key (☐), you can select different parts of the text to be printed in different ink colors for creating colorful labels.
The selected color setting for the cursor's current position is shown by the Color indicator at the top of the display. The default setting is COLOR1. For more details on color printing, refer to COLOR PRINT FUNCTION on page 123 to 124.
OPERATION
TO SELECT A COLOR SETTING BEFORE ENTERING TEXT:
① Press ◀, ▶, ▲ or ▼ to move the cursor to the position where you want begin using a different color setting.
2 Press □ until the color setting that you want to use to displayed. The currently selected color setting is shown by the Color indicator at the top of the LCD display.
③ Enter the new text.
TO CHANGE THE COLOR SETTING FOR A SELECTED AREA:
① Select the text by holding down Code and pressing Area to select all of the text, or by pree Area and using ▲, ▶, ▲ Home or ▼ to select only a part of it.
② Press □ until the color setting that you want to use is displayed. The currently selected color setting is shown by the Color indicator at the top of the LCD display.
③ Press New Block. The chosen text is given the selected color setting.
Format KEY
BACKGROUND
The Format key (Format) is used to change label formats, which determine the appearance and arrangement of the entire text. Press Format to change these formats at any time --- before, during or after you enter your text.
When the text is displayed in the WYSIWYG mode, you can see exactly how the label will appear before it is printed. (For more details on the label functions, refer to pages 112 through 121.)
OPERATION
TO CHANGE THE LABEL FORMAT:
① Press Format.
To quit the operation without changing any label formats, press Format (or Cancel) at any time.
② Press ▲ or ▶ until the function setting that you want to change is highlighted.
3 Press ▲ Home or ▼ End until the desired setting is displayed.
To select the default setting, press Space.
To change all label format functions to their default settings, hold down Code and press Space.
④ Repeat steps ② and ③ until all functions are set as you wish.
⑤ Press New Book. The text is displayed with the selected format.
To center the text and put a box around it:
① Press Format.
② Press ▲ or ▼ until the box setting (□) is selected for the GLOBAL FRAME function.
③ Press □ or □ setting for the H.AL1 (horizontal alignment) function is highlighted.
4 Press ▲ Home or ▼ End until the CENTER setting is selected.
⑤ Press New Block
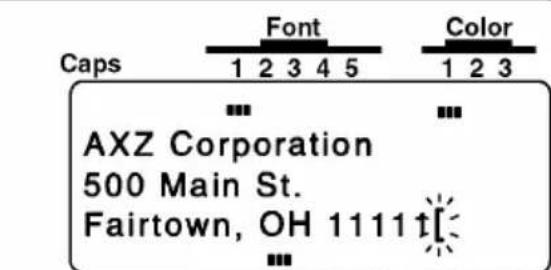
AutoFormats Stamp Zoom AAAAAA
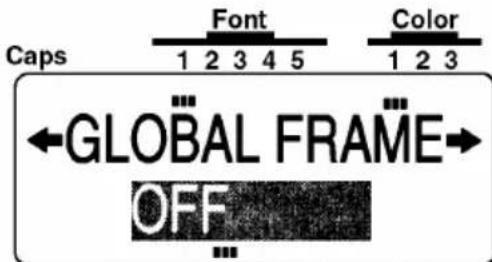
AutoFormats Stamp Zoom AAAAAA
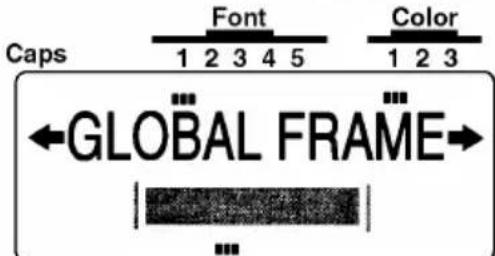
AutoFormats Stamp Zoom A A A A A A A
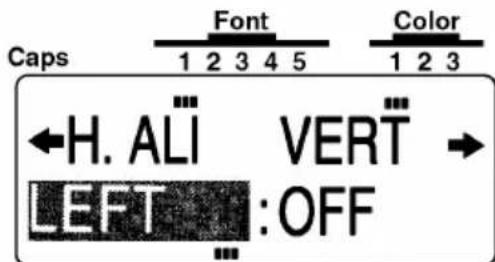
AutoFormats Stamp Zoom AAAAAA
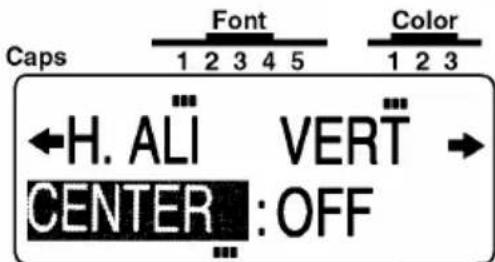
AutoFormats Stamp Zoom AAAAAA
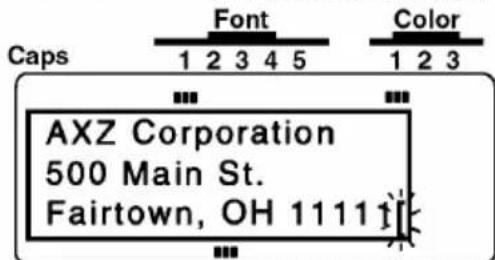
AutoFormats Stamp Zoom AAAAAA
GROBAL FRAME FUNCTION
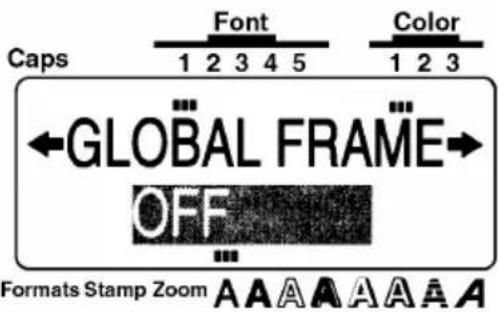
BACKGROUND
Unique labels can be created by emphasizing your entire text with one of the many frames and shading available. The default setting is OFF (no ftame or shading); however, the following settings are also available.
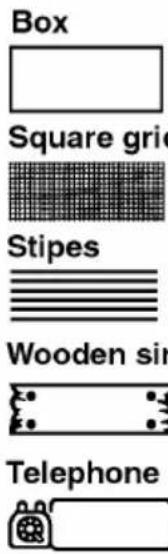
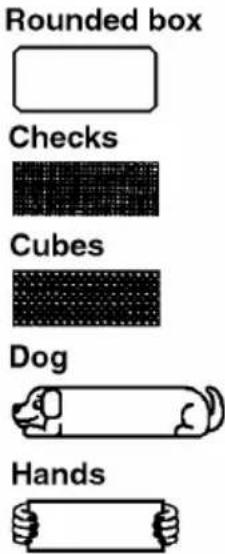
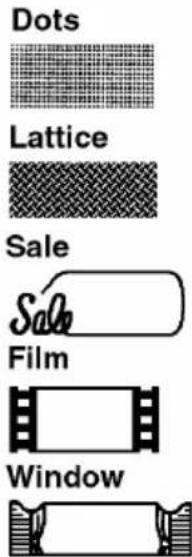
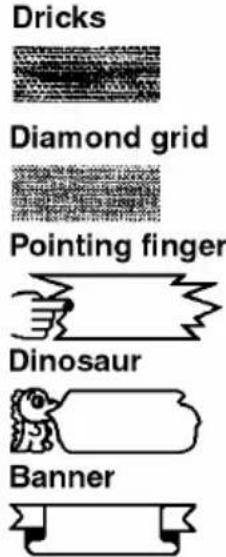
The GLOBAL FRAME function can only be applied to the entire text; it cannot be applied to just part of the text. However, the box, rounded box and shading patterns can be applied to just part of the text as explained in Undl/Frm (UNDERLINE/FRAME) KEY on pages 107 and 108.
OPERATION
TO CHANGE THE FRAME OR SHADING FOR THE ENTIRE TEXT:
① Press Format.
② Press ▶ or ▶ until the setting for the GROBAL FRAME function is highlighted.
③ Press ▲ Home or ▼ End until the frame that you want to use is displayed.
4 Press New Block. The text is displayed with the selected frame.
FRAME COLOR FUNCTION
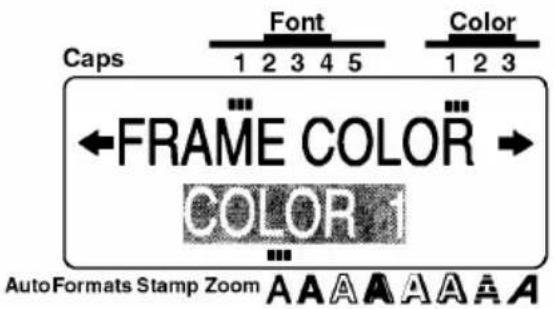
BACKGROUND
You can choose which of the three ink colors will be used to print any underline, frame, strike-out or shading in your text during color printing. For more details on color printing, refer to COLOR PRINT FUNCTION on pages 123 to 124.
The default setting is COLOR 1.
Before printing with the COLOR PRINT function, be sure the FRAME COLOR function has been set.
The color selected with the FRAME COLOR function will be applied all underlines, frames, strike-outs or shadings in the text; it cannot be applied to just part of the text. If you have not added an underline, frame, strike-out or shading to your text, the setting selected for this function is ignored during color printing.
OPERATION
TO CHANGE THE UNDERLINE, FRAME, STRIKE-OUT AND SHADING COLOR:
① Press Format.
② Press ▶ or ▶ until the setting for the FRAME COLOR function is highlighted.
③ Press ▲ Home or ▼ End until the color setting that you want to use is displayed.
4 Press New Black. All underlines, frames, strike-outs and shading are given the selected color setting.
SAMPLES
The FRAME COLOR function can be used to create labels like those shown below.
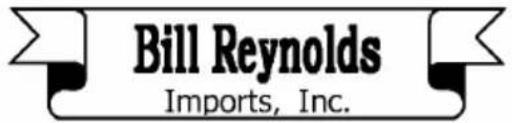
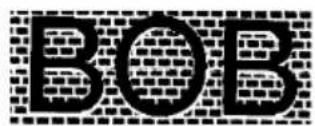
STYLE COLOR FUNCTION
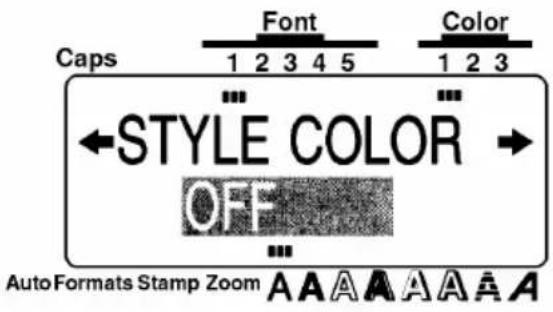
BACKGROUND
When using the COLOR PRINT function to print text formatted in any style other then A (normal) or A (bold), A (italic), or A & A (italic & bold), you can choose a fill-in color for the parts of the characters that are normally left blank as shown under SAMPLES. For more details on color printing, refer to COLOR PRINT FUNCTION on pages 123 to 124.
The default setting is OFF.
Before printing with the COLOR PRINT function, be sure the STYLE COLOR function has been set.
The STYLE COLOR function can only be aoolied to the entire text it; it cannot be applied to just part of the text.
If only the A (normal), A (bold), A (italic) or A & A (italic & bold) style settings are used in the text, the setting selected for this function is ignored during color printing.
If this function and the text are set to the same color, this function's setting is ignored during color printing.
OPERATION
TO CHANGE THE CHARACTER FILL - IN COLOR:
① Press Format.
② Press ▲ or ▶ until the setting for the STYLE COLOR function is highlighted.
③ Press ▲ or ▼ until the setting that you want to use is displayed.
4 Press New Block. The parts of the characters that are normally left blank are given the selected color setting.
The STYLE COLOR function can be used with styles other than normal, bold, italic, and italic & bold. (In the samples below, the STYLE COLOR function was set to fill in the characters with red.)
A (outline)
ABC
A (outline
ABC
A (solid)
ABC
A (striped)
ABC
A (shadow)
ABC
LENGTH FUNCTION
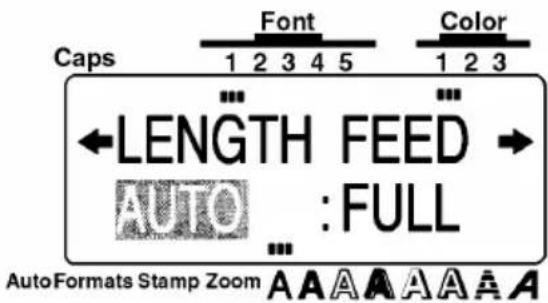
BACKGROUND
The length of the label can be set in two different ways. With the AUTO length setting, the machine compares your entered text with the size of the installed tape and automatically adjust the label length to fit the text. However, if you want to select the label length, it can be set between 1.5" (3.8 cm) and 11.3" (28.7 cm).
The default setting is AUTO.
The LENGTH function can only be applied to the entire text; it cannot be applied to just part of the text. If the text will not fit within the length that is set, the error message "TOO LONG!" will appear.
OPERATION
TO CHANGE THE LABEL LENGTH:
① Press Format.
② Press ▲ or ▶ until the setting for the LENGTH function is highlighted.
③ Press ▲ or ▼ until thet you want to use is displayed. Pressing either key once will change the length by 0.1" (0.1 cm if centimeters are displayed). If a key is held down, the length will continue changing in 1" (1.0 cm) step until the key is released.
4 Press New Block. The label is given the selected length setting.
FEED (TAPE FEED) FUNCTION
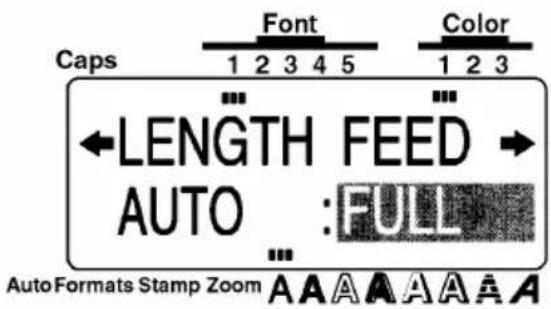
BACKGROUND
The FEED function allows you to select the size of the margins on the left and right side of your test.
The default setting is FULL; however, three other settings are also available.
FULL (1" (25 mm))
NONE (1/6" (4 mm))
NERROW (1/3" (8 mm))
MEDIUM (1/2" (12 mm))

The FEED function can only be applied to the entire text; it cannot be applied to just part of the text.
Since reducing the tape feed may decrease bar code readability, the FULL tape feed setting is recommended when the text contains bar codes
If an instant-lettering (rub-on transfer) or an iron-on transfer tape cassette is installed, the text will be printed with the FULL setting (1" (25 mm)-margins), even if a different setting was selected.
OPERATION
TO CHANGE THE TAPE FEED WIDTH:
① Press Format.
② Press ▲ or ▶ until the setting for the FEED function is highlighted.
③ Press ▲ Home or ▼ End until the tape feed width that you want to use is displayed.
④ Press New Block
H.ALI (HORIZONTAL ALIGNMENT) FUNCTION
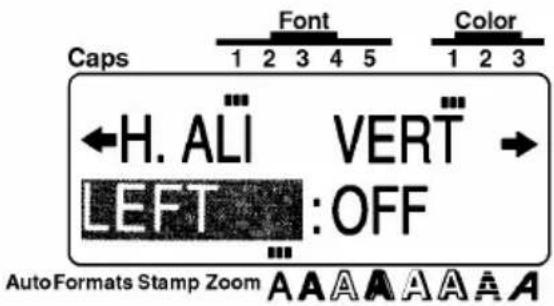
BACKGROUND
You can choose to align the text in one of four ways.
The default setting is LEFT; however, three other settings are also available.
LEFT
CENTER
RIGHT
JUSTIFY

The H.ALI (horizontal alignment) function can only be applied to the entire text; it cannot be applied to just part of the text.
If the label length for text containing multiple blocks has been set with the LENGTH function and its horizontal alignment has been set to JUSTIFY, the spaces between the blocks are adjusted so that the text spreads out evenly along the label.
OPERATION
TO CHANGE THE HORIZONTAL ALIGNMENT OF THE TEXT:
① Press Format
② Press ▲ or ▶ until the setting for the H.AL1 function is highlighted.
③ Press ▲ Home or ▼ End until the alignment setting that you want to use is displayed.
4 Press New Block. The text is displayed with the selected alignment.
SAMPLES
LEFT
ABC
DEFGHIJ
KLMNOP
Q
CENTER
ABC
DEFGHIJ
KLMNOP
Q
RIGHT
ABC
DEFGHIJ
KLMNOP
Q
JUSTIFY
A B C
DEFGHIJ
KLMNOP
Q
VERT (VERTICAL PRINTING) FUNCTION
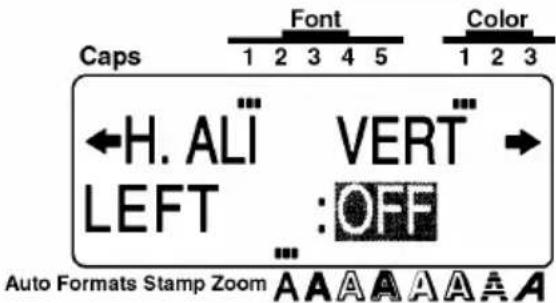
BACKGROUND
The text that you enter can be printed vertically along the length of your label. The default setting is OFF.
The VERT (vertical printing) function can only be applied to the entire text; it cannot be applied to just part of the text.
OPERATION
TO CHANGE THE VERTICAL PRINTING SETTING:
① Press Format.
② Press ▲ or ▶ until the setting for the VERT function is highlighted.
③ Press ▲ Home or ▼ End until the vertical printing setting that you want to use is displayed.
4 Press New Block. The text is displayed according to the selected vertical printing setting.
SAMPLES
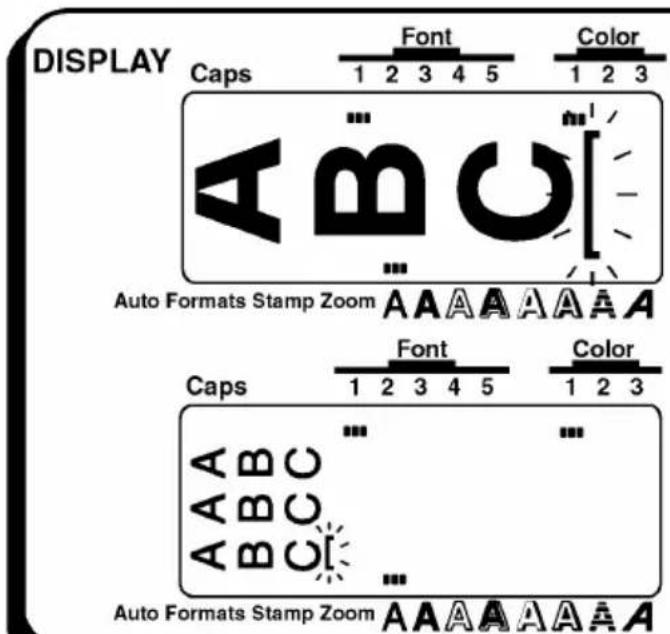
LABEL
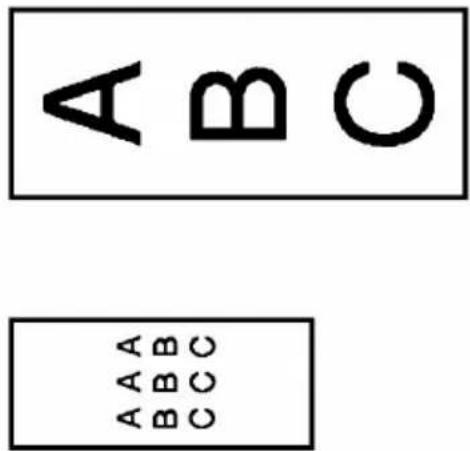
MIRROR (MIRROR PRINTING) FUNCTION
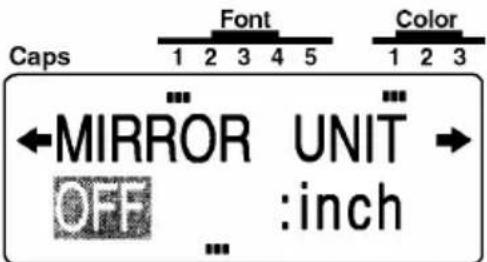
Auto Formats Stamp Zoom A A A A A A A
BACKGROUND
With this function, you can print your text in reverse so that it can be used from the adhesive side of the tape. If there labels are printed on clear tape and affixed to glass or any other clear material, the text can be read correctly from the opposite side.
The default setting is OFF.
When the MIRROR function is set to ON, print the text on clear tape.
The MIRROR (mirror printing) function can only be applied to the entire text; it cannot be applied to just part of the text.
OPERATION
TO CHANGE THE MIRROR PRINTING SETTING:
① Press Format.
② Press ▶ or ▶ until the setting for the MIRROR function is highlighted.
③ Press ▲ Home or ▼ End until the mirror printing setting that you want to use is displayed.
4 Press New Block
SAMPLES
DISPLAY
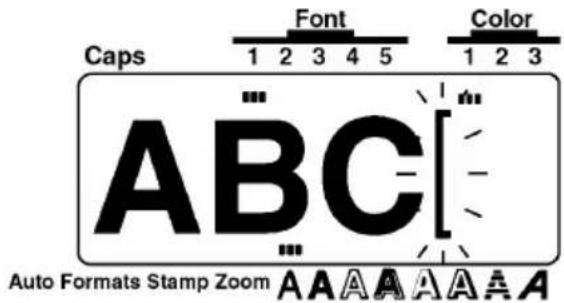
LABEL
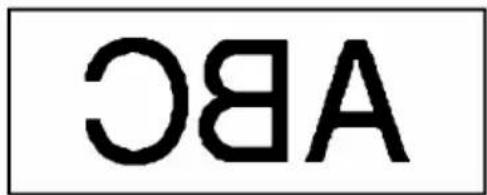
UNIT FUNCTION
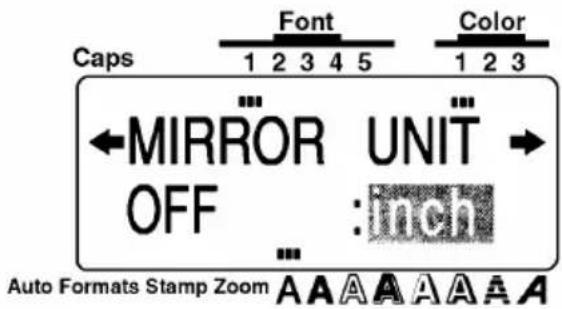
BACKGROUND
The measurements on the display are shown in either inches (inch) or centimeters (cm). With this function, you can choose which units are used when displaying measurements.
The default units setting is inch.
This setting can only be applied to all of the measurements; it cannot be applied to just part of them.
OPERATION
TO CHANGE THE UNITS OF THE MEASUREMENTS:
① Press Format.
② Press ▶ or ▶ until the setting for the UNIT function is highlighted.
3 Press ▲ Home or ▼ End until the unit setting that you want to use is displayed.
4 Press New Book. All measurements will be displayed in the selected units.
Print KEY AND Feed & Tape Cut KEY
BACKGROUND
After you have entered you text and chosen all of the format settings that you want to use, you can print the label. After the label is printed, it will automatically be cut if the A.CUT parameter of the Special Print function is set ON.
The Feed & × key (Feed & × ) is used to feed out 1" (25 mm) of tape and automatically cut it.
Press this key to feed out any leftover printtd tape after pressing Cancel to quit printing.
OPERATION
- To print a label, press Print. The massage "WORKING" appears in the display just before printing gegin, then "COPIES 1/1" appears if just one label is being printed.
If the COPIES parameter of the Special Print function is set to any number other than 1 when printing more then one copy of the label, the number of each copy is displayed while each label is being printed.
To quit printing, press Cancel.
- To feed out 1" (25 mm) of tape and cut it, press Feed &X.
COLOR PRINT FUNCTION
BACKGROUND
With the COLOR PRINT function, you can create colorful labels which are printed with up to three ink colors. By giving certain parts of your text a different color, you can make them more noticeable.
OPERATION
TO PRINT A LABEL WITH THE COLOR PRINT FUNCTION:
① Decide which ink color you want to use as COLOR1, COLOR2 and COLOR3.
Before printing with the COLOR PRINT function, use □ to select the color setting for each part of your label and press Format to set the FRAME COLOR and the STYLE COLOR functions. (For more details, refer to pages 113 through 115.)
② Insert the ink cassette for the first color (the color that will be used to print the parts of the text set to COLOR1) into a color printing tape cassette, then insert them into the tape compartment.
Make sure that the entire back of the cassette touches the bottom of the tape compartment.
③ Press Feed & to prepare for color printing.
4 Press Print. The setting for the COLOR PRINT function appears.
This setting appears only if at least two color settings have been selected and if color printing ink and tape cassettes have been installed.
The parameter settings selected for the Special Print function are ignored during color printing.
5 Press Home or End until the ON setting appears, then press New Block. The message "INSERT COLOR1" is displayed.
Before printing, be sure that there is enough tape in the tape cassette, otherwise the label will not be printed correctly.
To quit the COLOR PRINT function at any time, press Cancel.
If any color setting (COLOR1, COLOR2 or COLOR3) is not set, that color setting's massages are skipped and the message for the next color is displayed.
⑥ Open the tape compartment cover and check that the first ink cassette is installed, then close the cover and press. The message "WORKING" appears in the display just before printing begins, then "COPIES COLOR1" appears while the text set to COLOR1 is printed. When printing is finished, the message "REMOVE INK RIBBON" is displayed.
⑦ Open the tape compartment cover and remove the ink ribbon, then press The message "REWIND TAPE & INSERT COLOR2" is displayed.
8 Rewind the tape roll using your finger to turn it anti-clockwise until the tape end aligns with the tape cutter, insert the second ink cassette, then close the cover and press. The message "WORKING", and then "COPIES COLOR2" appears while the text set to "COLOR2 is printed. When printing is finished, the message "REMOVE INK RI-BBON" is displayed.
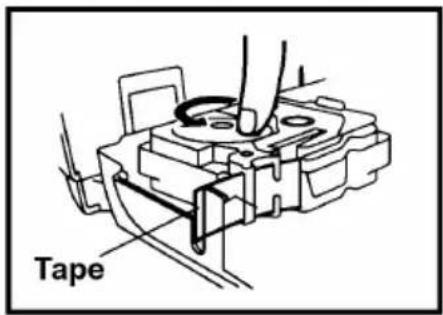
⑨ Open the tape compartment cover and remove the ink ribbon, then press The message "REWIND TAPE & INSERT COLOR3" is displayed.
10 Rewind the tape roll using your finger to turn it anti-clockwise until the tape end aligns with the tape cutter, insert the third ink cassette, then close the cover and press. The message "WORKING" and then "COPIES COLOR3" appears while the text set to COLOR3 is printed.
11 After the label is automatically cut off, use scissors to cut along the two dots printed on the label so that the margins will be equal.
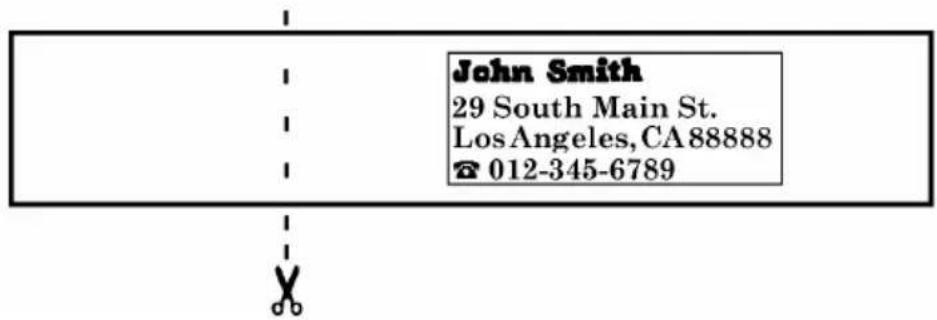
Stamp FUNCTION
BACKGROUND
The Stamp function allows you to quickly and easily create your own customized stamp. Use this function to automatically center the text and adjust the label length and margins to perfectly fit the pre-inked stamp film holders. Since the stamp holder is reusable, make new stamps by just replacing the stamp film in the holder.
Keep the stamp film holder out of the reach of children.
Avoid getting ink your eyes or mouth. If ink comes in contact with your eyes or gets in your mouth, immediately wash your eyes or mouth with fresh water for several minutes and consult a doctor.
Keep ink off skin, clothes and important pages. Immediately use soap to wash skin that has come in contact with ink. Even washing may not remove all ink.
OPERATION
TO MAKE A STAMP:
① Insert a stamp film cassette with the desired size into the tape compartment.
2 Hold down Code and press Auto Format. The Stamp indicator lights up and the STAMP FOR-MAT setting for the installed tape cassette is displayed. If a 3/4" (18-mm)-wide stamp film cassette is installed, STAMP M appears below the STAMP FORMAT setting; if a 1" (24-mm)-wide stamp film cassette is installed, STAMP L appears below the STAMP FORMAT setting.
If text has already been entered in the display, the message "OK TO CLEAR TEXT BUFFER?" appears. Press New Black to delete the text.
③ Type in and format your text.
4 Press Special Print Print
5 Press ▲ Home or ▼ End until the SELECT TAPE setting is set to FOR STAMP.
6 Press New Stock. The message "WORKING" appears in the display just before printing begins, then "COPY STAMP TAPE" is displayed while your text is cut from the stamp film. Afterwards, you can choose either the EDIT STAMP setting to edit the stamp text, or the FINISH STAMP setting to return the display to WYSIWYG mode (the Stamp indicator goes off.)
When printing large characters or at low temperatures, the stamp quality can be improved if the AC adaptor is connected.
⑦ After the stamp film is cut off, remove the backing paper.
Affixing the stamp film
8 Remove the frame from around the stamp holder ink pad, one end at a time, then remove the protective seal covering the ink pad.
If the stamp holder already contains a stamp film, hold the stamp over a piece of scrap paper and remove the stamp frame by pulling it off, one end at a time. Then, slowly peel off the stamp film. Be careful not no splatter the ink.
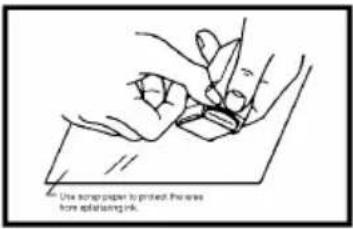
⑨ With the glossy side of the stamp film facing up, align one end of the stamp film with the slit in the side of the stamp holder.
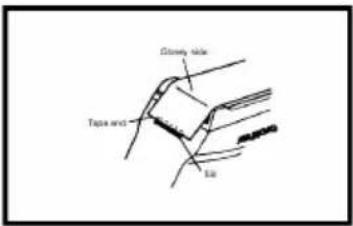
10 Hold the end of the stamp film in place with your thumb, then pass the stamp film through the guides while pulling it tight.
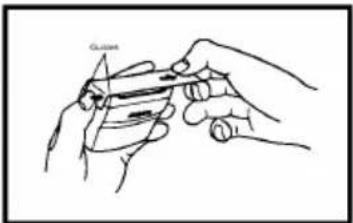
11 Fold the other end of the stamp film over the other side of the stamp holder and hold it in place with your finger.
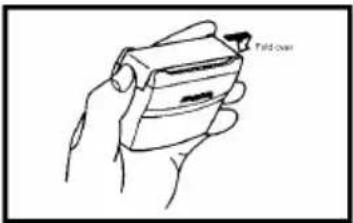
12 Fit the frame over the stamp film, then push the frame into place.
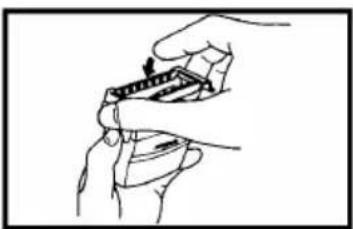
natural_image
Line drawing of a hand holding a small object, possibly a tool or device, with no visible text or symbols.13 Insert the stamp holder straight into the cap.
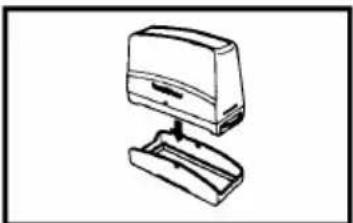
natural_image
Line drawing of a desktop computer with monitor and tower (no text or symbols)Be sure that the stamp is correctly covered by the cap in order to prevent ink spills.
When the stamp is not being used, cover it firmly with the cap and always store it standing up with the stamp facing downword. Do not leave the stamp laying on its side or leaning.
Store the stamp film holder and stamp film cassettes in a location where they are not exposed to high temperatures, high humidity or direct sunlight.
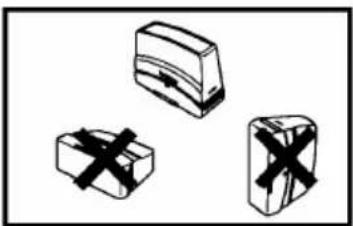
natural_image
Three 3D rectangular blocks with black X marks, arranged horizontally (no text or symbols)Printing an identification label for the stamp holder
14 Press ▲ Home or ▼ End until the EDIT STAMP setting, which was displayed after the stamp was made, is selected.
15 Press New Block
16 Insert a TZ tape cassette into the tape compartment.
Use 1/2" (12-mm)-wide tape to make an identification label for a stamp when the STAMP FORMAT is set to STAMP M and use 3/4" (18-mm)-wide tape to make a label for a stamp when the STAMP FORMAT is set to STAMP L.
17 Press Special Print Print
18 Press ▲ Home or ▼ End until the SELECT TAPE setting is set to FOR LABEL.
19 Press New Book. The message "WORKING" appears in the display just before printing begins, then "COPY LABEL TAPE" is displayed while your identification label is printed.
20 After the label is cut off, affix it to the holder so that its bottom edge is on the same side of the stamp holder as the raised logo.
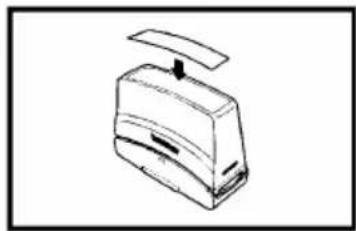
natural_image
Simple line drawing of a mechanical device with a handle and base (no text or symbols)Stamping
Since the length of time and force that the stamp holder should be held down depends on the amount of ink in the holder, first practice stamping on a piece of scrap paper. To stamp, place the stamp over the desired position and press straight down on the stamp holder to force ink through the stamp film.
You can expect to use a stamp film holder approximately 300 to 500 times, although some ink is lost when the stamp film is changed. The actual life of the stamp film holder may be slightly shorter depending on the size and thinkness of the characters, whether a shading pattern is used, etc.
After stamping, wait until the ink has completely dried before touching it in order to prevent smearing.
If the stamp holder is not pressed straight down, the stamp may be blurred.
Do not press the stamp holder down too forcefully.
Do not stamp on wet, sticky, rough or uneven surfaces. Only stamp on paper. The ink will not dry if plastic overhead projector transparencies and other ink-impermeable objects are stamped.
If the stamp made with a new stamp film is faint or incomplete, even after forcefully pressing down the stamp holder for up to 30 seconds, replace the stamp holder with a new one. Do not try to refill the stamp holder.
Special Print FUNCTION
BACKGROUND
The Special Print function allows you to set the number of copies of the label that will be printed, set whether the machine will automatically cut off each label, and turn the split printing function on and off.
Parameters Settings
COPIES (number of label copies 1 to 99 that will be printed)
A.CUT (automatically cuts off each ON, OFF label after printing)
SPLIT (splits the label lengthwise ON, OFF and prints it as two labels)
When the SPLIT parameter is set to ON, the COPIES parameter is ignored and only one copy of the label will be printed. The settings selected for these three parameters are ignored during color printing.
OPERATION
TO CHANGE A PARAMETER SETTING OF THE SPECIAL PRINT FUNCTION:
① Hold down Code and press Special Print
② Press ▶ or ▶ until the parameter settings that you want to change is highlighted.
3 Press ▲ Home or ▼ End until the desired setting is displayed.
When setting the COPIES parameter, pressing either key once will change the setting by 1. However, if either of these keys are hold down, the setting will continue changing in steps of 5 until the key is released.
To select the default setting, press Space.
To change all parameters to their default settings, hold down Code and press Space.
④ Repeat step ② and ③ until all parameters are set as you wish.
5 Press New Block. The labels are printed with the selected parameter settings.
To set the parameters without printing the label, press Cancel.
Display
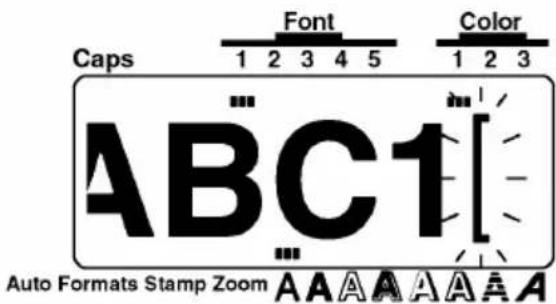
Default Print Settings
COPIES: 1
A.CUT: ON
SPLIT: OFF
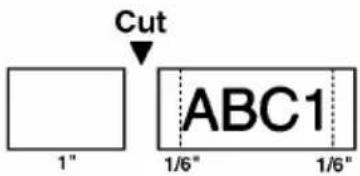
Custom Settings
Example 1
COPIES: 2
A.CUT: OFF
SPLIT: OFF
Example1
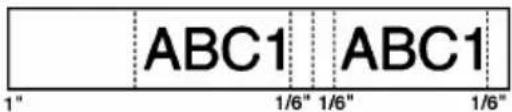
Example2
COPIES: 1
A.CUT: ON
SPLIT: ON
Example2

If the SPLIT parameter is set to ON, labels like those shown above are printed. Cut off the blank space on the bottom of the first label, then put the top and bottom parts together so that there is no bleak in the characters.
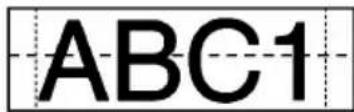
If the labels are printed on transparent tape, they can be put together without cutting the blank space off.
Seq. Numbering FUNCTION
BACKGROUND
The Seq. Numbering (Sequential numbering) function can be used to print many copies of the same text while increasing certain characters (letters, numbers or a bar code's data) after each label is printed. This type of automatic incrementation is very useful when printing serial number labels, production control labels or other labels requiring ascending codes.
Only one numbering field can be selected from any text.
If you include a non-alphanumeric character such as a symbol in the numbering field, only the letters and numbers in the numbering field will be increased when the labels are printed, or just one label will be printed if the field only contains a non-alphanumeric character.
OPERATION
TO PRINT LABELS WITH CHARACTERS IN THE NUMBERING FIELD:
① Press ▲, ▶, ▲ or ▼ to move the cursor to the left of the first character (number or letter) you want to include in the field.
② Hold down Code and press 2. The message "SELECT FIELD!" is dosplayed, then the first character is highlighted.
To quit the Seq. Numbering function at any time, press Cancel (or hold down Code and press 2).
③ Press ▶ or ▶ until all the characters to be included in the numbering field are highlighted.
The maximum number of characters in a numbering field is five. If you try to choose more then five characters, the error message "WRONG SELECT" will appear.
A numbering fielf must be located entirely within line of text of a single block. If you try to include text from two different lines or two different blocks in the numbering field, the error message "INVAL. CHARSI" will appear.
The numbering field cannot contain characters with different format settings. If you try to choose characters with different format settings, the error message "WRONG SELECT" will appear.
4 Press New Block. The NUMBER setting is displayed.
5 Press ▲ Home or ▼ End until the number of labels that you wish to print is displayed.
6 Press New Block to print the labels. The message "WORKING" appears in the display just before printing begins, then the number of each copy is displayed while it is being printed.
Letters and numbers increase as shown below.
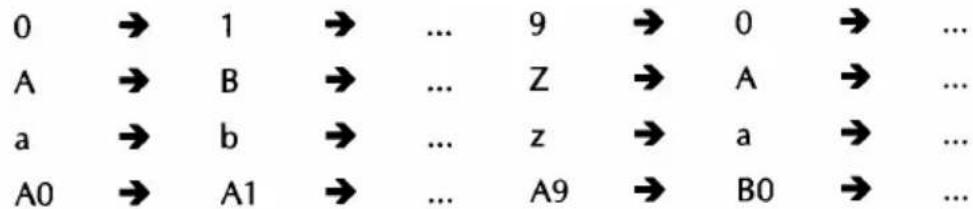
Spaces (shown as underlines (_) in the examples below) can be used to adjust the space between characters or to control the number of digits that are printed:

TO PRINT LABELS WITH A BAR CODE IN THE NUMBERING FIELD:
① Press □, ▶, ▲ or ▼ to move the cursor immediately to the left or in the middle of the bar code mark which you want to select as the numbering field.
② Hold down Code and Numbers 2. The NUMBER setting is displayed.
If the numbering field consists of a bat code, no additional characters can be selected.
③ Press ▲ Home or ▼ End until the number of labels that you wish to print is displayed.
4 Press to print the labels. The message "WORKING" appears in the display just before printing begins, then the number of each copy is displayed while it is being printed.
To print three labels with seat numbers 1Y, 1Z and 2A:
① Position the cursor to the left of "1!.
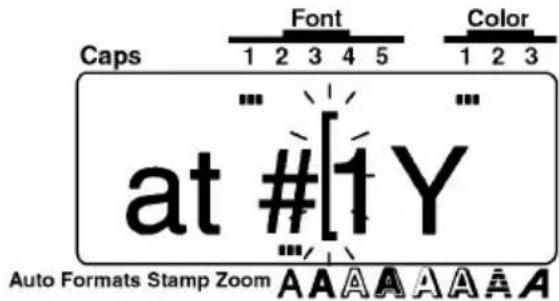
② Hold down Code and press Seq. Numbering 6 2
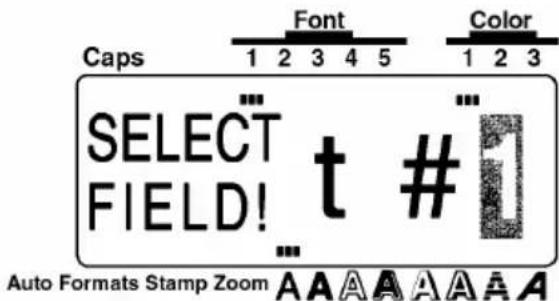
③ Press ▶ until the "Y" is also selected.
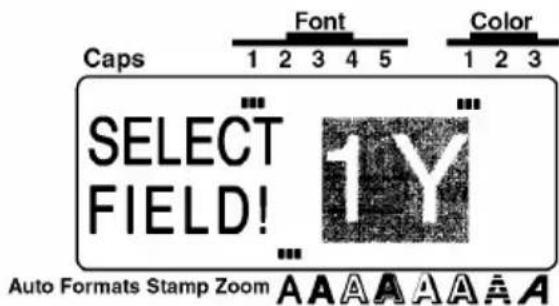
4 Press New block
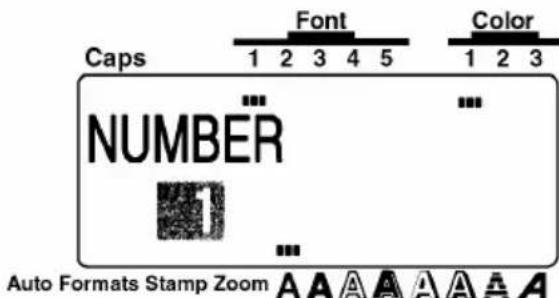
⑤ Press ▲ Home until NUMBER is set to 3.
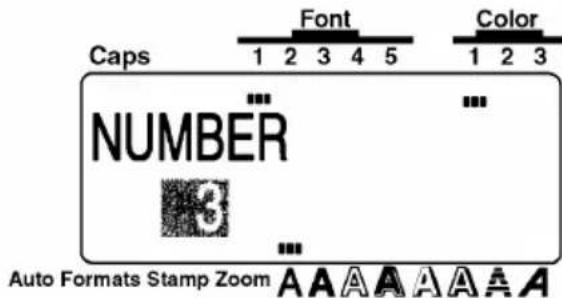
6
Press

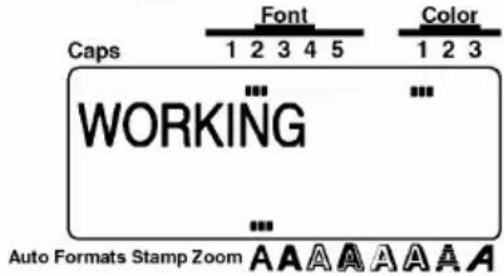
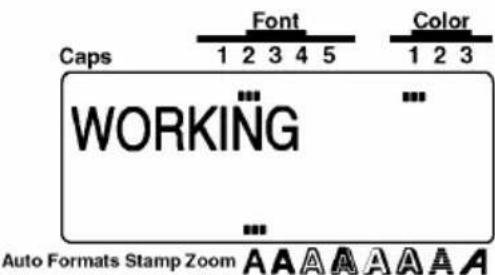
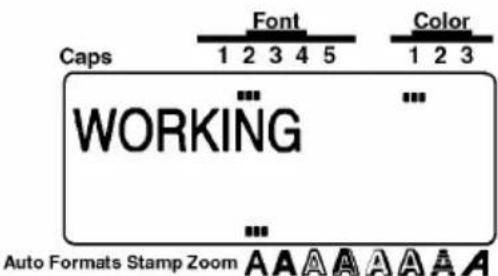
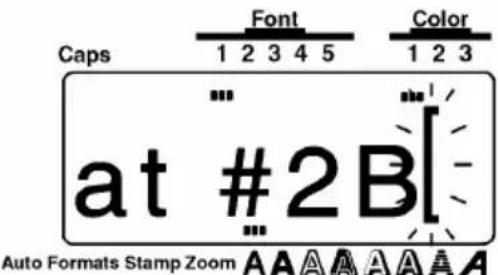
Seat #1Y
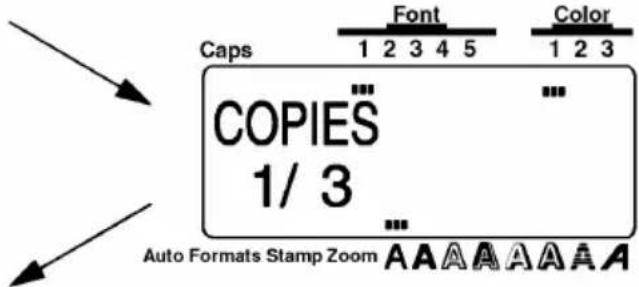
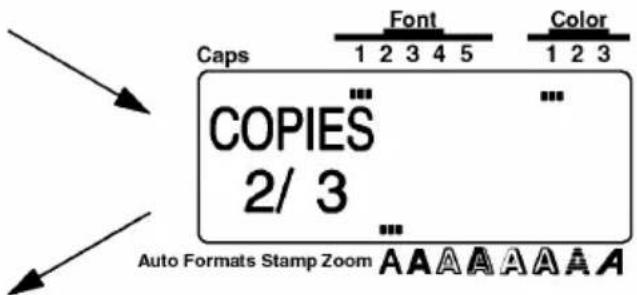
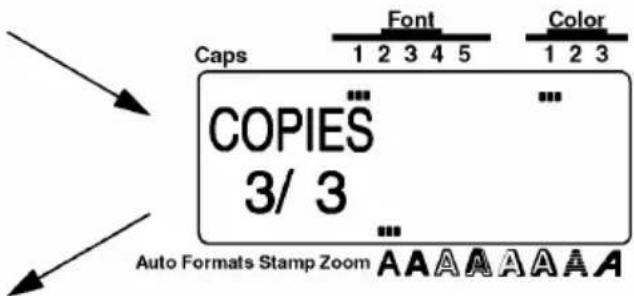
Seat #1Z
Seat #2A
Store, Recall AND M.Del KEYS
BACKGROUND
You can use the memory to store frequently used text. These text files remain in the memory, even after all characters are removed from the display with the Clear function (by holding down Code and pressing as).
When each file is stared, it is given a number so that it can be recalled more easily. Up to 100 files or about 3,000 characters on the P-touch 550 (or 1,000 characters on the P-touch 530) can be stored in the memory.
Since a copy of the stored text file is recalled when the Recall function is used, the text can be edited or printed without changing the originally stored file. When a file is no longer needed or more space is necessary, the M.Del function can be used to delete it.
OPERATION
TO STORE A TEXT FILE IN THE MEMORY:
① Hold down Code and press Store 87.
To quit the Store function at any time without storing the text, press Cancel (or hold down Code and press &7.)
② Press ▲ Home or ▼ End until the file number where you want to store the text is displayed.
The number for files that are still empty are highlighted when they are dispalysed. The number for files that already contain text are not highlighted and their text is shown on the display. To change the file number by ten, hold down Shift while pressing Home or End.
③ Press Next Blocks. The text is stored under the selected file number.
If a file is already stored under the selected file number, the message "OVERWRITE?" appears and you must choose whether or not to overwrite it (i.e., delete it from the memory and store the new one).
Overwriting the stored file with the new one
4 Press New Block. The previously stored file will be deleted and the new one will be stored under the selected number.
To go back and choose another file number without overwriting the text file, press Cancel.
TO RECALL A TEXT FILE FROM THE MEMORY:
① Hold down Code and press 0. The number and the first characters of the must recently stored or recalled text file are displayed.
To quit the Recall function at any time without recalling text, press Cancel (or hold down Code and press).
② Press ▲ Home or ▼ until the file that you want to recall is displayed.
To scan through the selected text file, press ▶ or ▶.
③ Press NewBlock. The text stored under the selected file number is displayed.
If text was entered in the display before the Recall function was started, the dispaly text is deleted when the recalled text is displayed.
TO DELETE A TEXT FILE FROM THE MEMORY:
① Hold down Code and press M9. The number and the first characters of the most recently stored or recalled text file are displayed.
To quit the M.Del function at any time without deleting a text file, press Cancel (or hold down Code and press 0).
② Press ▲ Home or ▼ End until the file that you want to delete is displayed.
To scan through the selected text file, press or
To select more than one file, select each file by dispalying it, then pressing Space to highlight the number. To cancel the selection of the file, press Space until the number is no longer highlighted. (If no files are selected by pressing Space, the file that is displayed is the file that will be deleted).
To select all the files in the memory, hold down Code and press Space. To cancel the selection of all files in the memory, hold down Code and press Star BS.
③ Press New Blocks. Either the message "OK TO CLEAR?" or "CLEAR ALL?" is dispalysed.
4 Press New Block. The selected files are deleted.
To store text under file number 8:
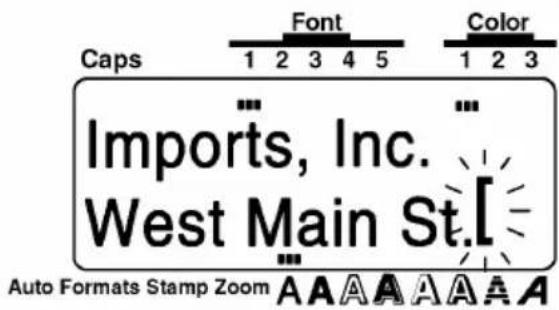
① Hold down Code and press & 7.
![Caps Font Color 1 2 3 4 5 STORE [ ] Auto Formats Stamp Zoom A A A A A A A A](/content/2026/05/770473/images/321e8477bde88586bec6247fa9715567d1a49464c04d1b83f531caf543649a54.jpg)
② Press ▲ Home or ▼ End until file number 8 is displayed.
![Caps Font Color 1 2 3 4 5 1 2 3 STORE [ ] Auto Formats Stamp Zoom A A A A A A A A](/content/2026/05/770473/images/00448d2f984a8cd5fe7cfb2e2684d7fe4a05b8c7e2d45abf0651f1d9df9b3a7e.jpg)
③ Press New Block
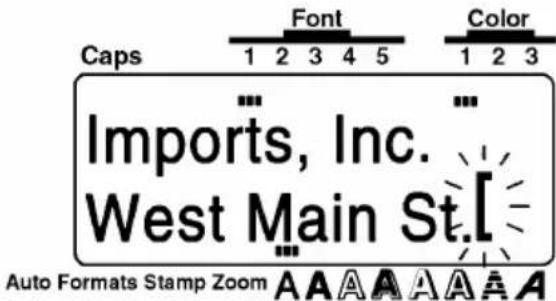
To recall text from file number 4:
④ Press Code and press Result
![Caps 1 2 3 4 5 Font Color 1 2 3 RECALL= [imports, [ 8 ] 'West Ma Auto Formats Stamp Zoom A A A A A A A A](/content/2026/05/770473/images/8bd1a1338d74cfed15280b15916e36d93e42e4cf91c4b2d827587514cdead4a0.jpg)
⑤ Press ▲ or ▼ until file number 4 is displayed.
![Caps 1 2 3 4 5 Font Color 1 2 3 RECALL [ 4 ] [ A X Z ] Auto Formats Stamp Zoom A A A A A A A A](/content/2026/05/770473/images/25e2c3212537a4e0d0f7f273bfbad41685386c2cbc10fd807304c5619d9c3772.jpg)
⑥ Press 📄 to replace the display text with the text from the recalled file.
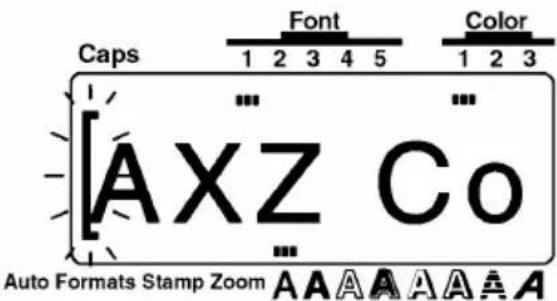
To delete the text from file number 8:
⑦ Hold down Code and press 19.
![Caps 1 2 3 4 5 Font Color 1 2 3 CLEAR [ 4 ] AXZ Auto Formats Stamp Zoom A A A A A A A](/content/2026/05/770473/images/d79a5a6b4bec911720363b207da78089cfe93ca7c43e72c936da69de8a268dd0.jpg)
⑧ Press ▲ or ▼ until file number 8 is displayed.
![Caps 1 2 3 4 5 Font Color 1 2 3 CLEAR Imports, [ 8 ] West Ma Auto Formats Stamp Zoom A A A A A A A](/content/2026/05/770473/images/8cea8221485944955c23aeeb78c7f13e8b8a93744eaa2e1e046ec544a901bcdc.jpg)
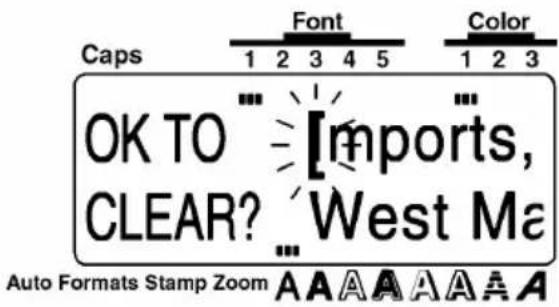
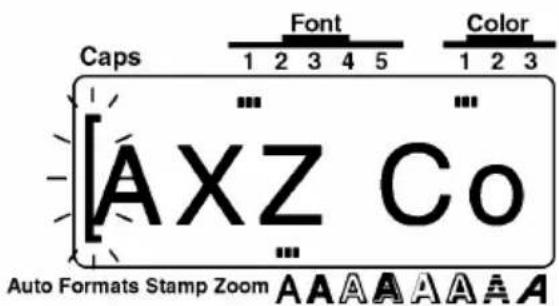
ERROR MESSAGE LIST
| ERROR MASSAGE | CAUSE | REMEDY |
| 4 DIGIT MAIN. | This message appears when less then the minimum four digits are entered as bar code data. | Enter a minimum of four digits before pressing  |
| 5 BARS LIMIT!5 BARS LIMIT! | This message appears if five bar code already exist when you hold down Code and press. | Limit the number of the bar codes in the text to five. |
| 5 BLOCK LIMIT! | This message appears if five blocks already exist when you hold down  and press and press  | Limit the number of blocks in the text to five. |
| 7 LINE LIMIT! | Thsi message appears if seven lines have already been entered in a block of text when you press  , causing to block to exceed the seven-line limit.This message appears if you press to join two blocks, causing the block to exceed the seven-line limit. , causing to block to exceed the seven-line limit.This message appears if you press to join two blocks, causing the block to exceed the seven-line limit. | Limit the number of lines in the text block to seven or hold down Code and press before entering the text.Adjust the number of lines so the block will not have more then seven lines. |
 | This message appears when the installed alkaline batteries become weak. | Replace the batteries or use the AC adaptor. |
| ERROR MESSAGE | CAUSE | REMEDY |
| BUFFER ENPTY! BUFFER EMPTY! | This message appears if no text has been entered when you  | Enter text before pressing [Area All]  |
| BUFFER FULL! BUFFER FULL! | This message appears if enough text has been entered to fill the buffer when you try to add a character, a space, a new line or new block.This message appears if enough text has been entered to fill the buffer when you  This message appears if enough text has been entered to fill the buffer when you This message appears if enough text has been entered to fill the buffer when you  | Delete some text so that more can be entered.Press any key, then delete some of the text before trying to change the text format.Press any key, then delete some of the text before trying to add a symbol, accented character or bar code. |
| CAN'T HERE CAN'T HERE | This message appears if the cursor is located in a bar code mark when you try to add a character or symbol, a space a new line or a new block.This message appears if the cursor is located in a bar code mark when you press  | Move the cursor or delete the bar code before entering the character, symbol, space, new line or new block.Move the cursor or delete the bar code before trying to change the text format (font, size, width, style, underline/ frame, or color). |
| CHANGE ADAPTOR | This meassage appears if a high-voltage adaptor is being used. | Remove the high-voltage adaptor and connect the optional 7.0V 1.2A AC adaptor. |
| CLOSETHE COVER | This message appears if the tape compartment cover is open. | Close the compartment cover. |
| CUTTER ERROR! | This message appears if the cutter did not operate correctly while cutting the tape. | Press any key to move the cutter to its correct position. If the cutter still does not operate correctly, contact your service representative. |
| ERROR! UL/FRM | This message appears if you try to underline or frame more then 35 characters. | Reduce the number of characters that you are trying to underline or frame. |
| INPUT ABCD AT BEGIN & END | This message appears if a letter between A and D has not been entered at the beginning and end of a bar code when the CODABAR protocol is used in Bar code mode. | Enter a letter between A and D at the beginning and end of the bar code. |
| INPUTWHOLE CODE | This message appears if the set number of digits are not entered in the bar code data. | Input the correct number of digits or change the number of digits set in the bar code parameters. |
| INSTALLCOLOR TAPE! | This message appears if a color printing cassette is not installed when you begin assigning the color settings or during color printing. | Install a color printing ink ribbon and tape cassette. |
| INSTALLATAMP TAPE! | This message appears if a stamp film cassette is not installed when you hold down and press | Install a stamp film cassette. |
| INVAL. CHRS! | This message appears if characters in different lines or blocks are selected as the numbering field.This message appears if a bar code is selected together with other characters as a numbering field. | Adjust the numbering field so that it only contains characters within a single line of a single text block.Select either the bar code or the characters alone as the numbering field. |
| LENGTH LIMIT! | This message appears if you try to add a character, symbol, bar code, space, return or new block, causing the text to exceed the one-meter limit.This messag appears if you turn on the power or try to print using the Seq. Numbering function, causing the entered text to exceed the one-meter limit.This message appears if you try to recall a text file, causing the text to exceed the one-meter limit.This message appears if you press after setting the label formats using the Format key or setting the text formats by pressing , , , , , , , , , , or , causing the text to exceed the one-meter limit. | Press any key, then delete some of the text or reduce the character size.Press any key, then delete some of the text or reduce the character size.Press any key, then delete some of the text before recalling the text file.Press any key, then delete some of the text before setting the label formats or text formats. |
| LIMIT2! | This message appears if you try to overlap more then two underlines, frames or shadings. | Reduce the number of underlines, frames or shadings that you are trying to set. |
| LINE LIMIT! | This message appears if you try to increase the number of lines in the text, causing them to exceed the maximum opssible for the installed tape.This message appears if you press  to add a new line or press [9077] to join two blocks, causing the number of lines in a block to exceed the maximumpossible for the installed tape. to add a new line or press [9077] to join two blocks, causing the number of lines in a block to exceed the maximumpossible for the installed tape. | Reduce the number of line or install a wider tape.Adjust the number of lines so the block will not have more then the maximum possible. |
| MEMORY FULL! | This message appears if you try to store a message that is too large to fit in the available memory space (maximum of 3000 characters on the P-touch 550 and 1000 characters on the P-touch 530). | Delete an unwanted file to make room for the new one. |
| NO FILES! | This message appears if no text files are stored in the memory when you try to recall or delete one. | Store a text file before trying to recall or delete one. |
| NO TAPE! | This message appears if no tape cassette is installed when you try to print a label or feed and cut the tape. | Install a tape cassette and try again. |
| OPEN THE COVER! | This message appears if the sed compartment cover is clo-when a message appears instructing you to rewind the tape tape during color printing. | Open the compartment cover and continue following the color printing directions. |
| RAM PROBLEM! | This message appears if there is a problem with the machine's random access memory. | Contact your service representative. |
| REPLACE BATTERIES! | This message appears when the installed alkaline batteries are about to run out. | Replace the batteries or use the AC adaptor. |
| ROM PROBLEM! | ·This message appears if there is a problem with the machine's read only memory. | ·Contact your servise representative. |
| SET1 1/2" ! | ·This message appears if a 1 1/2"(36-mm)-wide tape cassette is not installed when a template for 1 1/2"(36-mm)-wide tape is selected. | ·Install a 1 1/2"(36-mm)-wide tape cassette. |
| SET1" ! | ·This message appears if a 1"(24-mm)-wide tape cassette is not installed when a template for 1"(24-mm)-wide tape is selected. | ·Install a 1"(24-mm)-wide tape cassette. |
| SET3/4" ! | ·This message appears if a 3/4"(18-mm)-wide tape cassette is not installed when a template for 3/4"(18-mm)-wide tape is selected. | ·Install a 3/4"(18-mm)-wide tape cassette. |
| SET1/2" ! | ·This message appears if a 1/2(12-mm)-wide tape cassette is not installed when a template for 1/2"(12-mm)-wide tape is selected. | ·Install a 1/2"(12-mm)-wide tape cassette. |
| SET3/8" ! | ·This message appears if a 3/8"(9-mm)-wide tape cassette is not installed when a template for 3/8"(9-mm)-wide tape is selected. | ·Install a 3/8"(9-mm)-wide tape cassette. |
| SET1/4" ! | ·This message appears if a 1/4"(6-mm)-wide tape cassette is not installed when a template for 1/4"(6-mm)-wide tape is selected. | ·Install a 1/4"(6-mm)-wide tape cassette. |
| SYSTEM ERROR! | ·This message appears if there is a problem with the machine's software. | ·Contact your service representative. |
| TOO HIGH!TOO HIGH! | This message appears if the hight of the text is lager then the width of the installed tape.This message appears if you delete a block, causing the size of the text to be taller then the width of the installed tape. | Reduce the size of the characters or install a tape of greater width.Hold down Code and press New Block to create a new block or adjust the size of the text so that it will not be taller then the width of the installed tape. |
| TOO LONG!TOO LONG! | This message appears if the length of the text is longer then the label length that has been set.This message appears if the text typed in for an entry using the also formats function exceeds the preset length. | Delete some of the text, reduce the character width or increase the preset label length.Enter fewer characters. |
| WRONG SELECT | This message appears if more then five characters are selected as the numbering field.This message appears if characters with different format settings are selected as the numbering field. | Limit the numbering field to five characters.Only select characters with identical format settings. |
TROUBLESHOOTING
| PROBLEM | REMEDY |
| 1. The display stays blank after you have turned on the machine or abnormal characters are displayed. | ·If you are using alkaline batteries, check that they are properly inserted.·If the batteries are low, replace them with new ones.·If the batteries are low, replace them with new ones.·Turn off the machine, then while holding down Code and R, turn the machine back on to reset it. The text and formats in the display and all text files stored in the memory are erased. |
| 2. The printed characters are not formed properly. | ·If you are using alkaline batteries, they may below. Try using the AC adaptor or replace the batteries with new ones. |
| 3. The machine does not print or the printd characters are blurred. | ·Check that the tape cassette has been inserted properly.·If the tape cassette is empty, replace it with a new one.·Make sure that the tape compartment cover has been closed. |
| 4. A blank horizontal white line appears through the printed label. | ·Clean the print head as explained on page 19. |
| 5. Striped tape appears. | ·You have reached the end of the tape cassette. Replace it with a new one. |
| 6. The text files that you stored in the memory have been erased. | ·If the batteries are low, replace them with new ones. |
| 7. The machine has "locked up" (i.e., nothing happens when a key is pressed). | ·Turn off the machine, then while holding down Code and R, turn the machine back on. The text and formats in the display and all text files stored in the memory are erased. |
MACHINE SPECIFICATIONS
HARDWARE
Input device: KEYBOARD - 63 keys
LCD: 112 x 32 dots
23 indicators
Print type: 23 indicators
5 widths available
1/4" (6 mm)
3/8" (9 mm)
1/2" (12 mm)
3/4" (18 mm)
1" (24 mm)
11/2" (36 mm)
Power supply 8 AA alkaline batteries
(optional AC adapter model AD-60)
Auto power off if no key pressed within 5 minutes
Print head: 128 dot / 180 dpi
Dimensions: 8 45/64" x 9 31/32" x 3 27/64" (221 x 253 x 87 mm)
Weight 2 lbs. 10 ozs. (1.2kg)
SOFTWARE
Character size: 6 sizes (6, 9, 12, 18, 36 and 48 point) + AUTO
All are available in NARROW, MEDIUM and MODE
Character fonts: 8 built - in typefaces (P-touch 550)
5 built - in typefaces (P-touch 530)
Buffer size: Single line - 1 m
Multi - line
Multi - block
Memory size: 3,400 characters (P-touch 550)
1,000 characters (P-touch 530)
Number of characters: 398 characters
Print styles: Normal, Bold, Outline, Solid, Shadow, and Outline + Shadow,
Striped (each can be combined with Italic)
The P-touch 530/550 features the following:
- WYSIWYG display
- Color printing
- Stamp creating
• Pre-formatted label templates
• Multi-line printing (up to 7 lines)
• Multi-block printing (up to 5 blocks) - 7 sizes & 14 styles
• Text and label framing - Text underling
- Vertical printing
- Mirror printing
• Horizontal alignment adjustment - Adjustable tape feed
- Label length setting
- Repeat printing
- Split printing
• Numbering function - Bar code generation
- Zooming in and out
INDEX
A
A. CUT parameter.....128
AC adapter....10,12
Accent function 78
All function....27,97
Alt key....60
Area key 39,97
Auto Formats key......88
Automatic backup 56
Automatic power off....56
B
Backspace key....28,71
Backup 56
Barcode function....49,80
Numbering....131
Parameters ....80
Batteries....10,11,56
Blank display....146
Blocks....47,66
Bold character style ....104
C
Cancel key....68
Caps mode....24,61
Cassettes 10,13-15
Center alignment....118
Character
Size 102
Style 104
Width....102
CHECK DIG. Parameter.....80
Cleaning
Machine's surface......10
Print head and rollers .....19
Clear function....30,77
CODABAR symbols......82
CODE 39 symbols 82
Code key 59
CODE 128 symbols ......81
Color key 109
COLOR PRINT function .....42,123
Color printing
Frame....113
Ink and tape cassette....14-15
Shading....113
Style....114
Colored characters....114
Colored frame/shading......113
Combination character styles......104
Continuing....63
Contrast function 86
COPIES parameter....128
Creating
Bar codes....80
Stamps....125
Cursor 23
Cursor keys....57
D
Default settings
Font......100
Framing....107
Label formats....110
Size....102
Style....104
Text color....109
Text formats....97-98
Underlining....107
Width....102
Deleting
All characters....73
Characters......71
Stored text files....135
Text lines 72
Displaying
Final layout 85
Label length....87
E
EAN 128 symbols......81
END key....58
Error messages ......139-145
F
Failure to print....146
Features......9
Feed & Tape Cut key......117
FEED (tape feed) function......117
Font key.....100
Format key 32,40,110
Frame....107,112
Color....113
FRAME COLOR function....41,113
G
GLOBAL FRAME function....33,41,112
H
H.ALI (horizontal alignment function).....33,118
HOME key....58
/
Indicator
Auto Formats 88
Caps....24,31,61
Color....109
Font 100
Stamp....125
Style 104
Zoom 85
Indicators......23
Ink cassettes....13-15
Instant lettering tape ....17
Iron-on transfers....17
Italic character style....104
J
Justifying text ......118
K
Keyboard......8
L
Label backing....16
Label format functions ......110-121
Label length
Displaying....87
Selecting ....116
Label Length function 87
Label templates....90-96
LCD display......8
Left alignment....118
LENGTH function....116
Line Out function....72
Lines....31,63
Deleting....71
M
Malformed characters....146
Memory
Deleting....135
Recalling....135
Storing....134
MIRROR (mirror printing) function ..... 120
N
New Block function......47,66
Normal character style ......104
Numbering 130
Bar codes....131
Symbols......130
0
On/Off key....56
Outline character style....104
P
Power key 56
Power off....56
Precautions....10
Print head....19
Print key....29,122
Printing
Failure....146
Malformed characters .....146
PROTOCOL parameter......80
Q
Quitting....68
R
Recall function....36,135
Removing label backing.....16
Resetting the machine....146
Return key....31,63
Right alignment....118
Rollers....19
Rub-on transfers....17
s
Selecting
Character size ......102
Character styles....104
Character width.....102
Fill-in colors....114
Fonts 100
Frame color....113
Frames....107,112
Horizontal alignment....118
Italics....104
Label formats....110-121
Label length ......116
Mirror printing....120
Numbering field....130
Shading color....113
Shading....107,112
Tape feed width 117
Text colors ....109
Text formats....97-109
Underlines....107
Vertical printing....119
Seq. Numbering (sequential numbering)
function....50
Shading 107,112
Color....113
Shadow character style ....104,130
Shift key....61
Size key....102
Solid character style ....104
Space key....25,62
Special Print function....35,128
SPLIT parameter....128
Stamp function....125
Store function....28,134
Striped character style....104
Striped tape....146
STYLE COLOR function....41,114
Style key....104
Symbol function ......38,75
Symbols....77
Bar codes....81-82
Numbering....130
T
Tape cassettes....10,13-15
Text
Deleting....71
Recalling 135
Storing....134
Text format keys ......27,100-109
Troubleshooting 146
Typing
Accented characters....78
Capital letters....24,61
U
UNDER#S parameter....80
Underlining....107
Color 113
Undl/Frm key....107
UNIT function....121
V
VERT (vertical printing) function .....119
W
Width key 102
WIDTH parameter 80
WYSIWYG mode....23,85
Z
Zoom key 38,85
- Supplies
Obtain tape cassettes, AC adapters, and tape cutters from you nearest authorized dealer. Brother cannot be held responsible for trouble caused by the use of unauthorized supplies. Use only Brother TZ tapes with this machine. Do not use tapes that do not have the mark.
Stock No. Description QTY/PACKAGE PRICE
| 1-1/2" (36 mm) laminated tapes | |||
| TZ-161 | Black Characters on Clear Tape | 1 | 27.99 |
| TZ-261 | Black Characters on White Tape | 1 | 27.99 |
| TZ-661 | Black Characters on Yellow Tape | 1 | 27.99 |
| 1" (24 mm) laminated tapes | |||
| TZ-151 | Black Characters on Clear Adhesive | 1 | 23.99 |
| TZ-251 | Black Characters on White Adhesive | 1 | 23.99 |
| TZ-451 | Black Characters on Red Adhesive | 1 | 23.99 |
| TZ-651 | Black Characters on Yellow Adhesive | 1 | 23.99 |
| TZ-252 | Red Characters on White Adhesive | 1 | 23.99 |
| TZ-354 | Gold Characters on Black Adhesive | 1 | 26.99 |
| TZ-355 | White Characters on Black Adhesive | 1 | 26.99 |
| 3/4" (18 mm) laminated tapes | |||
| TZ-141 | Black Characters on Clear Adhesive | 1 | 20.99 |
| TZ-241 | Black Characters on White Adhesive | 1 | 20.99 |
| TZ-242 | Red Characters on White Adhesive | 1 | 20.99 |
| TZ-243 | Blue Characters on White Adhesive | 1 | 20.99 |
| TZ-344 | Gold Characters on Black Adhesive | 1 | 24.99 |
| TZ-345 | White Characters on Black Adhesive | 1 | 23.99 |
| TZ-441 | Black Characters on Red Adhesive | 1 | 20.99 |
| TZ-541 | Black Characters on Blue Adhesive | 1 | 20.99 |
| TZ-545 | White Characters on Blue Adhesive | 1 | 23.99 |
| TZ-641 | Black Characters on Yellow Adhesive | 1 | 20.99 |
| TZ-741 | Black Characters on Green Adhesive | 1 | 20.99 |
| TZ-B41 | Black Characters on Orange Fluorescent Adhesive | 1 | 24.99 |
| TZ-M41 | Black Characters on Clear (matte) Adhesive | 1 | 23.99 |
| TZ-WB41 | Black Characters on Bugs Bunny Adhesive | 1 | 23.99 |
| TZ-WT41 | Black Characters on Taz Adhesive | 1 | 23.99 |
| TZ-WS41 | Black Characters on Tweety & Sylvester Adhesive | 1 | 23.99 |
| 1/2" (12 mm) laminated tapes | |||
| TZ-131 | Black Characters on Clear Adhesive | 1 | 16.99 |
| TZ-231 | Black Characters on White Adhesive | 1 | 17.99 |
| TZ-232 | Red Characters on White Adhesive | 1 | 17.99 |
| TZ-335 | White Characters on Black Adhesive | 1 | 20.99 |
| 3/8" (9 mm) laminated tapes | |||
| TZ-121 | Black Characters on Clear Adhesive | 1 | 14.99 |
| TZ-221 | Black Characters on White Adhesive | 1 | 16.99 |
| TZ-325 | White Characters on Black Adhesive | 1 | 18.99 |
| TZ-421 | Black Characters on Red Adhesive | 1 | 16.99 |
| Stock No. | Description QTY/PACKAGE PRICE | ||
| 1/4” (6 mm) laminated tapes | |||
| TZ-111 | Black Characters on Clear Adhesive | 1 | 12.99 |
| TZ-211 | Black Characters on White Adhesive | 1 | 14.99 |
| TZ-315 | White Characters on Black Adhesive | 1 | $17.99 |
Special tapes
| Stock No. | Description QTY/PACKAGE PRICE | ||
| TZ-SE4 | Black Characters on 3/4” (18 mm) Security Adhesive | 1 | 29.99 |
| TZ-FA3 | Blue Characters on 1/2” (12 mm) Fabric Adhesive | 1 | 24.99 |
Multi-color printing cassettes
| Stock No. | Description QTY/PACKAGE PRICE | ||
| TZ-T240 | White Tape 1 19.99 | ||
| TZ-R041 | Black ink ribbon 112.99 | ||
| TZ-R042 | Red ink ribbon 1 12.99 | ||
| TZ-R043 | Blue ink ribbon 112.99 |
Stamp kit
| Stock No. | Description QTY/PACKAGE PRICE | ||
| SK-LB | Stamp Making kit for Large Black | 1 | 39.99 |
| SK-MB | Stamp Making kit for Medium Black | 1 | 37.99 |
| SH-LB | Additional Stamper for Large Black | 1 | 27.99 |
| SH-MB | Additional Stamper for Medium Black | 1 | 24.99 |
Options
| Stock No. | Description QTY/PACKAGE PRICE | ||
| AD-60 | AC Adapter for PT-330/350 | 1 | $24.99 |
ACCESSORY ORDER FORM
This order form is provided for your convenience should your retailer not stock the item(s) needed or if you prefer to order by telephone. To order by phone, please call Brother International at 1-800-668-2768 and have your Visa or MasterCard available.
| Stock No. | Description | Price | Quantity | Total |
| Total | ||||
Prices subject to change without notice.
Before Calling
- Review the reverse side of this form and select the desired items.
- Complete the order form, indicating the quantity of each item (for your records).
- Enter the total on the "Supply/Accessory Total" line below (for your records).
- Add appropriate Sales Tax and Shipping/handing costs (for your records).
- Have your Visa & MasterCard number with expiration date available.
| Supply/Accessory Total | |
| All Residents of Canada Please Add | G.S.T. |
| Applicable Sales Taxes (G.S.T. & P.S.T) | P.S.T |
| 5.00 | |
| Shipping/Handling | $ |
| TOTAL DEU |
G.S.T. # R100663764
P.S.T # 100100117TQ0001
* Pricing subject to change without notice.
ACCESSORY ORDER FORM
This order form is provided for your convenience should your retailer not stock the item(s) needed or if you prefer to order by telephone. To order by phone, please call Brother International at 1-800-668-2768 and have your Visa or MasterCard available.
| Stock No. | Description | Price | Quantity | Total |
| Total | ||||
Prices subject to change without notice.
Before Calling
- Review the reverse side of this form and select the desired items.
- Complete the order form, indicating the quantity of each item (for your records).
- Enter the total on the "Supply/Accessory Total" line below (for your records).
- Add appropriate Sales Tax and Shipping/handing costs (for your records).
- Have your Visa & MasterCard number with expiration date available.
| Supply/Accessory Total | |
| All Residents of Canada Please Add | G.S.T. |
| Applicable Sales Taxes (G.S.T. & P.S.T) | P.S.T |
| 5.00 | |
| Shipping/Handling | $ |
| TOTAL DEU |
G.S.T. # R100663764
P.S.T # 100100117TQ0001
* Pricing subject to change without notice.
GUÍA DEL USUARIO
INTRODUCCIÓN
TECLA Size Y Width....21
TECLA Style 22
TECLA Undl/Frm (SUBRAYADO/ENCUADRE)....24
TECLA Color 25
natural_image
Mechanical assembly diagram showing a hand operating a motor housing with a black arrow indicating motion direction (no text or symbols)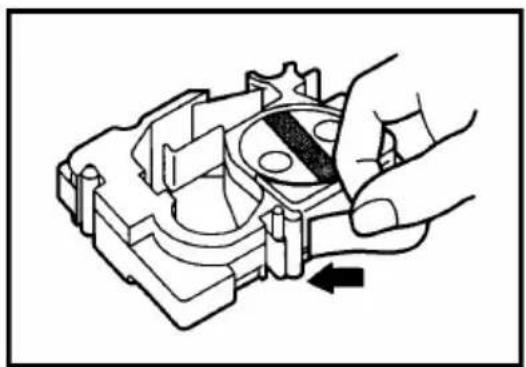
natural_image
Mechanical assembly diagram showing a hand turning a component with a black arrow indicating rotation (no text or symbols present)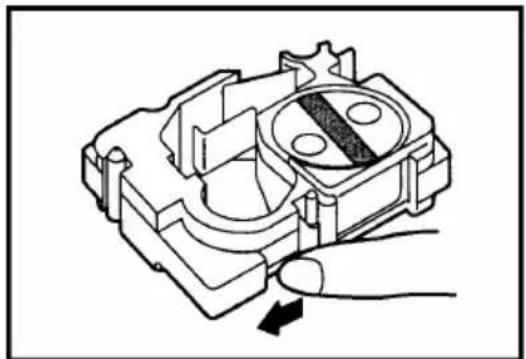
natural_image
Mechanical component diagram showing a hand pressing a button into a housing (no text or symbols)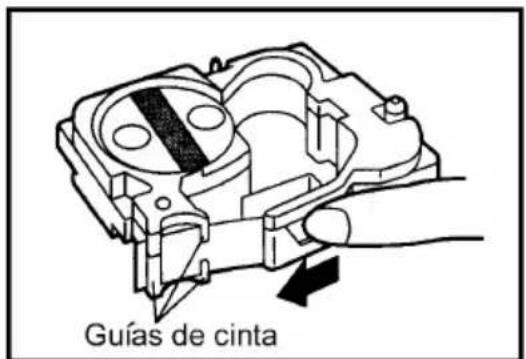
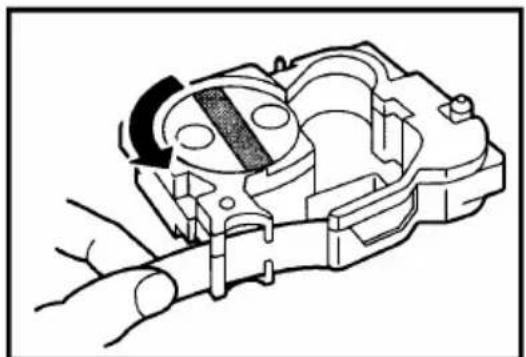
natural_image
Technical line drawing of a mechanical component with hands operating it (no text or symbols)| Plantilla de etiquetas preajustadas |
| VCR VHS (3/4" (18 mm)) |
| VCR 8mm-1 (3/8" (9 mm)) |
| VCR 8mm-2 (1/2" (12 mm)) |
| VCR VHSC-1 (1/2" (12 mm)) |
| VCR VHSC-2 (3/4" (18 mm)) |
| AUDIO-1 (1/4" (6 mm)) |
| AUDIO-2 (3/8" (9 mm), 1/2" (12 mm)) |
| AUDIO-3 (3/8" (9 mm), 1/2" (12 mm)) |
| NAME PLATE (3/4" (18 mm), 1 1/2" (36 mm)) |
| ADDRESS (3/4" (18 mm), 1 1/2" (36 mm)) |
| EQUIPMENT (3/4" (18 mm), 1" (24 mm), 1 1/2" (36 mm)) |
| EQUIPMENT (1/2" (12 mm)) |
| SLIDE (1/2" (12 mm)) |
| PRICE (3/4" (18 mm), 1" (24 mm), 1 1/2" (36 mm)) |
| SALE PRICE (3/4" (18 mm), 1" (24 mm), 1 1/2" (36 mm)) |
| FILE LONG (3/4" (18 mm), 1" (24 mm), 1 1/2" (36 mm)) |
| FILE LONGV (3/4" (18 mm), 1" (24 mm), 1 1/2" (36 mm)) |
| FILE SHORT (3/8" (9 mm), 1/2" (12 mm), 3/4" (18 mm), 1" (24 mm), 1 1/2" (36 mm)) |
| FLOPPY 3.5∂ (3/4" (18 mm), 1" (24 mm), 1 1/2" (36 mm)) |
| FLOPPY 5∂ (3/4" (18 mm), 1" (24 mm), 1 1/2" (36 mm)) |
TECLA Font
NARROW (8 mm (1/3"))
MEDIUM (12 mm (1/2"))

- USER'S GUIDE
- FCC NOTICE
- CONTENTS
- ABOUT THIS MANUAL.... 1
- QUICK REFERENCE GUIDE
- BEFORE YOU START
- LEARNING THE ROPES
- FOR YOUR INFORMATION
- ABOUT THIS MANUAL
- Power Supply (Refer to pages 11 and 12 for details.)
- Tape Cassettes (Refer to pages 13 to 15 for details.)
- Making Simple Labels
- Mr. J. Smith
- Affix the label
- MACHINE DIAGRAM
- FEATURES
- OPTIONAL AC ADAPTOR
- TO CONNECT THE AC ADAPTOR:
- TAPE CASSETTES
- TO CHANGE A TZ TAPE CASSETTE:
- TO CHANGE THE COLOR PRINTING INK AND TAPE CASSETTE:
- Feeding the tape through the cassette
- ATTACHING LABEL
- LAMINATED TAPE
- NON-LAMINATED TAPE
- INSTANT-LETTERING TAPE (RUB-ON TRANSFERS)
- IRON-ON TRANSFER TAPE
- Washing
- Drying
- Ironing
- PRINT HEAD AND ROLLERS
- TO CLEAN THE PRINT HEAD
- INTRODUCTION
- NAME TAG EXAMPLE
- To turn on the machine:
- John Smith
- ENTER THE TEXT
- To enter Caps mode:
- To type in the text "JOHN":
- To add a space:
- To type in "SMITH":
- To exit Caps mode:
- EDITING THE TEXT
- FORMATTING THE TEXT
- To change the font of all of the text:
- STORING THE TEXT
- To start the text as file number 1:
- PRINT THE TEXT
- EQUIPMENT LABEL EXAMPLE
- CLEARING THE DISPLAY
- To clear the display for a new label:
- ENTERING THE TEXT
- To type in "Place original face down." :
- To type in the second and third lines:
- To change the label formats:
- ⑪ Press Format.
- To print three copies of the label:
- ADDRESS LABEL EXAMPLE
- RECALLING TEXT
- To recall the name tag text file:
- To type in the address:
- To add the telephone symbol ( ☐ ):
- To zoom out from the text:
- To select the name:
- To change the style of the name:
- To add a frame around the entire text:
- To change the FRAME COLOR and STYLE COLOR functions:
- PRINTING THE TEXT
- To print a copy of the label in color:
- STORAGE SHELF LABEL EXAMPLE
- To type in the first block of text using Font 2:
- To type in the second block of text:
- To zoom in on the text and type in the last line:
- To ty in the third block of text:
- To enter the bar code data:
- To print using the Seq. Numbering function:
- FINDING TOUR WAY
- PAGE
- INPUTTING AND EDITING
- DISPLAYING
- FORMATTING
- PRINTING
- MEMORY FUNCTIONS
- On/Off KEY
- BACKGROUND
- OPERATION
- CURSOR KEY
- LEFT CURSOR KEY
- RIGHT CURSOR KEY
- UP CURSOR KEY
- DOWN CURSOR KEY
- Code/Alt/Shift KEYS AND Caps MODE
- Code KEY
- EXAMPLE
- Alt KEY
- Shift KEY
- Caps MODE
- Space KEY
- (RETURN) KEY
- ENDING A LINE OF TEXT
- MARKING A SELECTION
- CONFIRMING AN OPERATION
- New Block FUNCTION
- AXZ CORP. (123)456-7890
- Cancel KEY
- QUITTING AN OPERATION WITHOUT CHANGING THE TEXT
- REJECTING AN OPERATION
- BS (BACKSPACE) KEY
- TO DELETE A CHARACTER:
- Line Out FUNCTION
- TO DELETE A LINE OF TEXT:
- Clear FUNCTION
- TO ERASE ALL OF THE TEXT AND RETURN ALL FORMATS TO THEIR DEFAULT SETTINGS:
- Symbol FUNCTION
- TO TYPE IN A SYMBOL:
- Accent FUNCTION
- TO TYPE IN AN ACCENTED CHARACTER:
- TO CREATE A BAR CODE
- Selecting the bar code parameter settings
- Entering the bar code data
- Adding a special character to the bar code data
- Zoom KEY
- TO USE THE ZOOM FUNCTION:
- Contrast FUNCTION
- TO CHANGE THE CONTRAST:
- Label Length FUNCTION
- Auto Formats KEY
- TO USE THE AUTO FORMATS FUNCTION:
- Selecting a template for creating new text
- Entering or editing text in the template
- SAMPLES
- CHAMPION'S CUP
- JOE & ANN'S WEDDING
- Bill Reynolds
- SALES RESULTS (1)
- DAILY FAX (5)
- B DAILY FAX (5)
- NEW PRODUCTS (3)
- Area KEY AND All FUNCTION
- TO SELECT THE TEXT FORMAT BEFORE ENTERING THE TEXT:
- TO CHANGE THE TEST FORMAT AFTER ENTERING THE TEXT: Changing the text format for all of the text
- Changing the text format for only part of the text
- To select the second smallest character size and the italic and bold styles for all of the text:
- Font KEY
- TO SELECT A FONT BEFORE ENTERING TEXT:
- TO CHANGE THE FONT OF A SELECTED AREA:
- Size AND Width KEYS
- TO SELECT A SIZE & WIDTH BEFORE ENTERING TEXT:
- TO CHANGE THE SIZE & WIDTH OF A SELECTED AREA:
- Style KEY
- TO SELECT A STYLE BEFORE ENTERING TEXT:
- TO CHANGE THE STYLE OF A SELECTED AREA:
- Undl/Frm (UNDERLINE/FRAME) KEY
- TO SELECT AN UNDERLINE/FRAME SETTING BEFORE ENTERING TEXT:
- TO CHANGE THE UNDERLINE/FRAME SETTING FOR A SELECTED AREA:
- Color KEY
- TO SELECT A COLOR SETTING BEFORE ENTERING TEXT:
- TO CHANGE THE COLOR SETTING FOR A SELECTED AREA:
- Format KEY
- TO CHANGE THE LABEL FORMAT:
- GROBAL FRAME FUNCTION
- TO CHANGE THE FRAME OR SHADING FOR THE ENTIRE TEXT:
- FRAME COLOR FUNCTION
- TO CHANGE THE UNDERLINE, FRAME, STRIKE-OUT AND SHADING COLOR:
- STYLE COLOR FUNCTION
- TO CHANGE THE CHARACTER FILL - IN COLOR:
- LENGTH FUNCTION
- TO CHANGE THE LABEL LENGTH:
- FEED (TAPE FEED) FUNCTION
- TO CHANGE THE TAPE FEED WIDTH:
- H.ALI (HORIZONTAL ALIGNMENT) FUNCTION
- TO CHANGE THE HORIZONTAL ALIGNMENT OF THE TEXT:
- VERT (VERTICAL PRINTING) FUNCTION
- TO CHANGE THE VERTICAL PRINTING SETTING:
- MIRROR (MIRROR PRINTING) FUNCTION
- TO CHANGE THE MIRROR PRINTING SETTING:
- UNIT FUNCTION
- TO CHANGE THE UNITS OF THE MEASUREMENTS:
- Print KEY AND Feed & Tape Cut KEY
- COLOR PRINT FUNCTION
- TO PRINT A LABEL WITH THE COLOR PRINT FUNCTION:
- Stamp FUNCTION
- TO MAKE A STAMP:
- Affixing the stamp film
- Printing an identification label for the stamp holder
- Stamping
- Special Print FUNCTION
- Parameters Settings
- TO CHANGE A PARAMETER SETTING OF THE SPECIAL PRINT FUNCTION:
- Default Print Settings
- Custom Settings
- Seq. Numbering FUNCTION
- TO PRINT LABELS WITH CHARACTERS IN THE NUMBERING FIELD:
- TO PRINT LABELS WITH A BAR CODE IN THE NUMBERING FIELD:
- Store, Recall AND M.Del KEYS
- TO STORE A TEXT FILE IN THE MEMORY:
- Overwriting the stored file with the new one
- TO RECALL A TEXT FILE FROM THE MEMORY:
- TO DELETE A TEXT FILE FROM THE MEMORY:
- To recall text from file number 4:
- To delete the text from file number 8:
- ERROR MESSAGE LIST
- TROUBLESHOOTING
- MACHINE SPECIFICATIONS
- HARDWARE
- SOFTWARE
- The P-touch 530/550 features the following:
- INDEX
- A
- B
- C
- D
- E
- F
- G
- H
- /
- J
- K
- L
- M
- N
- 0
- P
- Q
- R
- s
- T
- U
- V
- W
- Z
- - Supplies
- ACCESSORY ORDER FORM
- Before Calling
- GUÍA DEL USUARIO
- INTRODUCCIÓN
- TECLA Font
Brand : BROTHER
Model : P-Touch 530
Category : Label printer