NB7D-CAR - Portable DVD Player Nextbase - Free user manual and instructions
Find the device manual for free NB7D-CAR Nextbase in PDF.


User questions about NB7D-CAR Nextbase
0 question about this device. Answer the ones you know or ask your own.
Ask a new question about this device
Download the instructions for your Portable DVD Player in PDF format for free! Find your manual NB7D-CAR - Nextbase and take your electronic device back in hand. On this page are published all the documents necessary for the use of your device. NB7D-CAR by Nextbase.
USER MANUAL NB7D-CAR Nextbase
Thank you for choosing this NEXTBASE portable DVD player. Please read this manual carefully before operation and keep it for future reference. It will be helpful should you encounter any operational problem.
WARNING: Do not expose this product to rain, moisture or water under any circumstances, doing so may result in the risk of electric shock or fire.
CAUTION:
To reduce the risk of electric shock, do not perform any servicing other than that contained in the instruction manual unless you are qualified to do so. Have the unit serviced by a qualified service technician if;
The unit has been exposed to rain or water. The unit does not seem to operate normally. The unit exhibits a marked changes in performance.
text_image
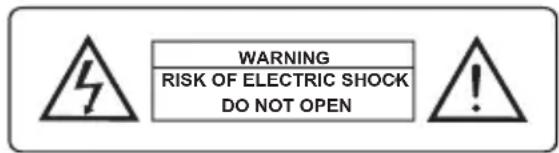
WARNING RISK OF ELECTRIC SHOCK DO NOT OPENLASER:
This product contains a Class 1M Laser. Due to possible eye injury only qualified service technicians should remove the cover or attempt to service this device.
LASER:
Type Semiconductor laser GaAlAs
Wave Length 650nm / 780nm
Output Power 5mW
Beam Divergence 60 degrees
text_image
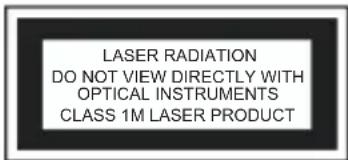
LASER RADIATION DO NOT VIEW DIRECTLY WITH OPTICAL INSTRUMENTS CLASS 1M LASER PRODUCTAUDIO LEVEL:
To prevent possible hearing damage, do not listen at high volume levels for long periods.

When using earphones listen at a reasonable volume for reasonable lengths of time.
Do not turn the volume so high that you cannot hear what is around you.
WEEE:
Disposal of Waste Electrical and Electronic Equipment and/or Battery by users in private households in the European Union.

This symbol on the product or on the packaging indicates that this can not be disposed of as household waste. You must dispose of your waste equipment and/or battery by handing it over to the applicable take-back scheme for the recycling of electronic equipment and/or battery. For more information please contact your local household waste disposal office.
DO NOT ATTEMPT TO SERVICE THE UNIT BY YOURSELF!
©
PACKAGE CONTENTS
Please check the contents of your purchased model using the guide below.
In the event of an item being missing please contact your local NEXTBASE dealer.
NB7-CAR / NB9-CAR
DVD Player | Easy Fit Car Mount | Car Power Cable | Remote Control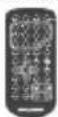 |
Earphones | Instruction Manual |
NB7T-CAR / NB9T-CAR
DVD Player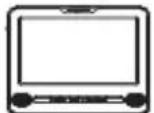 | Monitor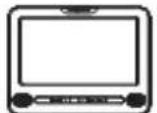 | Easy Fit Car Mount x 2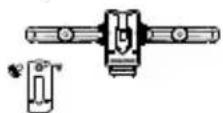 | Car Power Cable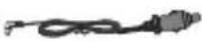 |
Remote Control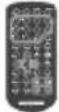 | Connection Cable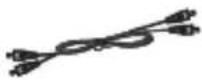 | Earphones x 2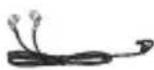 | Instruction Manual |
NB7D-CAR / NB9D-CAR
DVD Player x 2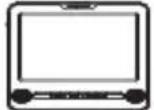 ____ ____ | Easy Fit Car Mount x 2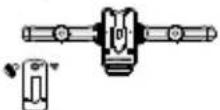 ____ ____ | Car Power Cable | Remote Control x 2.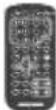 |
Connection Cable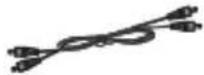 | Earphones x 2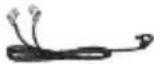 | Instruction Manual |
Note:
The actual products might appear slightly different from pictures shown above.
NB7-CAR SERIES DVD PLAYER
NB7-CAR / NB7T-CAR / NB7D-CAR
Player
text_image
20 21 19 18 17 16 15 14 13 12 11 10 9 8 7 6 5 4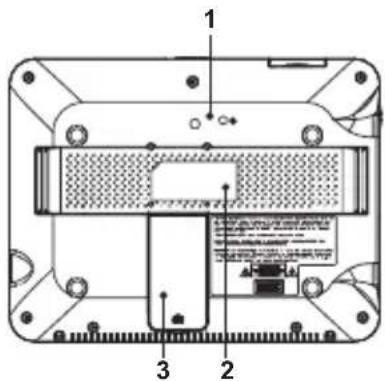
text_image
Technical diagram of a device with numbered components and labeled parts1. Fixing points for easy fit car mount bracket
Fixing points to secure the supplied car mount bracket.
See page 15 for further information.
2. Product Rating label
Product details, model name etc to be found here.
3. Player stand
Pull out stand from the bottom to use DVD player outside of vehicle.
Player stand will not be accessible when the car mount bracket is attached.
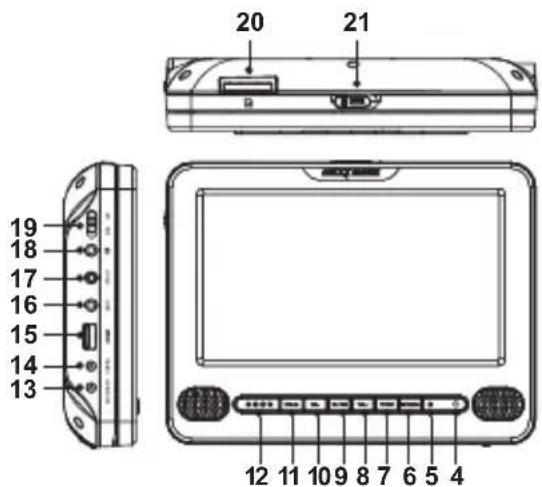
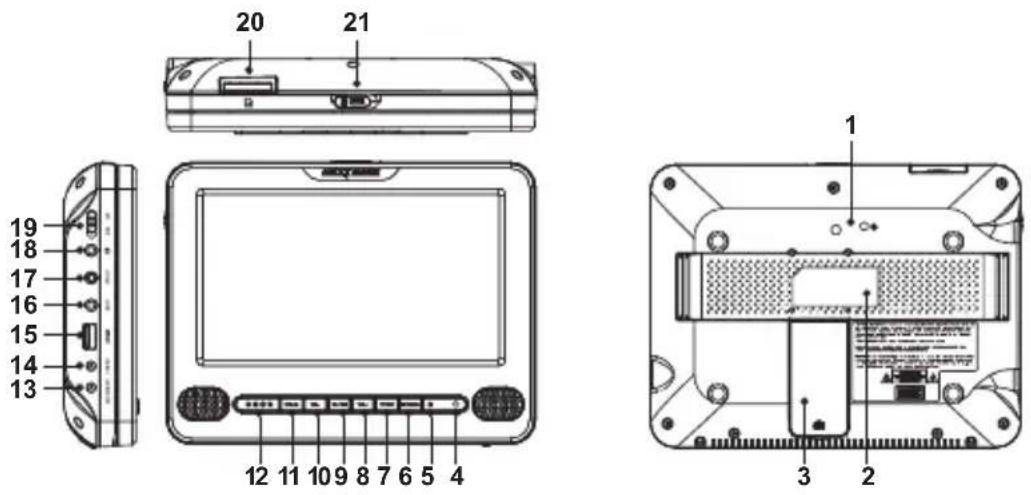
4. Receiver for remote control
Point remote control here, be careful when using two players in the same vehicle to avoid controlling the second DVD player.
5. Power LED indicator
LED will be illuminated (red) when power is supplied to DVD player.
6. Stop / Mode
Press to stop playback.
Press and hold for 2-3 seconds to select Mode: DVD / AV IN / MEDIA / SETUP.
Note: SETUP will only give access to the General Setup Page.
7. Down / Next
Press to navigate down within the menus.
Press to move to next chapter or track.
8. VOL+
Press to increase volume level.
Applies to DVD player speakers and earphones.
NB7-CAR SERIES DVD PLAYER (CONTD.)
NB7-CAR / NB7T-CAR / NB7D-CAR
Player
9. OK / Play & Pause
Press to confirm selection made within the Setup menu or DVD menu. Press to start / pause / resume playback.
10. VOL-
Press to decrease volume level. Applies to DVD player speakers and earphones.
11. Previous / Up
Press to move to previous chapter or track. Press to navigate up within the menus.
12. IR Headphone LED's
When illuminated the four red LED's indicate that the infra-red transmitter for use with compatible wireless headphones (not supplied) has been turned on. See page 27 for further information.
13. DC IN socket
Connect the supplied 12VDC car power cable here, not for use with 24VDC vehicles.
14. DC Out socket
Used with the 'T' (player/monitor) and 'D' (player/player) models to pass power between screens using the supplied connection cable. See page 17 for further information.
15. USB Port
Insert USB memory stick here. For direct connection of USB flash memory sticks only. NOT for PC connection or for external hard drive / alternative device connection See page 25 for further information.
©
©
NB7-CAR SERIES MONITOR (CONTD.)
NB7T-CAR
Monitor
1
8910111312
3 2
- VOL+ / Right
Press to increase volume level.
Press to navigate right and adjust settings within the monitor displaySETUP menu.
- DOWN
Press to navigate down within the monitor display SETUP menu.
- UP
Press to navigate up within the monitor display SETUP menu.
- VOL-/Left
Press to decrease volume level.
Press to navigate left and adjust settings within the monitor display SETUP menu.
AUDIO LEVEL: To prevent possible hearing damage, do not listen at high volume levels for long periods.
When using earphones listen at a reasonable volume for reasonable lengths of time.
Do not turn the volume so high that you cannot hear what is around you.
NB9-CAR / NB9T-CAR / NB9D-CAR
Player
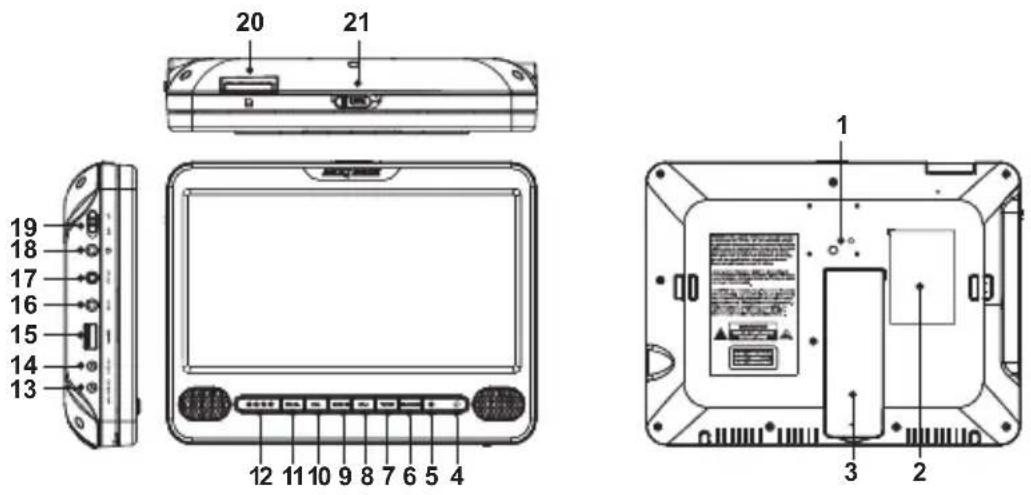
- Fixing points for easy fit car mount bracket
Fixing points to secure the supplied car mount bracket.
See page 15 for further information.
- Product Rating label
Product details, model name etc to be found here.
- Player stand
Pull out stand from the bottom to use DVD player outside of vehicle.
Player stand will not be accessible when the car mount bracket is attached.
- Receiver for remote control
Point remote control here, be careful when using two players in the same vehicle to avoid controlling the second DVD player.
- Power LED indicator
LED will be illuminated (red) when power is supplied to DVD player.
- Stop / Mode
Press to stop playback.
Press and hold for 2-3 seconds to select Mode: DVD / AV IN / MEDIA / SETUP.
Note: SETUP will only give access to the General Setup Page.
- Down / Next
Press to navigate down within the menus.
Press to move to next chapter or track.
- VOL+
Press to increase volume level.
Applies to DVD player speakers and earphones.
NB9-CAR SERIES DVD PLAYER (CONTD.)
NB9-CAR / NB9T-CAR / NB9D-CAR
Player
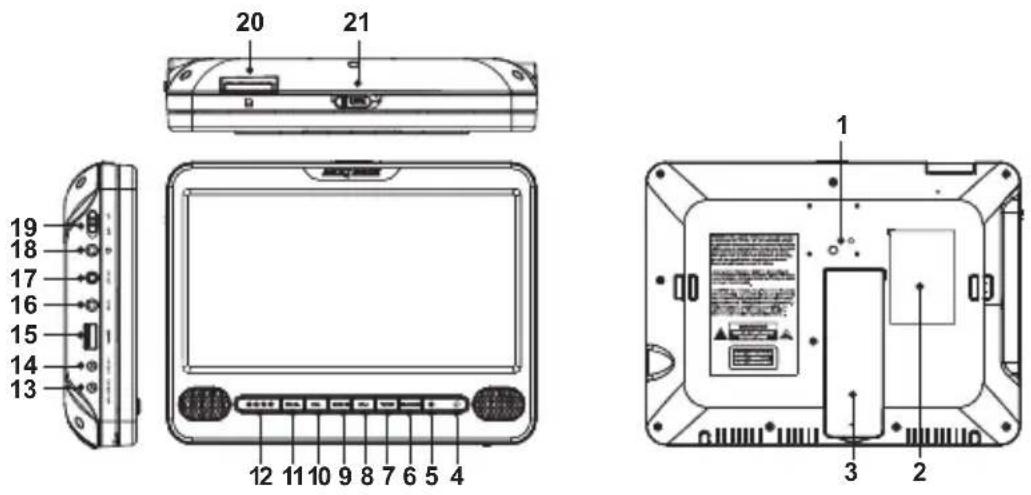
9. OK / Play & Pause
Press to confirm selection made within the Setup menu or DVD menu. Press to start / pause / resume playback.
10. VOL-
Press to decrease volume level. Applies to DVD player speakers and earphones.
11. Previous / Up
Press to move to previous chapter or track. Press to navigate up within the menus.
12. IR Headphone LED's
When illuminated the four red LED's indicate that the infra-red transmitter for use with compatible wireless headphones (not supplied) has been turned on. See page 27 for further information.
13. DC IN socket
Connect the supplied 12VD C car power cable here, not for use with 24VDC vehicles.
14. DC Out socket
Used with the 'T' (player/monitor) and 'D' (player/player) models to pass power between screens using the supplied connection cable. See page 17 for further information.
15. USB Port
Insert USB memory stick here. For direct connection of USB flash memory sticks only. NOT for PC connection or for external hard drive / alternative device connection See page 25 for further information.
©
©
©
©
EASY FIT CAR MOUNT & INSTALLATION (CONTD.)
Car Mount
7
8
9
11
10
PUB H
12
- Seat / Screen adjustment thumbwheel
Loosen thumbwheel to increase / decrease the distance between seat and the screen as required, remembering to re-tighten the thumbwheel before use.
- Screen viewing angle adjustment thumbwheel
Loosen this thumbwheel to change the angle of the screen as required, remembering to re-tighten the thumbwheel before use.
- Car mount guide
Once attached to the DVD player / monitor the bracket will slide down into this guide.
- Securing clamp thumbwheels
Remove the two thumbwheels to release the rear securing clamp , place the two clamps either side of the metal poles (stanchions) that connect the headrest to the car seat. Re-tighten the two thumbwheels.
Rear securing clamp
Stanchion
Thumbwheel
- Locking tabs
These locking tabs will lock into the player bracket and a click will be heard when the DVD player / monitor is correctly attached.
- Release catch
Push the catch backwards to release the locking tabs, pull DVD player / monitor upwards to remove from the car mount.
SYSTEM CONNECTIONS
NB7-CAR / NB9-CAR (Player only models)
Is recommended that the DVD player is mounted behind the drivers seat, for best cable routing.
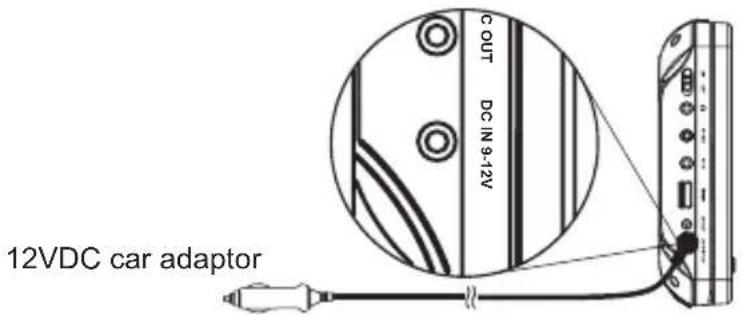
The only connection required is 12VDC (not 24VDC) power using the supplied car adaptor. With the vehicle running connect the car adaptor to the 12VDC outlet within the vehicle and making sure the DVD player is turned off connect the car adaptor to the socket marked 'DC IN 9-12V' which is located on the left hand side of the DVD player.
text_image
C OUT DC IN 9-12V 12VDC car adaptorThe DVD player can now be turned on. Please turn the DVD player off before disconnecting the car adaptor or turning off the vehicle.
NB7T-CAR / NB9T-CAR (Player / Monitor models)
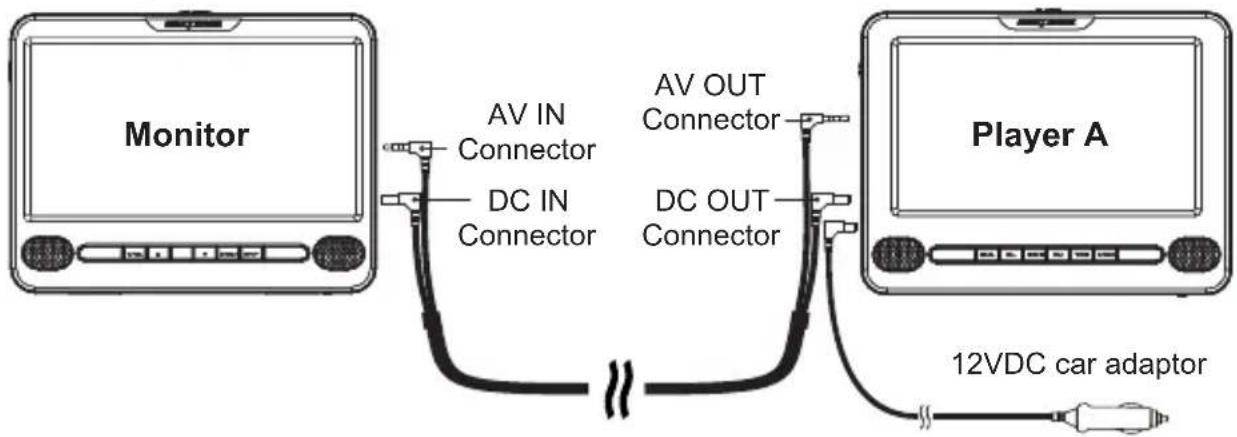
For the player / monitor models there is the standard car adaptor connection as described above and also the audio / video / power connection between the player and monitor to be made using the supplied cable.
DVD Player:
Insert the DC connector into the 'DC OUT' socket located on the left hand side of the DVD player.
Insert the 3.5mm AV connector into the 'AV OUT' socket also located on the left hand side of the DVD player.
Monitor:
Insert the DC connector into the 'DC IN' socket located on the right hand side of the monitor.
Insert the 3.5mm AV connect or into the 'AV IN' socket also located on the right hand side of the monitor.
text_image
Monitor AV IN Connector DC IN Connector AV OUT Connector DC OUT Connector Player A 12VDC car adaptorSYSTEM CONNECTIONS (CONTD.)
NB7D-CAR / NB9D-CAR (Player / Player models)
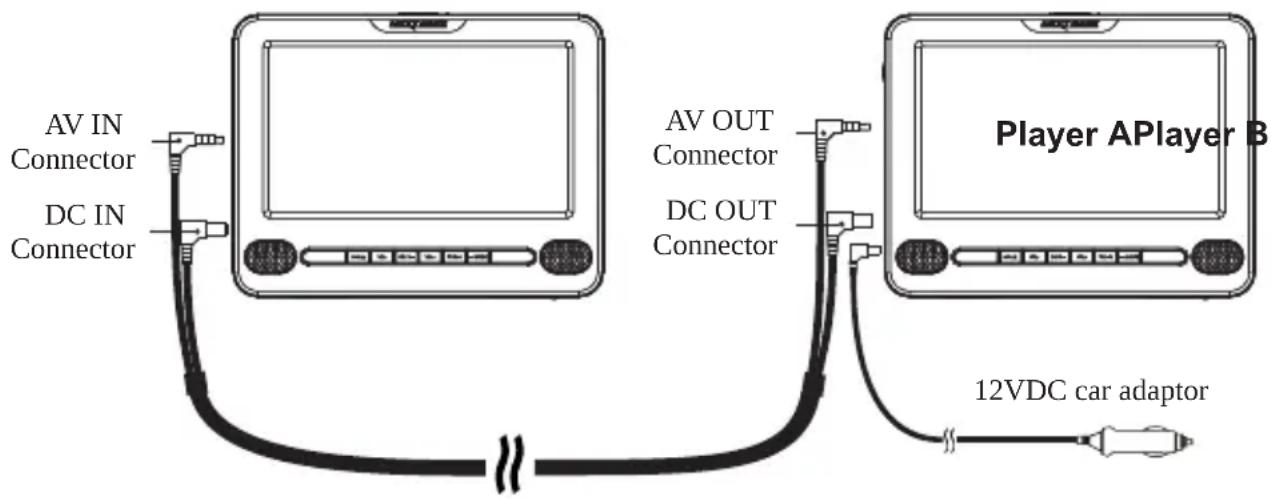
For the player / player models there is the standard car adaptor connection as described on the previous page to one of the two DVD players and also the audio / video / power connection between the two players to be made using the supplied cable.
DVD Player A:
Insert the DC connector into the 'DC OUT' socket located on the left hand side of the DVD player.
Insert the 3.5mm AV connector into the 'AV OUT' socket also located on the left hand side of the DVD player.
When sharing a movie between the two DVD players the disc should be in Player A.
DVD Player B:
Insert the DC connector into the 'DC IN' socket located on the left hand side of the DVD player.
Insert the 3.5mm AV connector into the ‘AV IN’ socket also located on the left hand side of the DVD player.
When sharing a movie Player B needs to be in AV IN mode.
text_image
AV IN Connector DC IN Connector AV OUT Connector DC OUT Connector Player APlayer B 12VDC car adaptorNote:
- For use with 12VDC vehicles only, not 24VDC vehicles. Should the DVD player be used in a 24VDC vehicle damage will be caused which is not covered under the manufacturers warranty.
- Always start the vehicle engine before connecting the DVD player to the supply or damage could result due to electrical surges during engine start.
CAR ADAPTOR FUSE INFORMATION
The car adaptor is fused in order to protect the car and DVD player from damage as a result of voltage / current surges, short circuit, cable damage or product failure.
The fuse is user-replaceable by unscrewing the end-cap, take care when removing the end-cap as there is a spring within the assembly.

text_image
unscrew 20mm glass fuse 3AReplacements fuses are readily available, should you have any difficulties please contact you local NEXTBASE dealer.
INSERTING A DISC
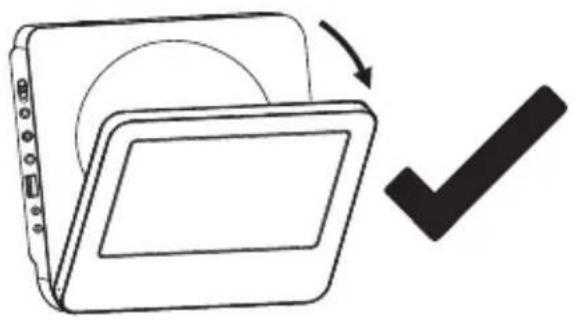
To open the disc compartment move the OPEN catch located on the top of the DVD player to the right.
Open the disc compartment by letting the screen move forwards, do not force the screen to open further.
natural_image
Simple line drawing of a device with a scroll and checkmark symbol (no text or labels)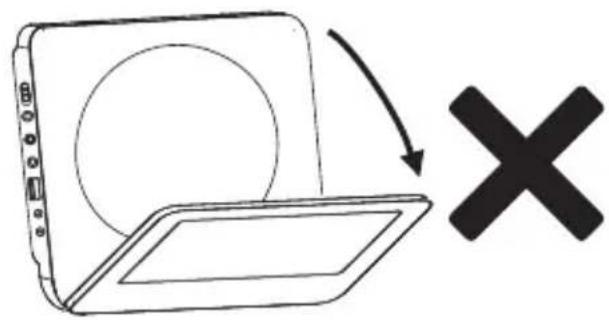
natural_image
Diagram of a device with a circular top and a rectangular base, accompanied by a black X symbol indicating cancellation or rejection (no text or labels present)Note:
Damage caused to the DVD player by opening the screen beyond the design limit is not covered under the manufacturers warranty.
Place disc onto the spindle with label facing forwards, making sure disc is secure. Close the disc compartment the DVD player will automatically read the disc.
AUDIO / VIDEO CONNECTONS
The CAR Series range of DVD players have Audio / Video (AV) Out and In functionality. This allows the DVD player to be connected using the an AV cable (sold separately) to an external screen, i.e. a television or an external AV source, i.e. a camcorder.
Please contact your local NEXTBASE dealer to purchase the correct AV Cable.
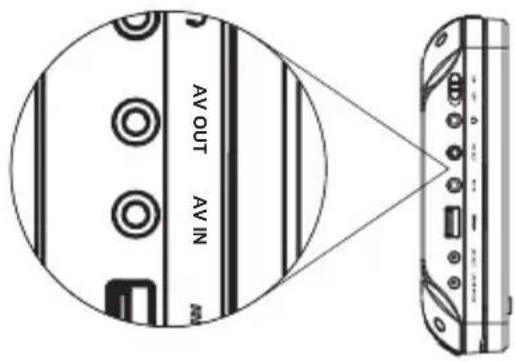
The connectors are located on the left hand side of the DVD player, see image below.
text_image
AV OUT AV INAudio / Video Out Connection
Connect the 3.5mm connector of the audio / video cable (not supplied) to the DVD player, using the socket marked AV OUT. Depending on the equipment that you wish to connect the DVD player to, you may need an adaptor to convert the ‘female’ RCA (red / white / yellow) connectors to ‘male’.
Audio / Video In Connection
Connect the 3.5mm connector of the audio / video cable (not supplied) to the DVD player, using the socket marked AV IN.
Depending on the equipment that you wish to connect the DVD player to you may need an adaptor to convert the ‘female’ RCA (red / white / yellow) connectors to ‘male’.
Press the MODE button on the front of the DVD player and then select AV IN, you can also use the SOURCE on the remote control.
The DVD player is now ready to receive audio and vid
eo signal from your external source.
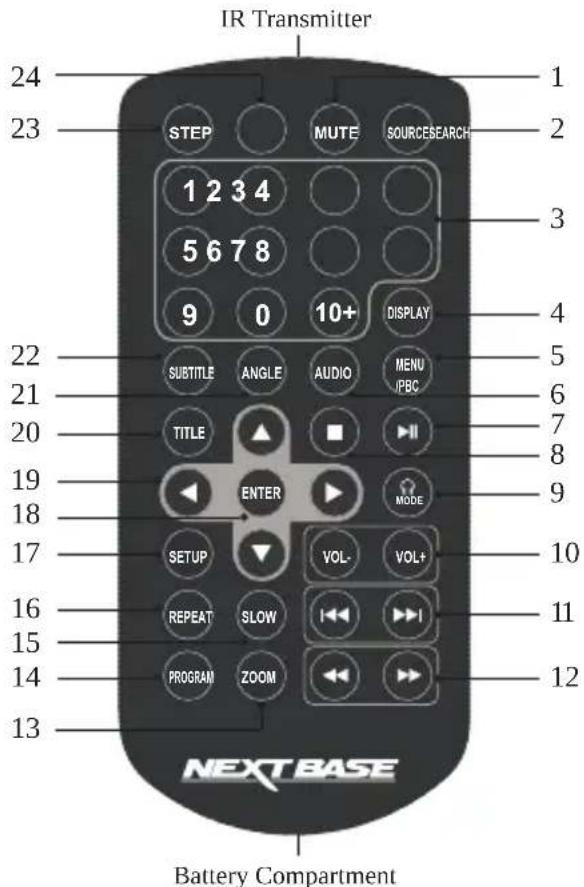
This section describes the remote control functions.
text_image
IR Transmitter 24 23 STEP MUTE SOURCESEARCH 1 2 3 4 5 6 7 8 9 0 10+ DISPLAY 22 SUBTITLE ANGLE AUDIO MENU JPBC 21 TITLE ■ ■ ■ ■ ■ ■ ■ ■ ■ ■ ■ ■ ■ ■ ■ ■ ■ ■ ■ ■ ■ ■ ■ ■ ■ ■ ■ ■ ■ ■ ■ ■ ■ ■ ■ ■ ■ ■ ■ ■ ■ ■ ■ ■ ■ ■ ■ ■ ■ ■ NEX T BASE Battery Compartment1. MUTE
Disable the audio output, applies to DVD player speakers, earphones and audio out.
2. SOURCE
Press to select media source: DVD / AV IN / MEDIA / SETUP.
3. NUMBER BUTTONS
Used to select numbered items within menus and also to input password.
4. DISPLAY
Press to display playback information, i.e. disk chapter etc.
5. MENU/PBC
DVD: Press to return to the disk root menu.
VCD: Press to turn on/off PBC (playback control).
6. AUDIO
DVD: Press to toggle through available languages on current disk.
CD/VCD: Press to toggle through available audio channels on current disk.
7. PLAY/PAUSE
Press once during playback to pause, press again to resume playback.

©
©
MEDIA PLAYBACK
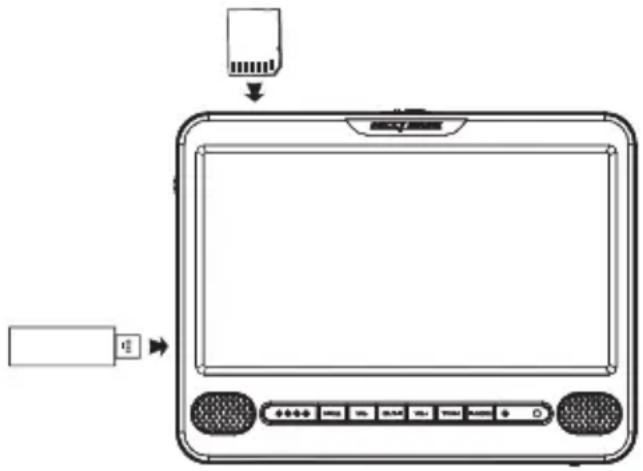
The CAR Series range of DVD players allow playback of video, photo and audio files from USB memory sticks and memory cards.
Insert the memory device as shown below, these can only be inserted fully when they are in the correct orientation, i.e. the memory card has contacts facing the front of the player as shown below.
text_image
Diagram showing a device with a labeled component and directional arrow, likely illustrating a process or system.Once a memory device is inserted, press the MODE button on the front of the DVD player or press SOURCE on the remote control and select Media, then USB or SD as required.
The folders / files stored on the memory device will be listed on screen, this may take a few seconds depending on how much content is stored on the memory device. Use the navigation and ENTER buttons to open folders and select files as required.
Viewing Images
Once an image has been selected a slide show will begin of the images available within the selected directory.
Press the stop button during the slide show to open the preview screen, from here you can access the 'Menu' to view button functions available during slide show. To continue select 'Slide Show' and press ENTER, alternatively select an image to start the slide show.
The slide show will automatically stop once images within the selected directory have been viewed.
Press ◀ to return to previous directory.
Music Playback
Once selected a music file (Mp3) will begin playback. During playback use the play / pause buttons on the remote control or on the front of the DVD player as required. Fast forward and rewind can be selected using the remote control.
Press ◀ to return to previous directory.
MEDIA PLAYBACK (CONTD.)
Movie Playback
Once a compatible video file (MPEG-2, DIVX4/5, AVI, XVID, JPG, MP3) has been selected playback will begin.
Should the file be of a format that is not supported (e.g. MPEG-4) an on screen message will appear saying ‘CODEC NOT SUPPORTED’.
During playback, functions such as play / pause, fast forward, repeat, zoom etc. remain available.
Once playback is stopped press to return to previous directory.
VIDEO COMPRESSION FORMATS
Video Compression Formats
The use of the DivX encoder is recommended in order to compress movies and then play upon this player. Whilst there are many movie formats and compression software available, most use MPEG4 algorithms at their heart. DivX is just one such MPEG4 compressor, but it is the most widely used and recognised by Sony, Panasonic and other manufacturers.
This device is capable of DivX playback in order to provide a reliable and consistent playback performance.
When using the official DivX encoder (download from www.DivX.com at a small charge) and always use the “Home Theatre” option for optimum compression and suitable playback quality upon the player. Maintain the 16:9 ratio for full screen viewing.
If your DivX movie is still unable to be played upon the DVD player then please change the file extension from .divx to .avi and re-try.
Use of other compression software, or the playback of other format files may have unreliable or unpredictable results and is not recommended.
WIRELESS HEADPHONES
The CAR Series range of portable DVD players have an in-built infra-red transmitter to allow wireless use of compatible headphones.
The transmitter is set to OFF by default and can be turned on by simply pressing the IR Headphone (MODE) button on the remote control.
Press once for 'Channel A'
Press twice for 'Channel B'
Press a third time to turn the IR transmitter OFF.
The IR transmitter can also be turned on through the SETUP menu as described later in this instruction manual.
Four red LED's will be visible on the DVD player when the transmitter has been turned on. These appear faint due to the nature of the transmitter and may be difficult to see in a bright environment.
This does not effect performance and is not a cause for concern.
There are two channels (A and B) available for transmission, this is to allow the two DVD players from NB7D-CAR / NB9D-CAR models to view different movies simultaneously and to transmit to two sets of headphones, listening to their individual movie soundtracks.
Dual Channel Infra-Red Transmitter Frequencies
Channel A: Left 2.3Mhz, Right 2.8Mhz
Channel B: Left 3.2Mhz, Right 3.8Mhz
Single Player (NB7-CAR / NB9-CAR)
Set both DVD p layer and headphones to Channel A, multiple headphones can be used.
Player / Monitor (NB7T-CAR / NB9T-CAR)
Set both DVD player and headphones to Channel A, multiple headphones can be used.
Player / Player (NB7D-CAR / NB9D-CAR)
Set DVD Player A to IR channel A and the headphones to Channel A.
Set DVD Player B to IR channel B and the headphones to Channel B.
This allows the two movies to be watched and heard without interference.
When sharing across the two screens there is no need to adjust settings
The receiving channel selected on the headphones must match the transmitting channel on the DVD player.
Contact your local NEXTBASE dealer to purchase compatible wireless headphones.
AUDIO LEVEL:

To prevent possible hearing damage, do not listen at high volume levels for long periods.
When using earphones listen at a reasonable volume for reasonable lengths of time.
Do not turn the volume so high that you cannot hear what is around you.
SYSTEM SETUP - GENERAL
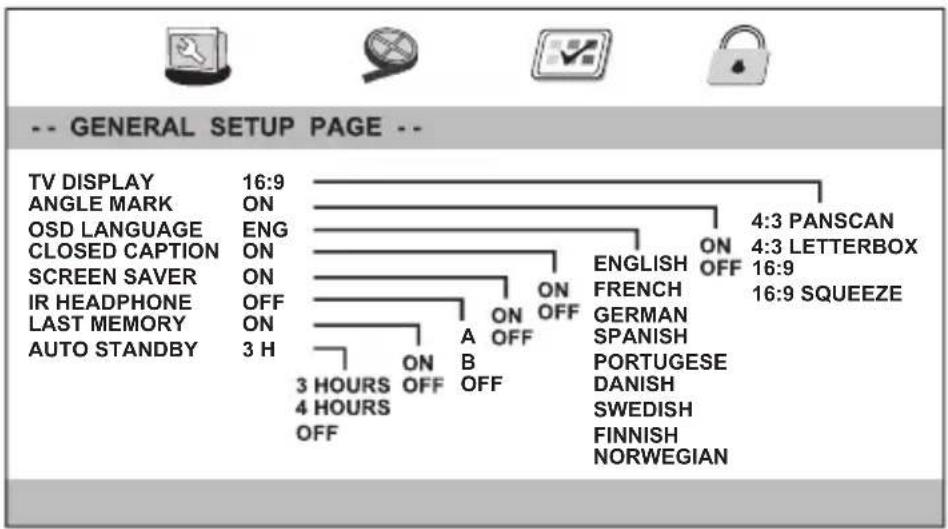
Press SETUP on the remote control to access the system setup menus. Using the navigation buttons and enter button, select required option, press SETUP to exit.
text_image
-- GENERAL SETUP PAGE -- TV DISPLAY 16:9 ANGLE MARK ON OSD LANGUAGE ENG CLOSED CAPTION ON SCREEN SAVER ON IR HEADPHONE OFF LAST MEMORY ON AUTO STANDBY 3 H 3 HOURS OFF 4 HOURS OFF 4:3 PANSCAN 4:3 LETTERBOX ON ENGLISH OFF FRENCH GERMAN SPANISH PORTUGESE DANISH SWEDISH FINNISH NORWEGIAN 16:9 SQUEEZETV DISPLAY
Select the aspect ratio of the playback image.
Default: 16:9
ANGLE MARK
Select the angle during playback.
Default: ON
OSD LANGUAGE
Select preferred language used for the DVD players on screen display.
Default: ENG
CLOSED CAPTION
Select whether to display the additional data that some discs contain during playback.
Default: ON
SCREEN SAVER
Turn Off / On the screen saver which appears on scr een after a few minutes of inactivity.
Default: ON
IR HEADPHONE
Turn on and select required channel for the IR transmitter.
Default: OFF
LAST MEMORY
Turn Off / On the last memory function.
Default: ON
AUTO STANDBY
Turn Off / On the auto standby function.
Default: 3 H
Some functions and features may depend on disc content and therefore may not be available.
SYSTEM SETUP - VIDEO
Video Setup Page
BRIGHTNESS
Adjust the brightness to best suit viewing environment.
Default: 00
CONTRAST
Adjust the contrast to best suit viewing environment.
Default: 00
HUE
Adjust the hue to best suit viewing environment.
Default: 00
SATURATION
Adjust the saturation to best suit viewing environment.
Default: 00
SYSTEM SETUP - PREFERENCES
Preference Page
ADU
| ENGLISH | FRENCH | |
| ENGLISH | FRENCH | GERMAN |
| FRENCH | GERMAN | SPANISH |
| GERMAN | SPANISH | PORTUGESE |
| SPANISH | PORTUGESE | DANISH |
| PORTUGESE | DANISH | SWEDISH |
| DANISH | SWEDISH | FINNISH |
| SWEDISH | FINNISH | NORWEGIAN |
| FINNISH | NORWEGIAN | |
| NORWEGIAN | OFF |
TV TYPE
Select the TV type for when DVD player is used with a television.
Default: PAL
AUDIO
Select the preferred audio language.
Default: ENG
SUBTITLE
Select the preferred subtitle language or turn subtitles off.
Default: ENG
DISC MENU
Select the preferred disc language.
Default: ENG
PARENTAL
Select the required parental control level to prevent minors from viewing unsuitable content.
The default setting is ADULT which allows all content. To change this setting, select required option and enter password (see Password Setup i nformation on next page).
Once the 4 digit password has been selected successfully OK will change to yellow, press ENTER to return to the preference menu. The selected parental control will be highlighted.
DEFAULT
Select RESET and press ENTER to return DVD player to default settings.
This will not reset parental control or password had these previously be changed.
Some functions and features may depend on disc content and therefore may not be available.
©
©
©
©
©
©
www.nextbase.co.uk