
DV3251 - TV BENQ - Free user manual and instructions
Find the device manual for free DV3251 BENQ in PDF.


| Product Type | LCD TV / HDTV |
| Screen Size | 80 cm (31.5 inches) |
| Native Resolution | 1366 x 768 |
| Aspect Ratio | 16:9 (widescreen) |
| Brightness | 500 cd/m² |
| Contrast Ratio | 800:1 |
| Response Time | 8 ms (grey-to-grey) |
| Viewing Angle | 85° horizontal/vertical |
| TV Tuner | Analog PAL, NTSC, SECAM |
| Audio Output | 2 x 8W speakers |
| Power Consumption | 180 W (typical) |
| Power Supply | AC 220-240V, 50/60 Hz |
| Weight (net) | 20 kg |
| Dimensions (W x H x D) | 997 x 593.5 x 123.5 mm |
| Connections | 1x Antenna, 2x SCART, 2x Composite, 2x S-Video, 2x Component, 1x HDMI/DVI, 1x PC D-Sub, 1x Audio Out, 1x Headphone |
| Special Features | Picture-in-Picture, Freeze, Sleep Timer, Teletext, Child Lock, Multiple Picture Modes |
| Supported Video Formats | 480i/p, 576i/p, 720p, 1080i |
| PC Input Support | Up to 1360x768 @60Hz (via D-Sub or DVI) |
| Remote Control | Included with batteries (2x AAA) |
| Cleaning Instructions | Use a slightly damp, lint-free cloth; avoid harsh chemicals |
Frequently Asked Questions - DV3251 BENQ
User questions about DV3251 BENQ
0 question about this device. Answer the ones you know or ask your own.
Ask a new question about this device
Download the instructions for your TV in PDF format for free! Find your manual DV3251 - BENQ and take your electronic device back in hand. On this page are published all the documents necessary for the use of your device. DV3251 by BENQ.
USER MANUAL DV3251 BENQ
Section 1: Quick Start Guide.... 1
-
Please read these instructions.... 2
-
Unpack the display .... 2
-
Select and prepare the installation location .... 3
-
Connect the antenna cable .... 4
-
Connect the power cable 4
-
Activate the remote control.... 5
-
Initialise the display 6
-
View the TV programs .... 7
Care and cleaning information 7
What's next? 7
Section 2: User's Manual....9
Getting to know your display....10
Introduction.... 10
What do I connect?...... 10
Input options 10
Connecting analog TV source inputs....10
Connecting Composite (AV) source inputs 10
Connecting Component Video source inputs....10
Connecting other Graphic source inputs....11
Display (front view).... 11
Display control panel.... 12
External AV devices (temporary) terminal panel 13
Display (rear view).... 14
Getting to know the remote control....16
Using the remote control ....18
Power on, power off and standby 18
Turning on the display....18
Turning off the display....18
Switching inputs 18
Adjusting volume.... 18
Adjusting the volume 18
Mute setting....18
TV sound mode selection 18
Changing programs 18
Using the program selection buttons on the remote control to change programs .....18
Using the program 5/6 buttons to sequentially change programs....19
Using the recall button to return to the previous viewed program....19
Selecting a picture mode .... 19
Table of Contents i
Using the freeze function 19
Adjusting aspect ratio 19
Using the PIP function 19
Using the sleep timer 20
Adjusting backlight....20
Display information.... 20
Using the Teletext function.... 20
Setting-up the display device 21
Connecting audio and video inputs.... 21
Connecting the SCART inputs....21
Connecting the SCART outputs 21
Connecting the Composite Video input 22
Connecting the S-Video input 22
Connecting the Component Video input 23
Connecting the PC input 23
Connecting the HDMI input 24
Connecting the DVT input 24
Connecting the audio output....25
On-Screen Display (OSD) menu....26
OSD structure 26
Navigating the OSD menu 26
Audio menu 27
Advanced Audio Settings....27
Picture menu....28
Feature menu 30
Window menu 31
TV menu 32
Performing manual installation.... 33
Editing programs 34
Naming a program....34
Swapping programs 34
Locking (preventing a program from selection)/unlocking a program 34
Deleting a program....34
Child lock 35
Enabling/disabling child lock 35
Changing password....35
Setup menu 36
Reference.... 37
Disclaimer 37
Copyright 37
Battery safety notice.... 37
Functions and features 37
Dimensional drawings.... 38
Specifications 39
Supported PC (D-Sub/DVI) Input Signal Timing 40
Supported Video (Component/DVI) Input Signal Timing 40
Aspect ratio behaviour 41
16:9....41
4:3....41
Letterbox....42
Wide 42
Real....43
Troubleshooting 44
TV....44
Antenna....45


DV3251-Lin.book Page iv Monday, December 12, 2005 4:07 PM

English




Table of Contentsiv


Benq
V32S/DV3251/DV3253
LCD Display
Section 1: Quick Start Guide
Welcome
1. Please read these instructions
Congratulations on purchasing your BenQ V32S/DV3251/DV3253 LCD Display. You have a state-of-the-art flat widescreen digital LCD display which should provide you with years of viewing pleasure.
Please take a few minutes to read these quick start instructions through before installing and using the display.
What's in the Quick Start Guide?
Section 1 contains the Quick Start Guide which provides you with enough information to setup the display and start viewing TV station broadcasts as quickly as possible. This is section 1.
What's in the User's Manual?
Section 2 contains the User's Manual which details the features and functions of the display and the remote control, describes how to connect to other devices, and provides product specifications and troubleshooting information for your further assistance.
The User's Manual also describes how to customise the display settings so that you can gain the best viewing experience possible to suit your preferences and viewing environment.
2. Unpack the display
The display carton disconnects from its base and lifts off over the top of the display. Follow the instructions on the carton to remove the upper carton from the base.
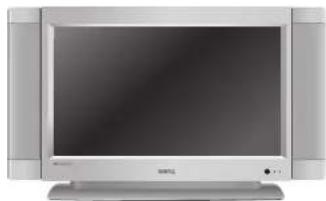
If you haven't done so already, carefully unpack the display and accessories (located in the top foam packers) from the delivery carton by lifting the display from the base whilst being careful to avoid damage to the display, and check that all the following items are included:
natural_image
Front view of a silver CRT television displaying its front panel and screen (no visible text or symbols)V32S/DV3251/DV3253 LCD display (x1)
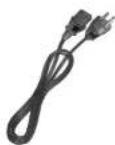
Power cable (x1)
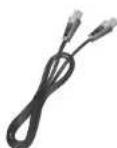
Antenna cable (x1)

Service information (x1)
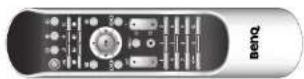
Remote control (x1)

AAA batteries (x2)
Quick Start Guide and User's Manual (x1)
The type of power cable supplied may differ from that illustrated, dependant upon your region of purchase.
If any item is missing or damaged, contact your place of purchase immediately and notify them of the discrepancy.
Dispose of packaging wisely:
• The cardboard carton can be recycled.
- Do not leave plastic bags within reach of young children or babies.
- Consider storing the packaging (if possible) for future transport of the display.
- Check that you haven't left an accessory inside the packaging, before discarding. Please keep the product documentation in a safe place for later reference.
For the primary safety of yourself and others, this LCD display should be handled with care to avoid damage to it or to persons which come into contact with it.
Section 1: Quick Start Guide2
All LCD screens have a very thin protective layer of glass which is liable to marking or scratching, and cracking if struck or pressured. The liquid crystal substrate is also liable to damage under excessive force or extreme temperatures. Please handle with care.
3. Select and prepare the installation location
In order to prevent potential dangers and prolong the service life of the display, please observe the following points when installing, operating and cleaning the display.

Do NOT place the display on an uneven, sloping or unstable surface where it may fall and cause damage to itself or others.

If recessed into a wall opening, you must leave at least 50–100mm free space both top and bottom for ventilation.

Do NOT place the display near water, like a spa or pool, or in a position which will allow the splashing or spraying of water onto the display, like in front of an open window where rain water may enter.

If wall mounting, allow at least 30mm space on top for attaching the display to the wall bracket. It slides in and down onto the bracket from above.

Do NOT place the display near or above sources of heat, such as radiators, heaters, fuel stoves and other heat-generating items (including audio amplifiers).

Do NOT cover or block the vents and openings whilst the display is switched on.

Do NOT place the display in direct sun or where direct sun or spot lighting will shine onto the display, as the heat may damage the display and the bright light will make viewing the display more difficult than necessary.

Do NOT place the display in an enclosed place without allowing for ventilation.

If wall mounting, have a suitable qualified and experienced tradesperson mount it safely. Ensure that the mounting bracket (optional accessory) is securely screw fixed to the wall structure, and not just the wall render, lining or cladding. Do not glue the bracket to the wall. Use only a recommended BenQ TV wall bracket for this model display. Ensure the bracket is level horizontally.
Once all considerations and precautions have been made, position the display where most suitable.
4. Connect the antenna cable
Connect a TV antenna cable fly-lead from your TV antenna system or Cable TV (CATV) to the antenna input on the rear of the display.
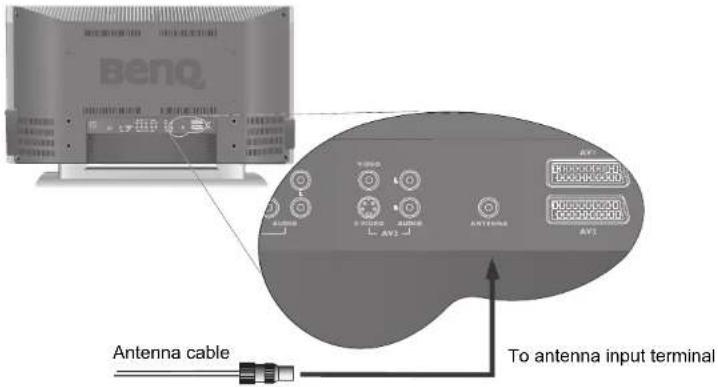
Check to make sure that all cable connections are correct and firmly in place. For best reception, you should have a properly aligned outdoor antenna system.
5. Connect the power cable
- Locate the power cable from the packaging, unwrap it, and plug the appropriate end into the AC input socket on the rear of the display (as illustrated below).
- Connect the other end into an appropriate wall power outlet, and switch it on (if switched). The display will enter standby mode and the power indicator (on the front lower right) will light up red.
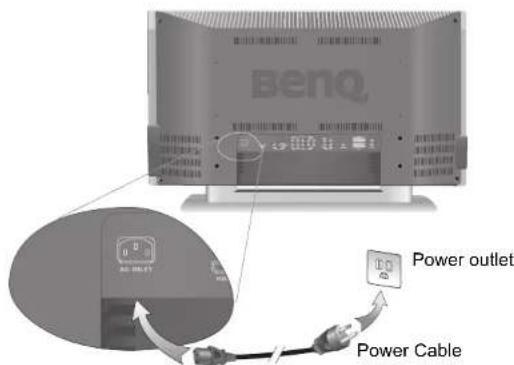
- The type of power cable plug and socket illustrated may differ from the type used in your region.
- Only use an appropriate power cable for your region. Never use a power cable which appears damaged or frayed. Never change the plug type on a power cable. Be aware of total loading when using extension cords or multiple outlet power boards.
WARNING: This BenQ LCD display has been engineered and manufactured with the highest priority on safety, however IMPROPER USE CAN RESULT IN POTENTIAL ELECTRICAL SHOCK OR FIRE HAZARD.
Section 1: Quick Start Guide4
6. Activate the remote control
Locate the remote control and batteries from the packaging, and unwrap them.
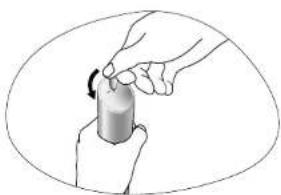
Turn the remote control end up to reveal its base, and open the lid of the battery compartment by using a small coin or similarly curved object to rotate the slot 90° anticlockwise.
The lid is spring loaded and will popup and come loose from the remote control body.
Insert the batteries (supplied) ensuring that the positive and negative marked battery terminals match the (+) and (-) marks in the battery compartment.
Note that these batteries are provided for your convenience so that you can operate the display straight away. You should replace them as soon as possible.
Refit the lid of the battery compartment by inserting the hinge into the recess at one edge and levering the lid down into position with the thumb of the hand holding the remote control body.
Whilst holding the lid in place in this manner, use your other hand and a small coin or similarly shaped object to rotate the locking slot 90° clockwise locking the lid in place.
natural_image
Illustration of a hand holding a cylindrical object with a rotating arrow, no text or symbols present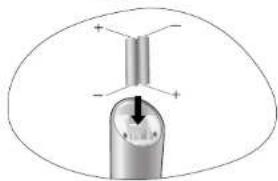
natural_image
Diagram of a mechanical component with a central shaft and a downward arrow, no text or symbols present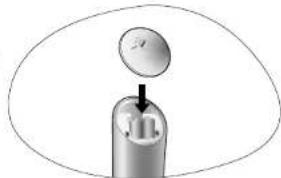
natural_image
Diagram of a mechanical component with a circular component and a downward arrow, no visible text or symbols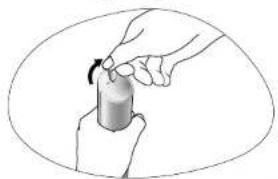
natural_image
Illustration of a hand holding a cylindrical object with an arrow indicating rotation (no text or symbols)Remote control usage tips
Point and aim the top front of the Remote Control directly at the display when pressing the buttons. Do not cover the sensor window on the front of the display (beside the power indicator lamp), or place objects in front of it which will block the direct line-of-sight between the Remote Control and the display sensor window.

- Do not let the remote control become wet, or place it in humid environments (like bathrooms.)
- If the remote control sensor window on the display is in direct sunlight or strong light, the remote control may not operate properly. In this situation, change the light source or readjust the angle of your display, or operate the remote control from a location closer to the remote control sensor window on the display.
Test the remote control
natural_image
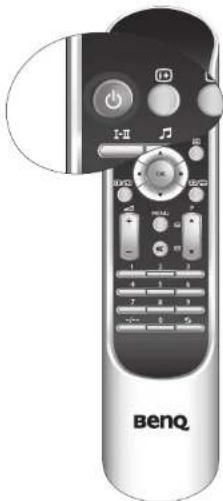
Illustration of a BenQ remote control with function keys and buttons (no text or symbols on the device itself)Press the Power button on the remote control. The display should turn on, and the power indicator change to green. If so, progress to the next step (7. Initialise the display) below.
If the display does not turn on, first check that the power is available (the power indicator will be lit red).
If so, try pressing the power button on the right of the top edge of the display. If the display turns on by this method, the problem lies with the remote control.
Secondly, check that the remote control batteries are properly installed. If need be, replace the batteries with new ones or known good ones.
See the troubleshooting section at the rear of the User's Manual for further assistance.
To turn off the display, press the Power button on the top of the display, or the Power button on the remote control again, and the display will return to standby mode (the power indicator will turn red.)
7. Initialise the display
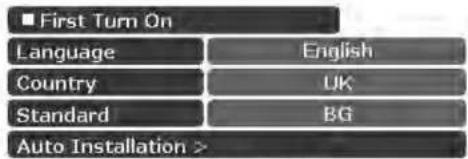
When first turned on (and until tuned), the "First Turn On" menu will display:
OK:Enter \~:Select <>:Adjust
The display uses the selections you make in this menu to determine which menu language to display and which TV station programs to search for and tune appropriate to the region you selected. This process need only ever be done once.
-
You can use the ◀ left, ▶ right, ▲ up and ▼ down buttons on the remote control or the display to navigate through the menu, and use the OK button on the remote control or the Input button on the display to make each selection.
-
When you select a 'Language', the 'Country' and TV 'Standard' items will change automatically to suit. You can select from English, Français, Nederlands, Deutsch, Italiano and Español.
- Once you've selected a 'Language', if your country is not displayed in the 'Country' item, you can select one from UK, France, Netherlands, Germany, Italy, Spain, Austria, Belgium, Luxembourg, Switzerland, Portugal, or Others.
- If 'Others' is selected as the 'Country', you will also need to select the TV broadcast standard suitable for your region from BG, DK, I or L.
- After you've chosen your 'Language', 'Country' and TV 'Standard', select the 'Auto Installation' menu item and then press the OK button on the remote control. After a short pause, the display will start searching for available programs and tune, sort and store them for you. This may take several minutes, depending on the available TV programs in your local reception area. Please allow the display to complete this tuning process.
Section 1: Quick Start Guide6





8. View the TV programs
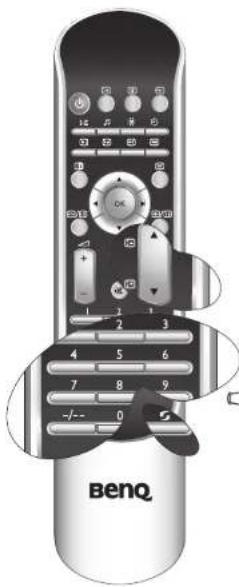
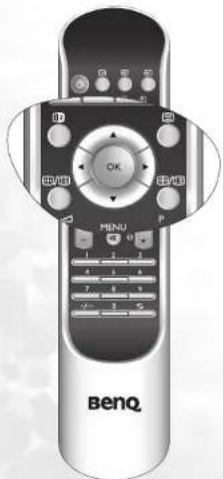
Press the Program ▲ or Program ▼ buttons on the remote control (as highlighted in the illustration) or press the Program ▲ or Program ▼ buttons on the top of the display to view the TV programs available in your area.
You can also select a program directly by selecting the station number using the numeric buttons on the remote control. For example, to select program 8, press the program selection button.
To select a double-digit program, press the Program entry button on the remote control, and then enter the program number using the program selection buttons. For example, to select program 28, press the Program entry button, and then the , program selection buttons on the remote control.
The remote control features a program return button so that you can quickly return to the previous viewed program, by pressing the Recall button (also highlighted in the illustration).
Please refer to the User's Manual for further information about the display and its operation.
The LCD display is a high resolution display device. To achieve the best possible display results, it is recommended that you connect it to a digital video source and set the source output resolution to match the LCD display resolution then select an appropriate aspect ratio.
When viewing traditional (analog) TV source, it is recommended that you set the aspect ratio to 4:3 or Wide.
See the User's Manual for more information about aspect ratios and settings.
To alter the volume, press the △ + or △ - button on the remote control or the Volume up ▶ or Volume down ◀ button on the display. The volume indicator will display on-screen.
Care and cleaning information
• Always turn off the display by pressing the power button before cleaning.
- Do NOT use cream, liquid, aerosol or spray cleaners. Use only a slightly damp well wrung-out (drip-free) and lint-free, clean soft cloth and lightly wipe the display.
- If necessary, use a pH-neutral liquid dish-washing detergent diluted with water on a separate clean lint-free cloth to remove oil or grease marks. Wipe over again with a clean dry lint-free cloth to remove any smear marks.
- Under close examination and in certain circumstances, you may notice that a few non-active pixels appear on the screen as a fixed point of colour. Please note that this does not affect the performance of your product as it is usually not visible at normal viewing distances.
- If the display is not going to be used for an extended period of time (like when you're going away for holidays), it should be switched off and unplugged from the wall outlet. You should also consider removing the batteries from the remote control (as they may leak).
What's next?
You have reached the end of Section 1: Quick Start Guide. By now, you should have a reasonable understanding of your new LCD display and its controls, know how to unpack, install, connect, turn on, tune, change the programs, and how to care for and maintain it. Should you wish to maximise your viewing experience pleasure, Section 2 of this booklet contains the User's Manual which describes how to customise the display settings to suit your preferences and viewing environment. It details the features and functions of the display and the remote control, describes how to connect other devices, and provides product specifications and troubleshooting information for your further assistance.
Section 1: Quick Start Guide 7


DC251-In-QuickStartGuide.In Page 8 Tuesday, December 13, 2005 2:03 PM

English
Section 1: Quick Start Guide8


Benq
V32S/DV3251/DV3253
LCD Display
Section 2: User's Manual
Welcome
Getting to know your display
Introduction
This booklet is divided into two sections: the Quick Start Guide; and the User's Manual. For details of the Quick Start Guide, see "1. Please read these instructions" on page 2.
This is section 2, the User's Manual which describes how to customise the display settings so that you can gain the best viewing experience possible to suit your preferences and viewing environment. This section details the features and functions of the display and the remote control, describes how to connect to other devices, and provides product specifications and troubleshooting information for your further assistance.
What do I connect?
This LCD display is a state-of-the-art flat widescreen digital display device. It has a built-in analog TV tuner which can be used to view standard definition analog television (TV or ATV), cable television (CATV), or radio frequency (RF) modulated video through its coaxial TV Antenna input socket.
However, the high quality of a widescreen LCD display isn't realized through analog TV. The highest possible quality display is only possible from high definition digital video sources like High Definition TV (HDTV), High Definition DVD (HVD).
Input options
This display supports the simultaneous connection of several different types of TV, Video and Graphic sources, and permits you to select whichever one of the available sources you wish to view at any time. You use the Input ⏻ button on the remote control or the display to cycle through and select an input source.
There are multiple sockets on the rear and side of the display for TV, Video, and Graphic inputs.
• Analog TV source input includes: 1 x Coaxial analog TV Antenna (BNL)
• Video source inputs include: 2 x S-Video, 2 x Composite Video, and 2 x SCART.
- Graphic source inputs include: 2 x Component Video (Y/Pb/Pr) or (Y/Cb/Cr), 1 x HDMI/DVI, and 1 x PC D-Sub.
You should connect whichever TV, Video or Graphic sources you wish to view on the display. You need not connect more than one if that one is all you wish to view.
Connecting analog TV source inputs
The TV Antenna input is the only input which can make use of the built-in TV tuner and enable this display to be referred to as a TV. You can connect an external VHF or UHF TV antenna (if available) to the TV Antenna input using an appropriate TV coaxial cable, and select the 'ATV' input to view analog TV broadcasts. See "4. Connect the antenna cable" on page 4. If you have cable TV, you can connect your cable TV decoder box to the TV Antenna input using an appropriate TV coaxial cable, and select the 'ATV' input to view cable TV.
Connecting Composite (AV) source inputs
You can connect an external analog video device (if available—VCR, VCD or DVD) to either of the Composite Video (AV or SCART) or S-Video inputs, and select 'AV1', 'AV2' (for SCART input), 'AV3', 'AV4' (for AV input), 'AV3-S', 'AV4-S' (for S-Video input) or 'AV2-S' (for S-Video via SCART input) as the input source respectively to view analog video. See "Connecting the Composite Video input" on page 22, "Connecting the SCART inputs" on page 21 or "Connecting the S-Video input" on page 22. If the video source device supports it, you could alternatively connect it using the Component inputs for the best possible resolution picture.
Connecting Component Video source inputs
You can connect Component Video inputs such as an external digital TV (DTV) tuner to either of the Component Video inputs, and select the 'Component 1' or 'Component 2' input respectively to view DTV broadcasts. See "Connecting the Component Video input" on page 23.


Connecting other Graphic source inputs
You can connect a PC video card graphic source (if available) like an RGB output or a digital DVI output. If your device supports HDMI output, you can also use the HDMI input on the LCD display for connection. Select the 'PC', 'DVI' or 'HDMI' input respectively to view the display. See "Connecting the PC input" on page 23, "Connecting the DVI input" on page 24 and "Connecting the HDMI input" on page 24.
Display (front view)
English
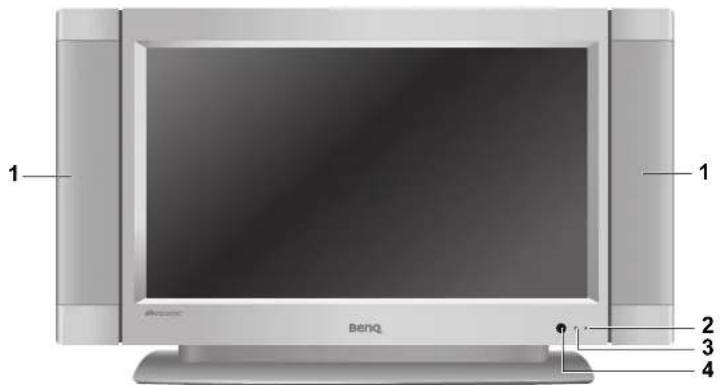
| No. | Name Description | |
| 1 | Speakers High-fidelity speakers for generating sounds. | |
| 2 | Power indicator | Lights up green when the display is powered on.Lights up red when the display is in standby mode.Flashes red when the display is connected to a PC and the PC enters standby mode. |
| 3 | Light sensor | If activated, this sensor detects ambient lighting condition and adjusts the brightness of the display automatically.See "Backlight" on page 36 for more information. |
| 4 | Remote control sensor | Receives command signals from the remote control. Do not obstruct the sensor by placing any objects in front of it, which will hinder the reception of signals. |
Getting to know your display 11
Display control panel
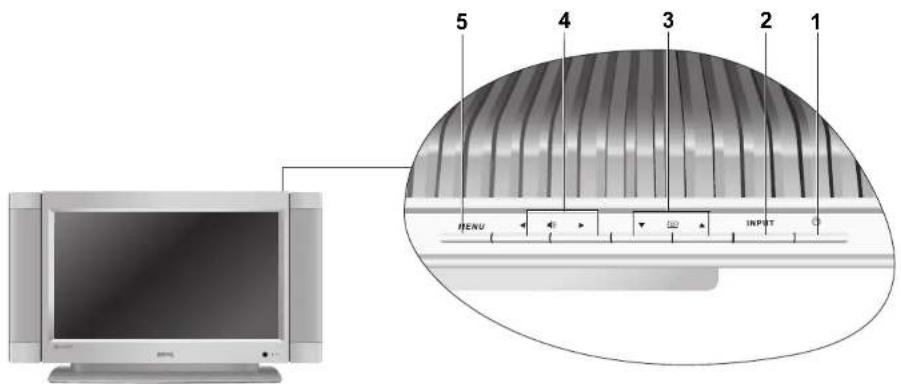
| No. | Name Description | |
| 1 | (Power) | Toggles the display between standby mode and on. (Performs the same action as the Power button on the remote control.) |
| 2 INPUT | Cycles through possible input signal sources. (Performs the same action as the Input button on the remote control.)In the OSD (On-Screen Display) menu, selects the highlighted menu item to enter a submenu. (Performs the same action as the OK button on the remote control.) | |
| 3 | Program ▼/▲ buttons | Sequentially selects the previous or next tuned TV program.(Performs the same action as the Program ▲/▼buttons on the remote control.)In the OSD menu, moves the selection highlight up or down.(Performs the same action as the arrow up/down buttons on the remote control.) |
| 4 | Volume ◀/▶ buttons | Adjusts the volume level of the speakers. (Performs the same action as the Volume +/- buttons on the remote control.)In the OSD menu, moves the selection highlight left or right or changes settings. (Performs the same action as the arrow left/right buttons on the remote control.) |
| 5 | M E N | Displays the OSD menu if not visible, or exits the current menu if displayed. (Performs the same action as the Menu button on the remote control.) |
External AV devices (temporary) terminal panel
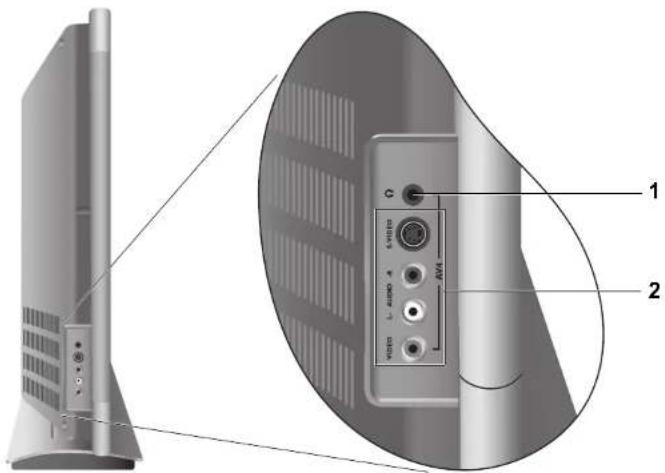
| No. | Name Description | |
| 1 | Headset socket | This socket is an audio output for connecting an external headset. The display speakers will be muted whenever the headset socket is being used. |
| 2 | AV4(RCA or S-Video) | •VIDEO (Composite video input):Connect to the composite video output of your AV device.•AUDIO (L/R audio inputs):Connect to the audio output of your AV device.(This input is common for either Video or S-Video audio.)•S-VIDEO (S-Video input):Connect to the S-Video output of your AV device.Connect your external AV device using either the Video or S-Video inputs. If both are connected to a video source at the same time, S-Video input takes preference over Video input. If you get to choose, S-Video will provide a better quality image. |
Getting to know your display 13
Display (rear view)
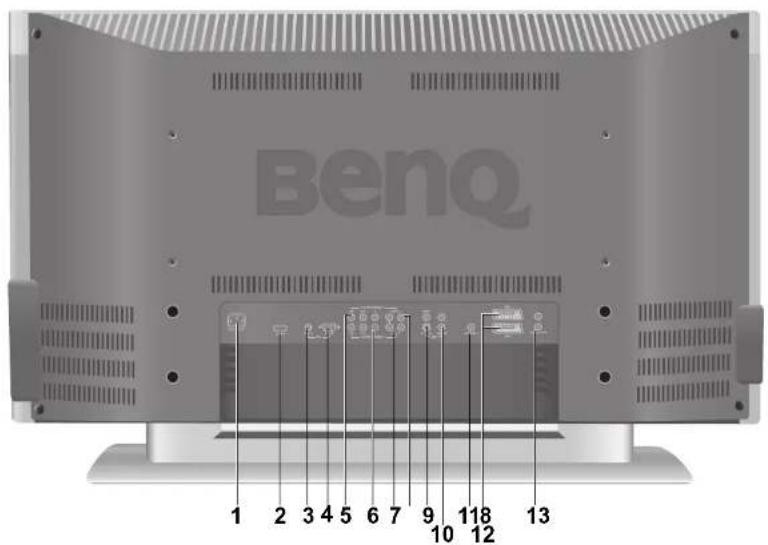
| No. | Name Description | |
| 1 AC | INLET Connect to | the AC power cable |
| 2 HDMI | Connect to a DVI digital video or HDMI digital audio/video output of your digital source device | |
| 3 PC | AUDIO | Connect to the audio output of either the PC or DVI digital video output as appropriate for your source device. |
| 4 PC | D-SUB | Connect to a PC's RGB video (D-Sub) output. See "Supported PC (D-Sub/DVI) Input Signal Timing" on page 40 for compatible timing modes. |
| 5 | COMPONENT 2 Y Cr/Pr Cb/Pb | Connect each to the component video (Y Cb/Pb Cr/Pr) outputs of appropriate video source devices |
| 6 | COMPONENT 1 Y Cr/Pr Cb/Pb | Connect each to the component video (Y Cb/Pb Cr/Pr) outputs of appropriate video source devices |
| 7 | COMPONENT 1 AUDIO | Connect each to the component audio outputs of appropriate video source devices to match that of each component video input |
| 8 | COMPONENT 2 AUDIO | Connect each to the component audio outputs of appropriate video source devices to match that of each component video input |
| 9 | AV3 VIDEO AV3 S-VIDEO | Connect to either the Composite Video or S-Video output as appropriate for your AV source deviceConnect your external AV device using either the Video or S-Video inputs. If both are connected to an AV source at the same time, S-Video input takes preference over Video Input. S-Video will provide a better quality Image. |


| 10 AV3 AUDIO | Connect to the audio output of either the Composite Video or S-Video output as appropriate for your AV source device. (These inputs are common for either Video or S-Video audio.) |
| 11 ANTENNA Connect | to your antenna TV/CATV cable system |
| 12 AV1 SCARTAV2 SCART | Connect each to the SCART output of up to 2 separate AV source devices. AV1 is full SCART compliant and also accepts gaming RGB. AV2 is AV input SCART compliant and also accepts S-Video. |
| 13 AUDIO OUT | Connect to the audio input of an audio device. This output is always available, however, its level is fixed and cannot be controlled by the Volume. |
English
Getting to know the remote control
1. ⏻ Power
Press this button to power the display on and off. See "Power on, power off and standby" on page 18.
2. Input
Press this button to select a different input source. See "Switching inputs" on page 18.
3. Backlight
Press this button to select your desired screen backlight level. See "Adjusting backlight" on page 20.
4. Information
Press this button to display the screen image source information. See "Display information" on page 20.
5. Sleep
- Press this button to set the automatic shut-off timer. See "Using the sleep timer" on page 20.
- When Teletext is displayed on the screen, press this button to select the corresponding colour Teletext page. See "Using the Teletext function" on page 20.
6. TV sound
- Press this button to toggle between stereo, mono and bilingual sound reception. During bilingual broadcasts, Sound 1 /Sound 2, or sound 1 /sound 2 / Sound 3 (depending on the received broadcasting signal) can be selected. See "TV sound mode selection" on page 18.
- When Teletext is displayed on the screen, press this button to select the corresponding colour 'Teletext page. See "Using the Teletext function" on page 20.
7. Preset
- Press this button to select from among 4 preset picture modes. See "Selecting a picture mode" on page 19.
- When Teletext is displayed on the screen, press this button to select the corresponding colour Teletext page. See "Using the Teletext function" on page 20.
8. Audio
- Press this button to select the AV source audio mode. (This is for all audio except TV Sound modes.)
- When 'Teletext is displayed on the screen, press this button to select the corresponding colour Teletext page. See "Using the Teletext function" on page 20.
9. Mode
Press this button to cycle the Teletext display mode between Teletext only or with Teletext superimposed on the display. See "Using the Teletext function" on page 20.
10. Index
Press this button to go to the Teletext index page. See "Using the Teletext function" on page 20.
11. ☐ Reveal
Press this button to display any concealed Teletext information. See "Using the Teletext function" on page 20.

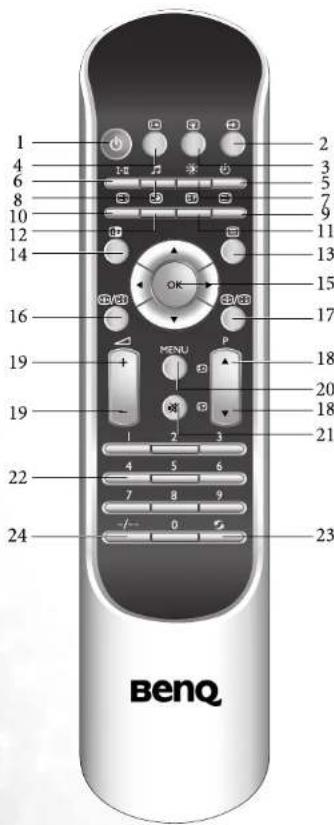
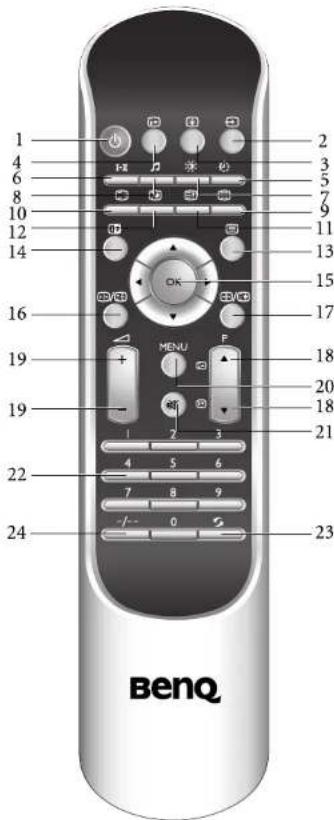
12. Subpage
Press this button to enter the subpage of a Teletext menu. See "Using the Teletext function" on page 20.
13. Teletext
Press this button to turn the Teletext decoder on or off. Page store won't start until the Teletext decoder is activated. See "Using the Teletext function" on page 20.
14. NP
Press this button to simultaneously view signals from two different sources on the screen. See "Using the PIP function" on page 19.
15. ▲/▼/▶/◀ and OK
- ▲▼: Press the ▲ or ▼ buttons to select settings.
- ▶◀: Press the ▶ or ◀ buttons to adjust OSD menu settings.
- Press OK to execute selections, or to enter a submenu you have selected.
See "Navigating the OSD menu" on page 26.
16. Freeze
Press this button to freeze the image on the screen. Press the button again to resume viewing in real time. See "Using the freeze function" on page 19.
17. Aspect
Press this button to adjust the screen image aspect ratio. See "Adjusting aspect ratio" on page 19.
18. ▲ / ▼ Program
- Press these buttons to sequentially change programs. See "Changing programs" on page 18.
- When Teletext is displayed on the screen, press these buttons to go to the previous or next page. See "Using the Teletext function" on page 20.
19. +/- Volume
Press these buttons to raise or lower the volume level. See "Adjusting volume" on page 18.
20. MENU
Press this button to display the OSD (On-Screen Display) menu for commands and settings. Press again to close. See "Navigating the OSD menu" on page 26.
21. Mute
Press this button to mute the sound output. Press it again to restore the sound output. See "Mute setting" on page 18.
22. Program selection
Press these buttons to select the program you wish to view. See "Using the program selection buttons on the remote control to change programs" on page 18.
23. Recall
Press this button to toggle between the current and the previous program you were viewing. See "Using the recall button to return to the previous viewed program" on page 19.
3 Using the remote control
Power on, power off and standby
Turning on the display
After plugging the display's power cord into a wall outlet, the display will enter standby mode automatically. The power indicator will light up red.
Press the ⏻ (Power) button on the top of the display, or press the Power button on the remote control as highlighted. The display will turn on and the power indicator will change to green.
Turning off the display
Press the ⏻ (Power) button on the top of the display, or the Power button on the remote control again, and the display will return to standby mode. The power indicator will turn red.
Switching inputs
Turn on all connected equipment or devices before selecting an input.
Press the INPUT button on your display, or press the Input → button on your remote control to display the current selected input.
Press the button repeatedly until your desired input is displayed. The sequence is as follows:
ATV AV1 AV1 - RGB AV2 (or AV2-S) AV3 (or AV3-S) AV4 (or AV4-S)
Component 1→ Component 2→PC→HDMI (or DVI)→ ATV→...

- AV2-S will appear only when S-Video (Y/C) signal is detected from the SCART inputs.
- AV3-S and AV4-S will appear only when the S-Video input signal is connected to these inputs.
• DVI will appear only when DVI digital video signal is connected to the HDMI input.
Adjusting volume
Adjusting the volume
- Press the Volume ▶ button on your display or press the Volume ∠ + button on your remote control to increase volume. The volume indicator will increase in length as volume rises.
- Press the Volume ▶ button on your display, or press the Volume △ - button on your remote control to decrease volume. The volume indicator will decrease in length as volume falls.
Mute setting
- Press the Mute ✕ button on the remote control to turn off the audio temporarily.
- Press the Mute ☑ button once more, or press the Volume ◀ or Volume ▶ button on your display to restore the sound level.
TV sound mode selection
Press the TV sound 1-Ⅱ button on your remote control to select "Sound 1", "Sound 2", "Sound 3", "Auto", "Nicam", "Stereo" or "Mono" systems (the items available will depend on the TV sound system being received).
Changing programs
Using the program selection buttons on the remote control to change programs
- To select a single-digit program, press the corresponding program selection button on the remote control. For example, to select program 8, press the program selection _ button on the remote control.
- To select a double-digit program, press the Program entry -/- button on the remote control, and then enter the program number using the program selection buttons. For example, to select program 28, press the Program entry button, and then the _1, _8 program selection buttons on the remote control.
Using the remote control18


- The program indicator icon on the top right corner of the screen shows either '-' or '-' to indicate which entry mode is selected.
Using the program ▲/▼ buttons to sequentially change programs
Press the Program ▲ /▼ buttons on your remote control, or press the Program ▲ or Program ▼ buttons on the display to sequentially cycle through your TV programs.
Using the recall button to return to the previous viewed program
To return to the previous viewed program, press the Recall 5 button on your remote control. This button can be used to toggle between the two most recently viewed programs without having to press the precise program number.
Selecting a picture mode
To select a picture mode, press the Preset ⚙️ button on the remote control. This enables you to select from the following settings:
- Standard
- Dynamic
- Cinema
- Personal
Using the freeze function
Press the Freeze 🎋/ 📄 button on the remote control to freeze the image on the screen. Press the Freeze 🎋/ 📄 button again to restore normal viewing.
This freeze function does not control the input source which will continue normally, but not be displayed whilst the image remains frozen. When the image freeze is stopped, normal play will resume in real time. That is, the displayed image will jump to the current time and any interim video is not displayed.
Adjusting aspect ratio
There may be situations where you select an image source which has a different aspect ratio to your screen. This model display has a true widescreen TV 16:9 aspect ratio, and so when viewing 4:3 aspect images like those from the built-in analog TV tuner, the screen will not be filled.
Should you wish to stretch or resize the image to fill the screen, you can use the Aspect ⊕/ ⊗ button on the remote control to select an aspect ratio you prefer. It will cycle through the following display aspect ratios for each press of the button:
• 16:9
- Wide
· 4:3
• Real
- Letterbox
The items available will depend on the input source being selected. See "Aspect ratio behaviour" on page 41 for details.
Using the PIP function
If your display is connected to both a Video and a Graphic source, pressing the PIP button allows you to display both images on the screen at the same time in PIP (Picture In Picture) mode.
• Full Screen: Normal display.
• Video On Graphic: Display the Video picture in a window inserted over the Graphics picture.

- Video image sources: TV (ATV), Composite Video (AV1, AV2, AV3 and AV4), Interlaced RGB Component Video (AV1-RGB) and S-Video (AV2-S, AV3-S and AV4-S).
• Graphic image source: PC
- If the display is set to Video On Graphic mode while the graphic image source cannot be detected, the Video picture will not be displayed either.
- The Teletext function is not available in the Video image in PIP mode.
Using the sleep timer
Press the Sleep Ⓥ button to enter the sleep timer function.
Press the button again to set the time interval. Time is set in increments of 30 minutes, from 0 to 180 minutes.
At the expiration of this time, the display will go into Standby mode. This is useful if you want the display to automatically turn itself off after a set period of time.
Adjusting backlight
To adjust the intensity of your display's backlight system, press the Backlight ⚙ button to select between "Auto", "Dark", Normal" or "Bright".
When viewing the display in dimly lit rooms it is recommended to set the backlight to "Dark" which will reduce the image brightness and make the dark areas of the image darker thus maintaining a high contrast image in a dark environment.
If "Auto" is selected, the ambient light sensor will be activated and the display's backlight will be changed automatically according to the ambient lighting condition.
Display information
Press the Information (i+) button to display the signal information, including input video signal source, Video format, TV sound and current selected program. The information displayed varies according to the input source being selected.
Using the Teletext function
Press the Teletext ≡ button to display Teletext. To return to normal viewing, press the button again.
Teletext is only available when 'ATV' is selected as the input source, and a program which transmits Teletext is currently displayed. Not all TV stations broadcast Teletext. If in doubt, please contact the TV station.
When Teletext is displayed on the screen, you can:
- Press the Mode ☐ button to cycle between Teletext modes including Teletext only and mixed display.
- Press the Index ☐ button to go to the Teletext index page.
- Press the Reveal ☑ button to display any concealed Teletext information (if available).
- Press the Subpage 🔒 button to enter the subpage of a Teletext menu (if available).
- Press the TV sound, Audio, Preset or Sleep buttons to jump to the corresponding coloured pages as displayed across the bottom of the Teletext screen.
- Press the ▲ or ▼ buttons to go to the previous or next Teletext page (if available).


4Setting-up the display device
Connecting audio and video inputs
Pay attention to the following when making connections:
- For safety reasons, before connecting any external devices, please turn the devices off.
- Also, before deciding upon a particular connection method, please familiarise yourself with the location and type of each input.
- Be aware that if incorrect connections are made, picture or colour quality may be adversely affected.
- Once connected, please ensure that all plugs and connectors are firmly seated.
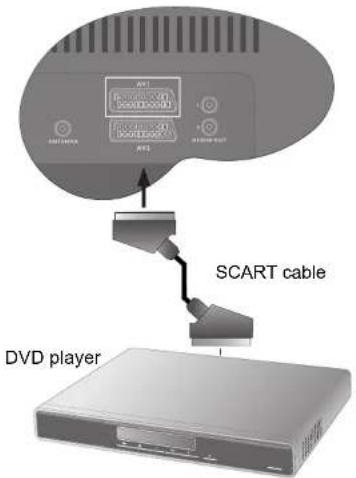
Connecting the SCART inputs
Connect the AV1 or AV2 (SCART) terminal on the display to the SCART terminal on the AV equipment using a SCART cable (not provided).
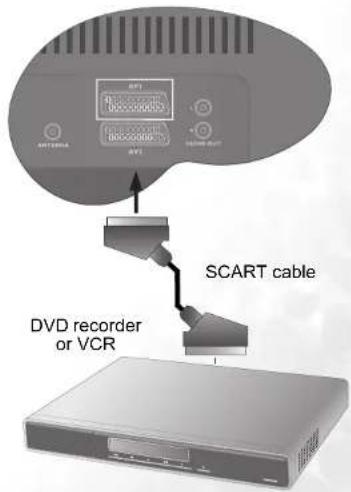
Connecting the SCART outputs
Connect the AV1 or AV2 (SCART) terminal on the display to the SCART terminal on the AV equipment using a SCART cable (not provided).
Depending on the input source connected and selected by using the Input button on the remote control, the AV1 and AV2 SCART terminals can be set to output different types of signals as shown in the table below:
| Selected input | Corresponding AV1 SCART output | Corresponding AV2 SCART output |
| AV1/AV1/AV1V | ||
| AV1 (Composite Video) | ATV | AV1 (Composite Video) |
| AV1 RGB ATV ATV | ||
| AV2 (Composite/S-Video) | ATVATV | |
| AV3/AV4 (Composite/S-Video) | ATV | AV3/AV4 (S-Video recombined as Composite Video) |
| Component 1/2 ATV ATV | ||
| PC ATV ATV | ||
| HDMI (DVI) ATV ATV |
Setting-up the display device 21
Connecting the Composite Video input
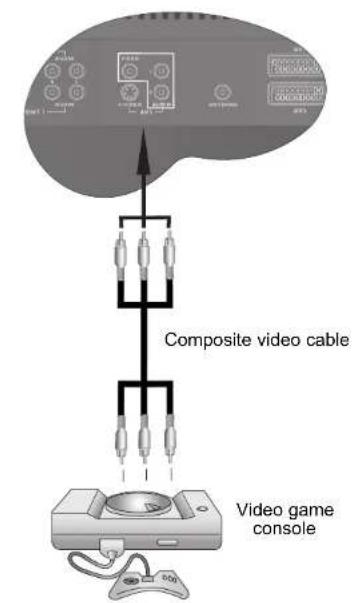
Connect the Composite Video output of your AV equipment to the Composite Video (AV3) input terminals on the back of the display using the Composite Video cable (RCA connector, not provided) as illustrated.
A Composite Video cable consists of three connectors: Yellow (video), White (left channel audio), and Red (right channel audio).

Composite Video Input is the most commonly used signal input, however, this type of input provides the least optimal image quality. S-Video and Component Video provide better quality signals. Many video sources can only output Composite video signals, for example, most VCRs, analog Camcorders and game consoles.
flowchart
graph TD
    A["Composite video cable"] --> B["Video game console"]
    B --> C["Computer"]
Connecting the S-Video input
-
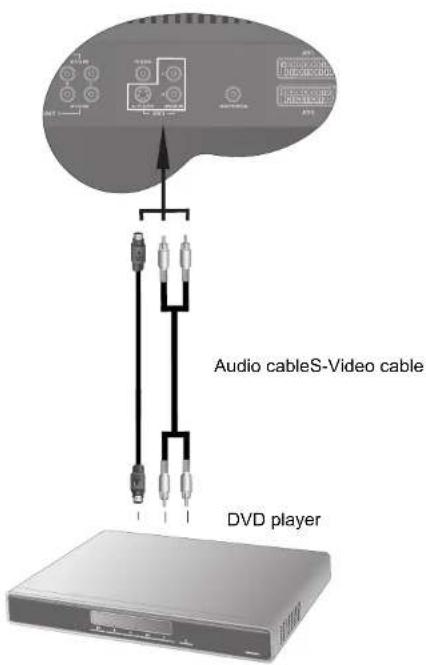
Connect the S-Video output of your AV equipment to the display's AV3 S-VIDEO terminal using the S-Video cable (not provided). Pay attention to the alignment of the plugs on the S-Video cable when inserting so as not to damage any pins.
-
Connect the audio output of your AV equipment to the display's AV3 AUDIO L/R input terminals using the AV cable (not provided). The yellow plugs are not used.
You need not connect both a Composite Video and an S-Video from the same device; just one or the other. If you have the choice, use the S-Video instead of Composite Video as an S-video signal provides a higher quality image to that of Composite Video.
Setting-up the display device22
Connecting the Component Video input
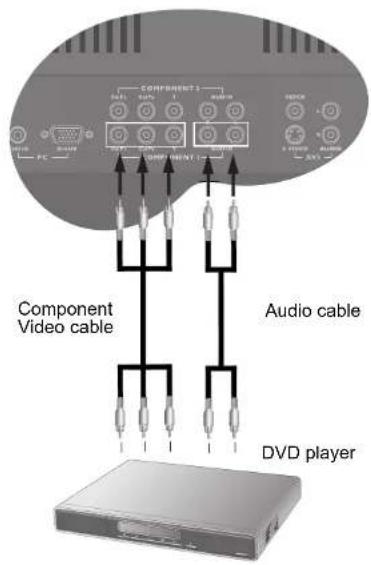
The display supports two separate sets of Component Video inputs. This allows you to connect two independent Component Video equipped AV devices to the display at the same time if you wish. You then need only select the appropriate input to view using the INPUT button on the remote control. A Component Video cable consists of three connectors: Green (Y), Blue (Pb), and Red (Pr).
-
Connect the Component Video output of your AV equipment to the display's COMPONENT (Y CB/PB CR/PR) terminals using the Component Video cable (not provided).
-
Connect the audio output of your AV equipment to the display's COMPONENT AUDIO L/R input terminals using an audio cable (not provided).

Of the analog video signal types, Component Video offers the best quality. Ensure the connector colours match, as failure to connect the correct colours of the cables to the corresponding coloured terminals will result in a incorrectly coloured or badly distorted image. See "Supported Video (Component/DVI) Input Signal Timing" on page 40 for timing options.
Connecting the PC input
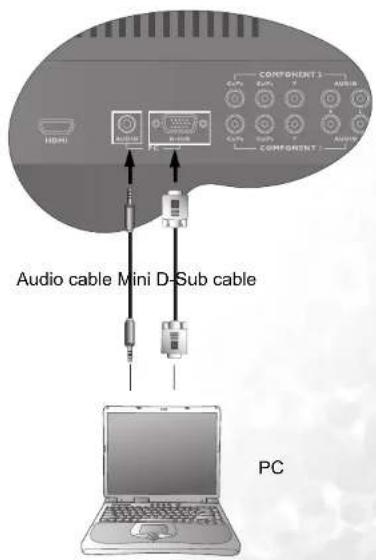
- Connect the video output of your PC to the PC D-SUB terminal on the display using a mini (15-pin) D-Sub cable (not provided).
- Connect the audio output of your PC to the display's PC AUDIO input terminal using an appropriate mini-jack stereo audio cable (not provided).

See "Supported PC (D-Sub/DVI) Input Signal Timing" on page 40 for timing options.
If you require more information on how to connect your particular equipment type, please refer to the manual of the piece of equipment you wish to connect.
Setting-up the display device 23
Connecting the HDMI input
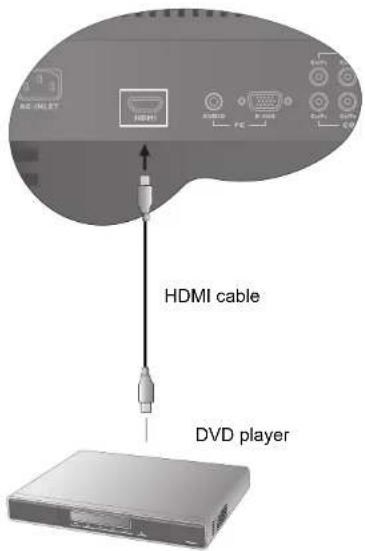
Connect the HDMI output of your equipment to the HDMI terminal on the display using an HDMI cable (not provided).
HDMI (High-Definition Multimedia Interface) is an uncompressed and all-digital audio/video interface. HDMI provides an interface between any audio/video source, such as a set-top box, DVD player, or A/V receiver over a single cable. HDMI supports existing high-definition video formats (576p, 720p and 1080i). It also has the flexibility to support enhanced definition formats such as 480p, as well as standard definition formats such as NTSC or PAL. It also supports Dolby 5.1 audio and high-resolution audio formats.
Connecting the DVI input
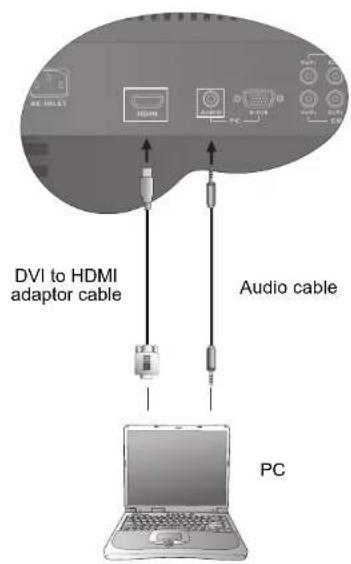
- Connect the digital video output of your equipment to the HDMI terminal on the display using a DVI to HDMI adaptor cable (not provided).
- Connect the audio output of your equipment to the display's PC AUDIO input terminal using an appropriate mini-jack stereo audio cable (not provided).
The DVI input only supports progressive signals. When connected to a High Definition Set Top Box, 1080i should be selected as the output resolution. When connected to a Personal Computer select 1024 x 768 as the image resolution. See "Supported PC (D-Sub/DVI) Input Signal Timing" on page 40 for further information.
Setting-up the display device24


Connecting the audio output
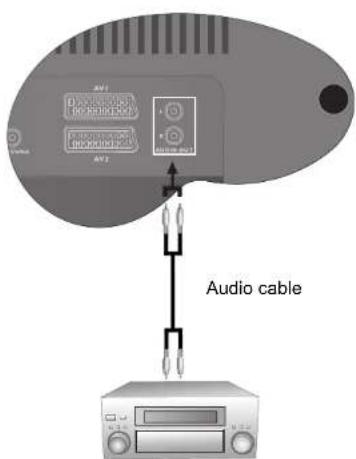
The display provides a set of (RCA type) stereo audio output terminals for delivering the audio signal to a sound system or other audio devices. If you use this outlet, you may wish to mute the built-in speakers. See "Audio menu" on page 27. Connect the AUDIO OUT L/R terminals on the display to the audio input terminals of an amplifier or other audio device using a suitable audio cable (not provided).
This output is always available. Its level is fixed and cannot be adjusted by the Volume setting of the display.
Audio amplifier
Setting-up the display device 25
On-Screen Display (OSD) menu
OSD structure
| Audio Picture Feature | ||
| VolumeBalanceSound TypeSteady SoundSpeaker OutAdvanced Audio Settings | Picture ModeContrastBrightnessColourSharpnessColour TEMP.NTSC TintNTSC SetupAutoFrequencyPhaseH. PositionV. Position | Black ExtensionACENoise ReductionAspect RatioAuto Format |
| Window TV Setup | ||
| PIPVideo InputGraphics InputPIP Audio | CountryStandardAuto InstallationManual InstallationProgram EditChild Lock | LanguageFreezeBacklightSleep TimerDPMSDVI InputReset All Settings |
The available menu items are dependent on the input source being selected. Unavailable items will be greyed out or not displayed.
Navigating the OSD menu
You can use the On-Screen Display (OSD) menu to adjust all the settings on your display. Select the function you desire, and refer to the pages indicated for more information.
Press the MENU button on your remote control, or the MENU button on the display to show the menu on screen:

- Press the ◀, ▶, ▲ or ▼ buttons on the remote control, or the Program ▲, Program ▼, Volume ▶ or Volume ◀ buttons on the display to select items on the menu, choose functions or change settings.
- Press the OK button on the remote control, or the INPUT button on the display to enter the submenu.
- Press the MENU button on the remote control, or the MENU button on your display to exit from the main menu.
For details see:
• "Audio menu" on page 27
• "Picture menu" on page 28
- "Feature menu" on page 30
• "Window menu" on page 31
- "Setup menu" on page 36
• "TV menu" on page 32
On-Screen Display (OSD) menu26

Audio menu
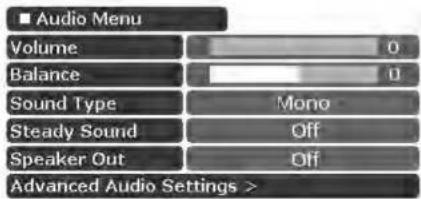
OK:Enter ^v:Select <>:Adjust
- Press the MENU button to display the main menu.
- Press the ◀ or ▶ buttons to select Audio and then press OK to enter the submenu.
- Press the ▲ or ▼ buttons to select an item.
- In the Audio menu, use the ◀ or ▶ buttons to adjust the setting or select the options.
- To return to the menu one level up, press the MENU button again.
English
| Item Function Operation Range | ||||
| Volume Adjust volume level. | Use ▶ to increase or ◀ to decrease volume. | 0 to 47 | ||
| Balance Adjust left or right speaker volume level. | Use ▶ to increase right speaker volume, ◀ to increase left speaker volume level. | -12 to 12 | ||
| Sound Type | Selects a sound type for current viewing input source. | Use the ▶ and ◀ buttons on the remote control or the Volume ▶ and Volume ◀ buttons on the display to change the selection. | • Auto• M o n • S t e r • S o u n • S o u n • S o u n • N I C A | |
| Current viewing input source | Available sound types | |||
| ATV | Auto, Mono, Stereo, NICAM, Sound 1, Sound 2, Sound 3 (available options are dependent on the signal received) | |||
| AV1, AV1 RGB, AV2 (AV2-S), AV3 (AV3-S), AV4 (AV4-S) | Sterco: audio input from the left and right channelsSound 1: audio input from the left channel onlySound 2: audio input from the right channel only | |||
| The items available for selection will vary depending upon the TV sound system being transmitted.If the sound quality is poor, try using 'Mono' as this is stronger. | ||||
| Steady Sound | Automatically adjusts the sound level to be constant amongst different TV stations when viewing TV programs. | • Off• Auto | ||
| Speaker Out | Enables sound output from the display's speakers when set to 'On'.You may wish to set this to 'Off' when using an external sound system. | • Off• On | ||
| Advanced Audio Settings- Press OK to enter. | ||||
| Preset Mode | Allows you to select a suitable audio preset mode according to the type of sound being played.If "Personal" is selected, you can adjust the Treble, Mid Treble, Middle, Mid Bass and Bass settings individually to your satisfaction. | Use the ▶ and ◀ buttons on the remote control or the Volume ▶ and Volume ◀ buttons on the display to change the selection. | • C l a s• POP• J a z z• R o c k• Personal | |
| Treble | Adjust treble tones. | Use ▶ to increase treble tone, ◀ to decrease treble tone. | -12 to 12 | |
sic
2018
-
m = 311
[Non-Text]


| Mid Treble | Adjust mid-treble tones. | Use ▶ to increase mid treble tone, ◀ to decrease mid treble tone. | -12 to 12 |
| Middle Adjust mid tones. | Use ▶ to increase middle tone, ◀ to decrease middle tone. | -12 to 12 | |
| Mid Bass | Adjust mid-bass tones. | Use ▶ to increase mid bass tone, ◀ to decrease mid bass. | -12 to 12 |
| Bass Adjust bass tones. | Use ▶ to increase bass tone, ◀ to decrease bass tone. | -12 to 12 | |
Picture menu
| Picture Menu | |
| Picture Mode | Standard |
| Contrast | 16 |
| Brightness | 16 |
| Colour | 16 |
| Sharpness | 16 |
| Color TEMP. | Normal |
| NTSC Tint | 0 |
| NTSC Setup | 7.5 IRE |
^^:Select <>:Adjust
1. Press the MENU button to display the menu.
2. Press the ◀ or ▶ buttons to select Picture and then press OK to enter the submenu.
3. Press the ▲ or ▼ buttons to select an item.
4. In the Picture menu, use the ◀ or ▶ buttons to adjust the setting or select the options.
5. To return to the menu one level up, press the MENU button again.
| Item Function Operation Range | |||
| Picture Mode | To restore a factory preset or user customized picture mode.If Personal is selected, you can adjust the Contrast, Brightness, Colour and Sharpness settings individually to your satisfaction.This option will not appear when PC or DVI (via the HDMI input) is the signal source.Remember to press the Preset button on the remote control to switch to the picture mode you want to use. | Use the ▶ and ◀ buttons on the remote control or the Volume ▶ and Volume ◀ buttons on the display to change the selection. | • Standard• Cinema• Dynamic• Personal |
| Contrast | Adjusts image white level when Personal is selected as the Picture Mode. | ▸ for brighter whites ◀ for darker whites | 0 to 64 |
| Brightness | Adjusts image black level when Personal is selected as the Picture Mode. | ▸ for brighter blacks ◀ for darker blacks | 0 to 64 |
| Colour | Adjusts image colour level when Personal is selected as the Picture Mode.This option will not appear when PC or DVI (via the HDMI input) is the signal source. | ▸ for more intense colours ◀ for less intense colours. | 0 to 64 |

| Sharpness | Adjusts image sharpness level when Personal is selected as the Picture Mode.☐ This option will not appear when PC or DVI (via the HDMI input) is the signal source. | ▸ for sharper image▸ for softer image | 0 to 7 |
| Colour TEMP. | Adjust the colour tint of the black and white part of the image. | Use the ▶ and ◀ buttons on the remote control or the Volume ▶ and Volume ◀ buttons on the display to change the selection. | • Warm: Biased toward red• Normal: Standard video/ TV colour temperature• Cool: Biased toward blue - for PC input |
| NTSC Tint | Adjusts colour tint☐ This option is not available for PAL video sources. | ▸ for redder tones◆ for greener tones | 0 to 64 |
| NTSC Setup | Adjust the black level in NTSC video.☐ This option is not available for PAL video sources. | Use the ▶ and ◀ buttons on the remote control or the Volume ▶ and Volume ◀ buttons on the display to change the selection. | 0, 7.5 IRE |
| ☐ The following options will appear only when PC is the signal source. | |||
| Auto | Automatically adjusts frequency, phase, H. position and V. position to place the image on the screen. | Press the OK button on the remote control or the INPUT button on the display to begin the auto adjustment function. | |
| Frequency Adjusts the display clock frequency. | Use the ▶ and ◀ buttons on the remote control or the Volume ▶ and Volume ◀ buttons on the display to change the selection. | -15 to 15 | |
| Phase Adjusts the display clock phase. -15 to 15 | |||
| H. Position | Adjusts the horizontal position of the image. | -30 to 30 | |
| V. Position | Adjusts the vertical position of the image. | -30 to 30 | |
Feature menu
| ■ Feature Menu | |
| Black Extension | Low |
| ACE | Off |
| Noise Reduction | Low |
| Aspect Ratio | Real |
| Auto Format | On |
^v:Select <>:Adjust
- Press the MENU button to display the menu.
- Press the ◀ or ▶ buttons to select Feature and then press OK to enter the submenu.
- Press the ▲ or ▼ buttons to select an item.
- In the Feature menu, use the ◀ or ▶ buttons to adjust the setting or select the options.
- To return to the menu one level up, press the MENU button again.
| Item Function Operation Range | |||
| Black Extension | Enhances the contrast among details when viewing dark images. | Use the ▶ and ◀ buttons on the remote control or the Volume ▶ and Volume ◀ buttons on the display to change the selection. | LowMiddleHighOff |
| ACE(Auto Contrast Enhancement) | Adjusts the auto contrast enhancement function that optimizes the image contrast ratio for interlaced inputs only.This option will not appear when PC, DVI (via the HDMI input), HDMI or HD Component Video (720p or 1080i) is the signal source. | LowMiddleHighOff | |
| Noise Reduction | Adjusts the image noise reduction function that helps to remove noise in TV images. Suitable in fringe and poor TV reception areas.This option will not appear when PC or DVI (via the HDMI input) is the signal source. | LowMiddleHighOff | |
| Aspect Ratio | Adjust image aspect ratio.The Real, Letter Box and Wide options are unavailable when PC or DVI (via the HDMI input) is the signal source. | Refer to "Aspect ratio behaviour" on page 41. | |
| Auto Format | Set the display to automatically adjust screen aspect ratio when the SCART input is used, or when a WSS (Wide Screen Signaling) signal is detected from Composite Video inputs (ATV, AV1, AV2, AV3 or AV4). | OnOff | |


Window menu
This item is available only when PC is the signal source.
| ■ Window Menu | |
| PIP | Full Screen |
| Video Input | AV1 |
| Graphics Input | PC |
| PIP Audio | Sub |
v :Select <>:Adjust
- Press the MENU button to display the menu.
- Press the ◀ or ▶ buttons to select Window and then press OK to enter the submenu.
- Press the ▲ or ▼ buttons to select an item.
- In the Window menu, use the ◀ or ▶ buttons to adjust the setting or select the options.
- To return to the menu one level up, press the MENU button again.
| Item Function Operation Range | |||
| PIP | Display Video and Graphic images simultaneously in either full-screen or Picture-In-Picture mode. | Use the ▶ and ◀ buttons on the remote control or the Volume ▶ and Volume ◀ buttons on the display to change the selection. | • Full Screen• Video On Graphic |
| Video Input | Select the video signal input source for the PIP function.☐ This option is available only if Video On Graphics is selected as the PIP mode. | ATV, AV1, AV1 RGB, AV2 (AV2-S), AV3 (AV3-S), AV4 (AV4-S)☐ The AV2-S option is available only if S-Video (Y/C) signal is detected from the SCART inputs. The AV3-S and AV4-S options are available only if the AV3 or AV4 S-Video signals are connected. | |
| Graphics Input | Select the graphics signal input source for the PIP function. | PC | |
| PIP Audio | (Picture-In-Picture audio)Select which audio source you want to hear.☐ This option is available only if Video On Graphics is selected as the PIP mode. | • Main• Sub | |
TV menu
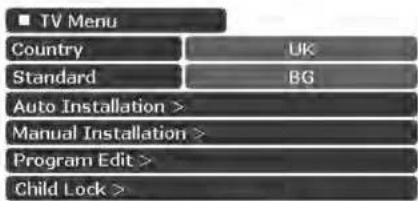
OK:Enter △v:Select <>:Adjust
- Press the MENU button to display the menu.
- Press the ◀ or ▶ buttons to select TV and then press OK to enter the submenu.
- Press the ▲ or ▼ buttons to select an item.
- In the TV menu, use the ◀ or ▶ buttons to adjust the setting or select the options.
- To return to the menu one level up, press the MENU button again.
| Item Function Operation Range | |||
| Country | Select the country where you live. This assists the auto-tuning operation and allows programs to be stored on the corresponding program numbers.For instance, Program 9 is stored on CH9, and responds to direct single numeric button program changing commands. | Use the ▶ and ◀ buttons on the remote control or the Volume ▶ and Volume ◀ buttons on the display to change the selection. | UKFranceNetherlanGermanyItalySpainAustriaBelgiumLuxemburgSwitzerlanPortugalOthers |
| Standard | Select the TV standard for your country.Only available if 'Other' is set as the Country menu item. | LBGIDK | |
| Auto Installation | Searches through all available programs and adds them to memory.Beware that this erases all previously stored programs. | Press OK to start. | |
| Manual Installation | Refer to "Performing manual installation" on page 33. | ||
| Program Edit | Refer to "Editing programs" on page 34. | ||
| Child Lock | Refer to "Child lock" on page 35. | ||


Performing manual installation
The Manual Installation feature allows you to change the program locations that are stored in the TV Program memory of the display.
This option is not possible when the Child lock is activated. See "Child lock" on page 35.
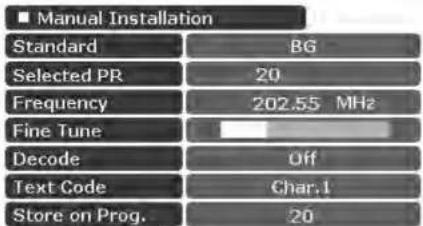
- From the TV Menu, press the ▲ or ▼ buttons to select Manual Installation and then press the OK button. The Manual Installation menu will display:
^^:Select <>:Adjust
- If the Country menu item is set to "Other", you should press the ◀ or ▶ buttons to select a TV standard according to your region. See "TV menu" on page 32.
- Press the ▼ button to highlight Selected PR and then press the program selection buttons to input the TV program you want to set up.
- Press the ▼ button to highlight Frequency and then press the ◀ or ▶ buttons to start the tuning system. If the tuned program is incorrect, press the ◀ or ▶ button again until your desired program is located. You can directly input the frequency using the program selection buttons if you wish.
- Press the ▼ button to highlight Fine Tune and then press the ◀ or ▶ buttons to adjust the reception of TV signal (only necessary where the image or sound reception is poor).
- If the SCART signal input is connected, press the ▼ button to highlight Decode and then press the ◀ or ▶ buttons to select from the following options:
- On: Select this option if an external decoder Set-Top-Box (STB) is being used.
- Off: Select this option if no external decoder STB is being used.
- Press the ▼ button to highlight Text Code and then press the ◀ or ▶ buttons to select a code format for the Teletext function.
- Press the ▼ button to highlight Store on Prog. and then press the OK button to save this program to the TV Program memory.
- Press the MENU button again to close the menus.
Editing programs
You can delete unwanted programs, add a program name and change the program position number.
This option is not possible when the Child lock is activated. See "Child lock" on page 35.
Naming a program
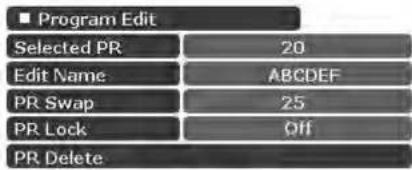
- In the TV Menu, press the ▲ or ▼ buttons to select Program Edit and then press the OK button. The following Program Edit menu will appear.
:Select 0..9:Select PR
- Press the program selection buttons to select the program you want to name.
- Press the ▼ button to highlight Edit Name then press the OK button.
- Press the ◀ or ▶ buttons to highlight the character you want to edit, and then press the ▲ or ▼ buttons to change it to your desired character.
- Repeat step 4 to edit other characters.
- Press the OK button to store the name.
- Press the MENU button again to close the menu.
Swapping programs
- In the TV Menu, press the ▲ or ▼ buttons to select Program Edit and then press the OK button.
- In the Program Edit menu that appears, press the ▼ button, and then the direct access program selection buttons to select the current program you wish to relocate to a different program position.
- Press the ▼ button to highlight PR Swap and then press the direct access program selection buttons to select the new location for the program. Two digit entry is required. For example, press "02" to select CH2. The program memory location is changed once the new numbers are entered.
- Press the MENU button to close the menu.
Locking (preventing a program from selection)/unlocking a program
- In the TV Menu, press the ▲ or ▼ buttons to select Program Edit and then press the OK button.
- In the Program Edit menu that appears, press the ▼ button, and then the direct access program selection buttons to select the number of the program you wish to lock.
- Press the ▼ button to highlight PR Lock and then press the ◀ or ▶ buttons to select from the following options:
• On: Lock the selected program.
- Off: Unlock the selected program.
4. Press the MENU button to close the menus. All programs which are locked cannot be viewed when the Child Lock function is enabled. See "Child lock" on page 35.
Deleting a program
- In the TV Menu, press the ▲ or ▼ buttons to select Program Edit and then press the OK button.
- In the Program Edit menu that appears, press the ▼ button, and then the program selection buttons to select the number of the program you wish to delete from the program memory.
On-Screen Display (OSD) menu34


- Press the ▼ button to highlight PR Delete and then press the OK button to delete the program.
- Press the MENU button to close the menus.
Child lock
The Child Lock function can be used to prevent access to selected programs. For example, to prevent children viewing inappropriate broadcast programs such as adult-only programs. This Child Lock only affects the RF Antenna input (not AV inputs), and prohibits the selection or display of every program which has had its PR Lock menu item set to "On". See "Locking (preventing a program from selection)/unlocking a program" on page 34.
The correct password is required to unlock and view those programs once the Child Lock Activate menu item is set to "On".
WARNING: You will be Inconvenienced if you activate the password functionality and subsequently forget the password. Write the password you use in this manual, and keep it in a safe place for later recall.
Enabling/disabling child lock
- In the TV Menu, press the ▲ or ▼ buttons to select Child Lock and then press the OK button. The following Child Lock menu will appear.
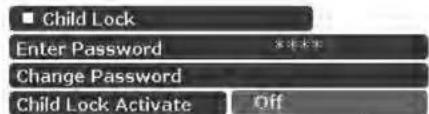
: Please enter 4 characters password
- You will be prompted to enter the password (default password: 0000). Enter the password using the program selection buttons. When entering, you can press the ◀ button to clear a wrong character. If you enter the wrong password, try again.
IMPORTANT: Write your selected password down here in this manual so that it is available to you should you ever forget it Password:
Keep this manual in a safe place.
-
Press the ▼ button to select Child Lock Activate and then press the ◀ or ▶ buttons to select from the following options:
-
On: Enables the Child Lock. Once enabled, the preselected programs will be locked.
• Off: Disables the Child Lock. - Press the MENU button to close menus.
Changing password
- In the TV Menu, press the ▲ or ▼ buttons to select Child Lock and then press the OK button.
- Press the ▼ button to select Change Password and then enter a new 4-digit password using the program selection buttons.
IMPORTANT: Write your selected password down here in this manual so that it is available to you should you ever forget it
Password: ____.
Keep this manual in a safe place.
- Enter the new password again using the program selection buttons.
- Press the MENU button to close the menu.
On-Screen Display (OSD) menu 35
Setup menu
| ■ Setup Menu | |
| Language | English |
| Freeze | Off |
| Backlight | Bright |
| Sleep Timer | 0 |
| DPMS | On |
| DVI Input | PC |
| Reset All Settings | |
OK:Enter ∼;Select <>:Adjust
- Press the MENU button to display the menu.
- Press the ◀ or ▶ buttons to select Setup and then press OK to enter the submenu.
- Press the ▲ or ▼ buttons to select an item.
- In the Setup menu, use the ◀ or ▶ buttons to adjust the setting or select the options.
- To return to the menu one level up, press the MENU button again.
| Item Function Operation Range | |||
| Language | Select your desired language for the OSD menu. | Use the ▶ and ◀ buttons on the remote control or the Volume ▶ and Volume ◀ buttons on the display to change the selection. | • E n g l i s h• F r a n ç a i s• Nederlands• D e u t s c h• I t a l i a n o• Español |
| Freeze | Freeze the motion on the screen image (however, broadcast continues). | • Off• On | |
| Backlight | Adjust backlight intensity.If "Auto" is selected, the ambient light sensor will be activated and the display's backlight will be changed automatically according to the ambient lighting condition. | • Auto• D a r k• N o r m a l• B r i g h t | |
| Sleep Timer | Set the Sleep timer to automatically turn off the display. | 0, 30, 60, 90, 120, 150, 180 minutes | |
| DPMS | The Display Power Management System (DPMS) protects the screen and enters power saver mode when no PC signal is detected. | • Off• On | |
| DVI Input | Select input signal type via DVI input if a PC or Video output device is connected to the display.Remember to adjust the timing settings of the output device according to "Supported Video (Component/DVI) Input Signal Timing" or "Supported PC (D-Sub/DVI) Input Signal Timing" on page 40. | • PC• V i d e o | |
| Reset All Settings | Restore all settings to their default values.☐ The TV program settings will not be reset. | Press the OK button on the remote control or the Input button on the display to activate the reset. | |


6 Reference
Disclaimer
BenQ Corporation makes no representations or warranties, either expressed or implied, with respect to the contents of this User's Manual. BenQ Corporation reserves the right to revise this publication and to make changes from time to time in the contents thereof without obligation to notify any person of such revision or changes.
Copyright
Copyright 2005 BenQ Corporation (www.benq.com). All rights reserved. No part of this publication may be reproduced, transmitted, transcribed, stored in a retrieval system or translated into any language or computer language, in any form or by any means, electronic, mechanical, magnetic, optical, chemical, manual or otherwise, without the prior written permission of BenQ Corporation.
Battery safety notice
The use of the wrong type of batteries may cause chemical leaks and/or explosion. Please note the following:
- Always ensure that the batteries are inserted with the positive and negative terminals in the correct direction as shown in the battery compartment.
- Different types of batteries have different characteristics. Do not mix different types.
- Do not mix old and new batteries. Mixing old and new batteries will shorten battery life and/or cause chemical leaks from the old batteries.
- When batteries fail to function, replace them immediately.
- Chemicals which leak from batteries may cause skin irritation. If any chemical matter seeps out of the batteries, wipe it up immediately using a dry cloth.
- Due to varying storage conditions, the battery life for the batteries included with your display may be shortened. Replace them within 3 months or as soon as you can after initial use.
Functions and features
- 1366 x 768 native image resolution providing true widescreen TV 16:9 aspect ratio
- 500 cd / m^2 brightness
• 800:1 contrast ratio - Compatible with digital television formats, including 480i / 480p / 576i / 576p / 720p / 1080i
• 2:2 Pull Down Recovery (PAL); 3:2 Pull Down Recovery (NTSC)
• Multiple preset picture modes
• Picture In Picture display function - Ceiling or wall mountable
• Graphic OSD - Constant audio output
- Several function shortcut Remote Control buttons including: Input selection, Preset Picture modes, Freeze frame, Aspect ratio control, PIP, Sleep timer, Back-light adjustment, Display Information, Teletext, Stereo/bi-lingual sound options.
Reference 37
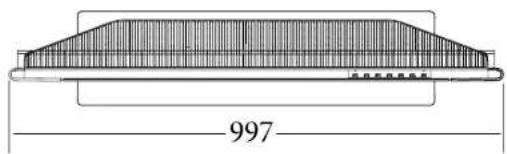
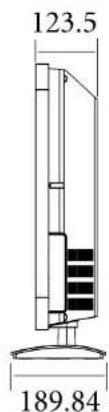
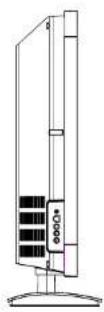
Dimensional drawings
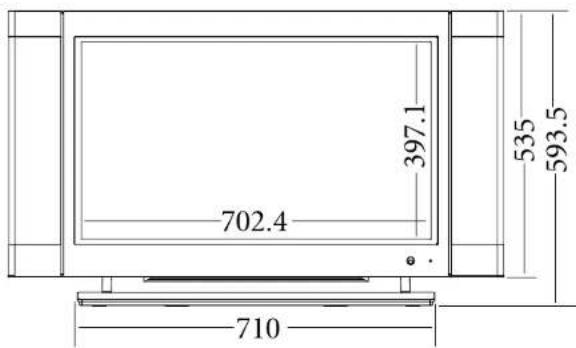
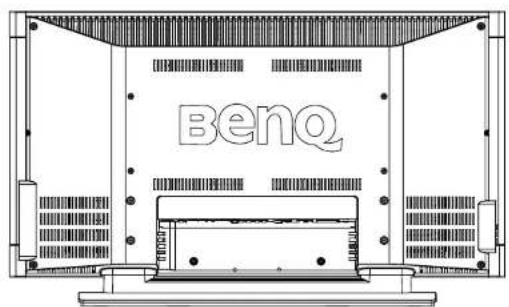
natural_image
Technical line drawing of a mechanical enclosure or enclosure with no visible text, numbers, or symbols.Unit mm
Reference38
Specifications
| Model V32S/DV3251/DV3253 | ||
| Weight 20 Kg (Net) | ||
| Display Dimensions 997 (W) x 593.5 (H) x 123.5 (D) mm | ||
| LCD Panel Size 80 cm (31.5 inches) | ||
| Aspect ratio 16:9 | ||
| Native resolution 1366 x 768 | ||
| Brightness | 500 cd/m2 | |
| Contrast ratio 800:1 | ||
| Viewing angle (left/right/up/down) 85°/85°/85° | ||
| Response time 8 ms grey to grey | ||
| Amplifier 8W x 2, 80Hz ~ 20KHz | ||
| Signal inputs | TV Analog PAL TV tuner | |
| Video | S-VideoComposite video (RCA)Composite video (SCART - Cenelec)Component video (YPB/CB PR/CR)Audio input | |
| Graphic | HDMDVI (via HDMI)PC D-subPC/DVI audio | |
| Signal outputs | RCA type audio outputMinijack type headphone output | |
| Component Video timings | 480i / 480p / 576i / 576p / 720p / 1080i | |
| PC horizontal frequency | 31.5 ~ 60 kHz | |
| PC horizontal frequency tolerance | ± 0.5 kHz | |
| PC vertical frequency | 60 ~ 75 Hz | |
| PC vertical frequency tolerance | ± 0.5 Hz | |
| Power supply | AC 220-240V, 50/60 Hz | |
| Power consumption 180 Watts | ||
| Operating temperature | 0°C ~40°C (at sea level) | |
| Storage temperature | -10°C ~ 50°C (at sea level) | |
| Video Systems | NTSC, PAL, SECAM | |
| Audio Systems | A2, NICAM | |
English
Design and specifications are subject to change without notice.
Supported PC (D-Sub/DVI) Input Signal Timing
| Resolution | Horizontal Frequency (Khz) | Vertical Frequency (Hz) | Dot Clock Frequency (Mhz) | Note |
| 720 x 400 31.467 | 70.082 28.32 VGA | |||
| 640 x 480 31.469 | 59.94 25.175 VGA | |||
| 640 x 480 37.861 | 72.819 31.5 VGA | |||
| 640 x 480 37.5 | 75 | 31.5 VGA | ||
| 800 x 600 37.9 | 60.317 | 40 | SVGA | |
| 800 x 600 48.077 | 72.188 | 50 | SVGA | |
| 800 x 600 46.875 | 75 | 49.5 | SVGA | |
| 1024 x 768 | 48.363 | 60 | 65 | XGA |
| 1024 x 768 | 56.476 70.069 | 75 | XGA | |
| 1024 x 768 | 60.023 75.029 | 78.75 XGA | ||
| 1360 x 768 | 47.7 60 | 85.5 |
Supported Video (Component/DVI) Input Signal Timing
| Resolution | Horizontal Frequency (Khz) | Vertical Frequency (Hz) | Dot Clock Frequency (Mhz) | Note |
| 720 x 480i (not available for DVI input) | 15.73 | 59.94 | 13.5 | Interlaced |
| 720 x 576i (not available for DVI input) | 15.62 | 50 | 13.5 | Interlaced |
| 720 x 480p 31.47 | 59.94 | 27 | Progressive | |
| 720 x 576p 31.25 | 50 | 27 | Progressive | |
| 1280 x 720p59 | 44.955 59.94 74.176 | Progressive | ||
| 1280 x 720p60 | 45 | 60 | 74.25 | Progressive |
| 1280 x 720p50 37.5 50 | 74.25 | Progressive | ||
| 1920 x 1080i59 | 33.716 59.94 74.176 | Interlaced | ||
| 1920 x 1080i60 | 33.75 | 60 | 74.25 | Interlaced |
| 1920 x 1080i50 | 28.13 | 50 | 74.25 | Interlaced |

- PC (D-Sub/DVI) and Video (Component/DVI) timing modes outside of these tables are not recognised and will not be displayed.
• To gain the best quality image on the display, you should select 1024 x 768 @60Hz as your PC source resolution, and select the '4:3' aspect ratio on the display when viewing PC input. - If the picture contains movement or character shimmering when the signal timing is changed, activate the Auto function in the Picture menu to recalibrate the image. See "Auto" on page 29.
• To fill the entire screen with a PC input signal, set the aspect ratio to '16:9'.


Aspect ratio behaviour
According to the signal sources connected to the display, the input video images may have different native aspect ratios. Aspect ratio refers to the ratio between the length and width of the video image. For example, standard definition TV video images have a 4:3 native aspect ratio, while HD'TV video images have a 16:9 native aspect ratio.
Your display is a digital display device that is capable of displaying video images in various aspect ratios regardless of their native aspect ratios. Please refer to the descriptions below for the selectable aspect ratios of the display and the resultant video images.
The Real, Letter Box and Wide options are unavailable when PC or DVI (via the HDMI input) is the signal source.
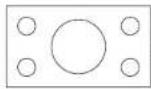
16:9
No matter what the aspect of the image source, resizes the image linearly and non-proportionately to fit the full 16:9 screen. This may alter the resultant displayed image aspect, depending upon the aspect of the image source.
| Original (source) video image Resultant (displayed) video image | ||
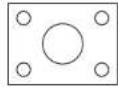 | 4:3 aspect ratio video image | 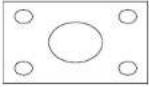 |
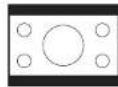 | Letterboxed video image | 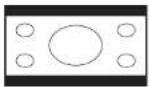 |
 | 16:9 aspect ratio video image | 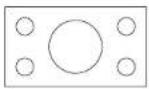 |
'16:9' is most suitable for images which are already in a 16:9 aspect, like HDTV, as it displays them without any aspect alteration. This differs from the 'Wide' aspect setting (described below) in that '16:9' uses linear image resizing, whereas 'Wide' uses non-linear resizing.
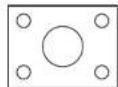
4:3
Resizes the image linearly and non-proportionately to a 4:3 aspect ratio, no matter what the aspect of the image source. In this mode, only an area of 1024 x 768 pixels in the center of the screen is used to display images.
| Original (source) video image Resultant (displayed) video image | ||
 | 4:3 aspect ratio video image | 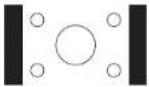 |
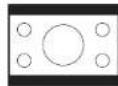 | Letterboxed video image | 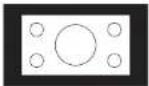 |
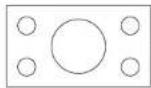 | 16:9 aspect ratio video image | 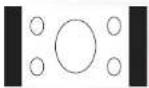 |
'4:3' is most suitable for images which are already in a 4:3 aspect, like standard definition TV, as it displays them without any aspect alteration. However, on this 16:9 aspect screen, there will be
Reference 41


black (unlit) vertical bars visible on the vertical edges of the screen on either side of the image, marking the difference between the width of a 4:3 aspect image and a 16:9 screen of the same height.
Letterbox
Resizes and scales the image proportionately and linearly at a given zoom ratio which can reach full screen, no matter what the aspect of the image source. This does not alter the displayed image aspect.
| Original (source) video image Resultant (displayed) video image | ||
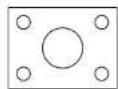 4:3 aspect ratio video image 4:3 aspect ratio video image | 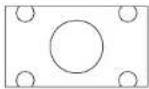 | |
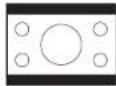 | Letterboxed video image | 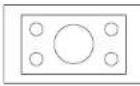 or or 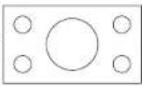 |
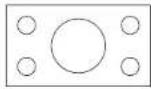 16:9 aspect ratio video image 16:9 aspect ratio video image | 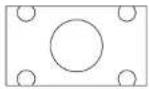 | |
'Letterbox' scales the image to a larger size than the screen on the expectation that the source is presented in a 4:3 aspect ratio. This effectively enlarges the size of the image so that the width matches the width of the screen, and the height stretches beyond the height of the screen to give a 16:9 ratio version of the original 4:3 image, resulting with the cropping of the top and bottom of the original 4:3 image. Some of the image is cropped and lost (not visible on-screen).
'Letterbox' is most suitable for images which are displayed in the so-called letterbox presentation format, which is created from a 16:9 aspect ratio image scaled down proportionally to fit into a 4:3 aspect display frame, resulting in black (unlit) horizontal bars visible on the image top and bottom marking the difference between the height of a 16:9 aspect image and a 4:3 screen of the same width.
Wide
Resizes the image non-linearly, no matter what the aspect of the image source. This may alter the resultant displayed image aspect.
| Original (source) video image Resultant (displayed) video image | ||
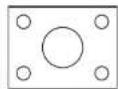 | 4:3 aspect ratio video image | 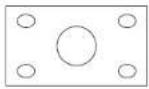 |
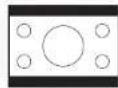 | Letterboxed video image | 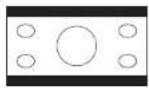 |
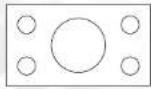 | 16:9 aspect ratio video image | 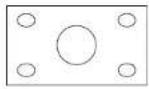 |
'Wide' non-linearly resizes the height of the image until it matches the full display height, and non-linearly resizes the width of the image until it matches the full display width. Non-linear resizing typically alters the image more towards the edges of the image, leaving the centre relatively unaltered. Non-linear resizing is useful for 4:3 aspect ratio images. This differs from
Reference42


the '16:9' aspect setting in that '16:9' uses linearimage resizing, whereas 'Wide' uses non-linear resizing. All of the available image is displayed and none is cropped or lost.
Real
Displays the image in a one-to-one pixel mapping in the centre of the screen without alteration or resize.
| Original (source) video image Resultant (displayed) video image | ||
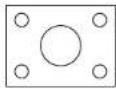 | 4:3 aspect ratio video image | 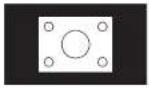 |
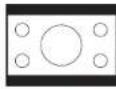 | Letterboxed video image | 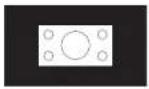 |
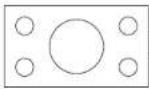 | 16:9 aspect ratio video image | 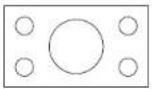 or or 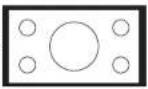 |
Reference 43
Troubleshooting
There are a very many external influences and circumstances beyond the control of BenQ which may be causing problems with your BenQ LCD display. Some of the more common and user fixable problems are listed below for your assistance.
Please check the following list before calling your nearest BenQ Customer Service Center, and attempt the following steps to diagnose and fix the problem yourself:
TV
| Symptoms Possible Causes | |
| Power does not turn ON | · Check that the power plug is securely inserted into both the AC Mains socket on the display and the wall outlet, and that the wall outlet is switched on.· Check that power is available from the wall outlet by trying another appliance or desk lamp from that same wall outlet. |
| There is no picture or sound | · Ensure the display power is ON (Indicated by the green Power indicator on the front of the unit)· Try a different input source to check whether the source is at fault.· Check for mis-connection of cables or for wrong input source. |
| There are spots on the screen | Your TV antenna signal is being affected by interference from automobiles, trains, high-voltage transmission lines, neon signs or another sources of interference. Try redirecting or relocating your antenna to reduce the affects of the interference. If the antenna is exterior, have a suitable qualified and experienced antenna specialist adjust the antenna. |
| Degraded colours or hue | · Check whether all the picture adjustments have been properly performed.· Press the Preset button on the remote control to select a different picture mode. |
| Improper screen position or size | Try selecting a different aspect ratio by pressing the Aspect button on the remote control. |
| The image appears distorted | Ensure the display's aspect ratio is correctly set to suit the image source. |
| The image appears too bright, and there is a loss of definition in the brightest areas of the image | · Reduce the contrast setting.· The DVD player is set for a high-level output.· The AV video signal has not been terminated properly somewhere in the external AV equipment. |
| The image appears too 'washed out', or the darkest areas of the image appear too bright. | · Reduce the brightness level till the black areas of the picture appear as black.· The DVD player may be set at too high a brightness level. |
| Power indicator lamp flashes red. | · Check the PC cable for disconnection.· This indicates the PC input has been selected with no PC source signal available.· The display has been placed in PC Standby mode. |
| "Out of range" appears | The PC input signal resolution is set too high. 1360 x 768 @ 60Hz is the highest acceptable PC timing. |


| Remote control does not function properly | ·Check for incorrect battery orientation.·Check for dead batteries·Check your distance and angle from the display.·Check whether remote control is properly being pointed at the display's remote control sensor window.·Check for any obstacle between the remote control and the remote control sensor window.·Check that the remote control sensor window is not under strong fluorescent lighting.·Check for any devices (PC or personal digital assistant, PDA) nearby that transmit infrared signal which may cause interference to signal transmission between the remote control and the LCD display. 'Turn off the infrared function of these devices. |
| There is no picture or sound, just noise. | ·Make sure the antenna cable is properly connected.·Change programs to confirm if the symptom is still present. |
| Picture is not clear. | ·Make sure the antenna cable is properly connected.·Change programs to confirm if the symptom is still present.·If PC is selected as the input signal source, use the Auto function in the Picture Menu to let the display adjust picture automatically. Select Real as the display aspect ratio. |
| No sound. | ·Check whether you have selected Mute for Audio setting.·Make sure the volume is not set to minimum.·Check the AV cables for disconnection.·Check to see that the Speaker Out option is set to 'Off' in the Audio menu. |
Antenna
| Symptoms Possible Causes | |
| The picture is not sharp or the picture contains image movement. | · The reception may be weak.· Change programs to confirm if the symptom is still present.· Make sure the outside antenna is not disconnected.· Make sure the antenna is facing the right direction. If the antenna is exterior, have a suitable qualified and experienced antenna specialist adjust the antenna. |
| The picture is doubled or tripled | · Make sure the antenna is facing the right direction.· Picture ghosting is caused by reflections from buildings, large metal structures and mountains. Carefully realign your antenna to minimise the ghost images. Ultimately a higher quality antenna professionally installed may be necessary to reduce the ghosting. |
| The picture is spotted | · There may be interference from automobiles, trains, high voltage lines, neon lights, etc.· There may be interference between the antenna cable and power cable. Try positioning them further apart. |
| There are stripes on the screen or colours faded | · Is the display receiving interference from other devices? Transmission antennas of radio broadcasting stations and transmission antennas of amateur radios and cellular phones may also cause interference.· Use the display as far away as possible from devices that may cause possible interference. |


DV3251-Lin.book Page 46 Monday, December 12, 2005 4:07 PM

English


Reference46






[Non-Text]
[Non-Text]
[Non-Text]
[Non-Text]
[Non-Text]
[Non-Text]
[Non-Text]
[Non-Text]
[Non-Text]
[Non-Text]
[Non-Text]
[Non-Text]
[Non-Text]
[Non-Text]
[Non-Text]

[Non-Text]
[Non-Text]
[Non-Text]
[Non-Text]
[Non-Text]
[Non-Text]
[Non-Text]
[Non-Text]


- Section 1: Quick Start Guide.... 1
- Section 2: User's Manual....9
- Getting to know your display....10
- Getting to know the remote control....16
- Using the remote control ....18
- Setting-up the display device 21
- On-Screen Display (OSD) menu....26
- Reference.... 37
- Benq
- Welcome
- Please read these instructions
- What's in the Quick Start Guide?
- What's in the User's Manual?
- Unpack the display
- Select and prepare the installation location
- Connect the antenna cable
- Connect the power cable
- Activate the remote control
- Remote control usage tips
- Test the remote control
- Initialise the display
- View the TV programs
- Care and cleaning information
- What's next?
- Getting to know your display
- Introduction
- What do I connect?
- Input options
- Connecting analog TV source inputs
- Connecting Composite (AV) source inputs
- Connecting Component Video source inputs
- Connecting other Graphic source inputs
- Display (front view)
- Getting to know the remote control
- ⏻ Power
- Input
- Backlight
- Information
- Sleep
- TV sound
- Preset
- Audio
- Mode
- Index
- ☐ Reveal
- Subpage
- Teletext
- NP
- ▲/▼/▶/◀ and OK
- Freeze
- Aspect
- ▲ / ▼ Program
- +/- Volume
- MENU
- Mute
- Program selection
- Recall
- Using the remote control
- Power on, power off and standby
- Turning on the display
- Turning off the display
- Switching inputs
- Adjusting volume
- Adjusting the volume
- Mute setting
- TV sound mode selection
- Changing programs
- Using the program ▲/▼ buttons to sequentially change programs
- Using the recall button to return to the previous viewed program
- Selecting a picture mode
- Using the freeze function
- Adjusting aspect ratio
- Using the PIP function
- Using the sleep timer
- Adjusting backlight
- Display information
- Using the Teletext function
- 4Setting-up the display device
- Connecting audio and video inputs
- Connecting the SCART inputs
- Connecting the SCART outputs
- Connecting the Composite Video input
- Connecting the S-Video input
- Connecting the Component Video input
- Connecting the PC input
- Connecting the HDMI input
- Connecting the DVI input
- Connecting the audio output
- On-Screen Display (OSD) menu
- Navigating the OSD menu
- For details see:
- Window menu
- TV menu
- Performing manual installation
- Editing programs
- Naming a program
- Swapping programs
- Locking (preventing a program from selection)/unlocking a program
- Deleting a program
- Child lock
- Enabling/disabling child lock
- Changing password
- Reference
- Disclaimer
- Copyright
- Battery safety notice
- Functions and features
- Aspect ratio behaviour
- 16:9
- 4:3
- Letterbox
- Wide
- Real
- Troubleshooting
Brand : BENQ
Model : DV3251
Category : TV