
AMS150-PB - Air-conditioner MIDEA - Free user manual and instructions
Find the device manual for free AMS150-PB MIDEA in PDF.

| Product Type | Air Purifier Fan |
| Model | AMS150-PB |
| Brand | Midea |
| Power Supply | Adapter: Input 100-240V~50/60Hz 1.5A, Output 24V 1.5A |
| Filter Type | HEPA filter (model FQ150CJ-2, includes 2 sets) + Pre-filter |
| Wind Speed Levels | 10 levels (1-10) |
| Wind Modes | Normal, Sleep (3 levels), Ion (Plasmacluster), AI Smart |
| Swing Function | Yes, oscillation |
| Timer | 1-12 hours (programmable on/off) |
| Auto Shut-off | After 15 hours of continuous operation |
| Intelligent Memory | Retains previous state after power loss (except timer) |
| Screen-off Function | Auto dim after 30 seconds of inactivity |
| Filter Replacement Reminder | Yes, indicator light |
| Remote Control | Yes, requires 2 AAA batteries (not included) |
| Control Panel | Touch buttons on unit |
| Safety Features | Polarized plug, overload protection (fuse 2.5A/125V), no solid-state speed control |
| Cleaning | Wipe with damp cloth; pre-filter clean every 2 weeks; HEPA filter replace every 6 months |
| Usage | Household use only; not for window installation |
| Customer Service | Toll-free: 866-646-4332 |
Frequently Asked Questions - AMS150-PB MIDEA
User questions about AMS150-PB MIDEA
0 question about this device. Answer the ones you know or ask your own.
Ask a new question about this device
Download the instructions for your Air-conditioner in PDF format for free! Find your manual AMS150-PB - MIDEA and take your electronic device back in hand. On this page are published all the documents necessary for the use of your device. AMS150-PB by MIDEA.
USER MANUAL AMS150-PB MIDEA
Warning Notice: Before using this product, please read this manual carefully and keep it for future reference. For additional support, please call customer service at 866-646-4332.
The design and specifications are subject to change without prior notice for product improvement. Consult with your dealer or the manufacturer for details.
USER MANUAL
natural_image
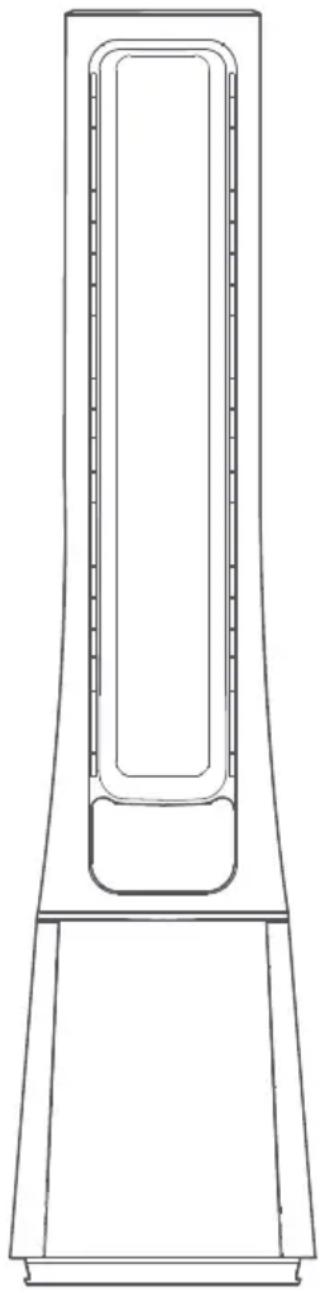
Technical line drawing of a vertical mechanical component with a rectangular base and internal channel (no text or symbols)READ AND SAVE THESE INSTRUCTIONS
SAFETY PRECAUTIONS ......2 INSTRUCTIONS ...... 7
IMPORTANT SAFETY INSTRUCTIONS .. 3 USER SERVICING INSTRUCTIONS ..... 10
RULES FOR SAFE OPERATION .... 4 PRODUCT PARAMETER .... 11
PRODUCT INTRODUCTION .... 5 CLEANING .... 11
INSTALLATION INSTRUCTIONS ...... 6 SERVICE AND SUPPORT ...... 11
Read This Manual
Inside you'll find many helpful hints on how to use and maintain your appliance properly. Just a little preventive care on your part can save you a great deal of time and money over the life of your appliance. You'll find many answers to common problems in the troubleshooting tips - you should be able to fix most of them quickly before calling customer service. These instructions may not cover every possible condition, so attention to safety details is required when operating and maintaining this product.
SAFETY PRECAUTIONS
To prevent injury to the user or other people and property damage, the instructions shown here must be followed. Incorrect operation due to ignoring of instructions may cause harm or damage. The different levels of risk is shown by the following indications.
WARNING
This symbol indicates a hazardous situation which, if not avoided, could result in death or serious injury.
CAUTION
This symbol indicates a hazardous situation, which, if not avoided, could result in minor or moderate injury.
NOTICE
This symbol addresses practices not related to physical injury.
IMPORTANT SAFETY INSTRUCTIONS

CAUTION
Read Rules for Safe Operation and Instructions Carefully.

WARNING
- This appliance has a polarized plug (one blade is wider than the other). To reduce the risk of electric shock, this plug is intended to fit in a polarized outlet only one way. If the plug does not fit fully in the outlet, reverse the plug. If it still does not fit, contact a qualified electrician. Do not attempt to defeat this safety feature.
- WARNING—To reduce the risk of fire or electric shock, do not use this fan with any solid-state speed control device.
- This product employs overload protection (fuse). A blown fuse indicates an overload or short-circuit situation. If the fuse blows, unplug the product from the outlet. Replace the fuse as per the user servicing instructions (follow product marking for proper fuse rating) and check the product. If the replacement fuse blows, a short-circuit may be present and the product should be discarded or returned to an authorized service facility for examination or repair.
a) Do not operate any fan with a damaged cord or plug. Discard fan or return to an authorized service facility for examination or repair.
b) Do not run cord under carpeting. Do not cover cord with throw rugs, runners, or similar coverings. Do not route cord under furniture or appliances. Arrange cord away from traffic area and where it will not be tripped over. - Do not leave the fan running unattended.
- Keep electrical appliances out of reach from children or infirm persons. Do not let them use the appliances without supervision.

WARNING
- If the supply cord is damaged, it must be replaced by manufacturer or its service agent or a similarly qualified person in order to avoid a hazard.
- This product complies with the maximum allowable concentration of ozone of 0.050 parts per million by volume (ppmv) in a 24-h period.
- This appliance is not intended for use by persons (including children) with reduced physical, sensory or mental capabilities, or lack of experience and knowledge, unless they have been given supervision or instruction concerning use of the appliance by a person responsible for their safety. Children should be supervised to ensure that they do not play with the appliance.
-
When the fan was assembled, the rotor blade guard shall not be taken off anymore.
-
Prior cleaning unplug the fan.
- The rotor guard shall not be dissembled/opened to clean the rotor blades.
- Wipe the fan enclosure and rotor blade guard with a slightly damp cloth.
- CAUTION: HIGH VOLTAGE INSIDE.
- CAUTION: This equipment should be inspected frequently and collected dirt removed from it regularly to prevent excessive accumulation that may result in flashover or a risk of fire.
- Never insert fingers, pencils, or any other object through the grille when fan is running.
- Disconnect fan when moving from one location to another.
- Be sure fan is on a stable surface when operating to avoid overturning.
- DO NOT use fan in window, rain may create electrical hazard.
• Household use only.
PRODUCT INTRODUCTION

Note:
Pictures in the manual are for reference only, and real objects within the packaging box will prevail in the end.
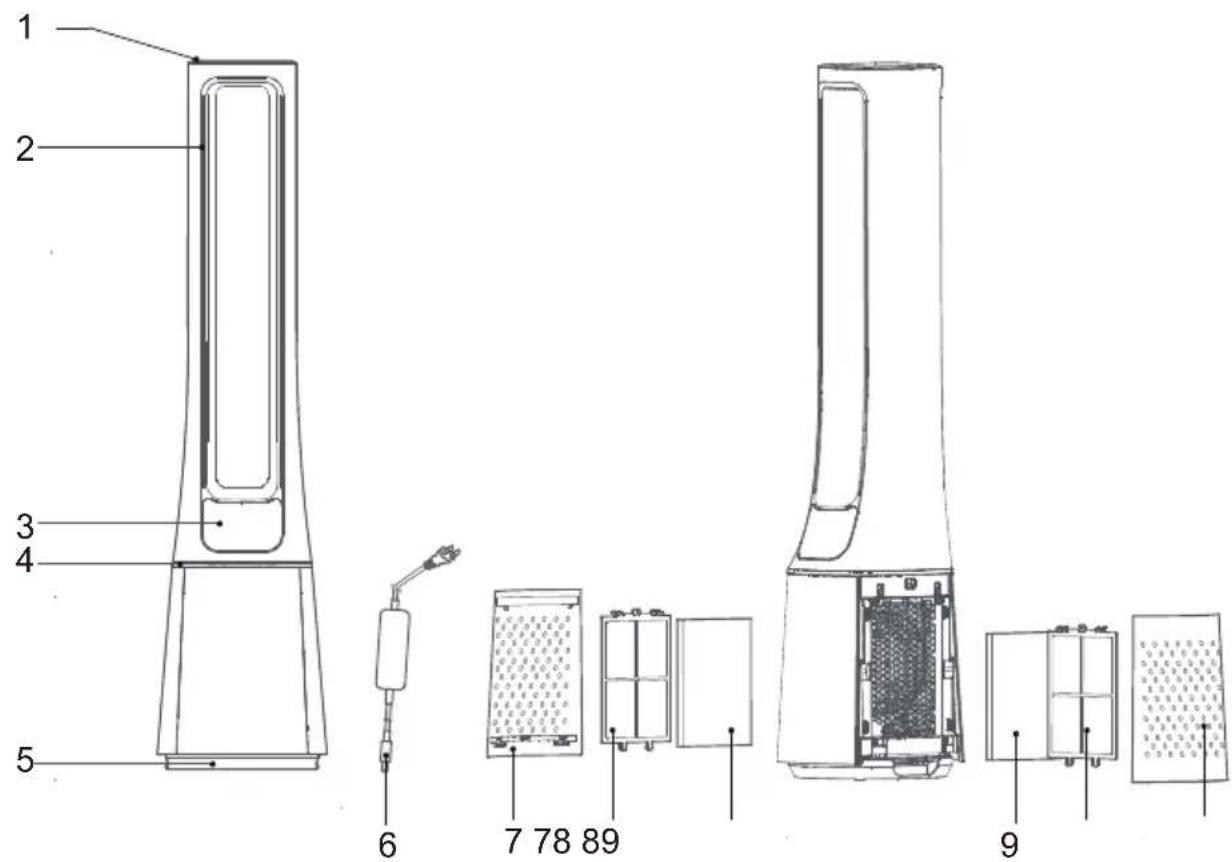
| NO. | Description NO. Description | ||
| 1 Top cover | 6 Adapter | ||
| 2 Air outlet | 7 | Air inlet grille | |
| 3 Display and Control panel | 8 | Pre-filter | |
| 4 | Center piece | 9 HEPA filter | |
| 5 | Base | ||
Remote Control x 1
Instruction × 1
HEPA Filter ×2
Adapter×1
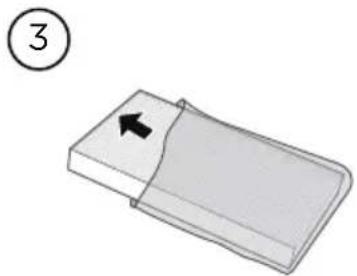
INSTALLATION INSTRUCTIONS
- Remove the air inlet grille.
- Take out the pre-filter. Press the raised part on both sides to pull it outwards and take out the pre-filter.
- Remove the protective film of the filter.
- Install the HEPA filter.
- Install the pre-filter. Align the slot position at the bottom and buckle up the upper U-shaped buckle.
- Install the air inlet grille. Align the upper two buckles and press them tightly, then press the two sides at lower part, slowly and gently buckle the air inlet grille.
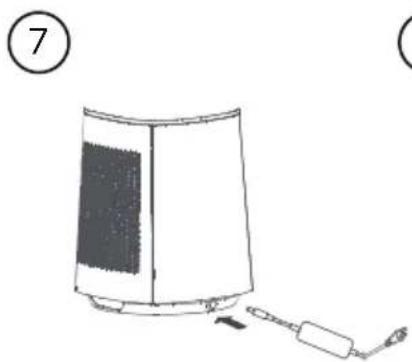
- Install the adapter, Tighten the plug with the socket position of the base.
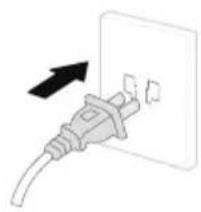
- Plug power supply.
natural_image
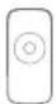
Simple line drawing of a rectangular object with an arrow pointing to it, labeled with circled number 3 (no text or symbols on the object itself)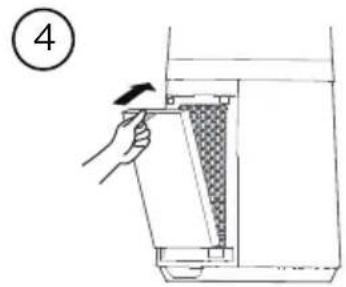
natural_image
Illustration of a hand inserting a card into a container with a checkered pattern (no text or symbols)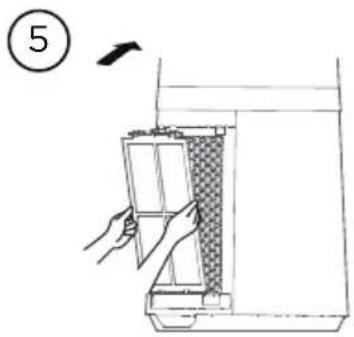
natural_image
Line drawing of a hand inserting a component into a device, no text or symbols present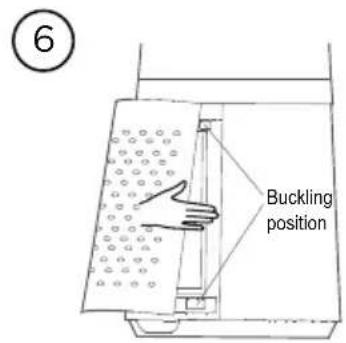
natural_image
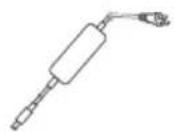
Line drawing of a portable electronic device with a cable and connector (no text or symbols)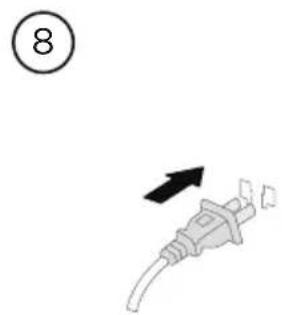
natural_image
Pure electrical plug diagram without any text, numbers, or symbols- It is recommended to clean the filter once every two weeks and replace it once every six months (the cleaning and replacement cycle can be adjusted according to the use environment).
INSTRUCTIONS
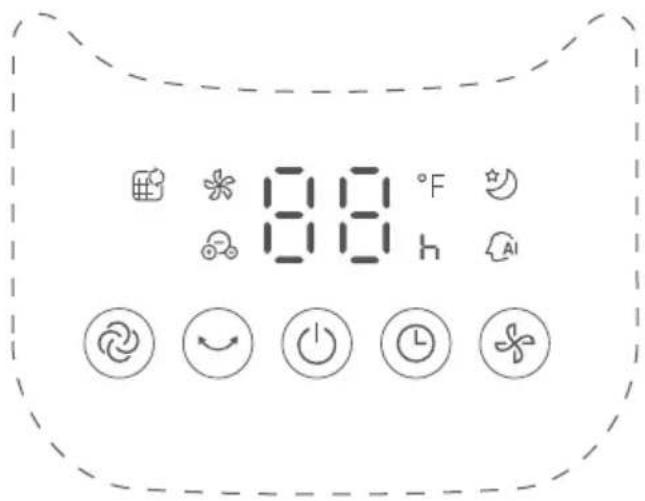
Control and display panel
| Button | Function Description |
 | Startup/Standby |
 | Touch this button to switch the wind mode among nor(When the filter replacement reminder light is on, press and hold this button to turn off the reminder light) |
 | Touch this button to start/stop the swing. |
 | Touch this button to switch the wind speed (cycles among level 1-2-3-···-10-1-2). |
 | Schedule to shut down in the power-on state, and schedule to start up in the standby state;Touch this button to set the timer (the display cycles among 0-1-2-···-12-Oh); Oh means that the timer is canceled. |
 | Filter replacement reminder icon; when the icon stays on, the filter needs to be replaced; |
 | In AI smart wind mode, the indicator light is on, and the wind power is automatically adjusted according to changes in ambient temperature. |
 | This indicator light is on in sleep wind mode.Start the sleep wind function, and the fan automatically adjusts the level according to the program; there are three levels: 1, 2 and 3; you can adjust the level of the sleep wind by pressing the wind speed button. |
 | Displays the wind speed level or set timer, and displays the temperature in the wind mode. |
 | This indicator light is on in ion wind mode.In this mode, plasmcluster is turned on, and level 1-10 wind has plasmcluster. |
INSTRUCTIONS
Additional Features and Maintenance
- Forced shut down There is no operation during the running of the fan, after 15 hours of continuous operation, the fan will be forced to shut down automatically.
- Intelligent memory When the fan is turned off or powered off, it will run in the state before turning off or power off when the power is powered on again (the timing function is not memorized).
- Screen-off function In case of no operation for 30 seconds during normal operation, the indicator light on the body will be automatically off, but the fan will continue to operate. Press the ON/OFF button to turn off the fan when the screen is off, and press the other button to restore display.
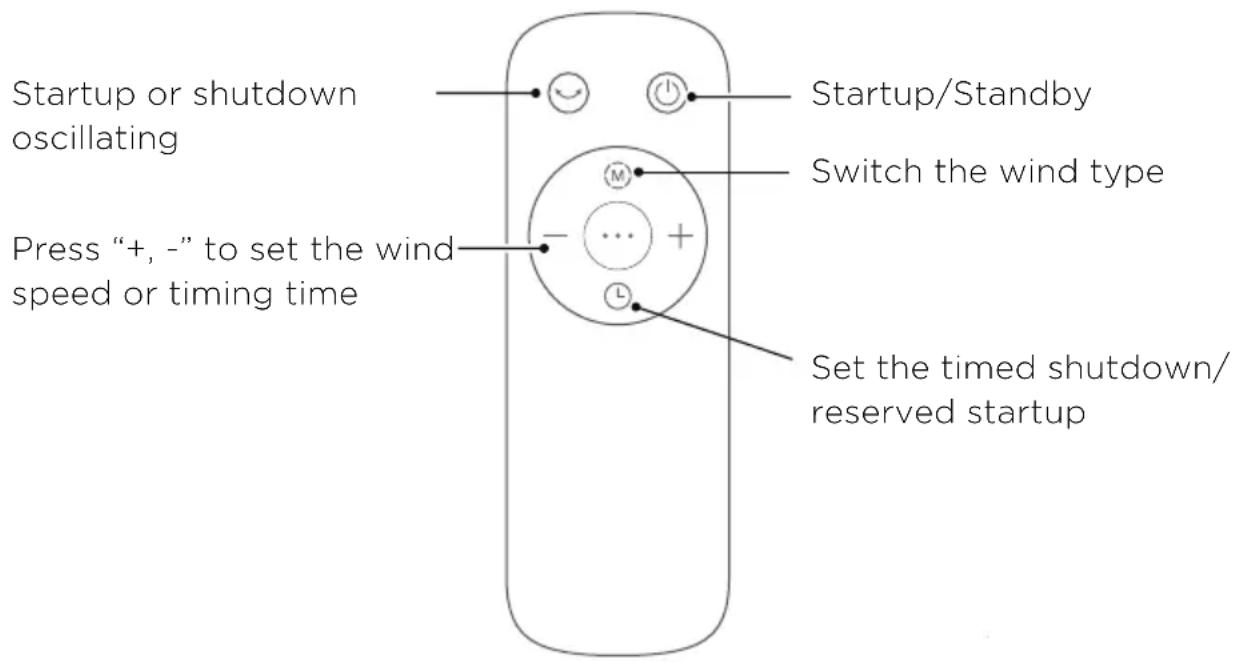
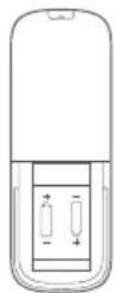
Remote control button description
Note:
- The remote control should be normally used on the front of the product and 30 degrees of the deviation angle.
- The battery contains many heavy metals, acids and bases, etc., which may threaten human's health; Waste batteries should be recycled separately.
INSTRUCTIONS
Remote control button description
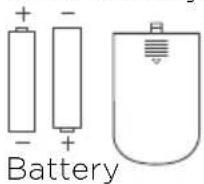
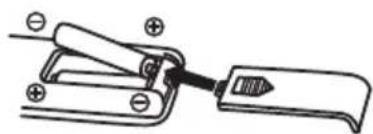
Use manganese or alkaline batteries of type "AAA".
DO not use rechargeable batteries.
Battery not included in the packaging.
AAA Battery, 1.5 V
BATTERY WARNING AS BELOW
-
Do not dispose of batteries in fire, batteries may explode or leak
-
Do not mix old and new batteries.
-
Do not mix alkaline, standard (carbon-zinc) or rechargeable (nickel-cadmium) batteries.
-
Non-rechargeable batteries are not to be recharged.
-
Batteries are to be inserted with the correct polarity.
-
Exhausted batteries are to be removed from the product.
-
The batteries must be removed from the remote controller before it is scrapped and that they are disposed of safely.
natural_image
Mechanical clamp or tool assembly diagram with no visible text or symbols
natural_image
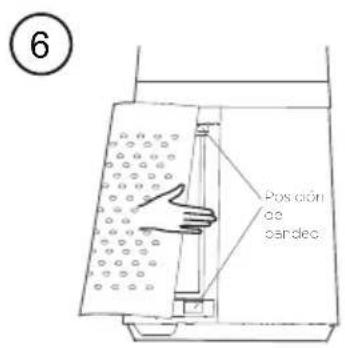
Line drawing of a hand holding a handheld device with an arrow indicating rotation (no text or symbols)Filter replacement
-
Filter model: FQ150CJ-2 (including 2 sets).
-
When the indicator light for replacement of filter is on, the prompt that reminds you of filter replacement will appear. If it is not replaced in time, the prompt will appear during each startup.
-
Replace a new filter.
-
Long press the mode button for 3 seconds to turn off the indicator light for filter replacement.
1
③
natural_image
Diagram of a mechanical or architectural component with a folded panel and directional arrow (no text or symbols)②

natural_image
Simple icon of a grid with a circular arrow, enclosed in a dashed circle (no text or symbols)4

INSTRUCTIONS
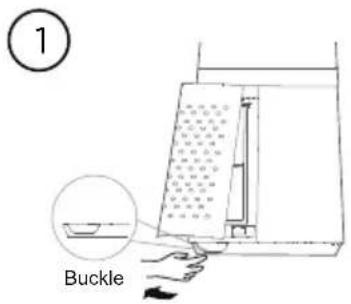
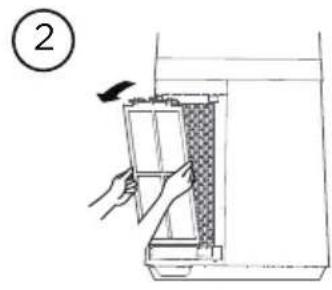
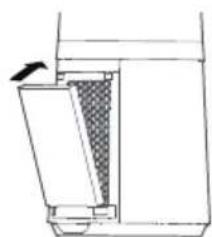
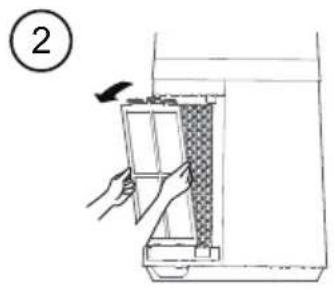
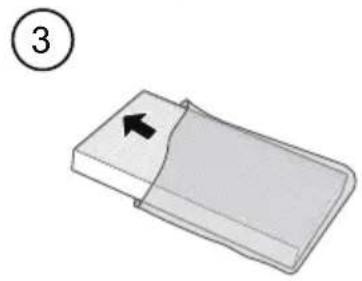
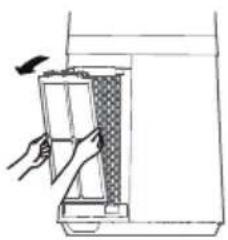
Pre-Filter cleaning
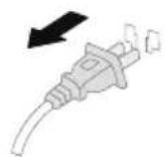
- Unplug the power cord.
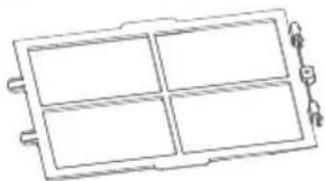
- Take out the filter.
- Remove the dust with vacuum cleaner.
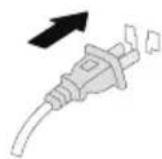
- Install the machine in reverse order and plug power supply.
1
②

natural_image
Hand inserting a card into a door panel (no text or symbols visible)③
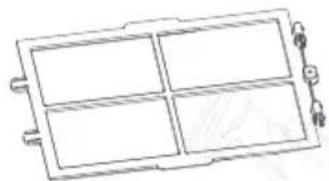
natural_image
Simple line drawing of a four-segment display panel with no text or symbols4
USER SERVICING INSTRUCTIONS
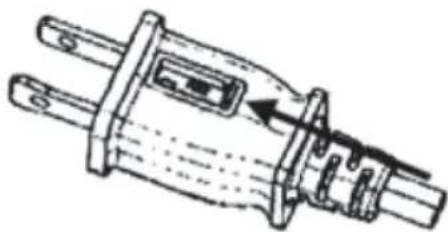
- Grasp plug and remove from the receptacle or other outlet device. Do not unplug by pulling on cord.
- Open fuse cover. Slide open fuse access cover on top of attachment plug towards blades.
- Remove fuse carefully. Insert the tip of your tool into fuse slot (close with the terminal), then prize the fuse gradually and slowly, but not overexert. If you feel tight, you can try it at several times and prize the fuse little by little. When one side of the fuse has been prized, then you can get the fuse out entirely.
- Risk of fire. Replace fuse only with 2.5 Amp, 125 Volt fuse.
- Close fuse cover. Slide closed the fuse access cover on top of attachment plug.
- Risk of fire. Do not replace attachment plug. Contains a safety device (fuse) that should not be removed. Discard product if the attachment plug is damaged.

Note:
- When you replace the fuse, please don't operate suddenly or overexert, or else the product will be damage or cause accident.
- When you feel it hard to be operated, please make sure you have got the right way.
natural_image
Technical line drawing of a mechanical component with no visible text or symbolsCLEANING
- Be sure to unplug from the electrical supply source before cleaning.
- Plastic parts should be cleaned with mild soap and a damp cloth or sponge. Thoroughly to remove soap film with clean water.
- Be sure not to make water or other liquid enter inside of motor.
PRODUCT PARAMETER
| Model Parts Input Output | |||
| AMS150-PB Adapter | 100-240V~50/60Hz 1.5A | 24V --- 1.5A | |
SERVICE AND SUPPORT
In the event of a warranty claim or if service is required for this unit, please contact us at the following:
Toll Free: 866-646-4332
For questions or comments, please write to:
Midea America Corp
759 Bloomfield Ave., # 386
West Caldwell, NJ 07006-6701
Customer Service: 866-646-4332
For your records, staple your sales receipt to this manual and record the following:
DATE OF PURCHASE:
PLACE OF PURCHASE:
(STAPLE SALES RECEIPT HERE)
NOTE: PROOF OF PURCHASE IS REQUIRED FOR ALL WARRANTY CLAIMS
natural_image
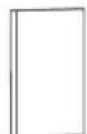
Line drawing of a vertical rectangular device with a central rectangular opening and base plate (no text or symbols)LEA Y GUARDE ESTAS INSTRUCCIONES
PRECAUCIONES DE SEGURIDAD .....2
natural_image
Simple 3D diagram of a rectangular object with an arrow pointing to its side, labeled with circled number 3 (no text or symbols on the object itself)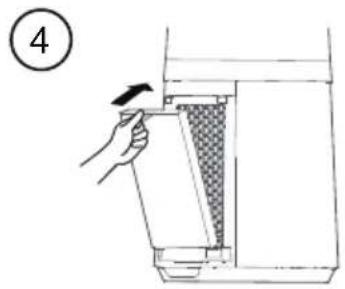
natural_image
Illustration of a hand inserting a card into a container with a patterned lid (no text or symbols)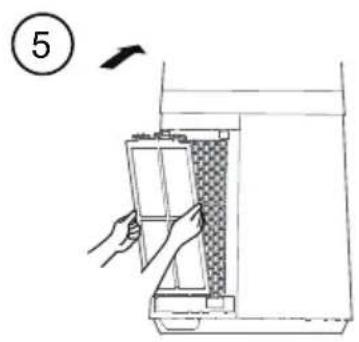
natural_image
Line drawing of a portable electronic device with a label '7' and a connector attached (no text or symbols on the device itself)
natural_image
Illustration of a plug with a black arrow pointing to its socket, no text or symbols presentnatural_image
Diagram of a mechanical clamp or tool with a handle and base, no text or symbols present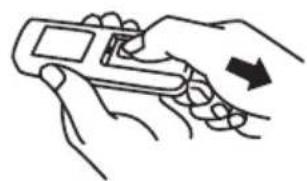
natural_image
Line drawing of two hands holding a handheld device with an arrow indicating rotation (no text or symbols)Cambio del filtro
natural_image
Simple icon of a document with a circular arrow, no text or symbols present4

natural_image
Pure technical diagram of a mechanical component without any text, numbers, or symbols
natural_image
Abstract circular logo with three interlocking curved lines (no text or symbols)INSTRUCCIONES
Limpieza del pre-filtro
natural_image
Illustration of a plug with a black arrow pointing to a white socket (no text or symbols)2
natural_image
Illustration of a hand opening a door with a patterned lid, showing no text or symbols③
natural_image
Simple line drawing of a rectangular frame with four equal sides and a small loop at the bottom (no text or symbols)④
natural_image
Illustration of a plug with a black arrow indicating direction (no text or symbols)natural_image
Technical line drawing of a mechanical component with no visible text or symbolsLIMPIEZA
759 Bloomfield Ave., # 386
West Caldwell, NJ 07006-6701
make yourself at home
- USER MANUAL
- READ AND SAVE THESE INSTRUCTIONS
- Read This Manual
- SAFETY PRECAUTIONS
- IMPORTANT SAFETY INSTRUCTIONS
- CAUTION
- Read Rules for Safe Operation and Instructions Carefully.
- WARNING
- PRODUCT INTRODUCTION
- Note:
- INSTALLATION INSTRUCTIONS
- INSTRUCTIONS
- Additional Features and Maintenance
- Remote control button description
- BATTERY WARNING AS BELOW
- Filter replacement
- Pre-Filter cleaning
- USER SERVICING INSTRUCTIONS
- CLEANING
- SERVICE AND SUPPORT
- (STAPLE SALES RECEIPT HERE)
- NOTE: PROOF OF PURCHASE IS REQUIRED FOR ALL WARRANTY CLAIMS
- LEA Y GUARDE ESTAS INSTRUCCIONES
- Cambio del filtro
- INSTRUCCIONES
- Limpieza del pre-filtro
- LIMPIEZA
Brand : MIDEA
Model : AMS150-PB
Category : Air-conditioner