
C-DMM-3002 - Car accessories Havis - Free user manual and instructions
Find the device manual for free C-DMM-3002 Havis in PDF.


| Product Type | Vehicle Dash Monitor Mount |
| Model | C-DMM-3002 |
| Brand | Havis |
| Compatible Vehicles | 2013-2019 Ford Police Interceptor (Standard and Interior Upgrade Package) |
| Mount Type | Flip-up dash mount |
| Included Hardware | Main upper mounting bracket, lower support bracket, VESA rotator plate, screws, washers, nuts |
| Tools Required | Ratchet wrench, dash panel removal tool, 7/16" open end wrench, socket set, Phillips screwdriver, torque wrench (in-lbs) |
| VESA Compatibility | Accepts VESA 75 and other Havis docking stations (with optional C-MM-2XX adaptors) |
| Adjustability | Up/down and side-to-side motion with swivel plate |
| Installation Location | Center dash, replacing OEM trim |
| Cable Management | Wire tie holes for routing along flip-up frame |
| Material | Metal brackets, plastic washers |
| Weight Capacity | Designed for typical computer/dock assemblies (exact limit not specified) |
| Safety | Check for obstructions before drilling; use provided hardware; torque to specifications |
| Maintenance | Periodically check fastener tightness; ensure smooth rotation of swivel |
| Country of Origin | USA (Havis, Inc., Warminster, PA) |
Frequently Asked Questions - C-DMM-3002 Havis
User questions about C-DMM-3002 Havis
0 question about this device. Answer the ones you know or ask your own.
Ask a new question about this device
Download the instructions for your Car accessories in PDF format for free! Find your manual C-DMM-3002 - Havis and take your electronic device back in hand. On this page are published all the documents necessary for the use of your device. C-DMM-3002 by Havis.
USER MANUAL C-DMM-3002 Havis
INSTALLATION INSTRUCTIONS
C-DMM-3002 Flip up Dash Monitor Mount
2013-2019 Ford Police Interceptor Standard Interior and Interceptor with Interior Upgrade Package (Ford option code 65U)
TOOLS REQUIRED:
Ratchet Wrench Dash panel removal tool Open End Wrench - 7/16"
Socket Set Phillips screwdriver Torque wrench (in-lbs.)
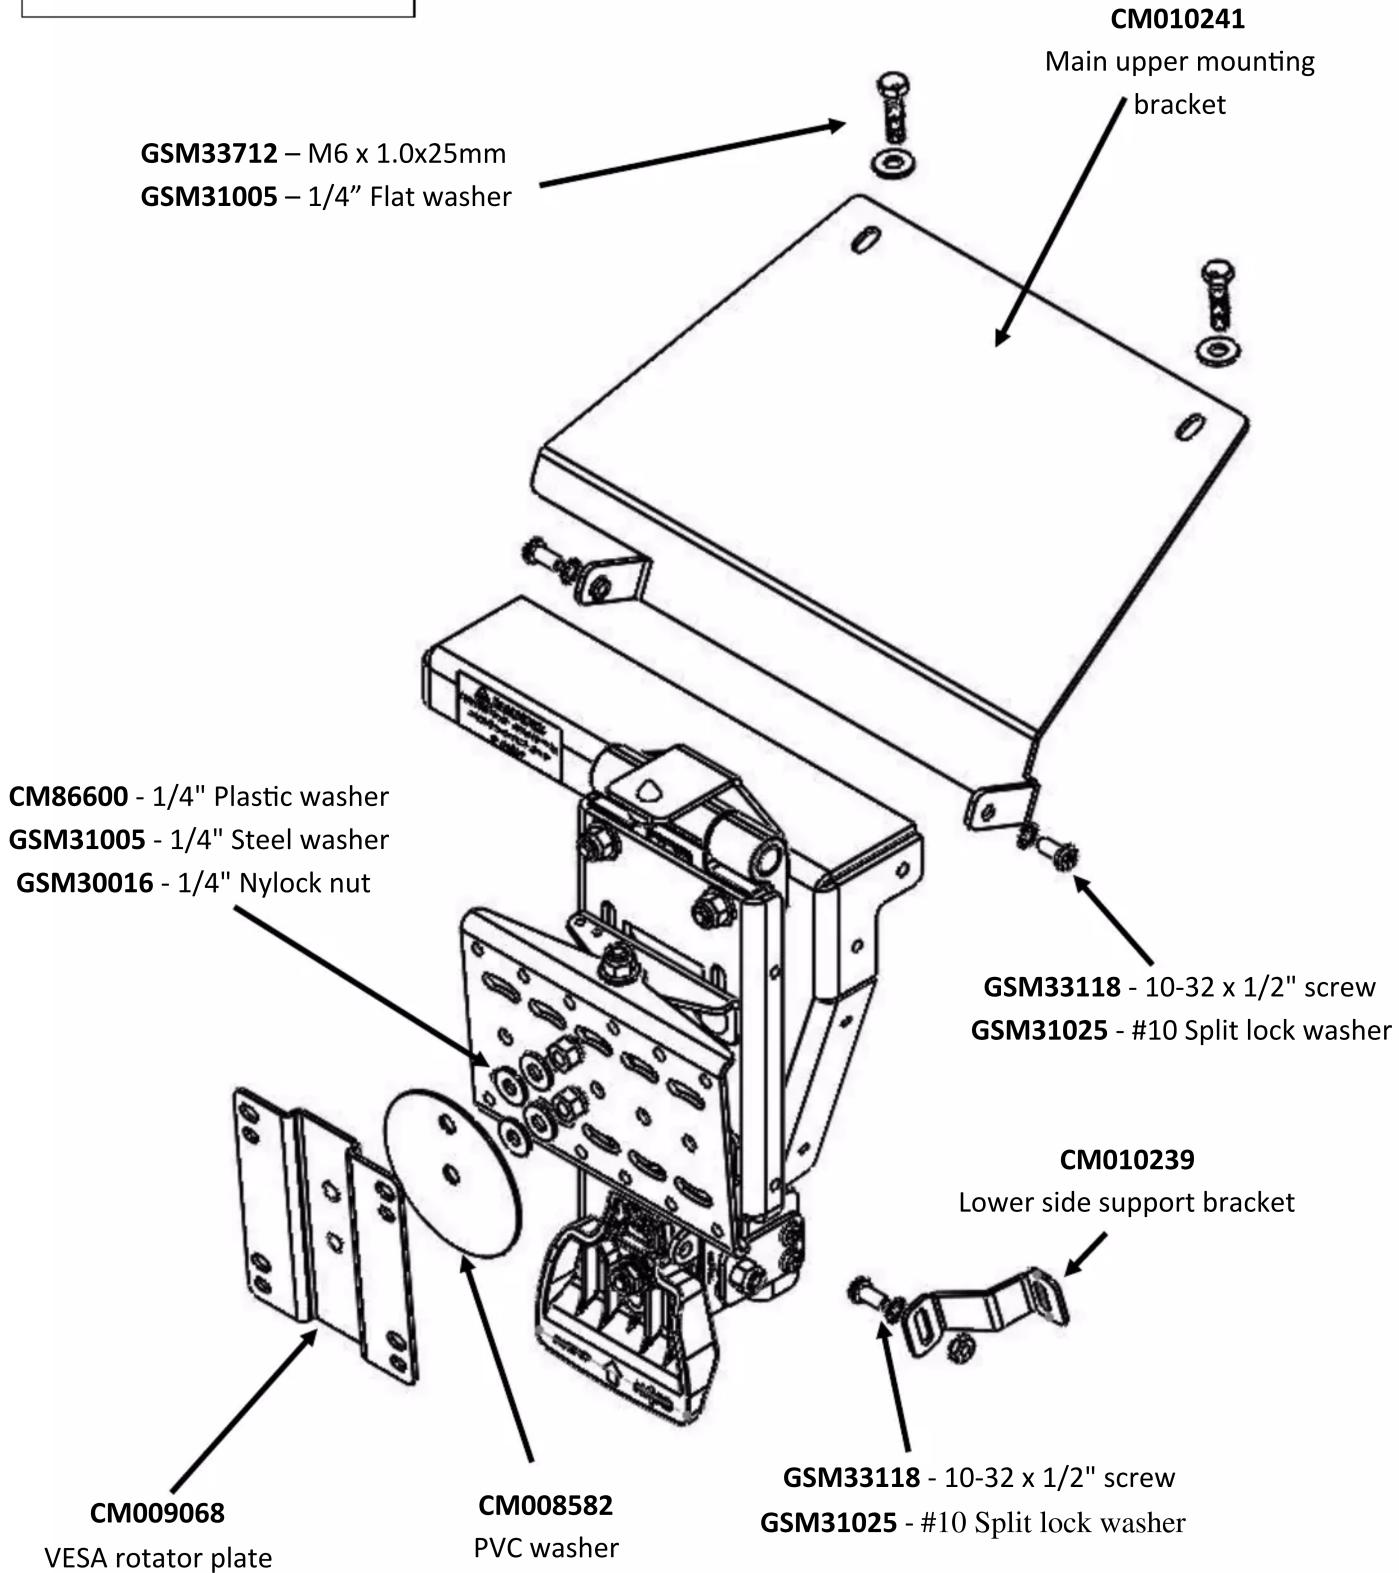
HARDWARE and PARTS:
QTY DESCRIPTION PART#
1 Main upper mounting bracket CM010241
1 Lower passenger side support bracket CM010239
3 10-32 x 1/2" Machine screw GSM33118
3 #10 Flat washer GSM31003
3 #10 Split lock washer GSM31025
2 M6 x 25mm machine thread bolt GSM33712
1 VESA rotator plate CM009068
1 PVC washer CM008582
2 1/4" Plastic washer CM86600
4 1/4" Steel washer GSM31005
2 1/4" Nylock nut GSM30016
Notes:
The C-DMM-3000 swivel plate accepts C-MM-301 offset bracket used with C-MM-2XX adaptors.
C-MM-2XX series adaptor brackets are not needed for most VESA 75 and other Havis Docking Station mounting applications.
CM009068 VESA rotator plate gives additional positioning options, but is not required depending on mounting preference.
Always!
Read all instructions before installing any Havis, Inc. products.
➢ Check for obstructions (Wires, brake lines, fuel tank, etc.) before drilling any holes!
▶ Use hardware provided with install kit
C-DMM-3002 Assembly
natural_image
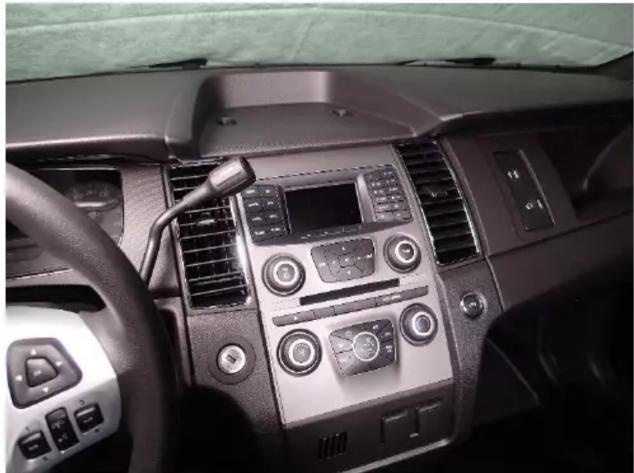
Interior view of a car dashboard with air conditioners and controls (no visible text or symbols)View of dash center instrument panel
natural_image
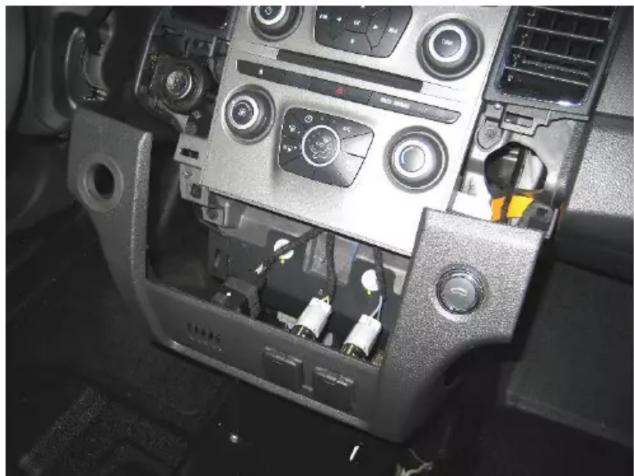
Interior view of a car dashboard with air conditioners and control knobs (no visible text or symbols)Carefully remove (unsnap) lower/ center dash panel
natural_image
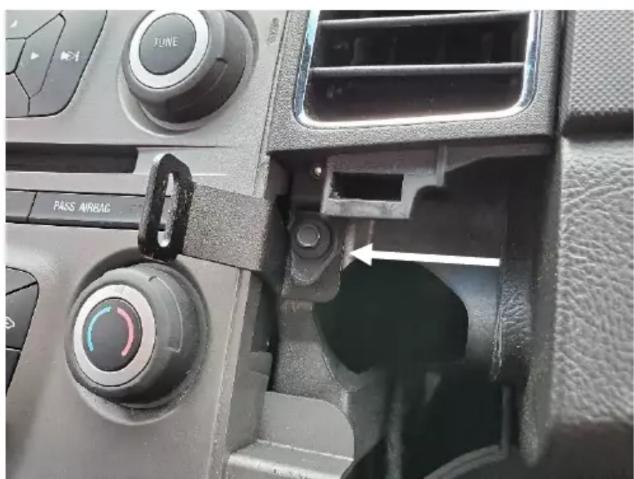
Close-up of a car airbag control panel showing mode dial, buttons, and airflow direction indicator (no readable text or symbols)Attach lower side support bracket using previously removed 7mm head fastener.
Havis, Inc.
75 Jacksonville Road
Warminster, PA 18974
T 800-524-9900 F 215-957-0729
www.havis.com
natural_image
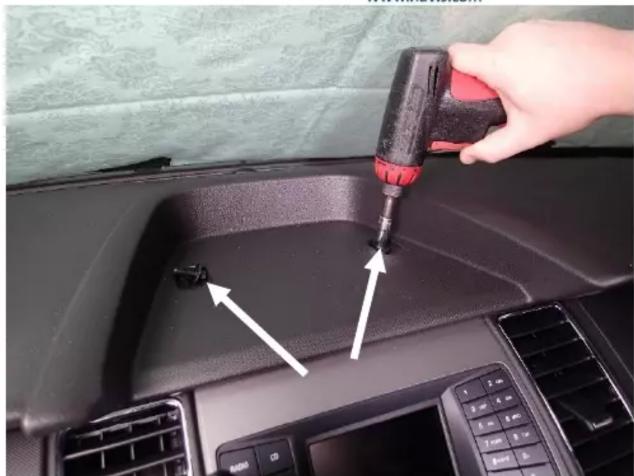
Close-up of a car interior showing a hand using a screwdriver to adjust the engine compartment, with no visible text or symbols.Remove the center dash top trim panel. (8 mm socket)
natural_image
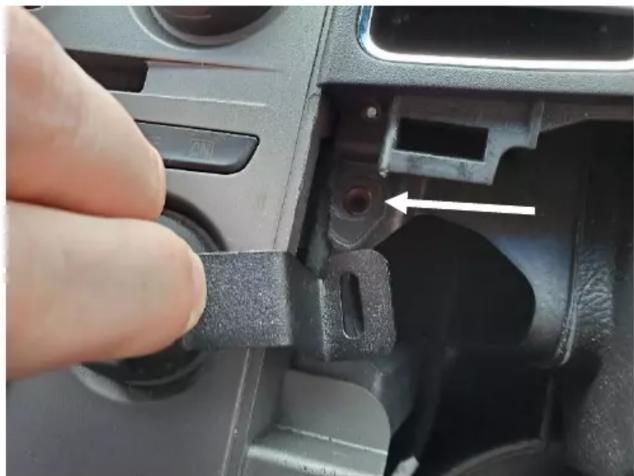
Close-up of a hand inserting a plastic clip into a car air vent (no text or symbols visible)On passenger side under vent, remove OEM 7mm head fastener and slide lower side support bracket between trim panel and dash.
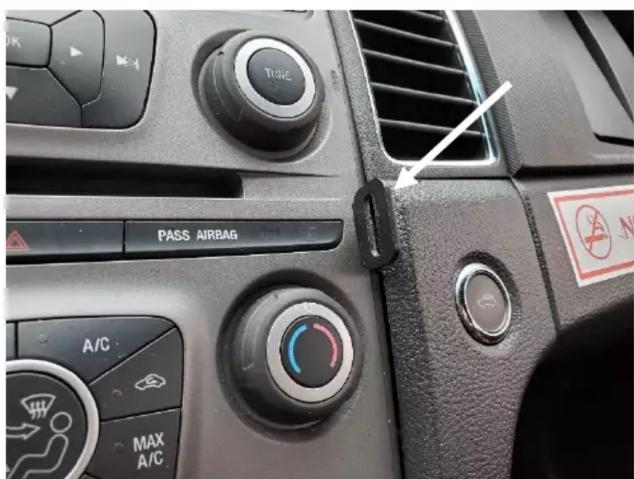
Re-install lower dash trim. Bracket should stick out as shown.
natural_image
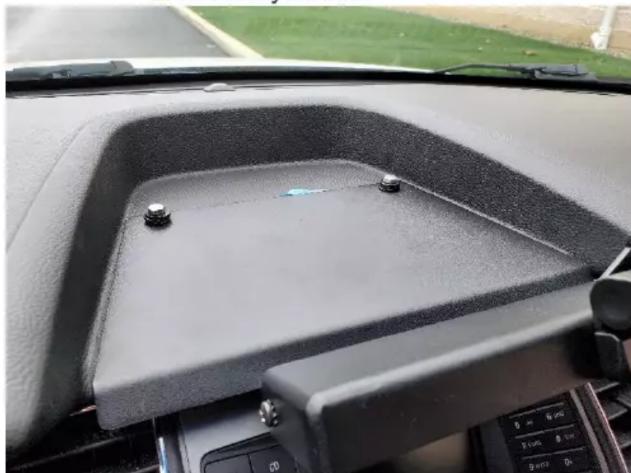
Interior view of a car dashboard with a black plastic tray and two screws on the rim (no visible text or symbols)Place upper main mounting bracket onto dash. Install using M6 x 25mm machine bolts and 1/4" flat washers.
natural_image
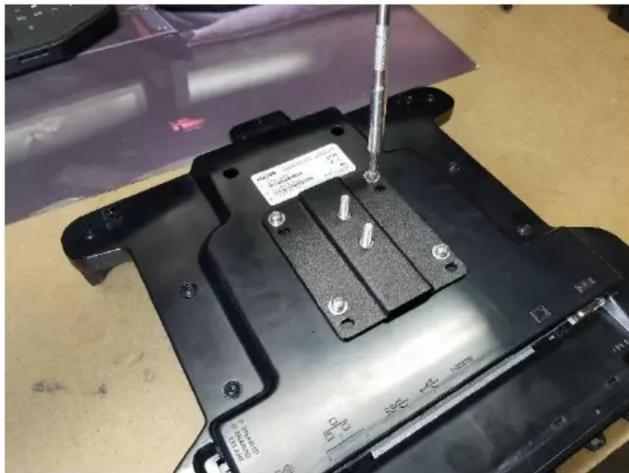
Close-up of a black electronic component with screw holes and a metal screwdriver inserted, placed on a workbench (no visible text or symbols)Attach VESA plate to the back of the dock. The gray nylon washer will go between this bracket and the DMM swivel plate.
natural_image
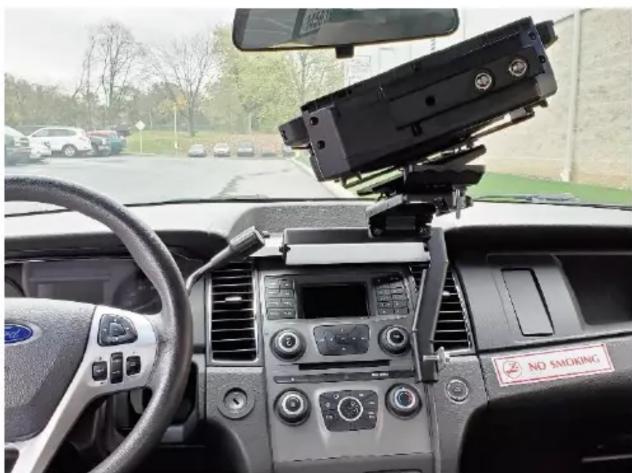
Interior view of a car dashboard with mounted electronic equipment and a 'NO SMOKING' label on the windshield (no readable text or symbols beyond basic labels)Route wiring as needed along the side of the DMM flip up frame using wire tie holes. Test up / down and side to side motion to confirm wire have adequate slack and strain relief.
Havis, Inc.
75 Jacksonville Road
Warminster, PA 18974
T 800-524-9900 F 215-957-0729
www.havis.com
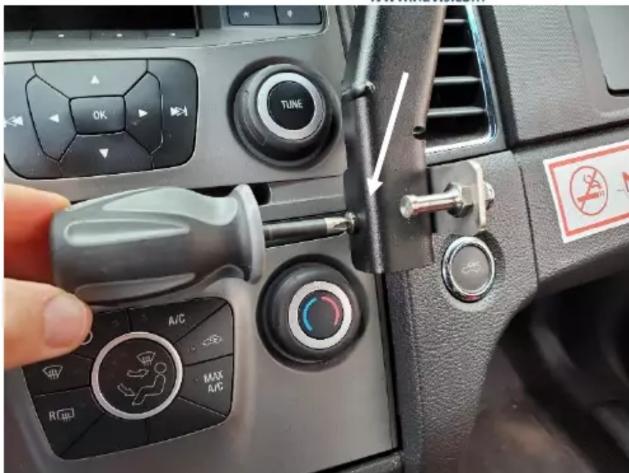
Attach to lower side support bracket using #10 x 1/2" machine screws, flat washers and split lock washers.
natural_image
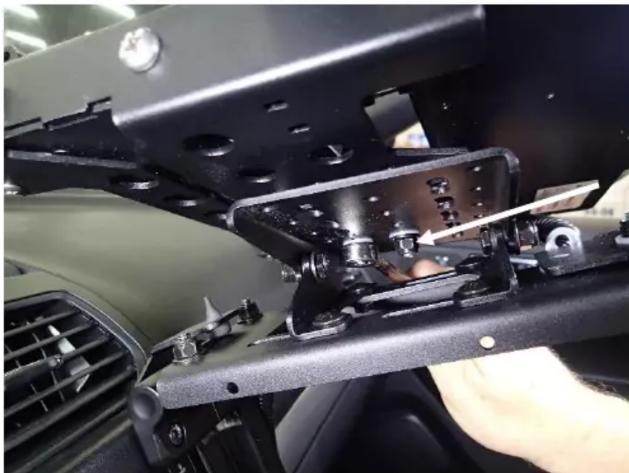
Close-up of a mechanical assembly with a hand adjusting components, no visible text or symbolsDetermine desired position for your specific computer and attach to DMM swivel plate using nylon washers, steel washers, and nylock nuts. Tighten so that the dock rotates smoothly. (Firm, but not too tight)
natural_image
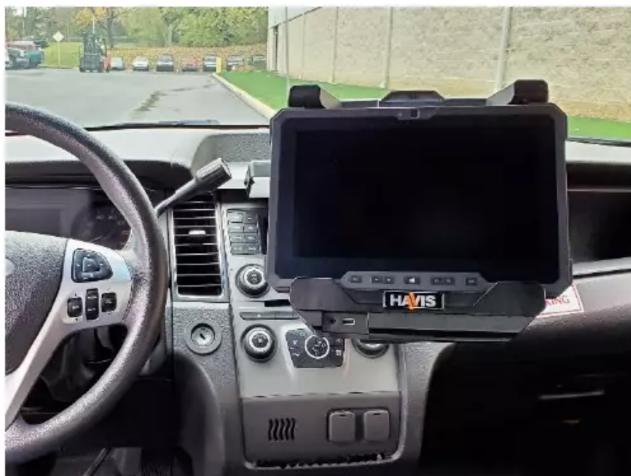
Interior view of a car dashboard with a tablet mounted on the steering wheel, showing steering wheel and dashboard controls (no visible text or symbols)Installation is now complete.
Brand : Havis
Model : C-DMM-3002
Category : Car accessories