C-TSM-CHGR-P-1 - Accessoires auto Havis - Free user manual and instructions
Find the device manual for free C-TSM-CHGR-P-1 Havis in PDF.

User questions about C-TSM-CHGR-P-1 Havis
0 question about this device. Answer the ones you know or ask your own.
Ask a new question about this device
Download the instructions for your Accessoires auto in PDF format for free! Find your manual C-TSM-CHGR-P-1 - Havis and take your electronic device back in hand. On this page are published all the documents necessary for the use of your device. C-TSM-CHGR-P-1 by Havis.
USER MANUAL C-TSM-CHGR-P-1 Havis
INSTALL INSTRUCTIONS C-TSM-CHGR-X-1 TRUNK SIDE MOUNT FOR 2011-2013 DODGE CHARGER X = "D" DRIVERS SIDE OR "P" PASSENGER SIDE
TOOLS REQUIRED:
Phillips Screwdriver
Jig Saw
Powered drill with 5/32" drill bit
HARDWARE:
QTY DESCRIPTION PART #
5 #10 x 3/4" Sheet metal screws GSM33195
Always!
Read all instructions before installing any Havis, Inc. products.
➢ Check for obstructions (Wire, brake lines, fuel tank, etc.) before drilling any holes!
➢ Use hardware provided with install kit
C-TSM-CHGR-P-1 shown Trunk Side Mount (Passenger Side)
NOTE: This instruction shows the passenger side installation. The Drivers side will install the same way.
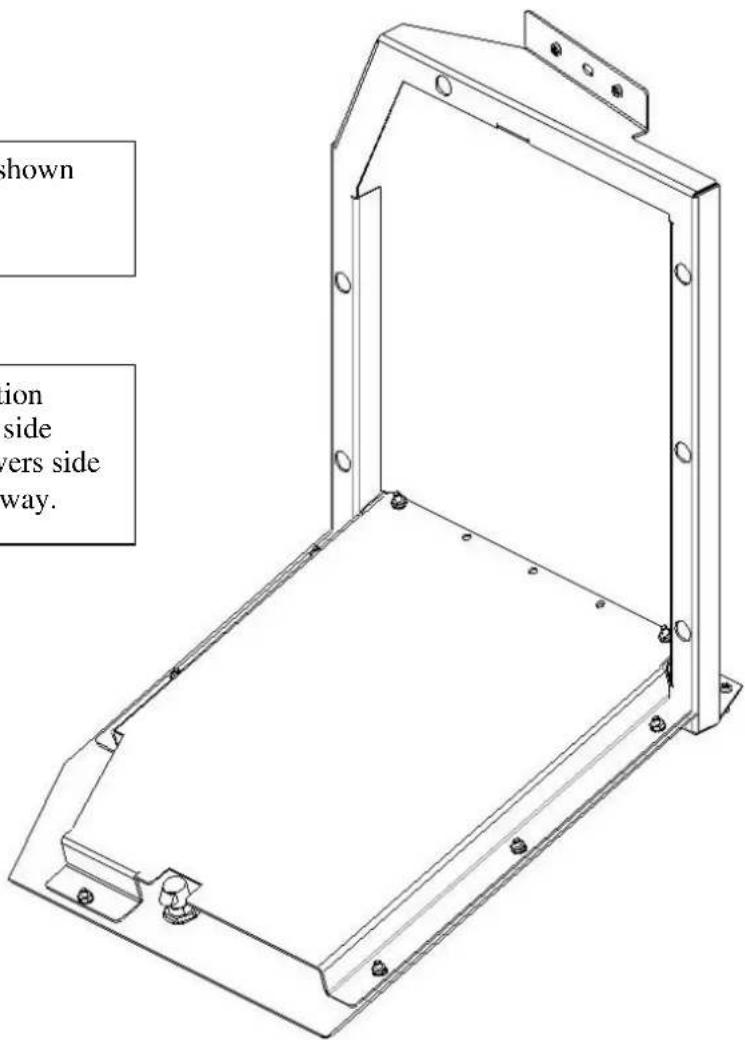
text_image
shown ion side vers side way.
natural_image
Interior view of a car trunk showing rear seats, rear camera, and cable (no text or symbols visible)View of passenger side trunk area prior to installation.
natural_image
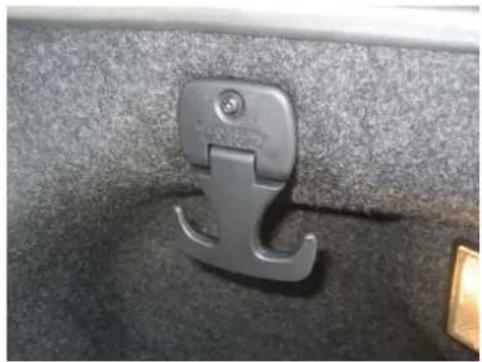
Close-up of a metallic car handle clip attached to a textured surface (no text or symbols visible)Remove side cargo hook. Mount screw to be reused later (Phillips screwdriver)

natural_image
Close-up of a metallic mechanical component mounted on a textured gray surface (no visible text or symbols)Remove rear loop trim panel fastener

natural_image
Interior view of a car showing exposed wiring and components, no visible text or symbolsRemove fender liner.
Run wiring as needed for emergency equipment.

natural_image
Close-up of a hand inserting a cable into a car battery panel, with no visible text or symbols.Unclip and move wiring at side floor area. Make sure it is repositioned so it will not get damaged.
Replace fender liner.

natural_image
Close-up of a hand using a tool to adjust or install a black metal component (no visible text or symbols)Place Trunk Side Mount frame assembly into position and attach to inner fender with previously removed Cargo hook screw into original hole.

natural_image
Close-up of a dark textured surface with a small metallic object at the bottom (no visible text or symbols)Make sure door has clearance at rear trunk trim panel.

natural_image
Close-up of a person in blue gloves operating a yellow handheld device inside a black vehicle frame (no visible text or symbols)With Trunk Side Mount in position, drill three 5/32 ^"" holes into floor.

natural_image
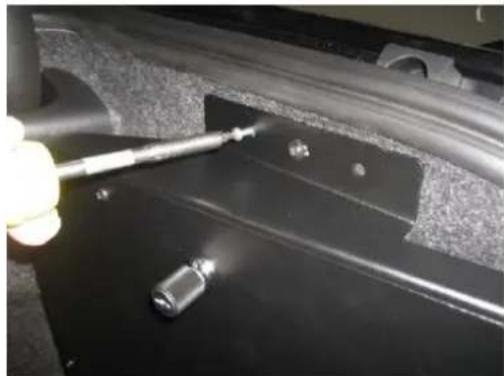
Person using a screwdriver to adjust or install a black mechanical component (no visible text or symbols)Attach lower frame to floor with # 10 x 3/4" sheet metal screws.
natural_image
Close-up of a hand using a tool to work on a black mechanical component, no visible text or symbolsDrill 5/32"holes at upper bracket (next to OEM screw) and attach with # 10 x 3/4" Sheet metal screws

natural_image
Interior view of a vehicle chassis frame with black metal components and a white arrow indicating direction (no text or symbols)Mount and wire equipment on inside door panel.

natural_image
Interior view of a vehicle showing two black metal compartments and a larger rectangular panel (no text or symbols visible)Finished Passenger-Side Mount shown with full width trunk tray

natural_image
Close-up of a car wheel assembly with a black metal frame and a blue NVS logo, showing no visible text or symbols.Finished C-TSM-CHGR-P-1 (Passenger Side Trunk Side Mount) Shown with Full Size Spare Tire.
NOTE: If your vehicle has the small donut spare tire, the flip up trunk liner should just clear the Trunk Side Mount.