C-SM-SA - Accessoires auto Havis - Free user manual and instructions
Find the device manual for free C-SM-SA Havis in PDF.

User questions about C-SM-SA Havis
0 question about this device. Answer the ones you know or ask your own.
Ask a new question about this device
Download the instructions for your Accessoires auto in PDF format for free! Find your manual C-SM-SA - Havis and take your electronic device back in hand. On this page are published all the documents necessary for the use of your device. C-SM-SA by Havis.
USER MANUAL C-SM-SA Havis
INSTALL INSTRUCTIONS C-SM SERIES ANGLED HEAVY DUTY CONSOLE & ACCESSORIES
TOOLS REQUIRED:
Standard socket set w/ 6" extension Metric socket set w/ 6" extension Standard wrench set

text_image
Monitor Platform (C-SM-MMP)Metric wrench set
Torx bit set w/ driver

text_image
Keyboard/Laptop Platform (GSM-5.4.1)
text_image
Angled Heavy Duty Console (C-SM-830 or 1225) trusion. inside of rusion.
natural_image
Technical line drawing of a mechanical bracket or mounting plate (no text or symbols)Pentex Printer
Mount
(C-PMS)
text_image
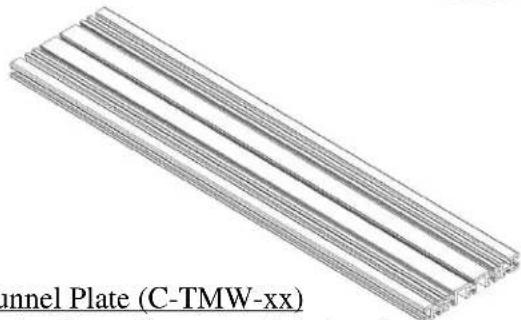
Channel Plate (C-TMW-xx)
natural_image
Isometric line drawing of a rectangular electronic enclosure with mounting feet and internal components (no text or symbols)Tunnel Plate (C-TMW-xx)
(Part # varies depending on vehicle type)
Console Extension
(C-SM-600, 800 or
1200)
C-SM_INST_9-10
Always!
Read all instructions before installing any Havis, Inc. products.
➢ Check for obstructions (Wire, brake lines, fuel tank, etc.) before drilling any holes!
➢ Use hardware provided with install kit
SUB ASSEMBLY:
- Install Tunnel Mount into vehicle. (See Tunnel Mount specific install instructions.)
- Determine desired height of console and console accessories prior to mounting in vehicle.
INSTALLATION:
-
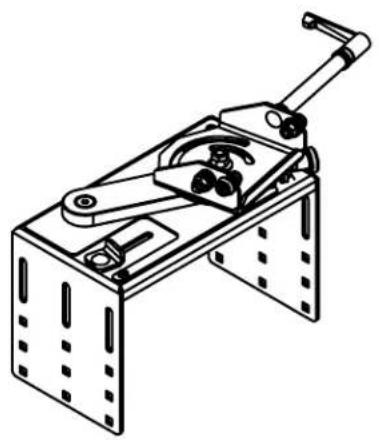
ADJUST CONSOLE HEIGHT: (See Figure #1)
-
To adjust height remove carriage bolts on side of console.
- Mount necessary accessories to side of console. (Monitor platform, keyboard/laptop platform, printer, etc. See instructions below.)
-
With all accessories and height determined, re-attach carriage bolts and nuts to console.
-
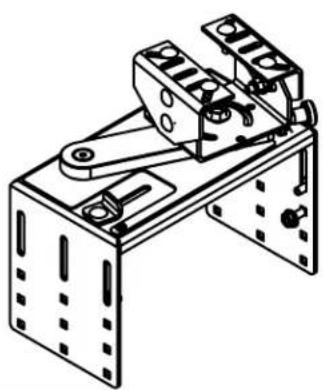
ATTACH MONITOR PLATFORM: (See Figure #2)
-
Mounting platform attaches to side of console using supplied carriage bolts and serrated nuts.
- Monitor mounting platform will mount to front row of holes on console.
- Attach C-UMM-101 and C-MM-XXX brackets to monitor platform prior to attaching to console.
Note: Prior to mounting accessories to side of Angled Heavy Duty console be sure to adjust height.
Height Adjustment

text_image
Figure #1Figure #2

text_image
Figure #2 Mounts to sides of ConsoleFigure #3
3. ATTACH KEYBOARD/LAPTOP PLATFORM:
(See Figure #3)
- Mounting platform attaches to side of console using supplied
• carriage bolts and serrated nuts. - When using platform for a keyboard, mount on rear rows of holes on console.
- When using platform for a laptop, you have the option of using any row of holes for desired height.
- Attach tilt / swivel, keyboard/laptop mount to swing arm assembly. RE: C-MD-202, C-KBM-101 (sold separate)

text_image
st height.Mounts to sides of Console
Note: Prior to mounting accessories to side of Angled Heavy Duty console be sure to adjust height.
C-SM_INST_9-10

text_image
Figure #4 Mounting Hardware A spare plastic end cap is provided in case you choose not to attach consoles together Figure #5 Mounts to Angled Heavy Duty console Tunnel Plate Hardware4. ATTACH PENTEX PRINTER BRACKET: (See Figure #4)
• Printer bracket attaches to front side of console.
- When mounted properly, printer housing will slide toward passenger side seat.
- Attach to Angled Heavy Duty console using supplied screws and Keps nuts.
5. MOUNT CONSOLE TO TUNNEL PLATE:
- Slide 14 - 20 × 34" bolts into slots of Tunnel Plate.
- Place Angled Heavy Duty console over 14 " bolts.
- Position console and attach to Tunnel using 14 -20 serrated nuts.
6. ATTACH CONSOLE EXTENSION: (C-SM-600, 800, 1200 see Figure 5)
- With Angled Heavy Duty console attached to Tunnel, position and attach 6" console extension. **A spare plastic end cap is provided in case you choose not to attach consoles together. Simply peel and stick to console end plate if desired.
- Slide (2) 1/4 - 20 × 3/4 hex head bolts into slots of Tunnel Plate.
- Place console extension and bolt down using 14 - 20 serrated nuts.
- Connect opposite end-to-end plate of Angled Heavy Duty housing. (Slot to slot). Adjust height as desired.
• Wire and install control heads and accessories.

natural_image
Mechanical assembly component with black frame and metal bracket (no visible text or symbols)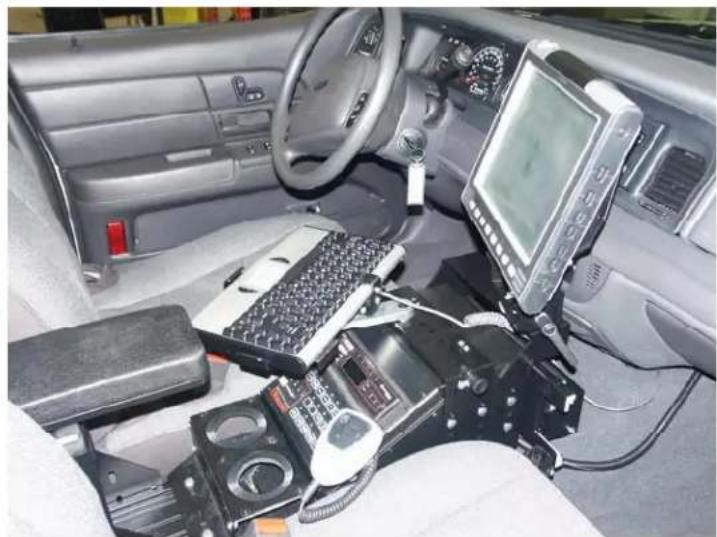
natural_image
Interior view of a car cockpit with electronic equipment and a mounted display (no visible text or symbols)C-SM-SA-1-HD ASSEMBLY WITH C-MD-200 SERIES
natural_image
Technical line drawing of a mechanical clamp or lever device with no visible text or symbols
text_image
5/16-24 JAM NUT GSM30070 5/16-24 CONICAL NUT GSM30160 5/16" BELLEVILLE WASHER GSM31091 C-MD-203 TOP REMOVED FOR CLARITY WASHER COMES -200 ASSEMBLY METAL PLATE CM003103-1 COMES WITH C-MD-200 ASSEMBLY SWING ARM 1/4-20 X 1-1/2" LG BOLT CM86504STANDARD
C-SM-SA-1-HD ASSEMBLY
natural_image
Technical line drawing of a mechanical assembly with levers and mounting brackets (no text or symbols)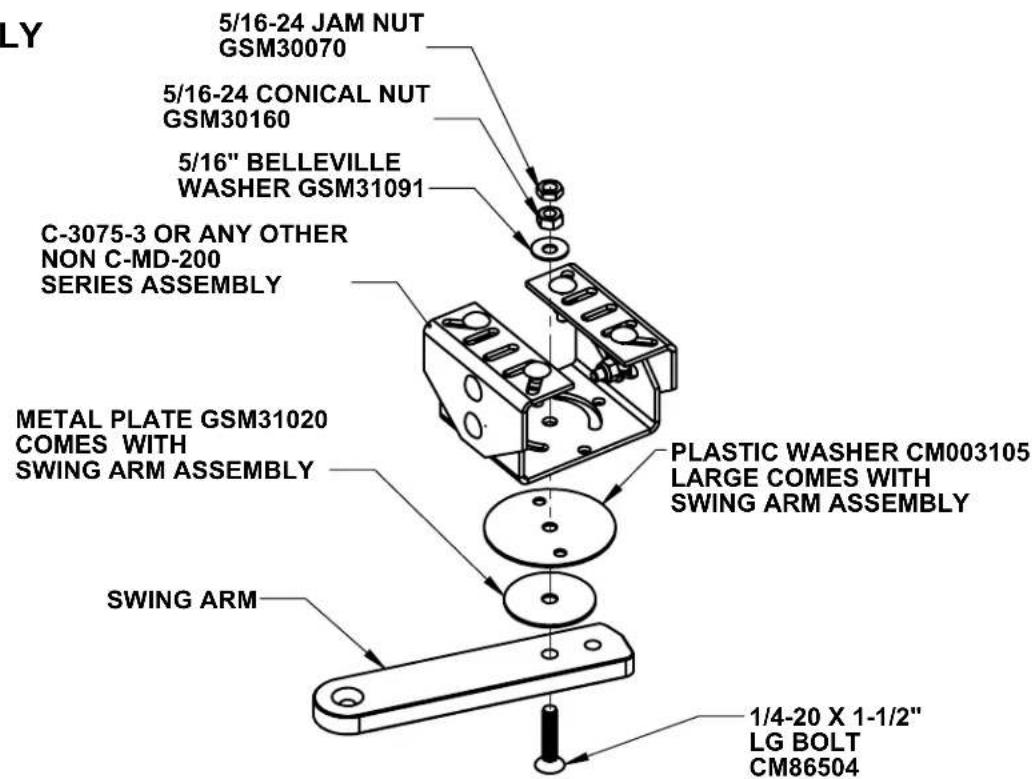
text_image
LY 5/16-24 JAM NUT GSM30070 5/16-24 CONICAL NUT GSM30160 5/16" BELLEVILLE WASHER GSM31091 C-3075-3 OR ANY OTHER NON C-MD-200 SERIES ASSEMBLY METAL PLATE GSM31020 COMES WITH SWING ARM ASSEMBLY SWING ARM PLASTIC WASHER CM003105 LARGE COMES WITH SWING ARM ASSEMBLY 1/4-20 X 1-1/2" LG BOLT CM86504
Productivity in motion
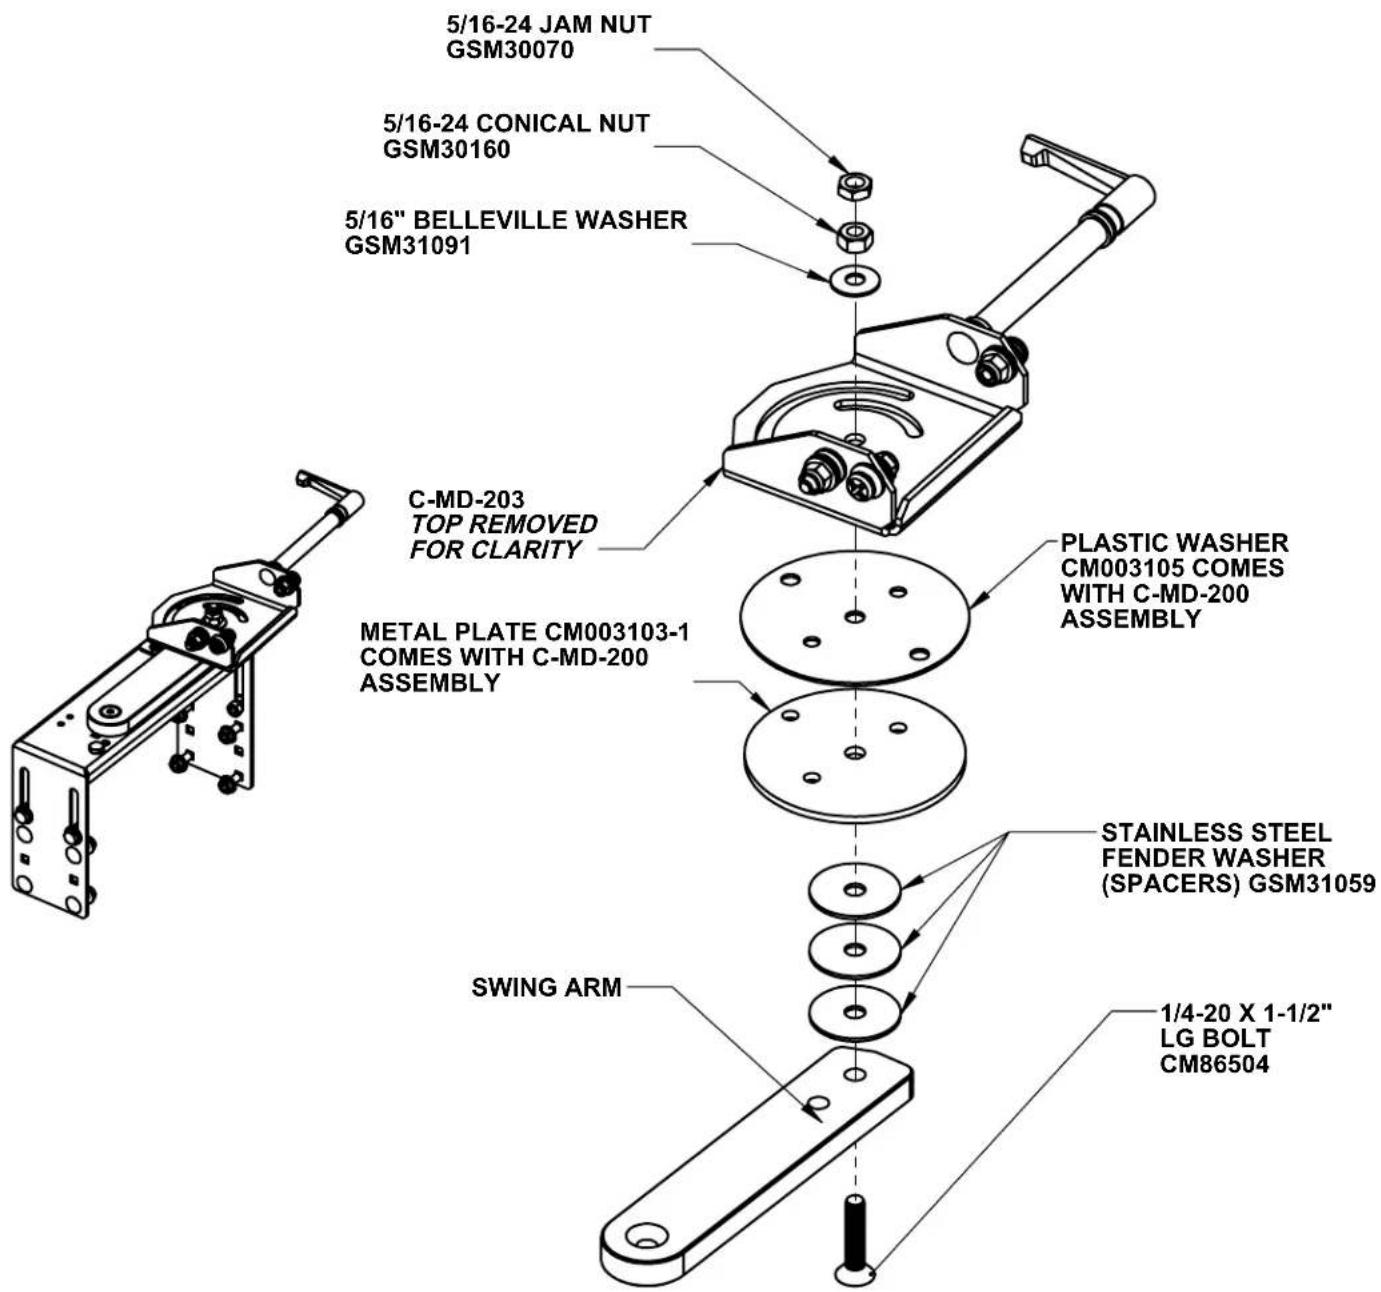
C-SM-SA-1 ASSEMBLY WITH C-MD-200 SERIES
text_image
5/16-24 JAM NUT GSM30070 5/16-24 CONICAL NUT GSM30160 5/16" BELLEVILLE WASHER GSM31091 C-MD-203 TOP REMOVED FOR CLARITY METAL PLATE CM003103-1 COMES WITH C-MD-200 ASSEMBLY PLASTIC WASHER CM003105 COMES WITH C-MD-200 ASSEMBLY STAINLESS STEEL FENDER WASHER (SPACERS) GSM31059 SWING ARM 1/4-20 X 1-1/2" LG BOLT CM86504
Productivity in motion