
STH903 - Dishwasher SMEG - Free user manual and instructions
Find the device manual for free STH903 SMEG in PDF.


User questions about STH903 SMEG
0 question about this device. Answer the ones you know or ask your own.
Ask a new question about this device
Download the instructions for your Dishwasher in PDF format for free! Find your manual STH903 - SMEG and take your electronic device back in hand. On this page are published all the documents necessary for the use of your device. STH903 by SMEG.
USER MANUAL STH903 SMEG
text_image
smeg STH 903STH903 HORIZONTAL DISHWASHER
- Safety and operating instructions 3
- Installation and hook-up 7
- Description of the controls 10
- Operating instructions 18
- Cleaning and maintenance 26
- T roubleshooting 30
Thank you for choosing this product.
We advise you to carefully read all the instructions contained in this manual, in order to understand how to operate your dishwasher safely and correctly. The manual is divided into paragraphs, which provide a step by step description of the dishwasher functions, with clear instructions accompanied by detailed illustrations. Recommendations are given for the correct use of the baskets, spray arms, containers, filters, washing programs, and for operating the controls. Follow the recommended cleaning procedures to ensure that your dishwasher always remains in perfect working order.
This manual provides a quick and easy reference for answering all your questions concerning the use of your new dishwasher.

INSTALLATION INSTRUCTIONS: Installation must be carried out by skilled, qualified staff, working in strict accordance with the instructions provided.
USER INSTRUCTIONS: these consist of recommendations for using the appliance, a description of its controls and of the correct cleaning and maintenance procedures.
1. Safety and operating instructions
THIS MANUAL FORMS AN INTEGRAL PART OF THE APPLIANCE: IT MUST ALWAYS BE KEPT INTACT TOGETHER WITH THE DISHWASHER. BEFORE USING THE APPLIANCE, CAREFULLY READ ALL THE INSTRUCTIONS CONTAINED IN THIS MANUAL. INSTALLATION MUST BE PERFORMED BY A QUALIFIED TECHNICIAN, IN COMPLIANCE WITH THE REGULATIONS IN FORCE. THIS APPLIANCE IS INTENDED FOR DOMESTIC USE, AND COMPLIES WITH THE EEC DIRECTIVES 73/23, 89/336 (INCLUDING 92/31 and 93/68) CURRENTLY IN FORCE, INCLUDING HE PREVENTION AND ELIMINATION OF RADIO FREQUENCY INTERFERENCE. THE APPLIANCE IS DESIGNED THE FOLLOWING PURPOSE: WASHING AND DRYING OF DISHES; ANY OTHER USE SHALL BE CONSIDERED IMPROPER. THE MANUFACTURER DECLINES ALL RESPONSIBILITY FOR USES OTHER THAN THOSE DESCRIBED ABOVE.
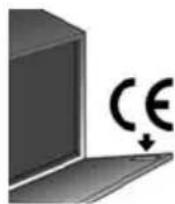
THE NAME PLATE FEATURING THE TECHNICAL DATA, SERIAL NUMBER AND MARKINGS IS VISIBLY POSITIONED ON THE INNER EDGE OF THE DOOR. THE NAME PLATE ON THE INNER EDGE OF THE DOOR MUST NEVER BE REMOVED.

DO NOT LEAVE THE DISCARDED PACKAGING MATERIALS UNSUPERVISED WITHIN THE HOME. SEPARATE THE VARIOUS MATERIALS WHICH MAKE UP THE PACKAGING AND TAKE THEM TO THE NEAREST SORTED WASTE COLLECTION CENTRE.
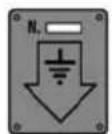
THE APPLIANCE MUST BE PROVIDED WITH AN EARTH CONNECTION IN ACCORDANCE WITH THE ELECTRICAL SAFETY REGULATIONS IN FORCE. THE MANUFACTURER DECLINES ALL RESPONSIBILITY FOR DAMAGE TO PERSONS OR PROPERTY RESULTING FROM THE FAILURE TO EARTH THE APPLIANCE OR FROM A DEFECTIVE EARTH CONNECTION.

IF THE APPLIANCE IS INSTALLED ON A CARPETED OR COVERED FLOOR, ENSURE THAT THE OPENINGS ON ITS UNDERSIDE ARE NOT OBSTRUCTED.
ALWAYS SWITCH OFF THE DISHWASHER AFTER EACH USE TO AVOID WASTING ELECTRICITY.

OBSOLETE APPLIANCES MUST BE RENDERED UNUSABLE. CUT OFF THE MAINS POWER CORD AFTER UNPLUGGING IT FROM THE WALL OUTLET, AND MAKE SAFE ANY COMPONENTS WHICH MIGHT BE DANGEROUS FOR CHILDREN (LOCKS, DOORS, ETC.).
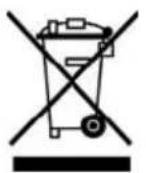
THIS APPLIANCE IS MARKED ACCORDING TO THE EUROPEAN DIRECTIVE 2002/96/EC ON WASTE ELECTRICAL AND ELECTRONIC EQUIPMENT (WEEE). BY ENSURING THIS PRODUCT IS DISPOSED OF CORRECTLY, YOU WILL HELP PREVENT POTENTIAL NEGATIVE CONSEQUENCES FOR THE ENVIRONMENT AND HUMAN HEALTH, WHICH COULD OTHERWISE BE CAUSED BY INAPPROPRIATE WASTE HANDLING OF THIS PRODUCT.

THE SYMBOL ON THE PRODUCT, OR ON THE DOCUMENTS ACCOMPANYING THE PRODUCT, INDICATES THAT THIS APPLIANCE MAY NOT BE TREATED AS HOUSEHOLD WASTE. INSTEAD IT SHALL BE HANDED OVER TO THE APPLICABLE COLLECTION POINT FOR THE RECYCLING OF ELECTRICAL AND ELECTRONIC EQUIPMENT. DISPOSAL MUST BE CARRIED OUT IN ACCORDANCE WITH LOCAL ENVIRONMENTAL REGULATIONS FOR WASTE DISPOSAL. FOR MORE DETAILED INFORMATION ABOUT TREATMENT, RECOVERY AND RECYCLING OF THIS PRODUCT, PLEASE CONTACT YOUR LOCAL CITY OFFICE, YOUR HOUSEHOLD WASTE DISPOSAL SERVICE OR THE SHOP WHERE YOU PURCHASED THE PRODUCT.
N THE EVENT OF A FAULT, DISCONNECT THE DISHWASHER FROM THE ELECTRICAL POWER SUPPLY AND SHUT OFF THE WATER TAP.
DO NOT USE APPLIANCES WHICH HAVE BEEN DAMAGED DURING TRANSIT! IF IN DOUBT, CONSULT YOUR DEALER.
THE APPLIANCE MUST BE INSTALLED AND CONNECTED IN ACCORDANCE WITH THE INSTRUCTIONS PROVIDED BY THE MANUFACTURER OR BY A QUALIFIED TECHNICIAN.
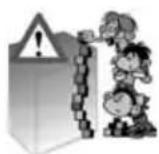
THE APPLIANCE IS INTENDED FOR USE BY ADULTS. DO NOT ALLOW CHILDREN TO COME NEAR OR PLAY WITH THE DISHWASHER. KEEP CHILDREN AWAY FROM DETERGENTS AND FROM THE OPEN DISHWASHER DOOR. THE PACKAGING MATERIALS (PLASTIC BAGS, POLYSTYRENE, METAL BARS, ETC.) MUST NOT BE LEFT WITHIN THE REACH OF CHILDREN.
KEEP CHILDREN AWAY FROM THE OPEN DISHWASHER. THE APPLIANCE MAY CONTAIN RESIDUES OF DETERGENT WHICH CAN CAUSE IRREVERSIBLE DAMAGE TO THE EYES, MOUTH, AND THROAT, AS WELL AS POSSIBLE DEATH BY SUFFOCATION.

DO NOT INTRODUCE SOLVENTS SUCH AS ALCOHOL OR TURPENTINE WHICH MAY CAUSE AN EXPLOSION.
DO NOT LOAD DISHES THAT ARE SOILED WITH ASH, WAX OR PAINTS.
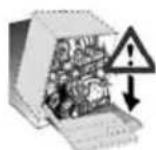
LEANING OR SITTING ON THE DISHWASHER DOOR WHEN OPEN MAY CAUSE THE APPLIANCE TO OVERTURN, PUTING PEOPLE AT RISK.
NEVER LEAVE THE DISHWASHER DOOR OPEN; PEOPLE MIGHT TRIP OVER IT.

DO NOT DRINK THE WATER RESIDUES WHICH MAY BE PRESENT INSIDE THE DISHES OR DISHWASHER AT THE END OF THE WASHING PROGRAM AND BEFORE THE DRYING CYCLE.
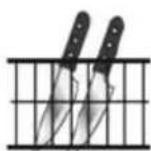
KNIVES OR OTHER SHARP-ENDED COOKING UTENSILS MUST BE PLACED IN THE CUTLERY BASKET BLADE-DOWN, OR LAID HORIZONTAL AND ENSURE THAT THEY DO NOT PROJECT FROM THE BASKET.

AQUASTOP MODELS
THE AQUASTOP DEVICE PREVENTS FLOODING IN THE EVENT OF A WATER LEAK. WHEN THE AQUASTOP DEVICE IS TRIPPED, CALL IN A QUALIFIED TECHNICIAN TO IDENTIFY AND REPAIR THE FAULT. IN MODELS EQUIPPED WITH THE AQUASTOP DEVICE, THERE IS A SOLENOID VALVE INSIDE THE WATER INTAKE HOSE. DO NOT CUT THE HOSE AND DO NOT ALLOW THE SOLENOID VALVE TO DROP INTO WATER. IN THE EVENT OF DAMAGE TO THE WATER INTAKE HOSE, DISCONNECT THE APPLIANCE FROM THE ELECTRICAL POWER SUPPLY AND FROM THE WATER SUPPLY.

IMMEDIATELY AFTER INSTALLING THE DISHWASHER, PERFORM A QUICK TEST OF THE APPLIANCE FOLLOWING THE INSTRUCTIONS BELOW. IF THE DISHWASHER FAILS TO OPERATE CORRECTLY, DISCONNECT IT FROM THE ELECTRICAL POWER SUPPLY AND CALL THE NEAREST TECHNICAL SERVICE CENTRE. DO NOT ATTEMPT TO REPAIR THE APPLIANCE.

THE DISHWASHER MEETS ALL THE REQUIREMENTS SET OUT BY THE REGULATIONS IN FORCE CONCERNING SAFETY AND ELECTRICAL EQUIPMENT. ANY TECHNICAL CHECKS SHOULD BE CONDUCTED EXCLUSIVELY BY A TRAINED AND AUTHORISED TECHNICIAN: REPAIRS CARRIED OUT BY UNAUTHORISED PERSONS WILL INVALIDATE THE WARRANTY, AS WELL AS POSING A POTENTIAL HAZARD TO THE USER.
The manufacturer declines all responsibility damage to persons or property resulting from failure to observe the above precautions, from tampering with even a single component of the appliance, or from the use of non original spare parts.
2. Installation and hook-up
Remove the polystyrene basket retainers.
Position the appliance in the desired place of installation. The back or sides of the dishwasher may be placed up against walls or other furniture units. If the dishwasher is installed near a heat source, fi t the special insulating panel to prevent overheating and malfunction of the appliance. To ensure stability, install integrated or built-under dishwashers only under continuous worktops, and screw them to the adjacent units. To facilitate the installation procedure, the intake and drain hoses can be positioned in any direction; make sure that the hoses are not kinked, crushed or pulled too tightly. Make sure to tighten the locking ring-nut once the pipes have been placed in the direction required. A hole at least 8 cm in diameter is required to allow the power supply cable and pipes to pass.
Level the appliance on the floor using its adjustable feet. This operation is essential for the ensuring correct operation of the dishwasher.

Building-in a dishwasher underneath a ceramic hob is absolutely forbidden.
A dishwasher can be built-in underneath a conventional hob provided there is no break in the kitchen worktop, and the dishwasher and hob are installed and secured correctly, so that no hazards are generated.

WARNING! Some protective systems preventing access to the door opening and closing mechanisms are not active until the appliance has been installed. If the appliance is not built into a cabinet, or is built into a cabinet but without one or both front panels, some mechanical parts which may cause serious injury when the door is opened and closed are accessible.
In all cases, never insert your hands into openings at the side of the bottom panel while the door is being opened or closed.

Never open the door of the appliance with the bottom drawer partially or completely open - If the bottom of the cabinet in which the appliance is built-in contains a drawer, make sure that it is completely closed before opening the dishwasher door. Opening the door with the bottom drawer partially or completely open may damage the bottom panel fi xing devices.
2.1 Water supply connection

Preventing the risk of clogging or damage: the water pipe is new or has not been used for a long time, before connecting to the water supply check that the water is clear and free of impurities, to prevent damage to the appliance.
The dishwasher must always be connected to the water system with new hoses; old or used hoses must never be reused.
CONNECTING TO THE WATER SUPPLY
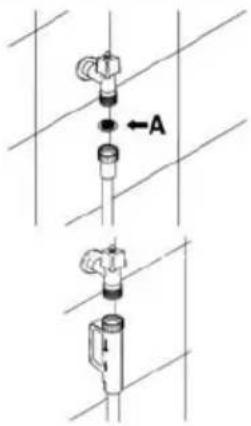
Connect the intake hose to a cold water supply with 34 " gas thread, inserting the fi Iter A supplied with the dishwasher. Take care to screw the hose fi rmly into place with your hands and then complete by tightening about 1/4 of a turn with pliers.
In dishwashers equipped with the ACQUASTOP device, the fi Iters is already fi tted inside the threaded ring.
text_image
Technical diagram showing two mechanical assembly steps with labeled component A and directional arrowDRAIN CONNECTION
Fit the drain hose into a pipe having diameter of at least 4 cm; the dishwasher is fitted with a special device which allows column installation, even with the drain pipe below the level of the dishwasher.
2.2 Electrical connection and precautions
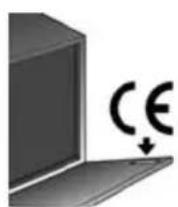
CHECK THAT THE VOLTAGE AND THE FREQUENCY OF THE MAINS MATCH THE RATINGS ON THE NAME PLATE OF THE APPLIANCE POSITIONED ON THE INNER EDGE OF THE DOOR.
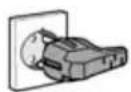
THE PLUG ON THE SUPPLY CORD AND THE CORRESPONDING SOCKET OUTLET MUST BE OF THE SAME TYPE AND MEET THE REGULATIONS IN FORCE.
THE PLUG MUST BE ACCESSIBLE AFTER INSTALLATION.
IN THE EVENT OF DAMAGE TO THE SUPPLY CORD, HAVE IT REPLACED BY THE MANUFACTURER OR AN AUTHORIZED TECHNICAL SERVICE CENTRE.
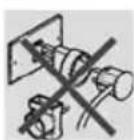
DO NOT USE ADAPTORS OR SHUNT CONNECTIONS IN ORDER TO AVOID THE POSSIBILITY OF OVERHEATING OR BURNING.

In the event of damage to the supply cord, have it replaced by the an Authorized Technical Service Centre in order to avoid any risk.

If this lamp needs changing, contact the manufacturer or an Authorised Service Centre.
The lamp must be of the same type and have the same characteristics as the one already installed (see dataplate next to the lamp holder).
WHEN CLEANING AND MAINTAINING THE APPLIANCE:
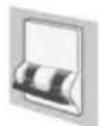
BEFORE CARRYING OUT ANY WORK, ALWAYS UNPLUG THE APPLIANCE FROM THE ELECTRICAL SUPPLY OR SWITCH OFF THE ALL-POLE DISCONNECTION DEVICE.

WARNING! Some components inside the appliance are intentionally electrically live even with the ON/OFF switch turned to off.
Before any repair operation, disconnect the appliance from the electrical mains.
FOR UK ONLY:

THIS APPLIANCE MUST BE EARTHED.
Fuse replacement
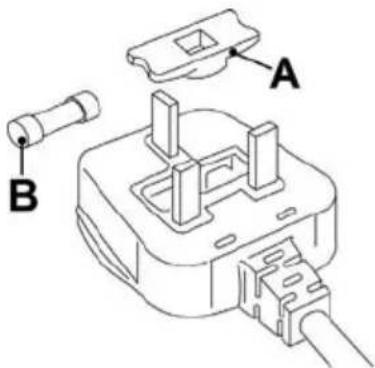
If the mains lead of this appliance is fitted with a BS 1363A 13amp fused plug, to change a fuse in this type of plug use an A.S.T.A. approved fuse to BS 1362 type and proceed as follows:
- Remove the fuse cover A and fuse B.
- Fit replacement 13A fuse into fuse cover.
- Refi t both into plug.
text_image
Technical diagram of a mechanical component with labeled parts A and B
The fuse cover must be refitted when changing a fuse if the fuse cover is lost the plug must not be used until a correct replacement is fitted.
Correct replacement are identified by the colour insert or the colour embossed in words on the base of the plug.
Replacement fuse covers are available from your local electrical store.
3. Description of the controls
3.1 Upper panel
All the dishwasher controls are grouped on the upper panel. Switch-on, programming, switch-off etc. procedures are only possible when the door is open.

text_image
1 2 3 4 5 11 10 7 6 9 8 13 12 smeg STH 903| 1 | ON/OFF BUTTONPressing this button energises the appliance. |
| 2 | SELECTED PROGRAM INDICATOR LIGHTS Illumination of this light denotes the program selected and theoccurrence of a fault (troubleshooting). |
| 3 | PROGRAM SELECTION BUTTONBy pressing this button in sequence it is possible to select the desired program. |
| 4 | SALT WARNING LIGHTIllumination of this light signals that salt container is empty. |
| 5 | RINSE AID WARNING LIGHTIllumination of this light signals that rinse aid dispenser is empty. |
| 6 | EXTRA PROGRAM BUTTONThis button gives access to the one of the fi ve extra programs (see table). |
| 7 | EXTRA PROGRAM LIGHTIlluminates to indicate that one of the fi ve extra programs (see table) is going to be executed. |
| 8 | "2/1" OPTION BUTTONPress this button to activate the option for use of 2/1 products. |
| 9 | "2/1" OPTION LIGHTIlluminates to indicate that the function is activated. |
| 10 | WASH-ZONE BUTTONPress this button to select the zone where you wish to concentrate the washing action. |
| 11 | WASH-ZONE LIGHTSIf one of the lights is on, the wash-zone washing system has been selected. |
| 12 | PROGRAM DELAY BUTTONPress this button to delay the start of the program by up to 9 hours. |
| 13 | INFORMATION DISPLAY |
SETTING THE WASHING PROGRAM AND SWITCHING ON
Toselectthemostsuitableprogramforthedishestobewashedrefertothetable below, which indicate the most appropriate program according to this type and degree of soiling.

-keepressingthebuPROGRAM selection (3)
correspondingtothedesiredprogramilluminates;
-closethedoor;afterabout2"theprogramwillstart.Whileitisinprogress,the
relativewllG&Hh(indicatingthattheprogramisbeingexecuted).
| PROGRAMME | LOAD CROCKERY AND CUTLERY | PROGRAM PROGRESS | DURATION | CONSUMPTION | DETERGENT GRAMS | |||
| MINUTES (1) | WATER LITRES | ENERGY (KWh) (1) | ||||||
| Nr | Symbol | Name | ||||||
| 1 | 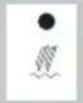 | SOAK | Mixed dishes awaiting washing | Cold rinse (to prevent dirt from drying). | 15' | 3,5 | 0,01 | - |
| 2 |  | NORMAL ECO (*) | Dishes and glasses with normal dirt | 2 cold prewash Wash at 52°C Cold rinse Rinse at 45°C Dry | 178' | 14,7 | 0,76 | 10+20 |
| 3 |  | DAILY | Mixed dishes, with normal dirt | Rinse at 65°C Cold rinse Rinse at 68°C Dry | 90' | 10 | 1 | 30 |
| 4 |   | NORMAL | Mixed dishes and pans, with normal dirt | Cold prewash Wash at 65°C Cold rinse Dry | 105' | 14 | 1,3 | 30 |
| 5 | STRONG AND FAST | Mixed dishes with normal dirt which has not dried | Wash at 65°C Cold rinse Rinse at 70°C | 50' | 10 | 1,2 | 30 | |

| PROGRAMME | LOAD CROCKERY AND CUTLERY | PROGRAM PROGRESS | DURATION | CONSUMPTION | DETERGENT GRAMS | |||
| MINUTES (1) | WATER LITRES | ENERGY (KWh) (1) | ||||||
| Nr | Symbol | Name | ||||||
| 6 | 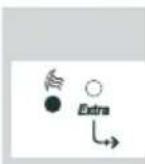 | RINSE | Clean mixed dishes requiring rinsing and warming before taking to table | Rinse at 68°C Dry | 40' | 3,5 | 0,7 | - |
| 7 | 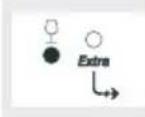 | LIGHT | Crystal, porcelain and mixed dishes, with light dirt | Wash at 45°C Cold rinse Rinse at 68°C Dry | 70' | 10 | 0,9 | 20 |
| 8 |  | BIO | Mixed dishes, with normal dirt | Cold prewash Extendend wash at 53°C Cold rinse Rinse at 68°C Extended drying | 170' | 13 | 1,05 | 30 |
| 9 | 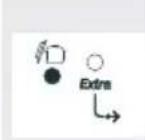 | INTENSIVE | Mixed dishes, very dirty | Wash at 70°C Rinse at 70°C Dry | 100' | 14 | 1,3 | 30 |
| 10 | 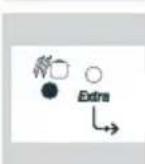 | SUPER | Mixed dishes and pans, very dirty | Prewash at 45°C Wash at 68°C 2 cold rinses Rinse at 70°C Dry | 110' | 16 | 1,5 | 10+30 (**) |
Only run the soak program with partial loads.
The WASH-ZONE (10) and "2/1" (8) options are available for all programs, except the soak.
To execute programs 6,7,8,9,10 extra programs (6) s the button
(*) Reference program as AS/NZS 2007 (10 grams on the door + 20 grams in the detergent dispenser).
(**) 10 grams on the door + 30 grams in the detergent dispenser).
(1) The cycle duration and power consumption may vary according to the water and room temperatures, and type and amount of dishes.
Thedoorcanbeopenedattheendofthecycleapproximately50mm forimproveddryingperformance.

The washing cycle will not take place if the dishwasher door is left open or not properly closed.
3.2 Washing programs

Before starting a washing program make sure that:
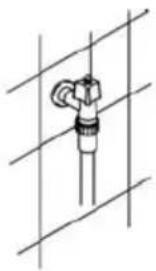
• The water supply tap is open.
- The correct amount of detergent has been added to the dispenser.
• The baskets have been correctly loaded.
- The spray arms are able to rotate freely and without obstruction.
• The dishwasher door is securely closed.
natural_image
Pure technical line drawing of a mechanical component without any text, numbers, or symbolsCANCELLING THE CURRENT PROGRAM
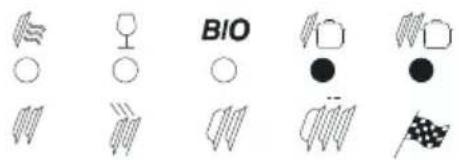
- To cancel the currently selected program, open the door and hold down the PROGRAM SELECTION (3) button for a few seconds until the indicator lights for programs 4 and 5 illuminate simultaneously.
text_image
BIO- Close the door.
• After approximately 1 minute the dishwasher will advance to the end of cycle.
CHANGING THE PROGRAM
To change the program in progress, simply open the door and select a new program. When the door is closed the dishwasher will automatically select the new program.
SELECTING THE WASH-ZONE OPTION
Press button (10) in repetition to select the zone where you wish to concentrate the washing action, in the following order:
1) right zone 65% - left zone 35% (right-hand light on)
2) right zone 35% - left zone 65% (left-hand light on)
3) both zones 50% (lights off)

Button (6) gives access to five extra programs in addition to the ones which can be selected directly using the program selector button.
This button must be pressed (the light comes on) after selection of the "main" program (1, 2, 3, 4 or 5).
This function is retained in the memory, so the button has to be pressed again (the light goes out) if the user wishes to execute one of the 5 main programs at the next cycle.
"2/1" OPTION BUTTON
(available in all programs except the soak program)
By pressing the button (8) you activate the "2/1" option, confirmed when the relative light comes on. This option has been studied for the use of dishwashing powder or tablets with integrated substances, in place of rinse-aid known on the markets as "2 in 1" or "double action" products; in this case the dishwasher will use the product in an optimal way avoiding detergent and rinse-aid consumption, which could already be found in the dishwasher.
Note: When selecting the "2/1" option, it is normal that the rinse-aid light remain on, if the container are empty.
DELAYING THE PROGRAM
(available in all programs except the soak program)
The PROGRAM DELAY button (12) can be pressed to delay the start of the program by up to 9 hours. This means that the dishwasher can be operated at the time of day of your choice. Press the button several times in succession and the display will show the delay with which the appliance will start, beginning from 9 hours.
The dishwasher will prewash the dishes, after which the "program delay" set previously.

TO SAVE ON ENERGY! ... AND PROTECT THE ENVIRONMENT
• Always try to run the dishwasher fully loaded.
- Do not wash the dishes in running water.
- Use the washing program that is most appropriate for each type of load.
- Do not carry out any preliminary rinsing.
- If available, connect the dishwasher to a hot water supply up to 60°C.
TO CUT DOWN ON DETERGENT CONSUMPTION! ... AND PROTECT THE ENVIRONMENT
The phosphates contained in dishwasher detergents are harmful to the environment. To avoid using excessive amounts of detergent and to save on electricity, observe the following:
- separate more delicate items from dishes that are more resistant to aggressive detergents and high temperatures;
• do not pour detergent directly on the dishes.

If the door has to be opened while washing is in progress, the program will be interrupted. The relative light will keep flashing and a beeper will signal that the cycle has not been completed. You must wait about 1 minute closing the door to restart the program. When the door is closed the program will continue from where it was interrupted. This operation should only be carried out if strictly necessary, because it might cause problems in execution of the program.
END OF CYCLE
At the end of the program the beeper sounds briefly and the lights of programs 4 and 5 flash.

text_image
BIOTo switch off the dishwasher, open the door and press the ON/OFF button (1).

At the end of the washing program, wait at least 20 minutes before removing the dishes, to allow them to cool down.
3. Operating instructions
Once the dishwasher has been correctly installed, prepare for use as follows:
- Add the rinse aid and detergent.
3.1 Using the rinse aid and detergent dispensers
The detergent and rinse aid dispensers are situated on the inner part of the door: the detergent dispenser is on the left, and the rinse aid dispenser is on the right.
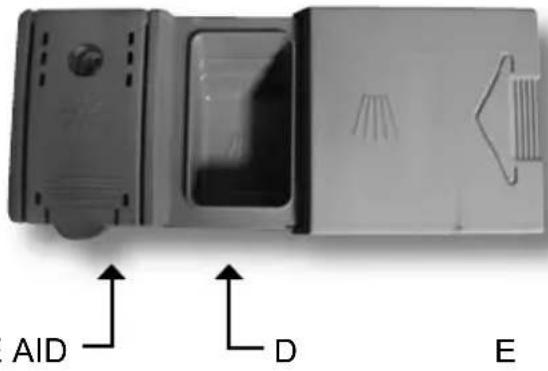
text_image
AID D E
With the exception of the SOAK program, before every washing cycle it is necessary to add the required amount of detergent to the detergent dispenser. The rinse aid, on the other hand, should only be added as required.

ADDING THE RINSE AID
The rinse aid helps the dishes dry faster and prevents the formation of scale deposits and staining; it is automatically added to the water during the final rinse cycle, from the container situated on the inner side of the door.
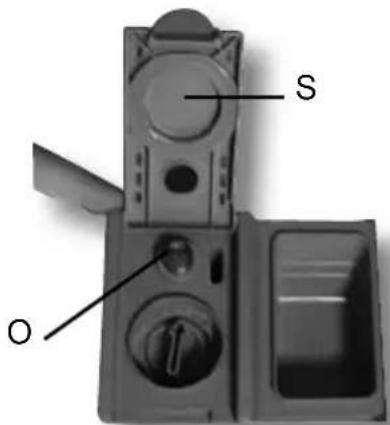
text_image
S O
To add rinse aid:
- Open the door.
- Open the door "S".
- Add the rinse aid until the container is full (approximately 140 cc). The optical level indicator “O” on the side of the cap should be completely obscured. Refi II the rinse aid when the optical level indicator becomes clear again, or when the rinse aid warning light illuminates.
- Close the door.
- Use a cloth to remove any spillage of rinse aid which might lead to the formation of excess foam.
ADJUSTING THE RINSE AID DISPENSER SETTING
The dishwasher is factory set for medium water hardness. However it possible to change the setting by turning the dispenser's selector to the desired position: the amount of rinse aid dispensed is proportional to the selector position.

- The amount of rinse aid must be increased if the washed dishes appear dull or feature circular stains.
- If, on the other hand, the dishes are sticky or have white streaks, it is necessary to reduce the rinse aid setting.
ADDING THE DETERGENT
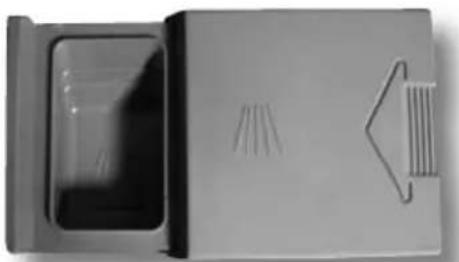
After adding the detergent, to close the lid slide it in the direction shown by the arrow as far as it will go then press gently to lock.
During washing, the dispenser will be opened automatically.
natural_image
Exterior view of a modern office building (no signage)
- Use only detergents specially formulated for dishwashers. For optimal washing results it is important to use a good quality detergent.
- The detergent packs must be sealed and stored in a dry place to prevent the formation of lumps which may negatively affect washing results. Once opened the detergent packs should not be kept for too long, otherwise the detergent loses its effectiveness.
- Do not use detergents formulated for washing dishes by hand, because they produce a great deal of foam and may negatively affect the operation of the dishwasher.
- Add the correct amount of detergent. An insufficient amount of detergent will result in a partial removal of dirt from the dishes, whereas an excessive amount is wasteful and does not improve the washing results.
-
The market offers liquid and powder detergents with differing chemical compositions, which may contain phosphates, or be phosphate-free but contain natural enzymes.
-
Detergents containing phosphates are more effective against grease and starch at temperatures above 60°C.
- Enzyme detergents, on the other hand, are also effective at lower temperatures (from 40 to 55°C) and are more easily biodegradable. With enzyme detergents it is possible to obtain at low temperatures comparable results to those which can only be achieved at 65°C using traditional detergents.
For the safeguarding of the environment we recommend the use of phosphate- and chlorine free.

The introduction of detergent into the rinse aid dispenser, even in liquid form, will damage the dishwasher.
4.3 General warnings and recommendations

Before using the dishwasher for the first time, it is advisable to read the following recommendations concerning dish types to be washed and their loading.
There are generally no constraints on the washing of domestic dishes, but in certain cases it is necessary to take their characteristics into account.
Before loading the dishes into the baskets it is necessary to:
- remove coarse food remains: e.g. bones, fish-bones, etc. which may clog the filter or damage the wash pump.
- soak any pots or pans with burnt-on food remains on the bottom to facilitate removal.
There is no need to pre-wash the dishes under running water before loading them into the baskets since this only wastes water.
Correct loading of the dishes helps ensure optimal washing results.

WARNING!
• Make sure that the dishes are securely in place so that they cannot tip over or obstruct the rotation of the spray arms during the washing cycle.
- Do not place very small objects in the baskets as these could fall and obstruct the spray arms or the wash pump.
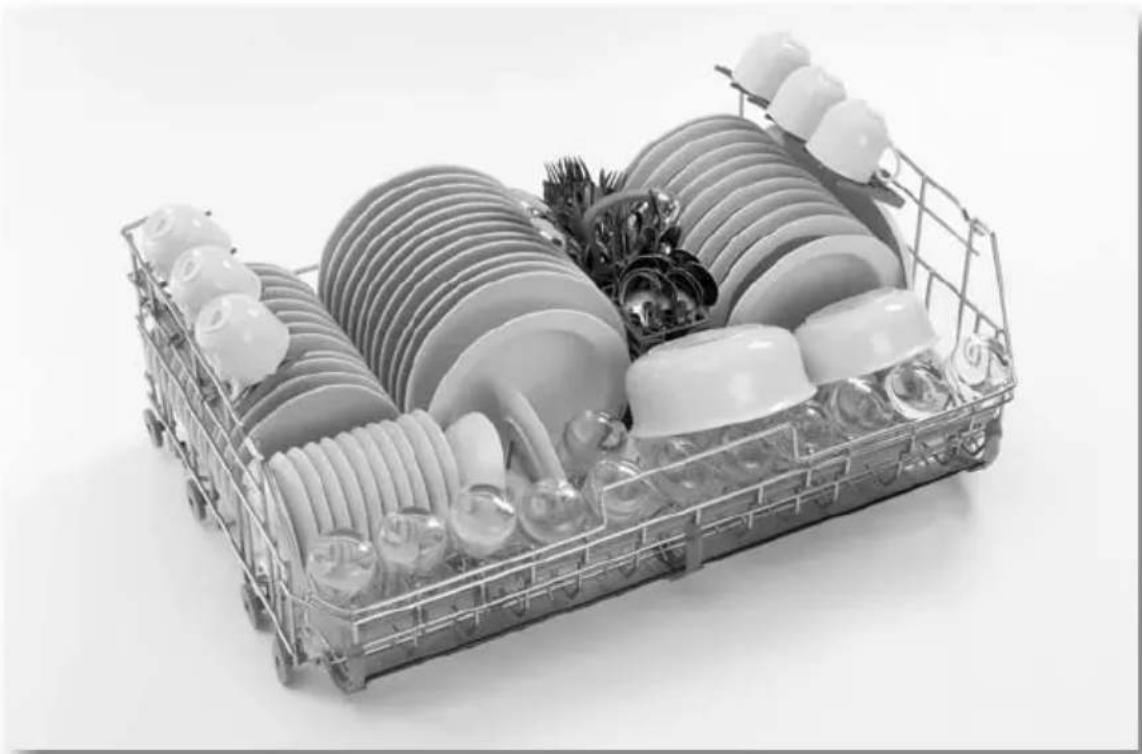
- Containers such as cups, bowls, glasses and pots should always be loaded with the opening facing downwards and with any cavities at an angle, to allow the water to drain out.
- Do not stack dishes or place them in such a way that they cover one other.
- Do not place glasses too close together because they may knock against each other and break, or there might be staining at the point where they touch.
- When using detergent tablet, take care not to place large pans or dishes in the zone underneath the detergent dispenser, since the tablet might fall onto the dishes and fail to dissolve completely.
MAKE SURE that the items being washed are dishwasher-safe.
Items which are not dishwasher-safe:
- Wooden dishes, pots or pans: may be damaged by the high washing temperatures.
- Handcrafted items: are rarely suitable for washing in a dishwasher. The relatively high water temperatures and the detergents used may damage them.
- Plastic dishes: resistant plastic dishes must be washed in the upper basket.
- Dishes and objects in copper, tin, zinc or brass: tend to stain.
- Aluminium dishes: made from anodised aluminium may lose their colour.
• Silverware: items may stain. - Glass and crystal: general, glass and crystal objects can be washed in the dishwasher. However, certain types of glass and crystal may become dull and lose their clearness after many washings. Therefore, for these items we recommend using the least aggressive program available.
- Decorated items: decorated objects available on the market are generally able to withstand washing in the dishwasher, although the colours may fade after a great many washes. If in doubt as to the fastness of the colours, it is advisable to wash just a few items at a time for approximately one month.
4.4 Using the baskets
The dishwasher has a capacity of 12 place-settings, including serving dishes.
natural_image
Black-and-white photo of a multi-tiered kitchen appliance with plates and dishware arranged in rows (no visible text or symbols)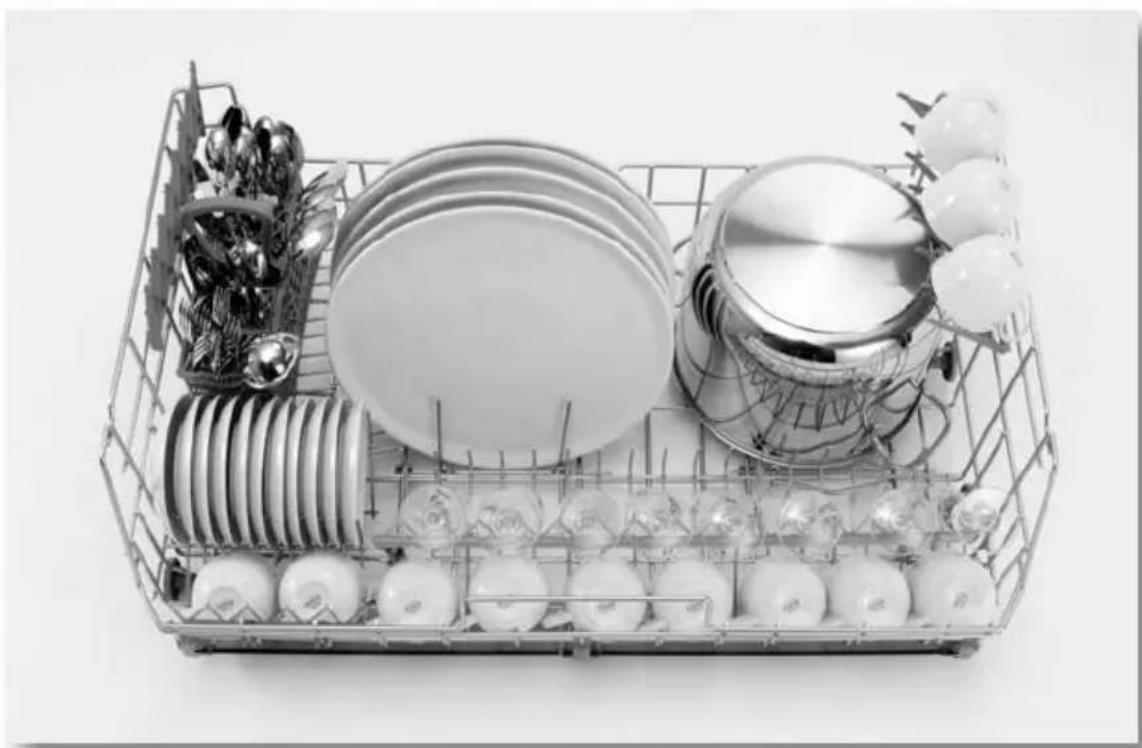
natural_image
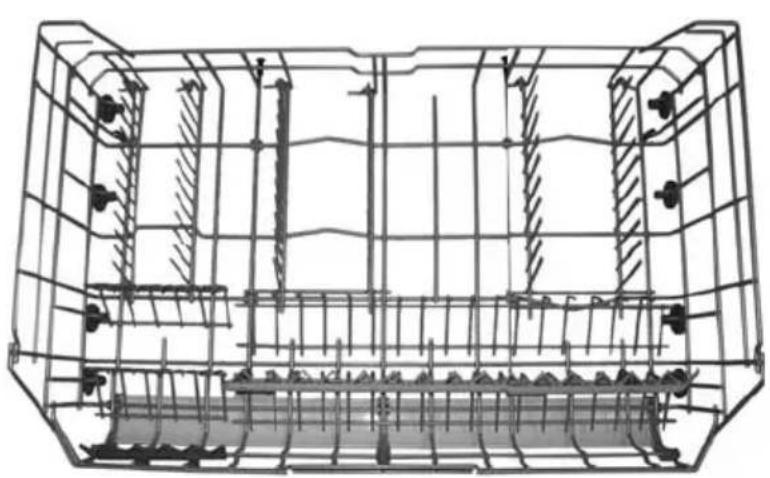
Black-and-white photo of a kitchen appliance basket with plates, utensils, and decorative items (no text or symbols visible)The basket is fitted with plate racks which can be stowed horizontal if required.
natural_image
Technical line drawing of a structural framework with grid lines and embedded components (no text or symbols)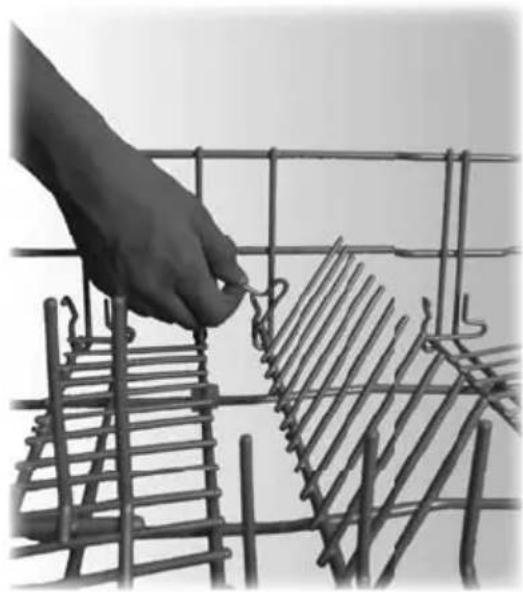
natural_image
Hand placing a wire cage into metal wireframes (no text or symbols visible)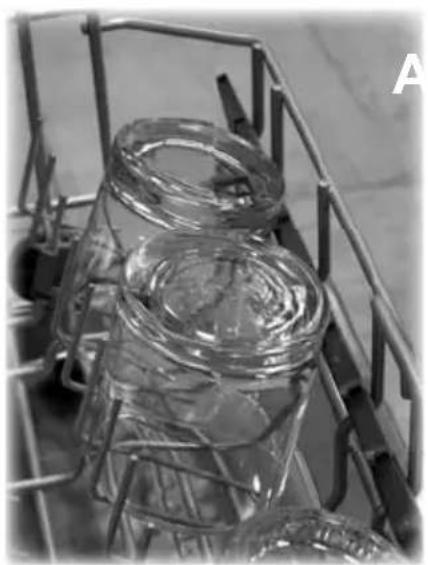
natural_image
Close-up of a metal rack with coiled transparent glass jars, no visible text or symbols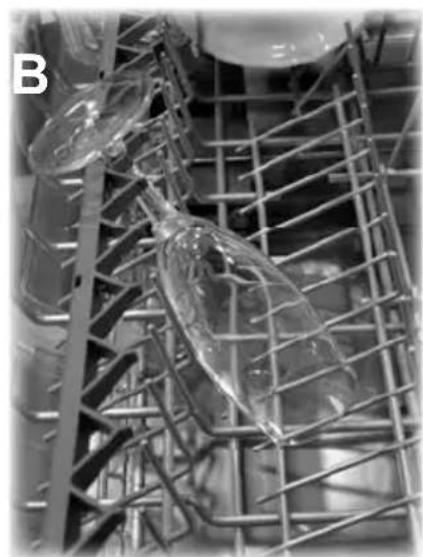
natural_image
Close-up of transparent plastic objects on metal wire cage (no text or symbols visible)The photos show the rack for normal glasses (item A) and for flute glasses (item B).
CUTLERY BASKET
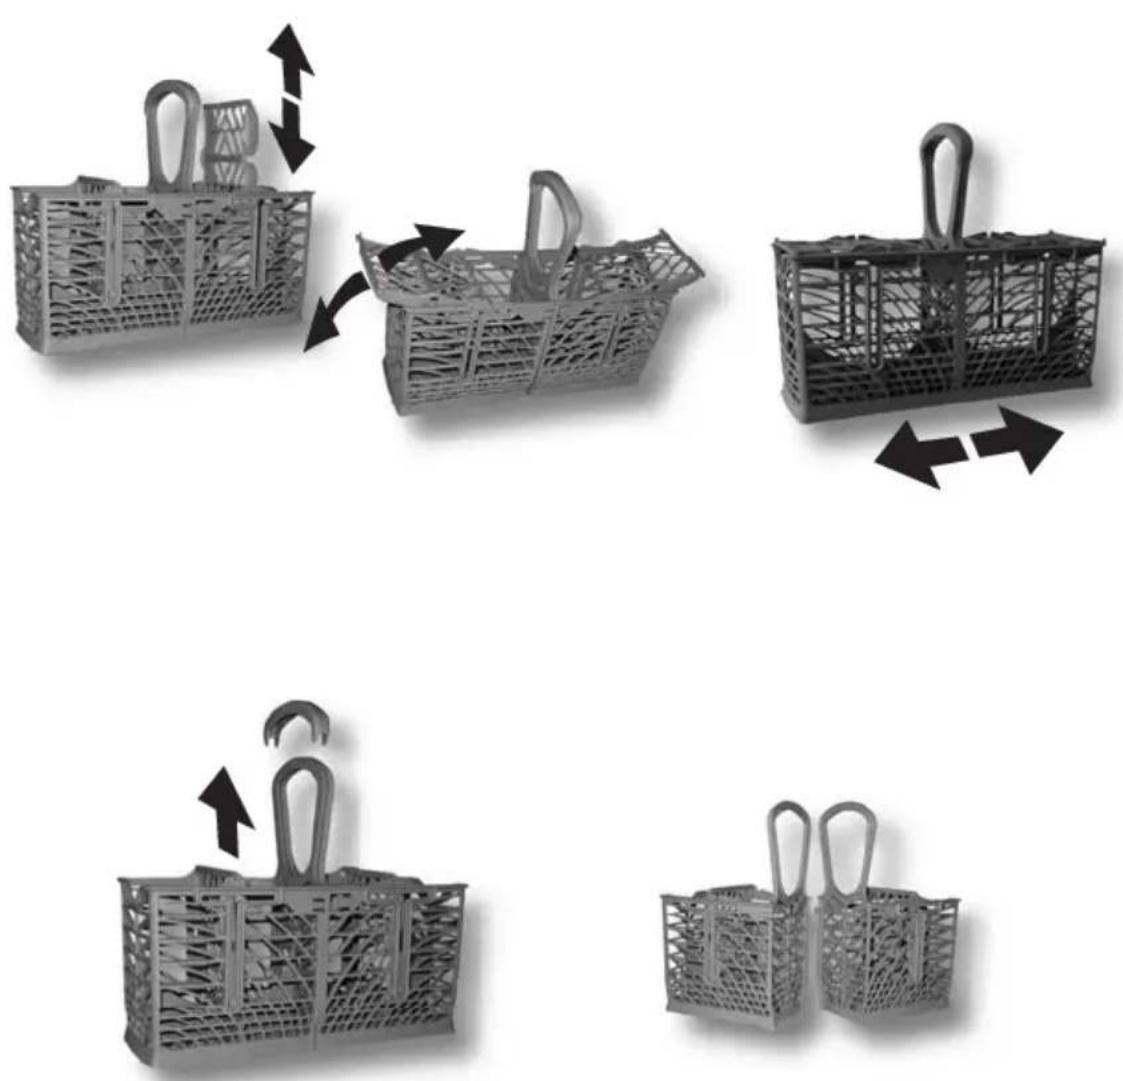
Cutlery must be placed with the tips facing downward.
The cutlery basket features an exclusive system of independent sliding tip-up supports, offering a series of combinations to allow optimum use of the space available. It can also be separated into two parts.
5. Cleaning and maintenance
Before carrying out any work, always disconnect the appliance from the electrical power supply.
5.1 General warnings and recommendations
Avoid the use of acidic or abrasive detergents.
Clean the outer surfaces and door-lining of the dishwasher regularly using a soft cloth moistened with water or with a normal detergent suitable for painted surfaces. Clean the door gaskets with a damp sponge. Periodically (once or twice a year) it is advisable to clean the tank and gaskets, using a soft cloth and water to remove any deposits.
text_image
Technical diagram showing a mechanical assembly with labeled component A and directional arrowCLEANING THE WATER INTAKE FILTER
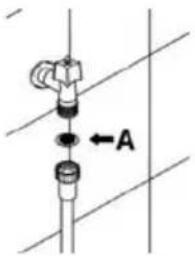
The water intake fi Iter A located at the outlet of the water supply tap needs to be cleaned periodically.
After having closed the water supply tap, unscrew the end of the water intake hose, remove the filter A and clean it delicately under running water.
Reassemble filter A in its seat and carefully screw the water intake hose back into position.
CLEANING THE SPRAY ARMS
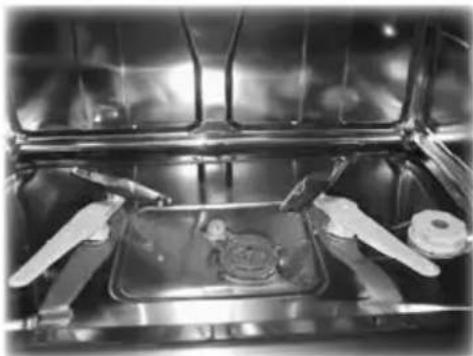
The spray arms can be easily removed for periodic cleaning of the nozzles, to prevent possible clogging. Wash them under running water and carefully replace them in their seats, checking that their rotary movement is in no way impeded.
- To remove the orbital spray arm assembly, take hold of the longer arm and pull the orbital unit upward. Wash the arms under a jet of running water and return them carefully to their seat.
After reassembly, check that the spray arms turn freely.
Otherwise, check that they have been installed correctly.
natural_image
Close-up of a stainless steel kitchen sink with visible utensils and a central tray (no text or symbols)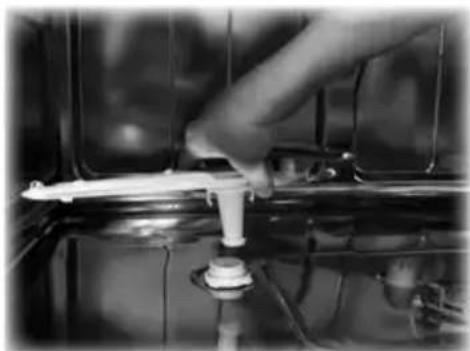
natural_image
Close-up of a hand adjusting a small white component on a metallic surface (no visible text or symbols)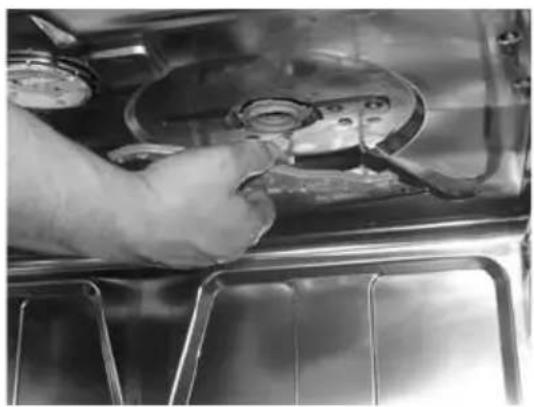
natural_image
Close-up of a hand using a tool to adjust or install a mechanical component on a metal shelf (no visible text or symbols)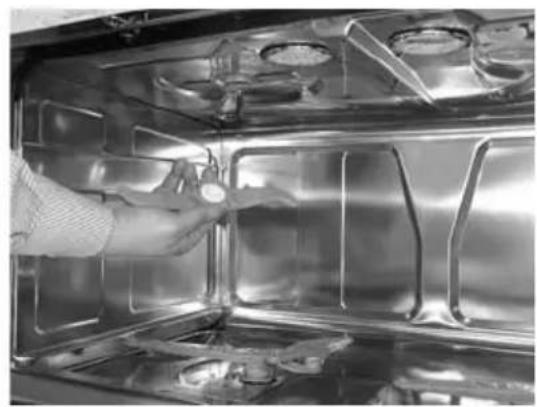
natural_image
Interior view of a stainless steel oven with a hand adjusting a tray (no visible text or symbols)To remove the upper spray arms, unscrew the locking ring. Wash them under running water and carefully replace them in their seats, checking that their rotary movement is in no way impeded.
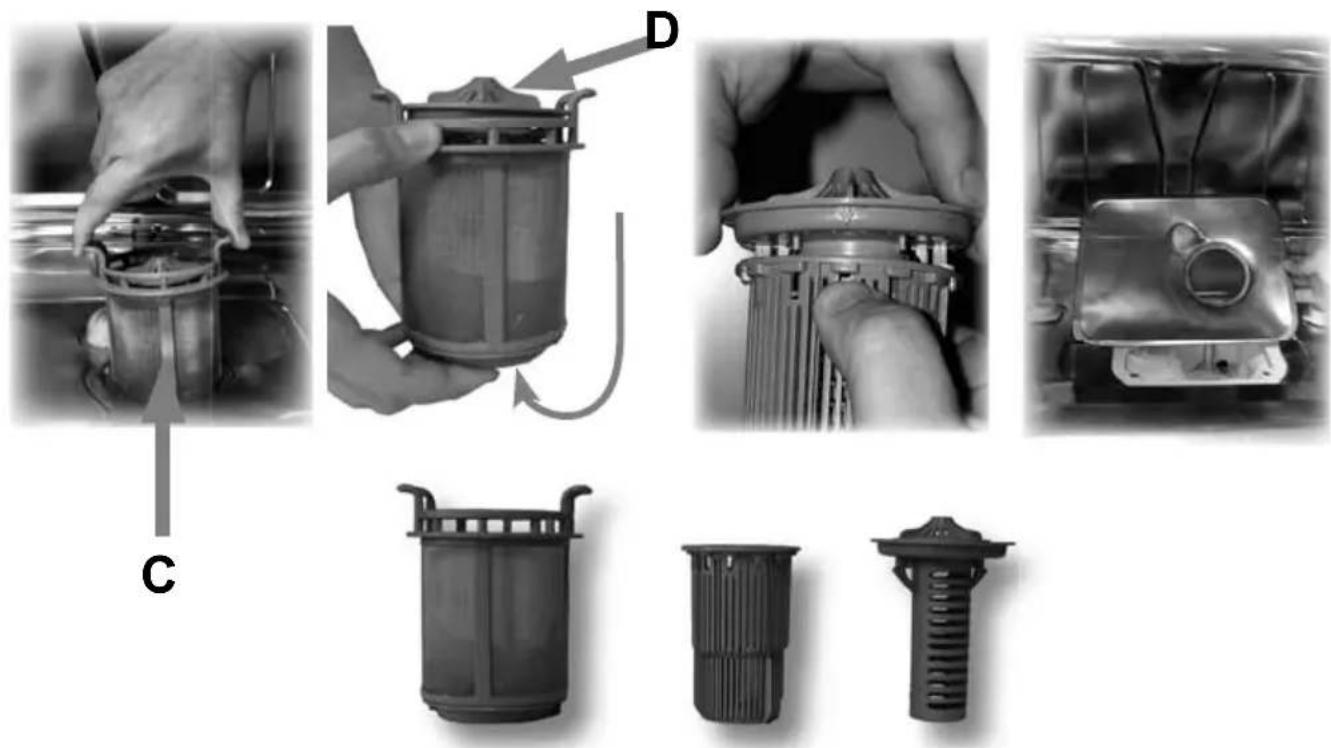
CLEANING THE FILTER UNIT
- It is advisable to periodically inspect the centre filter C and, if necessary, to clean it. To remove the filter, grip the tabs, turn them anticlockwise and lift upwards;
- push the centre fi Iter D from the underside to remove it from the micro-fi Iter:
- separate the two parts which make up the plastic filter by pressing the body of the filter in the zone shown by the arrows;
- remove the centre fi Iter by lifting it upwards.
natural_image
Black-and-white collage showing mechanical assembly steps including hand manipulation, valve assembly, and final packaging (no text or symbols visible)
GENERAL WARNINGS AND RECOMMENDATIONS FOR CORRECT MAINTENANCE:
• The filters should be cleaned under running water using a stiff brush.
- It is essential to thoroughly clean the filters according to the above instructions: the dishwasher cannot function if the fil ters are clogged.
- Carefully replace filters in their seats, to avoid damaging the wash pump.
PROLONGED DISUSE:
- Run the soak program twice in succession.
• Unplug power cord from the socket. - Leave the door slightly open, in order to prevent the formation of unpleasant odours inside the washing tank.
• Fill the rinse aid dispenser. - Shut off the water supply tap.
BEFORE STARTING THE DISHWASHER AFTER PROLONGED DISUSE:
- Check that there are no deposits of sludge or rust inside the water pipe: if there are, allow the water to run from the water supply tap for a few minutes.
- Plug the power cord into the socket.
- Reconnect the water intake hose and open the tap again.
TROUBLESHOOTING MINOR PROBLEMS
In some cases it is possible to remedy minor problems by referring to the following instructions:
If the program fails to start, check that:
• the dishwasher is connected to the electrical power supply;
• there is no power failure;
• the water tap is open;
• the dishwasher door is properly closed.
If water remains inside the dishwasher, check that:
• the drain hose is not kinked;
• the drain siphon is not obstructed;
• the dishwasher fi Iters are not clogged.

If the dishes are not being cleaned properly, check that:
• the correct amount of detergent has been added;
• there is no object obstructing the rotation of the spray arms;
• the dishes are being loaded correctly;
- the selected program is suitable for the dish types and their degree of soiling;
- all the fi Iters are clean and positioned correctly;
• the spray arm nozzles are not obstructed.
If the dishes fail to dry or remain dull, check that:
• there is rinse aid inside the special container;
• the rinse aid dispenser setting is correct;
- the detergent used is of good quality and has not lost its effectiveness (for example, through incorrect storage, with the box left open).
If the dishes show signs of streaking, staining, etc., check that:
• the rinse aid dispenser setting is not too high.
If there are visible traces of rust inside the tank:
- the tank is made of steel, and therefore any rust marks are due to external elements (fragments of rust from the water pipes, pots, cutlery, etc.). Special products are commercially available to remove such marks;
- check that the amount of detergent being used is correct. Certain detergents can be more corrosive than others.

If after following the above troubleshooting instructions the problem persists, call the nearest After-Sales Centre.
WARNING: any operations performed on the appliance by unauthorised persons are not covered by the warranty and shall be paid for by the user.
6. Troubleshooting
The dishwasher is capable of signalling a number of faults through the simultaneous illumination of several indicator lights, with the following meanings:
| FAULT DESCRIPTION | ||
| E1 | 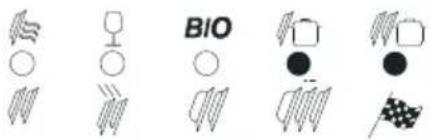 | Acquastop failureThe anti-fl ooding system has been activated (for the relevant models only).The system is tripped in case of water leaks.Contact the after-sales service. |
| E2 | 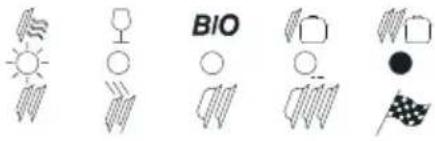 | Safety levelThe system which limits the water level inside the dishwasher has been tripped. Interrupt the program and switch off the dishwasher. Switch the dishwasher back on, program it again and start the washing cycle.If the problem persists, contact the after-sales service. |
| E3 | 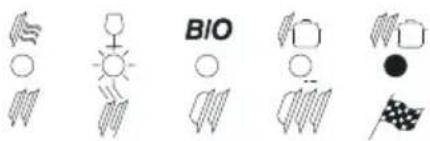 | Water heating malfunctionThe water is not heated or the heating parameters are not correct.Repeat the washing program; if the problem persists, contact the after-sales service. |
| E4 |  | Water tamperature monitoring malfunctionInterrupt the program and switch off the dishwasher.Switch the dishwasher back on, program it again and start the washing cycle.If the problem persists, contact the after-sales service. |
| E5 | 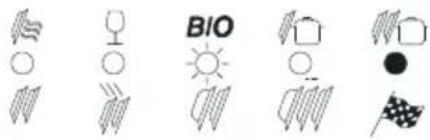 | Water intake malfunctionThe appliance does not take in water or does not do so correctly.Check that the water connections are correct, the water intake tap is turned on and the fi liter is not fouled.If the problem persists, contact the after-sales service. |
| E6 | 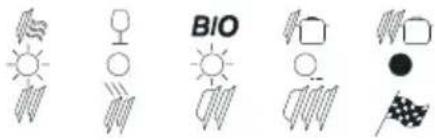 | Water pump-out malfunctionThe appliance does not pump out the water or does not do so correctly.Check that the drain hose is not kinked or crushed and that the sip and fi liter are not fouled.If the problem persists, contact the after-sales service. |
FAULT DESCRIPTION
E7
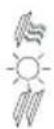
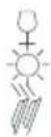
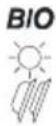
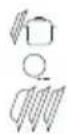

Turbine flow-regulator malfunction (some models solely)
The appliance is not able to “measure” the amount of water loaded accurately. Interrupt the program and switch off the dishwasher. Switch the dishwasher back on, program it again and start the washing cycle. If the problem persists, contact the after-sales service.
E8



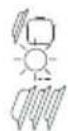

Alternate washing system malfunction
Interrupt the program and switch off the dishwasher. Switch the dishwasher back on, program it again and start the washing cycle. If the problem persists, contact the after-sales service.
E9

Water intake system malfunction
Contact the after-sales service.
○ Light off Light on Light ashing

If an alarm occurs the appliance interrupts the program in progress and signals a fault.
• Alarms E1, E2, E3, E4, E8 and E9 interrupt the current program immediately.
- The E5, E6 alarms interrupts the running program once the cause is resolved, it will bring bach the execution of the program.
- The alarm E7 is visualized at the end of the cycle that comes, however, brought to the end since the operation of the dishwasher is not harmed. To "reset" an alarm is necessary:
- Open and close the door, or turn off and on the machine. At this point is possible to program the dishwasher again.

If the malfunction persists, contact your authorised Service Centre.
TECHNICAL DATA
| Width 858 mm | |
| Depth measured fl ush with the outer edge of the control panel | 550 mm |
| Height (depending on models) 580 mm | |
| Capcity 12 Standard place settings | |
| Water supply pressure min. 0,05 - max. 0,9 MPa (min. 0.5 – max. 9 bar) | |
| Electrical characteristics See rating plate | |