
QR12PABT - Loudspeaker Qtx - Free user manual and instructions
Find the device manual for free QR12PABT Qtx in PDF.


| Product Type | Active PA Speaker |
| Model | QR12PABT |
| Brand | Qtx |
| Woofer Size | 12 inches |
| Amplifier Power | 400W Peak |
| Frequency Response | 50 Hz – 20 kHz |
| Max SPL | 120 dB |
| Bluetooth Version | 5.0 |
| Inputs | XLR, 1/4" Jack, RCA |
| Output | XLR Link |
| Controls | Volume, EQ Presets, Bluetooth Pairing |
| Enclosure Material | MDF with Carpet Covering |
| Dimensions (W x H x D) | 41 x 60 x 38 cm |
| Weight | 16 kg |
| Power Supply | AC 100-240V, 50/60Hz |
| Power Consumption | 200W RMS |
| Cooling | Built-in Fan |
| Mounting Options | Pole Mount (35mm socket) |
| Included Accessories | Power Cord, User Manual |
| Safety Features | Overload Protection, Thermal Protection |
| Maintenance | Clean with dry cloth; keep vents clear |
| Repairability | Replaceable amplifier module |
Frequently Asked Questions - QR12PABT Qtx
User questions about QR12PABT Qtx
0 question about this device. Answer the ones you know or ask your own.
Ask a new question about this device
Download the instructions for your Loudspeaker in PDF format for free! Find your manual QR12PABT - Qtx and take your electronic device back in hand. On this page are published all the documents necessary for the use of your device. QR12PABT by Qtx.
USER MANUAL QR12PABT Qtx
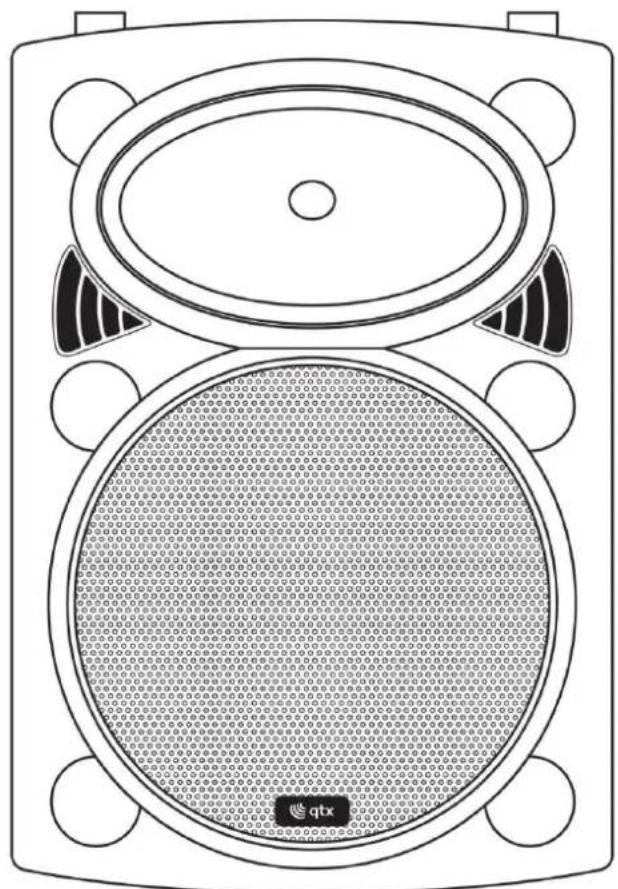
Version 1.2

Caution: Please read this manual carefully before operating
Damage caused by misuse is not covered by the warranty
Introduction
Thank you for choosing the QRPABT portable PA unit. Please read this manual prior to use to avoid damage to the item. This versatile portable PA unit is packed with features in a compact, manageable enclosure and is suitable for a wide array of applications ranging from public address for presentations to outdoor karaoke.
• 15Vdc power adapter with IEC input
- Internal 12V rechargeable battery
- 2 x VHF handheld microphones included
• Guitar / Microphone inputs (6.3mm jack)
• Master 2 band EQ and Echo effect for microphones
- Internal USB/SD/FM/BT media player with record function
- Bluetooth pairing with TWS function
• VCV mic override function
• I.R. remote control for media player
• Integral 35mm pole mount
- AUX line input
Please check the contents to ensure that the product has been received in good condition.
• QRPABT portable PA unit
• 2 x VHF handheld microphone transmitters
- 4 x AA batteries
• IEC mains power lead(s)
• IR Remote control for media player
- User manual
If you find any accessory is missing or the product has arrived with any problems, please contact your retailer at once.
This product contains no user-serviceable parts so make no attempt to try to fix or modify this item yourself as this will invalidate the warranty. We recommend you keep the original package and proof of purchase for any possible replacement or returned demand.
Warning
To prevent the risk of fire or electric shock, do not expose this appliance to rain or moisture. To prevent electric shock do not remove the cover. No user serviceable parts inside. Refer servicing to qualified service personnel.
Safety
Prior to connecting the mains adapter, ensure that the supply voltage is correct and the mains lead is in good condition. Avoid ingress of water or particles into the enclosure.
If the internal fuse blows, refer the unit to qualified service personnel
If the VHF microphone transmitter is to be unused for a long period of time, remove the batteries and store for later use.
Placement
Keep the unit out of direct sunlight and away from heat sources.
Place the unit in an upright position during use and storage.
Keep the unit away from moisture or dusty environments.
Cleaning
Use a soft cloth with a neutral detergent to clean the cabinet, panel and controls.
To avoid damage, do not use solvents to clean this equipment.
Control panel
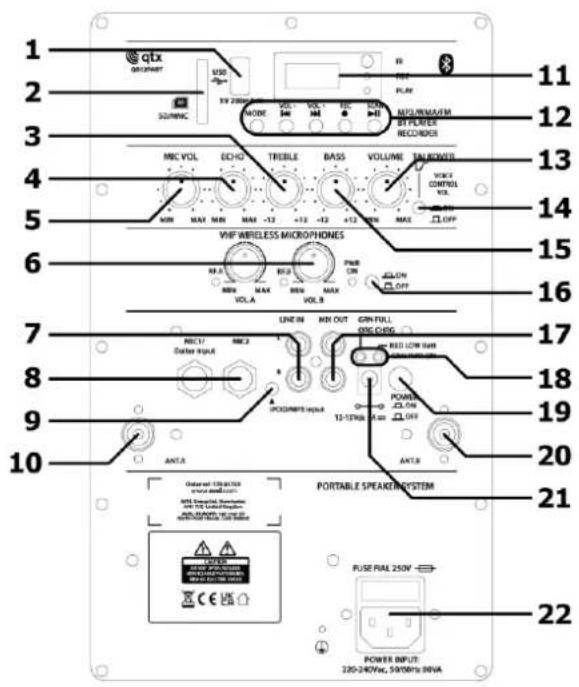
1 USB port
2 SD/MMC card slot
3 TREBLE EQ
4 ECHO level
5 Wired MIC / guitar volume
6 VHF Mic volumes A and B
7 LINE IN 2 x RCA
8 Wired MIC.1 / guitar and MIC.2 input 6.3mm jacks
9 Smart phone / aux input stereo 3.5mm jack
10 Antenna connection - VHF Mic A
11 Media player LCD display & IR receiver
12 Media player mode & transport controls
13 Main volume
14 VCV talkover on/off
15 BASS EQ
16 VHF wireless receiver on/off
17 MIX OUT line output 2 x RCA
18 Battery charge & power LEDs
19 Power on/off
20 Antenna connection - VHF Mic B
21 DC power input jack
22 IEC power inlet & fuse holder
Powering up
Your new QRPABT unit may arrive with you with the internal battery charged. Before connecting to the mains with the supplied power adaptor, switch the unit on and check the POWER LED (18). If it is green, there is charge in the battery. If it is red, then you will need to charge the battery before using away from a mains supply.
Connect the QRPABT unit to the mains using the supplied IEC mains lead (22). You may otherwise opt to connect the DC input jack (21) to an external 12-15Vdc supply, such as a car battery, or use the internal battery if charged.
When not in use but connected to the mains, if the POWER switch is in the off position, the internal battery will be re-charged from the mains supply. This can be observed by the CHARGE LED (18), which will light orange when charging. When fully charged, the CHARGE LED will change to green.
Note: it is recommended to store the PA unit at an ambient temperature and not with the battery fully discharged.
Initial setup
Turn all VOLUME & ECHO controls down (anti-clockwise) and turn the POWER switch on (the power LED should light). BASS and TREBLE controls should remain pointing vertically (12-o-clock position).
Turn up the main VOLUME control part way and switch VCV off. Your QRPABT unit should now be ready to operate.
VHF Microphone
Insert the supplied AA batteries into each of the handheld microphones by carefully unscrewing the base and connecting the "+" and "-" terminals of the battery to the corresponding contacts inside the microphone body, taking care to observe the correct polarity. Turn on the VHF receiver (16) and turn the VHF VOL controls (6) up (clockwise) part way.
Switch on each wireless mic in turn – the rear panel RF LEDs should light as a result. If the LED on the transmitter lights dimly, change the battery. Gradually increase the VHF VOL controls (6), testing each microphone for output through the speaker. Take care not to incur "feedback" (howling or screeching sound through the speaker) by keeping the microphone a sensible distance from the speaker and pointing away from the speaker so that it doesn't hear the speaker.
Turning the ECHO control (4) clockwise introduces a pre-set echo function for singing and special effects. BASS and TREBLE (15, 3) can be cut by turning anti-clockwise or boosted by turning clockwise.
When not in use, switch the handheld transmitters off and remove the batteries if not being used for long periods.
External Inputs
In addition to the QRPABT's own VHF microphones, a pair of 6.3mm jack inputs (8) are provided to connect external wired or wireless microphones, which are both governed by the MIC VOL control (5).
(MIC 1 can also accept an electric guitar input).
Twin RCA (7) and a 3.5mm stereo AUX (9) input are provided for line input sources such as CD player or smart phone. Adjacent to the twin RCA input is a twin RCA line output (17) carrying the overall main mix.
This can be fed on to further active speakers or portable PA units via a twin RCA lead.
VCV
The VCV button (14) activates a Voice-Controlled Volume function which causes the media player to be temporarily muted when there is audio input from a microphone. This can be useful to "duck" music when making announcements.
Internal USB/SD player & Bluetooth receiver
The QRPABT onboard media player (11) can play back files from USB/SD/FM media or a paired Bluetooth device. Insert a USB memory stick or an SD card with compressed digital audio files stored on it into the relevant slot on the top panel. Playback will normally start automatically from the last media inserted (USB or SD).
If the LCD display shows a jack plug (AUX), press the MODE button and check that the LCD display shows that media is being read from the USB or SD device. If not, press the ▶II button or try removing and re-inserting the memory device.
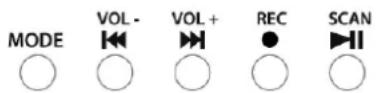
Increasing the Master Volume control (13) should result in the audio being played through the speakers. Rear panel controls for the media player (12) are detailed below...
MODE switches input between USB/SD/FM media or Bluetooth
press for previous track (hold for volume -)
▶▶ press for next track (hold for volume +)
REC Press to record audio to media
▶II Play/Pause playback or FM scan (hold to pair for TWS)
Pressing the REC button initiates recording of external inputs to any inserted USB or SD media as a .wav file. Pressing REC again will stop the recording. These tracks can be played back from USB/SD in the same way as mp3 files.
In FM mode, press and hold the ▶II button to initiate automatic scan of available radio stations, which are then stored to memory as channels in order of frequency. Once completed, use ◀ and ▶I buttons to step through saved radio stations.
To connect a smart phone or other Bluetooth device to the QRPABT media player, open the Bluetooth menu on your device and search for the QRPABT unit, which is simply called "bluetooth". Pair with this ID and connect to play audio from the Bluetooth device through the QRPABT unit.
TWS (True Wireless Stereo) can be activated if 2 of the same QRPABT are operated in Bluetooth range of each other. Switch both units on and before pairing any phone, set each to Bluetooth and press and hold Play. The LED is normally blue flashing before pairing, solid blue when paired, red flashing when TWS pairing, solid red when TWS paired. Pair the master unit to a smartphone and this will play the left channel, whereas the other QRPABT will play the right channel.
Pressing the MODE button will select between FM, Bluetooth & USB/SD playback.
Volume and track navigation can be achieved via the media player control panel. Bluetooth pairing is always available for a single device so long as the device is within reception range. It may be necessary to re-connect if the device has moved out of range and disconnected.
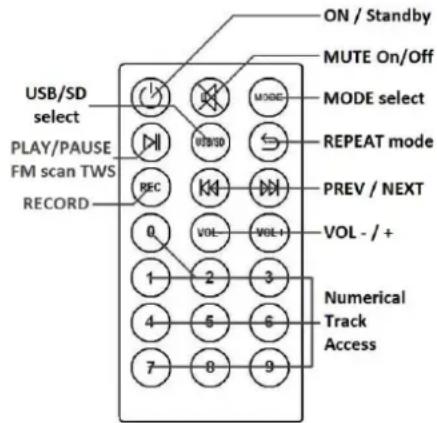
In addition to the panel controls, an infra-red remote control is provided for the media player which adds some further functions to allow greater control over the media player.
To use the remote, remove the clear plastic tab to activate the battery.
178.847UK, 178.848UK User Manual
Specifications
| QR12PABT | QR15PABT | |
| Main driver | 300mm∅ (12") | 380mm∅ (15") |
| Dimensions | 570 x 350 x 310mm | 685 x 440 x 380mm |
| Weight | 14.0kg | 18.4kg |
| Power supply | 220-240Vac 50Hz (IEC) or 12/15Vdc @ 3A or internal battery | |
| VHF Mic Batteries | 4 x AA | |
| Amplifier output | 50W + 50W max. | |
| Battery life | Up to 8 hours | |
| Controls | Mic/guitar volume, Echo, Bass, Treble, Master Volume & VHF mic volume, VCV | |
| Inputs | Mic.1/guitar, Mic.2 (6.3mm jack), Line In (L+R RCA), AUX (3.5mm stereo jack) | |
| Carrier frequency | 174.1MHz + 175.0MHz | |
Troubleshooting
| No output and no LEDs lit | Check POWER switch is on |
| Check battery is not drained fully | |
| Check mains or 15Vdc is connected if not on battery power | |
| Check IEC fuse hasn't blown | |
| Power LED lit but no VHF output | Check AA batteries in handheld transmitters |
| Check handheld transmitters are switched fully on and not muted | |
| Check VHF POWER is switched on | |
| Check RF LEDs are lit (otherwise check transmitter frequency) | |
| Music level off or keeps cutting out | Check that VCV is not switched on (will mute upon mic. signal) |
| Power LED lit but no media player output | Check USB or SD has mp3 or wma files stored |
| Check USB or SD is connected properly | |
| Press MODE button and try Play/Pause button | |
| In FM tuner mode, ensure that a station is tuned in correctly | |
| Check VOLUME is not turned down | |
| Press and hold "VOL +" button | |
| Check LCD display to see track countdown | |
| Power LED lit but no sound from external inputs | Check leads are OK and connected properly |
| Check volume and on/off switch on external mic or line source | |
| Check VOLUME or MIC VOLUME control is not fully down |


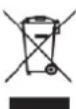
Disposal: The "Crossed Wheelie Bin" symbol on the product means that the product is classed as Electrical or Electronic equipment and should not be disposed with other household or commercial waste at the end of its useful life. The goods must be disposed of according to your local council guidelines.
Hereby, AVSL Group Ltd. declares that the radio equipment type 178.847UK and 178.848UK are in compliance with Directive 2014/53/EU
The full text of the EU declaration of conformity for 178.847UK is available at the following internet address: http://www.avsl.com/assets/exportdoc/1/7/178847UK%20CE.pdf The full text of the EU declaration of conformity for 178.848UK is available at the following internet address: http://www.avsl.com/assets/exportdoc/1/7/178848UK%20CE.pdf
Errors and omissions excepted. Copyright© 2021.
AVSL Group Ltd. Unit 2-4 Bridgewater Park, Taylor Rd. Manchester. M41 7JQ
AVSL (EUROPE) Ltd, Unit 3D North Point House, North Point Business Park, New Mallow Road, Cork, Ireland
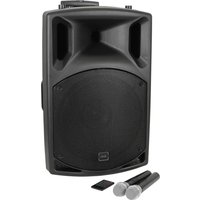


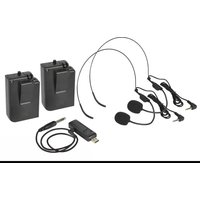
Brand : Qtx
Model : QR12PABT
Category : Loudspeaker