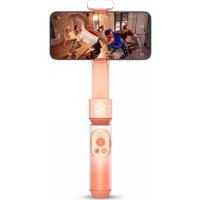
Weebill-S - Tripod Zhiyun - Free user manual and instructions
Find the device manual for free Weebill-S Zhiyun in PDF.


User questions about Weebill-S Zhiyun
0 question about this device. Answer the ones you know or ask your own.
Ask a new question about this device
Download the instructions for your Tripod in PDF format for free! Find your manual Weebill-S - Zhiyun and take your electronic device back in hand. On this page are published all the documents necessary for the use of your device. Weebill-S by Zhiyun.
USER MANUAL Weebill-S Zhiyun
The following features are available in this PDF document.

natural_image
Simple line drawing of a magnifying glass (no text or symbols)Quick Keyword Search
Enter the keyword in the search box and hit the search button

Quick Jump between Chapters
Click the title of a specific chapter on the Contents to jump to it
*Reading software such as Adobe Reader is needed to support the functions above.
ZHIYUN
WEEBILL-S
User Guide
Contents
Packing List
Packing List....1
■ Get to Know WEEBILL-S
Get to Know WEEBILL-S....2
■ Preparing and Charging the Batteries
Charger and Batteries Description 3
Charging Procedure....4
■ Installation and Balance Adjustment
Tripod Installation 5
Battery Installation 6
Camera Installation 6
Camera Control Cable Connection 7
Balance Adjustment....7
How to Use
Buttons Description 9
Display Screen Description 10
Menu Option Description 12
Motor Torque Adjustment....14
Stabilizer Mode Description 14
Manual Angle Lock 17
■ APP Operations
Download APP 18
How to Connect Stabilizer to Smartphone 18
Overview of the Main Functions....18
■ Calibration and Firmware Upgrade
When do you need to calibrate the stabilizer? 19
Initialization Method....19
Six-side Calibration 20
Motor Fine-tuning 22
Stabilizer Firmware Update 22
Product Specifications
■ Disclaimer and Warning
Reading Tips 24
Warnings....24
Safe Operation Guidelines 24
■ Disclaimer and Warning
Warranty Terms
Warranty Period 27
This warranty does not apply to the followings....27
Warranty Claim Procedure 27
Contact Card

text_image
QR code image containing encoded data, no visible human-readable textScan the QR code to watch tutorials
Packing List
The product package comes with the following items. In case any item is found missing, please contact ZHIYUN or your local selling agent.
natural_image
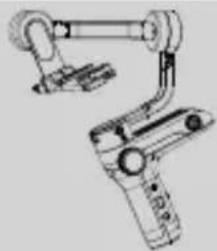
Mechanical robotic arm component (no text or symbols visible)WEEBILL-S Stabilizer*1
natural_image
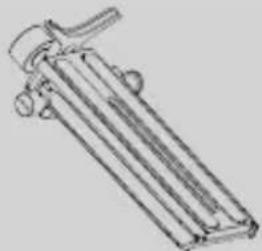
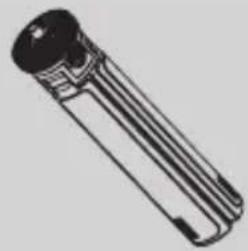
Line drawing of a mechanical component with a curved handle and rectangular body (no text or symbols)Quick Release Plate*1 Tripod * 1
natural_image
Simple line drawing of a cylindrical mechanical component with a flanged top (no text or symbols)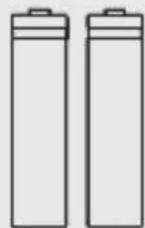
18650 Li-ion Battery * 2
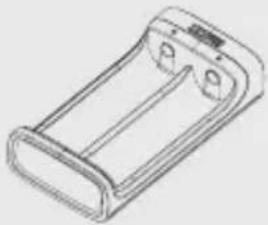
natural_image
Line drawing of a rectangular electronic device with two ports and a lid (no text or symbols)0 Battery Charger * 1
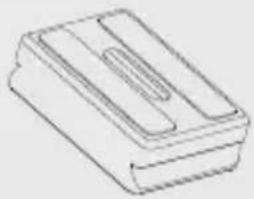
natural_image
Line drawing of a rectangular electronic component with a slot (no text or symbols)Camera Backing Base * 1
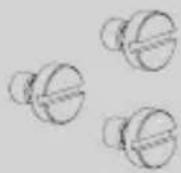
1/4-20 Screw*3
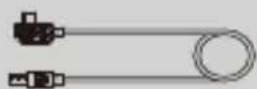
ZW-Micro-002 Camera Control Cable * 1
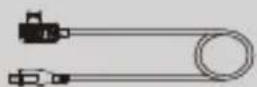
ZW-Mini-002 Camera Control Cable * 1
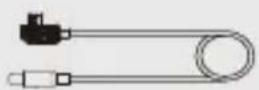
LN-MBUC-B01 Camera Control Cable*1

ZW-Multi-002 Camera Control Cable*1
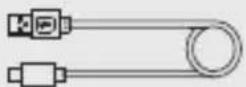
Type-C USB Firmware Upgrade Cable * 1
text_image
ManualQuick Start Guide*1 Storage Case * 1
natural_image
Illustration of a rectangular object with repeating patterned surfaces (no text or symbols)Get to Know WEEBILL-S
text_image
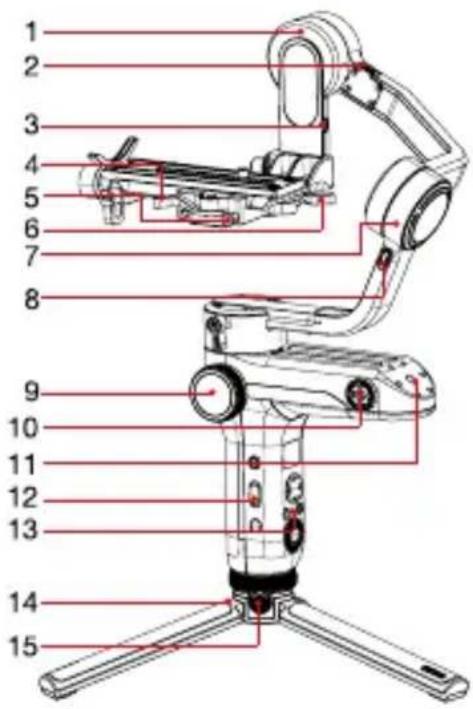
Labeled diagram of a robotic device with numbered parts for identification-
Tilt Axis Motor
-
Tilt Axis Lock Switch
-
Camera Control Interface
-
Quick Release Plate Latch
-
Safety Lock
-
Roll Axis Latch
-
Roll Axis Motor
-
Roll Axis Lock Switch
-
Focus/Zoom Control Wheel
-
1/4" Screw Thread with Crown Gear
-
1/4" Screw Hole
-
Side Buttons (see more on Buttons Description)
-
Control Panel (see more on Buttons Description)
text_image
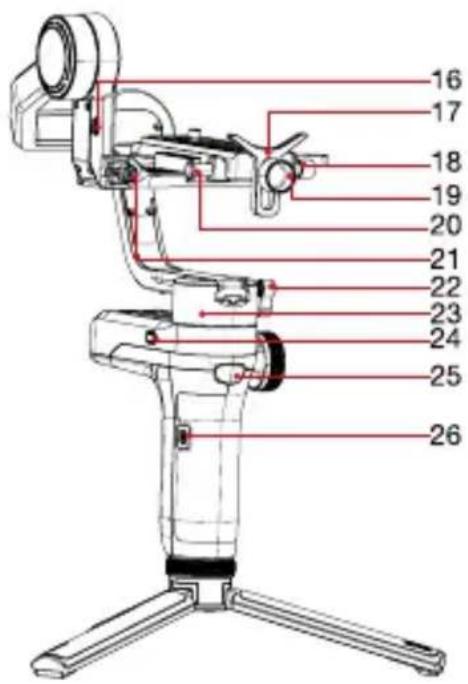
16 17 18 19 20 21 22 23 24 25 26-
Tripod
-
Tripod Lock Switch
-
Follow Focus Control Interface
-
Lens Support
-
Quick Release Lock Screw
-
Lens Support Lock Screw
-
Quick Release Plate Unleash Button
-
Tilt Axis Lock Screw
-
Pan Axis Lock Screw
-
Pan Axis Motor
-
Pan Axis Lock Switch
-
Trigger Button
-
Firmware Update Port
When using WEEBILL-S for the first time, please fully charge and activate the batteries with the dedicated charging device contained in the package to ensure normal use of the product.
Charger and Batteries Description
Charger Specifications
Name: 18650*2 Li-ion Battery Charger
Model: CH18650-2B
Input: 5V-2000mA
Output: 4.2V=800mA*2
●The LED indicator shines solid red when charging.
●The LED indicators shines solid blue when fully charged.
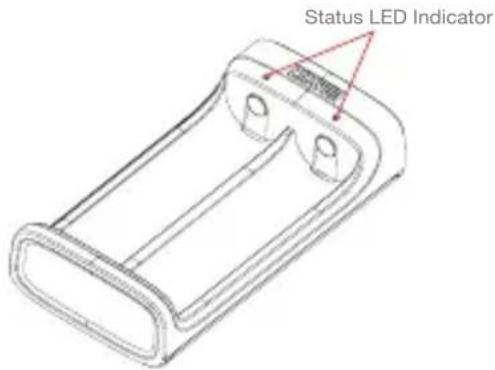
text_image
Status LED IndicatorBattery Specifications
Name: 18650 Li-ion Battery
Model: IMR 18650 MP
Capacity: 2600mAh
Voltage: 3.6V
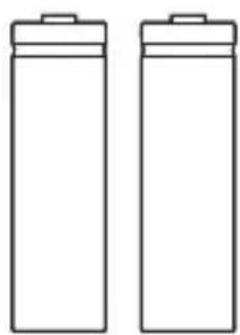
natural_image
Two identical cylindrical batteries with battery caps, no text or symbols visible
① The stabilizer is equipped with high-energy-density batteries, which may cause fire, economic loss or personal injury when not properly used and stored. Please read the disclaimer and warning herein as well as the description on the battery label carefully before using the batteries.
② Please use batteries provided or approved by ZHIYUN only. ZHIYUN will not take any responsibility for explosion, fire and/or accidents caused by non-ZHIYUN batteries.
When the batteries are not in use, please be sure to put them in the battery slot of the package or in plastic storage cases (the storage case needs to be purchased separately).
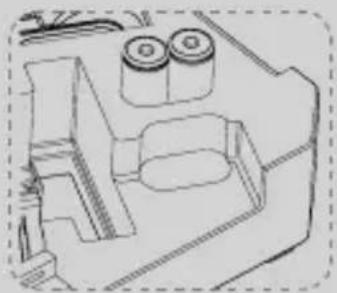
natural_image
Technical line drawing of a mechanical assembly with cylindrical components and housing (no text or symbols)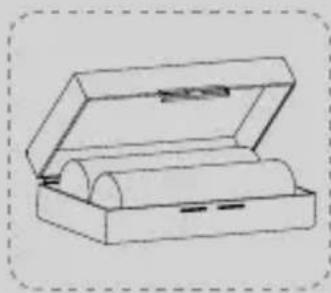
natural_image
Simple line drawing of an open box with a rolled document inside (no text or symbols)Charging Procedure
- Insert the batteries into the charger in the right direction (positive/negative end) accordingly.
- Connect the charger to the adapter via the Type-C USB cable.
- Plug the adapter into a power outlet to start charging.
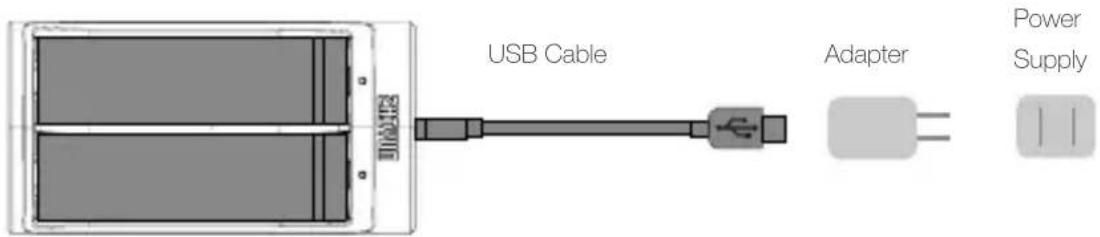
text_image
USB Cable Adapter Power Supply
① Due to the differences of the charger itself, charging the batteries may fail when the power supply is insufficient (for instance, when the current of the adapter is lower than 500mA). Conditions may vary depending on the specific chargers used. It is recommended to use an adapter with a higher current capacity.
② The battery cannot be charged through the USB port on the stabilizer.

① Please use a qualified standard 5V/ ≥ 2000mA adapter for battery charging; charging time depends on the maximum input current of the adapter.
② This stabilizer comes standard with two high-discharge-rate dedicated batteries. Please use and charge batteries provided or approved by ZHIYUN only.
③ Please make sure both the batteries are fully charged. Either battery undercharged can lead to failure of the stabilizer.
Tripod Installation
Get the tripod ready and mount it to the 1/4"-3/8" threaded hole at the bottom of the stabilizer, then unfold the tripod on a flat surface.
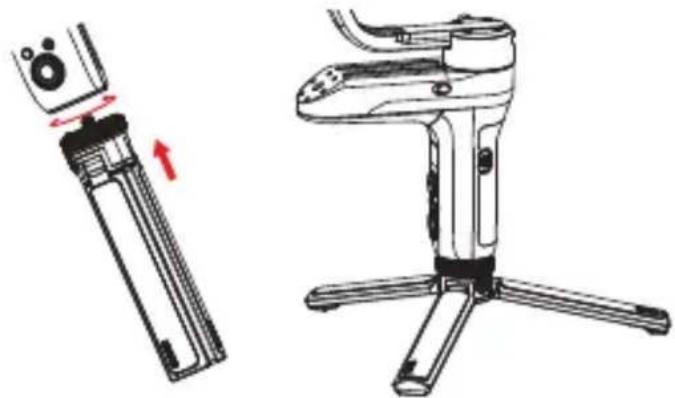
natural_image
Technical illustration of a handheld device with a camera and tripod base, showing a left-side assembly and a right-side view (no text or symbols)You can also install the tripod onto the base of the battery compartment to enter Sling Mode.
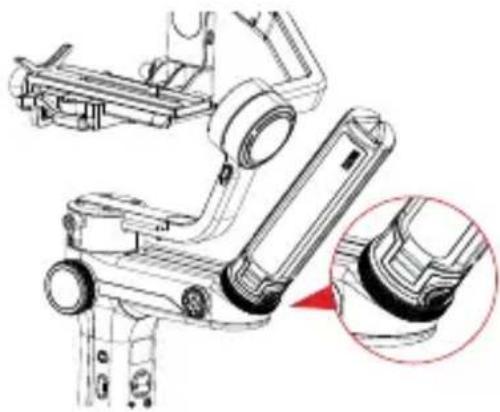
natural_image
Technical line drawing of a mechanical assembly with a magnified inset showing a detail (no text or symbols)
Please make sure to put the tripod lock switch to lock position before entering into Sling Mode.
Battery Installation
Slide out the cover of the battery compartment and load two ZHIYUN 18650 lithium batteries (note the positive and negative directions).
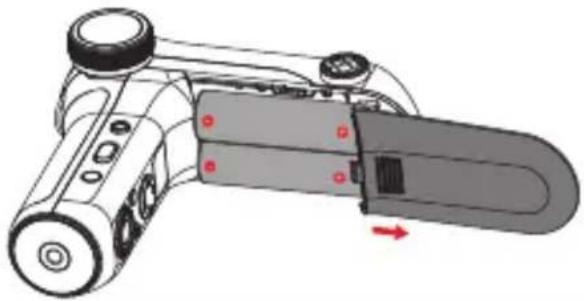
natural_image
Diagram of a handheld device with a gray internal component and red arrows indicating movement or force (no text or symbols present)Camera Installation

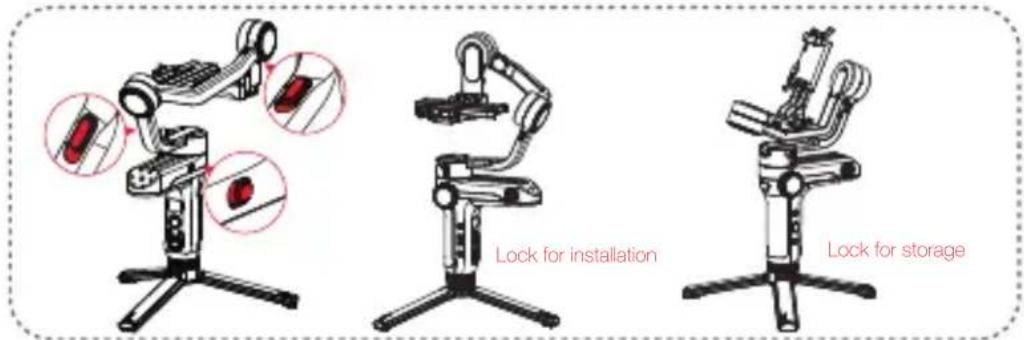
Each axis of the gimbal is equipped with a lock switch. You can use these lock switches to lock the axes for convenient installation and storage.
text_image
Lock for installation Lock for storage-
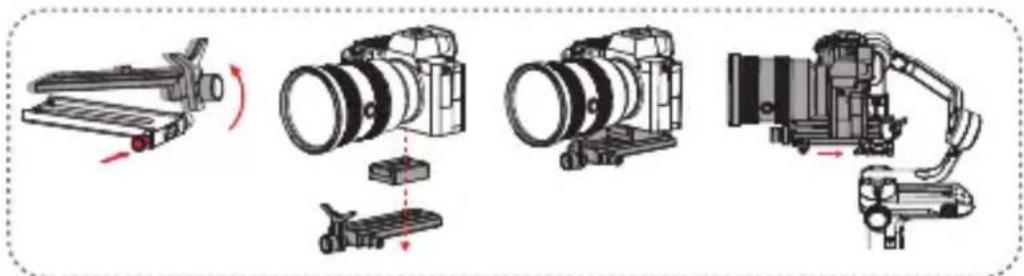
Take out the quick release plate module and press the Quick Release Unleash Button to take out the Arca quick release plate.
-
Mount the camera on the backing base as above, then mount it on the quick release plate and tighten the 1/4" screw at its bottom.
-
Adjust the lens support on the quick release plate to support the lens and ensure it is stable.
-
Mount the installed quick-release plate into the quick release module, and then install and lock the whole module on the three-axis stabilizer.

① Before mounting the camera, make sure it is prepared ahead of time. Remove the lens cap and make sure the camera's battery and memory card are already in place.
② A backing base is required if the camera lens is getting too close to the quick-release plate due to their large size. You can decide whether to install the backing base according to the actual situation.
③ There's a 1/4 threaded hole in the middle of the quick release plate for quickly screw or unscrew the 1/4 screw.
text_image
Diagram illustrating camera assembly steps with labeled components and directional arrowsCamera Control Cable Connection
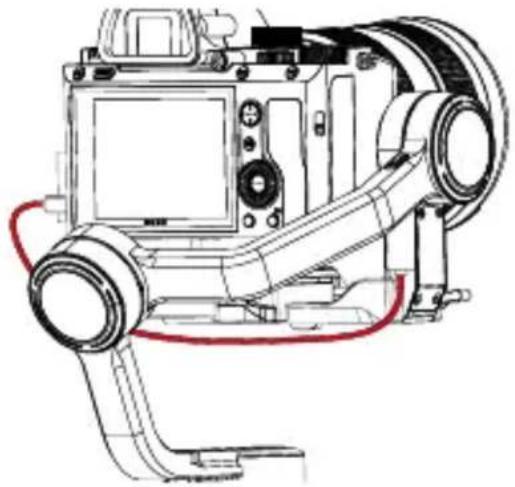
Plug the camera control cable into the control interface of the camera and stabilizer.
natural_image
Technical line drawing of a mechanical device with no visible text or symbols| Control Cable Name | ZW-Micro-002 | ZW-Mini-002 | LN-MBUC-B01 | ZW-MULTI-002 | ||
| Camera Port Type Micro USB Mini USB Type-C Multi USB | ||||||
| Camera Brand & Model | Nikon Canon Panasonic Nikon Sony | |||||
| D850 | 5D Mark IV | 6D Mark II EOS R GH5 Z6 A7RM3 | ||||
| Photo | √ | √ | √ | √ | √ | √ |
| Video | √ | √ | √ | √ | √ | √ |
| Switch to real-time preview | √ | √ | √ | × | × | × |
| AV | √ | √ | √ | √ | √ | × |
| TV | √ | √ | √ | √ | √ | × |
| ISO | √ | √ | √ | √ | √ | × |
| EV | √ | √ | √ | √ | √ | × |
| Electronic Focus | √ | √ | √ | √ | √ | × |
| Electronic Zoom | × | × | × | × | × | √ |

① The mentioned camera models in the form are only for reference.
② When controlling a Sony camera via a control cable, please power on the stabilizer before powering on the camera. Please make sure the camera is fully charged. The optical zoom is available if using a motorized lens, and the digital zoom is available if using a non-motorized lens. You can set in the camera menu.
③ For the full camera compatibility list, please visit ZHIYUN official website www.zhiyun-tech.com to check the WEEBILL-S Camera Compatibility List.
Balance Adjustment

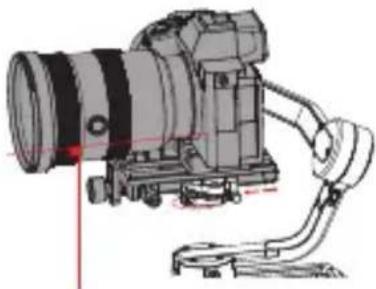
To facilitate the adjustment procedure, we recommend locking the three axes of WEEBILL-S the way as the camera-mounted state, then unlock and make balance adjustment of the axes one by one.
- Unlock the tilt axis and Quick Release Plate Latch, push the camera to move forward or backward until the camera can stay still and almost level with its lens facing front (as shown below). Complete this step by tightening up Quick Release Plate Latch.
natural_image
Technical line drawing of a mechanical device with no visible text or symbols- Make the lens face up, slightly loosen the thumb screw of the tilt axis, and push the camera to move upward or downward until the camera can stay still with the lens facing up (i.e. the camera stays still and vertical to the ground as shown below). Complete this step by tightening up the thumb screw.
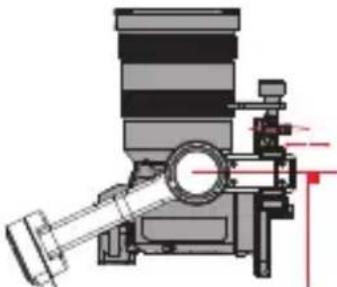
natural_image
Mechanical assembly diagram showing a cylindrical component with internal components and alignment lines (no text or symbols)- Unlock the roll axis, and the roll axis latch under the quick release plate, push the camera to move left or right until the camera can stay still and horizontal to the ground (as shown below). Complete this step by tightening up Roll Axis Lock Latch.
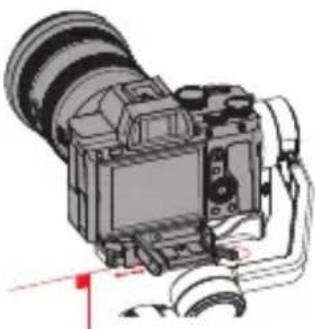
natural_image
Illustration of a DSLR camera with lens and control panel (no text or symbols)- Unlock the pan axis, slightly loosen the thumb screw on it, then adjust the pan axis until it stays still and horizontal to the ground (as shown below). Complete this step by tightening up thumb screw.
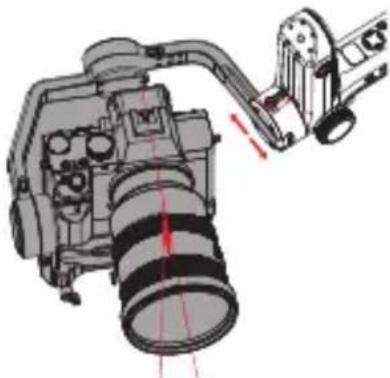
natural_image
Technical illustration of a camera assembly with lens and actuator components (no text or symbols)Buttons Description
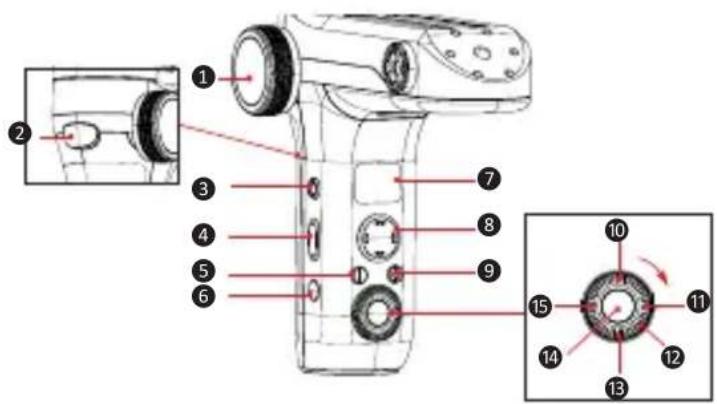
text_image
Technical diagram of a handheld device with numbered parts and exploded view, likely for assembly or maintenance instructions.① Focus/Zoom Control Wheel*
The Control Wheel controls the TransMount Servo Zoom/Focus Controller as default. Please select the electronic focus on the menu if required.
② Trigger Button
- Press and hold the Trigger Button to enter Following Mode as default, and let go the Trigger Button to switch back to the previous mode.
- Double press the Trigger Button to reset the motor position. (This operation is unavailable under POV Mode and Vortex Mode.)
- Triple press the Trigger Button to enter selfie mode. (This operation is unavailable under Locking Mode and Vortex Mode.)
③ Fn Button [Fn]
Press and hold the Fn Button to enter Go Mode as default, and let go the Fn Button to switch back to the previous mode.
4 Mode Switch
- Dial up and the stabilizer enters PF (Pan Following) Mode.
- Dial down the stabilizer enters L (Locking) Mode.
5 POV Mode (POV)
- Single press to enter POV (Point of View) Mode.
• Double press to enter V (Vortex) Mode - Press and hold the POV Mode Button to enter or exit standby Mode.
6 Power Button [ ⏻ ]
Press and hold the Power Button for 3 seconds to power on/off the stabilizer.
7 OLED Display
Stabilizer status and camera parameters (see more Display Screen Description).
8 Joystick
Four-way direction control of the camera/lens on
the stabilizer.
⑨ Video[ ●]
Single press to start/end video recording.
10 LV Button[LV]
- Single Press the LV Button to make the camera enter or exit the Live Preview mode.
- Double press the LV Button to lock all buttons on the front side of the grip and double press again to unlock the buttons.
- Triple Press to lock the control buttons on the grip, and double press to unlock it.
11 Right[ ▶ ]
- In the main screen, single press to move to the next option.
• Control the electronic zoom of the camera when carrying a Sony camera. - In the menu screen, single press to confirm the selection.
12 Dial
- In the main screen, rotate the dial to adjust camera parameters.
- In the menu screen, rotate the dial to switch between options.
13 Menu[•••]
Single press to enter or exit the menu screen.
14 Shutter Button
- Half-press the Shutter Button to activate autofocus.
• Full-press the Shutter Button to take photos.
15 Left[ ◀ ]
- In the main screen, single press to move to the previous option.
• Control the electronic zoom when carrying a Sony camera. - In the menu screen, single press to return to the previous screen.
*For the installation method of TransMount Servo Zoom/Focus Controller, please check the Instruction for the controller.

① Please slightly hold the camera when powering on the stabilizer to avoid erratic gimbal rotation which may cause camera damage.
② Please keep the grip stable when turning on the stabilizer. Shakes during the power-on may cause the stabilizer power-on failure.
Display Screen Description
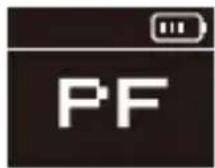
Camera params
settings unavailable
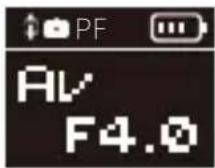
Camera params
settings available
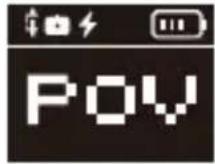
Connecting with Sony cameras
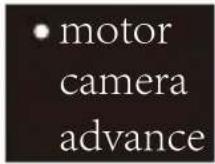
Menu screen

Axis lock
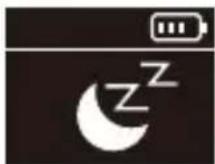
Standby mode

Key lock
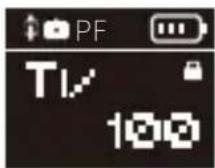
Icon Description
| [557S] | Camera connected with stabilizer |
 | Video Mode |
 | Photo Mode |
| [XZT] | The stabilizer is charging the Sony camera. (Select "sony", select "on" on the "camera" menu) |
 | Battery Level (stabilizer) |
| [HZZQ] axislock | This icon prompts when the axis is locked and the stabilizer will make a beep sound. (Please unlock the axis and long-press the POV Button to resume operation) |
 | Stabilizer is on Standby |
| key lock | Buttons are locked when camera parameter settings are unavailable |
| [SHWS] | Buttons are locked when camera parameter settings are available |
| [KBHO] | Pan Following Mode |
| [XGOK] | Locking Mode |
| [XBXZ] | Point Of View Mode |
 | Vortex Mode |
| [Y978] | Following Mode |
 | Go Mode |
| [5ZXA] | Aperture Value |
 | Shutter Speed Value |
 | ISO |
 | EV |
Menu Option Description
| Motor Torque Setting | auto | ||
| level | Low-torque | ||
| Medium-torque | |||
| High-torque | |||
| custom | Tilt Axis | ||
| Roll Axis | |||
| Pan Axis | |||
| camera | close (Close the interface) | ||
| canon | |||
| nikon | |||
| sony | off (Charging is off) | ||
| on (Charging is on) | |||
| sony-usb* | A7C | ||
| A9 | |||
| A7S-3 | |||
| panaso (Panasonic) | |||
| ccs | |||
| fuji (FUJIFILM) | |||
| olympus | |||
| zcam | |||
| bmpcc | |||
| sigma | |||
| Stabilizer params settings | speed | Control speed of joystick | Tilt Axis |
| Roll Axis | |||
| Pan Axis | |||
| Follow speed of motor | Tilt Axis | ||
| Roll Axis | |||
| Pan Axis | |||
| smooth | Tilt Axis | ||
| Roll Axis | |||
| Pan Axis | |||
| deadband | Tilt Axis | ||
| Roll Axis | |||
| Pan Axis | |||
| default (restore default settings) | yes | ||
| no | |||
| trajectory** (Trajectory Shooting) | preset (Preset) | Two preset paths available: preset1/preset 2 | |
| mode (Modes) | Two modes available: photo/video | ||
| points (Key Points) | Five at most key points can be set (A, B, C, D, E) | ||
| time (Time) | interval" for the time interval of photo taking, "duration" for the total amount of time | ||
| preview (Preview) Quick preview of the set path | |||
| start (Start) Enable motionlapse | |||
| vortex*** (Vortex Mode Settings) | direction (Rotation Direction) | “+” for clockwise rotation “-”for counter-clockwise rotation | |
| speed (Rotation Speed) Speed range 5-100 | |||
| custom (Customized Rotation Turns) | Automatic rotation turns setting (range 1~N) | ||
| unlimited (Unlimited Rotation) | Disabled when select "0", enabled when select "1". When "unlimited rotation" is enabled, "customized rotation turns" will be disabled and displays "×" | ||
| tracking (Tracking Settings) | 16mm/24mm/35mm/50mm/70mm/105mm | For better tracking results, please choose the current focal length corresponding to the lens in the menu. (For example, if the current focal length of the lens is 50mm then choose "50mm" in the menu.) | |
| focus (Follow Focus Motor Upgrade) | lite | upgrade (upgrade follow focus motor lite firmware) | |
| max | upgrade (upgrade follow focus motor max firmware) | ||
| wheel (control wheel setting) | Sensi (control wheel sensitivity) | low | |
| medium | |||
| high | |||
| AB Point **** | Max | Set the current wheel position as A point | |
| Set the current wheel position as B point | |||
| Clear AB Points | |||
| Lite | Set the current wheel position as A point | ||
| Set the current wheel position as B point | |||
| Clear AB Points | |||
| function(control wheel functions) | M-focus (TransMount Servo Zoom/Focus Controller) | ||
| E-focus(Electronic Zoom/Focus) | |||
| off(disable control wheel on the handle) | |||
| reverse(control the wheel in reverse direction) | off | ||
| on | |||
| Joystick Setting | Reverse(control the joystick in reverse direction) | Joystick(in vertical direction) | off |
| on | |||
| Joystick(in horizontal direction) | off | ||
| on | |||
| calibration(calibration settings) | yes (Enter six-side calibration) | ||
| no (Exit calibration setting) | |||
| angle(fine-tuning on motor angle) | pitch (Fine tune the tilt axis motor) | ||
| roll (Fine tune the roll axis motor) | |||
| key (Customization) | trigger | hold (Hold the button to enter the mode) | |
| click (Single click to enter the enter the mode) | |||
| Fn | hold (Hold the button to enter the mode) | ||
| click (Single click to enter the enter the mode) | |||
| about | Information of firmware versions, stabilizer model, and name of Bluetooth | ||

* For the difference between selecting Sony camera and Sony USB, please visit the official website of ZHIYUN and check the camera compatibility list for WEEBILL-S.
** 1. It is recommended to switch the stabilizer to L mode when setting key points. Pan axis motor can be manually set under this mode, makes it quicker to set key points.
- Double click video button to exit trajectory shooting.
*** Turn on: Switch the stabilizer to V mode and triple click POV button.
Pause: Triple click POV button when in rotation. (When resume, the record of the turns will start at its current angle)
Reset position: Double click trigger button when in rotation.
Exit: Switch stabilizer mode when in rotation.
****AB point settings are only available when connecting to ZHIYUN Servo Follow Focus correctly.
Motor Torque Adjustment
The motor torque of the stabilizer shall be adjusted by 3 levels to adapt the specific camera and lens applied for ideal performance.
Auto torque adjustment: Under auto torque adjustment, the stabilizer will adjust the motor torque according to the weight of the carried camera and lens.
Operation Method: Single press Menu Button and rotate the dial to "motor", then rotate the dial to "auto" and press the right side of the dial to confirm. The stabilizer will enter the auto torque adjustment state. Please do not operate the stabilizer before the stabilizer shortly vibrate, and a "√" mark will appear on the display screen, which means the auto torque adjustment is completed.
Customized Motor Torque: Please set a proper motor torque according to the actual camera setup. Overhigh motor torque will cause the stabilizer vibration, vise versa, excessive low motor torque will affect the gimbal stabilization.
Operation Method: Single press Menu Button and rotate the dial to "motor", then rotate the dial to "custom" and press the right side of the dial to confirm. Press right again to select the corresponding axis and set the parameters via the dial. Single press the left to exit, then the stabilizer will save the parameter and a "√" mark will appear on the display screen, which means the auto parameter adjustment is completed.

① When conducting the auto torque setting, please make sure that the three axes are unlocked and the stabilizer is straightly put on a flat surface.
② Please rebalance the stabilizer if camera setup is changed, and adjust the motor torque settings following the above method.
Stabilizer Mode Description

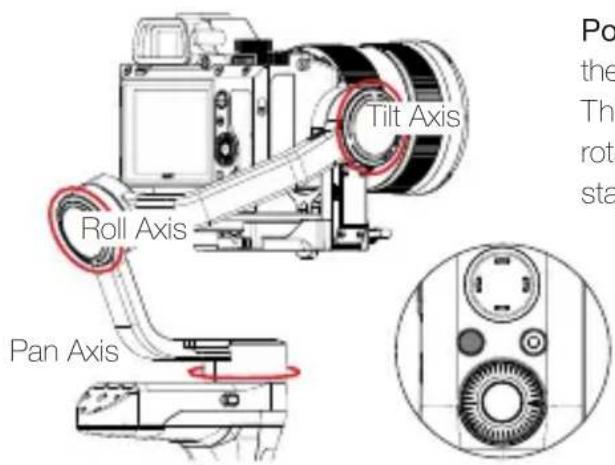
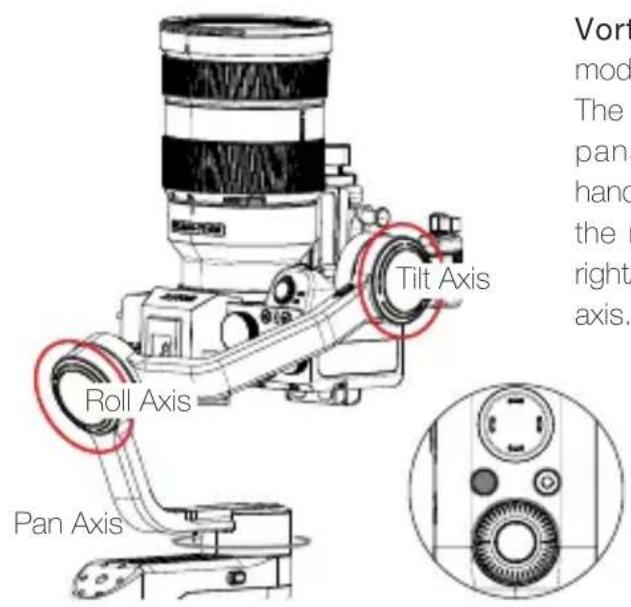
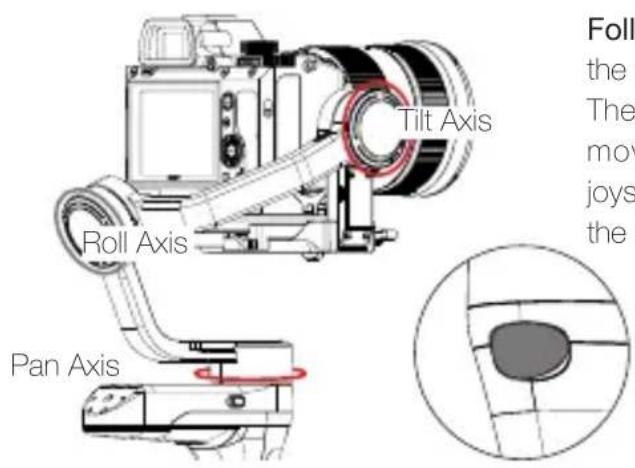
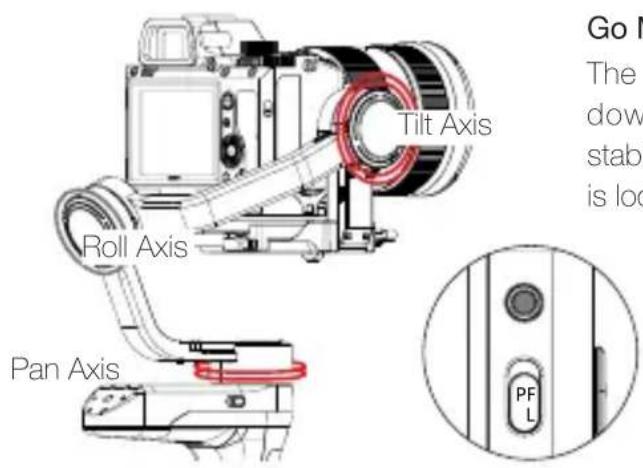
Motors circled in red will auto move with the stabilizer, while motors circled in grey are locked instead of moving with the stabilizer.
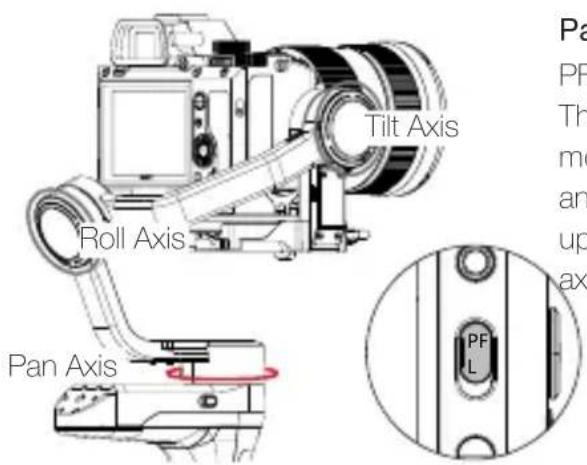
text_image
Tilt Axis Roll Axis Pan Axis PFLPan Following Mode (PF): Push up the PF/L mode switch
The camera pans left/right following the movement of the stabilizer while the tilt and roll axes are locked. Push the joystick up/down allows manual control of the tilt axis.
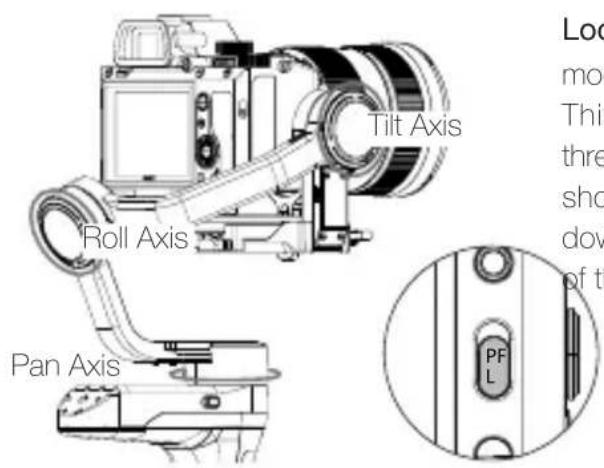
text_image
Tilt Axis Roll Axis Pan Axis Loc mod This thre sho dow of th PFLLocking Mode (L): Push down the PF/L mode switch
This mode locks the movement of all three axes to keep the camera fixed on a shooting direction. Push the joystick up/down and left/right allows manual control of the tilt axis and pan axis.
text_image
Tilt Axis Roll Axis Pan Axis Po the Th rota staPoint of View Mode (POV): Single press the POV mode button
This mode allows all three motors to rotate 360^ following the movement of the stabilizer.
text_image
Vort mod The pan hand the right axis. Tilt Axis Roll Axis Pan AxisVortex Mode: Double press the POV mode button
The camera tilts with a 90° angle and pans to follow the movement of the handle with unlimited 360° rotation while the roll axis is locked. Push the joystick right/left to control the rotation of the pan axis.
text_image
Tilt Axis Roll Axis Pan Axis Foll the The mov joys theFollow Mode: Press the Trigger Button at the back
The camera pans and tilts following the movement of the stabilizer. Push the joystick left/right to control the rotation of the roll axis.
text_image
Go The dow stab is loc Tilt Axis Roll Axis Pan Axis PFLGo Mode: Press the Fn Button
The camera pans left/right and tilts up/down following the movement of the stabilizer at faster speed while the roll axis is locked.
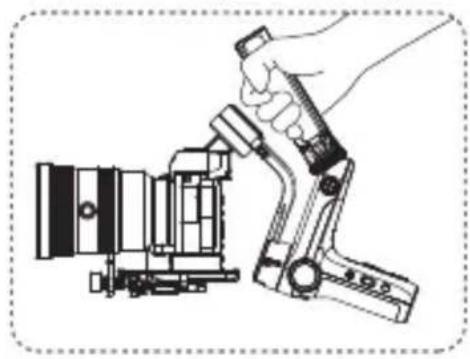
Sling Mode Upright Mode
natural_image
Illustration of a hand using a tool to adjust or install a camera lens (no text or symbols visible)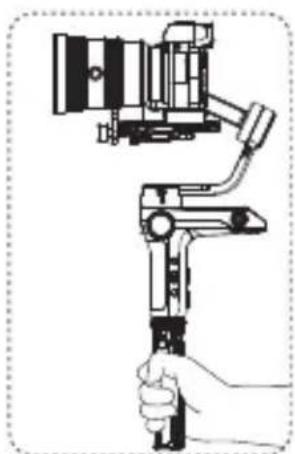
natural_image
Illustration of a hand holding a camera with a handheld device (no text or symbols)Please make sure to put the tripod lock switch to lock position before entering into Sling Mode.
Manual Angle Lock
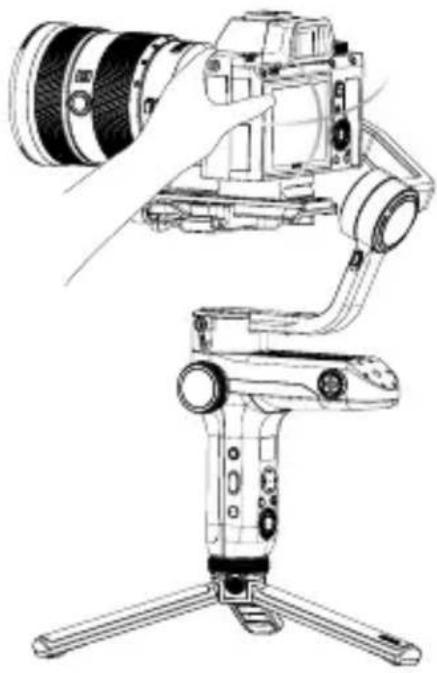
Under pan following mode and locking mode, you can manually rotate the camera to a certain angle, then loosen your grip and the camera position will be fixed. Under pan following mode, you can manually adjust the angle of the tilt axis. Under locking mode, you can manually adjust the angle of the pan axis and tilt axis.
natural_image
Line drawing of a DSLR camera with adjustable arm and tripod base (no text or symbols)Download APP

text_image
QR code with embedded red logo containing Chinese characters 'ZHEYER'Scan the left QR code (Android 5.0 and above, IOS 9.0 and above) or search "ZY Play" directly in the app store to download "ZY Play".
① Paired with the APP "ZY Play" designed for WEEBILL-S, it can provide you better use of various functions.
② The ZHIYUN APP is subject to regular update without notice.
How to Connect Stabilizer to Smartphone
- Power on the stabilizer and connect the stabilizer with your camera with a camera control cable. Turn on your phone Bluetooth.
2.Open "ZY Play" and choose the corresponding product page for WEEBILL-S. Tap "Connect" to connect with the stabilizer via the corresponding Bluetooth name. (Please check the USER ID: XXXX on the bottom of the quick-release plate to find the stabilizer Bluetooth name, or check it on "Menu"- "about".)
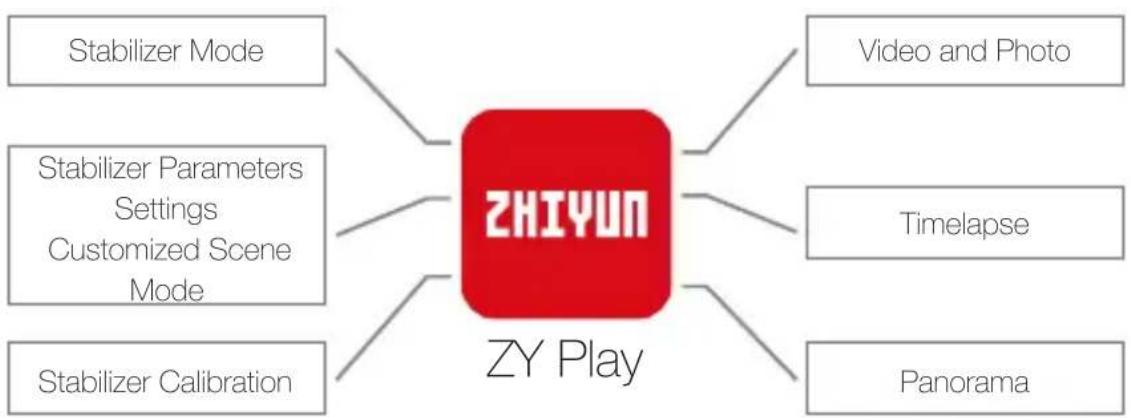
Overview of the Main Functions
flowchart
graph TD
    A["ZHIYUN ZY Play"] --> B["Stabilizer Mode"]
    A --> C["Video and Photo"]
    A --> D["Stabilizer Parameters Settings\nCustomized Scene Mode"]
    A --> E["Stabilizer Calibration"]
    A --> F["Timelapse"]
    A --> G["Panorama"]
When do you need to calibrate the stabilizer?
Please calibrate the stabilizer when necessary.
| Calibration Reason How to calibrate | |
| 1. A slight deviation is found in the tilt angle of the camera in level position after startup.2. A slight deviation is found in the roll angle of the camera in level position after startup.3. Frequent small angle correction is found when the camera is in level position while the stabilizer stays still. | Initializing the stabilizer |
| 1. A slight deviation is found in the level position after the initialization of the stabilizer.2. The stabilizer has not been used for a long time.3. The stabilizer undergoes significant temperature differences in operating environments. | Six-side calibration |
| A slight deviation is found in the tilt or roll angle of the camera in level position after initialization and six-side calibration of the stabilizer. | Fine-tune motor force |
Initialization Method
- Correctly install the batteries.
- Hold the camera mounting plate with one hand, long-press the power button to start up the stabilizer; long-press the POV mode button to enter standby mode while keeping hold of the camera mounting plate through the whole process in case of start-up failure.
- Put the stabilizer still on a table surface, and wait for about 30 sec., and the stabilizer will automatically complete initialization.

natural_image
Technical line drawing of a mechanical device with no visible text or symbolsSix-side Calibration
- Six-side calibration via APP:
According to the method introduced in "APP Operations", please connect the stabilizer with APP, and enter "Calibration", then conduct the six-side calibration according to the prompt.
- Six-side calibration via "Zhiyun Gimbal Tools"
Power on the stabilizer and turn it to standby mode. Connect the USB port on the stabilizer with a computer via a Type-C USB cable. Launch Zhiyun Gimbal Tools, click "open" on the top and click "calibration" on the bottom. Please conduct the process according to the following steps. A "√" mark will appear after the calibration is completed.
- Six-side calibration via OLED display guide
Power on the stabilizer and enter standby mode, then press menu and rotate the dial to "calibration" option. Single press Right to confirm the selection, and single press "yes" to start. Conduct the steps appearing on the stabilizer display screen. After the calibration is completed, a "√" mark will appear on the display screen.

① Please refer to the six-side calibration steps below. After the calibration is completed, please restart the stabilizer.
② In simple terms, six-side calibration is to place all six sides of the phone holder in vertical to a level surface respectively.
STEP 1
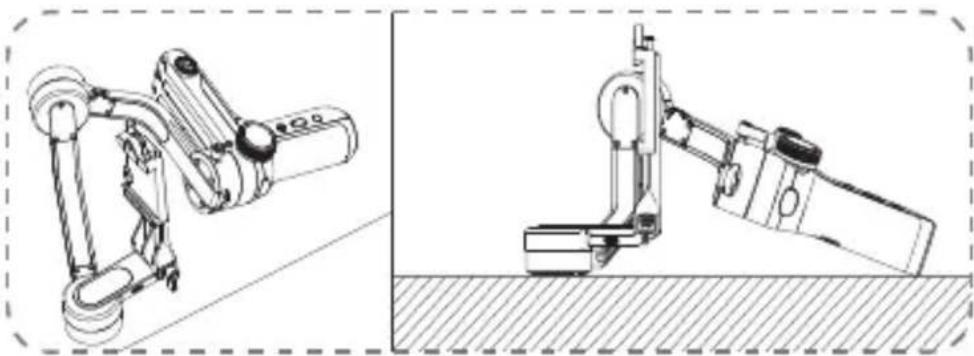
natural_image
Technical line drawing of a robotic arm and a mechanical device (no text or symbols)STEP 2
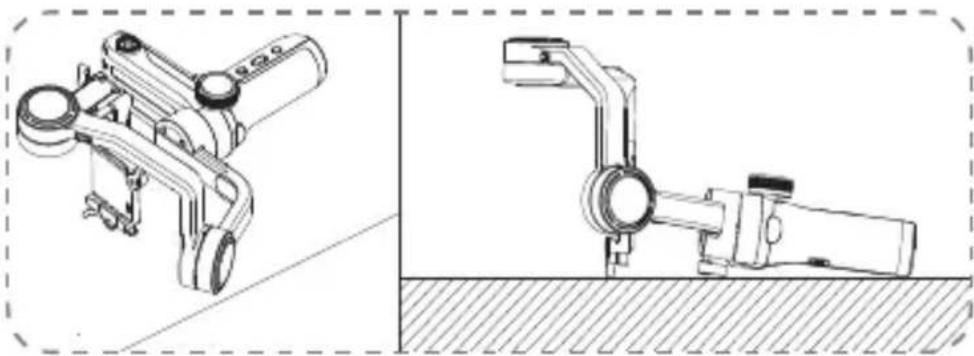
natural_image
Technical line drawing of mechanical components, one showing a bracket assembly and the other a bracket with a handle (no text or symbols)STEP 3
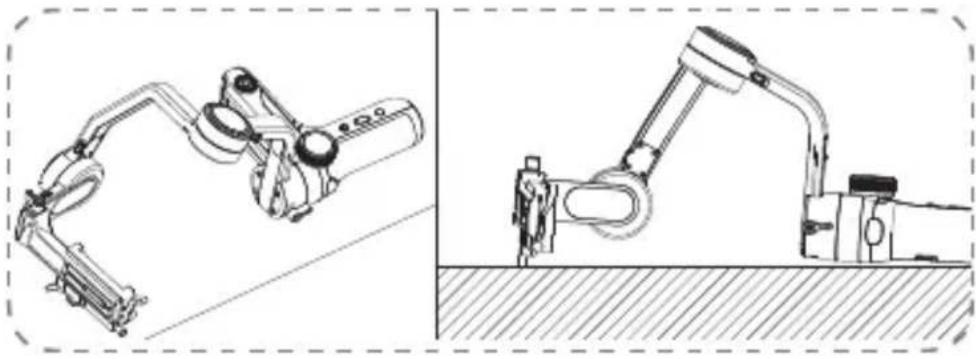
natural_image
Technical line drawing of a robotic arm and a robotic arm with a human figure, shown from different angles (no text or symbols present)STEP 4
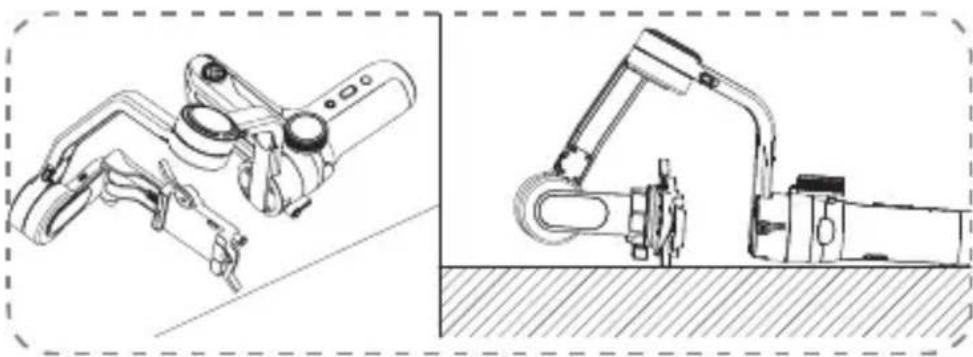
natural_image
Technical line drawing of a robotic arm assembly (no text or symbols present)STEP 5

natural_image
Technical line drawing of a robotic arm and a mechanical device on a surface (no text or symbols)STEP 6
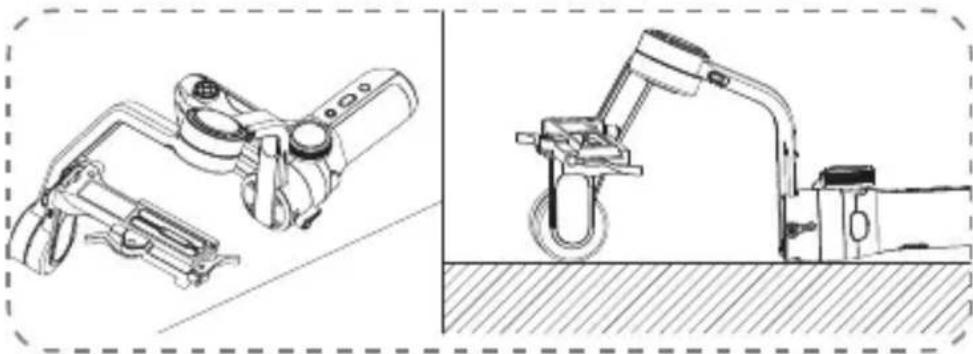
natural_image
Technical line drawings of mechanical components, one showing a bracket and the other a U-shaped clamp (no text or symbols)Motor Fine-tuning
According to the method introduced in "APP Operations", please connect the stabilizer with APP, and enter "Settings" and select "motor calibration", then set the fine-tuning value of the tilt axis and roll axis according to actual needs.
Stabilizer Firmware Update
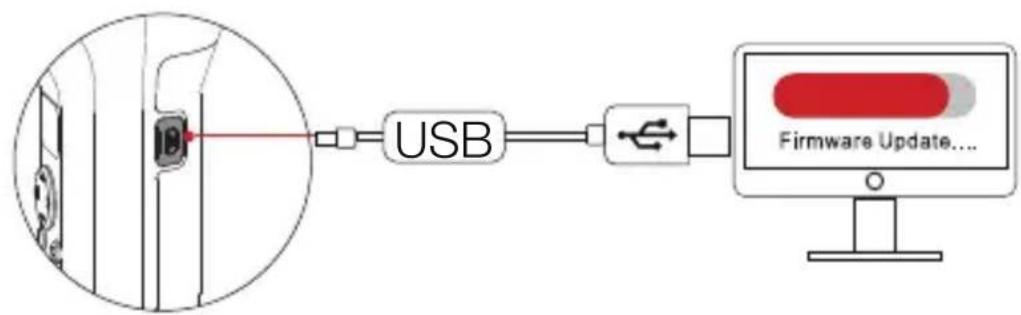
flowchart
graph LR
    A["Device Interface"] --> B["USB"]
    B --> C["Firmware Update..."]
Method 1 : Connect the USB port on the stabilizer with a computer via a Type-C USB cable to conduct the stabilizer firmware update and online calibration.
- Open ZHIYUN official website www.zhiyun-tech.com. Click "Download"-"Firmware" on the homepage. Find and download the USB driver and the latest firmware for your stabilizer model. (For Mac and WIN10, you don't need to download USB driver.)
- Install the downloaded driver.
- Power on the stabilizer and enter standby mode.
- Launch "Zhiyun Gimbal Tools", then conduct firmware update according to the operations in the firmware update tutorial.
Method 2 : Update via APP. According to the method introduced in "APP Operations", connect the stabilizer to APP. If a firmware update prompt pops up on APP, please tap to update.
Before the firmware update, please ensure that the power level of both stabilizer and phone remain above 50%. Do not exit APP or transfer APP to the background. Please pay attention to the APP prompt information.
Product Model: CR110
| Min. Standard Max. Remark | ||
| Operating voltage | 6.8V - 8.4V | |
| Operating current | 250mA - 3000MA | |
| Output Voltage (Micro USB port) | -5V - | |
| Output Current (Micro USB port) | -1000mA - | |
| Tilt Mechanical Range | -132° 314° +182° | |
| Roll Mechanical Range | -67° 314° +247° | |
| Pan Mechanical Range | -360° - | |
| Operation Temperature | -10°C 25°C 45°C | |
| Battery Capacity | One 2600mAh | Two 18650 Li-ion Batteries |
| Battery Runtime | -12h 14h Lab Data 1 | |
| Charging Time | -2.5h - Lab Data 2 | |
| Stabilizer Weight | -≈895g - | |
| Quick Release Plate Weight | -≈120g - | |
| Battery Weight | -≈95g - | |
| Tripod Weight | -≈180g - | |
| Bluetooth | Bluetooth 5.0 | |
"Lab Data 1": The 12h runtime is concluded via a complete test session in which the stabilizer is well balanced with ILCE-7RM3 camera with Vario-Tessar T* FE 24-70mm F4 ZA OSS installed. The ambient temperature is 25°C and it is placed at rest throughout the test session.
"Lab Data 2": This test is conducted with a 5V/2A rated power adapter at a specified temperature of 25^ C. The actual charging time varies with environmental factors.
All the data in this guide is gathered from internal experiments of ZHIYUN laboratories. Under different scenarios, data is different to some extent. Please refer to the actual use of WEEBILL-S.
Thank you for purchasing ZHIYUN WEEBILL-S. The information contains herein affects your safety, legitimate rights and obligation. Please read this instruction carefully to ensure proper configuration before use. Failure to read and follow this instruction and warnings herein may result in serious injury to you or bystanders, or damage to your device or property. Guilin Zhishen Information Technology Co., Ltd reserves all rights for final explanation on this instruction and other documents related to WEEBILL-S. The information is subject to update without notice. Please visit www.Zhiyun-tech.com to obtain the latest product information.
By using this product, you hereby signify that you have read this document carefully and that you understand and agree to abide by the terms and conditions herein. You agree that you are solely responsible for your own conduct while using this product, and for any consequences thereof. You agree to use this product only for purposes that are proper and in accordance with all terms, precautions, practices, policies and guidelines ZHIYUN has made and may make available.
ZHIYUN accepts no liability for damage, injury or any legal responsibility incurred directly or indirectly from the use of this product. Users shall observe safe and lawful practices including, but not limited to, those set forth herein.
ZHIYUN™ is the trademark of Guilin Zhishen Information Technology Co., Ltd. (hereinafter referred to as "ZHIYUN" or "ZHIYUN TECH") and its affiliates. All product names or marks referred to herein are trademarks or registered trademarks of their respective holders.
Reading Tips
Legends:

Hints and Tips

portant
Warnings
Read the ENTIRE User Guide to become familiar with the features of this product before operating. Failure to operate the product correctly can result in damage to the product or personal property and cause serious injury. This is a sophisticated product. It must be operated with caution and common sense and requires some basic mechanical ability. Failure to operate this product in a safe and responsible manner could result in injury or damage to the product or other property. This product is not intended for use by children without direct adult supervision. DO NOT use with incompatible components or in any way otherwise as mentioned or instructed in the product documents provided by ZHIYUN. The safety guidelines herein contain instructions for safety, operation and maintenance. It is essential to read and follow all of the instructions and warnings in the User Guide, prior to assembly, setup or use, in order to operate the product correctly and avoid damage or serious injury.
Safe Operation Guidelines
CAUTION:
- WEEBILL-S is a high-precision control device. Damage may be caused to WEEBILL-S if it is dropped or subject to external force, and this may result in malfunction.
- Make sure the rotation of the gimbal axes is not blocked by external force when WEEBILL-S is turned on.
- WEEBILL-S is not waterproof. Prevent contacts of any kind of liquid or cleaner with WEEBILL-S. It is recommended to use dry cloth for cleaning.
- Protect WEEBILL-S from dust and sand during use.
WARNING
To avoid fire, serious injury, and property damage, observe the following safety guidelines when using, charging, or storing your batteries.
Battery Use
- Prevent the batteries to come into contact with any kind of liquid. Do not leave batteries out in the rain or near a source of moisture. Do not drop the battery into water. If the inside of the battery comes into contact with water, chemical decomposition may occur, potentially resulting in the battery catching on fire, and may even lead to an explosion.
- If the battery falls into water with the stabilizer during use, take it out immediately and put it in a safe and open area. Maintain a safe distance from the battery until it is completely dry. Never use the battery again, and dispose of the battery properly as described in the Battery Disposal section below.
- If the battery catches fire, use water, water spray, sand, fire blanket, dry powder, or carbon dioxide fire extinguisher immediately to put out the fire. Battery-caused fire may lead to explosion. Please extinct the fire by applying the methods recommended above according to the actual situation.
- Never use non-ZHIYUN batteries. If replacement or backup is needed, please purchase new batteries from ZHIYUN's official website or authorized channels. ZHIYUN takes no responsibility for any damage caused by non-ZHIYUN batteries.
- Never use or charge swollen, leaky, or damaged batteries. Never use or charge if the battery smells, or overheats (exceeding maximum temperature of 160^ F/71°C). If your batteries are abnormal, contact ZHIYUN or a ZHIYUN authorized dealer for further assistance.
- The battery should be used within the temperature range from -10^ to 45^ . Use of battery in environments above 45^ may lead to a fire or explosion. Use of battery below -10^ may lead to serious battery damage.
- Do not use the battery in strong electrostatic or electromagnetic environments. Otherwise, the battery protection board may malfunction.
- Do not disassemble or use any sharp object to puncture the battery in any way. Otherwise, the battery may leak, catch fire or explode.
- Do not mechanically strike, crush, or throw the battery. Do not place heavy objects on the battery or charger.
- Electrolytes inside the battery are highly corrosive. In case of accidental contact of any electrolytes with your skin or eyes, rinse immediately with water for at least 15 minutes and seek medical advice as soon as possible.
- Do not use the battery if it has been involved in a crash or heavy impact.
-
Do not heat the battery and never put the battery in a microwave oven or in a pressurized container.
-
Do not place the battery on a conductive surface (such as a metal desk surface, eye-glasses, watch, jewelry, etc.)
- Prevent use of wires or other metal objects that could cause positive and negative short-circuit to the battery.
- If the battery terminal is dirty, wipe it with a clean, dry cloth. Otherwise it will cause a bad battery connection, which may result in energy loss or charging failure.
Battery Charging
- The battery will automatically stop charging once it is full. Please disconnect the battery and the charger when fully charged.
- Do not attach the batteries to a wall outlet or car charger socket directly. Always use a ZHIYUN approved adapter for charging. ZHIYUN takes no responsibility if the battery is charged using a non-ZHIYUN charger.
- Do not put the battery and charger near flammable materials or on flammable surfaces (such as carpet or wood). Never leave the battery unattended during charging to prevent any accident.
- Do not charge the battery immediately after use, because the battery temperature may be too high. Do not charge the battery until it cools down to normal room temperature. Charging the battery with its temperature over 45^ C or lower than 0^ C may lead to leakage, overheating, or damage.
- Examine the charger before use, make sure there is no damage to the enclosure, cord, plug, or other parts. Never use a damaged charger. Do not clean the charger with any liquid containing alcohol or other flammable solvents. Disconnect the charger when not in use.
Battery Storage
- Keep batteries out of the reach of children and pets.
- Do not leave the battery near heat sources such as a furnace or heater, or inside of a vehicle on hot days. Never expose the battery in any environment with temperature of over 60°C. The ideal storage temperature is 22°C-28°C.
- Store batteries in a dry environment.
- Do not leave the battery unused for too long after it has been completely discharged to prevent over-discharge of battery which may result in battery damage and permanent failure.
Battery Maintenance
- Do not over-charge or over-discharge the battery, which will damage the battery;
- The battery performance will be affected for not being used for a long time:
- Never use the battery when the temperature is too high or too low:
- Do not store the battery in any environment with a temperature of over 60°C.
Battery Disposal
- Please fully discharge the battery before putting it in the designated recycling bin. Batteries contain hazardous constituents and it is forbidden to put the battery in general waste bin. For related details please abide by the local laws and regulations on battery recycling and disposal.
- If the battery cannot be fully discharged, never put it in battery recycling bin. Please contact battery recycling companies for a proper solution.
Warranty Period
- Customers are entitled to replacement or free repair service in case of quality defect(s) found in the product within 15 days upon receipt of the product.
- Customers are entitled to free repair service from ZHIYUN for any product proven defective in material or workmanship that results in product failure during normal consumer usage and conditions within the valid warranty period, which is 12 months counting from the date of delivery.
This warranty does not apply to the followings
- Products subjected to unauthorized repair, misuse, collision, neglect, mishandling, soaking, accident, and unauthorized alteration.
- Products subjected to improper use or whose labels or security tags have been torn off or altered.
- Products whose warranty has expired.
- Products damaged due to force majeure, such as fire, flood, lightening, etc.
Warranty Claim Procedure
- If failure or any problem occurs to your product after purchase, please contact a local agent for assistance, or you can always contact ZHIYUN's customer service through email at SERVICE@ZHIYUN-TECH.COM or website at WWW.ZHIYUN-TECH.COM.
- Your local agent or ZHIYUN's customer service will guide you through the whole service procedure regarding any product issue or problem you have encountered. ZHIYUN reserves the right to reexamine damaged or returned products.
Customer Information
Customer Name: Contact No.:
Address:
Sales Information
Sales Date: Prod.Serial No:
Dealer:
Contact No.:
#1 Maintenance Record
Service Date: Signature of Repairman:
Cause of Problem:
Service Result: □ Solved □ Unsolved
□ Refunded (Replaced)

text_image
QR code with embedded red logo containing text 'ZT PLAT'Website Weibo

text_image
QR code with embedded red logo containing Chinese characters 'CENBE'
text_image
QR code with embedded red logo containing Chinese characters 'ZHEVIER'Vimeo

text_image
QR code with embedded red logo containing Chinese characters 'ZHEYIE'Google+

text_image
QR code with embedded red logo containing Chinese characters in centerFacebook (Zhiyun Support)

text_image
QR code with embedded red logo containing Chinese characters 'ZON' in the center.Facebook (Zhiyun Tech)

text_image
QR code with embedded red logo containing Chinese characters 'ZHEVIER'Youku

text_image
QR code with embedded red logo containing Chinese charactersYoutube

text_image
QR code with central red logo containing the word 'ZHEVER'
text_image
QR code with embedded red logo containing Chinese characters 'LIONB'Tel: +86 400 900 6868
USA Hotline: +1 808-319-6137,9:00-18:00 GMT-7,Mon-Fri
Europe Hotline: +49 (0) 61018132180, 10:00-17:00 GMT+1, Mon-Fri
Web: www.zhiyun-tech.com
E-mail: service@zhiyun-tech.com
Address: 09 Huangtong Road, Tieshan Industrial Zone, Qixing District, Guilin, 541004,
Guangxi, China
Certificate of Quality
This product is confirmed to meet quality standards and permitted for sale after strict inspection.
QC Inspector:

text_image
PQ O2 检 PASS QCPlease download the latest version from www.zhiyun-tech.com
This document is subject to change without notice.
ZHIYUN ^TM is a trademark of ZHISHEN.
All other trademarks cited herein are the property of their respective owners.
Copyright © 2020 ZHISHEN. All rights reserved.
ZHIYUN-TECH.COM