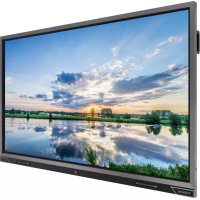
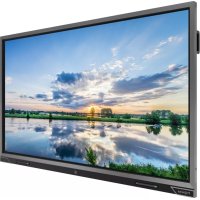
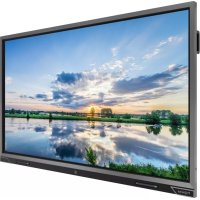
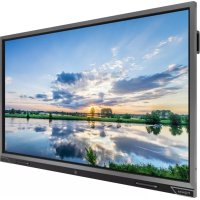
PW.1.15086.1001 - Monitor Prowise - Free user manual and instructions
Find the device manual for free PW.1.15086.1001 Prowise in PDF.


| Product Type | Interactive Touchscreen Monitor |
| Model Number | PW.1.15086.1001 |
| Screen Diagonal | 86 inches |
| Panel Type | Ultra HD LED - IPS |
| Resolution | 3840 x 2160 @ 60Hz |
| Brightness | 350 cd/m² |
| Contrast Ratio | 1200:1 |
| Viewing Angle | 178° |
| Touch Technology | HApro 2 (IR Touch) |
| Multi-Touch Points | 20 points |
| Multi-Writing Points | 10 points |
| Glass Thickness | 4 mm |
| Glass Hardness | Mohs 7 |
| Audio System | 2.1 sound (3 speakers: 2x16W + 1x15W subwoofer) |
| Microphone | Microphone array (4 wide area microphones) |
| ProWrite® Pens | 2 passive pens with dual tip size and color |
| Operating System | Prowse Central with Android |
| Connectivity | 3x HDMI 2.0 (1 with ARC/CEC), USB 2.0/3.0, RS232, LAN, Wi-Fi |
| Power Supply | AC 100-240V ~50/60Hz |
| VESA Mount | 700 x 400 mm |
| Certifications | CE, FCC, RoHS, UL, CB, RCM, ENERGY STAR |
| Warranty | Up to 8 years (5 years standard) |
| Package Contents | Touchscreen, remote control, batteries, WiFi module, antennas, ProWrite pens, NFC cards, pen tips, power cable, USB touch cable, HDMI cable, manuals |
Frequently Asked Questions - PW.1.15086.1001 Prowise
User questions about PW.1.15086.1001 Prowise
0 question about this device. Answer the ones you know or ask your own.
Ask a new question about this device
Download the instructions for your Monitor in PDF format for free! Find your manual PW.1.15086.1001 - Prowise and take your electronic device back in hand. On this page are published all the documents necessary for the use of your device. PW.1.15086.1001 by Prowise.
USER MANUAL PW.1.15086.1001 Prowise
User manual - Prowse Touchscreen
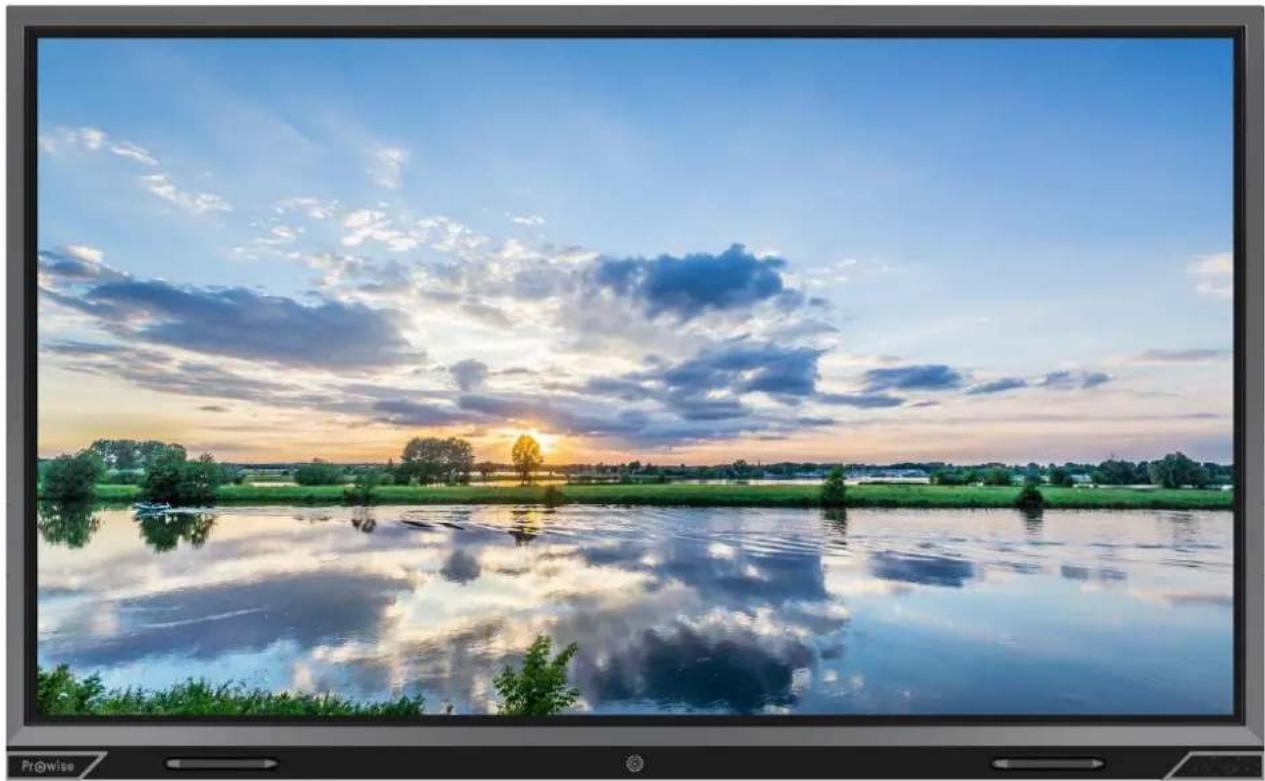
natural_image
Scenic sunset view over a calm lake with scattered clouds and green fields, no text or symbols visible.This user manual is applicable to Prowse Touchscreens with model number:
- PW.1.15055.0001
- PW.1.15065.0001
- PW.1.15075.0001
- PW.1.15086.0001
1. Index
1. Index 2
2. Important safety instructions 4
2.1. Safety 4
2.2. Placement 4
2.3. Repair 5
2.4. Environment 5
2.5. Recycling and disposal 5
Packaging 5
Device 6
Batteries 6
3. Installation 6
3.1. Place of installation 7
3.2. Cabling 7
3.3. WiFi module 8
3.4. Install the OPS PC module 9
4. At first glance 11
4.1. Product Specifications 12
4.2. Package contents 15
4.3. Product overview 17
4.4. Touchscreen control 18
4.5. The control button 20
4.6. Microphone 20
4.7. NFC card reader and remote control receiver 21
4.8. ProWrite® technology 22
4.9. Cleaning 23
5. Getting started
5.1. Turn the touchscreen on and off 24
5.2. Starting your device for the first time 27
5.3. Connect to a network 28
5.4. Adjust volume 29
6. Prowse Central
6.1. Prowse Central home 30
6.2. The Prowse Central menu 31
7. Adjust settings
8. OTA (Over The Air) updates 32
9. Remote control
9.1. Schematic view and explanation of the buttons 33
9.2. Angle at which the remote control is used 35
9.3. Replacing the batteries of the remote control 36
10. Connect peripherals 37
10.1. Connect the Prowse Touchscreen to an external PC 37
10.2. Connecting the Prowse Touchscreen to audio equipment 38
10.2.1. Connecting headphones 38
10.2.2. Connecting an amplifier 39
10.2.3. Connecting using the HDMI port (ARC) 40
10.2.4. Connecting using the HDMI port (CEC) 41
Appendix 42
RS232 protocol and code list 42
Protocol description 43
RS232 code list 43
Polling code list 46
2. Important safety instructions

WARNING! Before using the Prowse Touchscreen, please read this user manual and the safety instructions (separate document) carefully. Follow the warnings stated on the device, the user manual and the safety instructions. Always keep the safety instructions and the user manual within reach.
2.1. Safety
- Never open the housing of the touchscreen! You can get an electric shock or cause a short circuit.
- Do not use the touchscreen during thunderstorms and unplug the power cable to avoid damage due to a lightning strike.
- Make sure your touchscreen does not get wet! This could lead to short circuiting and electrocution hazard. Do not install the device close to water and do not place objects containing liquid on- or next to it.
- Excessive sound volume causes permanent hearing damage. If the device is used at high sound volume for an extended period of time, it can cause hearing damage to the listener.
- Only use components and accessories supplied by Prowse.
• Always turn off the touchscreen and unplug it from the electrical outlet when changing a module.
- Do not insert objects into the openings of the touchscreen that are not intended for this purpose. This could result in a short circuit or even fire.
2.2. Placement
- We recommend you don't install the touchscreen yourself or by a third party. Let Prowse or a certified Prowse partner install or mount the touchscreen to avoid possible damage. Prowse can not be held responsible for any damage or injury caused by incorrect installation by third parties. Damage due to incorrect installation by third parties will not be covered by the warranty.
- Do not install or place the touchscreen onto an unstable wall or floor.
- Do not use the touchscreen in an industrial environment where it will frequently get exposed to vibrations and dust.
- Do not place the touchscreen close to equipment that generates heat.
- Make sure that all ventilation openings, located at the back of the touchscreen, stay uncovered, so hot air can escape.
- Only connect the touchscreen to an earthed electrical socket.
2.3. Repair
Never repair the touchscreen yourself!
WARNING! Warning for electrified parts! Never open the housing of the touchscreen! You can get an electric shock, cause a short circuit or even a fire. This can cause injuries or damage to yourself and/or the touchscreen.
Always contact Prowse or a certified partner in case of a defect, to avoid damage. Contact information can be found at: www.prowse.com/en/contact.
2.4. Environment
- Unplug the power cable if the screen will not be used for an extended period of time.
• The power consumption in standby mode is <0.5 watts.
• The Prowse Touchscreen is ENERGY STAR-certified. - When the touchscreen is no longer usable, it can be disposed of at a designated collection point.

PLEASE NOTE! When WOL and WOS are activated, the power consumption in standby mode will increase!
2.5. Recycling and disposal
If you have questions about the correct disposal of your touchscreen, please contact Prowse or a certified partner.

natural_image
Recycling symbol composed of three chasing arrows forming a triangle (no text or labels)Packaging
The device is packaged to prevent transport damage. Packaging consists of resources that can be reused or recycled.
natural_image
Symbol of a trash bin crossed with no text or numbers, representing waste sorting or disposal (no text present)Device
Do not dispose of the device with household waste at the end of its lifespan. Ask about the possibilities for an environmental friendly and responsible method of disposal.
natural_image
Symbol of a trash bin crossed out by two diagonal lines (no text or numbers present)Batteries
Depleted or defective batteries do not belong in the household waste. Dispose of them at a collection point for empty batteries. The remote control uses 1.5V AAA batteries.
3. Installation
A Prowse certified mechanic will install the Prowse Touchscreen on delivery and will ensure the screen is ready for use. We do not recommend it, however if you want to install the screen yourself or by someone else, then please follow the steps below:
- Do not install the touchscreen alone.
- Use a certified Prowse wall bracket to install the Prowse Touchscreen on a wall.
- Use a Prowse VESA bracket when assembling the screen on a Prowse lift system.
- Please ensure the wall is strong enough to carry the weight of the touchscreen.
- Connect the cables (which cables you require depend on the external devices you use or other external sources like a lift system).
- If you are using an OPS PC module, ensure the module is inserted and locked correctly. Install the PC module as described in the chapter 'Install PC module'.
- Make sure to only connect the power cable when the above elements have been connected and only use the power cable supplied by Prowse.

CAUTION! Prowse can not be held responsible for any damage or injury caused by the incorrect installation of the touchscreen done by third parties. Damage to the touchscreen, caused by incorrect installation by third parties, will not be covered by the warranty. Always contact Prowse or a certified partner if you have any questions about the installation.
3.1. Place of installation
Please follow the instructions below, these will help guarantee reliable functioning and a long lifespan of your touchscreen.
Keep the touchscreen and all connected devices away from water and avoid dust and heat. Do not place the touchscreen near devices which produce heat or in the vicinity of water. Non-compliance with these instructions can lead to faults or damage to the touchscreen.
The Prowse Touchscreen can be used at an ambient temperature from 0 °C to +38 °C ( 32 °F to 100,4 °F ) and relative humidity from 10% to 90% (without condensation).
When switched-off, the touchscreen can be stored at a temperature from -20 °C to 60 °C (-4 °F to 140 °F) and relative humidity from 10% to 90% (without condensation).
Install the touchscreen on a stable, vibration-free floor/wall to avoid damage to the touchscreen. Make sure that all of the ventilation openings, located at the back of the screen, stay uncovered, so hot air can escape.
WARNING! Disconnect the power cable during a thunderstorm. For extra safety, we recommend using an overvoltage protection device, to prevent the touchscreen from sustaining damage as a result of power surges or lightning strikes.
3.2. Cabling
Only use the power cable supplied by Prowse to connect the Prowse Touchscreen to the mains power supply. The touchscreen must be placed close to the electrical outlet and the electrical outlet should be
easy to reach. Cables should not be laid in the walkway to avoid anyone stepping on them or tripping over them. Do not place any objects on the cables to avoid damaging them. Prevent electrical overloads when using a distributing plug, as this can lead to a short circuit.
For extra safety, we recommend using an overvoltage protection device to prevent the touchscreen from sustaining damage as a result of power surges or lightning strikes.

CAUTION! Only plug the power cable into grounded electrical outlets with AC 100-240V \~50/60Hz. If you are not sure about the power supply at the installation location, consult your energy company.
3.3. WiFi module
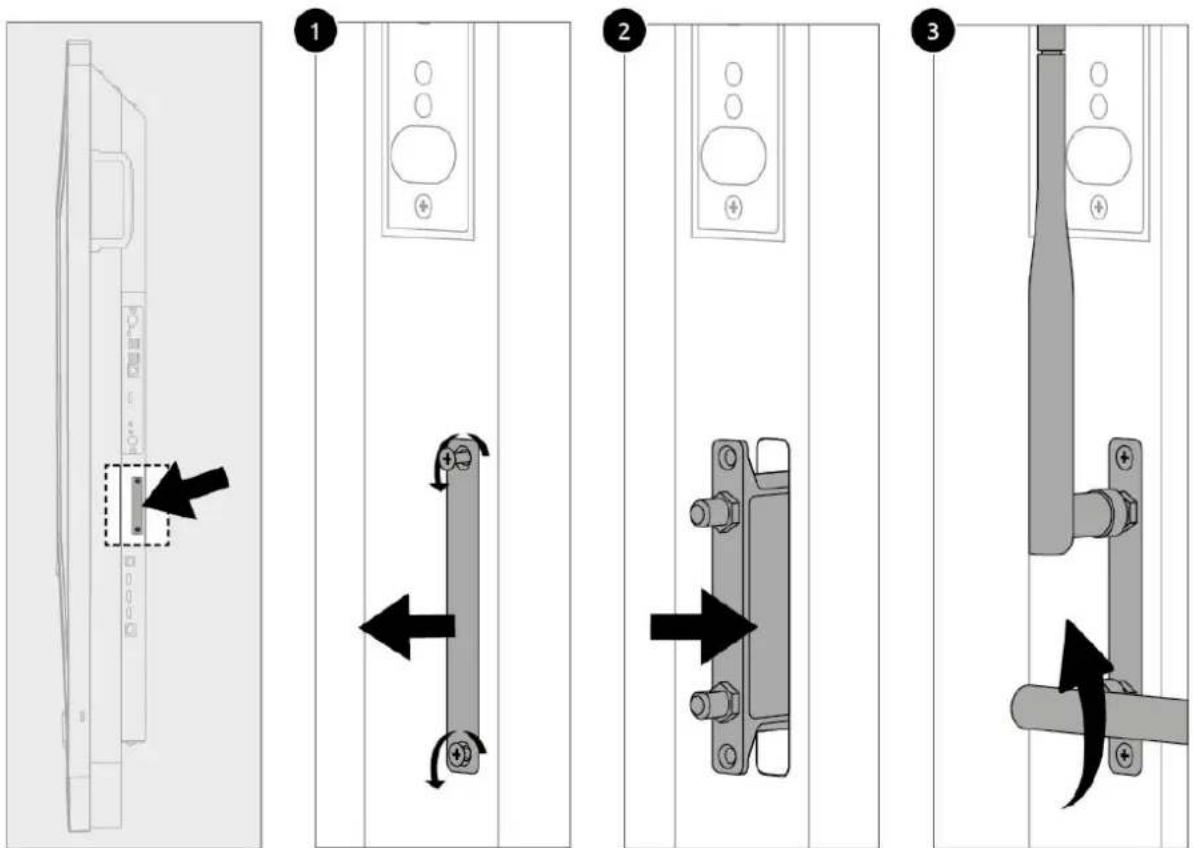
The Prowse Touchscreen is equipped with a WiFi module. Follow the steps below to successfully install the WiFi module.
text_image
Diagram illustrating three-step assembly steps of a door handle mechanism, showing lock, latch, and lock assembly with directional arrows.
HAZARD WARNING! Choking hazard. This product contains small parts that form a choking hazard for children. Keep this product out of reach for children when not installed into the touchscreen.
WARNING! Please make sure the power cable of the Prowse Touchscreen is disconnected before installation.
3.4. Install the OPS PC module
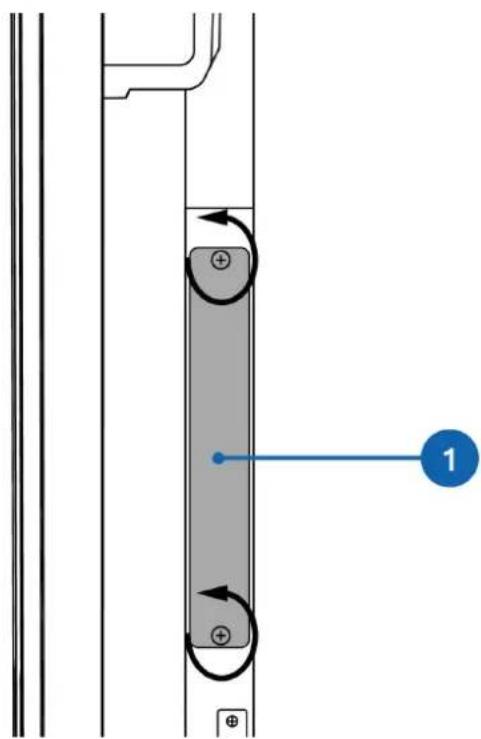
Follow the steps below to install the OPS PC module: (Please note the OPS PC module is optional)

CAUTION! Please ensure the power cable is not connected to the main power supply while installing the OPS PC module.
text_image
Technical diagram showing a vertical panel with two circular components and directional arrows, labeled with number 1.- Unscrew the screws
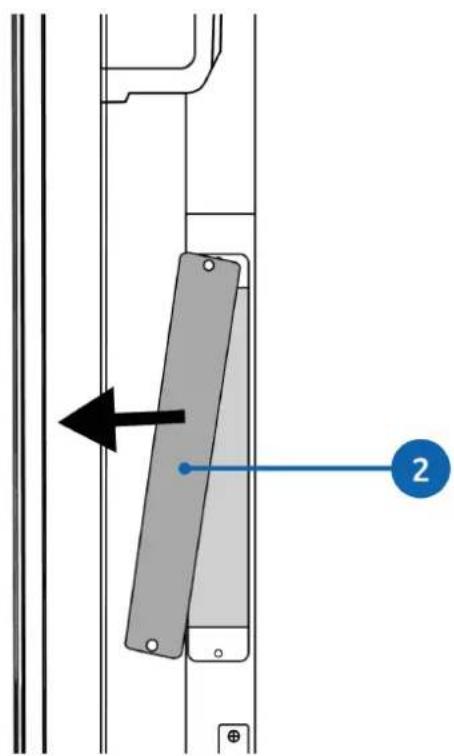
text_image
Technical diagram showing a mechanical component with labeled dimension '2' and directional arrow- Remove the cover plate
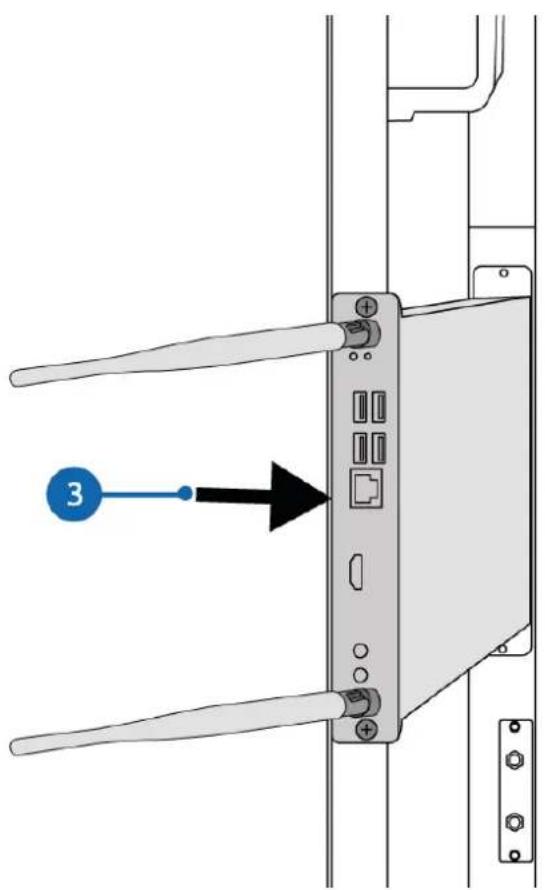
text_image
3- Insert the OPS PC module into the slot
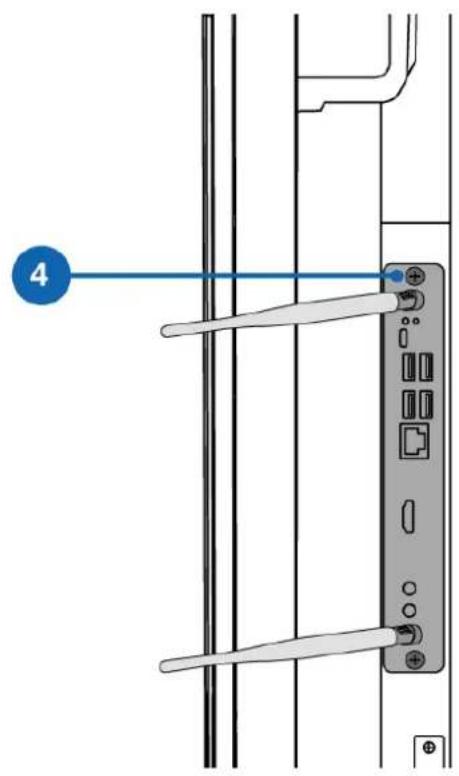
text_image
Diagram showing a device with labeled components and a blue arrow pointing to component 4- Tighten the lock screw of the PC module
4. At first glance
We recommend not to install the touchscreen yourself or by a third party. Have Prowse or a certified partner install or mount your touchscreen, to avoid possible damage.
Always adjust the screen to the correct height before use. Avoid standing in a stooped or bent posture and ensure that the ends of the screen are located within arm's reach.
In the optimal position of the screen, you can touch both the top and bottom of the screen without needing to stoop or reach far up. By positioning the screen properly, you can avoid physical problems that could result from an incorrect work posture. Avoid physical complaints caused by a poor posture.

DANGER! Risk of injury. Do not stand on a chair, stool or other object to operate the touchscreen. This especially applies to children! This involves a risk of falling that could result in serious injury. Ensure that the screen is installed at the correct height or that the lift is set to the correct height when the screen is used.
4.1. Product Specifications
Screen
| Bezel colour | Brushed aluminium (grey) |
| Diagonal | 55 inch / 65 inch / 75 inch / 86 inch |
| Panel type | Ultra HD LED - IPS |
| Resolution | 3840 x 2160 @ 60Hz |
| Glass plate | Anti-Glare Pro |
| Glass thickness | 4 mm / 0.16 inches |
| Glass hardness | Mohs 7 |
| Aspect ratio | 16:9 |
| Contrast ratio | 1200:1 |
| Brightness | 350 cd/m2 |
| Number of colours | 10 Bit (1.07B) |
| Viewing angle | 178° |
| Panel refresh rate | 60Hz |
Modules
| PC module slot | Yes, OPS slot |
Touch type
| Type | HApro 2 |
| Multi-touch | Yes (20 points) |
| Multi-writing | Yes (10 points) |
| Auto-calibration | Yes |
| Resistant to sunlight | Yes |
| Supported OS | Windows 7, 8.1 OS |
Audio
| Speakers | 2.1 sound (3 speakers) |
| Front speaker power | 2 x 16W (8Ω) |
| Subwoofer power | 1 x 15W (8Ω) |
| Dolby Audio | Yes |
Manufactured under license of Dolby Laboratories.
Dolby, Dolby Audio and the double-D symbol are trademarks of Dolby Laboratories.
| Microphone | |
| Type | Microphone array |
| Number of microphones | 4 |
| Auto switch (Windows/Central) | Yes |
| ProWrite® | |
| Number of pens | 2 passive pens |
| Multi-color writing | Yes |
| Multi-size writing | Yes |
| Special features | |
| Prowse Central | Yes |
| Over The Air updates (OTA) | Yes |
| NFC reader/writer | Yes |
| Connections | |
| HDMI 2.0 | 2 |
| HDMI 2.0 (CEC & ARC) | 1 (with CEC and ARC support) |
| Total HDMI 2.0 | 3 |
| VGA / DVI | Optional |
| DisplayPort | Optional |
| Audio output analog | 1 (3.5mm headphone Jack PJ3591 female) |
| Audio output digital | 1 (RCA composite female) |
| RS232 control | 1 (Sub-D, 9 pins) |
| AV in | 1 (including adapter to 3 x composite) |
| USB touch port | 1 (USB-B female) |
| USB 2.0 | 2 |
| USB 3.0 | 1 |
| Wi-Fi for online updates | Yes |
| General information | |
| Voltage | ~ 100-240 V (50/60Hz) |
| VESA standard | 55": 400x40065": 400x40075": 600x40086": 700x400 |
| Certifications | CE: EMC+LVD/FCC-IC/RoHS/UL+CB, RCM and ENERGY STAR |
| Warranty | 5 years standard (up to 8 years) |
| Environmental conditions | |
| Operation temperature | 0°C - 38°C / 32 - 100°F |
| Storage temperature | -20°C - 60°C / -4 - 140°F |
| Storage humidity | 10% - 90% |
| Operation humidity | 10% - 90% |
4.2. Package contents
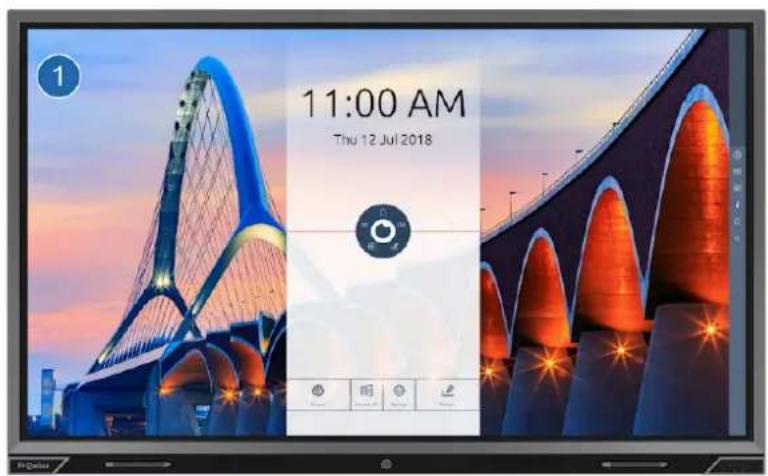
text_image
1 1:00 AM Thu 12 Jul 2018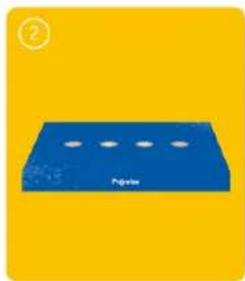
natural_image
Blue rectangular object with four small white holes on a yellow background (no text or symbols)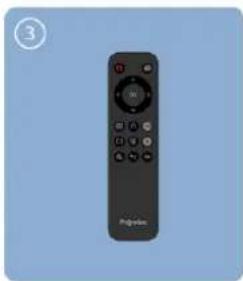
natural_image
Black remote control with a circular dial and 'Polarium' branding on the front (no additional text or symbols visible)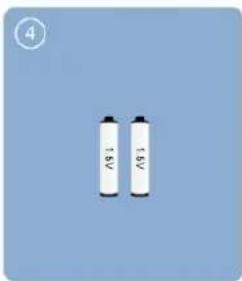
natural_image
Two cylindrical batteries labeled AS1 and AS2, placed on a plain blue background (no additional text or symbols)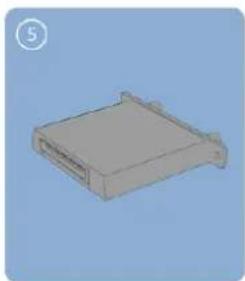
natural_image
3D rendering of a gray plastic electronic component with a rectangular body and mounting bracket (no text or symbols)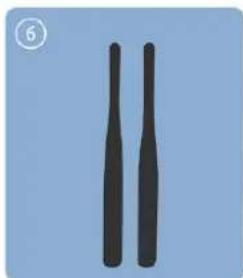
natural_image
Two black cylindrical objects against a light blue background (no text or symbols)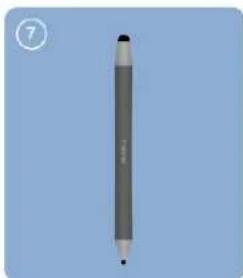
natural_image
Vertical cylindrical pencil with a black tip, against a plain blue background (no text or symbols)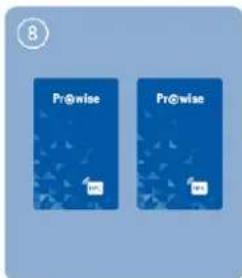
text_image
8 Pr@wise Pr@wise
natural_image
Two black icons on a light blue background: one with a curved shape and another with an upward arrow (no text or symbols)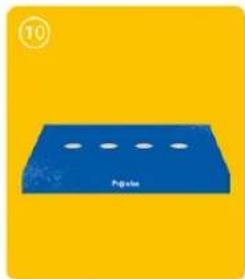
natural_image
Blue rectangular object with four circular holes on a yellow background (no text or symbols)
text_image
11 Quick Start Guide & Safety Instructions Copyright: CACOLO
text_image
12 Installation & Safety instructions Power Manufacturing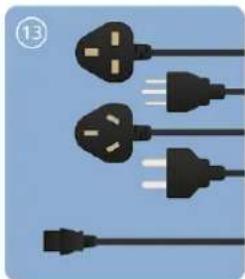
natural_image
Three black electrical plug wires against a blue background, no text or symbols visible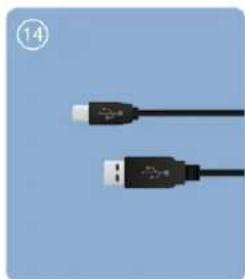
natural_image
Two black USB cables on a light blue background (no text or symbols visible)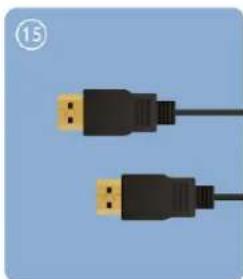
natural_image
Two USB connectors shown against a plain blue background (no text or symbols)-
Prowse Touchscreen
-
Accessory box:
-
Remote control
-
Batteries 1.5 V AAA (2x)
-
WiFi module
-
WiFi antennas (2x)
-
ProWrite® dual writing pen (2x)
-
NFC cards (2x)
-
Pen tips (4x)
-
Cable box:
-
Safety instructions Prowse Touchscreen
- User manual WiFi module
- EU, UK and US power cable
- USB touch cable
- HDMI cable

WARNING! Keep the packaging material, such as plastic foil, out of reach from children. Improper use of packaging materials can result in a suffocation hazard.

PLEASE NOTE! Check that what has been supplied is complete and contact our service desk within 5 days of delivery if it is incomplete. Please provide the serial number and a copy of the invoice.
4.3. Product overview
text_image
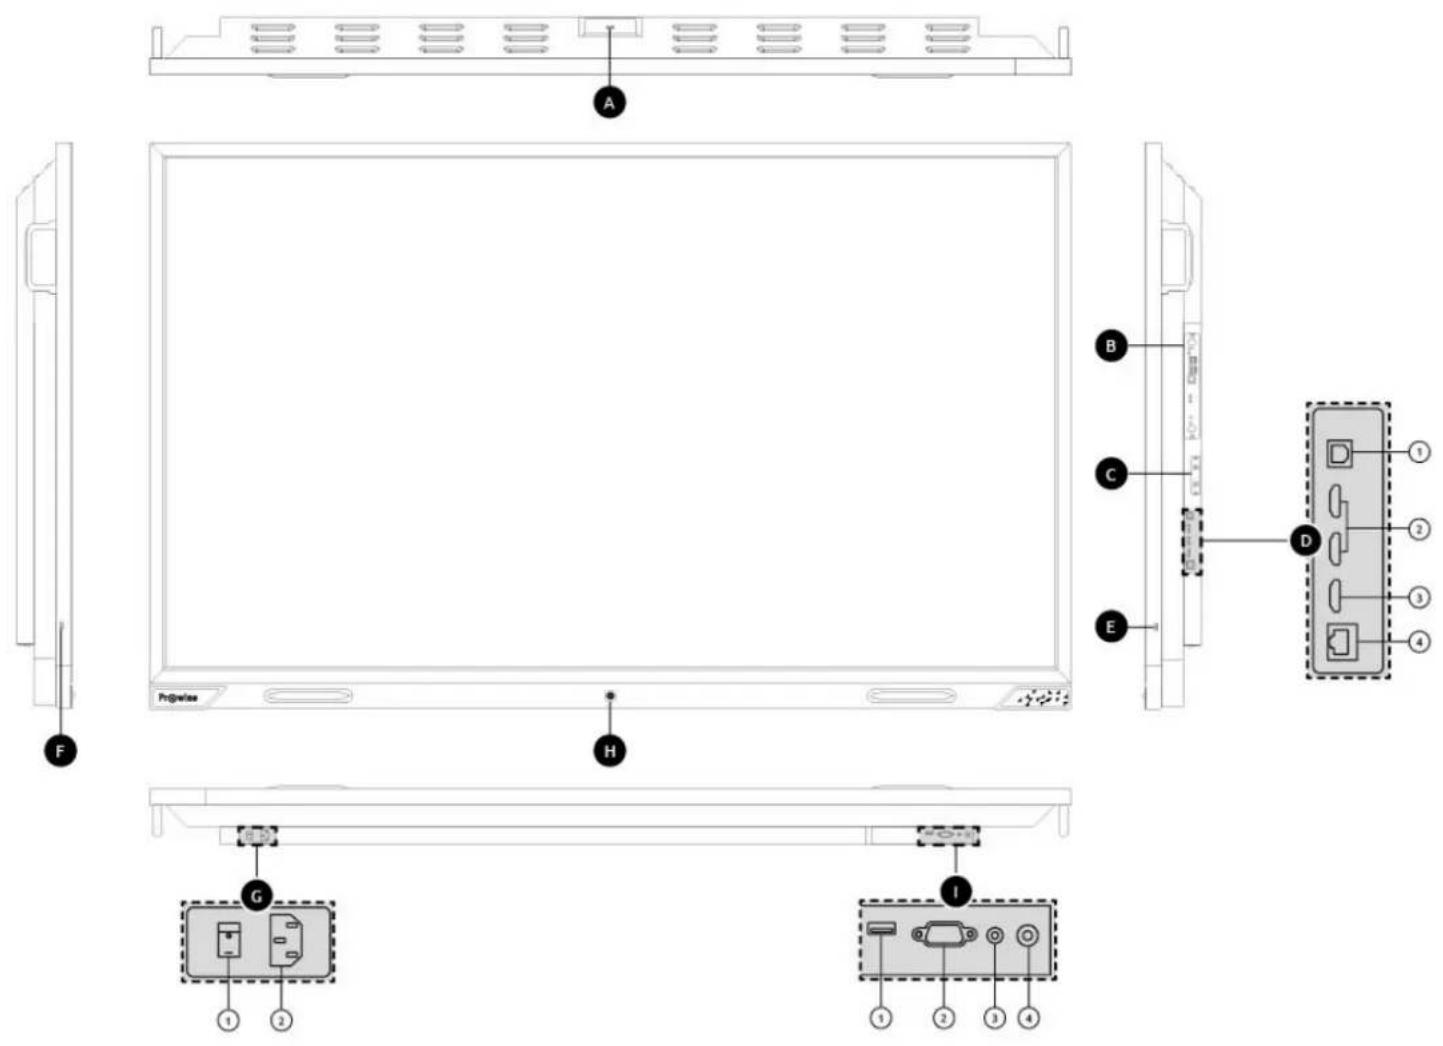
A B C D E F G H I 1 2 3 4A. USB 3.0 (external camera)
B. OPS slot (side)
C. WiFi Module slot (side)
D. External inputs / outputs (side)
- USB Type-B
- HDMI 2.0 inputs
- HDMI 2.0 ARC
- LAN port
E. USB 2.0
F. USB 2.0
G. AC-in and main power switch (bottom)
- Main power switch
- AC input
H. Control-Button (front)
When screen is off:
- Activates screen
When screen is on:
- Press < 1 seconds activates Prowse Central Menu
- Hold > 1 seconds activates shut down
I. Lift (Bottom)
- USB 2.0 for lift control and service
2.RS232 - Headphone
- Digital coax
4.4. Touchscreen control
The Prowse Touchscreen is fitted with 20-points multi-touch. The screen recognises up to 20 simultaneous touchpoints. This allows you to use the touchscreen with multiple people at once.
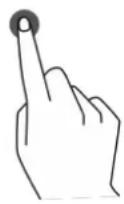 | Click | To click on a part of the screen, gently tap with one finger on the touchscreen. |
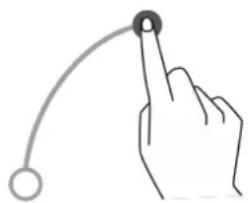 | Drag | Tap with one finger on the item that you want to move and drag it to the new location without releasing your finger from the screen. |
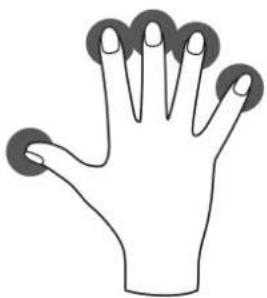
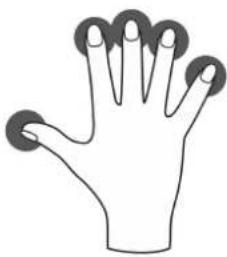 | Open Prowse Central menu | Place five fingers of one hand on the screen for at least 2 seconds. The menu will appear. |
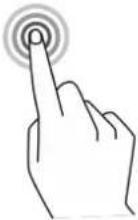 | Right-click (context-menu) (PC module) | Tap and hold one finger on the screen for a few seconds for the right click function. |
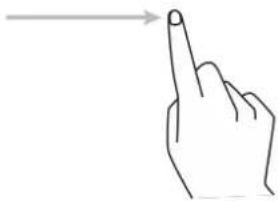 | Scroll | Slide one finger across the screen in the desired direction. |
The touchscreen can also be controlled by using a computer mouse or with the supplied remote control. Furthermore, you can use the control button, located in the center of the speaker bar of the touchscreen, to turn the touchscreen ON or OFF or to open the Central menu.
4.5. The control button
The control button can be found in the middle of the speaker bar of the touchscreen.

natural_image
Cross-sectional view of a mechanical component with a highlighted circular feature and an arrow pointing to it (no text or symbols)Control button
- When the touchscreen is in standby mode, short-press this button to turn it back on again.
- When the touchscreen is turned on, long-press this button to turn it off.
- When the touchscreen is turned on, short-press this button to open the Central menu.
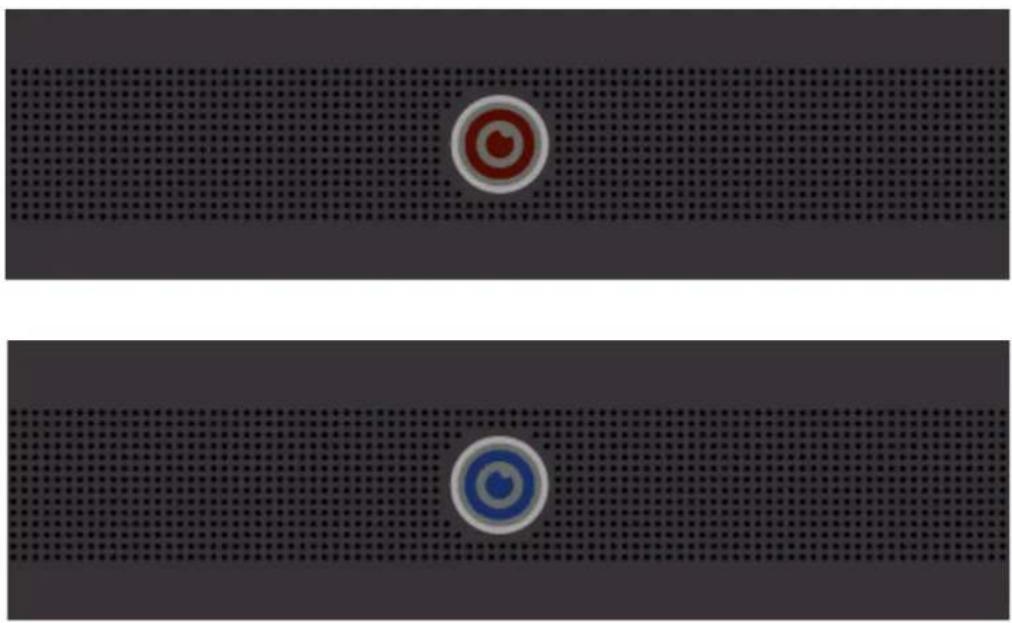
natural_image
Two circular target icons on a dotted grid background, no text or symbols present.The LED inside the control button indicates the touchscreen's status.
●The touchscreen is turned on: Blue
●Backlight is turned off: Blue
- Sleep mode: Flashing red (every 2 seconds)
- Standby mode: Red
4.6. Microphone
The Prowse Touchscreen has 4 wide area microphones. Thanks to these 4 wide area microphones, the recording quality will be excellent, making the Prowse Touchscreen ideal for video conferencing. Use the microphone in Prowse Central or if a PC module is installed.
4.7. NFC card reader and remote control receiver
The tab on the right-hand side of the speaker bar of the touchscreen, has various functions:
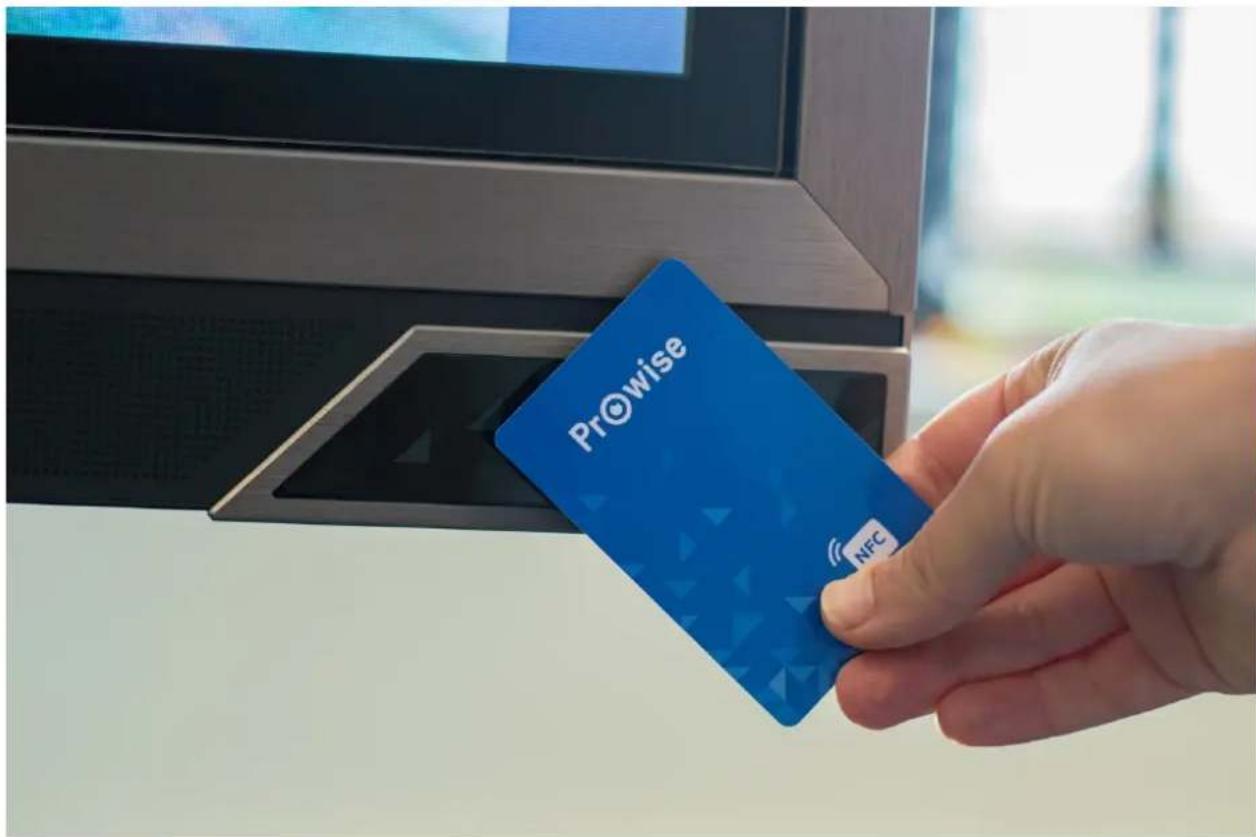
text_image
Pr©wise NFC- Hold the NFC card in front of the tab to log in using NFC technology.
- The remote control's IR sensor is located here.

PLEASE NOTE! To log in with an NFC card, the card must first be configured using the Prowse Central settings menu.
4.8. ProWrite® technology
The Prowse Touchscreen is equipped with two pens. These are conveniently located at the front of the screen and will automatically snap into place when you hold a pen in front of the docking location.
What makes the ProWrite® technology and pen combination unique in the market is that the pen has 2 different tip sizes available to use when writing on the screen. The advantages of this are:
- Write small and switch to large without any software interaction
- Switch between colours by turning around the pen
• Write simultaneously in 2 different colours and sizes
Next to the uniquely designed pens we enhanced the technology to give you a better experience. The highlights of this are:
- Fast writing response
• Writing tip as small as 2mm
• Full support for Windows Ink
• 20-points touch support
• 10-points writing support
With this technology the Prowse Touchscreen is an ideal touchscreen for collaboration and writing.

text_image
Prowise4.9. Cleaning
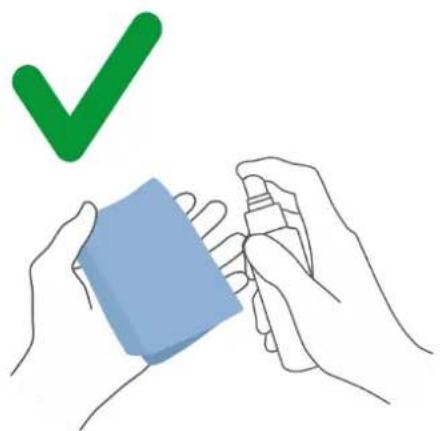
Clean the screen with a dry, lint-free, microfiber cloth. Ensure this cloth is free of impurities.
If you wish to use a cleanser, always use a cleanser recommended by Prowse. Do not use any aggressive cleansers as these can cause damage to the screen.
Never spray a cleanser directly onto the screen, apply it to a cloth first. The cloth may be slightly damp, but not wet, as this can cause damage to the screen.
natural_image
Illustration of two hands holding a blue rectangular object with a green checkmark above (no text or symbols on the object itself)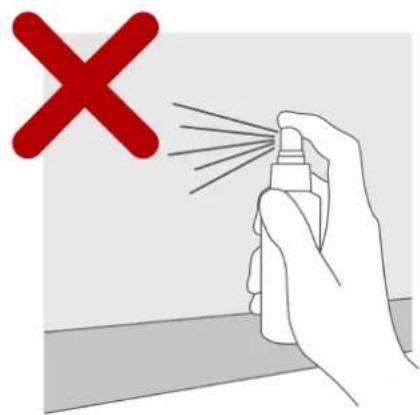
text_image
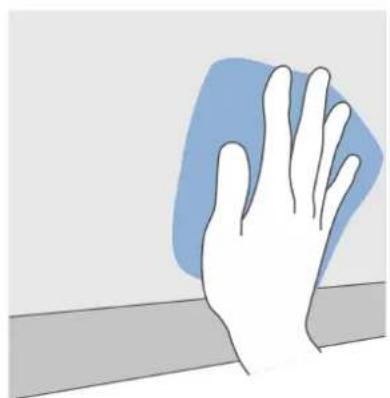
Illustration showing a hand spraying spray with a red 'X' symbol, indicating no chemical reaction or inspection.Gently wipe down the screen with the cloth. Clean the screen with gentle, circular movements without pressure to gain the best result. Never use an abrasive cleanser.
natural_image
Illustration of a hand cleaning a blue surface with a gray horizontal bar (no text or symbols)
WARNING! In the unlikely event that the touchscreen gets wet, do not turn the power on and do not insert the power cable into the electrical outlet. This can result in an electric shock. Should the touchscreen get wet when it's turned on, immediately turn off the power supply and disconnect the power cable of the touchscreen from the electrical outlet to avoid a short circuit.

CAUTION! Unplug the power supply before cleaning the screen.
5. Getting started
5.1. Turn the touchscreen on and off
Turn on
- Ensure the touchscreen is connected to the mains power supply.
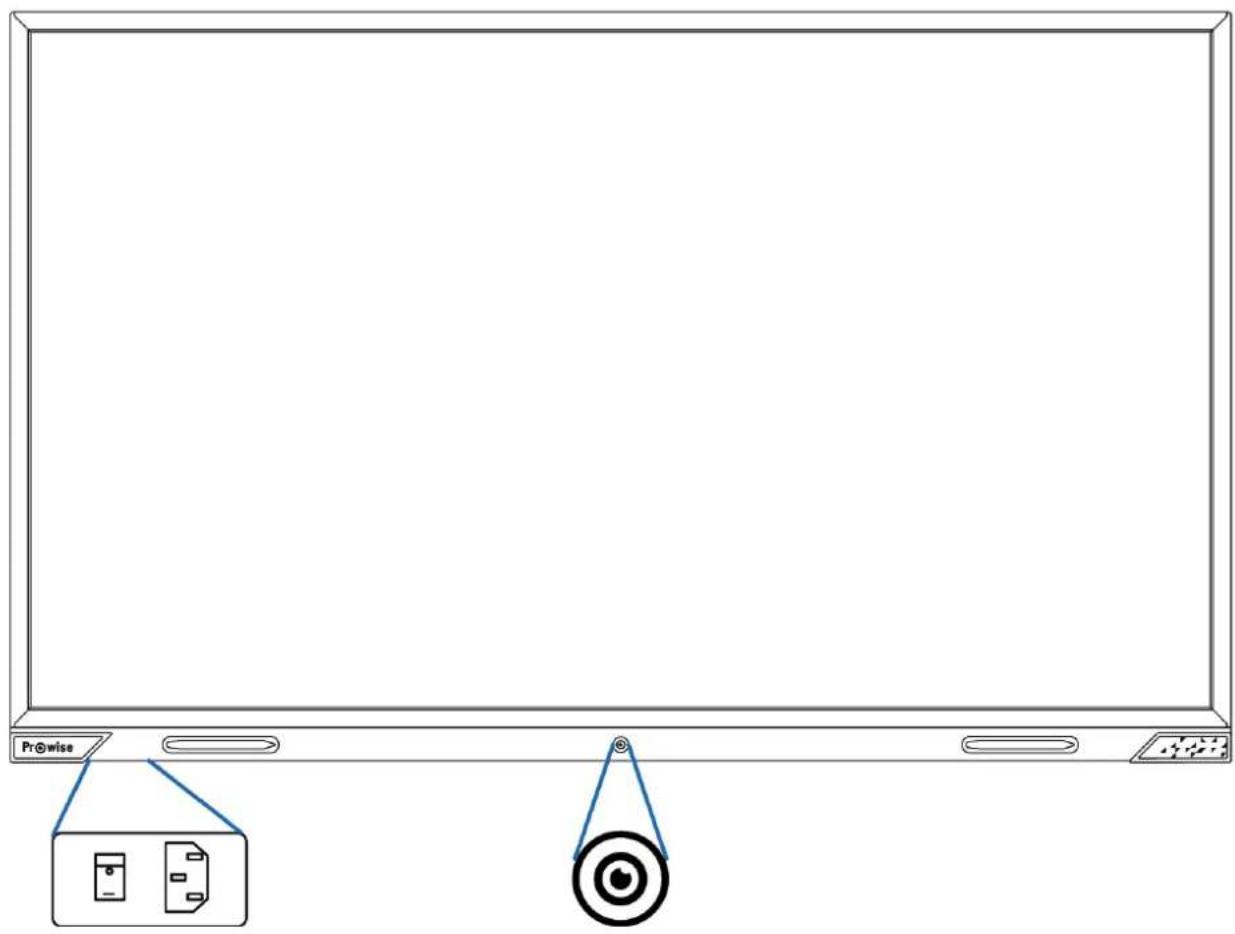
- Turn ON the power switch on the bottom left-hand side of the touchscreen.
There are a few different options to turn on the touchscreen once activated:
- Press the control button located in the middle of the speaker bar of the touchscreen
- Press the on/off button on the supplied remote control
Turn off
Using the on/off button of the control panel
text_image
Prowise Target- Press the control button in the middle of the speaker bar.
- The notification 'The system will shut down in 15 seconds' will appear.
- Select 'Shut down' if you wish to turn off the touchscreen or wait 15 seconds, to abort your touchscreen from closing down select the 'Cancel' button.
- Turn off the main power supply by using the power switch on the left hand side of the touchscreen (see picture).
Using Prowse Central
- Launch the Prowse Central Menu by placing five fingers of one hand on the screen, by pressing the menu tab on the right-hand side of the screen or by short pressing the control button of the touchscreen.
- Open the sidebar.
- Select the 'power' icon.
- The notification 'The system will shut down in 15 seconds' will appear.
- Select 'Shutdown' to shut the touchscreen down immediately, or wait 15 seconds for the touchscreen to shut down automatically. To abort the shutdown of your touchscreen select the 'Cancel' button.
- Turn off the main power supply by using the power switch on the right hand side of the touchscreen.

CAUTION! Wait to turn off the power switch (step 6) until the LED indicator light of the control button has turned red. Turning off the power switch when the system is still active can cause damage to the PC module.
Shut down automatically
When no active input source has been detected in a specific input channel, a notification will appear after 1 minute to shut down the touchscreen. This notification will be automatically accepted after 15 seconds by the system and the touchscreen will be shut down.

PLEASE NOTE! Turn the touchscreen off completely when moving the screen by turning off the power switch and removing the power cable from the screen.
5.2. Starting your device for the first time
The first time you start your touchscreen, a setup guide opens to help you configure the most important settings. Follow the steps below to complete the setup:
-
Ensure the touchscreen is connected to the mains power supply.
-
Turn on the main power switch.
-
Press the power button (control button or remote control)
-
The touchscreen will turn on and the setup guide will appear.
-
Follow the steps of the setup guide to complete the setup.
-
Once you are connected to the internet the touchscreen will automatically check for updates.
-
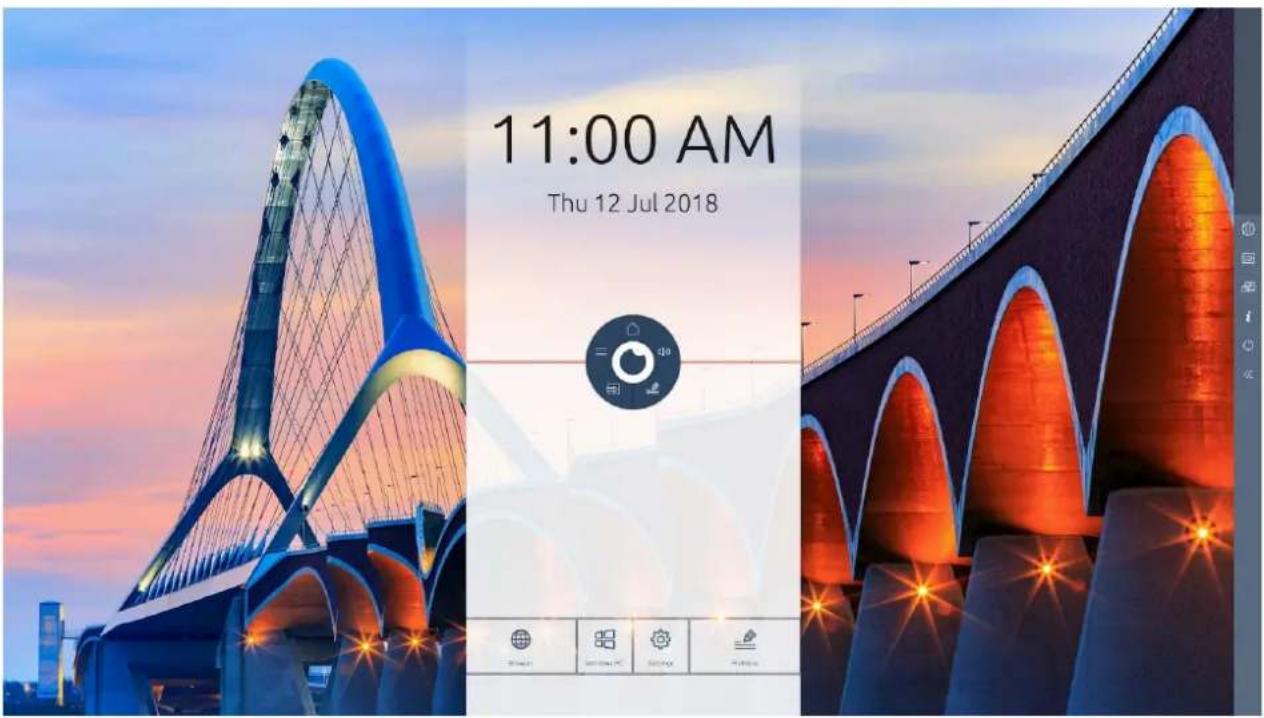
The welcome screen will appear and the Prowse Central environment will open right after that.
-
Open the Prowse Central menu to get started on your touchscreen. Open the menu by placing 5 fingers of one hand on the screen for at least 2 seconds, by pressing the menu tab or by using the control button.
text_image
11:00 AM Thu 12 Jul 20185.3. Connect to a network
Connect your touchscreen to a wireless WiFi network or via a network cable.
Ethernet
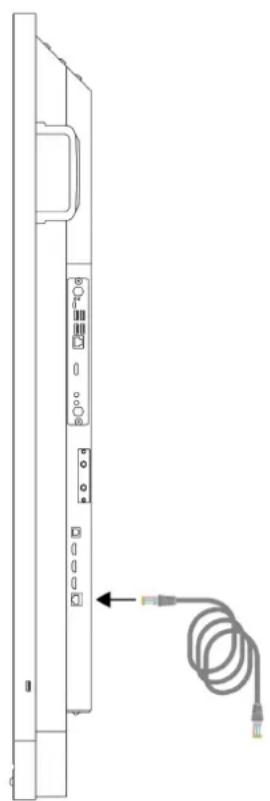
Connect the network cable to the LAN port of your touchscreen. The touchscreen will automatically detect the network and connect to it as soon as 'Ethernet' has been activated in the settings menu.
natural_image
Diagram of a computer monitor with ports and cable, no text or symbols presentFollow the steps below to view the specifications of the network:
- Place five fingers on the screen for at least 2 seconds to launch the Prowse Central menu
- Open the sidebar to access the settings menu
- Select the submenu 'Connectivity'
- Select 'Ethernet' by activating the toggle
- The network specifications will be displayed
WiFi connection
Follow the steps below to set up a connection to a WiFi network:
- Make sure the WiFi module is installed correctly
- Place five fingers on the screen for at least 2 seconds to launch the Prowse Central menu
-
Open the sidebar to access the settings menu
-
Select the submenu 'Connectivity'
-
Select 'WiFi'. The touchscreen will scan for available networks
-
Select the preferred network. Click the 'Advanced' button if you want to connect with an advanced network
-
Enter the password of the network. Select the eye icon if you wish to display the characters of the password
-
Press the 'Connect' button to connect to the wireless network
5.4. Adjust volume
The volume of the touchscreen can be adjusted in different ways:
• With the remote control:
- Use the volume buttons to adjust the volume.
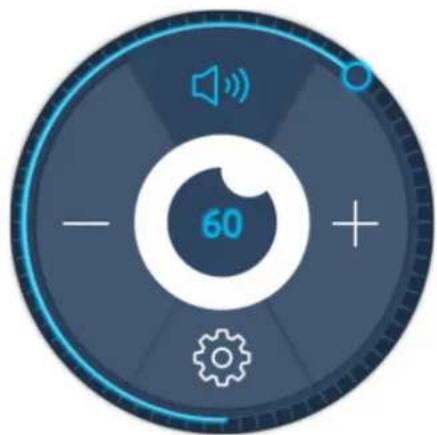
• With the Central Menu:
- Place five fingers of one hand on the screen for at least 2 seconds to launch the Prowse Central menu.
- Select the 'audio' icon.
- Adjust the volume by selecting the the '+' or '-' button or move by moving the slider to increase or reduce the volume.
natural_image
Circular digital icon with speaker, gear, and plus signs, no readable text or symbols6. Prowse Central

PLEASE NOTE! In the future, extra functionalities will be added to Prowse Central. The updates for Central will be installed on the touchscreen via OTA updates. More information about OTA updates can be found in "OTA (Over The Air) updates".
6.1. Prowse Central home
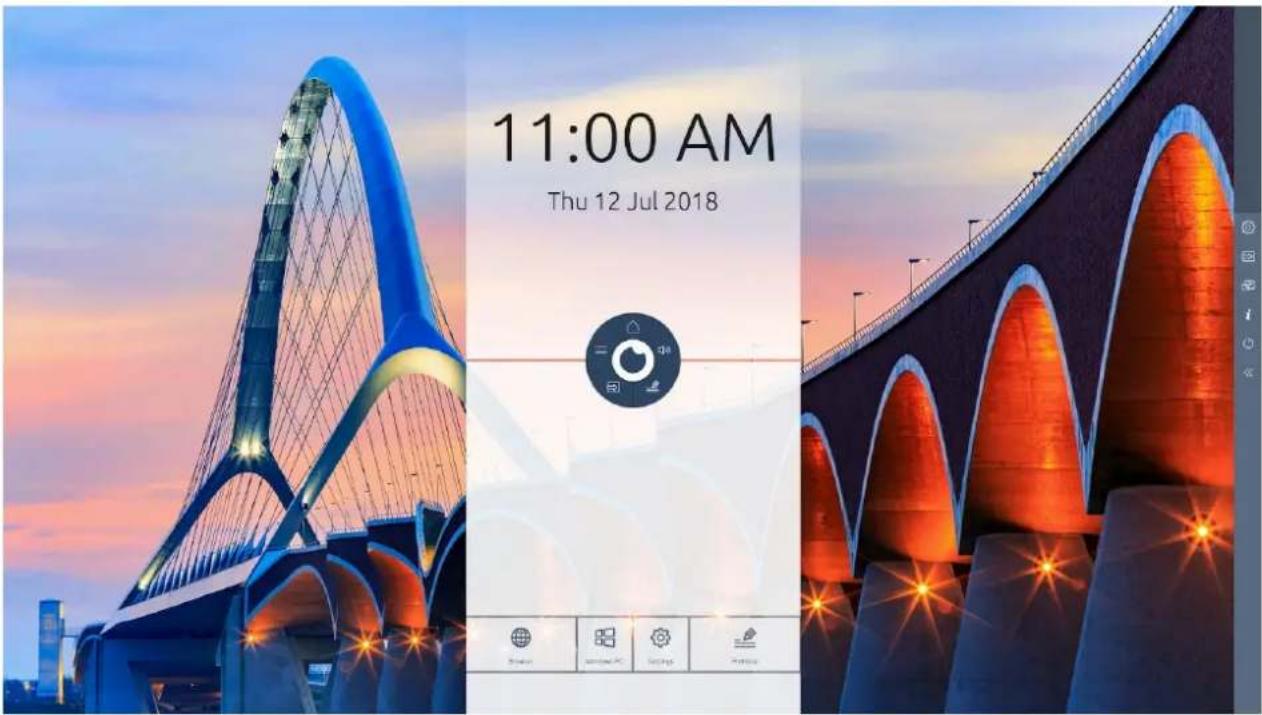
Prowse Central is the clever and intuitive operating system of Prowse integrated in the Prowse Touchscreen. Central brings everything together in one place.
Navigate quickly and easily to all main features and applications of your touchscreen.
text_image
11:00 AM Thu 12 Jul 20186.2. The Prowse Central menu
natural_image
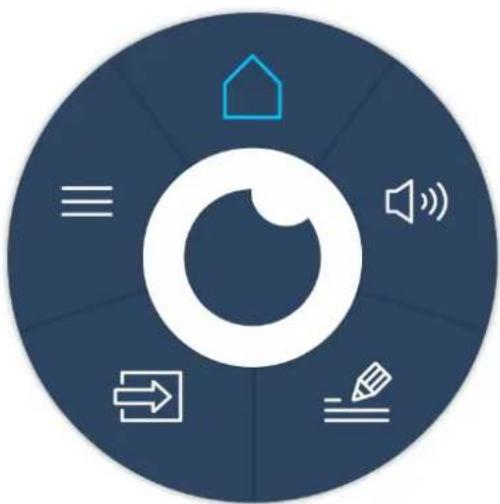
Circular icon with a stylized eye symbol and surrounding icons (no text or symbols)Easily adjust the settings of the touchscreen and open ProNote and other applications in the Prowse Central menu.
Change the position of the Prowse Central menu by dragging the circle over the screen and dropping it at your preferred position. The position of the sidebar can also be changed by selecting the arrows at the side of the screen. The sidebar will be displayed when opening the Prowse Central menu.
Launch Prowse Central menu
You can launch the Prowse Central menu in different ways:
- Place five fingers of one hand on the screen for at least 2 seconds.
- Press the Prowse Central menu button on the remote control.
- Press the menu tab on the right hand side of the touchscreen.
- Press the control button of the touchscreen.
natural_image
Line drawing of a human hand with five fingers and three circular buttons at the palm (no text or symbols)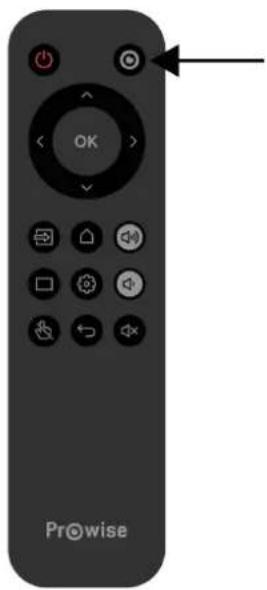
text_image
OK Prowise
natural_image
Close-up of a metallic component with a circular feature and an arrow pointing to it (no text or symbols visible)Close the Prowse Central menu
Click on the middle of the eye (inside circle of the Central menu) to close the Prowse Central menu or press the "back" button on the remote control. The sidebar will close as well.
7. Adjust settings
The settings menu of Central is located in the sidebar. Here you can adjust multiple settings of your Prowse Touchscreen, such as: display and audio settings, connectivity, NFC and other settings.
For more information about adjusting the settings in Prowse Central, please read the Prowse Central manual.
8. OTA (Over The Air) updates
OTA updates – over-the-air updates – ensure that you always have the latest software version installed on the touchscreen. The only thing required for OTA updates is a connection to the Internet with Prowse Central, which can be either a WiFi connection or an ethernet connection.
Automatic (OTA) updates are activated by default. The updates are installed when the touchscreen gets turned off. This function can be turned off in the "General Settings" menu. However, Prowse recommends always having OTA updates activated.

PLEASE NOTE! OTA updates require a WiFi or an ethernet (wired network) connection to Prowse Central.
9. Remote control
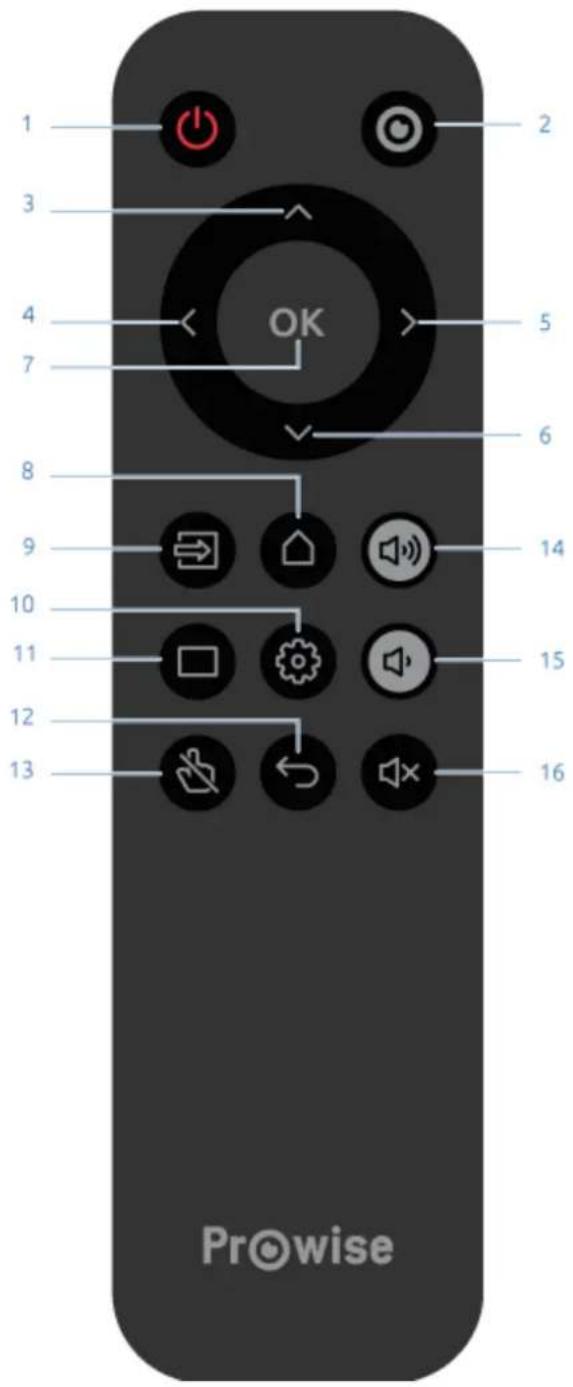
9.1. Schematic view and explanation of the buttons
text_image
1 2 3 4 5 7 OK 6 8 9 10 11 12 13 14 15 16 Prowise| 1 |  | Press this button to turn the touchscreen on or off. To turn the touchscreen off, press this button and then press Enter to confirm. |
| 2 |  | Opens the Prowse Central menu. |
| 3 |  | Navigation button – up |
| 4 | Navigation button – Left | |
| 5 | Navigation button – Right | |
| 6 |  | Navigation button – Down |
| 7 | OK | Confirm selection. |
| 8 |  | If an input other than Prowse Central home is active, this button can be used to return to Prowse Central home. |
| 9 | Opens the Prowse Central input selection. | |
| 10 |  | Opens the Prowse Central settings menu. |
| 11 |  | Temporarily disables the screen. This is depicted in the form of a black screen. |
| 12 | Go back one menu. If Central menu is active then this closes the menu | |
| 13 | Enable or disable the IR touch functionality of the touchscreen. | |
| 14 | Increase the volume level | |
| 15 | Lower the volume level | |
| 16 |  | Enable or disable the internal speakers of the touchscreen. |
9.2. Angle at which the remote control is used
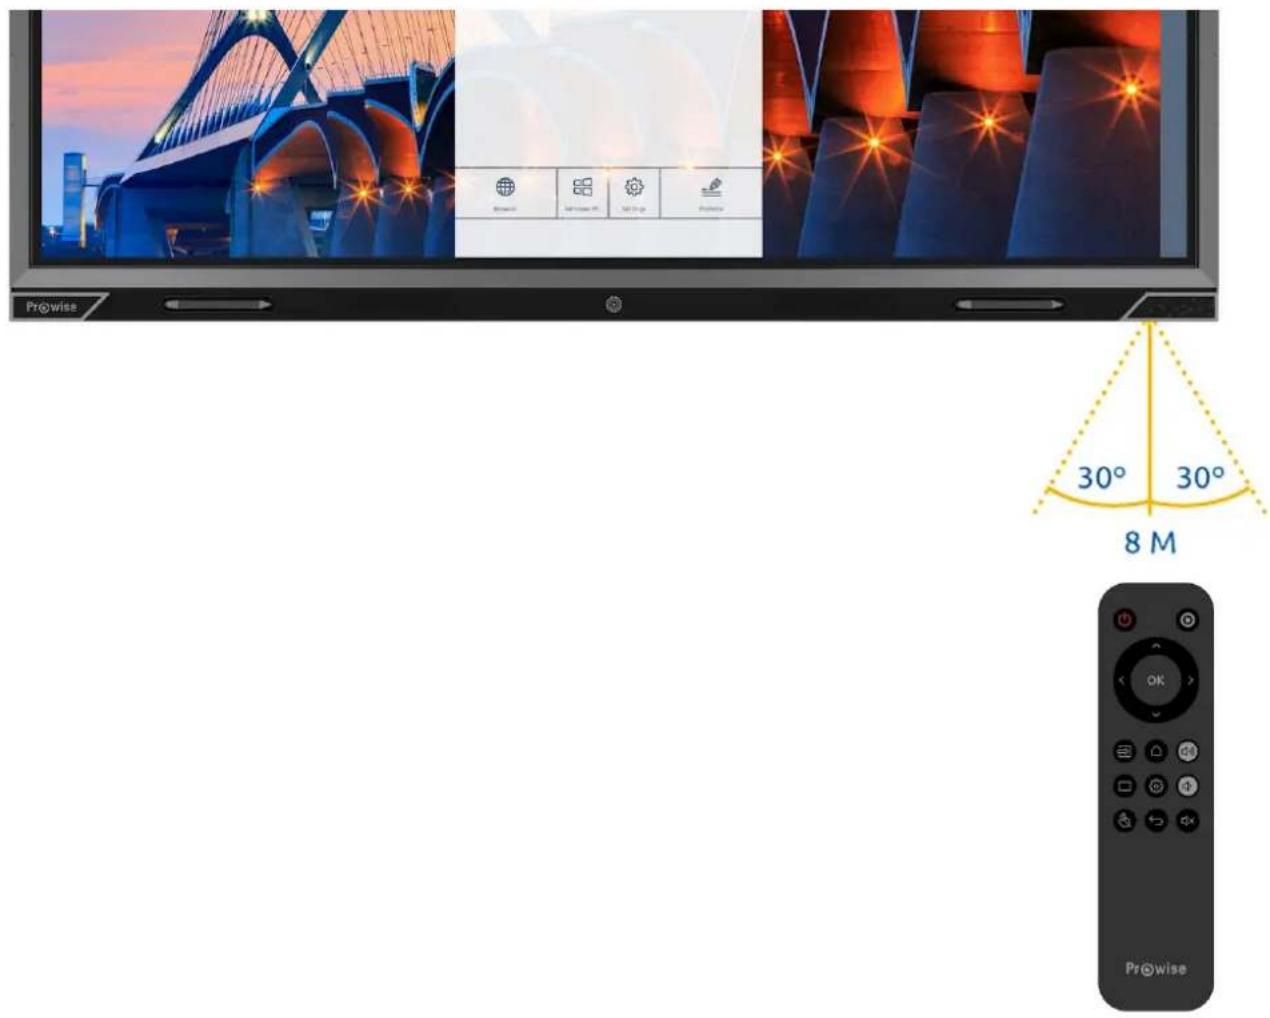
To use the remote control, point it to the IR receiver of the touchscreen (bottom right corner of the touchscreen). The remote control has a range of around 8 metres.
text_image
Prowise 30° 30° 8 M OK Prowise
CAUTION! If any obstacles are situated between the remote control and the receiver of the touchscreen, the remote control may not work properly.
9.3. Replacing the batteries of the remote control
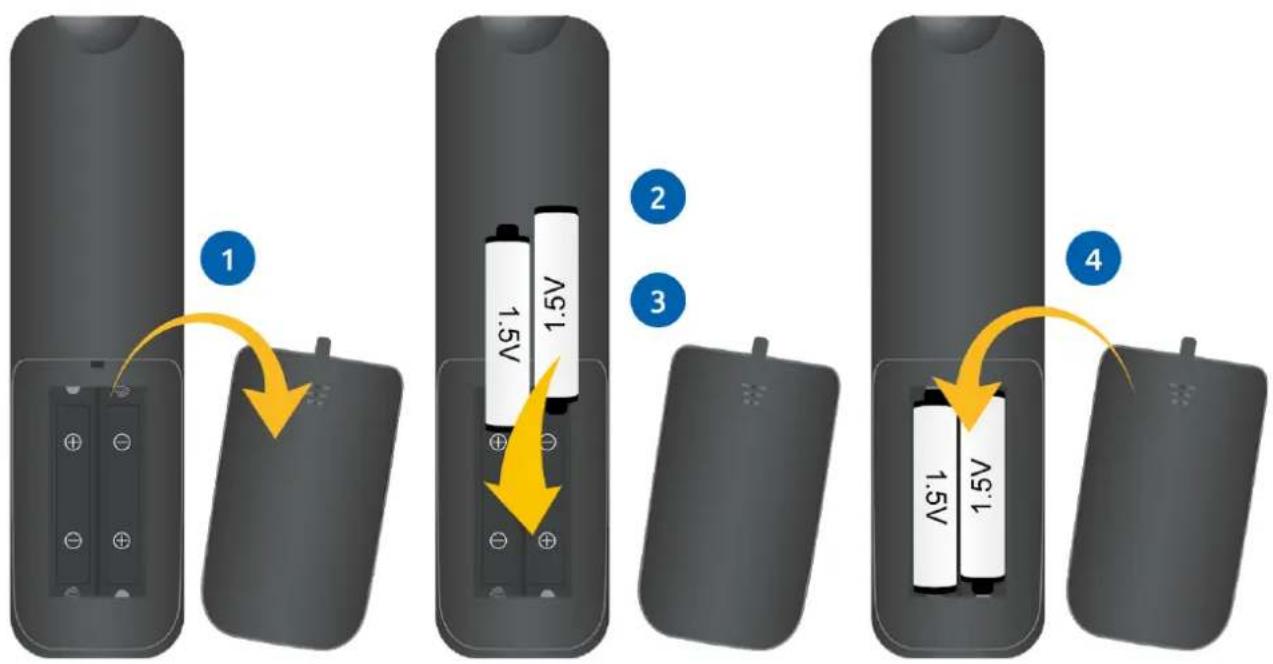
Before using the remote control for the first time, you must insert the two (1.5V AAA) batteries, supplied with the remote control. Once the batteries are running out and the remote control is no longer working properly, you must change the batteries. You can do this as follows:
- Carefully remove the cover plate on the reverse side of the remote control.
- Insert the two batteries (1.5V, AAA) into the remote control.
- Place them with the positive and negative poles as indicated by the (+) and (-) signs in the battery compartment.
- Close the battery compartment again by carefully replacing the cover plate.
text_image
1 2 3 4
WARNING! Remove any leaking batteries as quickly as possible from the remote control. Thoroughly wash your hands afterwards. The leaking chemicals are toxic and must never come into contact with the mouth, skin or eyes.

PLEASE NOTE! Only use 1.5 V AAA batteries. Insert them as shown by the instructions on the remote control.
10. Connect peripherals
10.1. Connect the Prowse Touchscreen to an external PC
text_image
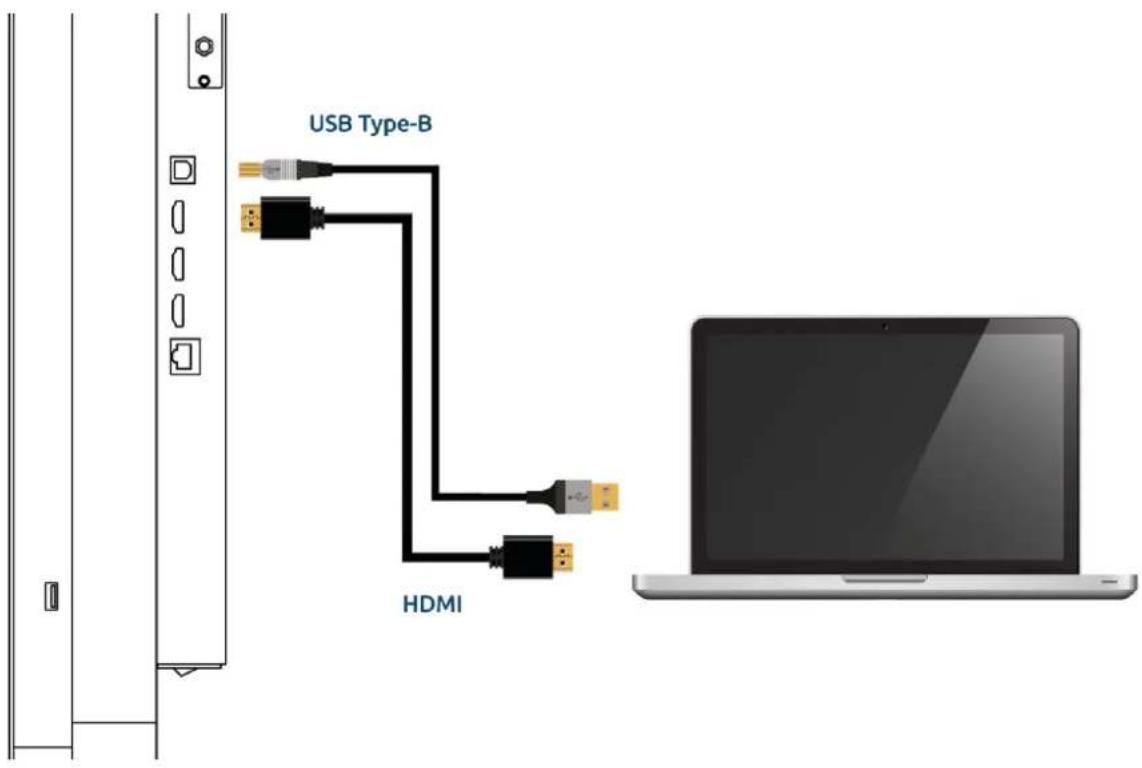
USB Type-B HDMIIn addition to an HDMI connection, a USB touch connection is also available on the right-hand side of the touchscreen. This can be used to connect an external PC with touch functionality.
- Connect an HDMI cable to the HDMI port of the external PC and to the HDMI input port of the touchscreen.
- Connect the USB touch cable to the touch USB port of the touchscreen and to a USB port on the external PC.
- Once all cables have been connected, switch on the touchscreen and the external PC.
- Once the touchscreen and the external PC have booted up, navigate in the Central menu to 'Input' and select the correct HDMI source.

PLEASE NOTE! We recommend using a cable that is as short as possible for the best connection quality and is no longer than 3 metres.
10.2. Connecting the Prowse Touchscreen to audio equipment
10.2.1. Connecting headphones
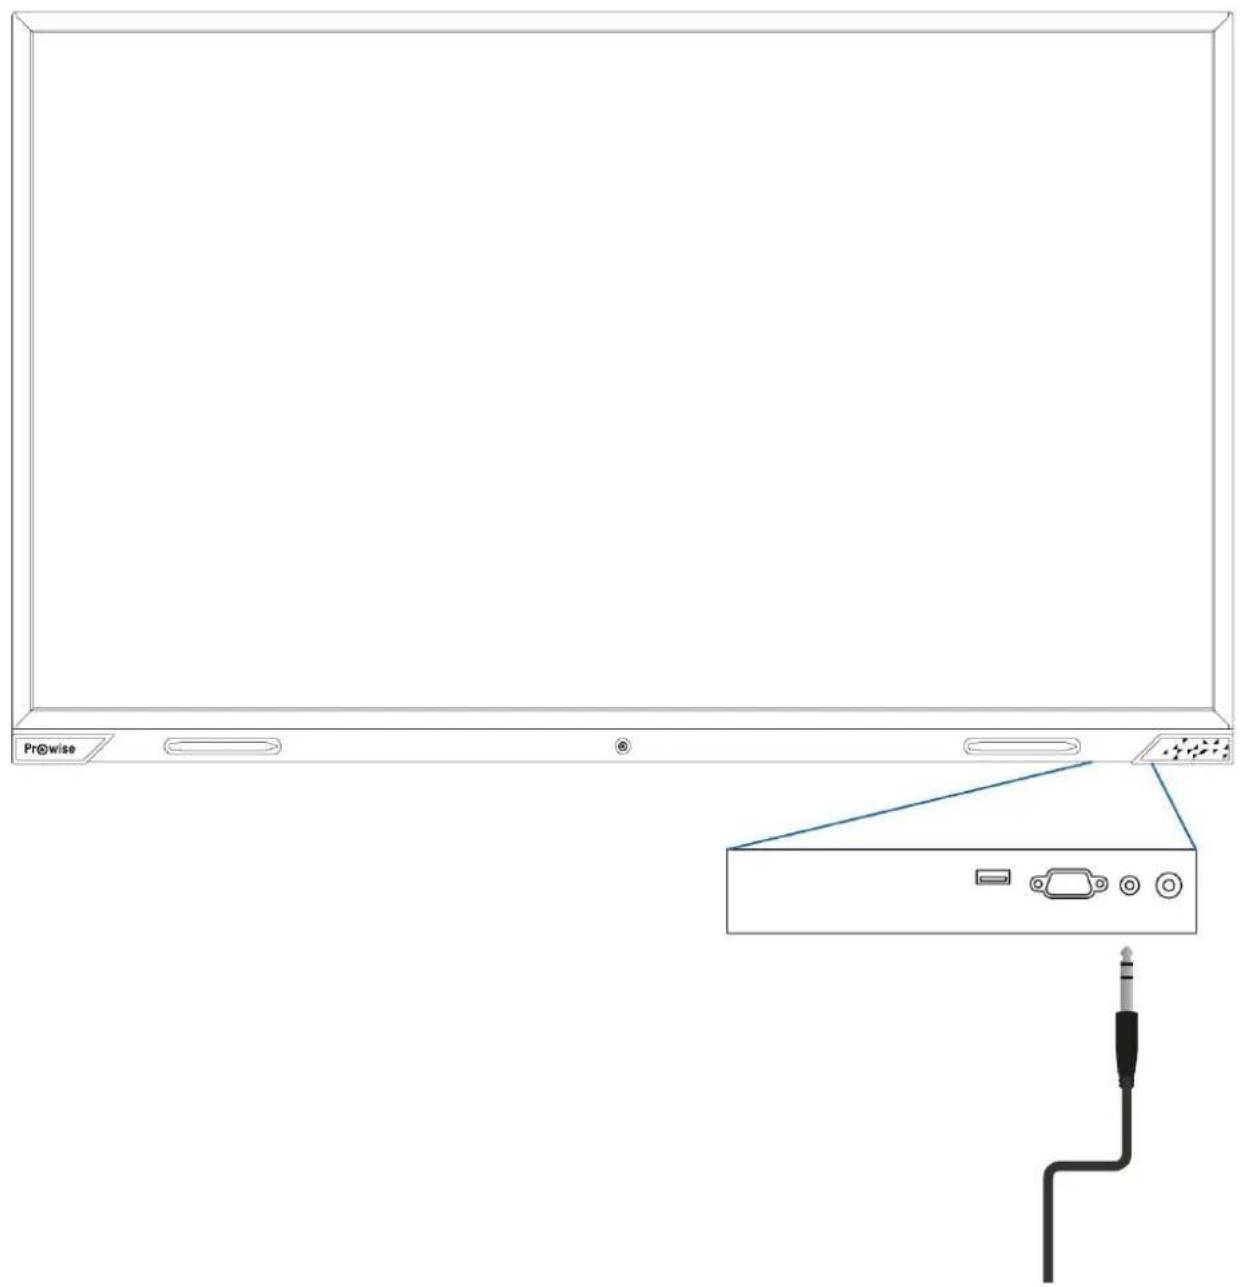
Connect headphones by plugging them into the analogue audio output "headphones". Use the touchscreen's volume control to adjust the headphones volume.
natural_image
Line drawing of a monitor front panel with an attached audio jack connected to the right side (no text or symbols on the device itself)10.2.2. Connecting an amplifier
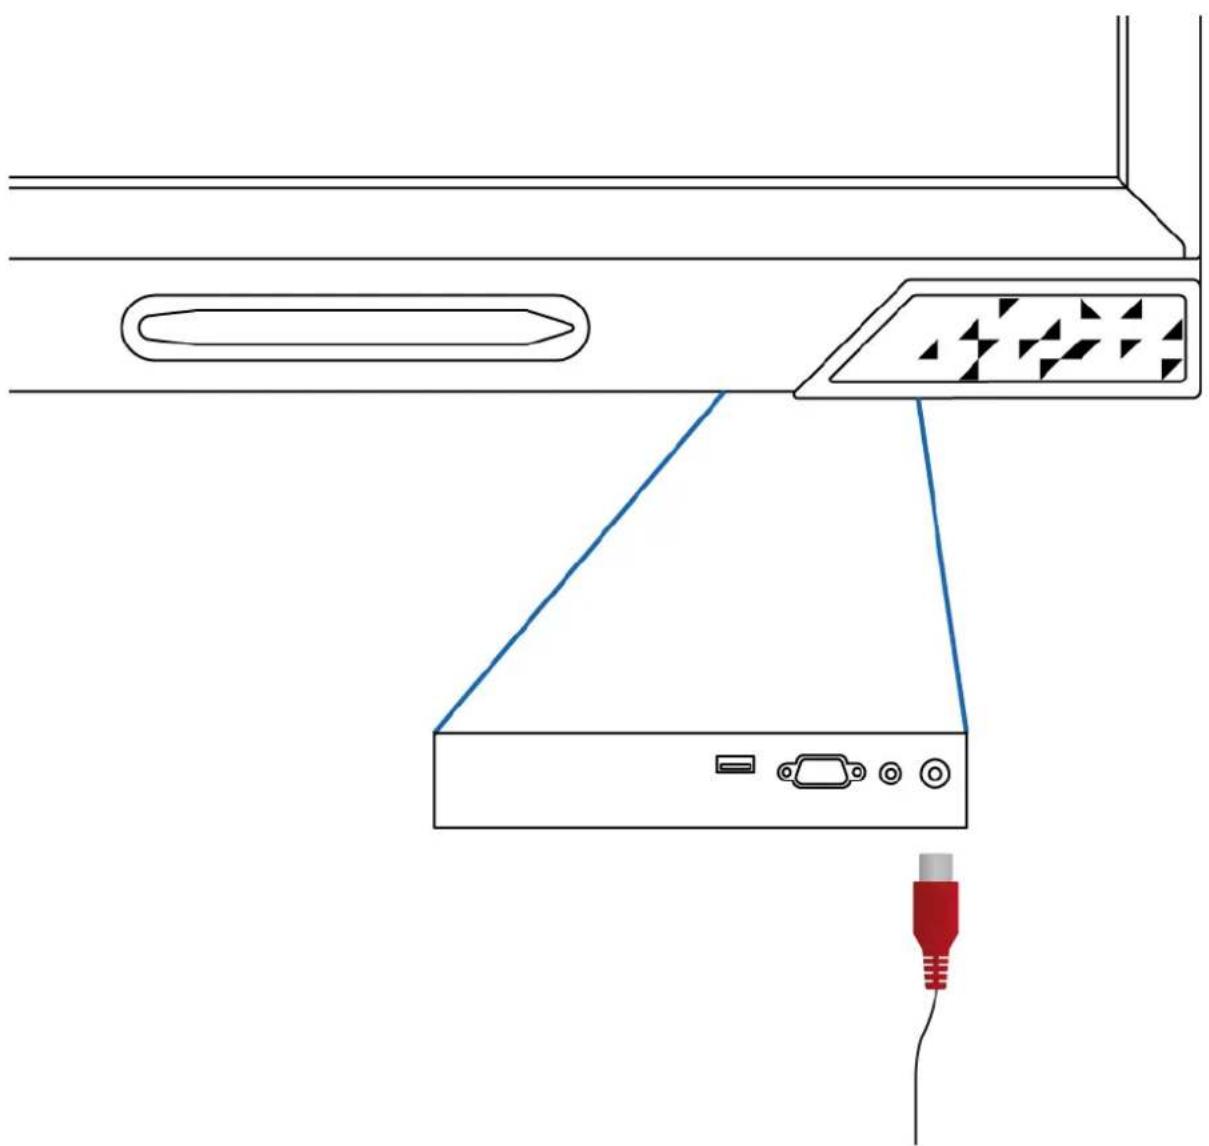
Connect an amplifier by plugging it into the analogue audio output or the digital coax port. Use the amplifier's volume control to adjust the amplifier's volume.
natural_image
Diagram of a device with a red connector and a triangular socket, showing no text or symbols.
PLEASE NOTE! The audio outputs (the analogue line output and the digital Coax port) are always active. If you connect an external audio device to the touchscreen and only wish to use this audio device, press the "Mute" button on the remote control or in the Central menu to turn off the touchscreen's internal speakers.
10.2.3. Connecting using the HDMI port (ARC)
It is possible to connect an external audio device using an ARC (Audio Return Channel) connection. This allows the external audio device to be controlled via the touchscreen. To connect an audio device via ARC, insert one end of an HDMI cable into the touchscreen's HDMI port with ARC support (3) and the other end in the external audio device's HDMI port.
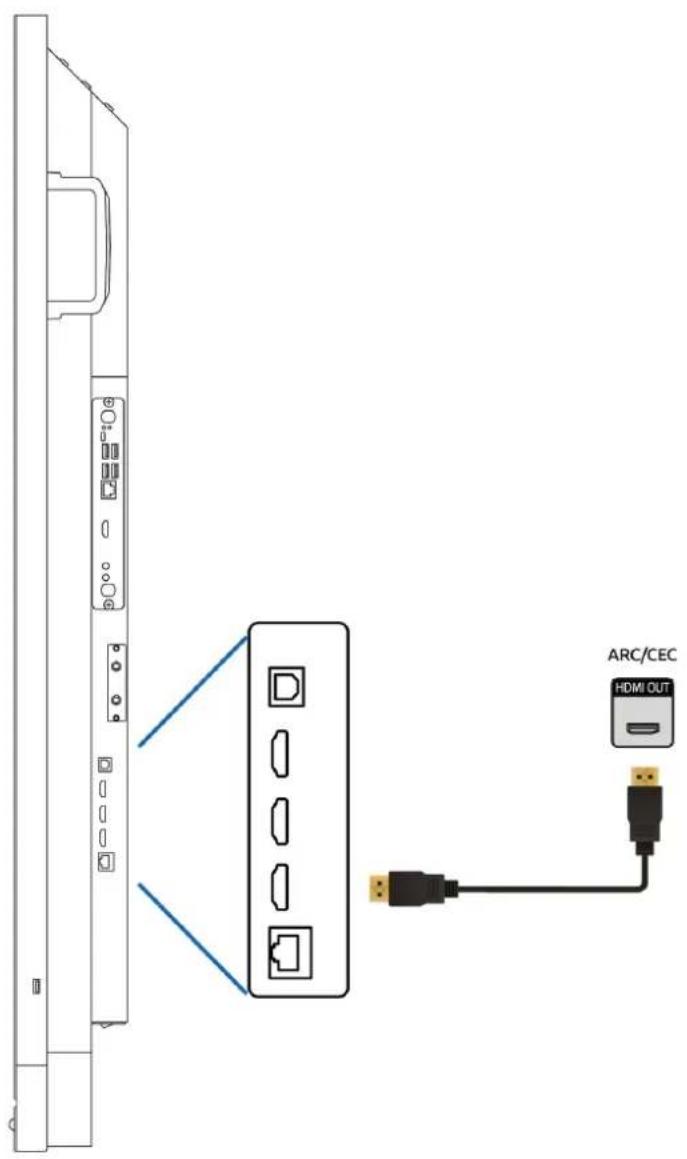
text_image
ARC/CEC HDMI OUT10.2.4. Connecting using the HDMI port (CEC)
CEC (Consumer Electronics Control) is a functionality that works via HDMI. The devices that are connected to each other in this way communicate via CEC. This allows these devices to be controlled via the touchscreen's remote control.
Connect a device via CEC by inserting an HDMI cable in the touchscreen's HDMI port (3).
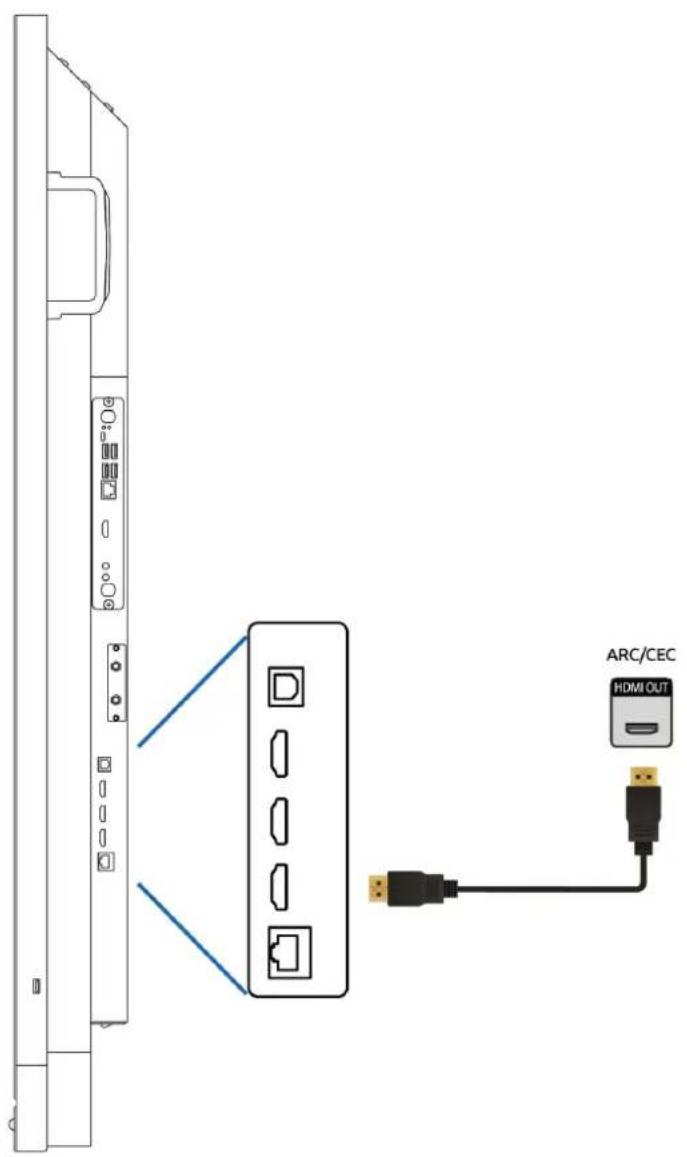
text_image
ARC/CEC HDMI OUTAppendix
RS232 protocol and code list
This appendix describes the hardware interface specification and software protocols of RS232 interface communication between the touchscreen and the connected PC or other control unit with RS232 protocol.
Male DSUB 9Pin (outside view)
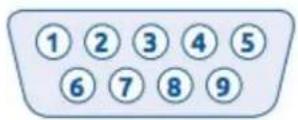
| Pin # | Signal | Remark |
| 1 | NC | |
| 2 | TXD | Output to TV |
| 3 | RXD | Input from TV |
| 4 | NC | |
| 5 | GND | |
| 6 | NC | |
| 7 | NC | |
| 8 | NC | |
| 9 | NC | |
| frame | GND |
Pin2 is TXD Pin3 is RXD. Pin to Pin connection as below.
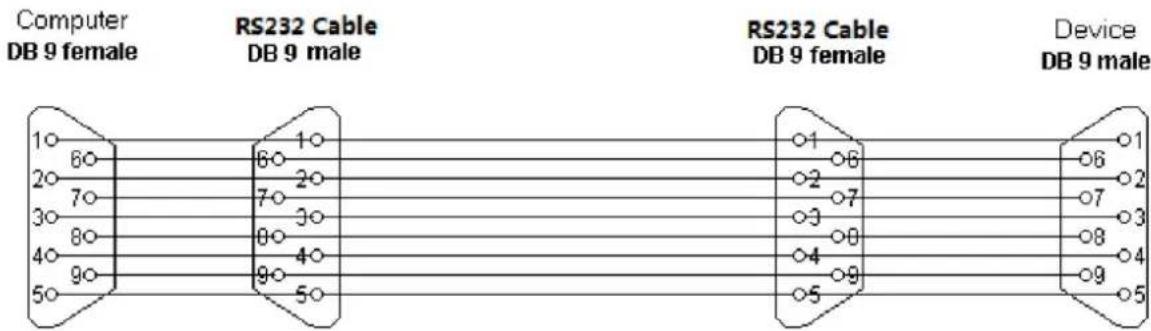
text_image
Computer DB 9 female RS232 Cable DB 9 male RS232 Cable DB 9 female Device DB 9 male 1o 6o 1o 2o 7o 2o 3o 8o 7o 4o 9o 3o 5o 9o 4o 6o 5o 5o 1 o 6 o 2 o 7 o 3 o 8 o 4 o 9 o 5 o 1 o 6 o 2 o 7 o 3 o 8 o 4 o 9 o 5 o 1 o 6 o 2 o 7 o 3 o 8 o 4 o 9 o 5 o 1 oSerial Port Settings
| Items | Value |
| Baud Rate | 115200bps (fixed) |
| Data Bits | 8 (fixed) |
| Stop Bits | 1 (fixed) |
| Parity | None (fixed) |
| Stream Control | None (fixed) |
Protocol description
Command format
| Version | 0.9 |
| Command Head | AA BB CC |
| Command Body | 3 bytes + 1 byte checksum(of leading 3 bytes) |
| Command Tail | DD EE FF |
RS232 code list
| Category | Function | Code | Remark |
| Power | Power on | AA BB CC 01 00 00 01 DD EE FF | |
| Power off | AA BB CC 01 01 00 02 DD EE FF | ||
| Source | HDMI 1 | AA BB CC 02 06 00 08 DD EE FF | |
| HDMI 2 | AA BB CC 02 07 00 09 DD EE FF | ||
| HDMI 3 | AA BB CC 02 05 00 07 DD EE FF | ||
| PC | AA BB CC 02 08 00 0A DD EE FF | ||
| Android | AA BB CC 02 0A 00 0C DD EE FF | ||
| Audio | Volume | AA BB CC 03 00 value checksum DD EE FF | value 0 <-> 100 (hex code) |
| Mute | AA BB CC 03 01 00 04 DD EE FF | ||
| Unmute | AA BB CC 03 01 01 05 DD EE FF | ||
| Bass | AA BB CC 03 07 value checksum DD EE FF | value 0 <-> 100 (hex code) | |
| Treble | AA BB CC 03 08 value checksum DD EE FF | value 0 <-> 100 (hex code) | |
| Balance | AA BB CC 03 04 value checksum DD EE FF | value -50 <-> 50 (hex code) | |
| Audio preset: Standard | AA BB CC 03 06 00 09 DD EE FF | ||
| Audio preset: Movie | AA BB CC 03 06 01 0A DD EE FF | ||
| Audio preset : Meeting | AA BB CC 03 06 02 0B DD EE FF | ||
| Audio preset: Classroom | AA BB CC 03 06 03 0C DD EE FF | ||
| Audio preset : Custom | AA BB CC 03 06 04 0D DD EE FF | ||
| Display | Brightness | AA BB CC 08 09 value checksum DD EE FF | value 0 <-> 100 (hex code) |
| Contrast | AA BB CC 08 0A value checksum DD EE FF | value 0 <-> 100 (hex code) | |
| Display preset : Normal | AA BB CC 08 0D 00 15 DD EE FF | ||
| Display preset: Dynamic | AA BB CC 08 0D 01 16 DD EE FF | ||
| Display preset: Vivid | AA BB CC 08 0D 02 17 DD EE FF | ||
| Display preset: Soft | AA BB CC 08 0D 03 18 DD EE FF | ||
| Display preset: User | AA BB CC 08 0D 04 19 DD EE FF | ||
| Settings | Language: English | AA BB CC 38 02 00 3A DD EE FF | |
| Language: Dutch | AA BB CC 38 02 01 3B DD EE FF | ||
| Language: German | AA BB CC 38 02 02 3C DD EE FF | ||
| Language: French | AA BB CC 38 02 03 3D DD EE FF | ||
| Language: Italian | AA BB CC 38 02 04 3E DD EE FF | ||
| Language: Spanish | AA BB CC 38 02 05 3F DD EE FF | ||
| Language: Swedish | AA BB CC 38 02 06 40 DD EE FF | ||
| Language: Norwegian | AA BB CC 38 02 07 41 DD EE FF | ||
| Language: Danish | AA BB CC 38 02 08 42 DD EE FF | ||
| User menu:5 fingers gesture off | AA BB CC 38 03 00 3B DD EE FF | ||
| User menu:5 Fingers gesture on | AA BB CC 38 03 01 3C DD EE FF | ||
| Key lock: Off | AA BB CC 38 04 00 3C DD EE FF | ||
| Key lock: On | AA BB CC 38 04 01 3D DD EE FF | ||
| IR lock: Off | AA BB CC 38 05 00 3D DD EE FF | ||
| IR lock: On | AA BB CC 38 05 01 3E DD EE FF | ||
| Touch: Off | AA BB CC 38 07 00 3F DD EE FF | ||
| Touch: On | AA BB CC 38 07 01 40 DD EE FF | ||
| PC | PC Power ON | AA BB CC 09 01 00 0A DD EE FF | |
| PC Power OFF | AA BB CC 09 00 00 09 DD EE FF | ||
| RC | WIN | AA BB CC 07 0B 00 12 DD EE FF | |
| Space | AA BB CC 07 46 00 4D DD EE FF | ||
| Alt+Tab | AA BB CC 07 1D 00 24 DD EE FF | ||
| Alt+F4 | AA BB CC 07 1F 00 26 DD EE FF | ||
| NUM_1 | AA BB CC 07 00 00 07 DD EE FF | ||
| NUM_2 | AA BB CC 07 10 00 17 DD EE FF | ||
| NUM_3 | AA BB CC 07 11 00 18 DD EE FF | ||
| NUM_4 | AA BB CC 07 13 00 1A DD EE FF | ||
| NUM_5 | AA BB CC 07 14 00 1B DD EE FF | ||
| NUM_6 | AA BB CC 07 15 00 1C DD EE FF | ||
| NUM_7 | AA BB CC 07 17 00 1E DD EE FF | ||
| NUM_8 | AA BB CC 07 18 00 1F DD EE FF | ||
| NUM_9 | AA BB CC 07 19 00 20 DD EE FF | ||
| NUM_0 | AA BB CC 07 1B 00 22 DD EE FF | ||
| Freeze/Unfreeze | AA BB CC 07 1C 00 23 DD EE FF | ||
| Display | AA BB CC 07 4C 00 53 DD EE FF | ||
| Input | AA BB CC 07 07 00 0E DD EE FF | ||
| Home | AA BB CC 07 48 00 4F DD EE FF | ||
| Menu | AA BB CC 07 0D 00 14 DD EE FF | ||
| Backspace | AA BB CC 07 40 00 47 DD EE FF | ||
| Blank screen | AA BB CC 07 4E 00 55 DD EE FF | ||
| Up | AA BB CC 07 47 00 4E DD EE FF | ||
| Down | AA BB CC 07 4D 00 54 DD EE FF | ||
| Left | AA BB CC 07 49 00 50 DD EE FF | ||
| Right | AA BB CC 07 4B 00 52 DD EE FF | ||
| Enter | AA BB CC 07 4A 00 51 DD EE FF | ||
| Back / Escape | AA BB CC 07 0A 00 11 DD EE FF | ||
| VOL+ | AA BB CC 07 03 00 0A DD EE FF | ||
| VOL- | AA BB CC 07 41 00 48 DD EE FF | ||
| PageUp | AA BB CC 07 42 00 49 DD EE FF | ||
| PageDown | AA BB CC 07 0F 00 16 DD EE FF | ||
| F1 | AA BB CC 07 45 00 4C DD EE FF | ||
| F2 | AA BB CC 07 12 00 19 DD EE FF | ||
| F3 | AA BB CC 07 51 00 58 DD EE FF | ||
| F4 | AA BB CC 07 5B 00 62 DD EE FF | ||
| F5 | AA BB CC 07 44 00 4B DD EE FF | ||
| F6 | AA BB CC 07 50 00 57 DD EE FF | ||
| F7 | AA BB CC 07 43 00 4A DD EE FF | ||
| F8 | AA BB CC 07 1A 00 21 DD EE FF | ||
| F9 | AA BB CC 07 04 00 0B DD EE FF | ||
| F10 | AA BB CC 07 59 00 60 DD EE FF | ||
| F11 | AA BB CC 07 57 00 5E DD EE FF | ||
| F12 | AA BB CC 07 08 00 0F DD EE FF | ||
| Shift + F10 | AA BB CC 07 16 00 1D DD EE FF | ||
| Red | AA BB CC 07 5C 00 63 DD EE FF | ||
| Green | AA BB CC 07 5D 00 64 DD EE FF | ||
| Yellow | AA BB CC 07 5E 00 65 DD EE FF | ||
| Blue | AA BB CC 07 5F 00 66 DD EE FF | ||
| Custom | Custom | AA BB CC 07 09 value checksum DD EE FF |
Polling code list
| Mode | Function | External Host Command | System Response | Actual Status |
| Power | Obtain power | AA BB CC 01 02 00 03 DD EE FF | AA BB CC 80 00 00 80 DD EE FF | POWER_ON |
| AA BB CC 80 01 00 81 DD EE FF | POWER_STANDY | |||
| Source | Obtain source | AA BB CC 02 00 00 02 DD EE FF | AA BB CC 81 06 00 87 DD EE FF | HDMI1 |
| AA BB CC 81 07 00 88 DD EE FF | HDMI2 | |||
| AA BB CC 81 05 00 86 DD EE FF | HDMI3 | |||
| AA BB CC 81 08 00 89 DD EE FF | PC | |||
| AA BB CC 81 0A 00 8B DD EE FF | Prowse Central | |||
| Audio | Obtain volume | AA BB CC 03 02 00 05 DD EE FF | AA BB CC 82 00 value checksum DD EE FF | VOLUME - value (hex code) |
| Obtain mute | AA BB CC 03 03 00 06 DD EE FF | AA BB CC 82 01 00 83 DD EE FF | MUTED | |
| AA BB CC 82 01 01 84 DD EE FF | UNMUTED | |||
| Obtain bass | AA BB CC 39 08 00 41 DD EE FF | AA BB CC 40 08 value checksum DD EE FF | BASS - value (hex code) | |
| Obtain treble | AA BB CC 39 09 00 42 DD EE FF | AA BB CC 40 09 value checksum DD EE FF | TREBLE - value (hex code) | |
| Obtain balance | AA BB CC 39 0A 00 43 DD EE FF | AA BB CC 40 0A value checksum DD EE FF | BALANCE value (hex code) | |
| Obtain preset | AA BB CC 39 0B 00 44 DD EE FF | AA BB CC 40 0B 00 4B DD EE FF | AUDIO_PRESET_STANDARD | |
| AA BB CC 40 0B 01 4C DD EE FF | AUDIO_PRESET_MOVIE | |||
| AA BB CC 40 0B 02 4D DD EE FF | AUDIO_PRESET_MEETING | |||
| AA BB CC 40 0B 03 4E DD EE FF | AUDIO_PRESET_CLASSROOM | |||
| AA BB CC 40 0B 04 4F DD EE FF | AUDIO_PRESET_USER | |||
| Display | Obtain brightness | AA BB CC 39 02 00 3B DD EE FF | AA BB CC 40 02 value checksum DD EE FF | BRIGHTNESS - value (hex code) |
| Obtain contrast | AA BB CC 39 03 00 3C DD EE FF | AA BB CC 40 03 value checksum DD EE FF | CONTRAST - value (hex code) | |
| Obtain preset | AA BB CC 39 06 00 3F DD EE FF | AA BB CC 40 06 00 46 DD EE FF | DISPLAY_PRESET_STANDARD | |
| AA BB CC 40 06 01 47 DD EE FF | DISPLAY_PRESET_DYNAMIC | |||
| AA BB CC 40 06 02 48 DD EE FF | DISPLAY_PRESET_VIVID | |||
| AA BB CC 40 06 03 49 DD EE FF | DISPLAY_PRESET_SOFT | |||
| AA BB CC 40 06 04 4A DD EE FF | DISPLAY_PRESET_USER | |||
| Settings | Obtain language | AA BB CC 39 0F 00 48 DD EE FF | AA BB CC 40 0F 00 4F DD EE FF | ENGLISH |
| AA BB CC 40 0F 01 50 DD EE FF | DUTCH | |||
| AA BB CC 40 0F 02 51 DD EE FF | GERMAN | |||
| AA BB CC 40 0F 03 52 DD EE FF | FRENCH | |||
| AA BB CC 40 0F 04 53 DD EE FF | ITALIAN | |||
| AA BB CC 40 0F 05 54 DD EE FF | SPANISH | |||
| AA BB CC 40 0F 06 55 DD EE FF | SWEDISH | |||
| AA BB CC 40 0F 07 56 DD EE FF | NORWEGIAN | |||
| AA BB CC 40 0F 08 57 DD EE FF | DANISH | |||
| Obtain gesture | AA BB CC 39 10 00 49 DD EE FF | AA BB CC 40 10 00 50 DD EE FF | GESTURE_OFF | |
| AA BB CC 40 10 01 51 DD EE FF | GESTURE_ON | |||
| Obtain keylock | AA BB CC 39 00 00 39 DD EE FF | AA BB CC 40 00 00 40 DD EE FF | KEY_LOCK_OFF | |
| AA BB CC 40 00 01 41 DD EE FF | KEY_LOCK_ON | |||
| Obtain IR lock | AA BB CC 39 01 00 3A DD EE FF | AA BB CC 40 01 00 41 DD EE FF | IR_LOCK_OFF | |
| AA BB CC 40 01 01 42 DD EE FF | IR_LOCK_ON | |||
| Obtain touch | AA BB CC 39 12 00 4B DD EE FF | AA BB CC 40 12 00 52 DD EE FF | TOUCH_OFF | |
| AA BB CC 40 12 01 53 DD EE FF | TOUCH_ON | |||
| PC | Obtain pc state | AA BB CC 09 02 00 0B DD EE FF | AA BB CC 83 01 00 84 DD EE FF | PC_ON |
| AA BB CC 83 00 00 83 DD EE FF | PC_OFF | |||
| AA BB CC 83 02 00 85 DD EE FF | PC_SLEEP | |||
| Other | Obtain freeze | AA BB CC 34 02 00 36 DD EE FF | AA BB CC 34 03 01 38 DD EE FF | FREEZE_ON |
| AA BB CC 34 03 00 37 DD EE FF | FREEZE_OFF | |||
| Obtain blank screen | AA BB CC 35 02 00 37 DD EE FF | AA BB CC 35 03 01 39 DD EE FF | BLANK_SCREEN_ON | |
| AA BB CC 35 03 00 38 DD EE FF | BLANK_SCREEN_OFF | |||
| Obtain sleep timer | AA BB CC 39 0D 00 46 DD EE FF | AA BB CC 40 0D value checksum DD EE FF | SLEEP_TIMER | |
| Custom | Obtain custom item | AA BB CC 39 07 00 40 DD EE FF | AA BB CC 40 07 value checksum DD EE FF | CUSTOM |