Totan - Child car seat Lorelli - Free user manual and instructions
Find the device manual for free Totan Lorelli in PDF.


| Product Type | Child Car Seat |
| Brand | Lorelli |
| Model | Totan |
| Approval | UN/ECE Regulation No. 44, Universal |
| Weight Groups | Group I (9-18 kg), Group II (15-25 kg), Group III (22-36 kg) |
| Installation | Forward-facing only, Isofix anchors with top tether, plus 3-point vehicle seat belt for groups II/III |
| Recline Positions | 4 positions, adjustable via handle under front of seat |
| Harness System | 5-point harness with pads, central buckle and crotch strap (Group I) |
| Headrest Adjustment | Adjustable via lifting handle |
| Belt Guide Slots | Group II (F14-a) and Group III (F14-b), plus lap belt guide (F14-c) |
| Dimensions | Approx. 45 x 45 x 60 cm |
| Weight | Approx. 6 kg |
| Cover Material | Fabric, washable by hand at 30°C max |
| Cleaning | Lukewarm water and mild soap; no abrasive cleaners, solvents, or machine drying |
| Plastic Parts Cleaning | With a damp cloth; no solvents |
| Replacement After Accident | Replace if subjected to severe stress in an accident |
| Safety Warnings | Do not modify; ensure belts are tight and not twisted; use only with vehicle 3-point static or retractor belt |
| Top Tether | Yes, must be hooked and tightened |
| Certification | ECE R44.04 |
Frequently Asked Questions - Totan Lorelli
User questions about Totan Lorelli
0 question about this device. Answer the ones you know or ask your own.
Ask a new question about this device
Download the instructions for your Child car seat in PDF format for free! Find your manual Totan - Lorelli and take your electronic device back in hand. On this page are published all the documents necessary for the use of your device. Totan by Lorelli.
USER MANUAL Totan Lorelli
IMPORTANT! KEEP FOR FURTHER REFERENCES. READ CAREFULLY!
NOTICE
- This is an "universally" securing device for children. It is approved in accordance with Rule No 44 for general use in vehicles and is suitable for most but not all seats in cars.
- Placing is correct if the vehicle manufacturer has declared in the Manual for the use of the vehicle that in the vehicle may be placed "Universal" Safety devices for children of this age group.
- This securing device for children is classified as "universal" under more stringent conditions than those applied in previous structures, which don't have this remark.
- If you have doubt, consult the manufacturer of safety equipment for children or the seller.
Only suitable if the approved vehicles are fitted with
3-points static or 3-point retractor safety-belts.
Approved to UN/ECER Regulation No. 16 or other equivalent standards.
Important safety instructions!
WARNING! It is appropriate only if approved vehicles are equipped with a 3-point holding device of safety belt, approved in accordance with Rule No 16 of the ECE at the UN or other equivalent standards.
WARNING! The hard components or plastic parts of safety device for children should be deployed and installed in way that during everyday use of the vehicle not be jammed by the movable seats or doors.
WARNING! All belts fastening car chair must be tight, belts restrain the child, must be adjusted to his body and not twisted.
WARNING! The device must be replaced if it has undergone significant load of an accident.
WARNING! Waist belt has to be adjusted low so that child's pelvis is restrained tight!
WARNING! It is dangerous to make changes or to supplement safety device without approval of the competent authority!
WARNING! Follow closely the instructions for installation. Failure can result in injury to the child!
WARNING! Do not leave the child unattended in the safety device!
WARNING! Any luggage or other items that can cause injury if a collision should be properly secured!
WARNING! Safety device for children should not be used without case!
WARNING! Cases of seat should not be replaced with another, unless recommended by the manufacturer, because it is an integral part of the system for securing children!
WARNING! Your child seat can only be fitted into the passengers seat of a car with a lap and diagonal seat belt. Do not use any load bearing contact points other than those described in the instructions and marked on the child restraint. Ensure the vehicle seat buckle is not positioned in or in front of the specified (labelled) belt guide of the child restraint system.
WASHING INSTRUCTIONS
- The car seat can be cleaned using lukewarm water and soap. Do not use aggressive cleaners like abrasives or thinner.
- The cover should be washed by hand at a maximum temperature of 30^ C. Do not put in the dryer, just airing it.
- The plastic parts can be cleaned by using a wettish drapery. Please, do not use any solvate.
Installation for group I(9-18kg)
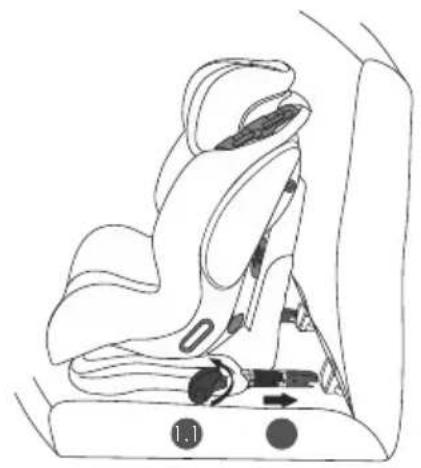
a) Place the car seat on the vehicle's seat
b) Rotate the adjuster button in anti-clock wise direction(1.1), and pull the isofix anchors outwards as far as it goes, wake sure it can't be push back (1.2)
c) Push the car seat towards the back of vehicle's seat(2.1)
d) Match the isofix anchors to the vehicle's anchoring point until hear a "click"(2.2)
e) Rotate the adjuster button in anti-clock wise direction(3.1), and push the car seat to the back of vehicle's seat as much as possible(3.2)
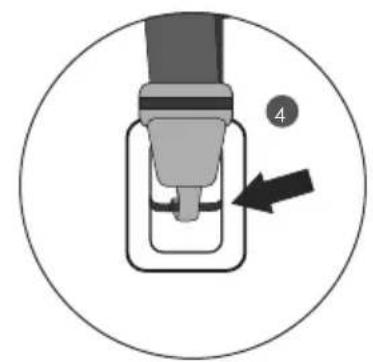
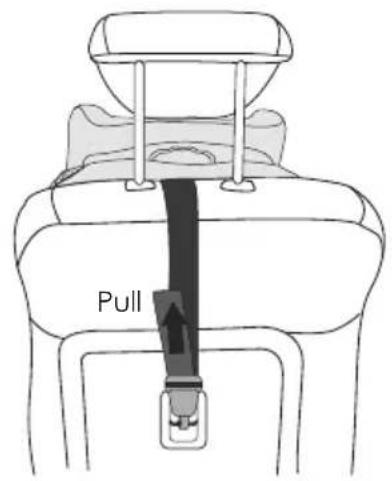
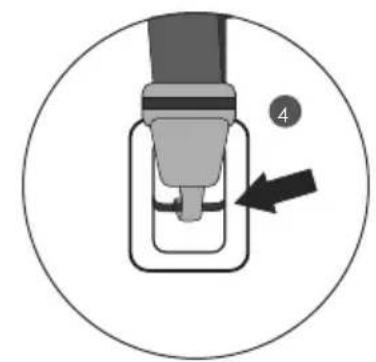
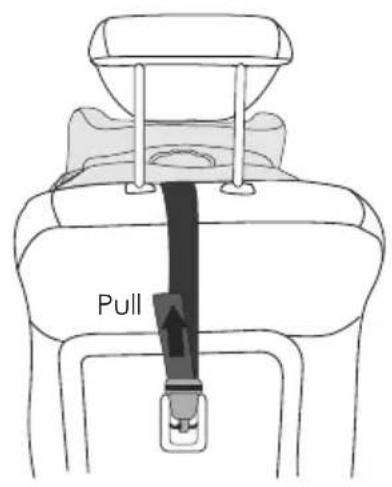
f) Hook the top tether up and pull as tight as possible(4)
natural_image
Line drawing of a car seat assembly with no text or symbols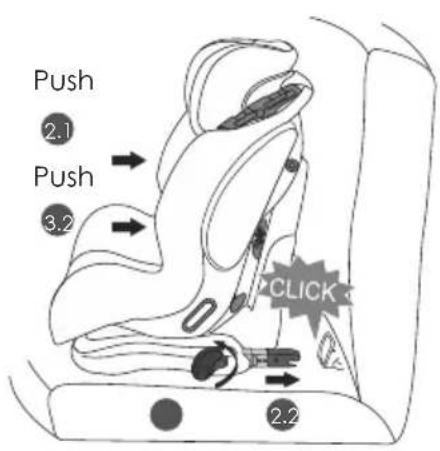
natural_image
Diagram of a mechanical component with a numbered arrow indicating a step, enclosed in a circle (no text or symbols present)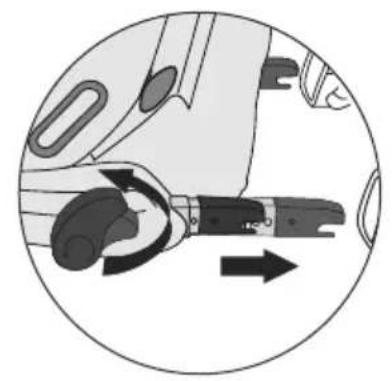
natural_image
Circular diagram showing a mechanical device with directional arrows indicating movement or force (no text or symbols)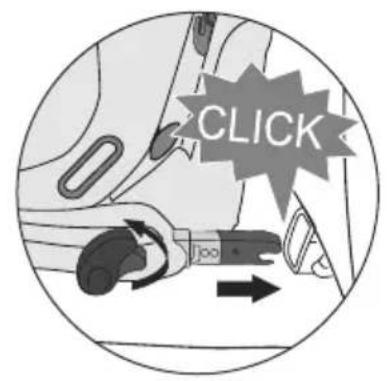
Installation for group II / III
This installation method is for a child within Group II(15-25kg) and Group III(22-36kg).
Note: the car seat must be used Isofix anchors plus top tether at the same time with 3-point automatic seat belt for group II/III all the time.
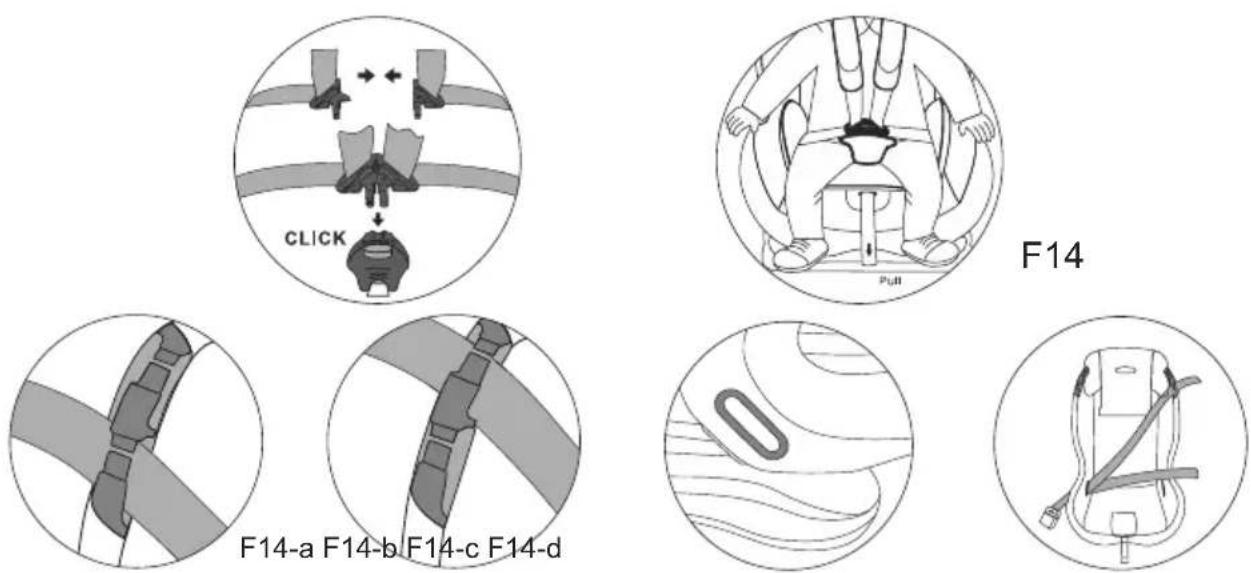
a) Remove the harness system, including the belt pads, central buckle and crotch strap.
b) Adjust the headrest by pulling the lifting handle at your required position according to your child's height.
c) Place your child into the car seat.
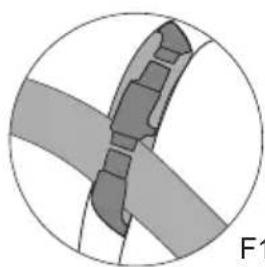
d) Thread the vehicle's shoulder belt from the Group II belt guide slot (F14-a), or Group III belt guide slot (F14-b), and thread the lap belt into the belt guide hole (F14-c). So the installation is completed (F14-d).
e) Joint the belts and buckle up.
The car seat must be fitted as a forward-facing position in the rear seats of vehicle Four positions of the car seat
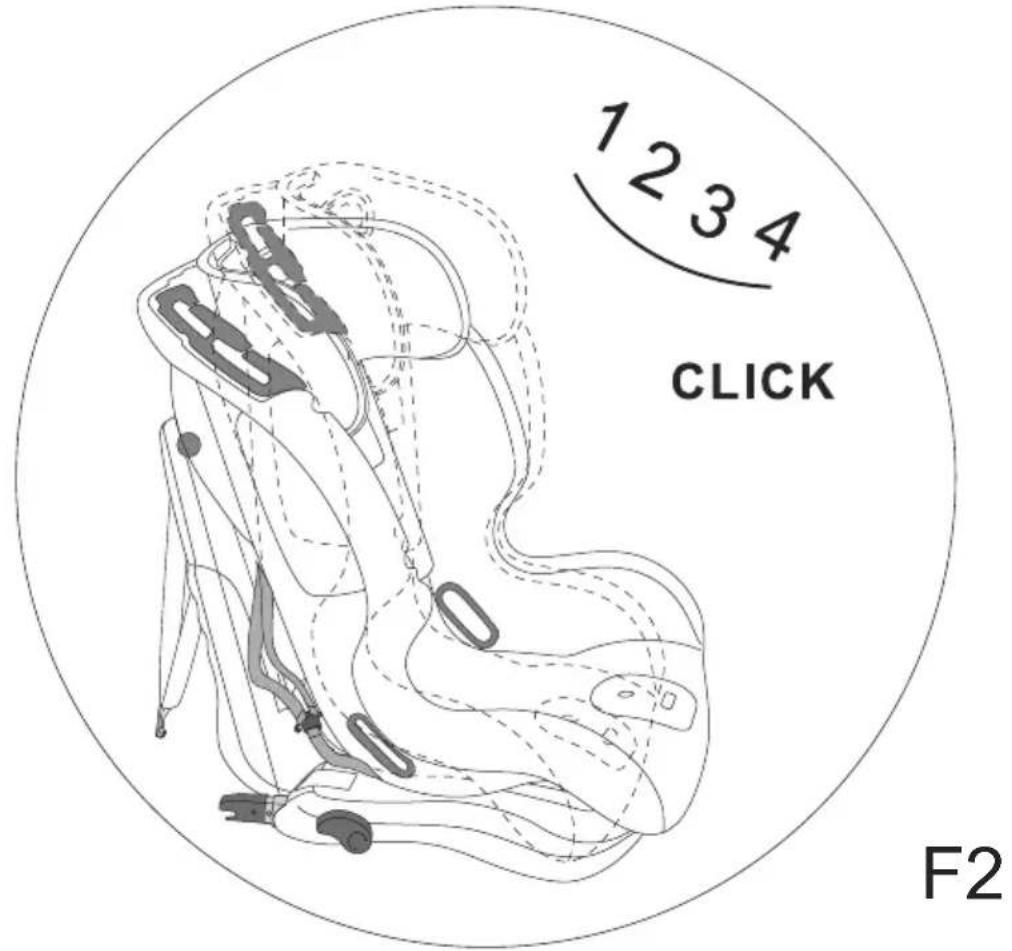
The “Titan” car seat can be used in four different positions. (see pic F2): Pull the positioning handle under the front of the seat forwards or backwards (feel the spring underneath), then release the handle.
THE TYPE OF APPROVED SEAT BELT YOU MUST HAVE
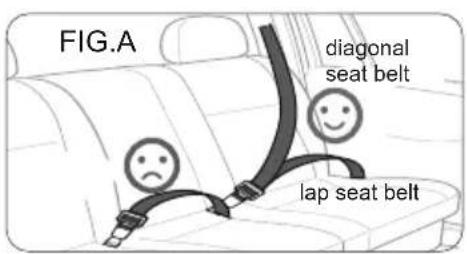
Your child seat can only be installed forward facing using a lap and diagonal seat belt in the front or rear passenger seat of the car. (FIG. A)
BG
natural_image
Line drawing of a car seat assembly with no text or symbols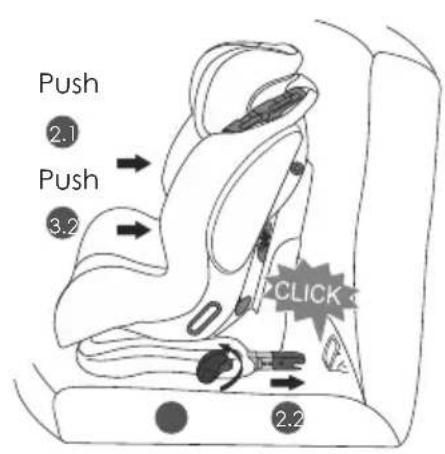
natural_image
Diagram of a mechanical component with a numbered arrow indicating a step, enclosed in a circle (no text or symbols present)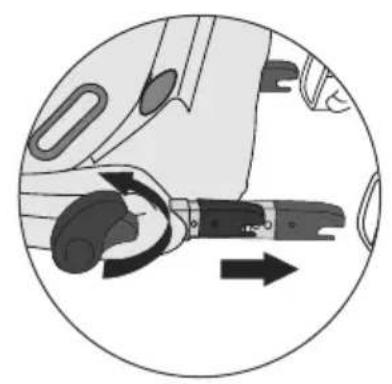
natural_image
Circular diagram showing a mechanical device with directional arrows indicating movement or force (no text or symbols)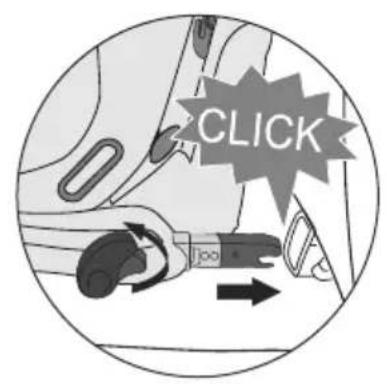
natural_image
Illustration of a person performing a pull-up exercise inside a circular frame (no text or symbols)F14
natural_image
Diagram of a mechanical component or assembly within a circular boundary, showing layered structure without any text or symbols.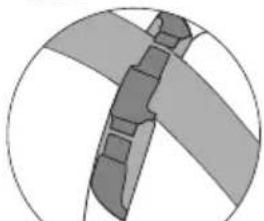
natural_image
Pure mechanical component diagram without any text, numbers, or symbolsF14-a F14-b F14-c F14-d
natural_image
Simple line drawing of a sphere with internal wavy lines and a central oval shape (no text or symbols)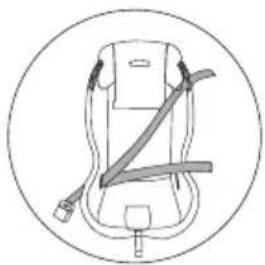
natural_image
Line drawing of a car seat with a belt and seatbelt, enclosed in a circle (no text or symbols)Brand : Lorelli
Model : Totan
Category : Child car seat