
Kos 3 - Tent High Peak - Free user manual and instructions
Find the device manual for free Kos 3 High Peak in PDF.


User questions about Kos 3 High Peak
0 question about this device. Answer the ones you know or ask your own.
Ask a new question about this device
Download the instructions for your Tent in PDF format for free! Find your manual Kos 3 - High Peak and take your electronic device back in hand. On this page are published all the documents necessary for the use of your device. Kos 3 by High Peak.
USER MANUAL Kos 3 High Peak
text_image
KOS 3 / 4| Aufbauanleitung - Set up instruction - Opzetinstructies - Instructions de montage | Kos 3 | Kos 4 | |
| Außenzelt / FlysheetBuitentent / Double toit | 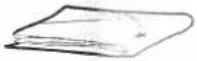 | 1 | 1 |
| Innenzelt / Inner tentBinnentent / Tente intérieure | 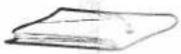 | 1 | 1 |
| Fiberglasgestänge / Fiberglas polesBoogstokken glasfiber / Arceaux fibre de verre | 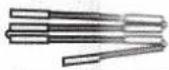 A A | 2 | 2 |
| Fiberglasgestänge / Fiberglas polesBoogstokken glasfiber / Arceaux fibre de verre | 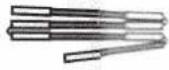 B B | 1 | 1 |
| Stahlaufstellstangen / Steel up right polesStalen luifelstokken / Mâts de relevée en acier | 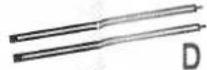 | 1 Set | |
| Erdnägel / pegGrondpennen / Piquets |  | 14 | 14 |
| Heringe / StakesSardines / Haringen |  | 9 | 9 |
| Sturmleinen / GuyropesStormlijnen / Haubans |  | 9 | 9 |
Kos 3
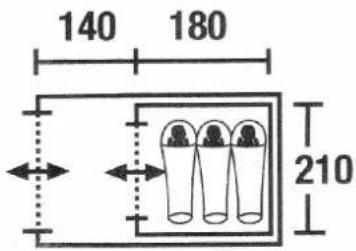
text_image
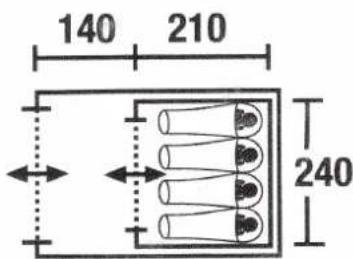
140 180 210Kos 4
text_image
140 210 240Spread out the fly sheet on clean and even surface. Ensure that the zippers are closed.
- Fit the pole sections together. Thread the color coded poles through the corresponding color coded sleeves.
- Raise the tent with closed zippers. Position the tent and anchor the fly sheet: Start to fix each corner with provided stakes.
● Fix the remaining pegging points with provided pegs.
- Open the fly sheet and lay out the inner tent.
Make sure that the entrance of inner tent match to outer tent.
● Fix the inner tent by using the provided hooks.
● Peg down the inner tent with provided pegs.
To maximize your pleasure with this tent please follow these recommendations:
Before your camping trip, take the time to familiarize yourself with the assembly instruction. If possible, do have a trial set up.
Be sure that your camping equipment is complete, and suitable for the local conditions you expect to find. Use special pegs for a sandy or for a rocky ground. Bring additional guy lines for increased safety under all weather conditions.
Set up
Look for a even ground. Remove any large and sharp stones as well as branches. Use natural windbreakers such as hedges or boulders. Avoid to set up your tent under trees because of the danger of lightning.
Be sure that the tension of the elastic rings and the tent fabric is not to strong enable to release strength during wind.
All zippers should be closed during set up. Please handle the zippers with care because they are wear and tear parts and excluded from guarantee.
For better stability drive the pegs into the ground at a slant, making sure that there is an even tension on the tent from all sides.
Dismantling
If possible, dismantle the tent under dry conditions to avoid fungus and stains. If the tent is wet, however, it should be put up again as soon as possible to dry completely.
Remove the pegs and guy lines carefully to avoid damage to the tent fabric.
Care
Clean the tent with clear water only.
For persistent stains use only mild cleaning agent. Check with your camping dealer for advice.
Do not clean the tent in the washing machine or dry cleaning.
The tent fabric and the seams should be waterproof treated after few time of use. Check with your camping dealer for advice.
Small damages of the tent fabric can be repaired with repair kits provided by your camping dealer.
The poles require no special care. The zippers should be from time to time treated with silicone or paraffin to retain their suppleness.
Packing
Pack the poles and accessories into the provided bags. Fold the inner and outer tent into rectangular shape measured to the width of the carry bag. Put the flat folded outer tent on top of the flat folded inner tent, roll together and fix with provided straps.
Put the tent into the carry bag and close the zipper carefully.
Store the tent in a dry, cool and well ventilated place.
Ultra violet - rays
Please be aware that all materials are effected by ultra – violet rays from the sun, and may become subject to fading colors. A tent will be obviously be effected less during short holidays. If the tent is put up for a very long period we recommend that you select a shady place.
Condensation
All tents are subject to some condensation. It is therefore essential that proper use is made of the provided ventilation, especially during the night time when the temperature drops.
Do not mix up condensation with leakage!
Please attend the following rules:
Don't keep cookers, heaters and lamps close to the tent-fabric.
Listen to the safety-instruction for these sets.
Keep the entrance clear.
Ask for the safety installation against fire on the camp