
DM 70 - Soundbar Accessory CANTON - Free user manual and instructions
Find the device manual for free DM 70 CANTON in PDF.


| Product Type | Active central surround speaker with integrated amplifier |
| Brand | Canton |
| Model | DM 70 |
| Power Supply | Mains voltage as specified on rating plate |
| Digital Inputs | 2 (optical/coaxial for SAT and DVD) |
| Analog Inputs | 2 (RCA for TV and AUX) |
| Outputs | Pre-out 2.1/5.1 mode, Sub out |
| Remote Control | Wireless RF, battery CR2450 |
| Audio Decoding | Dolby Digital, DTS, Dolby Pro Logic II, PCM |
| Surround Technology | SRS TruSurround XT, Virtual Surround |
| Playback Modes | Stereo, Surround 1, Surround 2 |
| Speaker Level Adjustment | Per channel (sub, front L, center, front R, rear R, rear L) |
| Speaker Delay | 1 m to 4 m in 0.1 m steps |
| Treble/Bass Adjustment | -6 dB to +6 dB |
| Bass Expansion | Dynamic adjustment: bypass, normal, medium |
| Lip Sync Delay | 0 ms to 70 ms |
| Startup Volume | Adjustable (default 50) |
| Preset Modes | 2.1 or 5.1 (with sub-variants DM1, DM70, etc.) |
| Magnetic Shielding | Yes, can be placed near TV |
| Cleaning | Use a clean, dry cloth; avoid chemical agents |
| Running-in Time | Approximately 15–20 hours |
| Warranty (Active Components) | 2 years from date of purchase |
Frequently Asked Questions - DM 70 CANTON
User questions about DM 70 CANTON
0 question about this device. Answer the ones you know or ask your own.
Ask a new question about this device
Download the instructions for your Soundbar Accessory in PDF format for free! Find your manual DM 70 - CANTON and take your electronic device back in hand. On this page are published all the documents necessary for the use of your device. DM 70 by CANTON.
USER MANUAL DM 70 CANTON
natural_image
Illustration of a computer monitor and two people with curved arrows indicating signal or data flow (no text or symbols)natural_image
Exterior view of a black horizontal panel with 'CANTON' branding on the front panel (no other text or symbols visible)2
3
natural_image
Coiled black cable with multiple connectors, no visible text or symbols4
natural_image
Black cable with two metallic pins, no visible text or symbols5
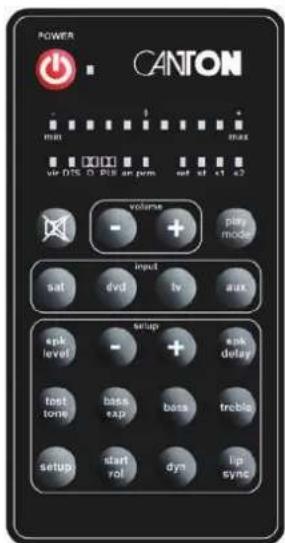
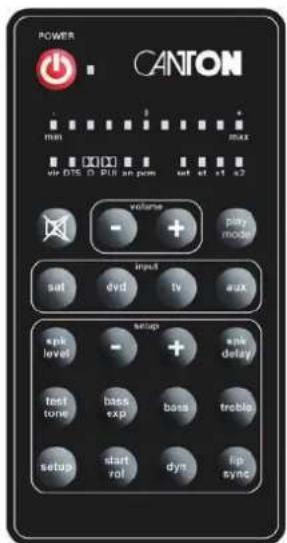
Fernbedienung
Ein/Standby-Taste
Dekodier-Modus
Mute-Taste
Speaker-Level
Basskorrektur-Taste
Test-Tone
Standby-Anzeige
st = Stereo, s1 = Surround1, s2 = Surround2
Speaker Delay (Distance)
treble
Laufzeitverzögerung
Please read these operating instructions carefully. Be sure to keep them in a safe place for future reference.
Canton cannot be held responsible for any damages that may occur through failure to observe the following points.
Select the flattest possible base for your loudspeaker. The tilt angle of the loudspeaker should not exceed 5 degrees. It should also be positioned in a clean, dry location and kept away from direct sunlight, sources of heat, vibrations, high moisture levels or extreme cold.
Never open the cabinet. In the case of any problems or defects please contact your dealer or a qualified specialist.
To avoid damaging your DM system it should only be operated with the voltage specified on the rating plate.
To avoid the risk of fire or electrical shock the DM system should not be exposed to rain or high humidity ( >80% ). The equipment complies with the current EMV regulations at an ambient temperature of +10^+40^ .
Do not exert any force on the operating elements, connections or cables. To move the loudspeaker first unplug the power cable then disconnect from other devices. Always hold the plugs instead of pulling the cables. Never handle the power cable with wet hands.
To protect the DM system amplifiers from overheating they must be located at a minimum distance of 5 cm from walls and furniture. Avoid any build-up of heat and never cover your DM system with curtains, tablecloths etc.
The DM 70 has magnetic shielding and can therefore be positioned next to your television set.
Do not position your DM system near any heat source or open flames (e.g. candles). For safety reasons always unplug the DM system from the mains during long periods of disuse or in case of thunderstorms or possible flooding.
Do not place anything on the cabinet of the DM system or in front of the bass reflex opening. Objects can be damaged by movement or vibrations.
Do not put any objects or body parts in the opening of the subwoofer. Current-carrying parts inside the cabinet may be touched and damaged. This can lead to short circuits, electric shocks and potential fires.
If any sound distortion occurs, such as unnatural knocking, throbbing or high frequency clicking, reduce the volume immediately.
Do not use chemical agents to clean the equipment. Instead use a clean, dry cloth.
Sudden changes in temperature may lead to a build up of condensation (water droplets) inside the DM system. Do not use the equipment until the moisture has evaporated (at least 2 hours).
The battery in the remote control must be disposed of at a battery collection point. Batteries should be kept out of the reach of children. Batteries shall not be exposed to excessive heat such as sunshine, fire or the like.
The battery must be inserted correctly according to the polarity. Use only the battery specified for this system (CR2450).
Access to the mains socket must be kept clear at all times so that the equipment can be unplugged in case of danger!
The user is responsible for the correct installation and connection of the DM system. Canton cannot accept responsibility for damages or accidents caused through inappropriate installation or incorrect connections.
Warning: Listening to music at high volume, particularly over a long period of time, can lead to hearing loss.
Dear Customer,
Welcome to the Canton family and thank you for the confidence that you have shown in us by purchasing this product. You have chosen a high quality loudspeaker system, which demonstrates your desire for excellence in terms of sound and workmanship.
Please read these operating instructions carefully before installing and connecting your DM system: they will help you to get the best from your system. Canton has a distribution network that extends across over 40 countries. This experienced team, along with our authorised dealers, will be happy to help you with any queries that may arise.
We hope that your DM system will give you a great deal of pleasure for many years to come.
Your Canton Team
System description
The Virtual Surround system of the DM Series generates a full sound field that is normally only possible with 5.1 systems. In order to achieve this the individual channels of a multi-channel recording undergo a special frequency-dependent process and are blended into two channels that then create a spatial surround effect, thus achieving maximum sound satisfaction with minimum installation effort.
If you have any problems with the remote control please refer to the chapter „Troubleshooting and Optimisation“ on Page 38.
Contents DM 70
The Digital Movie System DM 70 is supplied with the following component parts:
1) Active central surround speaker with integrated audio receiver.
2) User-friendly remote control.
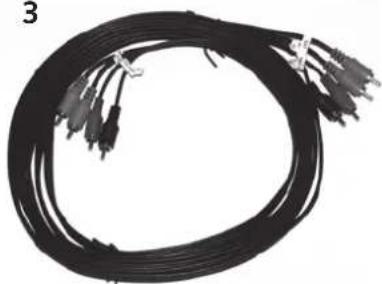
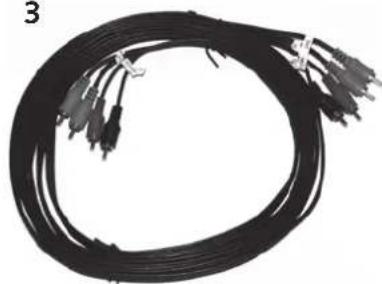
3) Cable to connect 2 digital and 1 analogue stereo audio sources.
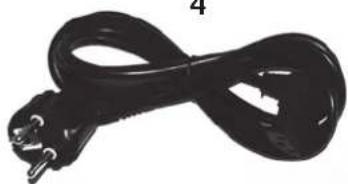
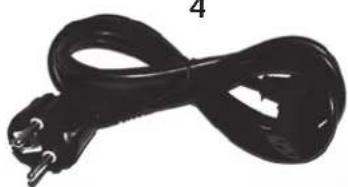
4) Power cable.
5) Battery (CR2450) for the remote control (not shown)
1

natural_image
Exterior view of a black rectangular electronic device with no visible text or symbols on its body2
3
natural_image
Coiled black cable with multiple connectors, no visible text or symbols4
natural_image
Black cable with a metallic connector, no visible text or symbolsRearview of the DM 70
Positioning the loudspeaker
The DM loudspeaker should be positioned above or below the television set. A flat screen can be placed directly on top of the DM 70.
Connecting source devices
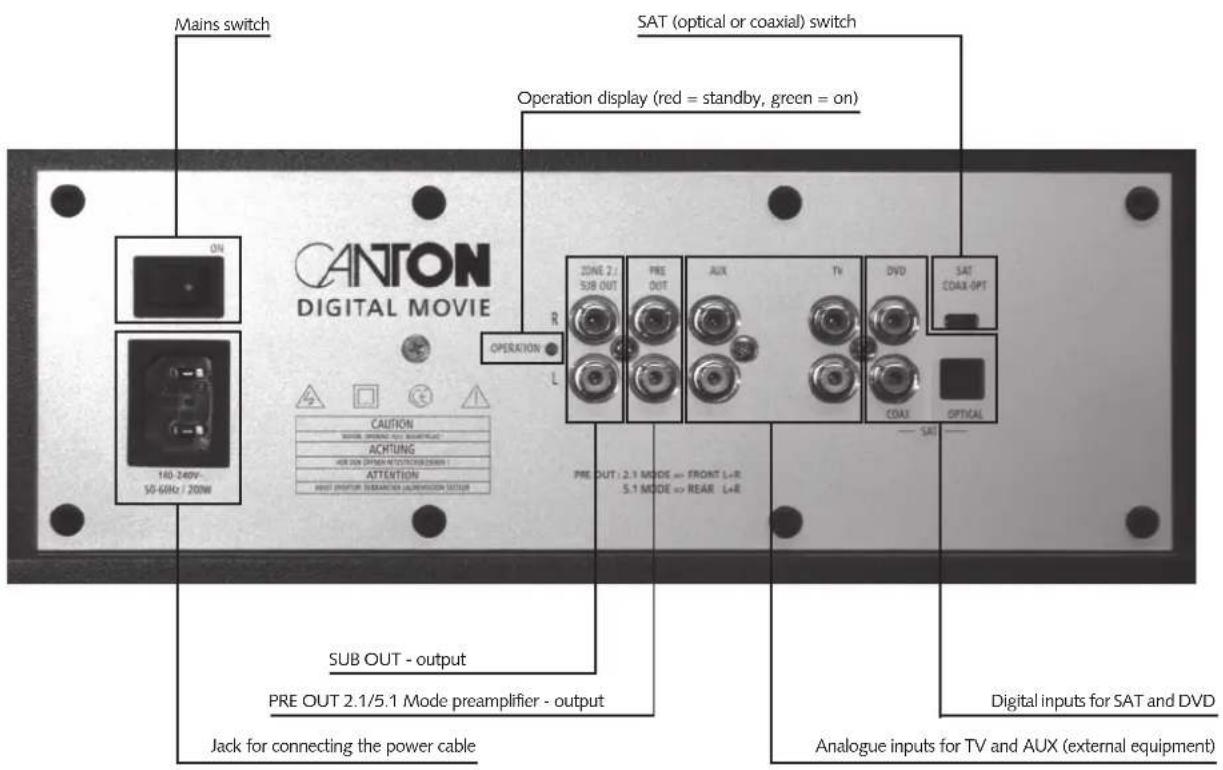
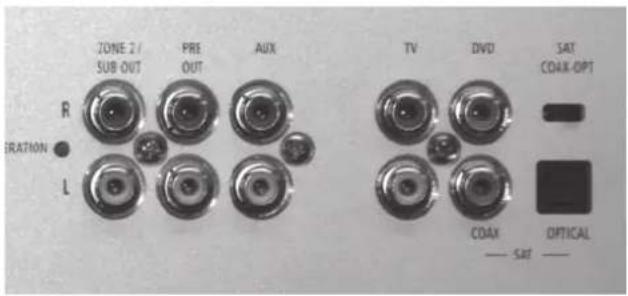
The Canton DM system offers a multitude of connection possibilities for all current audio sources, such as DVD players, video recorders, satellite receivers, multimedia consoles (Playstation®, X-Box®, ...) etc. The audio connections of your audio source devices can be connected to the relevant inputs on the rear of the DM 70 (DVD to DVD, SAT to SAT, etc. ...). Audio sources that have a digital output for Dolby Digital and DTS Bitstreams can also be digitally connected to the DM system. This ensures full Dolby Digital and DTS sound quality.
The video signal connections are made directly between the audio source devices and the image playback device. The required image source is selected using the Menu of the image playback device (3).
A digital satellite receiver can be connected to the DM system via an optical or a coaxial digital input. The required input must be selected using the slide switch (OPT/COAX) on the rear of the DM 70.
The PRE-OUT 2.1/5.1 Mode output allows devices such as active wireless loudspeakers to be connected. Depending on the chosen preset setting (Page 37) in 2.1 Mode the front channels and in 5.1 Mode the surround channels are used.
The Sub Out can be used for the connection of an optional available active subwoofer.
Note: When connecting an active subwoofer to the DM 70 go to „Speaker Setup" and set the volume of the subwoofer at -6 dB. Increase the level on the subwoofer itself to 6 dB. Further information on Page 33.
Remote Control
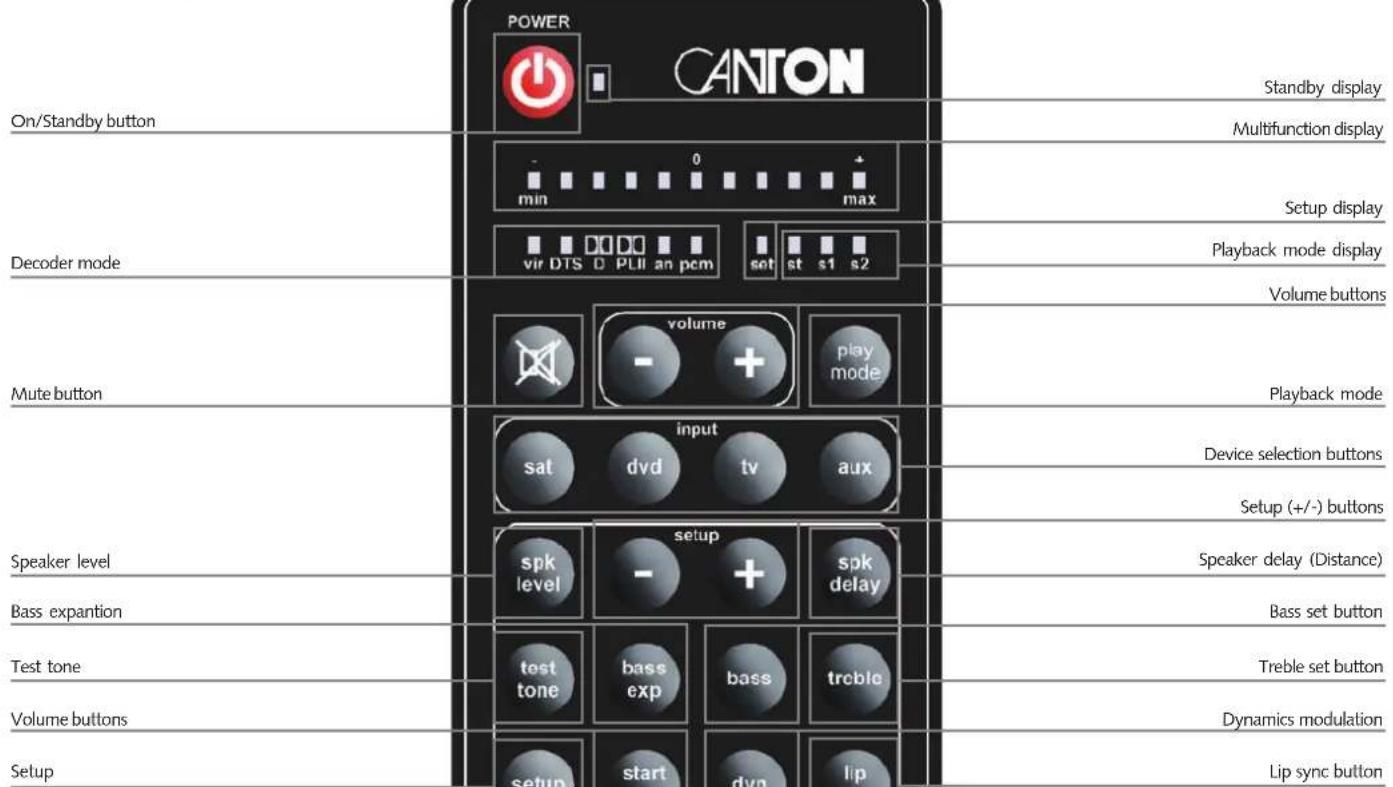
Setting up the remote control
Please put the remote control with the keypad facing down on an even surface and remove the cover on the back of the remote control. Insert the battery supplied into the battery compartment. Be careful to ensure that it is inserted correctly according to the polarity markings (+/-). In order to avoid unloading, the battery should only be touched on the „+“ pole.
Using the remote control
When all the devices are connected and the system is plugged in at the mains the Canton DM system is in standby mode. Press any button to activate the remote control. If the remote control is not used for more than 30 seconds it returns to standby mode and can be reactivated by pressing any button.
The DM system can be switched on or returned to standby mode by
pressing

If the red power light (LED) is flashing this means that there is no wireless connection between the remote control and the system. Check that the system is switched on at the mains or reduce the distance between the remote control and the DM system.
By pressing the volume of the DM system in the main menu can be adjusted in 100 stages from 0 ... 99. Only 11 stages will be displayed at any time. The system confirms the input by flashing of the respective LED.
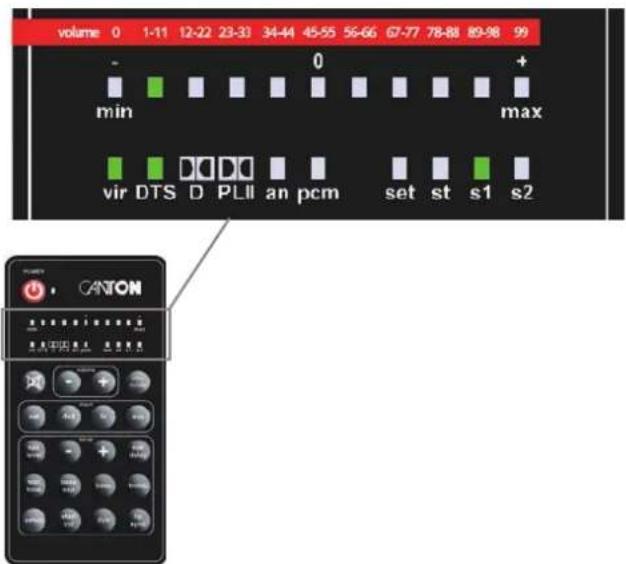

turns the volume off or on.
Using the DM system

Press to activate the DM system. The following lights will come on:
- one volume LED
- one playback mode LED
- one or two decoder mode LEDs

Press again to turn the DM system off.
The DM system will go into standby mode.
Main Menu
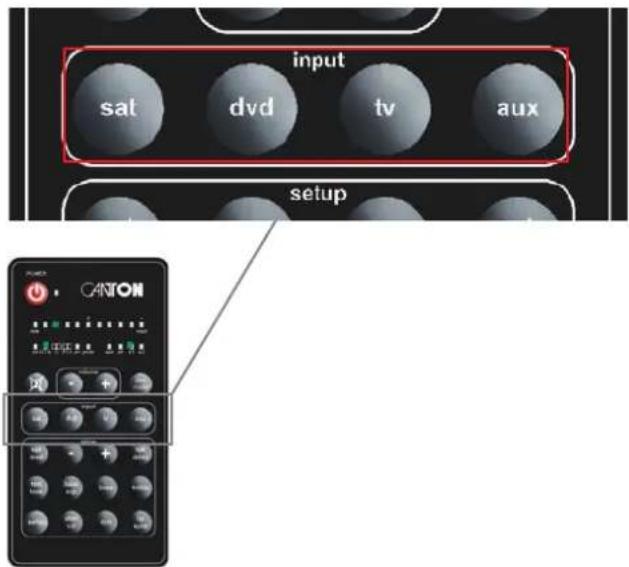
You can switch the inputs of the DM system directly using the buttons „sat“, „dvd“, „tv“ and „aux”.

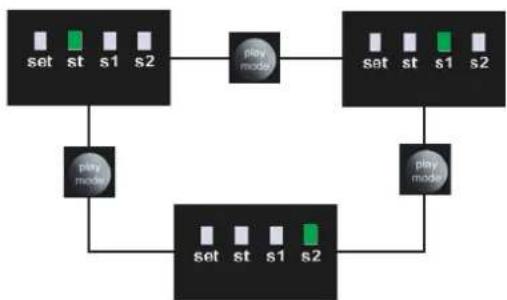
Use to select whether the sound reproduction should be in stereo or surround mode. The selected mode will be displayed via the three relevant LEDs.
st = Stereo, s1 = Surround1, s2 = Surround2
The system will set the relevant decoder mode automatically according to the input signal.
Play mode „stereo“ will activate analogue stereo or PCM
Play modes „surround 1 and surround 2 / 2.1 Mode“: Virtual Dolby Digital, Virtual Dolby Pro Logic II or Virtual DTS.
Play mode „surround 5.1 Mode“: Dolby Digital, Dolby Pro Logic II or DTS.
Note: In order to accommodate the different recording philosophies unique to music recordings we have implemented two surround modes. Use „surround 2“ predominantly in the case of poor speech intelligibility (for example, when the speech reproduction seems unusually dull and unclear).
flowchart
graph TD
    A["set"] --> B["play mode"]
    C["st"] --> B
    D["s1"] --> B
    E["s2"] --> F["play mode"]
    B --> G["set"]
    H["set"] --> I["st"]
    J["s1"] --> K["s2"]
    L["s2"] --> M["play mode"]
    M --> N["set"]
    O["st"] --> P["s1"]
    Q["s2"] --> R["s2"]
Setting up the DIGITAL MOVIE
Once your DM system has been successfully connected you need to adjust the individual components to suit the environment.
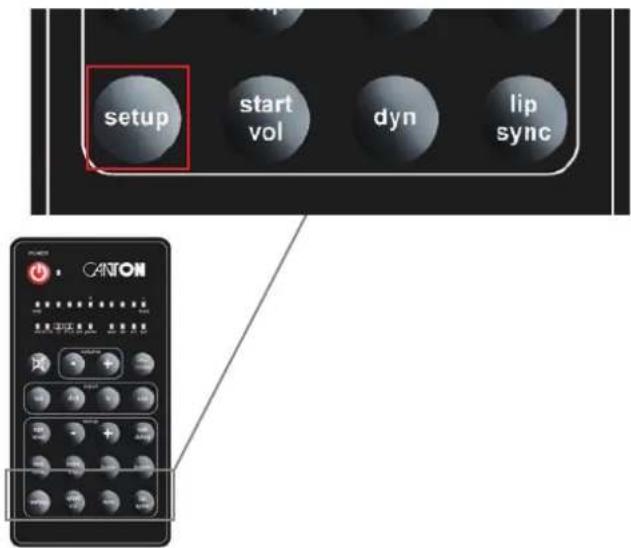
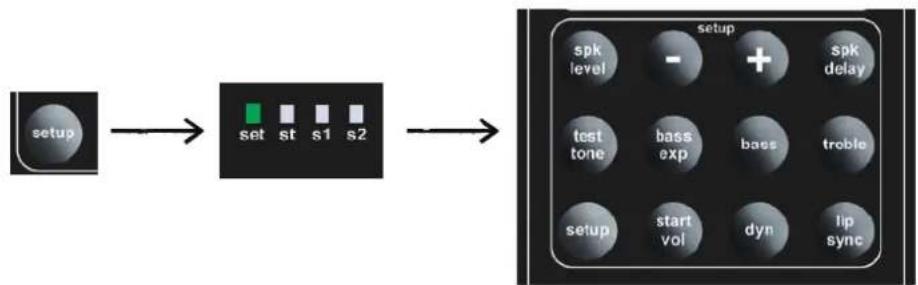
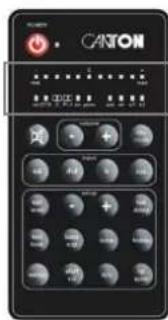
To adjust the DM system, turn it on and press the setup button for about 3 seconds. The LED „Set“ will start to flash. You can then use the relevant buttons (spk level, spk delay, bass exp...) to activate the desired functions. The values within each function can be adjusted up or down using the -setup+ buttons.
To leave the Setup press one of the input buttons, press the button again or wait until the remote control goes into standby after approx. 30 seconds.
flowchart
graph LR
    A["setup"] --> B["set"]
    B --> C["step"]
    C --> D["setup"]
    style A fill:#000,stroke:#fff,color:#fff
    style B fill:#999,stroke:#000,color:#fff
    style C fill:#999,stroke:#000,color:#fff
    style D fill:#999,stroke:#000,color:#fff
Speaker Setup
Speaker Delay (Distance)
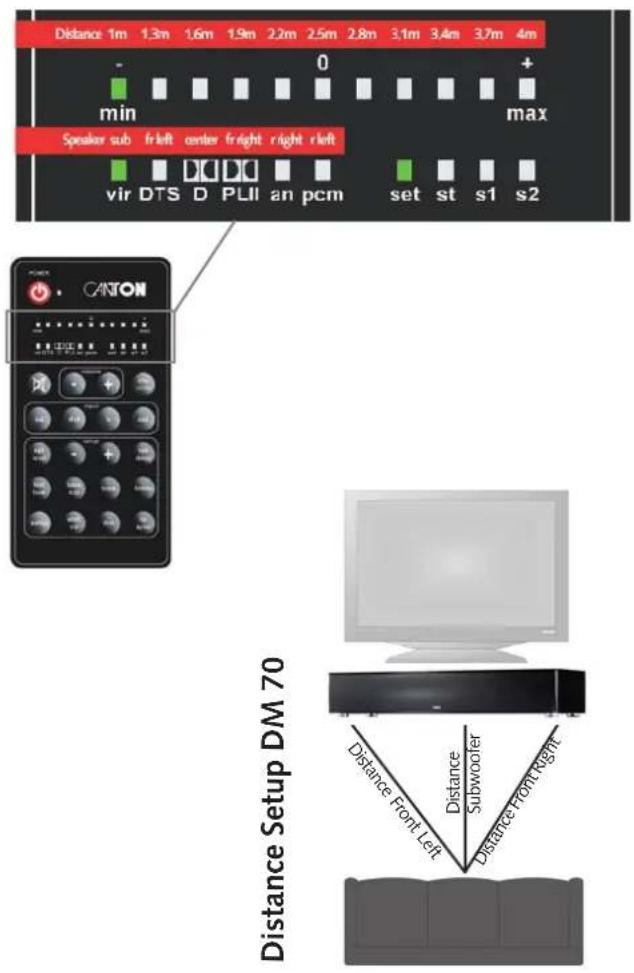
First measure the distance between the individual component parts of the DM system and your preferred listening position.
Activate the function (distance of loudspeaker) as described above. Press the button repeatedly until you have selected your chosen loudspeaker. The six LEDs on the left at the bottom will show which loudspeaker has been selected. They are arranged as follows: Subwoofer - front left - center - front right - rear right - rear left Now use the buttons to select the required distance. The distance can be seen in the top row and can be adjusted to values between 1m and 4m in 0,1m steps. The system confirms the input by flashing of the respective LED.
Speaker Level
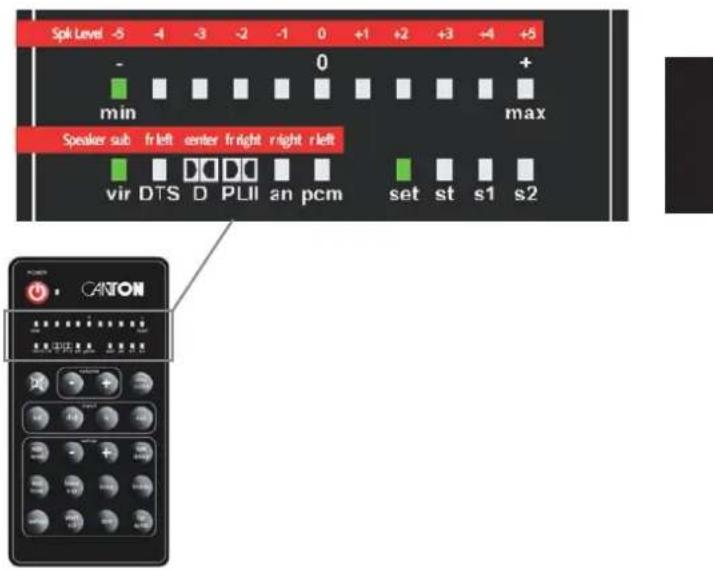
The tool is used to set the volume of the DM system. This can only be
activated after the spk function has been selected.
Warning! Before activating the test tone use the buttons
to set the volume of the system in normal operating mode to a
moderate value (40-50). Use the + buttons to adjust the
volume levels of the individual speakers. Select the relevant speaker by pressing repeatedly on the 📄 button.
Note: In 2.1 Mode the „Center, Rear Right and Rear Left“ are virtual loudspeakers and so no „Distance“ setting can be made.
The test tone is also not audible on these channels.
System Setup
Room Settings
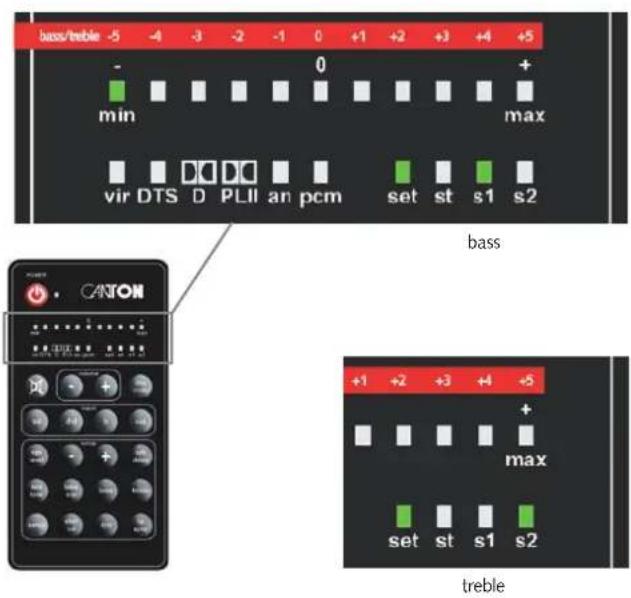
Use the boss and triple buttons to adjust the system to your room. The values range from -6dB to +6dB. The maximum values (-6dB and +6dB) are indicated by both LEDs on the left or the two right LEDs.
Helpful hints:
In rooms with relatively 'dead' acoustics – increase the treble In rooms with relatively 'live' acoustics – decrease the treble In freestanding position – increase the bass In wall position – decrease the bass The following rule applies in all cases: be guided by your own ears.
Dynamic Bass Adjustments
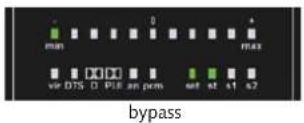
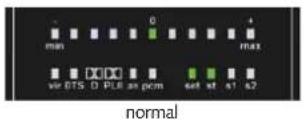
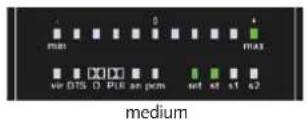
The dynamic bass base of the DM system can be adjusted in line with volume and auditory physiology to enhance the low frequency intensity. When playing films we recommend the settings „normal“ or „medium“. For audiophile stereo reproduction we recommend the setting „bypass“.
Suggested settings:
Time delay
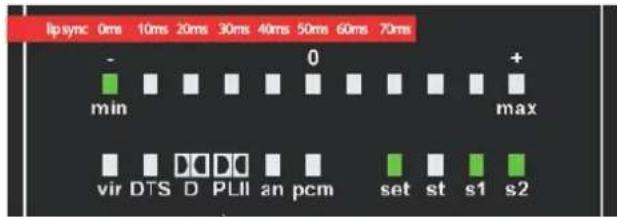
With lip sync the image can be synchronised with the sound, e.g. in order to match voices to delayed mouth movement.
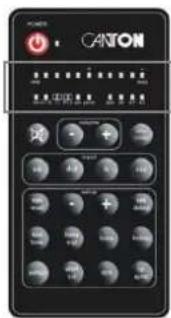
It is possible to set an audio signal delay of 0 to 70ms using the
buttons

Dynamics
The

button can be used to adjust the dynamics of the system.
Using
it is possible to select either the „compressed“ or
„full dynamic“ setting. For „normal“ reproduction we recommend the „full dynamic“ setting.
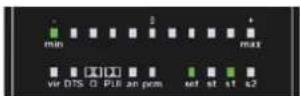
compressed
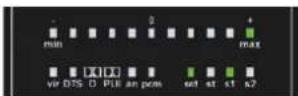
full dynamic
Startup Volume
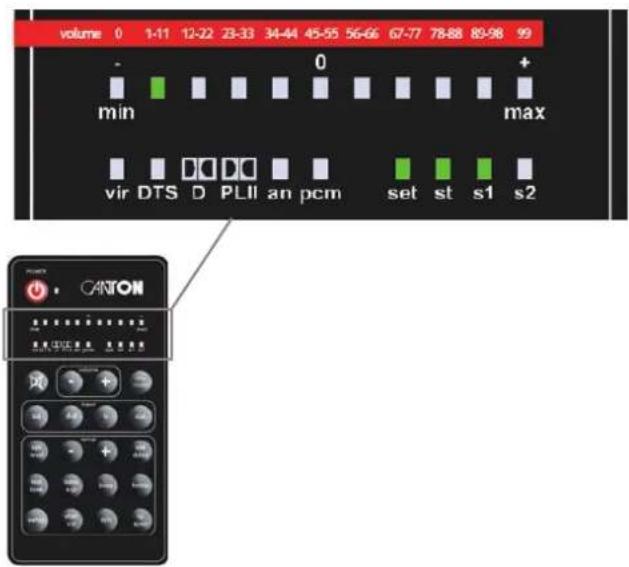
This value establishes the maximum volume that applies when the
DM system is turned on. If the device is set to a lower volume when it
is turned off this value remains in place.
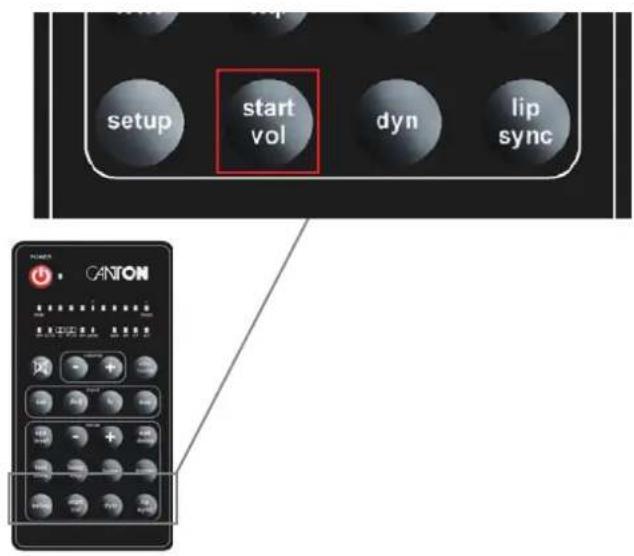
Press the

button to set the startup volume. The range
corresponds to the normal reproduction volume.
Preset
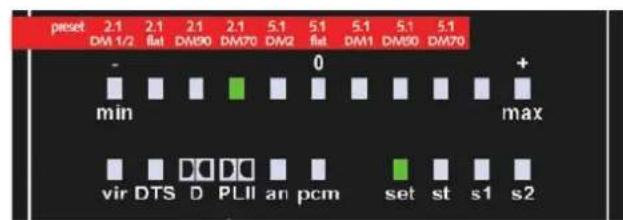
The Preset establishes in what mode your DM system will operate. The display differentiates between function-specific and product-specific characteristics.
Functions can be 2.1 Mode (factory setting) or 5.1 Mode. In the 5.1 Mode it is possible to operate active or wireless loudspeaker as rear speakers via the „2.1 MODE/5.1 MODE“ preamplifier output. The mode „5.1 DM 2“ and „5.1 flat“ should not be selected, as this setting requires an additional passive center speaker that cannot yet be connected to the system. This does not apply to modes „5.1 DM 1“, „5.1 DM 90“ and „5.1 DM 70“ as here the signals are reproduced by both front speakers.
To alter the Preset Mode of the system press both the spk level and the spk delay buttons simultaneously for approx. 3 seconds then use the
buttons to change the Preset. To leave this mode press
any input button, press the setup button again or wait for 30 seconds for the remote control to go into standby.
The product-specific characteristics are primarily related to your DIGITAL MOVIE system. Select the suitable menu points for your system.
Registering the remote control with the DM
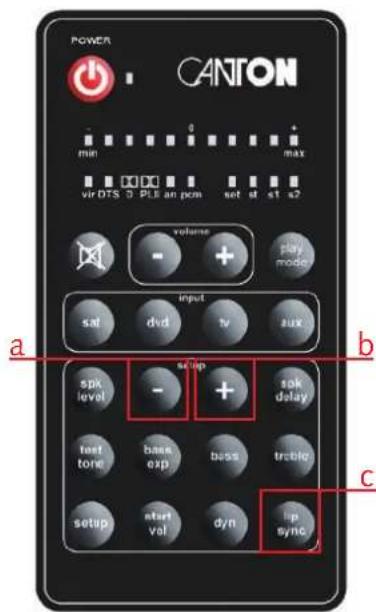
To register the remote control with the DM system follow the following process:
- Connect the DM to the power supply and switch it on at the mains. Be careful to ensure that the system was previously switched off for at least 20 seconds.
- Within 30 seconds of switching on press the following buttons in order
a.

b.

C.

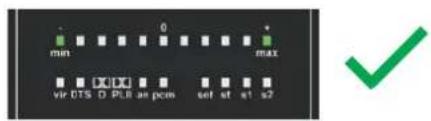
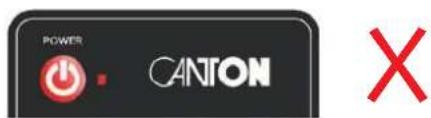
A positive registration will be confirmed by a simultaneous double flash of the left and right LEDs in the top row. If the registration has failed the standby LED will flash twice. Correct the cause of the error (device not switched on, distance too great etc.) and start the process again.
Troubleshooting and Optimisation
| Error | Possible causes | Solutions |
| No sound | 1. The volume is set at 0 or very low or the sound has been muted2. The wrong input has been selected | 1. Increase the volume2. Select the correct input for the audio source |
| No sound with Sat input | 1. The slide switch on the DM has not been set correctly (SAT Coax/Opt) | 1. Adjust the slide switch (SAT Coax/Opt) |
| No sound with Sat or DVD input | 1. The analogue output on the source device was used | 1. Make sure that your audio source is connected via the digital audio output |
| No surround sound (no Virtual Surround Effect) | 1. The playback mode is set to Stereo2. You are not halfway between the speakers or the distance settings do not correspond to the actual distances3. The system is in the wrong Preset (5.1Mode) | 1. Set the „play mode" to surround2. Set the correct distance to the DM system (Pg.32)3. Reset the system to 2.1 Mode |
| One speaker appears louder than the other or the stereo positioning is not central | 1. The satellite speakers are set at different levels or you are sitting closer to one of the speakers | 1. Correct the levels, using „test tone" (Pg.33) |
| System fails to recognise Dolby Digital or DTS (only „analogue" or „pcm" shown) | 1. The source is using the analogue connection2. The source does not support the formats or the wrong settings have been used | 1. Connect the audio source using a digital output to the DVD or Sat inputs2. For more detailed information refer to the operating instructions of the audio source |
| System is quieter after switching on than before switching off | 1. The startup volume is set at a low value (standard = 50) | 1. Set the startup volume to the required level (Pg.36) |
| In Surround Mode the signal sometimes fails (voices in particular) | 1. The system is in 5.1 Mode DM | 1. Set the system to 2.1 Mode (Pg.37) |
Error Possible causes Solutions
| Sound is dull (too little treble) | 1. You are playing back a stereo signal in Virtual Surround mode2. Your room has very ‘dead’ acoustics | 1. Change the playback mode to Stereo (Pg.30)2. Increase the treble levels as described in „Room settings“ (Pg.34) |
| Sound is too tinny | 1. Your room has very ‘live’ acoustics | 1. Decrease the treble levels as described in „Room settings“ (Pg.34) |
| You have too little upper bass | 1. The levels for the bass are set too low | 1. Increase the crossover frequency setting as described in „Room settings“ (Pg.34) |
| You have too much upper bass | 1. The levels for the room comp. bass are set too high2. The DM is very close to the wall or in the corner | 1. Decrease the crossover frequency setting as described in „Room settings“ (Pg.34)2. Reposition the DM further away from the wall |
| You have too much lower bass | 1. The DM is very close to the wall or in the corner2. The setting for „bass expand“ is set at medium | 1. Reposition the DM further away from the wall2. Set „bass expand“ to normal or bypass |
| Your bass levels are incorrectly set | 1. The levels for the DM are not set correctly | 1. Correct the levels |
| You have a delay between the image signal of your flat screen and the audio signal | 1. The signal processing of the flat screen takes longer than that of the DM system | 1. Set the required time delay using the „lip sync” function |
| The signal sounds distorted | 1. The processor can overload in the case of multichannel recordings2. The level of the system is set too high | 1. Change from „dynamic“ to „compressed“ (Pg.35)2. Reduce the volume |
Error Possible causes Solutions
| The red LED of the remote control is flashing | 1. The DM system is not switched on at the mains2. The distance between the DM system and the remote control is too great3. The battery of the remote control is almost dead4. The processor of the DM system or the remote control has shut down5. The remote control is not registered with the DM system | 1. Connect the DM to the mains and switch the power to ON2. Reduce the distance to the DM system3. Change the battery (CR 2450)4. Switch the DM system power off for approx. 10 seconds or take the battery out of the remote control for at least 10 seconds5. Follow the steps described in „Registering the remote control with the DM“ |
| The remote control does not work (no LED light) | 1. The battery is dead2. The battery has been inserted incorrectly | 1. Change the battery (CR 2450)2. Insert the battery correctly |
General care and maintenance
To ensure that you enjoy your Canton loudspeakers for a very long time please note the following care and maintenance instructions: Do not expose the cabinet of the loudspeaker to direct sunlight. Avoid extreme changes in temperature and protect your loudspeaker from moisture. Do not use abrasive or alcohol-based cleaning agents. The surface of the cabinet can be wiped clean with a lint-free cloth.
Running-in time
In order to develop its maximum performance ability a loudspeaker needs a running-in time of approx 15 – 20 running hours. In this time the characteristics of all the mechanical parts alter to reach the values set during the development of the loudspeaker, i.e. the suspension of the chassis becomes freer, improving the reproduction quality.
About TruSurround XT
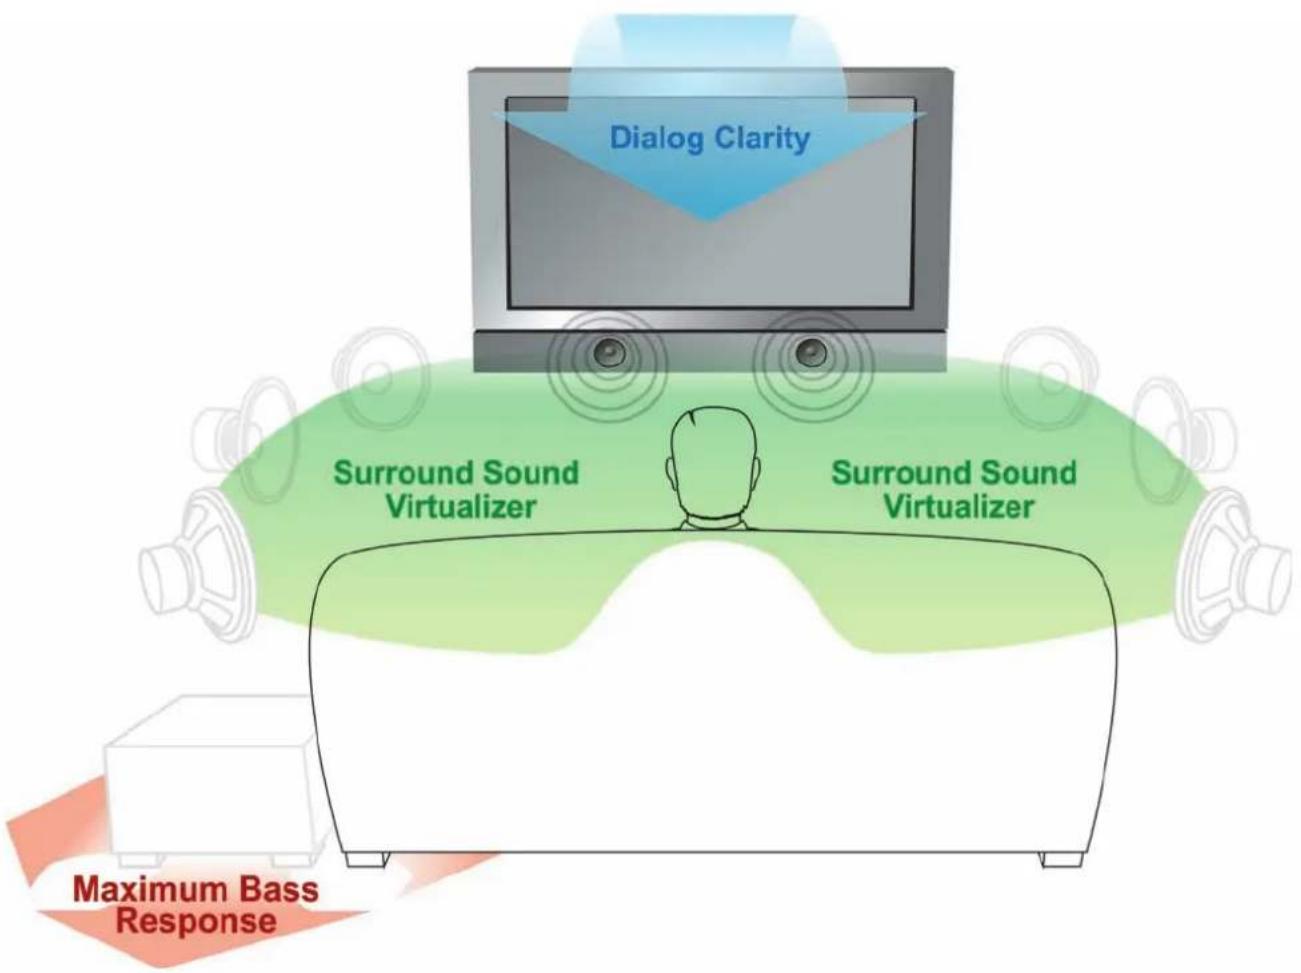
SRS TruSurround XT®, an audio enhancement technology from SRS Labs, processes multichannel content to create an immersive surround sound experience so the listener feels as if „phantom“ speakers appear to extend all around them, producing an amazing surround sound effect, without the clutter of extra wires or speakers placed around the room.
Additionally, it creates a 3D wall of sound that moves past the physical width of the DM 70 so the listener no longer needs to sit directly in the middle of the couch to hear best audio effect.
SRS TruSurround XT® also helps lift dialog out of the chaos of sound effects and makes it seem as though low frequency bass is "thumping" through the speakers.



Dolby, Pro Logic, and the double-D symbolareregistered trademarksofDolbyLaboratories.
Manufactured under license under U.S. Patent #'s: 5,451,942; 5,956,674; 5,974,380; 5,978,762; 6,487,535 & other U.S. and worldwide patents issued & pending. DTS is a registered trademark & the DTS logos and Symbol are trademarks of DTS, Inc. © 1996-2007 DTS, Inc. All Rights Reserved.
TruSurround, SRS and symbol are trademarks of SRS Labs, Inc.
Garantie-Urkunde · Warranty-Card
Seriennummer · Serial Number
In addition to the legally prescribed guarantee Canton and the Canton distributors also offer Europe wide the following warranty, as long as the product was purchased from an authorized Canton dealer: 5 years for all passive loudspeakers and 2-years for the active subwoofers and partially-active speakers. The warranty period begins on the date of purchase and is only valid for the original purchaser. Transport damage and damages caused by inappropriate use are not covered. The cover is not extended if any component parts are exchanged during the guarantee period. This guarantee applies to all loudspeakers sold by an authorised Canton dealer. In case of damage please contact your local dealer or contact the Canton Service Department directly.
Canton Elektronik GmbH+Co KG · Neugasse 21-23 · D-61276 Weilrod Telefon (06083) 287-0 Telefax (06083) 2 81 13 · www.canton.de
- Fernbedienung
- Laufzeitverzögerung
- System description
- Contents DM 70
- Rearview of the DM 70
- Positioning the loudspeaker
- Connecting source devices
- Setting up the remote control
- Using the remote control
- Using the DM system
- Main Menu
- Setting up the DIGITAL MOVIE
- Speaker Setup
- Speaker Delay (Distance)
- Speaker Level
- System Setup
- Room Settings
- Dynamic Bass Adjustments
- Time delay
- Dynamics
- Startup Volume
- Preset
- Registering the remote control with the DM
- General care and maintenance
- Running-in time
- About TruSurround XT
Brand : CANTON
Model : DM 70
Category : Soundbar Accessory