BHI100 - Cooker BAUMATIC - Free user manual and instructions
Find the device manual for free BHI100 BAUMATIC in PDF.


User questions about BHI100 BAUMATIC
0 question about this device. Answer the ones you know or ask your own.
Ask a new question about this device
Download the instructions for your Cooker in PDF format for free! Find your manual BHI100 - BAUMATIC and take your electronic device back in hand. On this page are published all the documents necessary for the use of your device. BHI100 by BAUMATIC.
USER MANUAL BHI100 BAUMATIC
natural_image
Simple line drawing of a fish with fins and tail, no text or symbols presentUser Manual for your Baumatic
BHI100-AUS
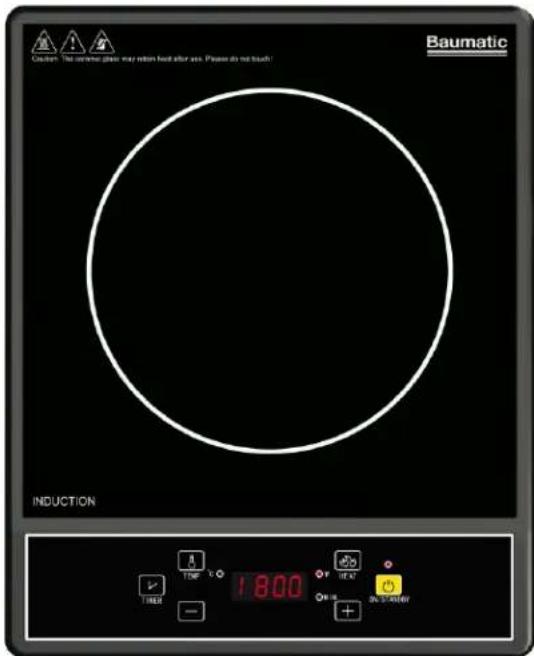
Freestanding 1 zone induction hob
text_image
Caution: No sensitive gain may return feed after use. Please do not touch! Baumatic INDUCTION A TEMP 1800 ON ON/ORDER
text_image
Baumatic®NOTE: This User Instruction Manual contains important information, including safety & installation points, which will enable you to get the most out of your appliance. Please keep it in a safe place so that it is easily available for future reference; for you or any person not familiar with the operation of the appliance.
GS 16/02/12
Dear Customer,
Congratulations on purchasing your new product from Think Appliances.
To register your parts and labour warranty (some conditions apply please refer to your warranty card for more details) please contact out Customer Care team on:
1800 444 357
Our Customer Care centre is there to ensure you get the most out of your appliance. For example, should you want to learn more about recommended cooking temperatures, the various cooking functions available, how to set and program your LED clock, and importantly taking care of your appliance when cleaning, please call us because we are here to help you.
It is important that you read through the following use and care manual thoroughly to familiarize yourself with the installation and operation requirements of your appliance to ensure optimum performance.
We also carry a complete range of spare parts for all Think products. For all your spare parts enquiries please contact our team at Pronto Parts on:
1300 306 973
Again, thank you for choosing an appliance brought to you by Think Appliances and we look forward to being of service to you.
Kind regards
Management
Think Appliances
Contents
Environmental note 5
Important safety information 6 - 8
Specifications 9 -11
Product dimensions 9
Product specifications 9
Electrical details 9
Ceramic hob surface layout 10
Control panel layout 10-11
Using the induction hob 11-15
Before first use 11
Cooking on the induction zone 11
Heat level settings 12-13
Using the timer 13
Turning off the induction zone after cooking 13
Cookware that is suitable for an induction hob 14
Hob guidelines 14-15
Cleaning and maintenance 15-16
Cleaning the ceramic hob top 15
After each use 16
Using a specialist ceramic hob cleaner 16
Installation 16-17
Positioning 16
Electrical connection 16-17
Electrical connection (European countries) 17
My appliance isn't working correctly 18-19
Error codes 18
General troubleshooting 18-19
Contact details 20
Environmental note
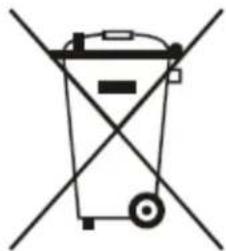
This appliance is marked according to the European directive 2002/96/EC on Waste electrical and Electronic Equipment (WEEE). By ensuring this product is disposed of correctly, you will help prevent potential negative consequences for the environment and human health, which could otherwise be caused by inappropriate waste handling of this product.
The symbol

on the product, or on the documents accompanying the product, indicates that this appliance may not be treated as household waste. Instead it shall be handed over to the applicable collection point for the recycling of electrical and electronic equipment.
Disposal must be carried out in accordance with local environmental regulations for waste disposal.
For more detailed information about treatment, recovery and recycling of this product, please contact your local city office, your household waste disposal service or the shop where you purchased the product.
natural_image
Symbol of a trash bin crossed with a diagonal line, representing waste sorting or disposal (no text or labels)
- The packaging materials that Baumatic uses are environmentally friendly and can be recycled.
- Please discard all packaging material with due regard for the environment.
Important safety information

text_image
Warning symbol with exclamation mark inside triangleYour safety is of the utmost importance to Baumatic. Please make sure that you read this instruction
booklet before attempting to install or use the appliance. If you are unsure of any of the information contained in this booklet, please contact the Retailer where you purchased your unit from.
General Information
- This appliance is designed for domestic household use and for the cooking and frying of domestic foodstuffs.
- Your new appliance is guaranteed against electrical or mechanical defects, subject to certain exclusions that are noted in the Conditions Of Guarantee. The foregoing does not affect your statutory rights.
- The use of this appliance for any other purpose or in any other environment without the express agreement of Baumatic Ltd. will invalidate any warranty or liability claim.
-
You should not use this appliance to store items on or as a work surface.
-
No modifications to the appliance are permitted by Baumatic Ltd.
- You should not store or place flammable or highly flammable liquids/materials on top of or near the appliance. Items made from aluminium, plastic or plastic film should also be kept away from the appliance, as they may fuse to the surface.
○ Repairs may only be carried out by registered engineers or authorised service agents.
Child Safety
○ Baumatic strongly recommend that babies and young children are prevented from being near to the appliance and should not be allowed to touch the appliance at any time.
○ If it is necessary for younger family members to be in the kitchen, please ensure that they are kept under close supervision at all times.
- Older children should only be allowed to utilise the appliance when supervised.
General Safety
- If you notice any scratches, splits or cracks in the ceramic glass, you should immediately switch off the appliance and disconnect it from your mains supply. Otherwise there is the risk of electric shock occurring.
- DO NOT insert any foreign objects into, or block, the air ventilation openings.
During use
- Any film or stickers that are present on the hob surface when it is delivered should be removed before use.
- Care should be taken when utilising the appliance, otherwise there is a risk of burns being caused.
- The induction hob can not withstand abnormally heavy weights. Take care not to overload the hob.
- You should not allow the electrical connection cables to come into contact with the hob surface when it is hot or any hot cookware.
- The electrical connection cable should not hang over the edge of the table or counter.
○ If fat and oil overheats, then it can ignite extremely quickly. For this reason, when cooking with fat and oil the appliance should not be left unattended.
○ Make sure that the appliance is switched off after use.
- The appliance surfaces will become hot during use and retain heat afterwards. Care should be taken to avoid burns from touching the hob surface when it is still hot.
○ IMPORTANT: This ceramic induction hob fully complies with current legislation regarding electro-magnetic interference and is designed not to interfere with other electronic appliances providing these comply with the same legislation.
As the hob generates magnetic fields in its immediate vicinity, pacemakers and active heart implants must be designed to comply with relevant regulations. If in doubt, you should consult the manufacturer of your device or your Doctor. In this respect, Baumatic can only guarantee the conformity of our own product.
○ If an object made of metal, (e.g. saucepan lid, knife, fork or spoon) is placed on a cooking zone that is switched on, it can get hot.
Do not place the induction hob onto a surface made from iron, stainless steel or aluminium during use as this could cause the surface to heat up.
Cleaning
○ Cleaning of the hob should be carried out on a regular basis.
○ IMPORTANT: Before attempting to clean the appliance, it should be disconnected from the mains and allowed to cool.
- Great care should be taken whilst using this appliance and when following the cleaning procedure.
- You should not use a steam jet or any other high pressure cleaning equipment to clean the appliance.
Declaration of conformity
This appliance complies with the following European Directives:
-2006/95/CE General regulations / Low tension -1935/2004/CE 90/128/EEC This appliance is suitable to come in contact with food
-2004/108/CE
Electromagnetic compatibility
- The manufacturer declares that the hob is built using certified materials. This appliance must be used by a trained person for domestic purposes only.
To avoid damaging your appliance
- The ceramic glass can be damaged by objects falling onto it.
- The ceramic glass edge can be damaged by knocks from cookware.
- Cast iron and cast aluminium cookware with damaged bases may scratch the ceramic surface if they are dragged across it.
- Pans should be lifted on and off the hob surface and not dragged.
- The cooking zone should not be switched on without cookware placed on it. Also the cookware should not be empty.
- Food or liquid that has high sugar content may damage the hob top, if it comes into contact with the ceramic hob surface. Any spillages should be wiped up immediately, however this may not prevent the hob surface from becoming damaged.
Specifications
Product dimensions
Depth: 345 mm
Width: 280 mm
Height: 60 mm
Product specifications:
○ 1 x 2.00 kW standard induction zone (∅ 190 mm)
- Front touch control operation
- Electronic timer
Electrical details
Rated Voltage: 220 - 240 Vac 50/60 Hz
Supply Connection: 10 A
Max Rated Inputs: 2.00 kW
Mains Supply Lead: 3 core x 1.5 mm ^4
For future reference please record the following information which can be found on the rating plate and the date of purchase which can be found on your sales invoice. The rating plate of your hob is located on the underneath of the appliance.
Model Number
Serial Number
Date of Purchase ....
Ceramic hob surface layout
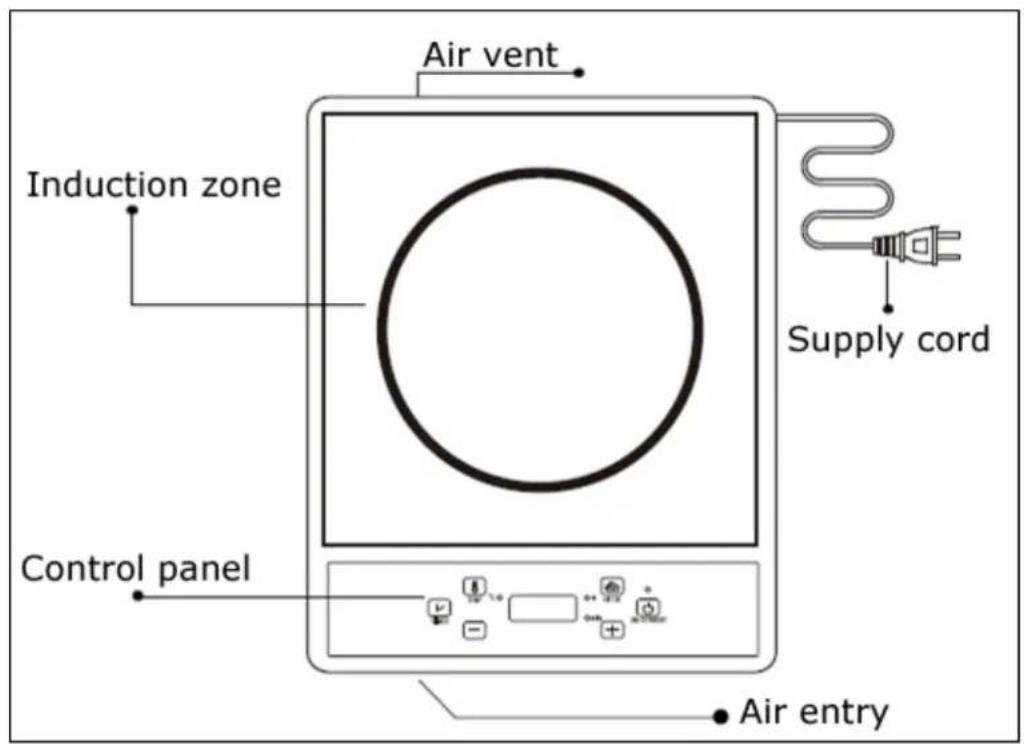
text_image
Air vent Induction zone Supply cord Control panel Air entryControl panel layout
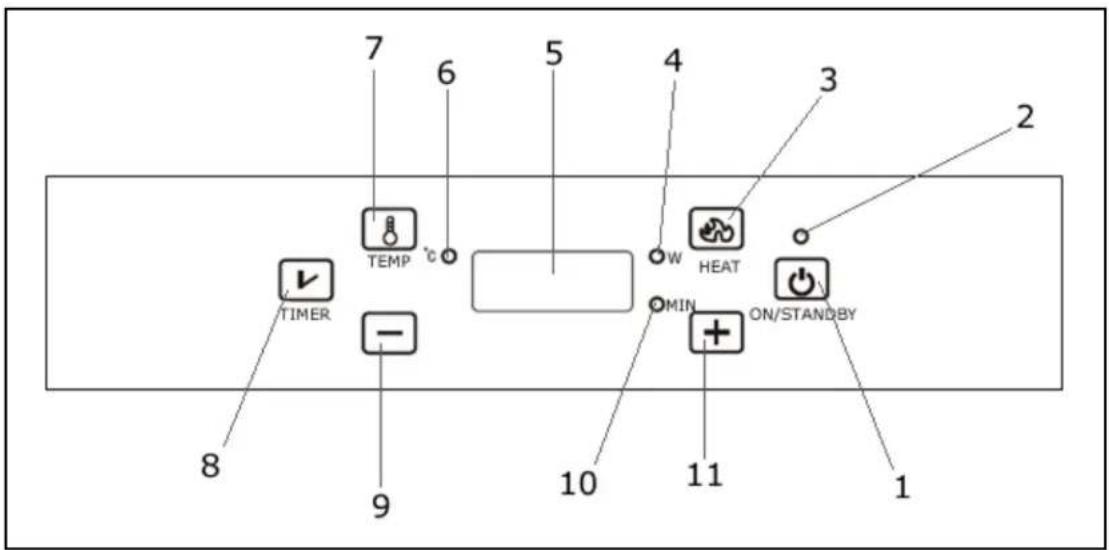
text_image
7 6 5 4 3 2 TEMP W HEAT MIN ON/STANDBY 8 9 10 11 1- ON/STANDBY button
- Power light
- Heat button
- Heat "W" light
- LED display
- Temperature light
-
Temperature button
-
Timer button
- Minus button
- Timer "min" light
- Plus button
Using the induction hob
Before first use

IMPORTANT: You should clean the ceramic hob surface (see "Cleaning and maintenance" section).
- You should switch on the hob for 5 minutes at the maximum setting. This will help to eliminate any new smell that exists and evaporate any humidity that has formed on the heating elements during transit.
- You must place a saucepan filled half full with cold water on the zone as you burn it off. Otherwise the induction zone will not operate.
Cooking on the induction zone
natural_image
Hand icon of a finger pressing a button with an 'Power' button (no text or symbols)- When the appliance is first connected to the electrical supply, the power light (2) will flash to indicate that the hob is in a standby state.
- Press the ON/STANDBY button (1). A buzzer will sound and the power light (2) will turn on.
- Place a suitable pan on the cooking zone. Make sure that the bottom of the pan and the surface of the cooking zone are clean and dry.
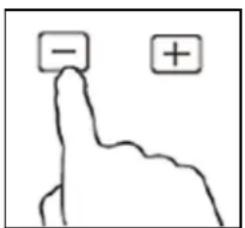
- Press the plus button (11) and the heat "W" light (4) will turn on to indicate that the hob is heating up.
text_image
- +- The hob will be set at the default heat setting of 3. You can change the heat level by using the plus and minus buttons.
- You can adjust the heat setting at any time during the cooking process.
Heat level settings
- The settings below are to be used as a guideline only. The exact setting required will depend on several factors, including your cookware and the amount of food that you are cooking.
- You should experiment with the induction hob power levels to find the best settings to suit you.
| Power setting | Suggested use |
| 1 - 2 | ○ Delicate warming for small amounts of food.○ Melting chocolate, butter and foods that burn quickly.○ Gentle simmering.○ Slow warming. |
| 3 - 4 | ○ Reheating.○ Rapid simmering.○ Cooking rice. |
| 5 - 6 | ○ Pancakes. |
| 7 - 8 | ○ Sautéing.○ Cooking pasta. |
| 9 | ○ Stir-frying.○ Searing.○ Bringing soup to the boil.○ Boiling water. |
natural_image
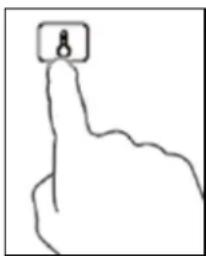
Hand cursor icon pointing at a button (no text or symbols)- It is also possible to set a temperature setting using the temperature button (7) followed by the plus and minus buttons. The temperature light (6) will turn on.
- The temperature button allows you to select the approximate temperature that the induction zone
will emit. The corresponding temperature for each power setting is shown in the table below.
| Power setting | 1 | 2 | 3 | 4 | 5 | 6 | 7 | 8 | 9 |
| Temperature (°C) | 60 | 80 | 100 | 120 | 140 | 160 | 180 | 200 | 220 |
IMPORTANT: The temperatures in the table above are approximate. The temperatures do not indicate the temperature of the hob surface or the temperature of the contents of the pan but just the temperature that the induction zone will emit.
natural_image
Hand pointing at a cloud icon (no text or symbols)- To return to the heat setting mode just press the heat button (3).
IMPORTANT: A buzzer will sound for 10 seconds before the hob turns off if:
- The pan is not placed correctly on the cooking zone
- The pan you are using is not suitable for induction cooking. No heating will occur unless there is a suitable pan on the cooking zone.
- The pan is too large or too small for the cooking zone.
Using the timer
- When the cooking zone is in use, it is possible to set a countdown time after which the hob will turn off automatically.
text_image
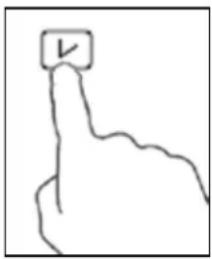
Hand-drawn icon of a finger pressing a button with the letter 'V' in the top-left cornerTo set a countdown time, press the timer button (8) and a buzzer will sound. The display will flash "0:00" and the timer "min" light (10) will come on to indicate that the hob has entered the time setting mode.
text_image
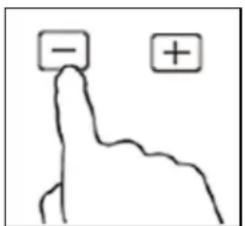
- + +Use the plus (11) and minus (9) buttons to set the required countdown time. Each press of these buttons which increase or decrease the time by 1 minute. If either of the buttons is held down, the time will increase or decrease by 10 minutes.
- When the display shows the correct countdown time release all buttons. The display will flash for 5 seconds before the timer will be set. The countdown will then begin straight away.
- When the timer reaches "0:00" the hob will automatically switch off. The default time for the hob to automatically switch off after is 2 hours.
- You can cancel the timer function at any time during the countdown by pressing the timer button (8).
Turning off the induction zone after cooking
natural_image
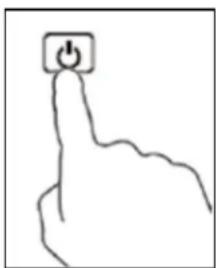
Hand icon of a finger pressing a button with an 'Power' button (no text or symbols)- After you have finished using the induction zone, press the ON/STANDBY button (1) to turn the hob off and stop the zone heating.
Cookware that is suitable for an induction hob
The table below shows cookware that is normally suitable for use on an induction zone hob:-
| Cookware | Suitable |
| Steel, enamelled steel | Yes |
| Cast iron | Yes |
| Stainless steel | Yes (if stated by the pan manufacturer) |
| Aluminium, copper, brass | No |
| Glass, ceramic, porcelain | No |
- The bottom of the pans should be as flat and thick as possible.
- Certain types of cookware may result in a noise being made when being used on an induction zone hob. This does not mean that there is an appliance fault.
- IMPORTANT: You should make sure that all pans are placed in the centre of the induction zone that you are using.
Hob guidelines
- The first few times the hob is used, it may give off an acrid, burning smell. This smell will disappear completely with repeated use.
- The saucepan must be positioned exactly on the zone for efficient heating to occur. Pans should have the same diameter as the cooking zone that it is being used on.
-
You should not use saucepans with rough bottoms, as this can scratch the ceramic surface.
Before use, make sure that the bottom of the saucepan is clean and dry. -
When cold, the bottom of the pan should be slightly concave, as it will expand when hot and lie flat on the surface of the hob. This will allow the heat to transfer more easily.
- The best thickness for the bottom of the pans is 2 – 3 mm of enamelled steel and 4 – 6 mm for stainless steel with sandwich type bottoms.
○ If these rules are not followed, then there will be a great loss of heat and energy. Heat not absorbed by the saucepan, will spread to the hob, frame and surrounding areas.
○ Preferably cover pans with a lid to permit cooking at a lower heat.
○ Always cook vegetables and potatoes, etc. in as little water as possible, to reduce cooking times.
- DO NOT attempt to heat an empty pot.
- You should never leave the hob unattended at any time during use.
- Food or liquid that has high sugar content may damage the hob if it comes into contact with the ceramic hob surface. Any spillages should be wiped up immediately, however this may not prevent the hob surface from becoming damaged.
- Never heat foods in sealed containers, such as compressed products or cans to avoid an explosion caused by heat expansion.
○ IMPORTANT: The ceramic hob surface is tough; however it is not unbreakable and can be damaged. Especially if pointed or hard objects are allowed to fall on it with some force.
DO NOT USE THE HOB
IF THE SURFACE
BECOMES BROKEN OR
CRACKED. YOU SHOULD
CONTACT THE
BAUMATIC SERVICE
DEPARTMENT IMMEDIATELY.
Cleaning and maintenance

text_image
Warning symbol with exclamation mark inside triangleCleaning operations must only be carried out when the oven is cool.
The appliance should be disconnected from your mains supply before commencing any cleaning process.
Cleaning the ceramic hob top

Any residues that are left on the hob top surface from cleaning agents will damage it. You should remove any residues with water and a little washing up liquid.

Abrasive cleaners or sharp objects will damage the hob surface; you
should clean it using water and a little washing up liquid.

Although it is easier to clean some deposits whilst the hob surface is
still warm. You should take care not to burn yourself if cleaning the hob surface when it is still warm.
- DO NOT directly rinse the induction hob under water. No liquids should come into contact with the internal parts of the appliance.
After each use
○ Wipe the appliance over with a damp cloth.
- Dry the appliance by rubbing the surface with a clean cloth.
Using a specialist ceramic hob cleaner
It is possible to purchase specialist ceramic hob cleaner/conditioner.
You should follow the instructions given by the manufacturer of the specialist ceramic hob cleaner. You should ensure that it is suitable for use on your appliance.
Installation
Positioning

The adjacent furniture must be able to withstand a minimum
temperature rise of 85^ C above the ambient temperature of the room it is located in, during periods of use.
- NEVER place the appliance on a gas cooker or hob during use as the magnetic lines can heat the metal parts of the gas cooker or hob.
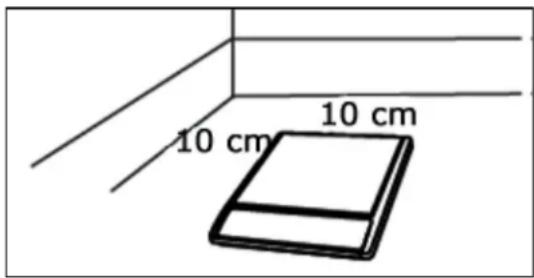
- To use the induction hob it should be placed horizontally on an appropriate surface. There should be a space of at
least 10 cm between the sides and rear of the hob and any adjacent wall or cupboard.
- Do not use the induction hob in narrow spaces to avoid hindering the release of heat through the ventilation gaps.
text_image
10 cm 10 cm- Do not place the appliance onto carpet, a tablecloth or paper to avoid blocking the air vents which can result in overheating.
- The appliance should not be located near any other heat source such as radiators, heaters, cookers, ovens and hobs.
Electrical connection
- The induction hob comes supplied with a 10 amp plug fitted.
- The wiring in the mains lead is coloured as follows:
Brown- Live
Blue- Neutral
Green and yellow- Earth
○ with the coloured markings identifying the terminals in your spur
box, please proceed as follows:-
The brown wire must be connected to the terminal marked "L" (live), or coloured red.
The blue wire must be connected to the terminal marked "N" (neutral), or coloured black.
The green and yellow wire must be connected to the terminal marked "E" (earth), or by the earth symbol, or coloured green and yellow.
- When the connection is completed, no stray strands or cut wire should be present. The cord clamp must be secured over the outer sheath.
Electrical connection (European countries)
The induction hob comes supplied with a European plug.
- As the colours of the wires in the appliance's mains lead may not correspond with the coloured markings identifying the terminals in your spur box, please proceed as follows:-
The brown wire must be connected to the right hand terminal.
The blue wire must be connected to the left hand terminal.
When the connection is completed, no stray strands or cut wire should be present. The cord clamp must be secured over the outer sheath
My appliance isn't working correctly
Error codes
If you appliance senses an abnormality, the hob will enter stand-by mode and will display a corresponding error code.
| Error code | Possible causes | What to do |
| E3, E6 | Temperature sensor error. | Wait a moment and then press the ON/STANDBY button (1). When the temperature of the hob normalises, the appliance will operate as usual. |
| E7, E8 | Abnormal supply voltage. | Wait a moment to see if the voltage normalises. If not then please contact the Advice Line. |
| E1, E2, E4, E5, Eb, EC | Various. | Contact the Advice Line. |
General troubleshooting
If your hob does not appear to be operating correctly, please refer to the table below before contacting the Advice Line.
| Problem | Possible causes | What to do |
| The induction hob cannot be turned on. | No power. | Make sure that the induction hob is connected to the power supply and that it is switched on.Check whether there is a power outage in your home or area. If you've checked everything and the problem persists, call the Advice Line. |
| The touch controls are difficult to operate. | There may be a slight film of water over the controls or you may be using the tip of your finger when touching the controls. | Make sure the touch control area is dry and use the ball of your finger when touching the controls. |
| The glass is being scratched. | Rough-edged cookware.Unsuitable, abrasive scourer or cleaning products being used. | Use cookware with flat and smooth bases. See the section on cookware in this manual. |
| Some pans make crackling or clicking noises. | This may be caused by the construction of your cookware (layer of different metals vibrating differently). | This is normal for cookware and does not indicate a fault. |
| The induction hob makes a low humming noise when used on a high heatsetting. | This is caused by the technology of induction cooking. | This is normal, but the noise should quieten down or disappear completely when you decrease thepower level. |
| Fan noise coming from the induction hob. | A cooling fan built into your induction hob has come on to prevent the electronics from overheating. It may continue to run even after you've turned the induction hob off. | This is normal and needs no action. Do not switch the power to the induction hob off at the wall while the fan is running. |
| The power light (2) turns on but the pans do not become hot. | The induction hob cannot detect the pan because it is not suitable for induction cooking. The induction hob cannot detect the pan because it is too small for the cooking zone or not properly centred on it. | Use cookware suitable for induction cooking. See the section on cookware in this manual.Centre the pan and make sure that its base matches the size of the cooking zone. |
| The induction hob or a cooking zone has turned itself off unexpectedly. | The ambient temperature detected is too high.The air entry or air vent slot is blocked.The maximum working time has been reached. | Wait for the temperature to lower before turning the hob on again.Check the air entry and air vent slots for blockages.If the error keeps occurring, please call the Advice Line. |
text_image
Warning symbol image with exclamation mark inside a triangleIMPORTANT: If your appliance appears not to be operating correctly, then you should disconnect it from your
mains supply and then contact the Advice Line on telephone number 1800 444 357.
DO NOT ATTEMPT TO REPAIR THE APPLIANCE YOURSELF.
Please note that if an engineer is asked to attend whilst the product is under guarantee and finds that the problem is not the result of an appliance fault, then you may be liable for the cost of the call out charge.
Please refer to the conditions of guarantee that appear on the warranty card that you receive with the appliance.
Baumatic®
Think Appliances Pty Ltd.
416-424 Barry Rd
Coolaroo VIC 3048
Sales Telephone
1300 132 824
Service Telephone
1800 444 357
Website
www.thinkappliances.com
United Kingdom
Baumatic Ltd.,
Baumatic Buildings,
6 Bennet Road,
Reading, Berkshire
RG2 0QX
United Kingdom
Sales Telephone
(0118) 933 6900
Website:
www.baumatic.co.uk