Pro 4Artists FOILFX01 - Shaver BABYLISS - Free user manual and instructions
Find the device manual for free Pro 4Artists FOILFX01 BABYLISS in PDF.

| Product Type | Single Foil Shaver |
| Brand | BaByliss |
| Model | Pro 4Artists FOILFX01 |
| Reference | FXFS1E |
| Power Source | 2 AA batteries (alkaline recommended) |
| Battery Type | Non-rechargeable AA batteries |
| Battery Life | Varies by battery; use alkaline for optimal duration |
| Usage | Dry shaving |
| Cutting Technology | Single stainless steel blade |
| Foil | Fine metal foil |
| Noise Level | Below 70 dB(A) |
| Vibrations | Below 2.5 m/s² |
| Daily Maintenance | Clean with provided brush after each use |
| Weekly Maintenance | Rinse shaving head under clean water, let dry |
| Blade Replacement | Replace shaving head and internal blades together |
| Safety | Do not immerse appliance in water; do not touch blades |
| Batteries | Remove batteries at end of life; do not mix battery types |
| Box Contents | Shaver, cleaning brush, protective cover, 2 AA batteries |
| Adaptation Period | 2 to 4 weeks for skin to get used to it |
Frequently Asked Questions - Pro 4Artists FOILFX01 BABYLISS
User questions about Pro 4Artists FOILFX01 BABYLISS
0 question about this device. Answer the ones you know or ask your own.
Ask a new question about this device
Download the instructions for your Shaver in PDF format for free! Find your manual Pro 4Artists FOILFX01 - BABYLISS and take your electronic device back in hand. On this page are published all the documents necessary for the use of your device. Pro 4Artists FOILFX01 by BABYLISS.
USER MANUAL Pro 4Artists FOILFX01 BABYLISS
BaBylissPRO 4 Artists

natural_image
Exterior view of a modern electric shaver with a flat case and mesh grip (no text or symbols visible)RASOIR METALLIQUE A GRILLE SIMPLE SINGLE FOIL METAL SHAVER
FRANCAIS
REEMPLACEMENT DE LA LAME
natural_image
Simple line drawing of a rectangular container with a side port and an arrow indicating direction (no text or symbols)Fig. 1 Fig. 2
natural_image
Diagram of a battery with an open lid and internal circuit structure (no text or symbols)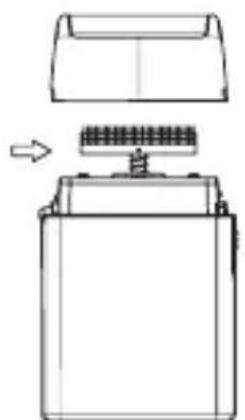
natural_image
Diagram of a battery with an open lid and internal circuit board (no text or symbols)Fig. 3 Fig. 4

natural_image
Technical line drawing of a battery with a lid and internal structure, showing no text or symbolsPlease carefully read the safety instructions before using the appliance.
Vibrations < 2,5 m/s ^4
LpA (dB(A)) < 70
SINGLE FOIL METAL SHAVER FXFS1E
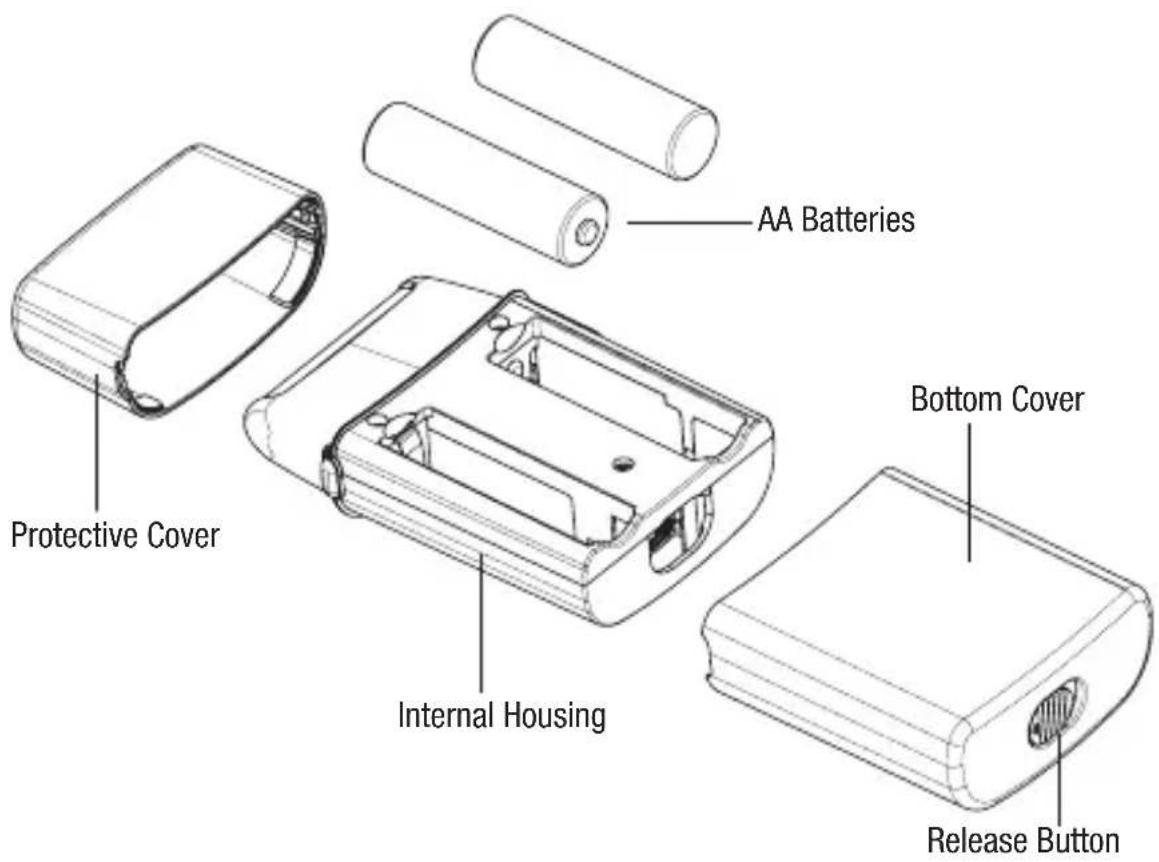
This shaver has been engineered to give you a clean, close, smooth shave. It requires 2 AA batteries (included). We recommend using longer-lasting alkaline batteries in your shaver. If you are not going to use your shaver for a long period of time or if the batteries are dead, remove or replace the batteries from the unit.
- Remove the metal housing by sliding the bottom switch over and pulling the cover off.
-
Align the 2 AA batteries with the positive and negative positions indicated inside the battery compartment. Being careful not to bend the springs, insert the negative end of each battery first so it will slip easily into place.
-
Return the metal housing by sliding it over the plastic inner housing until it clicks into place.
-
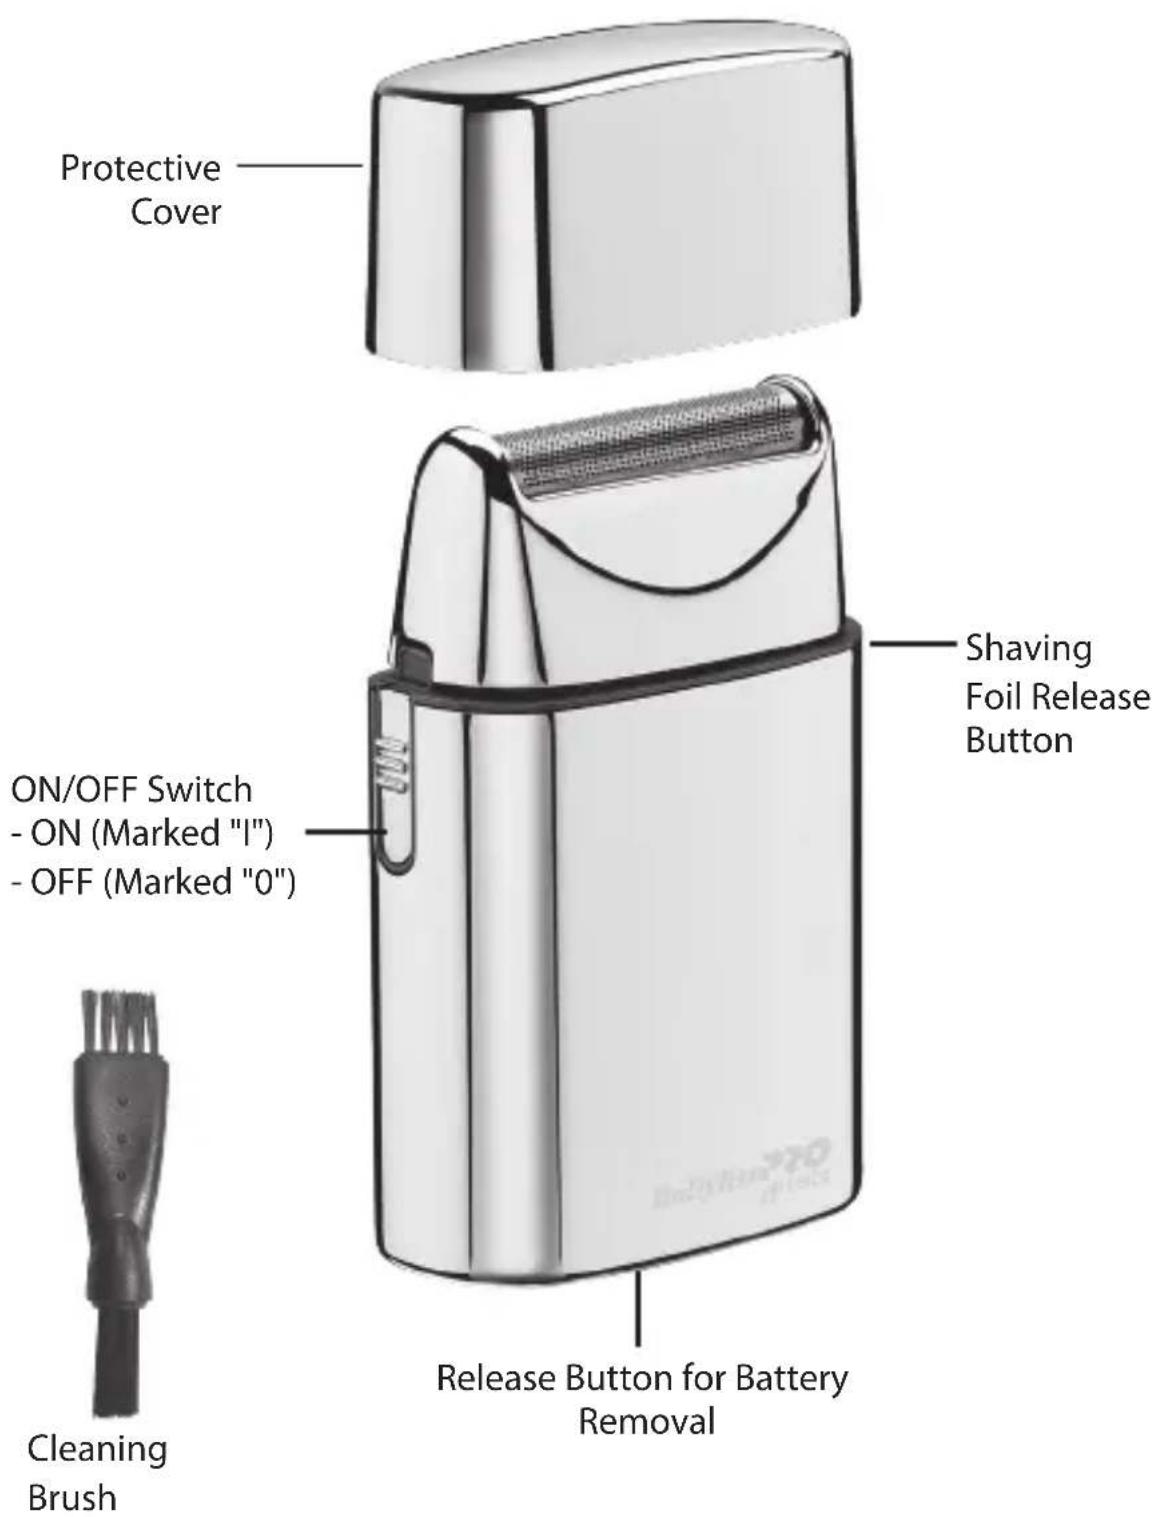
To use your shaver, push ON/
OFF switch upward to the ON (I) position.
- After you finish using your shaver, push down on the ON/OFF switch to turn the shaver OFF (O).
-
Remove the batteries if the batteries are no longer functional or if the shaver is left unused for an extended period of time.
-
Clean the battery contacts and also those of the device prior to battery installation.
-
Remove used batteries promptly.
-
Always purchase the correct size and grade of battery most suitable for the intended use.
-
Replace all batteries of a set at the same time.
-
Do not mix old and new batteries. Do not mix alkaline, standard (carbon zinc), or rechargeable (nickel cadmium or nickel metal hydride) batteries.
ON/OFF SWITCH
To operate, simply slide switch to the ON (I) position. To stop operation, set to the OFF (0) position.
VERY IMPORTANT: Blades must be cleaned and oiled on a regular basis for proper functioning. Failure to regularly clean and oil the blades will void the warranty.
BASIC INSTRUCTIONS FOR USE
- Men whose skin is sensitive or easily irritated by shaving, or who suffer from a skin allergy, should test one section on the
leg or arm before using the shaver.
-
Remove the protective cover and turn on the unit to start shaving. Hold the shaver at a right angle to the area of your face that you want to shave and run the single shaving foil carefully along your skin. Tip: In general, we recommend that you shave against the direction of hair growth, as this is the best way to trim the hair. Pull your skin tight, with your fingers in inaccessible areas, to achieve optimum results.
-
Switch the shaver off each time after shaving and clean it.
- Do not push the shaver on the skin too hard as it could cause irritation, make the shaver warm and prevent a perfect shave.
- Please note that it takes 2 to 4 weeks for your skin to adapt to a shaver, so please do not change shaving instruments in this period of time.
- If hair is longer than 1 mm begin by cutting the hair down first with a trimmer, then use shaver for a smooth close finish.
USER MAINTENANCE INSTRUCTIONS
TAKING CARE OF YOUR SHAVER
Do not remove the shaving foil unit while the shaver is switched on. Always switch the shaver off!
Ensure that no water gets into the inside of the shaver to avoid the risk of an electric shock when it is back in operation.
Never press on the cutting blades or the shaving foil and do not touch them with hard objects as this can cause irreparable damage to the shaver or parts.
Be careful when dealing with the blades, as they are very sharp. Risk of injury!
When cleaning, do not apply any detergents or scouring agents and do not use any abrasive or sharp objects. They can cause irreparable damage to the shaver.
NOTE: When cleaning your shaver, make sure the unit is turned off.
CAUTION!
- DO NOT run shaver or cutters under water. Use only the small brush (included) to clean.
- To clean the external surfaces of the shaver, use a damp cloth. Do not use strong detergents or other chemicals.
- To dry, wipe the surface of the shaver with a dry towel. Do not use a hair dryer or heater to dry the shaver.
- The shaver should not be used until it has completely dried.
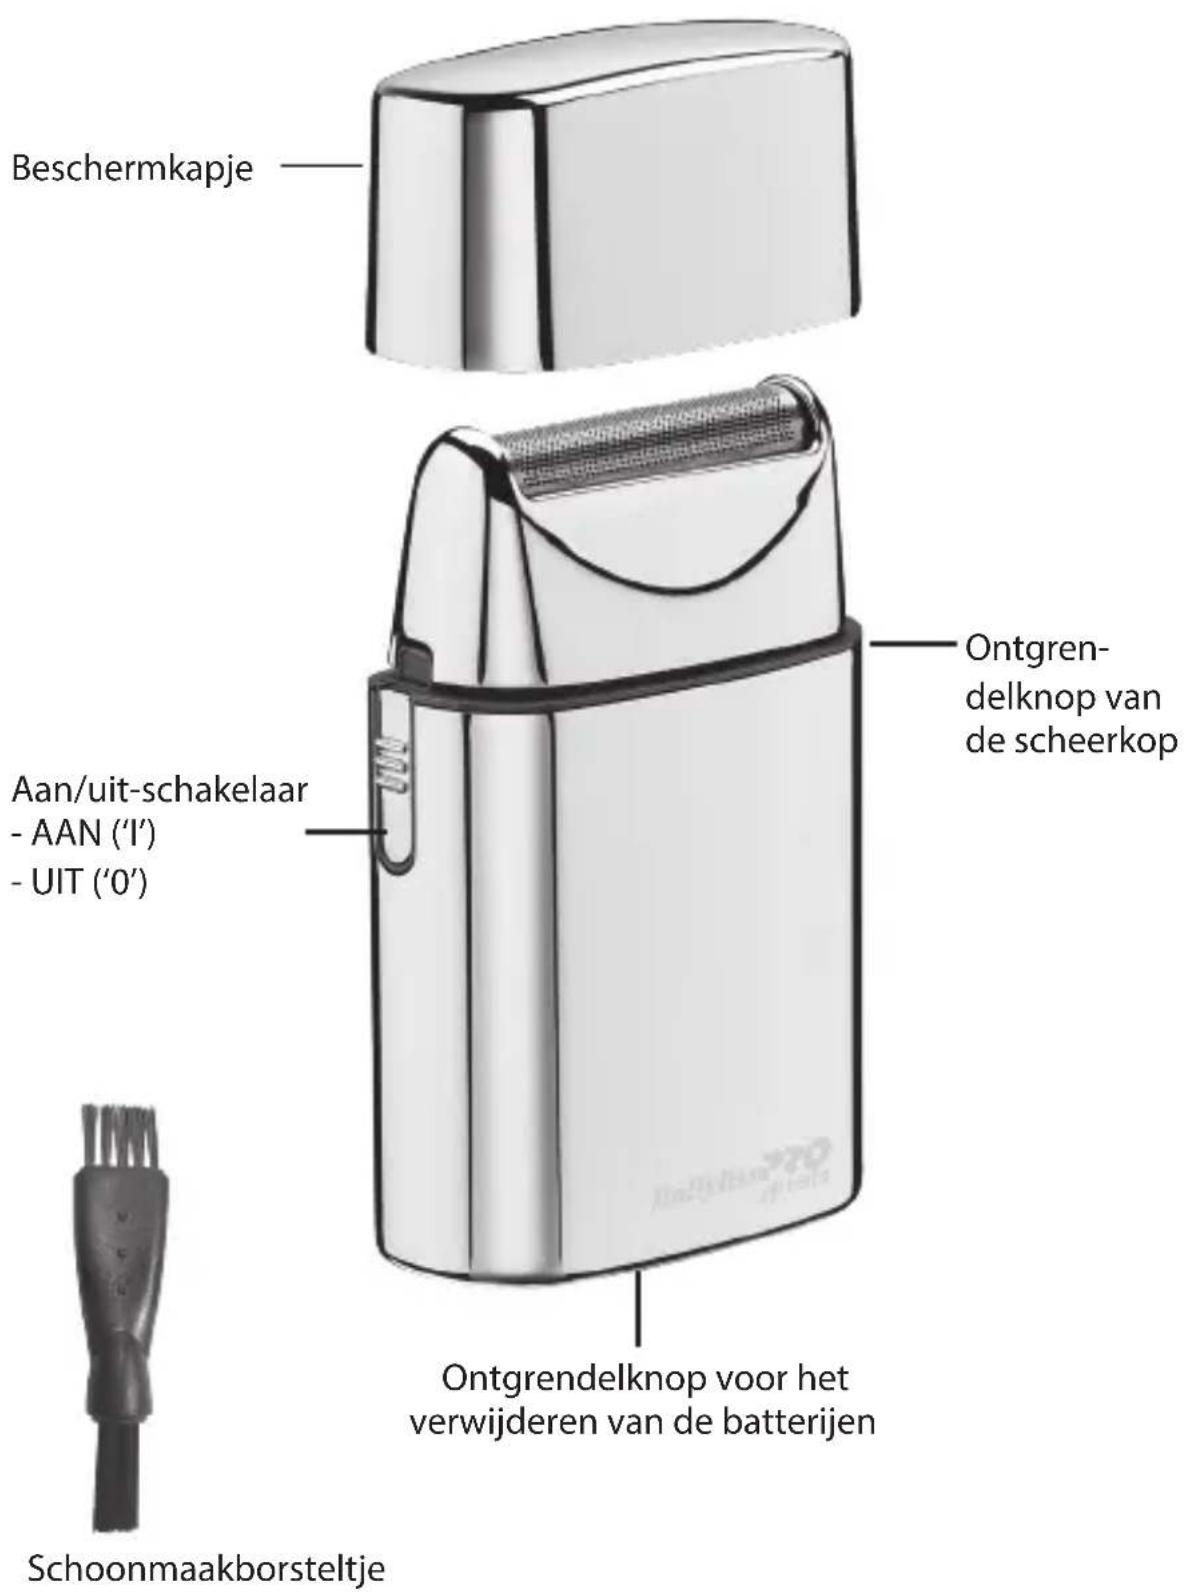
TO REPLACE FOIL HEAD ASSEMBLY
- Remove the foil head assembly by pressing the round release button located on the side of the shaver. Hold the foil head assembly on both sides and lightly pull away from shaver unit.
- Take the replacement foil
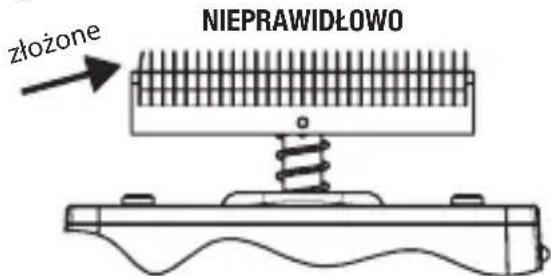
head assembly out of package. Align the replacement foil head assembly over the cutters. Carefully move the replacement foil head assembly down towards the shaver unit until it firmly snaps into place.
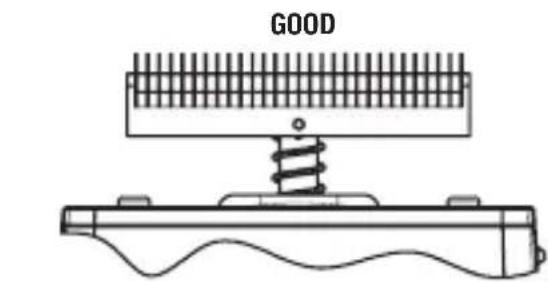
BE CAREFUL NOT TO DAMAGE THE FOIL OR CUTTERS WHILE INSTALLING.
TO REPLACE CUTTERS
NOTE: Always replace the cutters and foil head assembly at the same time.
- To remove cutters, place your fingers on each side and gently pull up and away from drive shaft.
- To replace cutters, remove the new cutters from the packaging. Align cutter about the drive shaft and lightly push down until it snaps into place.
- Replace the foil head assembly, turn shaver on to ensure it is working properly.
natural_image
Technical line drawing of a mechanical device with spring and base plate (no text or symbols)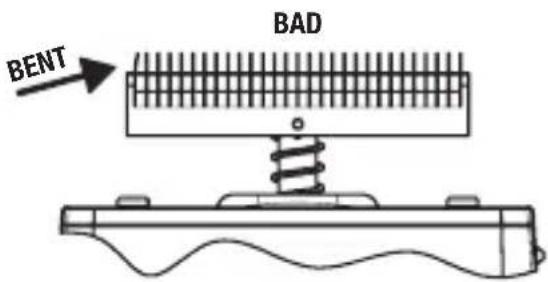
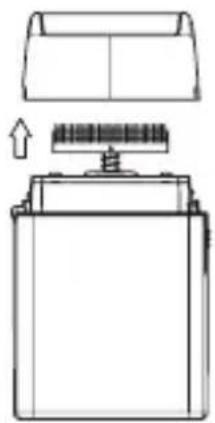
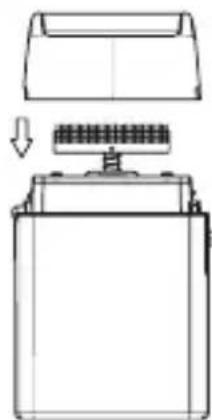
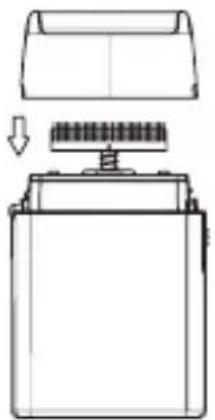
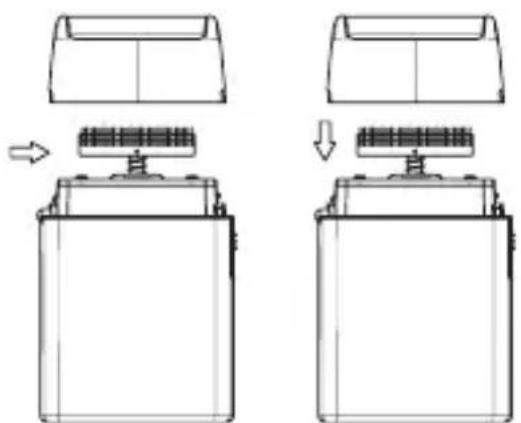
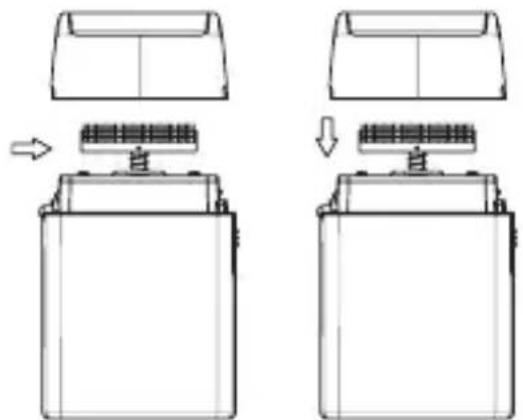
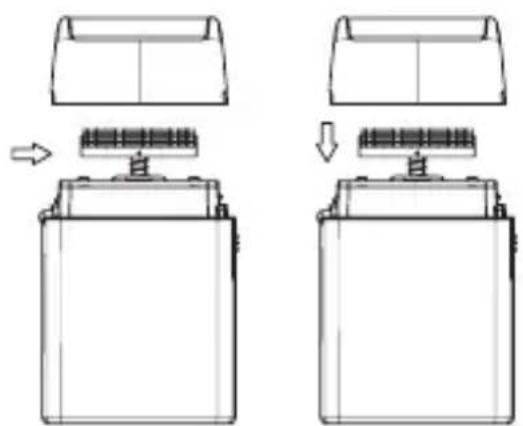
Daily maintenance:
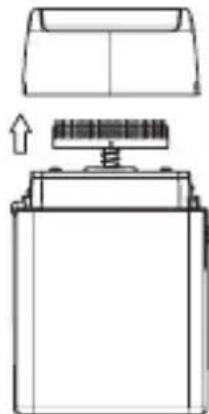
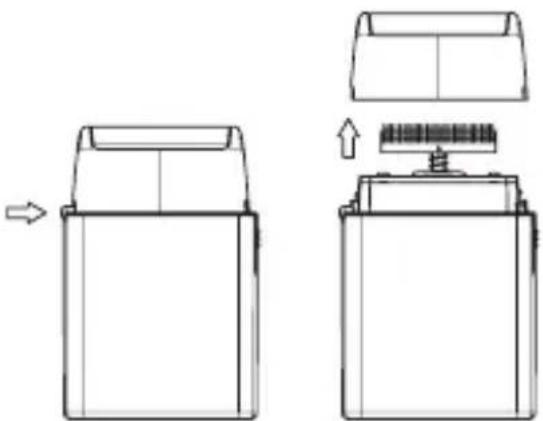
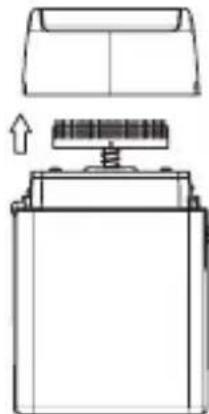
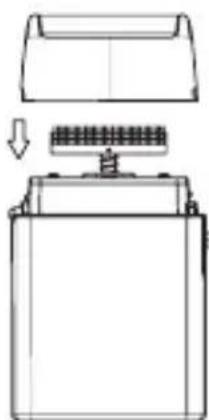
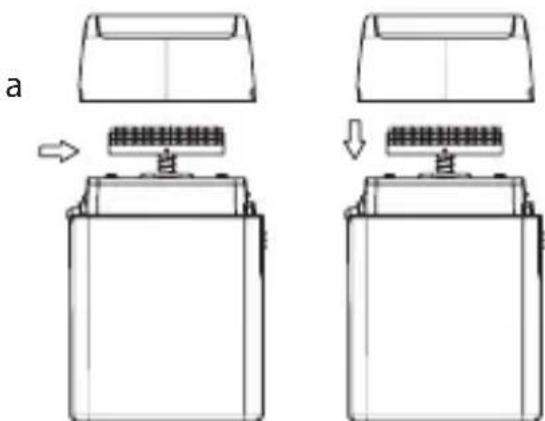
- Press the release button on the side of shaver and remove the head assembly (see Fig. 1 & 2).
- Use cleaning brush to whisk away any debris on and around cutter (See Fig. 3).
- Snap the head assembly closed (see Fig. 4).
natural_image
Technical line drawing of a mechanical device with two views showing internal components (no text or symbols)Fig. 1 Fig. 2

natural_image
Technical line drawing showing two views of a battery casing with internal components and mounting points (no text or symbols)Fig. 3 Fig. 4
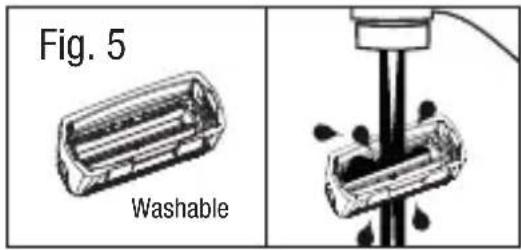
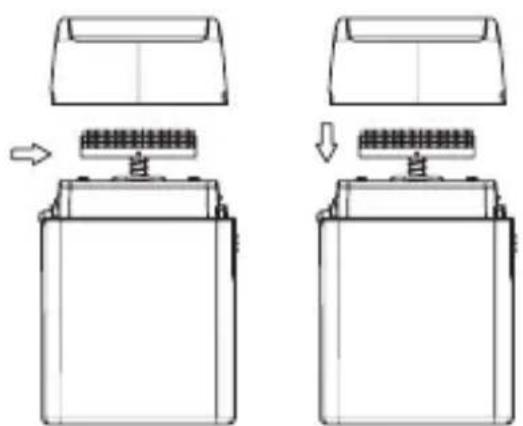
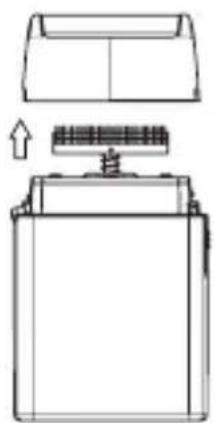
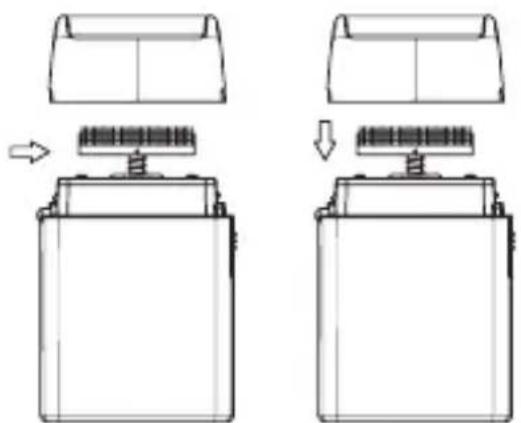
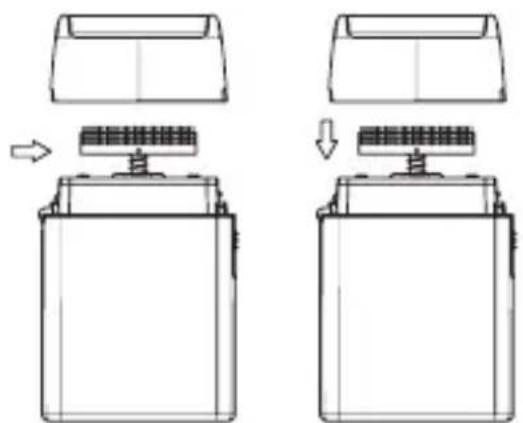
Weekly Maintenance:
- Repeat steps 1 – 3 from the Daily Maintenance cleaning steps.
- Rinse the head of the shaver under running water (see Fig.5). NEVER submerge the shaver in water.
- Leave head open for drying.
- Press the shaver head back into place (see Fig. 4).
BATTERY REMOVAL
- Remove the metal housing by sliding the release button over and pulling the bottom cover off.
- Remove batteries by pulling them out and away from battery contacts.
- Dispose used batteries.
FXFS1E CORDLESS FOIL SHAVER
DEUTSCH
natural_image
Diagram showing two views of a battery casing with internal components and directional arrows indicating assembly (no text or symbols)Abb.3 Abb.4
METTALIC SCHEERAPPARAAT MET ENKEL SCHEERBLAD FXFS1E
natural_image
Simple line drawing of a rectangular container with a side cover and an arrow pointing to it (no text or symbols)Fig. 1 Fig. 2
natural_image
Technical line drawing of a battery with an open lid and internal circuit structure (no text or symbols)
natural_image
Diagram of a battery with an open lid and internal structure, showing no text or symbolsFig. 3 Fig. 4
natural_image
Diagram of a battery with a tray and internal circuit, showing no text or symbolsFXFS1E DRAADLOOS SCHEERAPPARAAT MET ENKEL SCHEERBLAD
natural_image
Technical line drawing of a mechanical device with two views showing internal components and directional arrows (no text or symbols)Fig. 1 Fig. 2
natural_image
Diagram showing two stages of battery mounting process with arrows indicating movement (no text or symbols)Fig. 3 Fig. 4
Limpeza semanal:
natural_image
Simple line drawing of a rectangular container with a handle and an arrow pointing to the side (no text or symbols)Fig. 1 Fig. 2
natural_image
Diagram of a battery casing with an open lid and internal structure, showing no text or symbols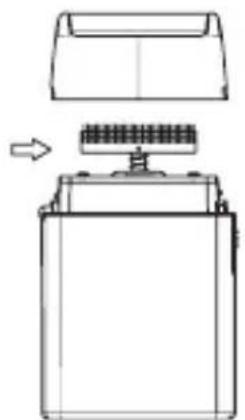
natural_image
Technical line drawing of a battery with an open lid and internal structure, showing no text or symbols.Fig. 3 Fig. 4
natural_image
Technical line drawing of a battery with a lid and internal structure, showing no text or symbolsVEDLIKEHOLD AV BARBERMAS- KINEN
Ikke ta av barberhodet mens apparatet er på. Slå alltid av apparatet først.
natural_image
Simple line drawing of a rectangular container with a lid and an arrow pointing to the side (no text or symbols)Eik. 1 Eik. 2
natural_image
Technical line drawing of a battery casing with an open lid and internal components (no text or symbols)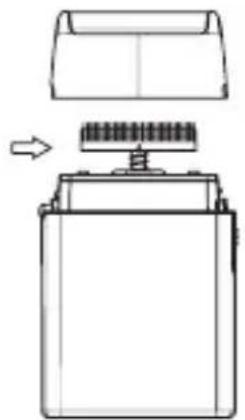
natural_image
Diagram of a battery with a top panel and internal components, showing no text or symbolsEik. 3 Eik. 4
natural_image
Technical line drawing of a battery with a lid and screw base (no text or symbols)natural_image
Technical line drawing of a battery pack assembly (left) and its internal structure with a spring-loaded component (right), showing no text or symbols.- ábra 2. ábra
- ábra 4. ábra
Heti karbantartás:
przycisk
natural_image
Technical line drawing of a mechanical device with two views showing internal components and assembly (no text or symbols)Rys. 1 Rys. 2
natural_image
Technical line drawing of a battery casing with internal components and mounting points (no text or symbols)Rys. 3 Rys. 4

Týdenní údržba:
natural_image
Technical line drawing of a battery pack assembly showing front and side views with no text or symbolsРис. 1 Рис. 2
natural_image
Diagram showing two steps of battery mounting process with arrows indicating movement (no text or symbols)Рис. 3 Рис. 4
Еженедельный уход:
natural_image
Technical line drawing of a mechanical device with two views showing internal components and directional arrows (no text or symbols)Şekil.1 Şekil.2
natural_image
Diagram showing two views of a battery casing with internal components, no text or symbols presentŞekil.3 Şekil.4
Haftalık Bakım:
natural_image
Technical line drawing of a mechanical device with two views showing internal components and directional arrows (no text or symbols)1 pav. 2 pav.
natural_image
Technical line drawing of a battery holder with mounting base and internal circuit components (no text or symbols)3 pav. 4 pav.
natural_image
Technical line drawing of a battery pack assembly showing front and side views with no text or symbolsFig. 1 Fig. 2
natural_image
Diagram showing battery mounting process with two views of a component (no text or symbols)Fig. 3 Fig. 4