Sonicare HX7130 - Toothbrush PHILIPS - Free user manual and instructions
Find the device manual for free Sonicare HX7130 PHILIPS in PDF.

User questions about Sonicare HX7130 PHILIPS
0 question about this device. Answer the ones you know or ask your own.
Ask a new question about this device
Download the instructions for your Toothbrush in PDF format for free! Find your manual Sonicare HX7130 - PHILIPS and take your electronic device back in hand. On this page are published all the documents necessary for the use of your device. Sonicare HX7130 by PHILIPS.
USER MANUAL Sonicare HX7130 PHILIPS
natural_image
Two Philips sonicare electric toothbrushes with labeled function buttons and brand logo (no text-heavy elements)1
-1
1_
-1
1
English 5
Español 24
Français (Canada) 45
Introduction
Welcome to the Philips Sonicare family! This toothbrush enables you to obtain superior plaque removal, whiter teeth and healthier gums(*). The Next Generation Sonicare Technology offers a superior clean even in hard-to-reach areas while being gentle on gums (*). Sonicare fluid action supports the bristles to clean by driving fluid deep between teeth and along the gumline. Using Sonicare's clinically developed and proven features, you can be confident that you are getting the very best clean.
Further support and product registration are available to you at:
www.philips.com/support
Note: *vs manual brushing
Important safety information
Only use the product for its intended purpose. Read this information carefully before you use the product and its batteries and accessories, and save it for future reference. Misuse can lead to hazards or serious injuries.
WARNINGS
- Only use original Philips accessories or consumables. If supplied, only use the original USB cable and USB power supply unit.
- This appliance contains no user-serviceable parts. If the appliance is damaged, stop using it and contact the Consumer Care Center in your country. If the USB cable or USB power supply unit is damaged stop using it.
- Keep the charger away from water.
- After cleaning, make sure the charger is completely dry before you connect it.
- This appliance can be used by children and persons with reduced physical, sensory or mental capabilities or lack of experience and knowledge if they have been given supervision or instruction concerning use of the appliance in a safe way and understand the hazards involved. Cleaning and user maintenance shall not be made by children without supervision.
- Children should be supervised to ensure that they do not play with the product.
- Rinse the handle, especially the brush head connection. Gently clean around the rubber seal.
- Make sure brush head and toothbrush are dry before storing in travel case.
- Do not clean any part of the product in the dishwasher.
- Do not use adapters and chargers outdoors or near heated surfaces.
- This appliance has only been designed for cleaning teeth, gums and tongue.
English
- Replace the brush head every 3 months or sooner if signs of wear appear. Stop using a brush head with crushed or bent bristles.
- Avoid direct contact with products that contain essential oils or coconut oil. Contact may result in bristles dislodging.
- The maximum altitude of use is 4500 meters.
MEDICAL WARNINGS
- Stop using the appliance and consult your dentist/doctor if excessive or prolonged bleeding occurs after use, or if you experience discomfort or pain during use.
- If you have a pacemaker or other implanted device, contact your doctor or the manufacturer of the implanted device prior to use.
- This appliance is a personal care device and is not intended to be shared by multiple users.
BATTERY SAFETY INSTRUCTIONS
- This appliance contains batteries that are only removable by skilled persons.
- Only use the product for its intended purpose. Read this information carefully before you use the product and its batteries and accessories, and save it for future reference. Misuse can lead to hazards or serious injuries. Accessories supplied may vary for different products.
- Only use original Philips accessories and consumables.
- Keep product and batteries away from fire and do not expose them to direct sunlight or high temperatures.
- If the product becomes abnormally hot or smelly, changes color or if charging takes longer than usual, stop using and charging the product and contact Philips.
- Do not place products and their batteries in microwave ovens or on induction cookers.
- Do not open, modify, pierce, damage or dismantle the product or battery to prevent batteries from heating up or releasing toxic or hazardous substances. Do not short-circuit, overcharge or reverse charge batteries.
- This appliance contains batteries that are non-replaceable. When the battery is at end of life, the appliance shall be properly disposed of, see section on Disposal.
- Charge only with Philips HX6110 input ratings: 4.75-5.25VDC, 1.5W.
- Charge and use the product at a temperature between 0 °C and 40 °C (32°F and 104°F).
- To avoid accidental short-circuiting of batteries after removal, do not let battery terminals come into contact with metal object (e.g. coins, hairpins, rings). Do not wrap batteries in aluminium foil. Tape battery terminals or put batteries in a plastic bag before you discard them.
- This appliance contains a Lithium-ion rechargeable cell. MUST BE RECYCLED OR DISPOSED OF PROPERLY.
Storage and transportation conditions
Temperature -20°C to +60°C (-4 °F to 140 °F).
Electromagnetic fields (EMF)
This Philips appliance complies with all applicable standards and regulations regarding exposure to electromagnetic fields.
FCC compliance (United States)
Changes or modifications not expressly approved by Philips could void the user's FCC authorization to operate the toothbrush.
This device complies with Part 15 of FCC Rules. Operation is subject to the following two conditions: (1) this device may not cause harmful interference, and (2) this device must accept any interference received, including interference that may cause undesired operation.
This equipment has been tested and found to comply with the limits for a Class B digital device, pursuant to part 15 of the FCC Rules. These limits are designed to provide reasonable protection against harmful interference in a residential installation. This equipment generates, uses and can radiate radio frequency energy and, if not installed and used in accordance with the instructions, may cause harmful interference to radio communications. However, there is no guarantee that interference will not occur in a particular installation. If this equipment does cause harmful interference to radio or television reception, which can be determined by turning the equipment (handle) off and on, the user is encouraged to try to correct the interference by one or more of the following measures:
- Reorient or relocate the receiving antenna (of the radio or television).
- Increase the separation between the equipment (handle) and receiver.
- Connect the equipment (charger) into an outlet on a circuit different from that to which the receiver is connected.
- Consult the dealer or an experienced radio/TV technician for help.
ISED Compliance
This device contains licence-exempt transmitter(s)/receiver(s) that comply with Innovation, Science and Economic Development Canada's licence-exempt RSS(s). Operation is subject to the following two conditions:
8 English
1 This device may not cause interference.
2 This device must accept any interference, including interference that may cause undesired operation of the device.
SAVE THESE INSTRUCTIONS
LIST OF SYMBOLS USED
The following symbols may appear on the product:

natural_image
Simple line drawing of an open book with no text or symbols visibleThis symbol means read the instructions for use, before using the appliance.
text_image
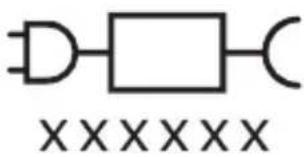
XXXXXXThis symbol means to use the indicated power supply.
Intended use
Sonicare power toothbrushes are intended to remove adherent plaque and food debris from the teeth to reduce tooth decay and improve and maintain oral health.
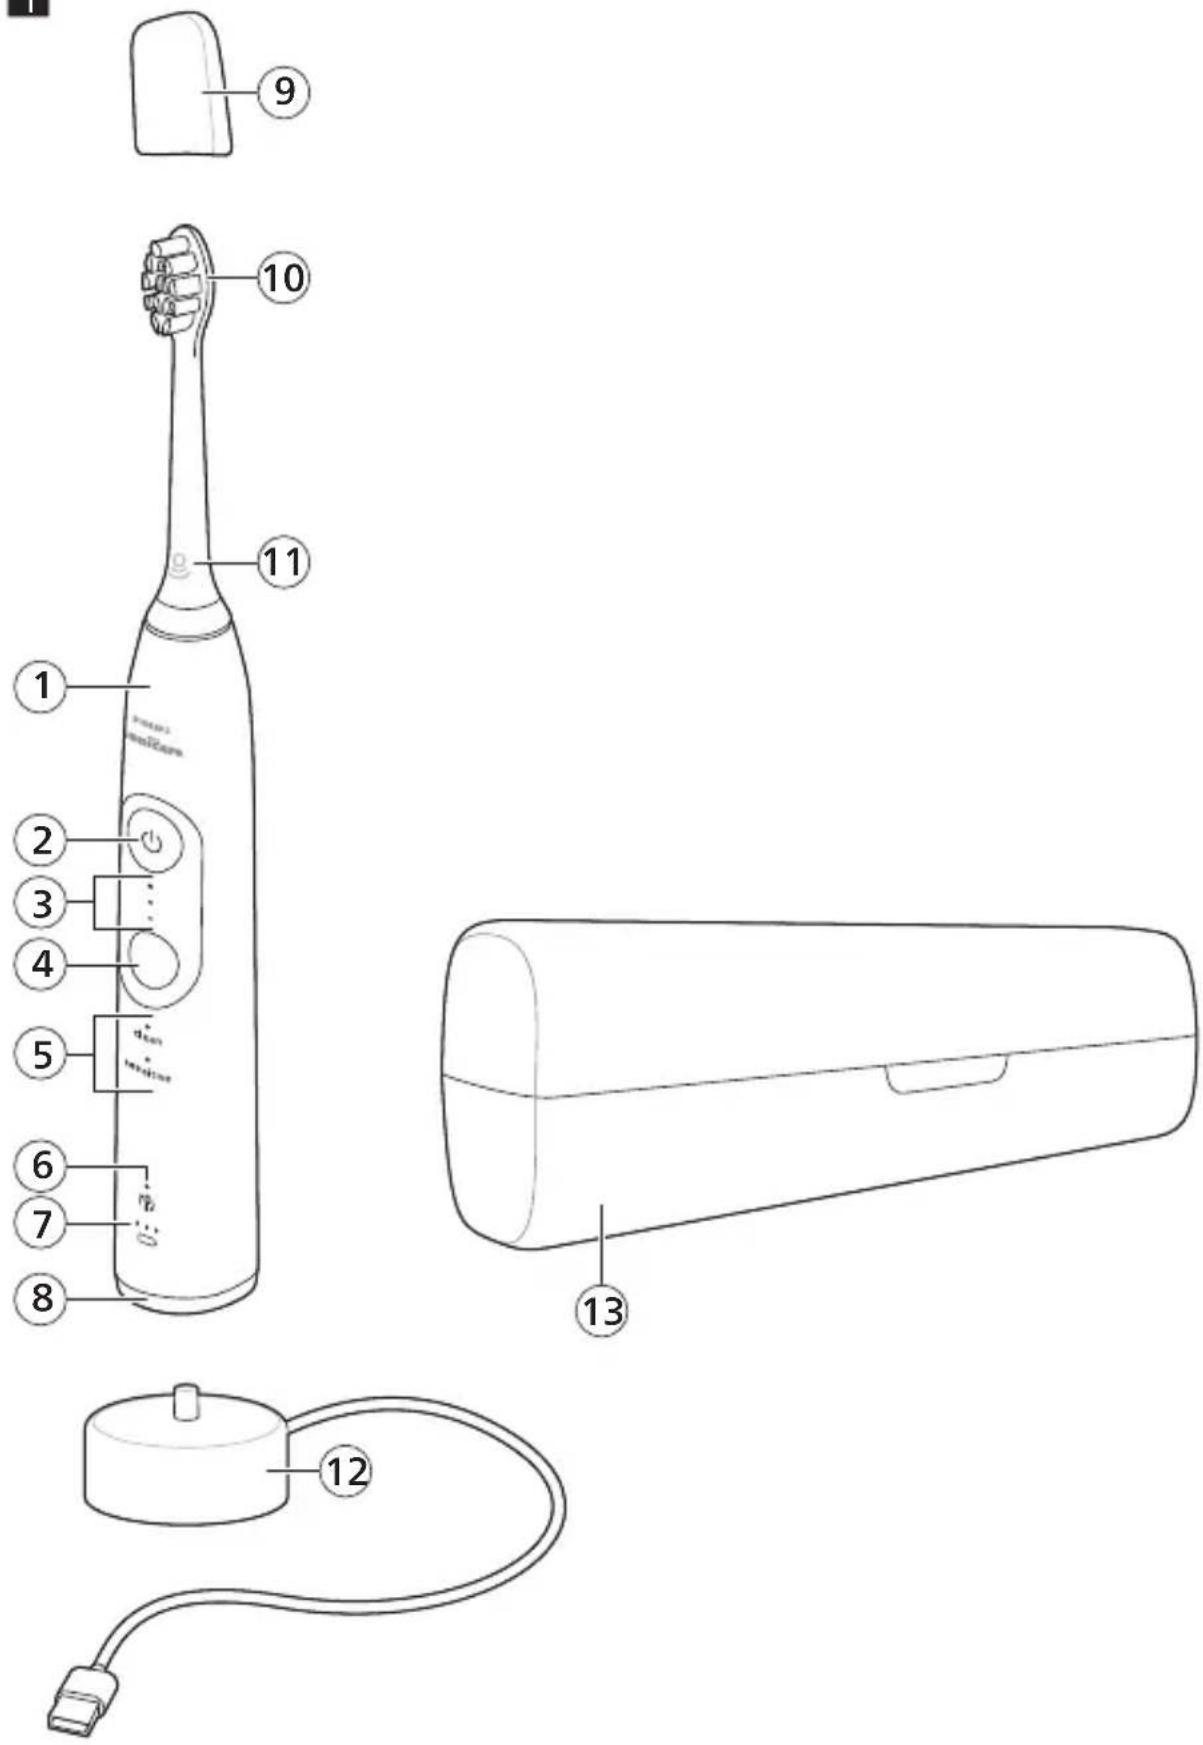
Your Philips Sonicare (Fig 1.)
1 Handle
2 Power on/off button
3 Intensity indicator
4 Mode/intensity button
5 Mode indicator
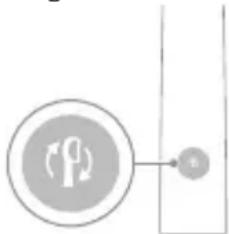
6 Brush head replacement reminder
7 Battery indicator
8 Light ring (6000 series only)
Accessories:
9 Brush head cap
10 Smart brush head(s)
11 BrushSync symbol
12 USB charger (wall adapter not included)
13 Travel case
Note: Accessories included may vary based on the model purchased.
Note: Wall adapter not included. You can use any compatible IPX4 splash-proof adapter (identifiable by the "IPX4" text or symbols on the adapter).
Getting started
Attaching the brush head
natural_image
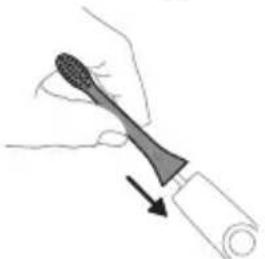
Illustration of a hand holding a toothbrush with an arrow indicating force or direction (no text or symbols)1 Align the brush head so the bristles point in the same direction as the front of the handle.
natural_image
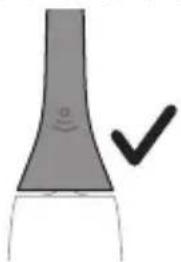
Simple line drawing of a curved object with a checkmark indicating a detail (no text or symbols)2 Firmly press the brush head down onto the metal shaft until it will not go any further.
Note: It is normal to see a slight gap between the brush head and the handle.
Using your Philips Sonicare toothbrush
If you are using your Sonicare toothbrush for the first time, it is normal to feel more vibration than when using a non-electric toothbrush. It is common for first-time users to apply too much pressure. Only apply gentle pressure and let the toothbrush do the brushing for you. Please follow the brushing instructions below for the best experience.
To help you transition to your new Sonicare power toothbrush, use a lower setting for the first 1-2 weeks, then transition to a higher setting.
Brushing instructions
natural_image
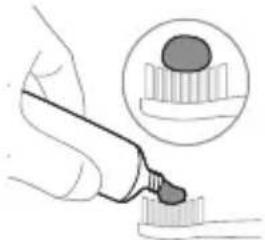
Illustration of a hand using a pen to apply a product to a surface, with an inset showing a magnified view of the surface (no text or symbols present)1 Wet the bristles and apply a small amount of toothpaste.
text_image
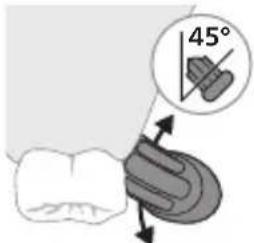
45°2 Place the toothbrush bristles against the teeth at a slight angle (45 degrees), pressing firmly to make the bristles reach the gumline or slightly beneath the gumline.
Note: Keep the center of the brush in contact with the teeth at all times.
text_image
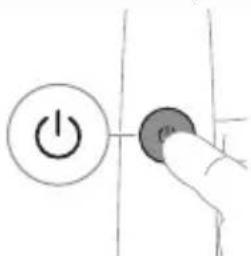
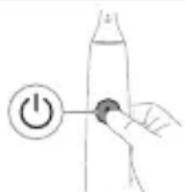
Hand-drawn diagram showing a power button with an 'Power' icon and a circular button labeled 'C'.3 Press the power on/off button to switch on the Philips Sonicare.
natural_image
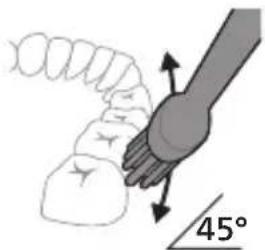
Diagram showing a hand holding a tool with a 45-degree angle indicator (no text or symbols on the diagram itself)4 Gently keep the bristles placed on the teeth and in the gumline. Brush your teeth with small back and forth motion so the bristles reach between the teeth. Continue this motion throughout your brushing cycle.
Note: The bristles should slightly flare. It is not recommended to scrub as you would with a manual toothbrush.
Note: If you apply too much pressure, you will be alerted by a change in vibration of the handle and a flashing purple light ring (6000 series only).
natural_image
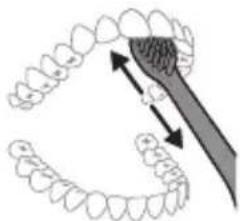
Diagram showing dental tool application on upper teeth with magnified detail (no text or labels)5 To clean the inside surfaces of the front teeth, tilt the brush handle semi-upright and make several vertical overlapping brushing strokes on each tooth.
6 After you have completed the brushing cycle, you can spend additional time brushing the chewing surfaces of your teeth and areas where staining occurs. You can also brush your tongue, with the toothbrush switched on or off, as you prefer.
Note: Your Philips Sonicare toothbrush is safe to use on braces (brush heads wear out sooner when used on braces) and dental restorations (fillings, crowns, veneers) if they are properly adhered and not compromised.
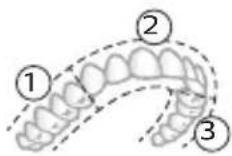
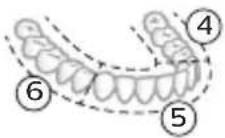
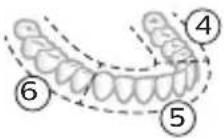
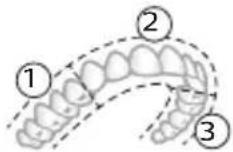
BrushPacer
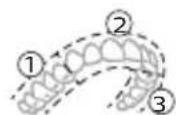
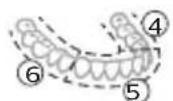
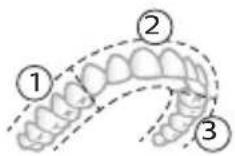
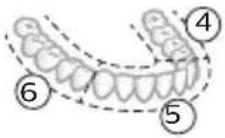
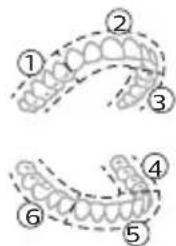
To make sure you brush evenly throughout the mouth, divide your mouth into 6 sections using the BrushPacer feature. The BrushPacer divides the brushing
12 English
time into 6 equal segments and indicates when you should move to the next area. The segments are indicated with a brief pause in vibration. The toothbrush automatically stops at the end of the brushing session.
Note: Additional time is added when you use the White or Gum Health modes (when available).
Modes
Your power toothbrush is equipped with two modes: Clean and Sensitive OR Clean and Gum Health.
Based on the smart brush head you use, the optimal mode and intensity will be selected automatically by the BrushSync technology.

text_image
clean tensiveTo manually change the mode, press the mode/intensity button when the toothbrush is off. All brush heads work with each mode.
Clean Sensitive Gum Health
| Benefit Plaque removal Extra gentle | mode for sensitive teeth and gums | Plaque removal and gum massage | |
| Recommended intensity level | High Low* High | ||
| Total brushing time | 2 minutes 2 minutes 3 minutes and 20 seconds | ||
Clean Sensitive Gum Health
| How to brush Brush each segment for 20 seconds | Brush each segment for 20 seconds | Brush each segment for 20 seconds Then brush along the gum line of segments 1,3,4, and 6 for 20 seconds each |
 |  | |
 |  |  |
 |
Note: *Disclaimer is in the EasyStart section.
Intensities
Intensity settings
natural_image
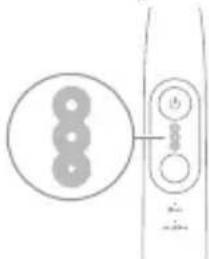
Simple line drawing of a device with three circular components and a vertical connector (no text or symbols)Your power toothbrush comes with 3 different intensity settings:
- High intensity (three lights)
- Medium intensity (two lights)
- Low intensity (one light)
Note: High intensity is recommended for best cleaning results.
text_image
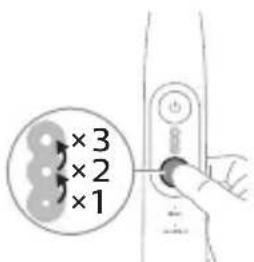
×3 ×2 ×1To manually select your desired intensity, press the mode/intensity button when the toothbrush is on to cycle through the options. The intensity setting can only be changed when the toothbrush is on.
BrushSync technology

natural_image
Diagram of a microphone with a circular icon showing wireless signal, no text or symbols presentBrushSync technology enables your brush head to communicate with your handle using a microchip. The symbol at the bottom of the brush head indicates that the brush head is equipped with this technology.
BrushSync technology enables:
- Brush head replacement reminder
- Brush head mode and intensity pairing
Philips Sonicare offers a wide range of smart brush heads, equipped with BrushSync technology. To explore our full range of toothbrush brush heads, and find the brush head that is best for you, go to
www.philips.com/toothbrush-heads for more information.
Features
- Pressure Sensor Feedback
- BrushPacer
- SmarTimer
- EasyStart
- Brush Head Replacement Reminder
- Brush Head Mode Pairing
Pressure Sensor Feedback
Your Sonicare toothbrush measures the pressure you apply while brushing, to help protect your gums and teeth from damage.

natural_image
Line drawing of a person using a toothbrush (no text or symbols)If you apply excess pressure, the handle changes its sound and vibration. For the 6000 series, additionally, the light ring flashes purple at the bottom of the handle until you reduce the pressure.
Note: Your product comes with the Pressure Sensor Feedback activated. To deactivate this feature (see 'Activating or deactivating features').
BrushPacer
text_image
Diagram showing two dental arch structures with numbered labels indicating different tooth locations or regions.The BrushPacer is an interval timer that helps you to brush evenly through the mouth by dividing your mouth into 6 sections.
SmarTimer
The SmarTimer indicates that your brushing cycle is complete by automatically switching off the toothbrush at the end of the brushing cycle.
Dental professionals recommend brushing no less than 2 minutes twice a day.
Note: If you press the power on/off button after you started the brushing cycle, the toothbrush pauses. If you press the on/off button within 30 seconds, the timer resumes to allow you to finish your brushing cycle. After a pause of 30 seconds, the SmarTimer resets.
EasyStart
This Philips Sonicare model comes with the EasyStart feature deactivated. The EasyStart feature gently increases the power over the first 14 brushings to help you get used to brushing with the Philips Sonicare. The EasyStart feature works with all modes.
*Disclaimer
When the Philips Sonicare toothbrush is used in clinical studies, it must be used at high intensity with the handle fully charged and the EasyStart feature deactivated.
To activate EasyStart (see 'Activating or deactivating features').
Brush Head Replacement Reminder
Your Philips Sonicare is equipped with BrushSync technology that tracks the wear of your brush head.
Note: This feature only works with Philips Sonicare smart brush heads with BrushSync technology.
1 When you attach a new smart brush head for the first time, the handle recognizes that you have a Philips brush head with BrushSync technology and begins tracking brush head wear.
2 Over time, based on the pressure you apply and the total time the brush head has been used, the handle tracks brush head wear in order to determine the optimal time to replace your brush head. This feature guarantees the best cleaning and care of your teeth.
flowchart
graph TD
    A["Traffic Light Icon"] --> B["B"]
    style A fill:#f9f,stroke:#333
    style B fill:#ccf,stroke:#333
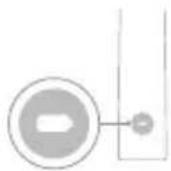
3 When the Brush Head Replacement Reminder indicator lights up amber, you should replace your brush head.
Note: All smart brush heads come with the brush head replacement reminder feature activated. To deactivate the brush head replacement reminder see 'Activating or deactivating features'.
Brush Head Mode Pairing
Brush heads with BrushSync technology are equipped with a microchip which communicates with the handle and automatically pairs it with the recommended mode and intensity. Most brush heads with BrushSync technology will auto pair to Clean Mode. Brush heads with specific benefits will pair with the corresponding mode (when available), e.g. S2 Sensitive: Sensitive Mode.
Note: If you choose to change mode/intensity from the recommended setting, the brush head will remember the chosen setting for future brushing sessions.
Activating or deactivating features
You can activate or deactivate the following features of your toothbrush:
- EasyStart
- Brush Head replacement reminder
- Pressure Sensor Feedback
Note: The brush head replacement reminder is only compatible with Sonicare smart brush heads. The smart brush head must be attached to the toothbrush in order to activate or deactivate the replacement reminder.
From handle:
Step 1: Place the handle on a plugged in charger.
Step 2: Press and hold power on/off button for:
EasyStart Brush head replacement reminder Pressure Sensor Feedback
Up to 3 seconds Up to 5 seconds Up to 7 seconds
Step 3: Let go of the power on/off button when you hear:
1 beep 1 beep and then 1 beep, 2 beeps and 2 beeps then 3 beeps

Together with:

If you see the left LED for the battery indicator flash green 2 times and hear 3 tones low to high, then the feature has been activated.
OR
If you see the left LED for the battery indicator flash amber 1 time and hear 3 tones high to low, then the feature has been deactivated.
Charging and battery status
This Philips Sonicare toothbrush is designed to provide on average 42 brushing sessions, each session lasting 2 minutes (21 days if used twice per day) on a fully charged battery. The battery indicator shows the battery status when you complete the 2-minute brushing session, when you pause the toothbrush, or while it is charging.
Note: It can take up to 24 hours to fully charge the battery before first use, but you can use the Philips Sonicare toothbrush before it is fully charged.
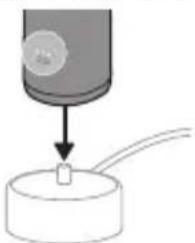
Charging
Charging on charger
1 Attach the USB charging cord to a wall adapter, plug the wall adapter into an electrical wall outlet.
natural_image
Diagram showing a mechanical component with a downward arrow and a small rectangular block on a base (no text or symbols)2 Place the handle on the charger.
3 Connect the attached USB cable to the 5V DC input power supply unit.
- Charge only with Philips compatible chargers or safety approved adapters with input ratings: 100 - 240V\~; 50/60Hz; 3.5W and output ratings 5VDC; 2.5W.
- A UL-listed or certified 1310 Class 2 power supply (NAM only).
4 The battery indicator and light ring (6000 series only) illuminate, the handle beeps twice, and all lights on the handle illuminate upward from the bottom of the handle.
5 The flashing light of the battery indicator shows that the toothbrush is charging.
6 When the handle is on the charger and the battery is fully charged, the LED lights of the battery indicator start flashing green. Once the battery is full, the green light remains solid for 30 seconds and then turns off.
Battery status
Battery status (handle on plugged-in charger)
When the handle is placed on the charger, the battery indicator shows the battery level.
| Battery status | Number of flashing LEDs | LED color |
| Low | 1 Flashing green | |
| Partially full 2 Flashing green | ||
| Full 3 Flashing green until full, | then green for 30 seconds and then switches off | |
Battery status (when handle is not on plugged-in charger)
When the toothbrush is awake, the battery indicator at the bottom of the handle shows the battery level.
| Battery status Number of flashing LEDs | LED color |
| Full 3 Solid green | |
| Partially full 2 Solid green | |
| Medium low 1 Solid green | |
| Low 1 with 3 beeps after brushing | Flashing amber |
| Empty 1 with 2 sets of 5 beeps after brushing | Flashing amber |
| Note: To save energy, the battery indicator will switch off when no longer charging. | |
| Note: When the battery is completely empty, the toothbrush switches off. Place the toothbrush on the charger to charge it. | |
| Note: To keep the battery fully charged at all times, you may keep your toothbrush on the charger when not in use. | |
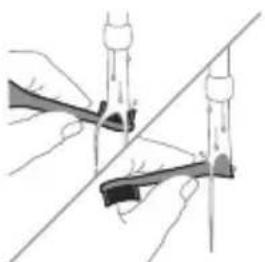
Cleaning
Toothbrush handle
natural_image
Simple line drawing of a medical procedure with a tool and tubing (no text or symbols)1 Remove the brush head and rinse the metal shaft area and buttons with warm water. Make sure you remove any residual toothpaste on the handle and around the buttons at least once a week, but preferably after each use.
Caution: Do not push on the rubber seal on the metal shaft or around buttons with sharp objects, as this may cause damage.
2 Wipe the entire surface of the handle with a damp cloth.
Caution: Do not tap the handle on the sink to remove excess water.
3 Dry the handle with a soft cloth or towel.
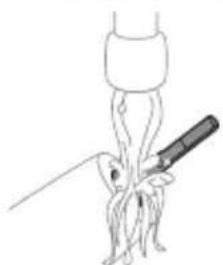
Brush head
natural_image
Illustration of two hands using a tool to cut or adjust a mechanical component, with no visible text or symbols.1 Rinse the brush head and bristles after each use.
2 Remove the brush head from the handle and rinse the brush head connection with warm water at least once a week. Rinse the travel cap as often as needed and air dry. Use only on a dry brush head.
Note: The brush head cap is used for shipping purposes and is not intended for continued use.
Charger
1 Unplug the charger before you clean it.
2 Wipe the surface of the charger with a damp cloth.
3 Dry the charger with a soft cloth or towel.
Travel case
Rinse with warm water and use a damp cloth to clean the travel case and allow to air dry.
Storage
If you are not going to use the product for an extended period of time, unplug it from the electrical outlet, clean it and store it in a cool and dry place away from direct sunlight.
Replacement
Replace Philips Sonicare brush heads every 3 months to achieve optimal results. Use only Philips Sonicare replacement brush heads.
Locating the model number
Look on the bottom of the Philips Sonicare toothbrush handle for the model number (e.g.HX123A).
Warranty and support
Philips warrants its products for two years after the date of purchase. Defects due to faulty materials and workmanship will be repaired or replaced at Philips' expense provided that convincing proof of purchase in the qualifying period is provided.
Philips recommends use of genuine Sonicare brush heads for optimal performance. Use of other brush heads may damage your Sonicare toothbrush and limit your warranty protection.
Contact our Consumer Care Center at 1-800-682-7664 (North America), outside North America contact your local Philips Consumer Care Center. Internet information: www.philips.com/support.
WARRANTY EXCLUSIONS
What is not covered under warranty:
- In mouth attachments including brush heads and nozzles.
- Damage caused by use of unauthorized replacement parts or unauthorized brush heads.
- Damage caused by misuse, abuse, neglect, alterations or unauthorized repair.
- Normal wear and tear, including chips, scratches, abrasions, discoloration or fading.
IMPLIED WARRANTIES
ANY IMPLIED WARRANTIES, INCLUDING IMPLIED WARRANTIES OF MERCHANTABILITY AND FITNESS FOR A PARTICULAR PURPOSE, SHALL BE LIMITED TO THE DURATION OF THE EXPRESS WARRANTIES SET FORTH ABOVE. IN SOME STATES LIMITATIONS ON DURATION OF IMPLIED WARRANTIES DO NOT APPLY.
LIMITATION OF REMEDIES
IN NO EVENT SHALL PHILIPS OR ANY OF ITS AFFILIATED OR SUBSIDIARY COMPANIES BE LIABLE FOR ANY SPECIAL, INCIDENTAL OR CONSEQUENTIAL DAMAGES BASED UPON BREACH OF WARRANTY, BREACH OF CONTRACT, NEGLIGENCE, TORT, OR ANY OTHER LEGAL THEORY. SUCH DAMAGES INCLUDE, WITHOUT LIMITATION, LOSS OF SAVINGS OR REVENUE; LOSS OF PROFIT; LOSS OF USE; THE CLAIMS OF THIRD PARTIES INCLUDING, WITHOUT LIMITATION, DENTISTS AND DENTAL HYGIENISTS; AND COST OF ANY SUBSTITUTE EQUIPMENT OR SERVICES. SOME STATES DO NOT ALLOW THE EXCLUSION OR LIMITATION OF INCIDENTAL OR CONSEQUENTIAL DAMAGES.
Disposal
CONTAINS LITHIUM-ION RECHARGEABLE CELL. MUST BE RECYCLED OR DISPOSED OF PROPERLY.

text_image
RECYCLE RBRC 7.800.822.8837- Contact your local town or city officials for electronics recycling and battery disposal information. You can also call 1-800-822-8837 or visit www.call2recycle.org for drop-off locations.
- For assistance, visit our website www.philips.com/support or call 1-800-682-7664 toll free.
- Your product is designed and manufactured with high quality materials and components, which can be recycled and reused. For recycling information, please contact your local waste management facilities or visit: www.recycle.philips.com.
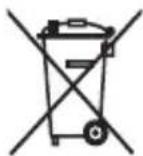
- This symbol means that electrical products and batteries shall not be disposed of with normal household waste.
- Follow your country's rules for the separate collection of electrical products and batteries.
Note: In this product, perchlorate material is present in lithium coin and/or batteries. Special handling may apply for these materials, for more information, go to: www.dtsc.ca.gov/hazardouswaste/perchlorate
Removal of built-in rechargeable battery
- The built-in rechargeable battery must be removed by a qualified professional when the product is discarded. Before removing the battery, make sure that the battery is completely empty.
- Instructions for removal of built-in rechargeable batteries can be found on www.philips.com/support. Use the Philips support home search bar to enter the toothbrush model number and find your product. The model number begins with "HX" (e.g. HX123A) and can be found on the bottom of your toothbrush. The battery removal instructions are in the Troubleshooting and Repair section of the product's support page.
- If batteries are damaged or leaking, avoid contact with the skin or eyes. If this occurs, immediately rinse well with water and seek medical care.
- When you handle batteries, make sure that your hands, the product and the batteries are dry.
Introducción
www.philips.com/support
natural_image
Simple line drawing of an open book with no text or symbols visiblenatural_image
Illustration of a hand holding a tool with a pointed tip and arrow indicating direction (no text or symbols)natural_image
Simple line drawing of a curved object with a checkmark indicating a detail (no text or symbols)natural_image
Illustration of a hand using a pipette to apply liquid onto a surface, with an inset showing a droplet on a surface (no text or symbols present)text_image
Hand-drawn diagram showing a power button with an 'Power' icon and a circular button labeled 'n', connected by a line.natural_image
Diagram showing dental tool application on upper teeth with magnified detail (no text or symbols)text_image
clean sensitiveClean Sensitive Gum Health
Clean Sensitive Gum Health
natural_image
Diagram showing a circular component with three vertical elements connected by a line to a vertical device with three circular components (no text or symbols)natural_image
Illustration of a toothbrush with a sensor icon and signal symbol (no text or labels)natural_image
Line drawing of a person using a toothbrush (no text or symbols)text_image
Diagram showing two dental arch structures with numbered labels indicating different tooth locations or regions.natural_image
Diagram showing a mechanical component with a downward arrow and a small cylindrical part attached to a circular base (no text or symbols)natural_image
Line drawing of a medical procedure showing a tool interacting with a surgical instrument (no text or symbols present)natural_image
Illustration of two hands using a tool to cut or mark a surface, with no visible text or symbolsGARANTÍAS IMPLÍCITAS
text_image
RECYCLF RBRC 7.800.822.8837natural_image
Simple line drawing of an open book with no text or symbols visiblenatural_image
Illustration of a hand holding a toothbrush with an arrow indicating force or movement (no text or symbols)natural_image
Simple line drawing of a curved object with a checkmark mark (no text or symbols)natural_image
Illustration of a hand using a pipette to apply a product to a small object, with an inset showing a cylindrical object (no text or symbols present)natural_image
Hand holding a button with an 'Power' icon, no text or symbols presentnatural_image
Diagram showing a mechanical component with angular measurement of 45° (no text or symbols present)natural_image
Diagram showing dental tool application on upper teeth with magnified detail (no text or symbols)text_image
Diagram showing two dental arch structures with numbered labels indicating different tooth positions or regions.text_image
clean safe drivenatural_image
Simple line drawing of a device with three circular components and a vertical connector (no text or symbols)natural_image
Illustration of a toothbrush with a sensor icon and signal symbol (no text or labels)natural_image
Line drawing of a person holding a pen or stylus (no text or symbols)flowchart
graph TD
    A["Traffic Symbol"] --> B["Terminal v"]
natural_image
Diagram showing a mechanical component with a downward arrow and a small square base, connected to a circular base (no text or symbols)natural_image
Simple line drawing of a biological structure with a pointed tool inserted, no text or symbols presentnatural_image
Illustration of two hands using a tool to adjust or install a mechanical component, with no visible text or symbols.EXCLUSIONS DE GARANTIE
text_image
RECYCLE RBRC 1.800.822.8837www.philips.com/Sonicare
www.philips.ca/sonicare
©2025 Koninklijke Philips N.V. (KPNV). All rights reserved.
Philips and the Philips shield are trademarks of KPNV.
Sonicare and the Sonicare logo are trademarks of Philips Oral Healthcare, LLC and/or KPNV.
©2025 Koninklijke Philips N.V. (KPNV). Tous droits réservés.
Philips Oral Healthcare, LLC.
22100 Bothell Everett Highway
Bothell, WA 98021
300014393541 (27/02/2025)