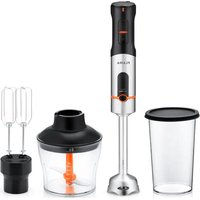
2054FL - Blender Flama - Free user manual and instructions
Find the device manual for free 2054FL Flama in PDF.


| Product type | Immersion blender with accessories |
| Brand | Flama |
| Model | 2054FL |
| Power | 600 W (estimate) |
| Voltage | 220-240 V ~ 50/60 Hz |
| Chopper bowl capacity | 200 g maximum |
| Whisk capacity | Up to 6 eggs |
| Functions | Blending, chopping, whisking |
| Speed control | Power regulator and TURBO button |
| Max operating time (blender) | 1 minute |
| Max operating time (chopper) | 30 seconds |
| Max operating time (whisk) | 2 minutes |
| Rest time between cycles | 30 seconds (blender/whisk), 3 minutes (chopper) |
| Rest time after 5 cycles | 20 minutes |
| Shaft material | Stainless steel |
| Shaft cleaning | Dishwasher or soapy water |
| Body cleaning | Damp cloth, do not immerse |
| Safety | Sharp blades, unplug before cleaning |
| Warranty | 36 months |
| Included accessories | Blending shaft, chopper, whisk, measuring cup |
Frequently Asked Questions - 2054FL Flama
User questions about 2054FL Flama
0 question about this device. Answer the ones you know or ask your own.
Ask a new question about this device
Download the instructions for your Blender in PDF format for free! Find your manual 2054FL - Flama and take your electronic device back in hand. On this page are published all the documents necessary for the use of your device. 2054FL by Flama.
USER MANUAL 2054FL Flama
natural_image
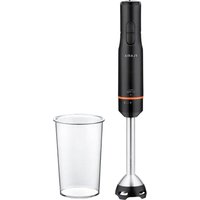
Product photo of a Flava blender with three different kitchen utensils (mush, side bowl, and side bowl) shown in grayscale.2054FL
PT VARINHA MÁGICA COM ACESSÓRIOS 1
ES BATIDORA DE MANO CON ACCESORIOS 6
EN HAND BLENDER WITH ACCESSORIES 11
FR MIXEUR PLONGEANT AVEC ACCESSOIRES 16
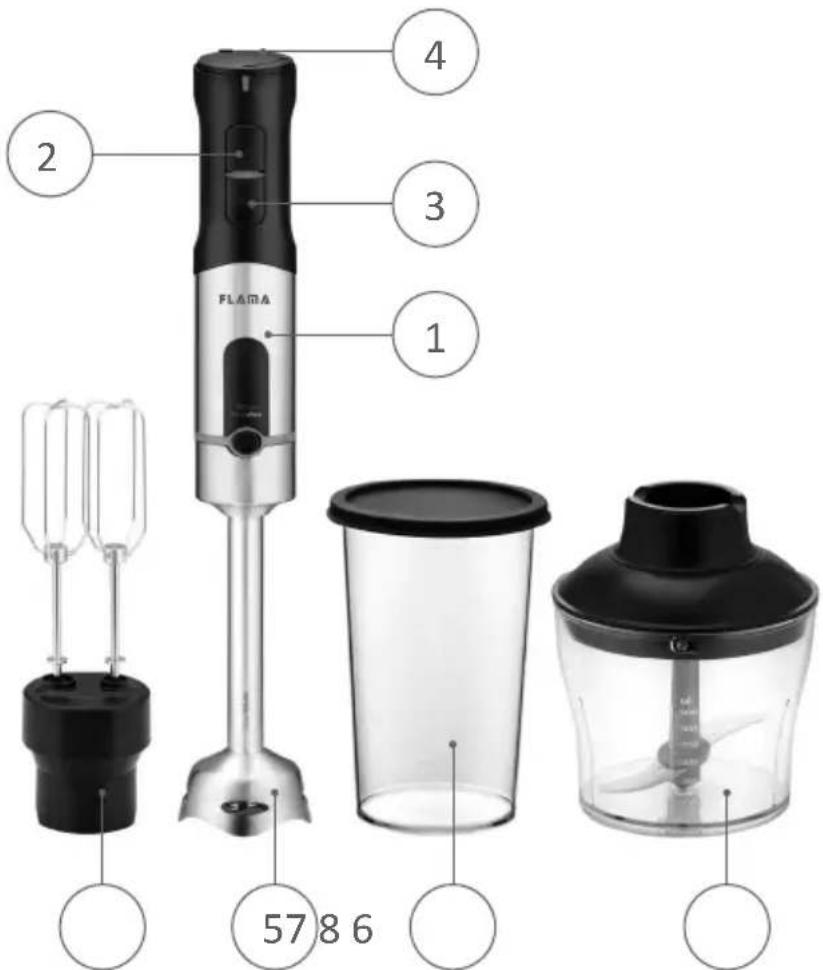
DESCRIÇÃO
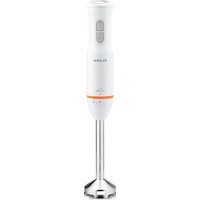
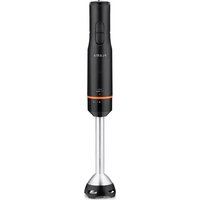
- Hand blender body
- ON button
- TURBO Button
- Power regulator
- Hand blender Foot
- Chopping accessory
- Whisking accessory
- Measuring cup
DESCRIPCIÓN
natural_image
Symbol of a trash bin with crossed lines and a blank rectangular base (no text or numbers)Please read these instructions carefully before using the appliance for the first time and keep them for future reference. Any use not in accordance with the instructions releases FLAMA from all liability.
Check that the supply voltage of the electrical installation in your home corresponds to that indicated on the rating plate of the appliance.
The appliance can be used by persons with limited physical, sensory or mental capabilities or lack of experience and knowledge if they have been given supervision or instruction concerning use of the appliance in a safe way and understand the risks involved.
Children shall not play with the appliance.
This appliance is not intended for use by children.
Keep the appliance and its power cord out of the reach of children.
Always disconnect the appliance from the power supply by removing the plug from the fixed power socket after each use, when it is not supervised, and when assembling, dismantling, and cleaning.
Cleaning and maintenance should be carried out as indicated in the Cleaning and Maintenance instructions.
Care should be taken when handling the sharp cutting blades.
Do not allow the blades to touch the handle.
Do not clean the blades when the hand blender foot is still attached.
After 1 minute of continuous operation, let the blender stand for 30 seconds.
Do not use the appliance if it is not working properly or if it is damaged in any way. Any intervention other than cleaning must be carried out by an Authorised Flama Technical Assistance Service.
If the power cord is damaged, it must be replaced by the manufacturer, its after-sales service or similarly qualified personnel in order to avoid a hazard.
This product complies with the Electromagnetic Compatibility and Low Voltage Directives.
This instruction manual is also available in PDF format in www.flama.pt.
OPERATION
After removing the packaging, check if the appliance is complete and undamaged. Do not use the appliance if it is visibly damaged. Contact customer service.
Check that the voltage of the power supply corresponds to the value indicated on the specifications label.
Wash and clean the foot of the blender and all parts that come into contact with food before using for the first time.
Let hot food cool down before chopping or pouring into a glass (maximum temperature of 80 °C).
Cut large food items into pieces about 2 cm before any preparation.
USAGE
WARNING - The maximum operation duration must not exceed 1 minute, and there should be a 30-seconds rest between each operation. After 5 cycles, a 20-minute rest period is required.
Insert the foot of the blender into the body and twist it to the right until it locks.
Plug the blender into the power outlet.
Immerse the foot of the blender in the food you wish to liquefy or chop and press the ON button.
Mix the ingredients by moving the appliance slowly up and down and in circles.
You can adjust the power of the blender using the power regulator.
If you wish to achieve maximum power immediately without using the power regulator, press the TURBO button.
After use, disconnect the blender from the power outlet and turn the foot to the left to detach it.
IMPORTANT - Remove the container where you intend to use the blender from any heat source while chopping food.
IMPORTANT
Never use the blender with the foot poorly attached, as it may cause serious damage.
If the blender does not work, it may be because the foot is not properly attached to the body. Try removing the foot and reattaching it.
If the blender gets too hot, it indicates that it has been used continuously for too long. Stop for a few minutes.
Chopper Accessory
The maximum operation duration must not exceed 30 seconds, and there should be a 3-minute rest between two consecutive cycles.
After 5 cycles, a 20-minute rest period is required.
- Place the chopper bowl on a clean, level surface.
- Assemble the blade in the bowl.
- Place the food in the bowl.
Note: remove bones from the meat, cut it into small pieces, and place it in the bowl. The maximum amount of meat must not exceed 200 g per batch.
- Place the lid on the bowl, ensuring that the inner part aligns with the groove of the lid. Then, press the lid down and turn it until it locks. To remove the lid, turn in the opposite direction.
- Insert the body of the blender into the lid and turn until it locks.
- Plug the blender into the electrical outlet.
- Press the ON button to turn on and simultaneously adjust the power regulator to the desired power.
- To stop, release the ON button.
Whisk Accessory
The maximum continuous operation duration must not exceed 2 minutes, and there should be a 30 seconds rest between each operation.
- To assemble, insert the whisk accessory into the body of the blender and twist it to the right until it locks. To disassemble, turn in the opposite direction.
- Plug the blender into the electrical outlet.
- Press the ON button to turn on and simultaneously adjust the power regulator to the desired power.
NOTE - It is recommended not to whisk more than 6 eggs/whites.
- To stop, release the ON button.
CLEANING AND MAINTENANCE
Before any cleaning operation, ensure that the blender is turned off by unplugging it from the power outlet.
Never immerse the body of the blender in water. Do not use detergents or abrasive products for cleaning.
Detach the foot of the blender from the body.
Wash the foot of the blender under running water, using a non-abrasive detergent and a cloth or sponge. Rinse and clean. Place it vertically so that any water that may have entered drains out.
NOTE - The foot of the blender can be washed in the dishwasher.
Wash the measuring cup, the lid, and the accessory components in warm soapy water.
NOTE - It is not recommended to wash the measuring cup, lid, and accessories in the dishwasher, as plastic components may deteriorate.
Clean the body of the blender with a damp cloth and then dry it with a soft, dry cloth.
CAUTION: The blades of the foot of the blender are very sharp; clean them with extreme care.
When not in use, store the appliance in a well-ventilated area to prevent the motor from being affected by moisture.
ANOMALIES AND REPAIR
In case of malfunction, please take the appliance to an authorized Technical Assistance Service. Do not attempt to disassemble or repair the appliance, as this may be dangerous.
PROTECTING THE ENVIRONMENT
natural_image
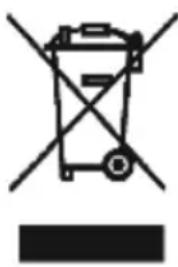
Symbol of a trash bin with crossed lines indicating no waste or discharge, and a solid black rectangle below (no text or labels)This symbol indicates the separate collection of electrical and electronic equipment.
The main objective of the separate collection of this waste is to reduce the quantity to be disposed of, promote re-use, recycling and other forms of recovery in order to reduce its negative effects on the environment.
When it is no longer in use, this appliance must not be disposed of together with other unsorted municipal waste.
The user is responsible for delivering it free of charge to the selective collection facilities available for that purpose.
Pieces of equipment that are no longer in use can also be taken back at points of sale, by purchasing new pieces of equipment that are equivalent and have the same functions.
For more detailed information on collection points, please contact your City Council or a point of sale for this equipment.
CONSIGNES DE SÉCURITÉ
DYSFONCTIONNEMENTS ET RÉPARATIONS
natural_image
Symbol of a trash bin with crossed lines indicating no waste or discharge, and a solid black rectangle below (no text or labels)This page has been deliberately left blank
- Keep the proof of purchase (receipt) for this product carefully. When a repair is made under these conditions, the technician will require proof of purchase. This assistance can only be provided once you have proven, with the proof of purchase, that your appliance is within the warranty period.
- The warranty period for this appliance is defined by the respective EU Directive in force on the date of purchase/delivery.
- Within the guarantee period, we will repair or replace, free of charge, any parts which, during the normal use of the appliance, have deteriorated as a result of a proven material or manufacturing defect.
- This warranty does not cover consumable items, light bulbs, easily breakable parts made of glass or plastic, or any other defects that do not impair its proper functioning.
- We accept no liability for damage caused by incorrect or careless use of the appliance, by its connection to an electrical current other than that indicated on the appliance's rating plate, by faulty electrical installation, or by atmospheric, chemical or electrochemical causes. Other claims or demands for compensation relating to objects which are not an integral part of the appliance will be denied.
- The provision of assistance under warranty does not extend the warranty period. Only within this period will assistance be provided under warranty. The right to assistance is only granted to the first purchaser of the device and cannot be transferred to a third party.
- The warranty expires when unauthorized persons have attempted to repair, modify or replace parts of the appliance.
- All expenses and risks of transportation to our factory or vice versa will always be borne by the buyer.
WARRANTY CONDITIONS
To benefit from the Technical Assistance service during the 36-month warranty period after the date of purchase, you will need to:
Present the Invoice/Proof of Purchase, stating the model and the manufacturing number of the product (whenever possible).
Note: Failure to present the aforementioned documents will be grounds for not providing services under warranty.
CONDITIONS DE GARANTIE
CONDITIONS DE GARANTIE
- DESCRIÇÃO
- DESCRIPCIÓN
- This product complies with the Electromagnetic Compatibility and Low Voltage Directives.
- OPERATION
- USAGE
- IMPORTANT
- Chopper Accessory
- Whisk Accessory
- CLEANING AND MAINTENANCE
- ANOMALIES AND REPAIR
- PROTECTING THE ENVIRONMENT
- CONSIGNES DE SÉCURITÉ
- DYSFONCTIONNEMENTS ET RÉPARATIONS
- WARRANTY CONDITIONS
- CONDITIONS DE GARANTIE
Brand : Flama
Model : 2054FL
Category : Blender